Gahm
-
Posts
1,217 -
Joined
-
Last visited
Content Type
Profiles
Forums
Gallery
Events
Everything posted by Gahm
-

US Brig Syren by Gahm - Model Shipways
Gahm replied to Gahm's topic in - Kit build logs for subjects built from 1801 - 1850
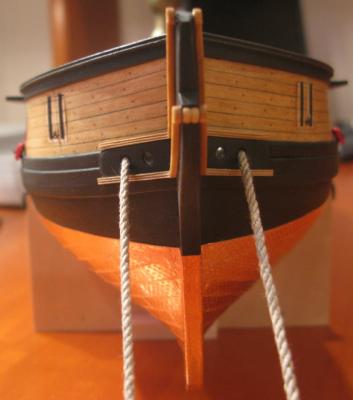
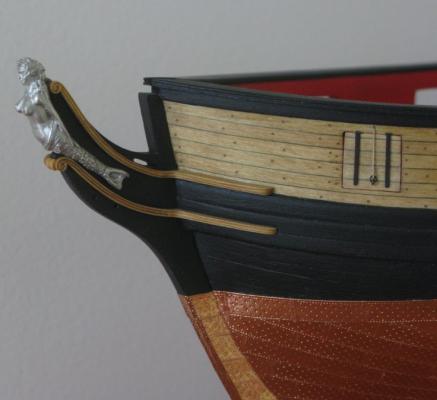
Yes, I liked your idea of showing the lead as an additional detail of the hawse pipes. Makes them look a bit more interesting than having just for black holes there Thomas -
US Brig Syren by Gahm - Model Shipways
Gahm replied to Gahm's topic in - Kit build logs for subjects built from 1801 - 1850
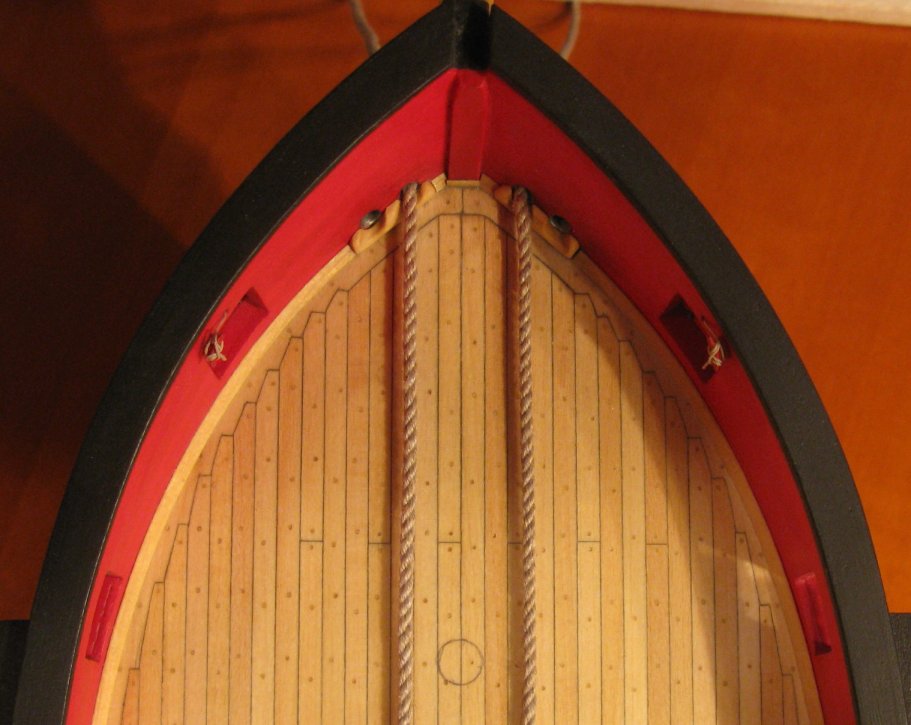
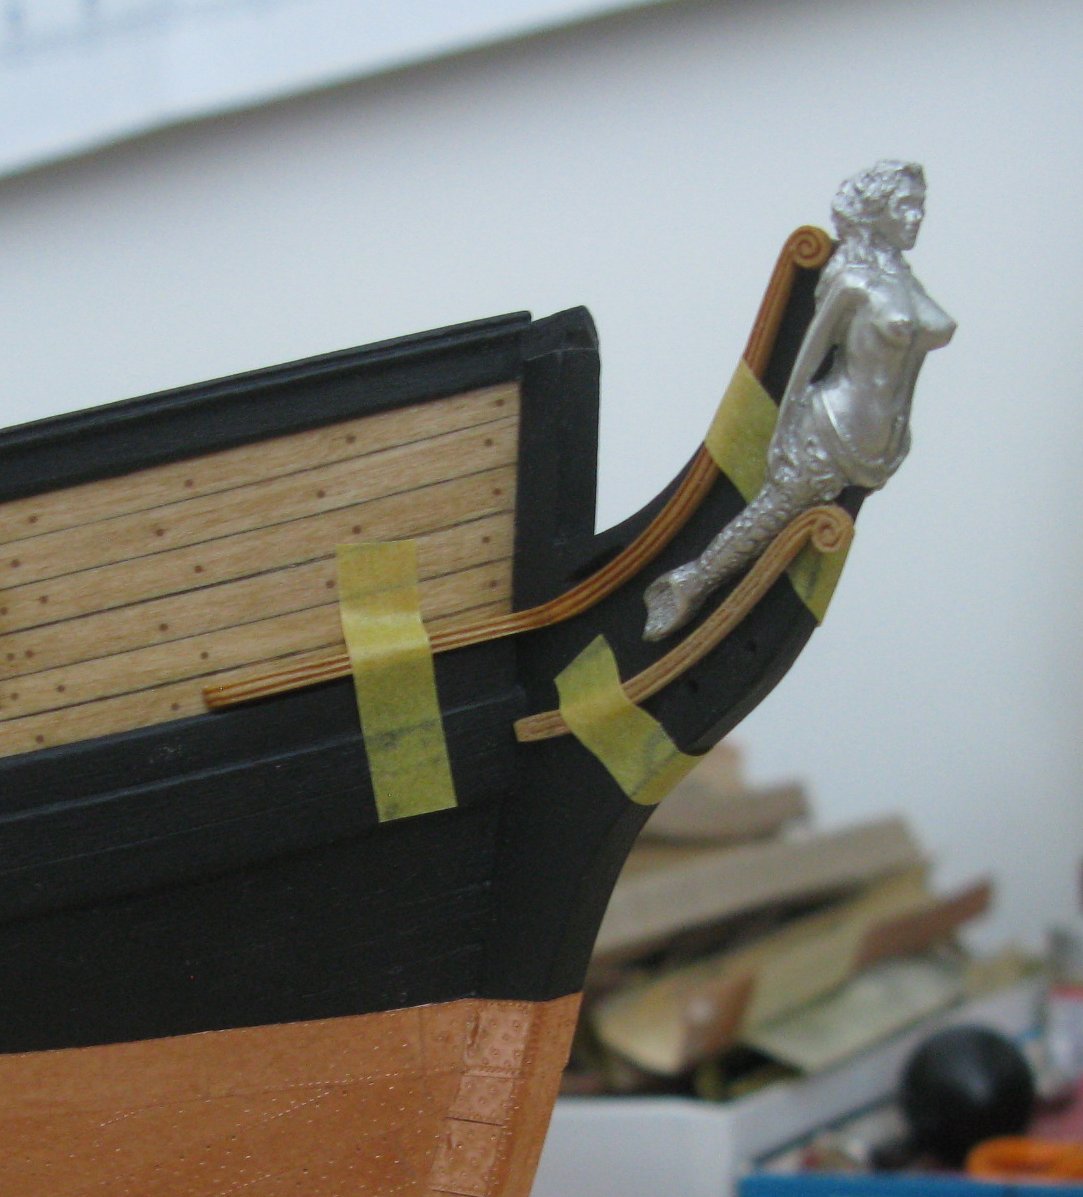
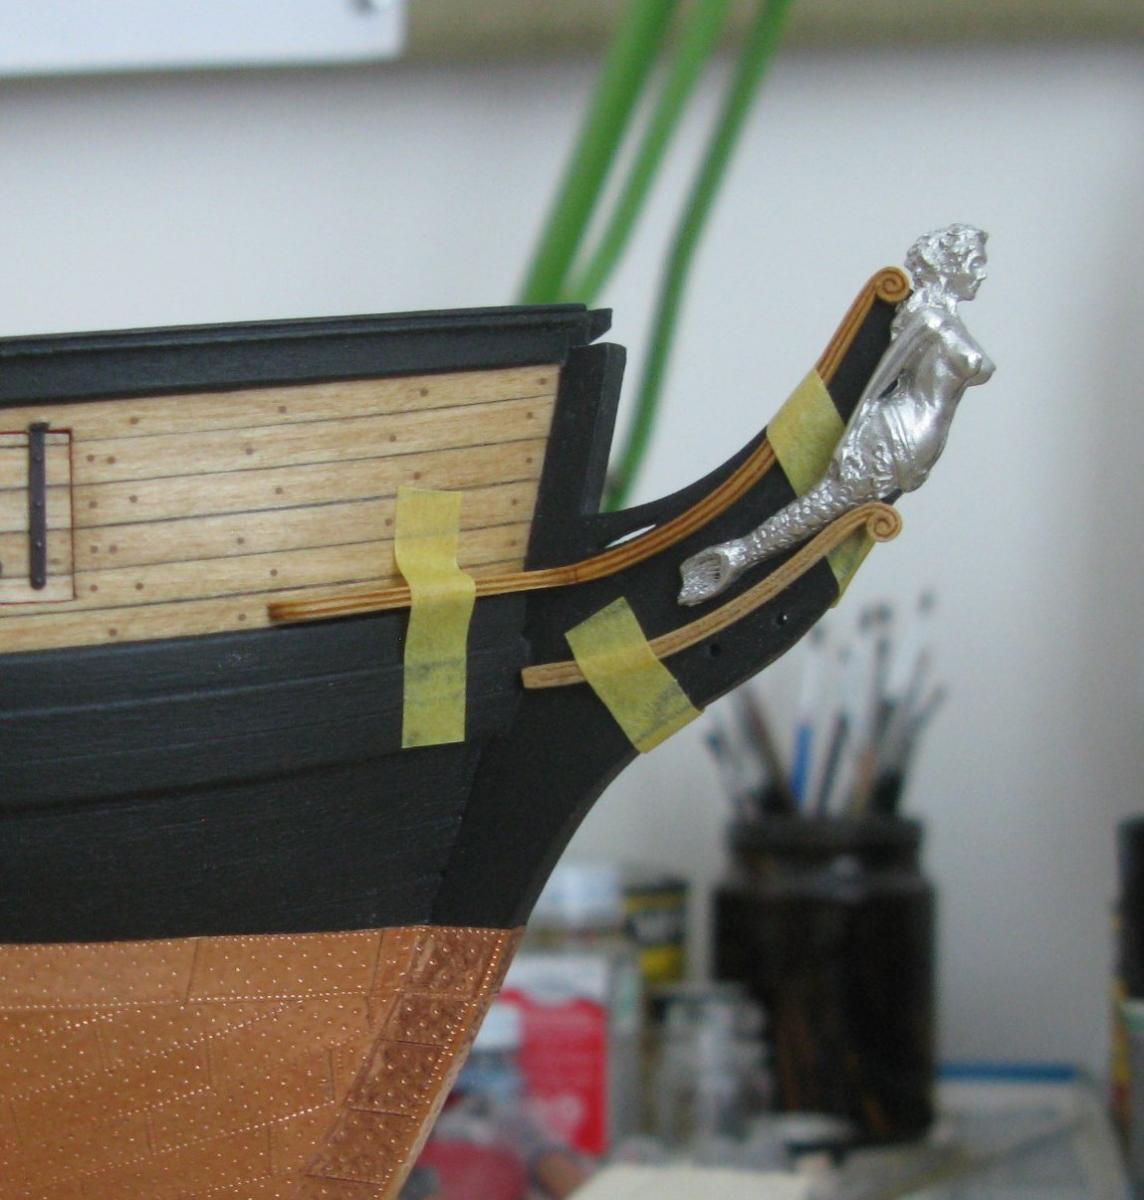
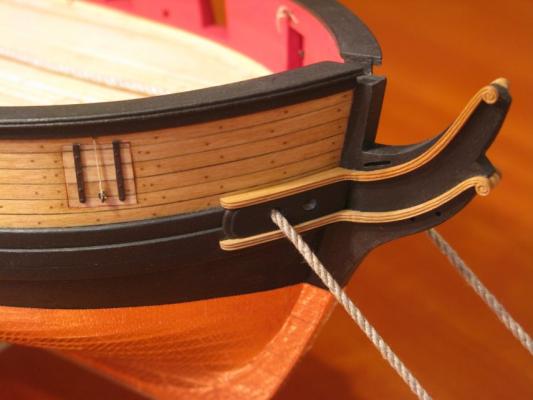
A little progress - I finished the hawse pipes. The anchor cables which are shown in the pictures are not my final choice. But I still have some time to get me the “right” ones.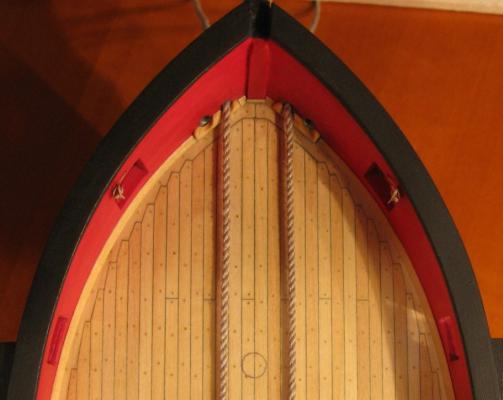
-
Looks like you are dealing nicely with the warp. As Augie is saying, the blocks will stabilize the framework. By the way, your kit backlog is quite impressive! Have fun with the Syren! Thomas
-
Beautiful work, Bob! As always . . . Thomas
-
Excellent framing job, Augie! . . . as expected from you Thomas
- 2,191 replies
-
- 1
-

-
- confederacy
- Model Shipways
- (and 1 more)
-
Have fun with the project! Building ship models is a great hobby, and Syren is an excellent start! Thomas
-
Your framing looks very nice and clean! Thomas
- 2,191 replies
-
- 1
-
-
- confederacy
- Model Shipways
- (and 1 more)
-
I just "discovered" your Le Superbe/ Glorieux model. Outstanding!! Thomas
- 126 replies
-
- 2
-
-
- le superbe
- heller
- (and 2 more)
-
It will be great to have your whole build log restored! Just break it down into several loads and you should have no problems. That's how I brought mine back after the crash Thomas
-
US Brig Syren by Gahm - Model Shipways
Gahm replied to Gahm's topic in - Kit build logs for subjects built from 1801 - 1850
Thank you, Bob and Richard! Bob, you are right , sanding the edges before gluing the parts together helps quite a bit to get a "decent" guide for the lines. I mainly used the carving knife to open up the lines to the same width and depth which the upper cheek parts had so that the transition looked a bit smoother. Richard, yes, I intend to do all parts of the headrails out of pear wood - and any other "fine detail" work on my model as well. A denser wood has just a lot of advantages when it comes to detailed work. And I was lucky, when I built the quarter badges I ordered me some Swiss pear wood, which turned out to NOT have the typical reddish look but was more of a yellowish to greenish color. Initially I was a bit disappointed and did not like it too much until I discovered that it perfectly blends in with the bass wood I am using on my model! Thomas -
US Brig Syren by Gahm - Model Shipways
Gahm replied to Gahm's topic in - Kit build logs for subjects built from 1801 - 1850
Thank you, Ferit! I highly appreciate your kind words! Thomas -
US Brig Syren by Gahm - Model Shipways
Gahm replied to Gahm's topic in - Kit build logs for subjects built from 1801 - 1850
Dirk, thowen, B.E., Thank you for your kind comments! With these head rails I follow Chuck's advice in the instruction booklet and take each step as a little project on its own. That makes for slow progress, but eventually I may be getting there Thomas -
US Brig Syren by Gahm - Model Shipways
Gahm replied to Gahm's topic in - Kit build logs for subjects built from 1801 - 1850
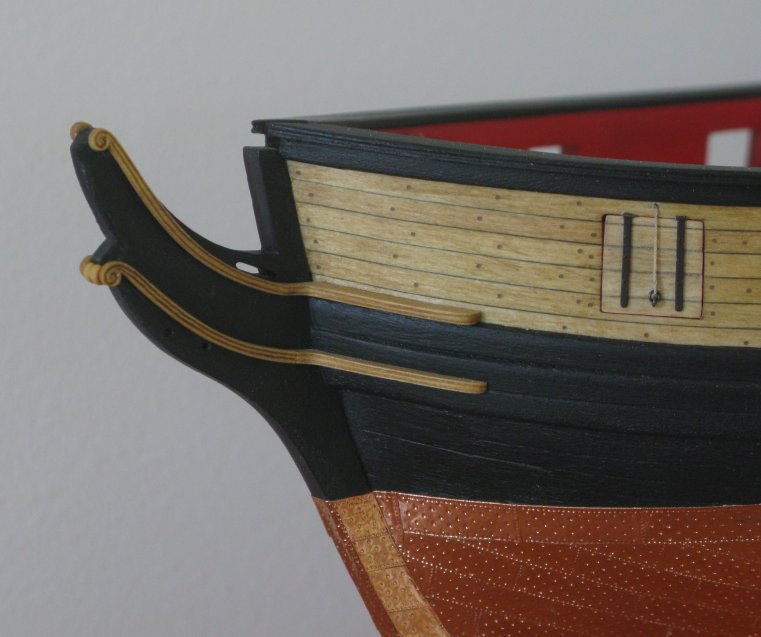
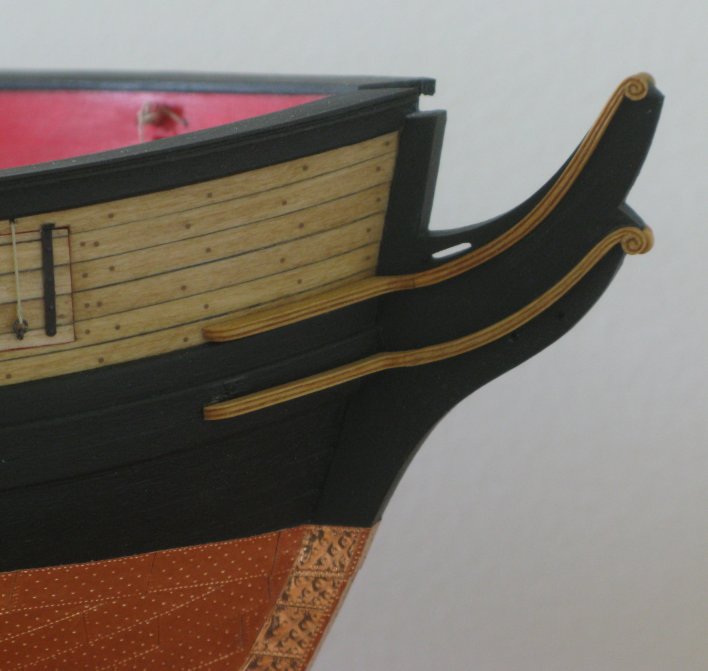
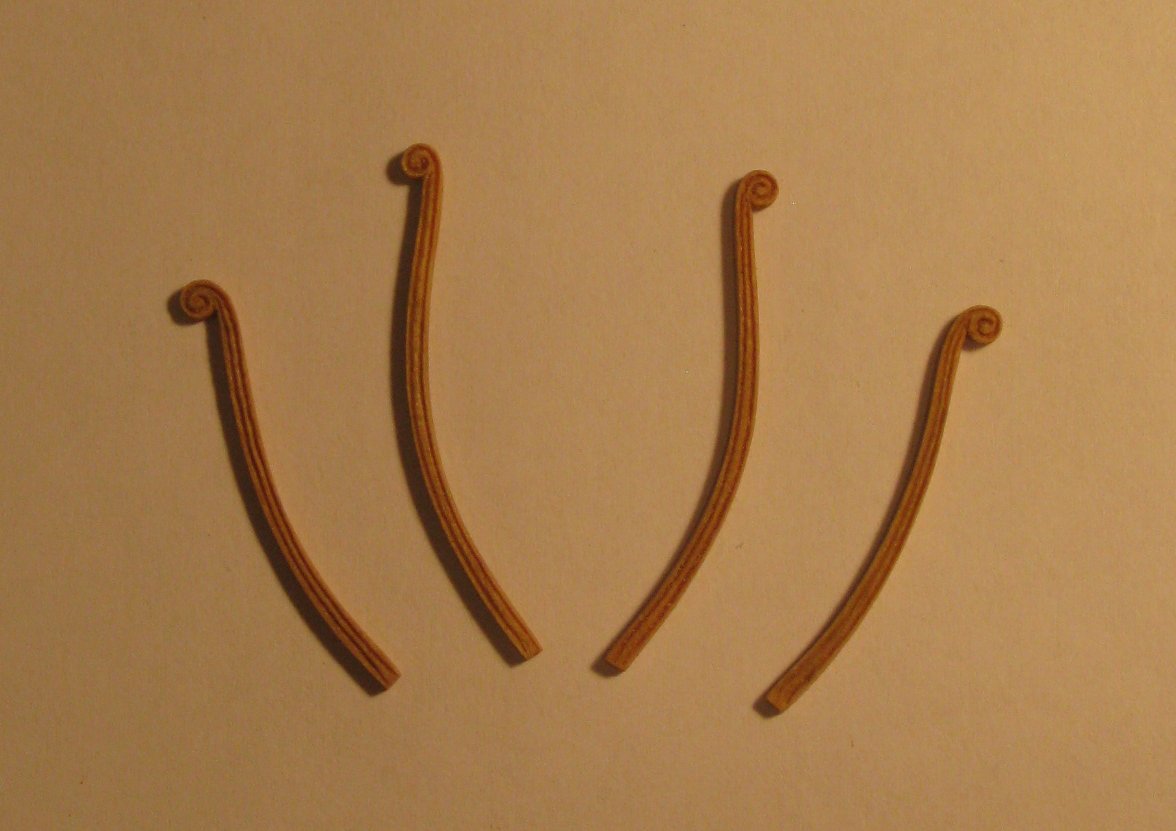
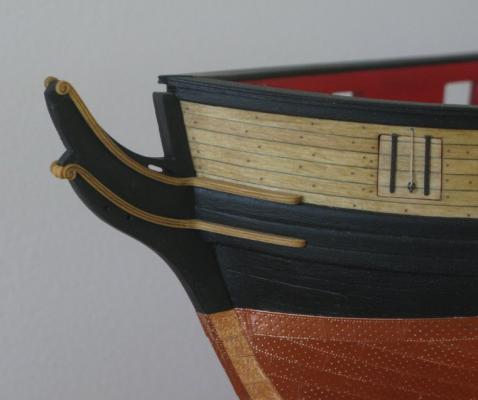
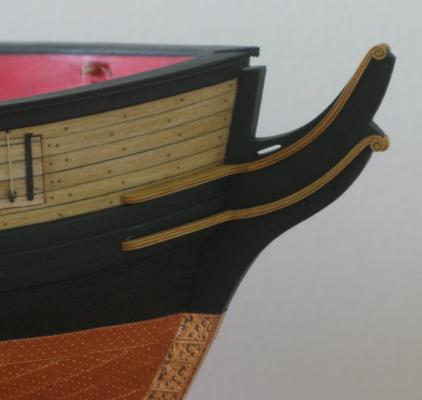
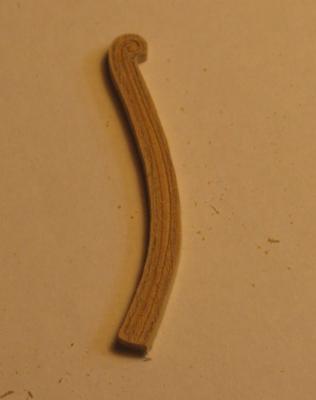
Cheeks are finished and mounted. Using pear wood it was difficult to apply the impression method to the lower parts of the cheeks with satisfactory results. So I built each part out of three layers, the middle one being about the thickness of the middle “molding line” (Img 1/ Fig 1). Gluing the 3 pieces together generates natural guides for the molding lines which can be opened up with a carving knife to match the upper part of the cheek (Img 1/ Fig 2). The tricky piece is the transition from the upper to the lower cheek. After fitting both parts to the model I glued them together without permanently mounting them to the Syren. In this way it was much easier to clean up the transitions (Img 1/ Fig 3). The final result now permanently attached to my Syren is shown in Img 2 – 4. Image 1 Image 2 [ Image 3 Image 4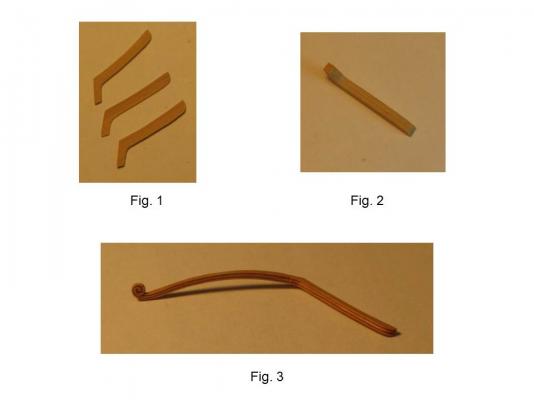
-
Well, that looks like a lot of tedious work . . . but the result is well worth it! I really love your coils! Thomas
-
Excellent progress, Augie. It is a pleasure watching your model take shape! Thomas
- 2,191 replies
-
- 1
-
-
- confederacy
- Model Shipways
- (and 1 more)
-
As usual, excellent planking job! And I love your gun port framing - very clean and precise! Thomas
-
US Brig Syren by Gahm - Model Shipways
Gahm replied to Gahm's topic in - Kit build logs for subjects built from 1801 - 1850
Ferit, Bob, Rowan, Thank you for your nice compliments! Your feed back on those cheeks is most welcome. I have done several prototypes by now and there was/is always something about them which I think I need to improve upon. That is one of the problems when you are too close to a project! Thomas -
Very well done, Augie! Your Confederacy is moving along very smoothly! Thomas
- 2,191 replies
-
- 1
-
-
- confederacy
- Model Shipways
- (and 1 more)
-
US Brig Syren by Gahm - Model Shipways
Gahm replied to Gahm's topic in - Kit build logs for subjects built from 1801 - 1850
Thank you, Dirk and Richard! Dirk, I am still convinced that you will be finished with your whole ship when I am done with the rails. Actually you are already very advanced with your rails and they look very, very nice! So better don't wait for me! Richard, after having worked on the cheeks I realize what kind of tricky stuff they are. And the rest of the rails is probably not much better. So I am even more impressed by how quickly you put the whole rails together and how nice they turned out! Thomas -
US Brig Syren by Gahm - Model Shipways
Gahm replied to Gahm's topic in - Kit build logs for subjects built from 1801 - 1850
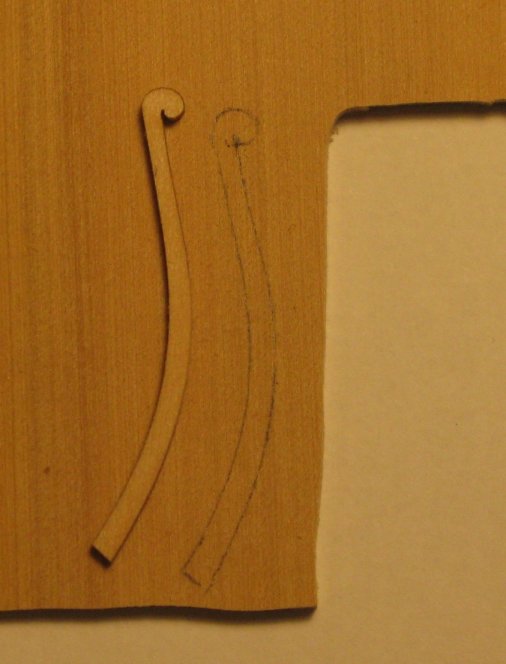
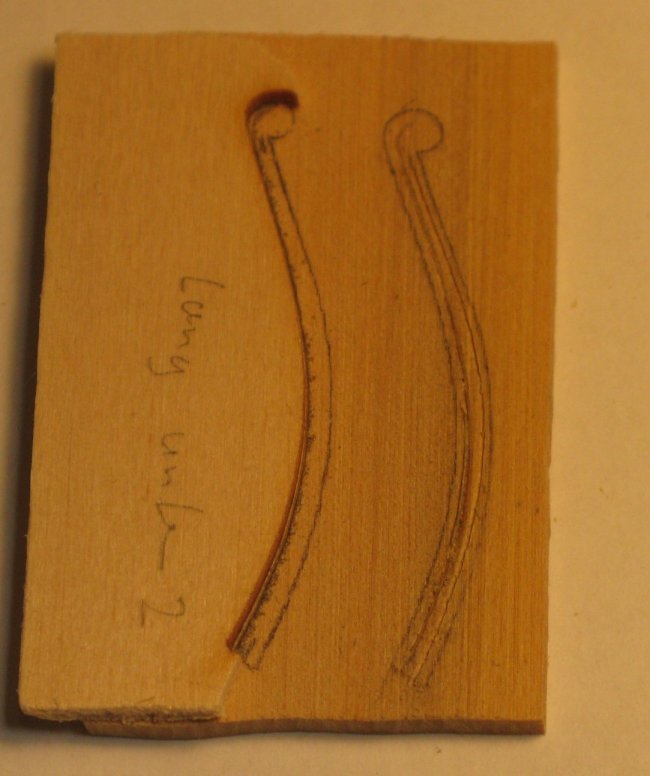
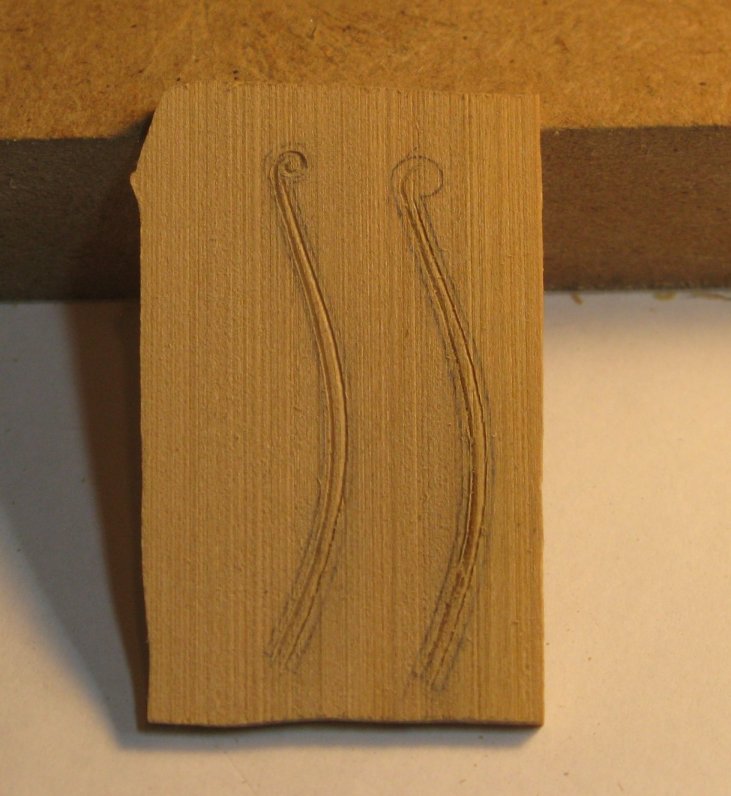
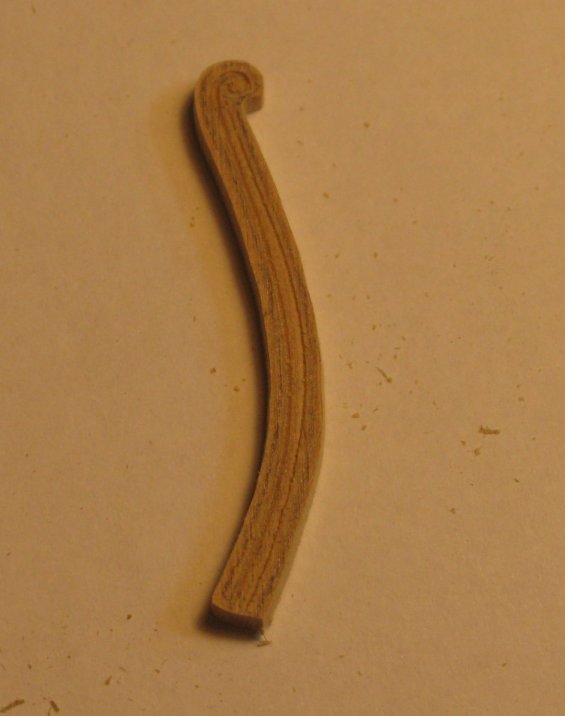
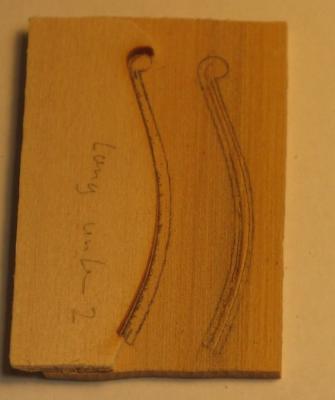
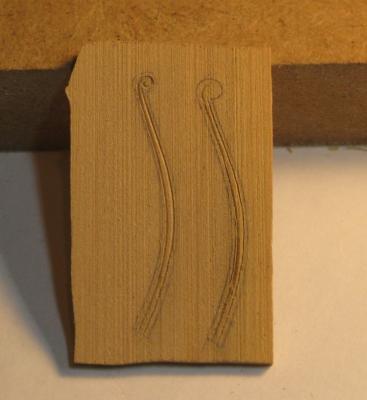
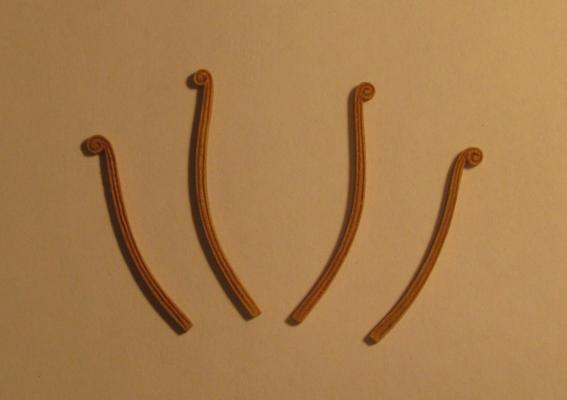
I started with the first part of the head rails, the cheeks. After a bit of experimentation I found a technique which seems to work for me. I use pear wood as it allows for more precise carving of the scrolls due to its higher density. However, this advantage turns into a disadvantage when the molding lines need to be done. The grain of the wood very easily derails the impression of straight lines. Therefore I took the laser cut negative shapes of the cheeks (which are left when you cut out the cheeks provided by the kit) as guides to impress and carve the lines into the pear wood (images 1 a d 2). I finished the lines and the carving of the scrolls before I roughly cut out the cheeks with a (manual) scroll saw (image 3 and 4). All that remains to be done is sand the pieces to the right shape (image 5). Images 6 and 7 show the first prototypes temporarily mounted to check for the right fit. Copying of the cheek contour onto the pear wood Impressing and carving the molding lines into the pear wood Lines and scroll are done before cutting out the cheek The cheek is roughly cut out with a manual scroll saw Finished cheeks after sanding Temporarily mounting of prototype cheek to check for correct fit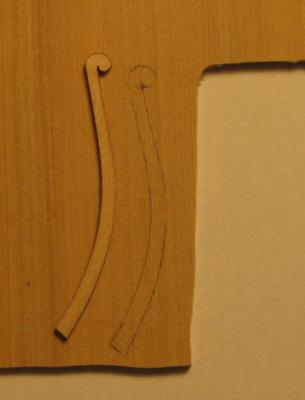


-
Impressive progress . . . in spite of the problems! Thomas
-
US Brig Syren by Gahm - Model Shipways
Gahm replied to Gahm's topic in - Kit build logs for subjects built from 1801 - 1850
Thank you, John! -
Well, I have not rigged any carronades either yet, so I may not be the best reference, but it looks to me like you did a very nice job! Thomas
-
Beautiful build! And great images as well! Thomas
-
Bob, you have enough experience and expertise to handle a "little challenge" like this. Your decision to continue is clearly the right choice. I will be watching closely as Essex is on my candidate list for future builds as well. But at the time I am finished with Syren you are probably long done with Essex. Thomas