Gahm
-
Posts
1,217 -
Joined
-
Last visited
Content Type
Profiles
Forums
Gallery
Events
Everything posted by Gahm
-
 Wow! The stern and quarter galleries of your Essex look fantastic! Very well done! Thomas
 -
Once you have the cheeks in place you need to fine-tune position and perhaps tail shape of the figurehead anyway. It should be no problem to (carefully) bend it a little bit if needed. Or even better - make your own figurehead Thomas
-
US Brig Syren by Gahm - Model Shipways
Gahm replied to Gahm's topic in - Kit build logs for subjects built from 1801 - 1850
Thank you, greatgalleons! Thomas -
US Brig Syren by Gahm - Model Shipways
Gahm replied to Gahm's topic in - Kit build logs for subjects built from 1801 - 1850
Scott and B.E., thank you for the compliments! Your feedback and insights are highly welcome! Thomas -
US Brig Syren by Gahm - Model Shipways
Gahm replied to Gahm's topic in - Kit build logs for subjects built from 1801 - 1850
Thank you for the Likes and your encouraging comments! Feedback is always highly appreciated! So on to the 2nd half of the head rail Thomas -
US Brig Syren by Gahm - Model Shipways
Gahm replied to Gahm's topic in - Kit build logs for subjects built from 1801 - 1850
Thank you, Russ! I am still not quite sure whether they look like they should. I guess I need a little distance to that topic Thomas -
US Brig Syren by Gahm - Model Shipways
Gahm replied to Gahm's topic in - Kit build logs for subjects built from 1801 - 1850
After not posting anything for several weeks here is a brief update about my head rail efforts: First I ended up not really liking the middle rails shown in the last images, so I finally tore them down. The major reason for that was that the part which was mounted directly on the wall of the ship turned out to be too short and as a consequence the shape of the head timbers would go from concave to convex. Then I tried to figure out which method of building the head timbers would lead to some decent looking results. I tried the method mentioned by Chuck in the head rail design of the Confederacy as there the head timbers do not consist out of 2 parts each but just one continuous piece. However, the Syren plans do not show any head timber profiles, so that method ended up with too many “degrees of freedom”. I finally went with the method described in the Syren instructions. With this method one of the challenges consists in generating the perception that each head timber, although constructed out of 2 parts, looks like it is made out of one continuous piece of wood. As I was not quite sure whether I ultimately would get acceptable results I finished middle rail and head timbers just on one side. So the good news is I have finished half of the head timbers. The bad news is I still have to do the other half.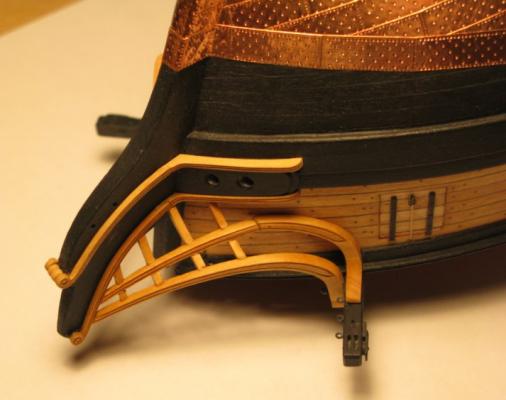


-
Beautiful work, Bob! Your cabin looks great! Thomas
-
Hello Richard, I am just catching up with your log. Your carronades and transom turned out great!! And you are off to a very good start on the quarter galleries. Just keep in mind that the whole assembly is slightly slanted as well and not mounted perpendicularly to the wall of the Syren. I noticed that at the very end of my quarter gallery construction and had to redo all of it. Believe me, at that point I was not happy! Thomas
-
I love the details you are putting in your Essex! Great work as usual! Thomas
-
US Brig Syren by Gahm - Model Shipways
Gahm replied to Gahm's topic in - Kit build logs for subjects built from 1801 - 1850
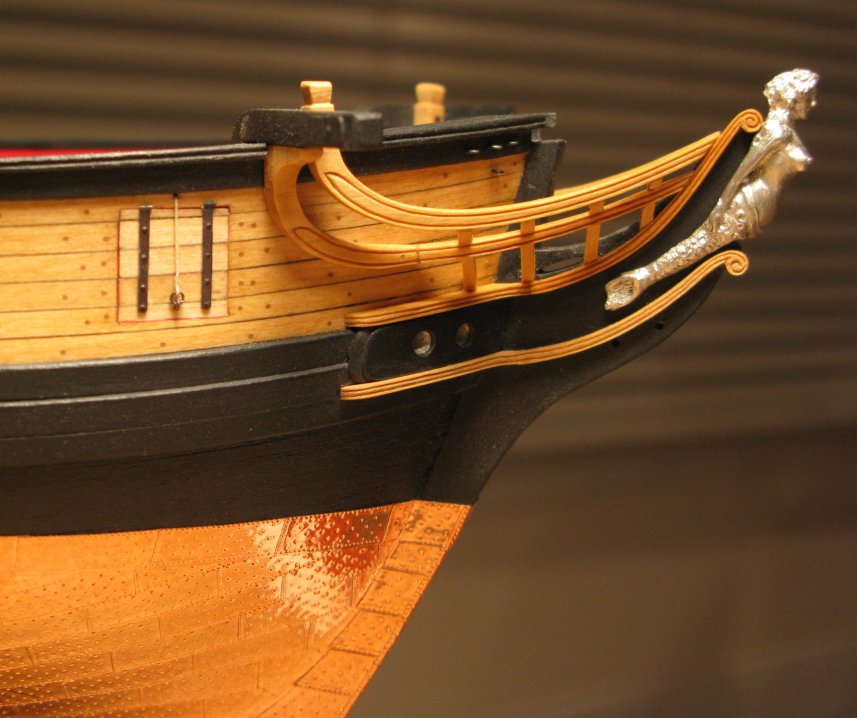
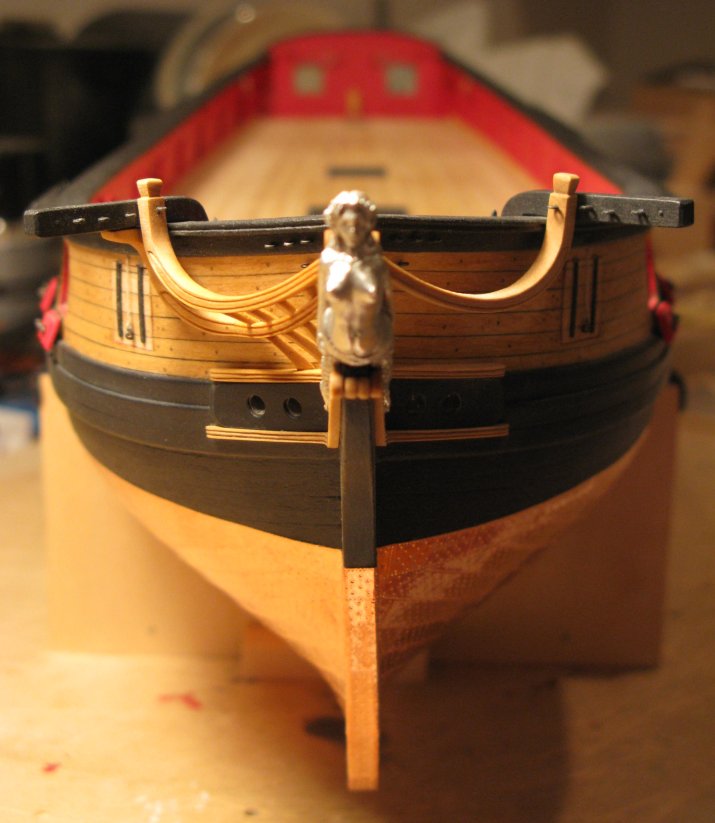
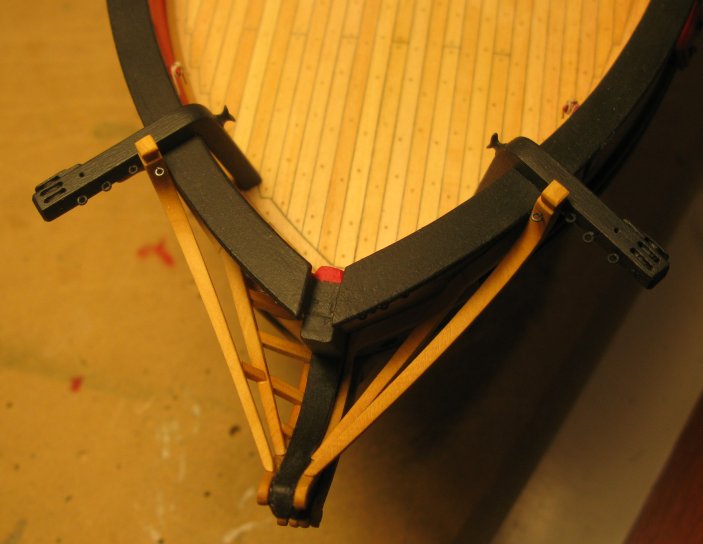
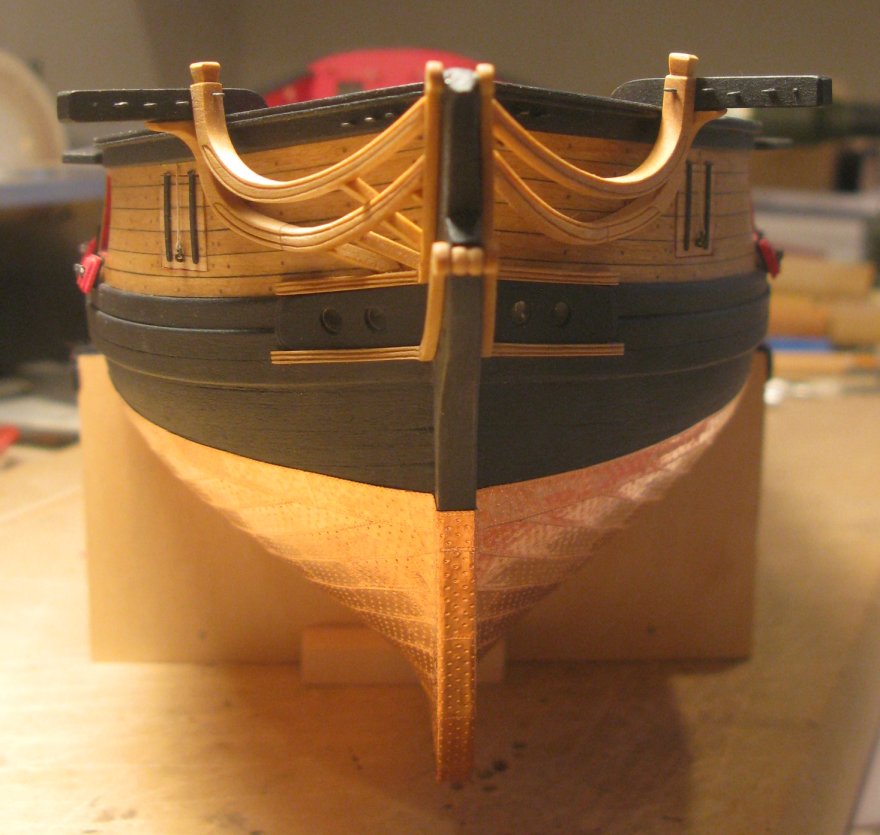
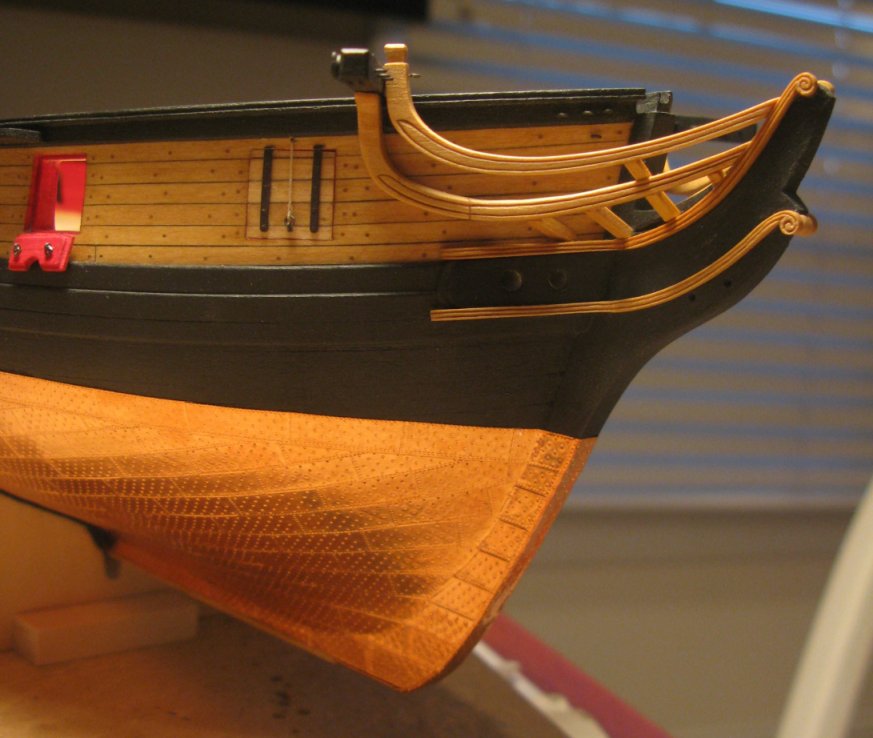
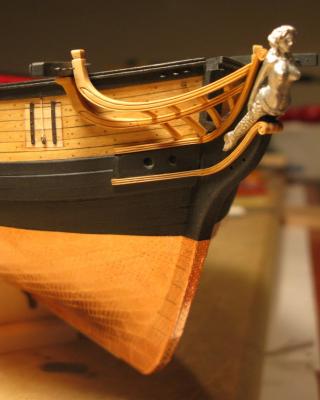
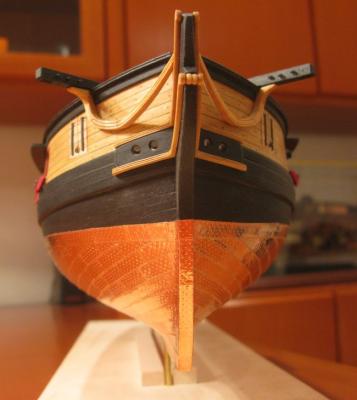
After several weeks of interruption due to traveling I finally resumed work on the head rail of my Syren model. Upper rails and middle rails are finished, and I started with the head timbers. I am using the method described by Chuck in the instruction book. Building those head timbers is a bit tricky and clearly not my favorite occupation! Below are different views of the current state of the head rail. Thomas Backboard view Top view Front view Starboard view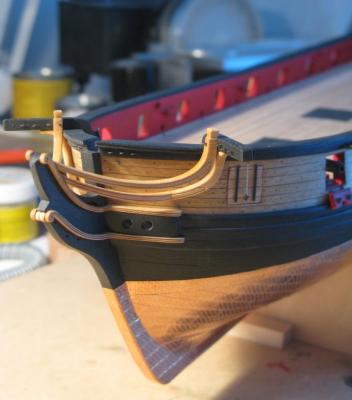


-
Excellent copper job! Your Essex looks great! Thomas
-
I love your clean and precise way of building! Looking Great! Thomas
-
After 3 weeks of traveling I am just catching up with your build log again. Your Confederacy looks GREAT! Well done! Thomas
- 2,191 replies
-
- 1
-

-
- confederacy
- Model Shipways
- (and 1 more)
-
US Brig Syren by Gahm - Model Shipways
Gahm replied to Gahm's topic in - Kit build logs for subjects built from 1801 - 1850
Dirk, unfortunately my plans for the timbers are that I can get to them at the earliest in January. Too many other commitments for the rest of the year! However, looking at the plans and Chuck's description I still have the "illusion" that they should be relatively straight forward - perpendicular to the keel and connecting the two rails. Of course I have no experience so far with them and probably will go through several rounds of prototyping (other people call it construction and deconstruction ) before I may get anything useful! Thomas -
US Brig Syren by Gahm - Model Shipways
Gahm replied to Gahm's topic in - Kit build logs for subjects built from 1801 - 1850
Thank you Bob! Your feedback - especially as you have already done these head rails yourself - is highly appreciated! Thomas -
US Brig Syren by Gahm - Model Shipways
Gahm replied to Gahm's topic in - Kit build logs for subjects built from 1801 - 1850
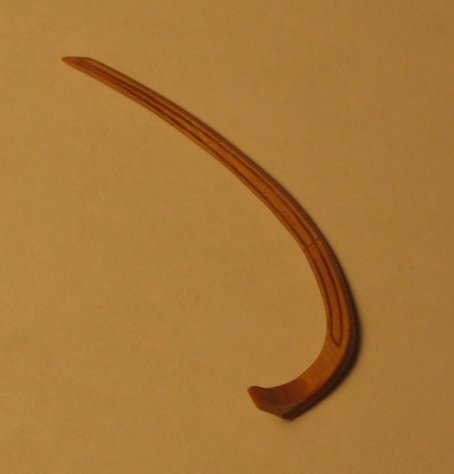
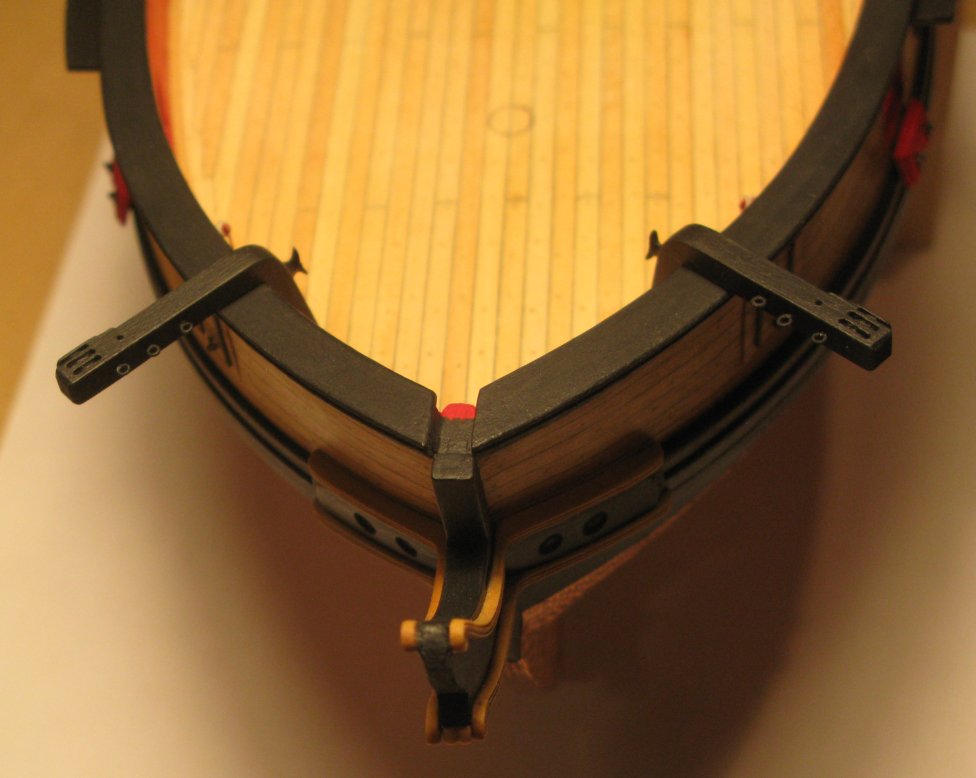
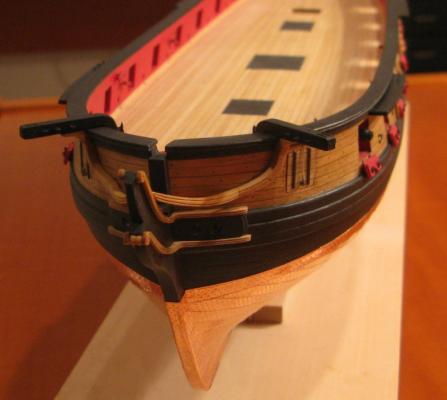
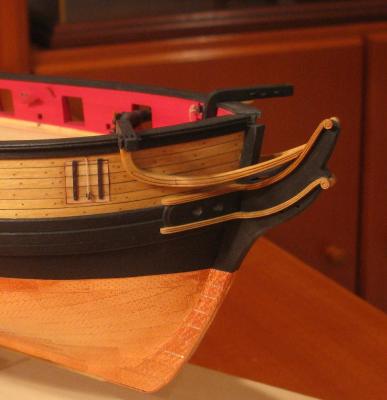
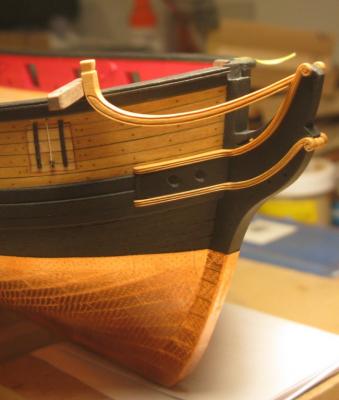
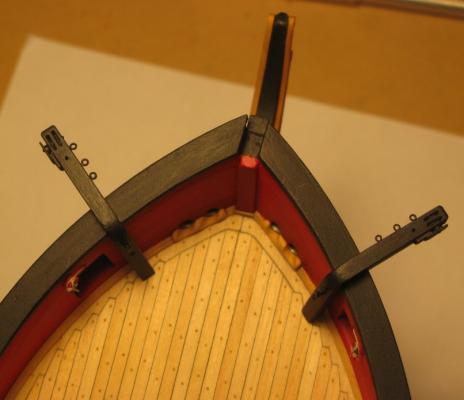
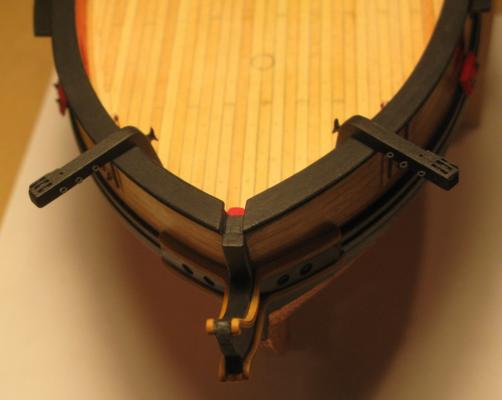
A little update on the head rails: I started with the middle rails as they seem to be the most challenging parts and I wanted to get them out of the way before Christmas. Like the cheeks I made them out of pear wood. Image 1 shows the assembled starboard rail including the hanging knee. To get the right shape I fitted the 3 pieces of the middle rail together as they were temporarily mounted on the hull, but I removed the piece as a whole for the final finishing. Images 2, 3, and 4 show the permanently mounted middle rails from different angles. Image 5 shows a prototype of the upper rail. The final candidate will have the upper end of the molding ending a bit further down to be better in sync with the middle rails. Image 1: Starboard middle rail Image 2: Starboard middle rail Image 3: Mounted middle rails Image 4: Mounted middle rails Image 5: Prototype of upper rail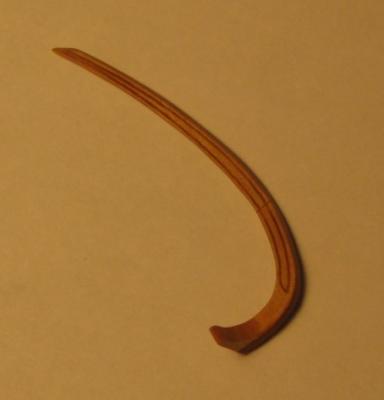
-
Beautiful work, Bob! Thomas
-
Excellent work, Bob! I am always amazed how fast you move through your builds without compromising quality! Well done! Thomas
-
US Brig Syren by Gahm - Model Shipways
Gahm replied to Gahm's topic in - Kit build logs for subjects built from 1801 - 1850
Thank you, Bob. As you know the catheads are just a "stepping stone" to the real tricky stuff, the head rails. Let's see how that goes Thomas -
US Brig Syren by Gahm - Model Shipways
Gahm replied to Gahm's topic in - Kit build logs for subjects built from 1801 - 1850
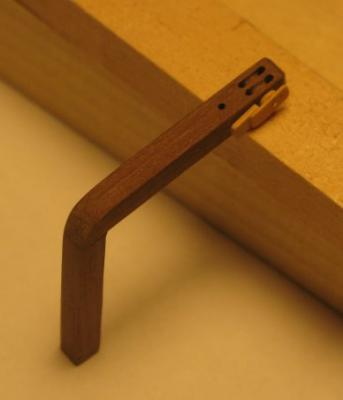
The catheads are finished. I used walnut and pear (first 2 images) instead of bass wood as it is easier to do the necessary detail work.
-
US Brig Syren by Gahm - Model Shipways
Gahm replied to Gahm's topic in - Kit build logs for subjects built from 1801 - 1850
Thank you, Gerty! -
US Brig Syren by Gahm - Model Shipways
Gahm replied to Gahm's topic in - Kit build logs for subjects built from 1801 - 1850
Thank you, Chuck! I fully agree, the cables shown in the pictures clearly won't make it to the "finals". Thomas -
US Brig Syren by Gahm - Model Shipways
Gahm replied to Gahm's topic in - Kit build logs for subjects built from 1801 - 1850
Thank you, Jason! For the lead lining I used aluminum tubing of the right diameter (you can get that in any hobby shop at very low cost), reduced the wall thickness of the tube to scale with a file, glued it in the hawse hole, and removed the protruding parts on both sides of the hole with a rotary tool equipped with a diamond bur. Finally I opened both sides of the tube up with a conical piece of metal - actually I used an old chisel from my fossil hunting days and gave it a conical tip using a file. Finally to give the aluminum a more "lead-like" look (otherwise it is too bright and shiny to simulate lead) I painted it with Testor's steel paint. Once that was dry I moved my chisel tip a little bit in the opening to produce a few scratches. Both together along with the tube shape give a pretty realistic lead impression. On the outside you are supposed to create the "fancy border" out of 2 layers of wood. Of course you do everything I described with only one layer of wood in place. This gives you the opportunity to cover up any mess you made with the second layer Thomas -
Your Syren is moving along really nicely! Deck looks great! Thomas