Gahm
-
Posts
1,217 -
Joined
-
Last visited
Content Type
Profiles
Forums
Gallery
Events
Everything posted by Gahm
-
 I just saw your build log for the first time. Your Granado looks very good! And it was an excellent idea not to use the decals. Your version is far superior! I am always tempted to build the Granado at some time myself. . . so I will follow your build log with great interest! Thomas
 -
First time I see your build log . . . simply amazing . . . outstanding craftsmanship! Thomas
-
US Brig Syren by Gahm - Model Shipways
Gahm replied to Gahm's topic in - Kit build logs for subjects built from 1801 - 1850
Thank you for your compliments! The truth is it is not too difficult to build a nice looking Syren model due to the high quality of the kit, the excellent instruction book, and the amazing details which Chuck designed into the model. Thomas -
US Brig Syren by Gahm - Model Shipways
Gahm replied to Gahm's topic in - Kit build logs for subjects built from 1801 - 1850
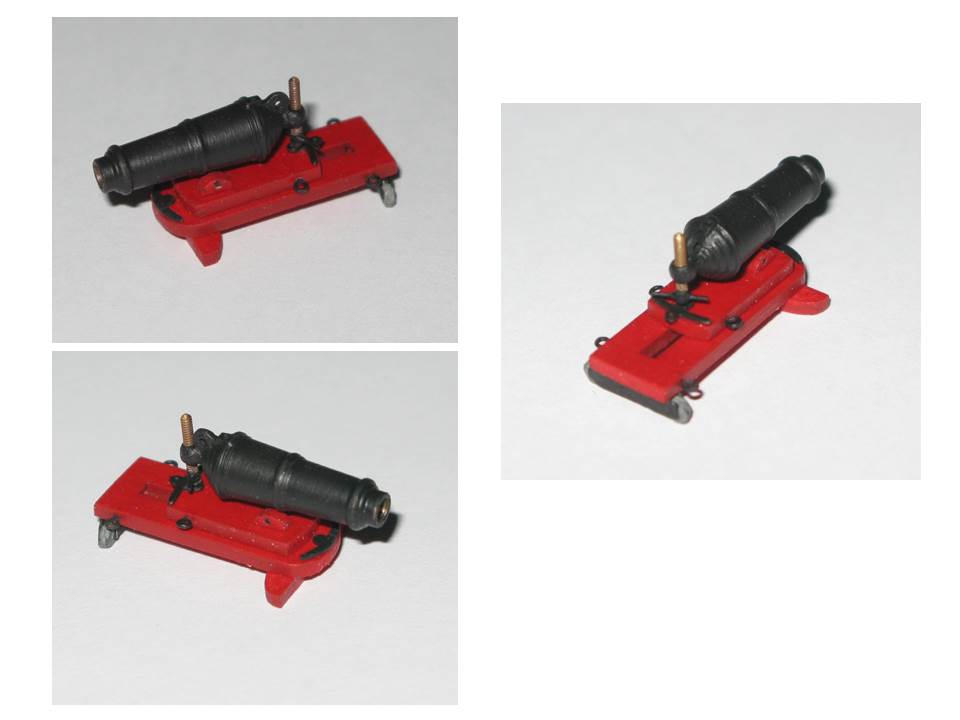
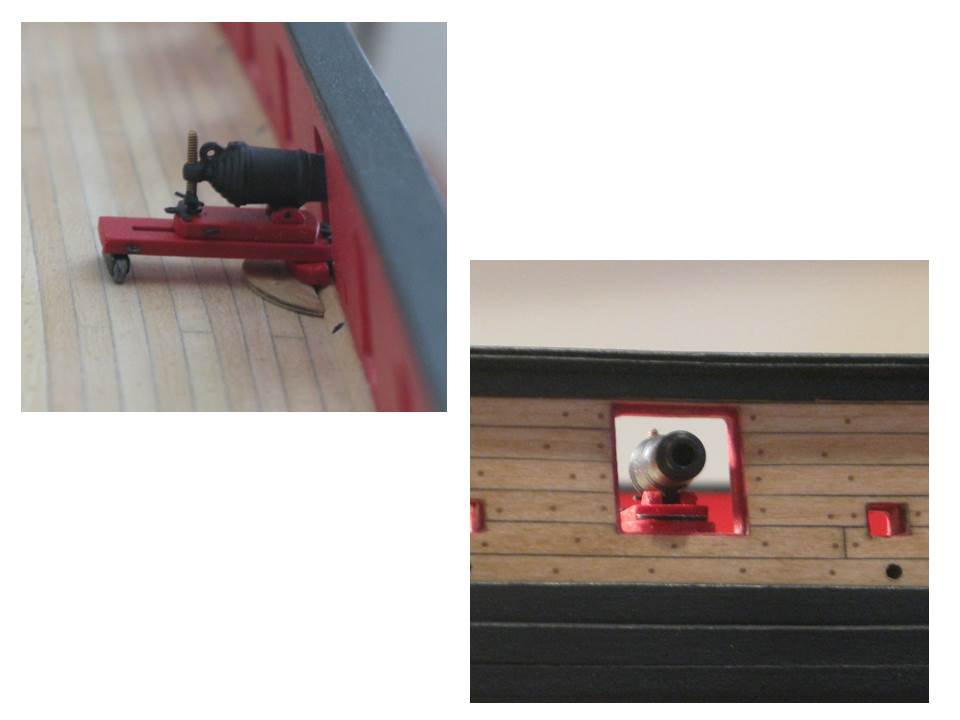
I was also curious what a carronade would look like. Below is my first prototype. Views of carronade prototype . . . and how it fits into the gun ports

-
That is a very good looking Syren! Thomas
-
US Brig Syren by Gahm - Model Shipways
Gahm replied to Gahm's topic in - Kit build logs for subjects built from 1801 - 1850
Thank you, Chuck. -
US Brig Syren by Gahm - Model Shipways
Gahm replied to Gahm's topic in - Kit build logs for subjects built from 1801 - 1850
Thank you, Russ for stopping by. I was also quite happy with the way the guns ended up in the middle of the gun ports. Augie, I kind of had the same thought . . . the first 2 teeth. Well, hopefully another 16 to follow soon. Thomas -
US Brig Syren by Gahm - Model Shipways
Gahm replied to Gahm's topic in - Kit build logs for subjects built from 1801 - 1850
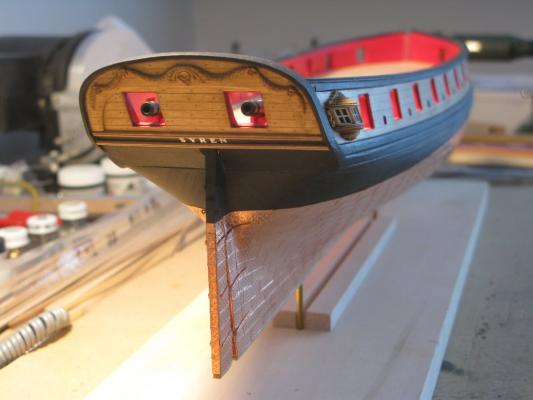
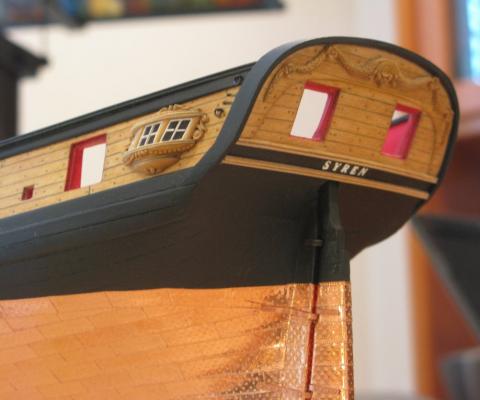
Before moving on with building all these gun port lids I wanted to make sure that the rear gun ports of my Syren model were correctly located and properly dimensioned . . . at least this was a good excuse to build the long guns first . Finished long guns. Stern of Syren showing long guns.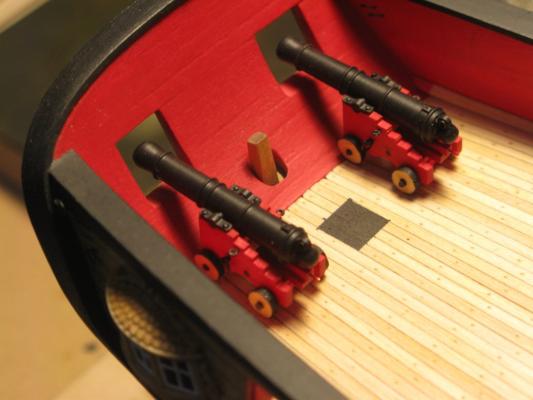
-
Beautiful model! What rigging line did you use? Is it the same as provided with the kit? Thomas
-
Your yards look great. Very well done! Thomas
-
US Brig Syren by Gahm - Model Shipways
Gahm replied to Gahm's topic in - Kit build logs for subjects built from 1801 - 1850
Hello Prodas, to produce these carvings I used a combination of rotary tool, small chisels, and Exacto knife, . . . and a lot of patience . . . Thomas -
US Brig Syren by Gahm - Model Shipways
Gahm replied to Gahm's topic in - Kit build logs for subjects built from 1801 - 1850
Thank you, Augie! I guess I will take a similar approach. Thomas -
US Brig Syren by Gahm - Model Shipways
Gahm replied to Gahm's topic in - Kit build logs for subjects built from 1801 - 1850
I think you have a good point there. What line diameter did you use? Thomas -
US Brig Syren by Gahm - Model Shipways
Gahm replied to Gahm's topic in - Kit build logs for subjects built from 1801 - 1850
Thank you, Augie. Your description of the cleats makes sense. Then looking at the different models, including the one from Chuck, I would assume that only ropes are attached if the port was in use - that means no ropes for the closed side ports. That leaves the question for the stern ports: what are the holes for if the belaying ropes went over the transom? Or was it handled either way and we have a choice to go through the holes or over the transom? Thomas -
US Brig Syren by Gahm - Model Shipways
Gahm replied to Gahm's topic in - Kit build logs for subjects built from 1801 - 1850
Bob and Augie, thank you for the compliments! They are always appreciated! Looking at the next steps which are the gun port lids, I have a question, where I am curious how you handled this. Chuck's plans show holes over all gun ports which have upper lids (the 4 closed gun ports and the stern ports). I would assume that they are meant to have ropes go through which are attached to the outside of the upper lids to open them. Yet, they are nowhere shown, and for the stern ports Chuck writes in the instruction book that the ropes would go over the transom and belayed to a cleat above each port inboard? Having not read the whole instruction book I also would appreciate if you could point me to where the belaying of the ropes for the stern ports is described (what lines, which cleat) as it is probably easier to attach the lines to the upper port lids before I mount them (better access). Thomas -
US Brig Syren by Gahm - Model Shipways
Gahm replied to Gahm's topic in - Kit build logs for subjects built from 1801 - 1850
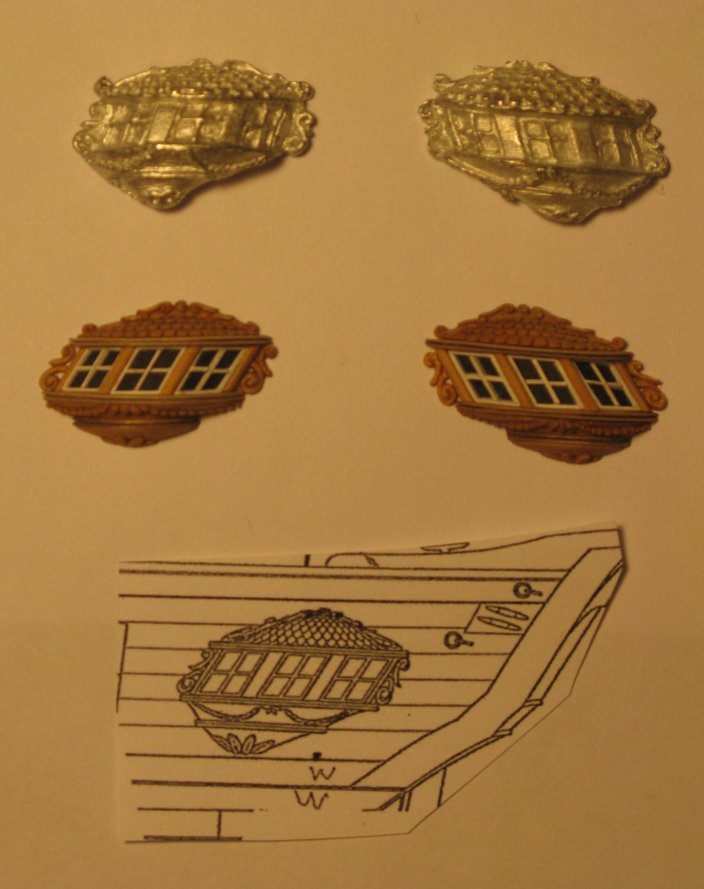
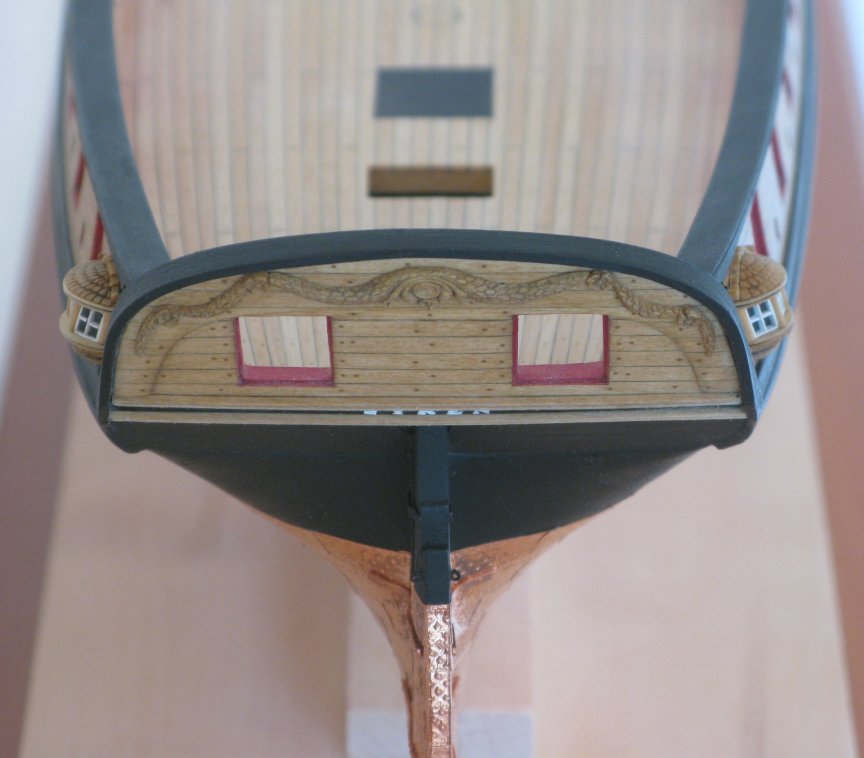
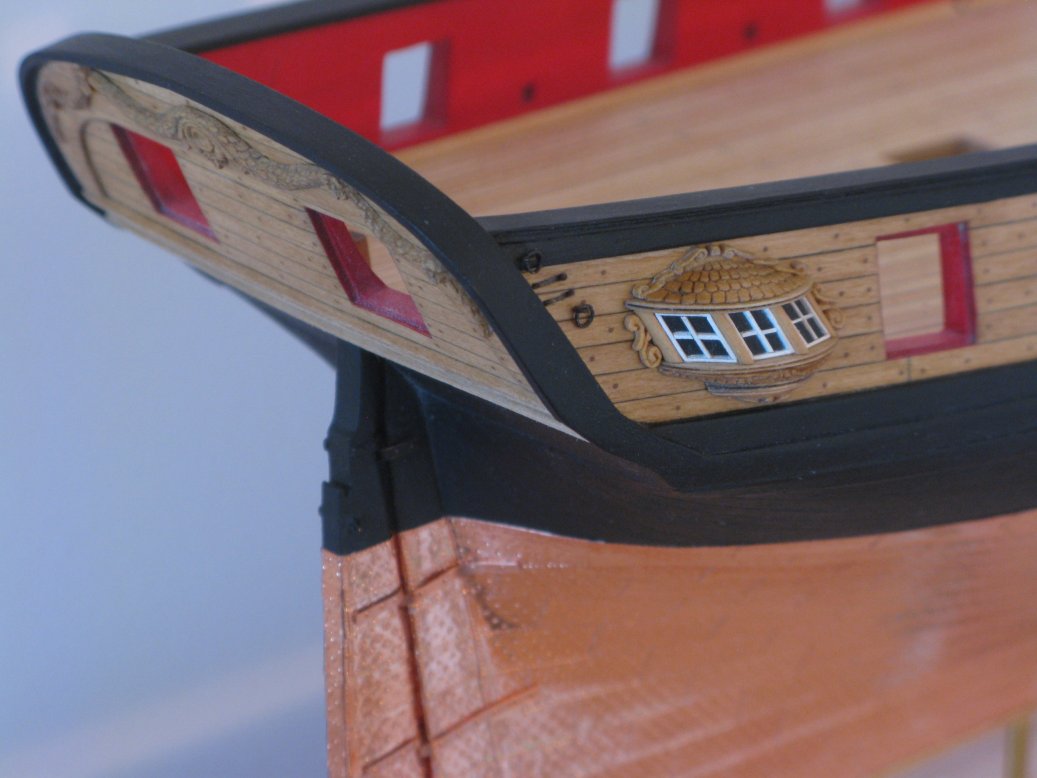
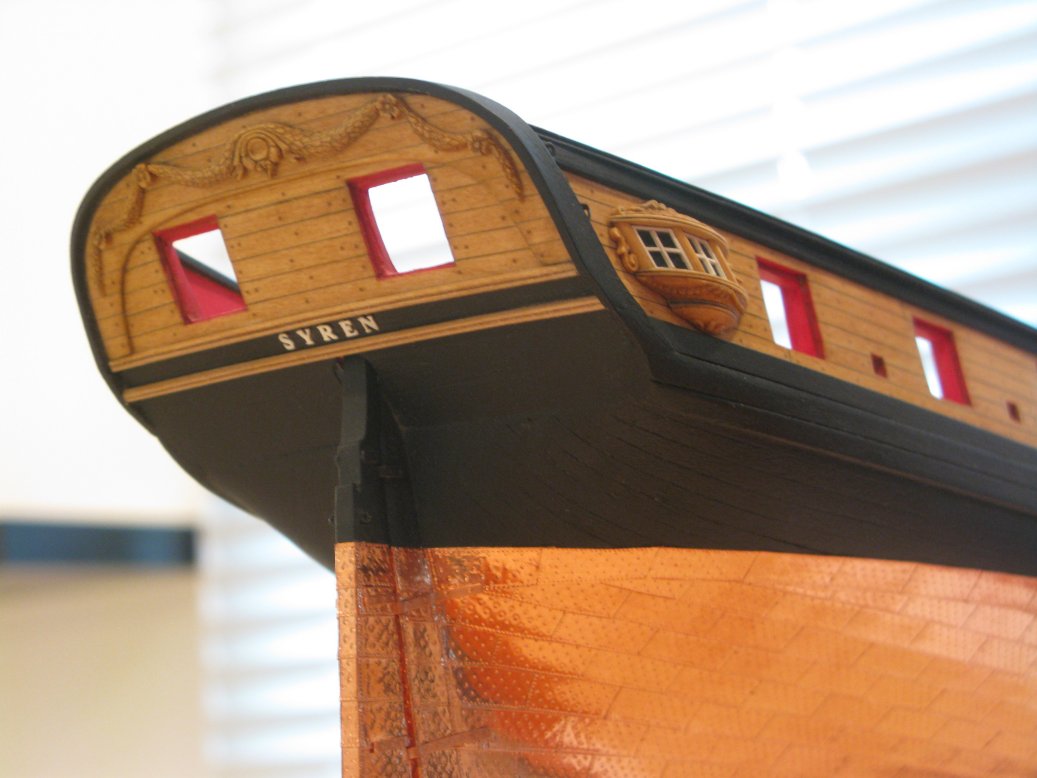
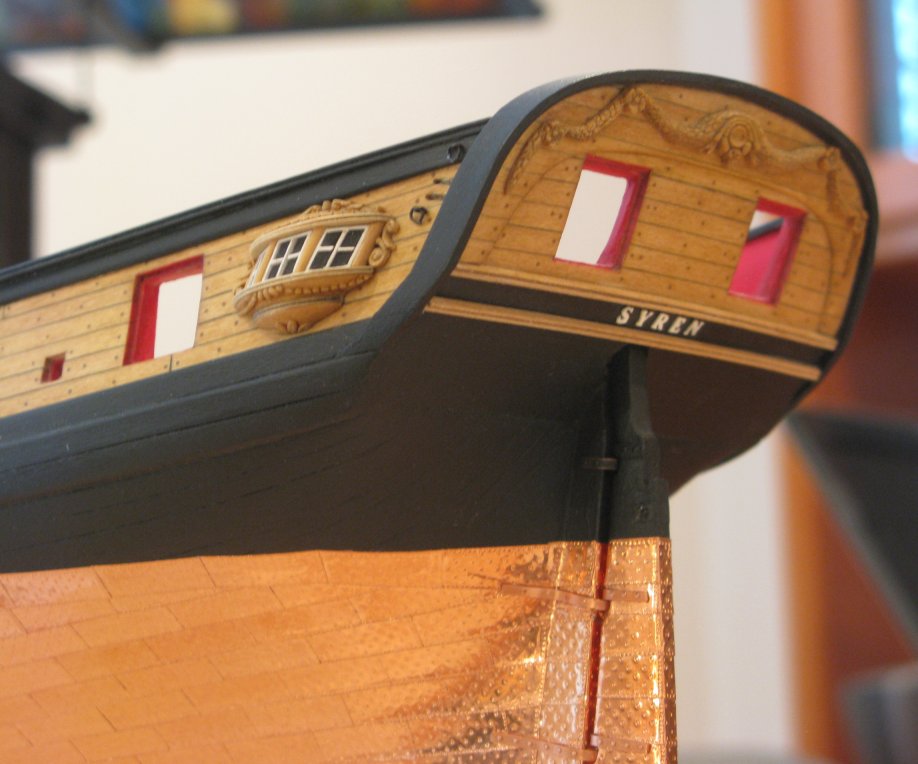
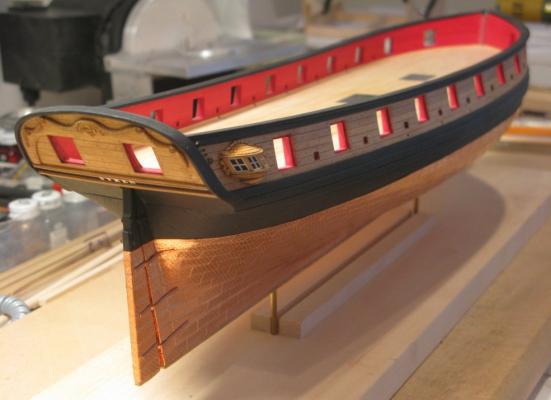
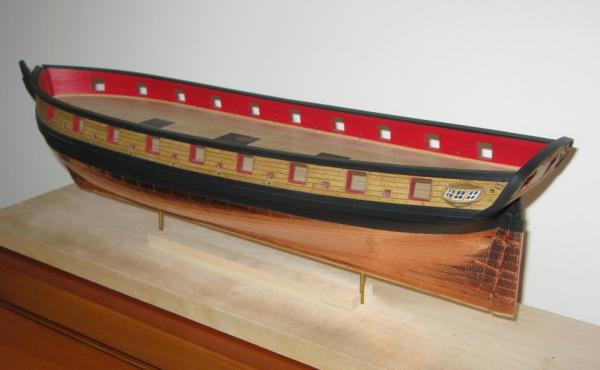
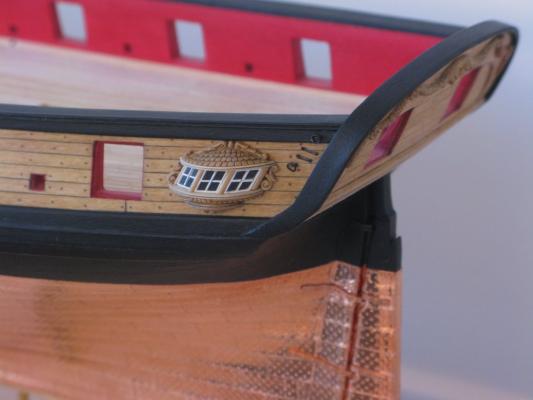
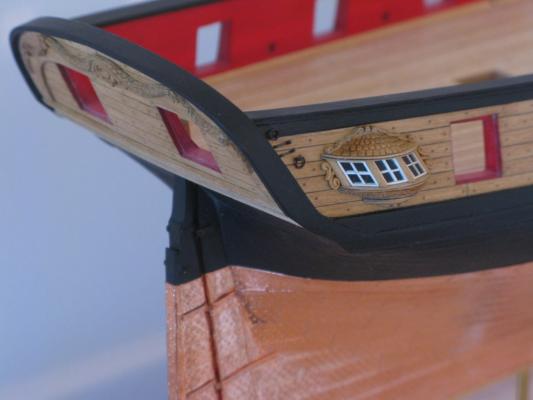
Here a little update: I am finally finished with the 2nd page of chapter 9. I still had to do some adjustments to the starboard quarter gallery and had to finish the port version as well. Both are permanently mounted now as you can see in the following pictures. Finished quarter galleries Stern view from above Starboard side Port side Port side, close up view from above Starboard side, close up view from above Starboard side, close up view from below Port side, close up view from below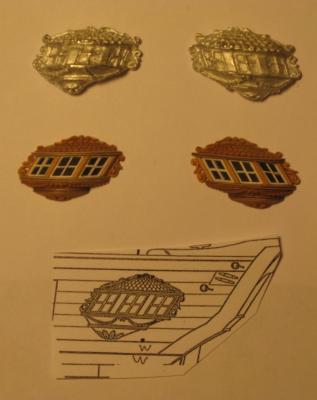


-
Your Syren really is coming along very nicely! Your rigging is just superb! But I am glad to hear that somebody else also has to do some other stuff but ship modeling. I was already under the impression that I was the only one getting distracted by such "ordinary tasks" like yard work, home projects, earning a living, family, . . . (-: Thomas
-
Thank you for reposting your build log! I followed it closely before and the excellent quality of your model was one of the reasons why I changed my original intention of building a Caldercraft model and switched to the Syren. And by the way, I never regretted it. I have a lot of fun with the project, I am just always short of time! Thomas
-
Amazing progress! . . . and very well done! I would not worry about the copper patina. That is one of the few things which is happening on its own Thomas
-
First time I looked at your build log. Simply amazing! You are building a masterpiece! Thomas
-
I am just catching up with your build log. Excellent job on the standing rigging!! I can't even imaging how that must feel . . . I am still struggling with chapter 9 (I believe) Thomas
- 1,668 replies
-
- 1
-

-
- syren
- model shipways
- (and 1 more)
-
Your Syren is coming along very nicely! And you very successfully "weathered" one of the more difficult parts, which is the transom. Thomas
-
As an after thought . . . you may be able to hide most of the repair work behind your lower gun port lids. So as long as you don't have to correct the closed ports (for a balanced view) you may be able to do it without painting the hull. Thomas
-
Here is my 2 cents worth on your issues: Eye bolts: I would go with the smaller ones as they are more scale appropriate, and experiment a little with getting them black. Here you have at least 2 good choices, painting and oxidizing (Blacken it). Painting works fine if you use the right paints. Normally paints which are designed for wood are in my experience not so well suited for metal. However, all the paints designed for plastic models normally also stick pretty well to metal. If you use the paint in a diluted fashion so that it does not cover up the details (here it would be the hole of the bolt) and apply several coats you should get good results. Blacken it should work fine, too. Nearly everybody has to deal with the flaking effect at the beginning. To avoid that you have to make sure that the part you want to blacken is fat free and clean. To insure this put it in aceton (you can get this at Lowes), rins it thoroughly with water afterwards, and always use tweezers as to not contaminate the part again. Then put the part in a dilution of Blacken it (something like 1 part Blacken it, 2 parts water) and let it stay there until it is black. Due to the dilution the oxidization will go much slower and the build up of the black coat will be far more homogeneous and not flaky. Afterwards rins it carefully in water again to stop the reaction. Without that your part may disintegrate in a few years because of ongoing corrosion. Gun ports: This clearly is not a simple issue and may need some more involved correction work. Manipulating the guns probably will not get you there. In my opinion one resolution could be to build up the gun ports. By this I mean add about half a plank to the lower edge of each gun port (--> this should give you the needed height for your carronades) and remove about that much at the upper edge of the gun port. At least on your pictures you seem to have enough space left without having to change the hand rails. Now, obviously such a correction would be clearly visible at the outside of your Syren. The solution for that would be to paint the hull with ogre paint. As far as I know most of these ships were painted like this anyway, so you would not do anything which is historically incorrect. Actually, there was one build log in the past where somebody chose to do so right from the beginning, and he ended up with a magnificent Syren model. Also all the models from Caldercraft as well as a lot of museum models are painted like this. So this suggestion may sound like a lot of work, but once you look at the details it is perfectly doable and a comprehensive way of getting rid of your problems completely. Thomas
-
Beautiful headrail!! Thomas