Javlin
-
Posts
1,681 -
Joined
-
Last visited
Content Type
Profiles
Forums
Gallery
Events
Everything posted by Javlin
-
Everybody is moving into new areas of interest...it happens much.
-
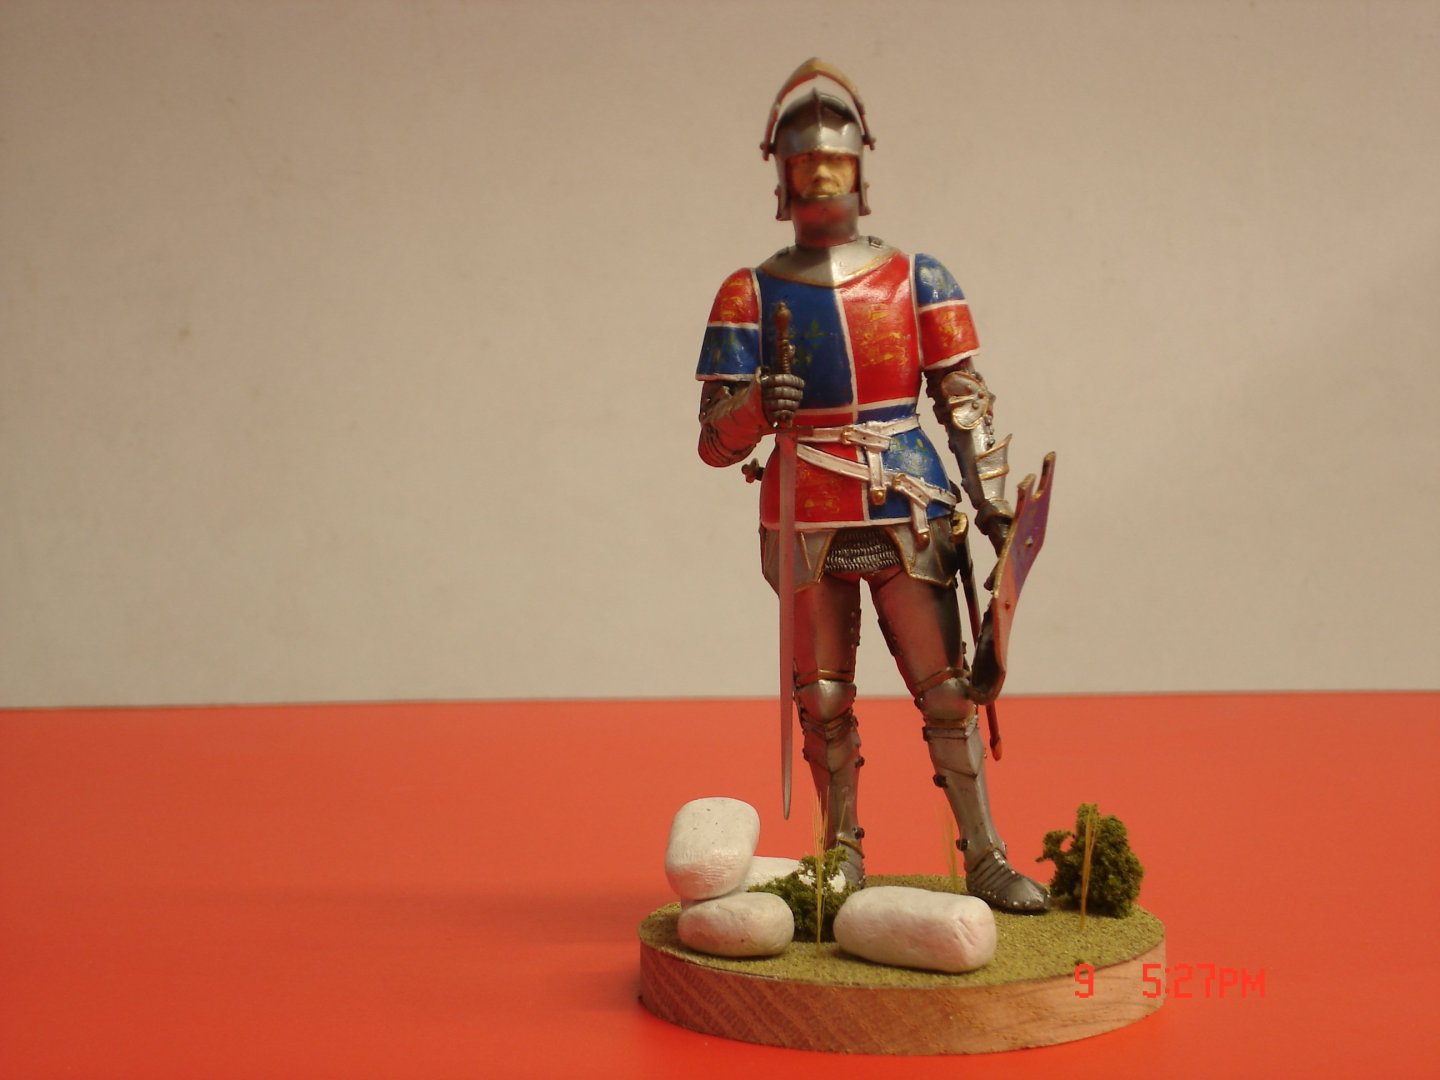
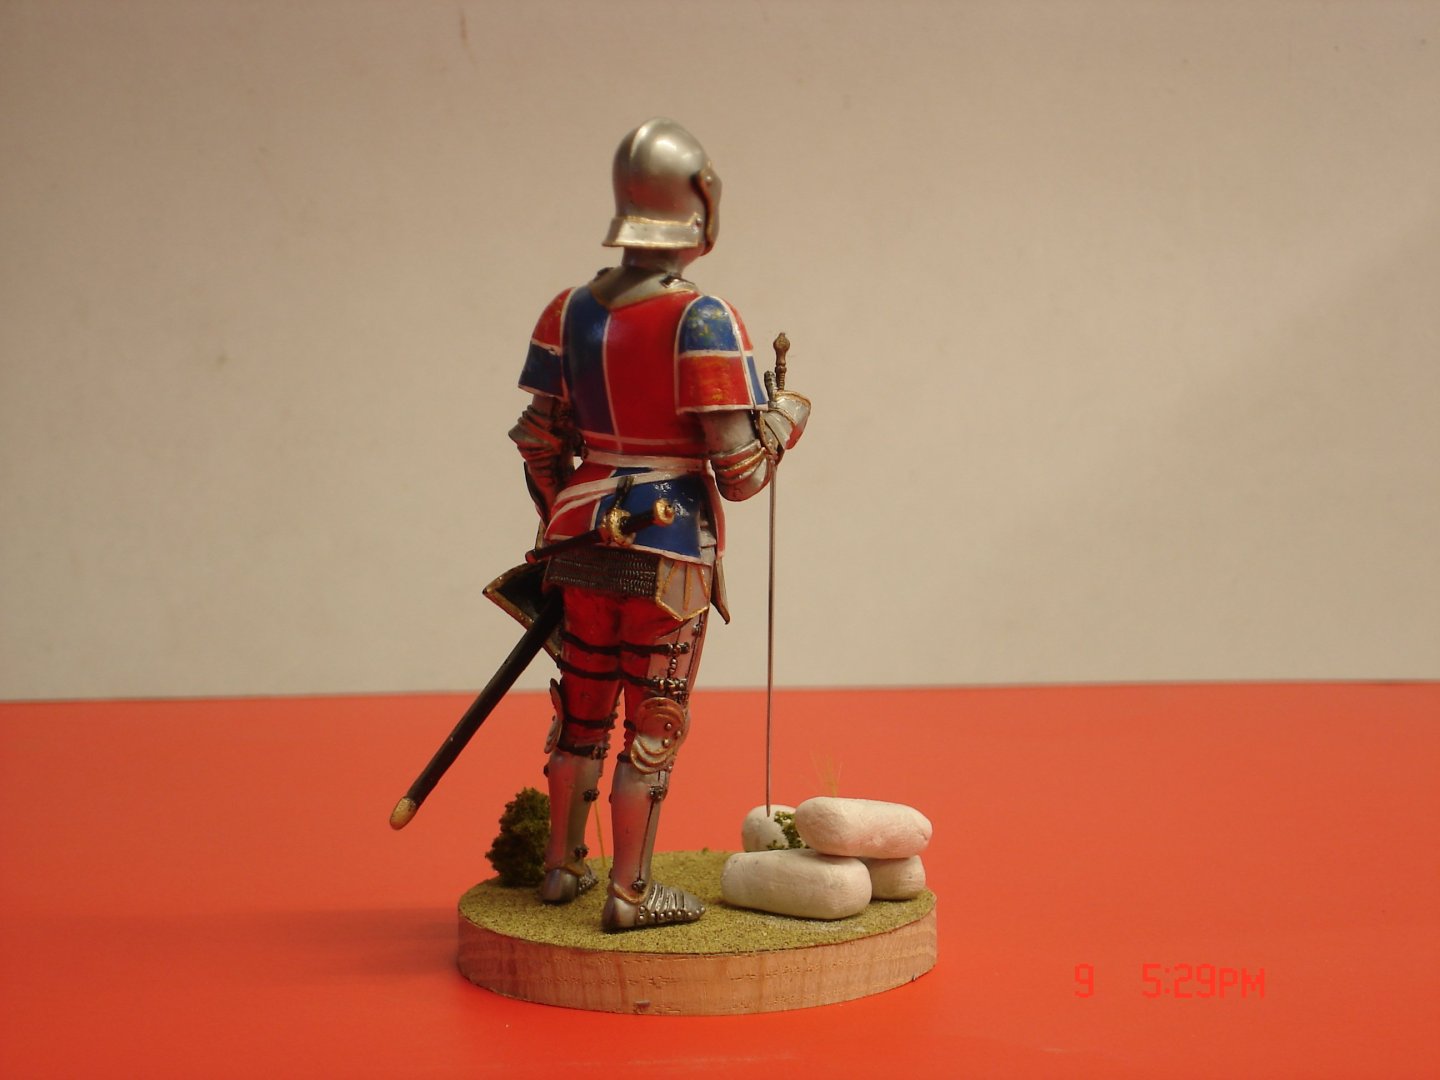
Nice one Alan!! I almost bought another Knight in 1/16 the other day "Blue Knight" but the pics just did not look that authentic?You know of any sources for the 1/16 from 1200's/1400's?
-
Knight by Javlin - MiniArt - 1/16 - PLASTIC
Javlin replied to Javlin's topic in Completed non-ship models
Thanks Jack it's something I might try again it was fun/different. -
Thanks Mike what's great about it means the End is Near!
- 68 replies
-
- 2
-

-

-
- Scharnhorst
- Trumpeter
- (and 1 more)
-
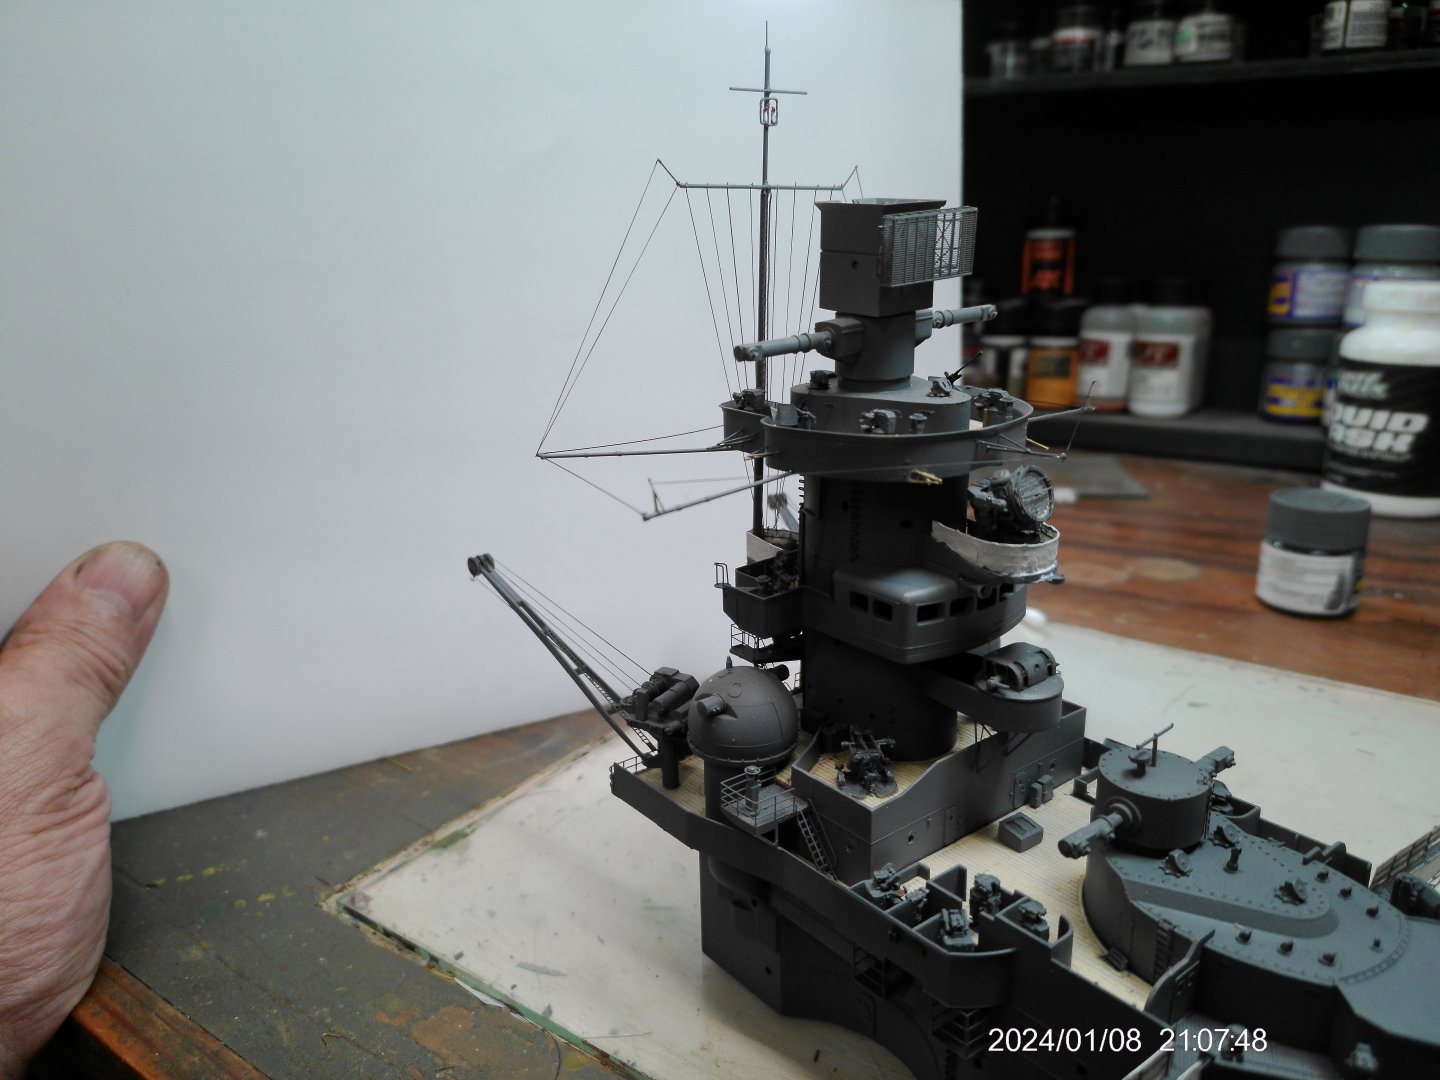
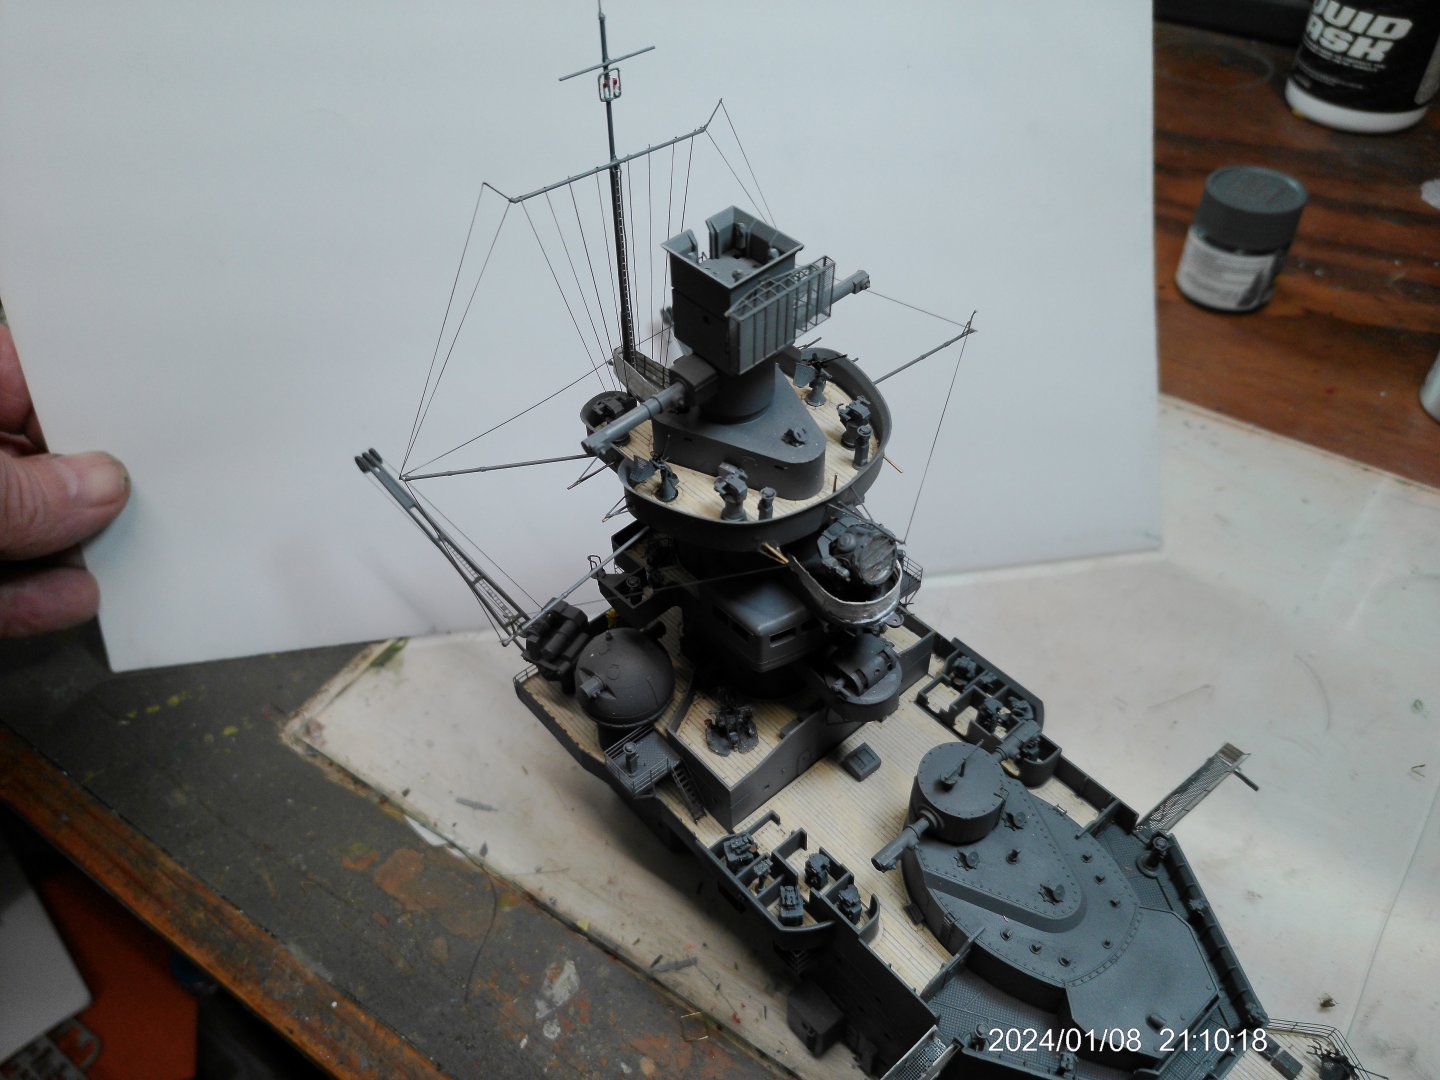
Thanks Alan it's my favorite part of the build after thinking their is still one more line each side short that needs to be added no biggie.
- 68 replies
-
- 1
-
-
- Scharnhorst
- Trumpeter
- (and 1 more)
-
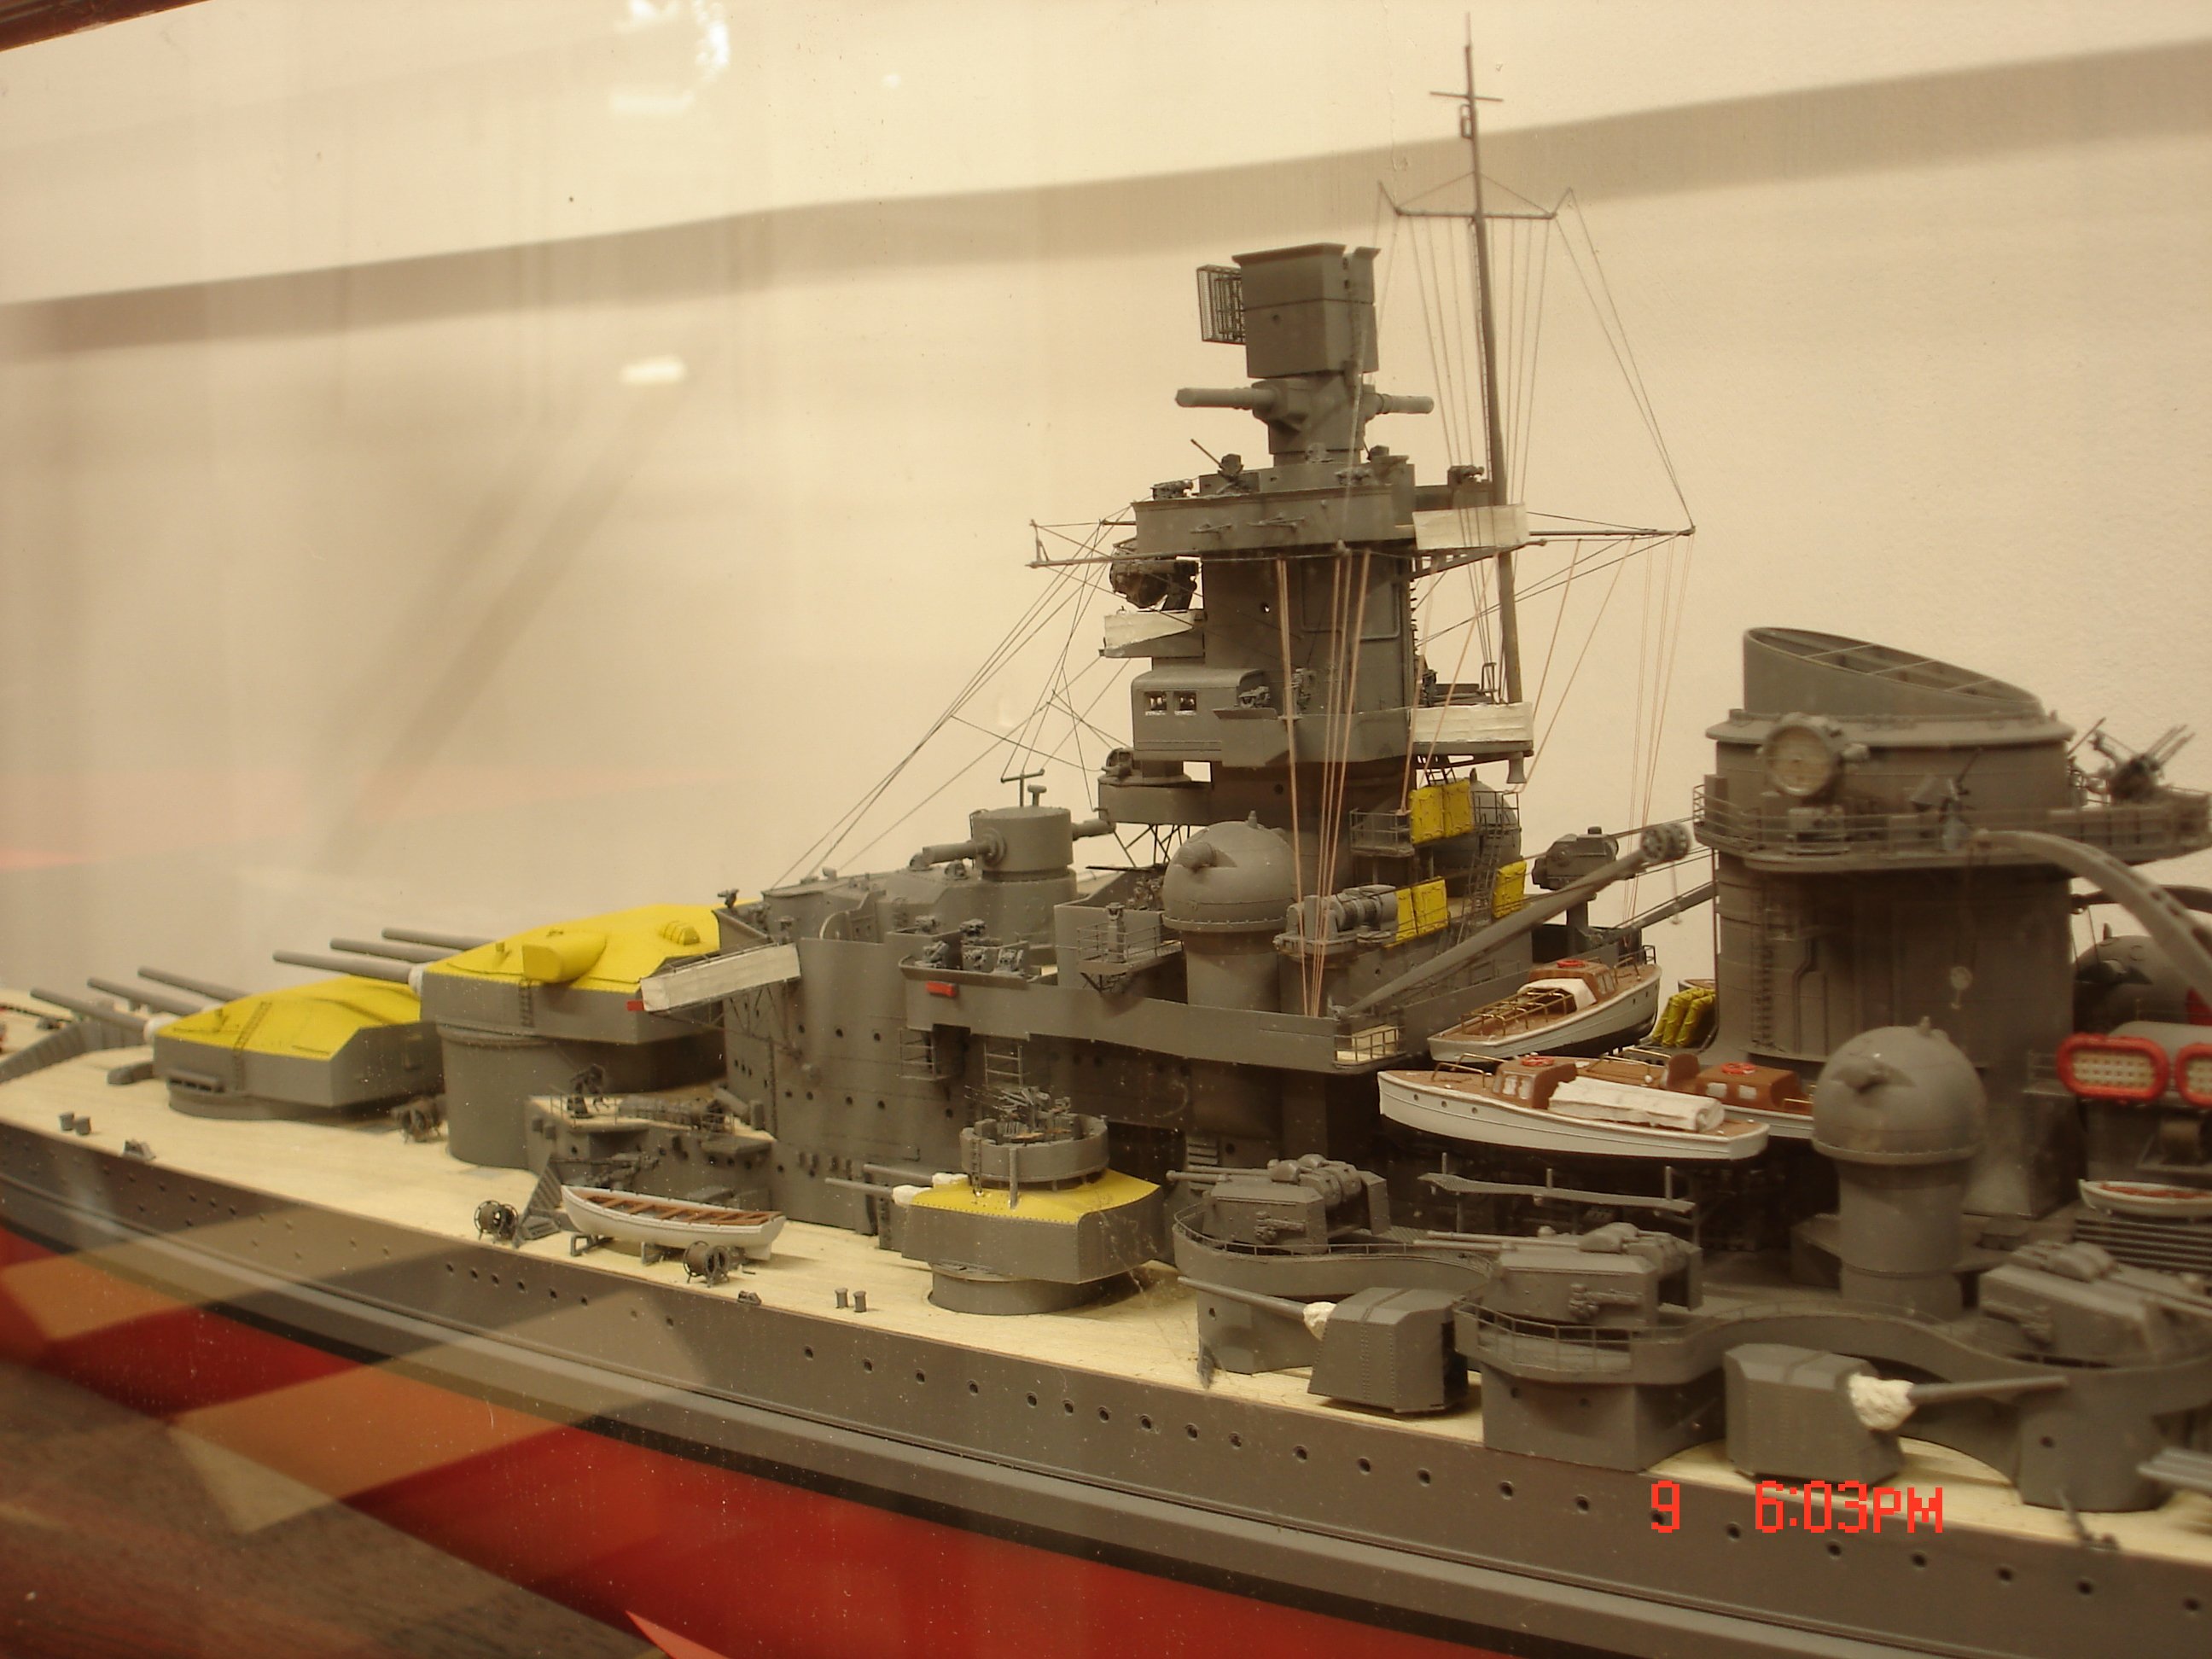
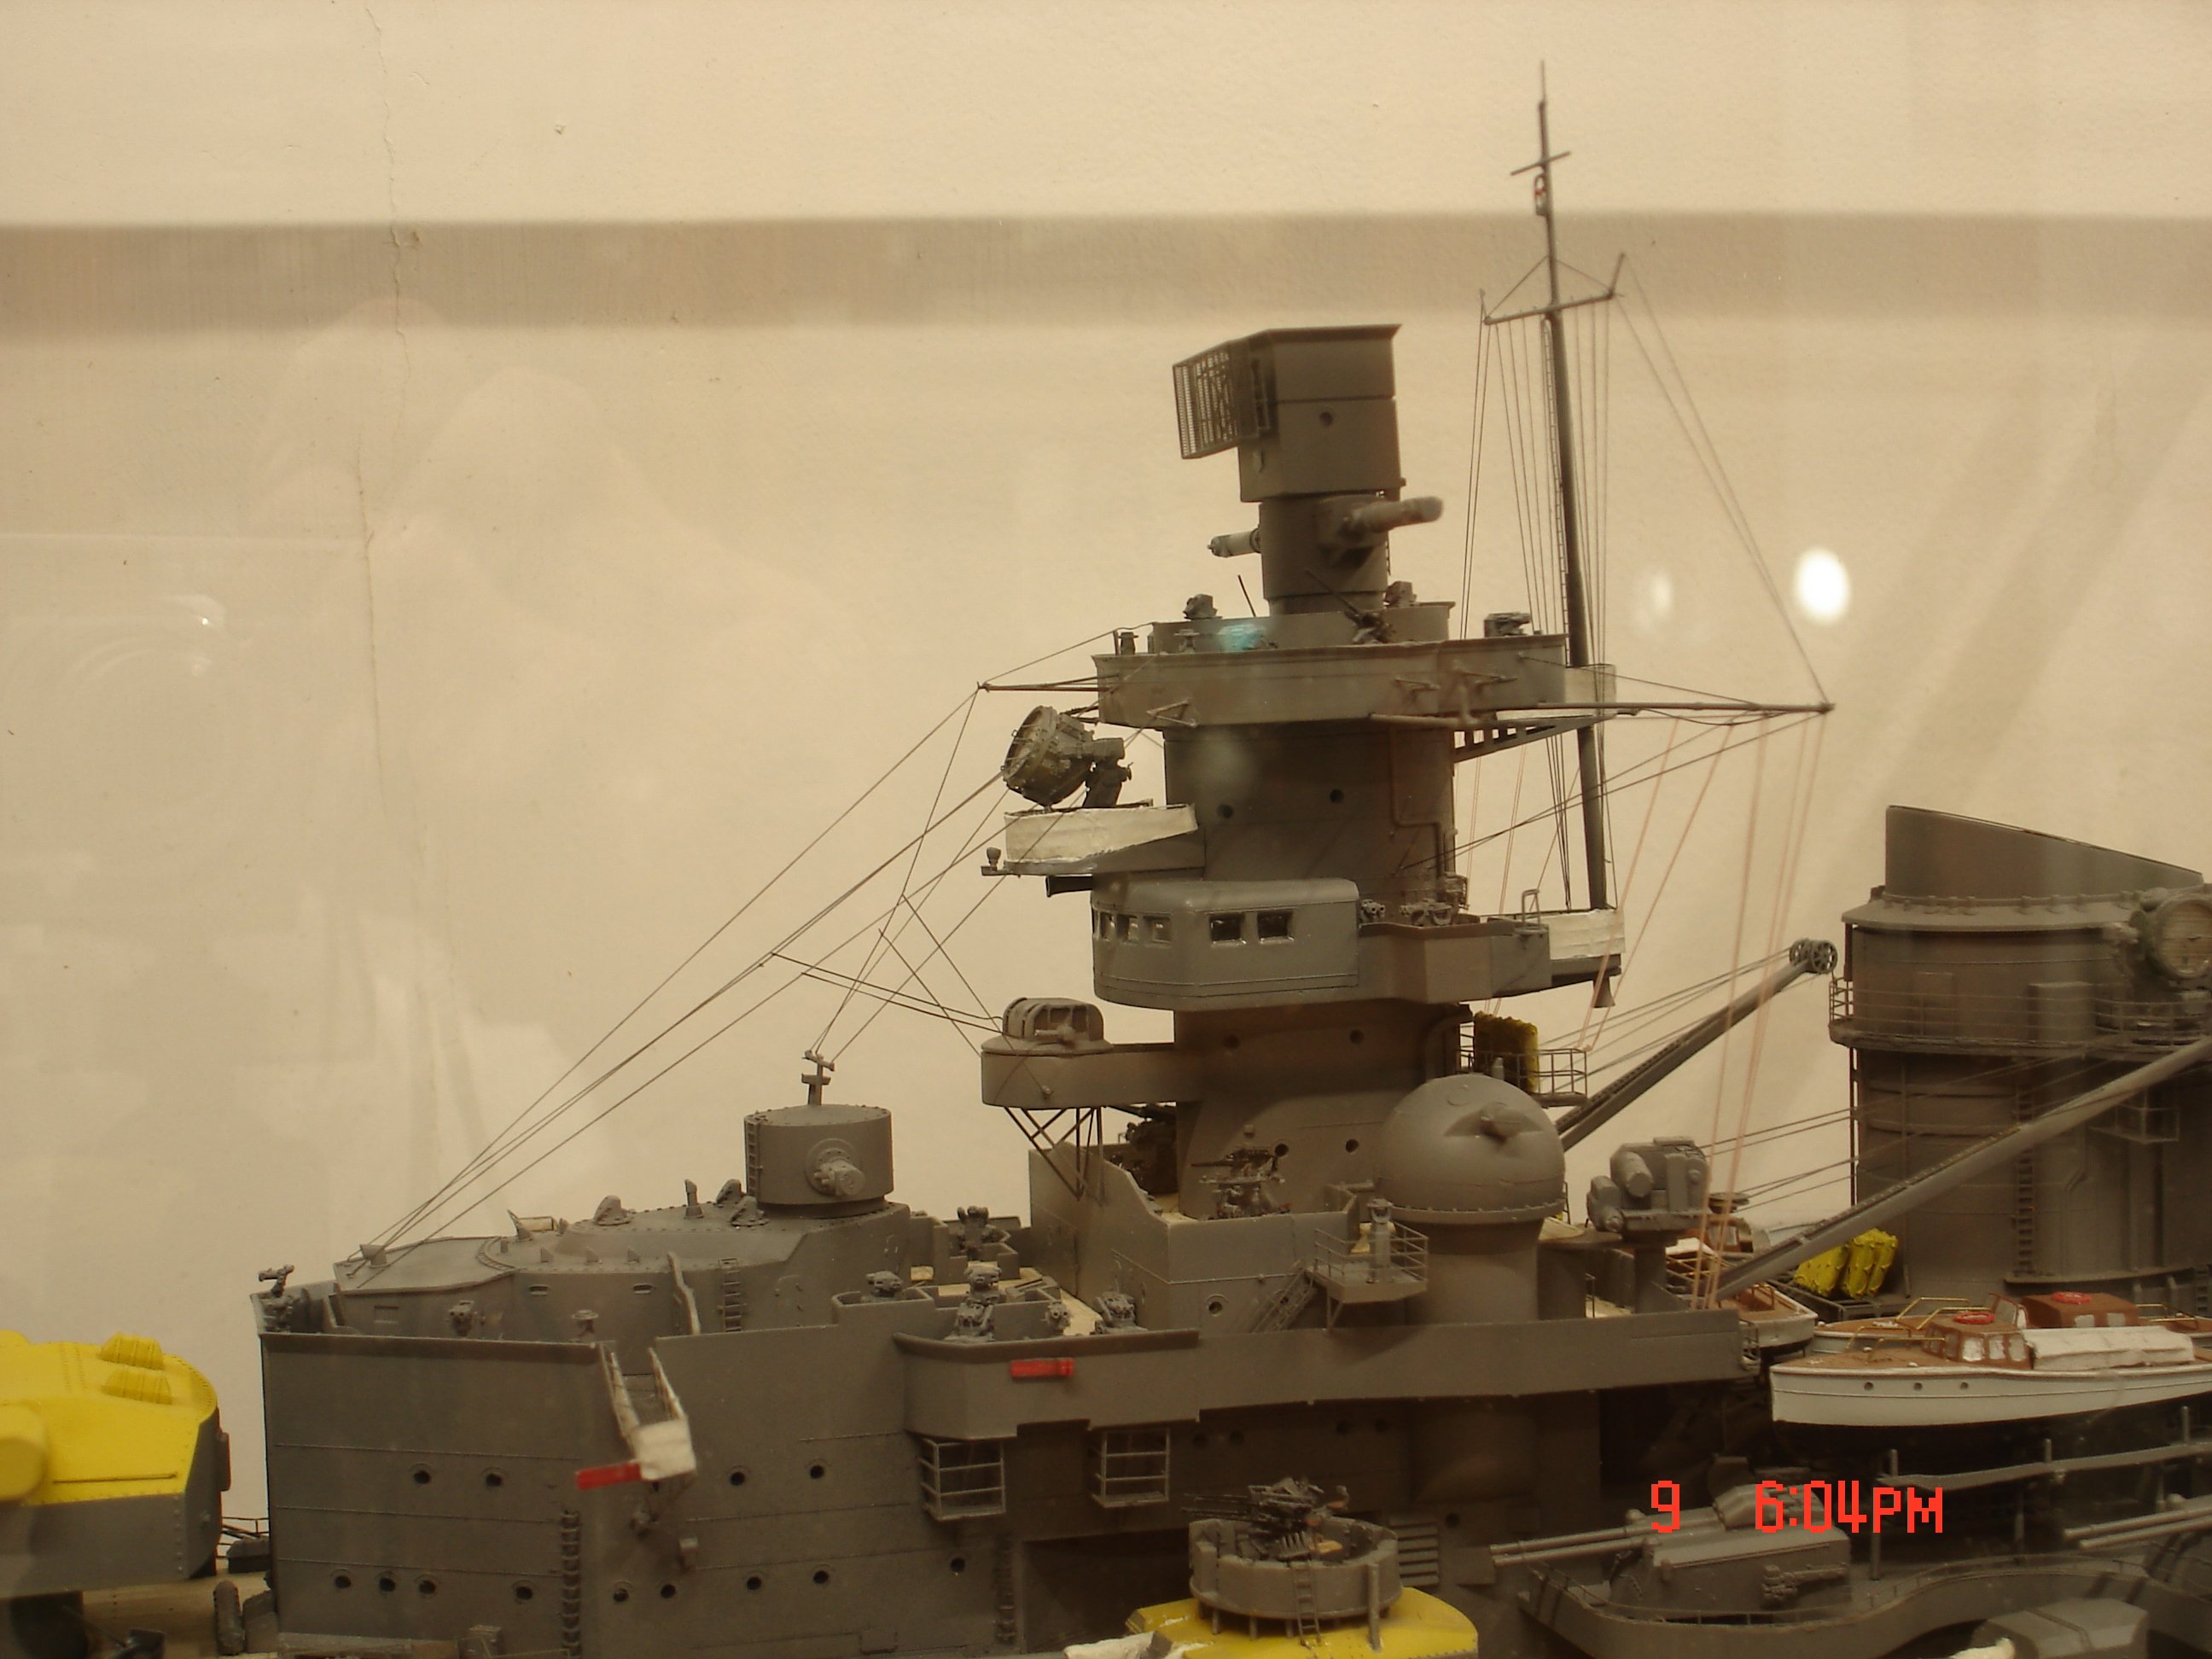
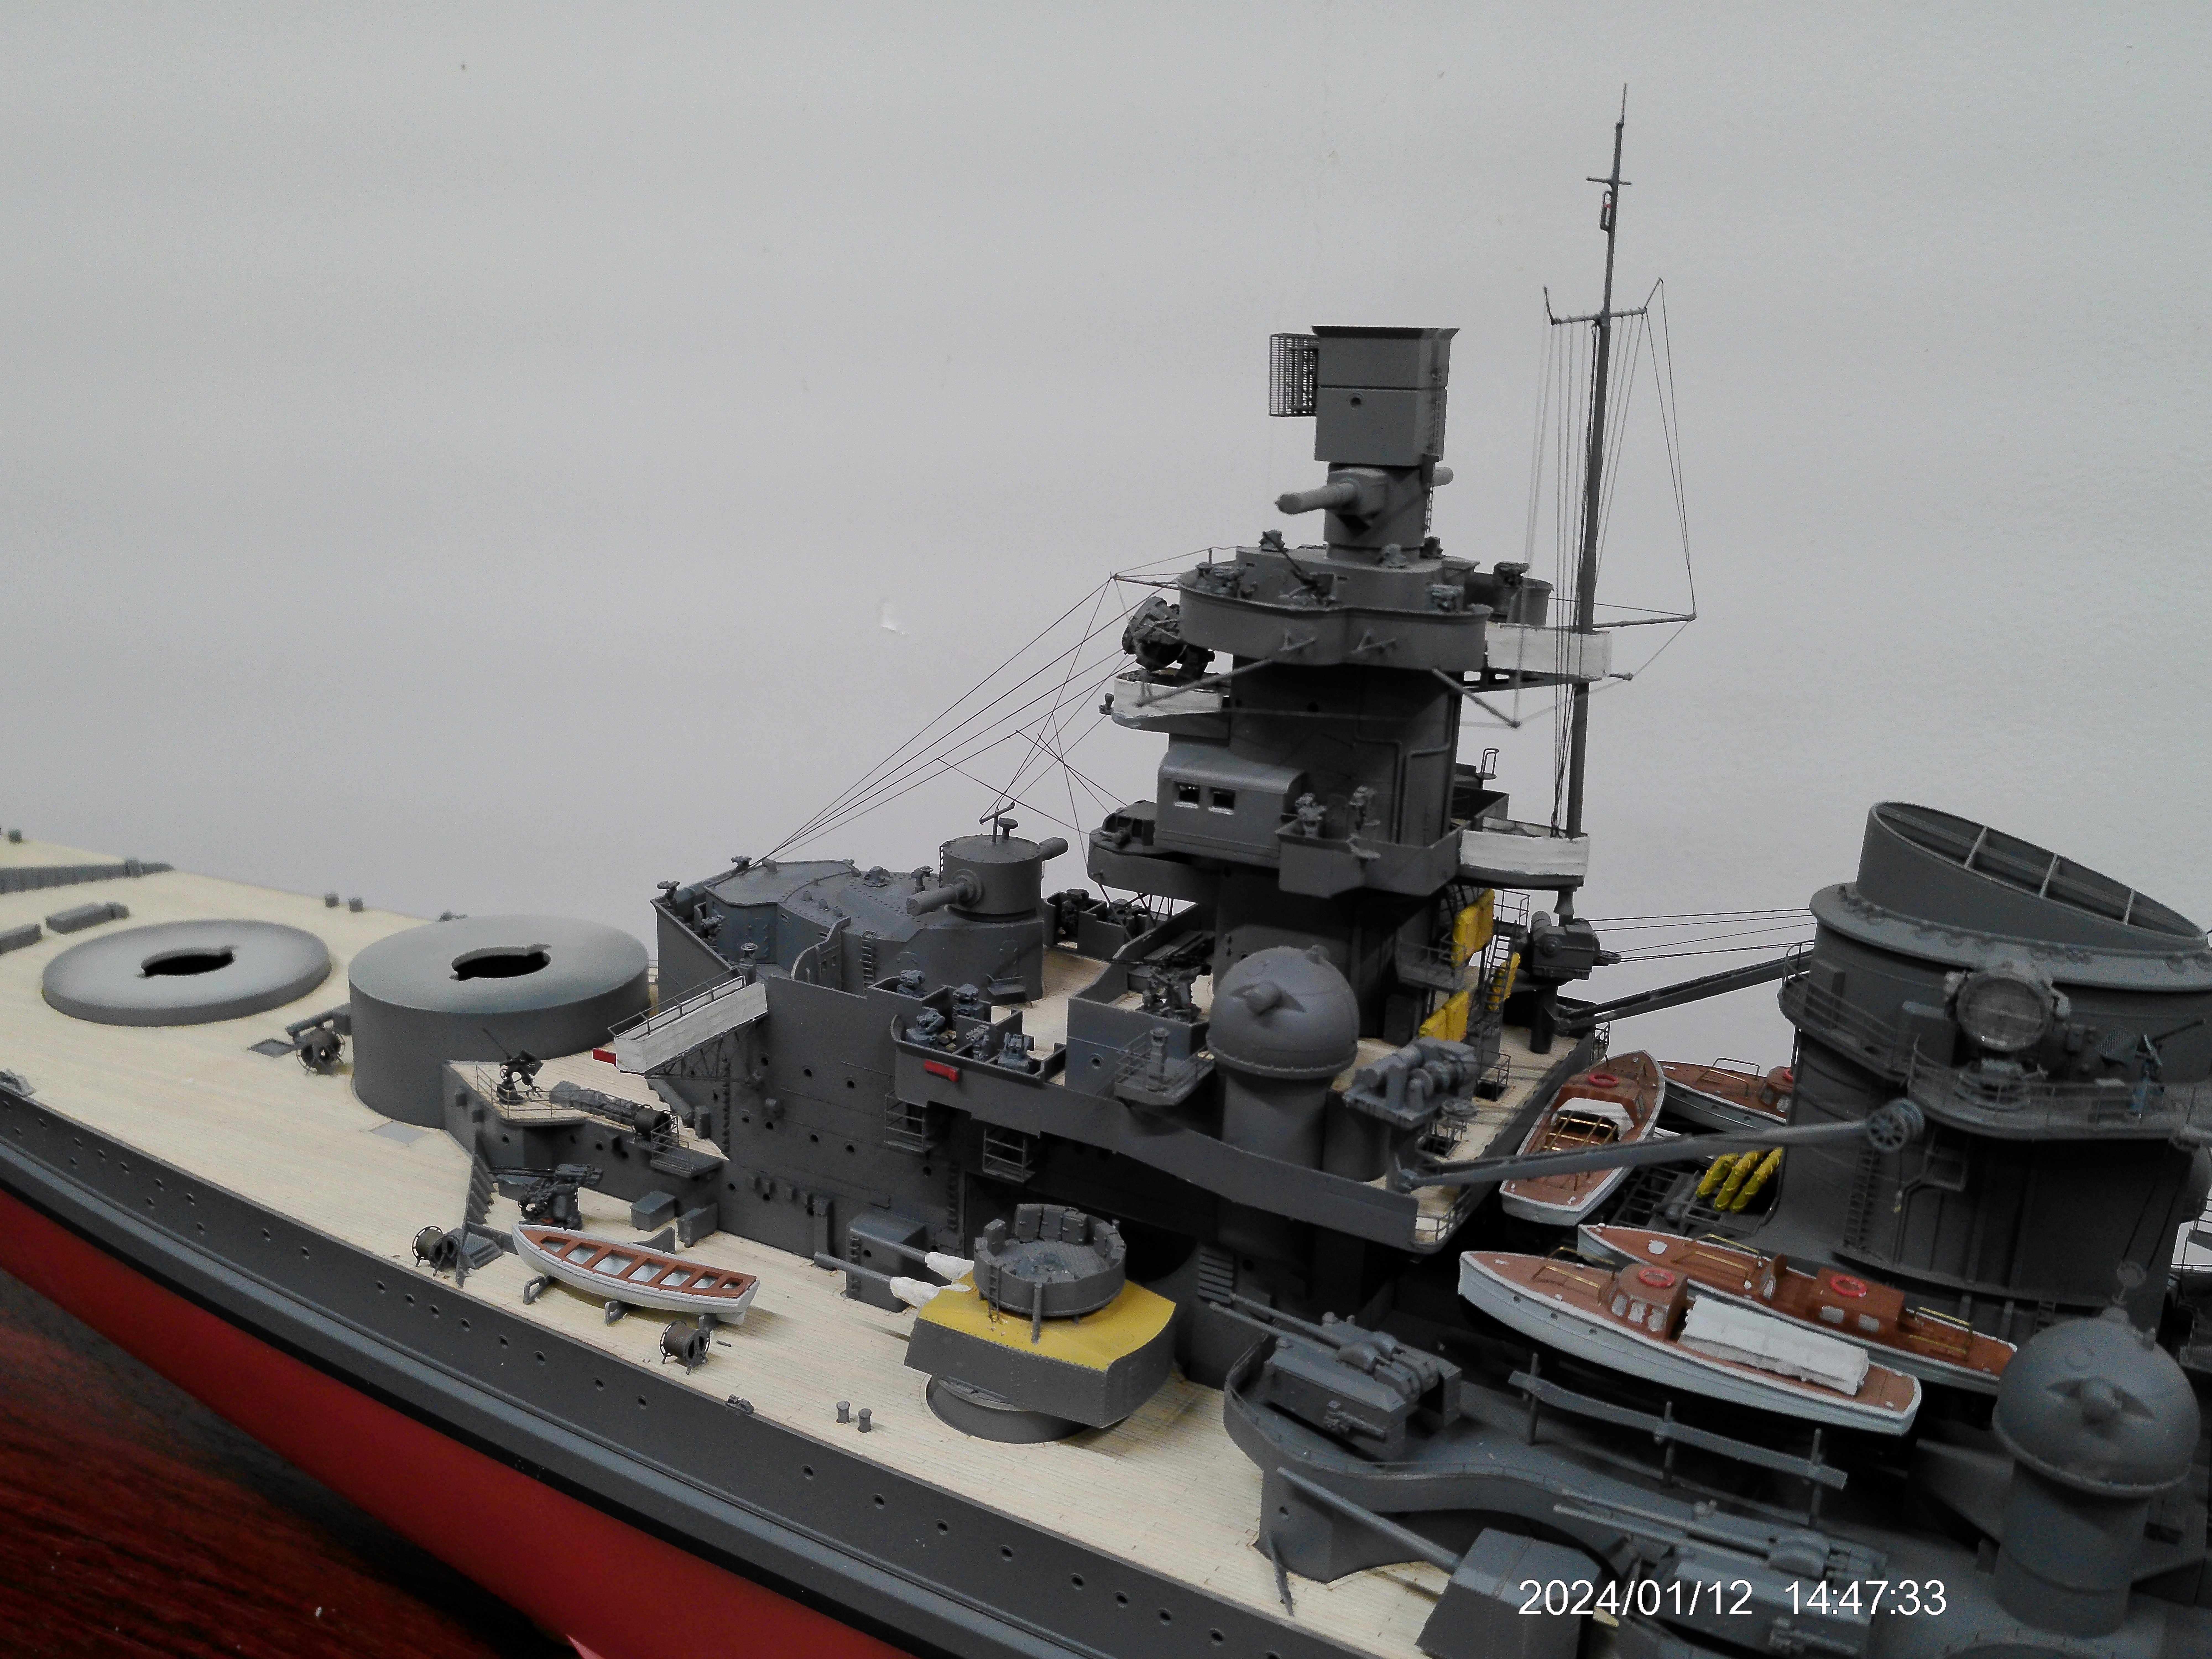
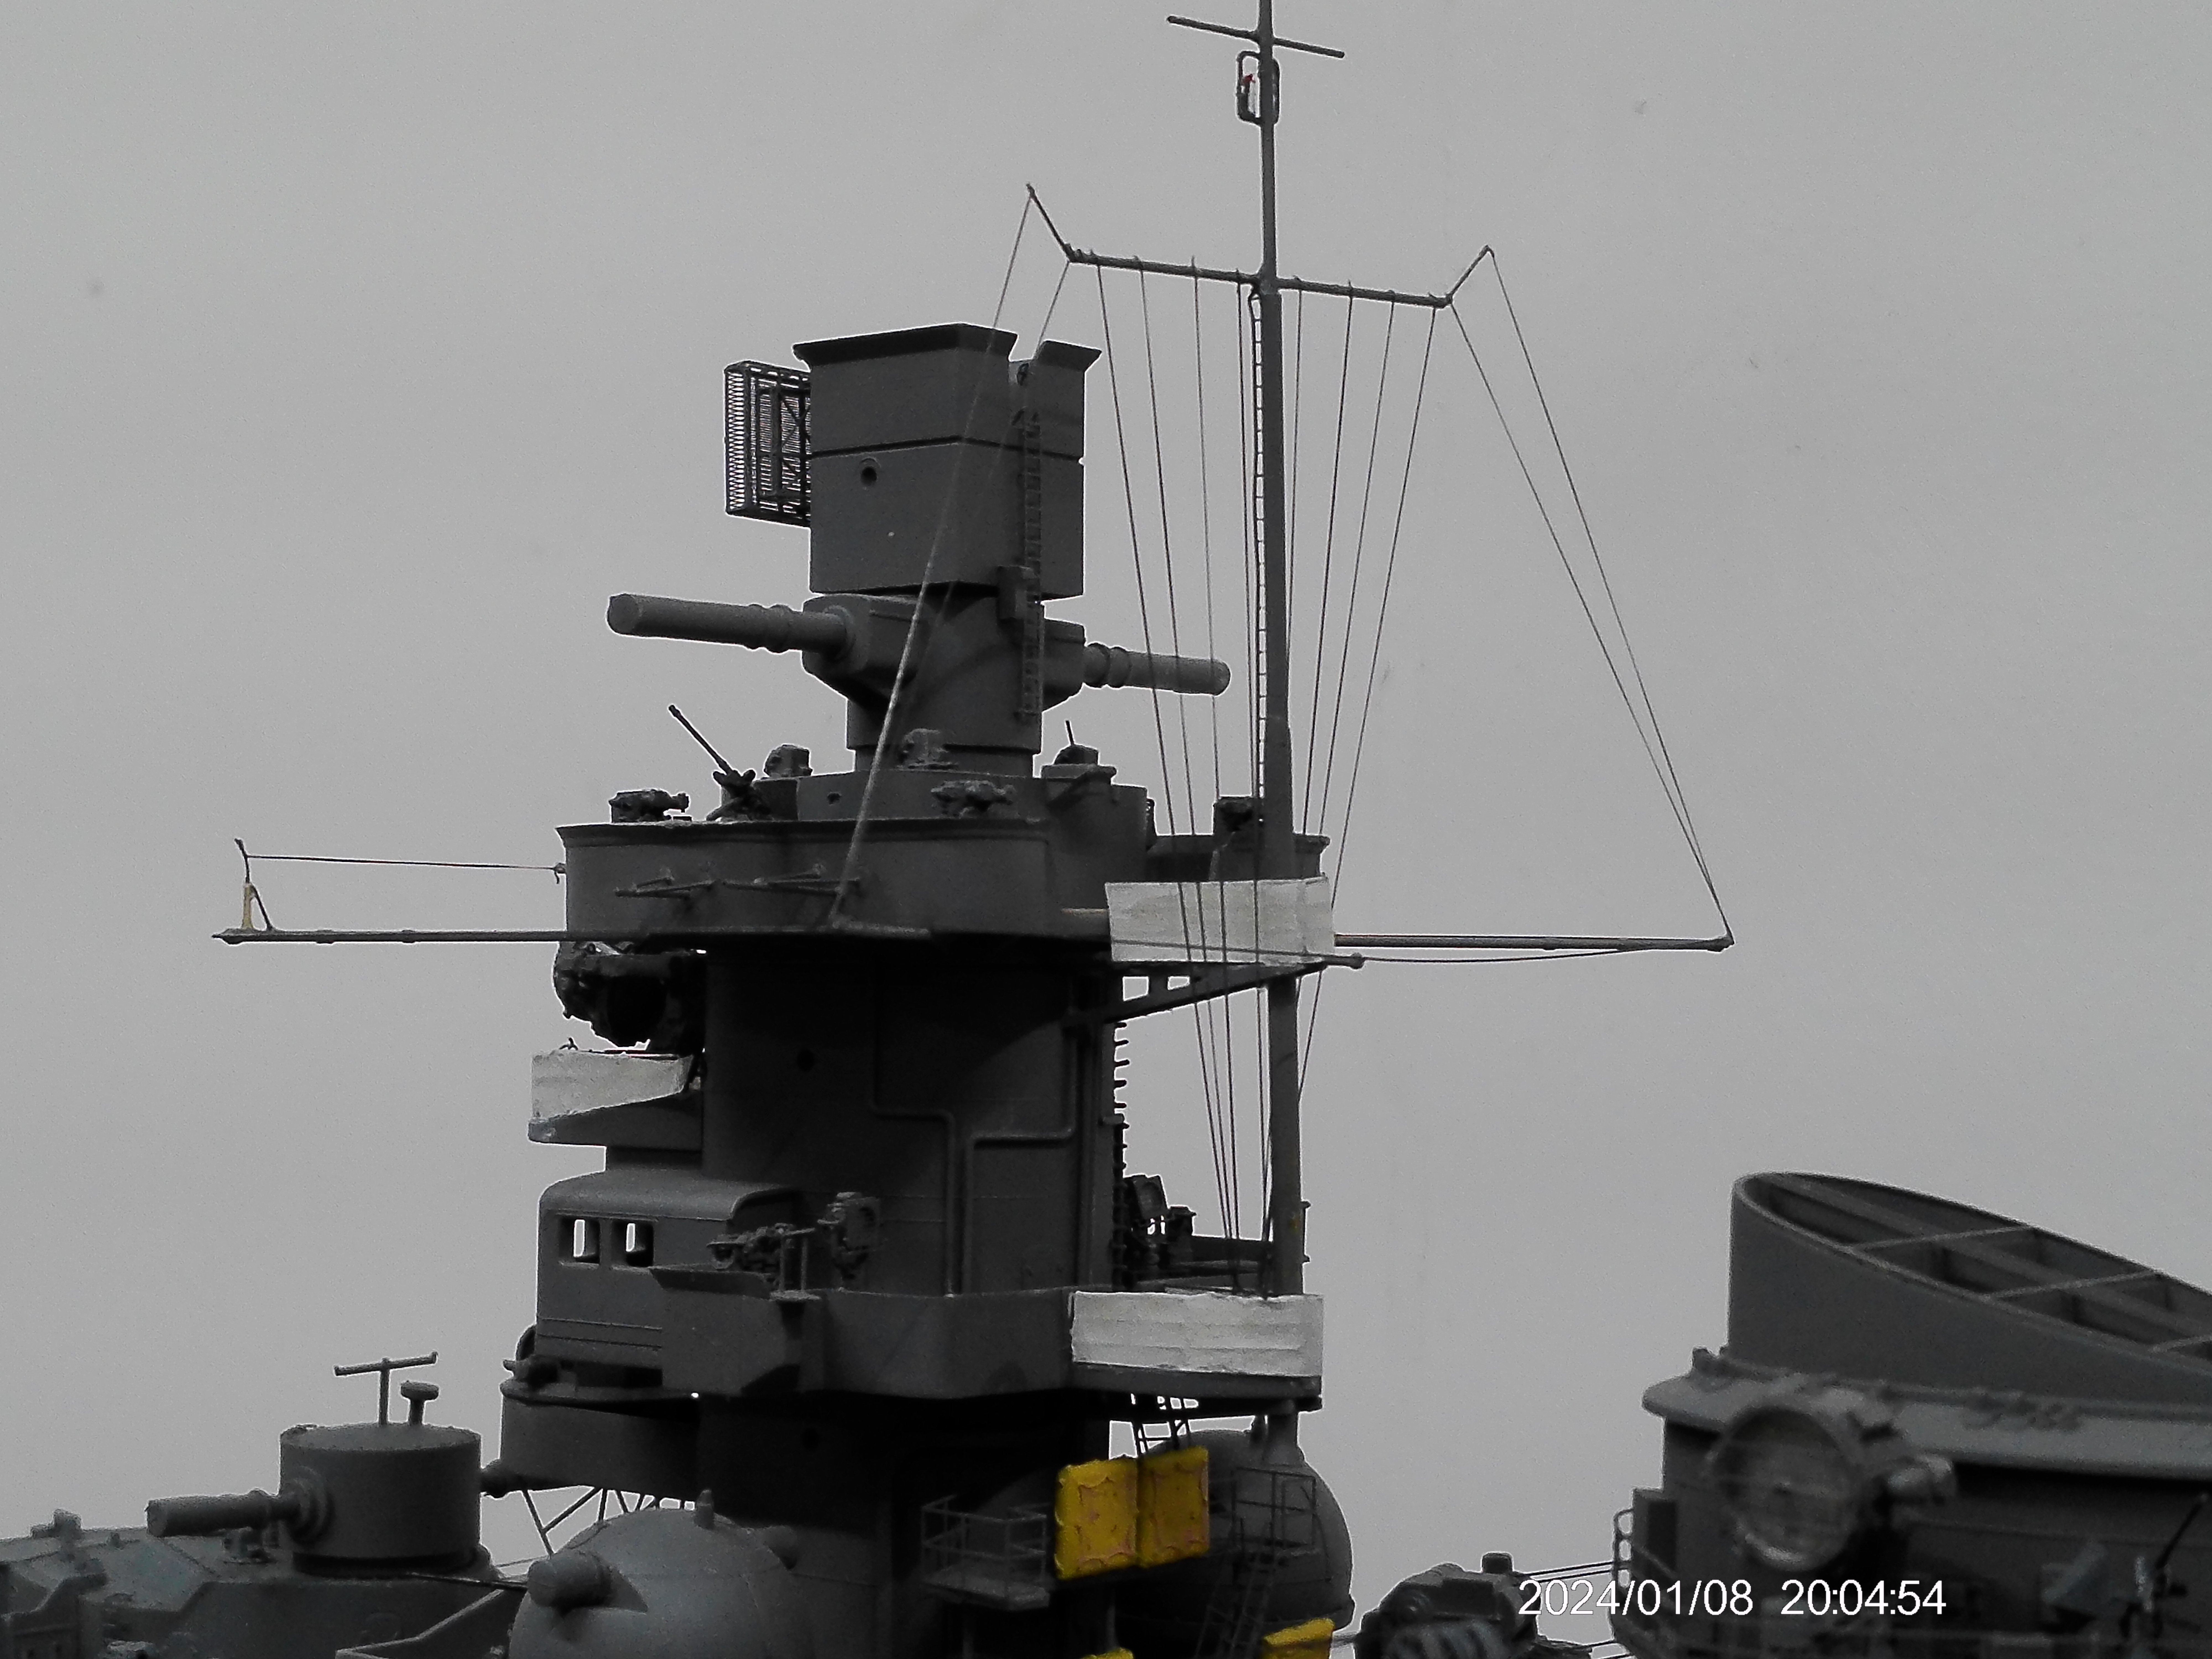
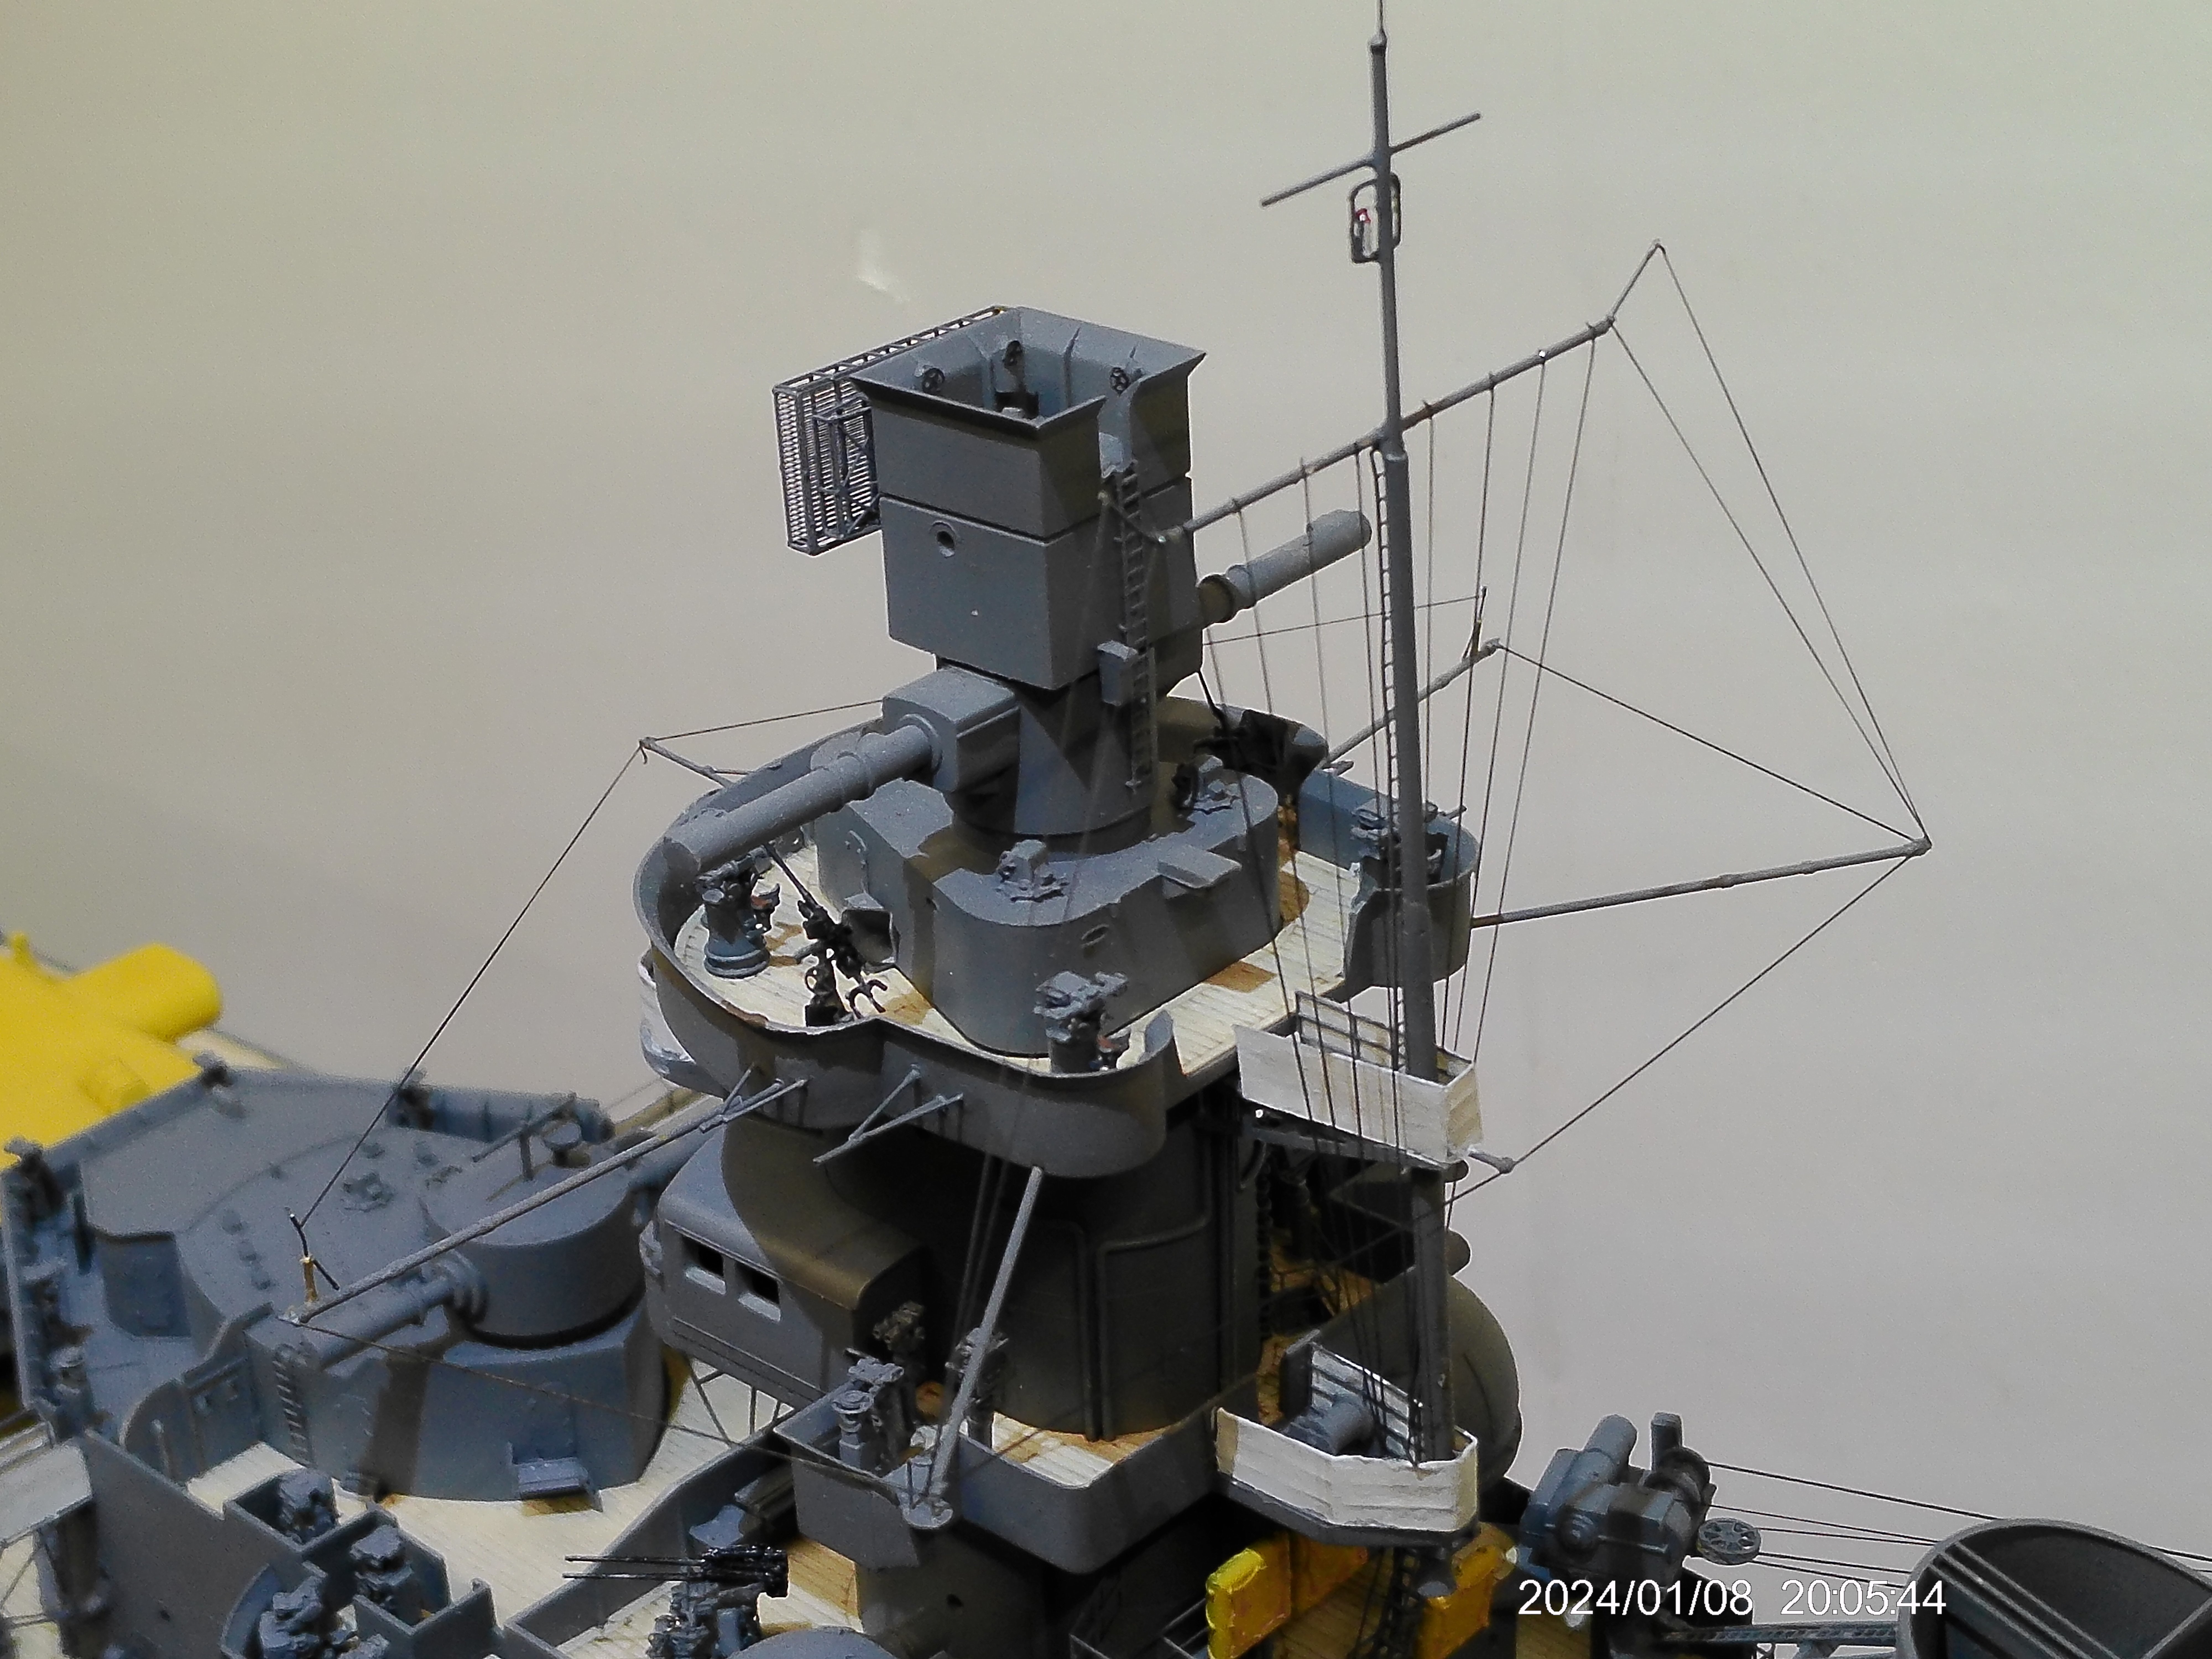
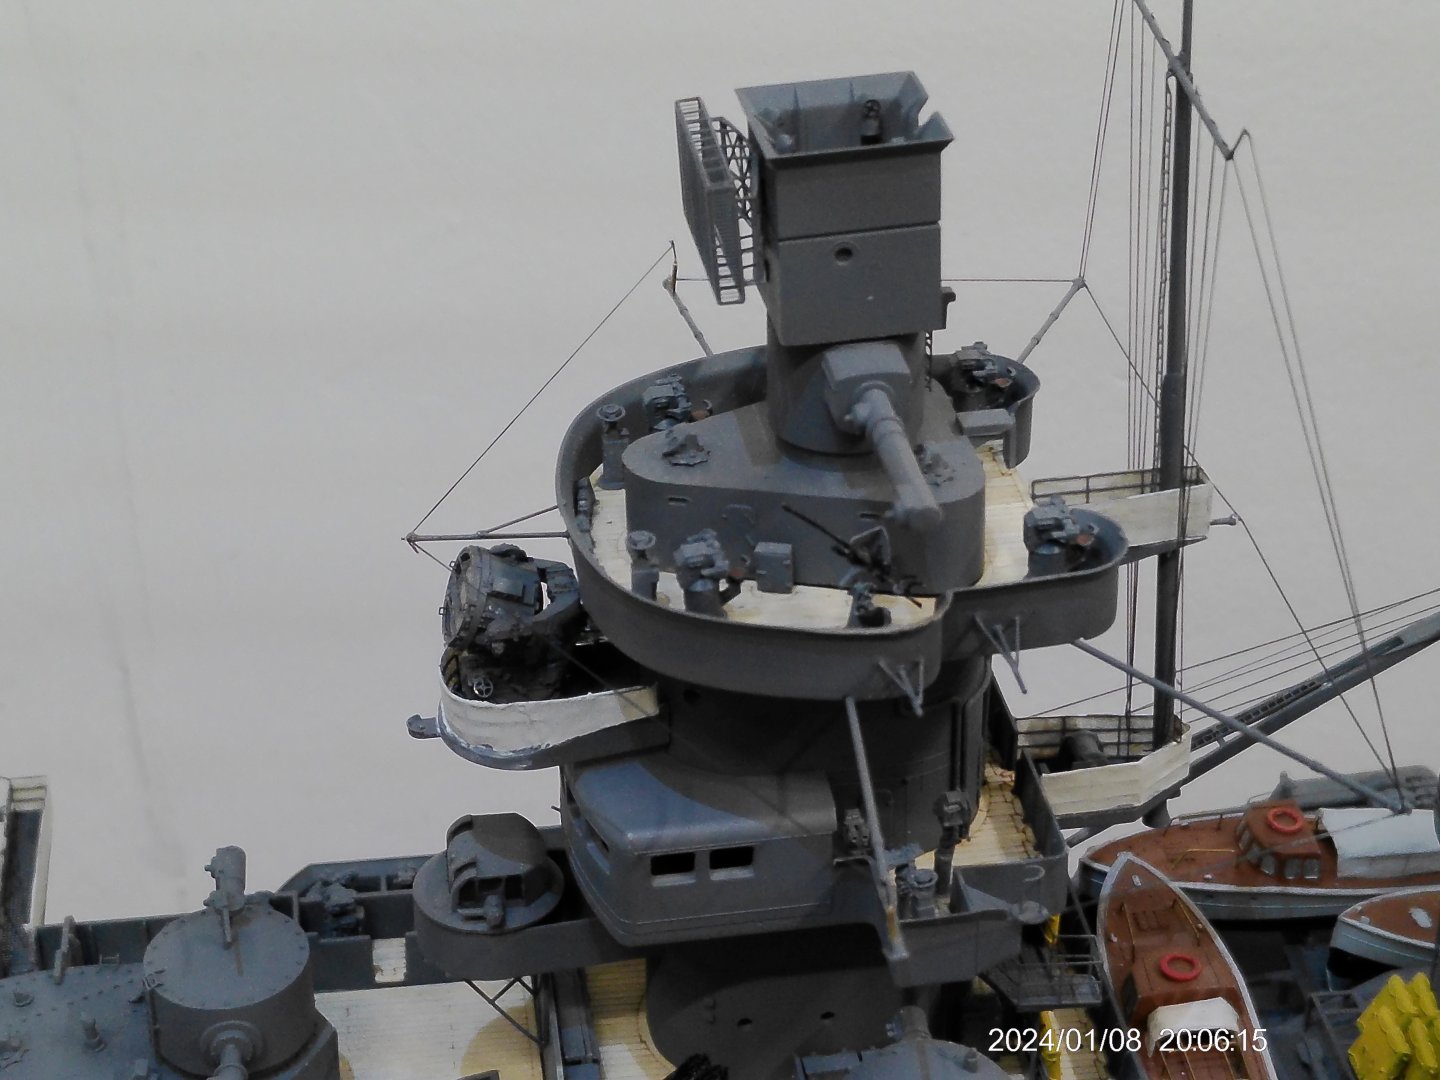
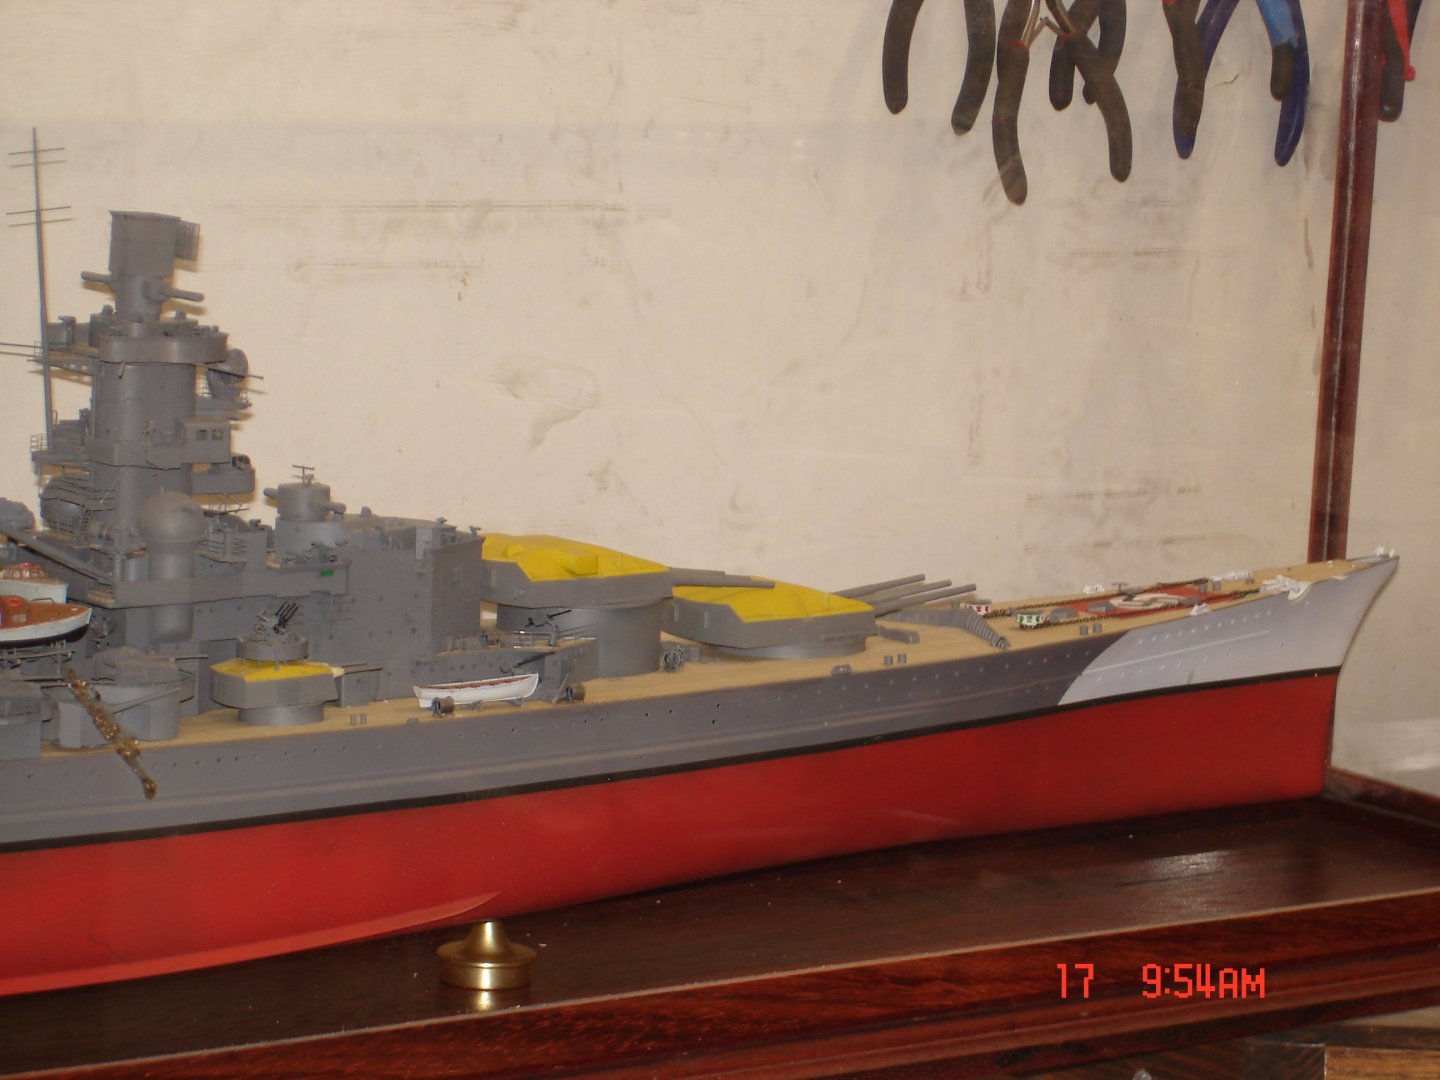
The forward SS is rigged and I think I may of gotten about 90% now on to the rear SS many rope lines for flags in that area so some more brown into the mix.Sorry had taken two pics earlier to close got fuzzy did those without the cover you get the cover this time.

- 68 replies
-
- 7
-

-
-
- Scharnhorst
- Trumpeter
- (and 1 more)
-
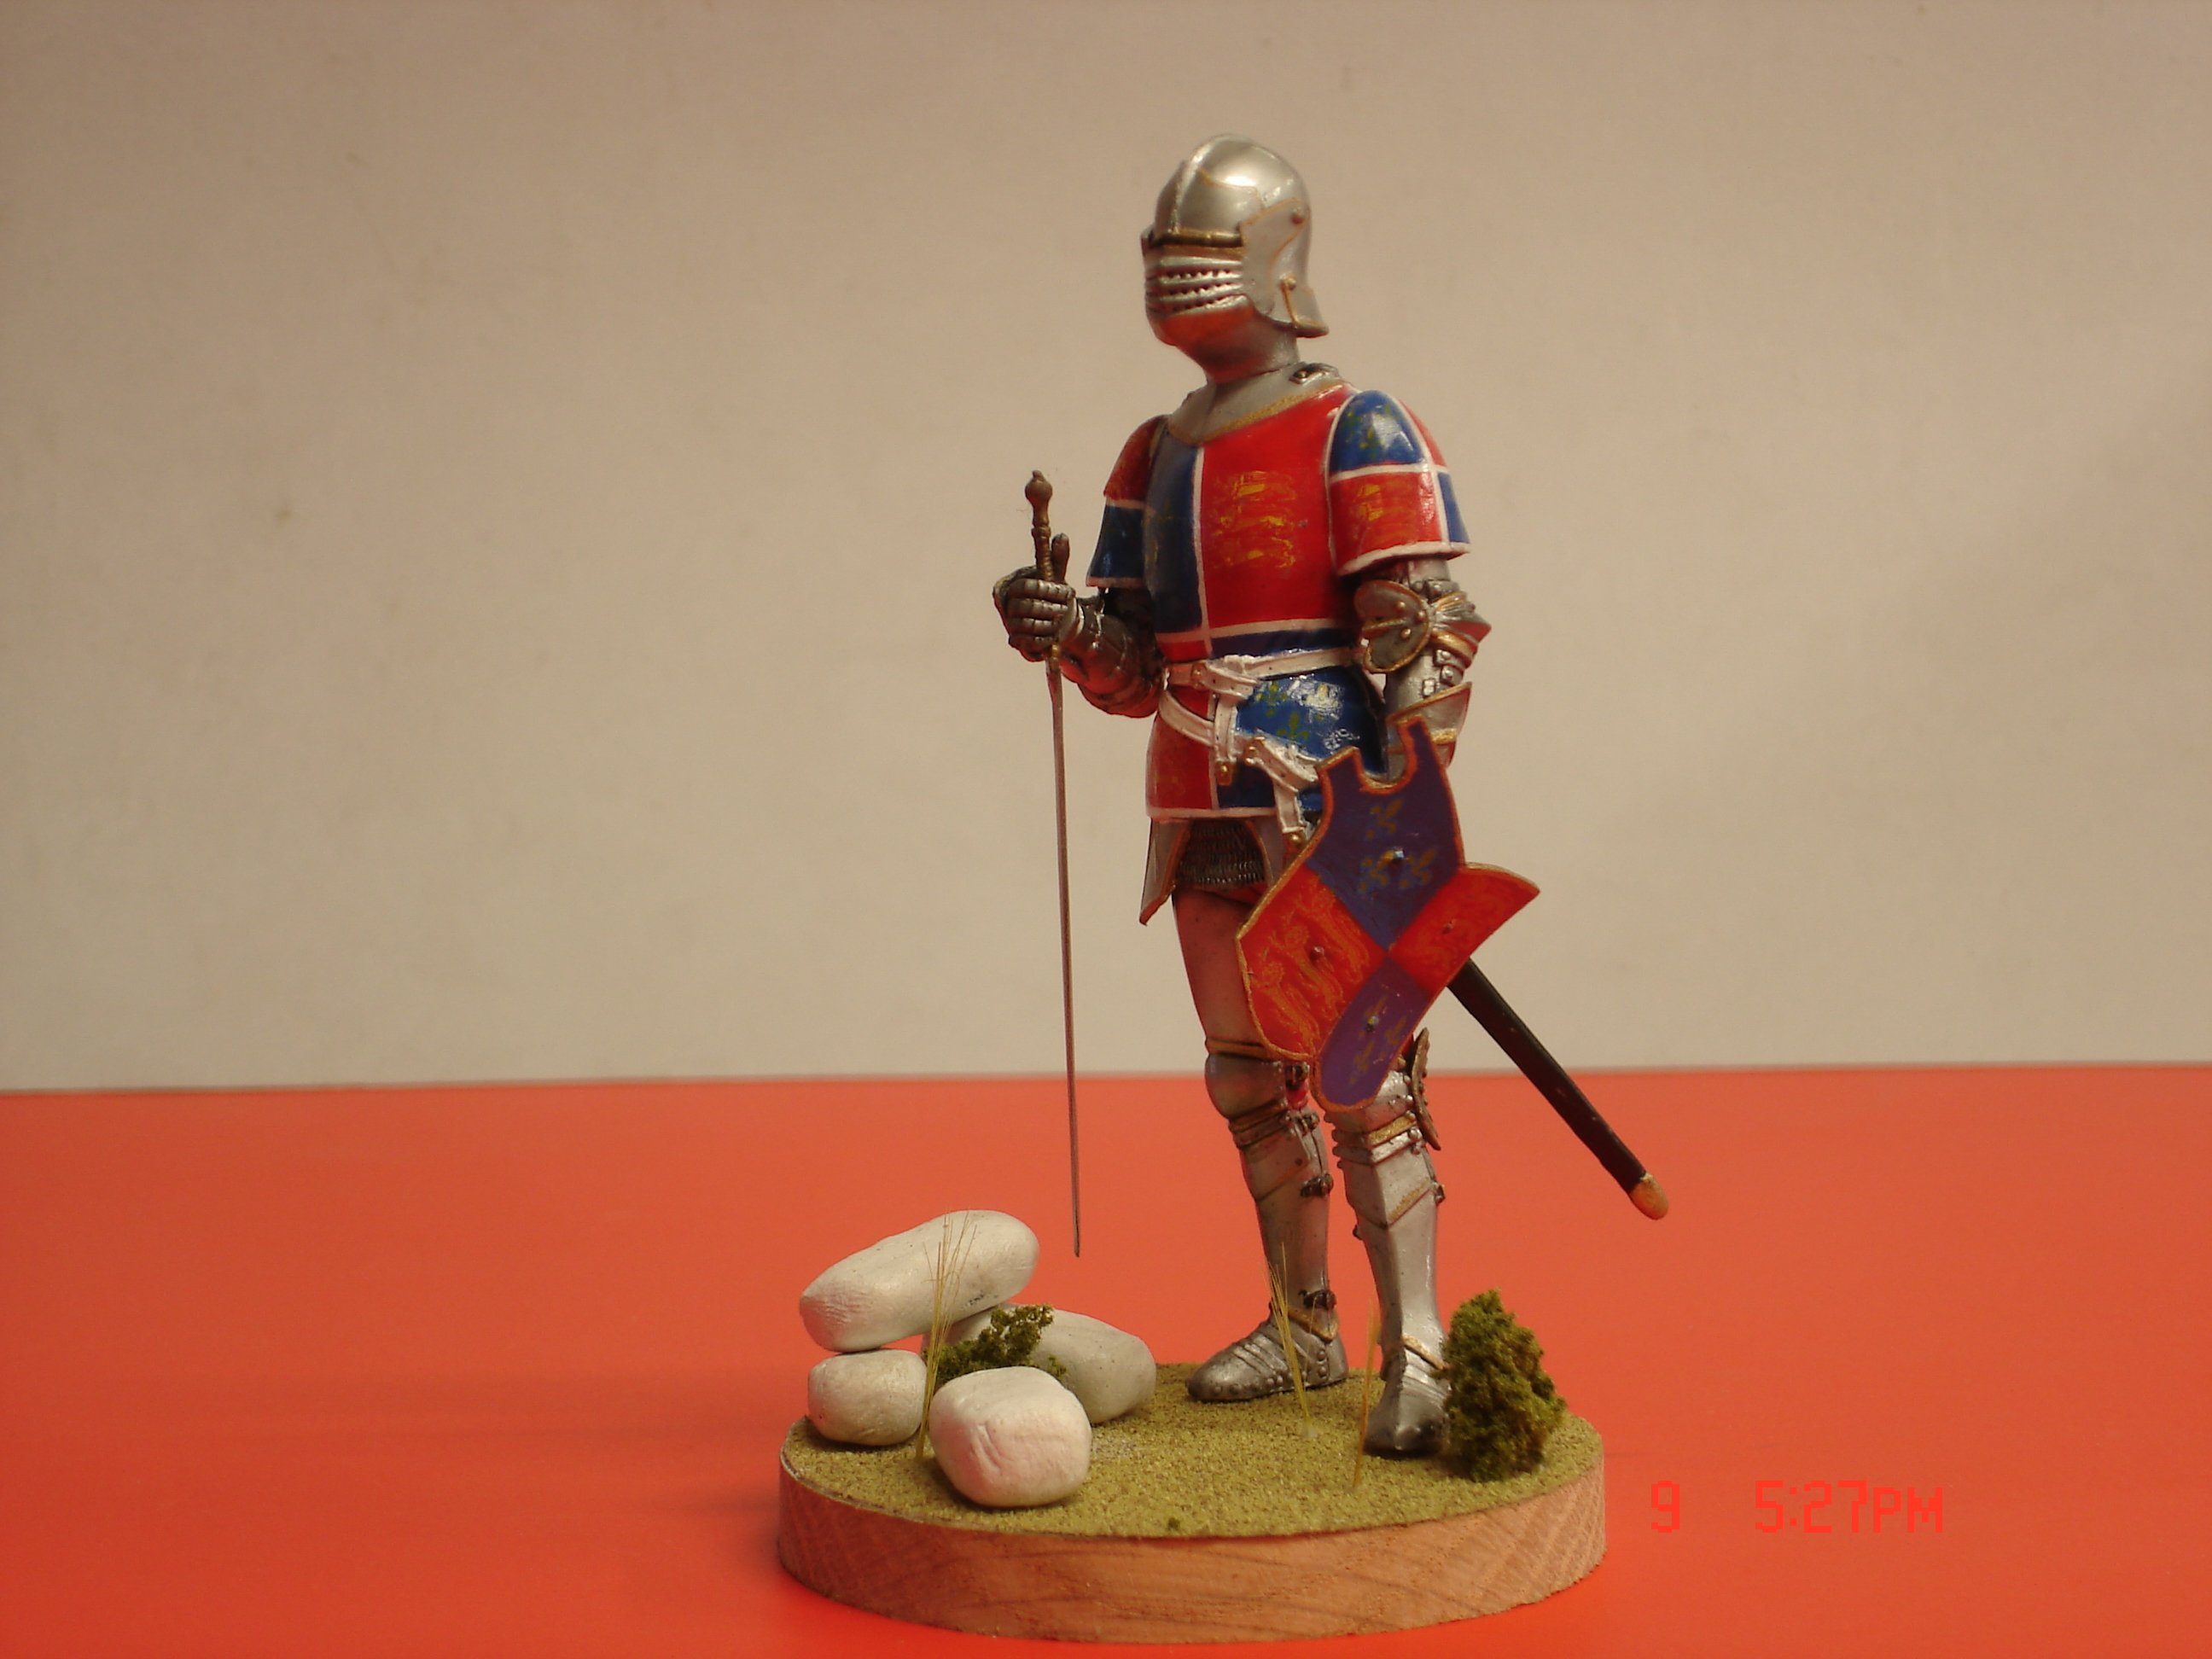
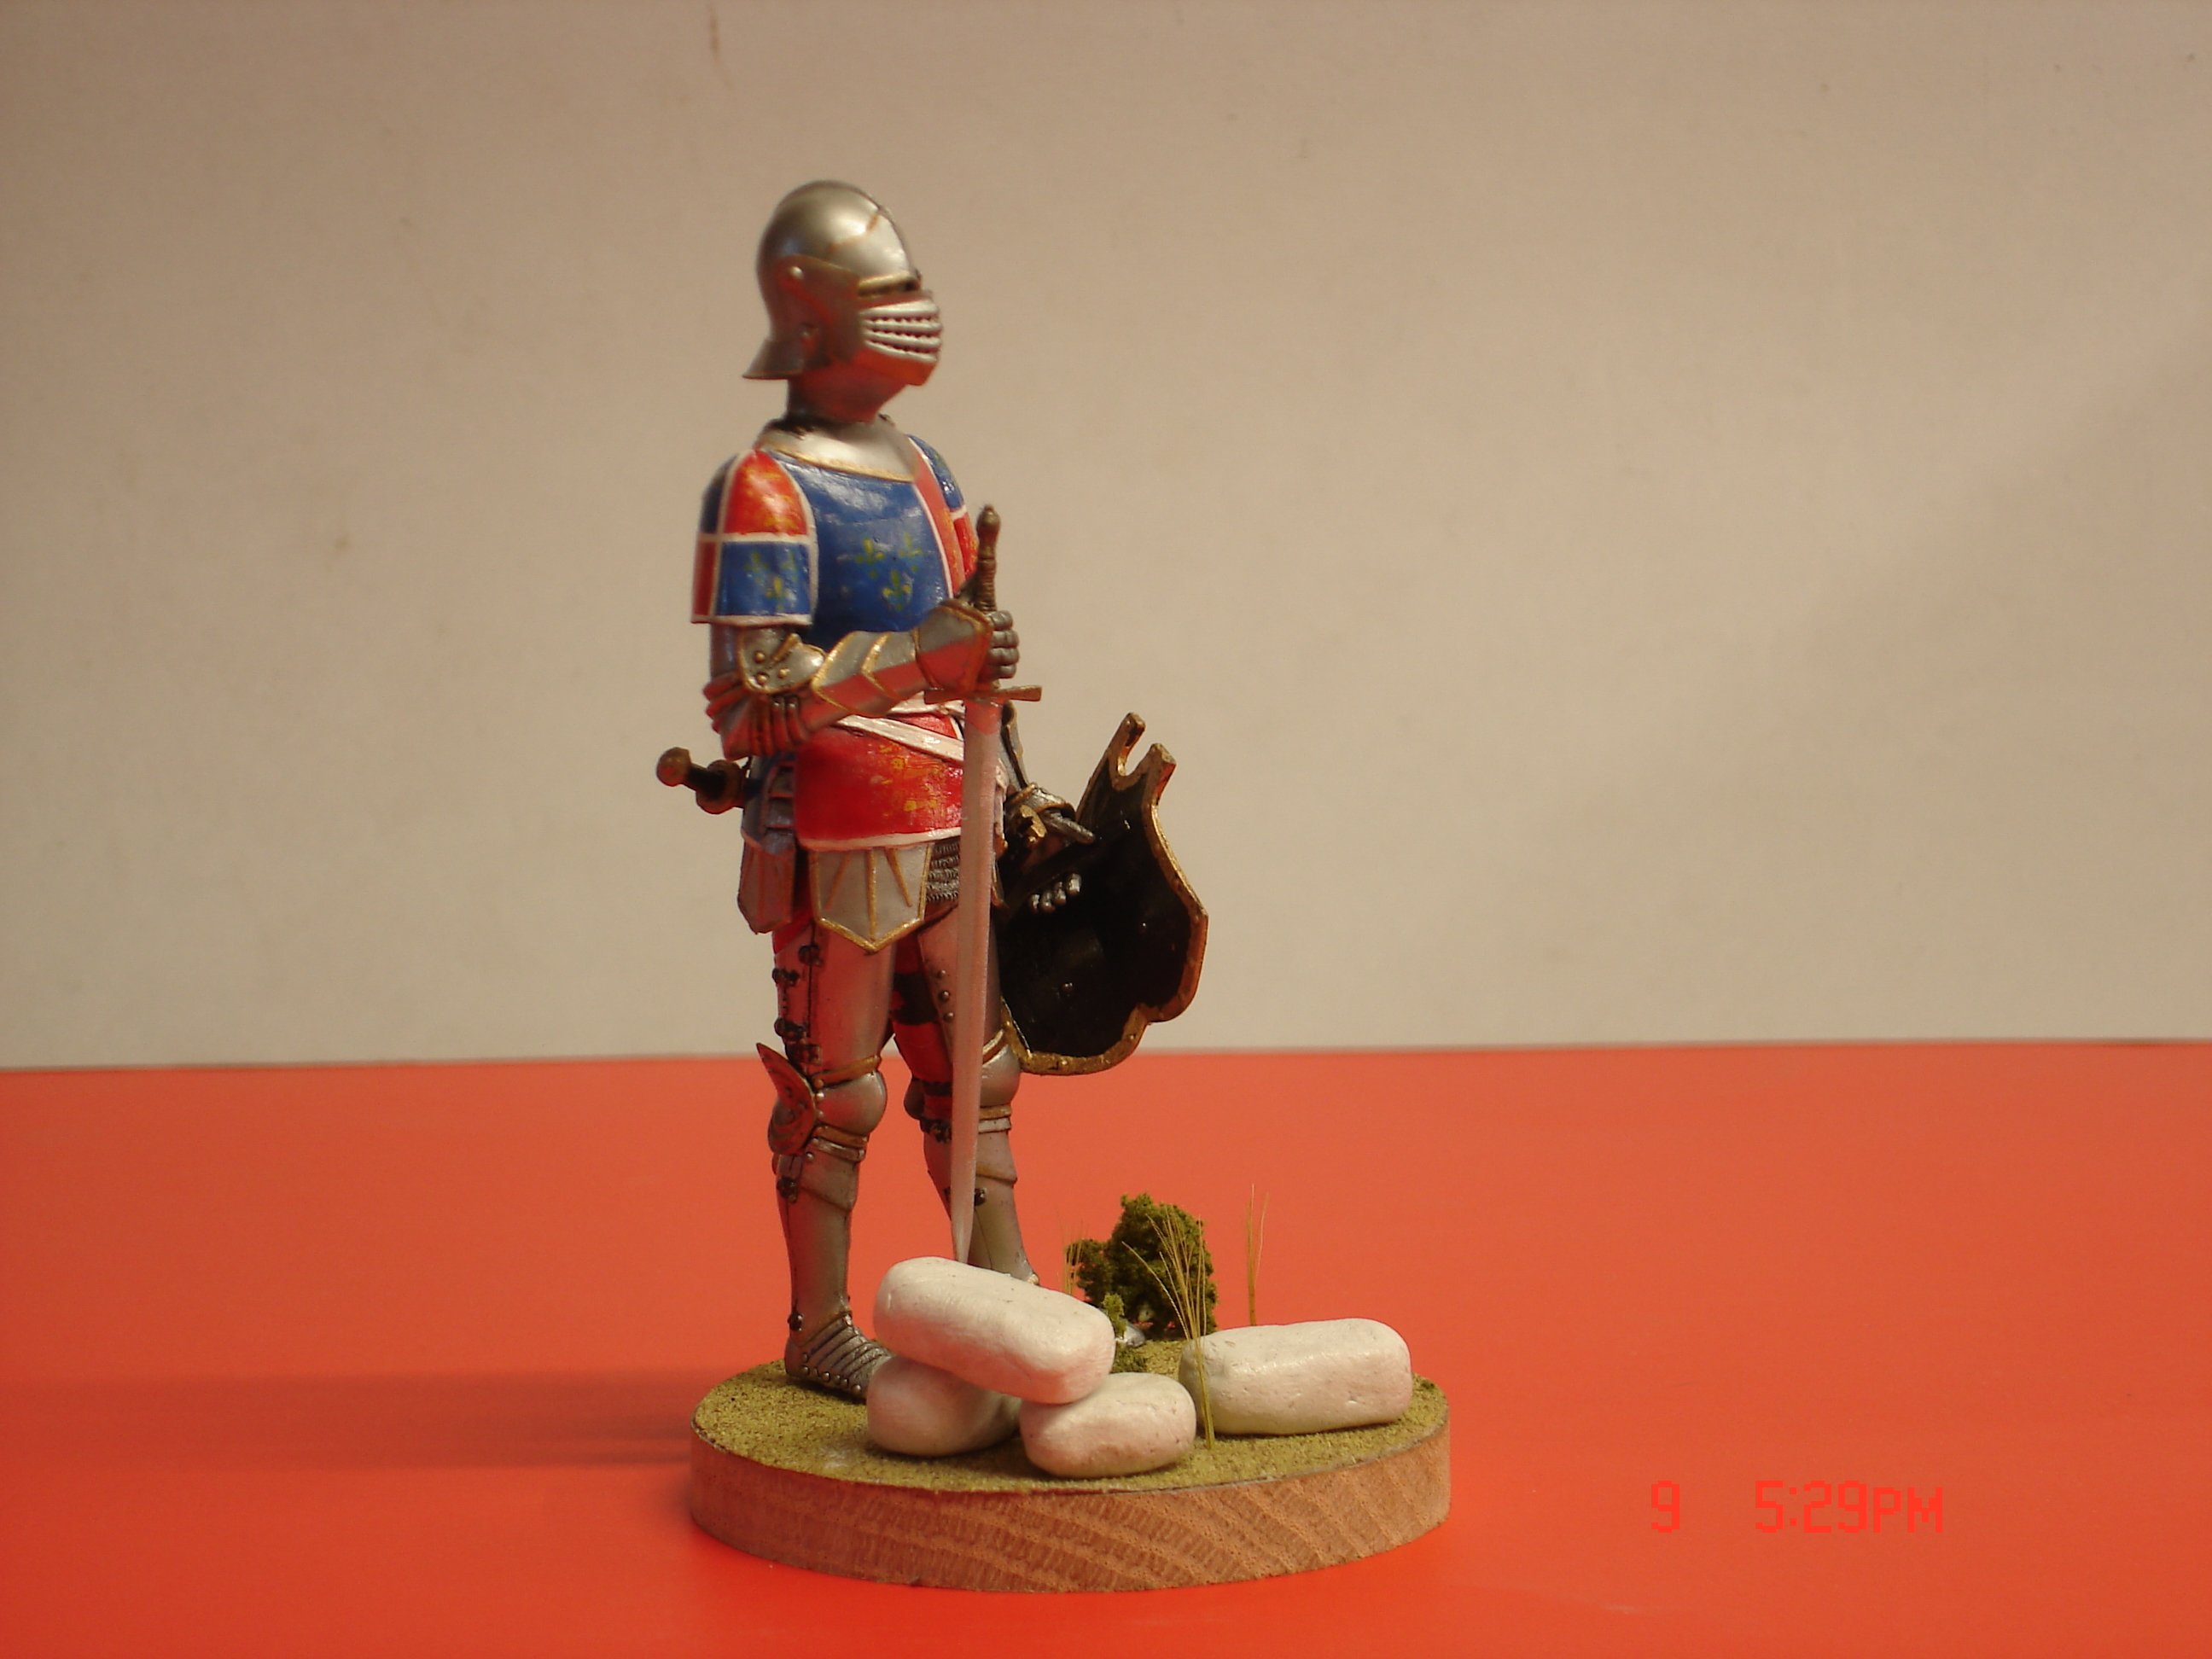
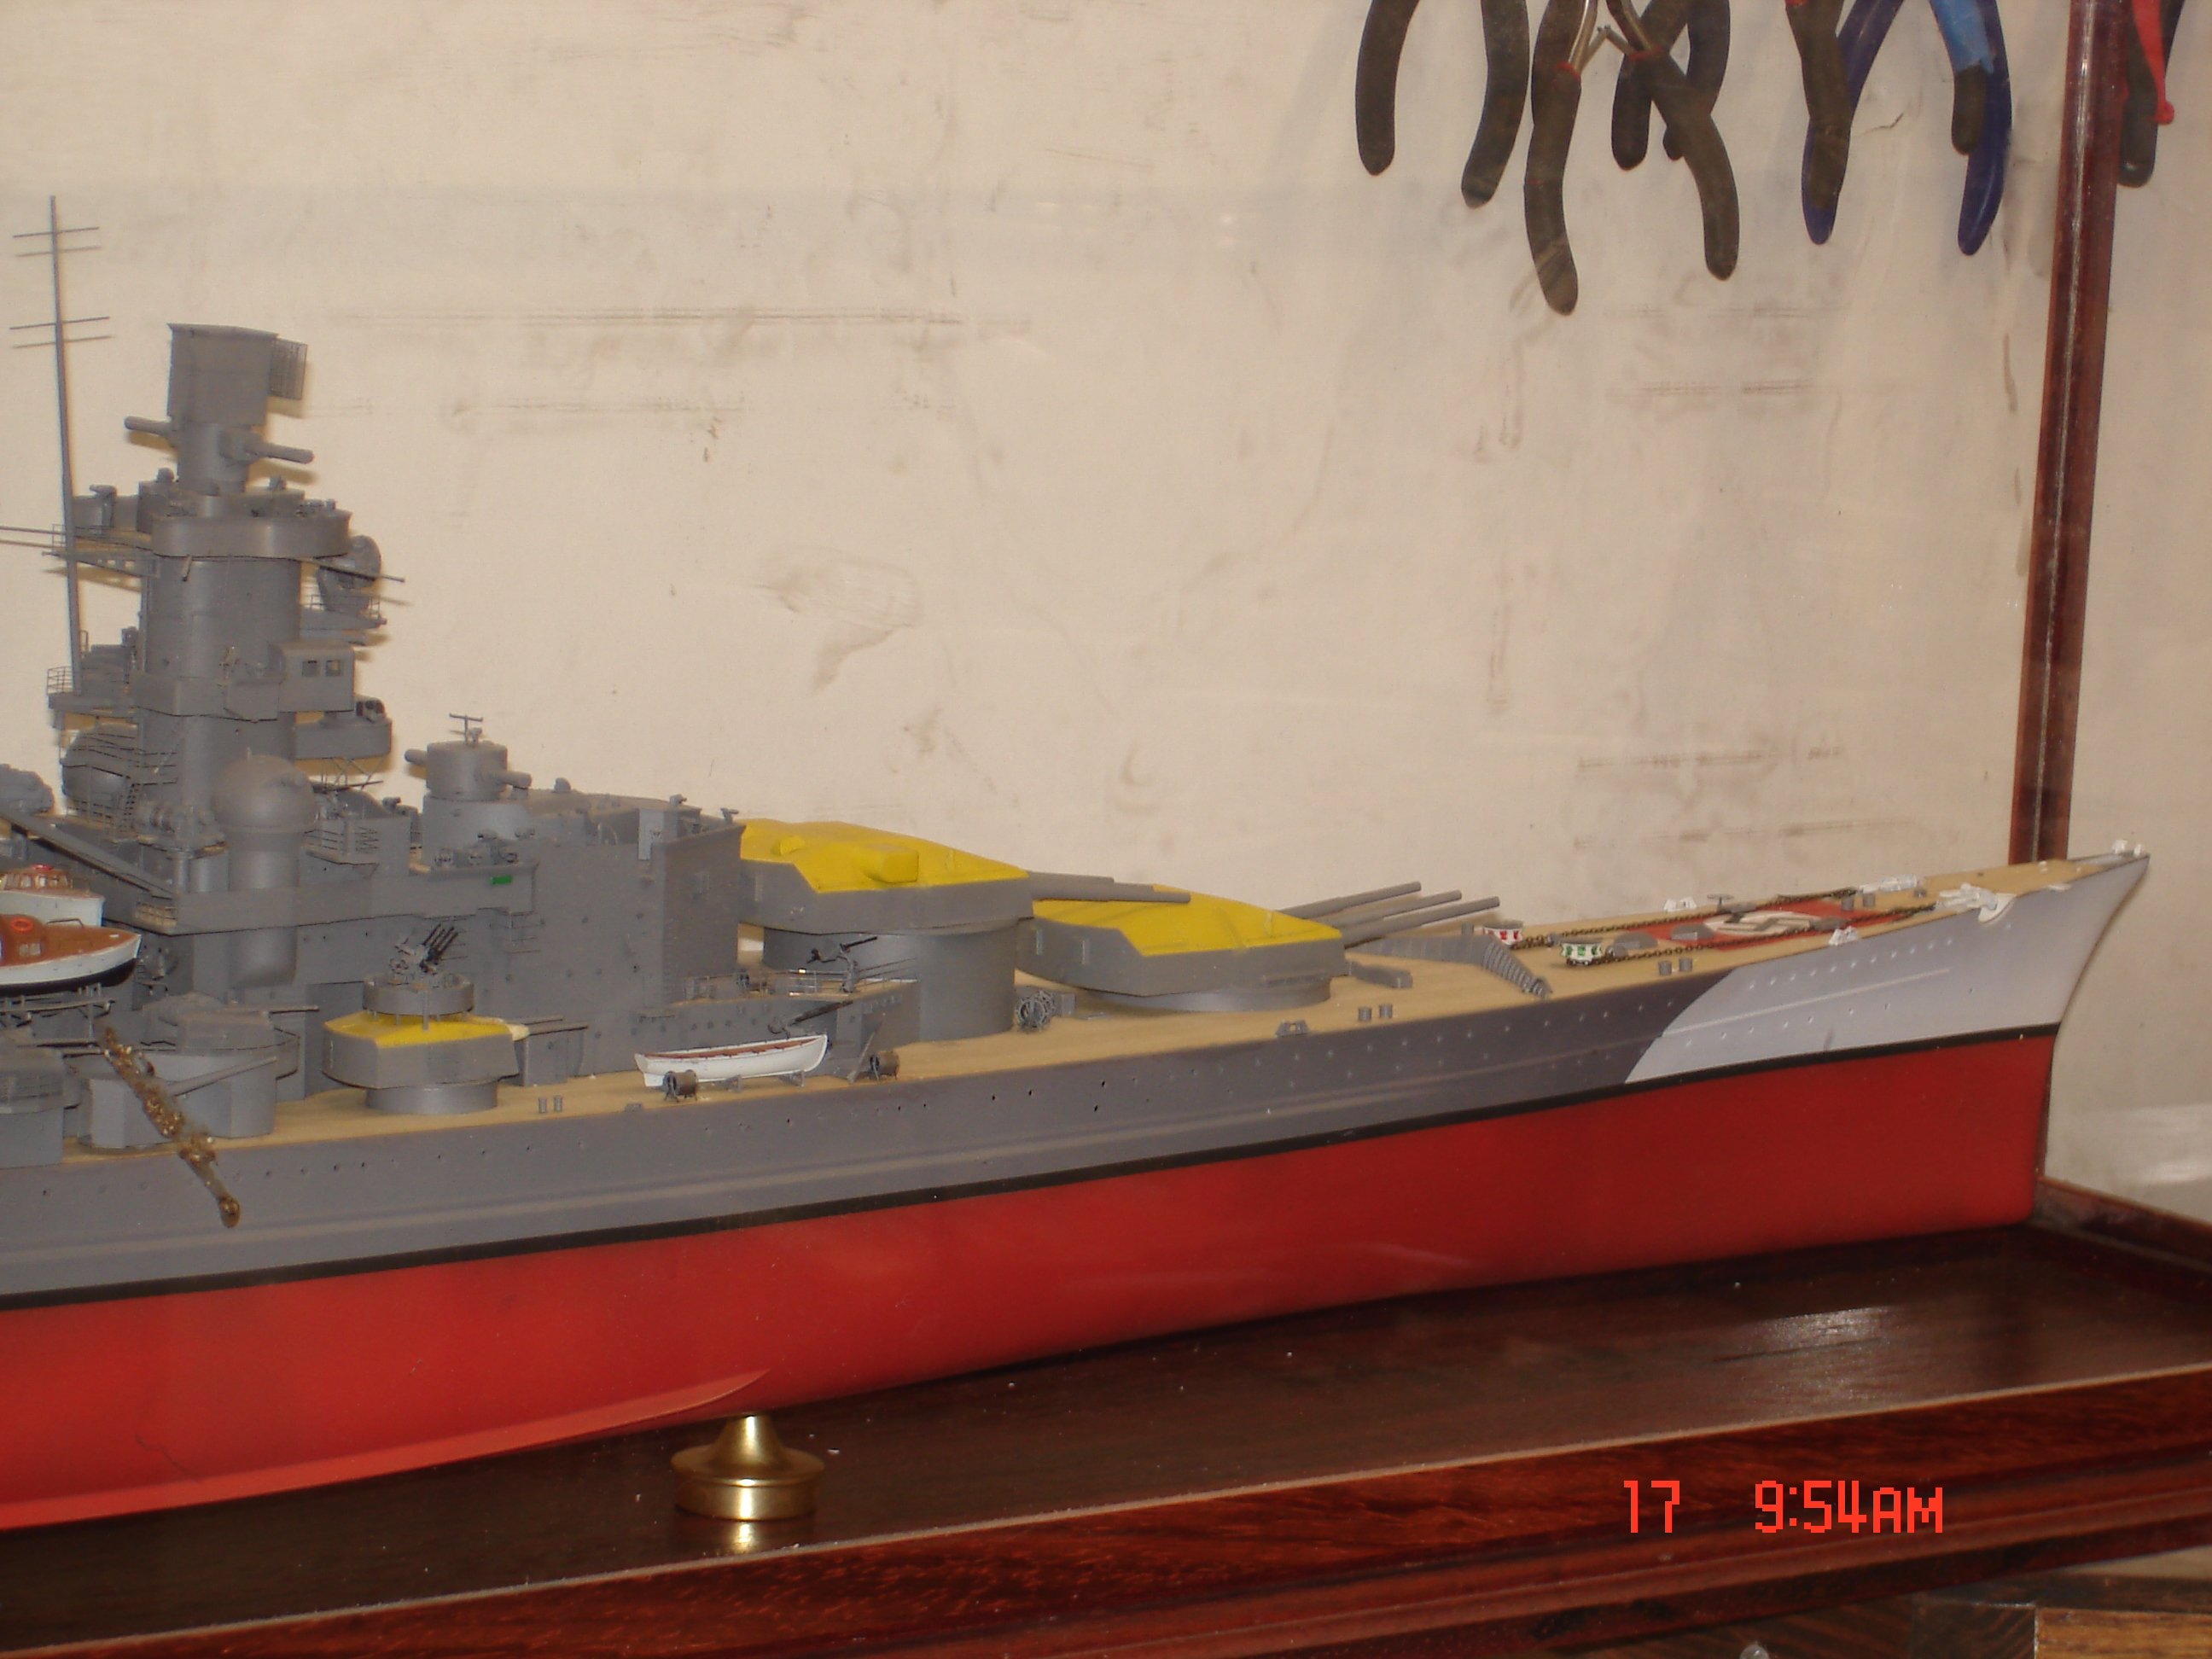
I am kinda calling this one done.The build was different and fun the dio is not a strong point for me but it kinda works I may still paint the stones a more grey color


-
Gold Digger by Jack12477 - Masterbox 1:35 scale
Javlin replied to Jack12477's topic in Completed non-ship models
Well done! -
Work continues waiting on some brown EZ-line for the ropes for the flags quite a few of those so the turrets came off and blast bags till the line shows up.

- 68 replies
-
- 6
-
-
-
- Scharnhorst
- Trumpeter
- (and 1 more)
-
Why the young Lad is smarter than I have been giving him credit for.....good idea.
- 24 replies
-
- 6
-
-
-
- Akitsushima
- Pit Road
- (and 1 more)
-
Waterline then I would suspect another fantastic Dio on your part?
- 24 replies
-
- 2
-
-
- Akitsushima
- Pit Road
- (and 1 more)
-
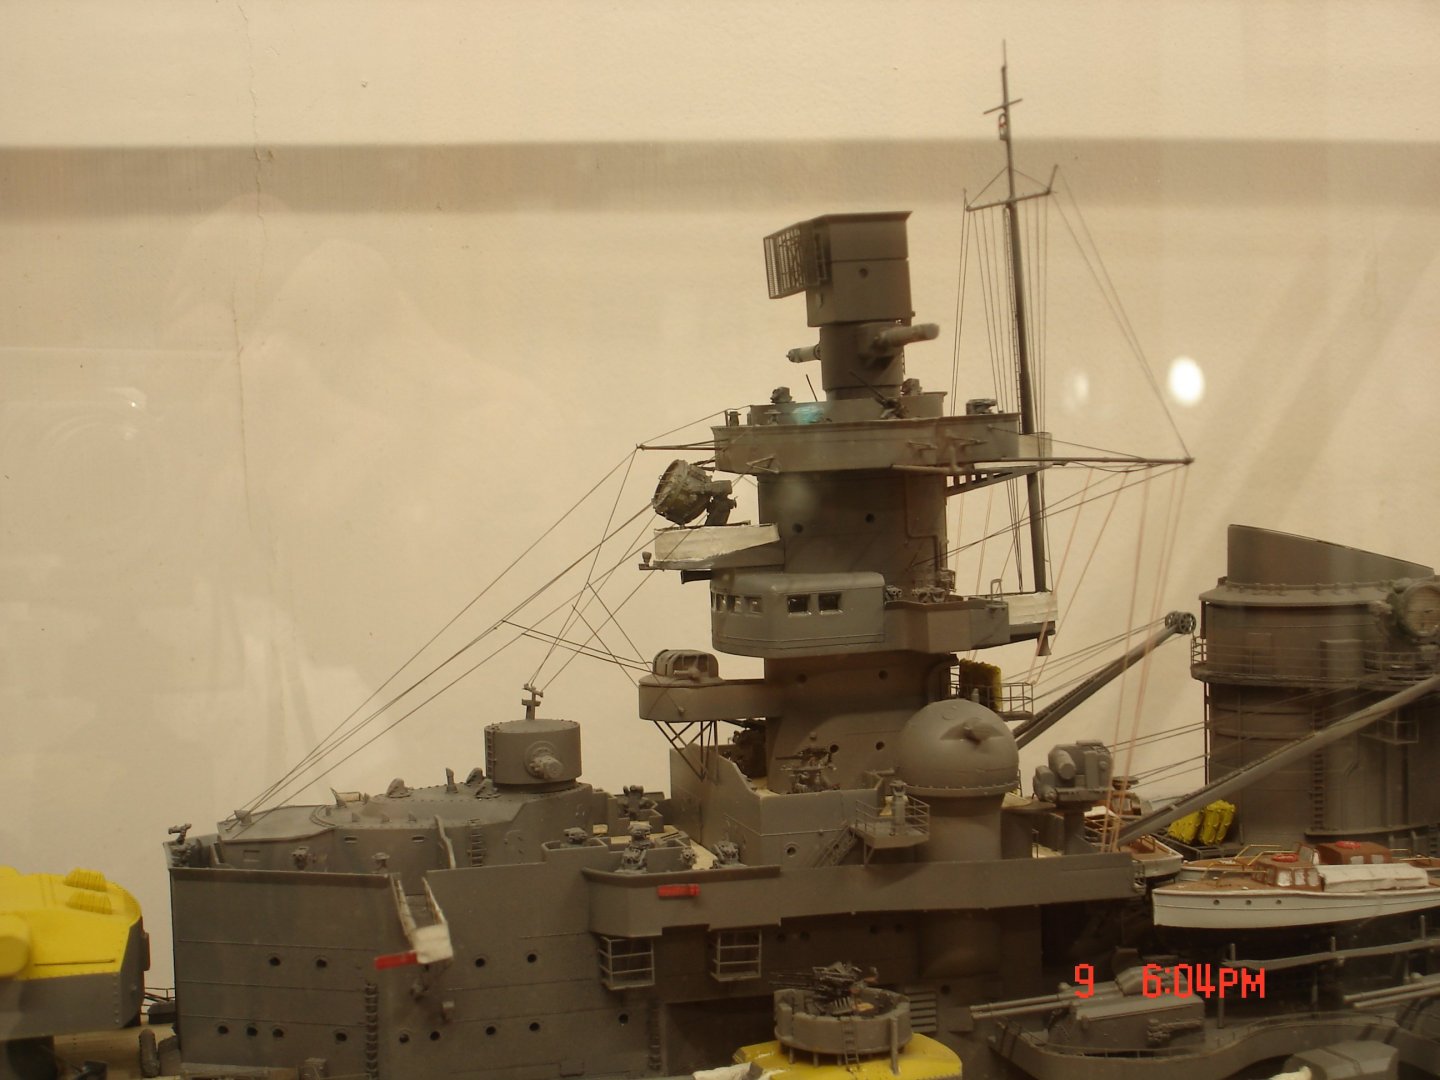
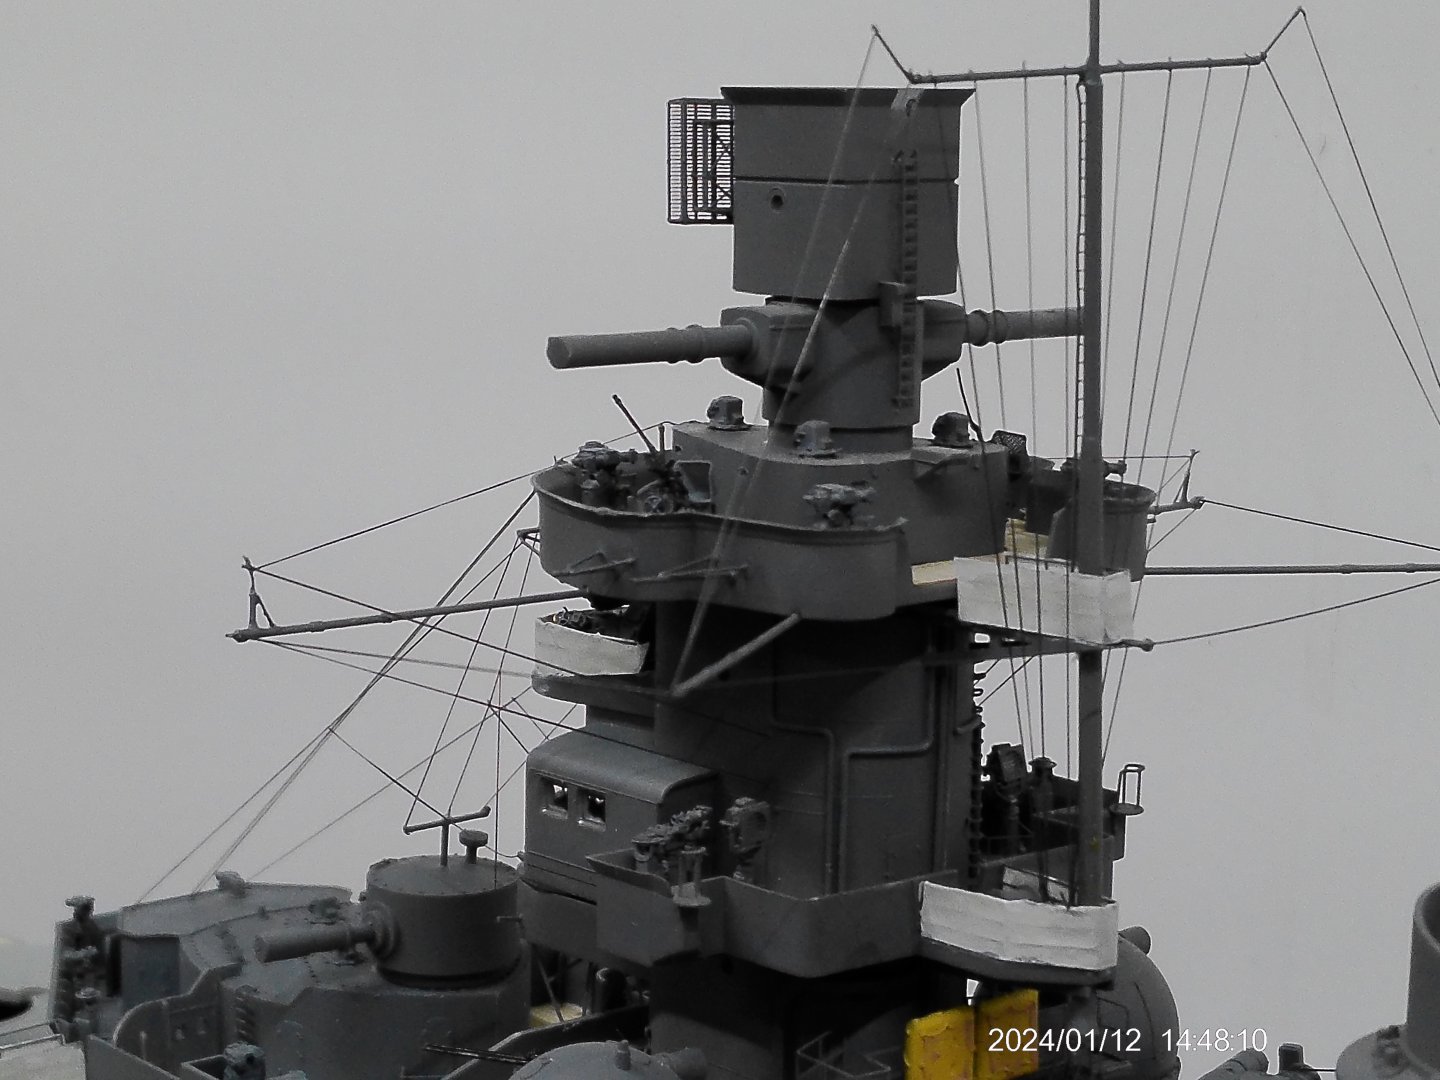
I have started rigging the Foreward SS area still waiting on some brown EZ-line used for flags for the most part.The first pic shows were I had to add an upright extension to a foreward yard off the SS upper deck still not painted yet and the line heads to a piece I made last week.I am finding these little tri-leg projections all over the SS found four more tonight using a magnifying glass. https://i.postimg.cc/P5w6g8Rz/scharnhorst_001.jpg This pic shows where I used black metal line between the outrigger yards of the SS from front yard to rear and around the front yard to the tri-leg on the SS is EZ-line.The metal line on the sides and back will handle much in rope this will allow the lines not to sag no were as much and look more natural ...I hope. https://i.postimg.cc/d0cWwVMM/scharnhorst_006.jpg You can see just off to the side of the searchlight a new pole added still have to add the V for tri-leg to the bottom it's a beotch.These go to the forward control room and then to the rangefinder right below https://i.postimg.cc/9fPLMHVD/scharnhorst_011.jpg The other side where another tri-leg was located and is complete a bit of trial/error here took about 20 minutes and third fold was correct just a PIA but guys rigging is one of the most important elements in bring these ships to life. https://i.postimg.cc/G2cqTghq/scharnhorst_016.jpg You can see the little mooring lights I made out of brass below the upper yard.I am just to gullible in thinking these manufactures will include this stuff such as the lights and parts for a successful rigging process but then again I am going 1943 other years where different.You would have to be a Scharnhorst fanatic to know what I missed. https://i.postimg.cc/0QcZYGzx/scharnhorst_021.jpg Thanks for looking in.


- 68 replies
-
- 3
-
-
-
- Scharnhorst
- Trumpeter
- (and 1 more)
-
I have built some Otaki also but could not remember the direction Otaki> ARii or vice versa.The Otaki P-40 1/48 is one to stay away from the fuse is a snake.
-
Graham that came out pretty sweet but boy it fills up quick didn't it?My hobby room on the shop is 6'X16' and it filled up fast also.I am sure from what I have read you will find this place your little sanctuary of peace like I find mine....many hours of happy modeling!!
-
I have built some ARii kits they always tended to be older in production but built up pretty well as I remember.So,what about this kit is it from the 70/80's?It looks to be of decent moldings from the sprue shots.
-
Came out out real Nice Chris!
-
I think that will be the next ship Jolle I like German engineering and the Atlantic Bow design.
- 211 replies
-
- 3
-
-
- Russo-Japanese War
- Mikasa
- (and 2 more)
-
Jolle those boats do look great and 3D is a game changer in some areas on my build of the Scharnhorst I am using them for small parts that simple plastic injection would never get there.The cost they add to the build can be some what substantial in the end but I feel it's well justified in these 1/200 ships.Keep up the fantastic work you are doing will be checking in.
- 211 replies
-
- 3
-
-
- Russo-Japanese War
- Mikasa
- (and 2 more)
-
I hear ya Mike but the big guns are cool.I am thinking my next 1/200 for what it's worth will be the Bismark I like the lines on Kreigsmarine stuff when outfitted with Atlantic bow.I am seriously starting to think about downsizing my collection of 1/48 and 1/72 one day keep the ships,1/32 and a handful of 1/48's.
- 24 replies
-
- 3
-
-
- Akitsushima
- Pit Road
- (and 1 more)
-
Interesting subject matter Mike you and me like the IJN stuff.
- 24 replies
-
- 4
-
-

-
- Akitsushima
- Pit Road
- (and 1 more)
-
Some very Nice stuff Jolle I may be lucky if I am 1/5 the builder you are I have lots to learn!I never thought of positioning the men as one builds?I was wondering what you guys were using for research shame not much in the line of books.The Anatomy of the Ship seem to be some Nice productions of research which I am using keep up the fantastic work Jolle 1/200 is an amazing scale to play in!
- 211 replies
-
- 3
-
-
-
- Russo-Japanese War
- Mikasa
- (and 2 more)
-
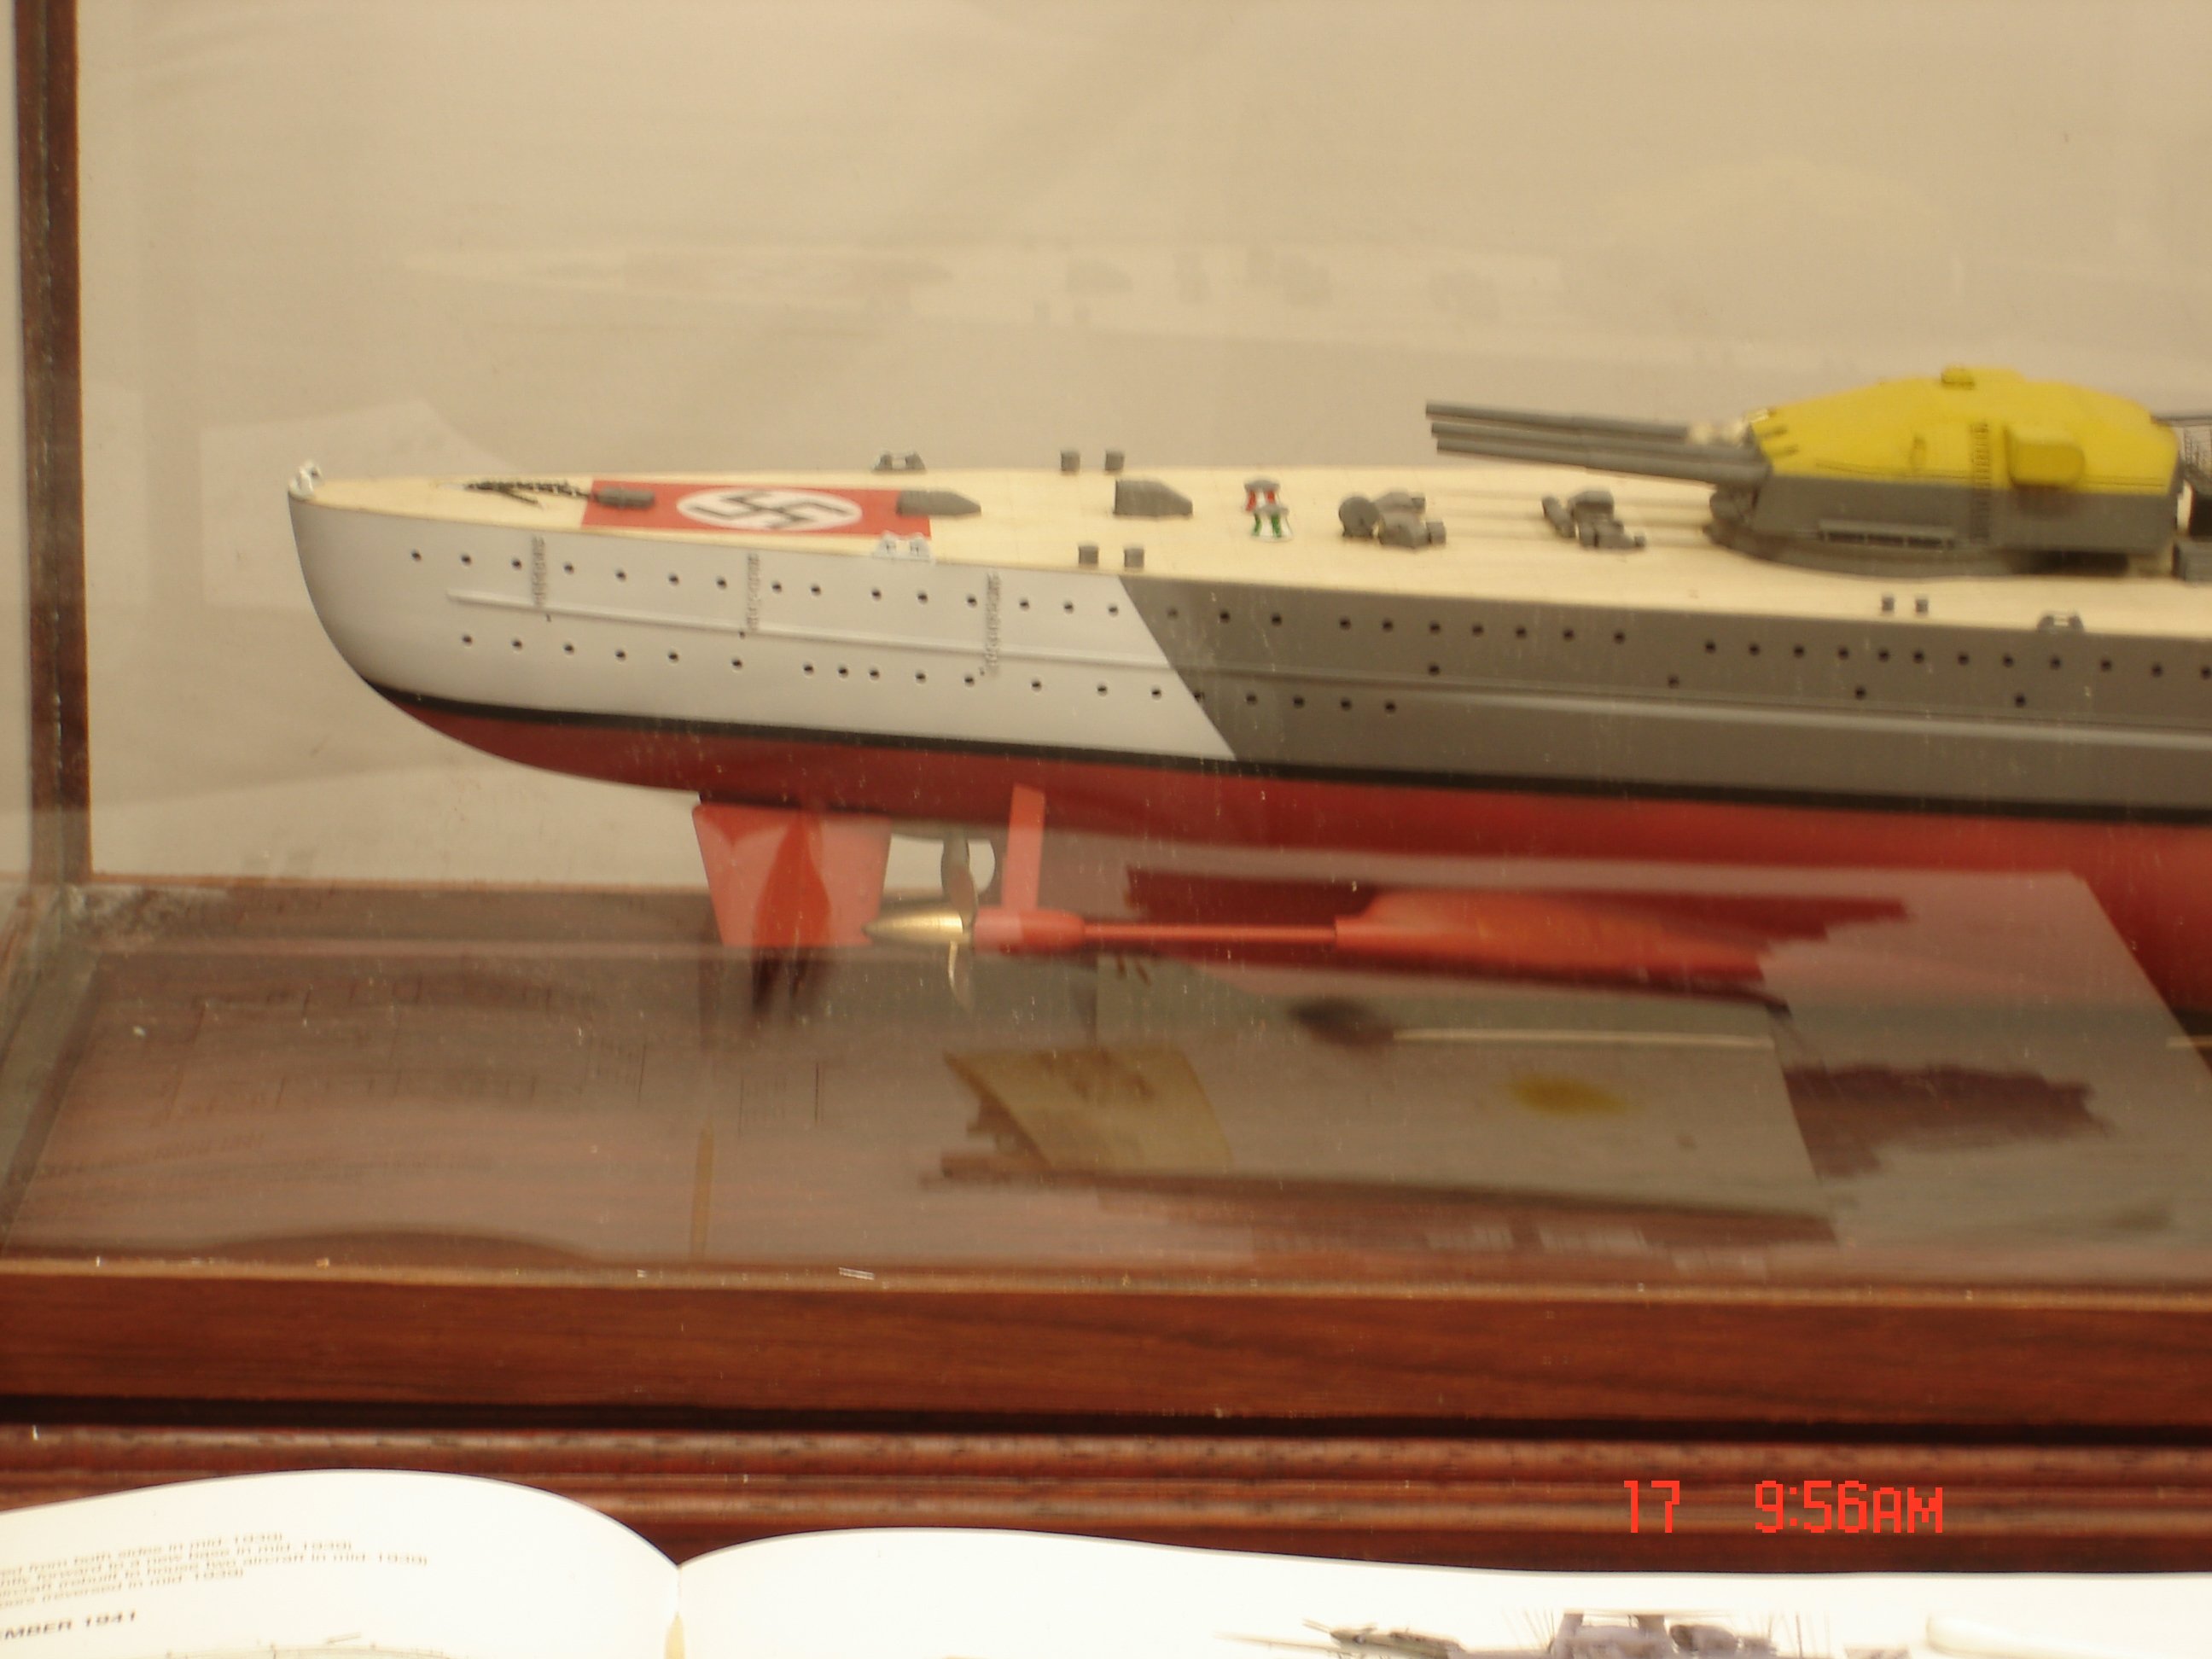
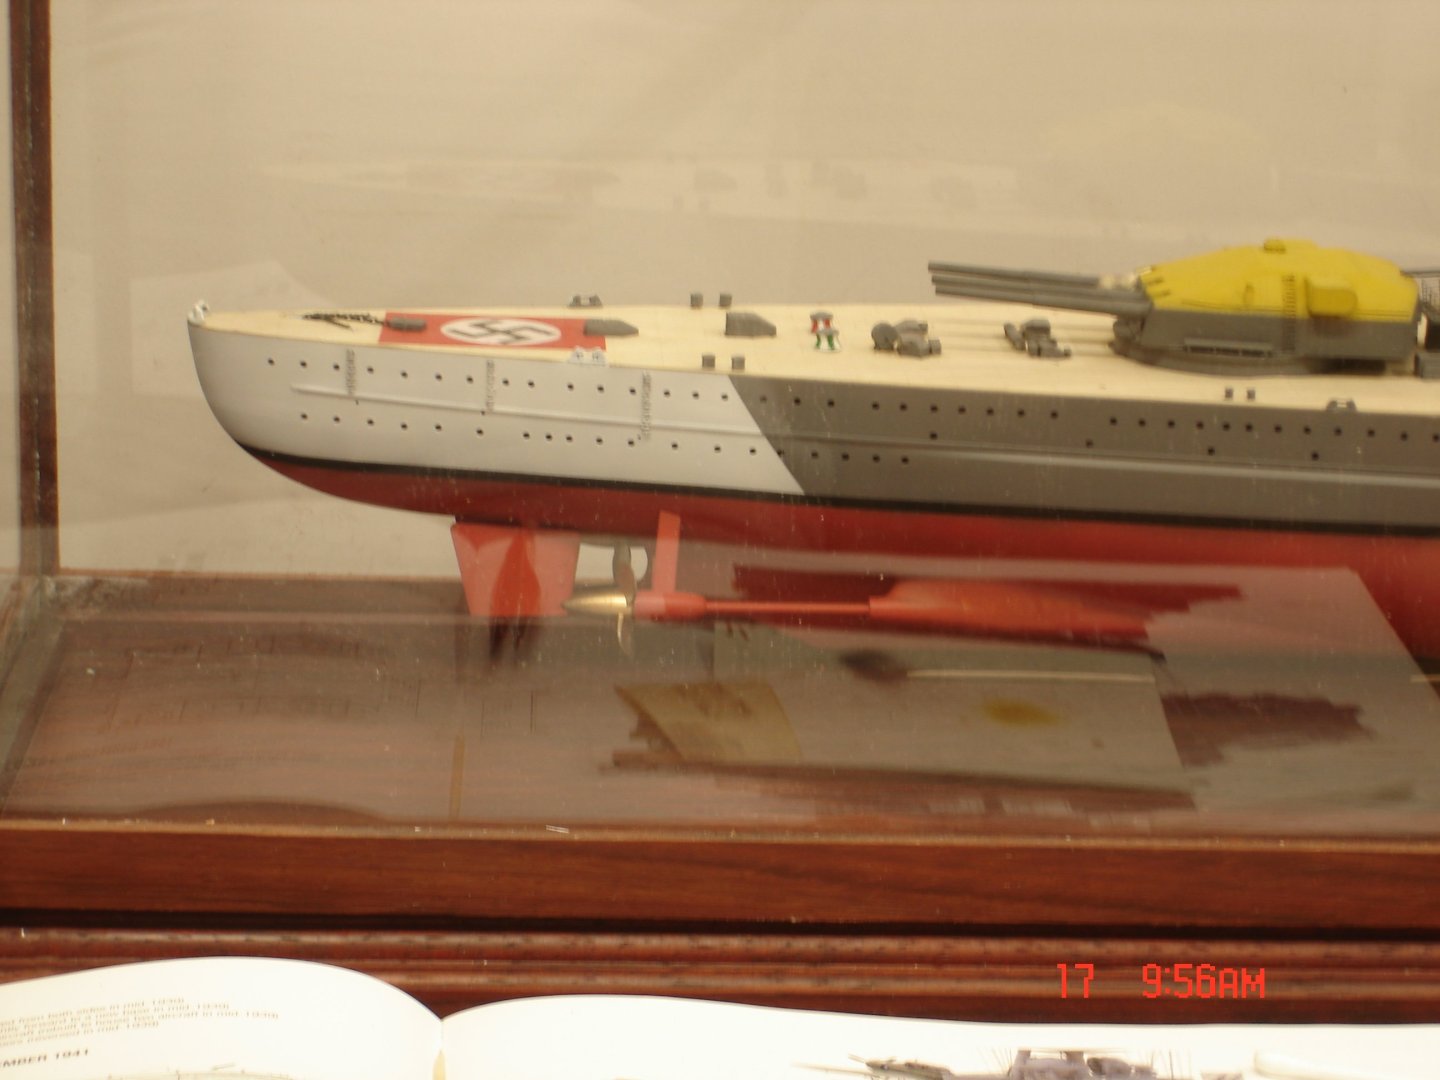
I went RLM 75 for the hull and just picked a white.The turret colors I had to make but but started with RLM04 and worked it from there.Your measurement comes in @1.771" weras mine is 1.875" that's 1/10" lower than mine at the bottom of the boot?It's a judgement call ?is your build up and running yet? I was looking at the waterline and if you go your measurement you will be about 1/10" above the rear shaft support go higher.The Atlantic bow came about because the Kreigsmarine like there ships to sit low in the water but the flat/straight bow let the deck get to much wash.You can see the nice gentle slope upward to the forward mast when you sit back
- 68 replies
-
- 3
-
-
- Scharnhorst
- Trumpeter
- (and 1 more)