HOLIDAY DONATION DRIVE - SUPPORT MSW - DO YOUR PART TO KEEP THIS GREAT FORUM GOING! (Only 20 donations so far - C'mon guys!)
×


Ulises Victoria
-
Posts
1,790 -
Joined
-
Last visited
Content Type
Profiles
Forums
Gallery
Events
Everything posted by Ulises Victoria
-
 (Hmmmm I could swear I had posted this before!) Thank you all for your comment. Really appreciate it. Pat: Thanks for the tip. Will take it into account. I hadn't think of that.
 -
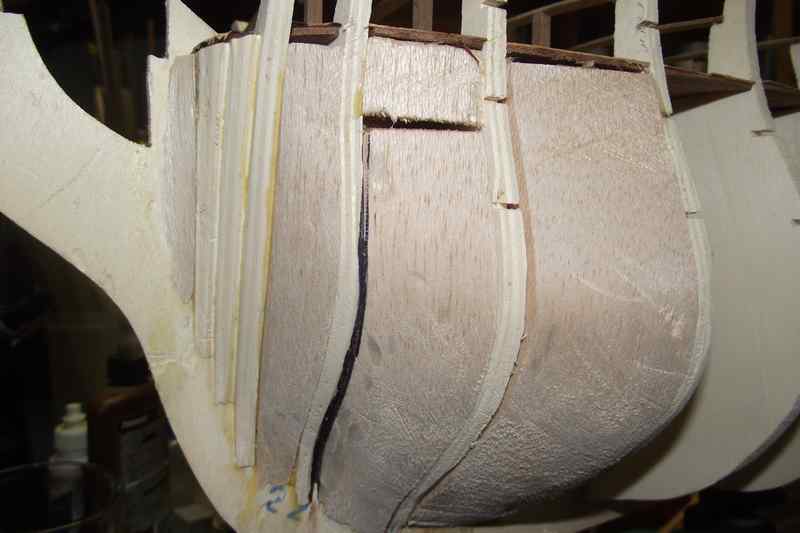
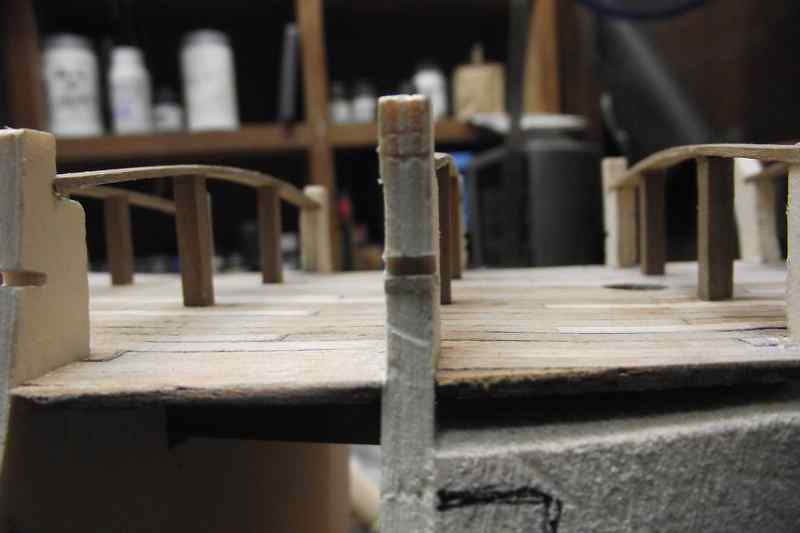
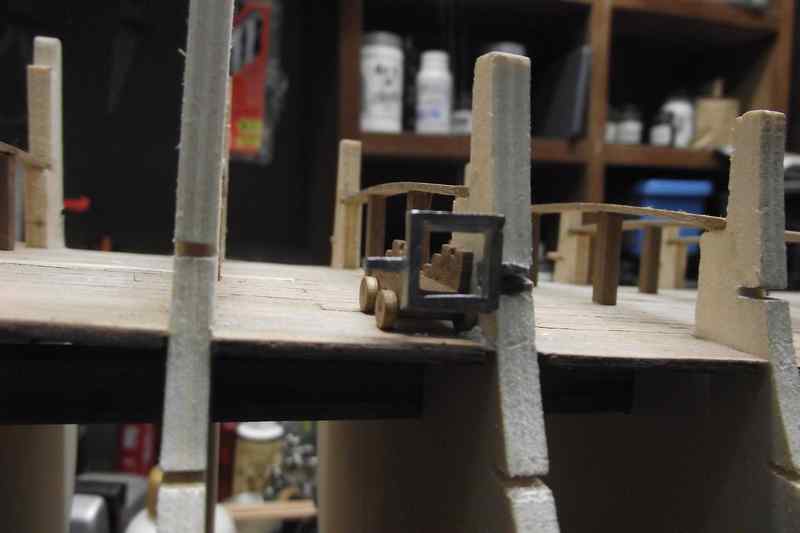
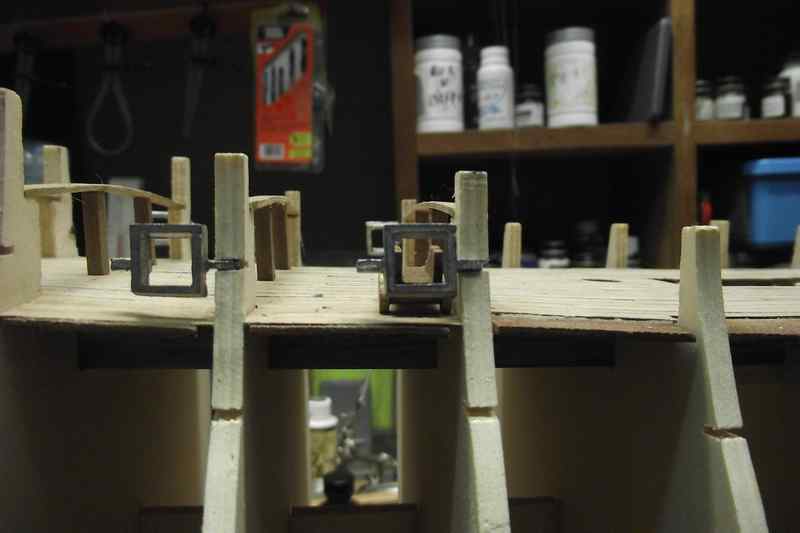
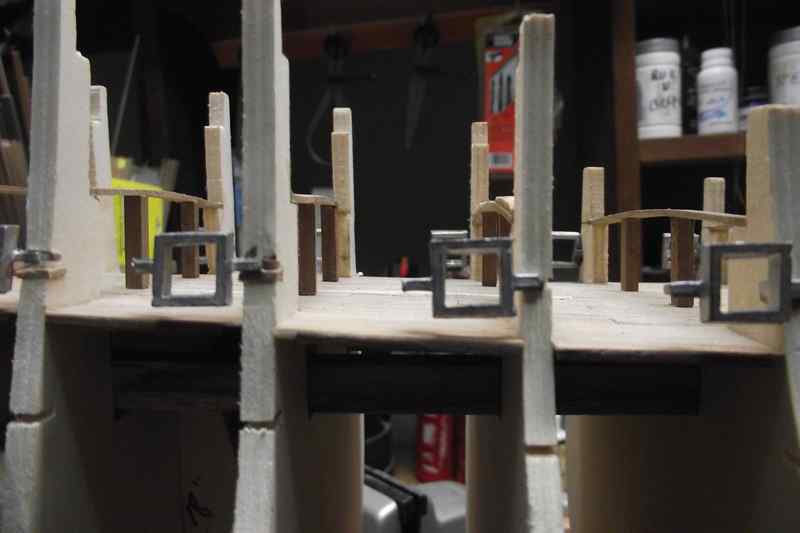
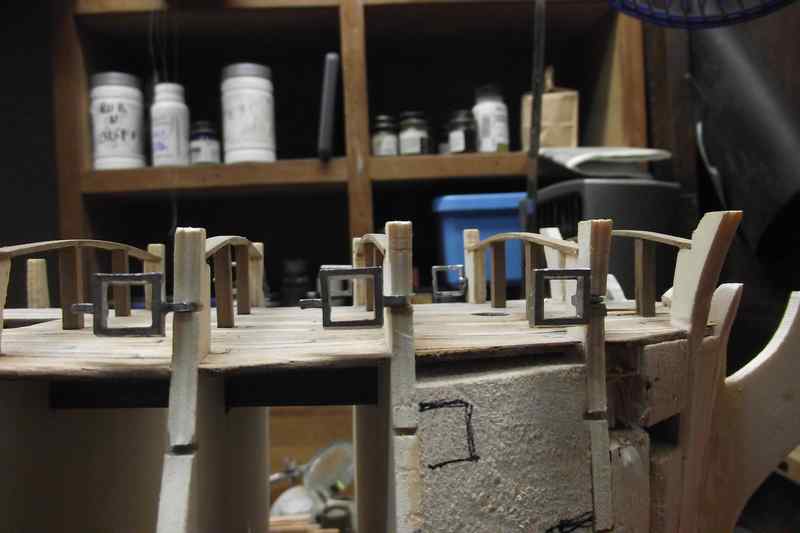
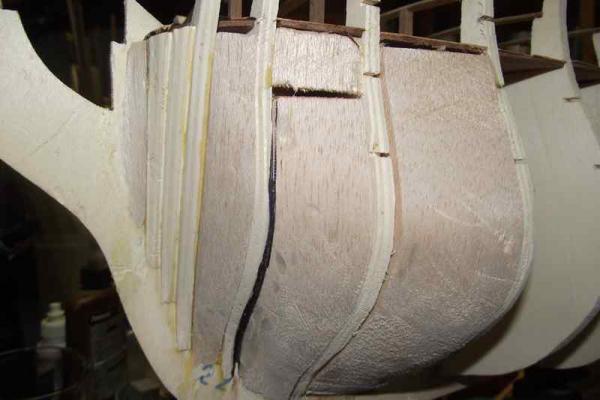
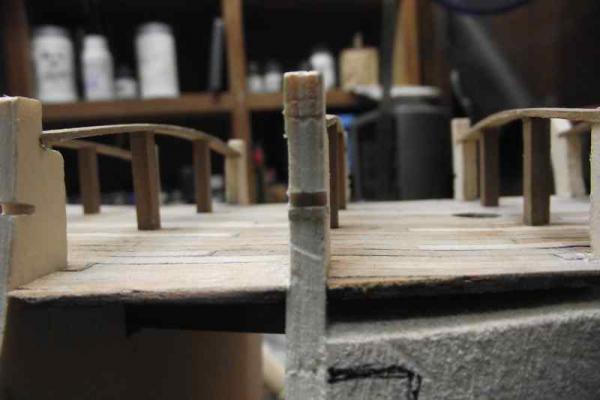
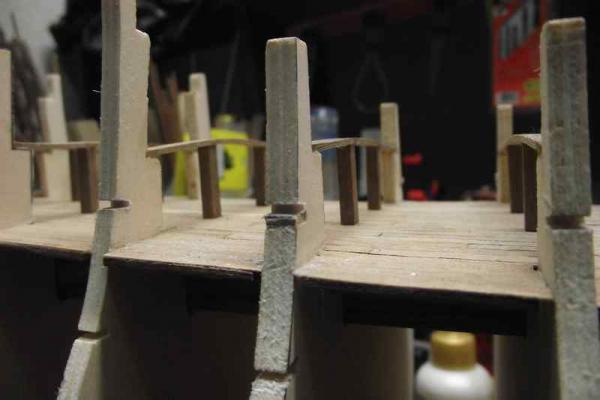
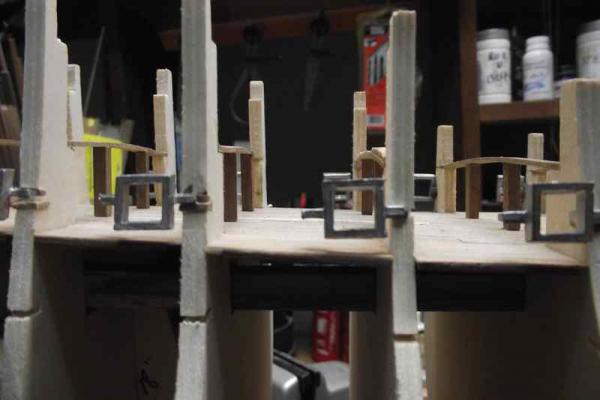
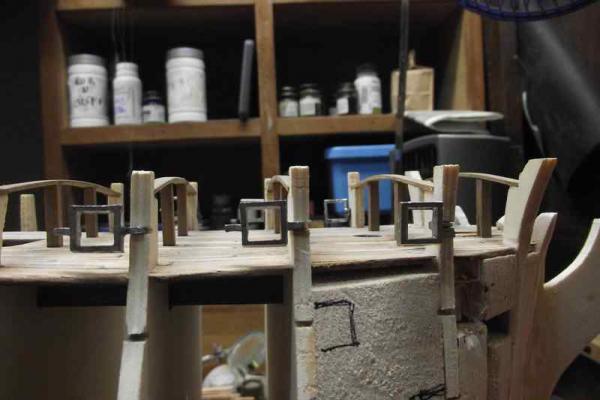
Update June 25 2014 I used balsa blocks to fill empty spaces. This is the first time I attempt something like this. I know it's not the cleanest of the jobs, but I think it will serve its purpose I had to modify the slots where the cannon frames go. They were not aligned properly. This is a job that has consumed a lot of my time because I know it's a very critical step. Here I am dry fitting the cannon frames to check that their height is correct so the carriages/cannons assemblies are properly aligned and that the cannons can fit through the openings. A lot of extra trimming/refilling had to be done here.


- 786 replies
-
- 7
-

-
- Royal Louis
- Finished
- (and 1 more)
-
A very fine brush, very little paint on it, a very steady hand, eye magnifiers and a bucket load of patience. I did something similar in my Golden Hind.I used the brush almost dry of paint. It took several passes to leave a good coat of paint. There is something strange in the poster's photo. The ship looks unfinished except for the golden ornaments. In any case you should paint the hull of it's right color(s) and lastly the ornaments. I don't see how that modeler is going to paint the hull without messing the gold.
-
Couldn't expect less. Here's to a great match, whoever wins.
-
Splendid!!! I love the old worn look you gave to the decks. Very nicely done. Felicidades, linda. (Hey... in two hours... Brazil vs. México)
-
THE BLACKEN-IT TRIALS
Ulises Victoria replied to Erebus and Terror's topic in Metal Work, Soldering and Metal Fittings
Hey... can you make a trial for wood glues? (just kidding) Very informative. I use Blacken-It extensively as I hate gold and shinny parts on my ships, except where it's meant to be. -
Nice work, Viv. Hey... are you getting ready for the World Cup?
-
I am building Mamoli's 1/90 Royal Louis. Mixed feelings. Instructions are for advanced builders. Don't expect step by step instructions. But of course, this is not a kit for a beginner either. Lots of metallic parts. Wood materials look excellent, except for some walnut strips that look like they were ripped instead of cut. Bulkhead laser cut parts were cut very precisely, as there were just a few adjustments that had to be done, which I consider normal for a kit of this complexity. Laser cut false decks were another area where more heavy adjustments had to be done. Since I am just beginning this build, there isn't much more I can say about it at this time.
-
Absolutely. It's cheaper than going to the movies.
-
I tried to get a few pieces of wood from Victory. My dream was (is) to turn a pen or set of pens with wood from Victory. I copy below the answer I got from them: Ulises, There is no uniformity of size, as these pieces have been removed from the ship due to their state or repair. A single piece will cost you £350 plus 20% vat and postage. If this is of interest, please let me know and I will arrange for a piece to be selected and photographed for you. That way, you can see it before you agree. Giles
-
Hello Michael. The sails in my Bounty, which were unfurled was a set I bought specifically for her. And yes, they are too thick. However, I tend to prefer to put furled sails, as in my Vasa. I do not follow any pattern. I just cut a triangular piece of cloth with the larger side to the length of the mast, and bend the sail to the mast. I may use white glue on the edges to prevent the cloth from unraveling. The triangular shape is so that they don't get too fat in the middle. I would love to know more about your daughter in law's "amazing" electronic sewing machine. Sounds like a CNC for fabric works.
-
Thank you very much for your kind words, John. The best thing you can say to me is that you learned something from my work, especially since I don't consider myself an expert by any means. I appreciate it.
-
I have to say that if I'm building this ship it's because I had the opportunity to buy it really cheap. I paid $450 USD at Model Expo in May 2010.
- 786 replies
-
- 1
-
-
- Royal Louis
- Finished
- (and 1 more)
-
That's cool mtdoramike
-
I found this. Anyone has some experience with this or sees it as a possible solution? http://www.ebay.com/itm/DECK-HULL-PLANKING-WITH-WOOD-CALKING-STRIPS-ATTACHED-MAKES-FOR-BEAUTIFUL-DECKS-/271507749176?pt=Model_Kit_US&hash=item3f371f7938
-
That's OK, Michael, but I am not the one trying or wanting to buy the kit. I already have it.
- 786 replies
-
- 1
-
-
- Royal Louis
- Finished
- (and 1 more)
-
I personally wouldn't go that route. Even if that's the closest possible to the real thing, I don't think it would be feasible on a scale model. What scale is your Xebec? My opinion is the inking of the sides of the planks is enough.
-
Hola linda! Wow you are doing a magnificent job. I confess I haven't visited for some time and what I see now is great progress and very well done. Felicidades chica!
-
Thank you Mike. I will post the definitive results once I have finished planking my decks.
-
Its from a PDF file of a magazine from a Ship Modeling Club in Spain. Obviously in Spanish. Too large to post here. (19mb) If you want I can try to zip it and send by email.
-
Nigel may be right. That is a definitive possibility.
-
This guy is planking vertically, while the method I am used to is horizontally, meaning you lay each plank all the way from bow to stern. What are your comments on this matter? What would problems arise with this "vertical" method?
-
Hi Nick- Thanks for visiting and your comments. I want this ship to look used. So I want to give the decks a weathered appearance without being too overdone. I have a product called Weather-it. It's supposed to "age" unpainted wood, but unfortunately, that looks is lost when applying something over it like tung oil, boiled linseed oil or varnish. It seems like number 10 is the look I want.I will also do some weathering techniques on the hull, like applying a slight brick-red color dry brush around the gunports and a few water running marks as well as some rust where the anchors hang. Will see how this come out.
- 786 replies
-
- 4
-
-
- Royal Louis
- Finished
- (and 1 more)
-
dry brushing
Ulises Victoria replied to stevetuck56's topic in Painting, finishing and weathering products and techniques
Wow... I would describe the dry brush technique in a couple of sentences. This is way beyond that. Excellent description.