HOLIDAY DONATION DRIVE - SUPPORT MSW - DO YOUR PART TO KEEP THIS GREAT FORUM GOING! (Only 20 donations so far - C'mon guys!)
×


Ulises Victoria
-
Posts
1,790 -
Joined
-
Last visited
Content Type
Profiles
Forums
Gallery
Events
Everything posted by Ulises Victoria
-
 Thank you Banyan. I plan to put first planking, then file the frames to level with the planking and then paint red just before second planking.My guess is that this order will eliminate any chance of a bright metallic shiny spot after the second planking. Open to ideas, though.
 -
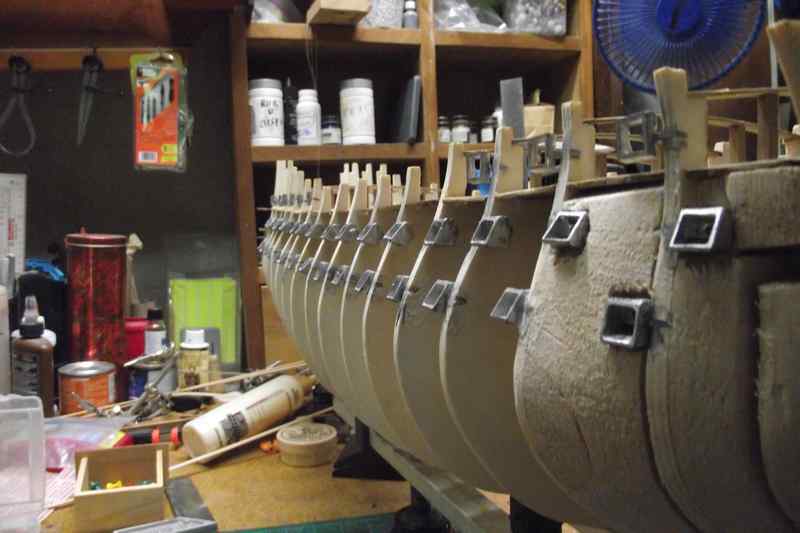
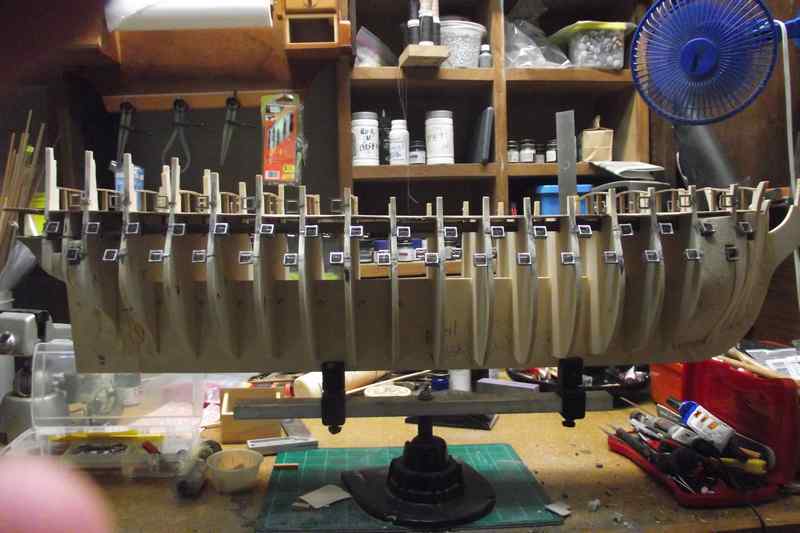
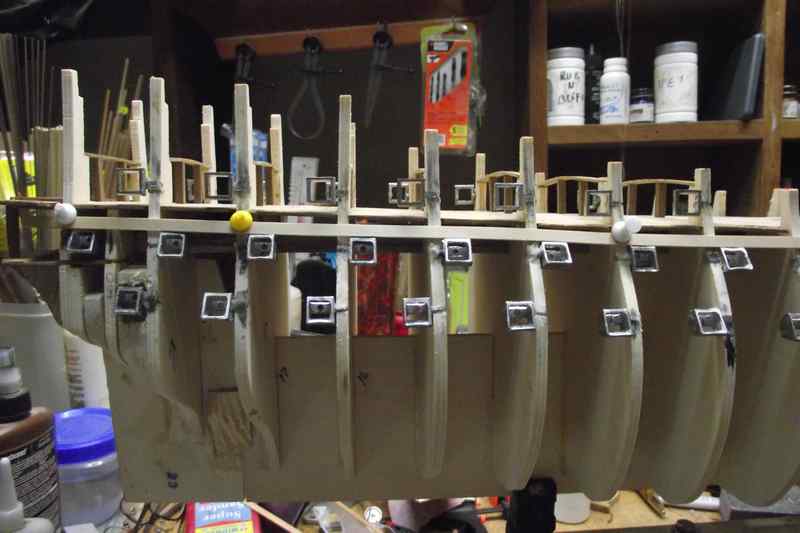
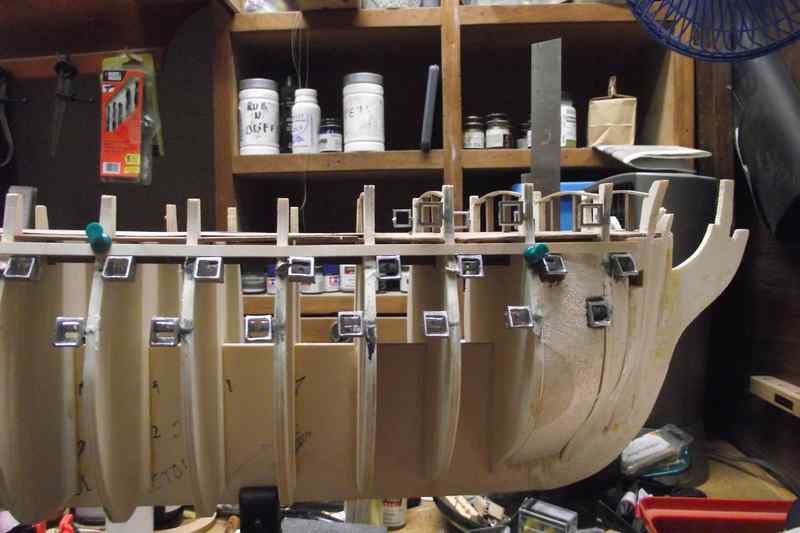
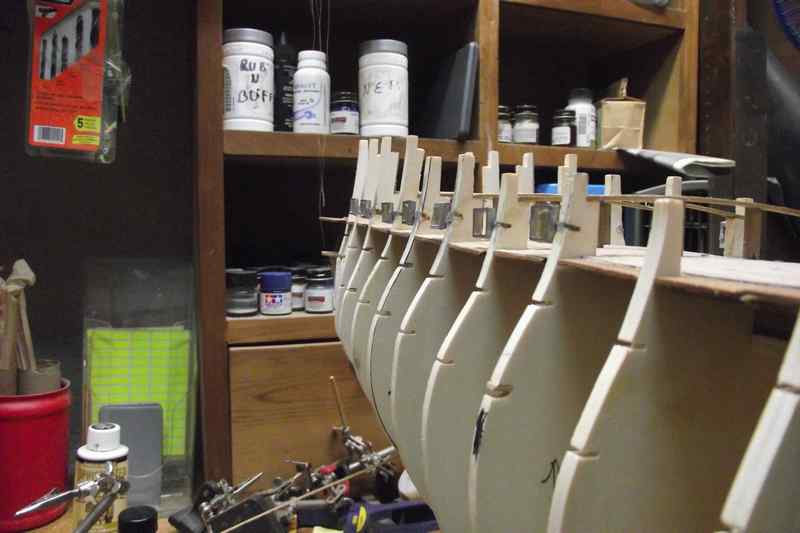
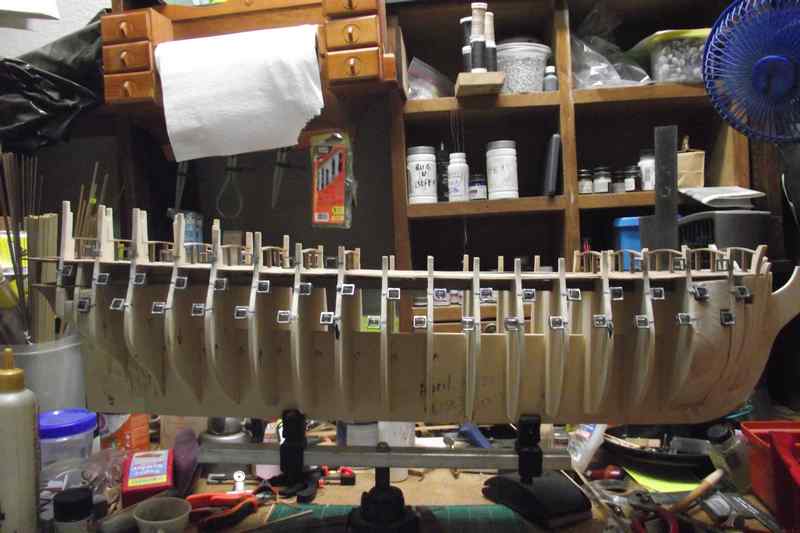
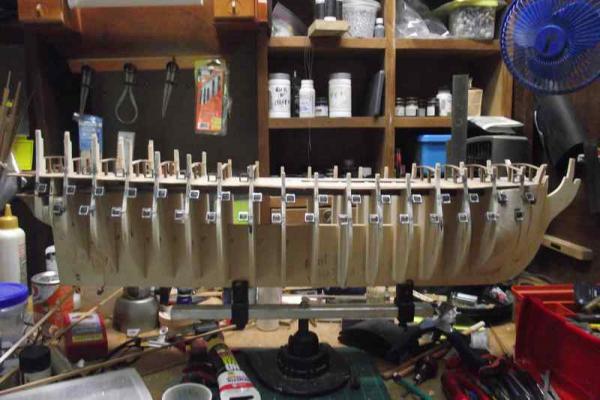
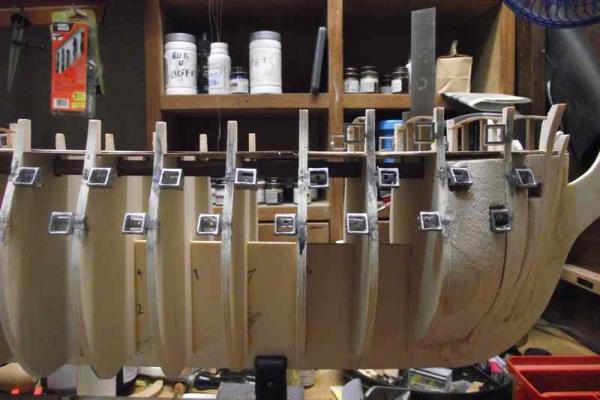
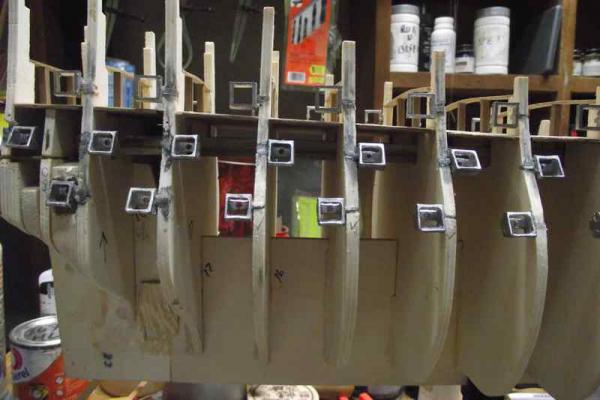
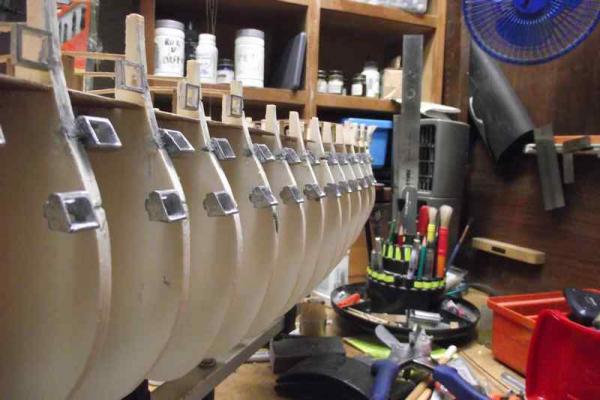
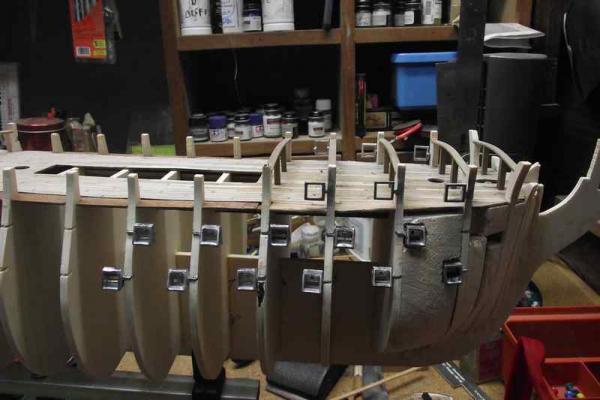
Update July 14-14 Hello all. I finished placing all the cannon metal frames on both sides of my ship. Port side was done a little quicker and more accurate thanks to the lessons learned on starboard side and the use of the jig to measure the distance between the first and second rows. Things like inclination are easily fixed thanks to the flexibility of the soft metal lugs in the mounting frames. If by chance there are any inaccuracies at the moment of planking, they will be deal with on the spot, whenever possible. So far I am happy with what I've done, although I'm sure it's very far away from perfection. Thanks for visiting!


- 786 replies
-
- 7
-

-
- Royal Louis
- Finished
- (and 1 more)
-
Why (unless I'm missing something) is it so difficult to find precise rigging information on French First Rate ships of the 18th century era? I've been looking for weeks for information to complement the kit's rigging instructions of my Mamoli Royal Louis 1780, unsuccessfully. Any help or guidance will be greatly appreciated. Ulises PD I have some books on rigging: Lennart, Lees, Lever, Anderson, but they are about different nationalities, (English) type of ships (Frigate) or eras (1600-1720).
-
WOW! You really are into making things exactly as the originals. Nice work!!!
-
What can I say that hasn't already been said. Hmmm... Excelso!!! That comment about a Vasa kit with Fred Hocker involved sounds like a marvelous idea.
-
Thanks. My best reward is seeing someone saying: "This helped me!"
- 786 replies
-
- 1
-
-
- Royal Louis
- Finished
- (and 1 more)
-
Thanks. Fortunately there were NOT all of them. Just a few.
- 786 replies
-
- 1
-
-
- Royal Louis
- Finished
- (and 1 more)
-
Gracias Karl. Indeed!!! Thanks David. It actually feels good to realize you've learn something new. Fortunately it was not a disastrous mistake, and correcting it only took a few more hours of work... (or pleasure??? )
- 786 replies
-
- 1
-
-
- Royal Louis
- Finished
- (and 1 more)
-
Thank you, linda. I hope you are getting better. Yes I'm recovering very nicely of my mistake, but that meant a lot of extra work, that's all. Cheers Ulises
-
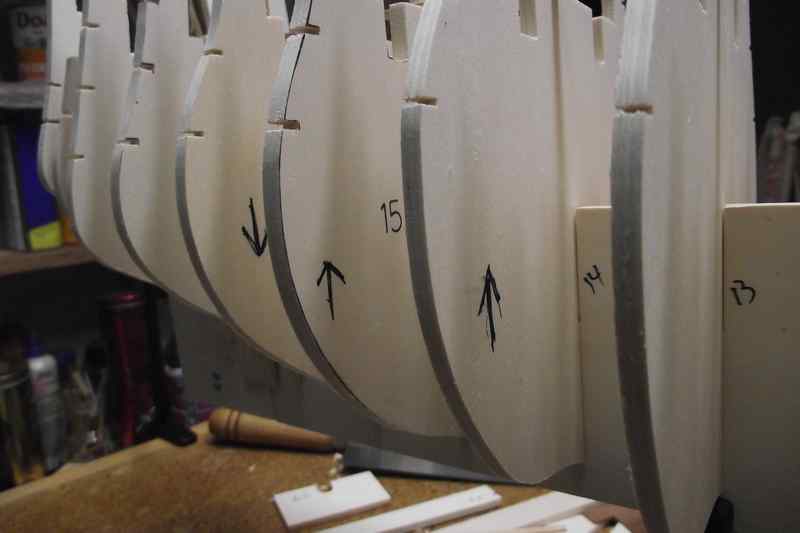
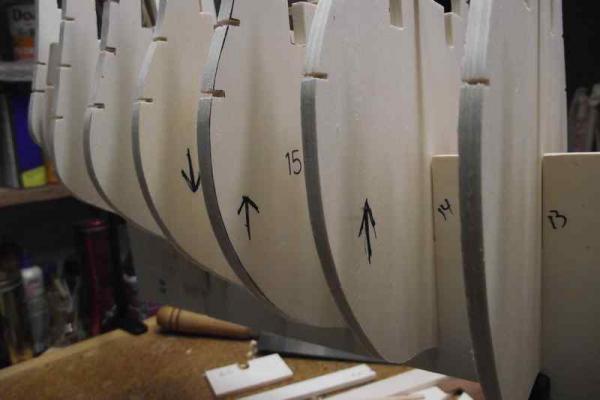
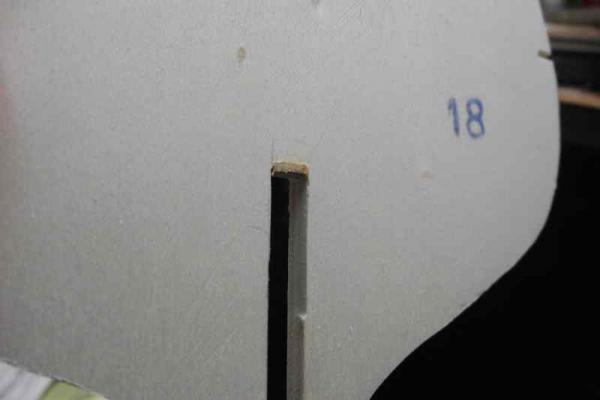
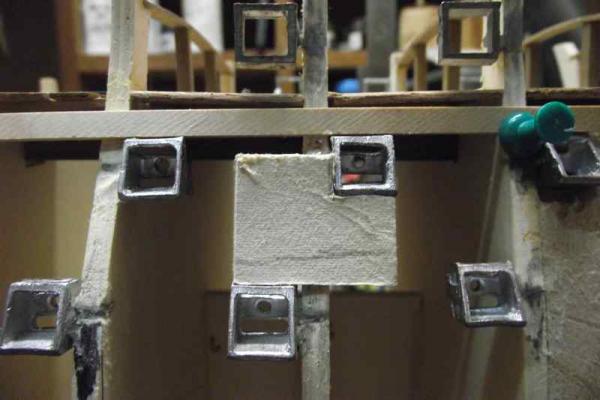
I thank everyone for your comments and your likes. I just want to point out a mistake I made and that it happened because my failing to plan ahead or foresee potential problems. At the beginning of my log I pointed out that some of the upper surface of the bulkheads, where the false deck would lay on, was not leveled, and I showed a photo with a strip of wood laid over them showing the inconsistencies. I then proceeded to add small bits of wood in the slots of those bulkheads that needed raising and filing down those which needed lowering. HERE'S MY BIG MISTAKE. I didn't see that by doing this I would change the level of the slots where the cannon metal frames were to be inserted. This caused all that subsequent problem of having to realign the cannon metal frames. What I should have done was to modify the surface where the false deck would be laid upon, not the whole bulkhead altitude. Lesson learned! Hope this is clear and help somebody else to avoid a potential problem. Cheers Ulises Strip of wood showing misalignment Arrows show the direction in which the bulkhead had to be modified BIG MISTAKE.Adding those little pieces of wood, or filing down some others, changed the overall level of the slots in the bulkheads
- 786 replies
-
- 1
-
-
- Royal Louis
- Finished
- (and 1 more)
-
What is a spokeshave? May you post a photo, please? EDIT: NVM... found it.
-
Hey Viv... these last photos show very nice progress. I love how you are modifying your kit and making it look worn and used. Cheer up.I sincerely was hoping Brazil would beat Alemania. Ni modo,linda.
-
Me quito el sombrero (Hats off) at what you are doing with this trashed kit. At first it seemed a hopeless attempt, but now you are building a masterpiece out of a piece of junk. Felicidades!!!
-
Or you can sand the pins thinner
-
Well this may be a little too late, but.... The way I do it, is I just pull the thread through the pin hole, then put a minuscule drop of white glue in the pin and "plug" the pin in the hole trapping the thread. Snip it and place the coil over it "to cover the ugliness"... Nice work with this section, btw.
-
Arthur: Yeah. I'm foreseeing a problem here, but that is how I understand the instructions. I was planning to epoxy the end side of the plank to the side of the frame and the upper and lower edges to each other over and below.. Planking this is going to be a very interesting job. Thanks for your input, my friend.
-
Thank you all for the likes and your comments. Many times a simple comment makes you see things from a different point of view and reveal something is not completely right. I appreciate all the comments and particularly those like this from Mark, who points out a good point. Mark: I remember checking some of the cannons but not all. Will do that next session. Thank you.
-
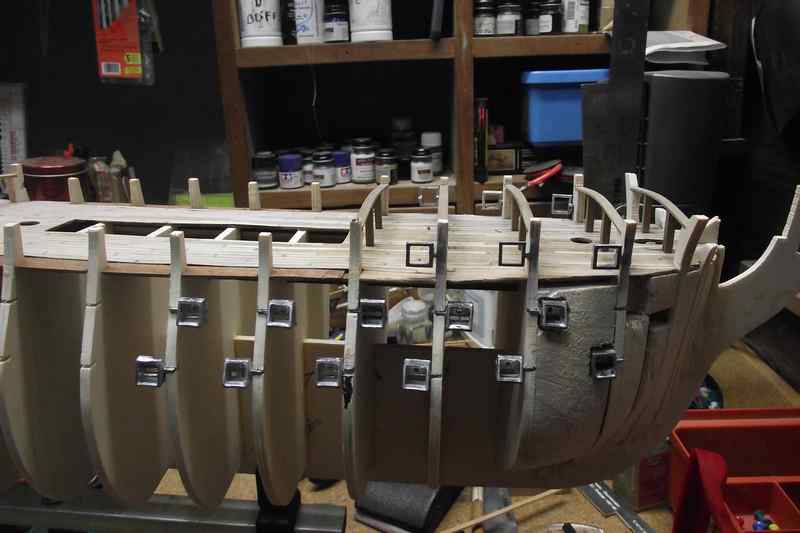
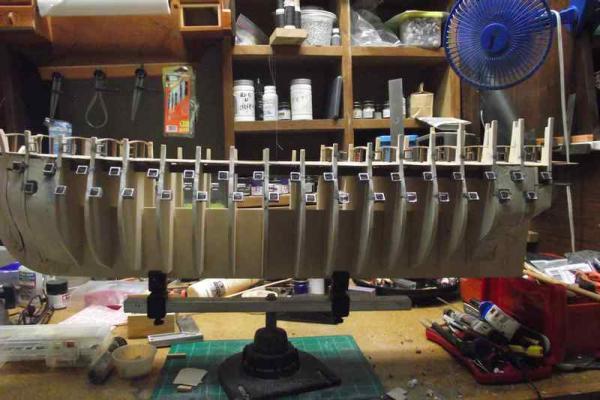
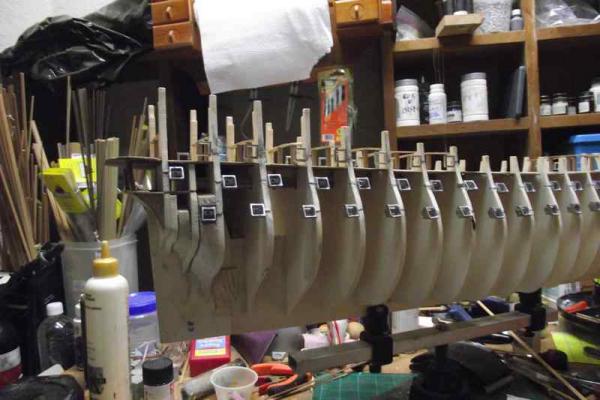
Update July 4. Happy 4th of July to you USA citizens!!! I modified the placement of many of the gun-ports. Not all of them, mind you. I think they look better now! The first planking will be laid so that the frames protrude and then they have to be filed/sanded down to level with the planking, so a lot can be corrected before that in terms of inclination, etc. Micro alignment is still possible without having to remove and re-install the frames, thanks to the flexibility of the soft metal lugs. As usual, comments will be very welcome. Cheers!
- 786 replies
-
- 8
-
-
- Royal Louis
- Finished
- (and 1 more)
-
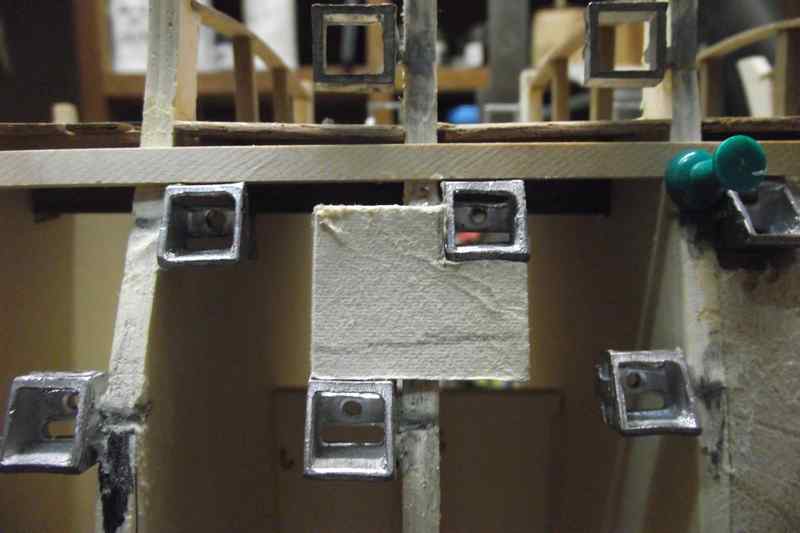
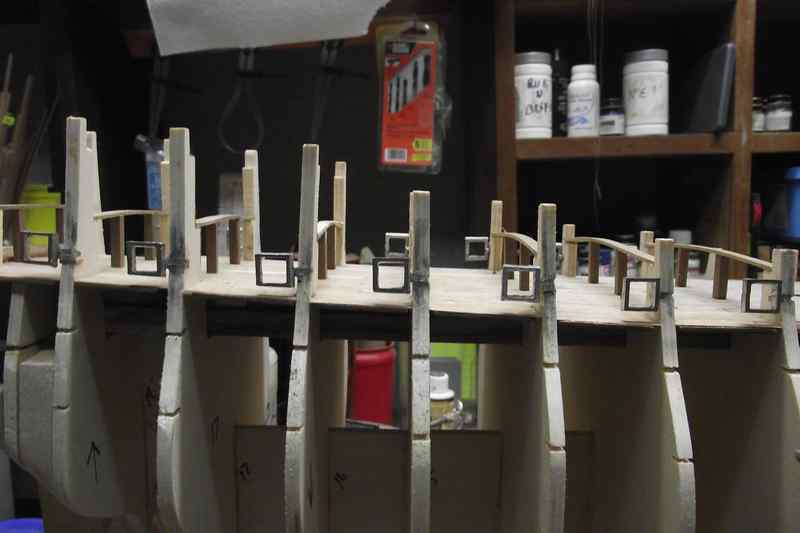
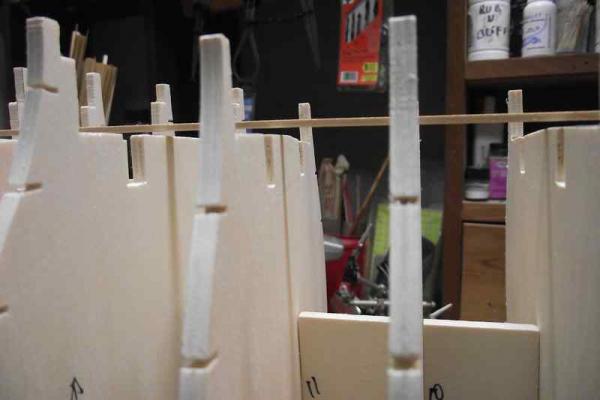
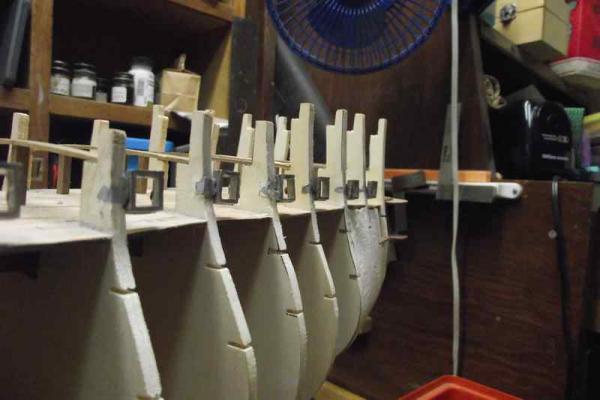
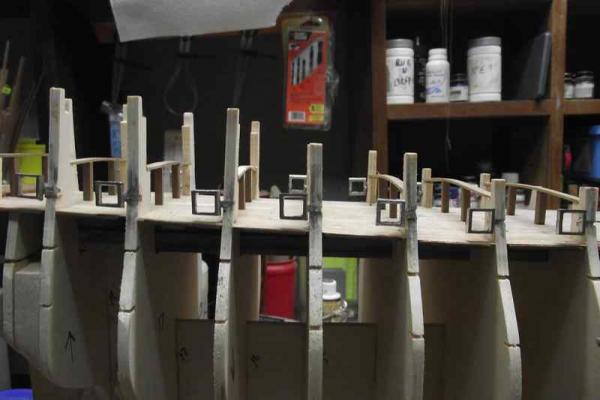
Gunports redux. Okay. I decided to re-do the upper gun ports using a strip of plank. They are now more precisely aligned with the deck above. Not perfect, but seems like perfection is still beyond my capabilities So now I made the ultra-super-high-tech jig you see below to measure the distance between high and low frames, and will start re-aligning them tomorrow, once the glue is dry. These frames are obviously a bit too low. After some work, they lay now parallel to the temporary plank. Inclination is easily fixed. Jig Cheers.


- 786 replies
-
- 11
-
-
- Royal Louis
- Finished
- (and 1 more)
-
Well... thank you guys. Appreciate your comments. So some say that sternmost port is too low but didn't see the jump at 9th frame, which other saw. Well this is a work in progress, and much to be done yet. In any case, this may be another possibility: Since I'm planning not to leave all and every gunport open, but leave them randomly open, closed semiopen...(sorry I don't remember whos I took this idea from, which made look his ship much more realistic) it may be possible to "fake" an unaligned gunport with an aligned closed door. I think I'm going to study this other possibility. It will have an effect on the way second planking will be laid. Thanks again for visiting and your comments.
- 786 replies
-
- 3
-
-
- Royal Louis
- Finished
- (and 1 more)
-
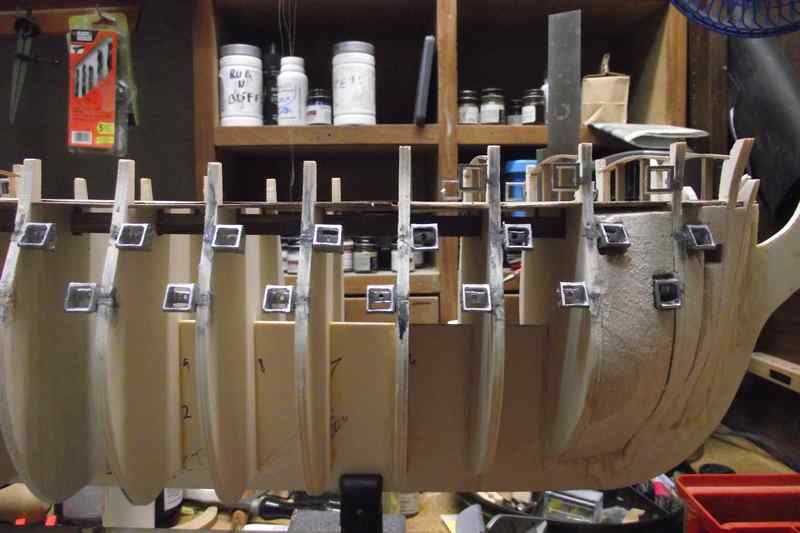
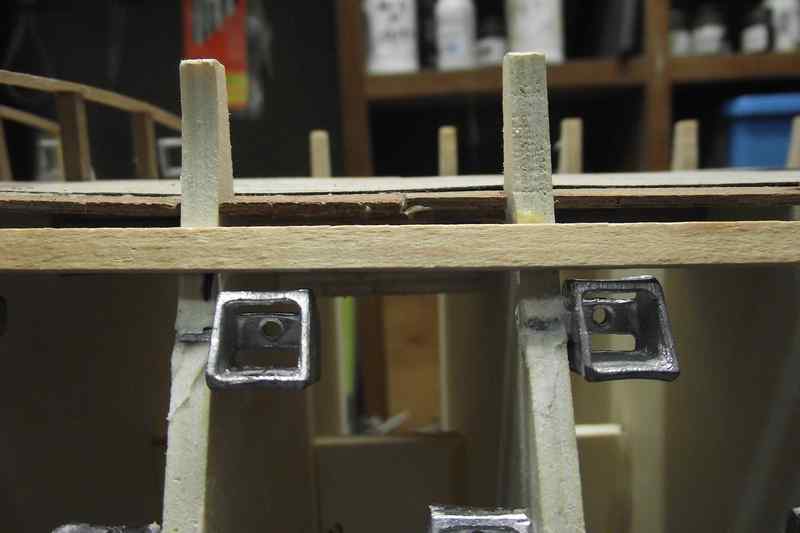
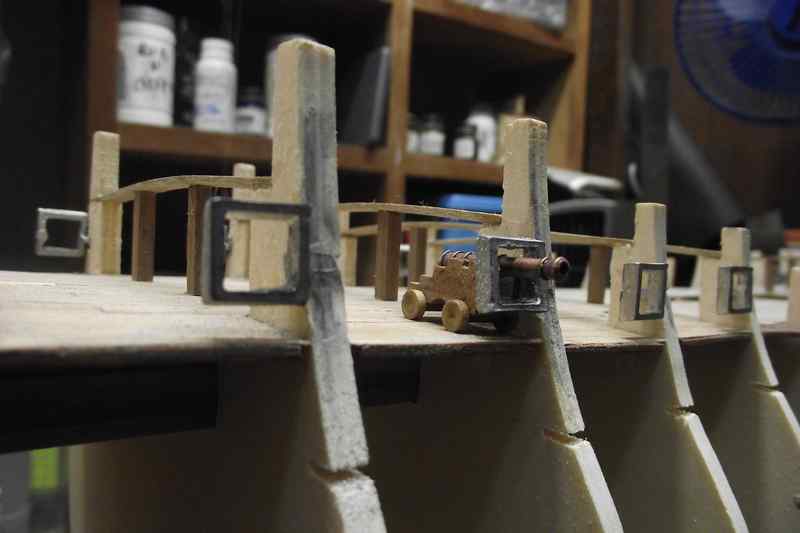
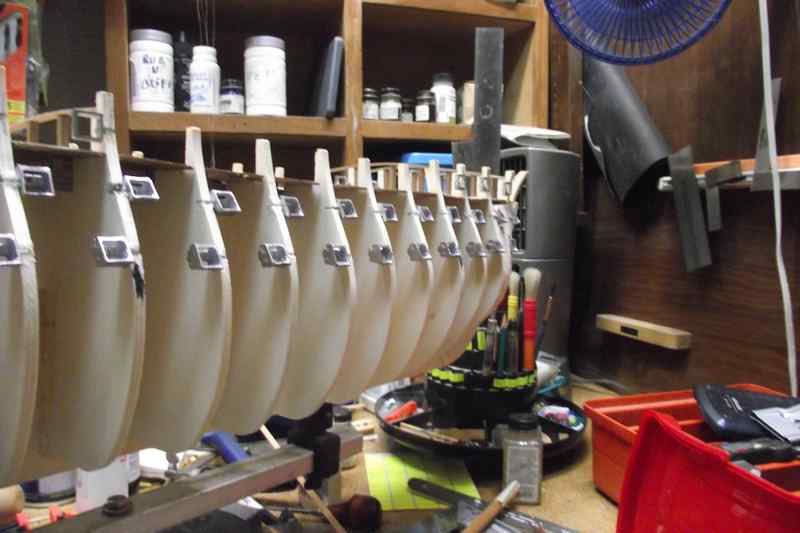
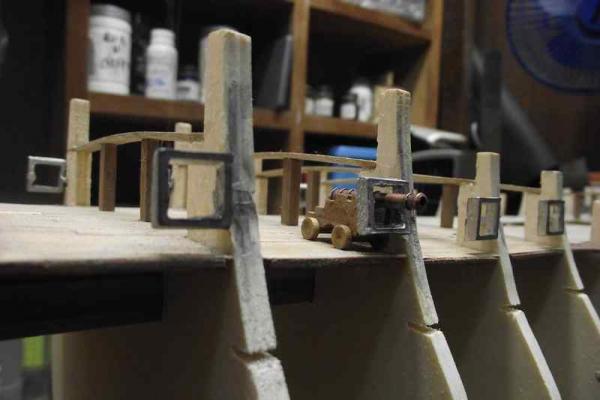
Update July 1st. I finished gluing the metal cannon frames for both sides of the upper deck, and those of the starboard side of the two lower decks. They are different in shape. They seem to follow a reasonable smooth line across the hull, except at the point of the frame number 9 from right to left where it seems to be a slight jump. Hope this will not be too noticeable once the hull is planked, as it's supposed to follow a smooth curve following the wales. This is new stuff for me. It's taking me much time.First I had a really hard time trying to understand what the instructions were trying to say. After several tries, the light shone upon me and finally managed to decipher what they meant. (Some further alignment is still possible) Testing for proper height against a gun carriage


- 786 replies
-
- 8
-
-
- Royal Louis
- Finished
- (and 1 more)
-
Amazing. I'm speechless. Great work that humbles the rest of us.
- 662 replies
-
- 1
-
-
- bonhomme richard
- frigate
- (and 1 more)
-
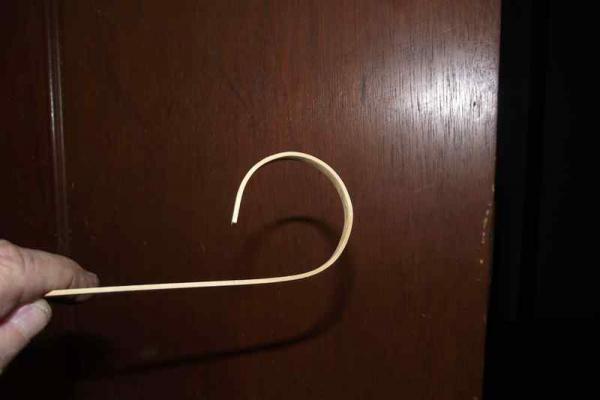
I also use the hair curling thing. I have that electric plank bender also but prefer the hair curler.

-
Excellent work Vince. I will be following closer from now on, as you are a bit ahead of what I'm doing on my Royal Louis. Although not the same ship, some of your ideas are universally applied. Thanks for sharing. That cutting tool is one of my favorites and most used cutting tools. Nice buy. Ulises
-
Arthur: Yes...the lugs are a bit offset from the center of the frame.I try to put them all in the position where the frame is higher to get a better clearance for the guns. I am aware that they will not interfere with the laying of the upper decks afterwards. And also yes...I will have to carve a few holes there, but being balsa I don't see it as a major problem. Good observations Arthur.Thank you for your comments.