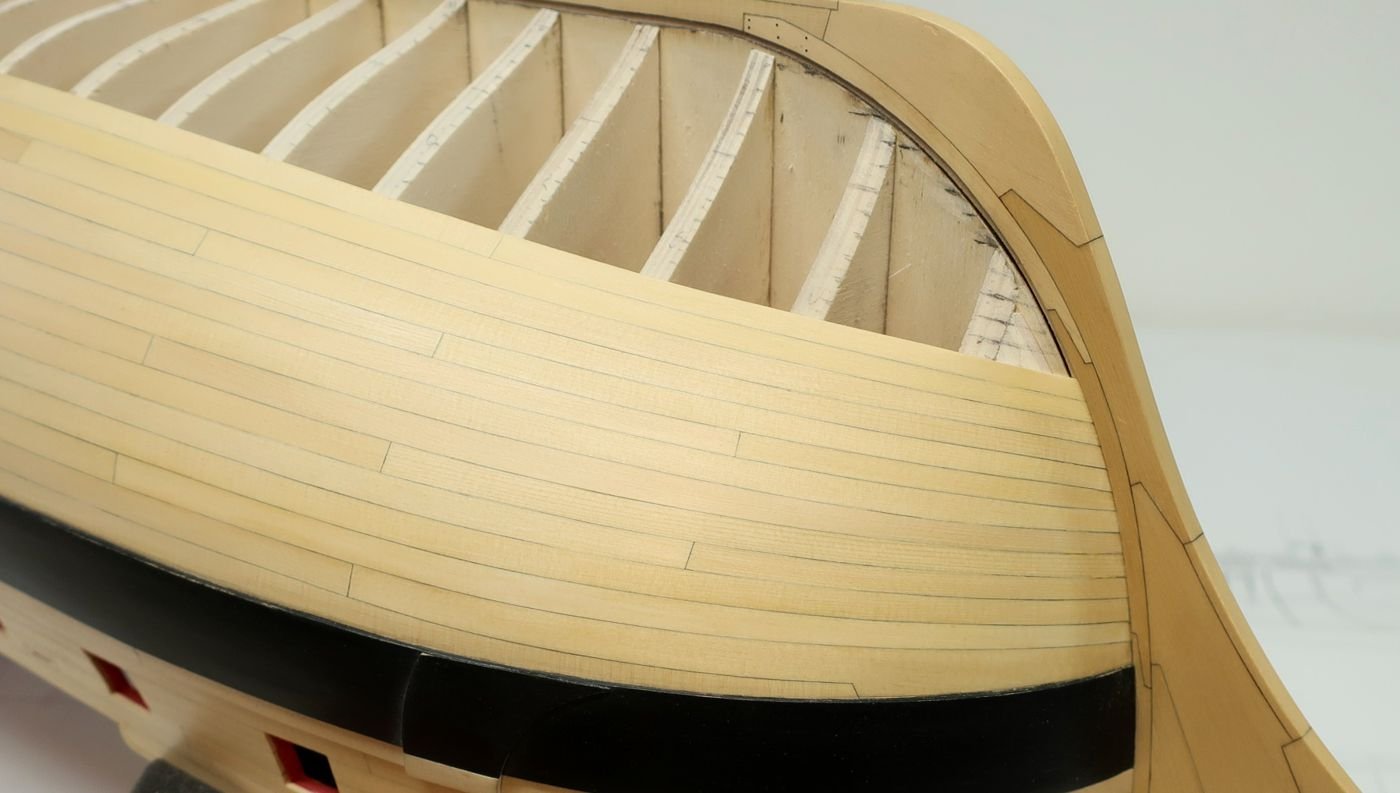
RiverRat Posted May 17, 2013 #1 Posted May 17, 2013 I'm near to starting the second planking of my Rattlesnake and am not sure which plank ends are left exposed; the ends of the hull planking, facing aft, or of the transverse planking of the transom counter. Here's my RS stern after the first planking, with the plank ends facing aft at the (unplanked) counter, for example; I've browsed the Galleries, couldn't see a definitive answer. Many had trim at those joints; mine won't. I'm thinking do the stern planking first, and have the hull planking ends end exposed there, rather than stern planking covering the ends of the hull planks. Is there a "correct" way? Sure I can do as I please, but I'd hope to show what might have actually been done. (Please, I hope they woudn't be mitered!) Brian "Give you joy!" Current Build: RATTLESNAKE 1:64 POB (Mamoli) Kits on hand: "Lexington", Mamoli: "Robert E. Lee", Scientific Scratch to do: "Fannie Dugan", 1870s Sidewheeler Steamboat
BareHook Posted May 17, 2013 #2 Posted May 17, 2013 I would think the counter/stern planks would be enclosed by the hull planks, or the ends of the hull planks are exposed. Ken isali 1 Current Build: Authentic Hannah Kit Bash Pending Continuation: Sea of Galilee Boat Completed Build: MS AVS On Shelf: AL Independence, Blue Jacket Alfred
lamarvalley Posted May 17, 2013 #3 Posted May 17, 2013 Hey Brian... I'm not sure if this is helpful or not, not even the same ship but what the heck... Mine is the San Fran II and I terminated with the hull planks out...I thought it looked better from the side to have the hull run the length rather than have a border aft. It's hard to see in the pic but above the board that holds the chain I put a thin veneer on the border that ran upwards to the transom... that seemed like a good place to stop it rather than all the way to the keel. Looking at my answer I'm not even sure I answered your question at this point...
russ Posted May 17, 2013 #4 Posted May 17, 2013 The transom planking's ends are covered by the hull planks. That is pretty much standard. Russ T'aint a hobby if you hurry Completed projects Cross section model by Russ 1/48 scale Biloxi schooner model restoration 1/24 scale Biloxi oyster skiff 1/24 scale Biloxi schooner 1/48 scale POB Current project Biloxi lugger Captain Roy 1/48 scale POB
druxey Posted May 17, 2013 #5 Posted May 17, 2013 (edited) I agree that in model work that is the usual convention. However, in many real ships both the side and transom planks hooded into rabbets in the fashion piece (the curved timber that made the 'corner' of the stern). This was to avoid exposed end-grain, where moisture could wick in to the planks and start rot. I've done this the 'correct' way on a model and can state that it is a very tricky job! No wonder one doesn't see this on models. Edited May 17, 2013 by druxey garym 1 Be sure to sign up for an epic Nelson/Trafalgar project if you would like to see it made into a TV series http://trafalgar.tv
allanyed Posted May 17, 2013 #6 Posted May 17, 2013 That's a first for me Druxey. It makes complete sense though. What about on later ships where the lower planking wrapped around the fashion piece and ended at the tuck molding? Would the planking at the stern above the tuck molding have been hooded into the fashion piece? Thanks for this interesting new (for me) tidbit. Allan
russ Posted May 17, 2013 #7 Posted May 17, 2013 I agree. I had never seen this. However, for many 19th and 20th century ships, the end grain of the side planks did overlap that of the transom planks. Russ garym 1 T'aint a hobby if you hurry Completed projects Cross section model by Russ 1/48 scale Biloxi schooner model restoration 1/24 scale Biloxi oyster skiff 1/24 scale Biloxi schooner 1/48 scale POB Current project Biloxi lugger Captain Roy 1/48 scale POB
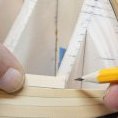
Chuck Posted May 17, 2013 #8 Posted May 17, 2013 Hahns Rattlesnake...Planks overlap the counter planking. You will also see on most ships like this that there are two counters. An upper and a lower under the transom. I am not sure if the kit simplifies this or if it is in fact a flat area on the same plain as the transom. simply a decorative design. My guess is that it is a simplification for the kit so the one piece cast transom can be utilized. I dont have a copy of the rattlesnake plans to double check...But even if the upper counter was relatively flat I would think it at least angled differently than the transom. Less than normally seen on a ship of this type though because there are no quarter galleries.. Its hard to say without the plans in front of me. BUT...totally unrelated and based on what Druxey has shown. The cutter Cheerful I am working on has this feature of a rabbeted fashion piece. . Its going to be quite a challenge to model it. You can see it clearly in the photo below. This would not have been the case on rattlesnake however based on what I have seen of her. Chuck Passaro - MSW Admin Sloop Speedwell - POF scratch Block Island Boat - POF scratch HMS Winchelsea - POB scratch build HM Cutter Cheerful - POB scratch build Royal Barge - POF scratch Medway Longboat- POF Scratch SYREN SHIP MODEL COMPANY
RiverRat Posted May 18, 2013 Author #9 Posted May 18, 2013 Hi Chuck, I have a copy of that stern pic, but the one I have is not very clear. I may not be using the terms "transom" and "counter" correctly. I have been using, wrong or right, transom as the main part with the lights/windows, and counter as the undercut below that. Here's a side view of the RS stern: Set me right here! What's the correct terminology for these two areas of the stern? Thanks, Brian "Give you joy!" Current Build: RATTLESNAKE 1:64 POB (Mamoli) Kits on hand: "Lexington", Mamoli: "Robert E. Lee", Scientific Scratch to do: "Fannie Dugan", 1870s Sidewheeler Steamboat
Chuck Posted May 18, 2013 #10 Posted May 18, 2013 You are correct...the upper part being the transom and the lower curved part being the counter. On larger frigates that small band above the counter is angled an extends to become the base of the quarter galleries port and starboard. This was what I was unsure about. I was mistaken now that I see the plan. Rattlesnake didnt have any quarter galleries so I was questioning if it was indeed flat and part of the transom. Based on the plan you show it clearly is. This two pieces of decorative molding that define this area makes it hard to see when looking dead on at the stern. But the profile drawing you show makes it clear that this is a flat area of the bottom of the transom. I wonder if the two pieces of molding were an attempt to make the privateer appear like a larger frigate or if it was merely decorative. Having no quarter galleries would make this tough to pull off such a ruse. I would still plank it as Hahn did with the p&S planking overlapping the counter planks. I hope I didnt confuse you with that. Chuck Chuck Passaro - MSW Admin Sloop Speedwell - POF scratch Block Island Boat - POF scratch HMS Winchelsea - POB scratch build HM Cutter Cheerful - POB scratch build Royal Barge - POF scratch Medway Longboat- POF Scratch SYREN SHIP MODEL COMPANY
druxey Posted May 18, 2013 #11 Posted May 18, 2013 Allan: higher up, it wasn't so critical as it was well above water level. The wale and side planking there extended aft past the planks of the counter. Be sure to sign up for an epic Nelson/Trafalgar project if you would like to see it made into a TV series http://trafalgar.tv
russ Posted May 18, 2013 #12 Posted May 18, 2013 Druxey: I see what you are talking about now. That makes much more sense. Thanks. Russ T'aint a hobby if you hurry Completed projects Cross section model by Russ 1/48 scale Biloxi schooner model restoration 1/24 scale Biloxi oyster skiff 1/24 scale Biloxi schooner 1/48 scale POB Current project Biloxi lugger Captain Roy 1/48 scale POB
RiverRat Posted May 18, 2013 Author #13 Posted May 18, 2013 OK!! Thanks Chuck for the terminology verification. I had looked up definitions and pictures ( on the internet ) for these two terms before, and vagueness prevailed. Thank you all for your input. I'll be doing stern planking first in this case, though it's not necessarily universal. Stuns'ls alow and aloft! Brian "Give you joy!" Current Build: RATTLESNAKE 1:64 POB (Mamoli) Kits on hand: "Lexington", Mamoli: "Robert E. Lee", Scientific Scratch to do: "Fannie Dugan", 1870s Sidewheeler Steamboat
allanyed Posted May 18, 2013 #14 Posted May 18, 2013 Thanks again Druxey. I was picturing counters, but thinking fashion pieces and the fact that they are so far above the water line, no need to hood the ends of the planks. Allan
JPett Posted May 20, 2013 #15 Posted May 20, 2013 Ahoy Brian The instructions for the MS Rattlesnake tell you to miter this corner at the counter. I made up and pinned to the counter a temporary cover with the correct angle and planked up to that. Then I removed it and planked the counter. I have not completed this on my build but it has worked well so far. I can only assume this applies to the transom too. There is a pic of the temporary cover here http://modelshipworld.com/index.php?/topic/45-rattlesnake-by-jpett-model-shipways-ms2028-scale-164th/?p=870 I have included a pic from the instructions whichcan be downloaded here http://www.modelexpo-online.com/images/docs/MS2028/MS2028_Rattlesnake-Instructions-Complete.pdf On with the Show.... J.Pett “If you're going through hell, keep going” (Winston Churchill) Current build: MS Rattlesnake (MS2028) http://modelshipworld.com/index.php?/topic/45-model-shipways-rattlesnake-ms2028-scale-164th/ Side Build: HMS Victory: Corel http://modelshipworld.com/index.php?/topic/3709-hms-victory-by-jpett-corel-198/?p=104762 On the back burner: 1949 Chris Craft Racer: Dumas http://modelshipworld.com/index.php?/topic/939-1949-chris-craft-racer-by-jpett-dumas-kit-no-1702/ Sometime, but not sure when: Frigate Berlin: Corel http://www.corel-srl.it/pdf/berlin.pdf
RiverRat Posted May 21, 2013 Author #16 Posted May 21, 2013 Thanks JPett. I'd downloaded the MS instructions long ago and now remember seeing that joint, but I'll be sticking with my plan to overlap the counter rather than trying that miter. This approach seems to have been approved by several, so I'm quite OK with it. Hey, got my replacement wood today (some of the kit wood was ratty) and will get to the second planking soon. Brian "Give you joy!" Current Build: RATTLESNAKE 1:64 POB (Mamoli) Kits on hand: "Lexington", Mamoli: "Robert E. Lee", Scientific Scratch to do: "Fannie Dugan", 1870s Sidewheeler Steamboat
dvm27 Posted May 22, 2013 #17 Posted May 22, 2013 (edited) Contemporary photos of a NMM model I'm currently working on, HMS Speedwell, clearly show the fashion piece as Druxey has modelled it. I am currently working on this area and am constructing the fashion piece in two different sections, in effect building out the rebate . The end result will resemble Druxey's model but without the difficult task of creating the double rebates fore and aft. Very few navy board models were accurately framed and I suspect the square tuck work around was yet another convention to make the model builder's life easier. I certainly agree overlapping the transom planks with the side planking would be a heck of a lot easier! Just to reference a point Chuck brought up regarding Harold Hahn. Harold was an amazing ship modeler, a pioneer who influenced modern scratch building probably more than anyone else of his generation. But he freely stated that many of the choices he made with regards to construction were conventions to suite his own taste and did not always represent full size building practice. Some have criticized him for this but he never tried to pass off his work as 100% authentic. When I built my first Hahn-style model I thought I was building a replica of the original. I was, in fact, building a replica of a Harold Hahn model. There's no way I was ready to build a fully framed model at that time and I'll forever be greatful to Harold for introducing me to scratch building. Edited May 22, 2013 by dvm27 mtaylor and tlevine 2 GregwebsiteAdmiralty Modelsmoderator Echo Cross-section buildAdmiralty Models Cross-section BuildFinished buildPegasus, 1776, cross-sectionCurrent buildSpeedwell, 1752


Recommended Posts