Search the Community
Showing results for tags 'sherbourne'.
-
 Here's my Sherbourne build log. It may be somewhat abbreviated, and not in any case as detailed as the other build logs here.
 -
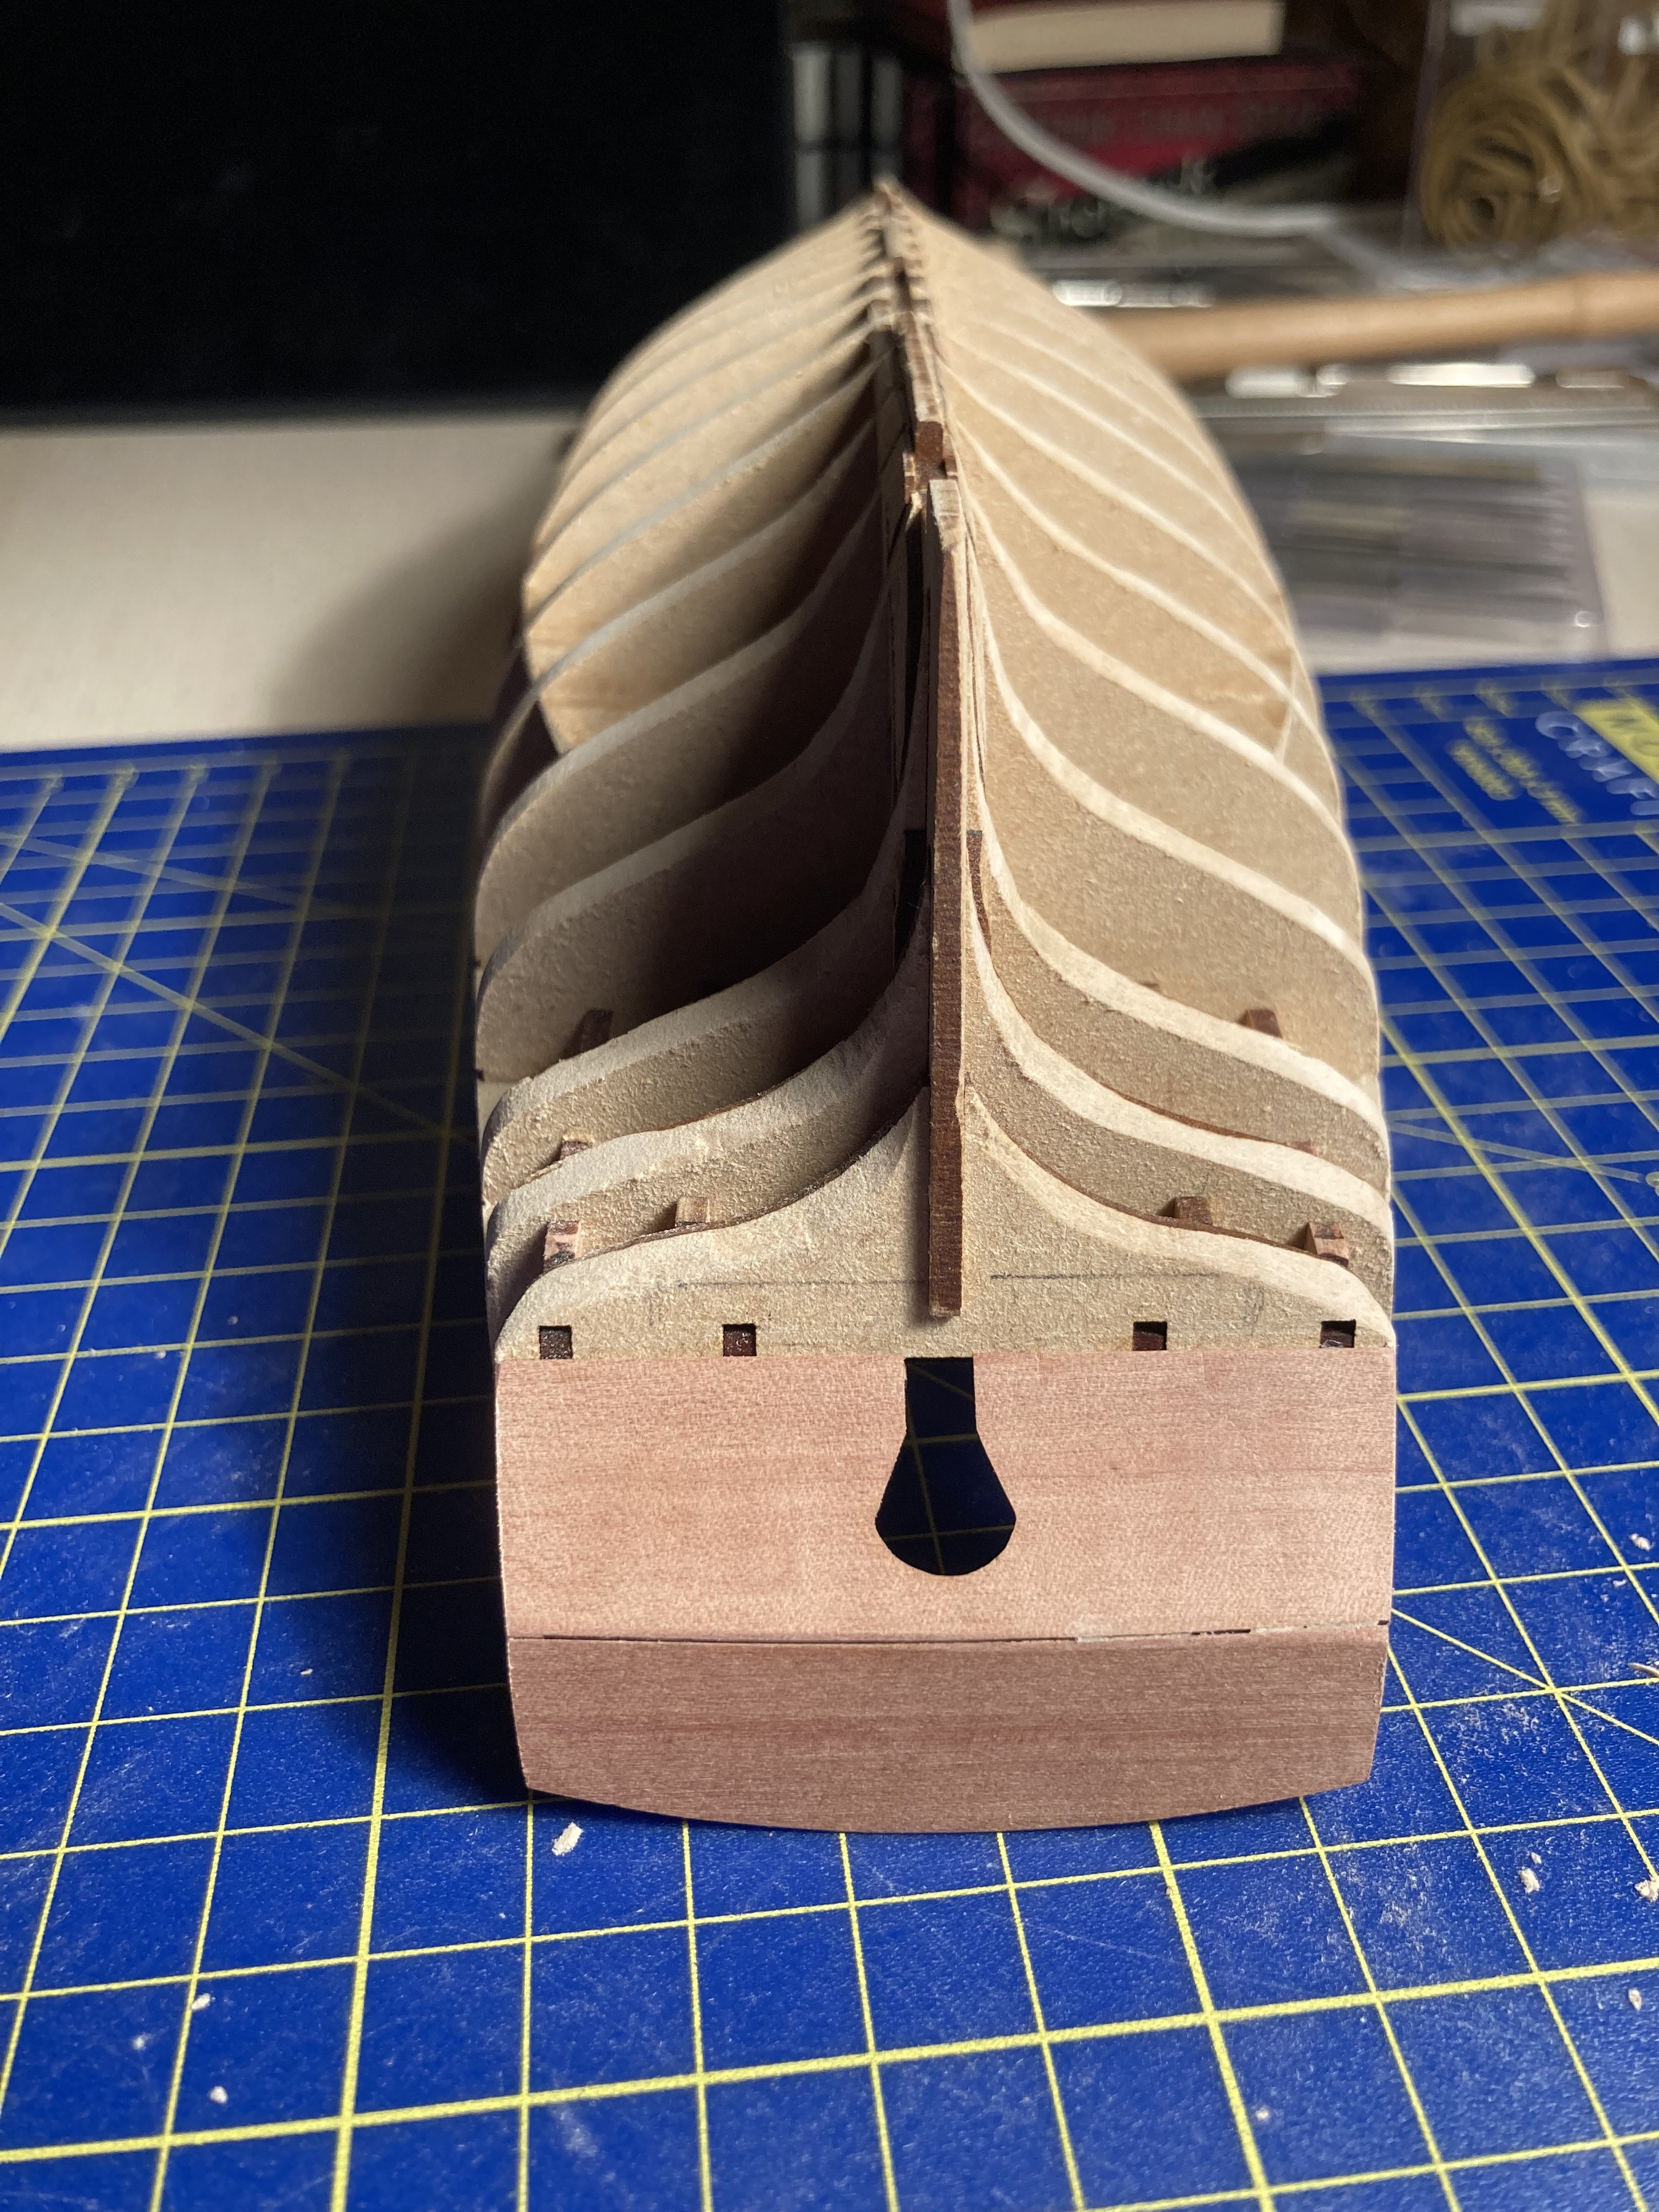
 Finally after number of unsuccessful attempts started to build the first model, something that has been planning to do for years but due to circumstances in life never actually made enough progress. Still need to learn how to bend parts but luckily transom when I submerged in the water which turned out to be hotter than was supposed to be took the right shape/curved by itself right away! need to be more careful next time and use different method. This seems such a nice kit! Parts go well so together, I found that what I needed to worry about was not to get overzealous with sanding - took too much of the back part of the ship (one of the last pictures). Contemplating now whether to add some type of filler to it or whether the first planking will make this not-visible and it isn't an issue.. A bit scared of how planking will go but watched some videos on this forum and feel myself prepared - this is fun!
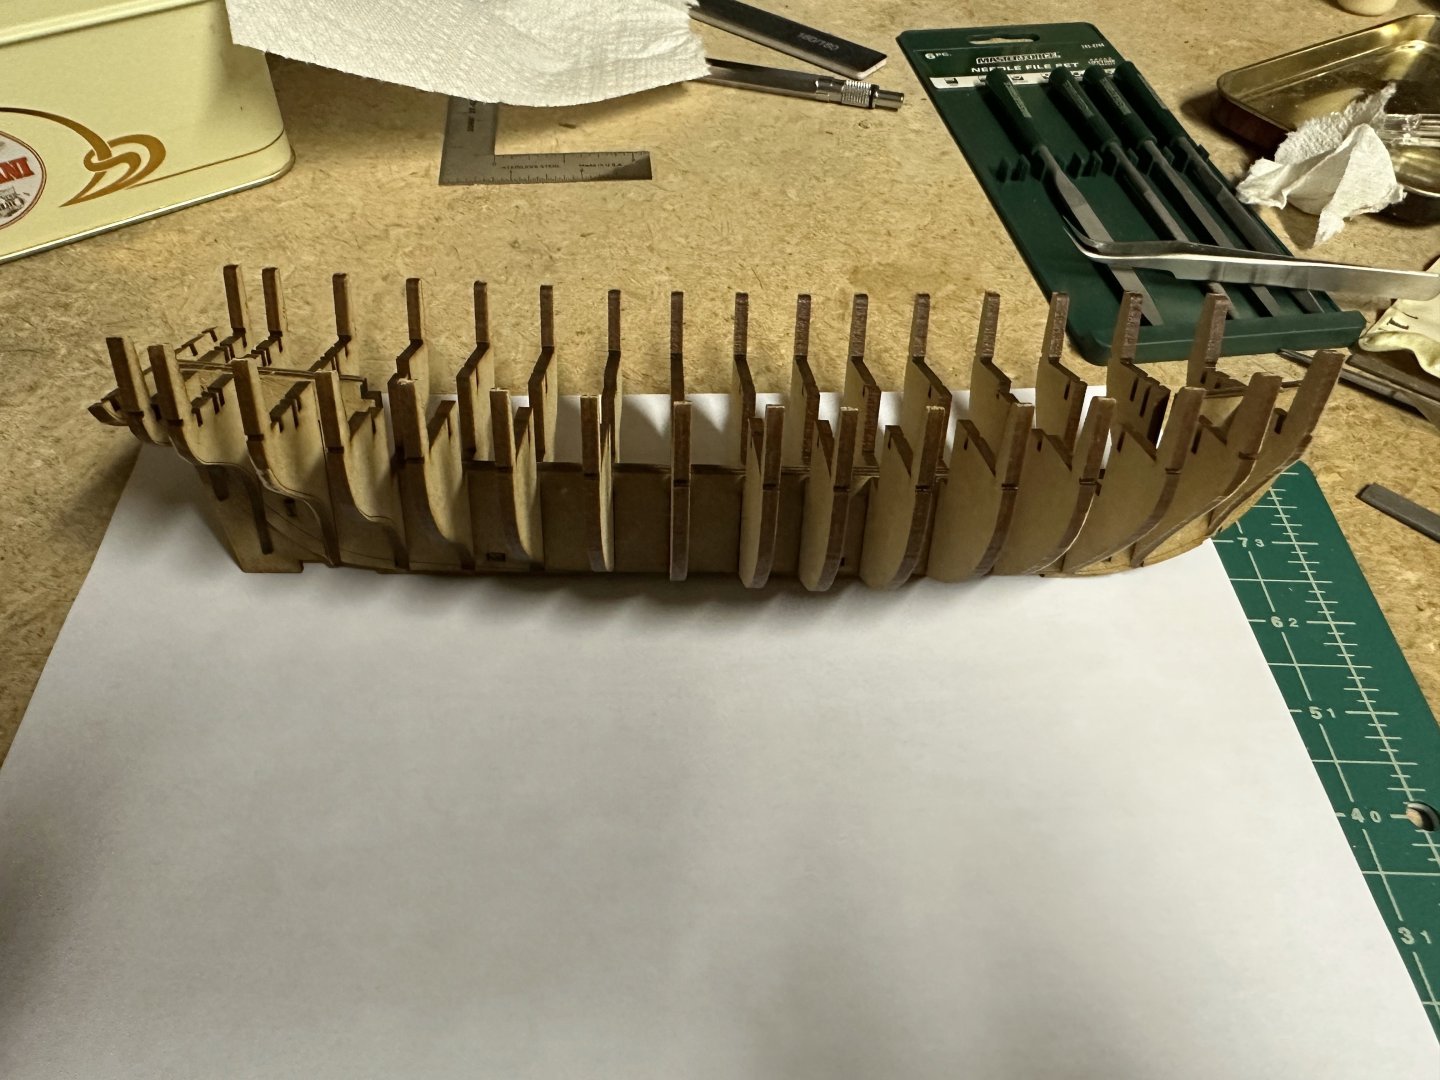


-
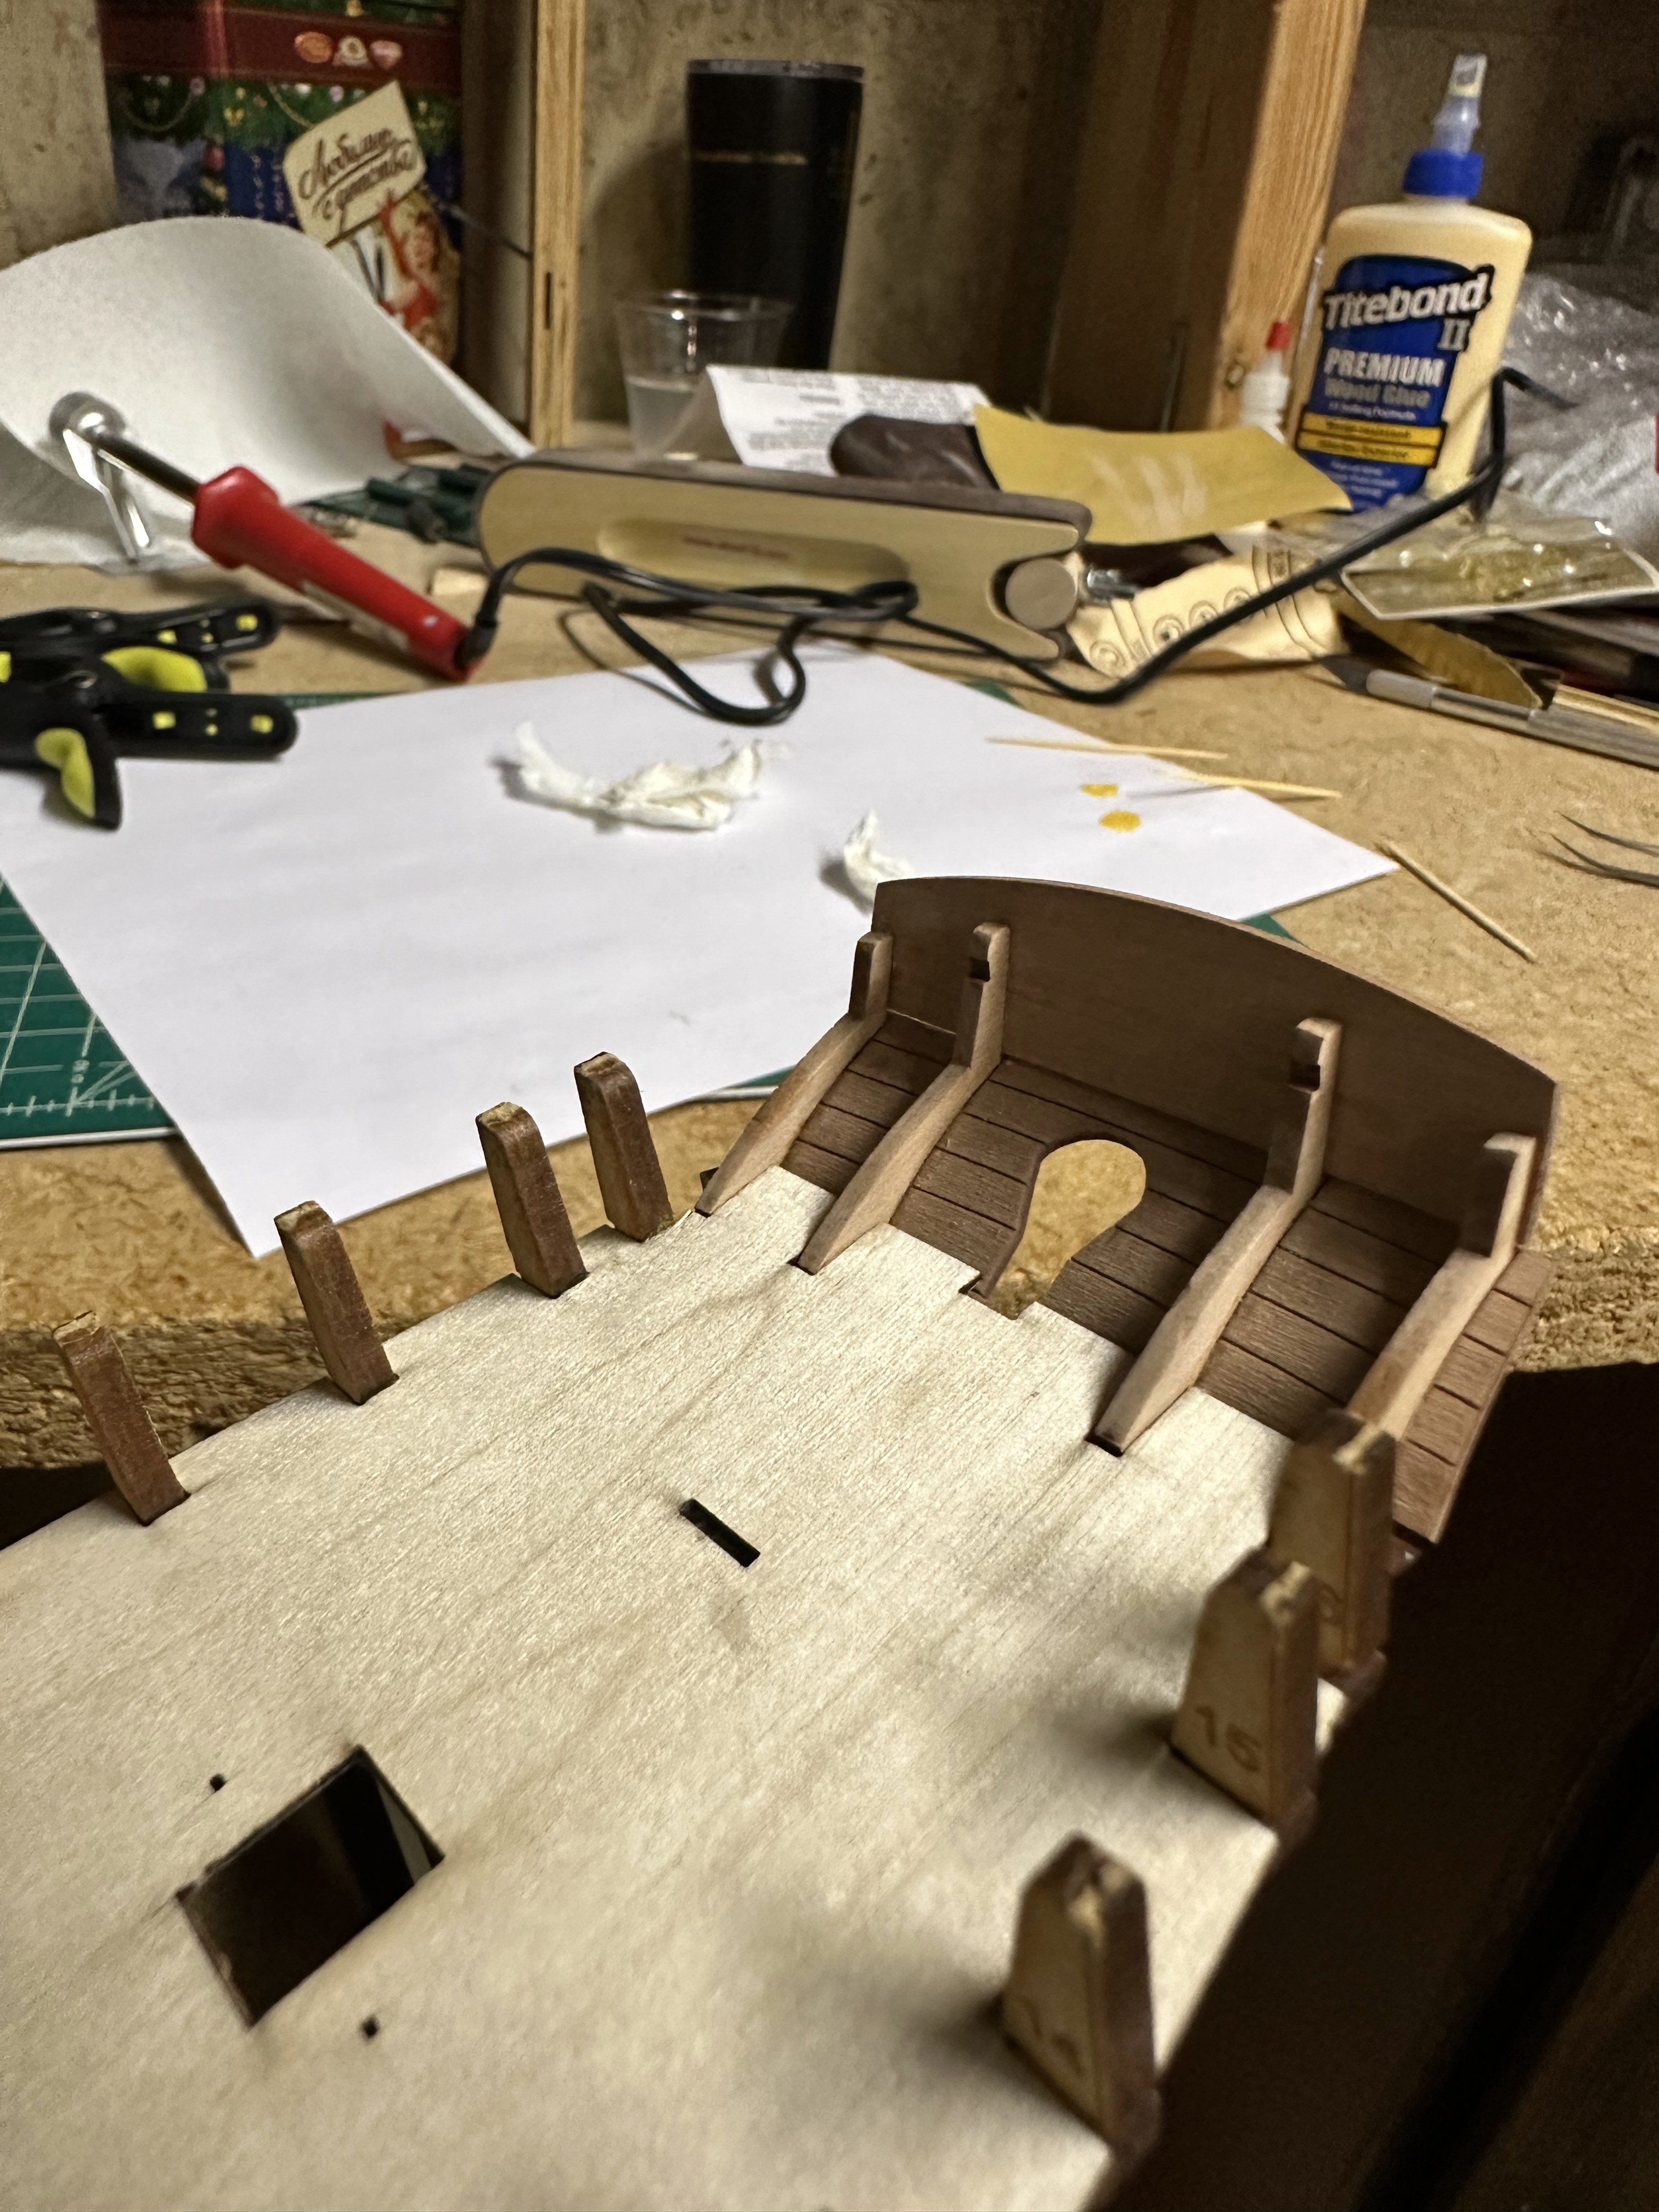
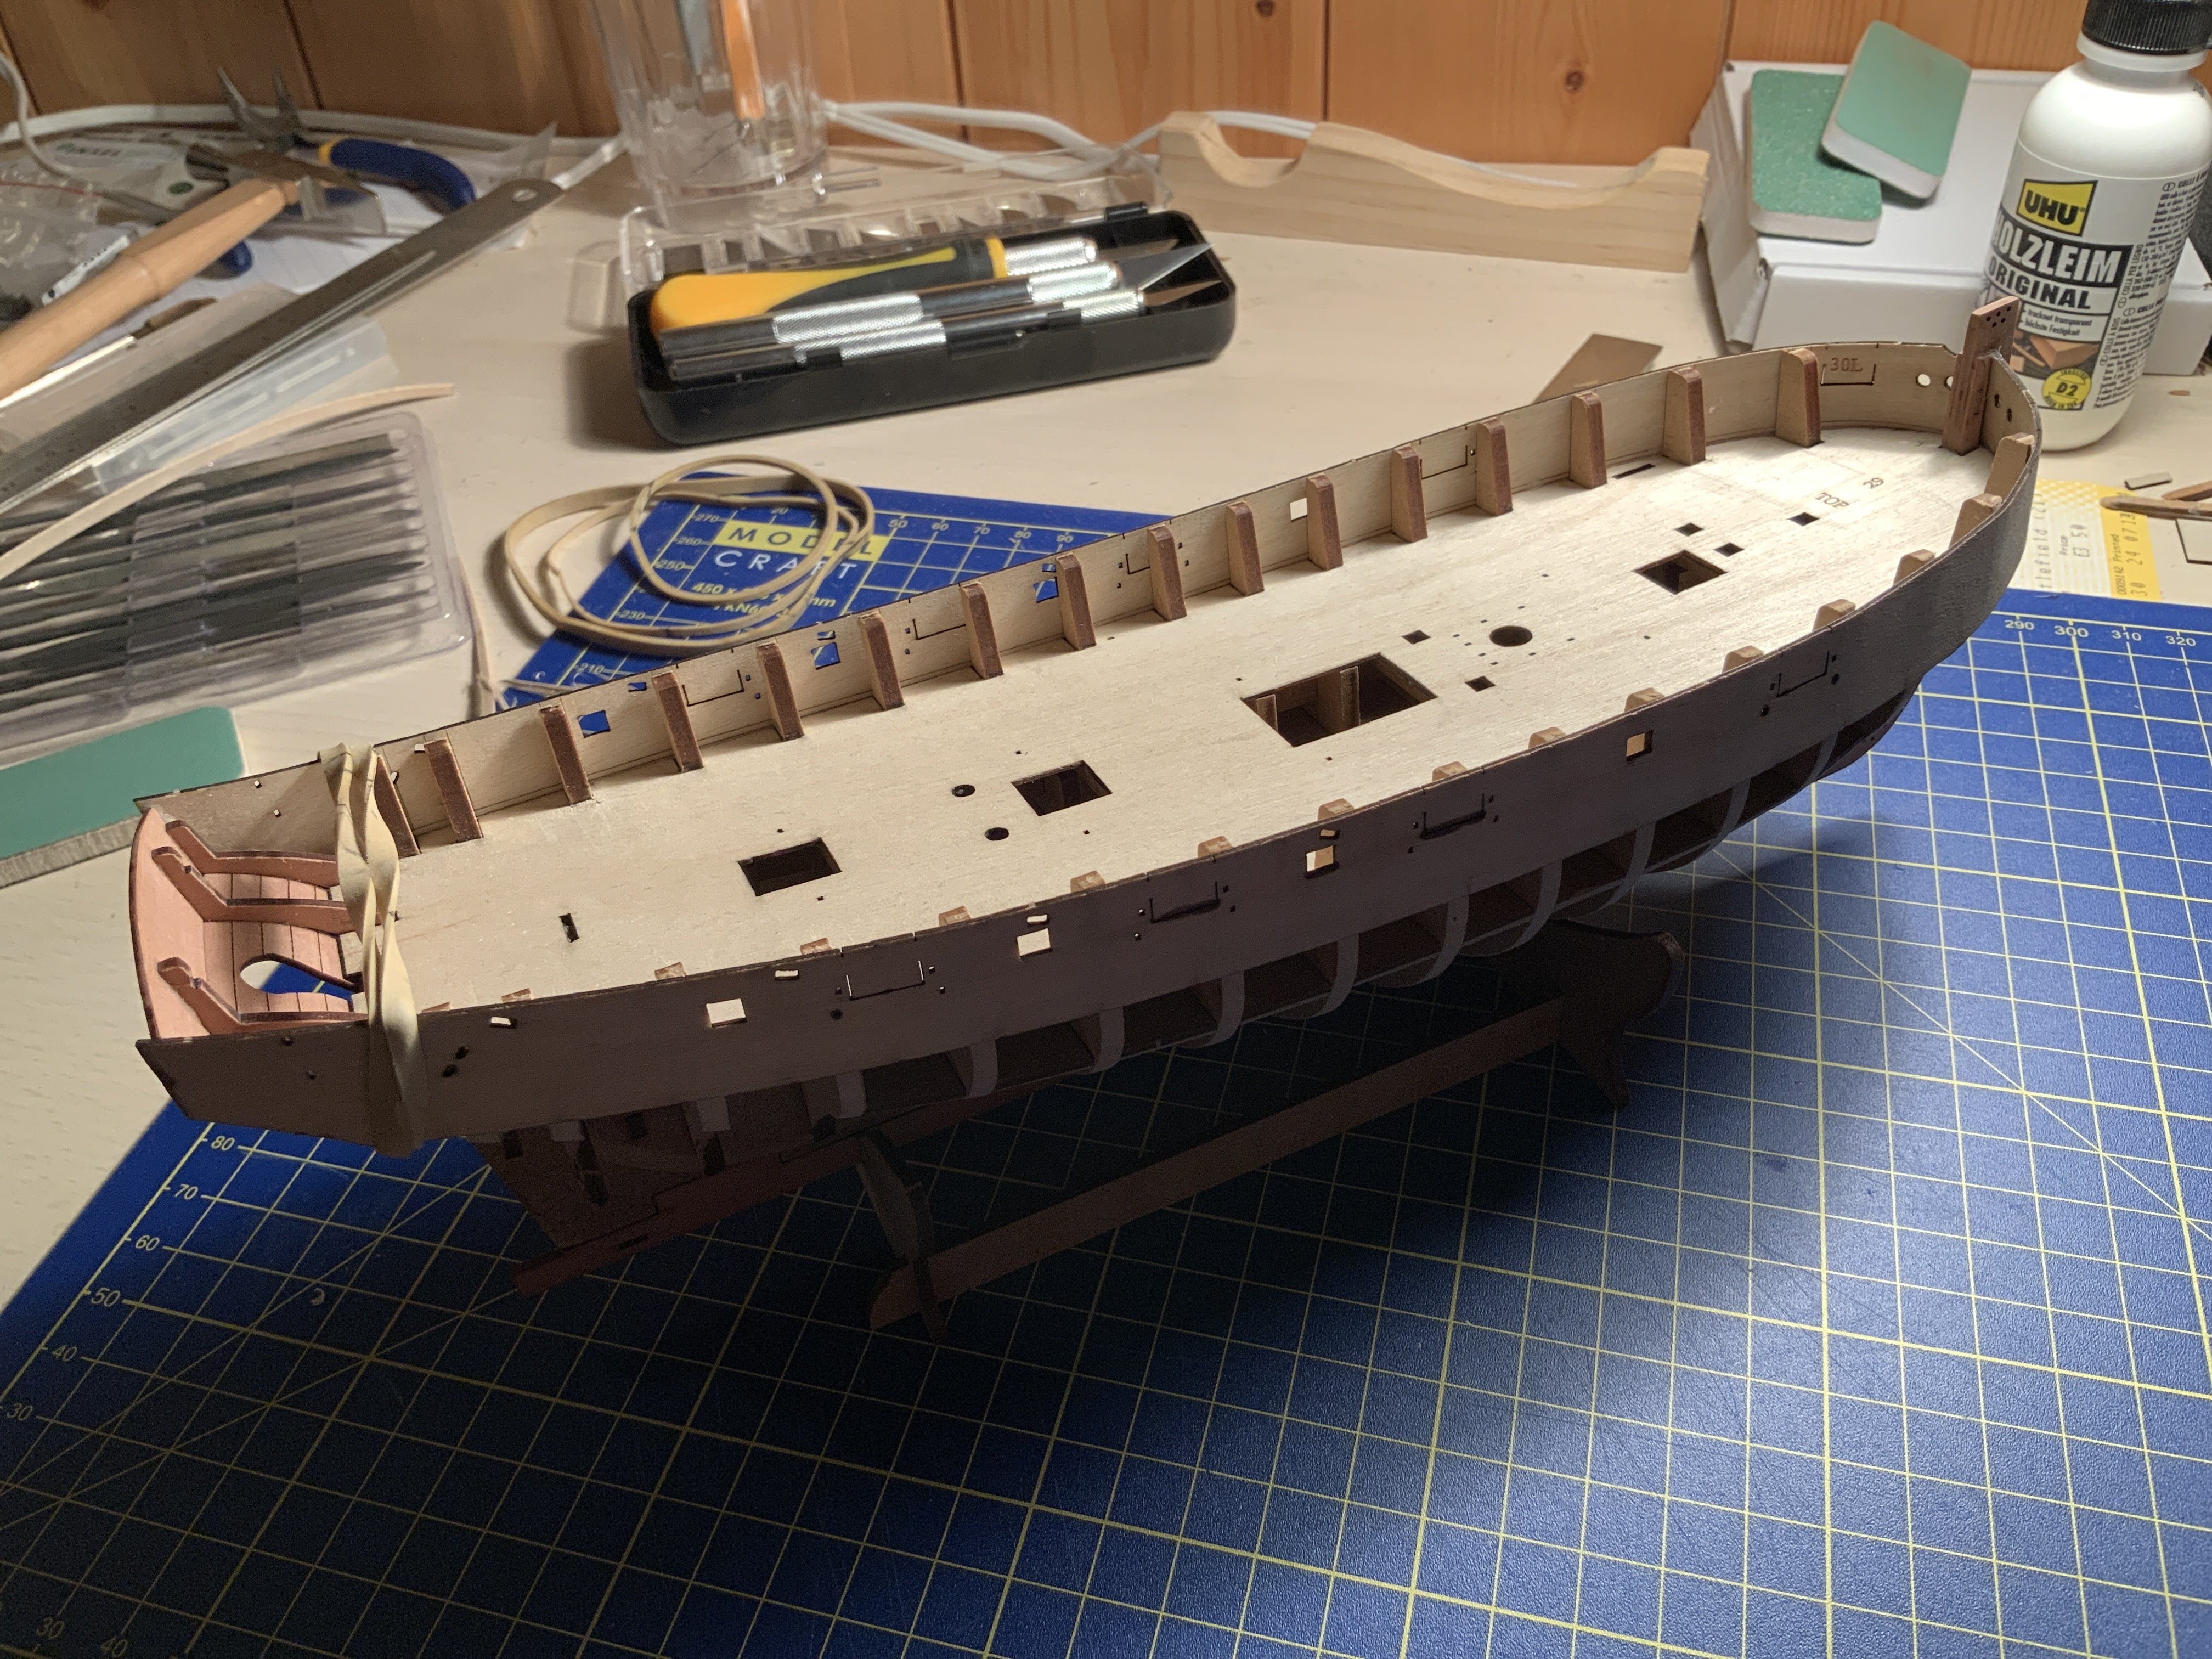
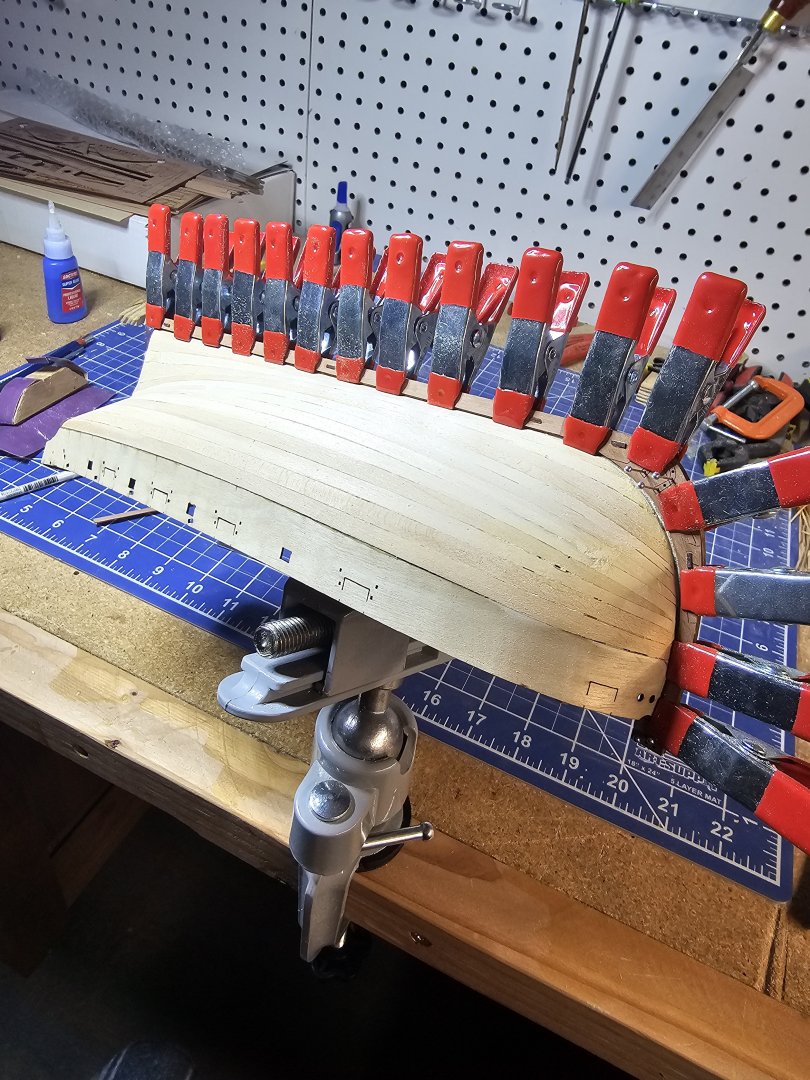
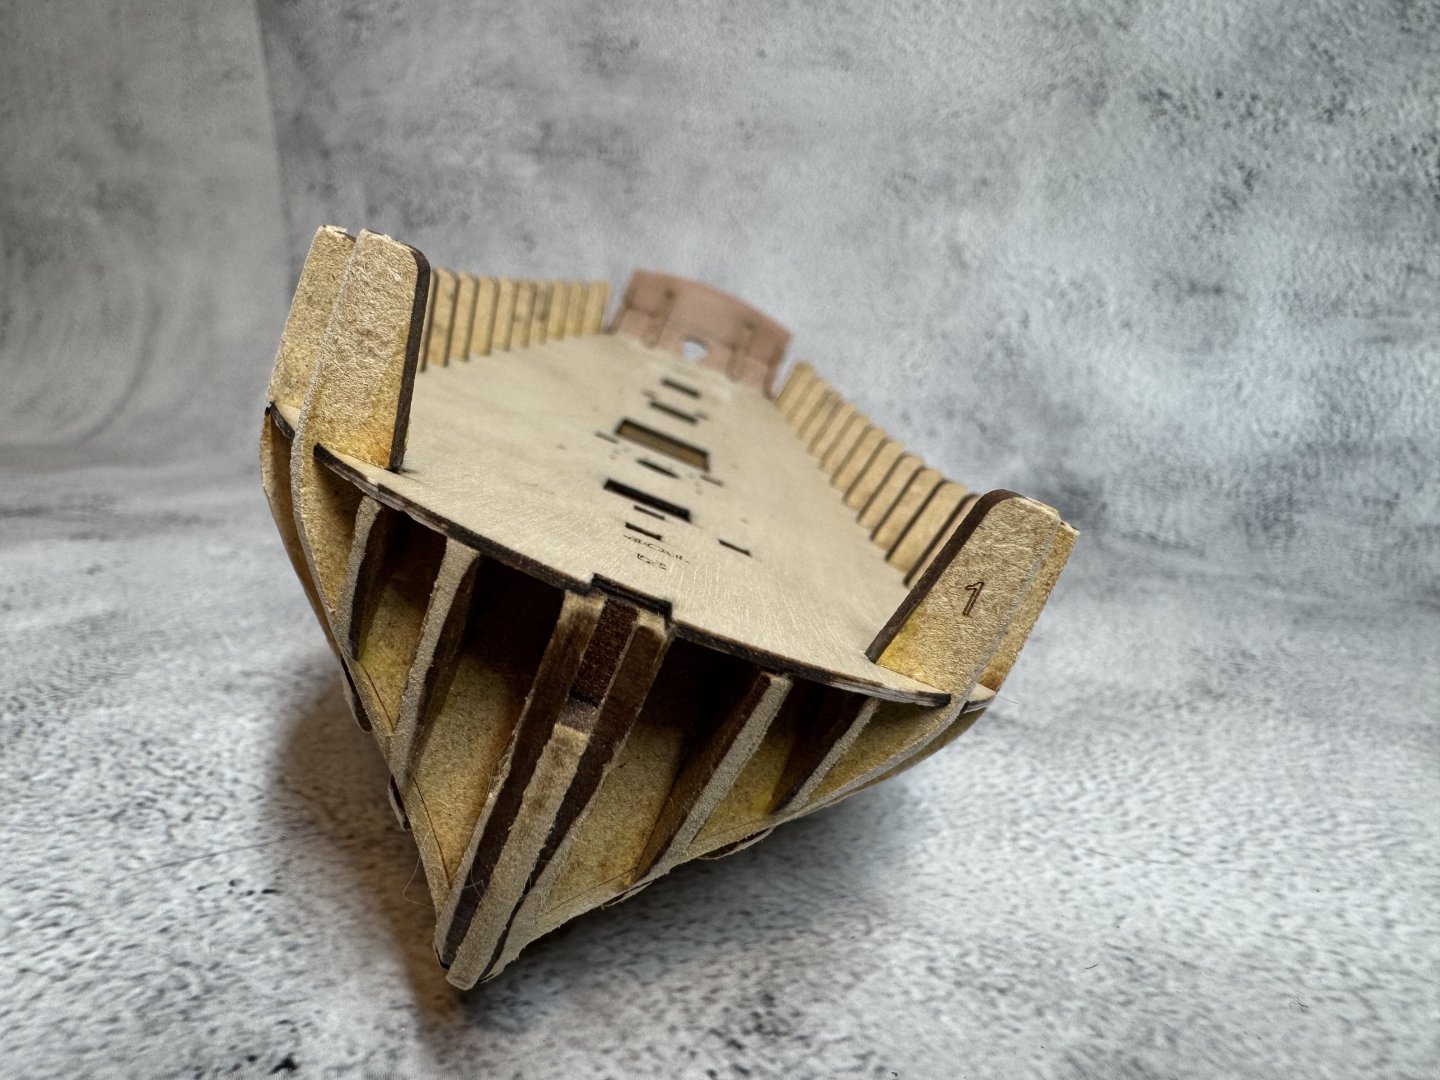
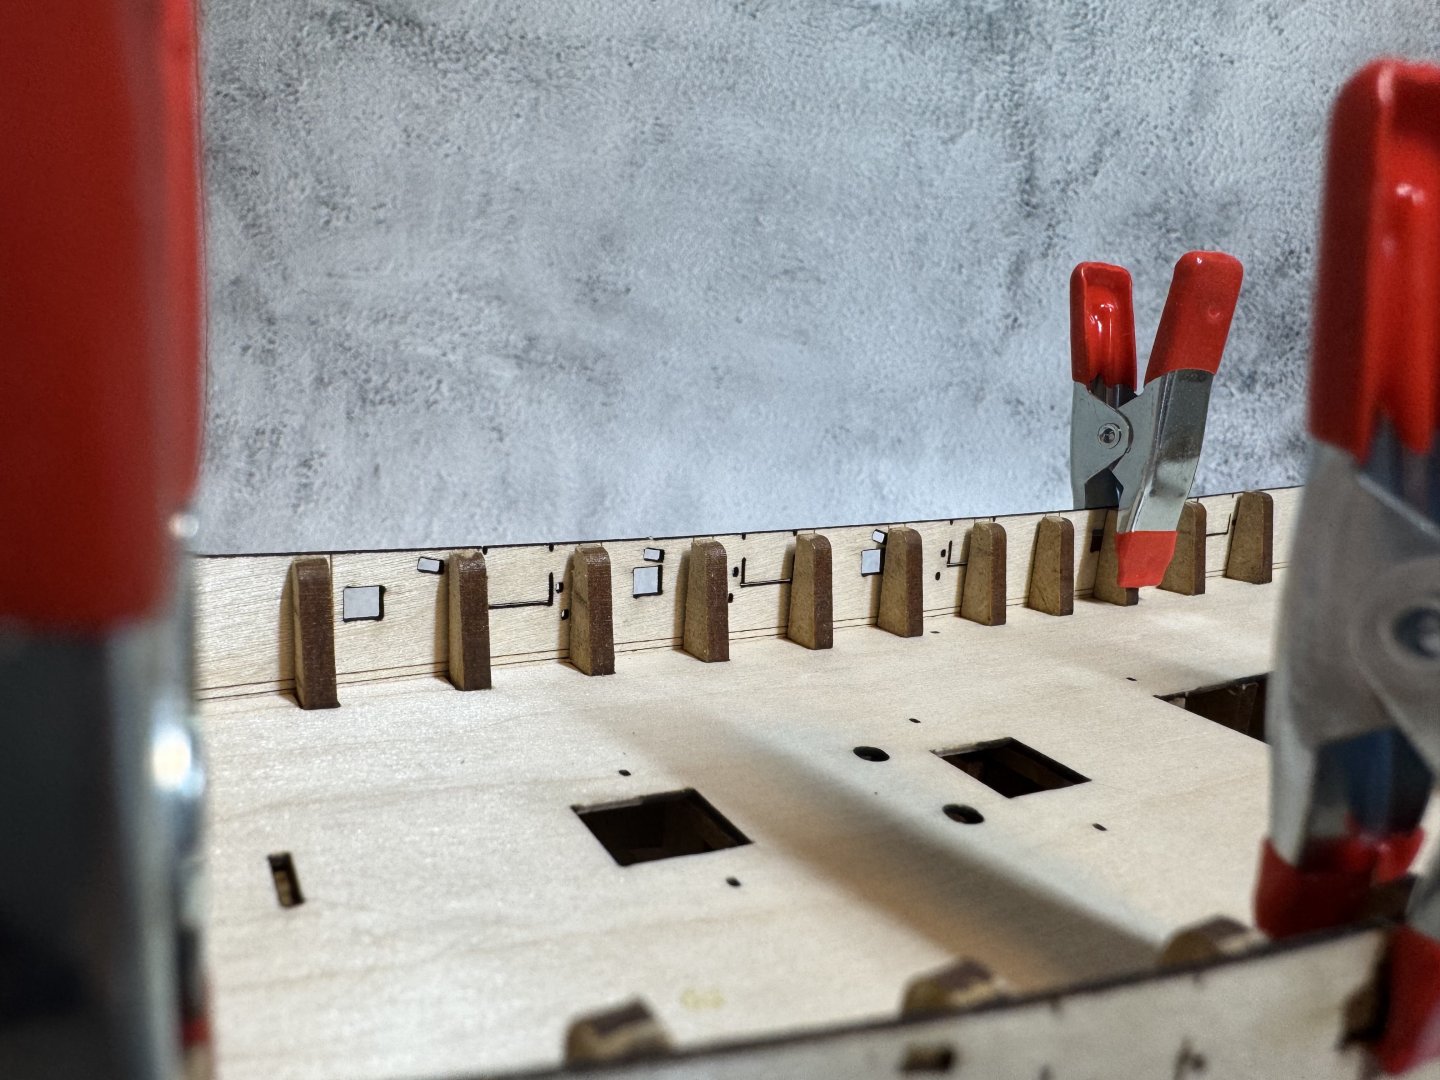
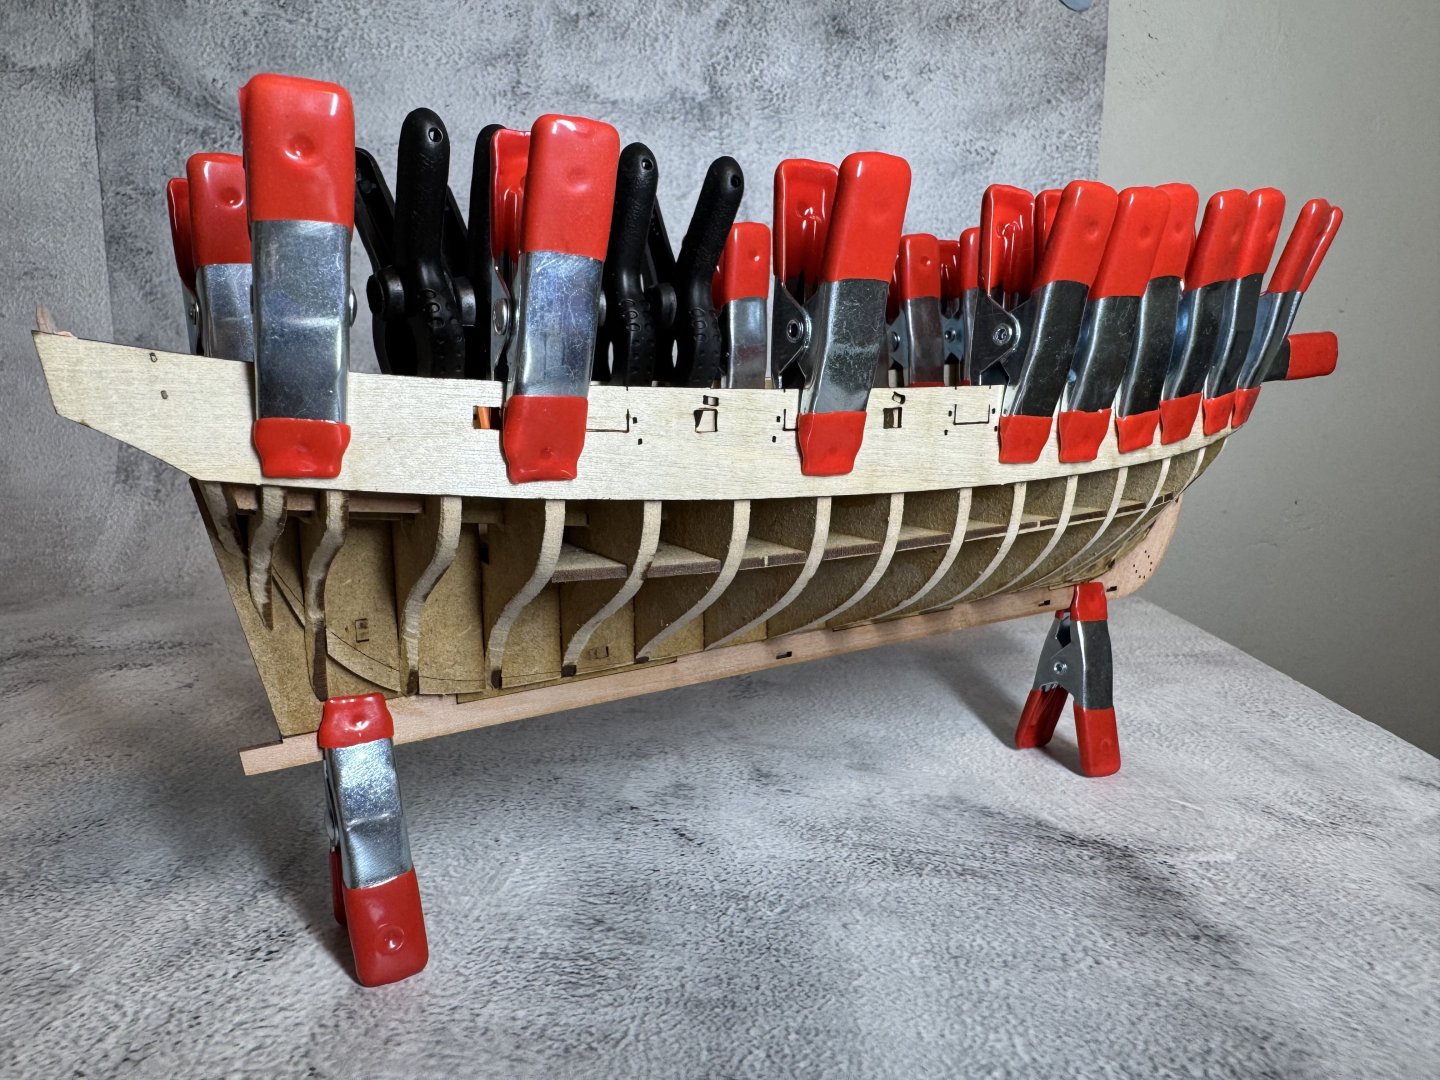
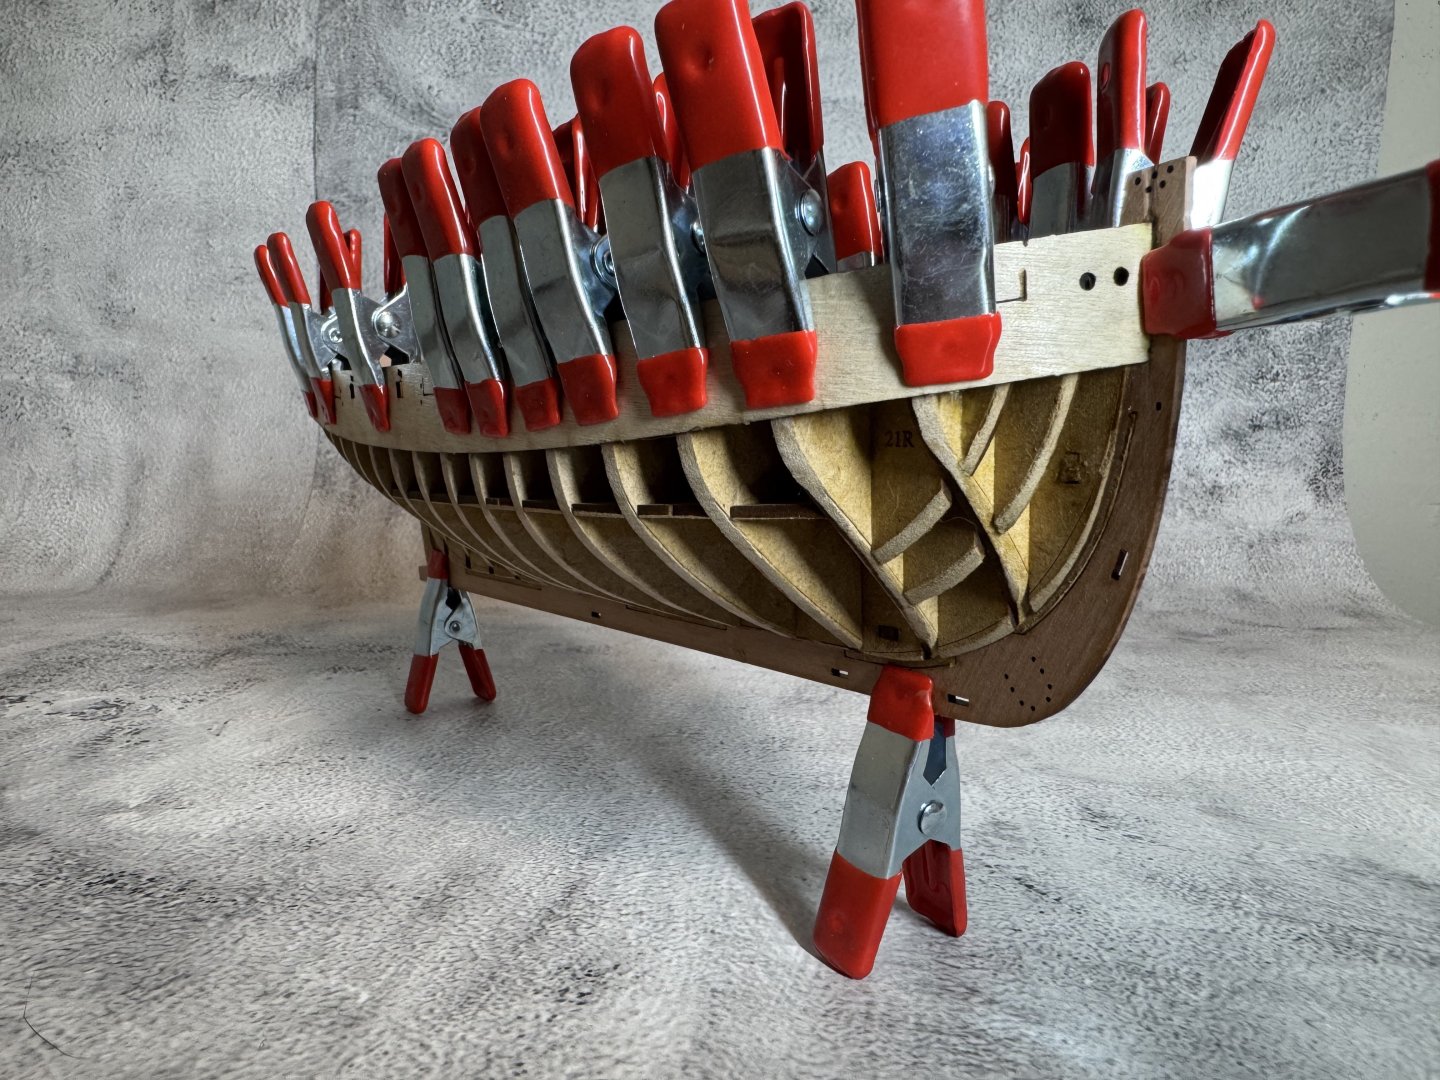
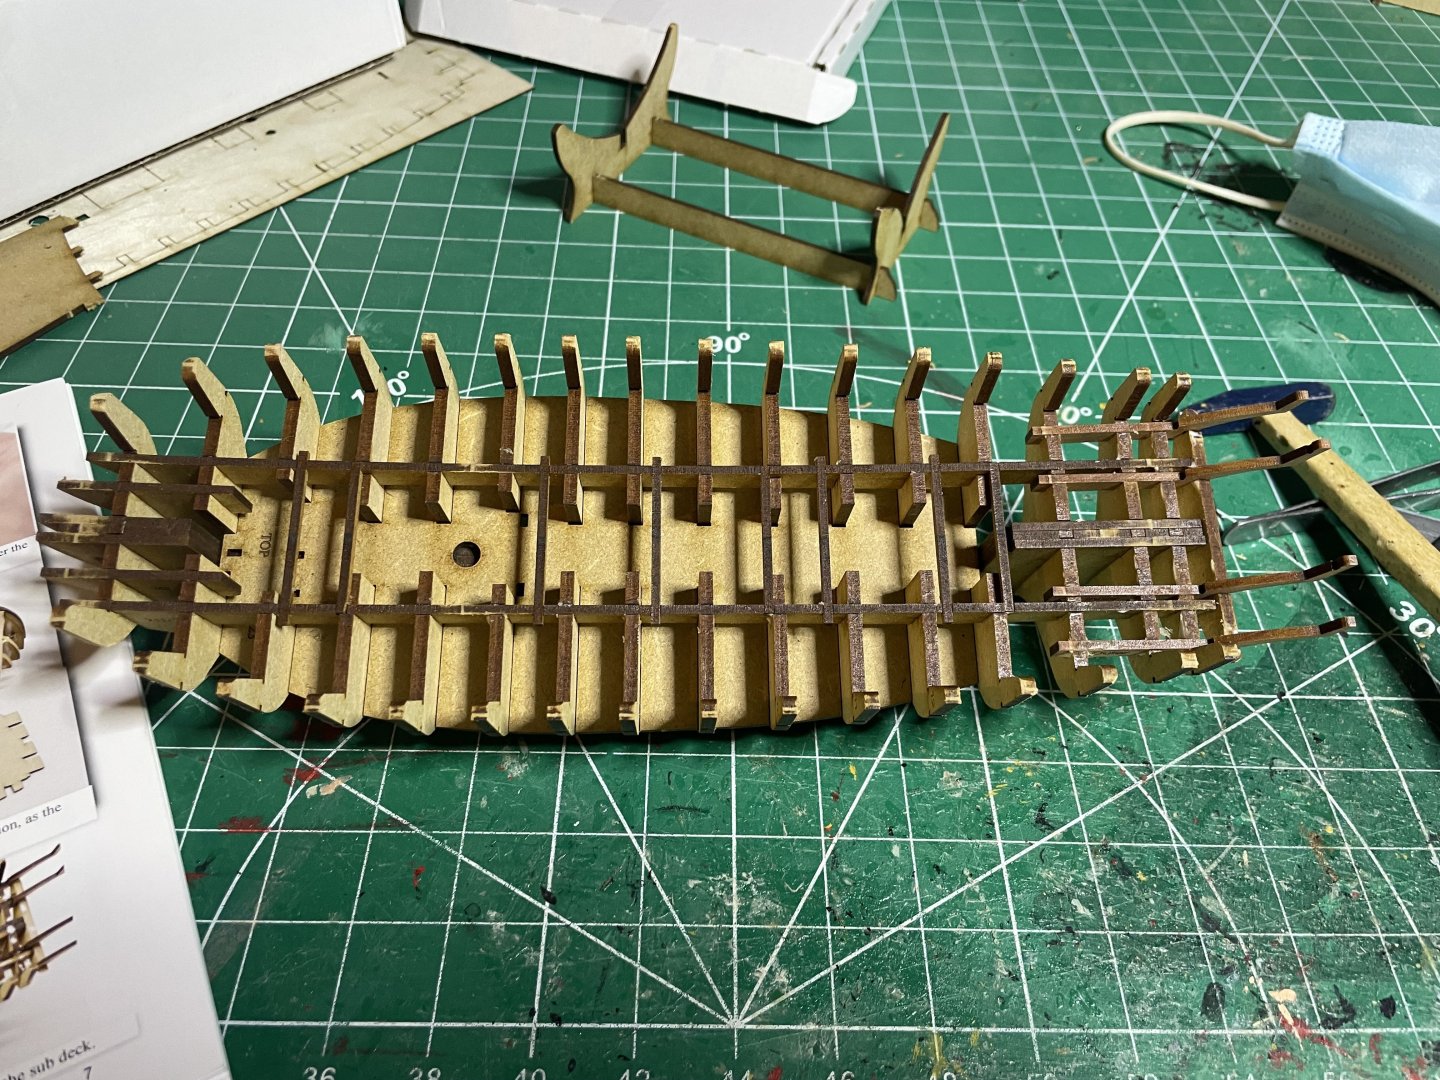
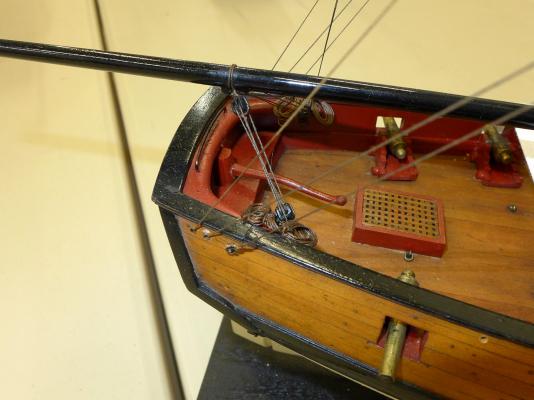
 As stated in my Pinnace post, I started a HMS Cutter Sherbourne. I have made some good progress on it after a couple months or so. I have slowed way down now that I am working the very fine details and getting ideas. I really wished I got the Vanguard of this model. The materials would have been better for some of the parts that I want to do more fine details. But overall, this one is not bad either. So, as always started putting together the frame using lego and 1,2,3 block. Thanks to the person that answered me on that they were. Love using them. While working on that, I was working on shaping the two gun-port Balkwarks. Placed the gun-port balkwarks into place and clamp overnight. Also, I shaped the hull getting it ready for first planking. Ok, time not to be a chicken and start the 1st planking taking my time and remembering to let the plank naturally lay this way you get a better fit. I did some shaping using water and clamping into position. Time for second planking. Took even more time on this one. I believe it took over 1.5 weeks about 2 - 3 hours. Was really taken time shaping and let glue dry before moving on. Now, I started working on the inside. I even added an extra piece in there to help transition the inside of the bulkwarks and the decking. a baseboard if you will. Well, that about catches this build up. I do have some more progress, but I did not take pictures yet. Such as the Main wale and the posts on top of the upper cap. Anyway, time to get back to the shipyard.


-
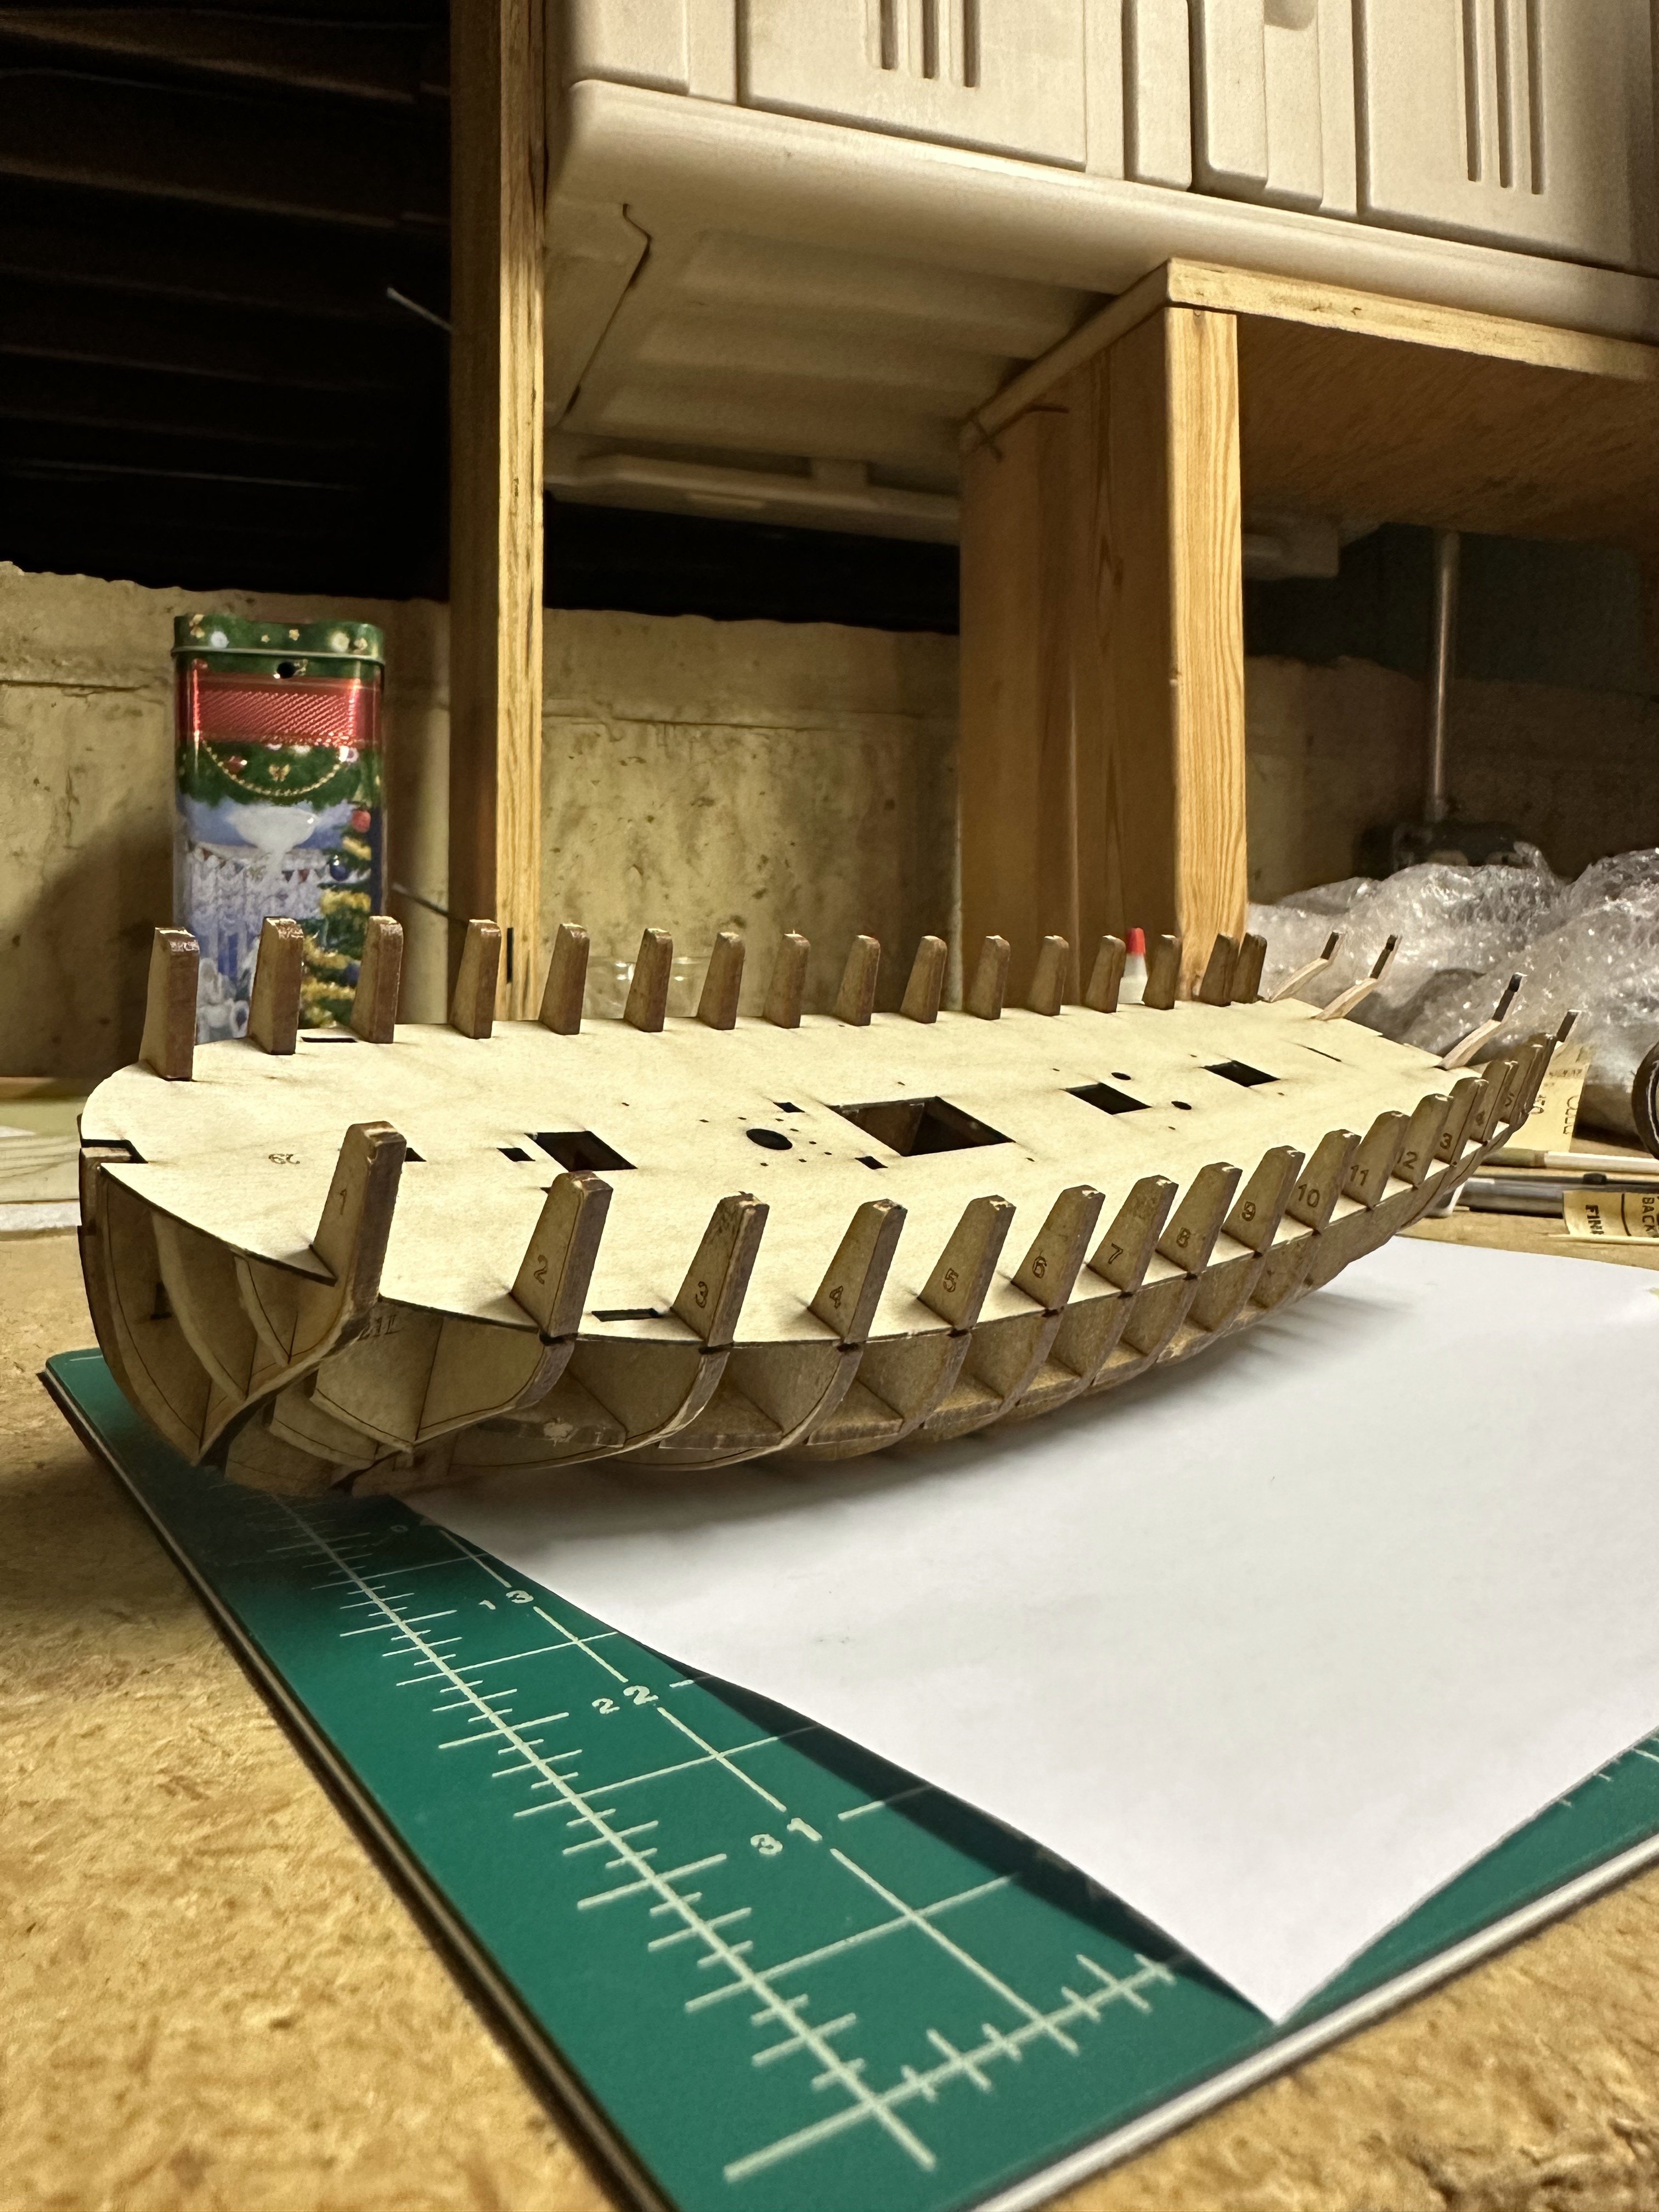
 Hello, These are the first steps of my HM Cutter Sherbourne build. The kit looks fantastic in the box: lots of detail and high-quality parts. So far, the hull skeleton went together perfectly – everything fits like a glove. This is my first wooden sailing ship model. I don't have a lot of time for modelling these times, but but I’ll try to post regular updates—even small ones. I expect the hull planking and the rigging will be the trickest steps for me. Wish me luck – and feel free to share any tips or advice! I’ll definitely appreciate it. 😊
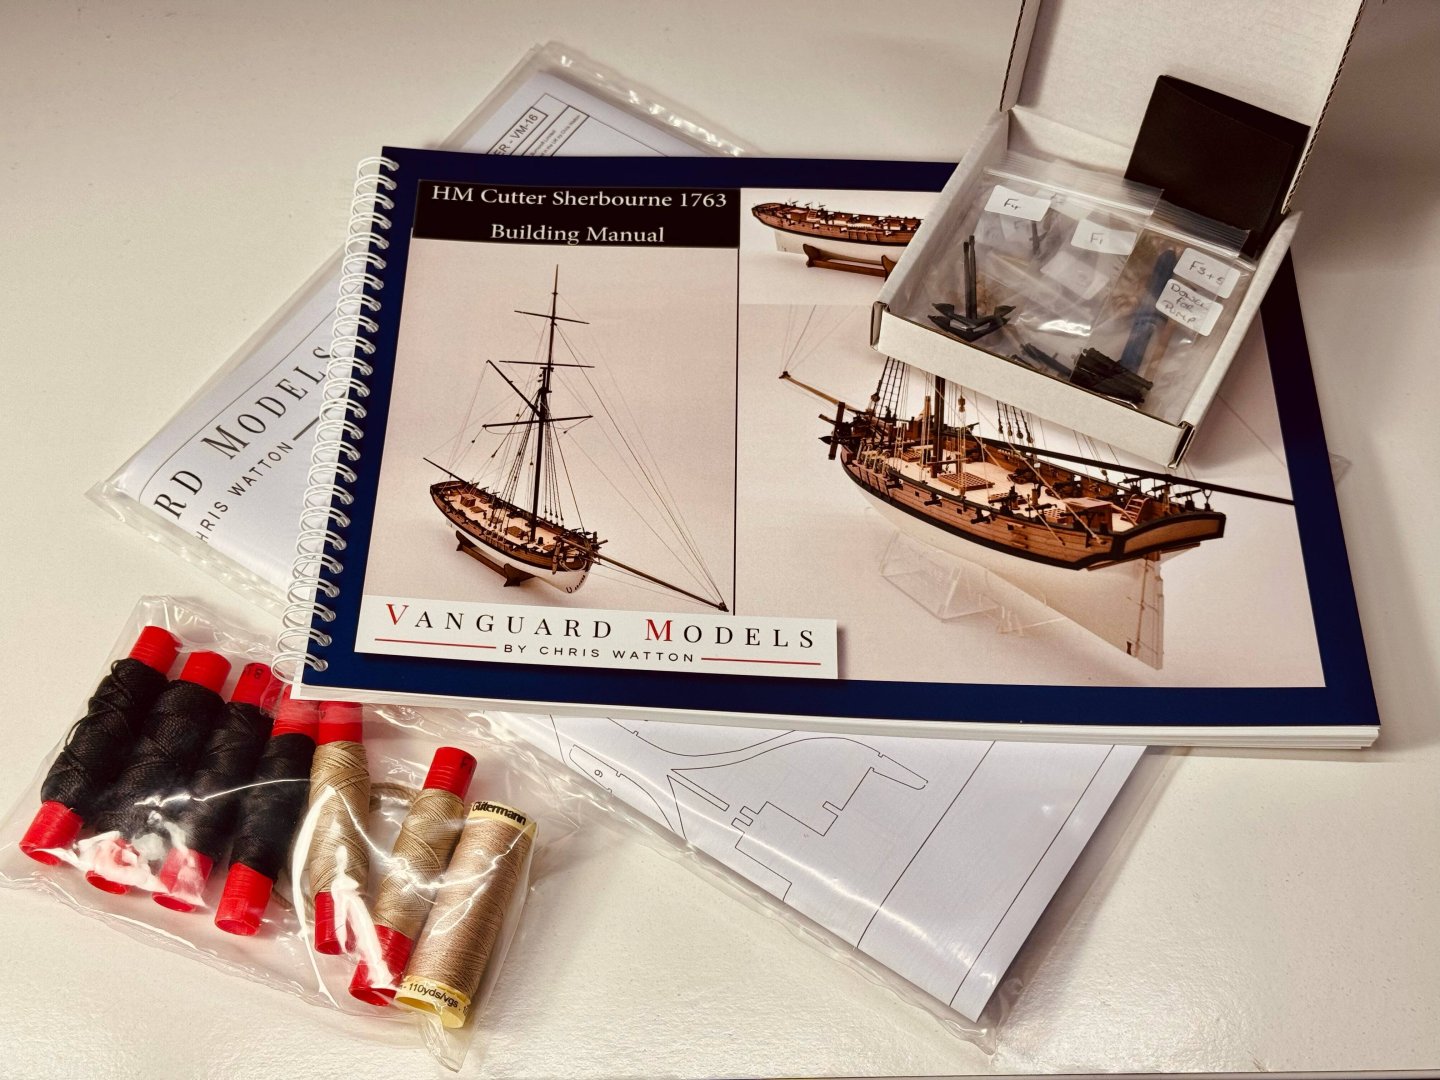


- 9 replies
-
- 14
-

-
- Vanguard Models
- Sherbourne
- (and 1 more)
-
 Back on MSW after quite a few years break from working on my MS Niagara... Decided on Vanguard's Sherbourne since it's an entry-level kit with much simplified rigging compared to the Niagara (get some basic skills in first before finishing that one). Started Sherbourne in January while taking some pics along the way. The kit is done exceptionally well- materials and instruction book are 1st rate!!! Chris does an excellent job with his products and kit designs! Highly recommend!!! So far, no problems with the build (recalling it's of the lessons I learned from Niagara, yet learning new stuff as well) Only major change from the original kit is my color scheme (decided to stain the hull and deck, and keep most wood as natural as possible, sort of a rustic/worn look to it)


-
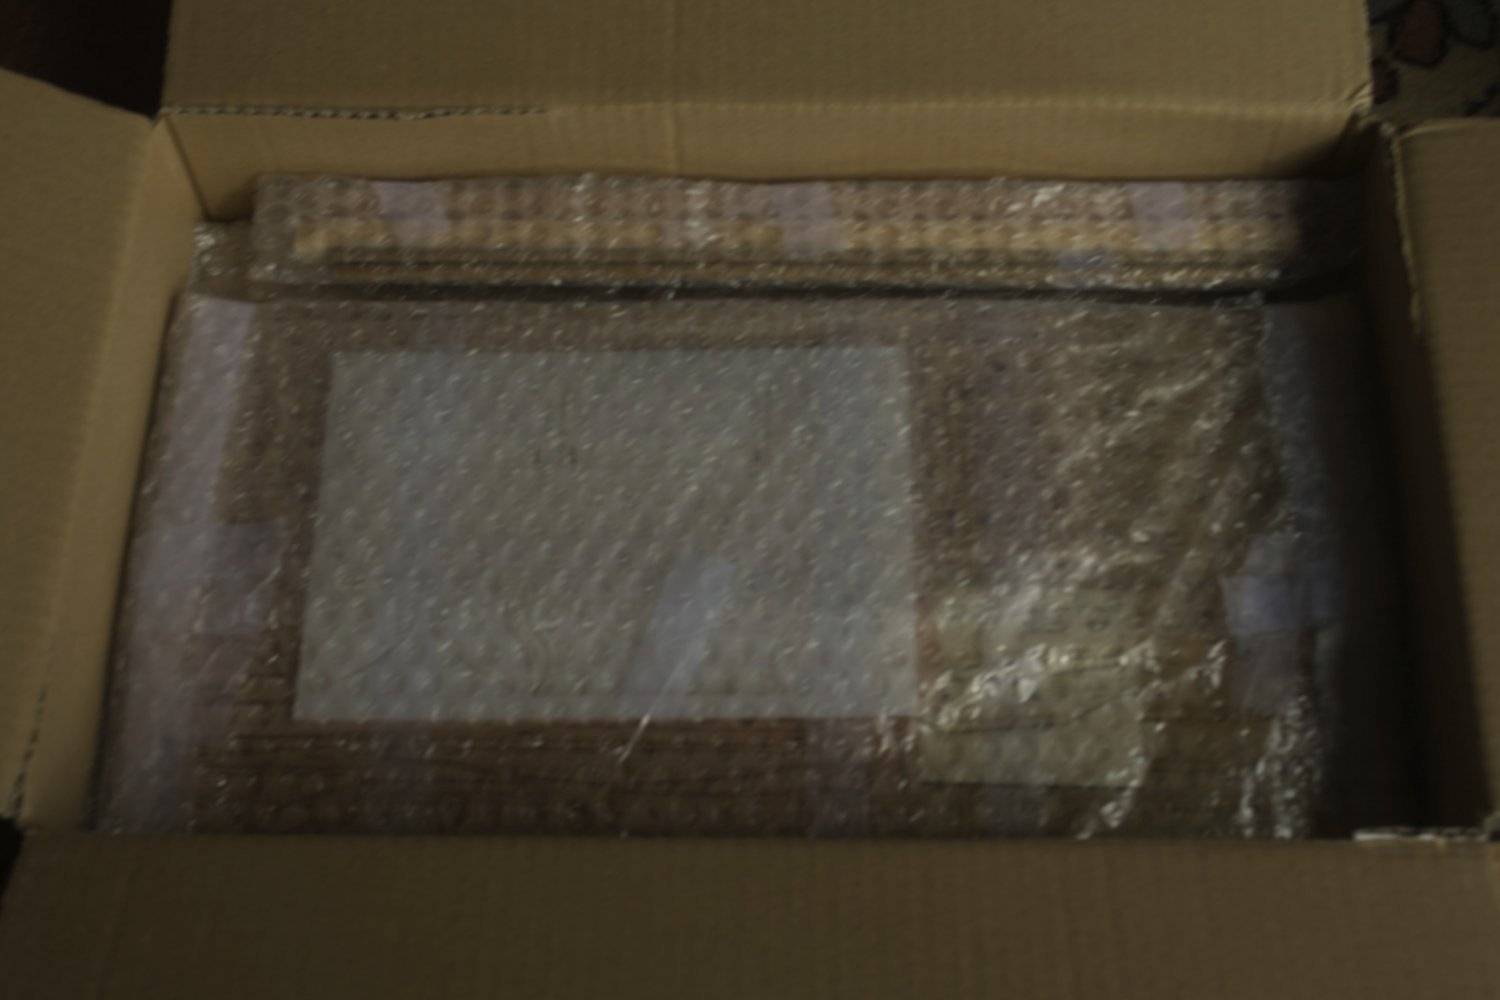
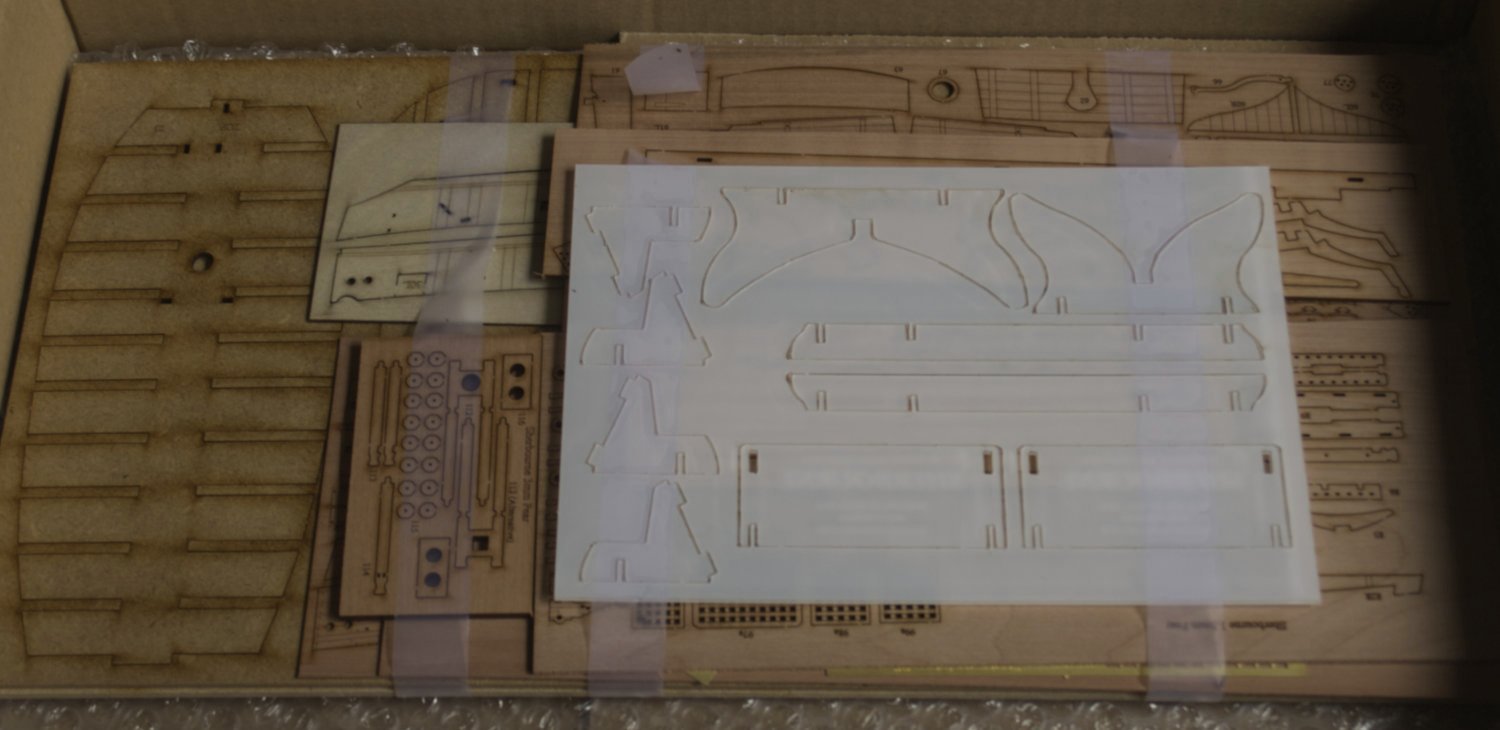
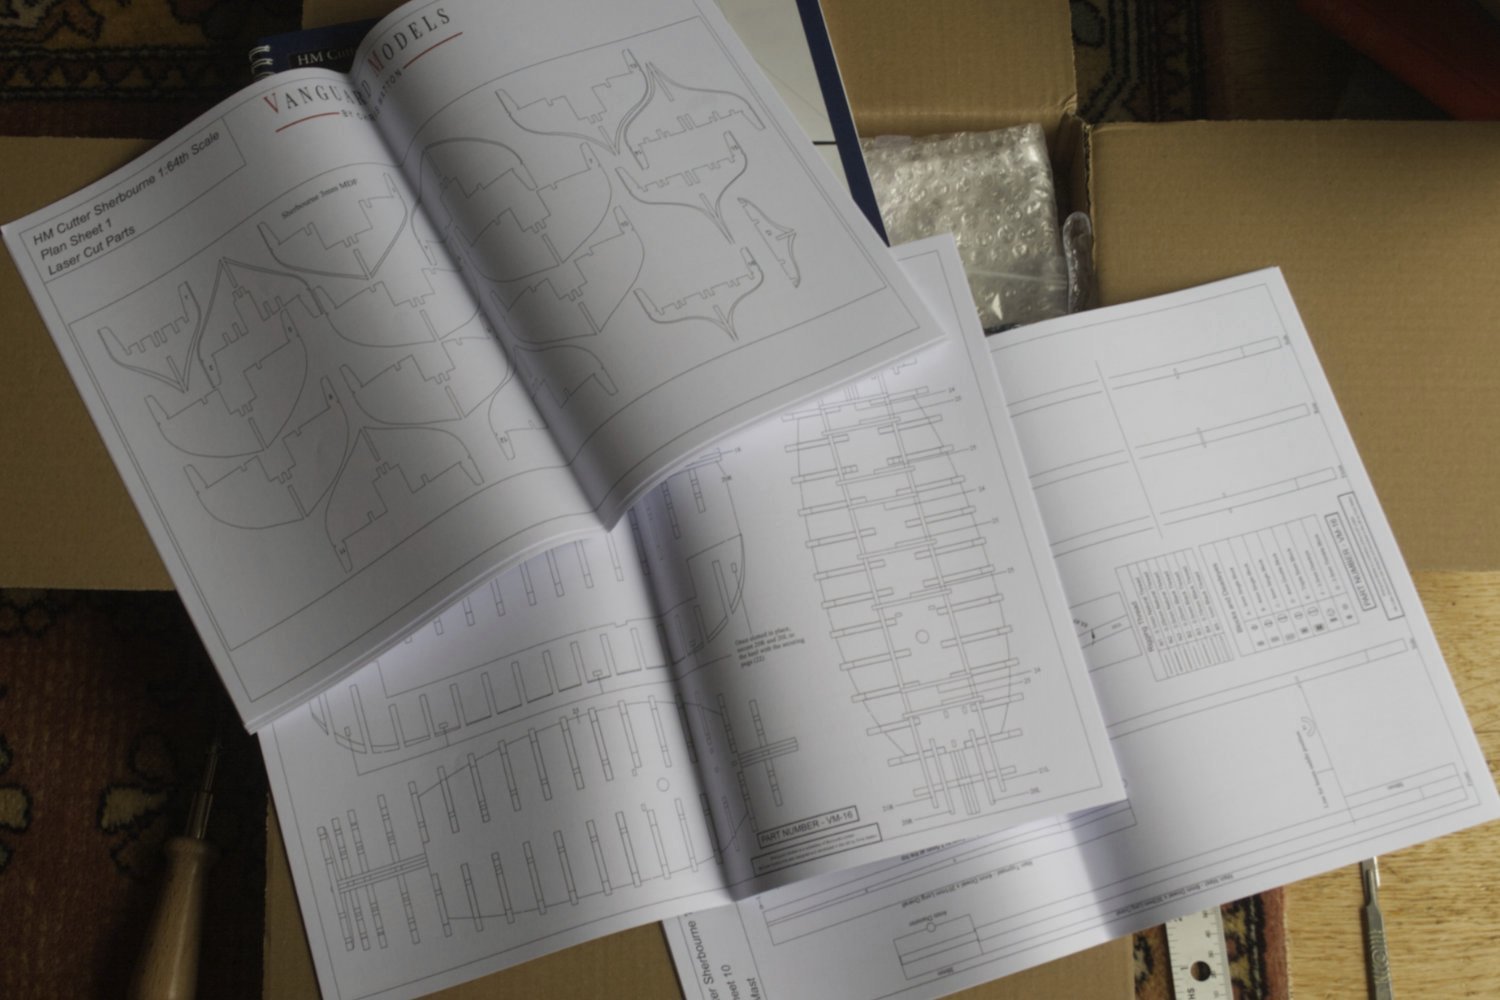
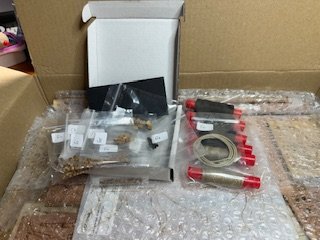
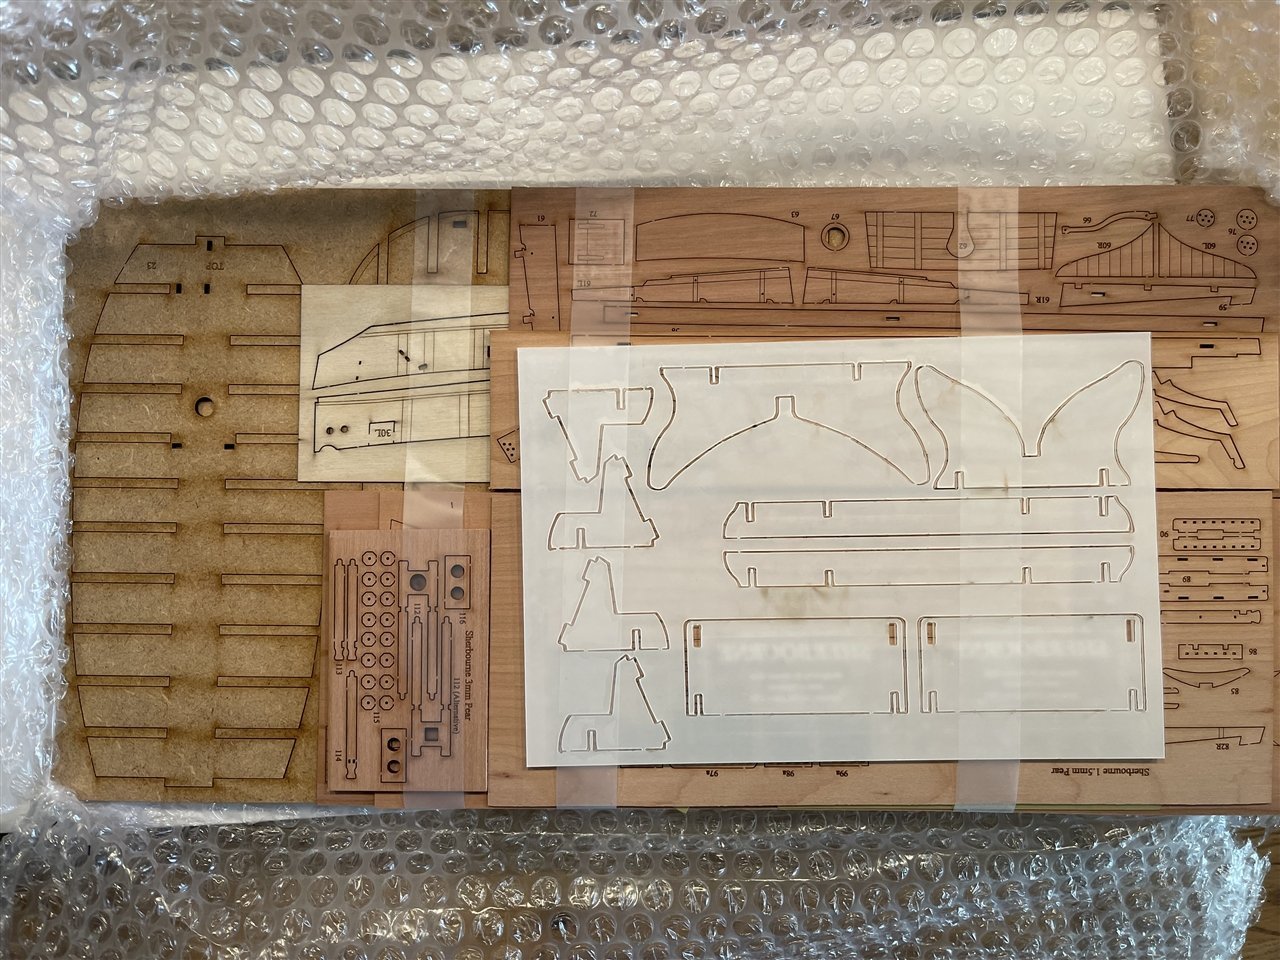
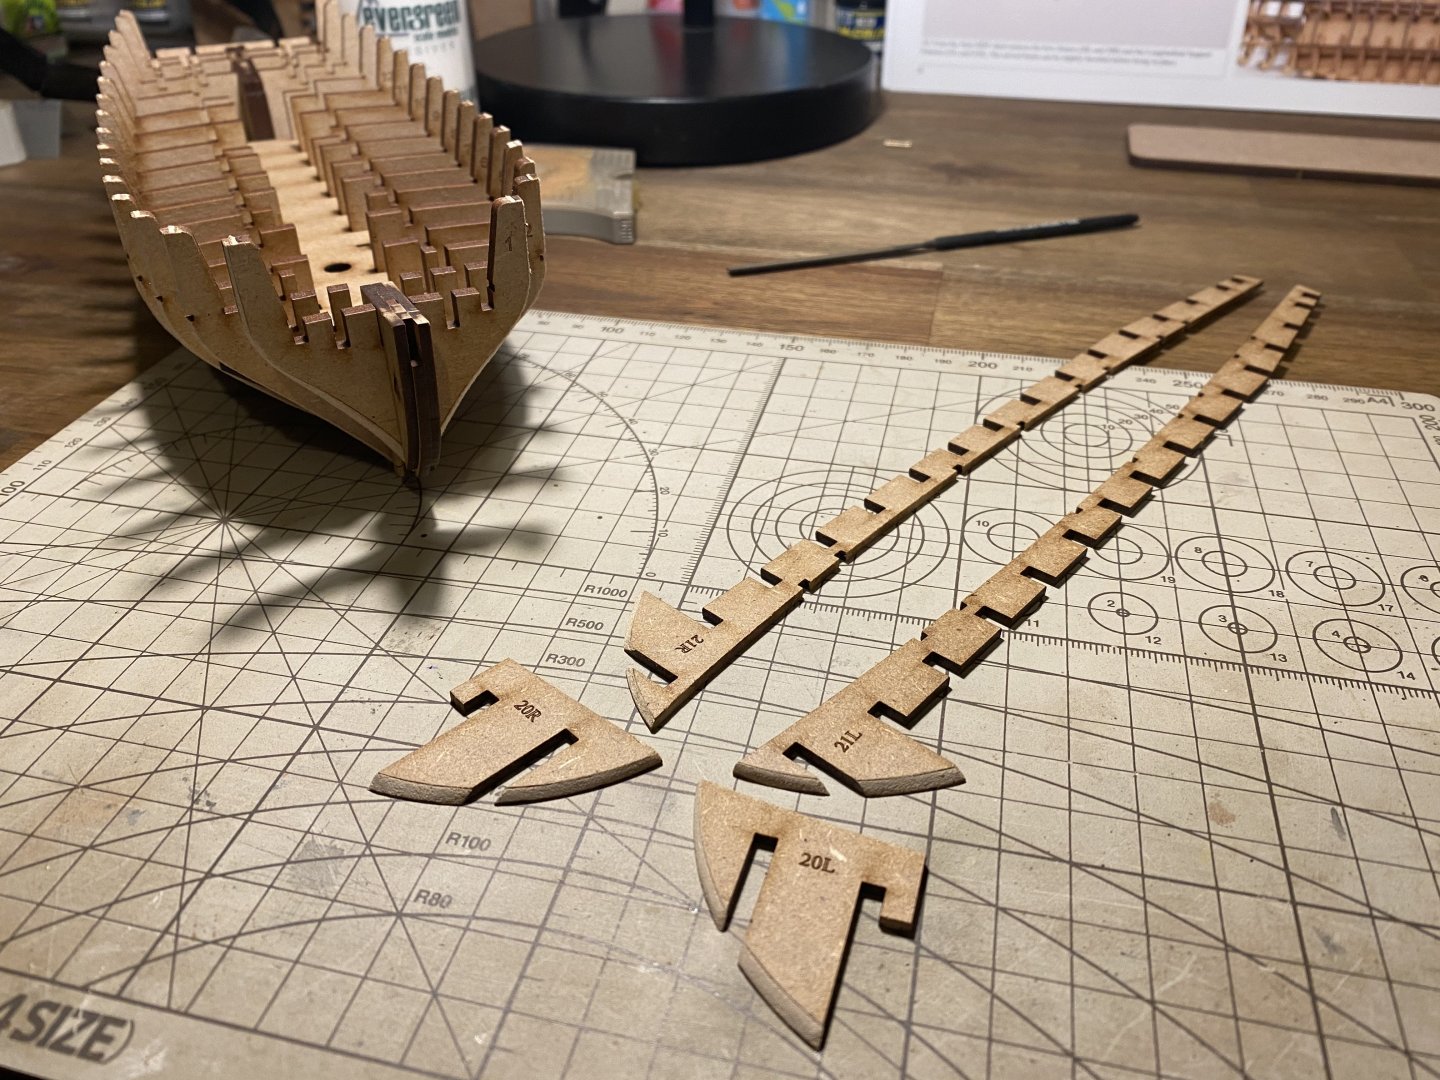
 I'm starting on Vanguard Models' HM Armed Cutter Sherbourne. It's described as a Novice level kit, but it looks significantly more involved than my prior models, the three Model Shipways starter models. I took a few unboxing photos. The box has some nice photos of the completed model on the outside. Inside, by far the nicest set of instructions I've seen is right on top. There are what appear to be diagrams of the laser-cut parts sheets, as well as rigging guides. Fittings, "rope", etc. Long thin pieces and flat pieces 🙂 I'm looking forward to getting started.
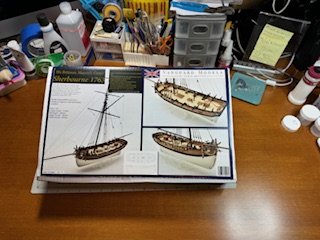

-
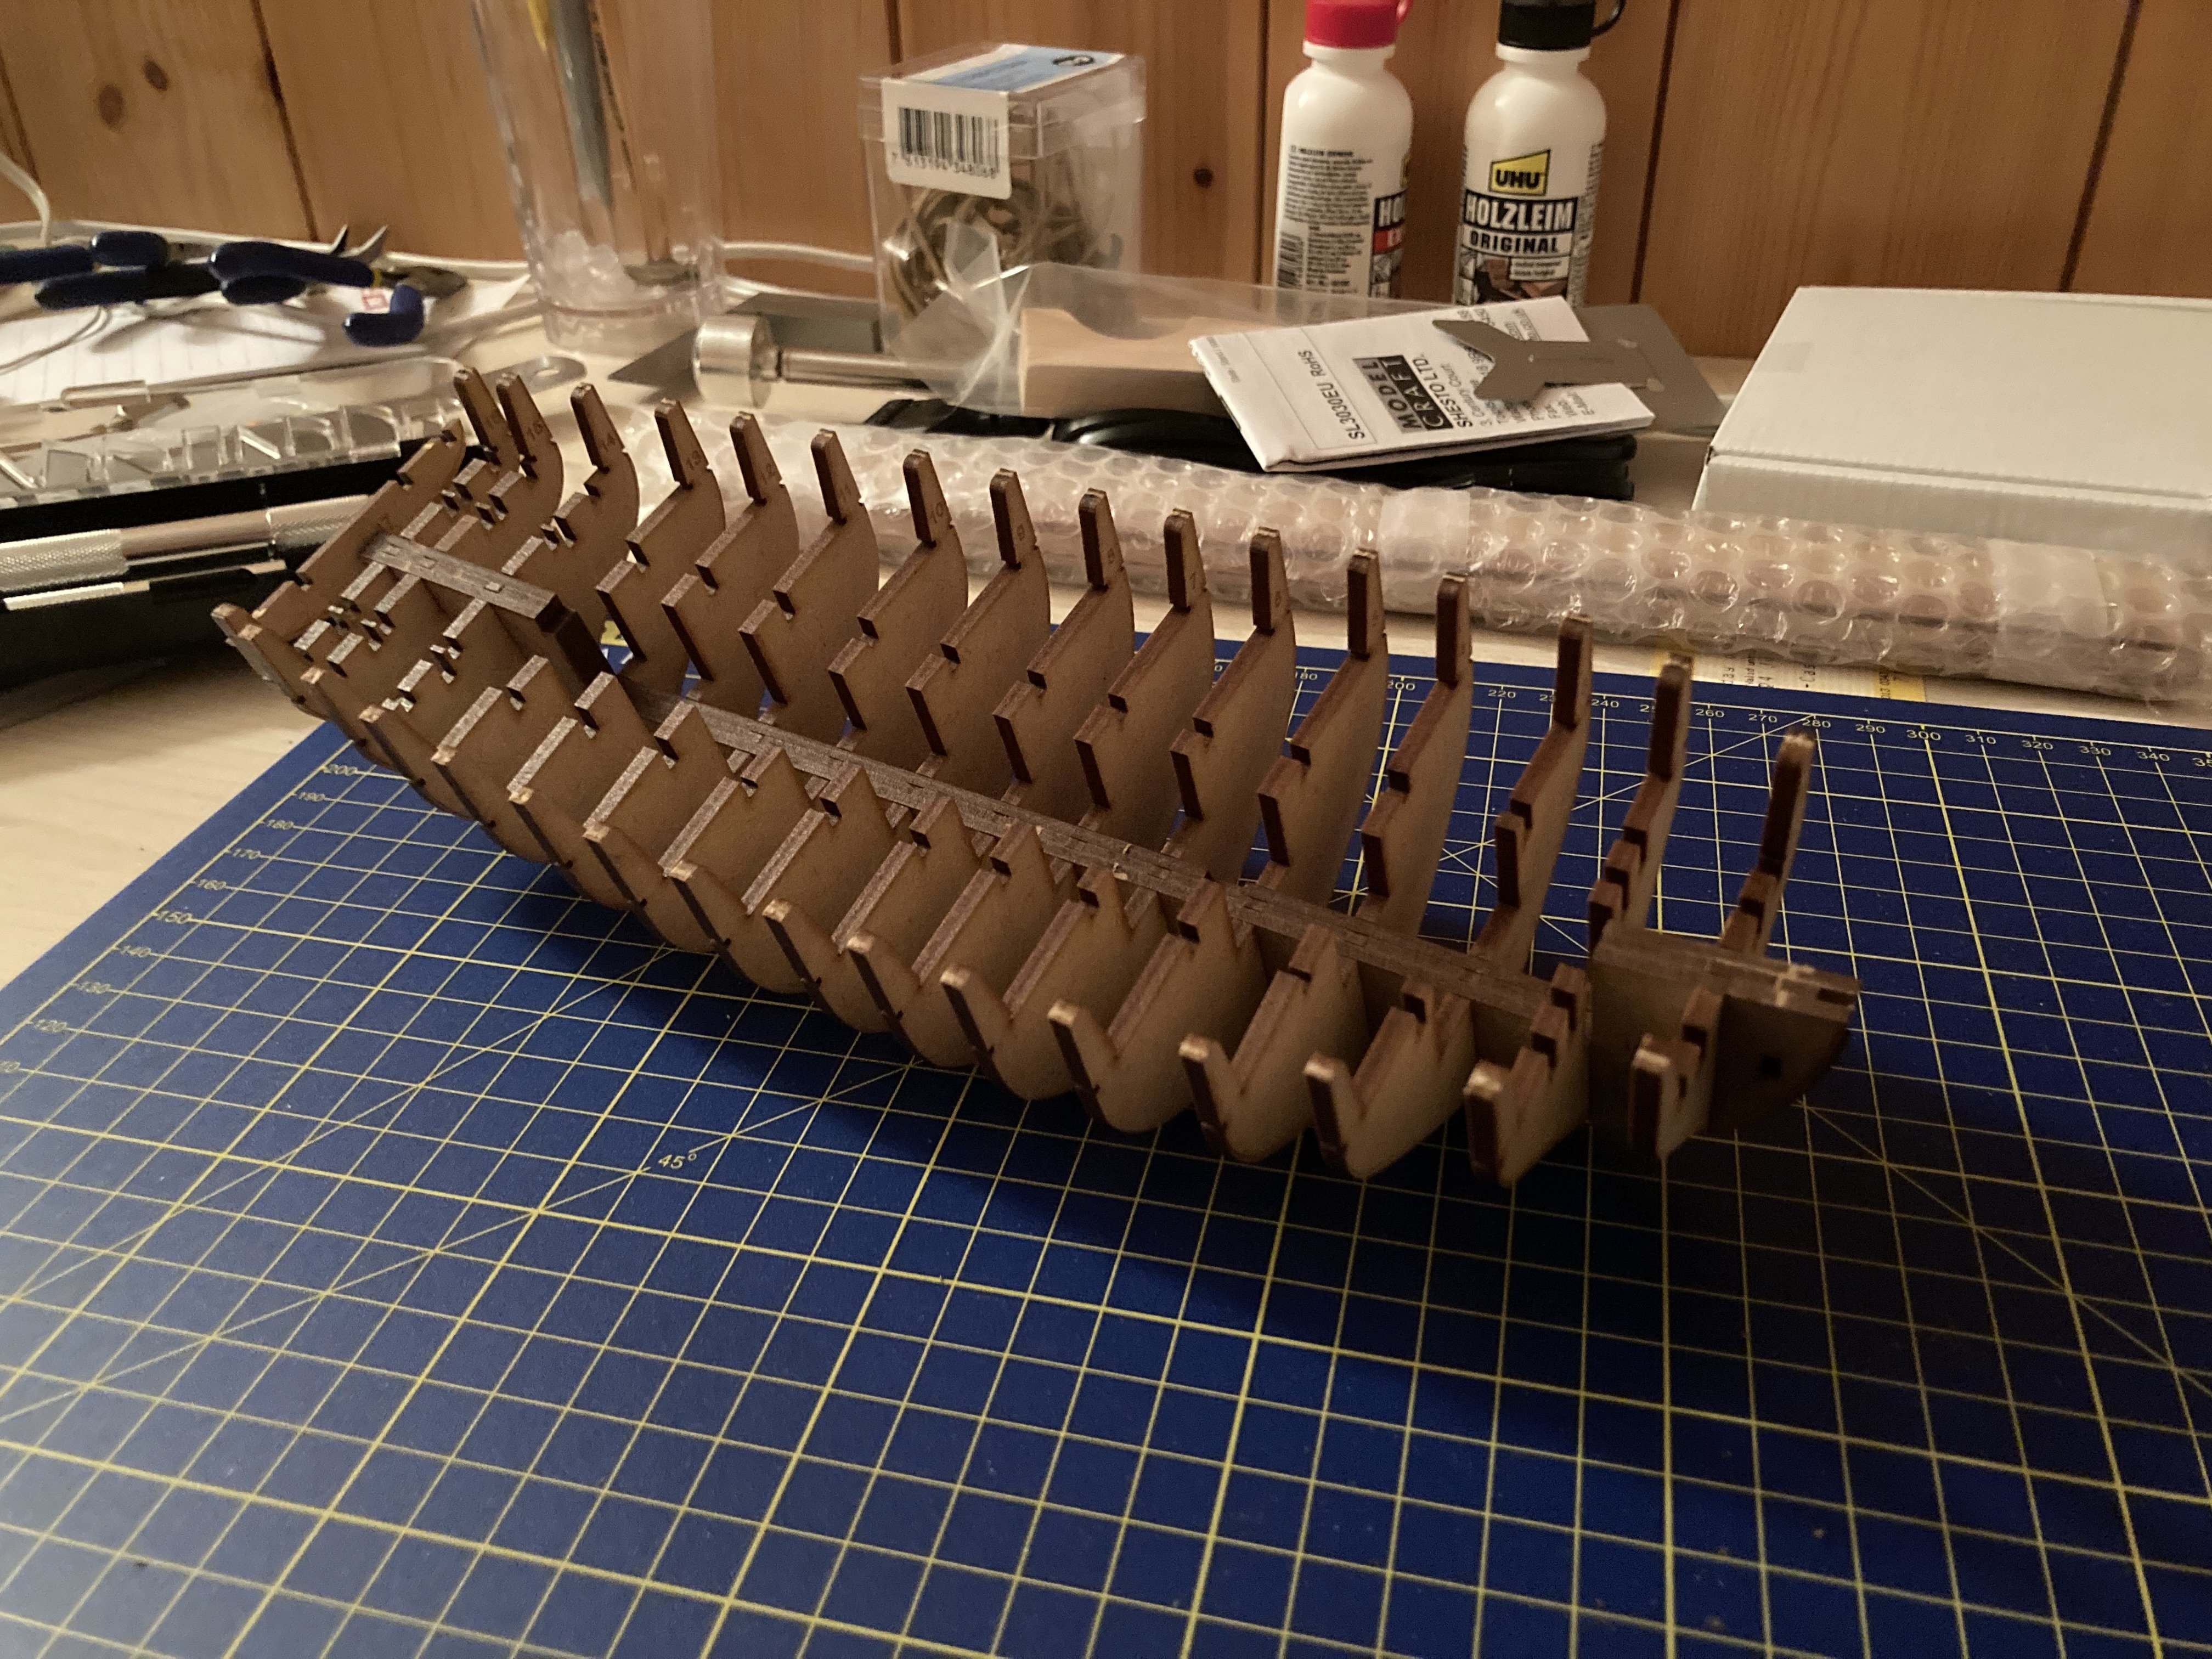
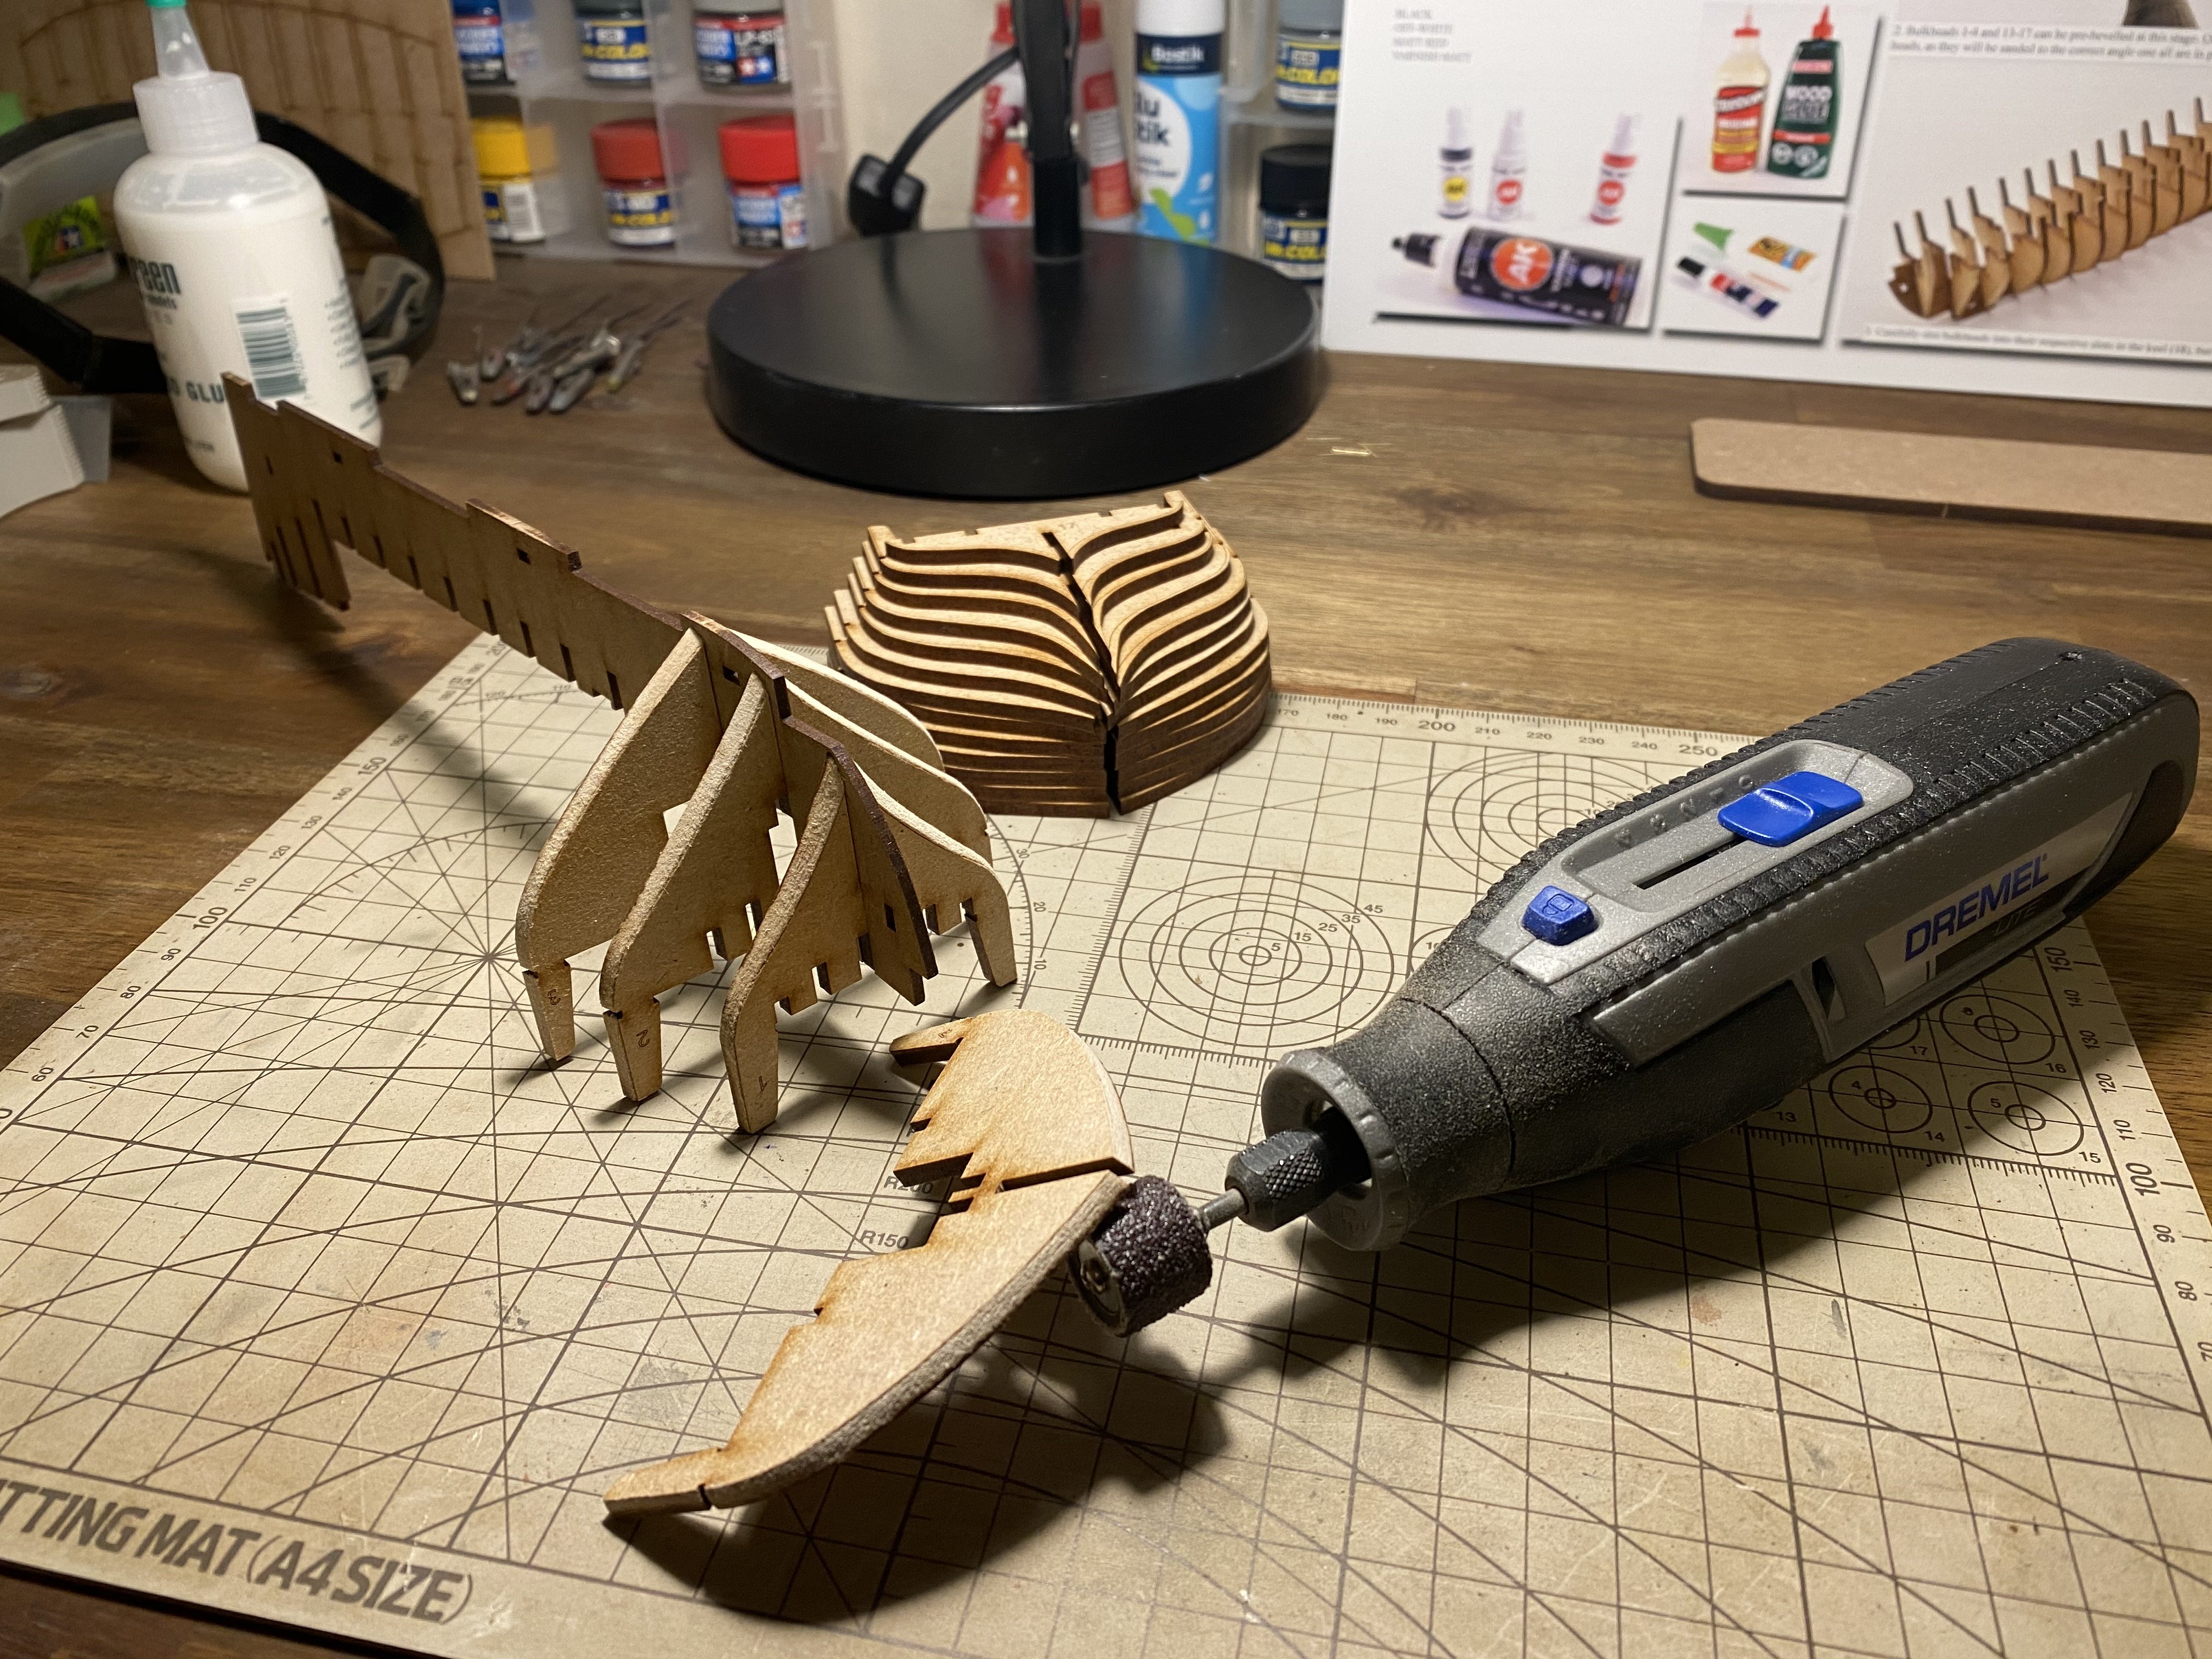
 So it was finally time. Tools have been gathered and I finally got a small desk for the job. First step is just some pre beveling so I suppose I'll just follow the indicator lines and sand it down to that. I am afterall new to all this so hopefully it goes alright. This is just a startup progress so I will post more here in time. Edit, I am sanding with the smallest Modelcraft "finger sander" and so far its doing pretty well (I just hope the band dont break to easily hehe..)

- 129 replies
-
- 9
-
-
- vanguard models
- Sherbourne
- (and 1 more)
-
 After a decade of following this forum off and on, I've finally decided to try my first wooden model ship. I've always been fascinated by wooden ships, especially wooden sailing warships. Every time we've been on vacation and there's a wooden ship museum, I make sure it's on the itinerary. Usually my family is waiting outside while I slowly make my way through the models. What prompted me to finally start a model of my own was a trip to Maine we just returned from, which included a stop at Bluejacket Shipcrafters near Acadia. While I'm several years from retirement, and a busy professional, my youngest is now in college, so I have a little time to start a hobby I've longed to try. Outside of helping my boys with some plastic models and hundreds of lego sets over the years, I have not built any kind of model since I was a young teenager. I have done some basic home improvement over the years, and have never been afraid to try something myself, but I really have no advanced wood working or model making knowledge I can turn to. I am an educator and scientist so we'll see if any of that transfers over. The first step of course was to pick a first model. I first found this forum years go when I had inherited an old (never begun) wooden ship model, which probably dated from the 1960s. It had a carved hull, basically no instructions, just sets of plans with no explanation, and piles of metal and wooden parts or fairly low quality. I had no idea where to begin, let alone what to do. I bought a planking book, but I couldn't figure out how to apply what was in the book to the model I had. I thought I'd try a simpler model, but the only real novice model ships that were recommended a decade ago were ones like the Model Shipways Shipwright Series. While I actually like sailing and sailboats, I just was not all that interested in building a sailboat or a fishing boat. I'd lose interest. I wanted to build a warship of some sort. But I just couldn't find one that stepped the beginner through the process. A decade later, I quickly discovered Vanguard Models and started reading the various reviews, various build logs, and YouTube reviews. And better yet, the instructions are all available online, so I could see not only what building a model entailed, but also how much hand holding there might be. I could get a high quality model (well, at least the parts are high quality, no promises about the finished product), with some fantastic instructions. They are pricey, but from everything I've read and heard, you get what you pay for. The last thing I want to deal with is wood splitting because of poor quality material (as opposed to poor quality ability). And for me, as a complete novice, part of what I'm paying for is a detailed set of instructions, with lots of color photos. It was a pretty quick decision to go with Vanguard. The next step was which model. They're a new company, so they don't have as many options as some others, but I'm hoping I'll stick with this hobby because I'm excited to see what comes next. The most obvious choice was the Sherbourne, a new model for 2024, designed for the novice. One challenge was that I now have disposable income, so I was really tempted to buy a more advanced model, even if it took me the rest of my life to build. Thankfully, I read the various warnings posted on this forum of people who start a model way beyond their abilities, set up a build log, and never finish it. I also looked closely at the instructions for the Sherbourne compared to other more complex models (and saw some of the plans included with the Sherbourne on various unboxing videos) and realized that the Sherbourne doesn't skip steps in the instructions in ways that more advanced models might. I also knew I wanted to set up a build log, not only to keep myself on track, but because I thought my experience as a complete novice might be useful for others considering or starting this hobby. And finally, I thought that as a novice, if I take on a model ship that is geared toward the novice, there might be more patience with the kinds of basic (silly, stupid) questions I might need to ask here. So Sherbourne was the obvious choice. It's a warship, albeit a small one - well, at least it's armed, I don't know when a ship qualified as a warship in the parlance of wooden ships. Living in the US, I was going to order from Age of Sail, but there were out of stock, and it was going to be a month before they were restocked with the Sherbourne. So I instead ordered directly from Vanguard, which meant paying more because of the exchange rate and shipping. It should arrive by the end of this week. Next step while waiting for the model to arrive is getting the tools I'll need.
- 133 replies
-
- 12
-
-
- Sherbourne
- vanguard models
- (and 2 more)
-
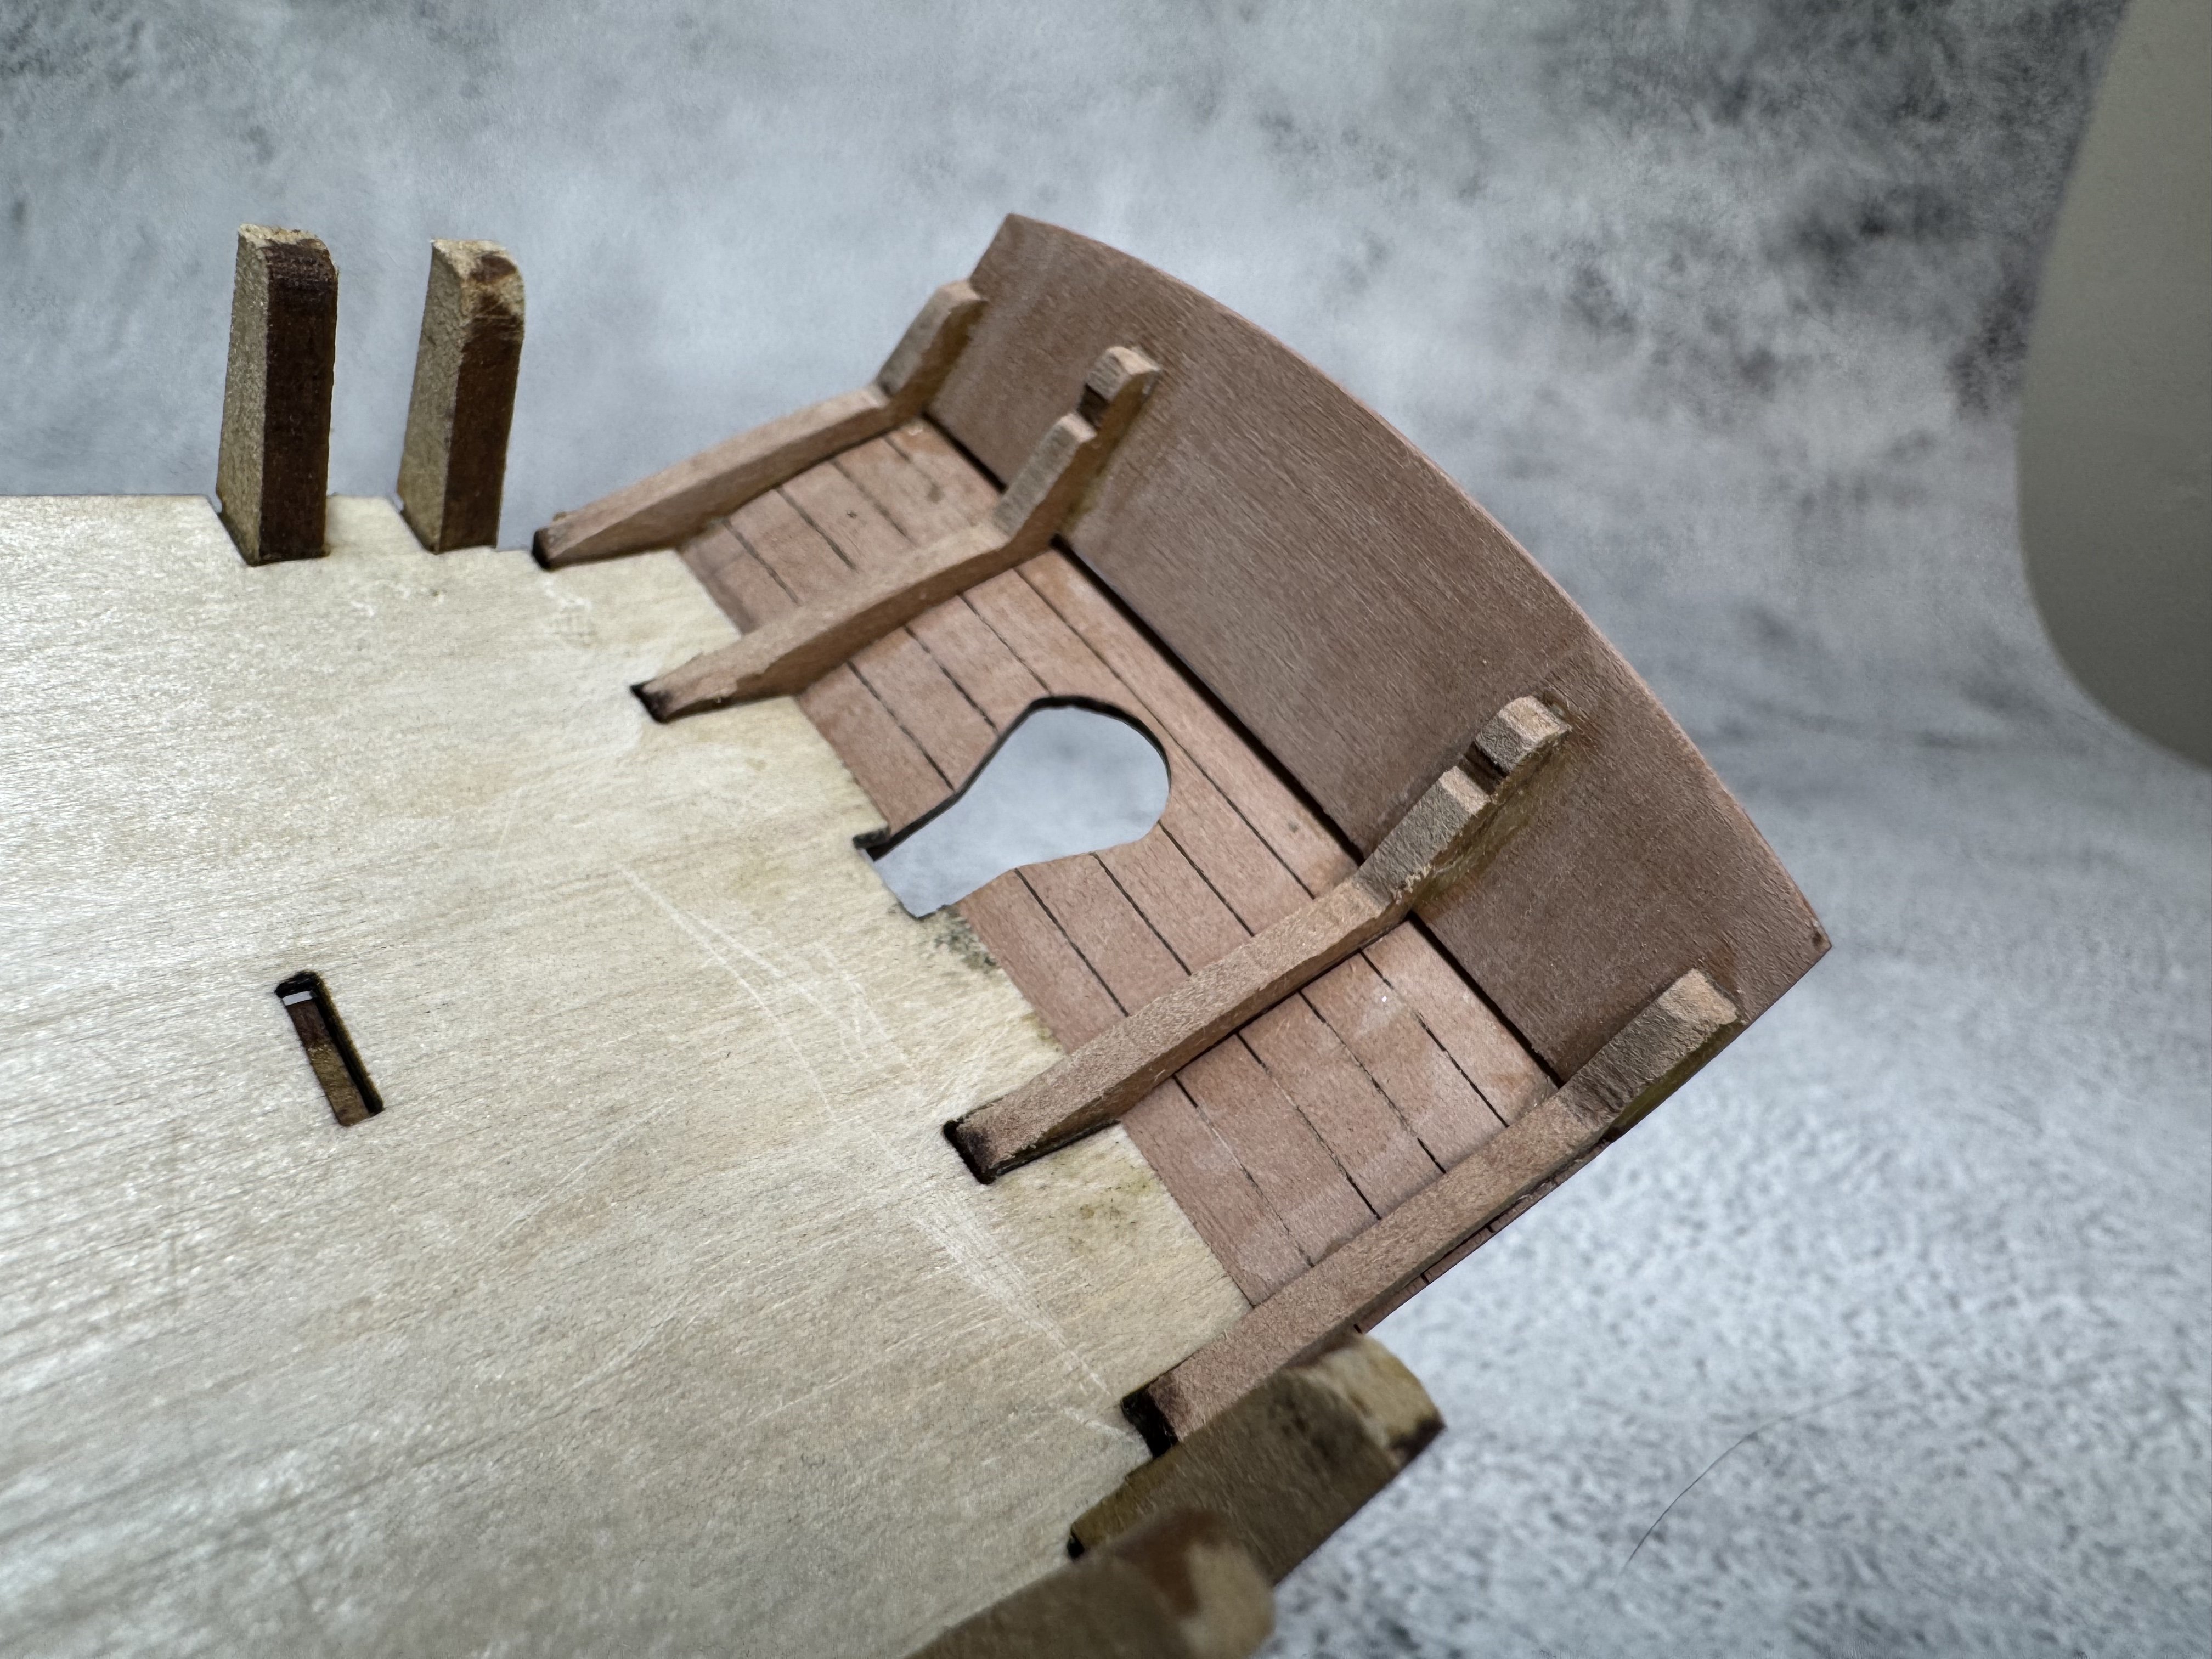
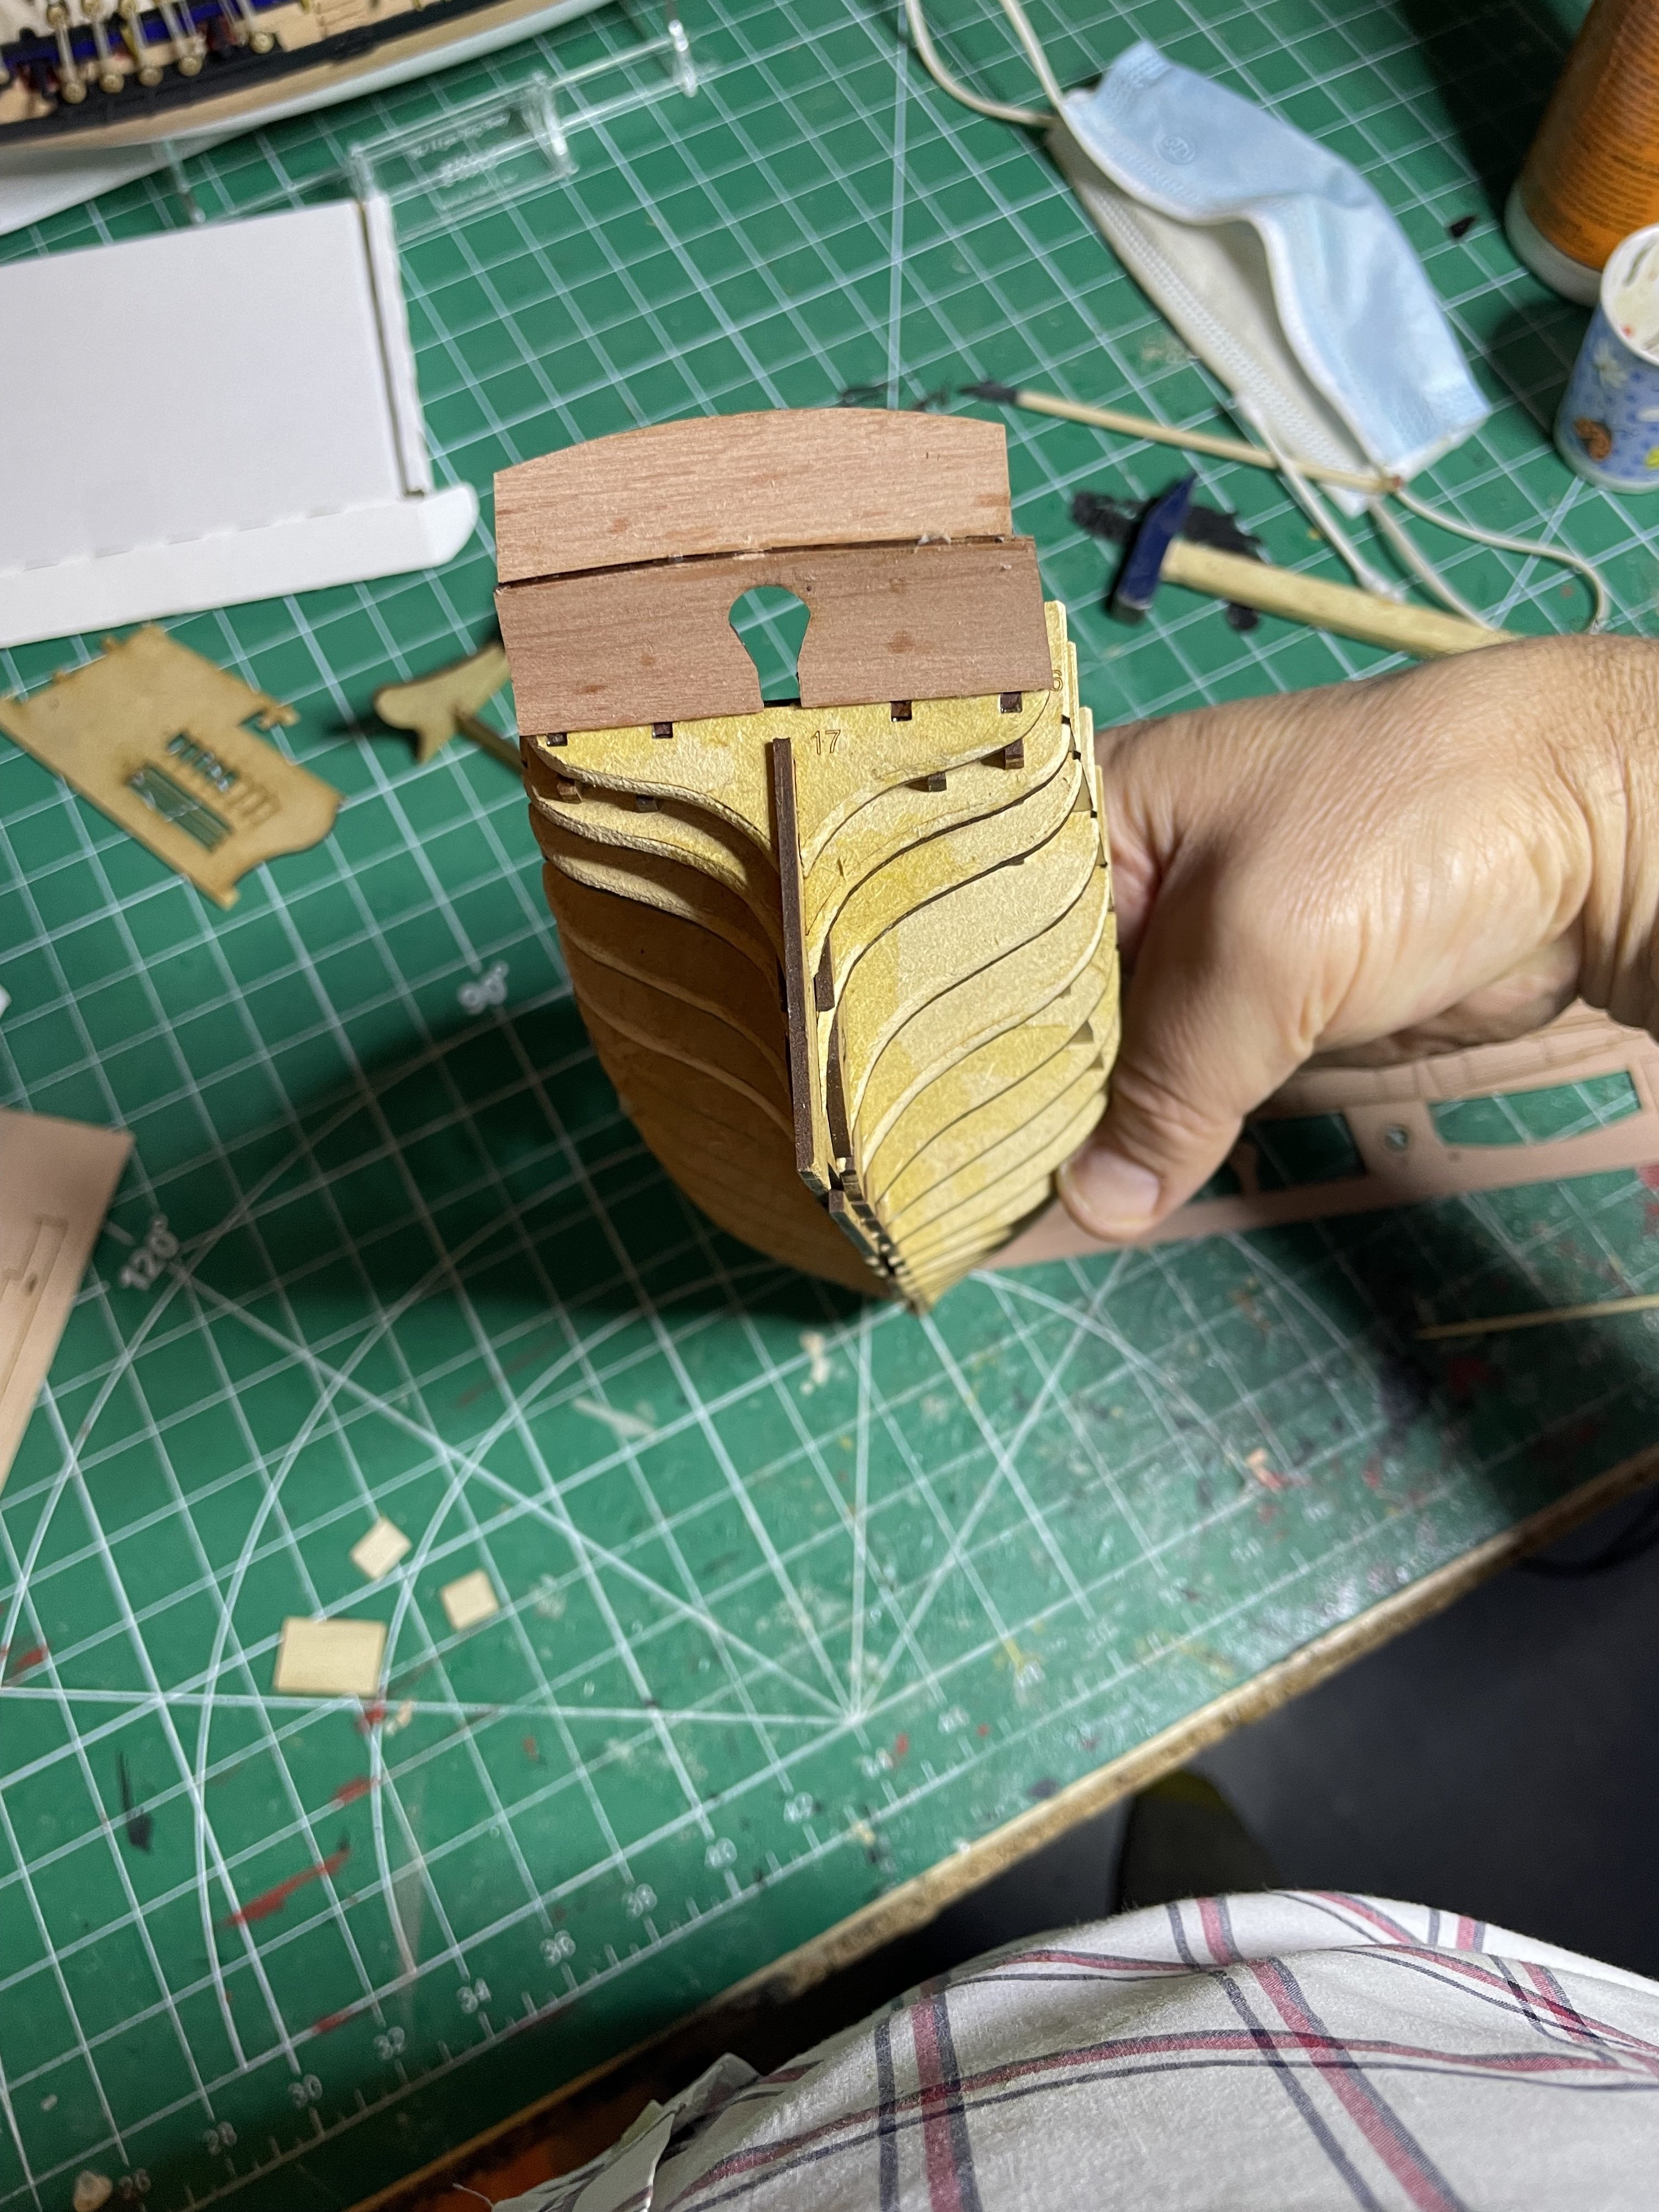
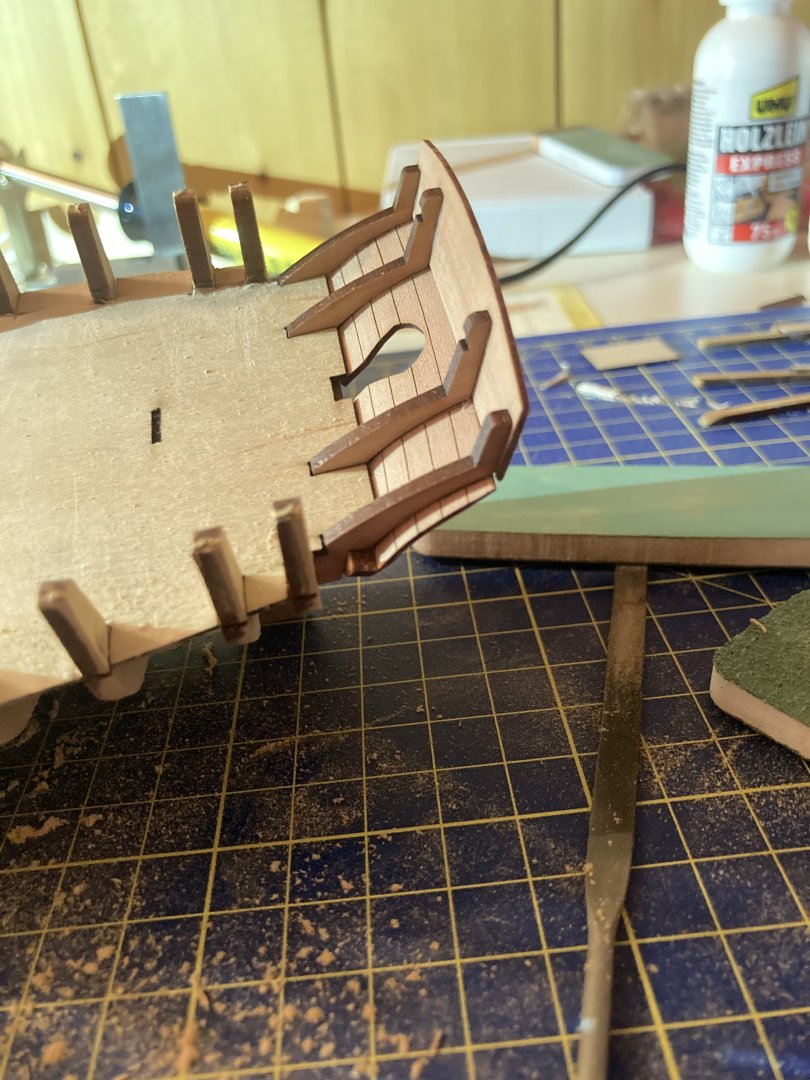
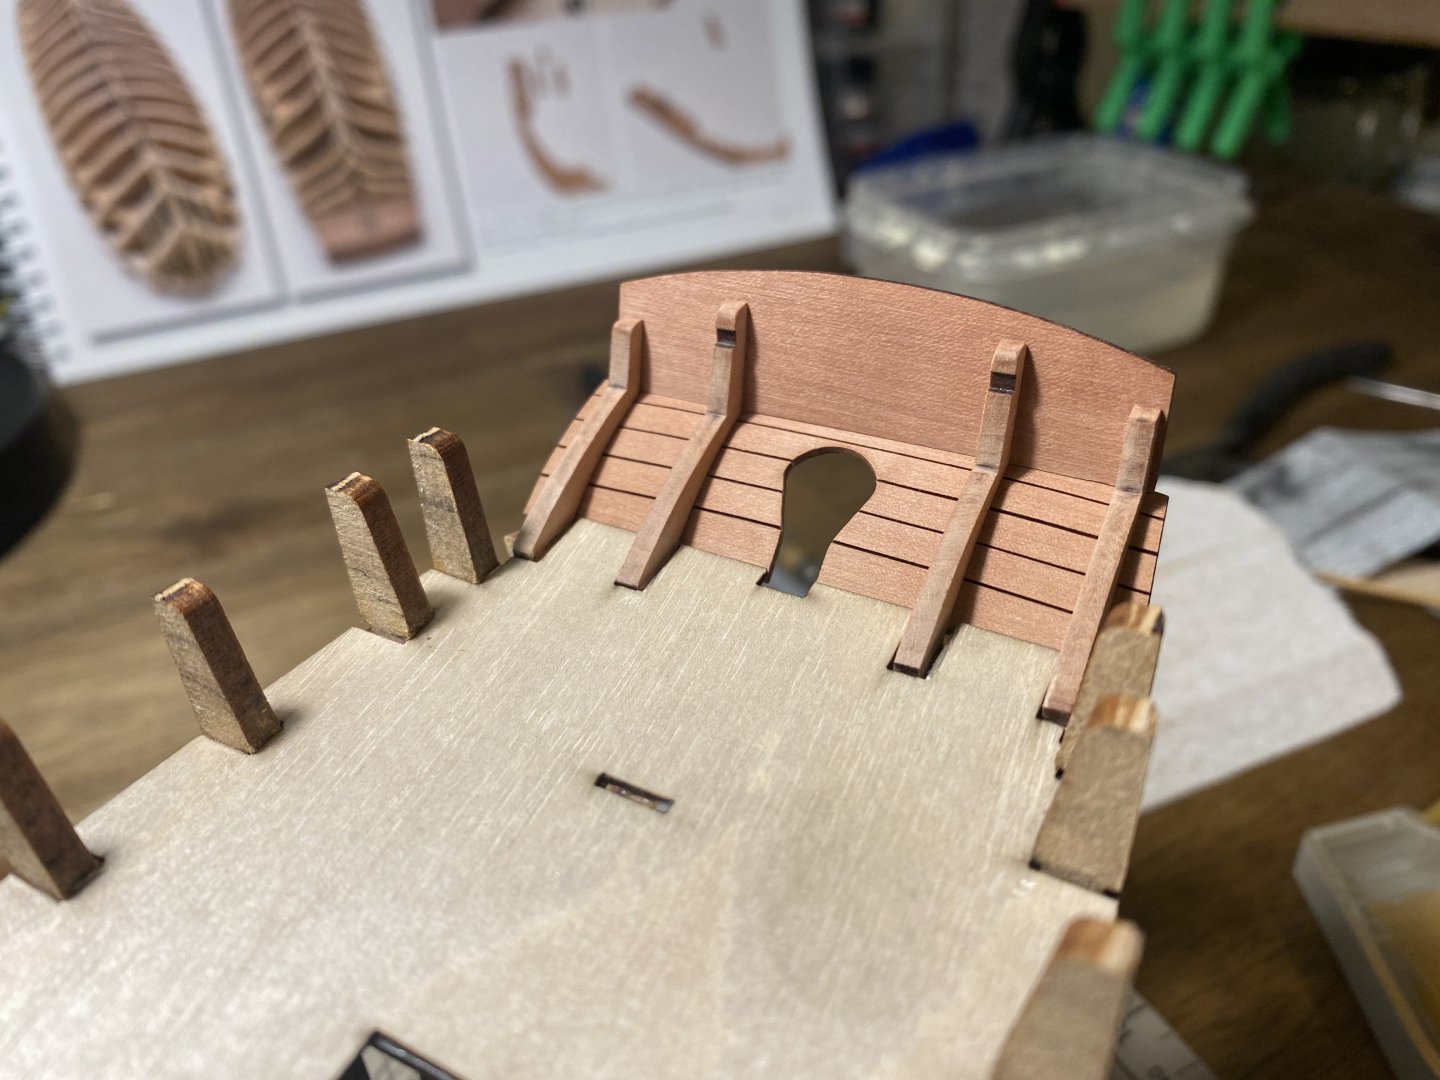
 Hello All, Finally I get to start a build log I had big plans to document every small step of my first ever build, but when I started I completely forgot about taking pictures. I was having too much fun. I had originally planned to start with the 3 part Model Shipways Shipwright Series, but it has not arrived yet and I was not able to wait any longer. Yesterday I completed the first steps up until the glueing of the deck (step 21), and today I sanded the hull before glueing on the prow and the bulwarks. I will leave this to dry overnight before starting on the planking. That should hopefully be a great experience. A big thank you to @chris watton for creating such a nice kit for us beginners. I gave me an instant feeling of accomplishment. Now it is up to the forum to tell me what I am doing wrong and how I can improve One thing I have learnt is to not use too much glue. I made a real mess back at the stern counter and transom (pic 5). I tried to remove the overspill with a damp brush, but that made it only worse. If this was a plastic model I would use a scriber and then a panel liner to fresh up the lines, but I guess that is out of the question on wood. Any tips on how I can fresh up those lines?


-
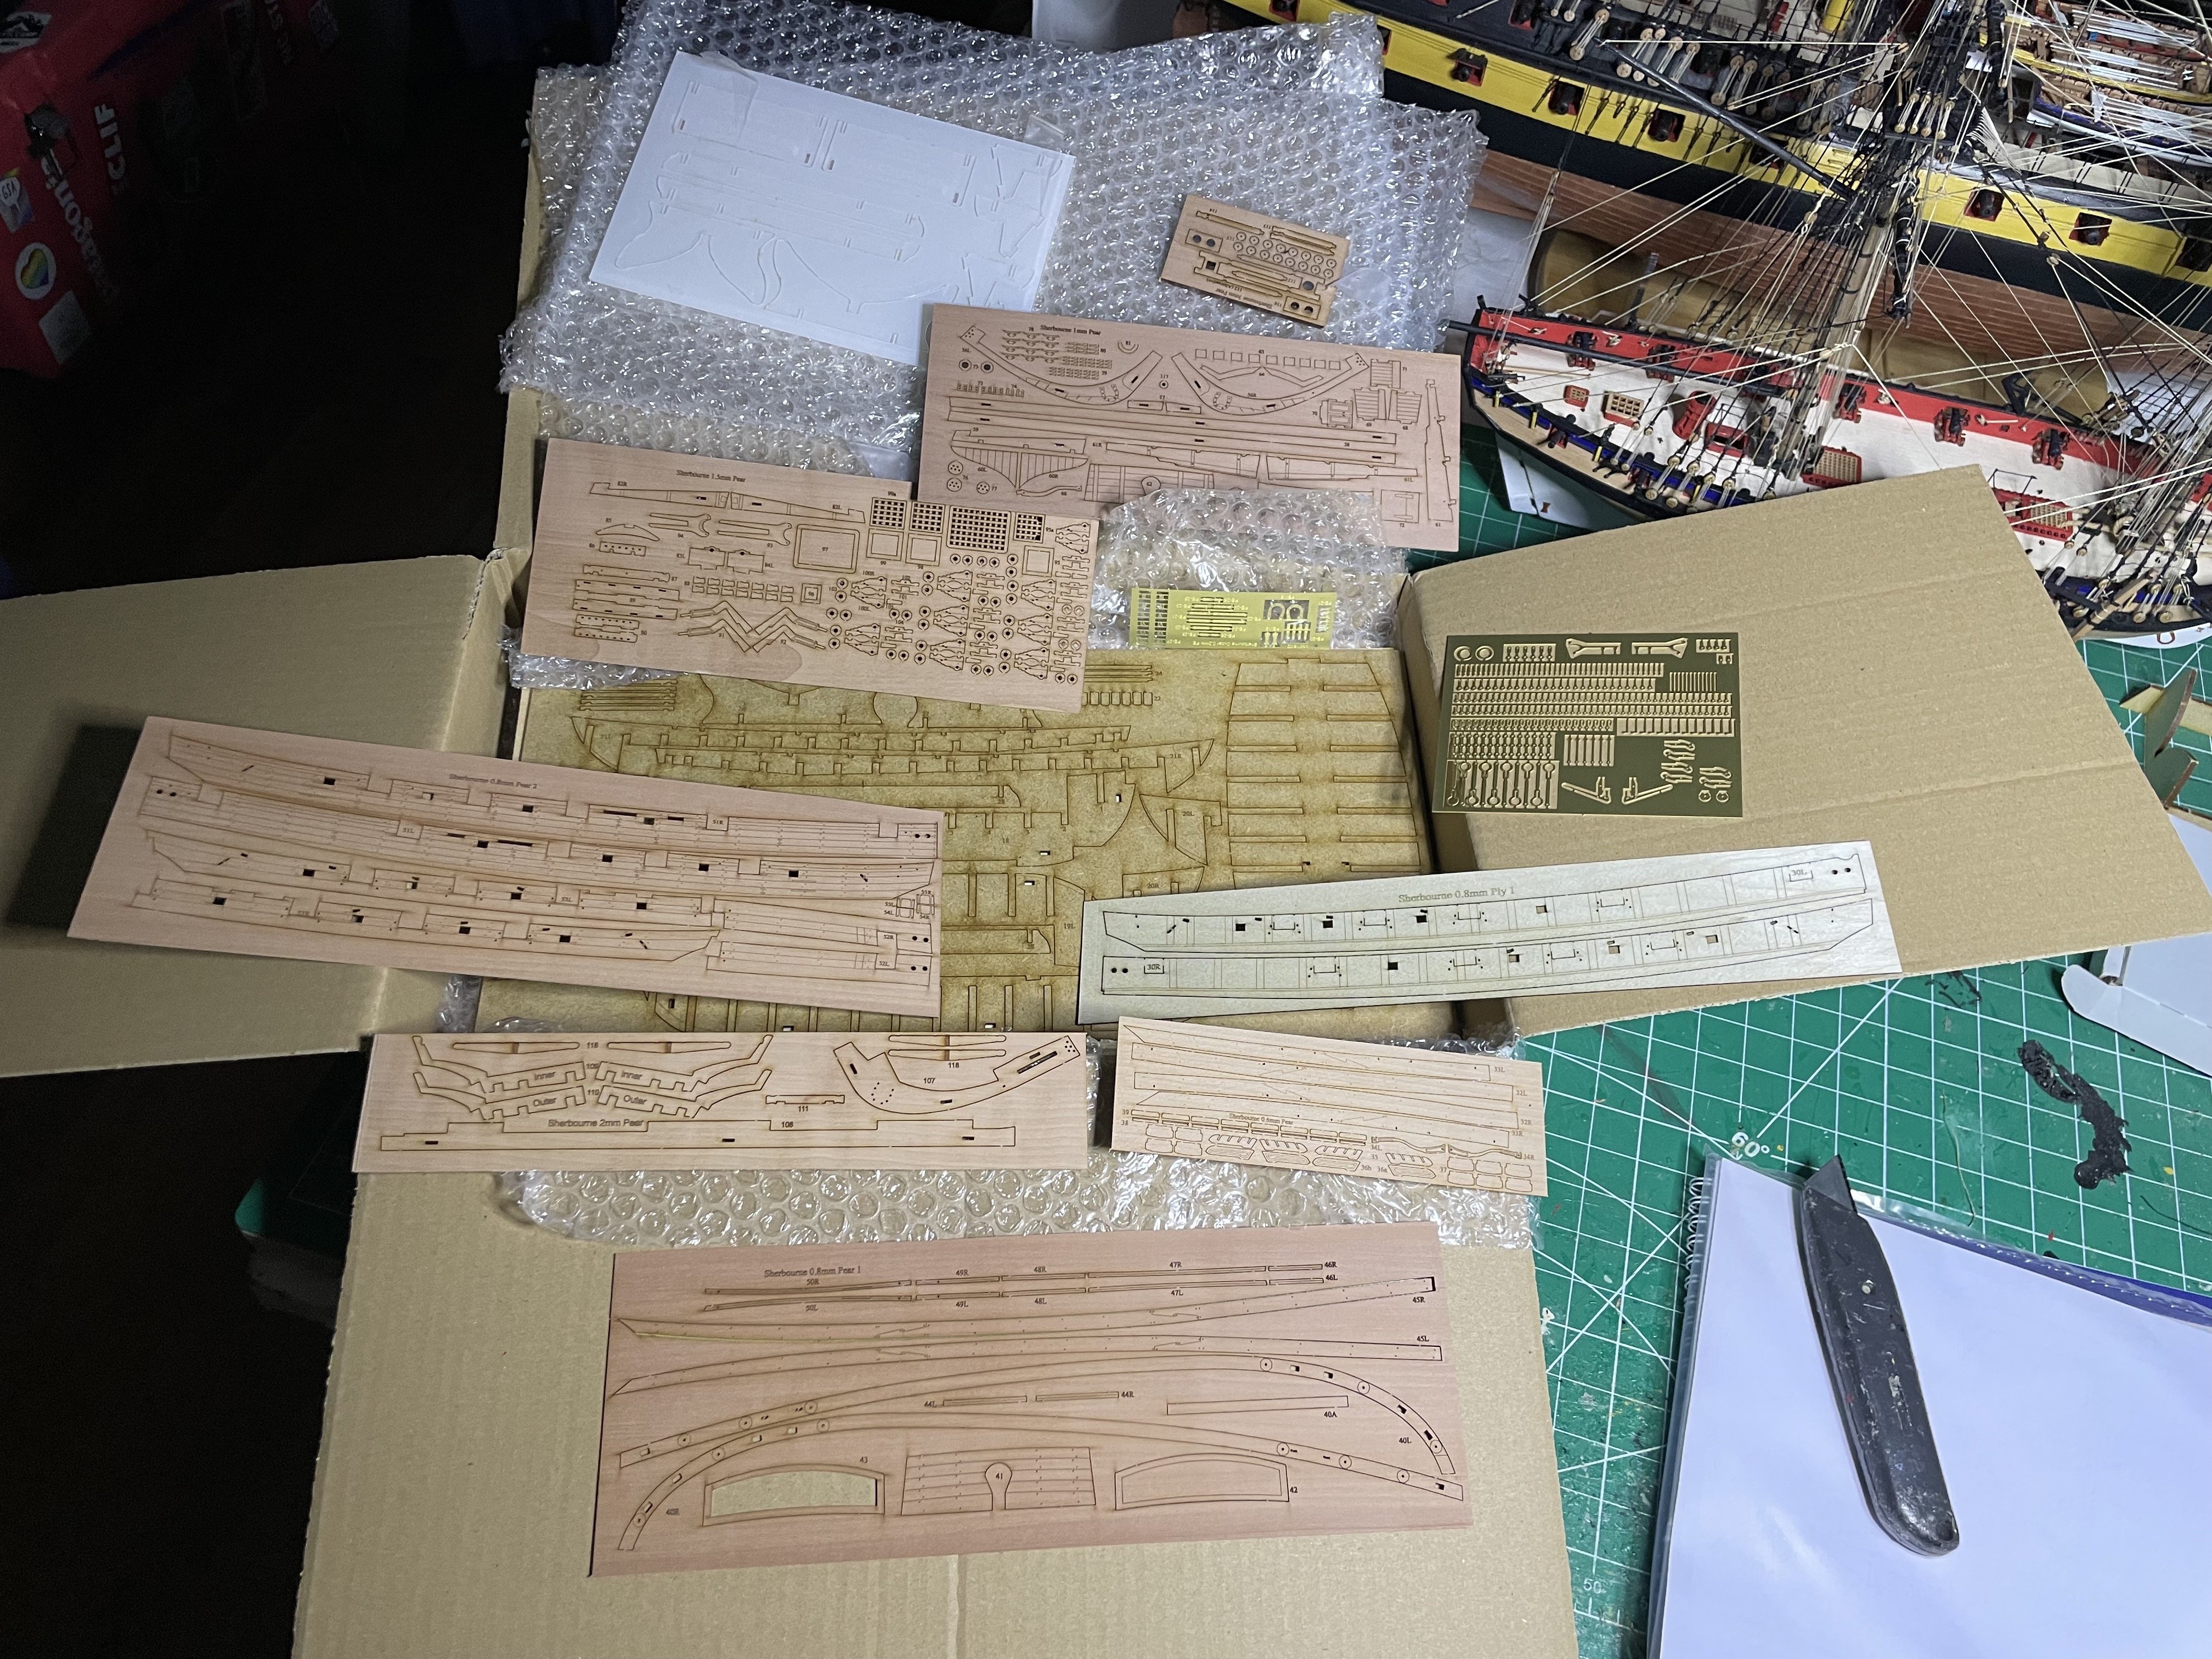
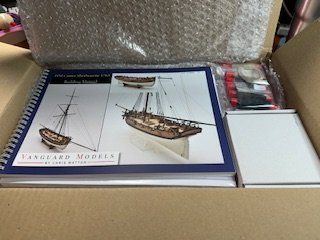
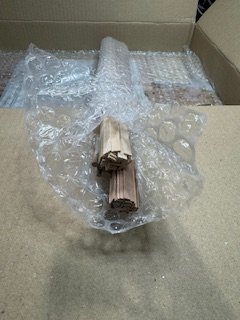
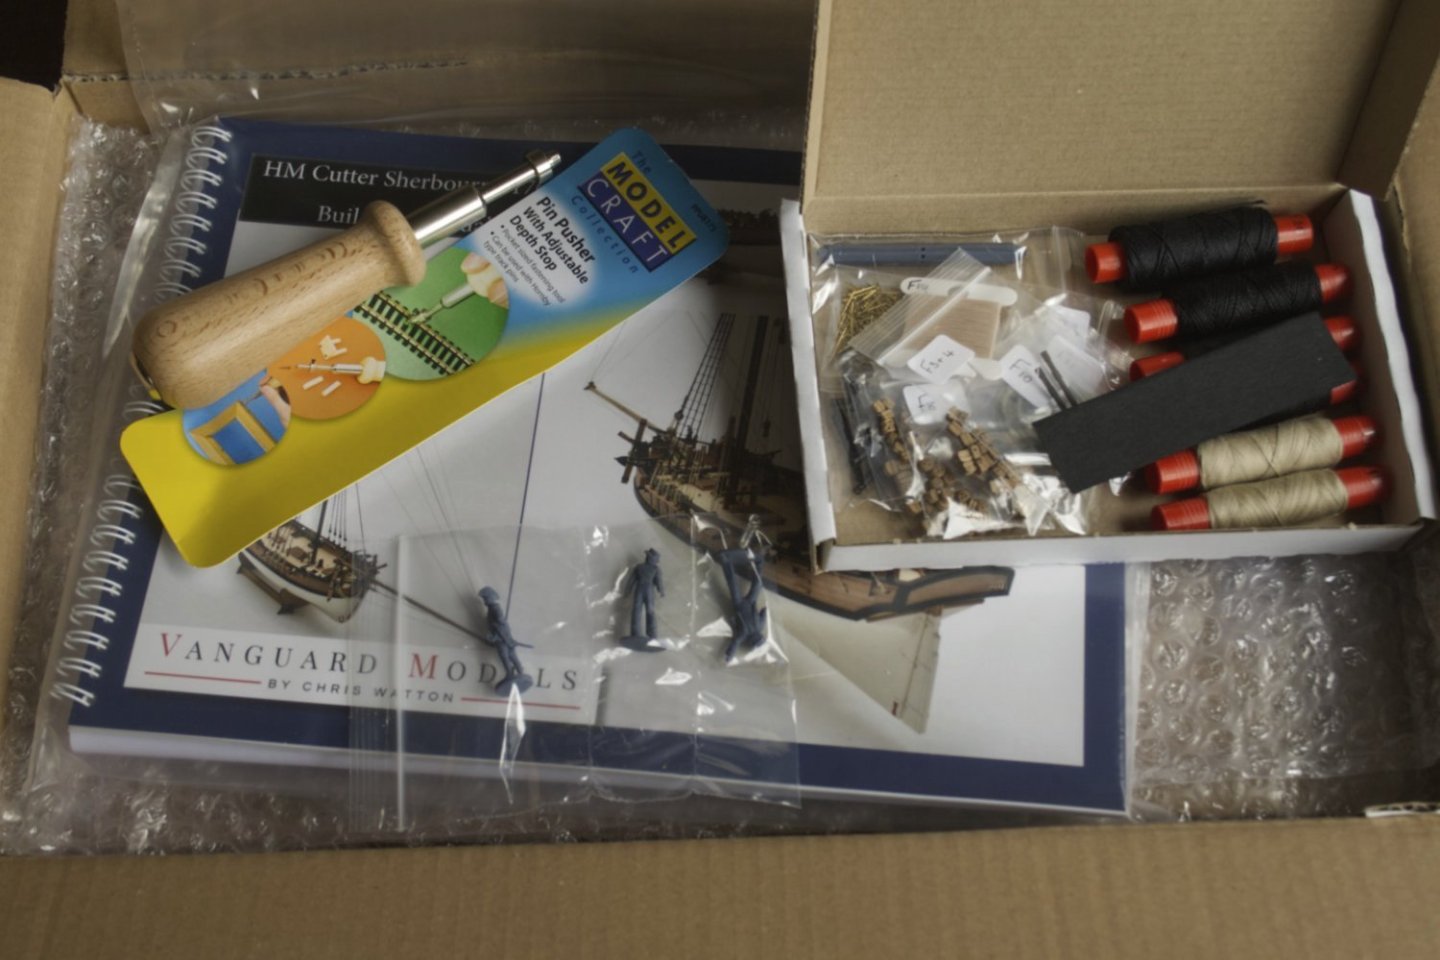
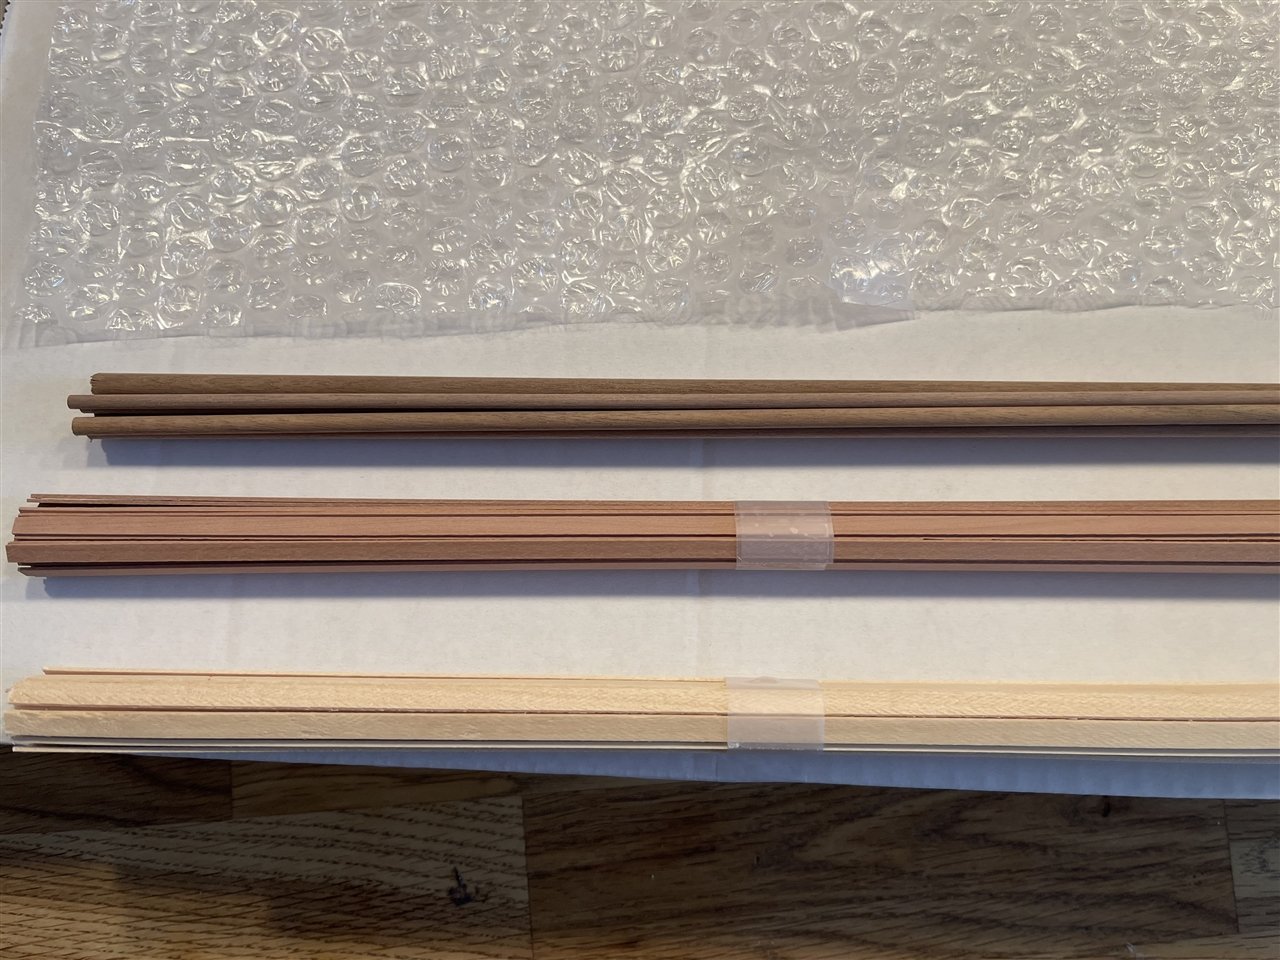
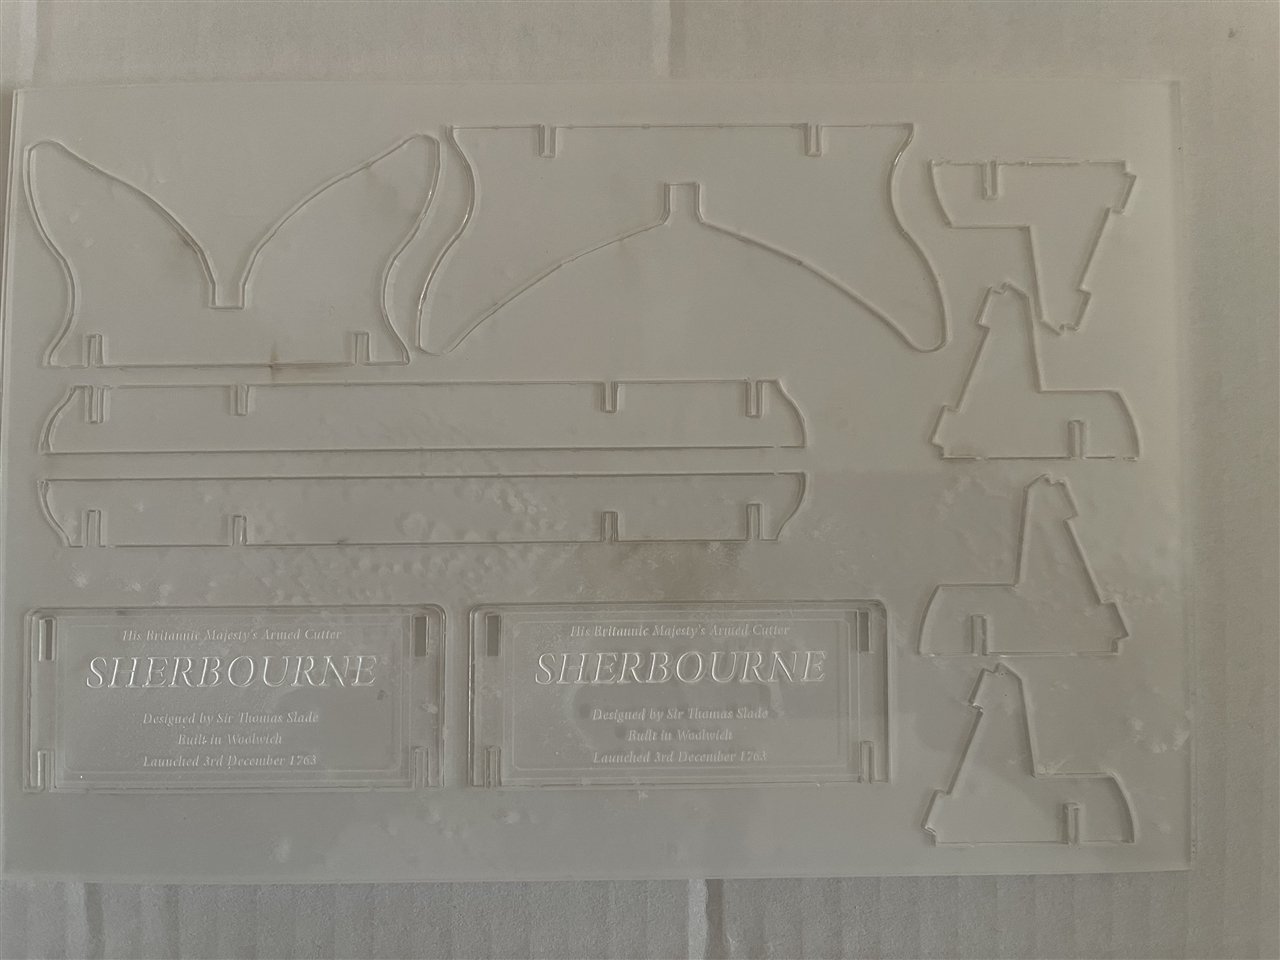
 Moving forward 1 1/2 centuries from my (nearly finished) previous build, this is the new Vanguard Models Sherbourne. Included in the box were a few extras; being new to ship modelling, I'd ordered a pin pusher and some crew who will, I hope, lend scale to the build. Seen here with cordage, detail parts and the instructions. Below the instructions and bubble wrap was the wood (and acrylic base). In addition to the instruction booklet, there are 19 A3 sheets of plans and rigging guides.


-
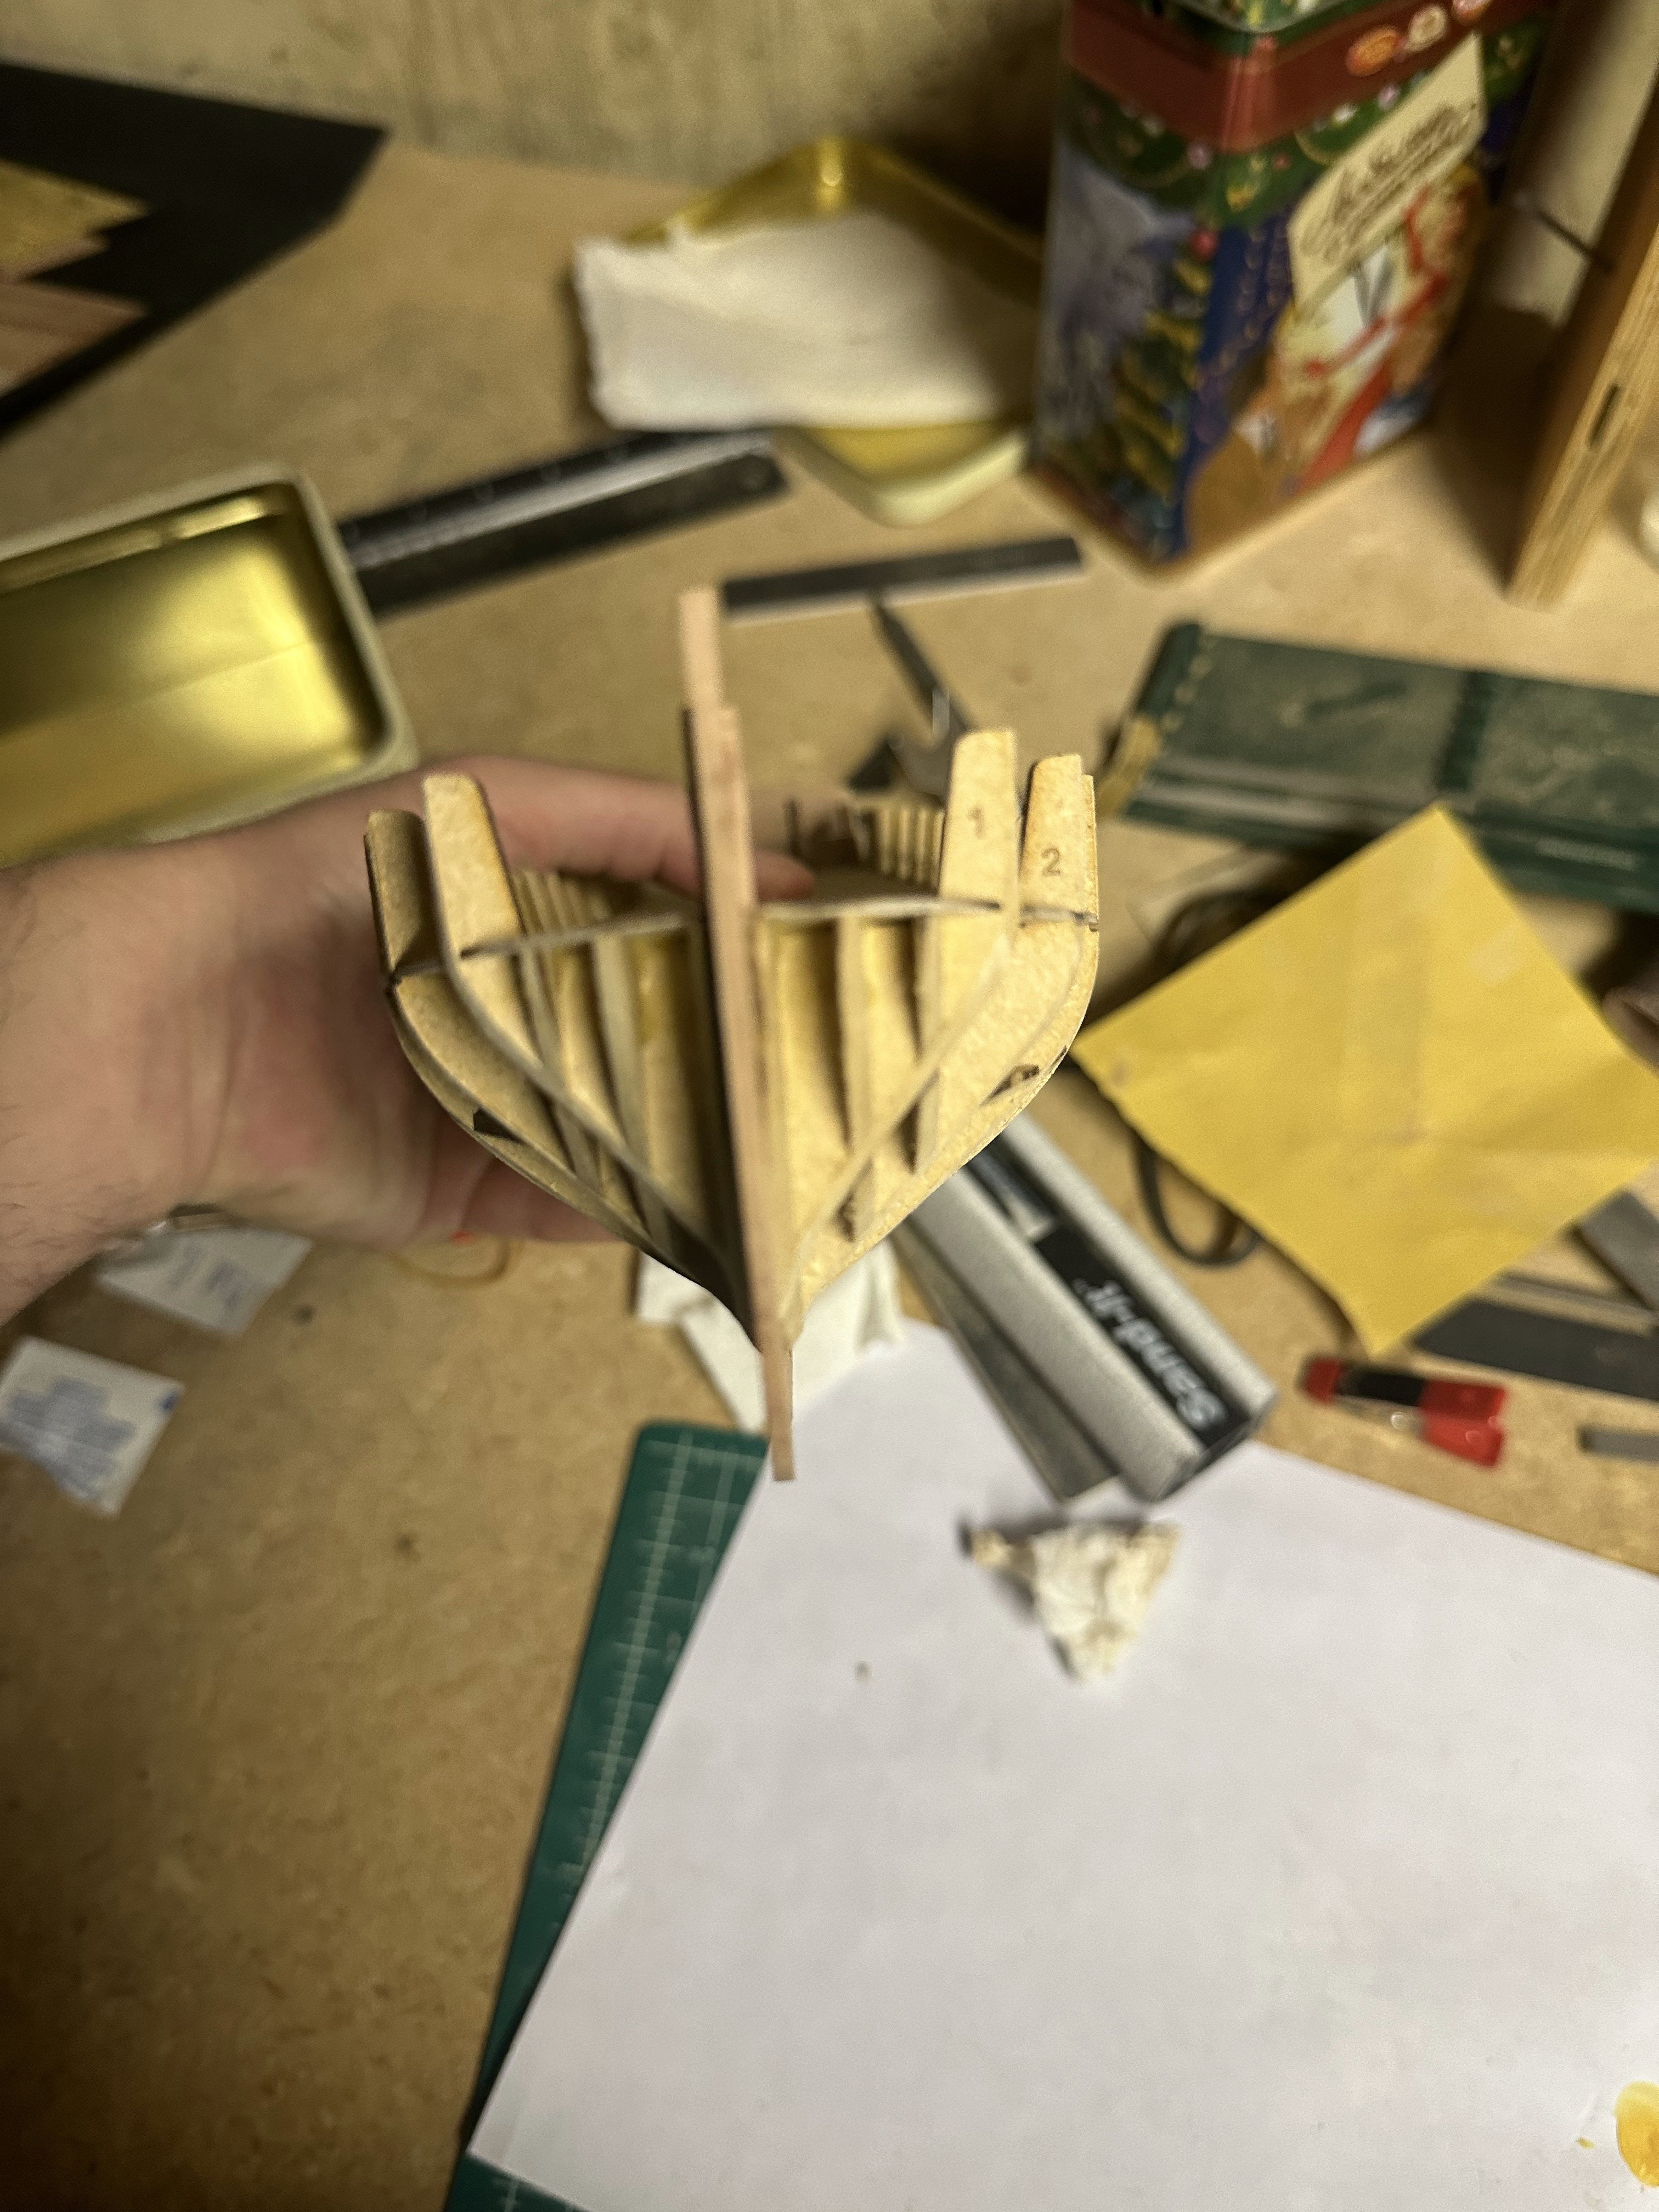
 Hi! My name is Manuel, and Im in my early twenties and Im from Switzerland. This is my first wooden model kit ever, so the fun is guaranteed Now comes a bit of blabla, feel free to skip to the pictures Disclaimer: I already started the build 5 days ago, at the time when I created this post Im laying down my first ever plank (Masterplank on the starboard side) but Im catching myself doing everything else instead since Im a bit nervous… Also English is neither my mother tongue nor is English grammar my strong side so please forgive me my sins (My English teacher did not). To whom is this guide? : Me? Dont really have an asnwer for this one yet. But surely also for other beginners, and for everyone else because sharing is caring. Why HM Sherbourne? : I wanted to buy a frigate but then reason struck me and I started to look for something small, but still in scale 1:64. So I came across HM Sherbourne and saw there are a lot of videos on YouTube about it (Im following modelkit stuffs build, really awesome for beginners can only recommend it) and its supposed to be a beginner friendly model. Do I know what I am doing? : Absolutly not!!! So now enough blabla, lets get to the real stuff! The first few steps were really easy, although I messed up the false deck since I didnt pushed it down fast enough nor did I dryfit it and therfore got some splintering (see photo). Im quite happy how the stern turned out though. Next was the sanding, it took me a lot of time since I felt unsure how much material I needed to remove but then decided to just go through with it on and hate myself later. So I arrived at the ply bulwarks and o my o my was I scared at first, but then after some careful bending and dryfitting (I really can only recommend dryfitting and reading the manual, which is really great by the way! Although a picture with where to put glue on the bulwarks would have been nice, but modelkitstuff saved me there ) Yesterday I felt confident enough to glue them on and it more or less worked! I gueeesss? We will see. I will move on now to cut off the overlength at the stern and then put on my first plank ever! Wish me luck! Kind Regards Manuel


- 11 replies
-
- 10
-
-
- Sherbourne
- Vanguard Models
- (and 1 more)
-
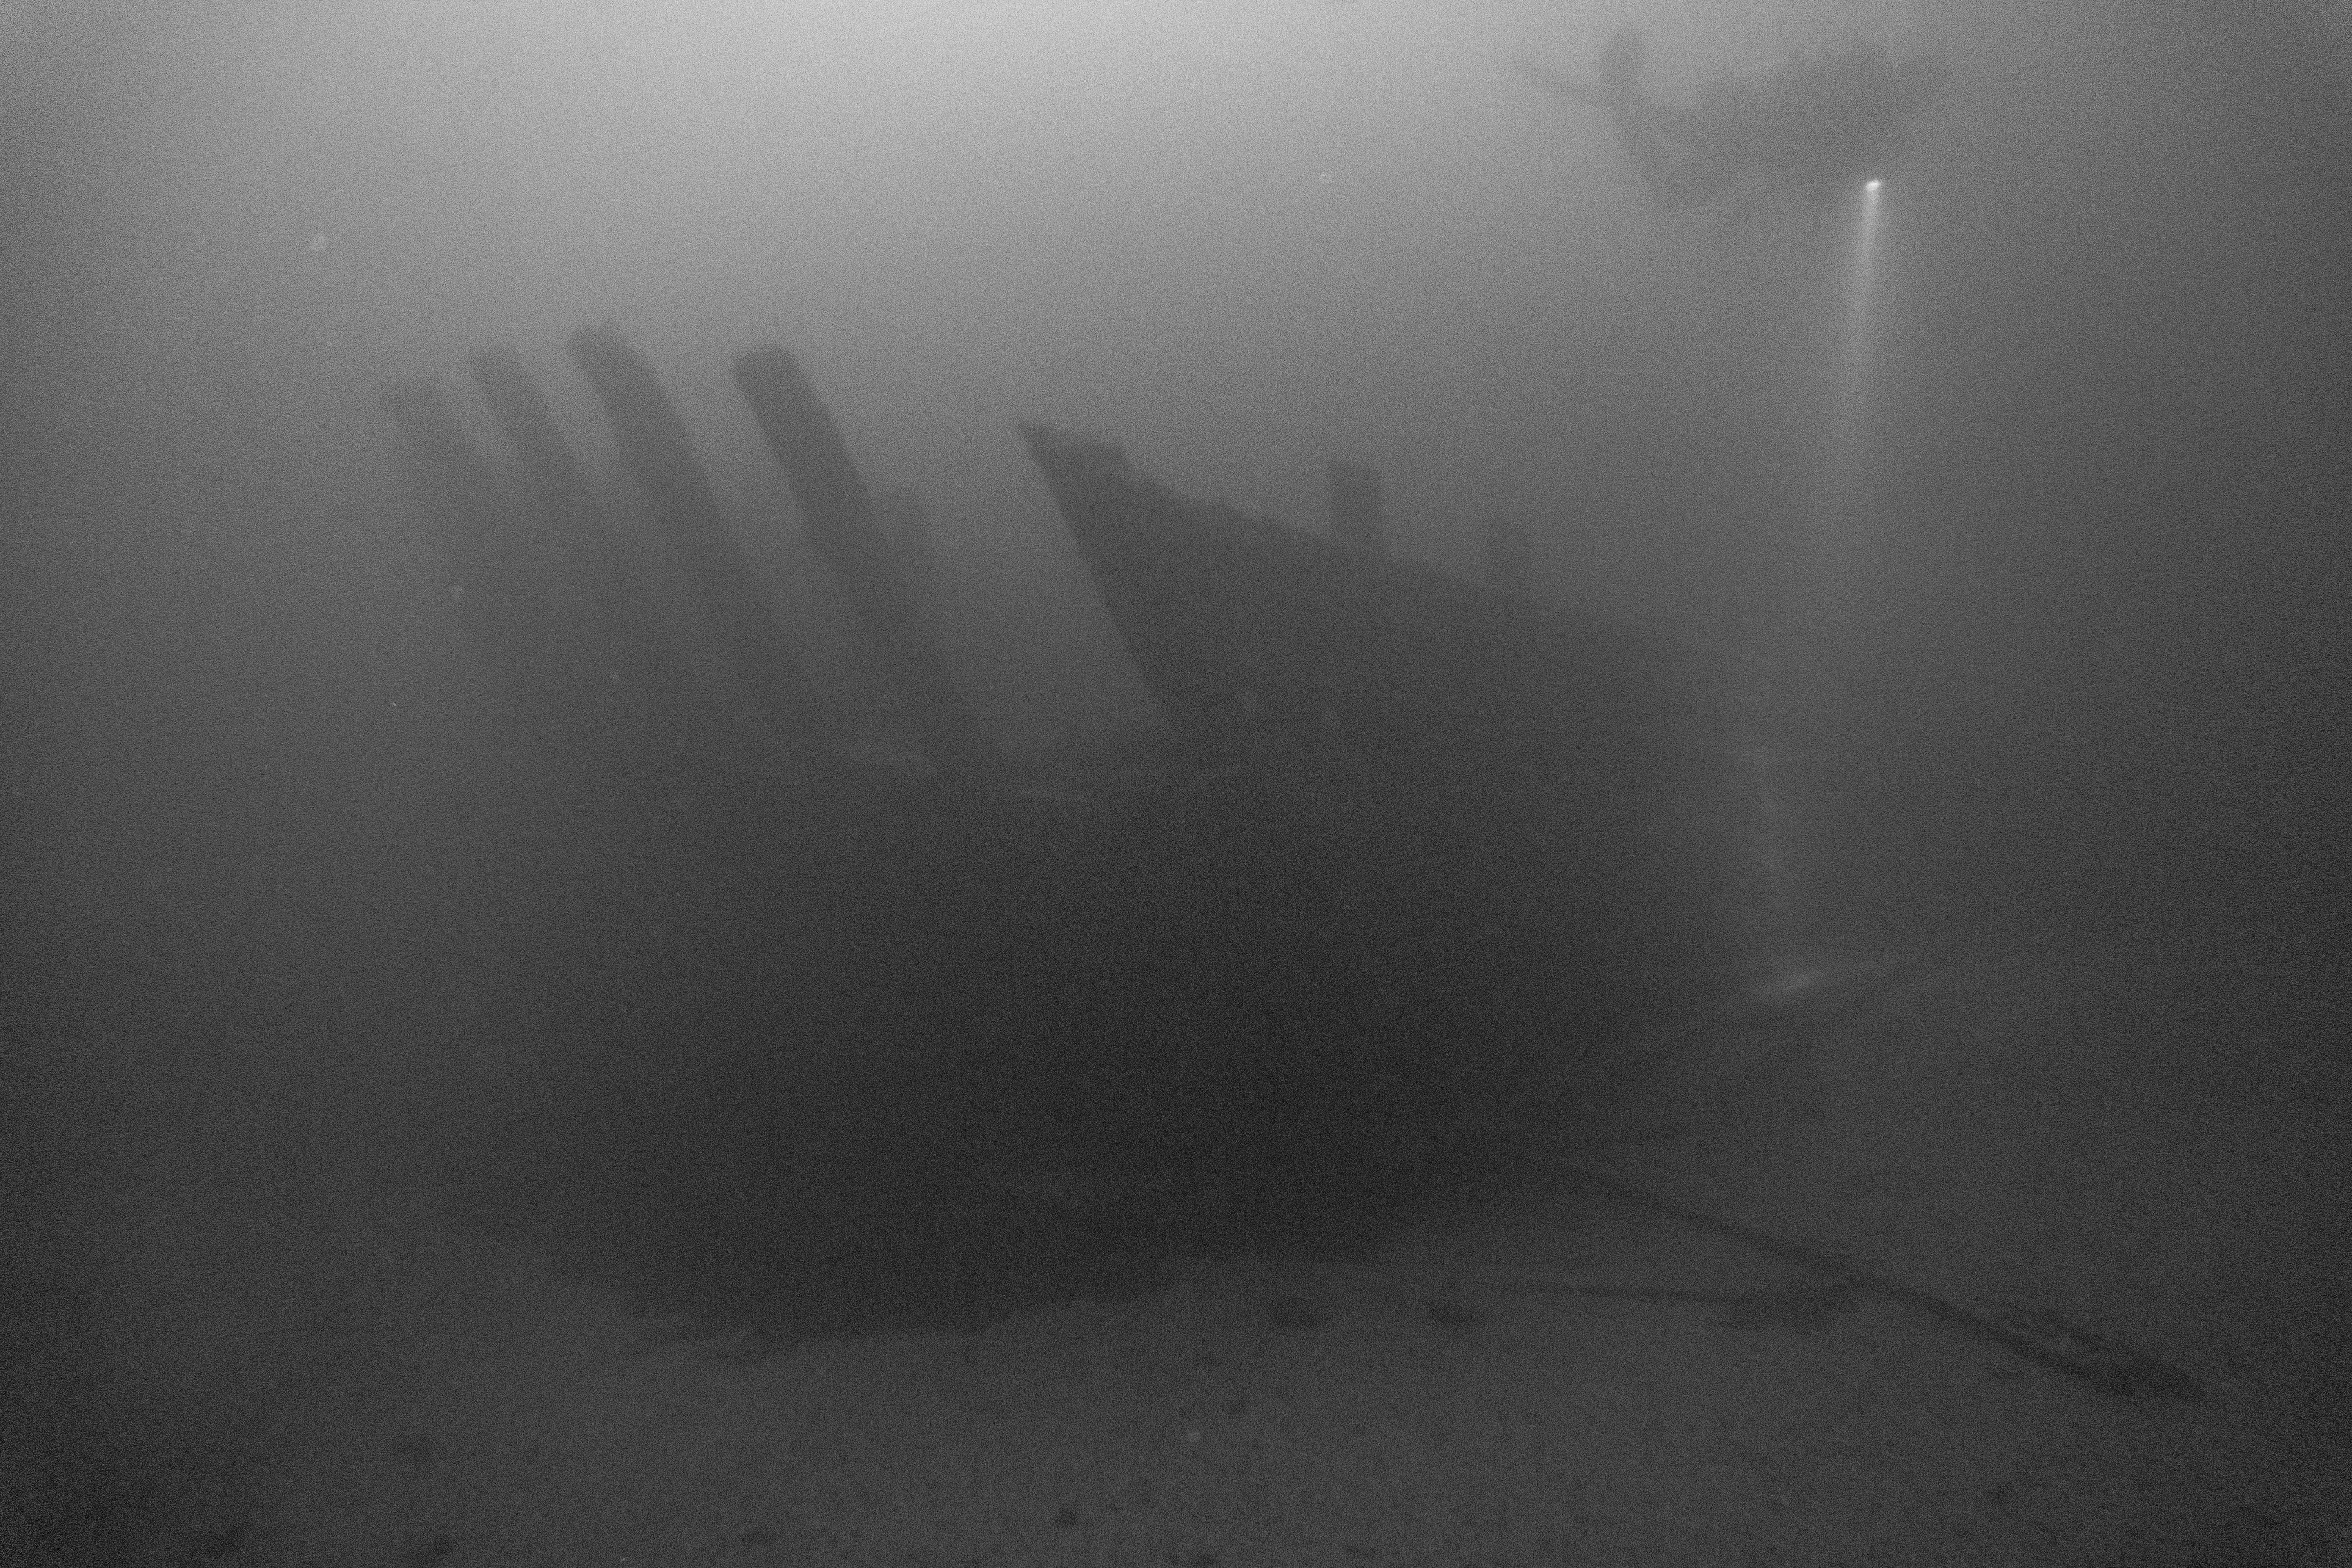
 Greetings all! I've had a lifelong interest in the sea, ships and maritime history, and building some sort of a ship model has been in the back of my brain for a decade or more. Late last summer I was given an old and battered model of a full-rigged ship, perhaps from the 1960's or so, and repairing her finally gave me the spark to make my first proper foray into modeling. While looking for a beginner friendly model I originally decided on Amati's Lady Nelson, but on some level I was bothered by it not being based on a real ship. Fortunately I kept browsing and eventually stumbled on Vanguard Models' Sherbourne, which seemed perfect. The kit arrived a bit over a month ago now, but I needed to order some basic tools, glues and such to get started. I still need to decide on an airbrush and paints, but that can wait until later, as it is going to continue to be too cold to paint outside for a few months. I've taken the time to study the manual - which is very detailed, and various build logs on this forum, not only of the Sherbourne, but also other ships of the time period. If this build goes well and modeling feels like a hobby for me, I'd like to advance on to a bigger kit, maybe Vanguard's HMS Sphinx. I'm also toying with the idea of eventually building PoF models of some of the wrecks that I've been diving in the Baltic Sea. Maybe similar to this model of the Swedish ship Svärdet and the wreck models at the Vasa museum. I look forward to starting the build process soon and returning with my first updates!


- 19 replies
-
- 6
-
-
- First build
- Cutter
- (and 2 more)
-
 There are a few different planking and rigging ideas I want to experiment and the HM Armed Cutter Sherbourne kit ticked all the boxes for this task. One of the methods I wish to try out is the use of steam to bend bend and twist the planks. The twisting of tapered planks around the bow region, I think, should produce the same result as Chuck's lateral planking method which I have tended to use, with limited success, on some of my last recent builds. I can also see the benefit with twisting some planks in the stern area, particularly those that fold under the stern counter and with the lower garboard plank(s) which twists toward the stern post area. There are some excellent YouTube videos, showing this method on Jason's Modelkit Stuff YouTube channel. The Sherbourne kit is scheduled for delivery tomorrow (4th December 2024) morning and the shipyard is ready and waiting for the new arrival. My next my major project will be the Harpy (Vanguard Models) which may arrive later in the week, but will probably arrive sometime next week, depending on when @chris watton receives the manual and plan sheets from the printers.
- 43 replies
-
- 7
-
-
- Vanguard Models
- Sherbourne
- (and 1 more)
-
 Table of contents Pre-building Log #1: research and preparation Log #2: Unboxing and review Hull Construction Log #3: Frame assembly Log #4: Transom, Fairing and Keel Log #5: Bulwarks Log #6: First planks Log #7: First layer planks - pt 2 Log #8: Finishing and sanding first layer planking Log #9: Starting the second layer planking Log #10: Completing the first band Log #11: completing the second layer planking Hull painting Log #12: Priming the hull Log #13: Painting the hull Hull details Log #14: Bulwarks and Wales Log #15: Bulwarks and wales pt 2 ——————————————————— Log #1: Research and preparation This is the start of the Sherbourne build log, the kit won’t be arriving for another 2-3 weeks but anything that I should be aware of or extra parts I should get please let me know. I will be replacing all rope with Ropes of Scale and the kit blocks with Syren blocks.
- 60 replies
-
- 9
-
-
- vanguard models
- cutter
- (and 1 more)
-
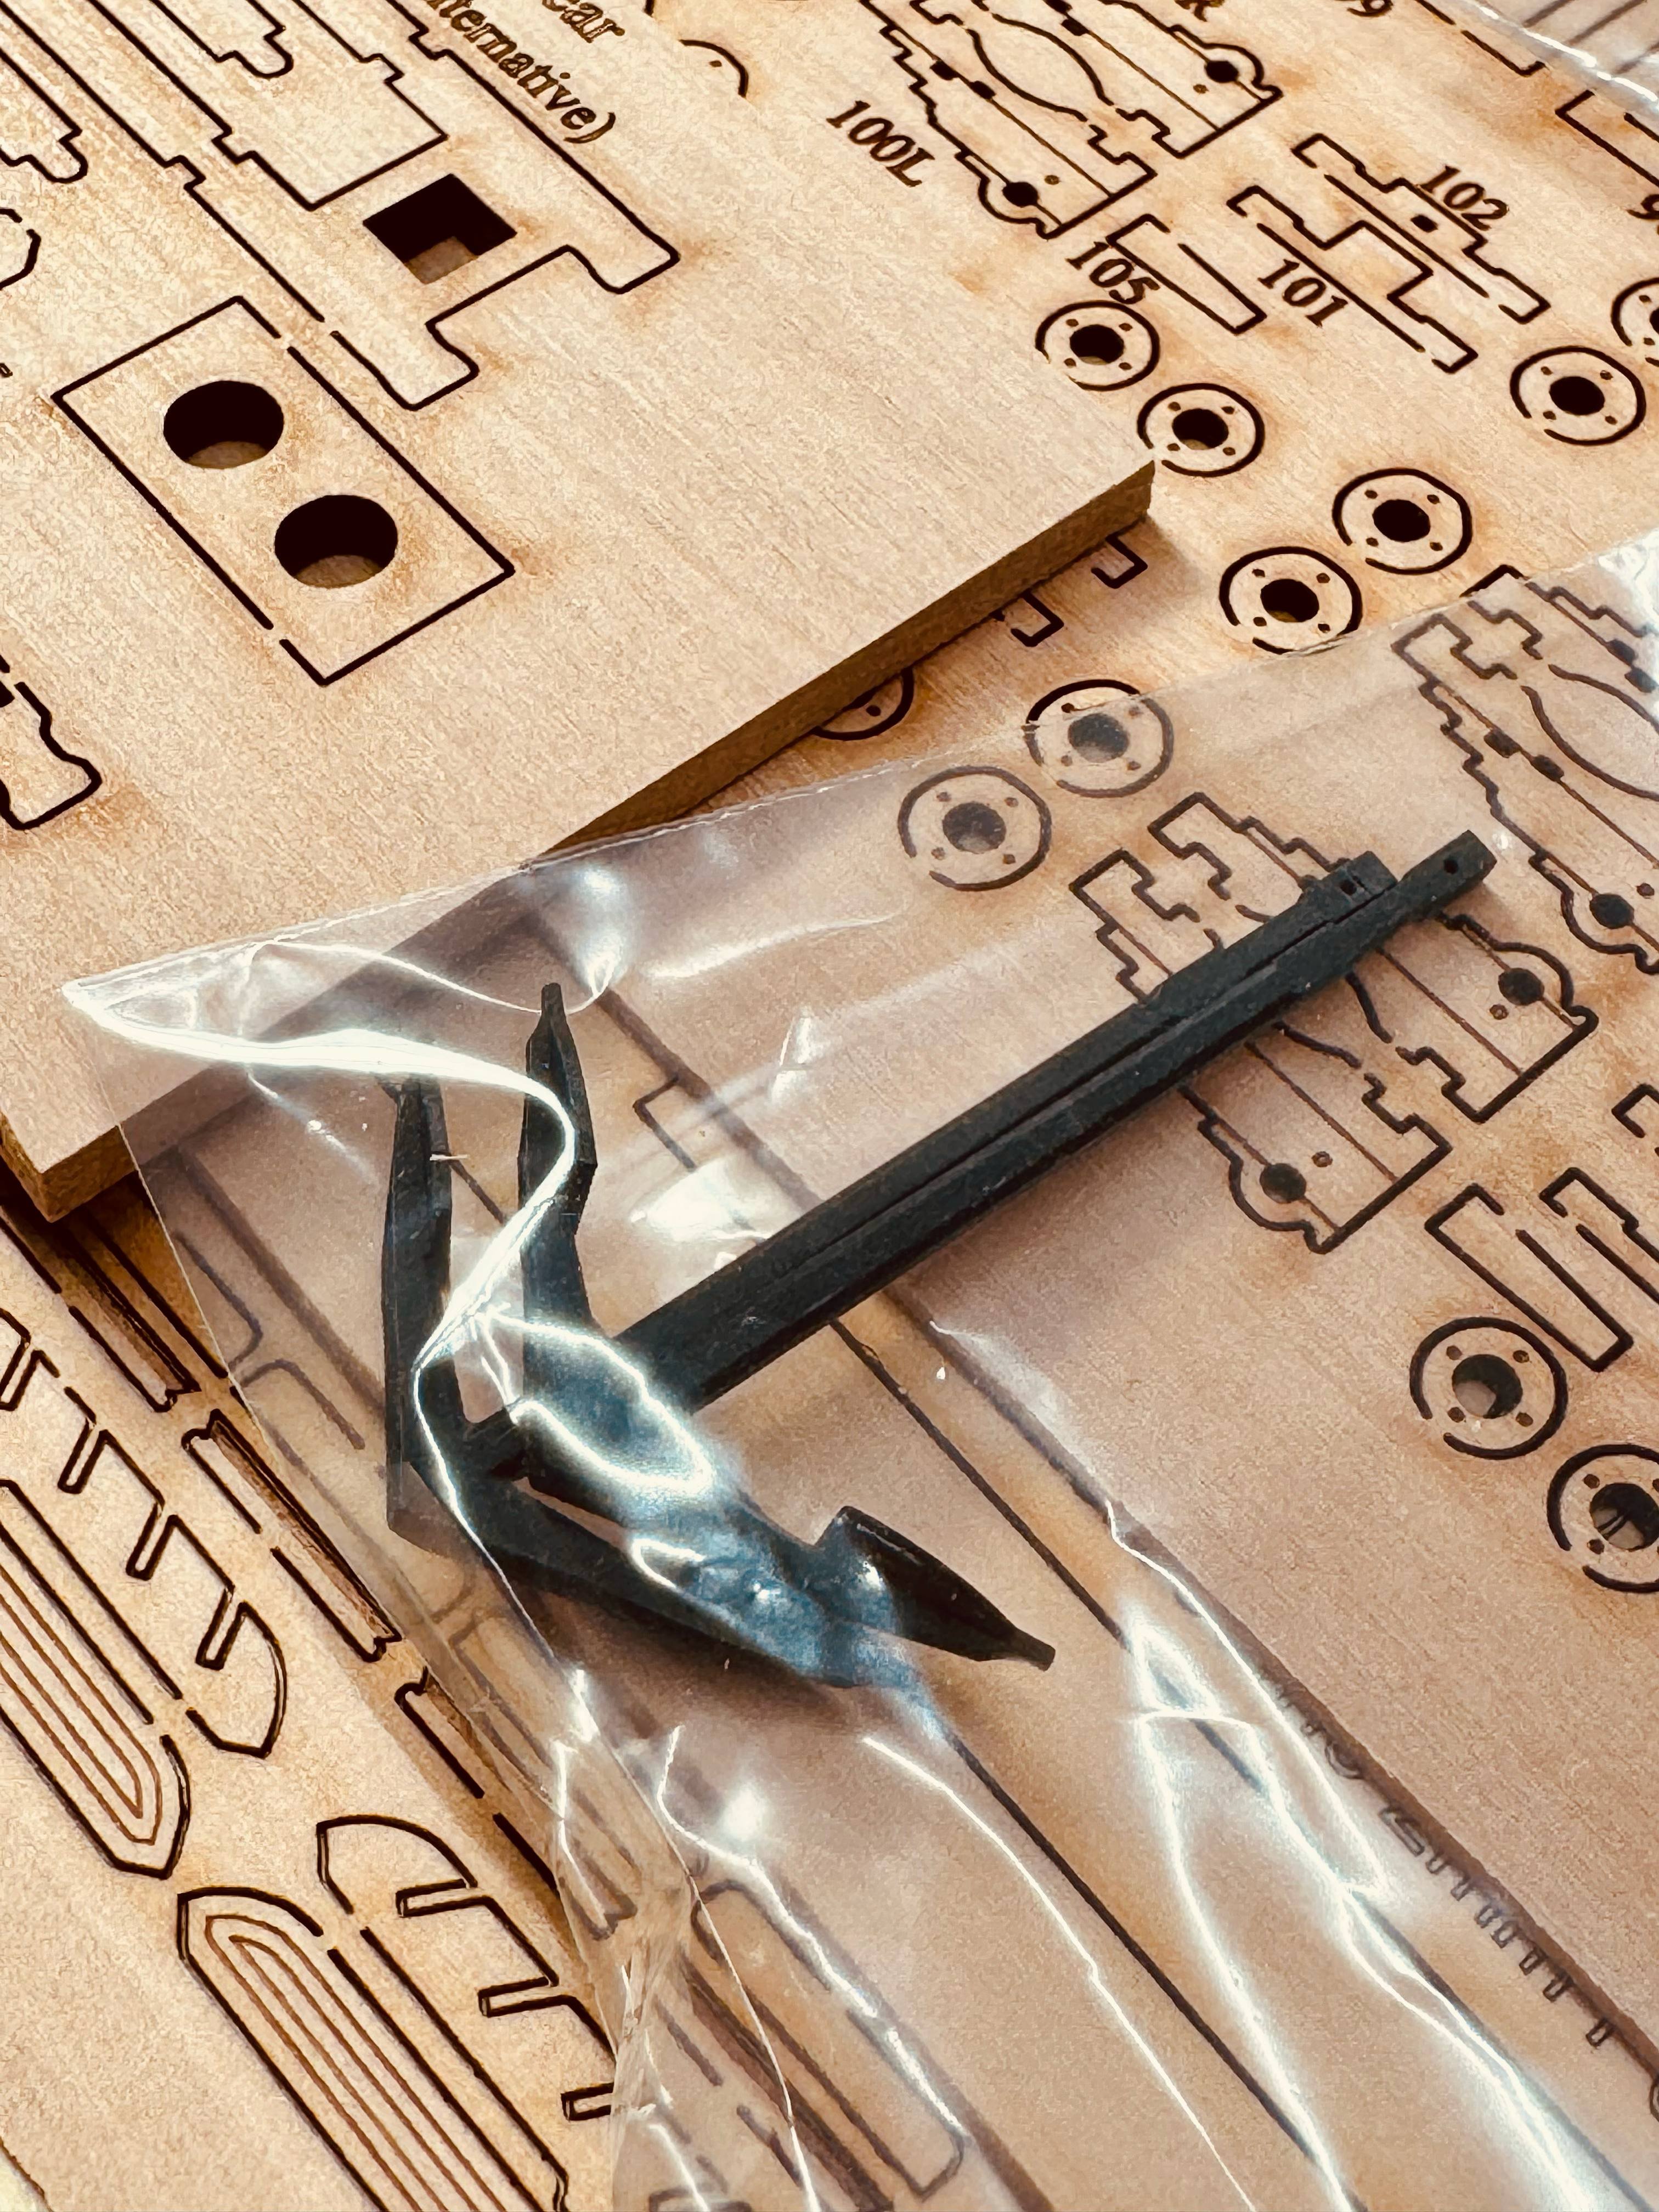
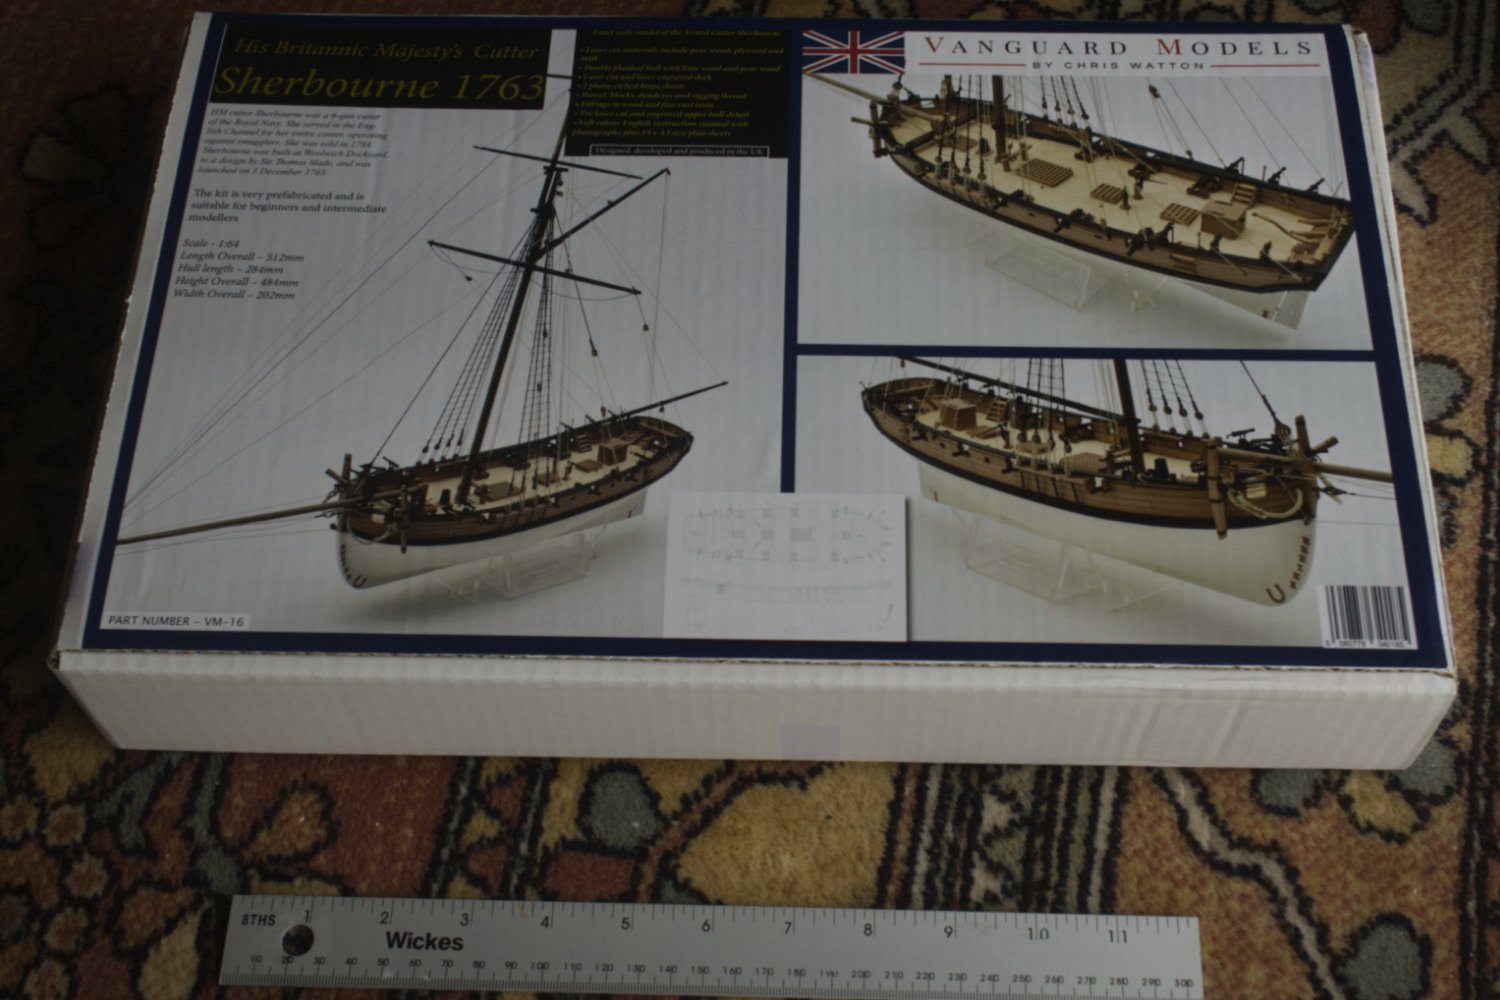
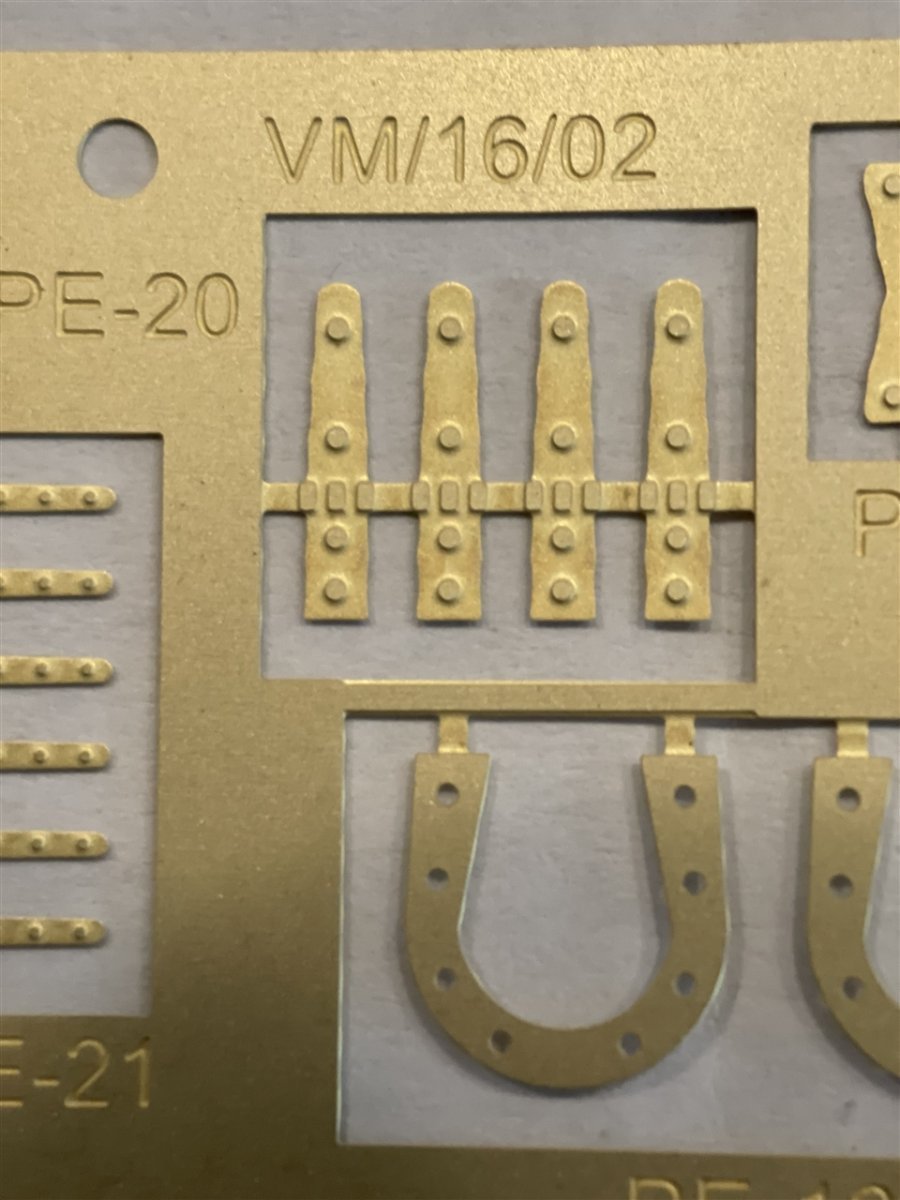
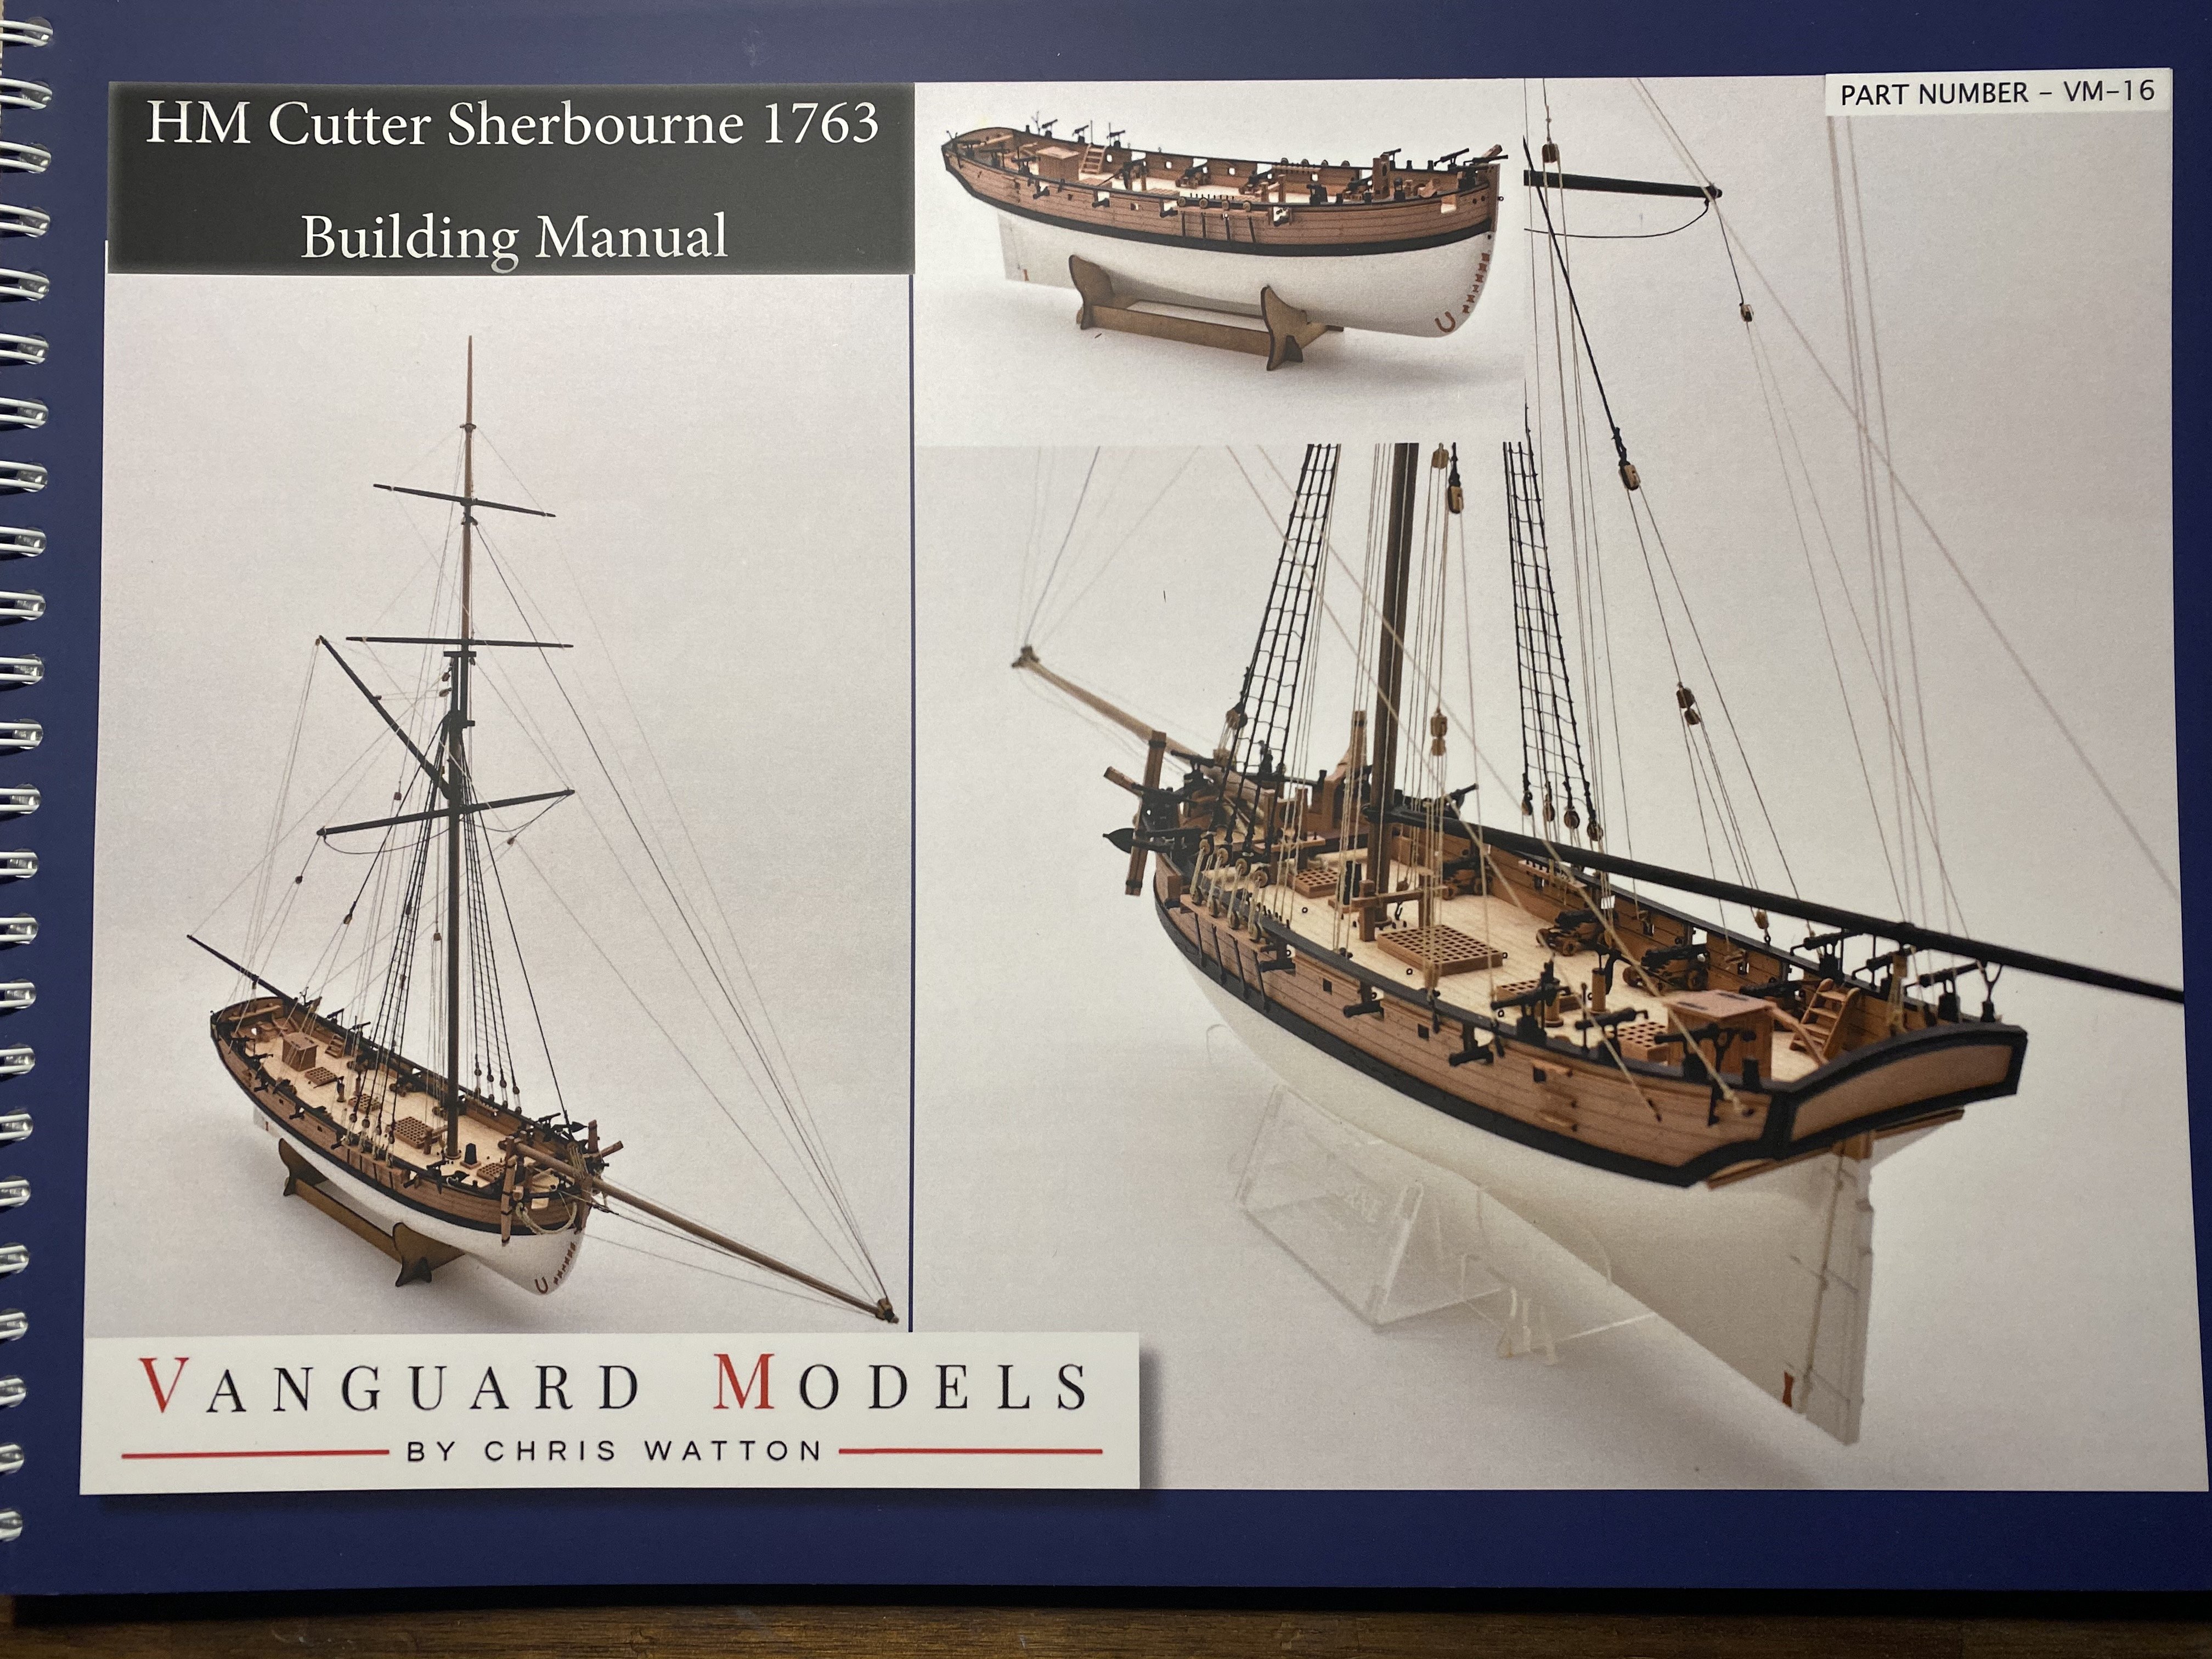
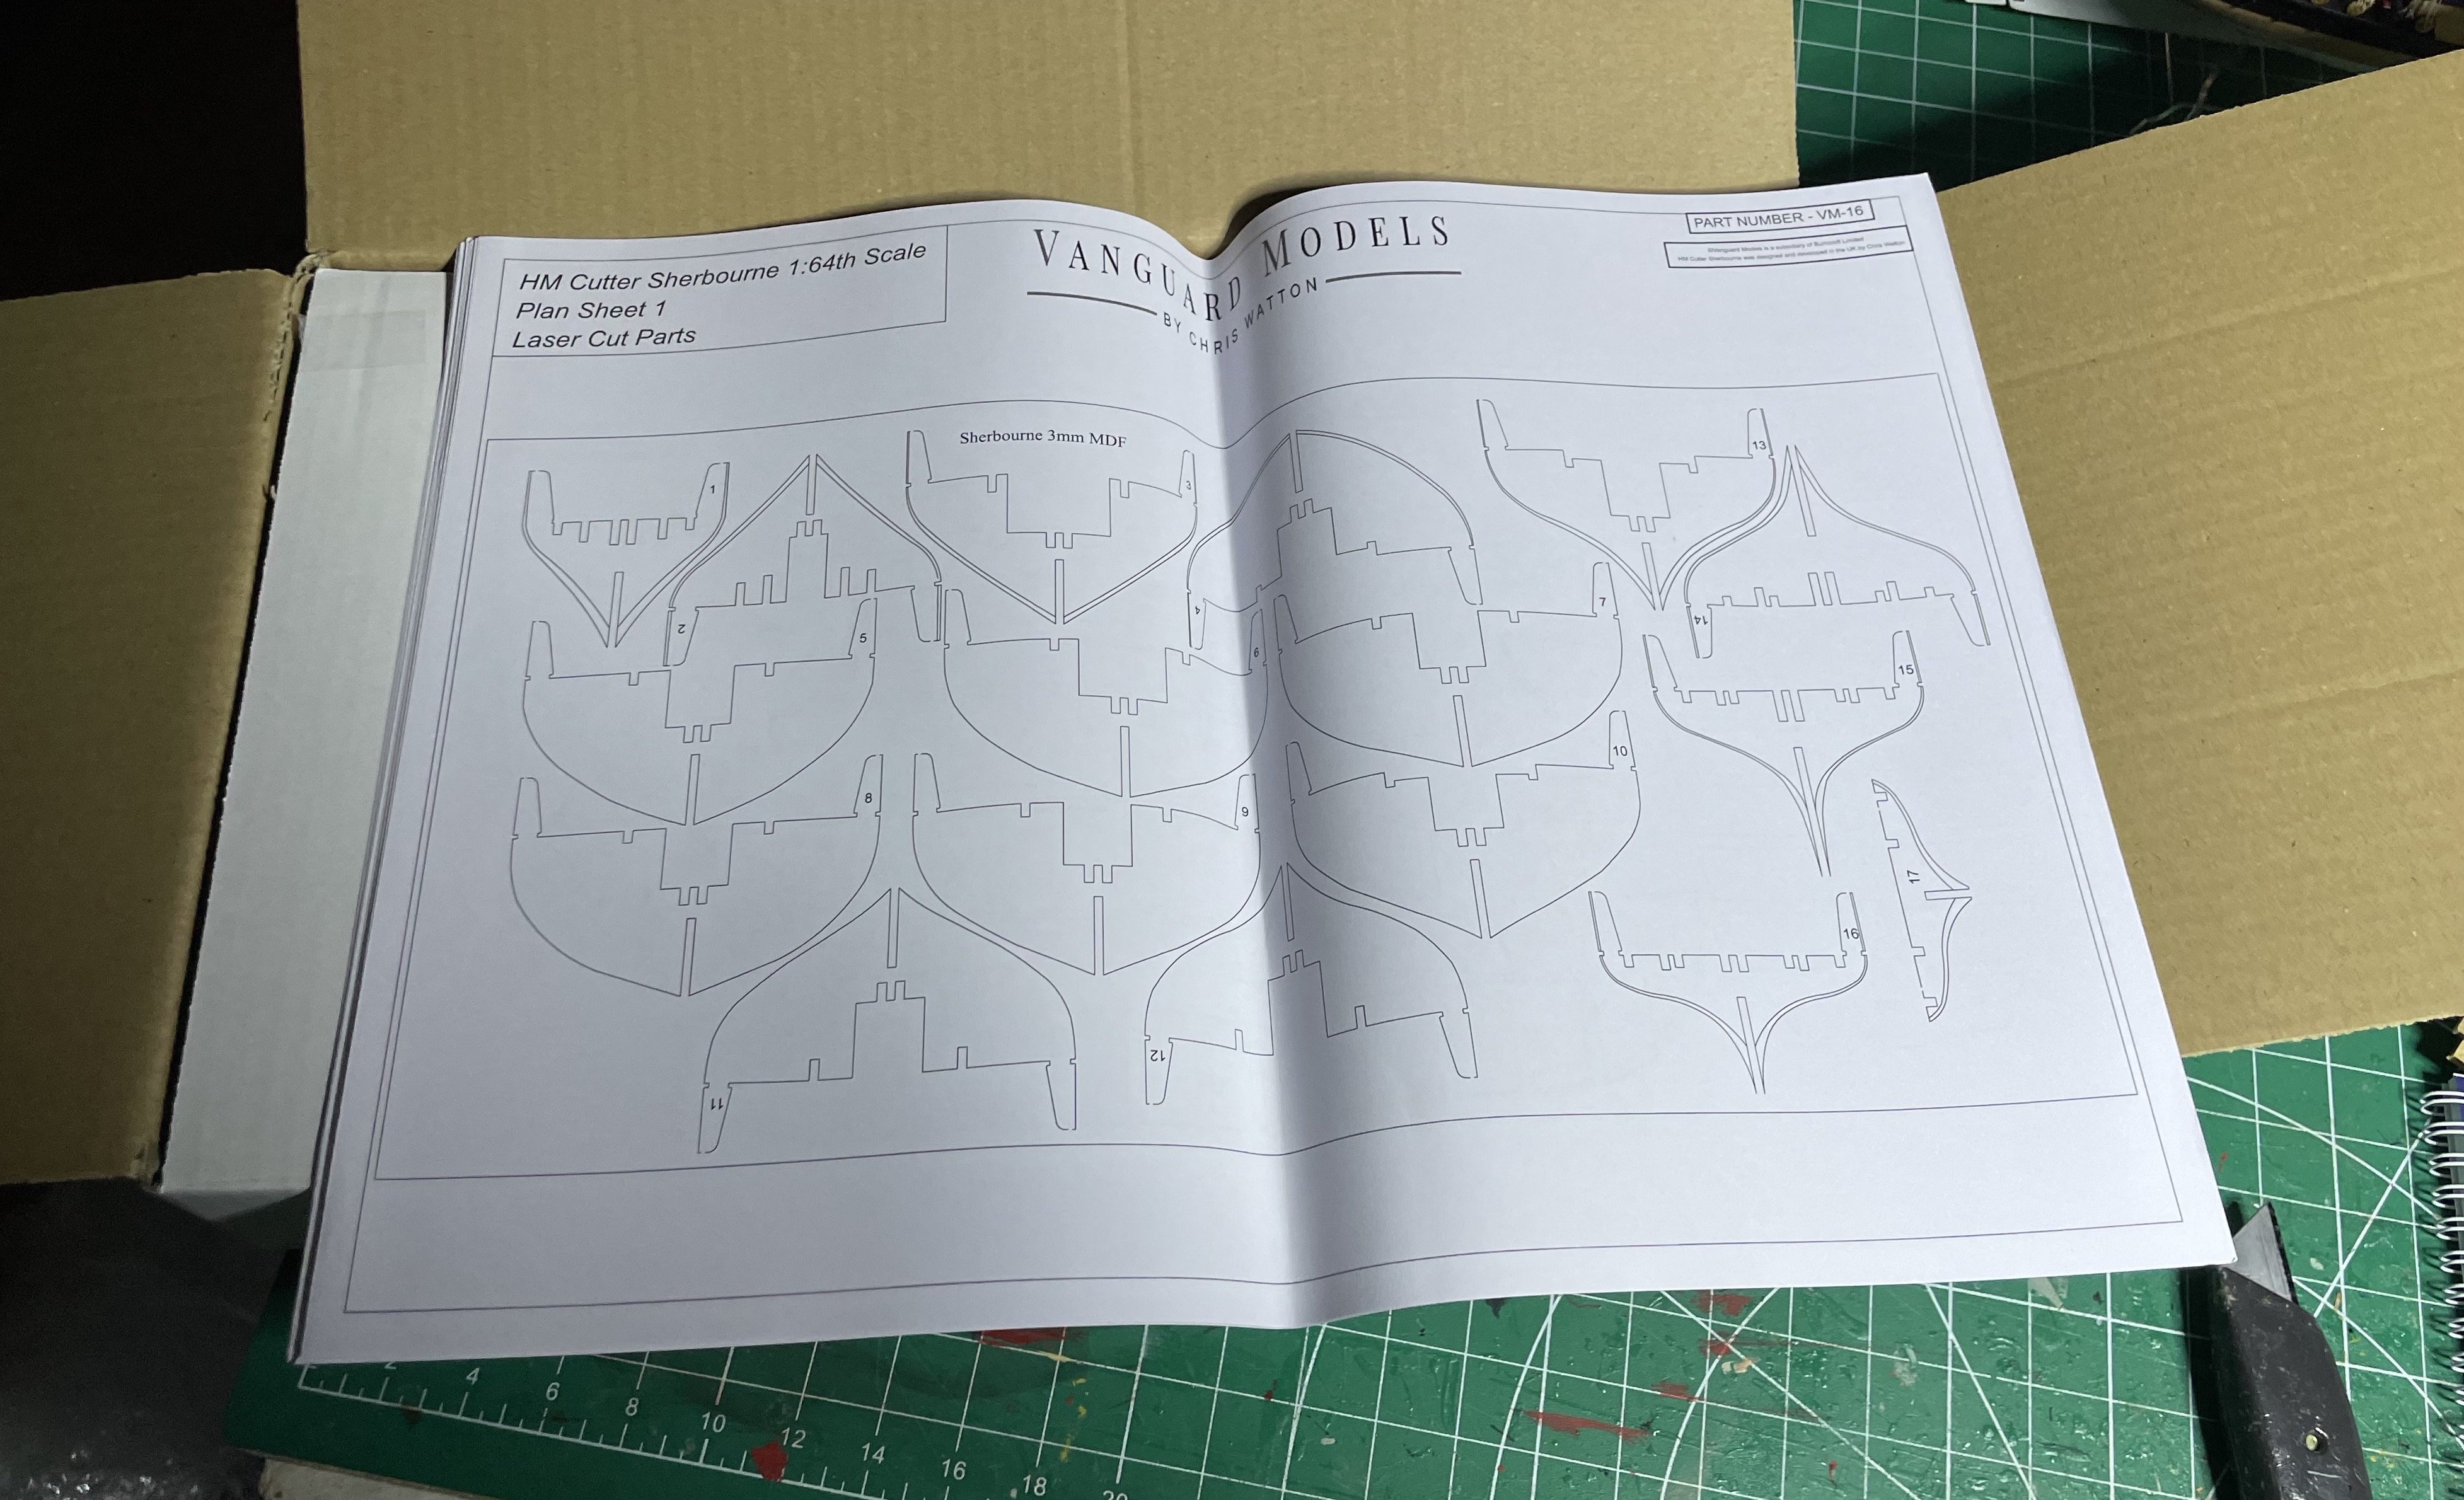
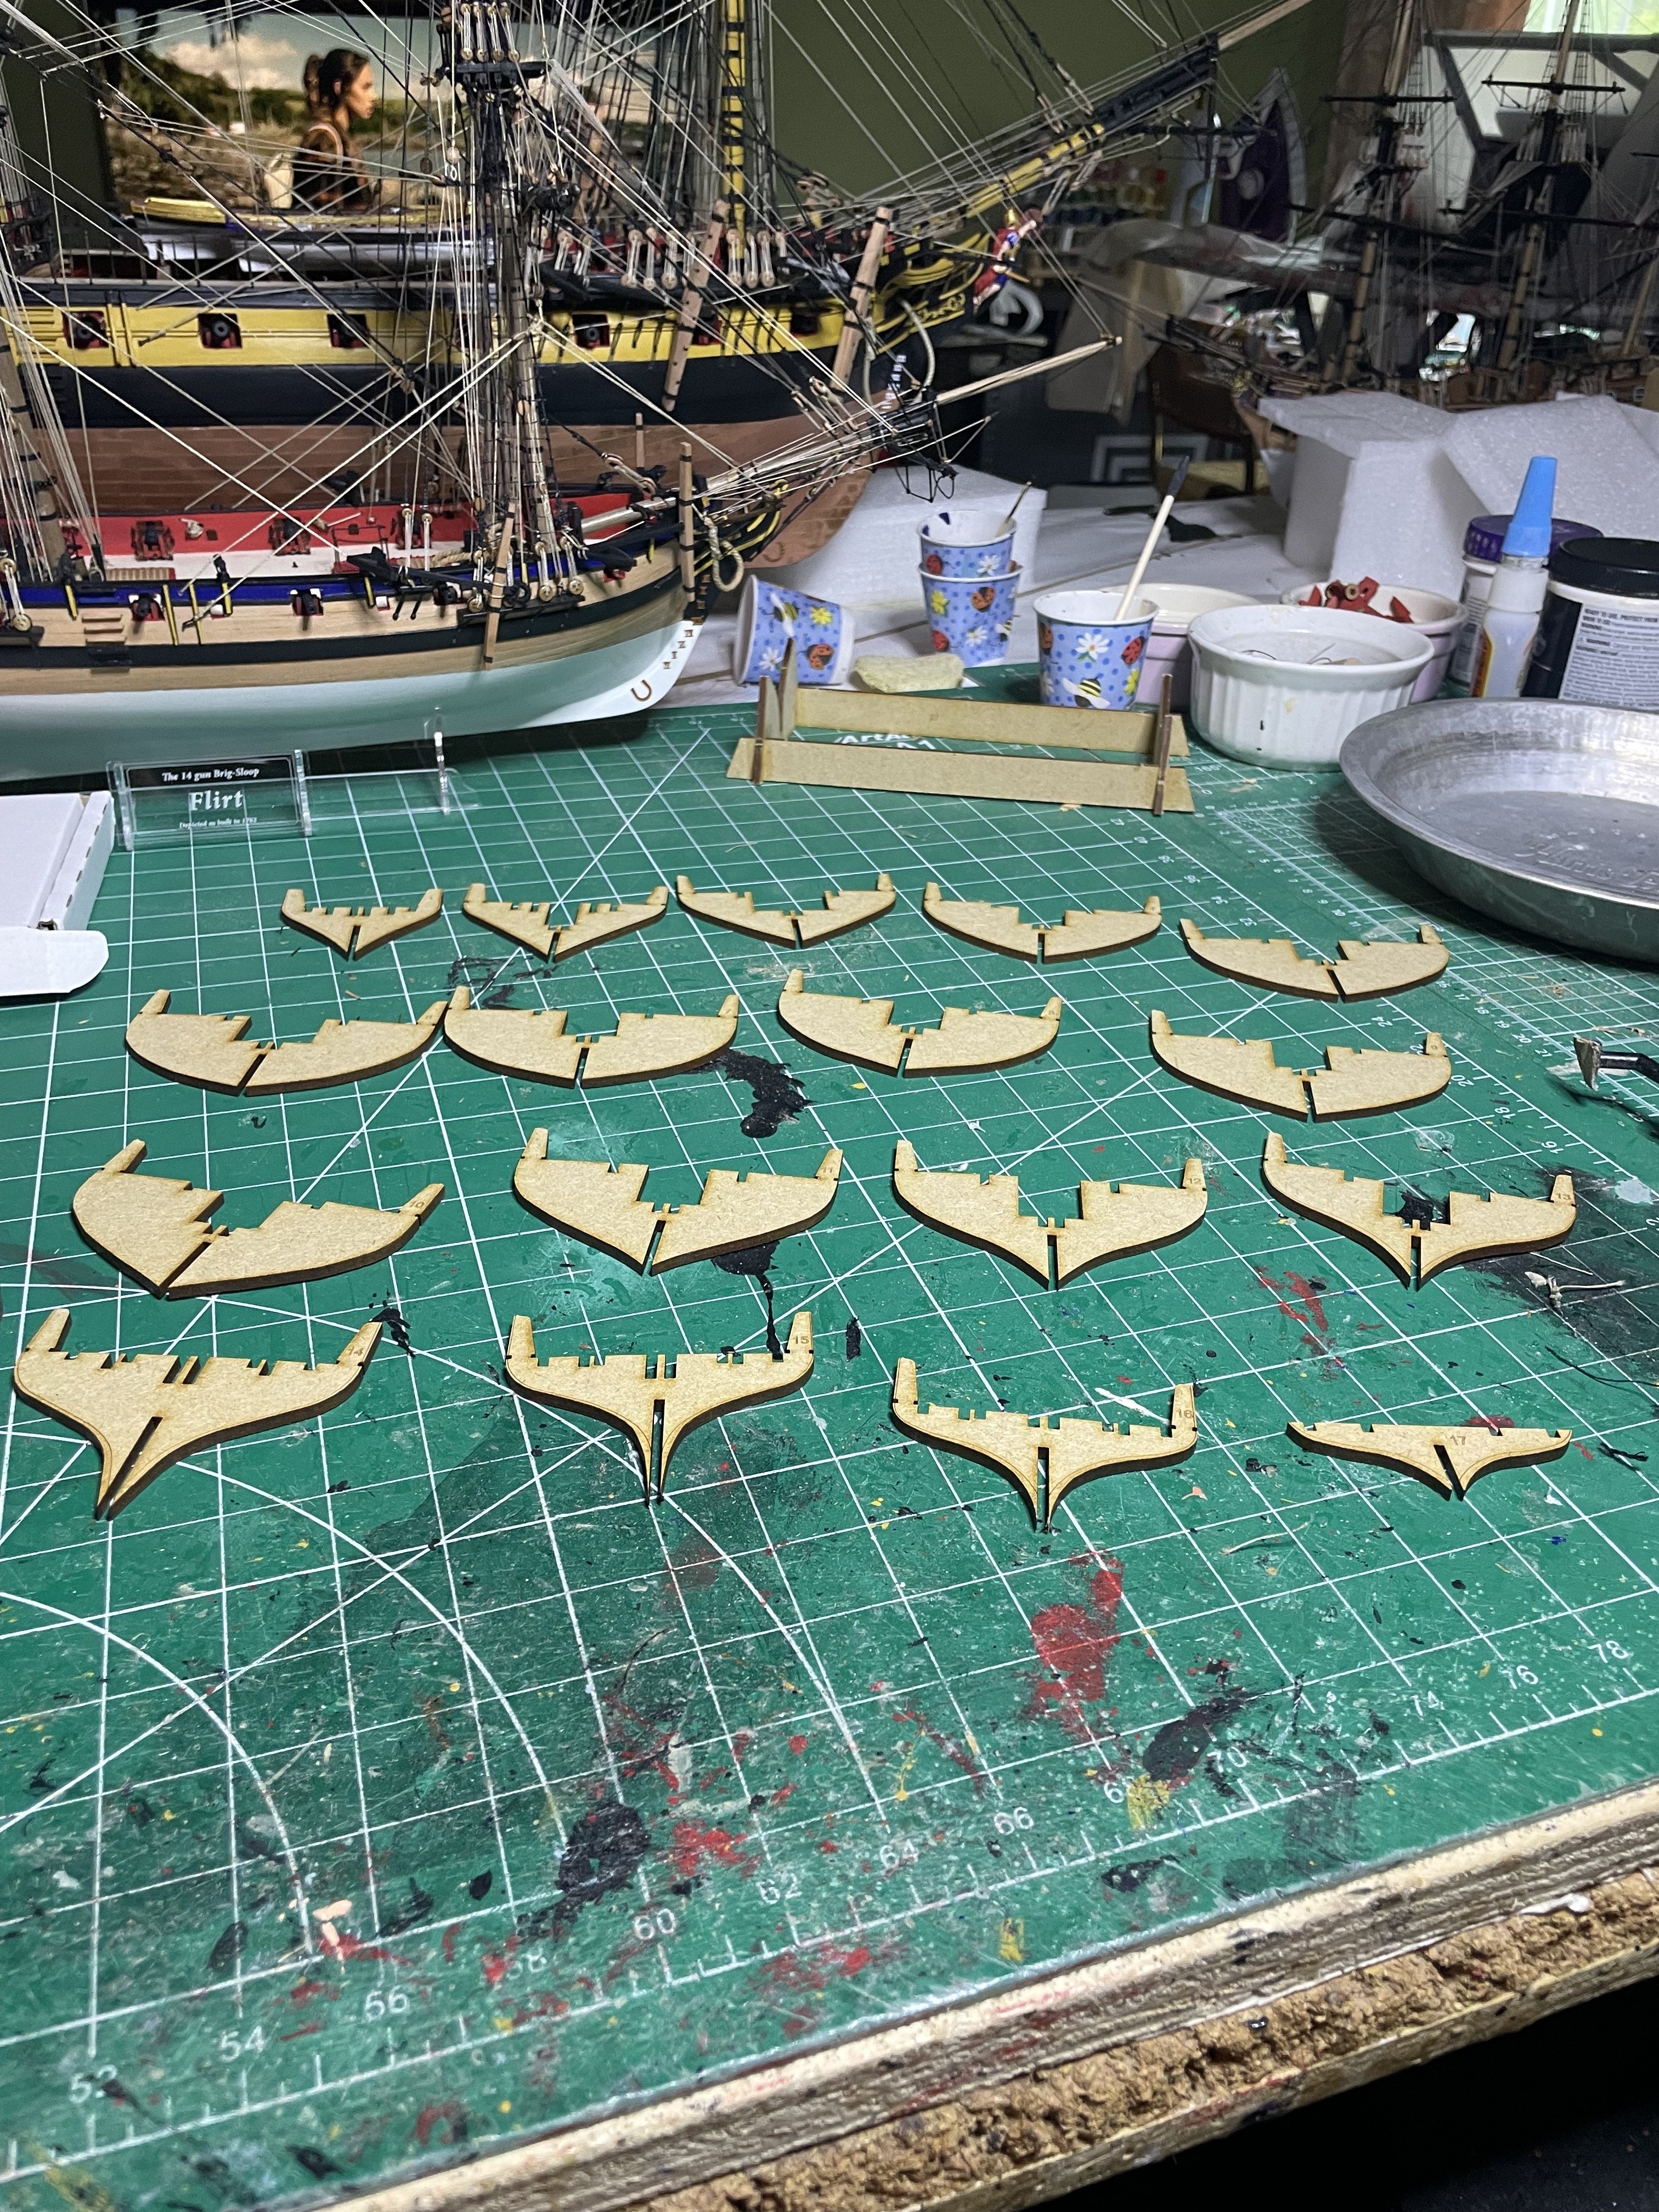
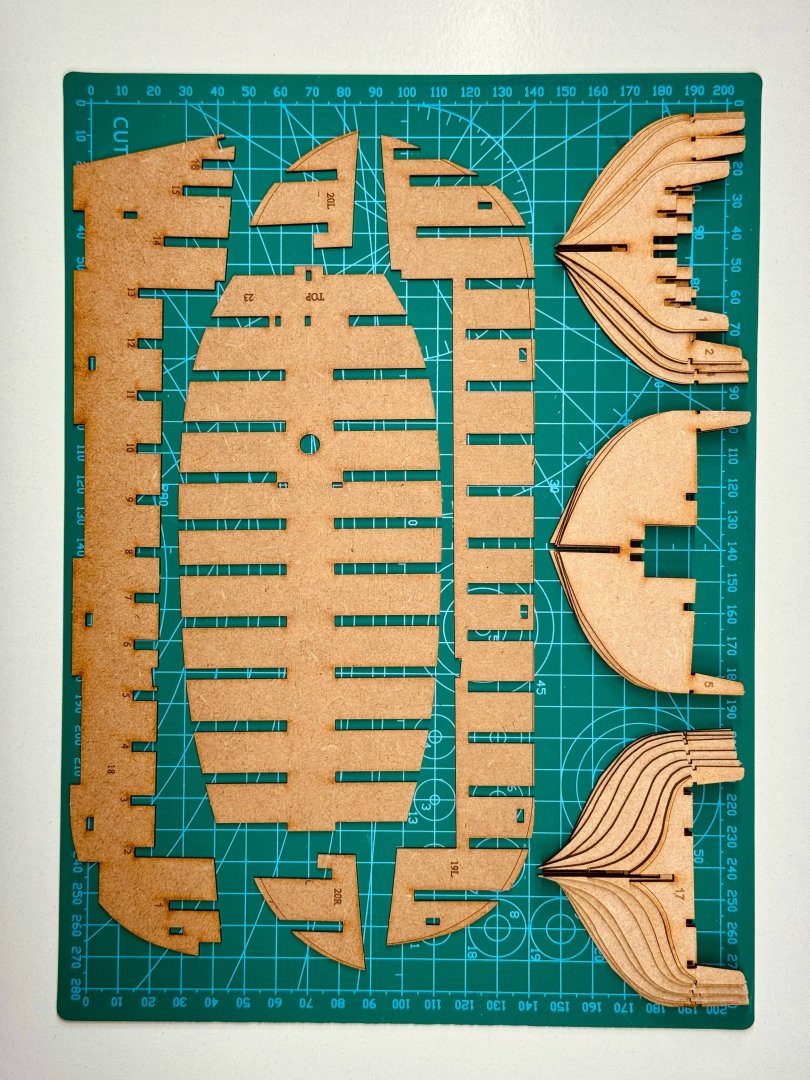
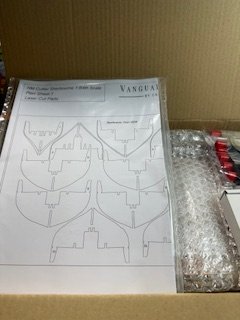
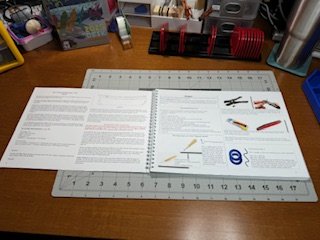
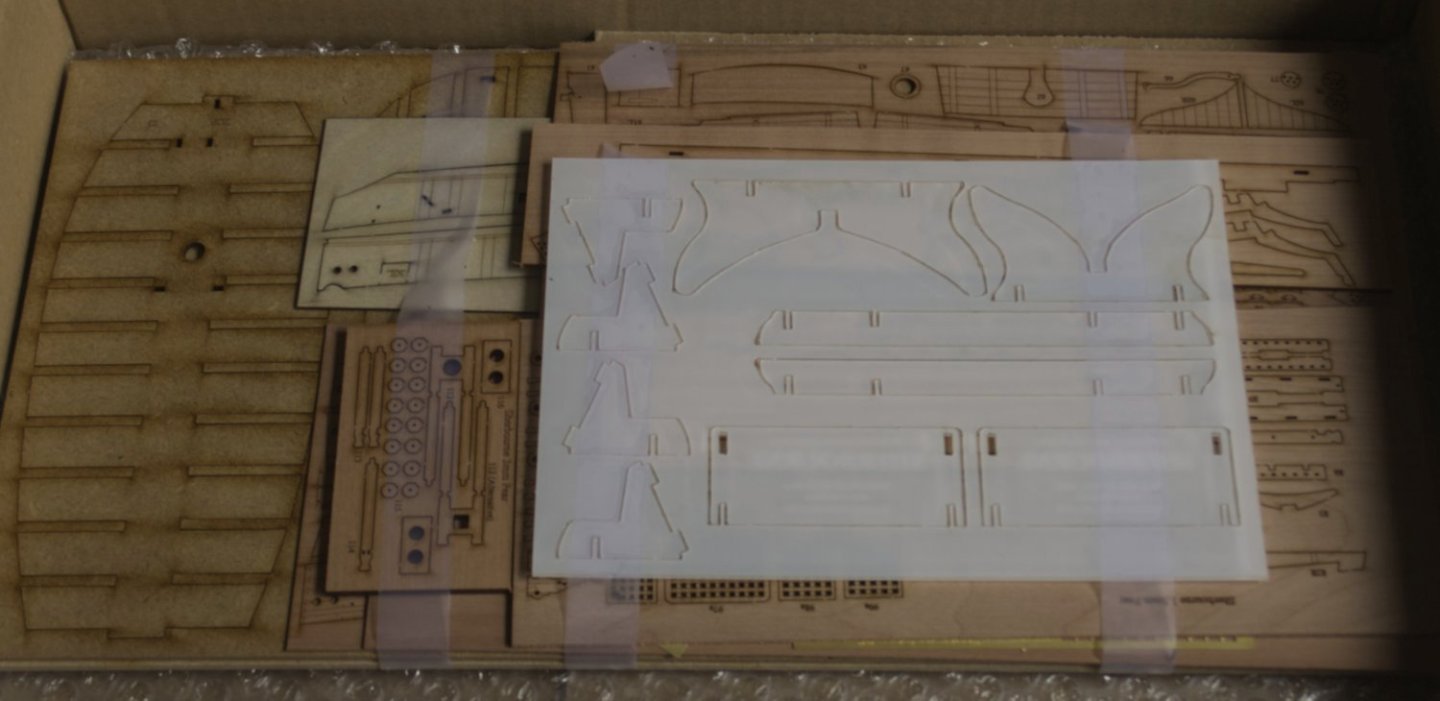
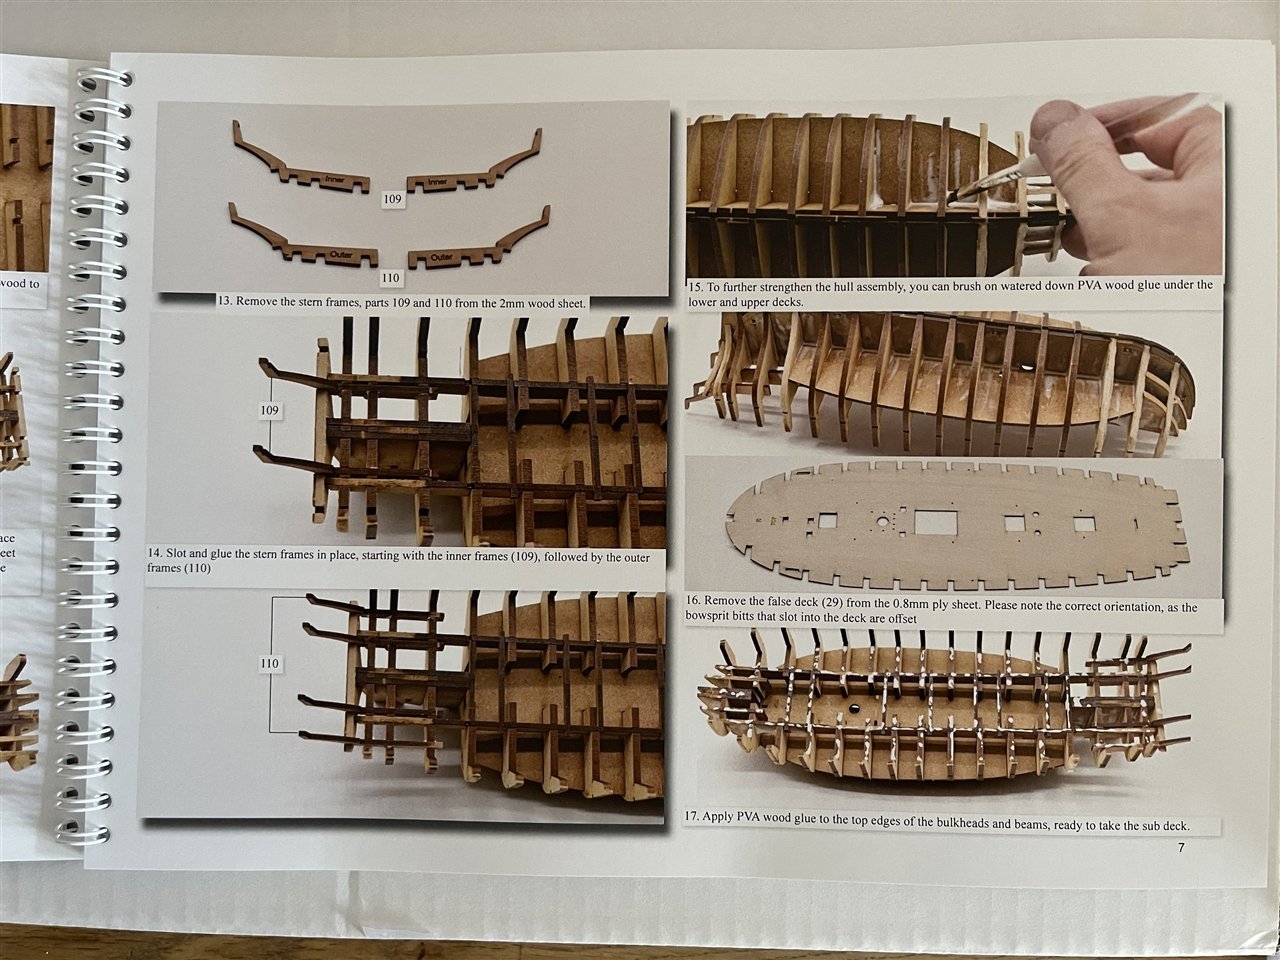
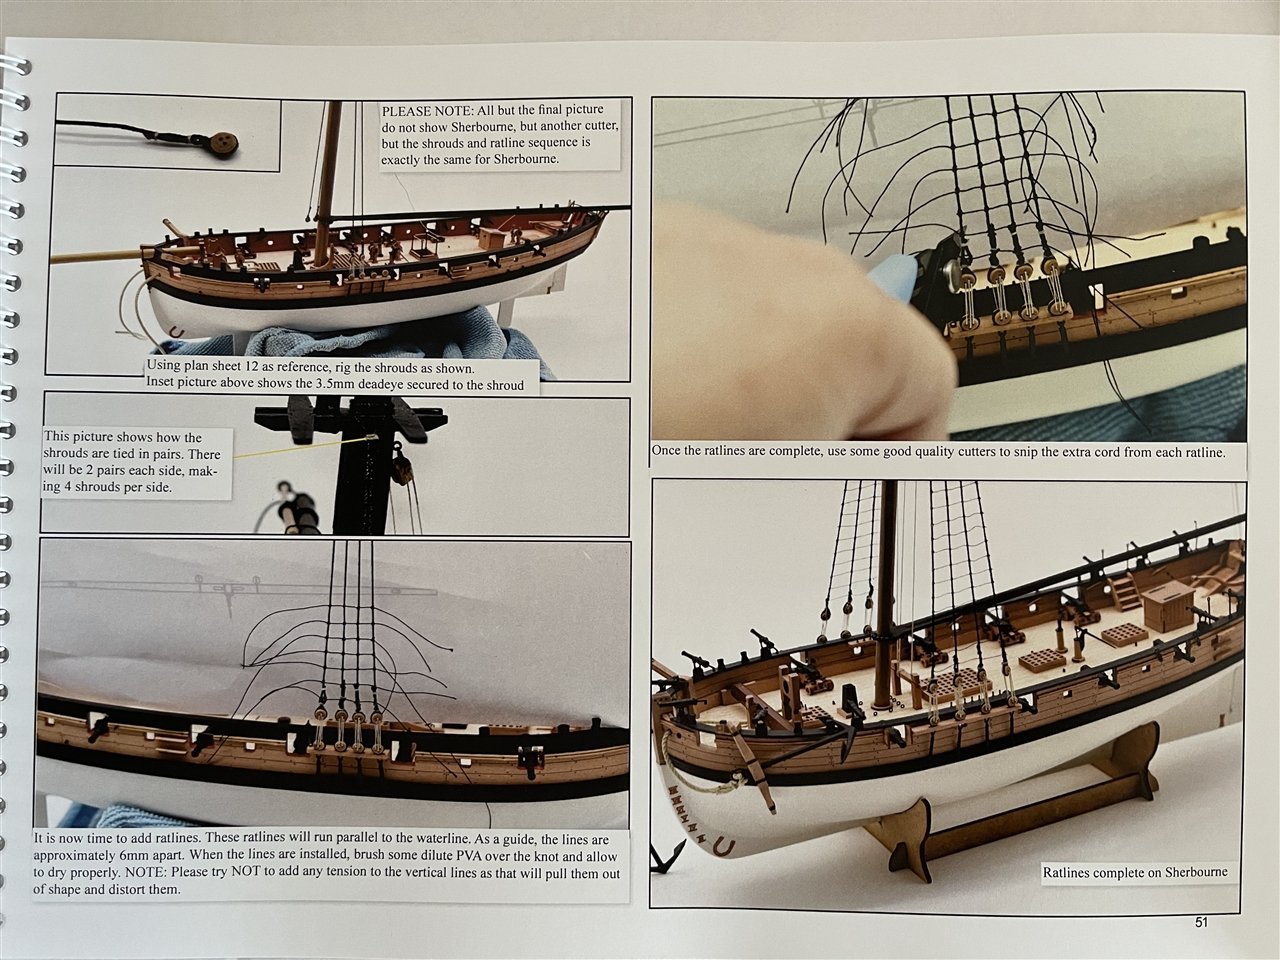
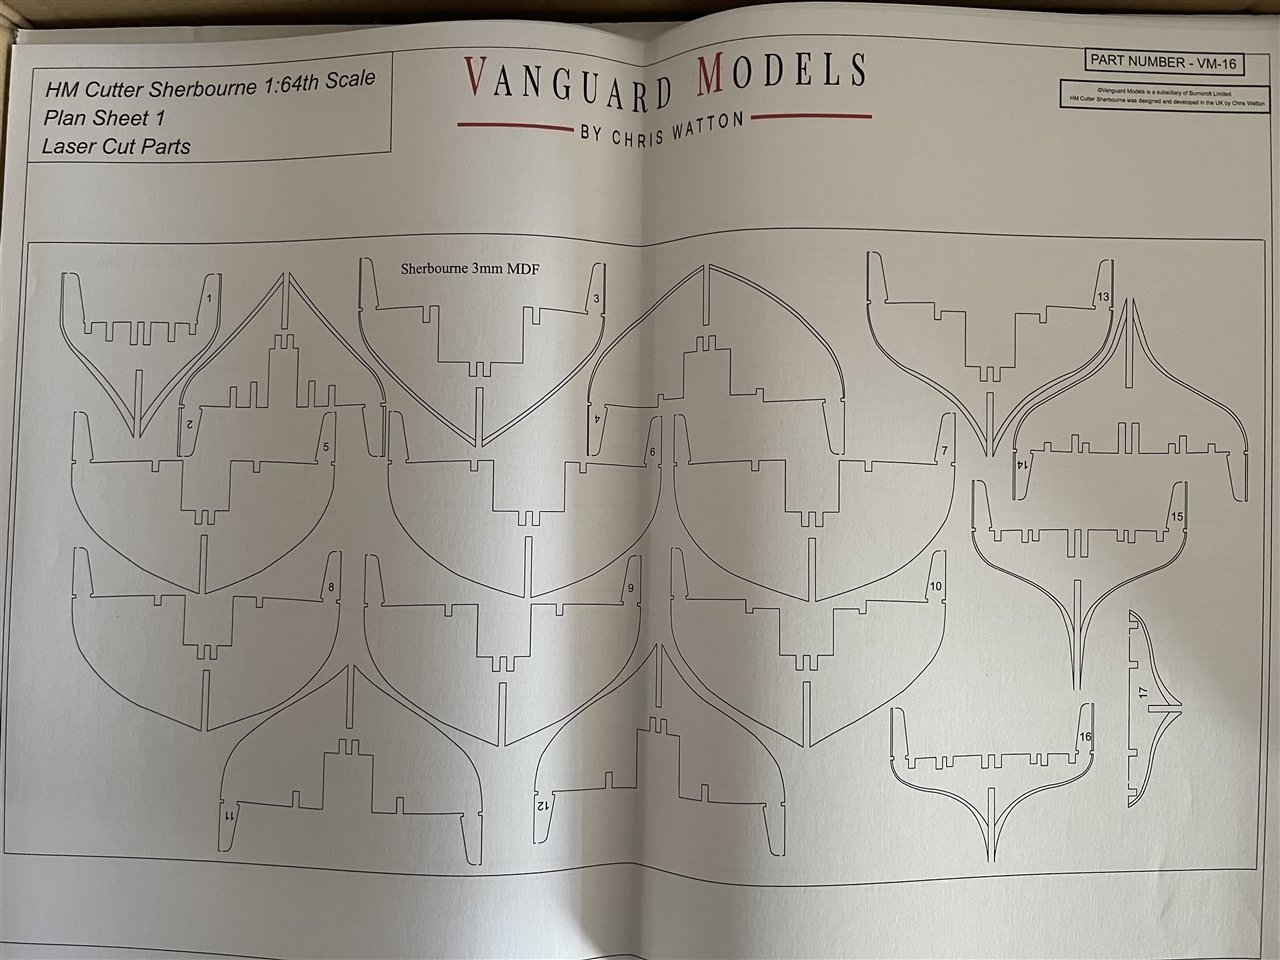
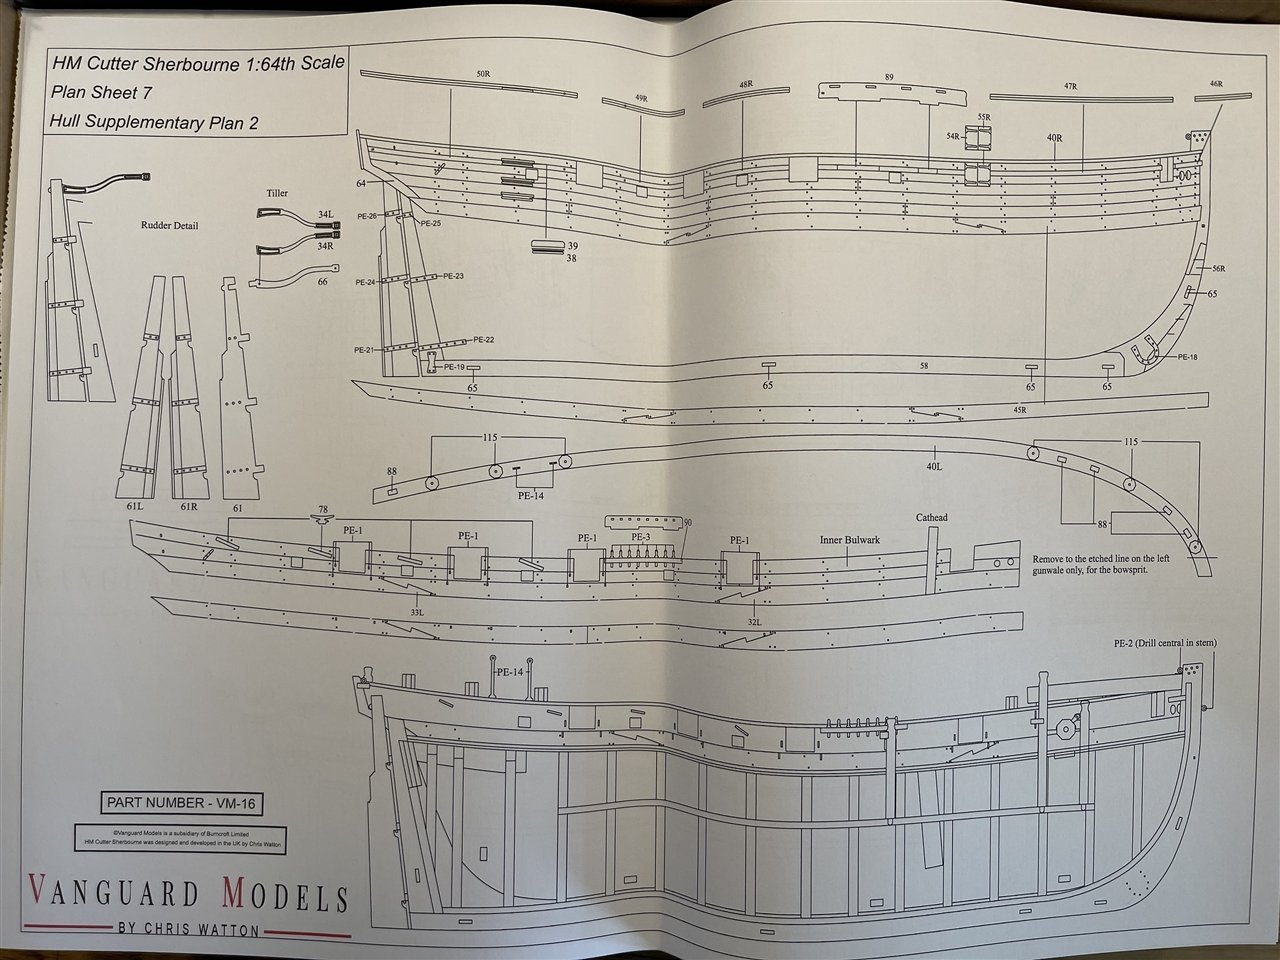
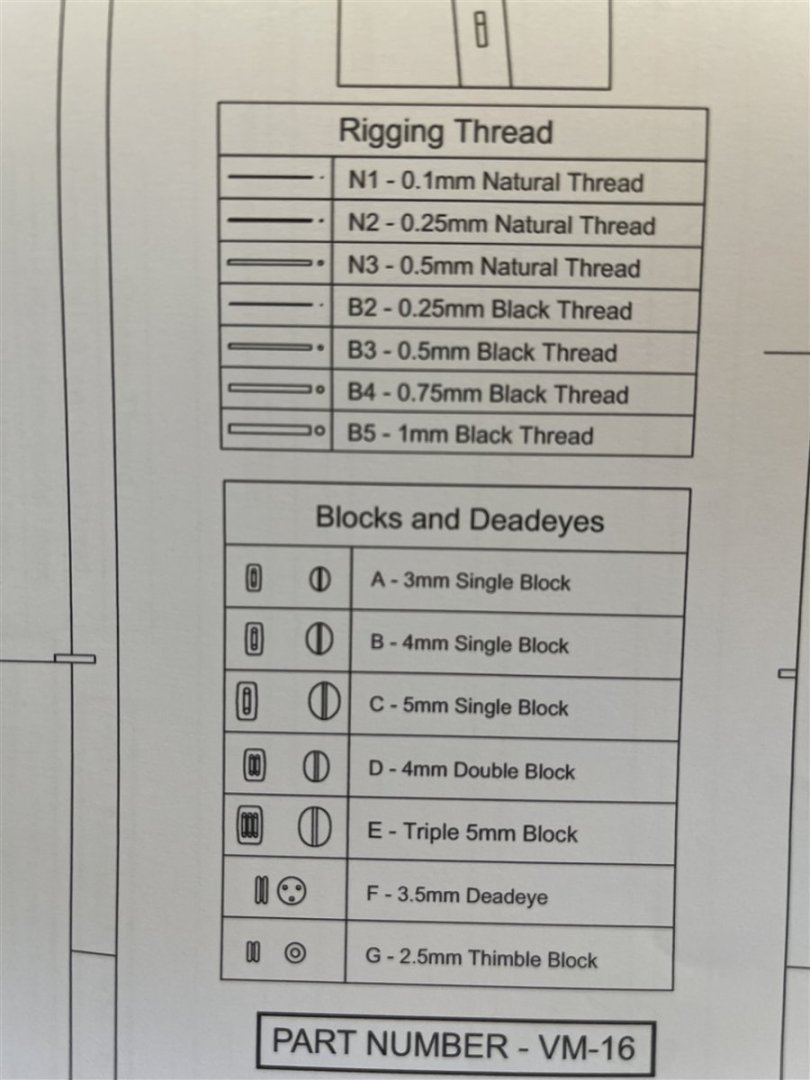
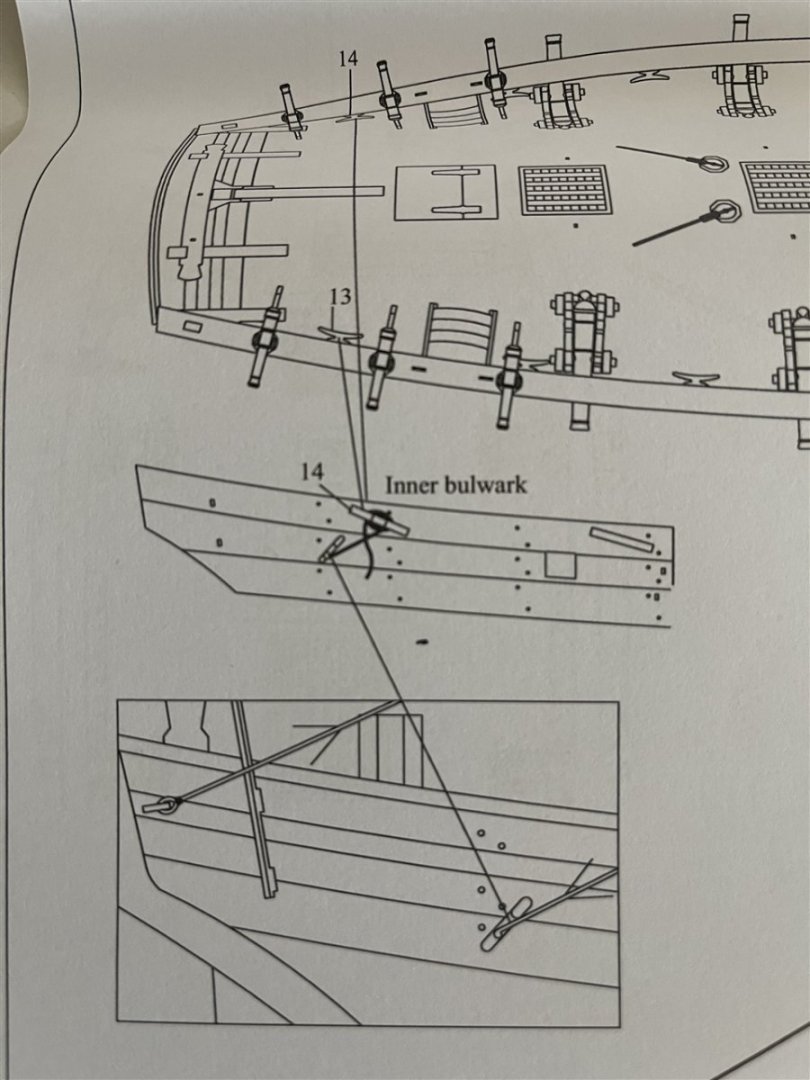
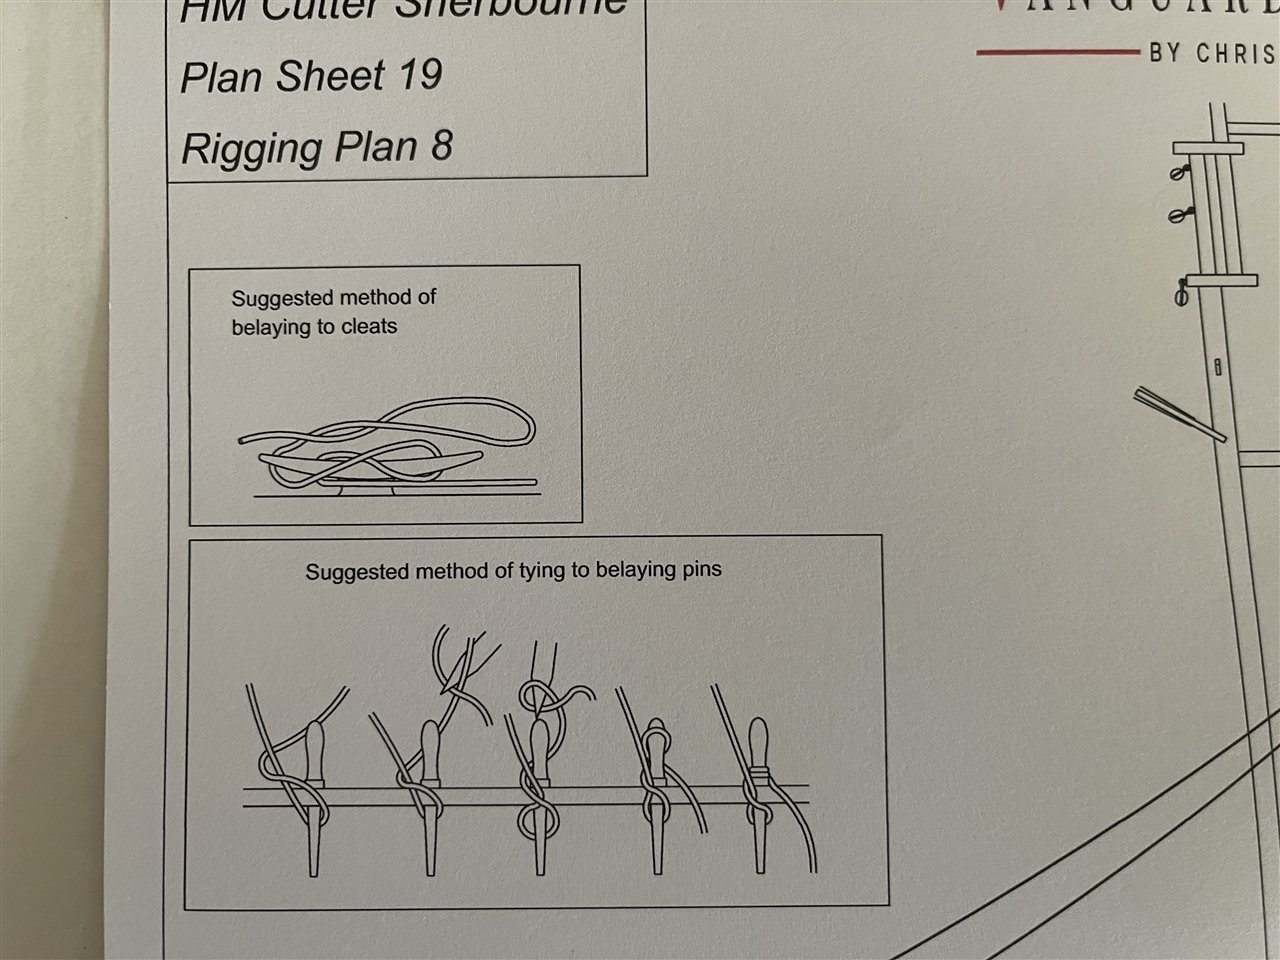
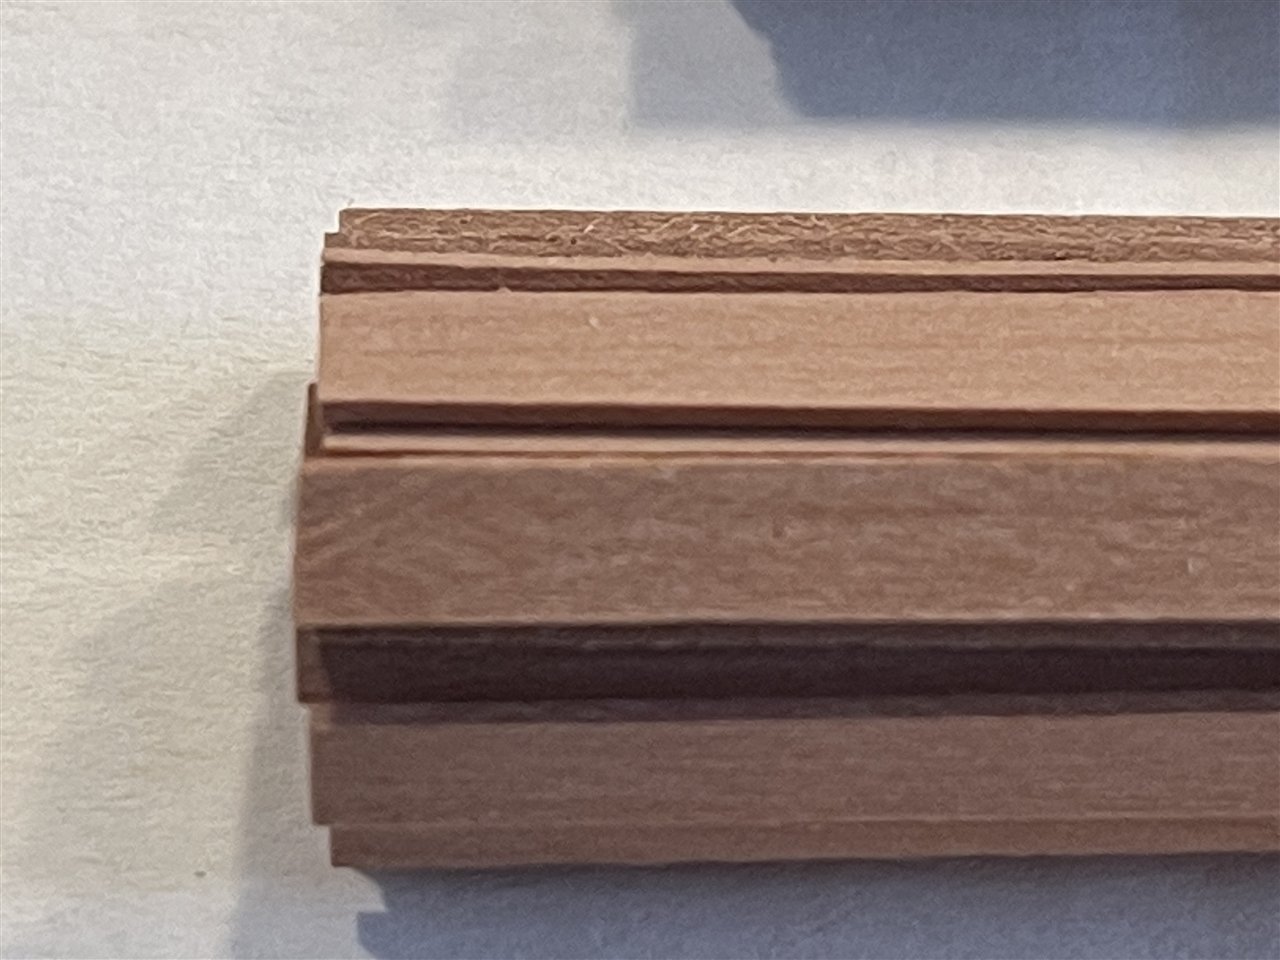
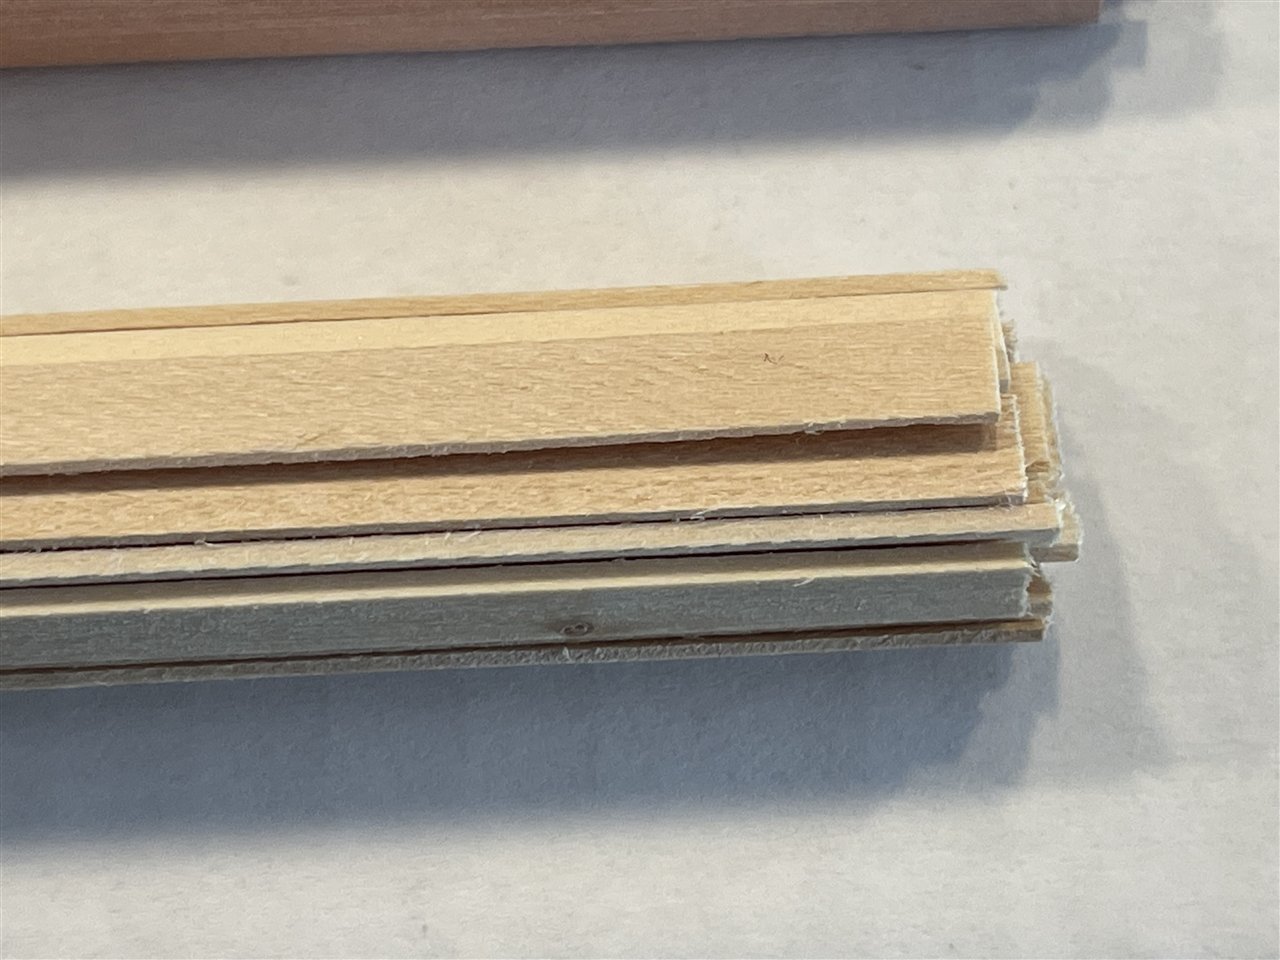
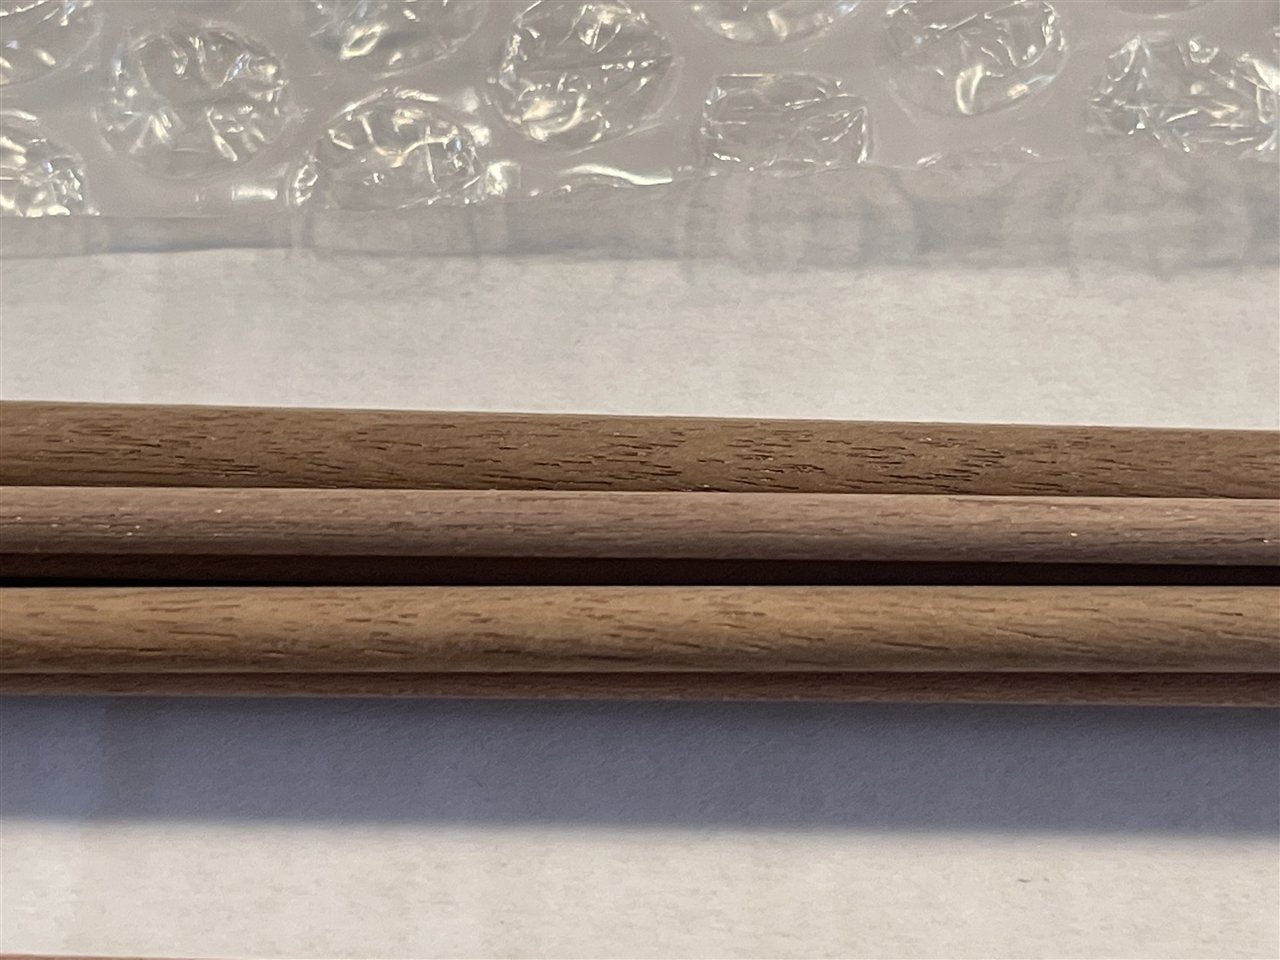
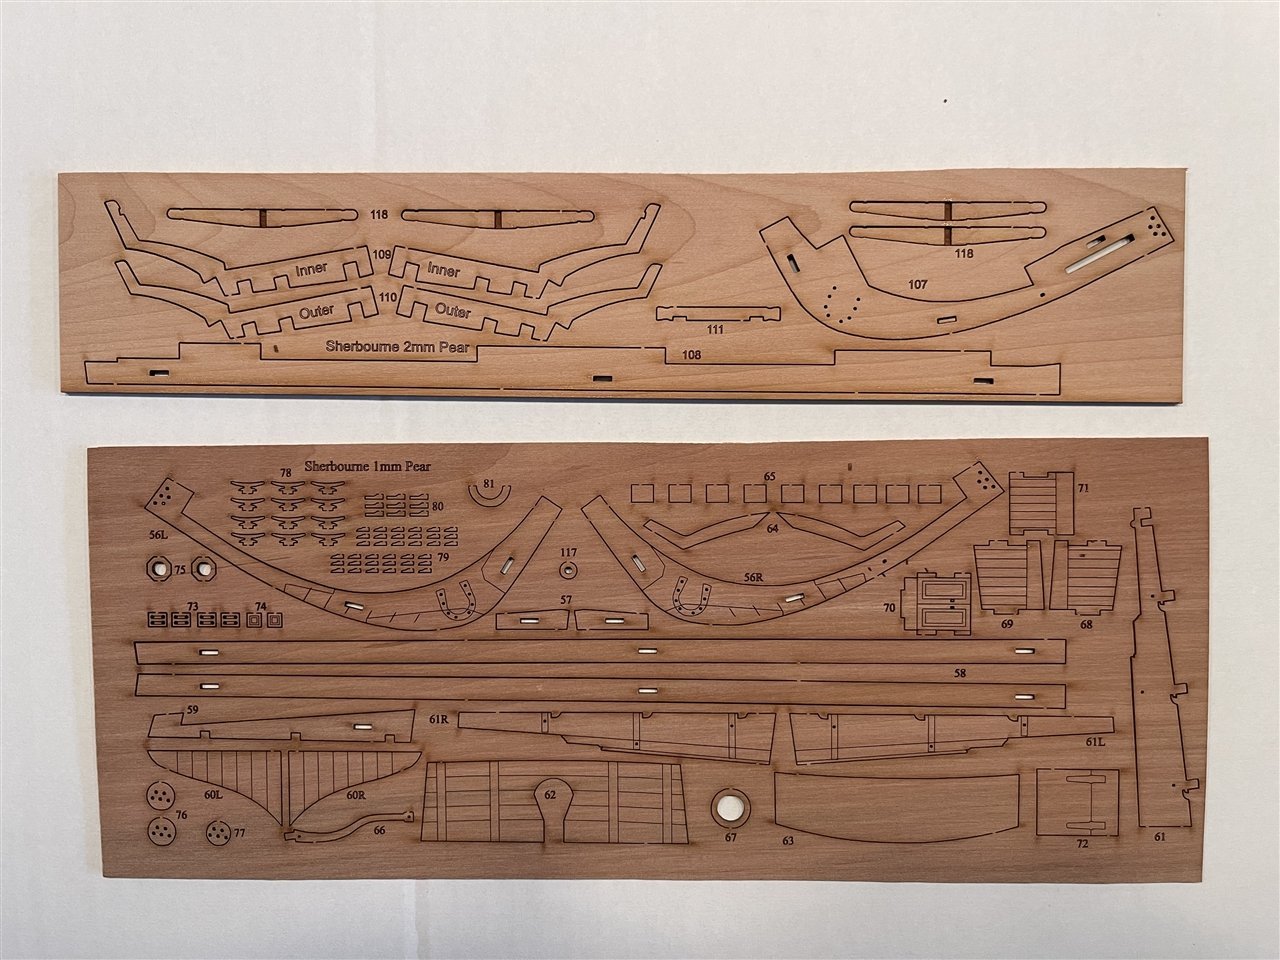
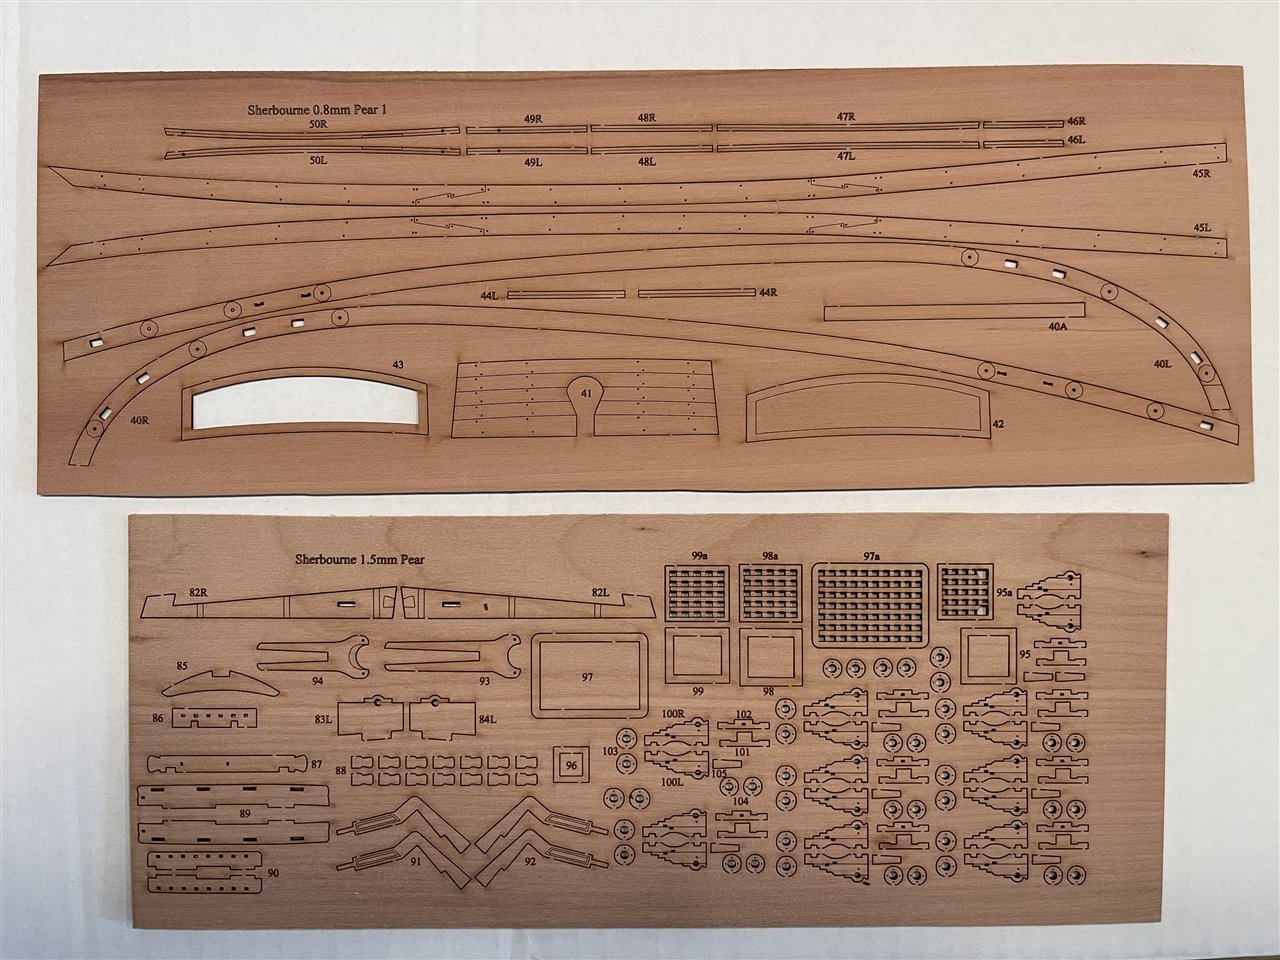
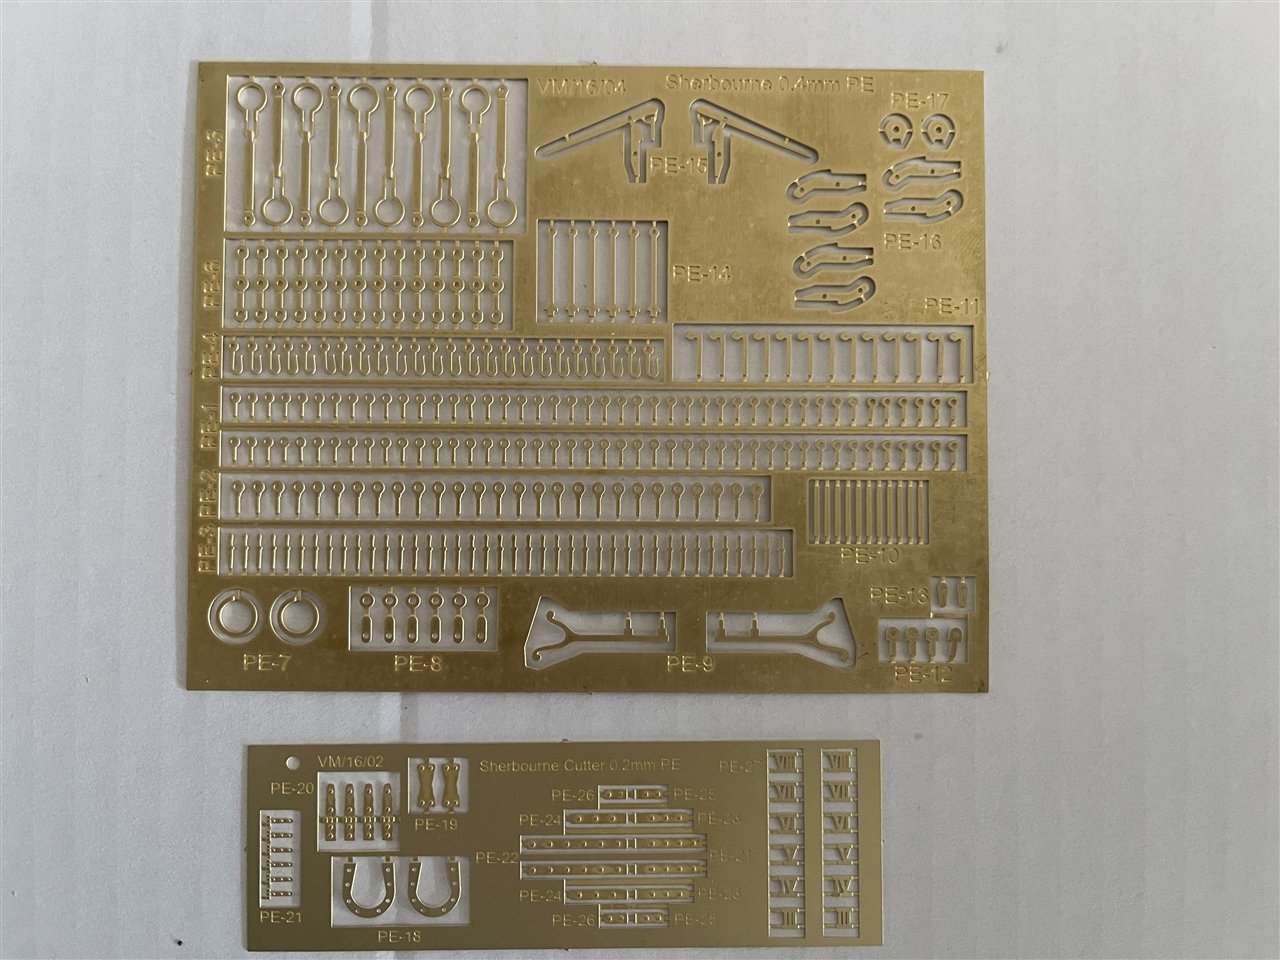
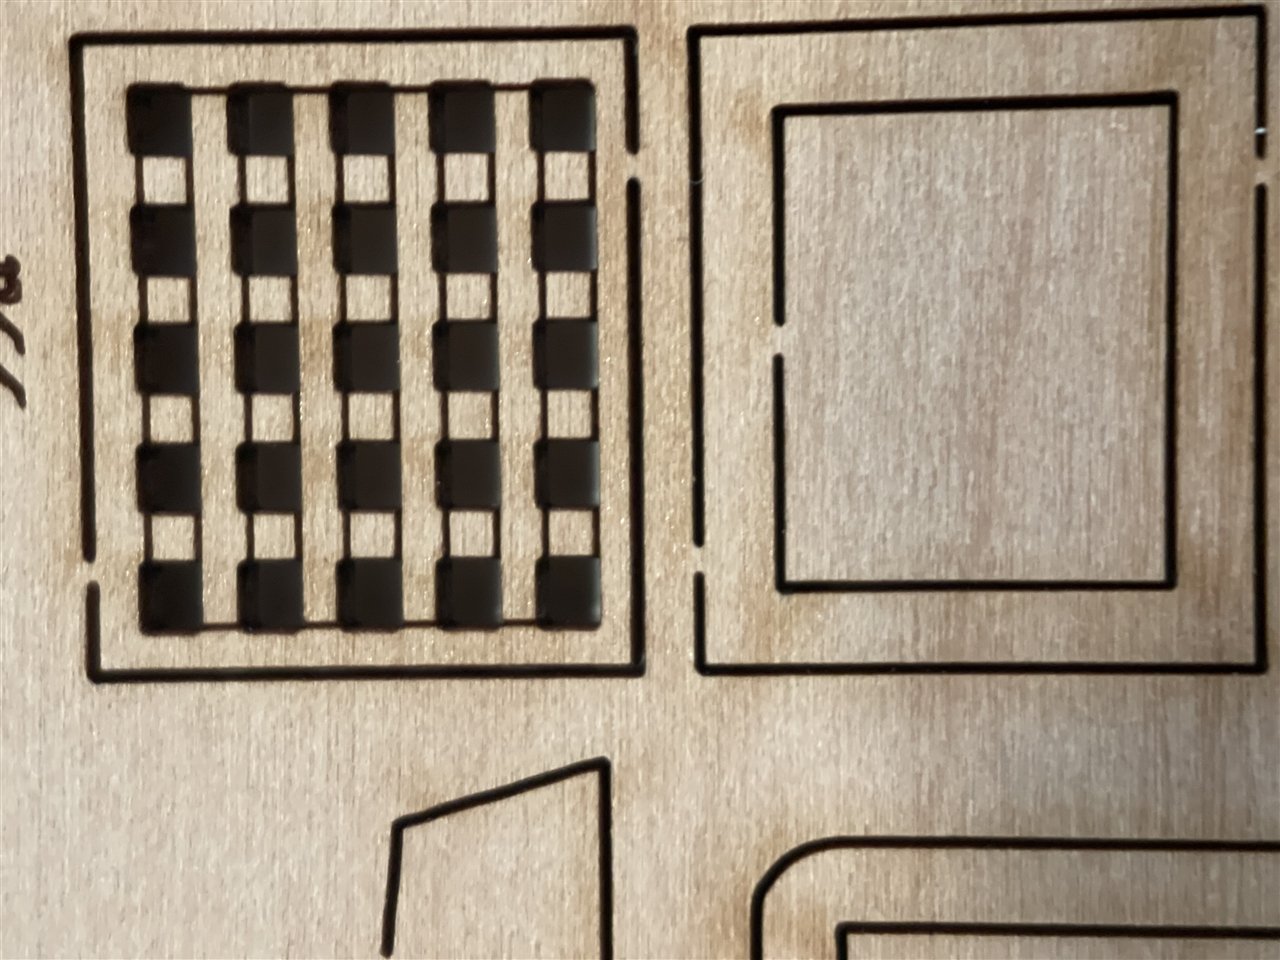
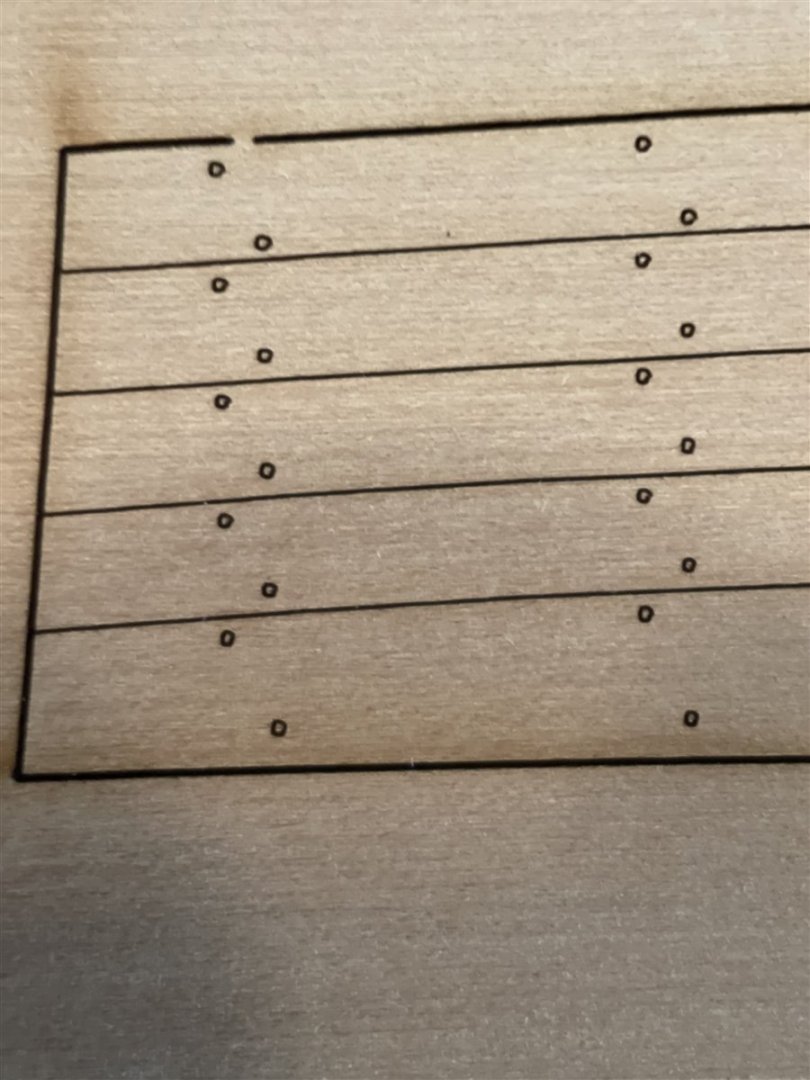
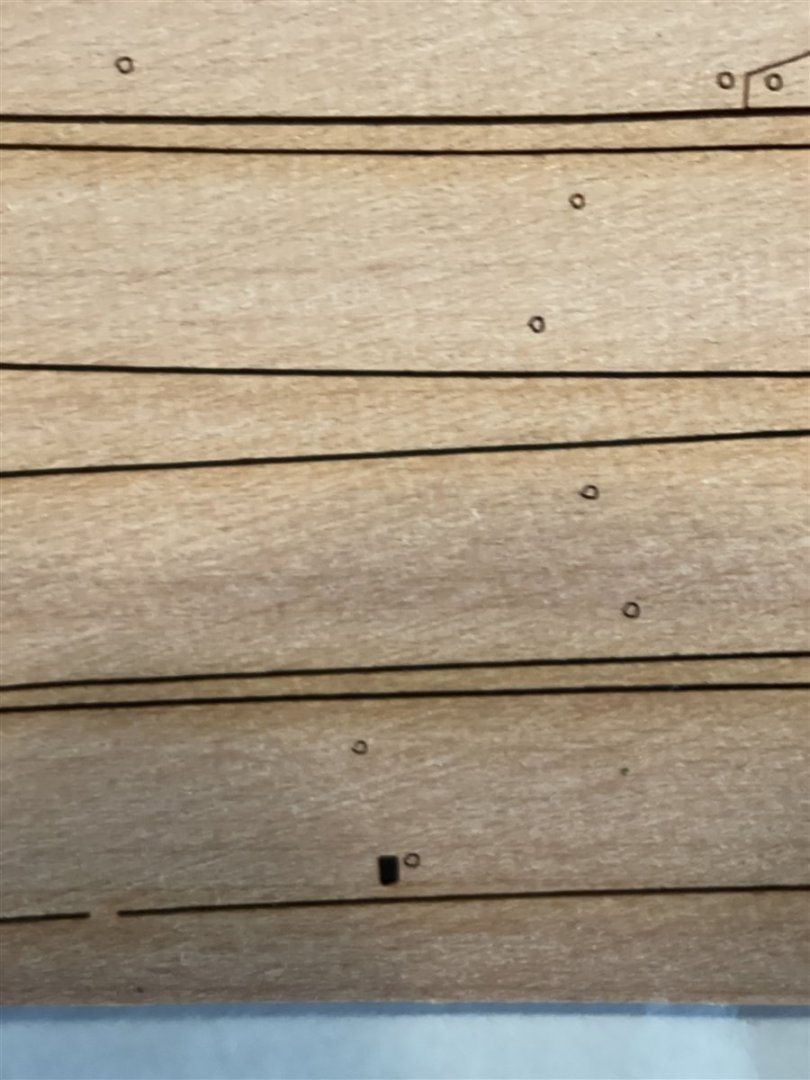
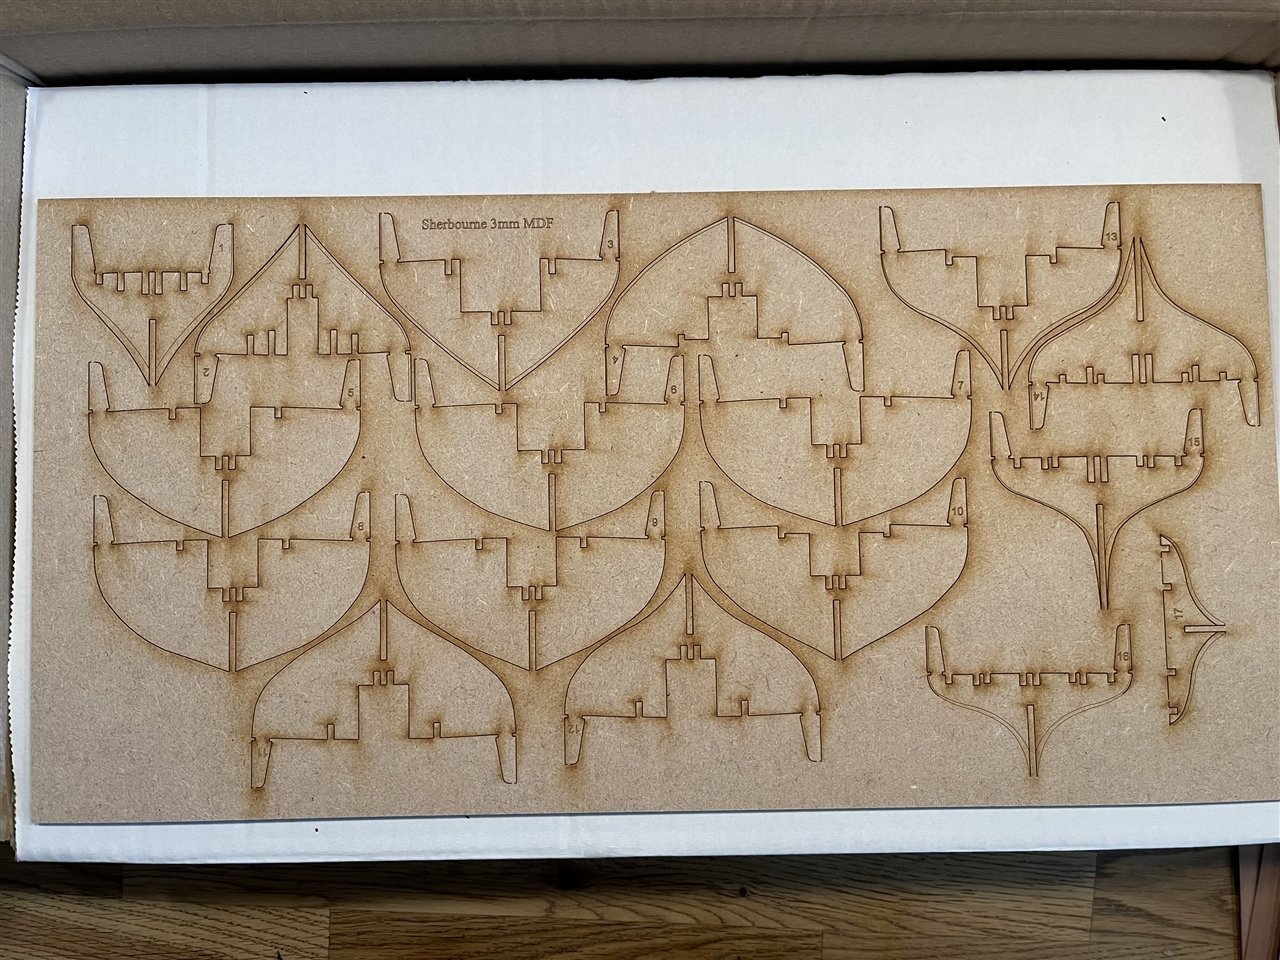
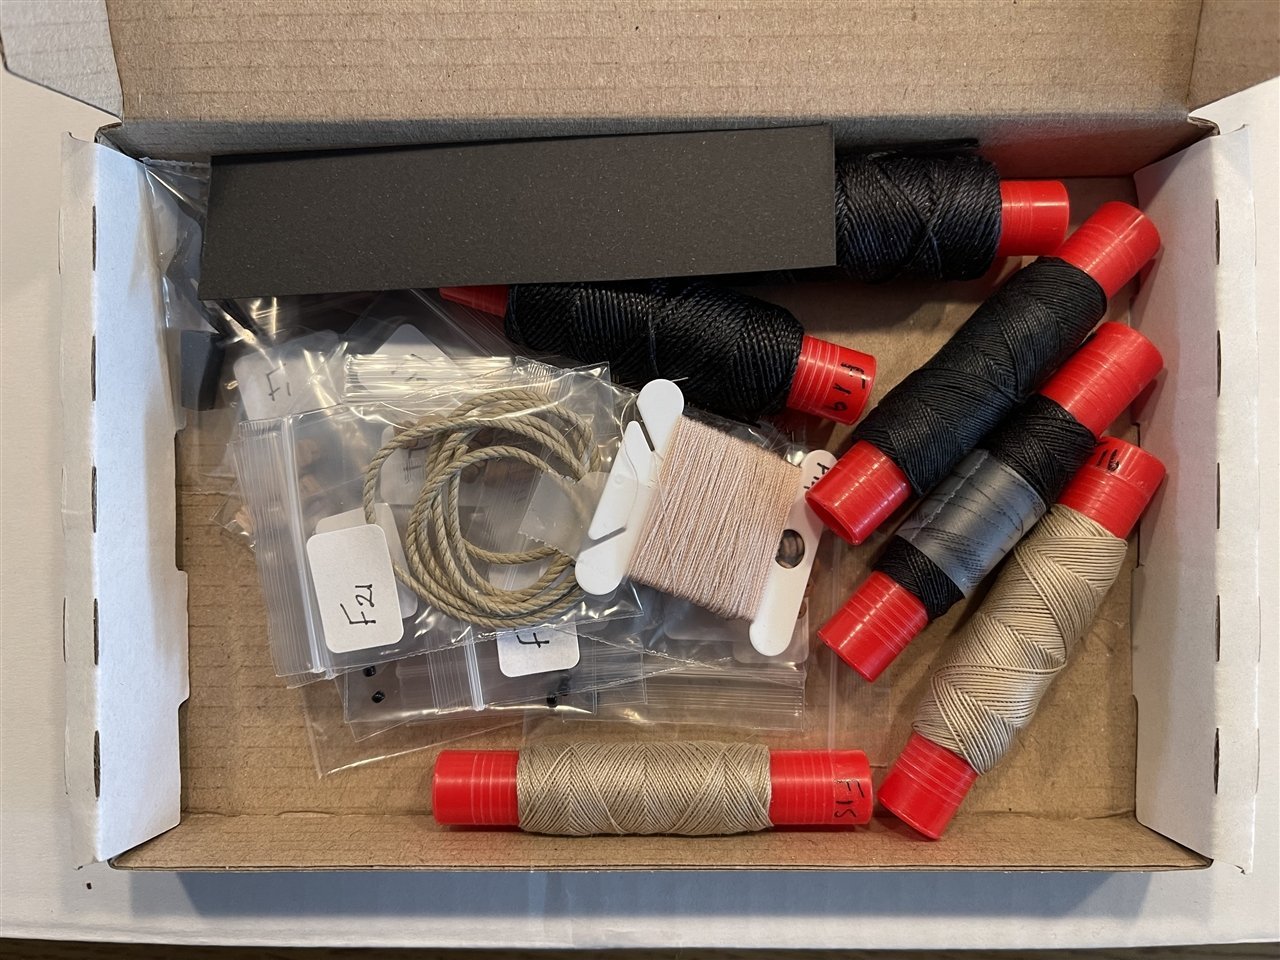
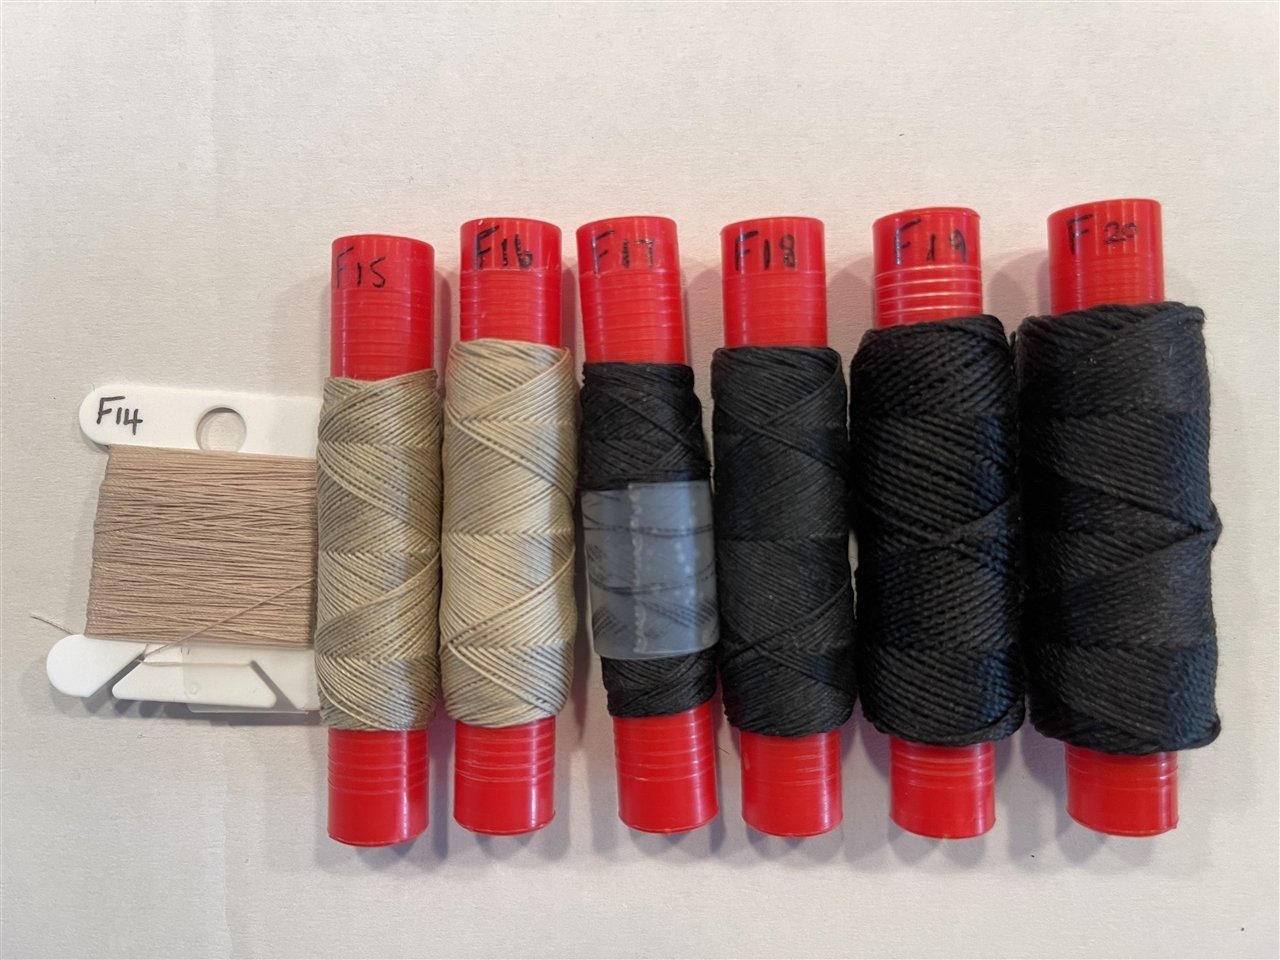
 HM Armed Cutter Sherbourne - 1763 1:64 Vanguard Models Part Number - VM - 16 Available from Vanguard Models for £149.00 (around €175.00) History From the publisher’s website: HM cutter was a 6-gun cutter of the Royal Navy. She served in the English Channel for her entire career, operating against smugglers. She was sold in 1784. Sherbourne was built at Woolwich Dockyard under the supervision of Master Shipwright Joseph Harris, to a design by Sir Thomas Slade, and was launched on 3 December 1763, having cost £1,581.8.9d to build and fit. Sherbourne was commissioned under Lieutenant John Cartwright, later to become a prominent parliamentary reformer, and was assigned to support the work of the Board of Customs by operating against smugglers in the English Channel. Cartwright commanded Sherborne from 7 December 1763 to 14 May 1766. His area of responsibility was the South Coast of England, including Dorsetshire and Devon. His brother George, when at loose ends, went with him in Sherborne on a cruise out of Plymouth to chase smugglers. Lieutenant Christopher Raper succeeded Cartwright in 1766 as Sherbourne’s commander for the next three years. Between 1769 and 1777 the cutter was commanded successively by Lieutenants Stephen Rains, Thomas Rayment and Thomas Gaborian, all the while remaining based in the Channel. Her final commanders were Lieutenant Arthur Twyman, from September 1777 until May 1778, and then Lieutenant Arthur Hayne until September 1779. She was then laid up. In 1783 Sherbourne participated in William Tracey’s unsuccessful attempt to raise HMS Royal George, which had sunk in Spithead in 1782. Although the dockyard rated Sherbourne as unfit for service, Tracey conducted some repairs and she was of some use. She was finally sold at Portsmouth on 1 July 1784. Tons burthen – 85 Length – 54 ft 6 in (16.6 m) Beam – 19 ft (5.8 m) Complement – 30 Armament – 6 x 3-pounder guns + 8 swivel guns The Kit Designed by Chris Watton this kit is aimed for the novice builder. This skill level is defined as follows (text from publishers website): "NOVICE: We have pitched this level at the absolute beginner, whilst still providing a good basis for more experienced modellers to make their own individual mark on the project. Kit design and techniques are all aimed to make this project as easy for you as possible, guiding you in every way to create a successful and beautiful model that you can be rightly proud of." The kit includes (text from publishers website): Laser cut and engraved parts in MDF and pear wood. Laser etched and cut lime wood deck with treenail detail 2 sheets of photo etched brass High resolution 3D-printed parts. Double planked hull in limewood for first planking and pear wood for second planking. Walnut dowel for masting. Multiple sizes of both black and natural rigging thread along with all necessary blocks and deadeyes Comprehensive, full colour instruction manual, along with NINETEEN plan sheets which include all masting and rigging drawings. The rigging drawings are designed to allow the novice to successfully complete a rigged ship. Features laser-engraved treenails on both inner and outer bulwarks. Dimensions of the finished build: Length Overall – 512mm Hull length – 284mm Height Overall – 484mm Width Overall – 202mm The Box The kit comes in a sturdy nice looking box covered with an A3 printed product label which is affixed to the lid of the box. Inside the box everything is very well protected by either plastic bags or wrapped in bubble foil. None of the parts arrived damaged, warped or bended. Instructions / Plans After opening the box you will see the instruction manual and the plans: The instruction manual is of high quality paper, fully coloured and has a spiral binding which is very practical if space on your workbench is limited. In addition you always can download the instructions from the website and have it ready on your iPad or other digital device. In the manual you have step by step instructions from the very beginning up to the rigging as well as a lot of useful informations regarding e.g. recommendations for tools, colors and glues you can use to get the best out of your kit. The instructions are supplemented by 19! A3 plans. Some examples of informations you can get from them: Overview of the laser cut parts: Detailed drawings of the model, parts and assembly: Parts needed for the shown assembly phase, clearly marked so you can identify them easy and fast: Some detailed instructions on how to assemble parts with all the measurements given: And finally the rigging instructions in such a high level of detail that rigging this model will be pure fun and excitement ... From leading the threads through the blocks ... and where to belay them ... and last but not least ... how to do the belaying ... The Parts As mentioned above, all parts are well packed and secured. From top to bottom we first have the display stand made of clear acetate protected with a thin foil; The stand has two engraved nice looking name plates ... Next there are three bundles of wood: Lime wood for the first planking, pear wood for the second planking and walnut dowels for the masts, yards and other parts like the hand pumps: The wood strips and dowels are of high quality, no scratches, bendings or fuzzy edges as the macro shots show: All the rest of the parts is precut/prefabricated. Laser Cut Sheets - Pear Wood Upper sheet: parts for the anchors, stern frames, keel and prow Lower Sheet: parts for keel and prow, rudder, stern counter and transom parts, companionway as well as some fittings ... Upper sheet: Rails, transom parts and counter, main wales and gunwales, Lower sheet: Rudder parts, channels, pin rails, timberheads, catheads, gun carriages, gratings and more fittings Upper sheet: Bulwark patterns and port lids Lower sheets: Left: Mast caps, posts for the swivel guns, pawl posts and bitts / Right: Spirketting planks, bulwark ladders and tiller arm The cuts and engravings are really impressive: Treenail details: Photo Edged Parts There are two small sheets with photo edged parts. Upper sheet: Mainly parts for the Chain plates, handpumps, eyebolts, hooks, belaying pins, stanchions, swivel guns, gun carriage center booms, anchor rings and lower boom cradle Lower sheet: horse shoe plates, fish plates, rudder straps and depth markings As well as all of the prefabricated parts the level of detail and quality of manufacturing is very very good: MDF Parts There are two MDF Laser Cut sheets mainly holding the parts for the skeleton. 2mm sheet: Building cradle, deck beams, false keel and keel/bow parts, support patterns, locking pins and the lower deck 3mm sheet: Bulkheads Plywood Parts There are three parts out of plywood. These are the left and right side bulwarks as well as the sub deck. The bulwarks have markings on it to help align them as well as to ease the process of fitting the bulwark patterns: This image shows the sub deck and the engraved lime wood deck which will be glued on top of it: Again the level of detail and the manufacturing quality is astonishing: Fittings and Materials These are provided in a little box so nothing is rolling around in the big box. All items are clearly marked and waiting for assembly in their plastic bags ... There are 3 sizes of natural coloured thread (0.1mm/0.25mm/0.5mm) and 4 sizes of black coloured threads (0.25mm/0.5mm/0.75mm/1.0mm). The threads are of good quality as well as all parts in this kit: The kit comes with wooden blocks and deadeyes in different sizes: Thimble blocks (2.5mm), Deadeyes (3.5mm), single blocks (3, 4 and 5mm) and double blocks (4mm) The 3 D printed parts are the 3 pounders, swivel guns, anchors, the chimney and the main winch drum: Finally we have the anchor hawse rope, parrel beads, brass pins and a small piece of black cardboard for the anchor stock: Conclusion It is hard to believe that you can get this kind of quality for so little money. The manufacturing quality is of the highest standard across all components of the kit. Following the instructions step by step and making use of the plans should enable everybody to achieve the goal of finishing the build of an extremely well looking ship model with a high level of detail regarding its size. As there are a lot of prefabricated parts the potential for frustration should be very low and that's what I am looking for as a beginner. Just looking at the parts and the really good instruction manual as well as the plans is so much fun that you can draw all your motivation from it alone to start and finish the model. In addition the build time will not be hundreds of hours so you can see the light at the end of the tunnel as soon as you start your build. If you are a beginner this kit will for sure get you addicted to ship modelling. For experienced modellers it must be pure fun as well and if this will be your first Vanguard Models ship kit I think it will not be your last one.


- 8 replies
-
- 25
-
-

-
- vanguard models
- cutter
- (and 1 more)
-
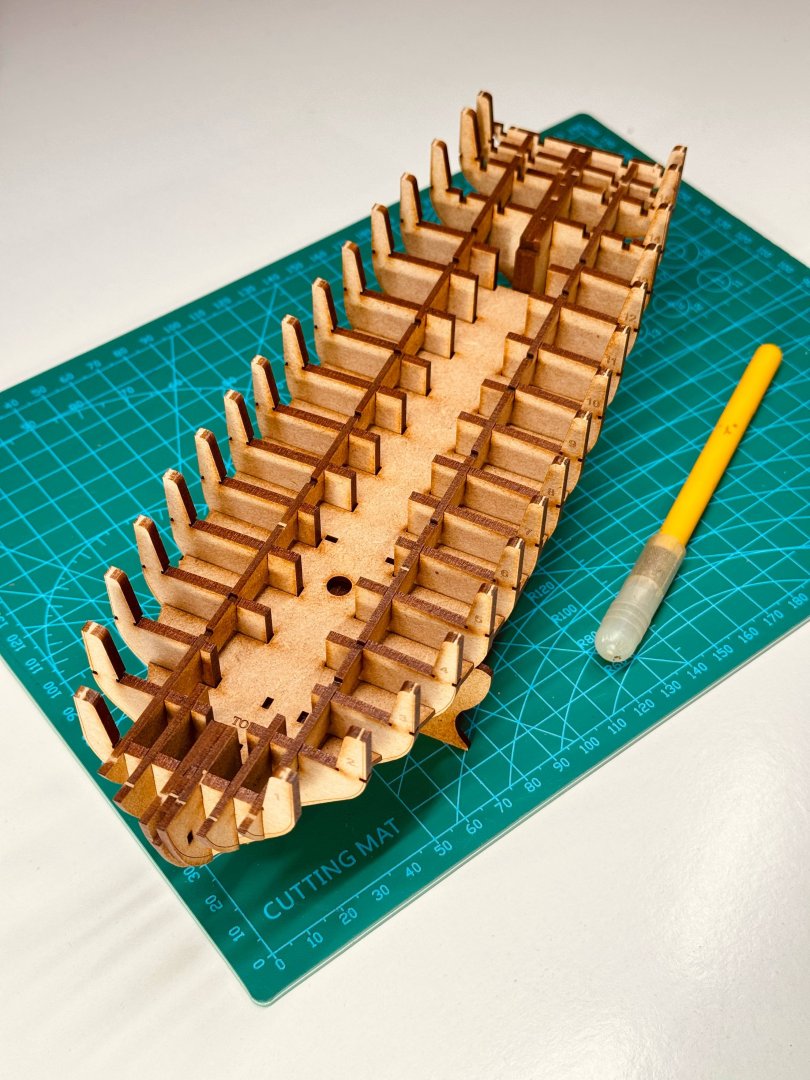
 Hello everyone my first post on MSW and looking forward to starting off with the excellent Vanguard Models Sherbourne kit ( My first Vanguard kit and certainly not the last ) the first thing i noticed was the amazing smell of the high quality timber when opening the box and then the great instruction Manual. So far everything has gone together fantastic great design thank you Chris Watton I do really like the mdf for the frame it is easy to do the Fairing and for the glue i have used evergreen premium wood glue only now it's time to start shaping hull planks. Cheers Lee.


-
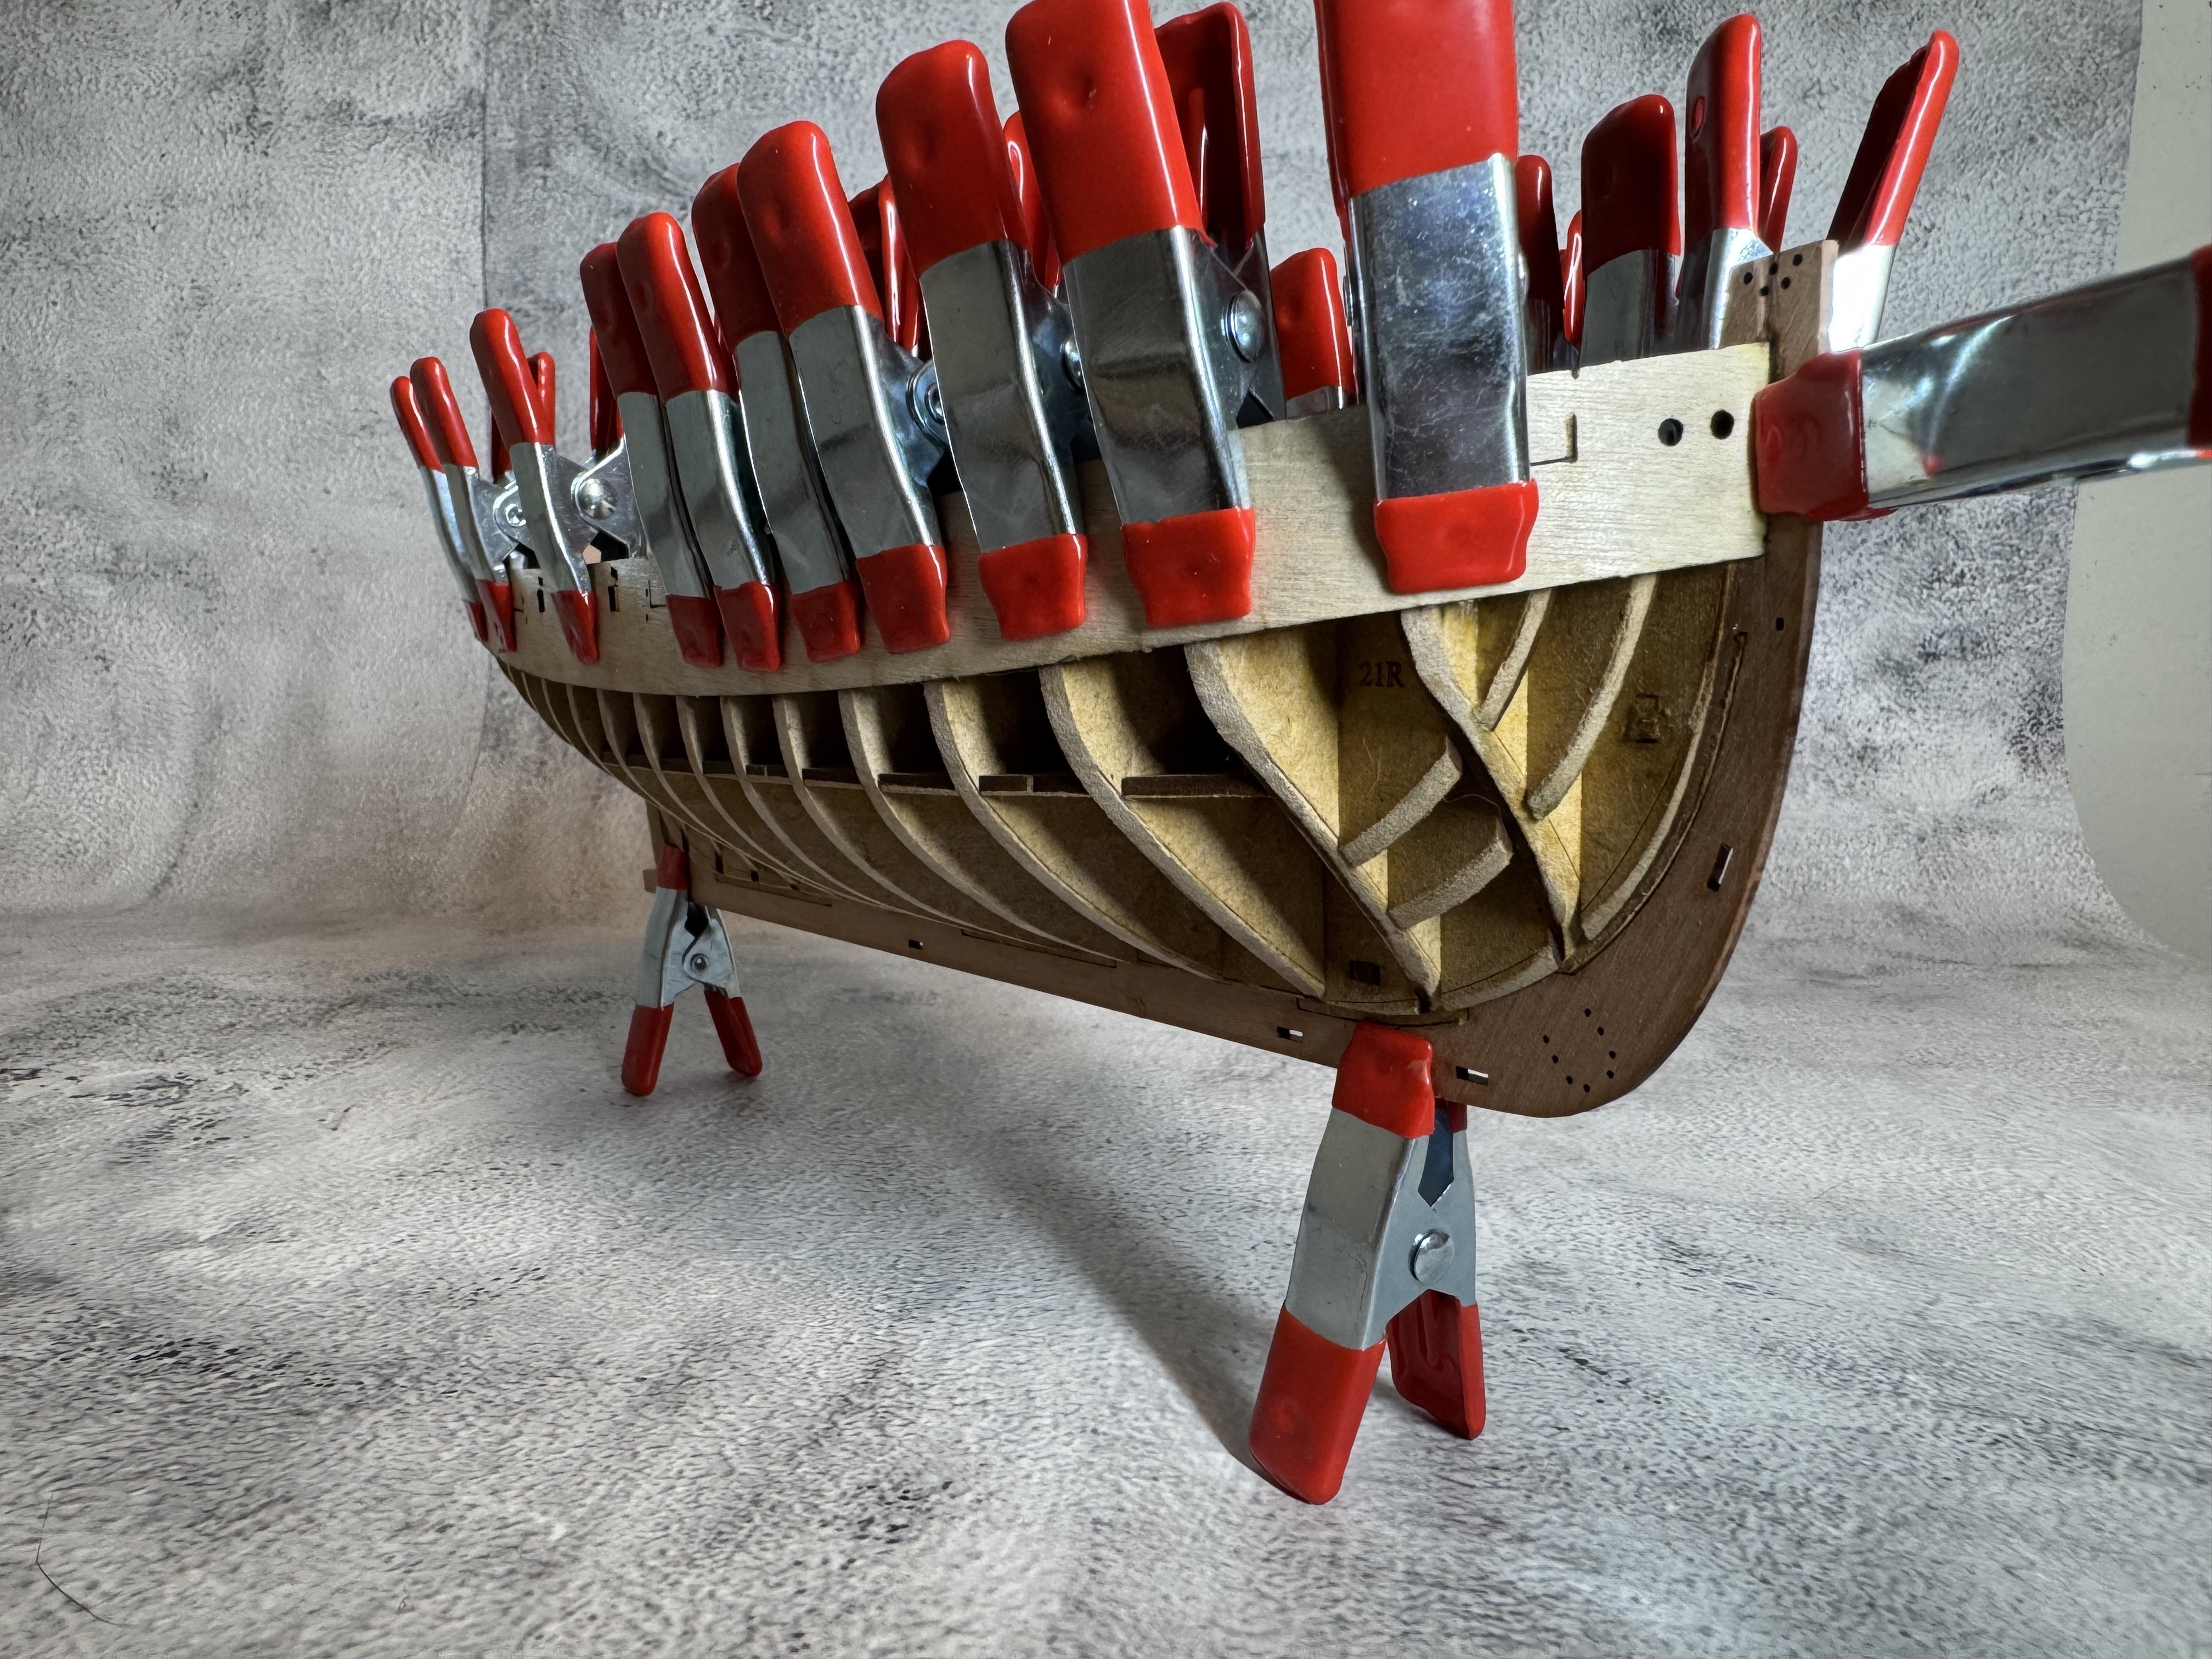
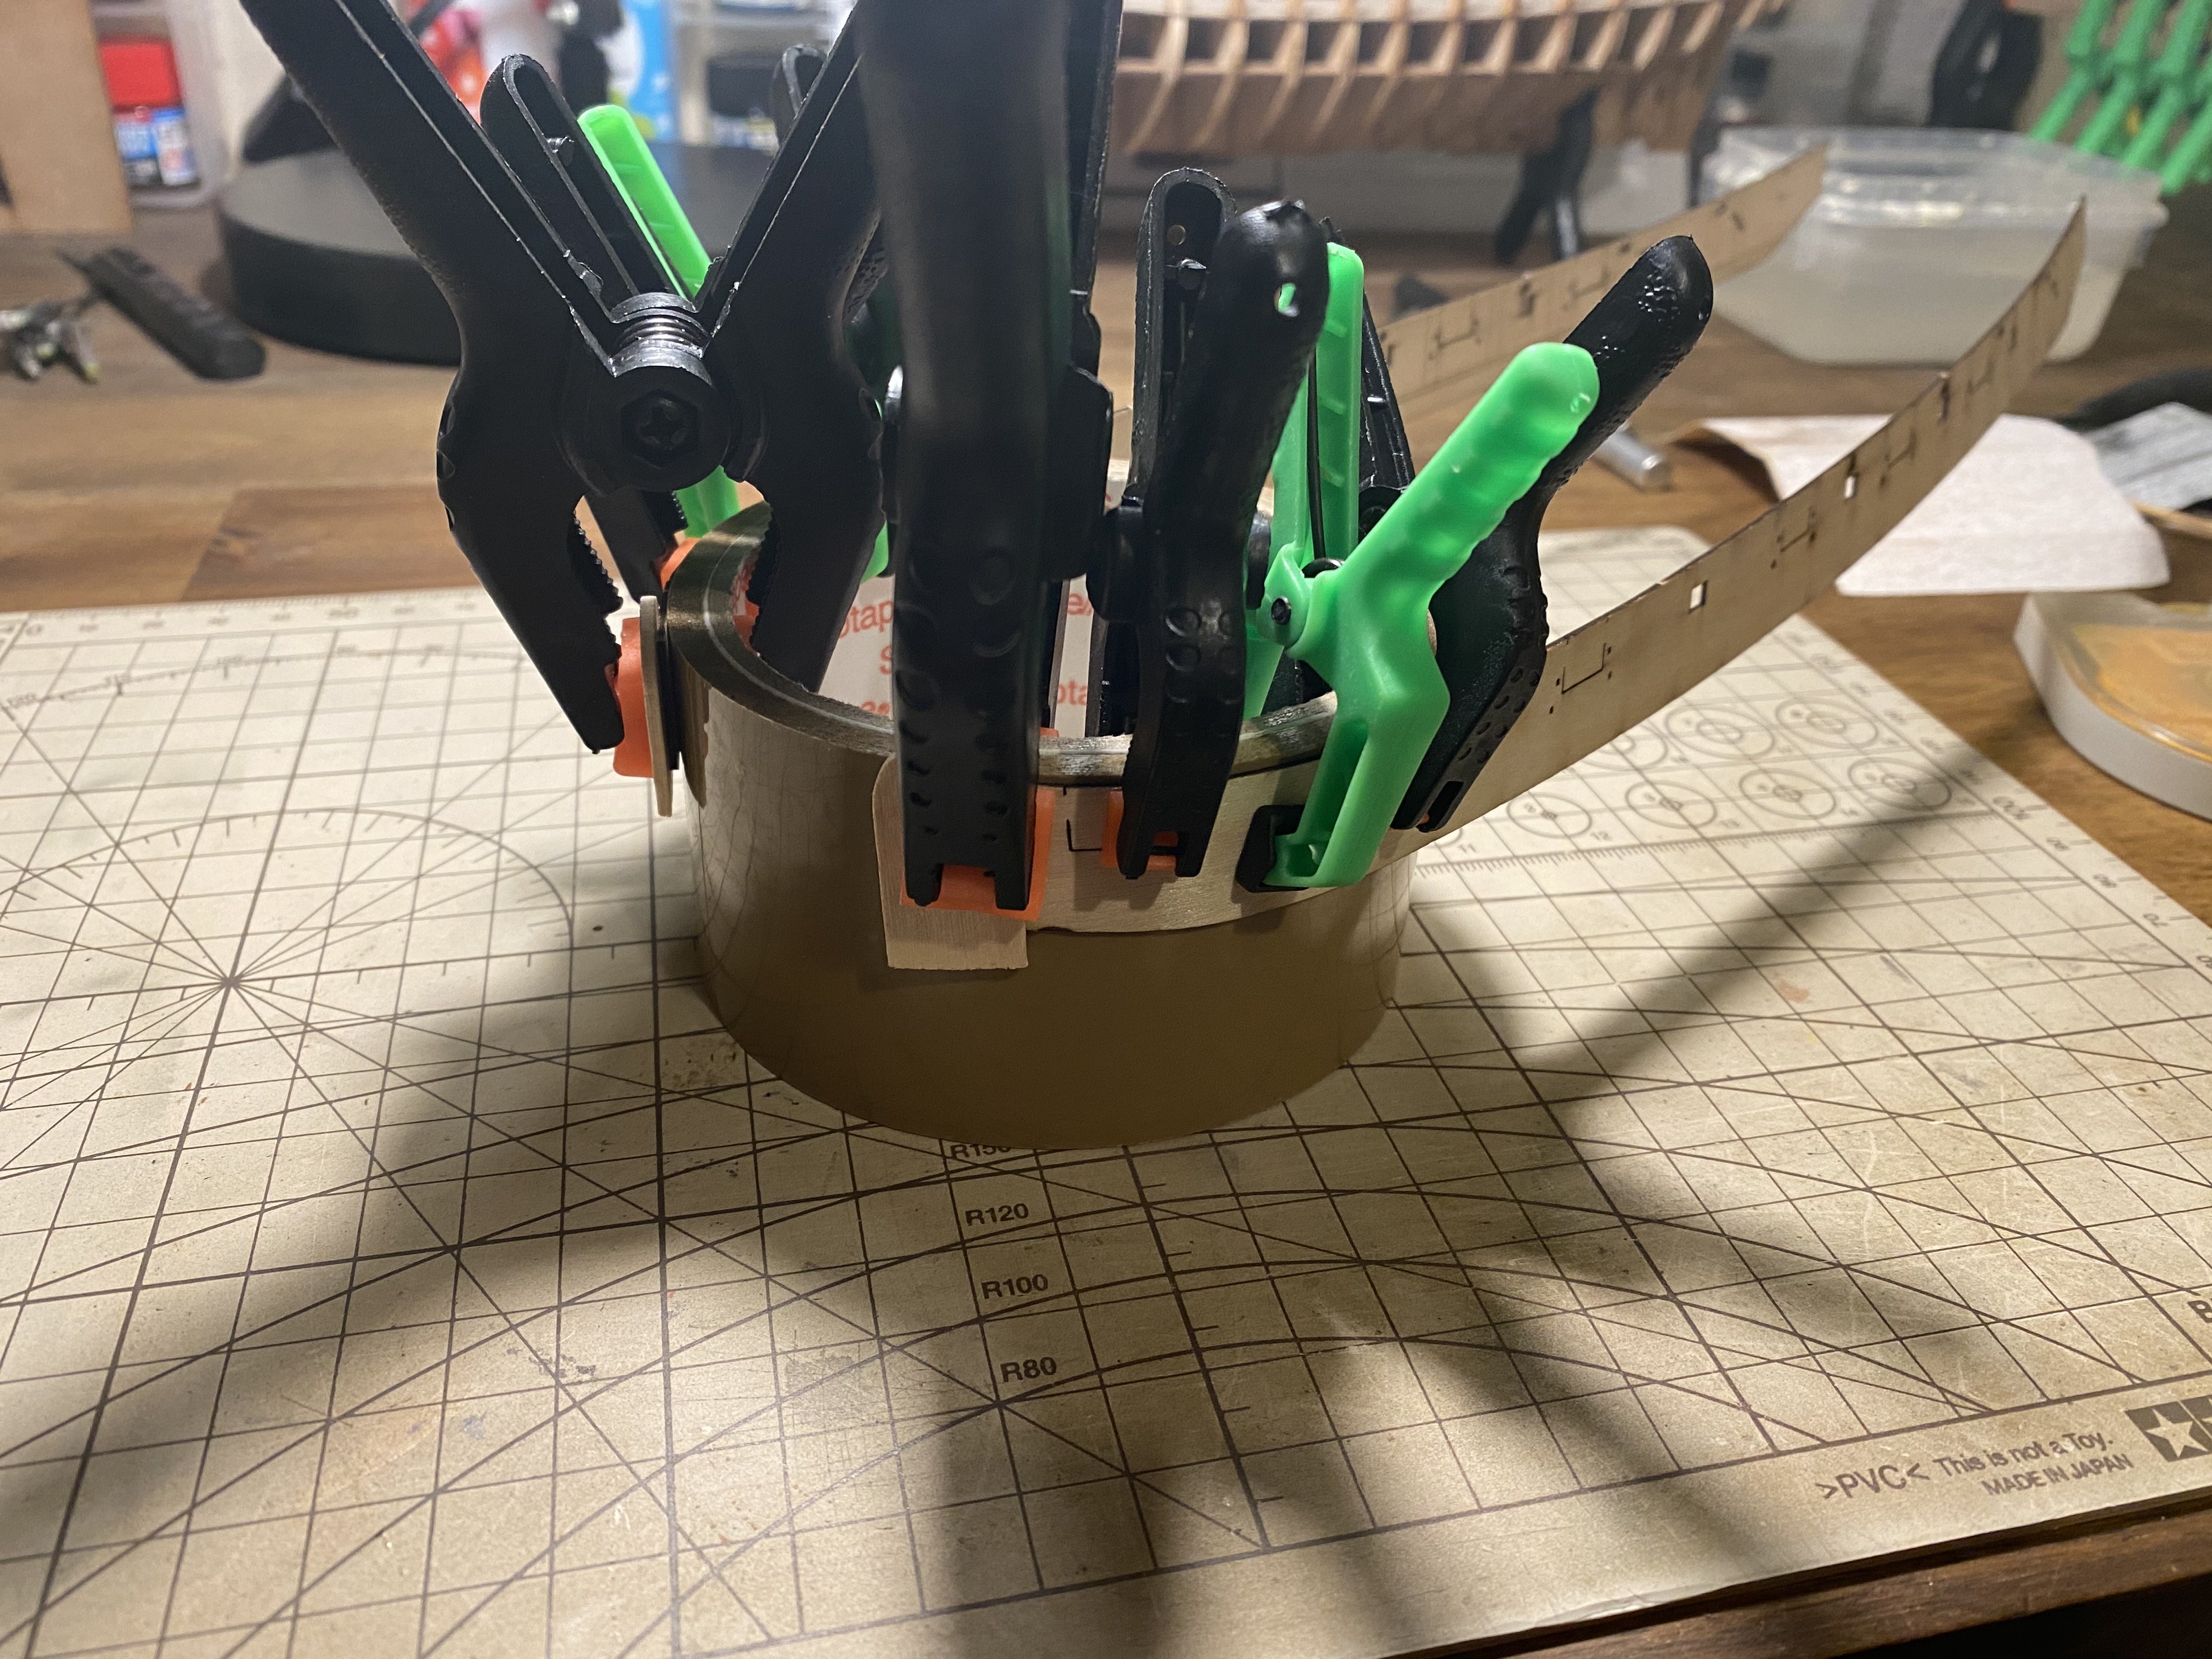
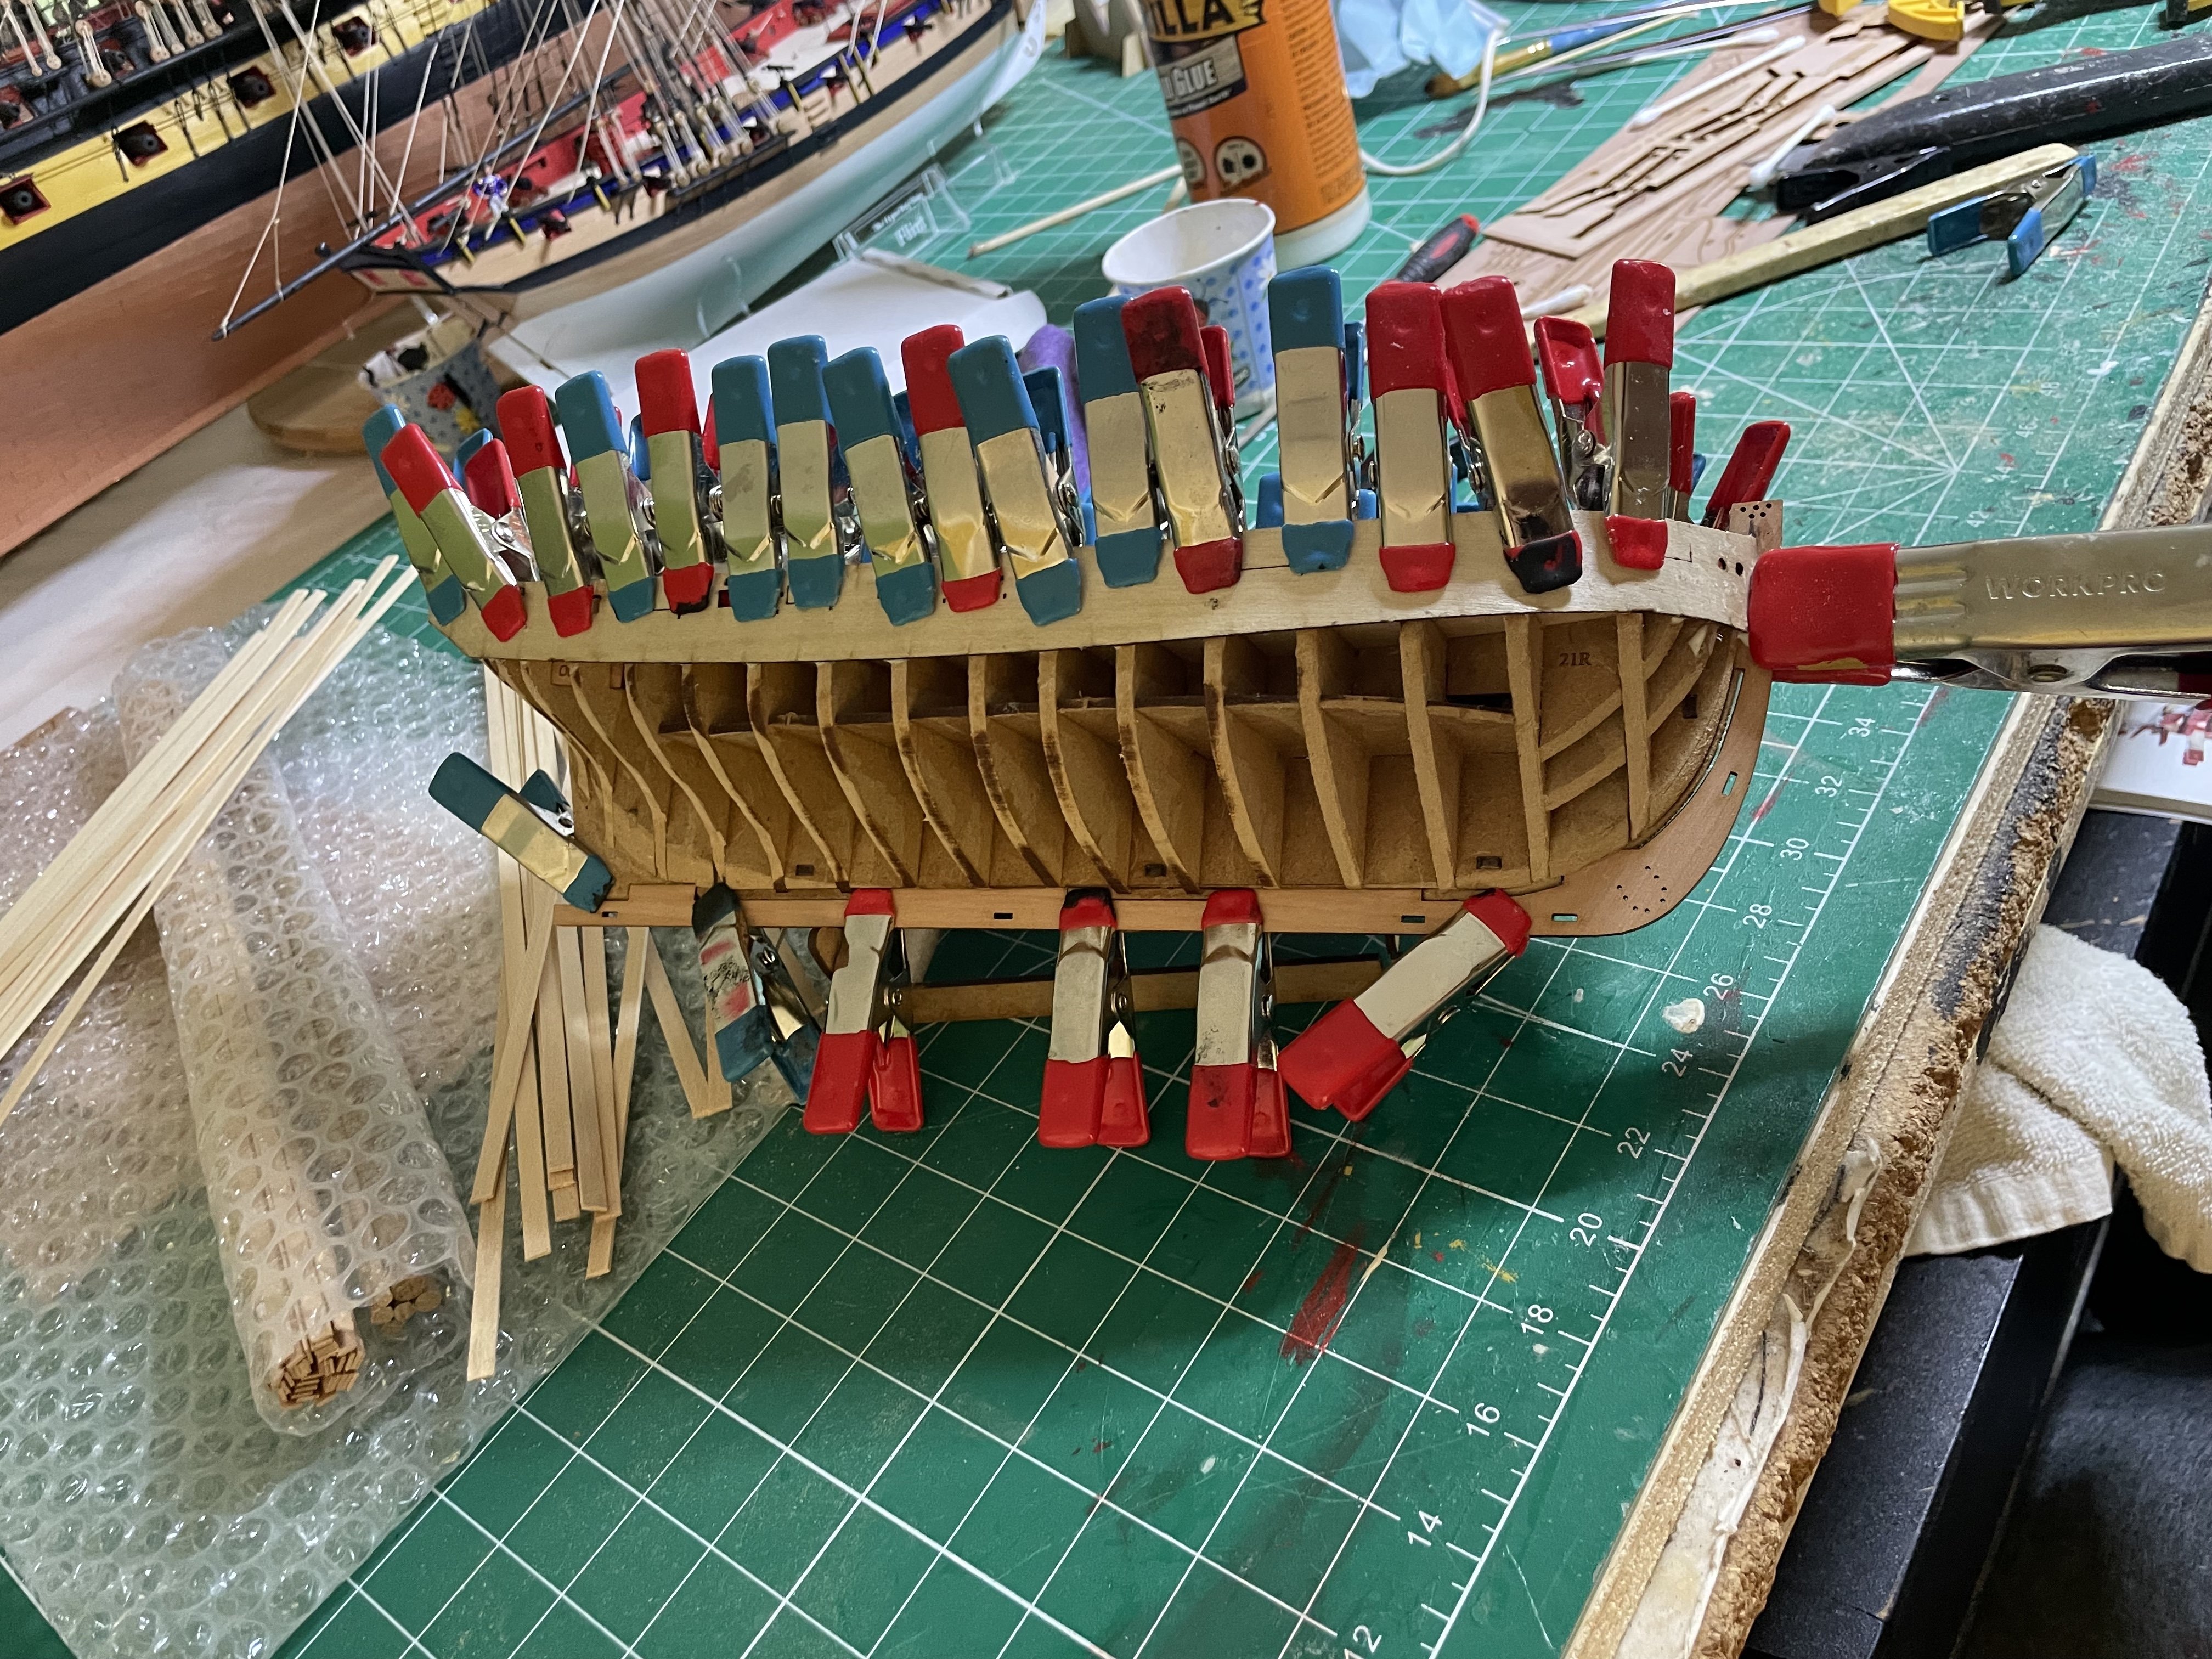
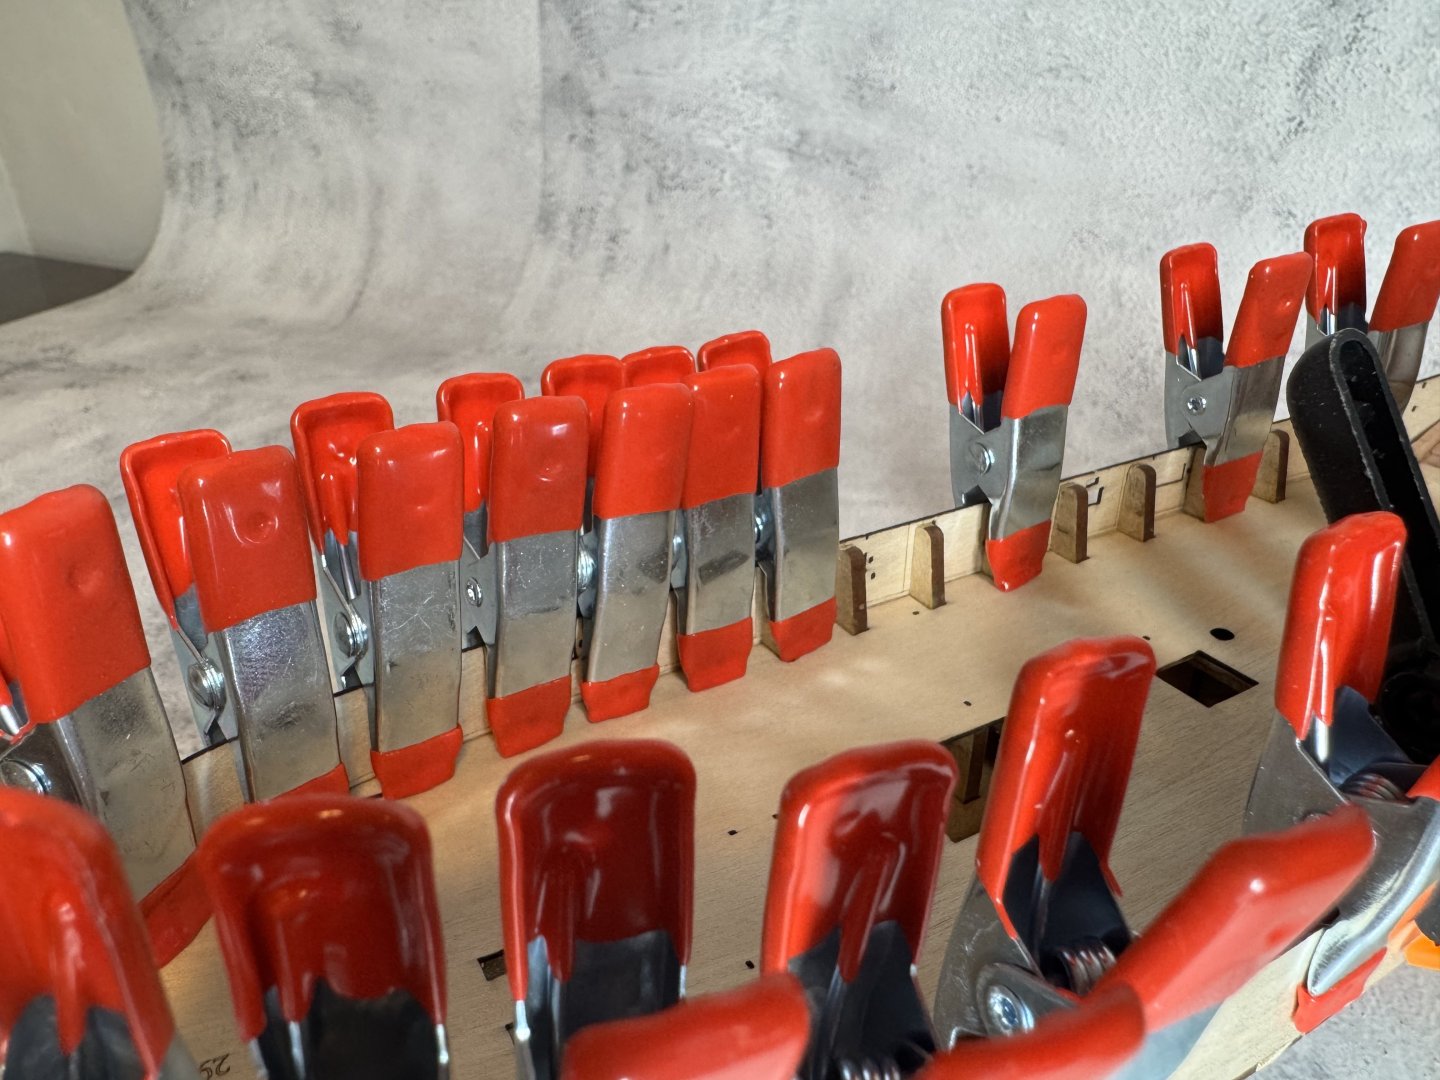
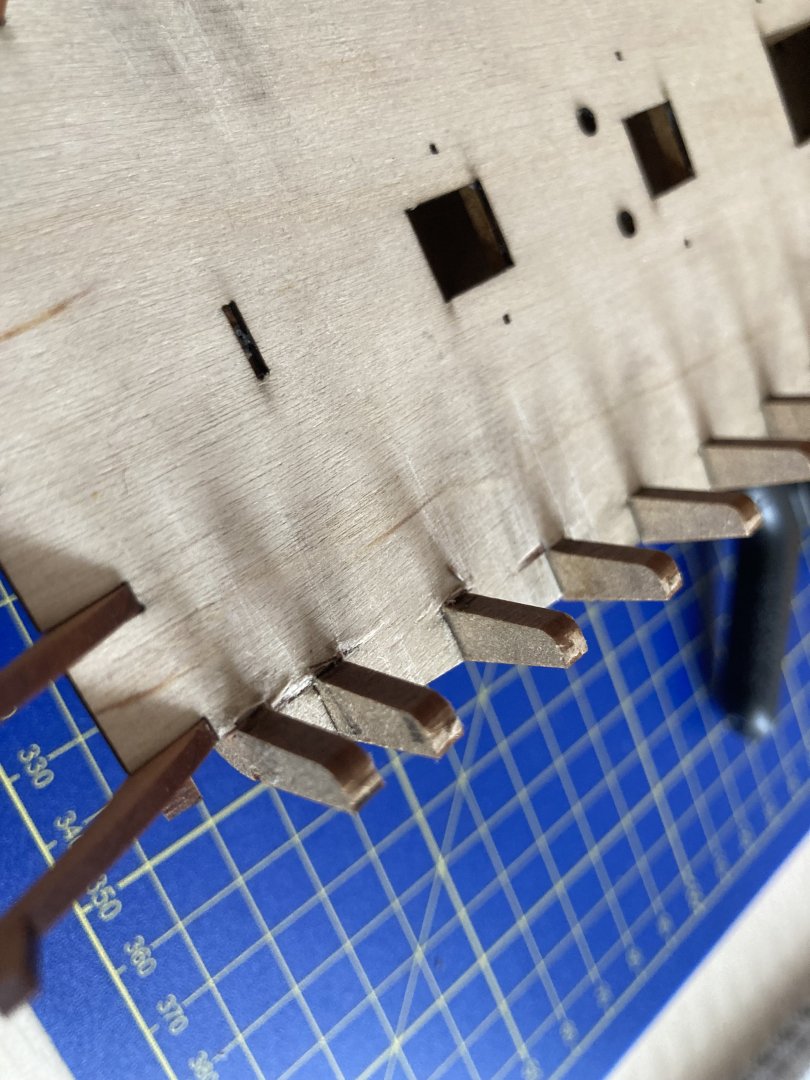
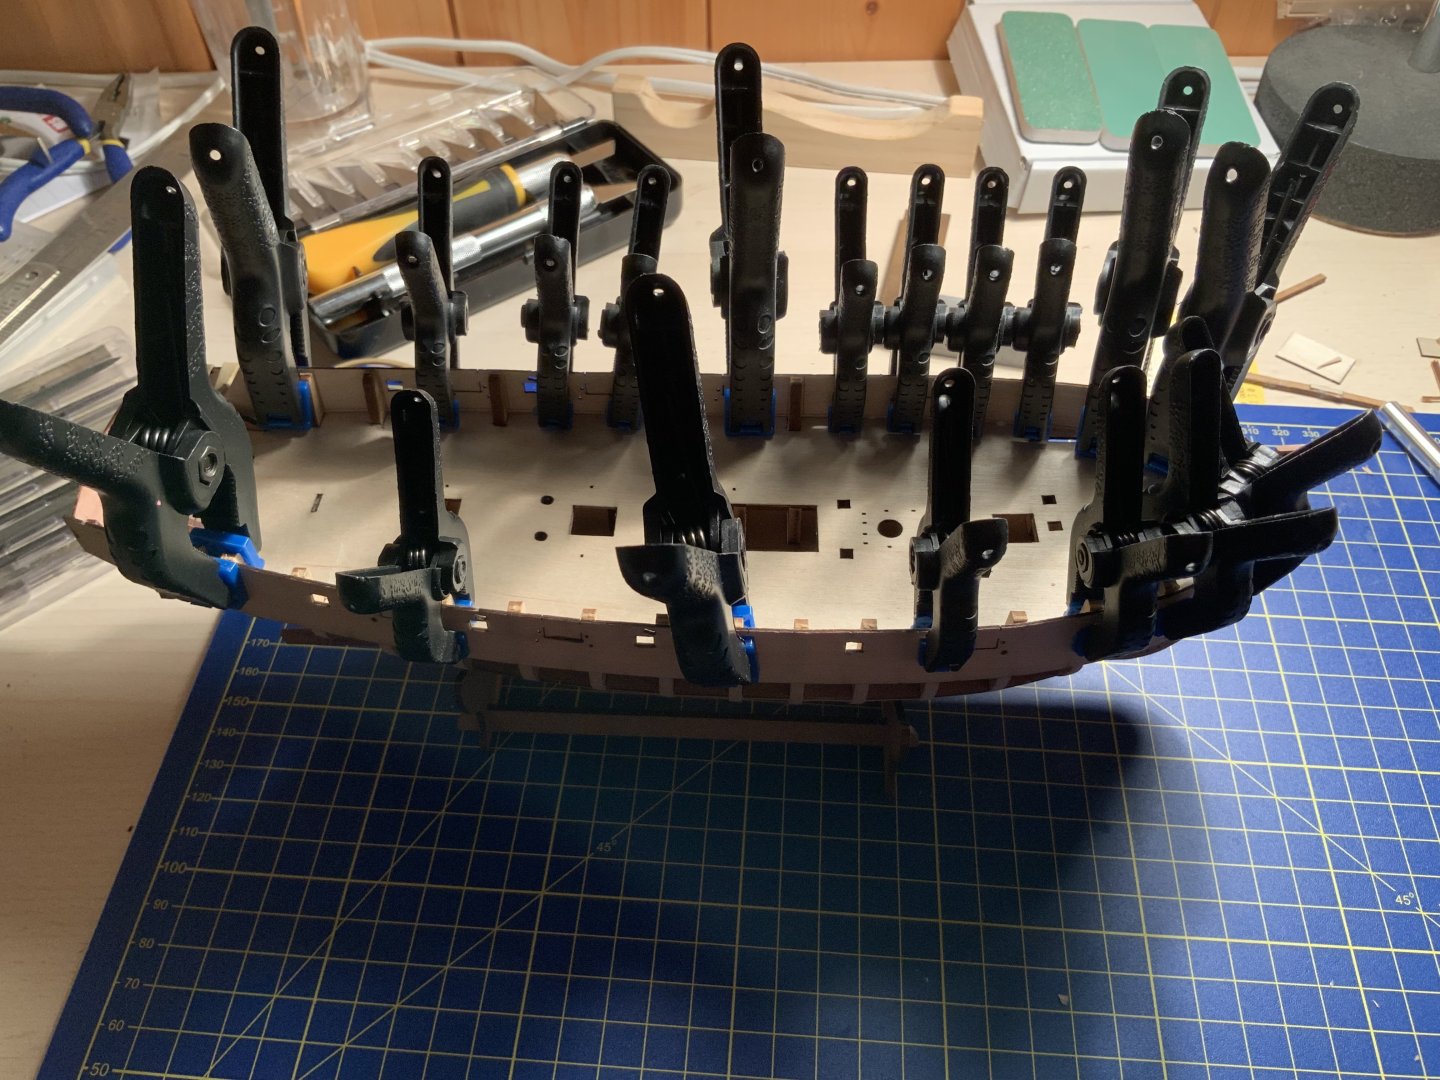
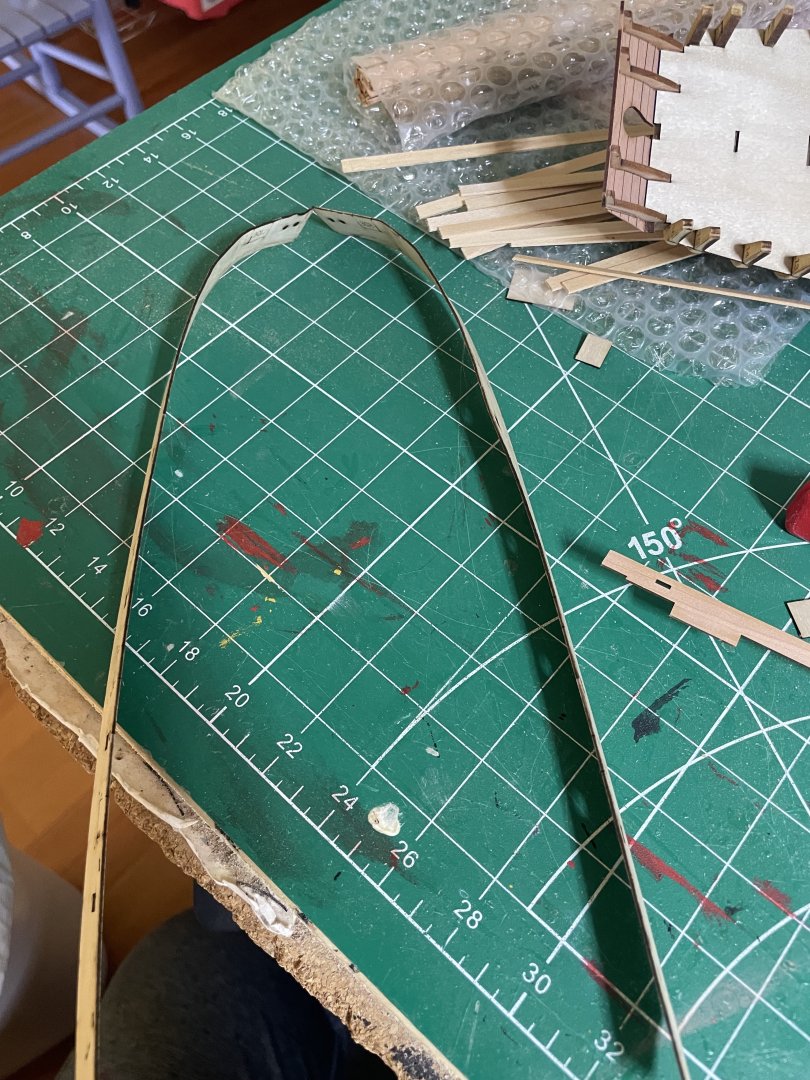
 Having just finished HMS Flirt, I saw that Chris had 2 new models, HM cutter Cherbourne and gun brig Adder. I bought both and flipped a coin to see which to build first. Cherbourne won. So here is the unwrapping Constructing the frame Feathering the edges. Convenient lines to help beginners know how far to go Placing the bulkheads Attaching stern Bulwarks soaked then clamped overnight Glued in place, can never have enough clamps.
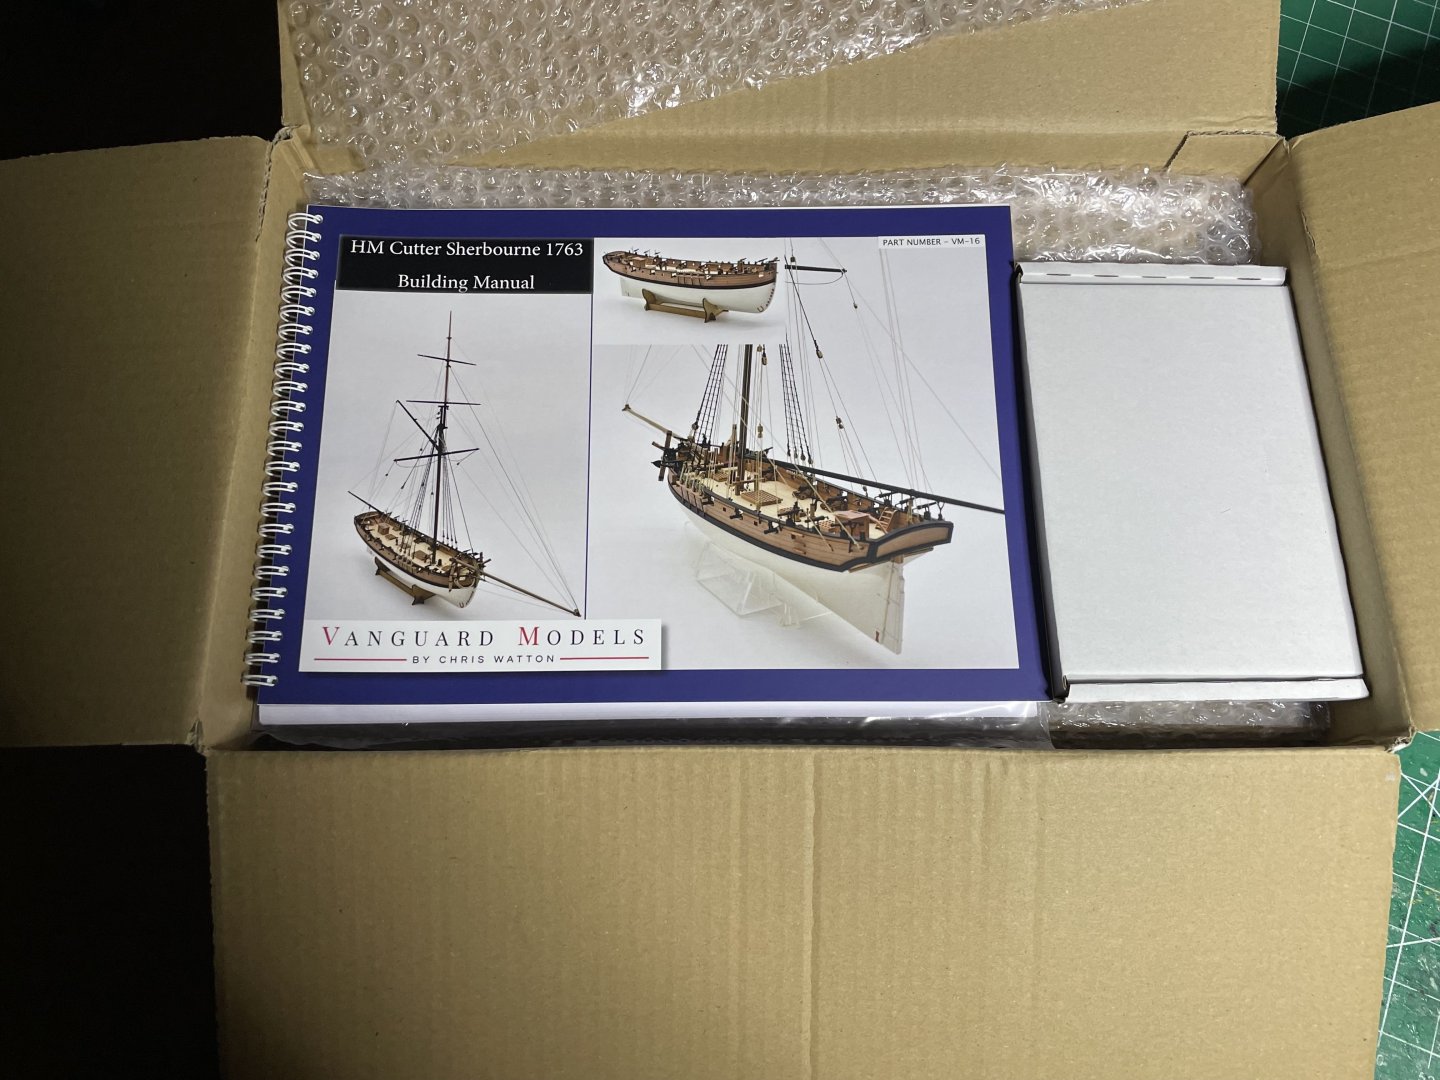


-
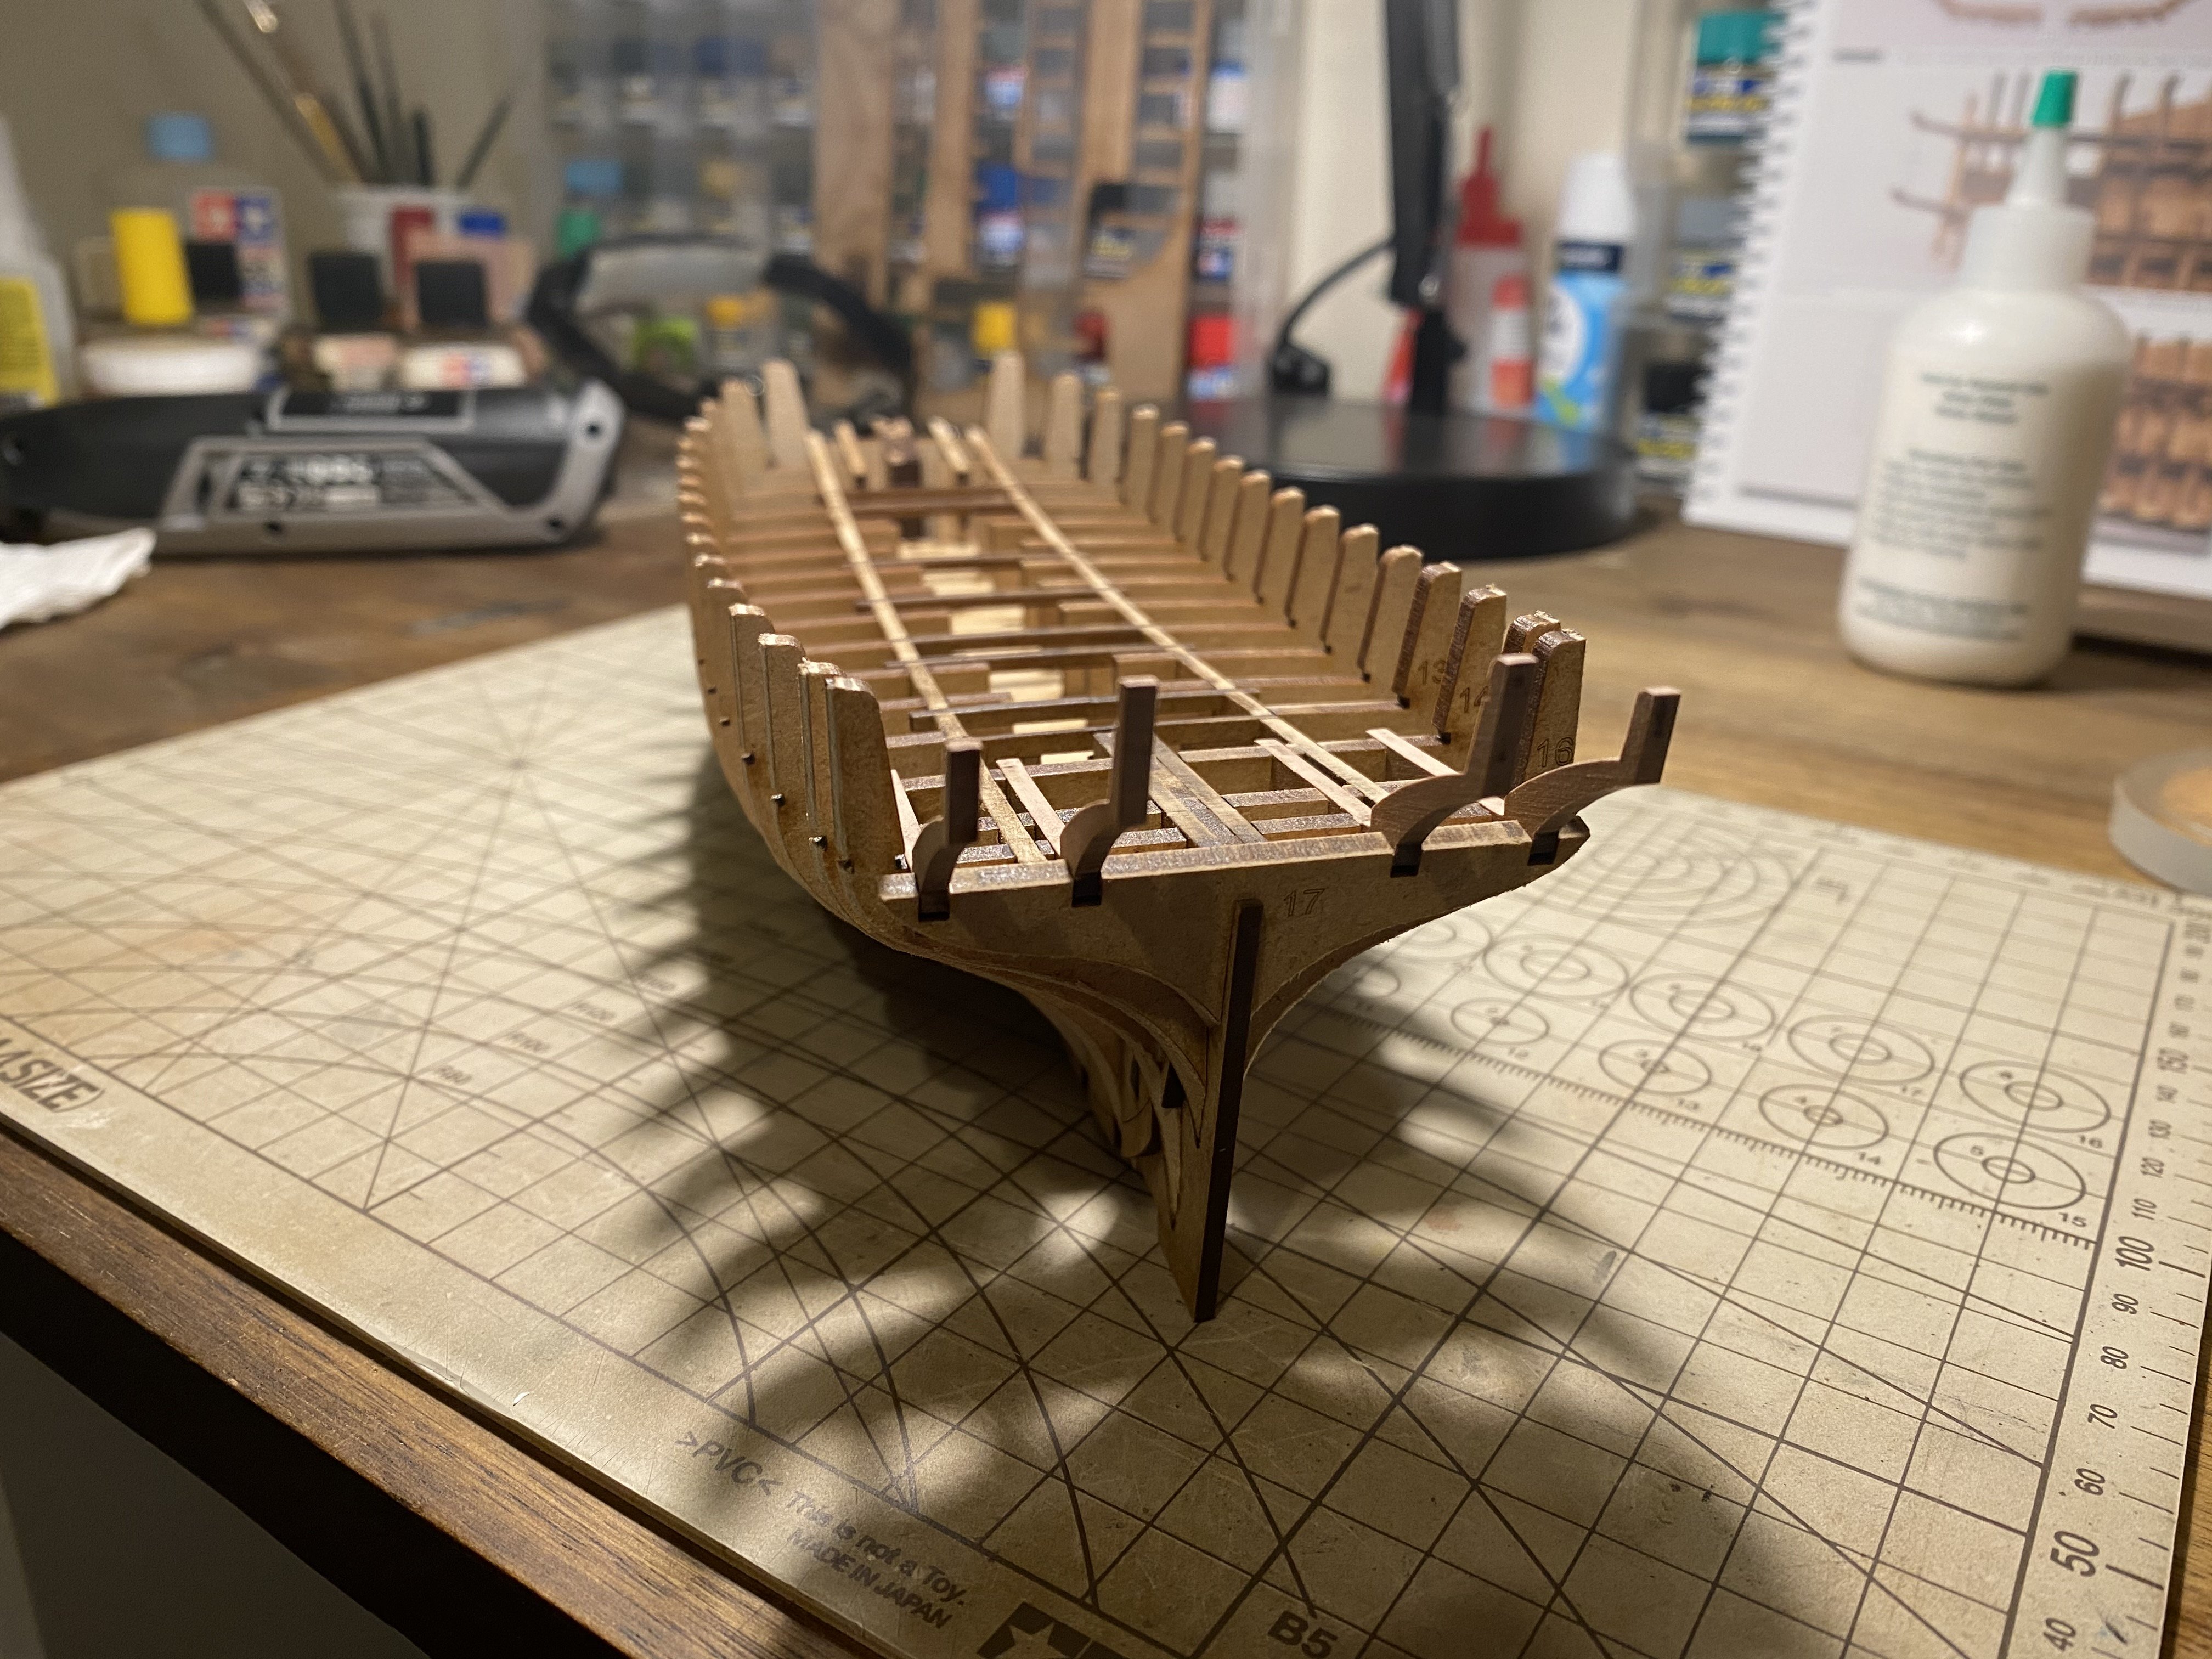
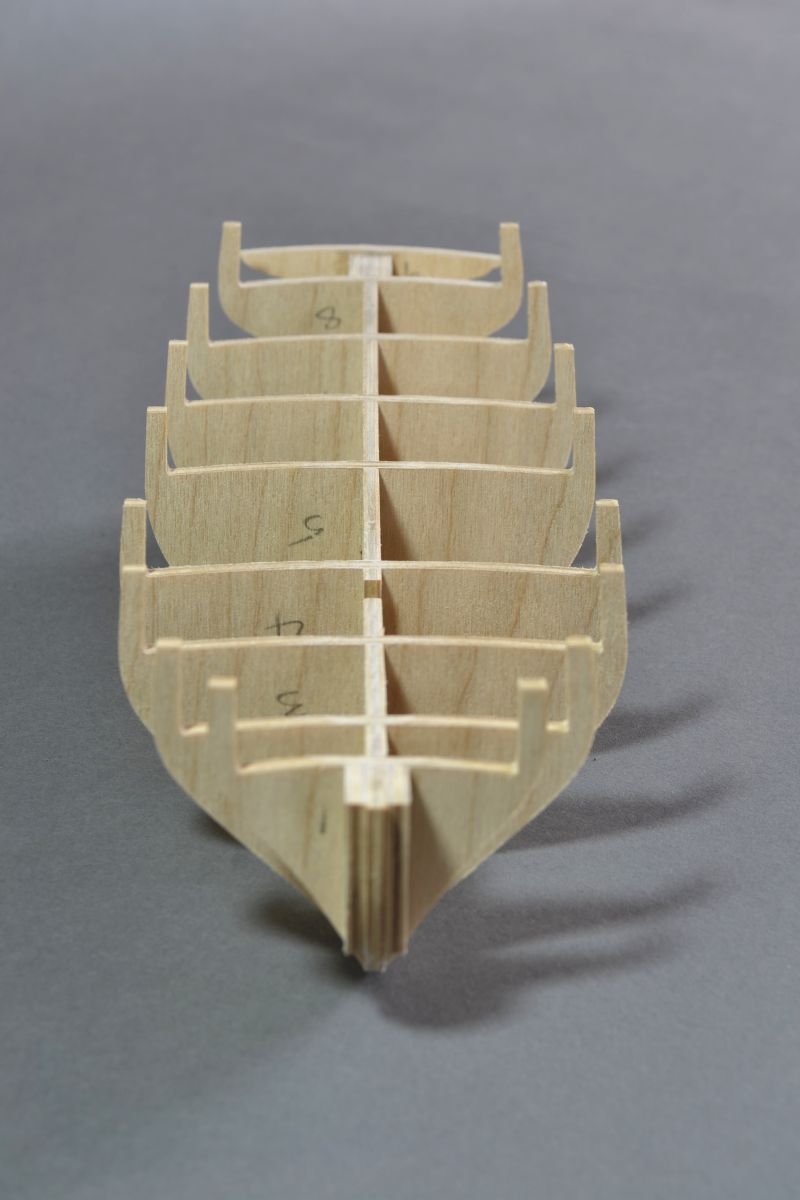
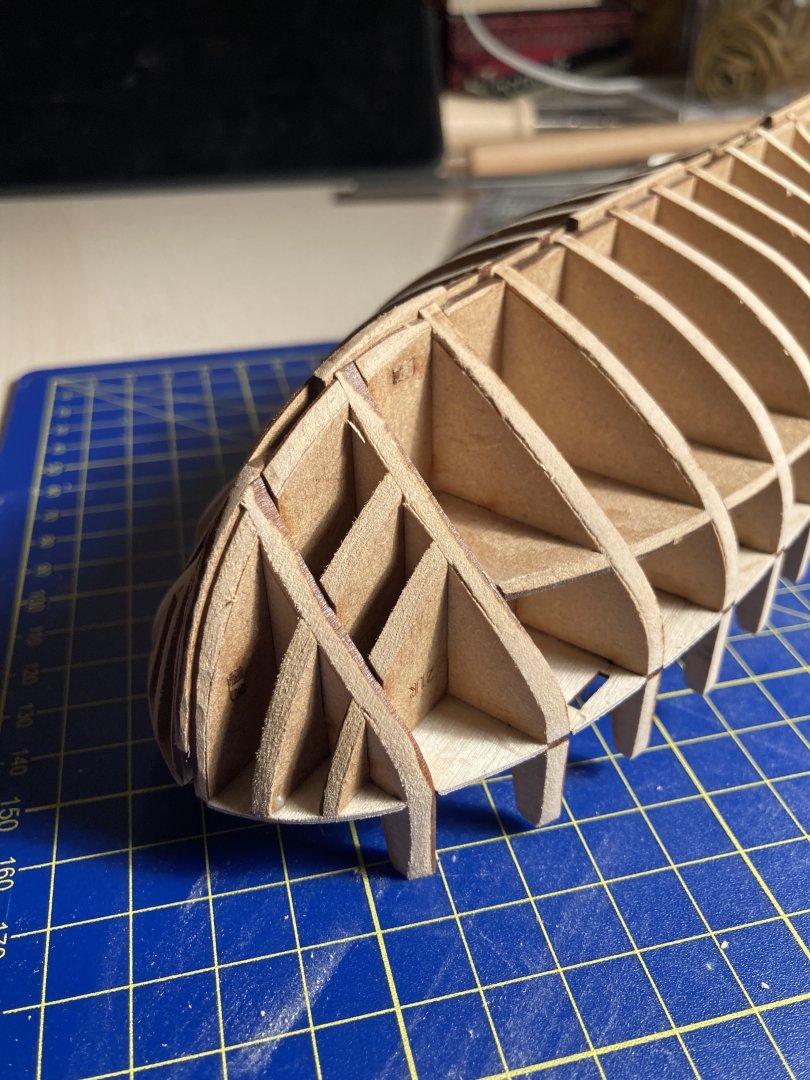
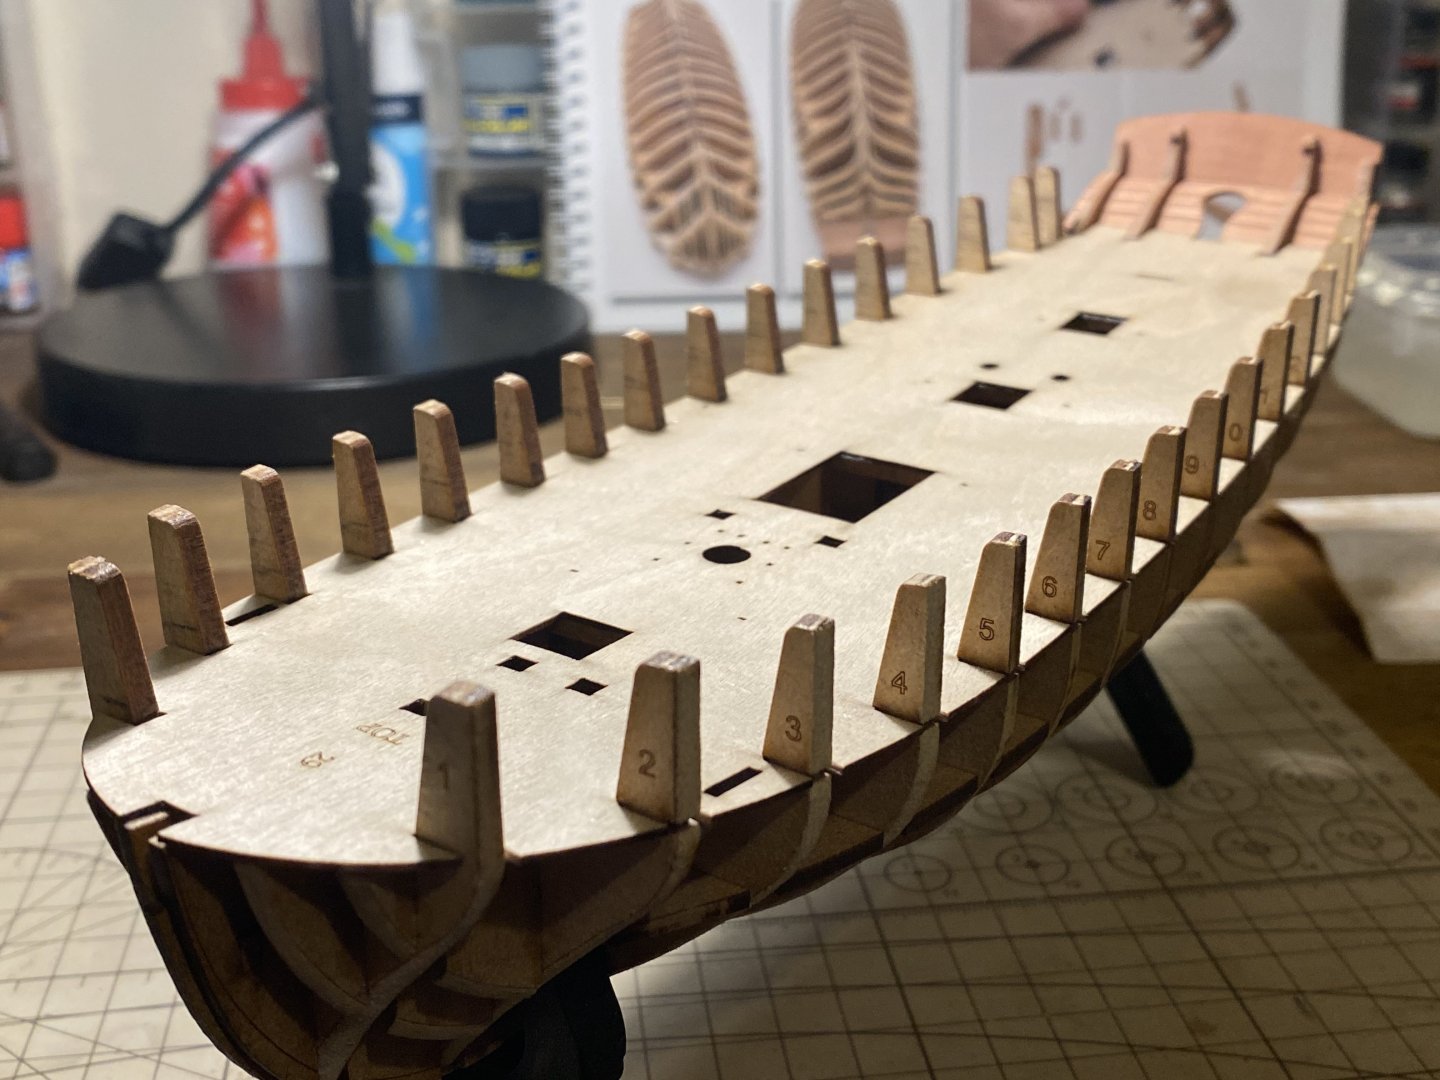
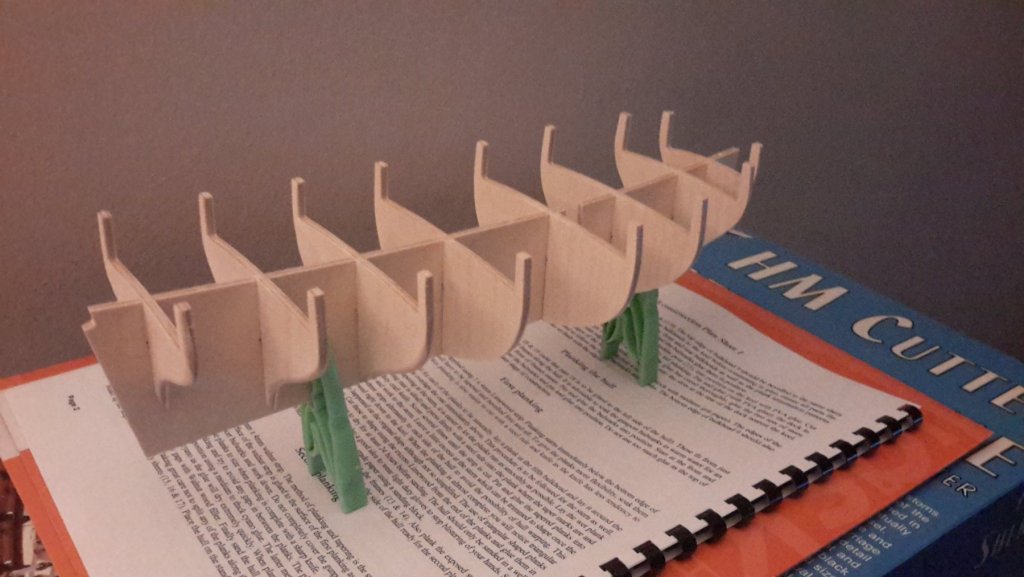
 This is going to be my fourth model, but it is going to be a step up from the very simple ones I have built so far. Of those, two, namely a rowing boat and a yakatbune (Japanese houseboat) did not even have masts and the remaining one, a ship's boat, had very simple rigging. In terms of hull planking, these kits were also very simple. It is time to try something slightly more complex - even though Vanguard classifies this model as one for novice builders. Given the simplicity of my earlier builds, I still very much feel like a novice and because this model offers both plank on frame construction and a step up in rigging complexity, but also comes with instructions aimed at a beginning builder, this looks like an ideal fourth build for me. Having ordered the kit last weekend, I was surprised to already receive it today (Tuesday, so only two days later). I was also surprised by the quality of the kit; even though I had heard and read great things about Vanguard kits, I was still extremely impressed with the materials and the fantastic instruction booklet and (19!) plan sheets. I could not wait to start building and was soon equally impressed with the design and the precision of the fit of the laser cut parts. It is already clear to me that this is going to be an immensely enjoyable build. The first step of the build is, unsurprisingly, to assemble the internal structure of the ship. What is great about how this works in this kit is that it is not simply a matter of glueing a set of frames into a keel but that, instead, many strengthening elements are included in the structure as well, both ones which run parallel to the keel as ones that run parallel to the frames. Furthermore, two layers of (false) decks are included to provide yet another axis of stability. Everything slots wonderfully together, and the result (see below) is a very strong three dimensional structure, which will form a great basis for the hull planking and the ship as a whole. Now I just need to let the glue dry thoroughly, and it is already time to start planking, something which I still have little experience with and which I am both looking forward to and dreading a little bit ...
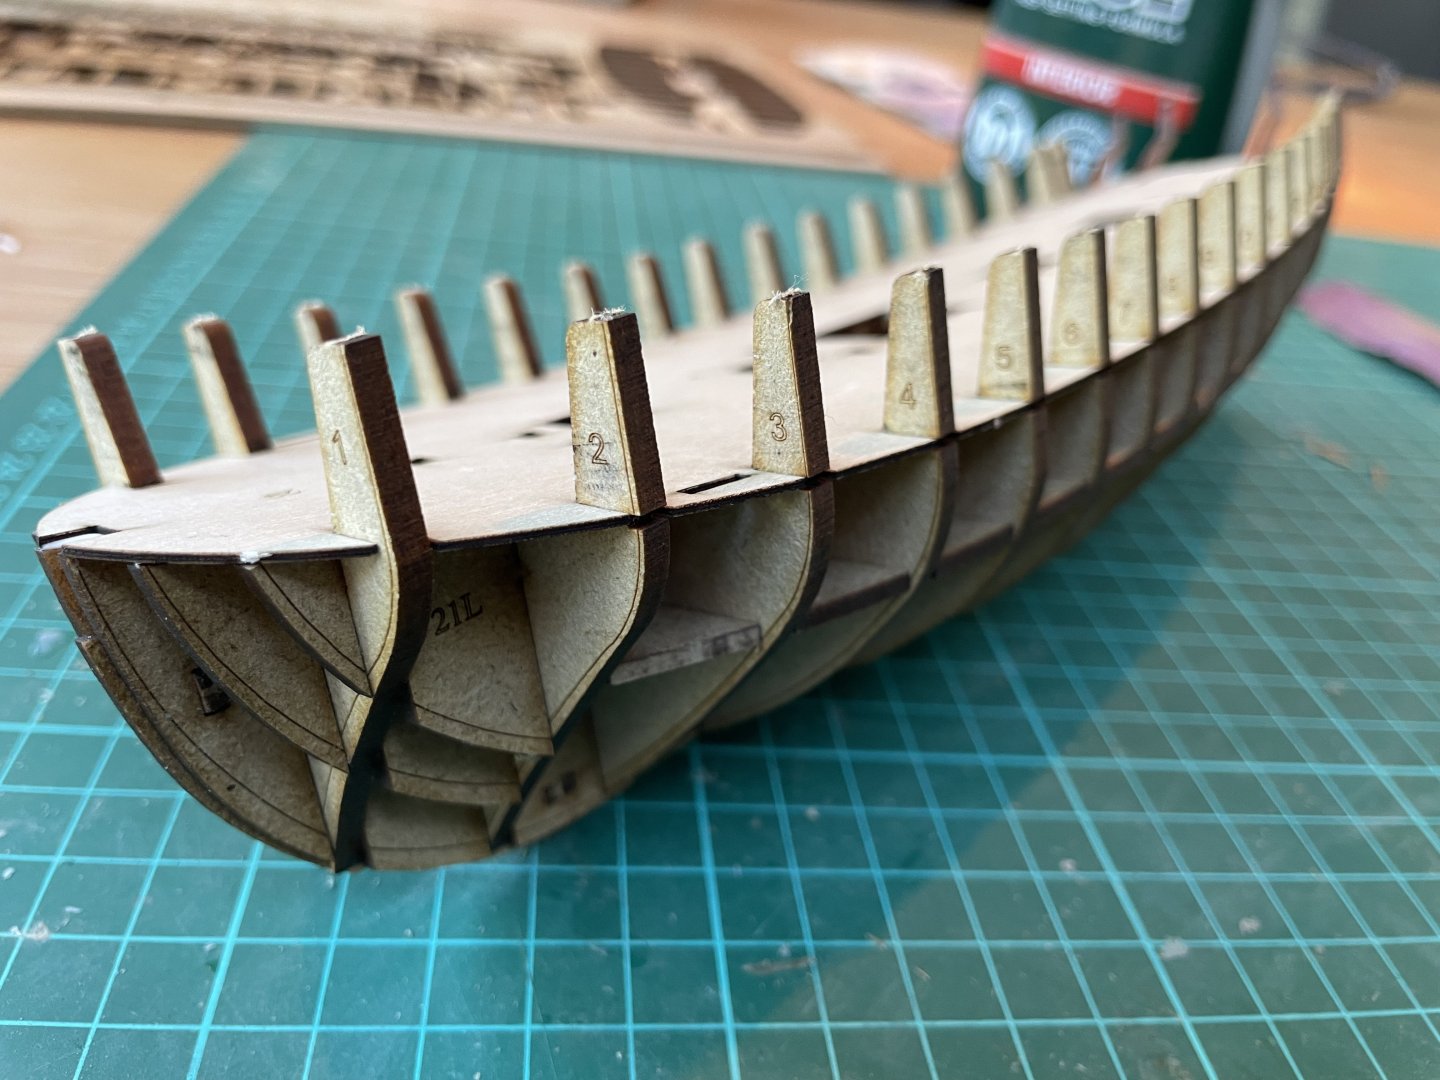
-
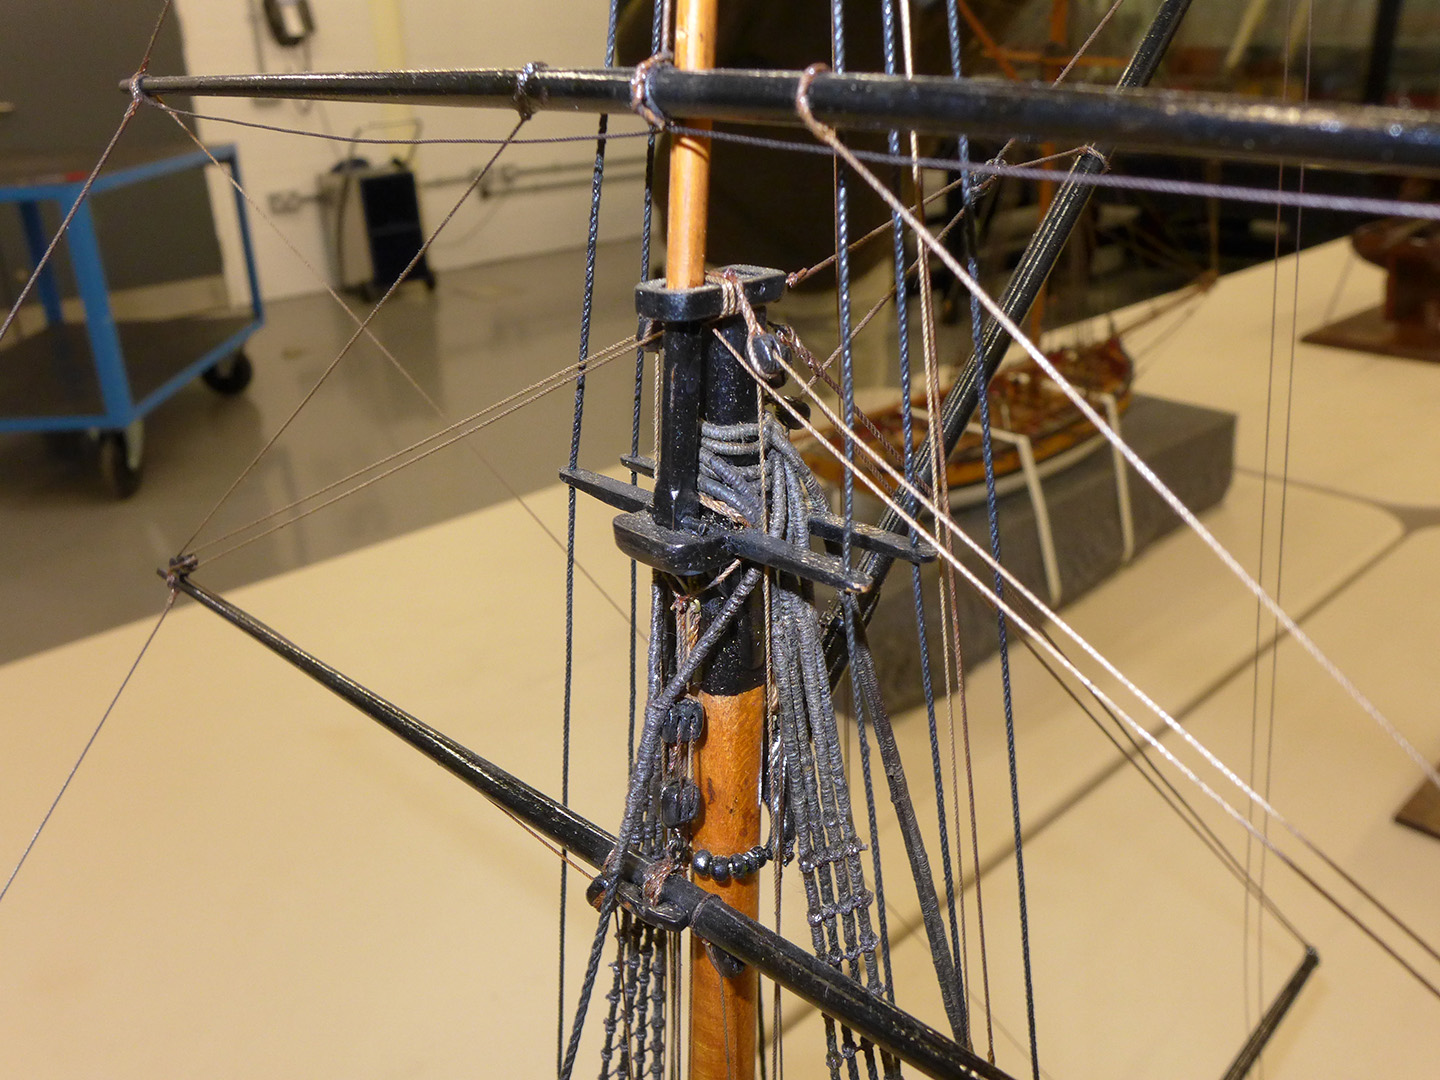
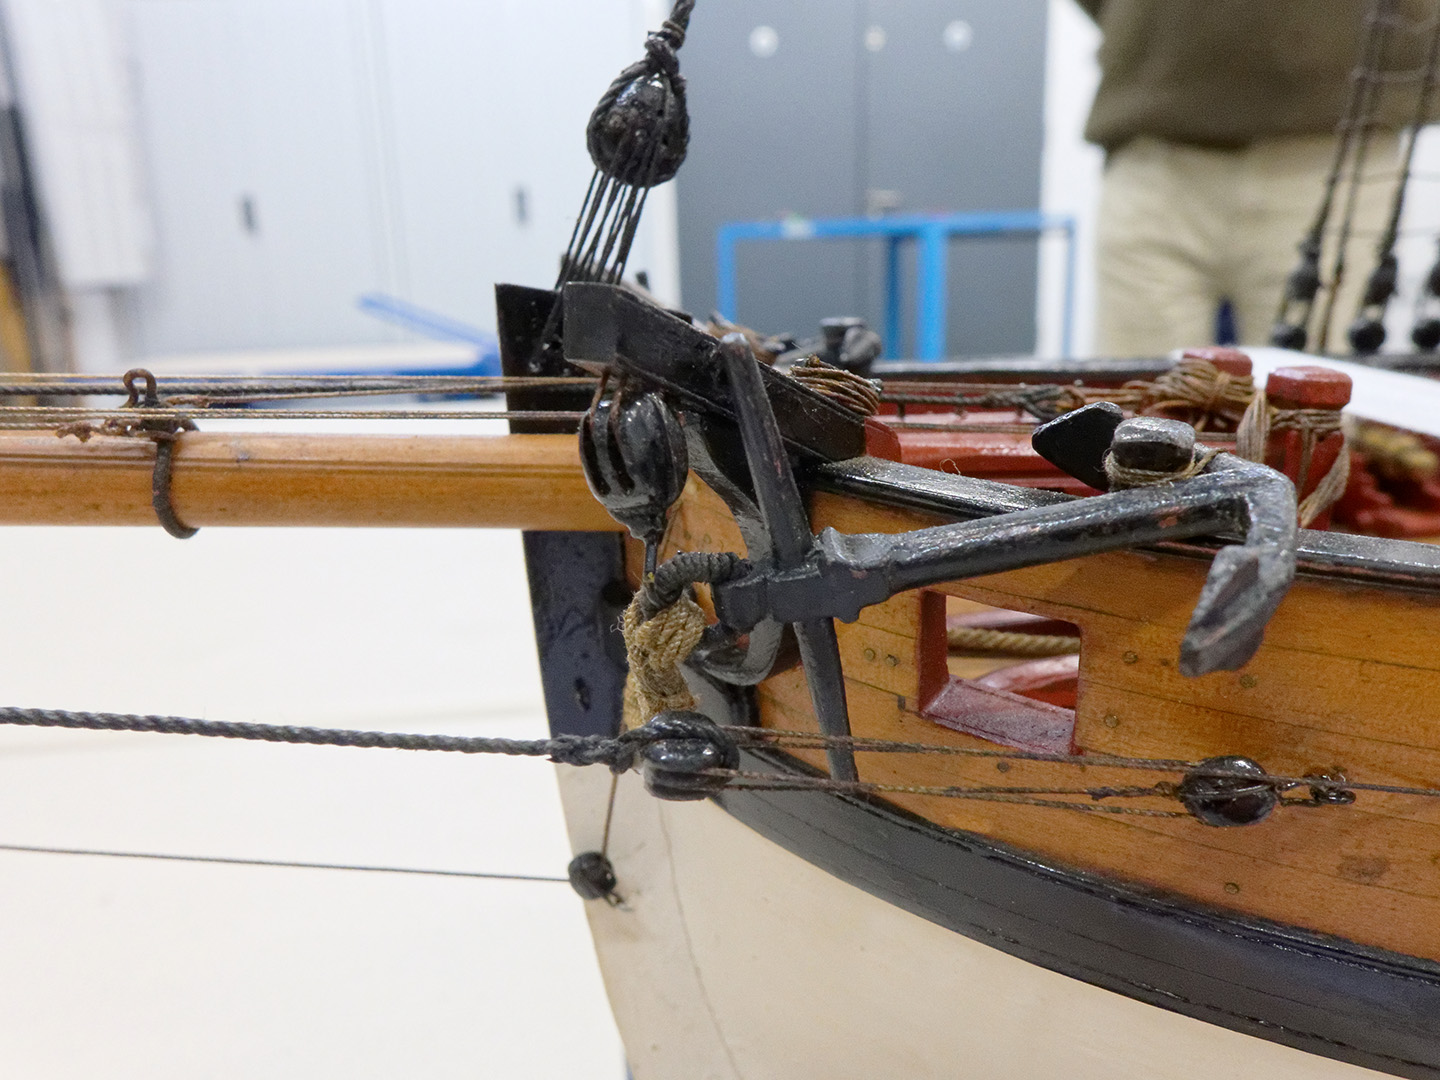
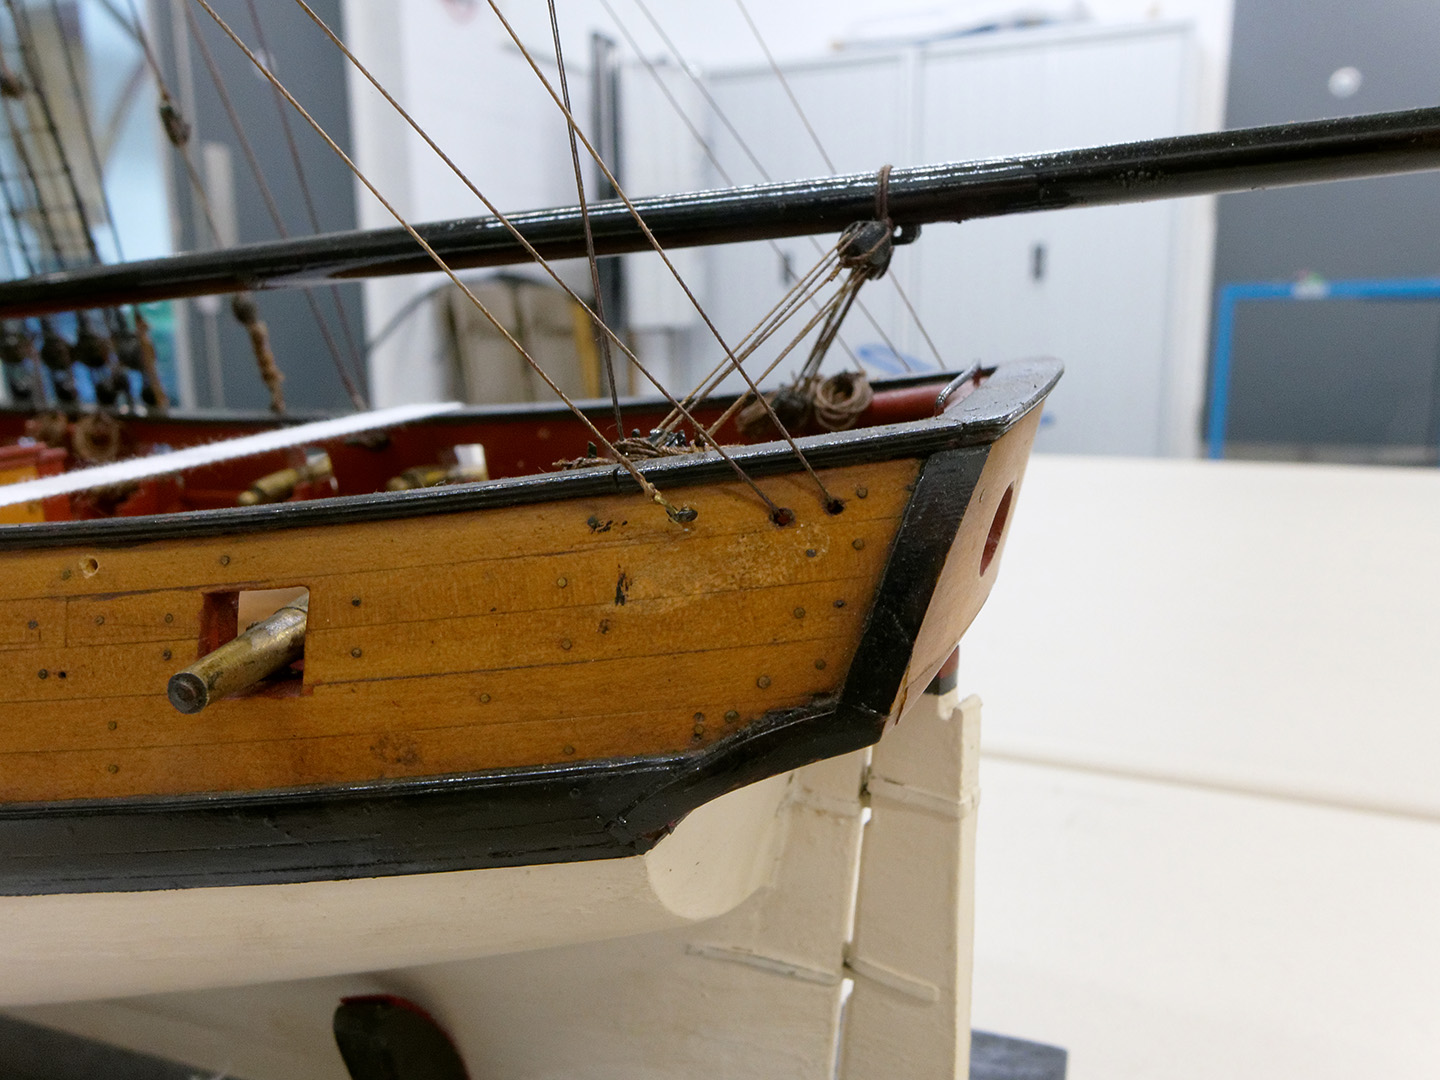
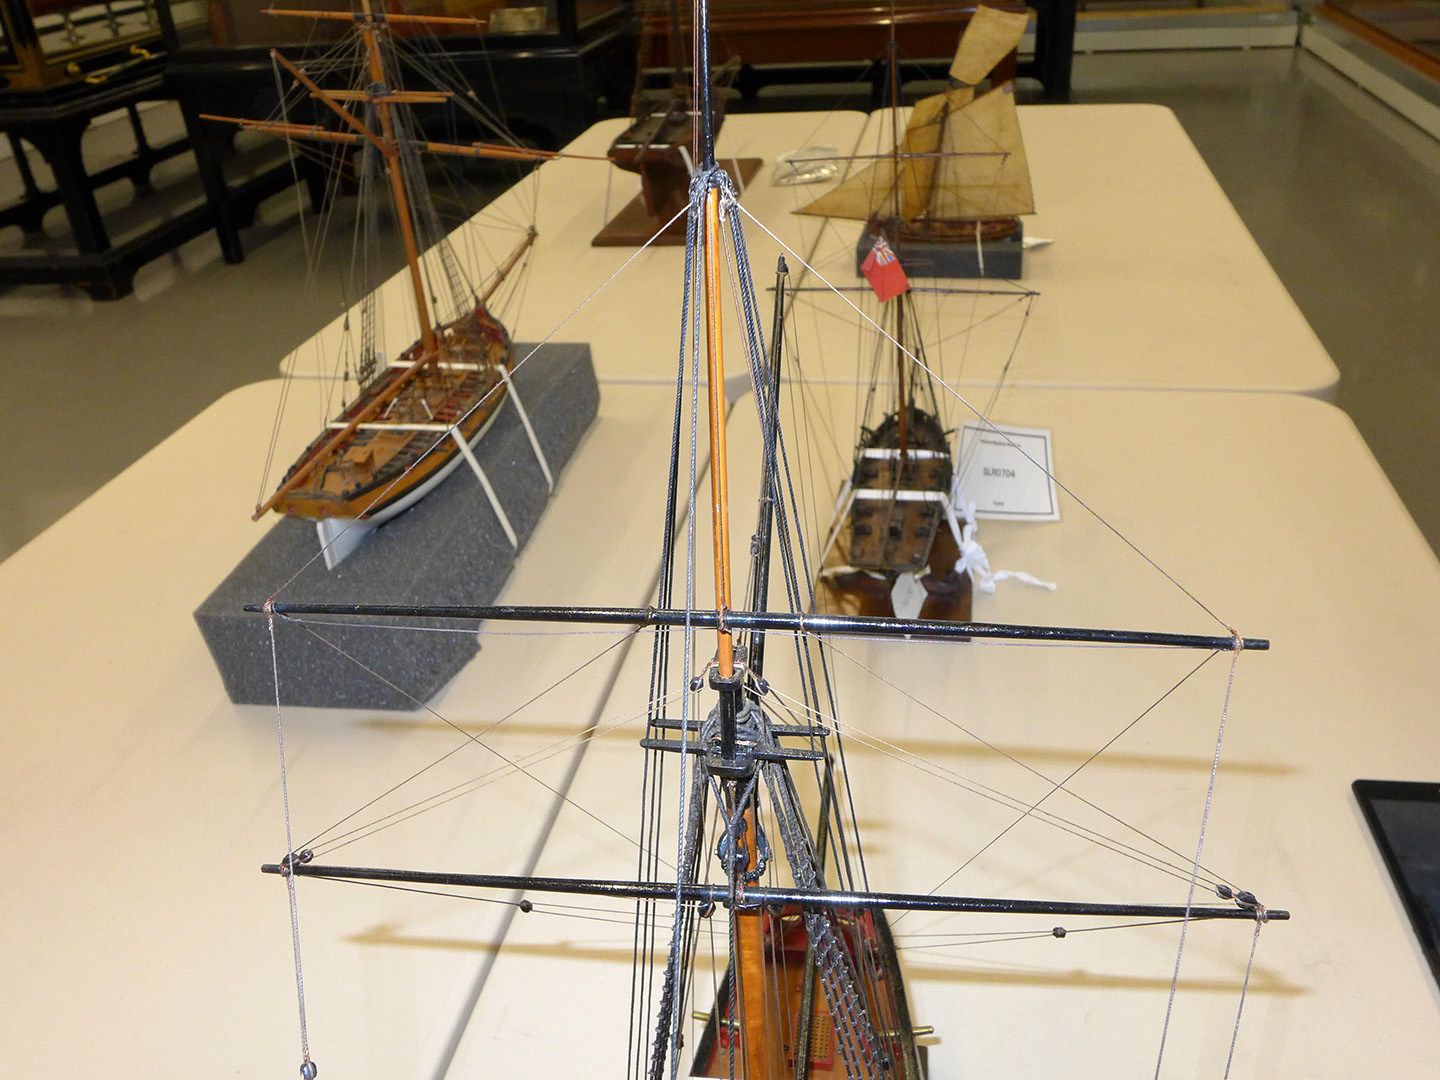
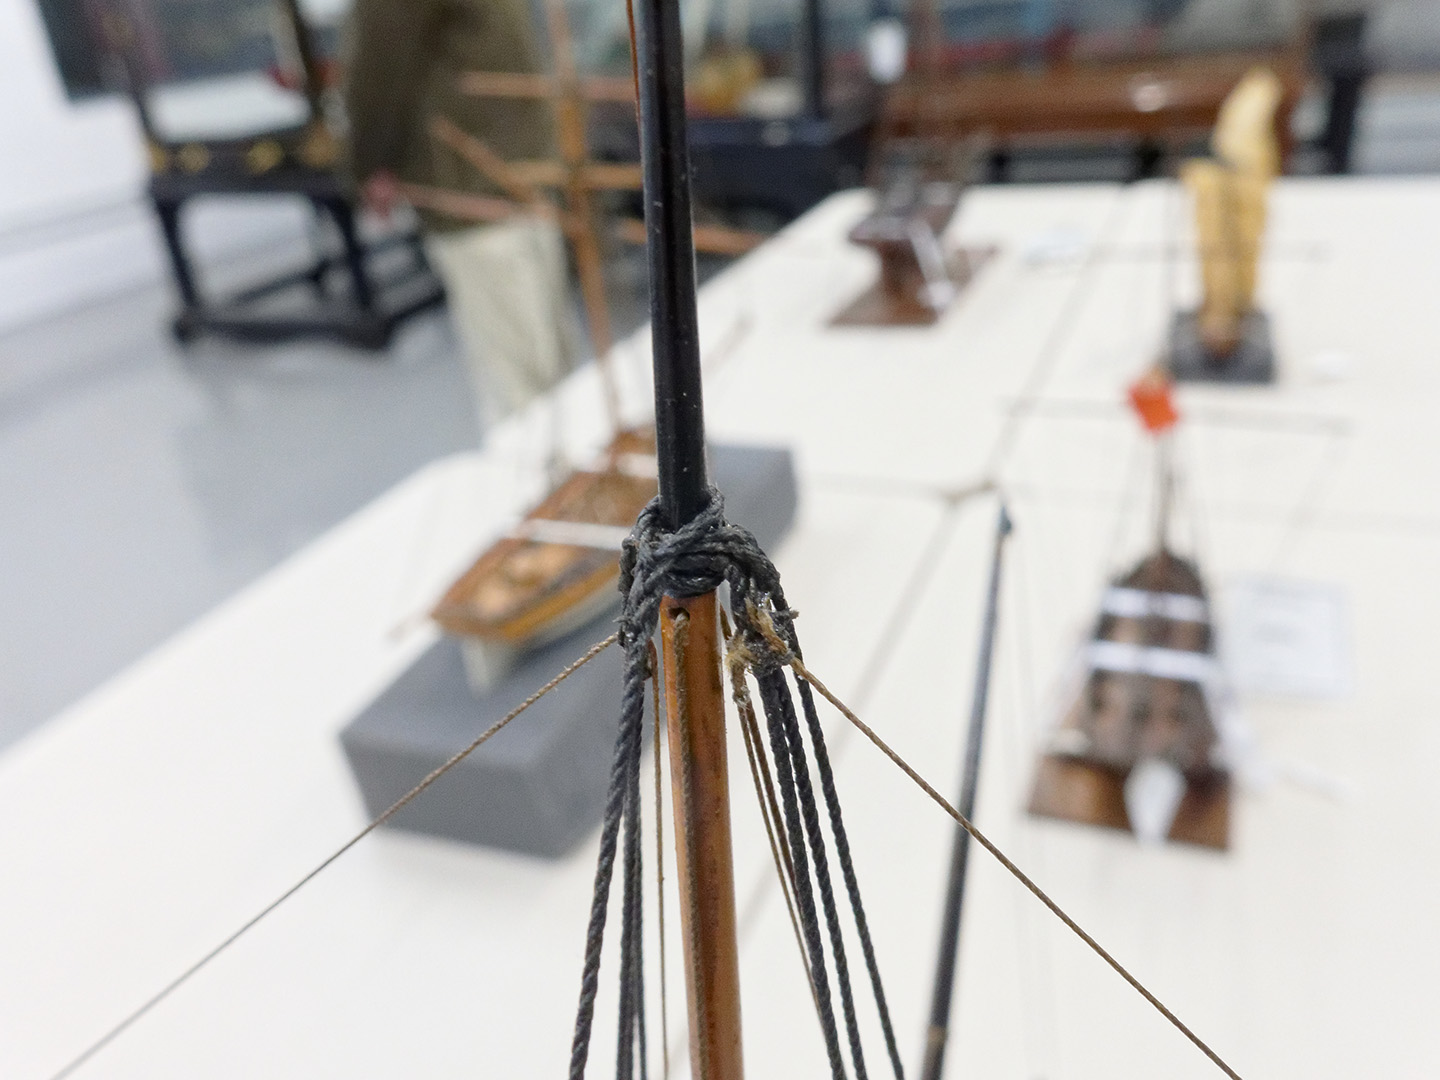
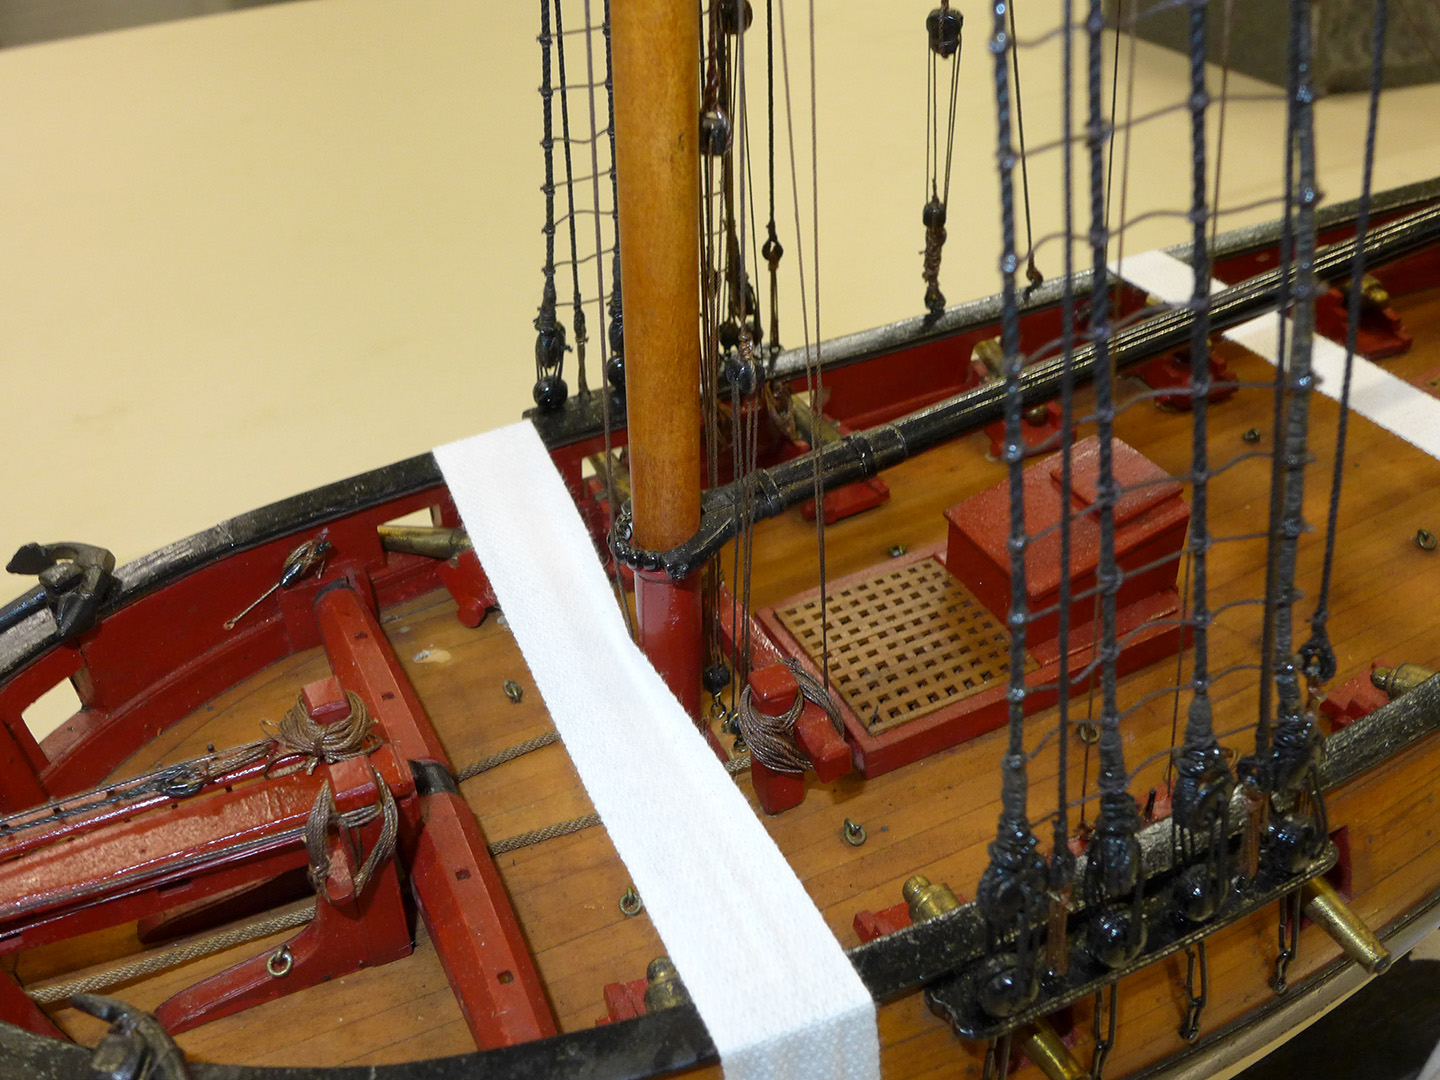
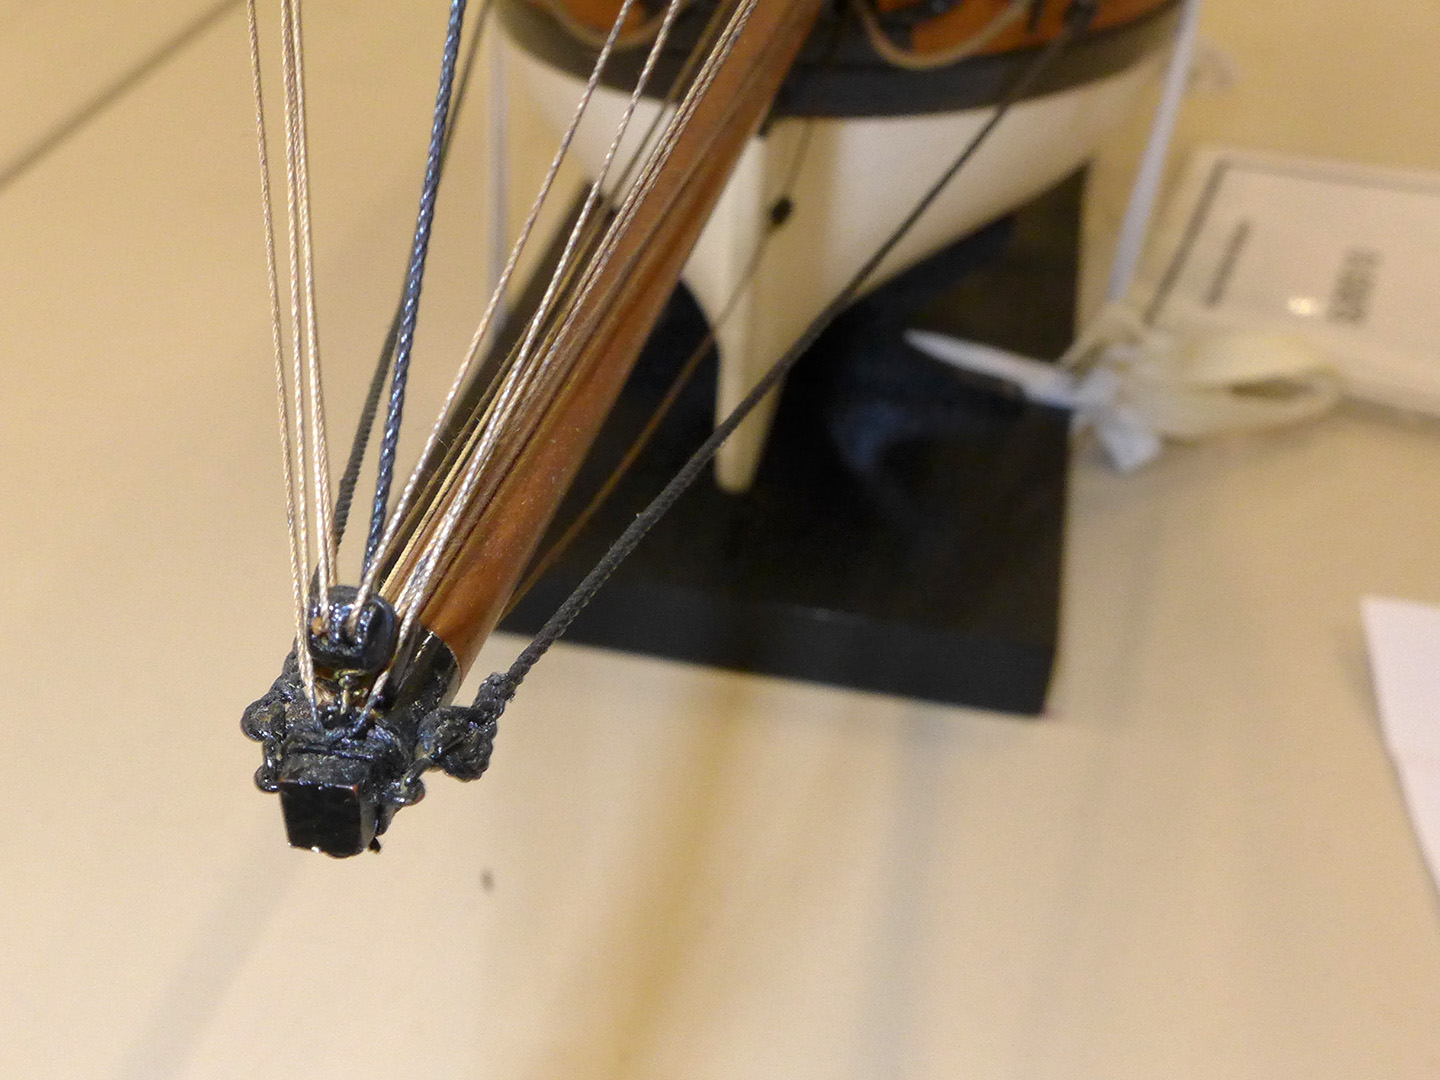
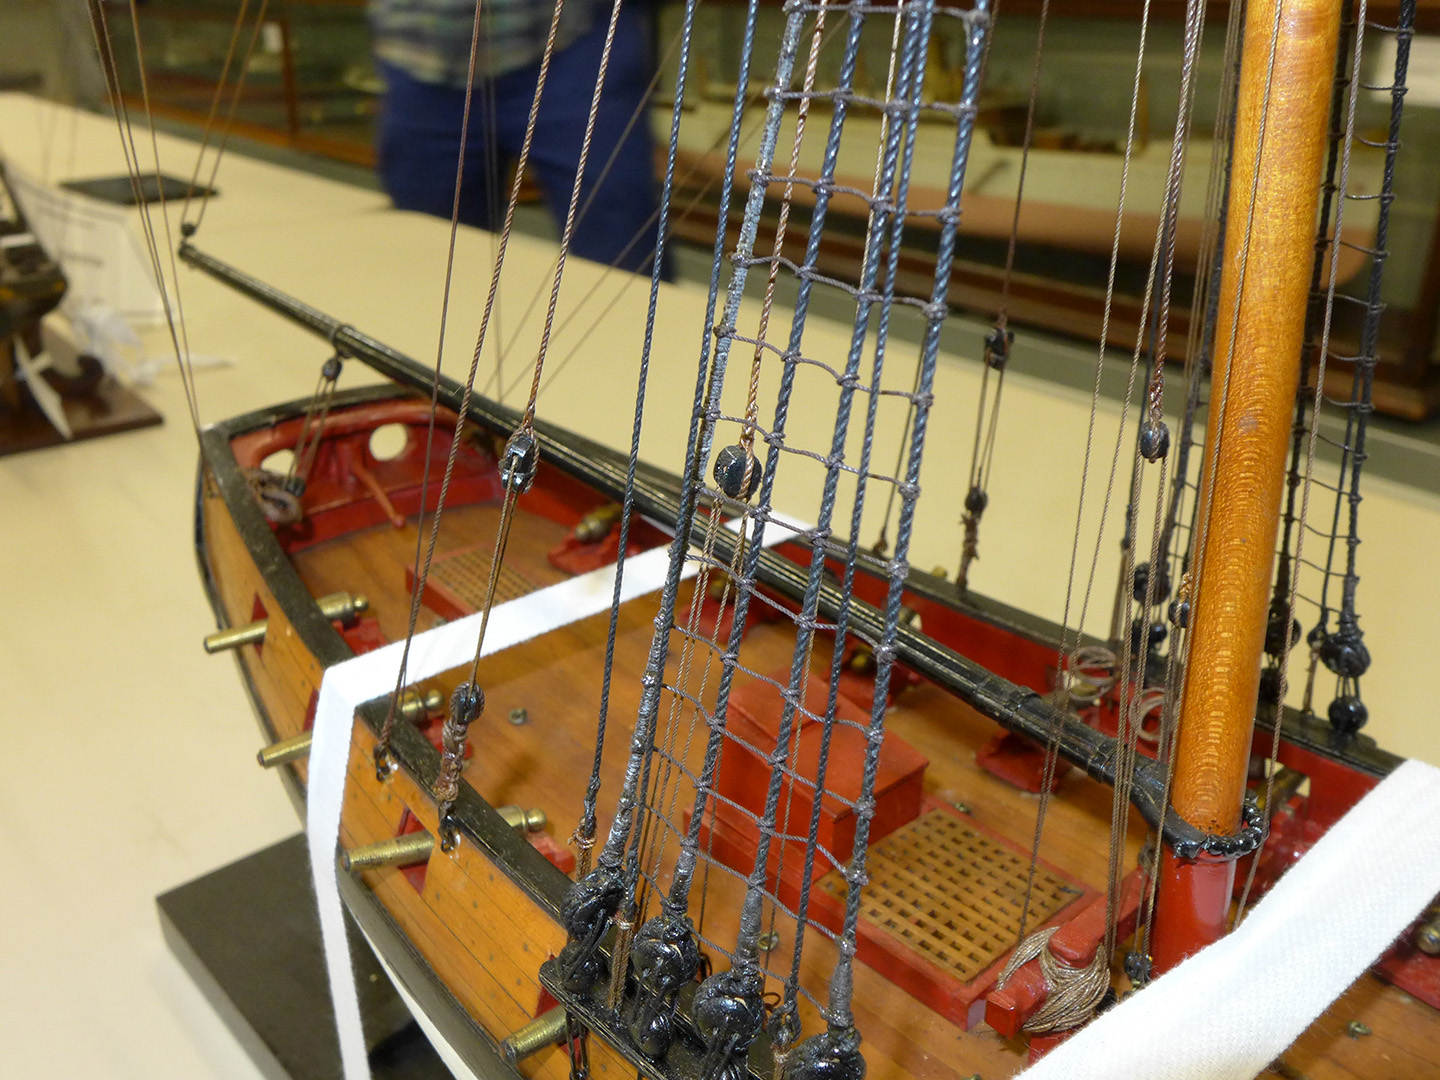
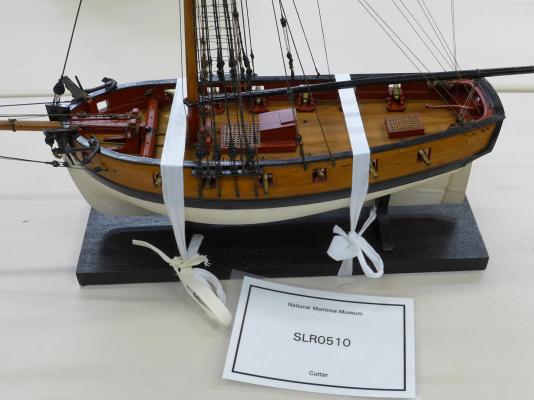
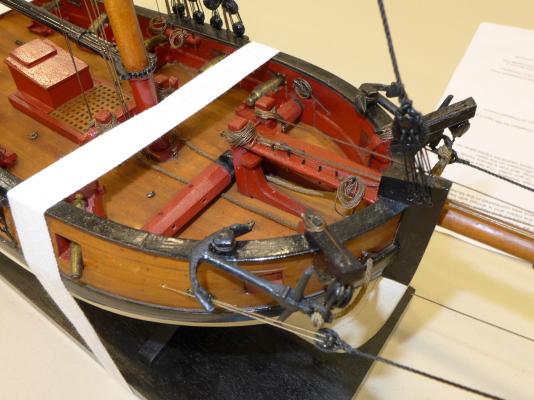
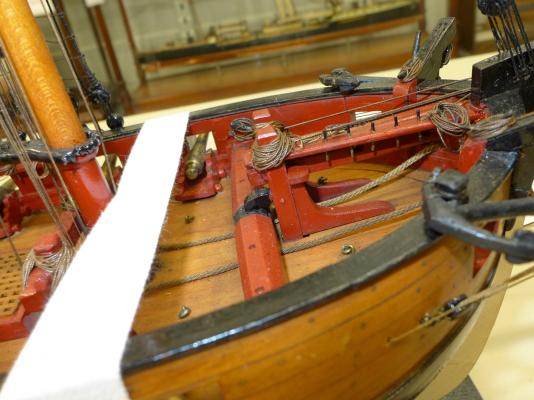
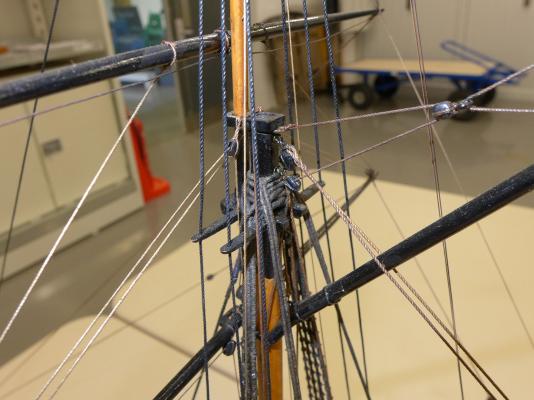
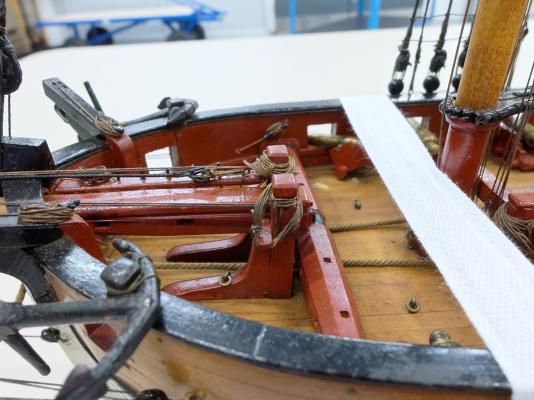
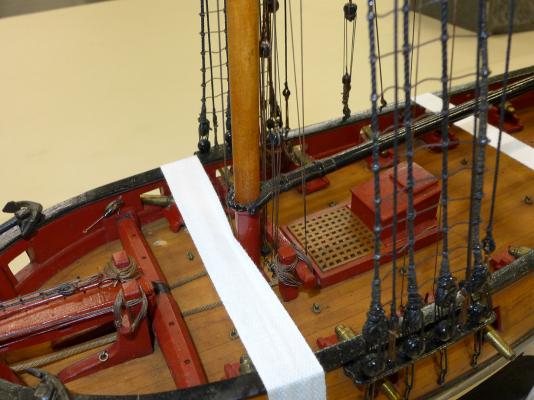
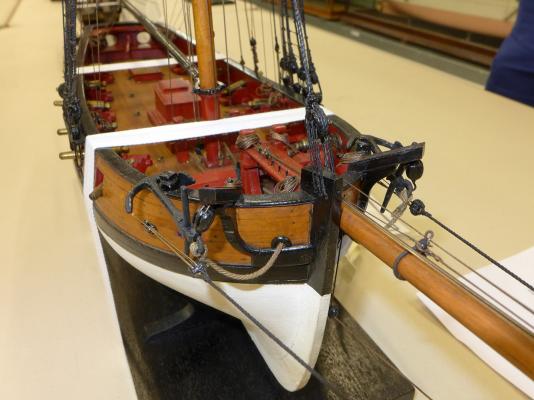
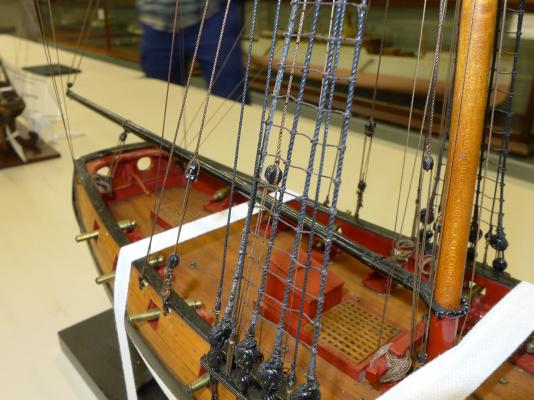
In order for me to understand better the rigging practices for cutters of the 18th Century, I wrote to the National Maritime Museum asking if I could see some of the cutter models they have in storage, now that they no longer have a model display at the Museum in Greenwich. Nick Ball, the Assistant Curator of Ship Models, wrote back very quickly saying that I would be welcome to visit and could see all of the models I had requested which are now stored at the Royal Historic Dockyard in Chatham -- except for one which was stored in another location less accessible to the occasional visitor. He, together with Dave Lindridge the Store Manager, gave me a very generous amount of time to look at and photograph the models that they had taken out for inspection – during which they provided a lively discussion about their jobs and the models they were showing. In fact Nick said he was pleased to show visitors the models because it gave him more of an opportunity to review models in their vast collection. I asked Nick about permission to post my pictures and he told me it was fine as long as I made it clear the pictures were from the NMM collection. He also asked to be provided to the links of the photos as he himself (as a trained naval archaeologist) was very keen on the details and would enjoy any discussion that ensued. I will post the photos of the individual models under different messages, this post deals only with the first of the models. I just need to add that I am enormously grateful to Nick and Dave for their patience and generosity with their time for this visit, which for me was invaluable. 1763 cutter NMM ID SLR0510 First off is their cutter referenced in the NMM as Object ID SLR0510. It is described there as “a full hull model of a cutter (circa 1763) Scale: 1:48. The vessel measures 53 feet on the main deck by 20 feet in the beam and is armed with twelve 3-pounders. The model was donated unfinished and was completed in the Museum in 1960”. For me there were four main points of interest, apart from the fact that it is dated the same year as my Sherbourne. The first is that the fore belaying pins are arranged fore-aft beside the bowsprit. Gregor, Dirk, Kester and I have been trying to figure out how the belaying pins would be set given that the kit of the Sherbourne provides no plans for such a belaying rack. Each of us have provided our own particular possibility – with Dirk going for an arrangement such as that on the AOTS book of the Alert, and Gregor going for a rack right on the stem. I had made a rack that was parallel to the windlass. However, now I have seen the arrangement on the NMM cutter SLR0510, and, as you will see, the 12-gun cutter I saw had the same arrangement, I have changed my own rack accordingly. The second is that the topmast is fore of the main mast. I had understood that earlier in the century the practice was to place the topmast aft of the main mast. In fact the cutter Hawke (which I also saw at Chatham and whose pictures follow in a subsequent post) was the only one of these models to place the topmast aft of the main mast. The third point of interest was the windlass. The original NMM plans for the Sherbourne showed this type of windlass, and Gregor has already made one in the same style, and I followed his example – rather than following the type of windlass provided for in the Sherbourne kit. The fourth point of interest is that, like the Trial that you'll see in a subsequent post, the lower hull is painted up to the wales, and not to a waterline. The following were the other pictures I took of the1763 cutter, all of which will have details which will be picked up by those more knowledgeable than I am! Tony


- 42 replies
-
- 23
-
-
- Cutter
- 18th Century
- (and 4 more)
-
 Hello all Now is the time to start my second build log since I have finished the Americas Cup Endeavour. I am more interested in warships of the age of sails so it feels natural to build Sherbourne as a second kit. The ship is not so big but still has all features of a period ship. The main purpose of this build is to learn as many skills as possible so I can not tell how the finished model will look like. I will scratch and replace many parts in the kit just to learn how to do it. The model will be of darker but better walnut than supplied in the kit. I bought it in a local hobby shop here in Helsingborg and I think it is Amati's replacement wood. As sources for the build I will use AOTS Alert, Rigging period for and after craft and other books that I find fits. I will also pick ideas from Chucks cutter Cheerful and of course from the very nice Sherbournes by Gregor, Dirk, Tony and Kester. I hope you don't mind I follow some of your ideas . Ps, Some of the pictures are to small. You will see the full photos if you click (open) on them.
 -
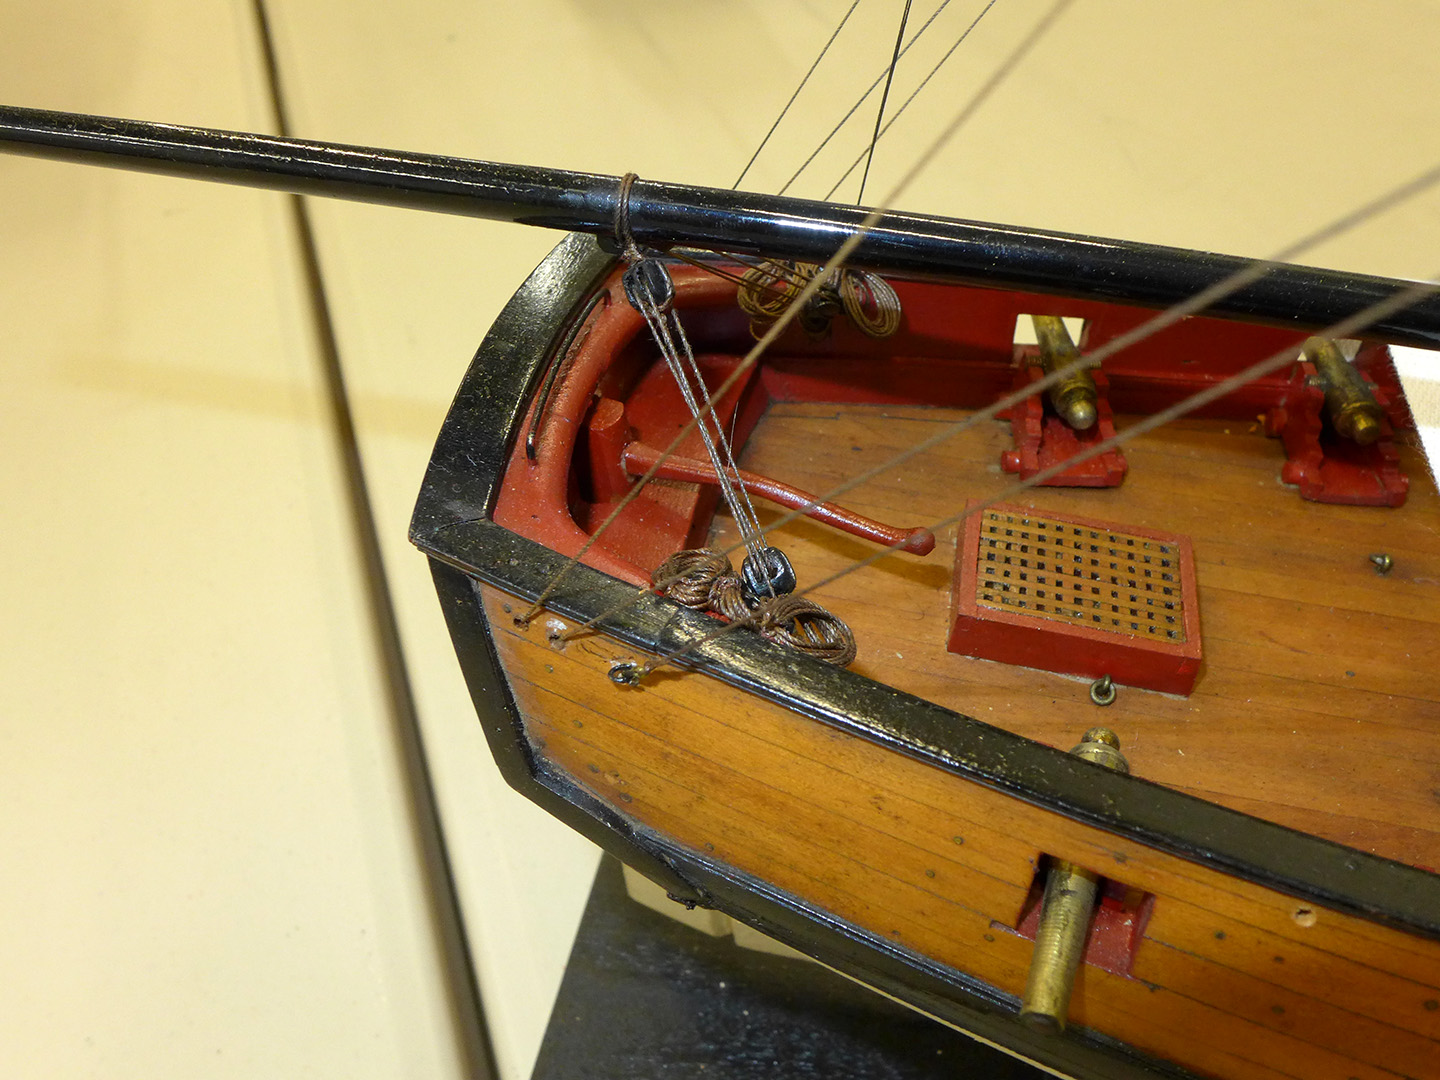
 I found this book via MSW: It is privately printed (2011) which explains the wonderfully uncommercial title. It is however a very well written and generally useful book for anyone who is trying to move on from an out-of-the-box kit build. It can of course be used as an enhanced set of instructions for the Sherbourne; but it is equally valid as a good read with lots of nice photos and a source of useful tips for any ship modeller. There is an associated website with some downloads from the book: https://www.grbsolutions.co.uk and a contact email which is how I got hold of my copy.
- 2 replies
-
- 8
-
-
-
- caldercraft
- Sherbourne
- (and 1 more)
-
 Hello all, after reading several build logs here I thought why not, so here is mine. This is the first time I've built a wooden kit so this will be a bit hit and miss so please bear with me. So far I've just dry placed bulkheads and bevelled bow and stern ones.
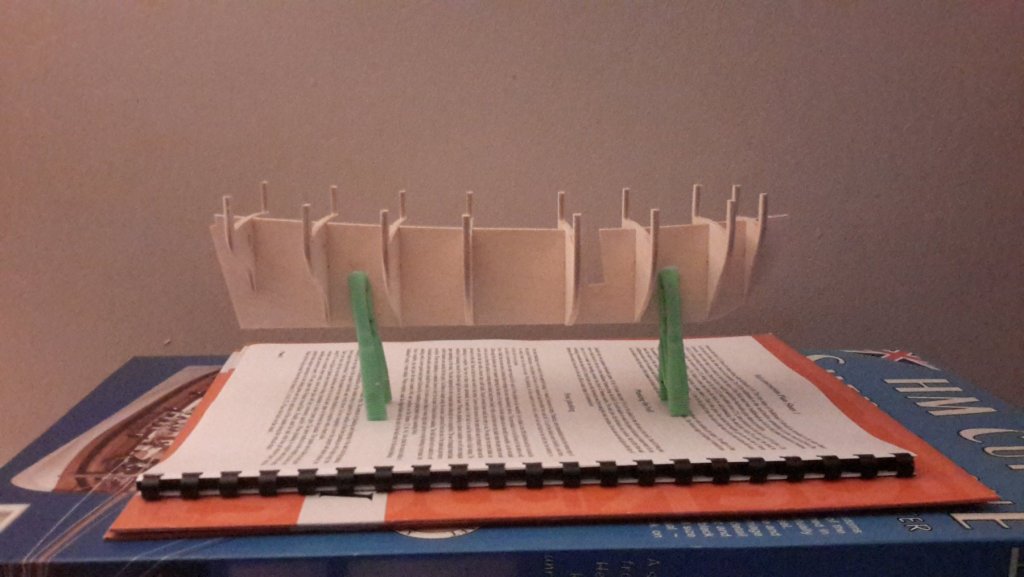
- 84 replies
-
- 5
-
-
- sherbourne
- caldercraft
- (and 2 more)
-
 This is my first plankton plank model. Sl
 -
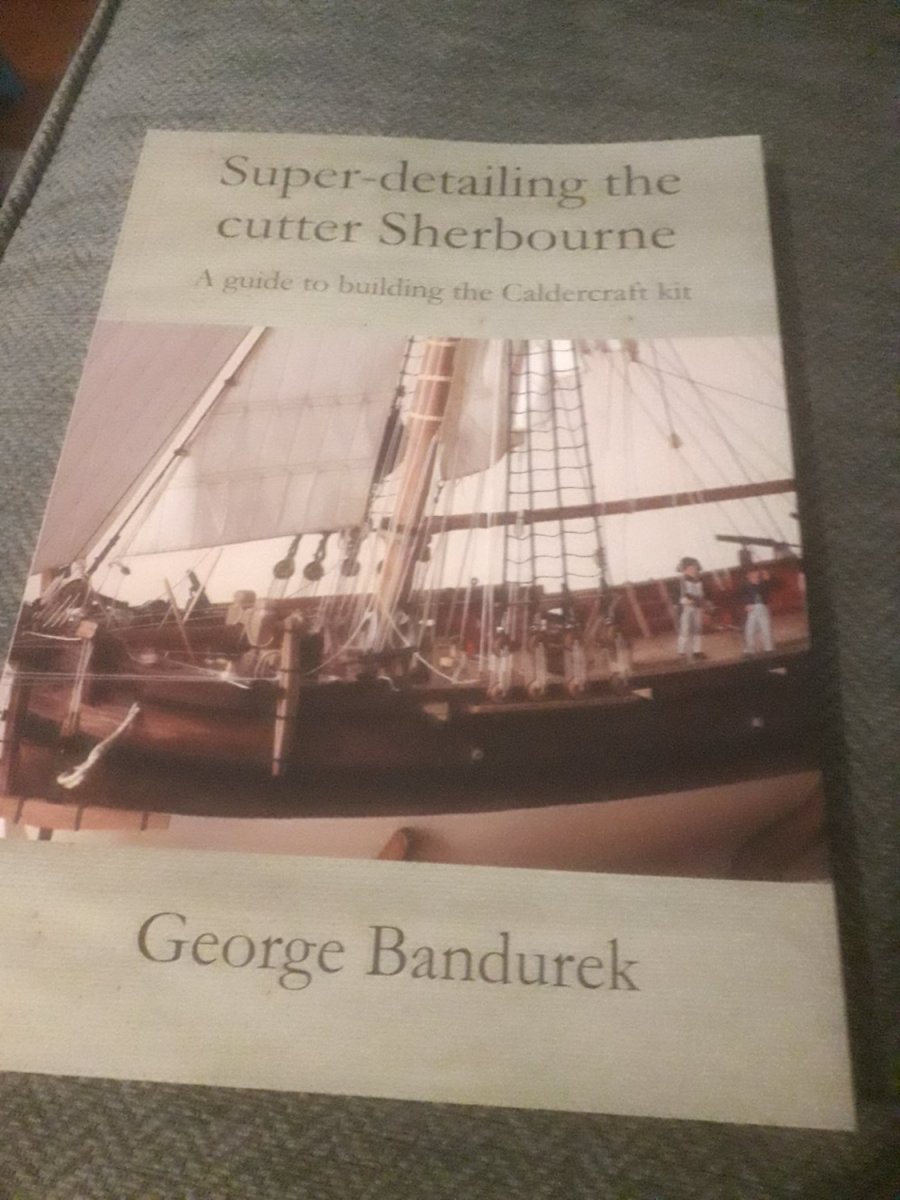
 Super detailing the cutter Sherbourne, a guide to building the Caldercraft kit, by George Bandurek. I published this book in 2011 and at the time there were several threads that showed photos of my build. These are not now easily accessible so I have resurrected some of the information. The attached pdf files are extracts from the book that show how I tackled some of the topics. I would welcome any comments on these extracts, or if you have bought a copy of the book (thank you!) then please post a review. More information on the book is available on my website www.grbsolutions.co.uk. Buy direct and you will get a signed copy! George Bandurek Shrouds.pdf Sails MB.pdf Cannon.pdf Anchors.pdf
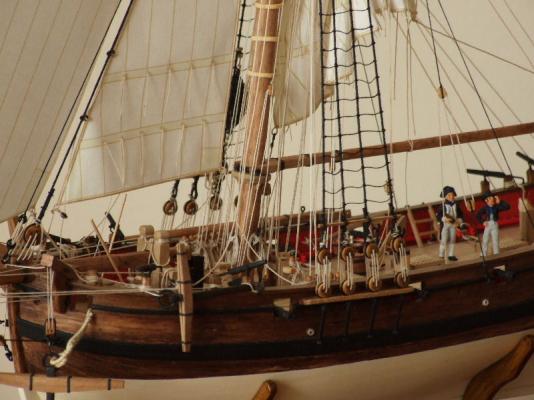
- 10 replies
-
- 14
-
-
- Sherbourne
- Jotika
- (and 5 more)
-
 Hello - Thought I'd do a smaller kit so hopefully it will not take quite so long. The first steps done with the bulkheads. Next the balsa filler bits bow and stern plus a bit of support for the mast. The ply decking sheet dry fitted so as to lay the central planking with access to trim around hatches etc. It's good to see there are currently other Sherbourne builds going on at the moment so I'll be able to learn what to do. Thanks for looking in. Regards Doug
- 40 replies
-
- 9
-
-
- sherbourne
- caldercraft
- (and 1 more)