adivedog
-
Posts
123 -
Joined
-
Last visited
Recent Profile Visitors
464 profile views


-
 SUBaron reacted to a post in a topic:
Swift by adivedog - Artesania Latina - 1:50 - First build
SUBaron reacted to a post in a topic:
Swift by adivedog - Artesania Latina - 1:50 - First build
-
Gabek reacted to a post in a topic:
Swift by adivedog - Artesania Latina - 1:50 - First build
-
Gabek reacted to a post in a topic:
Swift by adivedog - Artesania Latina - 1:50 - First build
-
EricWilliamMarshall reacted to a post in a topic:
Dinghy by adivedog - FINISHED - Midwest Products - Small
-
GrandpaPhil reacted to a post in a topic:
Dinghy by adivedog - FINISHED - Midwest Products - Small
-
GrandpaPhil reacted to a post in a topic:
Swift by adivedog - Artesania Latina - 1:50 - First build
-
GrandpaPhil reacted to a post in a topic:
Swift by adivedog - Artesania Latina - 1:50 - First build
-
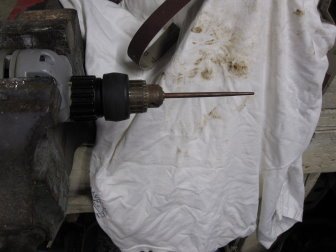
Sanding the bowsprit to correct size with a hand drill. Just lock drill on, then use course sand paper to taper. Measuring often
- 159 replies
-
- 2
-
-
- swift
- artesania latina
- (and 1 more)
-
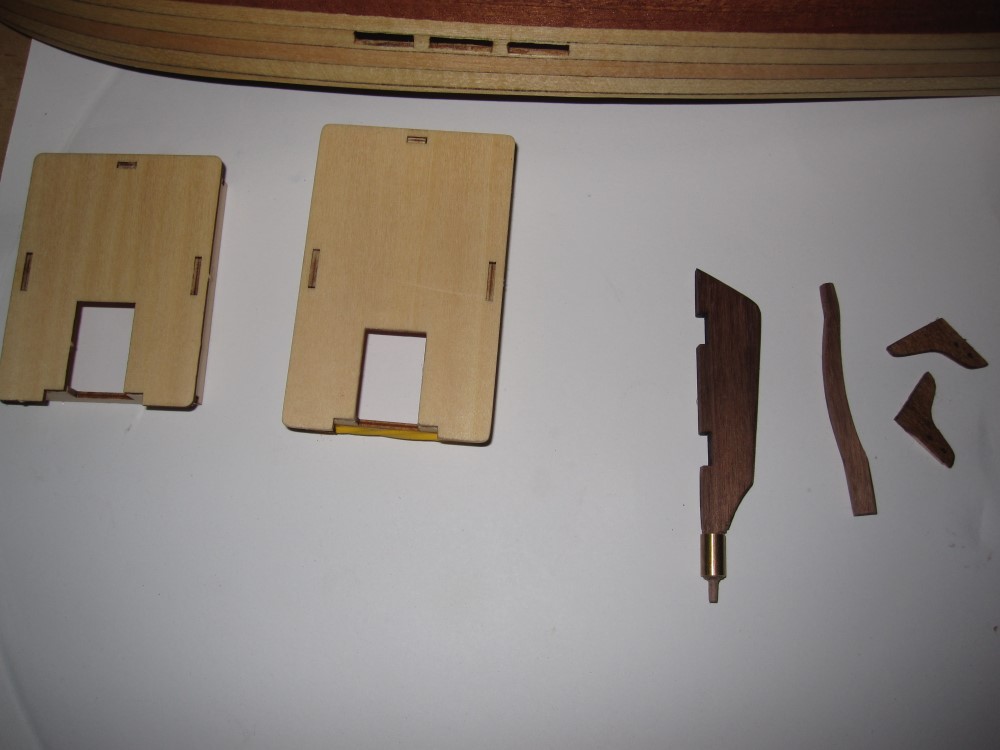
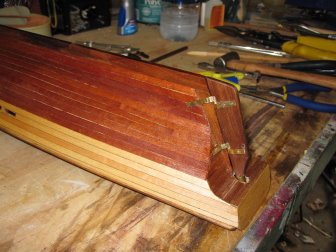
Got the rudder done, not perfect but did the best I could. Forgot how patient you have to be in the hobby. And correcting mistakes. Got the helm glued on Now starting on the Bowsprit. Having a dremel has been a life saver. Especially with a ferrule that accepts .4 micro bits for eyebolts.
- 159 replies
-
- 2
-
-
- swift
- artesania latina
- (and 1 more)
-
Altduck reacted to a post in a topic:
Swift by adivedog - Artesania Latina - 1:50 - First build
-
ccoyle reacted to a post in a topic:
Swift by adivedog - Artesania Latina - 1:50 - First build
-
After 5 years, I'm actually back on the build. Working on rudder and bowsprit. Will get photos this am. Have spent several days trying to get fittings on the rudder, which wasn't helped by the fact that one of the rudder hinges was missing. Spent a few hours searching stores and found paper binders that were the same width and color, so made one after several tries. The bowsprit, I formed by putting my drill in a vise and using sand paper to form, checking the diameter regularly to get final size right. Pictures to follow, heading to garage now.
- 159 replies
-
- 2
-
-
- swift
- artesania latina
- (and 1 more)
-
mrshanks reacted to a post in a topic:
Swift by adivedog - Artesania Latina - 1:50 - First build
-
Am about to start back on build. Hope I can remember how to do it. Didn't realize it's been almost 3 years. Don't remember why I quit. ?
-
Just got back from spending 5 months in Texas staying warm. Will be getting back on the Swift, as soon as I get everything caught up and the weather gets a little warmer. Hope everybody survived the winter OK
-
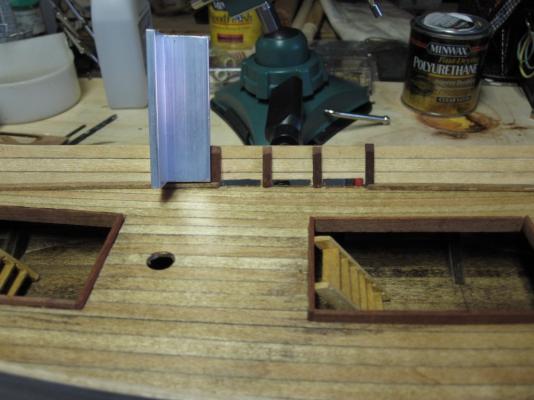
Got the stanchions done on the larboard side, mowed the yard, now taking a break. Used the aluminum angle iron to make sure they were square. I did bevel the bottom of the stanchions at the scuppers to give water easier drainage.

- 159 replies
-
- 7
-
-
- swift
- artesania latina
- (and 1 more)
-
Good job on the planking. Nothing to it
- 831 replies
-
- 1
-
-
- Armed Virginia Sloop
- Model Shipways
- (and 1 more)
-
Tony, I'll mess around with it when I am waiting for the glue to dry on something. this weekend I plan on doing the stanchions and top rail. I would imagine that the scuppers will be something that can be added anytime, even after it's done do there's plenty of time to get it figured out.
-
Bob, I agree with Grimber. Don't worry about the time. Sometimes, I don't work on it for several days or a week. Sometimes, you will only work on it a few minutes when you glue something and may not work on it again until the next day. Just take your time, relax, and enjoy it. It is kind of nice to see something spring from nothing and you did it.
-
I think I might try some tin. I can use snips to cut and then I can shape it, then maybe paint ?
-
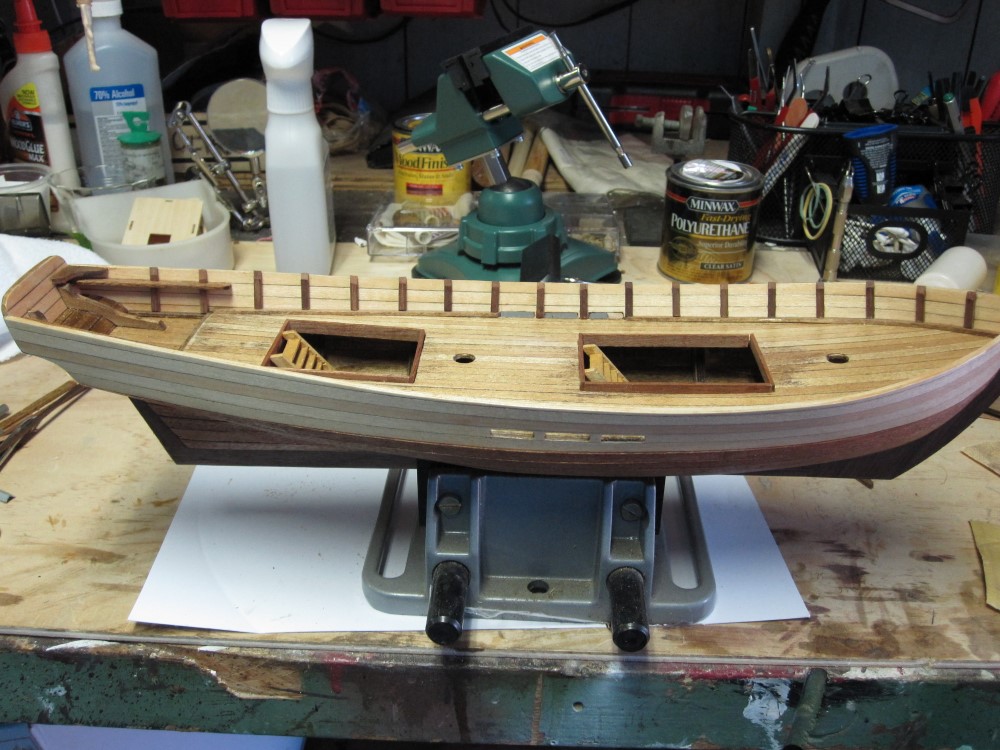
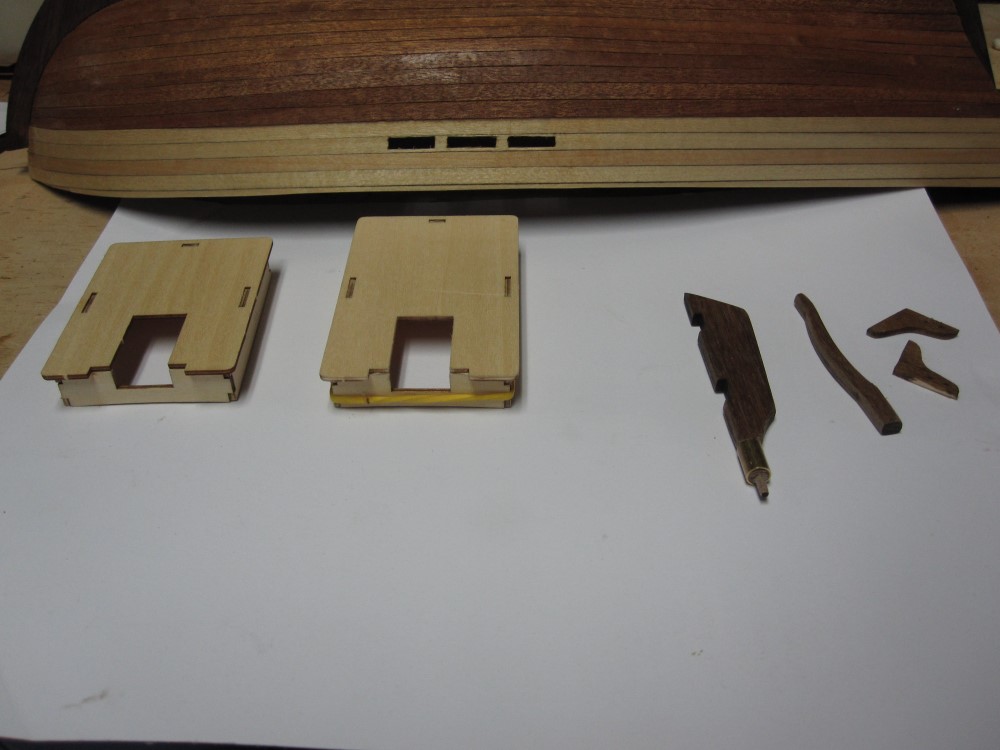
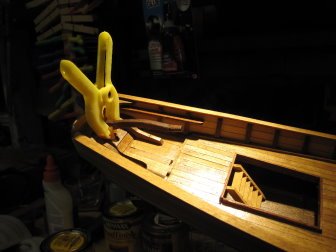
I put poly on the hull, stern, and keel. While letting it dry, I glued the deck houses together, and worked on the rudder. Tomorrow, I'll put the hole in the stern and start on the stanchions.( Not sure if that's spelled right. ) and top rail.


- 159 replies
-
- 1
-
-
- swift
- artesania latina
- (and 1 more)
-
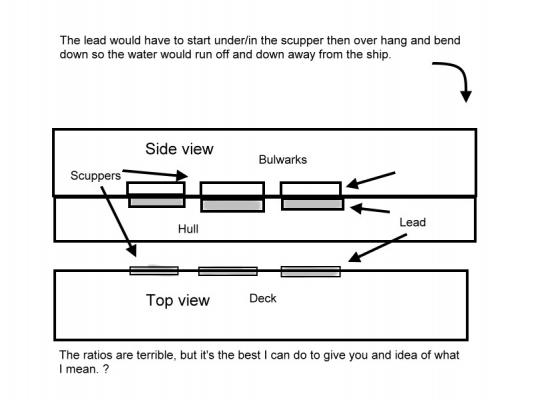
Hi Tony. Thanks for the idea. I think the lead would have started just inside the scupper and would extend out a little over the hull then bend down to keep the water away from the ship. Keep thinking, we ought to come up with something. I attempted to draw something but I don't know if it will make any sense.
-
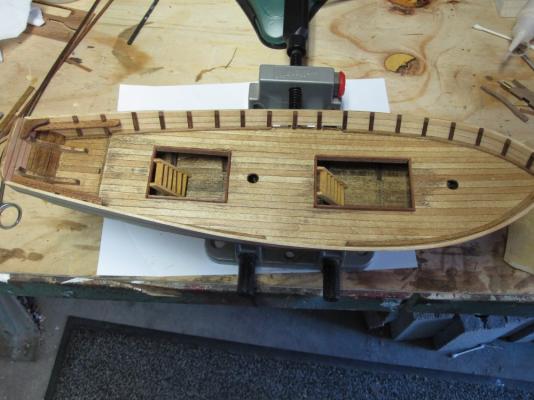
Also, I didn't measure the plank widths when I did my deck. It came out fine, I think there was a little difference on the outer edge, but not much. I did find the difference on the width's when I did the first planking. I really doubt if the old boys back then measured the plank widths too much anyway.
- 153 replies
-
- 1
-
-
- swift
- Artesania Latina
- (and 1 more)
-
One thing I found. you might check the distances from the center line to the outer edges on both sides. I had to sand one side down a little to make it even.
- 153 replies
-
- 1
-
-
- swift
- Artesania Latina
- (and 1 more)
-
Thanks Gdog, I'm sure yours will. Keith, there were four keel pieces. Bow, stern, and the two main pieces. I don't really like the way they were done, but that's what you get. I did try to glue-saw dust the joints but it didn't take too well. Also, would think the keel should be beveled some, but assume it's not so it will sit in the stand ?