


davec
-
Posts
265 -
Joined
-
Last visited
Content Type
Profiles
Forums
Gallery
Events
Everything posted by davec
-
 wow - looks fantastic! I agree with your comment about the detail on the gaspatch guns. The ones that come with the WNW kits are awesome - it is a real achievement for an aftermarket company to do even better.
 -
AMC DH9 by davec - Wingnut Wings - 1/32
davec replied to davec's topic in Non-ship/categorised builds
Mike and Rob - many thanks! I've got the lower wing and stabilizer on, so the model is beginning to look vaguely like an airplane. I am pleased that the decals worked. This was my second attempt at the plane. I tried to do this with paint as a first effort with my new (at the time) stencil cutter. I had an even a harder time with paint bleeding under the masks at the surface irregularities than I did with the decals conforming. I also had problems with the bulldog paints I was trying at the time. I ended up so frustrated I threw the model away. That was back when the models were list price, had free shipping from new zealand, and we all thought WNW would be around forever. Thanks for the masking advice. I wasn't consistent on masking the strut mounting points, but should be OK here. This was not a place where the tolerances are incredibly tight and I think I have been able to get the surfaces adequately cleaned up.
- 27 replies
-
- 10
-

-
Your making great progress and your model is coming out really well. As to "I didn't realize how time consuming cleaning up all the tiny parts would be," cleaning laser char seems to be an acquired skill. A lot of people here seem to have gotten really good at it (the logs of Chuck Passaro's new Speedwell kit are amazing). I've been working on the Dory, but cutting the parts out of a different kind of wood with the plan to not paint or stain. It hasn't been a time saver over cleaning up kit parts. Debonding is definitely a really important skill. I'll be following along. Dave
-
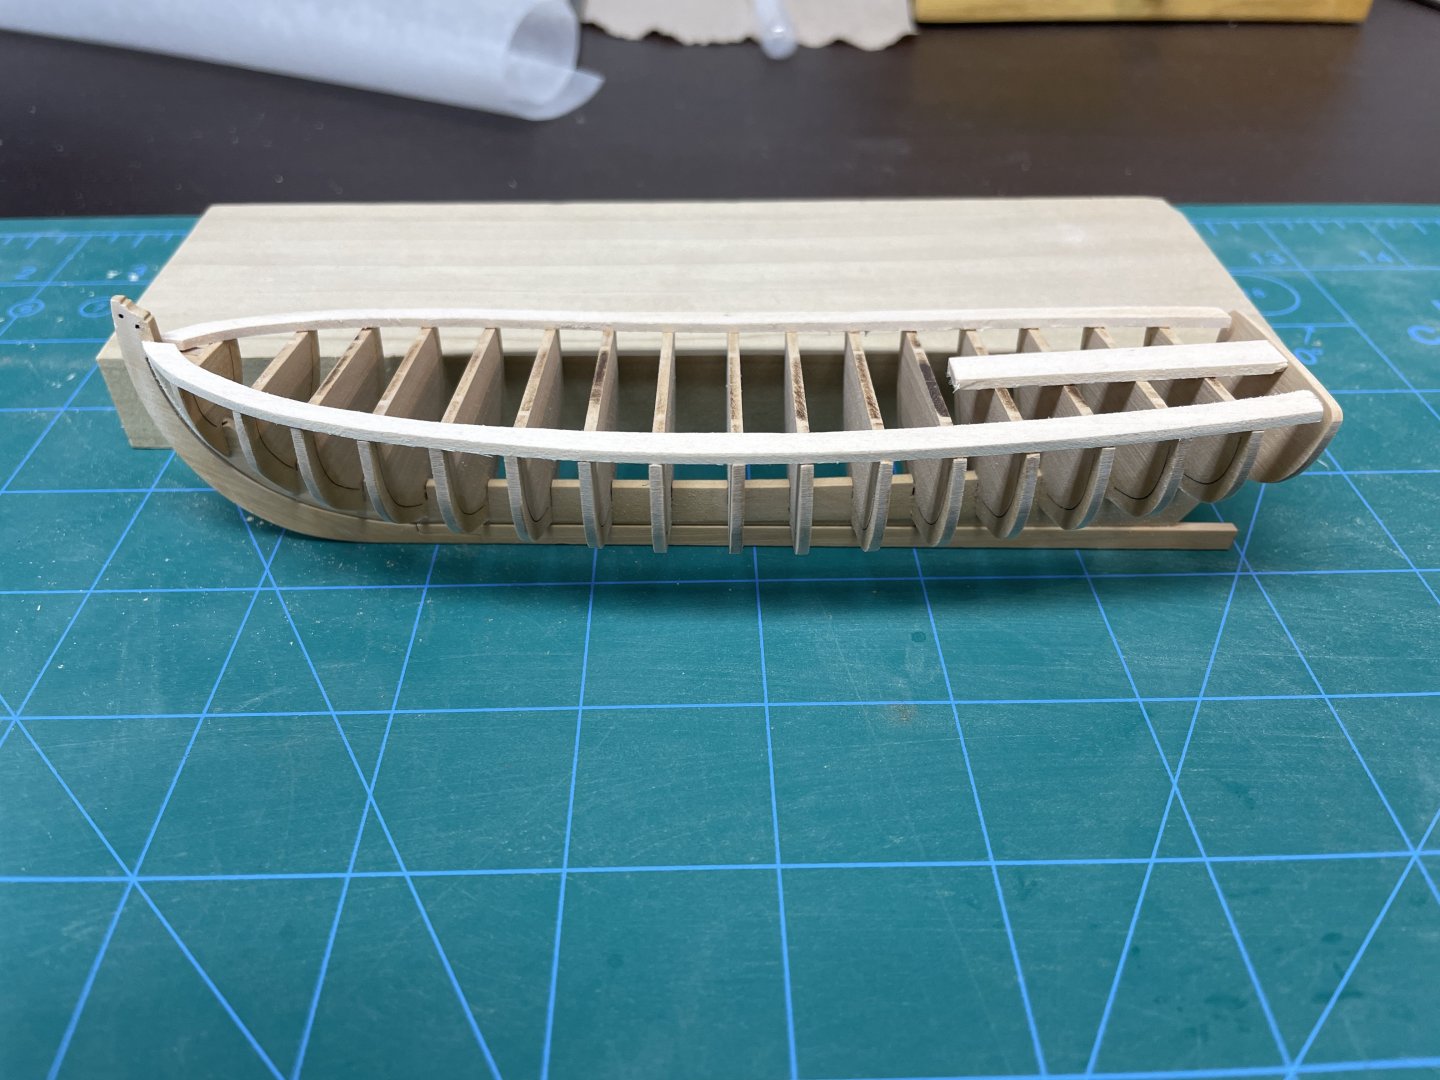
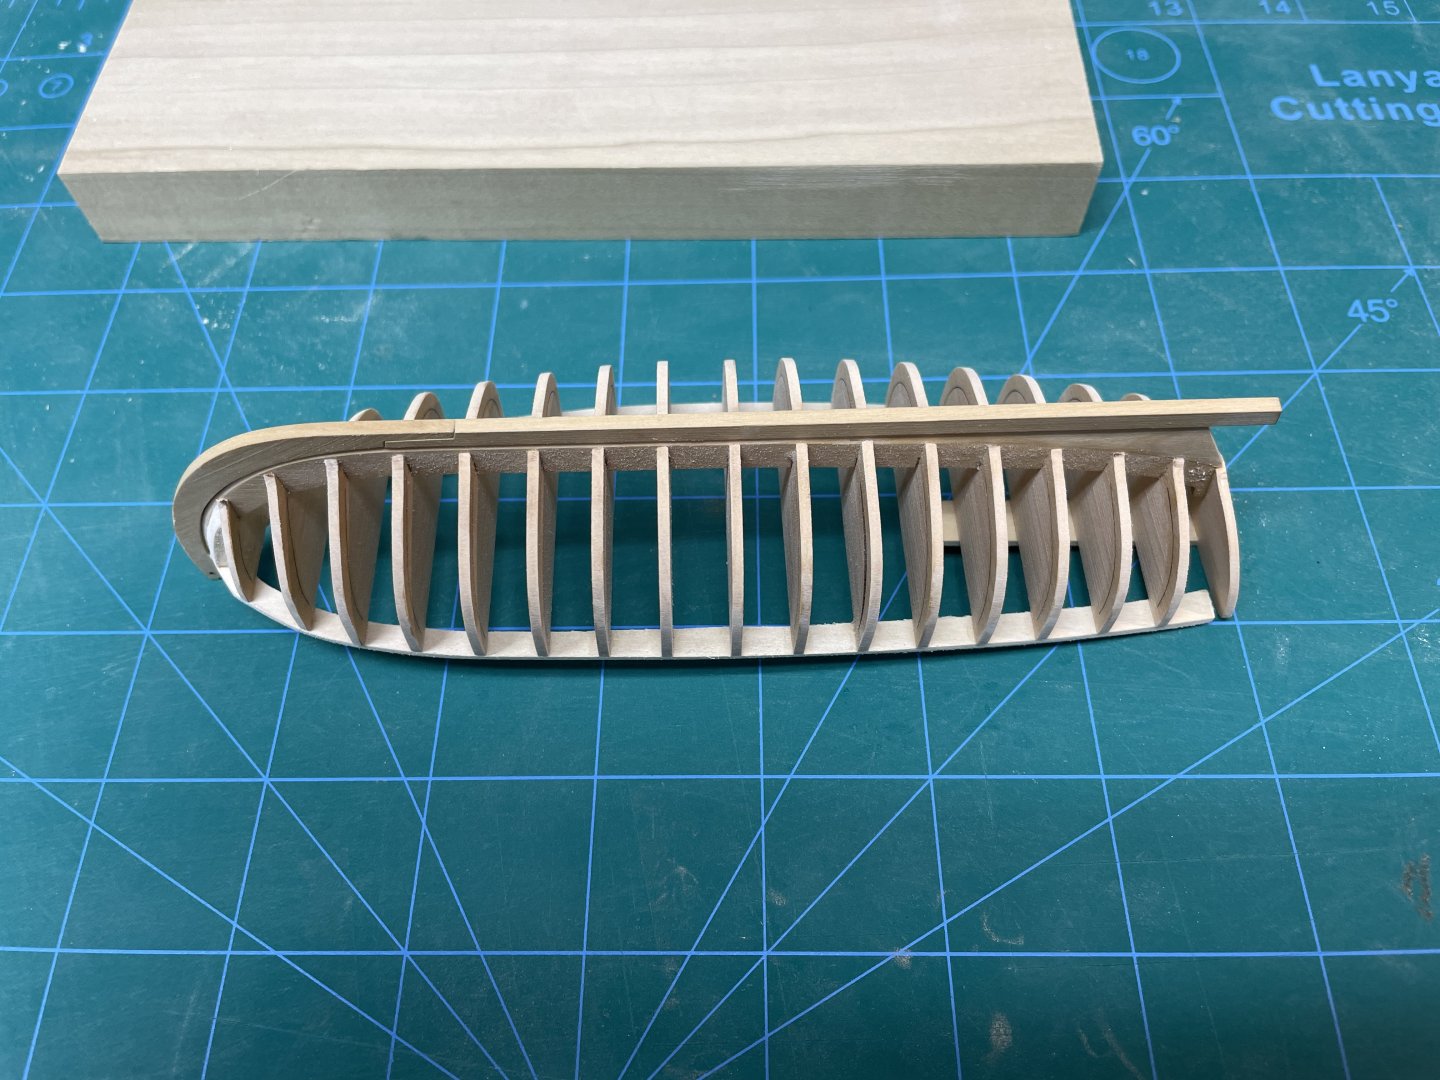
The frames are cut out, glued together, installed, and faired. I debonded and reglued the sternpost again after the picture was taken. When I dryfit the garboard strake, it was a little too short. I realized I had glued the sternpost a little too far out. I'm not using the kit parts, and without the laser marked guides, didn't get the post in the right place the first time. After regluing and refairing, it looks like the planks will fit correctly. I tried brushing water on the hull bottom as per the instructions. It looks like it works great on the kit wood, but not the boxwood I'm using. I didn't get an adequate bend, and there were some water stain marks (should have taken a picture, but didn't) on the other side of the wood at the margin of where the water soaked into the wood. I was able to sand most of the stain away. I got an adequate bend from fully soaking the wood (fortunately did not weaken the glue joints) and didn't have a problem with staining.
- 7 replies
-
- 4
-
-
- Grand Banks Dory
- Model Shipways
- (and 1 more)
-
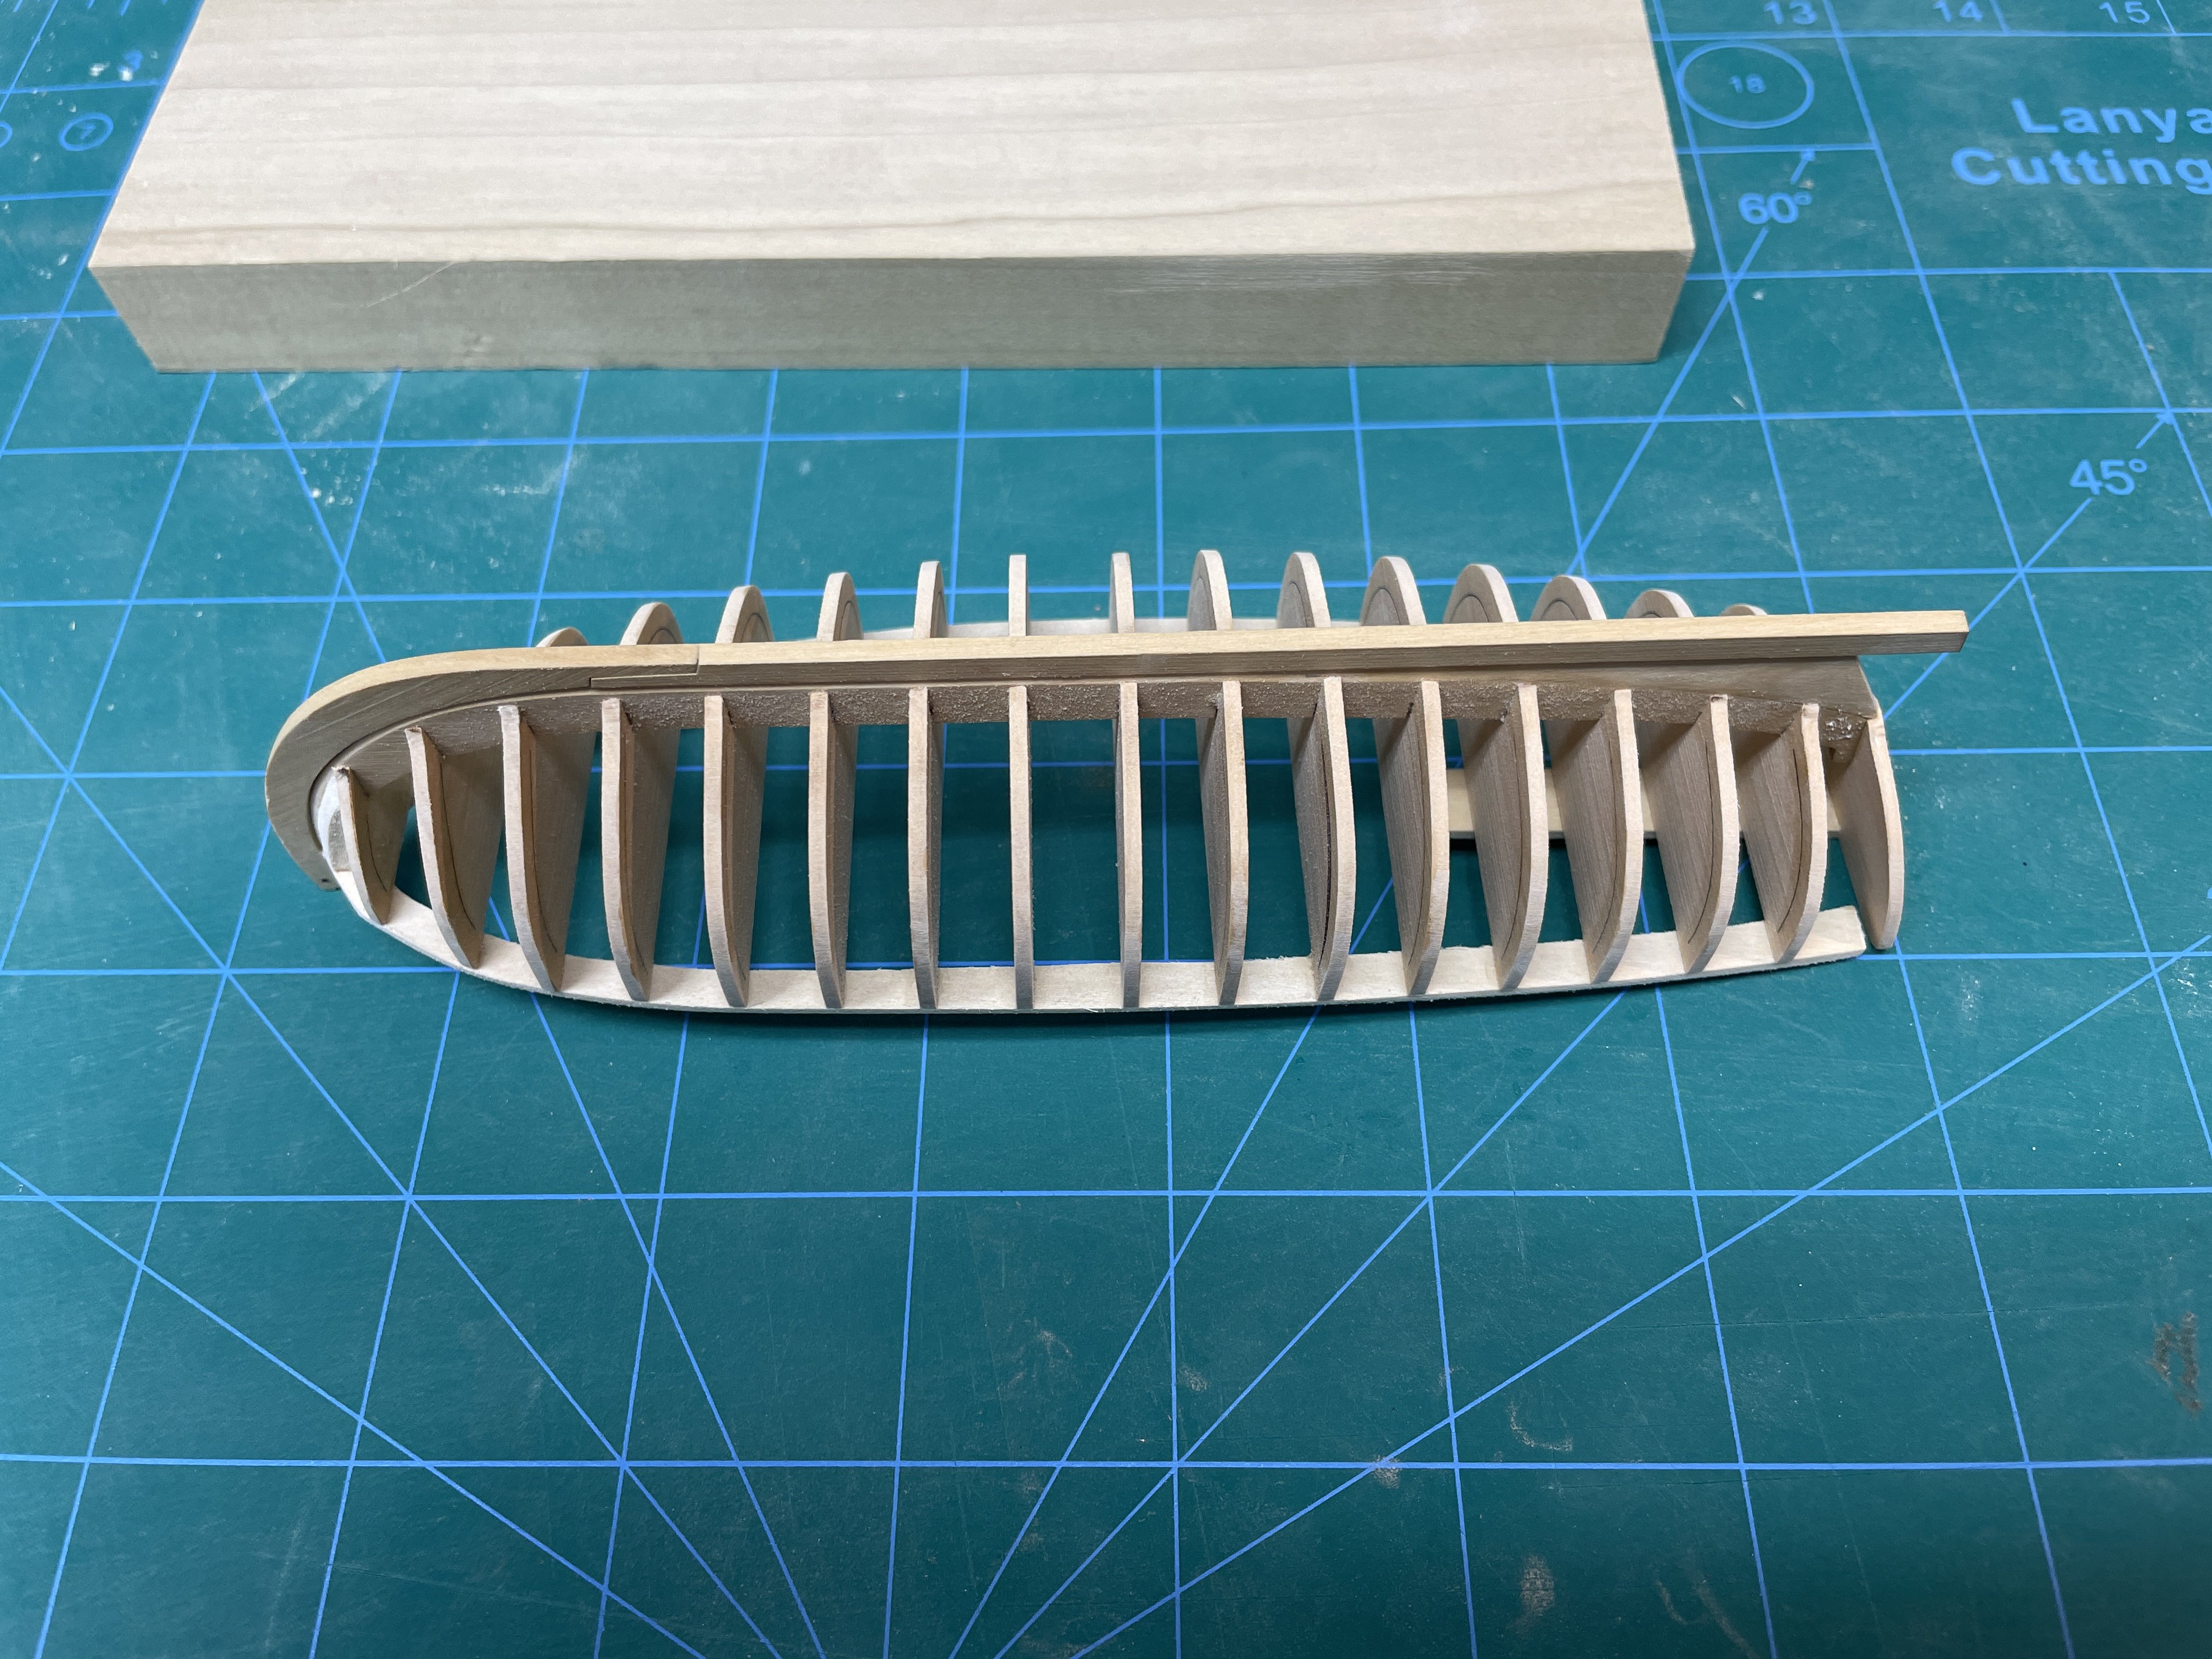
Fairing complete (I think). The supports worked. I was able to sand without anything coming loose, which was great as the boxwood was harder to sand than basswood would have been. I'm ready to start marking out the strakes and starting planking. The kit instructions use 1/8x1/32 basswood planks and edge bend them into place. Not sure whether this is going to work with boxwood. I'll give it a try, but cut the planks from 1/32" sheet so that if I need to spile some of the planks from sheet stock, the grain will all look the same.

-
Hi Tim- Your model is coming along beautifully. You’ve done a great job with all your joinery. Placement of those two carlings so the pump shafts run correctly was challenging. I got stuck there and page 3 of my log has a bunch of posts about how I worked through it, as well as Greg’s approach. I ended up without enough room between the well wall and the inner carling. As I look back on my model, I ended up not installing the inner carling which allowed enough room for the shafts to run right. Between the deck and mast partners, it isn’t visible at all on one side (unless you look underneath) and only a corner of the notch is visible on the unplanked side. I can't remember if I did this deliberately. I don't remember doing it, and just noticed when I went back to my pictures. As I remember working on the lower deck, 80% of the work was individually shaping the knees and waterway. If you used a glue that isn’t hard to debond, it might be worth considering redoing the lower deck. You will be able to reuse the knees and waterway which will save you a ton of time, and this will let you fix both the pump shaft placement and the size of the hatch. If you redo the deck, make sure the space between the well wall and the inner carling is wide enough for a pump shaft and that the width of the carling is narrow enough that the other pump shaft that runs on the other side of it also ends up in the right place. Only one edge of the carling will be visible on the unplanked side, so you can modify as necessary. Your other solution with debonding the carlings and attached ledges, and moving the carlings to the correct location might be something to try first, but however you patch the current notches will likely be visible (probably a small piece of carefully cut boxwood would work) and it wouldn’t address the hatch size. You could try this first and if it doesn’t work, then replace the entire deck. I'm looking forward to seeing how you proceed. I'm sure the end result will be great. Please let me know if I can clarify anything. Dave
-
Rob - your rigging (and the entire model) look awesome. I'm particularly appreciative of the tip about deburring with the .5 bit. I've always struggled with threading the line through the tubing. I've run a .3 bit through the hole, but clearly not the same as deburring. I'm hoping changing approaches (or doing both) fixes one of the things I've always been really frustrated by. The DH-9 is British (no turnbuckles) so I will be CA'ing the two ends of elastic rigging. I will try your way next time I build one of the German planes in my stash. thanks!! Dave
-
Great start! I will be following along. Dave
-
AMC DH9 by davec - Wingnut Wings - 1/32
davec replied to davec's topic in Non-ship/categorised builds
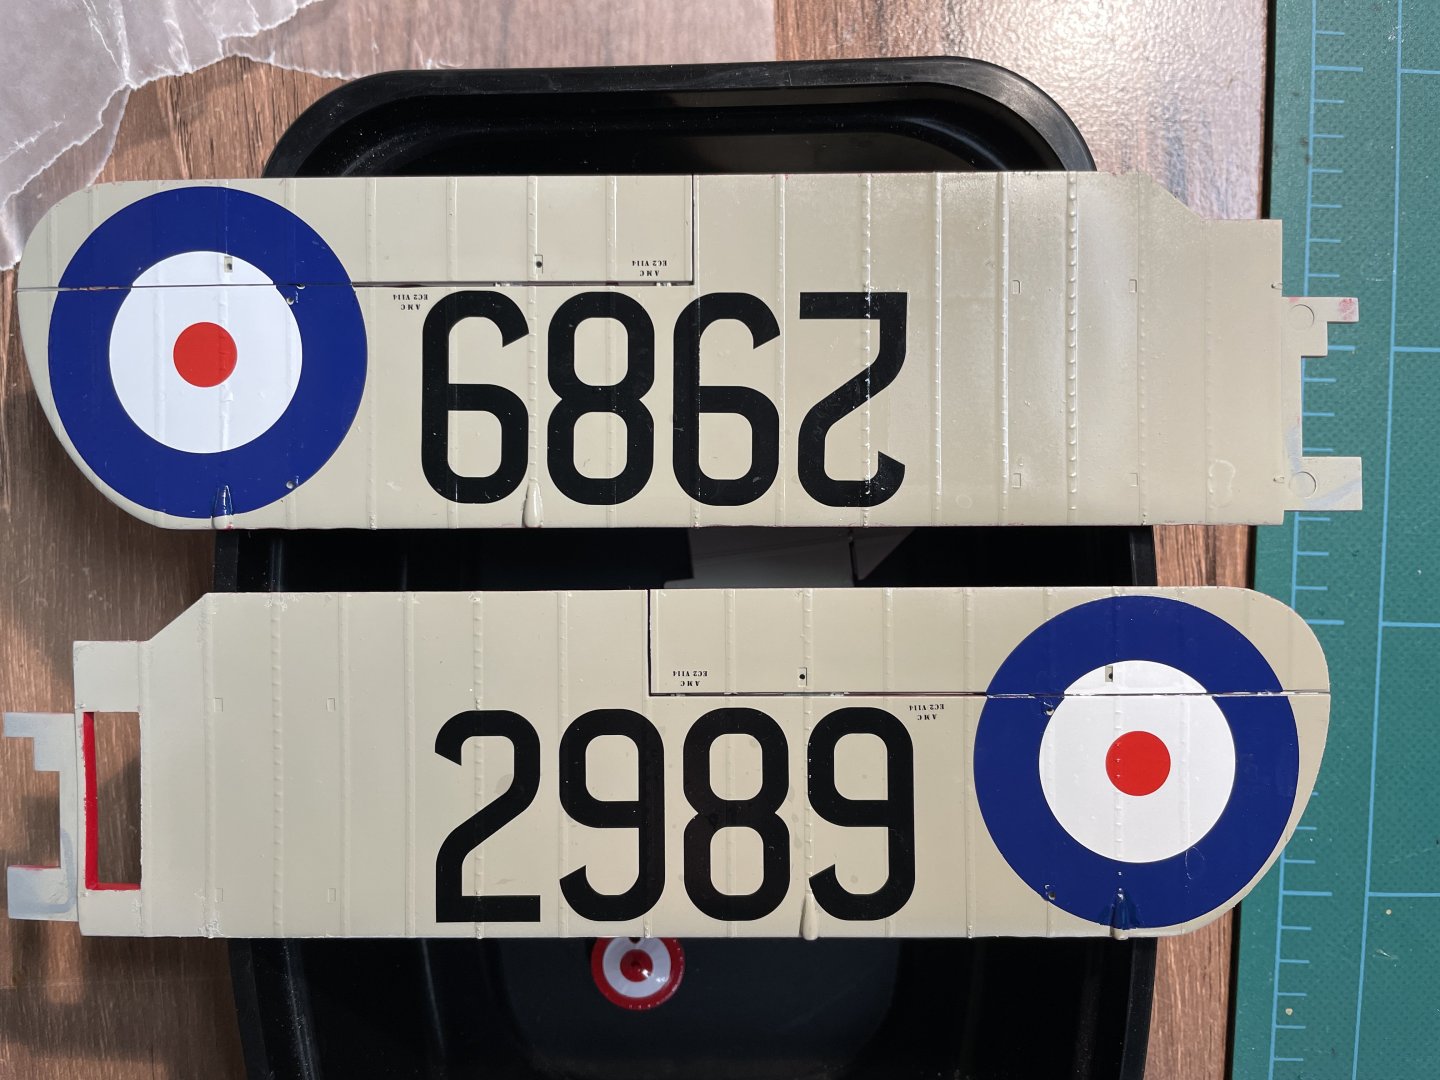
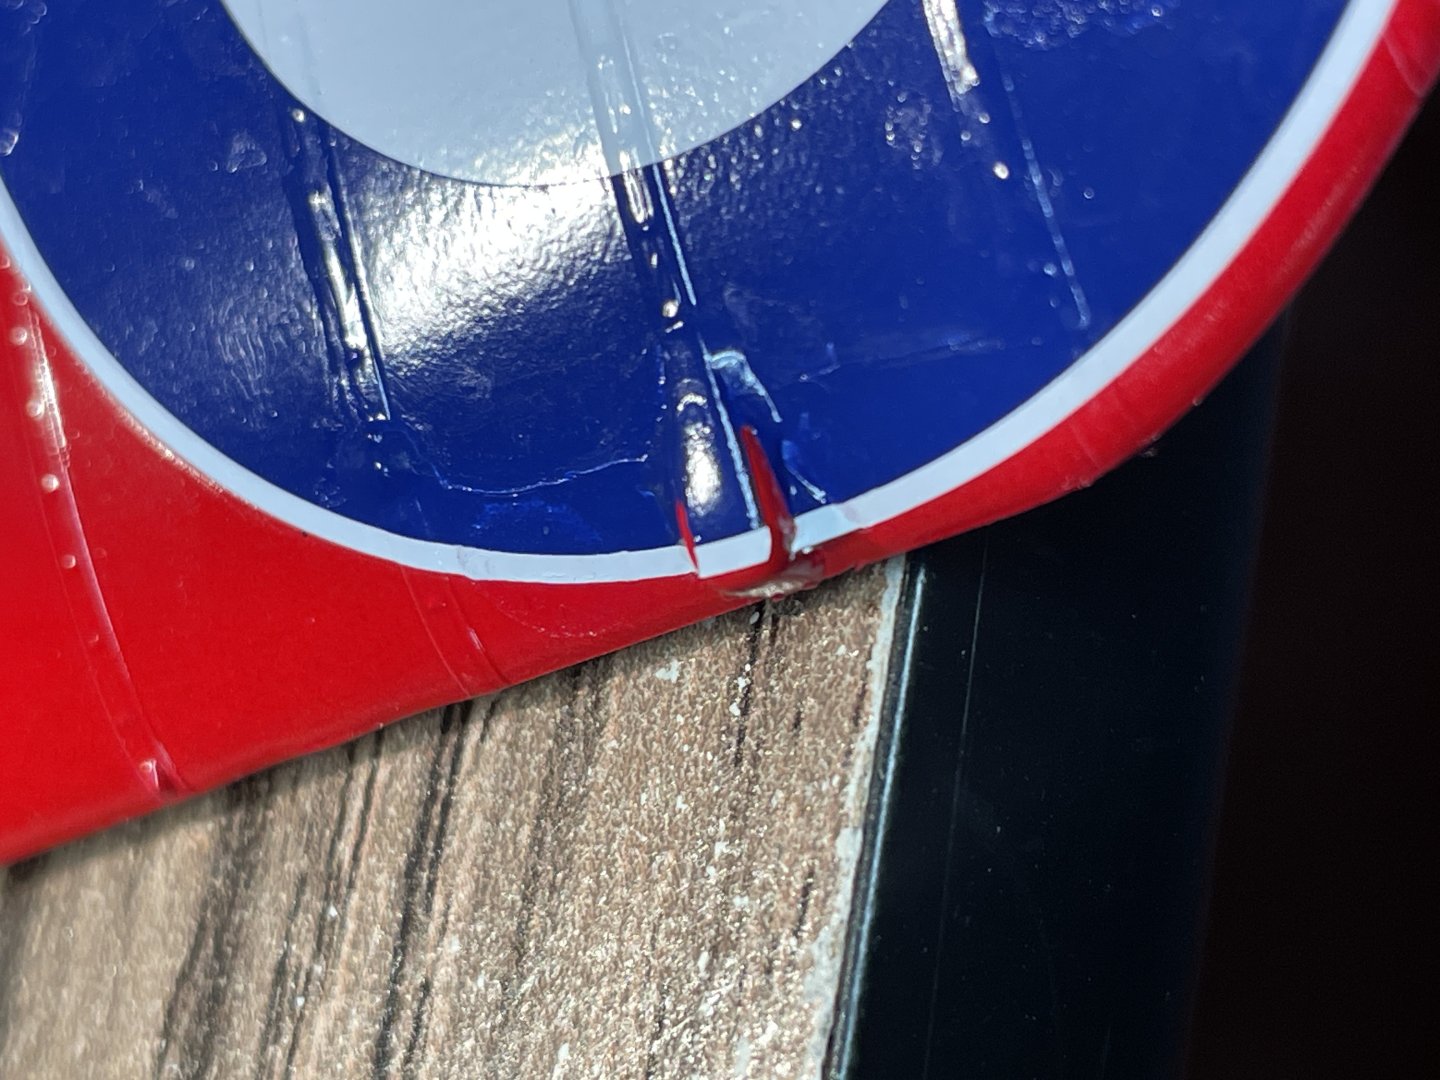
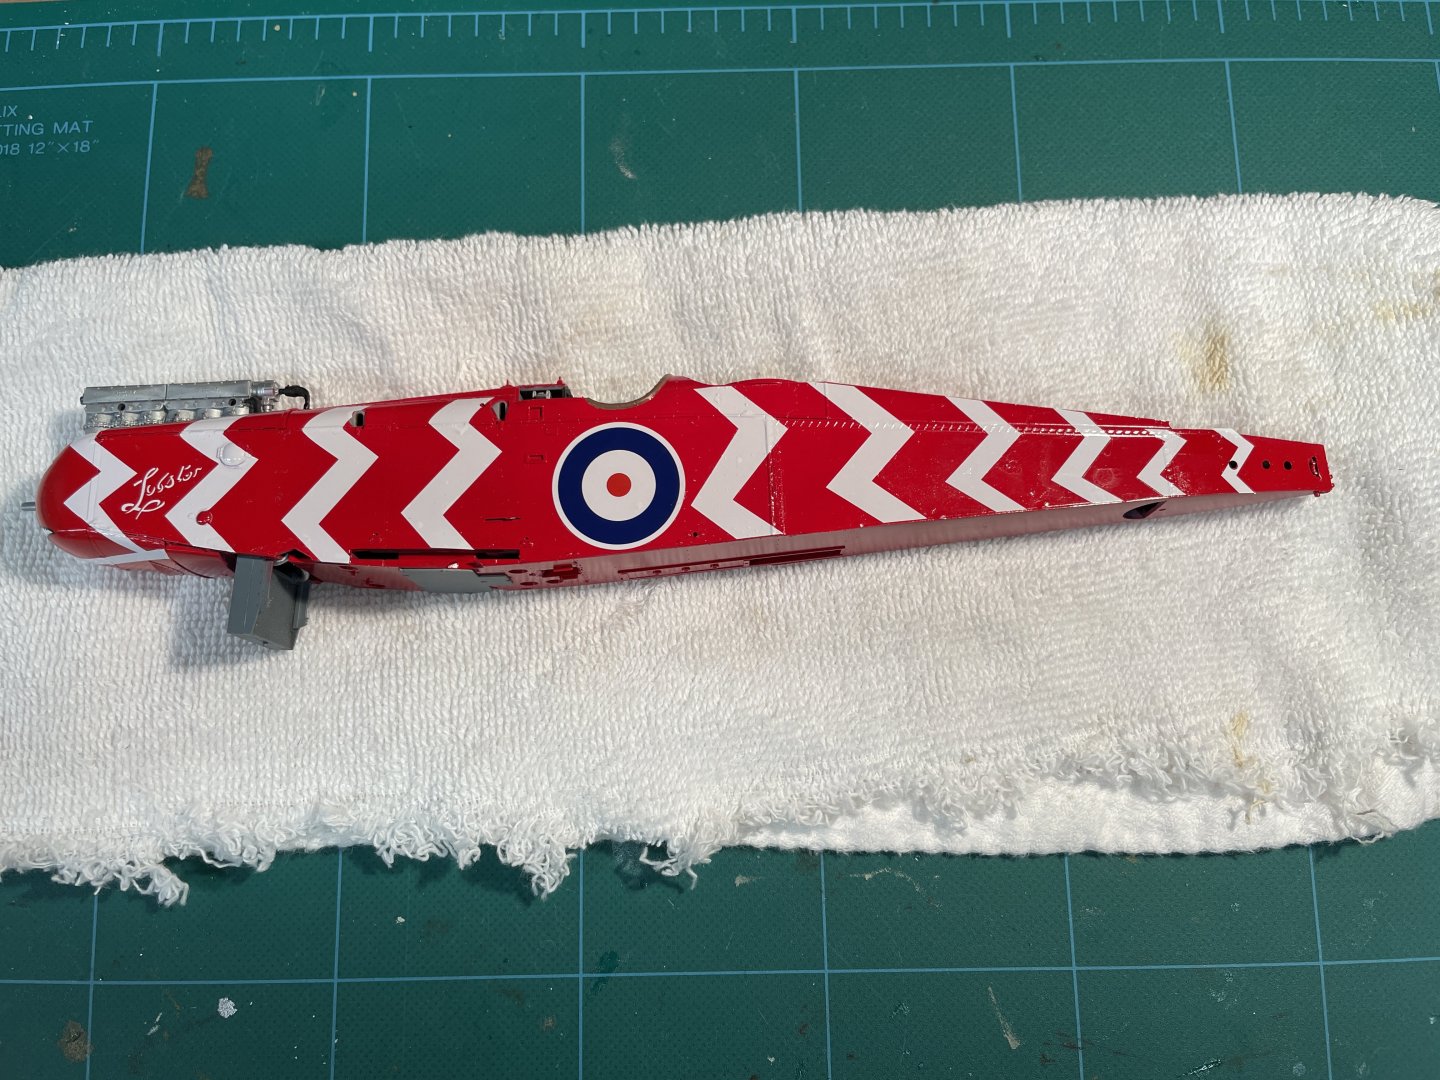
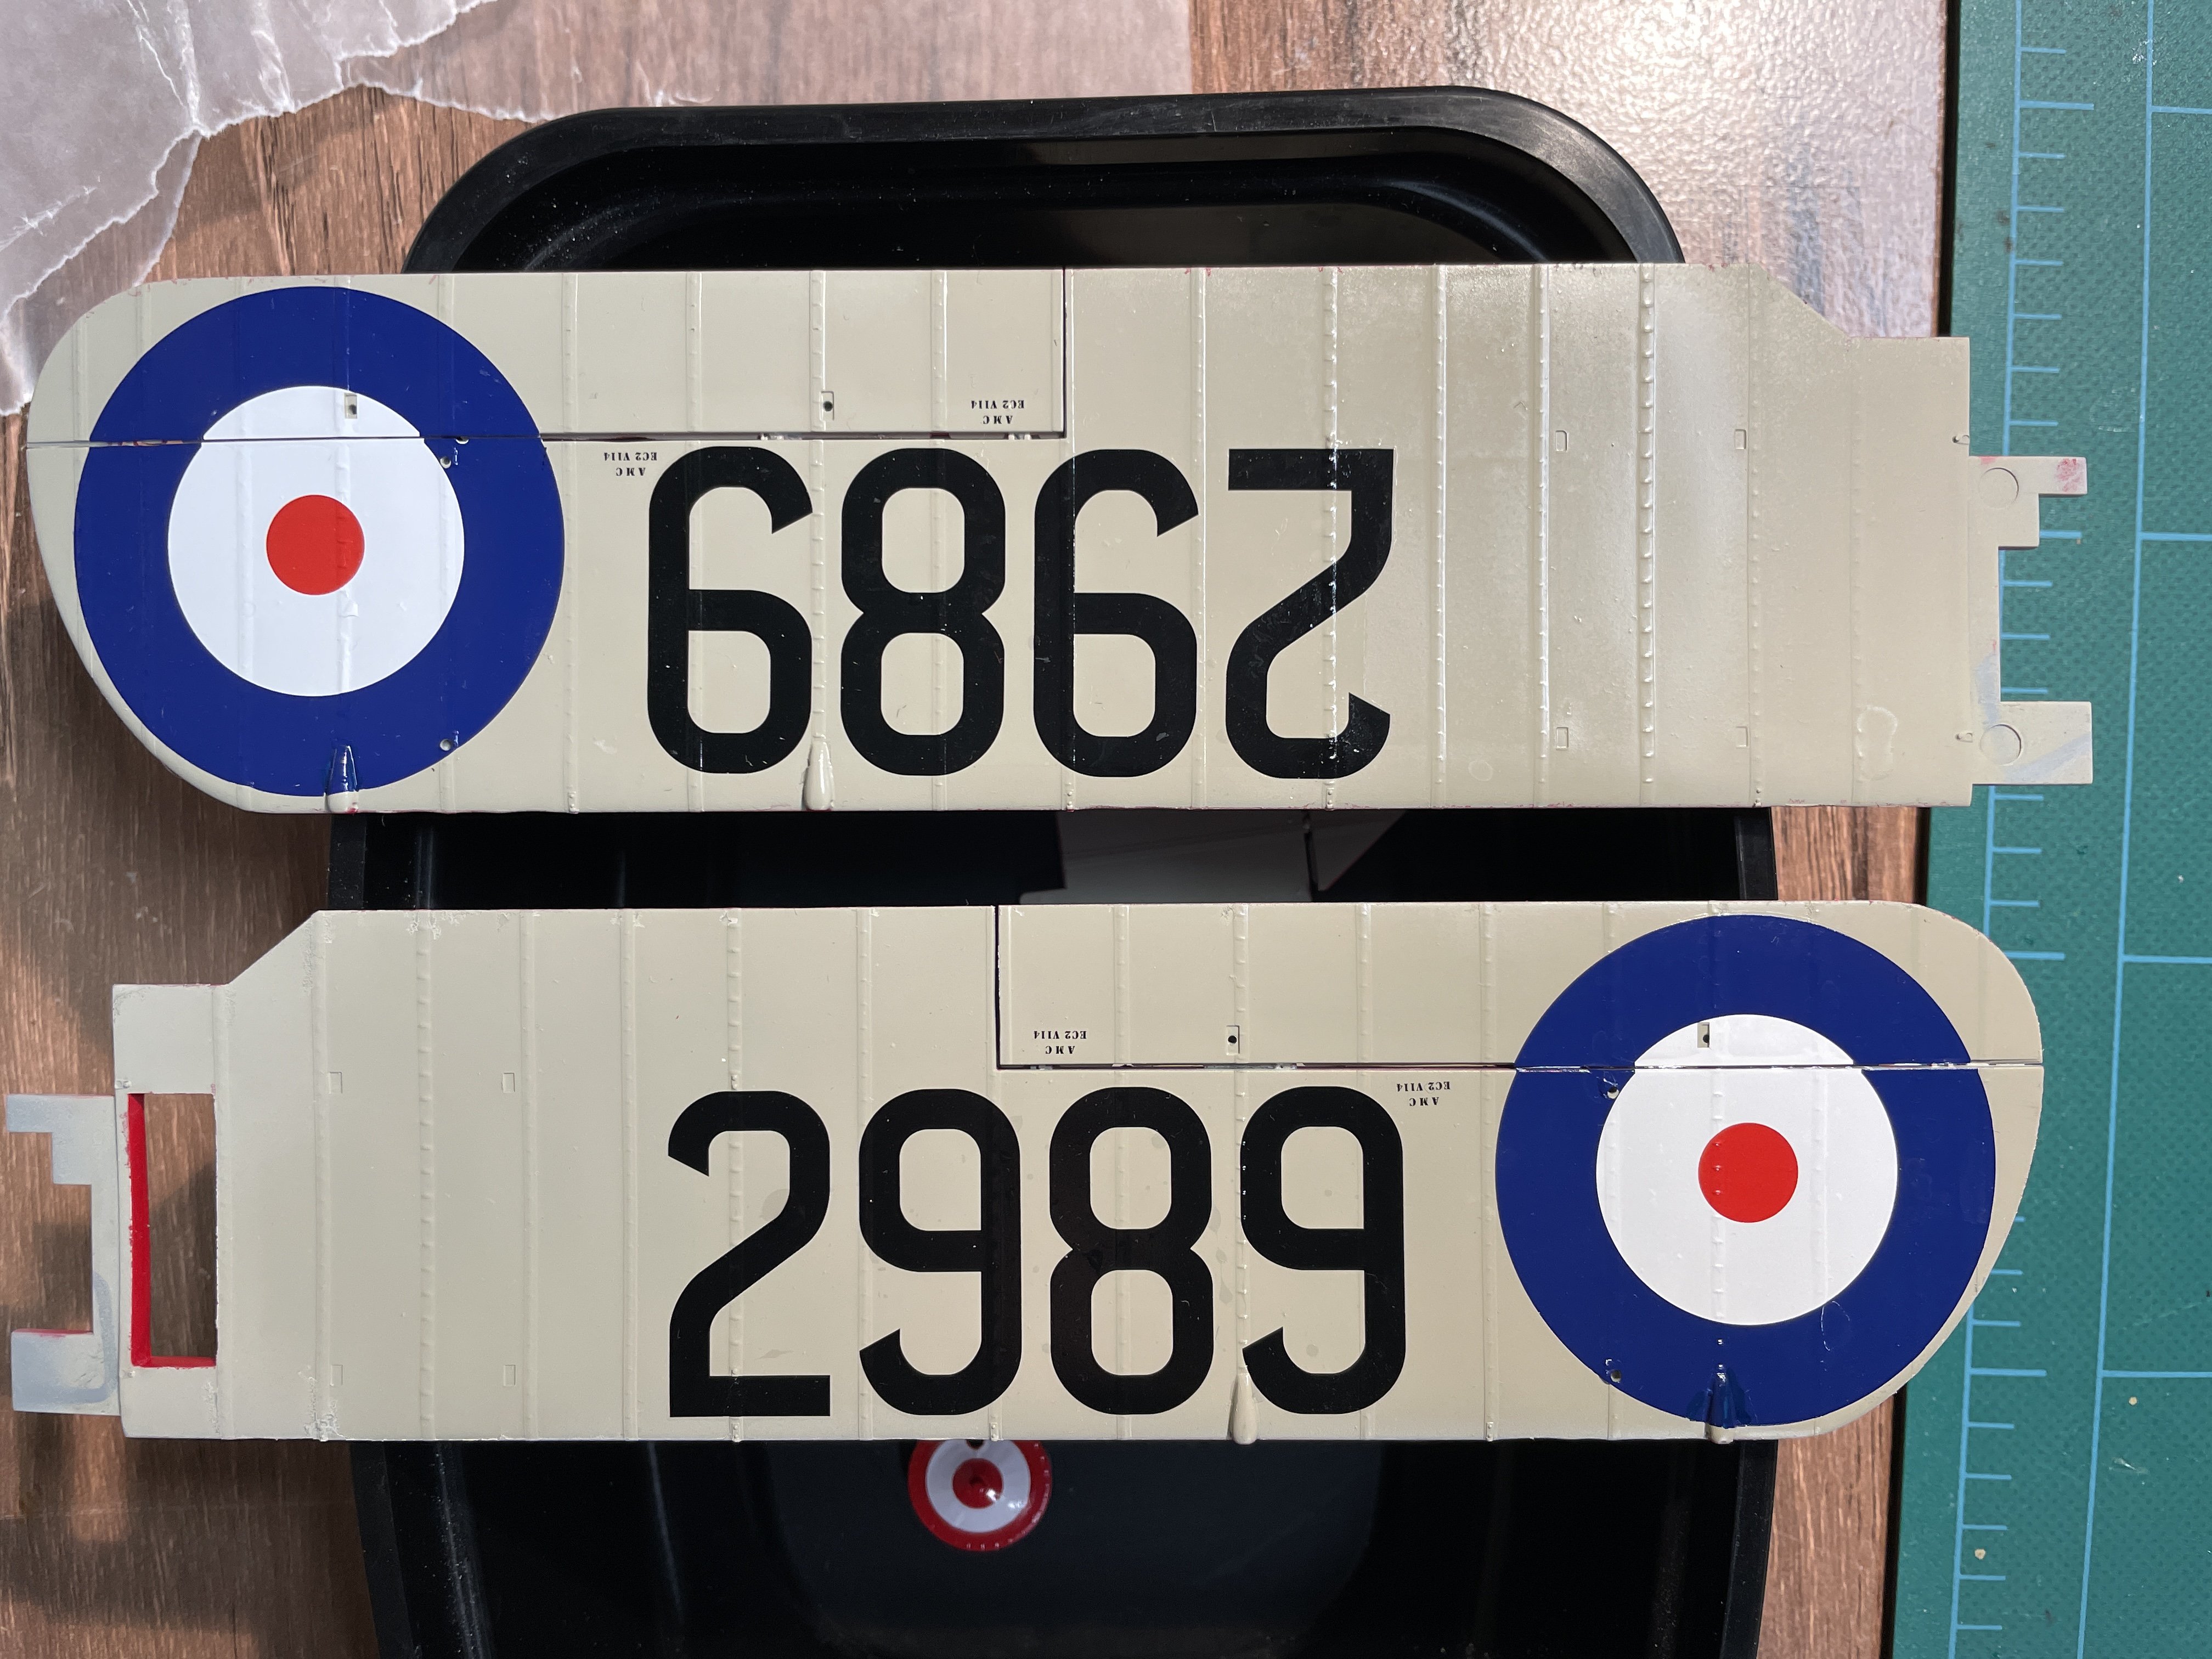
Mike - I am really enjoying these kits. I have vivid memories of building kits in the 70's and 90's and spending a lot of time and frustration trying to get things together. I've been watching your builds and have been really impressed with how you solve whatever building issues come up with your kits. There are a few downsides to the great engineering. The tight tolerances make cleaning paint off joints really important, and I have created my own gaps and filling by not doing this well enough. The other big gap is between my skills and getting the full potential out of the kit, but I'm getting better with each one I build. Some more progress on the DH9. This model has a lot of decals. Not as many as DocRob's AEG, but still a lot. I've been plugging away and have most of the applied except for one side of the fuselage. Overall, they have been going on well. There have been a few challenges, especially the roundels where there are some ~5x5x4 mm small nacelles sticking up under the edge of the decal, which I've had a really hard time getting the decals to settle over. They seem too big for the decal to fully conform to. I've got some splits in the decals and a few place where I cut them and am touching up with paint. The tamiya blue matches well and I'm pleased with the lower ones after touch up. The upper roundel has a white stripe around it. I'm going to try to touch that up tonight. There was a gas cap on the side of the fuselage that was almost as big, and I was able to get the decal to settle over it with 6-7 applications of softener and heat. Not sure it would have worked with the bigger bumps.
- 27 replies
-
- 18
-
-
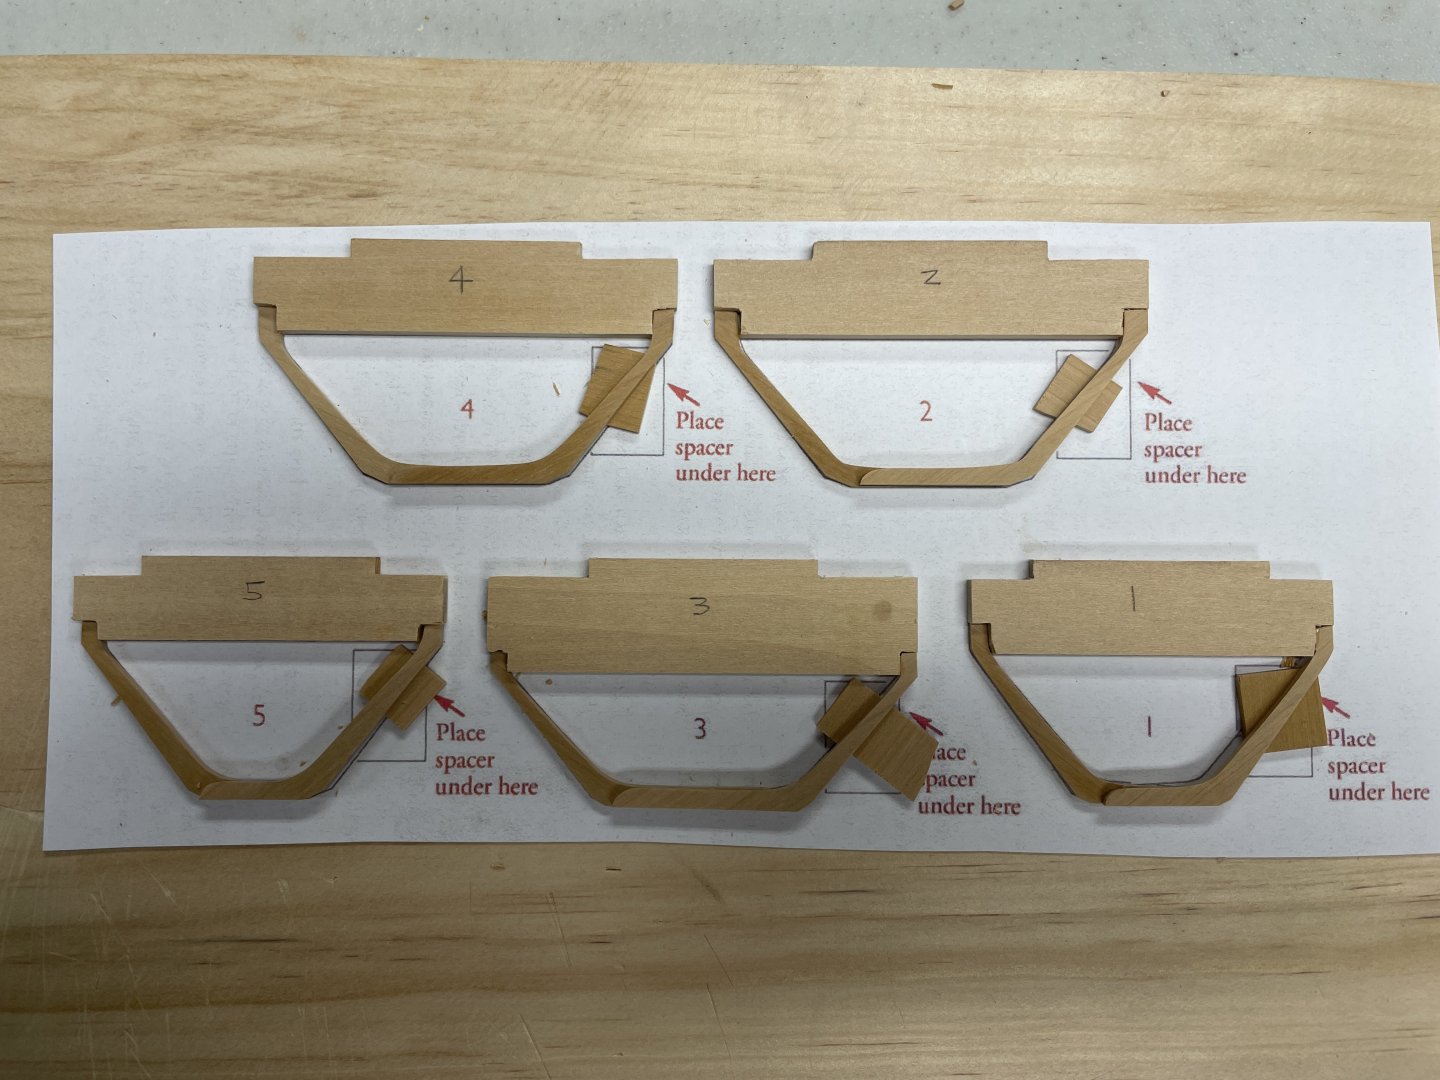
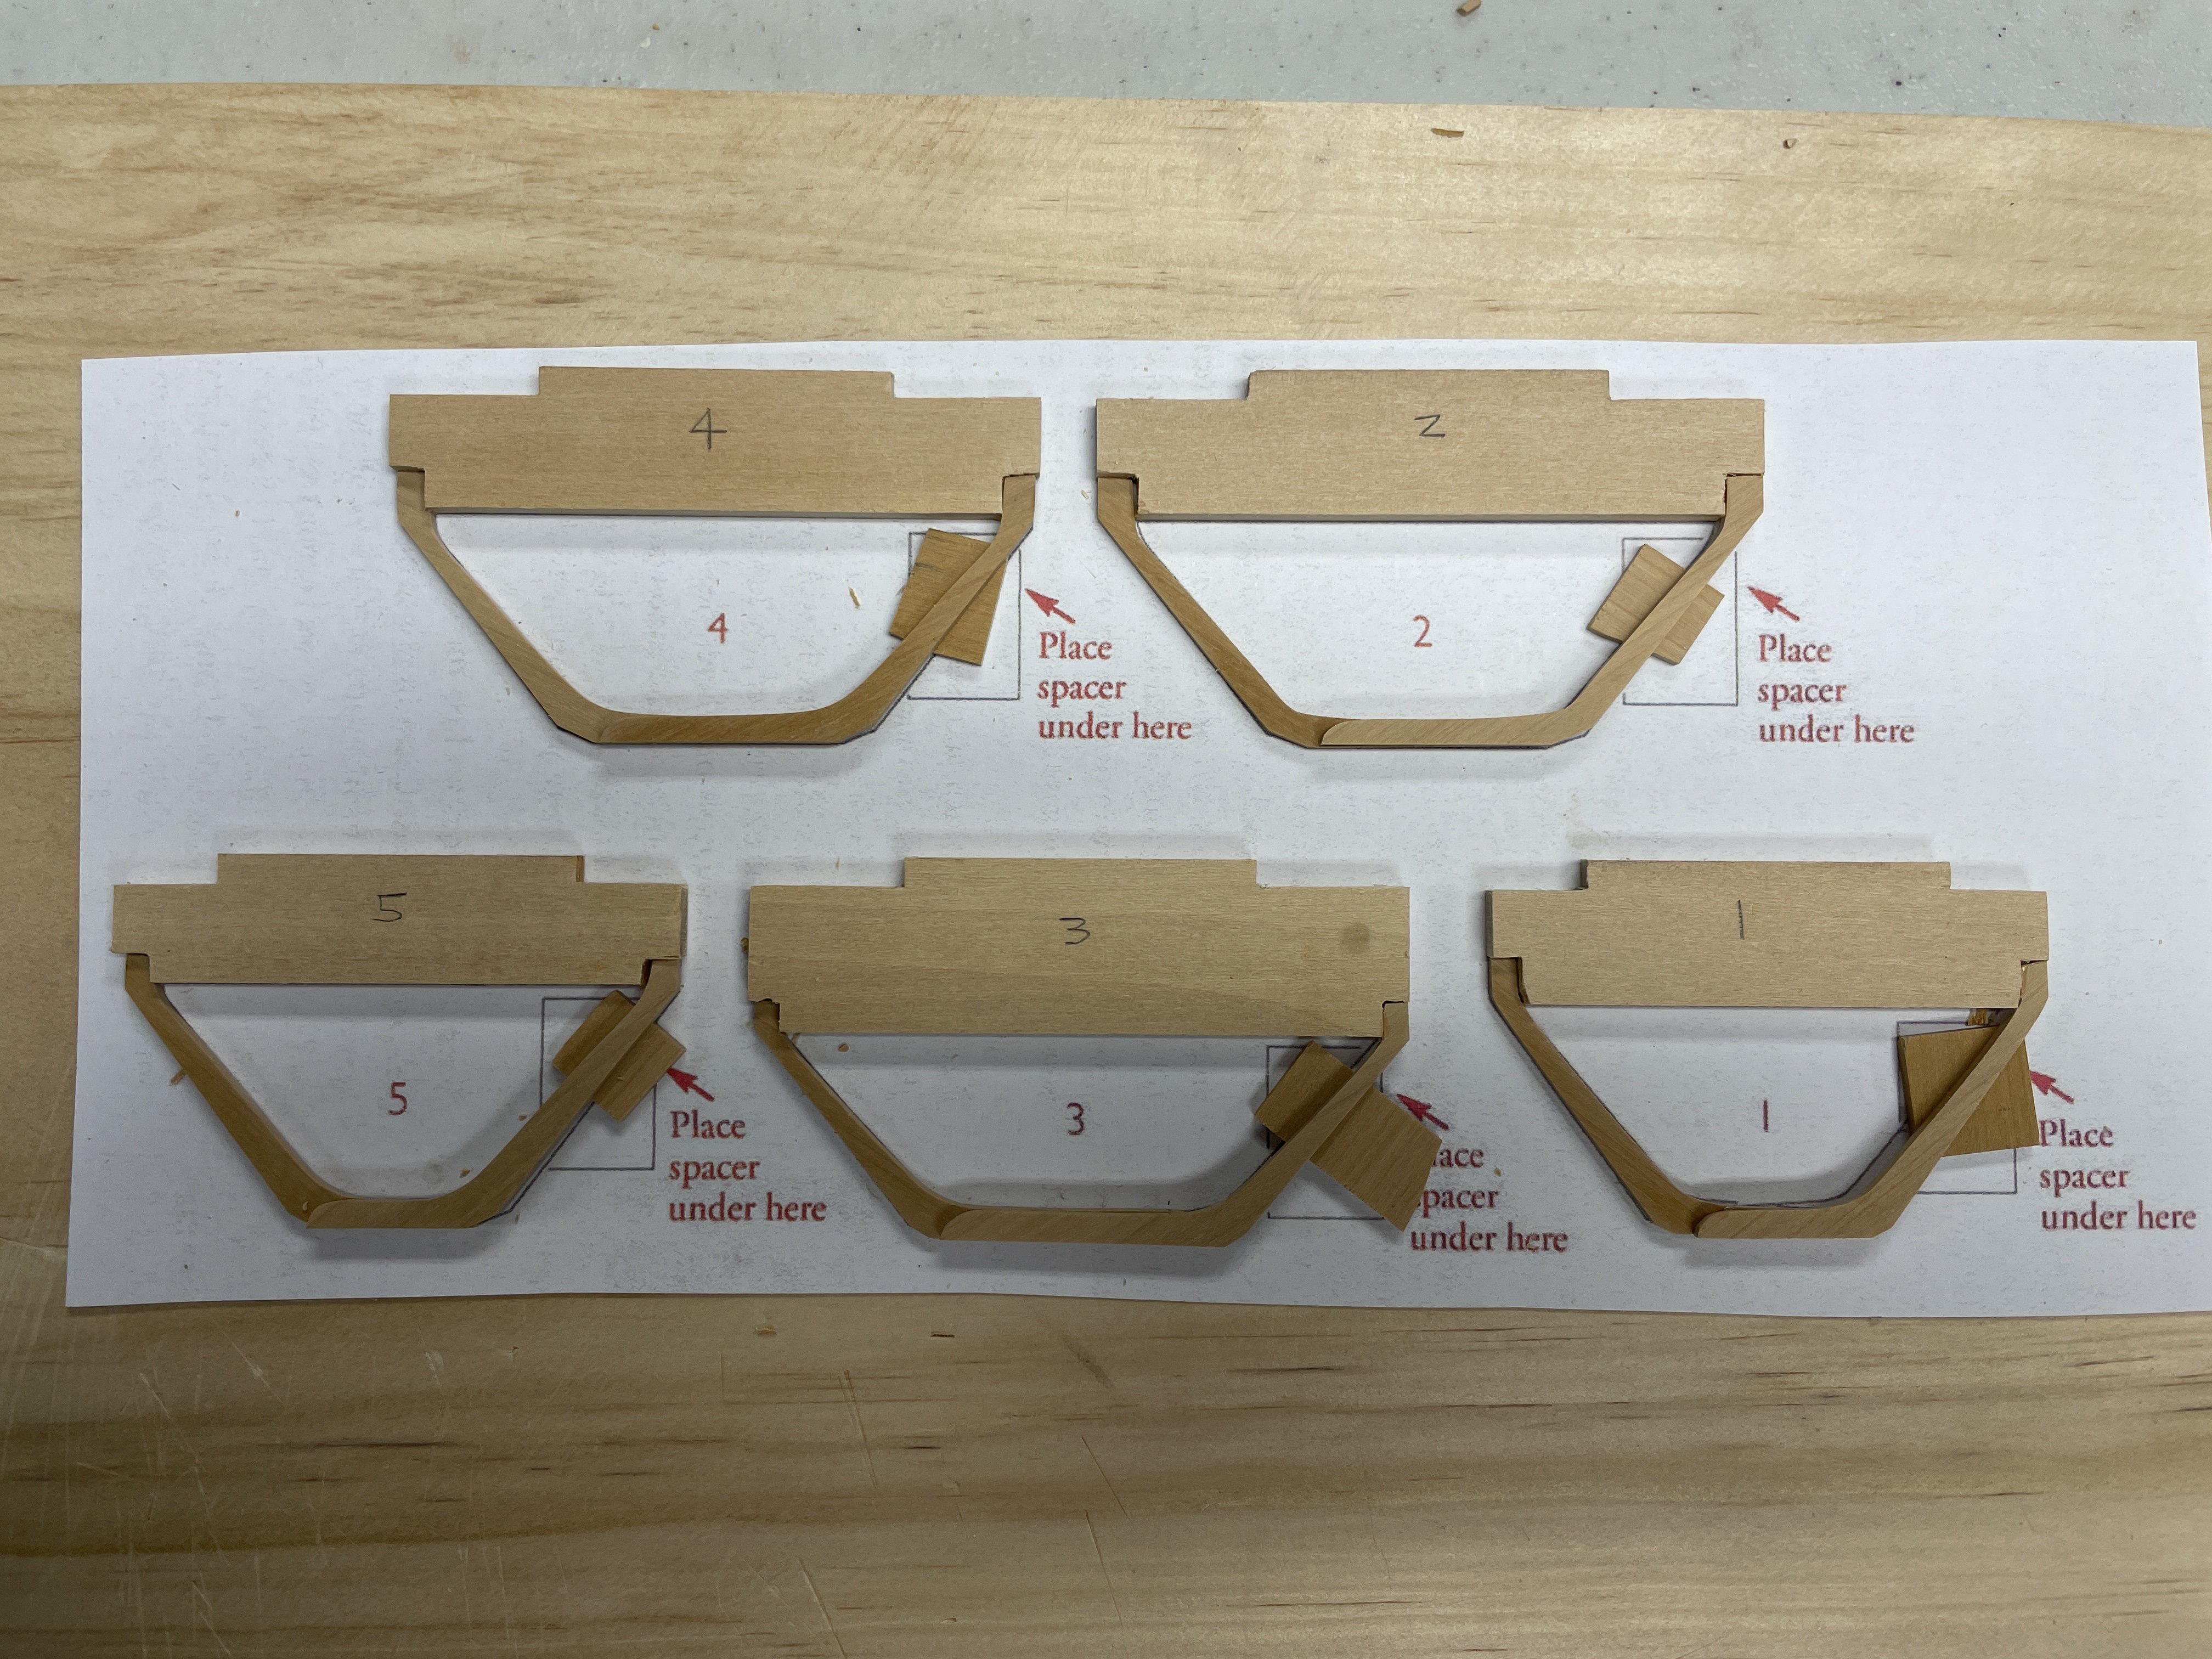
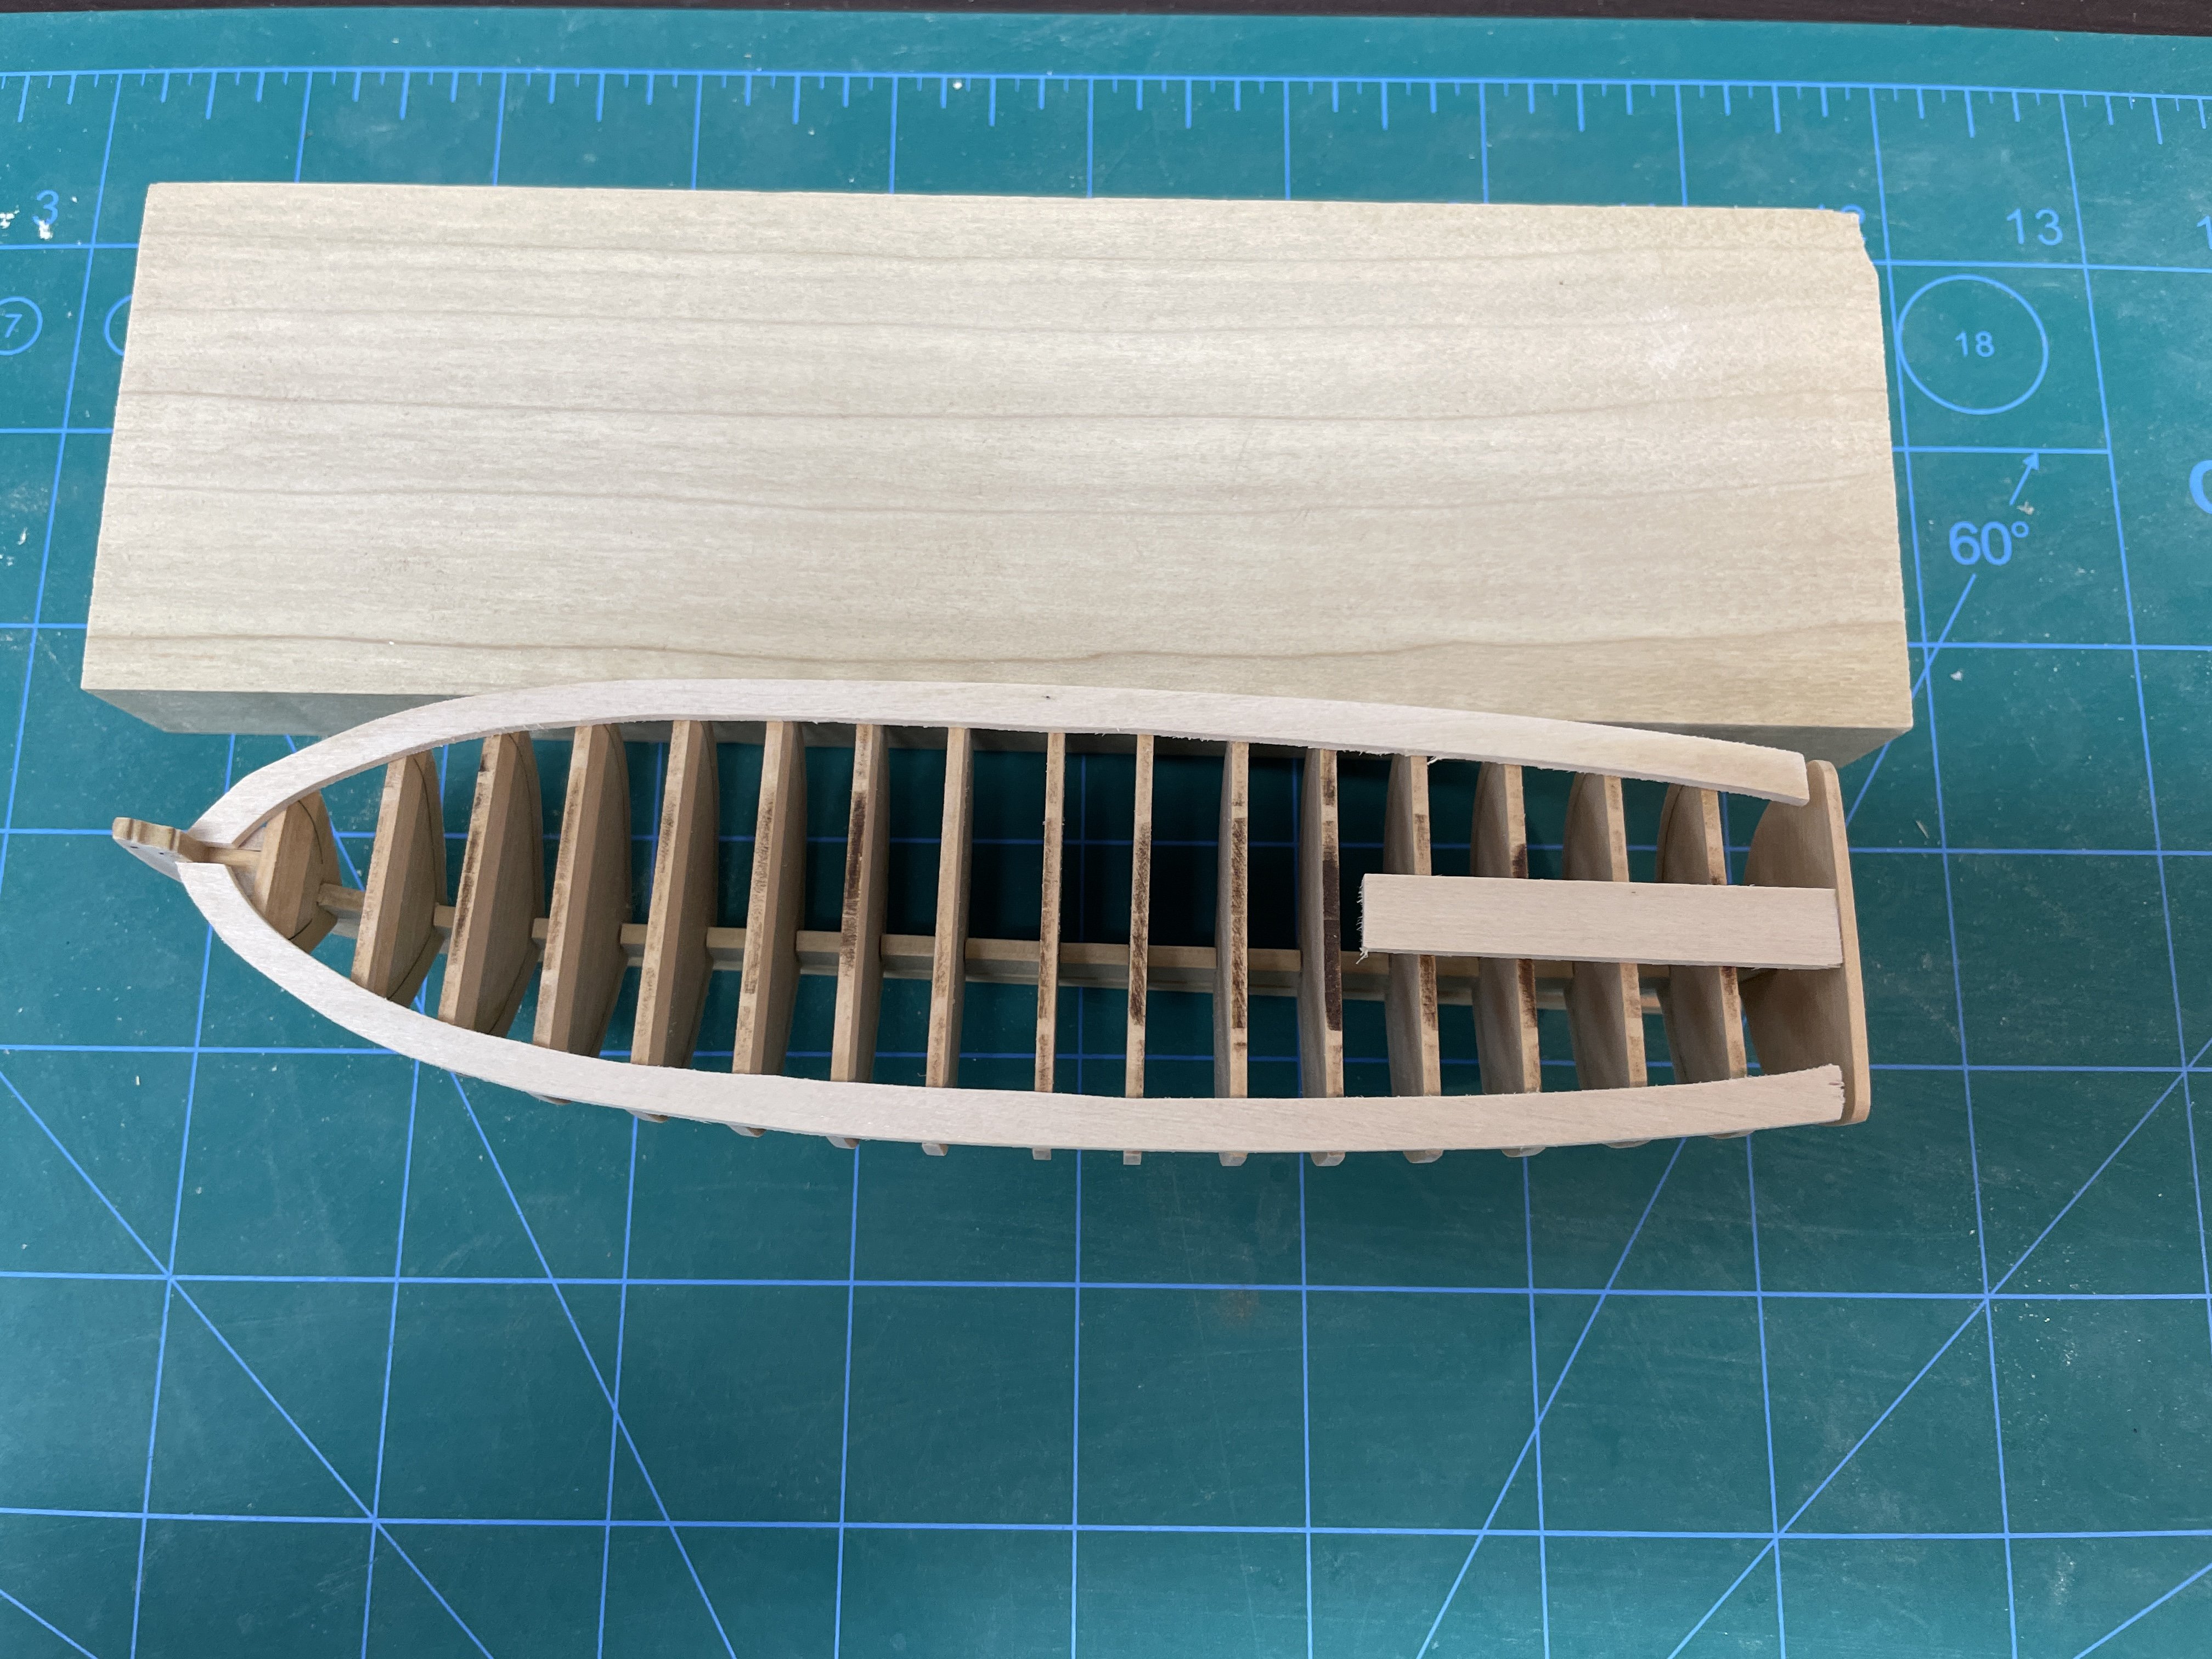
I spent some time travelling and work got busy, but I've been cutting out and sanding pieces. I made the jig support pieces in basswood. They are thick enough that I think they will support the sanding and bending even thought the boxwood frames and planking may exert more force than the kit basswood during the sanding and gluing. I made new parts and didn't use the kit ones as it looks like these get sacrificed when the model is cut from the jig and I wanted to leave the original kit buildable.
- 7 replies
-
- 8
-
-
- Grand Banks Dory
- Model Shipways
- (and 1 more)
-
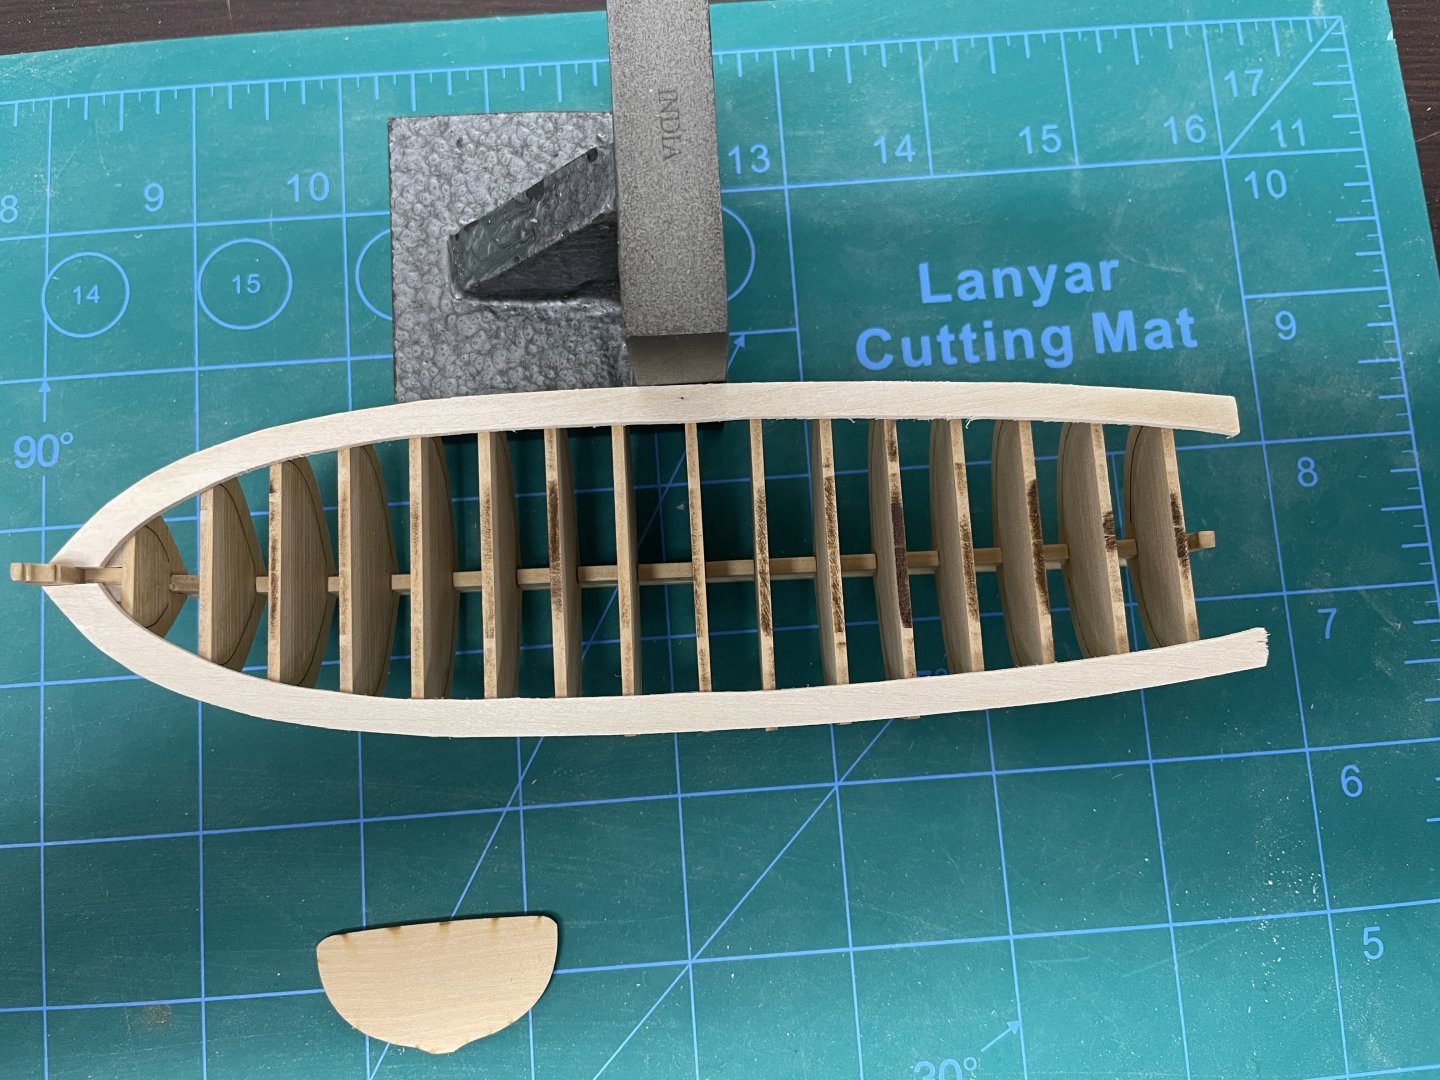
I decided to add some support prior to fairing. The basswood pieces will get removed after. It has been a while of gluing, debonding, and regluing, but I think I am in a good place. The frames are symmetric and look in the right place related to the bearding line. Took longer than planned, but hopefully sets me up for success for the rest of the build.

-
Tim - Great to see your progress. The deck framing looks excellent.
-
HMS RESOLUTION 1667 by KarenM
davec replied to KarenM's topic in - Build logs for subjects built 1501 - 1750
really impressive!! -
Impressive work on the covering boards. I'm looking forward to seeing the progress pictures. Dave
-
Westland Sea King HU.5 by chadwijm6 - Airfix - 1/48
davec replied to chadwijm6's topic in Non-ship/categorised builds
James - I think your work looks great, and the photoetch you have used, especially the instruments, really add to the model. I also agree with CDW that a lot of the photoetch in the sets isn't very helpful. Some of the prepainted instruments are way better than paint and decal and some of the folded metal looks way better than thick molded plastic. Some definitely doesn't. Picking and choosing which to use definitely makes sense. I'm looking forward to seeing the rest of the model come together.- 54 replies
-
- 10
-
-

-
Nice! congratulations on finishing!
-
AMC DH9 by davec - Wingnut Wings - 1/32
davec replied to davec's topic in Non-ship/categorised builds
James - I'd promised myself I would never accumulate a stash. I had 13 or 14 wnw kits on the shelf, which was more than I ever planned. My father was a big time accumulator. When he passed he had several hundred models in his attic (and a house packed full of other things). I brought home about 50 of the models, so now I have a full utility shelf worth to build. Makes me feel guilty having them sit there when a new model comes out that I want to build more. It was funny you mentioned the Kotare Spitfire, because I got a great deal on one at the local IPMS show in February and will probably build it next. Most of his other models got sold to a wholesaler. Lots of lessons about what our families have to deal with when we leave our treasures behind. I'm travelling for a few days. Before I left I got did some more work on the DH-9. I have finished painting, other than some touch up where I pulled off the masking. I will start decaling as soon as I get home. Dave -
Great to see you back at work on the model. Coming along beautifully! Dave
-
AMC DH9 by davec - Wingnut Wings - 1/32
davec replied to davec's topic in Non-ship/categorised builds
Hi James - It was very disappointing to see WNW go under, and then the big spike in prices. I was lucky to buy a number of their kits at list price (including when there was free shipping from NZ). I really enjoyed my first one, a Fokker EIII which went together relatively quickly, so I bought the other ones I liked, then bought some more when they had their water damaged kit sale and their final warehouse clearance sale. Then I inherited my dad's very substantial stash. I have enough models to keep me busy a long, long time. The kits were a little expensive at their original price, but spread over the 2-3 months it takes me to build one, it stays an affordable hobby. My skills don't really do them justice, but I bought them to build, not collect. -
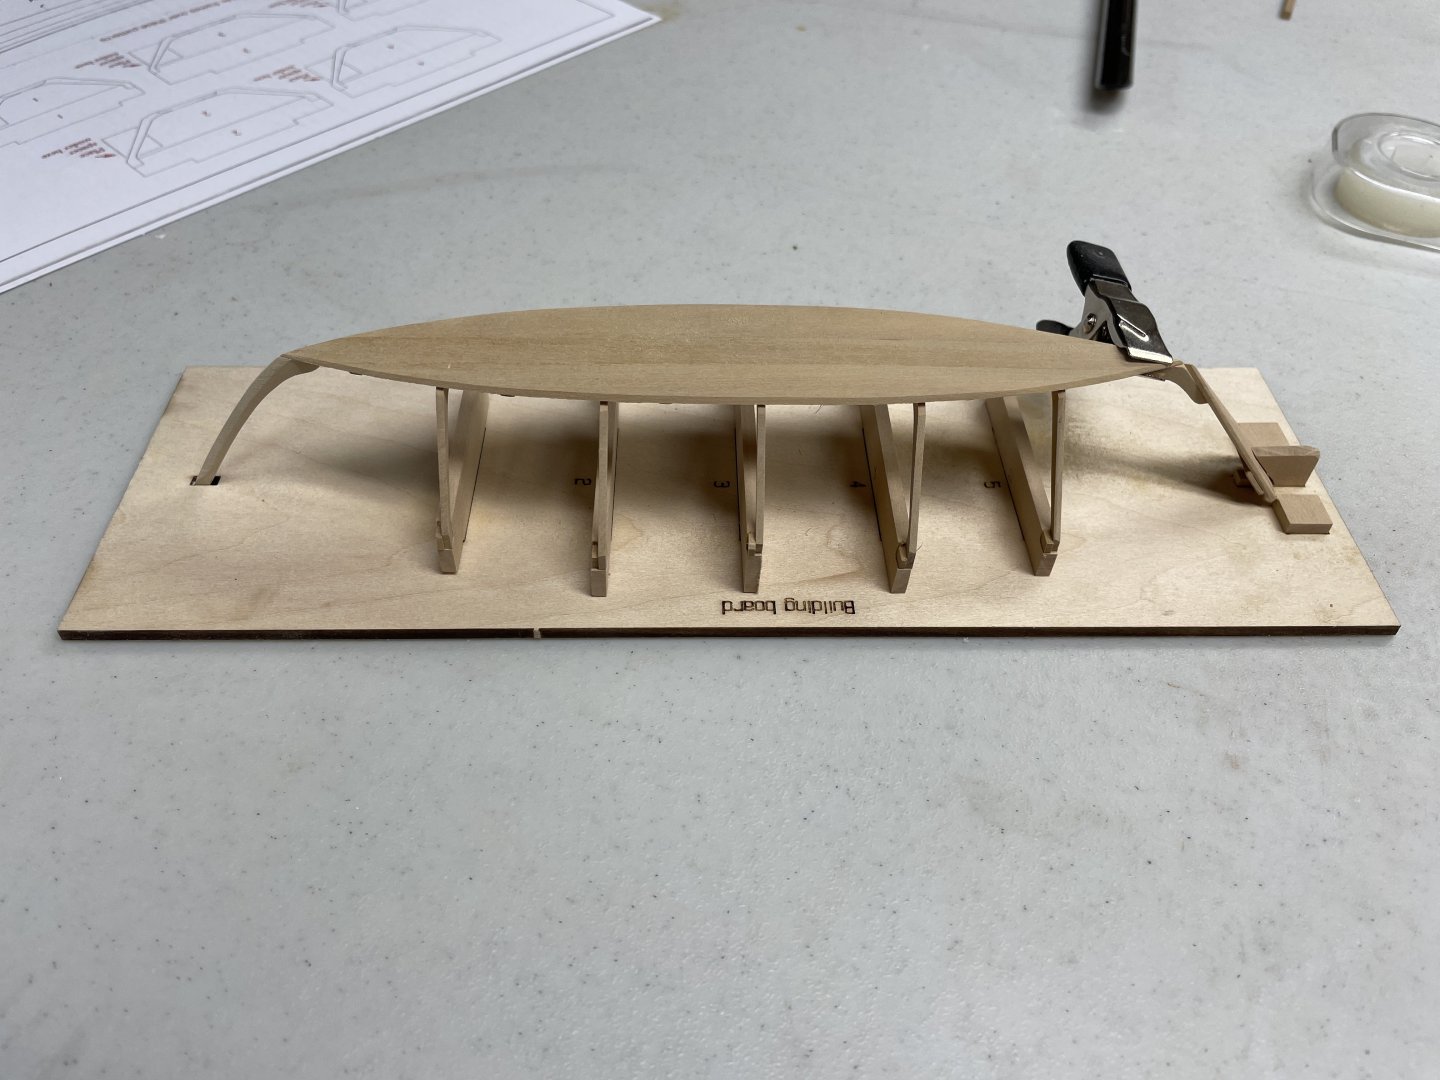
I'm impressed by your research and the drawing on the building board. I'm really looking forward to seeing your progress.
-
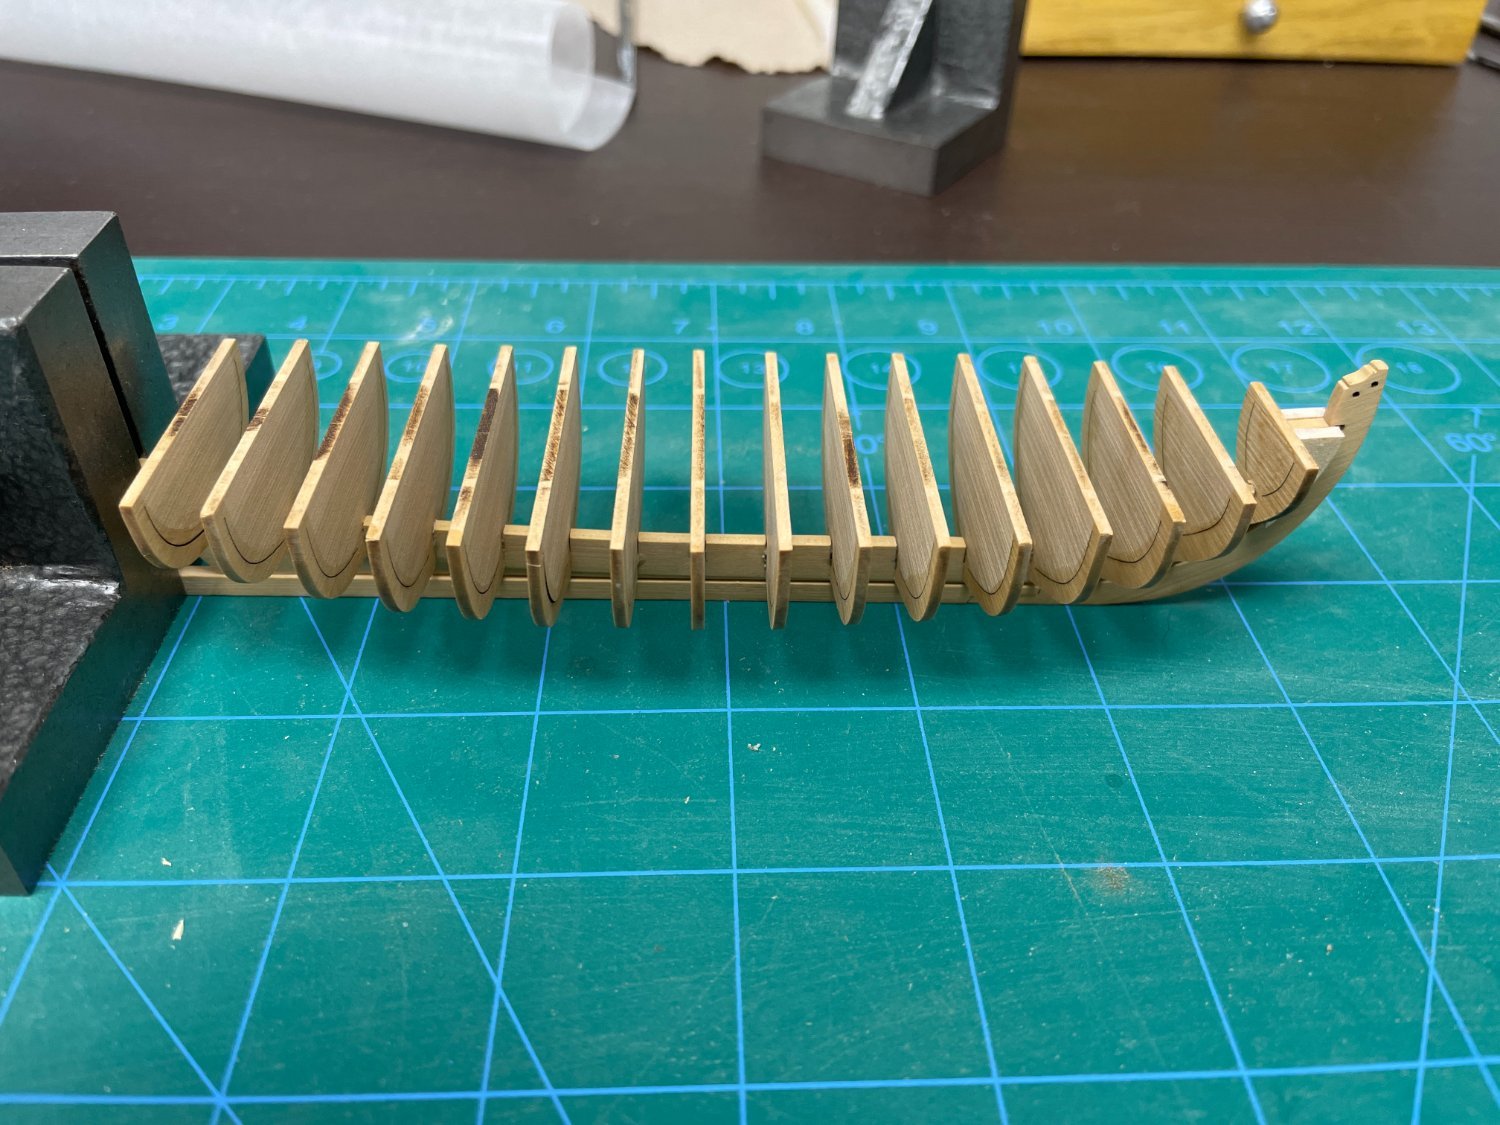
I think I'm finally in business with the frames being properly oriented. I have some night shifts and travel coming up. It will be a week or so before I can start fairing.

-
AMC DH9 by davec - Wingnut Wings - 1/32
davec replied to davec's topic in Non-ship/categorised builds
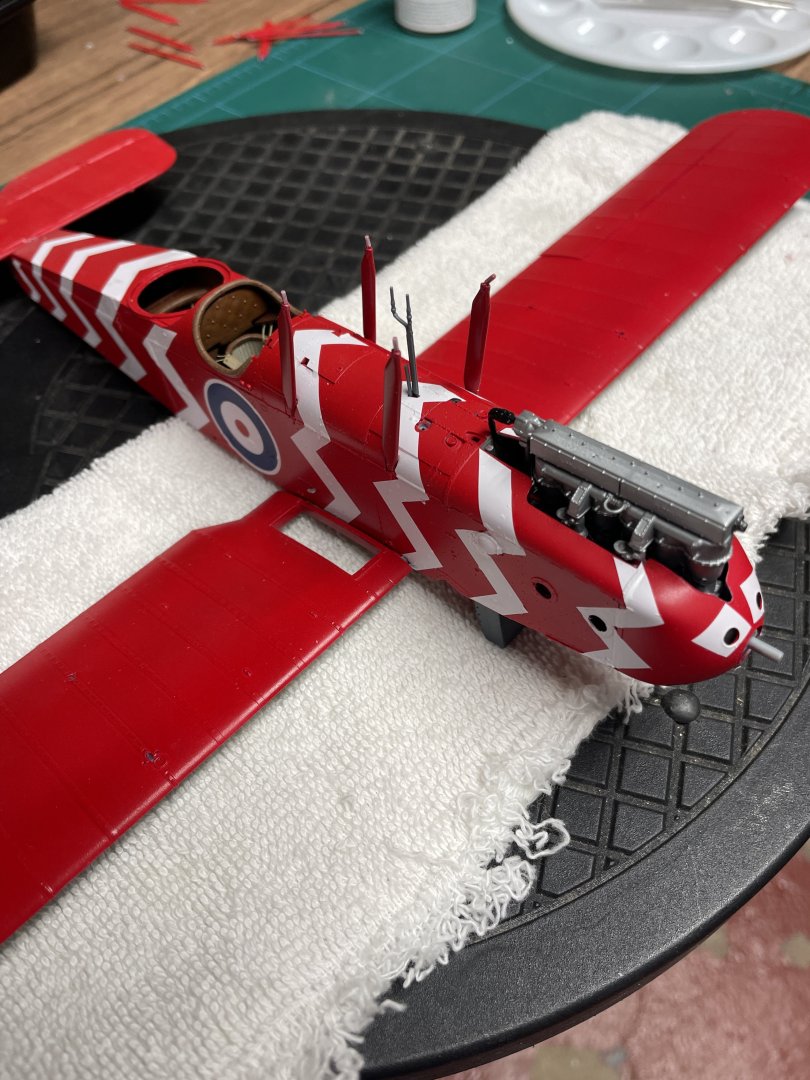
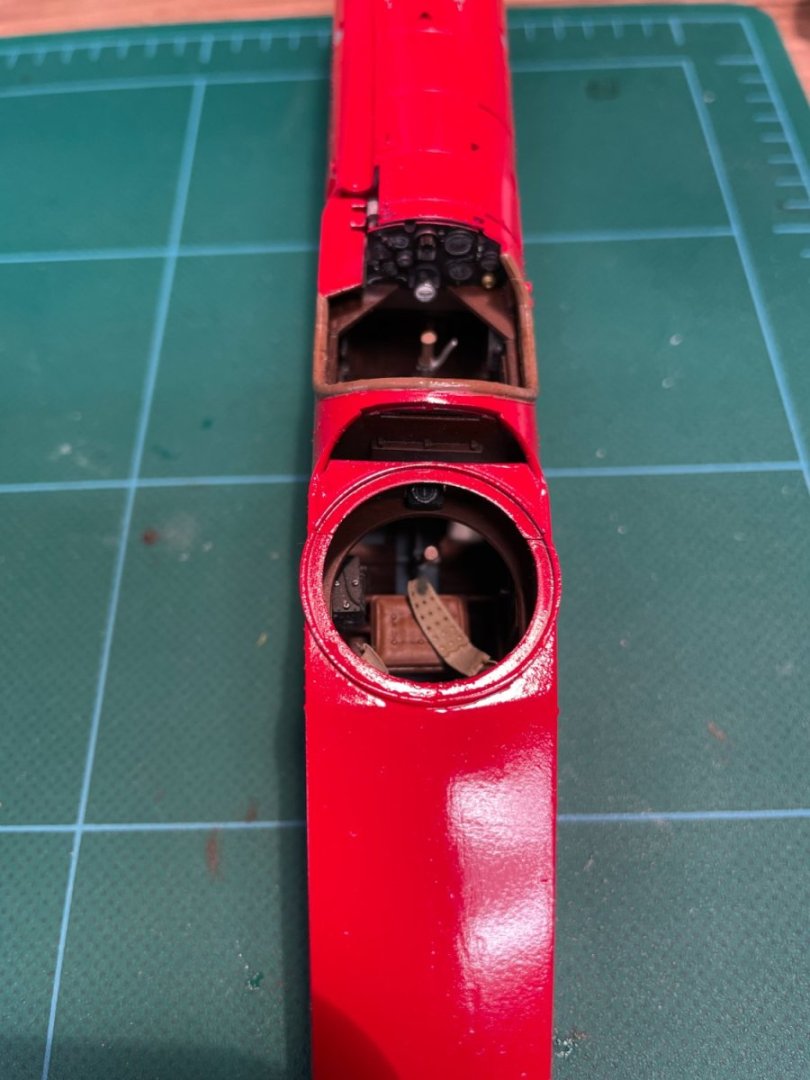
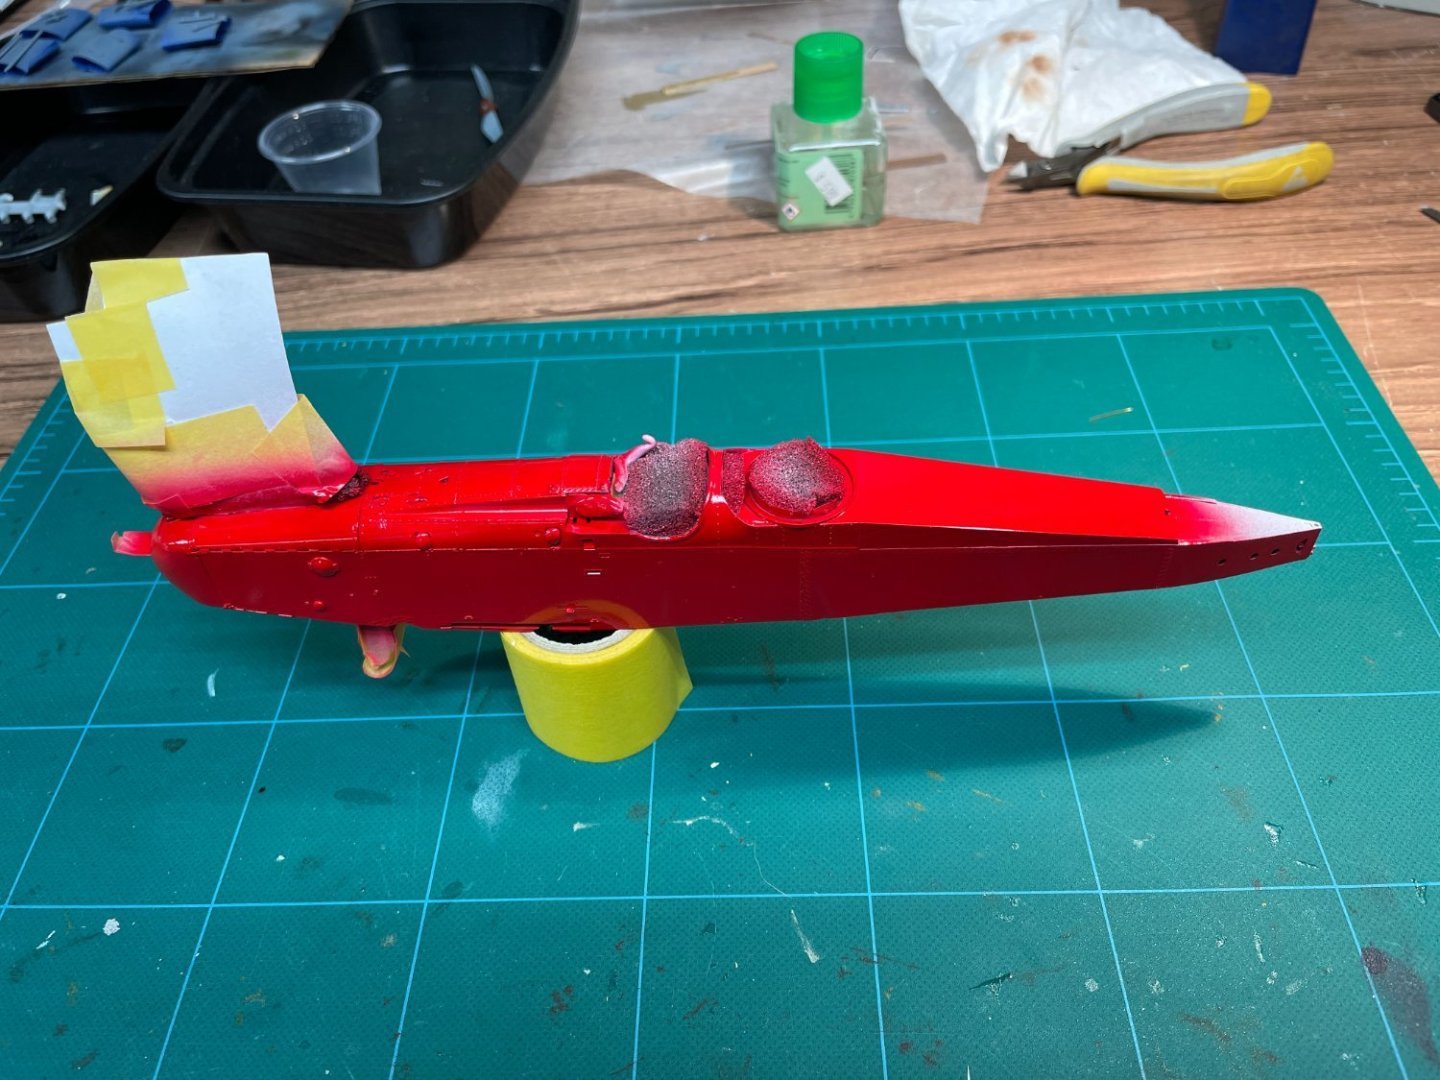
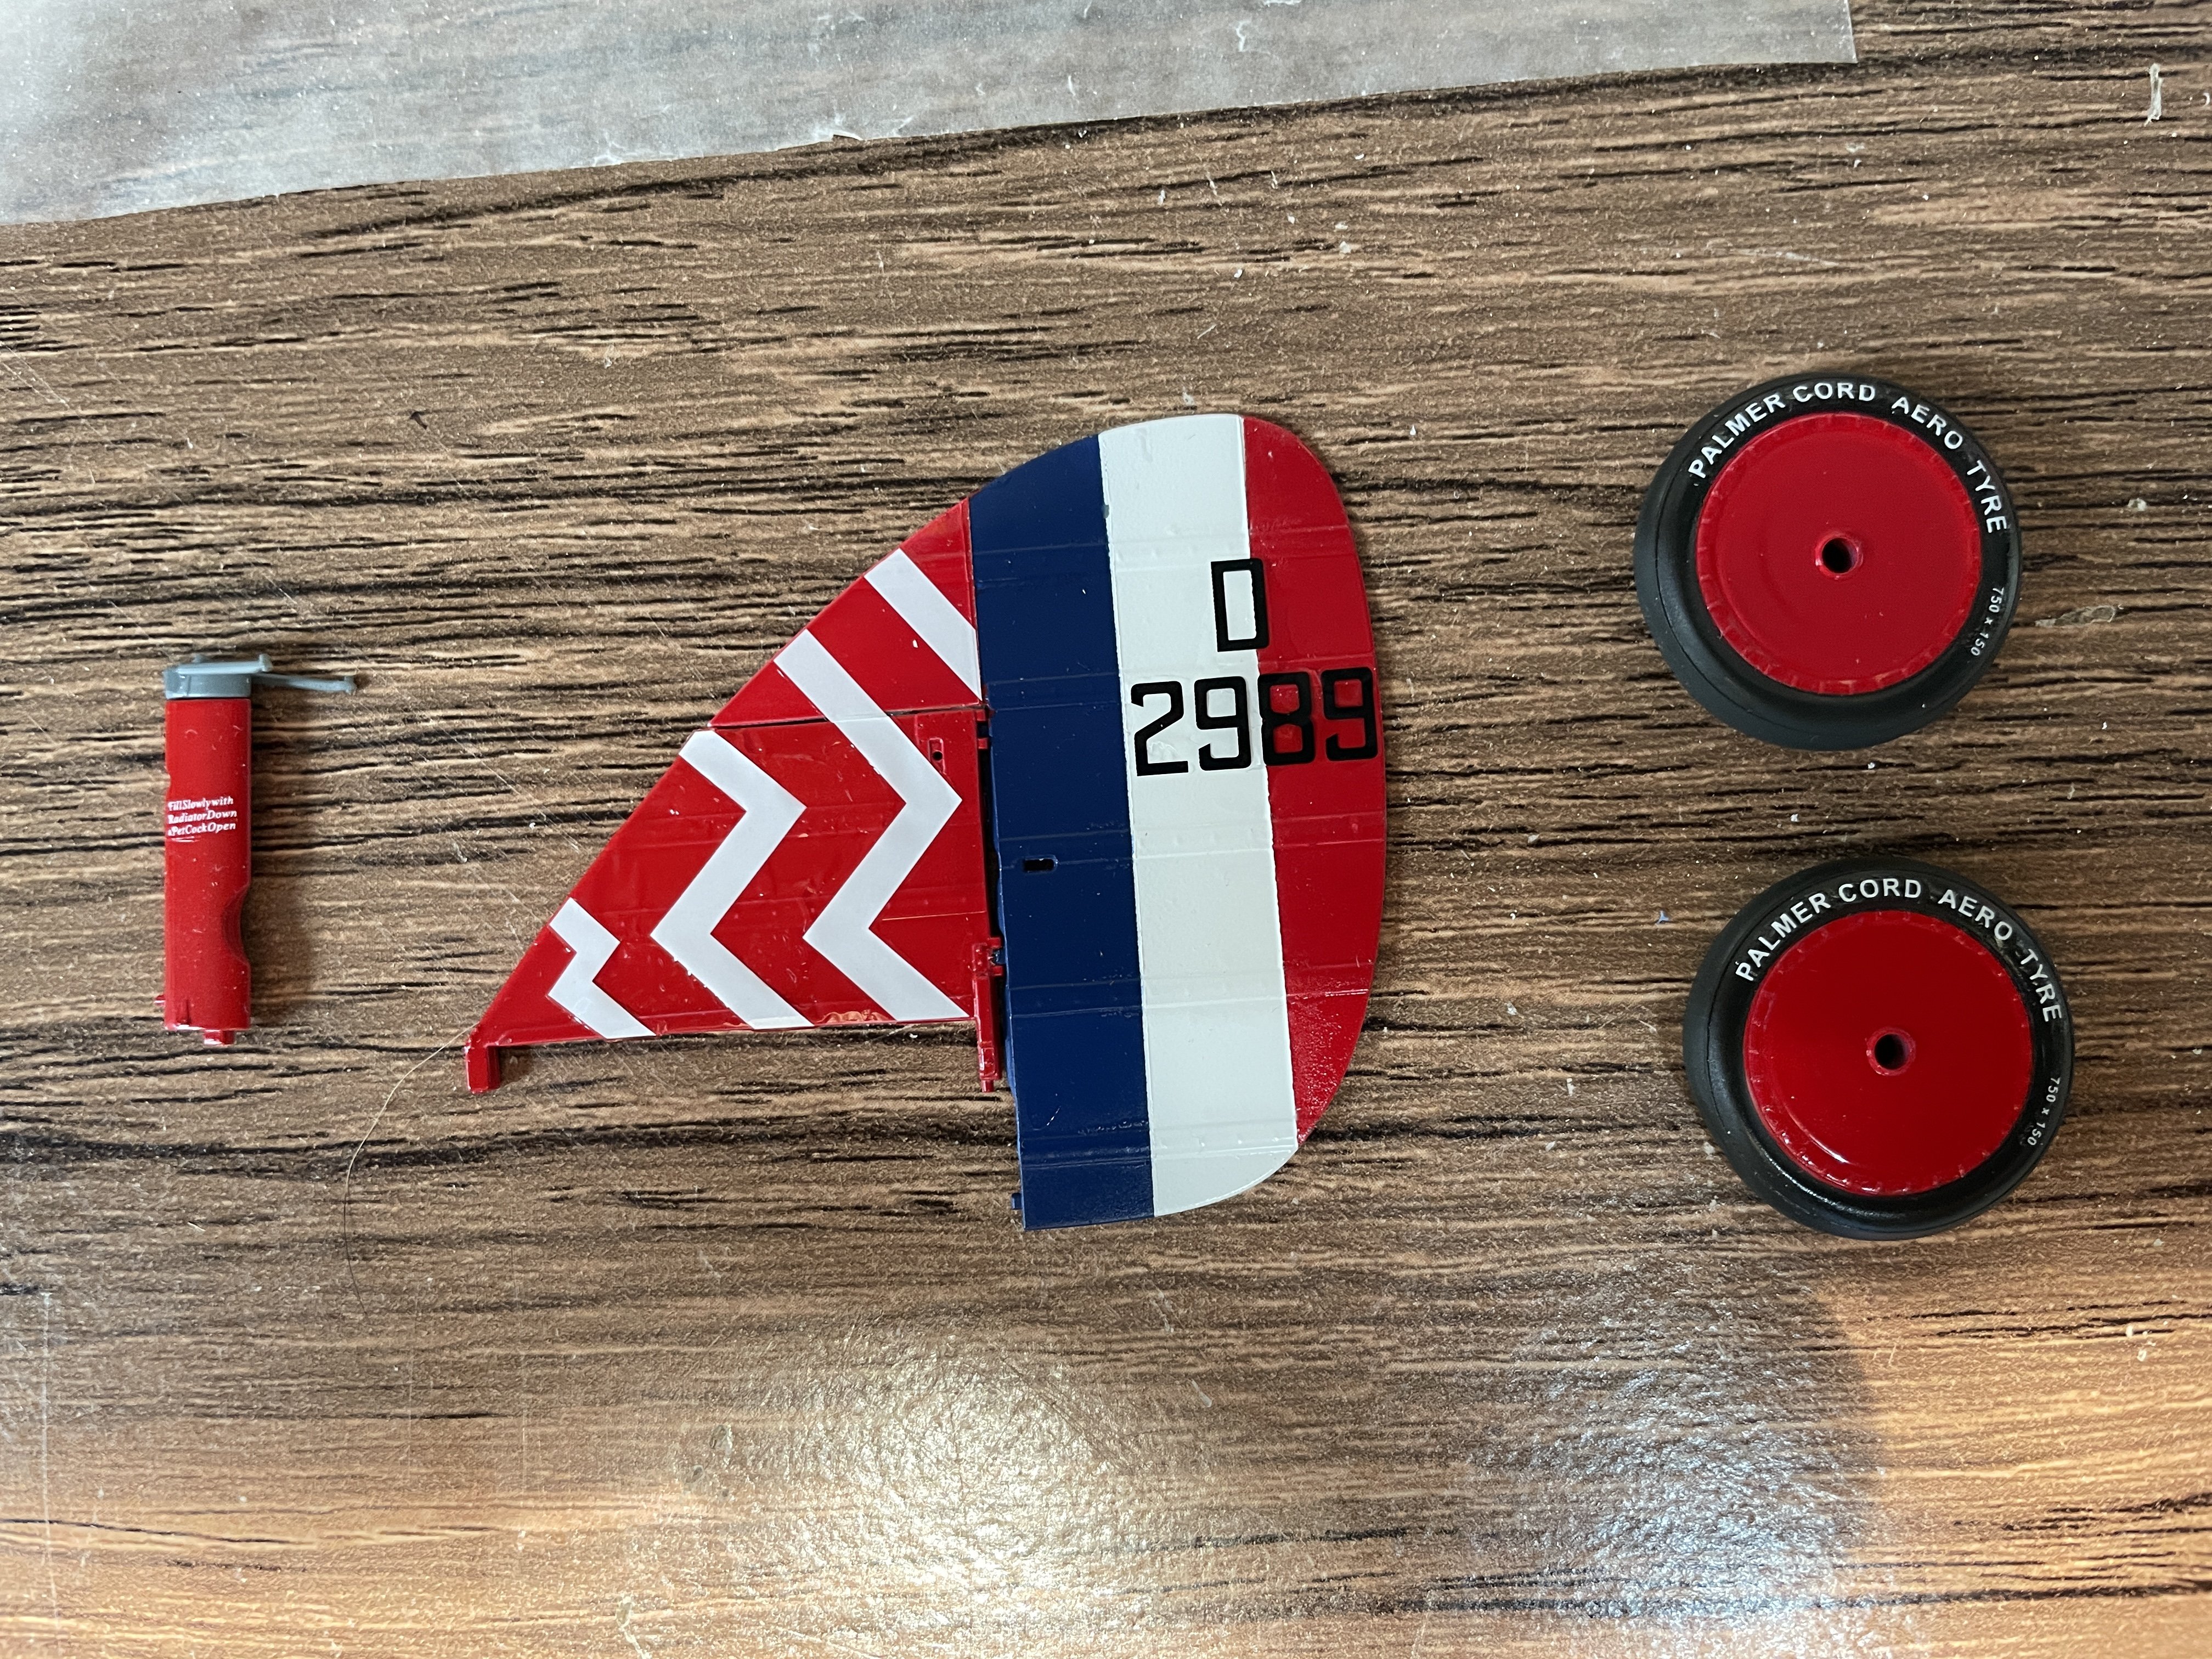
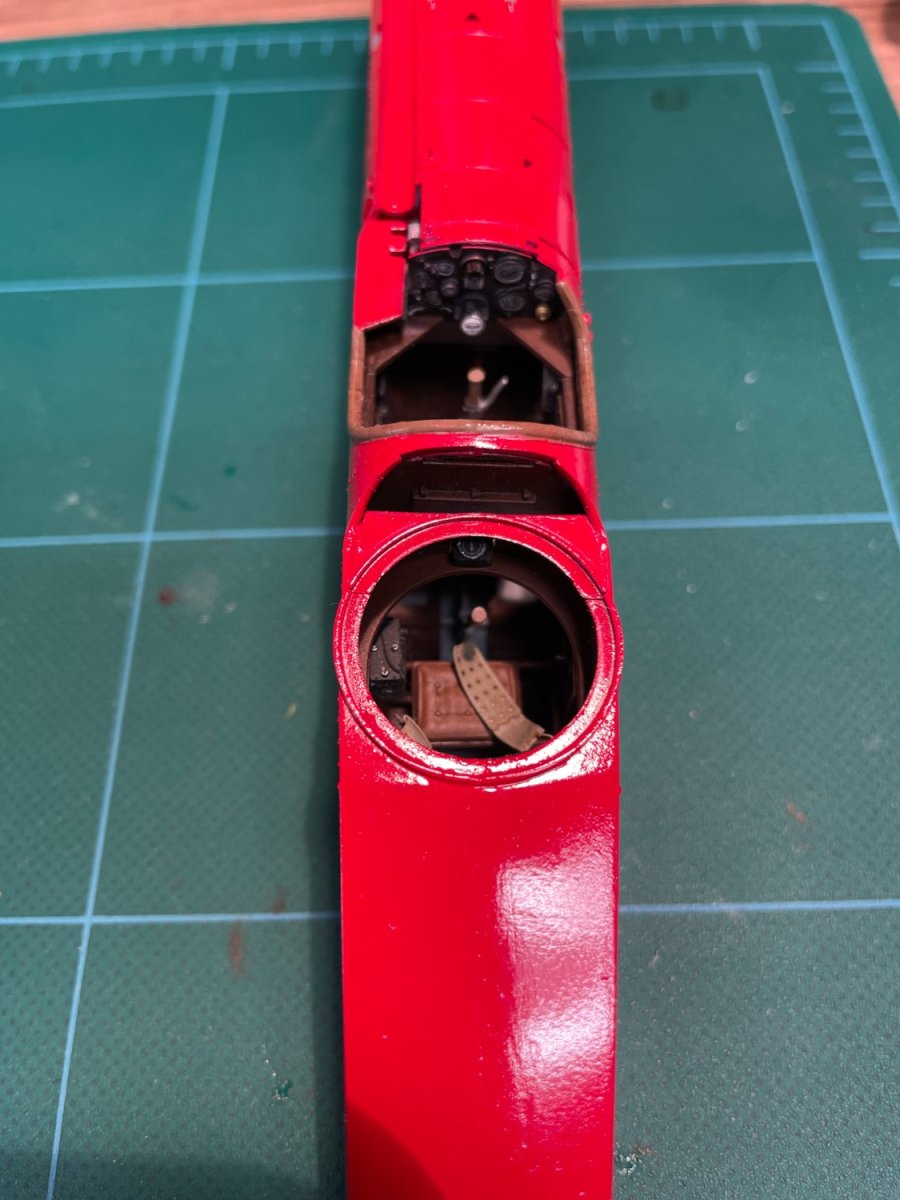
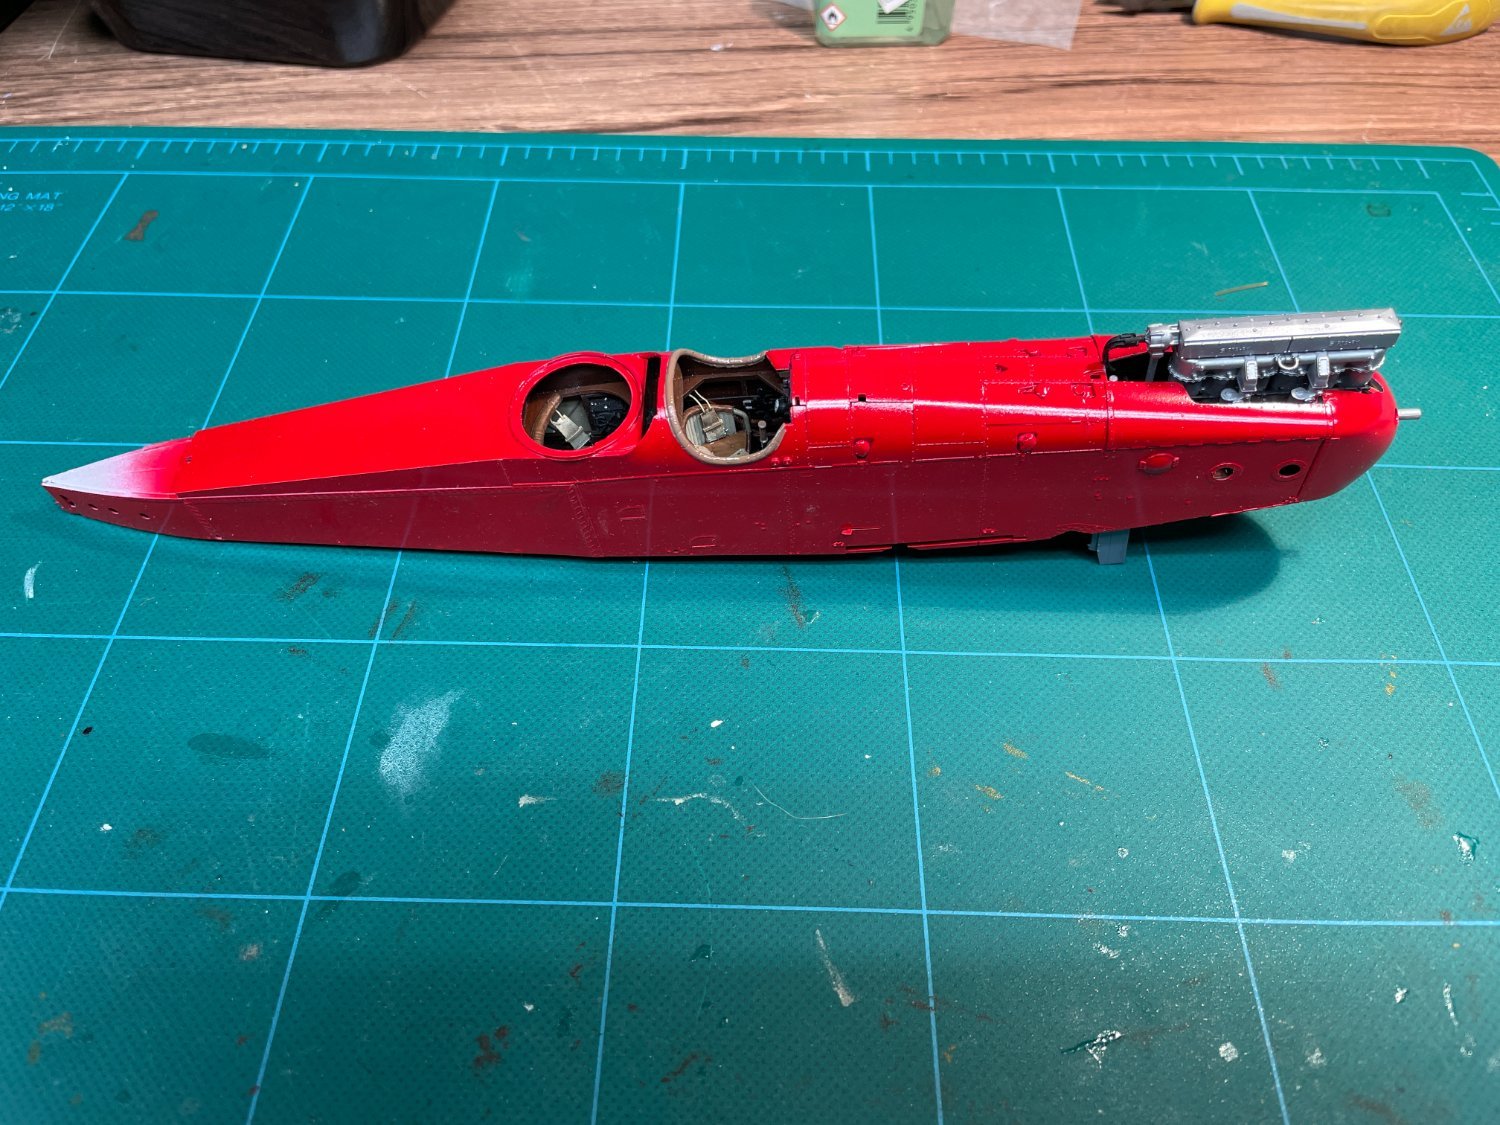
Ken - many thanks! That will save me a step and decrease the chance that I have another painting mishap. Sprayed a lot of red paint today. The wings are drying. I went back to the fuselage, pulled off the rest of the masking, put a wash on the leather around the cockpit, and did more touching up. I also finished painting the tail. The stabilizer doesn't lie flat, so some of that area may end up visible. I'm very pleased with the instrument panel touch up. I didn't take a before picture, but the overspray was pretty significant. This is a vast improvement and I think this is the best I'm going to do - it isn't that easy to reach with a brush. I'll touch up the red on the edge (didn't see that until the picture). The red tinge on the middle upper instrument is probably reflection. It wasn't there when I went back to the model.
- 27 replies
-
- 11
-
-
AMC DH9 by davec - Wingnut Wings - 1/32
davec replied to davec's topic in Non-ship/categorised builds
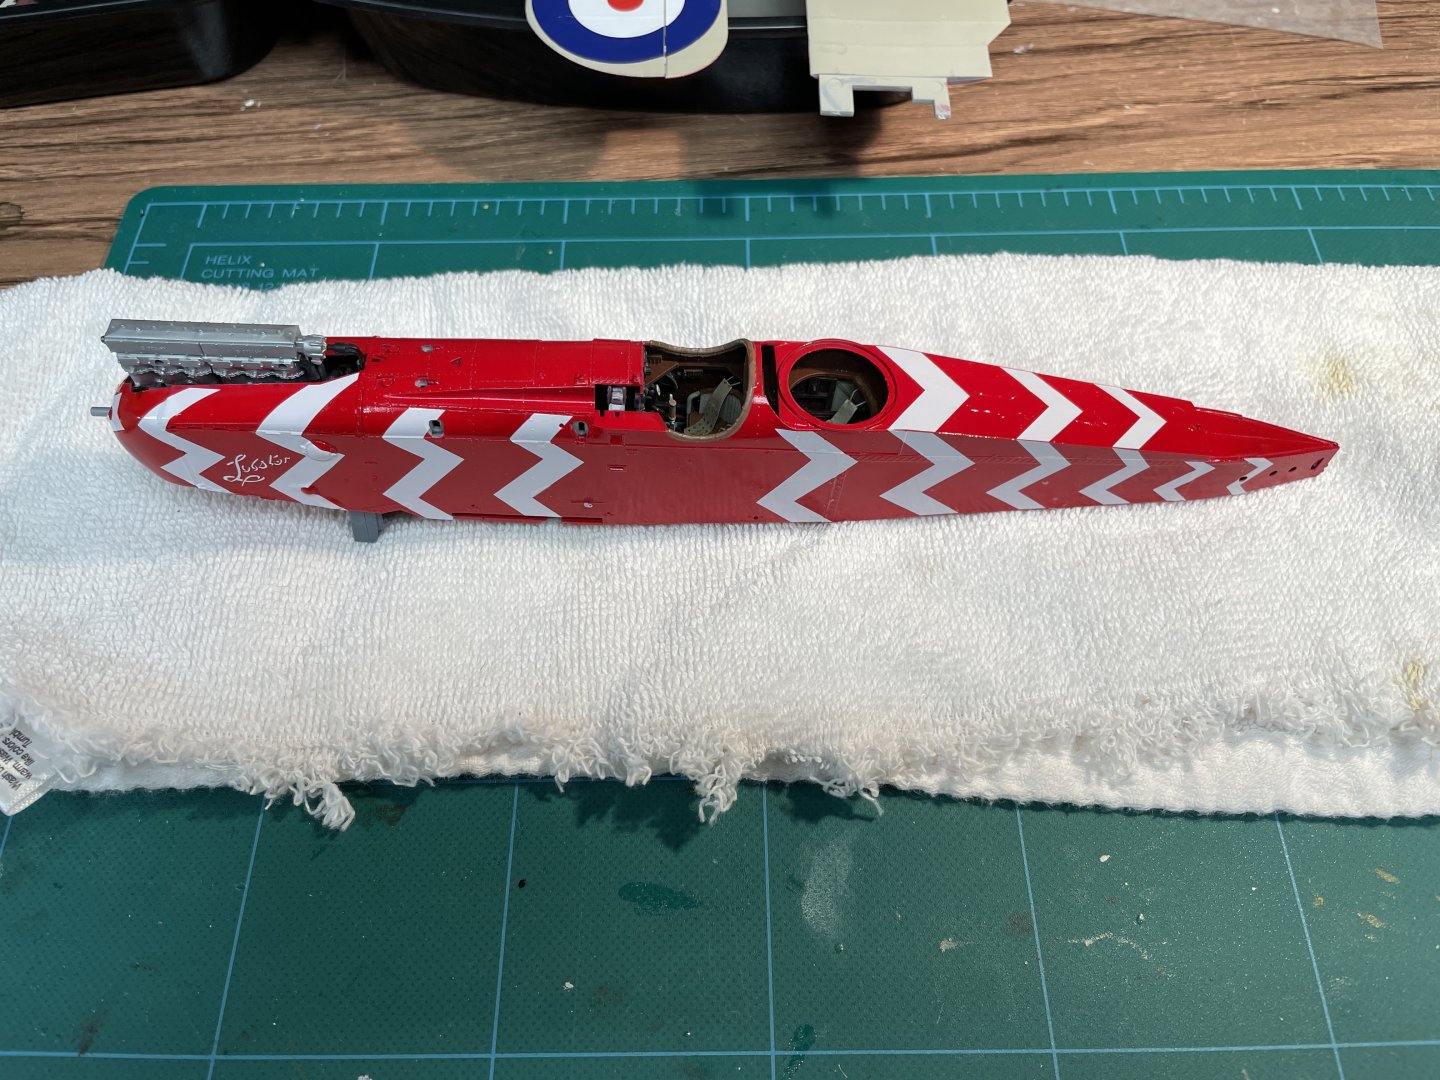
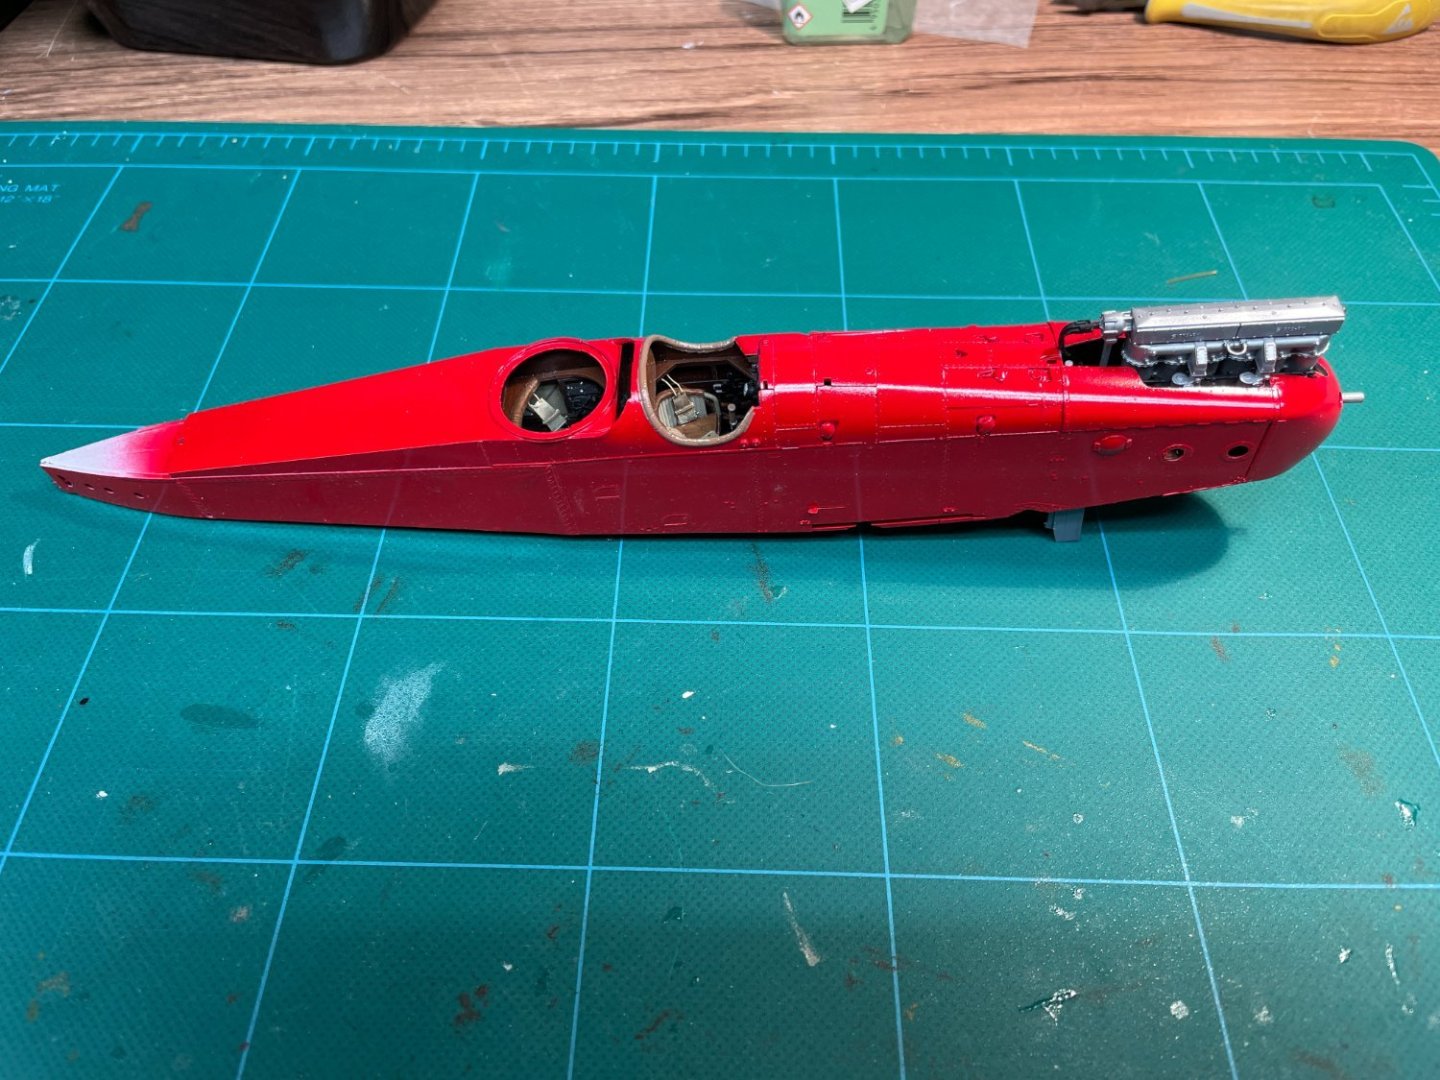
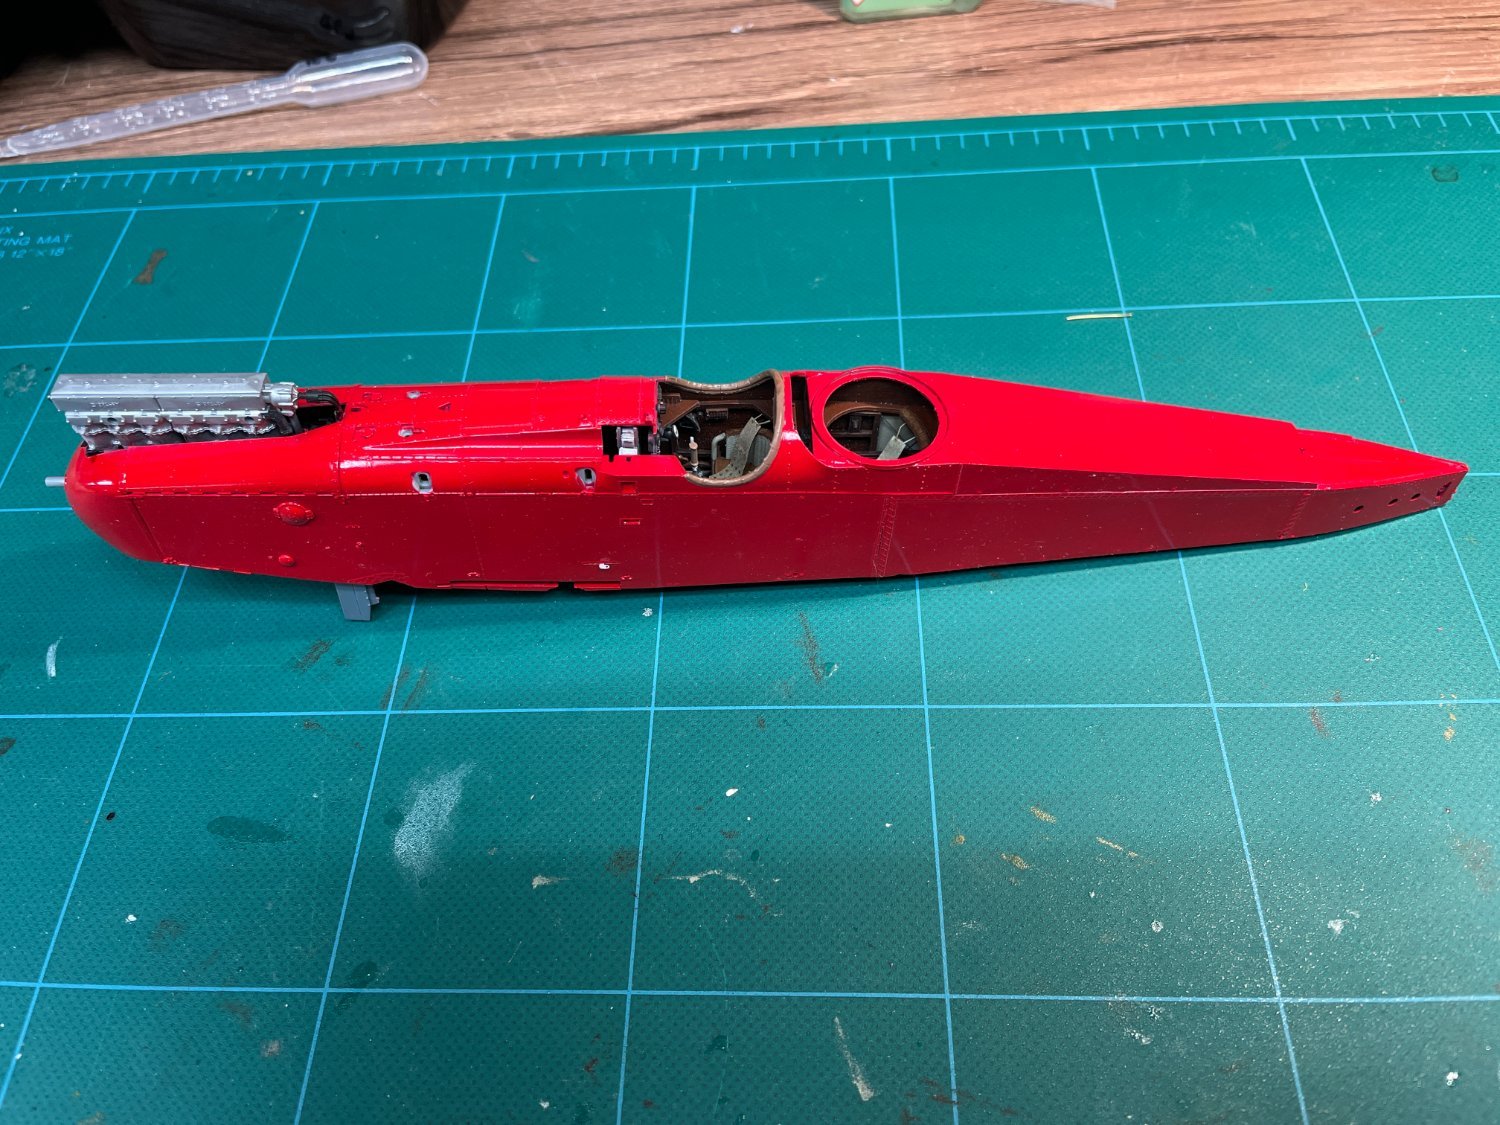
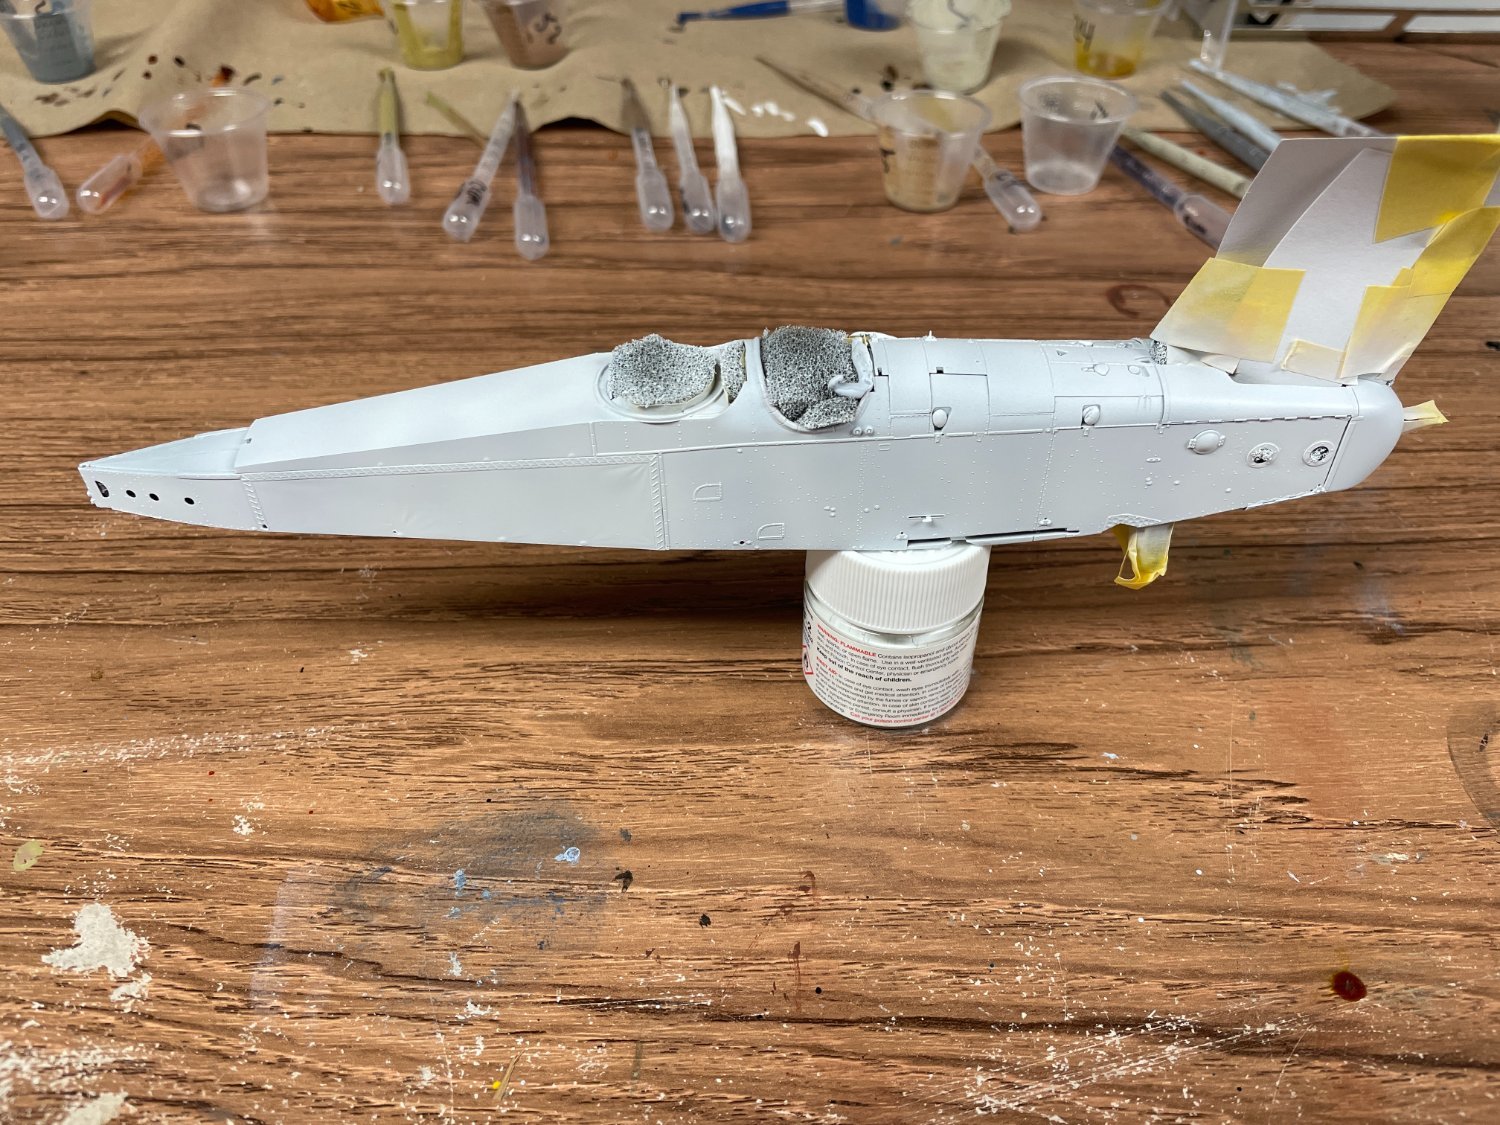
I’ve been working on the model for a few minutes every few days. I got the fuselage closed. Tolerances are always so tight that despite being really careful to clean up the glue joints, I end up with a little step at the joint that requires some sanding and filling. I had a few mistakes when priming and sanding, especially not masking far enough away from where I was working and getting some overspray on the instrument panel, which was very frustrating. I always find masking world war 1 models with the exposed engines and open cockpits really challenging - please let me know if you have any suggestions. I’m painting the model red, so used white primer. I just sprayed the red paint, which went down pretty well. The lobster scheme has decals over nearly the entire fuselage, so I sprayed gloss paint, which should let me put the decals on directly (do I need a clear gloss coat over a gloss finish?). It looks pretty toylike now, but with the decals on and a clear flat coat, should look as intended. I’ve cleaned up the overspray and touched up, and am feeling better about the progress. I’ve always had difficulty getting a good finish brushing Tamiya paint and had my first revelation of the project – I highly recommend Tamiya retarder. Mixing a drop of retarder with a few drops of paint in a palette completely changes how it brushes – all of a sudden it flows really well. I’ve got a lot of the rest of the parts cut out and sanded and most painted. I masked and primed the wings this morning.
- 27 replies
-
- 15
-
-
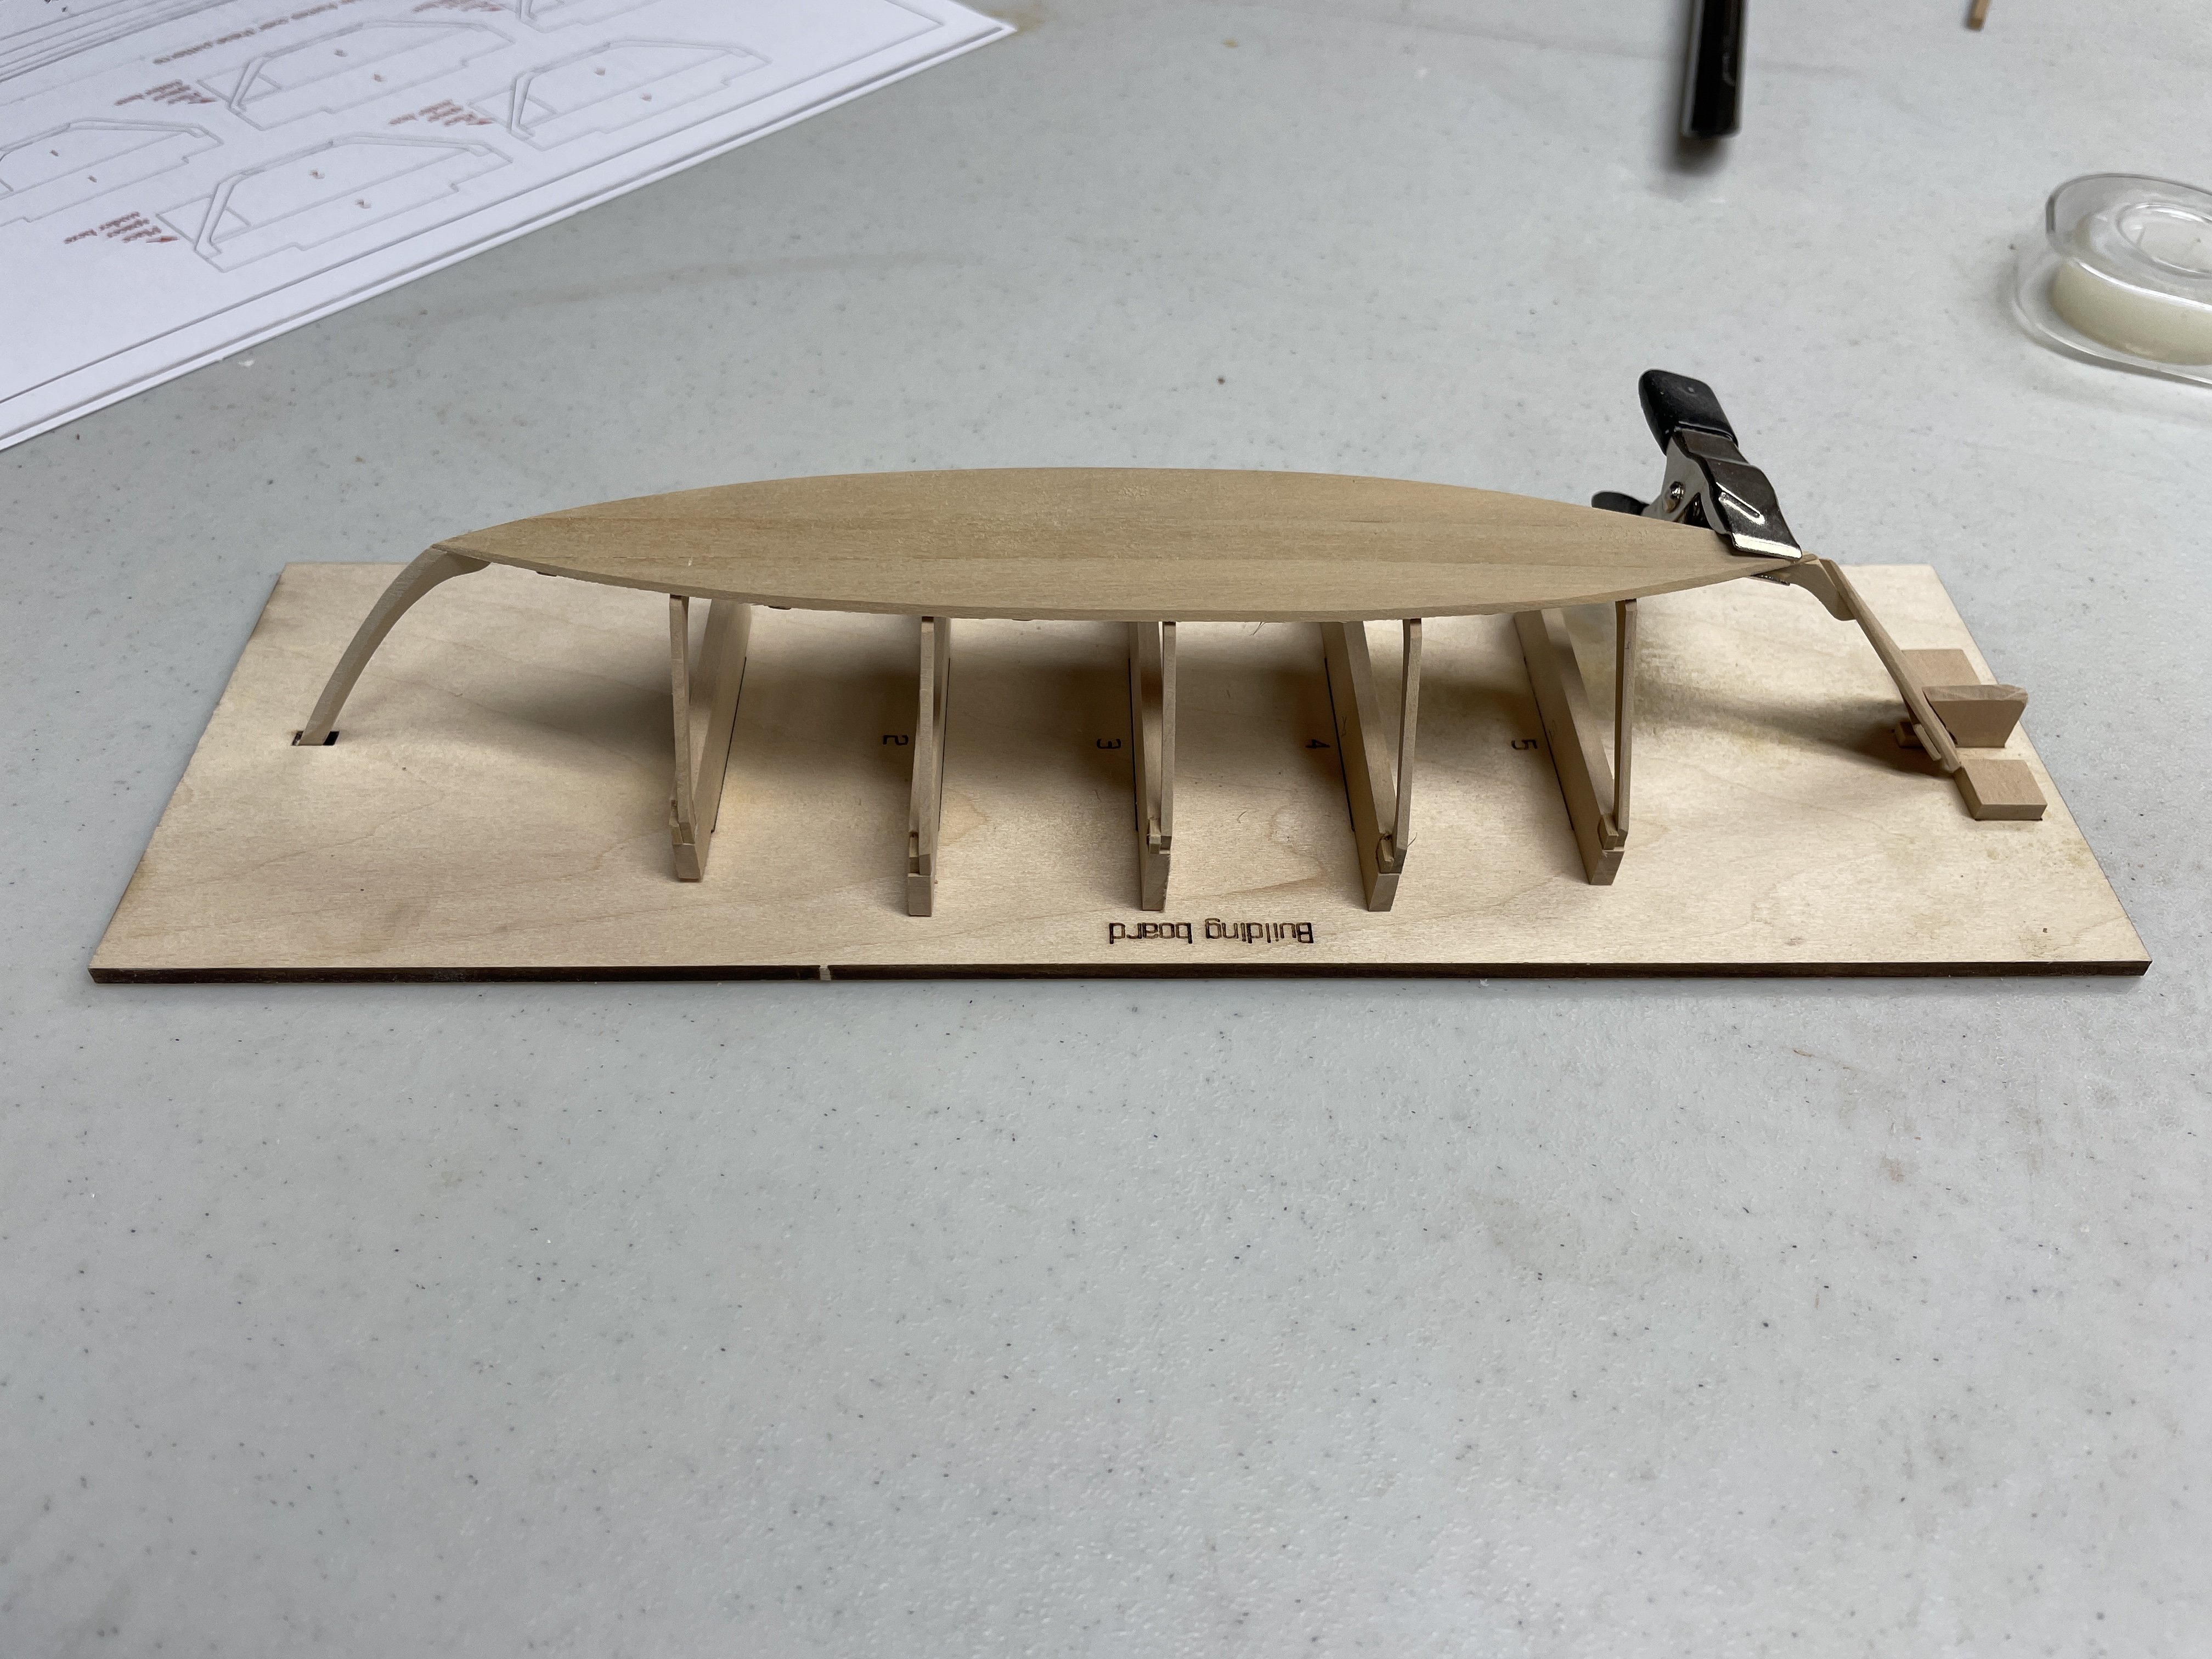
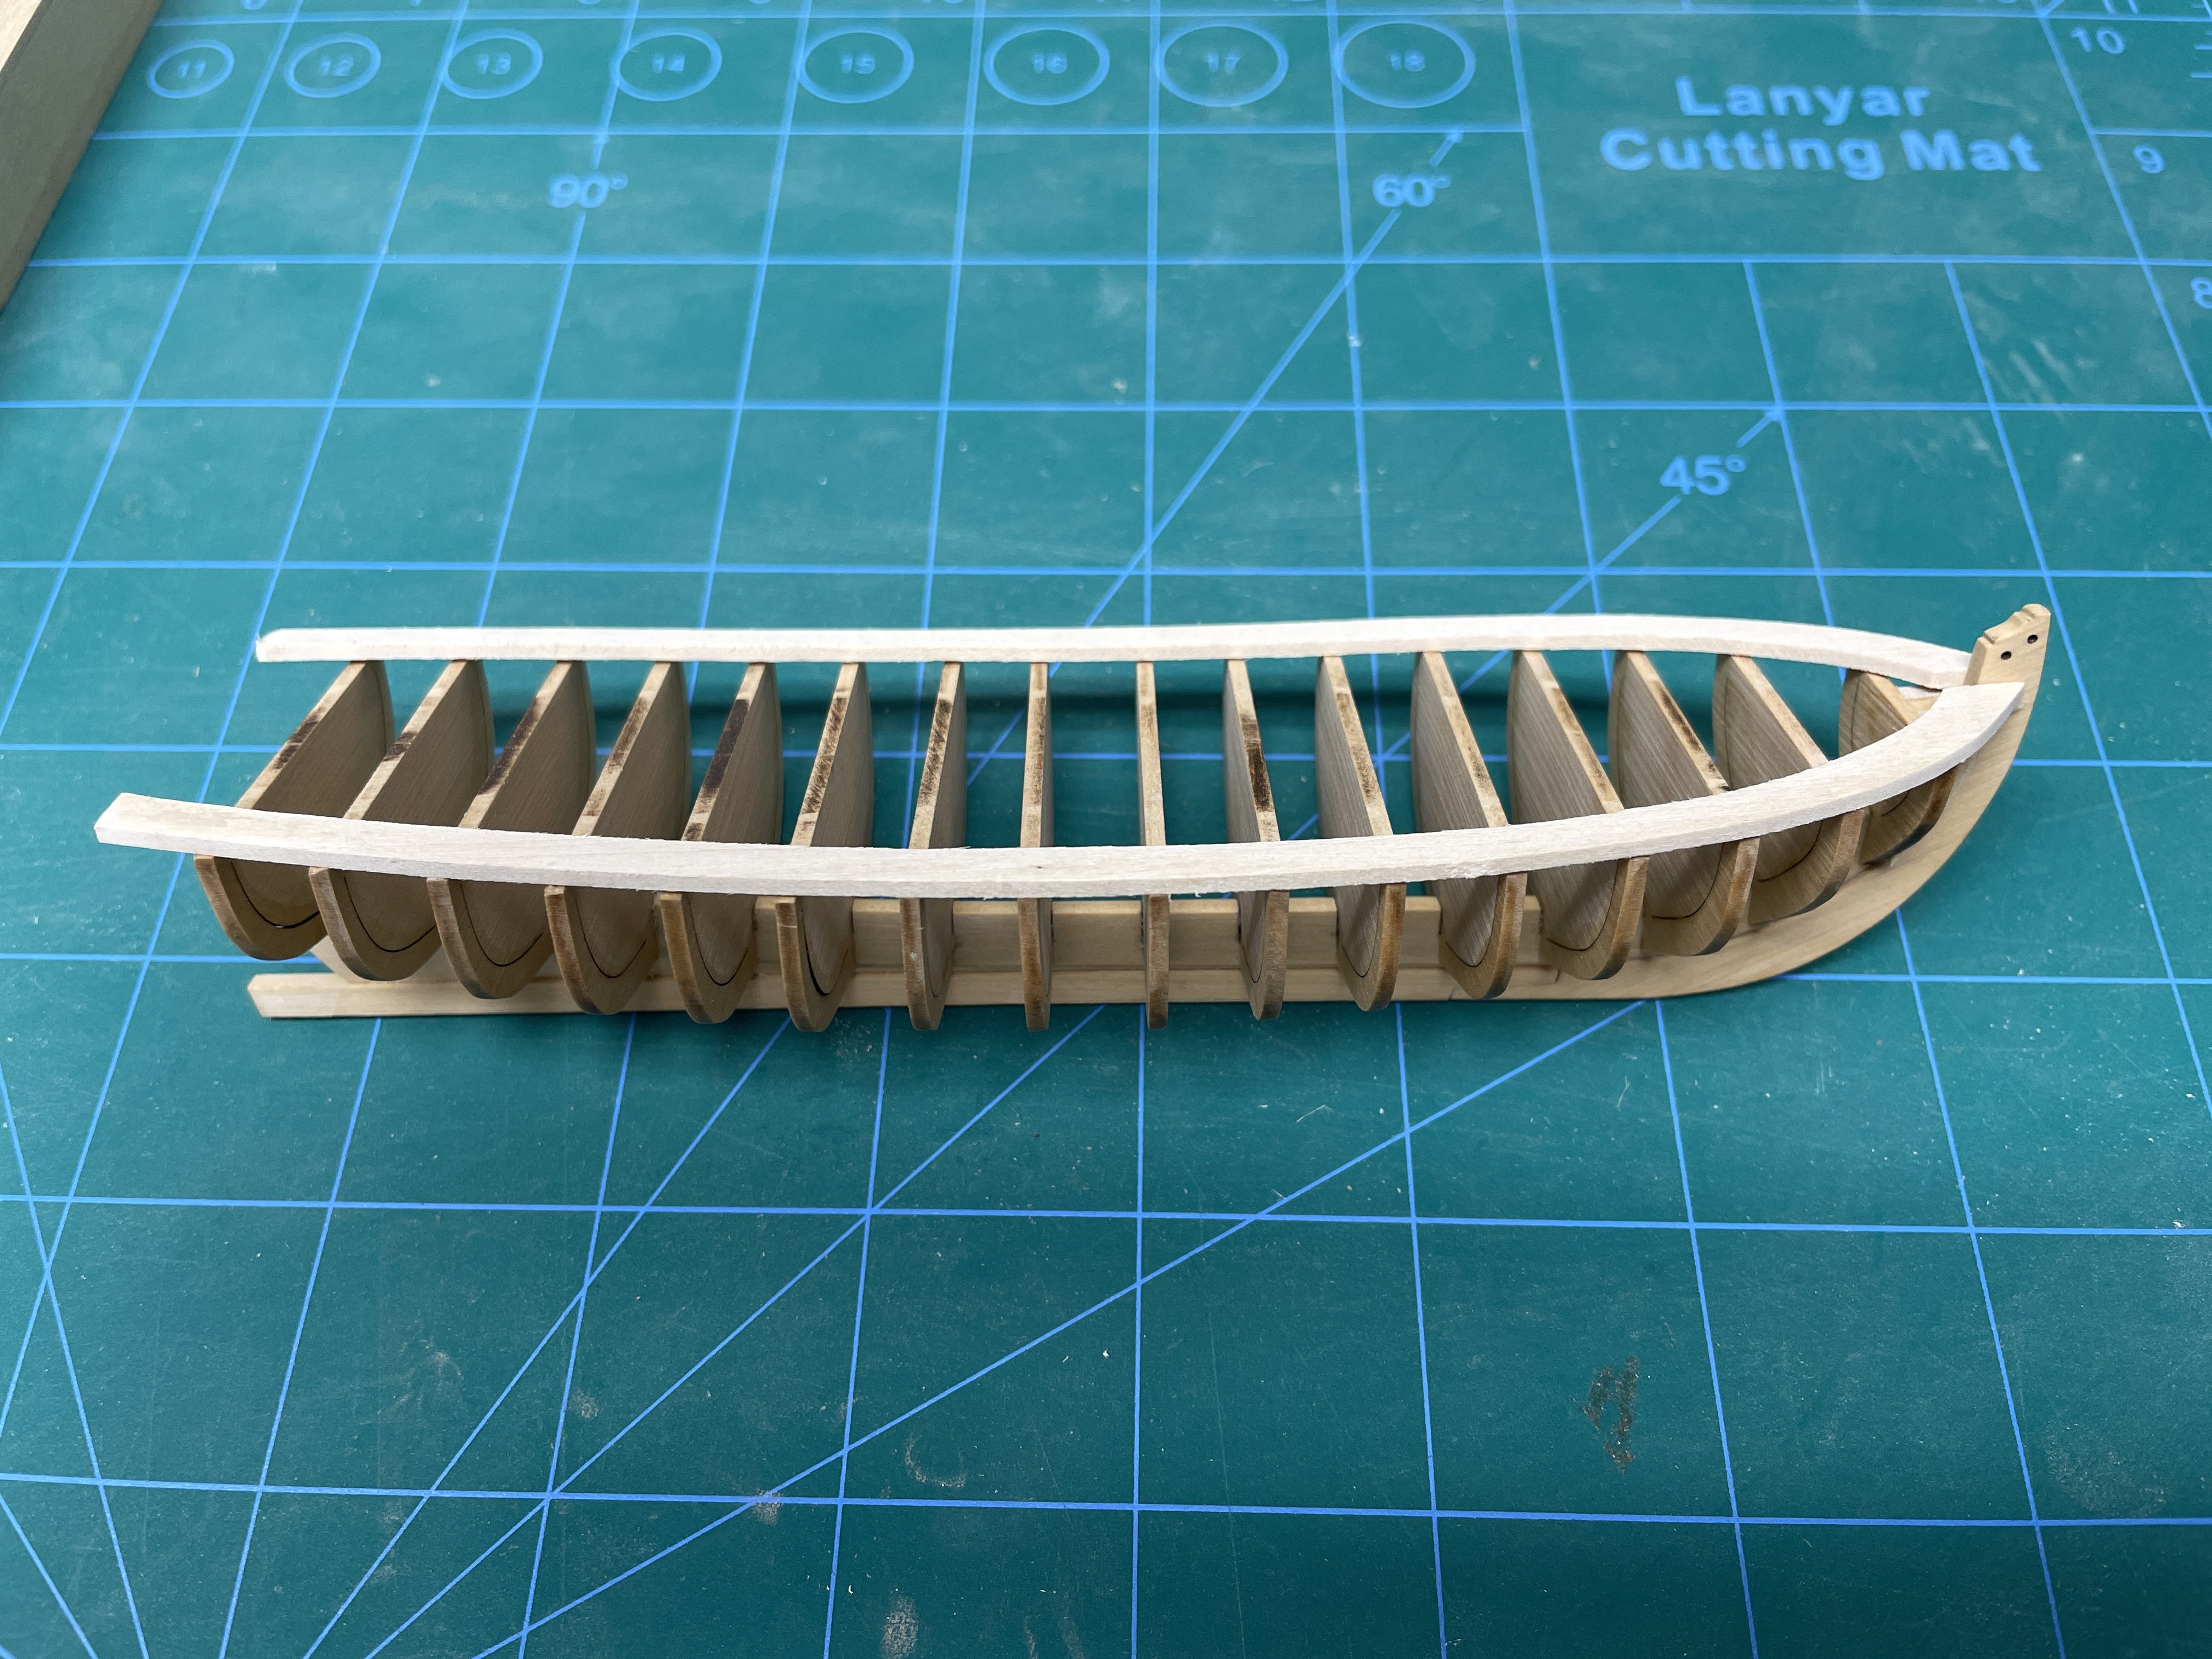
Getting the frames set in all 3 dimensions turned a little more challenging than I thought. I’ve done some travelling and only had short workshop sessions each day, so was only attaching 1-2 frames every few days. I had a setback where every time I added a piece, I got a dark mark at the joint. I thought it was the char particles getting caught in the glue so I debonded, sanded, and reglued a few times. I finally realized that the moisture in the glue was oxidizing the machinist angle plates I was using to keep things square when drying. I stopped using the plates, which got rid of the staining, but made keeping everything oriented more challenging. I think I finally have the frames where I want them. I’ll be shaping a sacrificial strip to glue across the upper end of the frames, crossing over to the filler pieces. I’m worried that I debonded and reglued so much that my glue joints won’t be strong and the extra support will be important. I have the last piece drying and will post a picture later today.
-
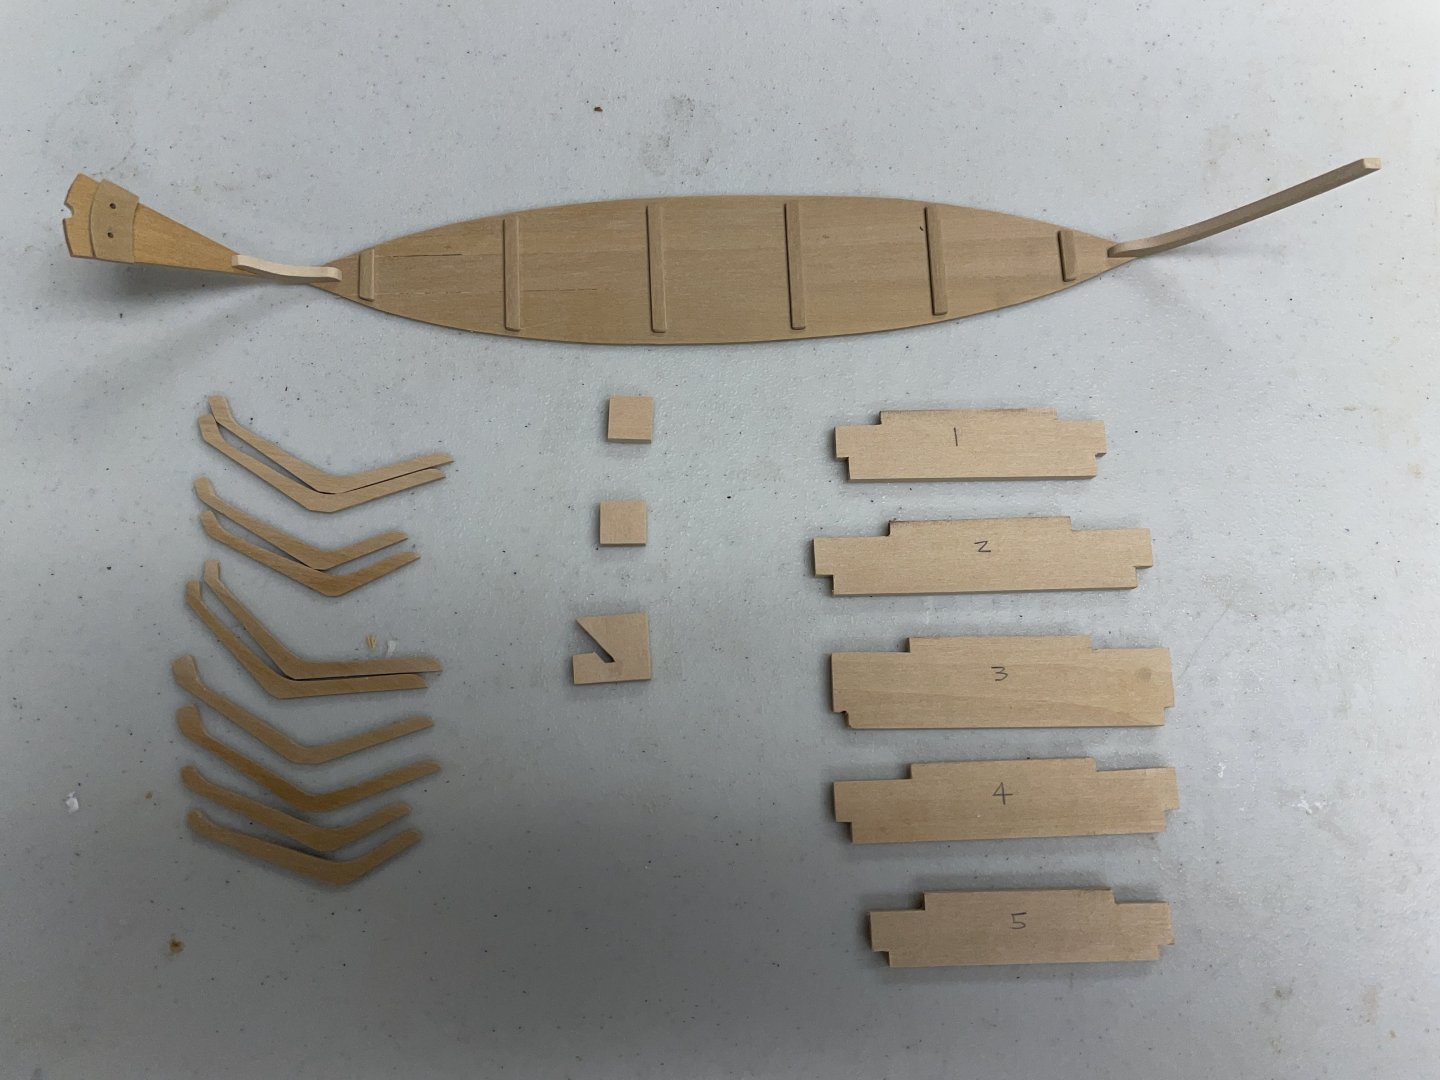
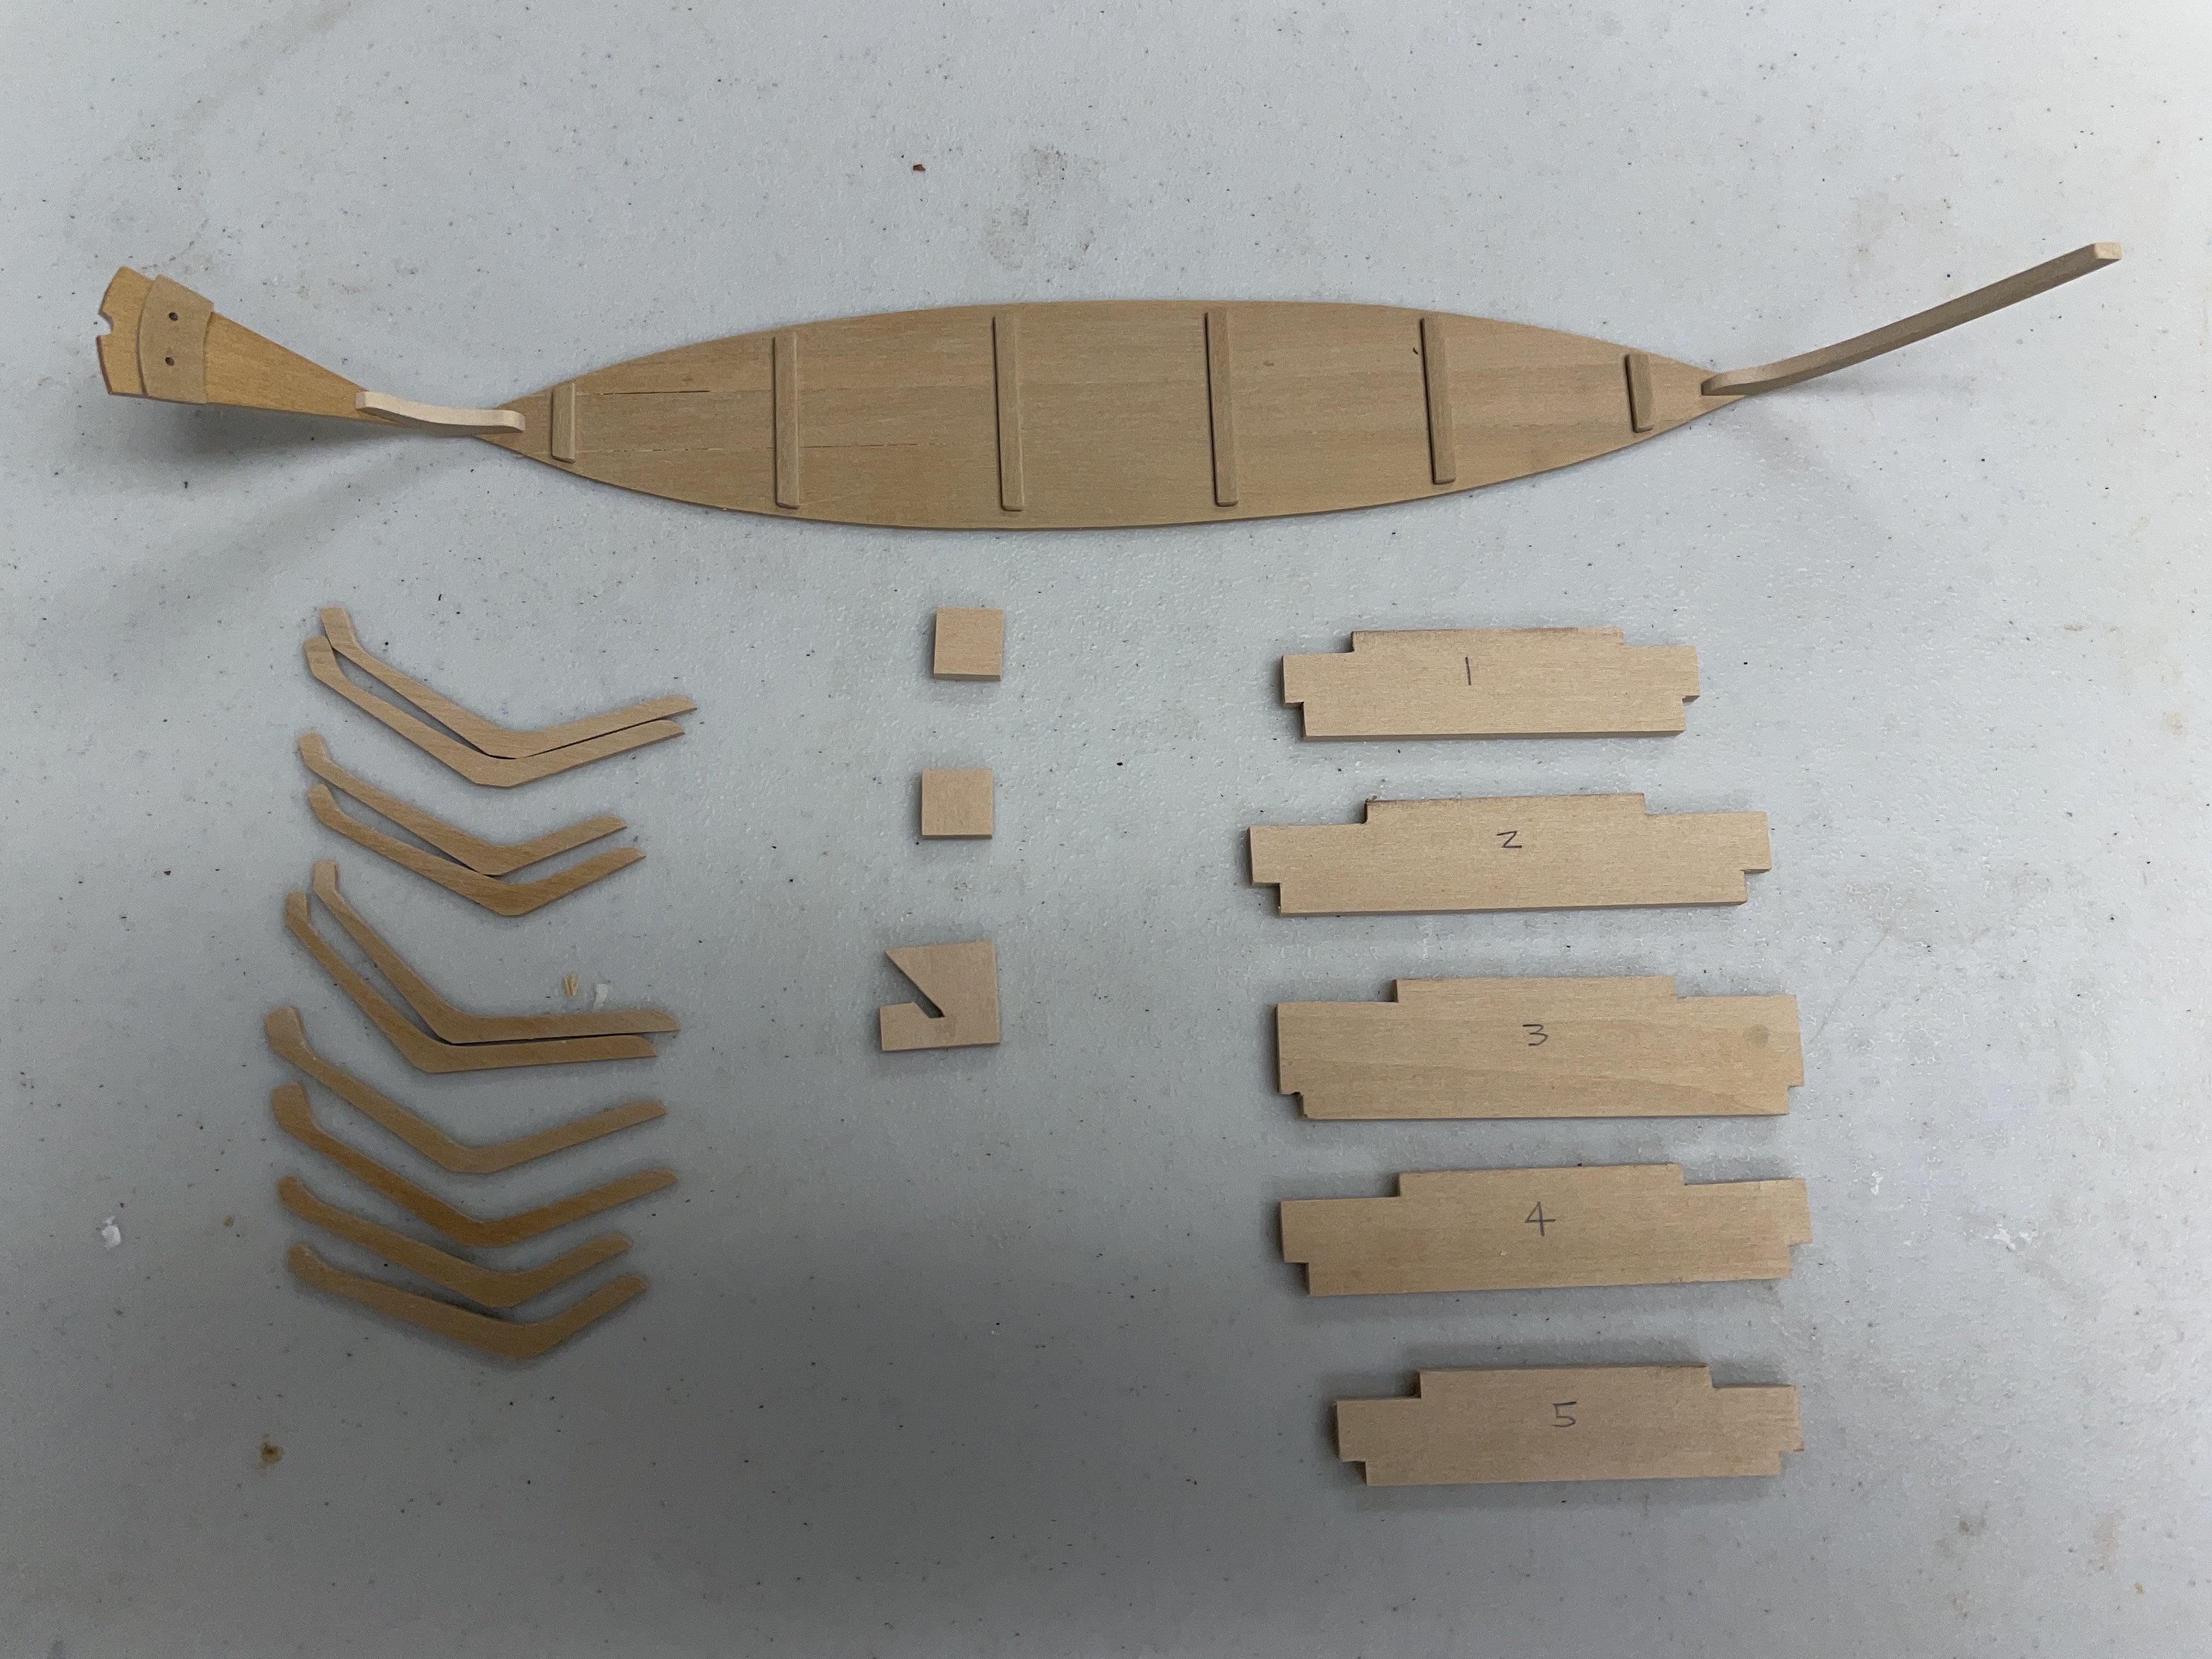
Robert - many thanks! I have a special talent for turning simple things into challenges. Helge - thanks for following. I looked at your build, which looks really interesting. I hadn't realized that Dorys were rigged for sail. I plan on building according to the model shipways plans (or at least to scans of the kit parts) so will not be rigging the model. I've made a little progress, adding the stem and stern. I've started cutting the frames and crosspieces for the building jig.
.thumb.JPG.18761bddc28302dd823d1d8a85fedcf1.JPG)
- 7 replies
-
- 6
-
-
- Grand Banks Dory
- Model Shipways
- (and 1 more)


.JPG.8be5b98e27233297e7dd650d685bd3eb.JPG)