drobinson02199
-
Posts
915 -
Joined
-
Last visited
Content Type
Profiles
Forums
Gallery
Events
Everything posted by drobinson02199
-
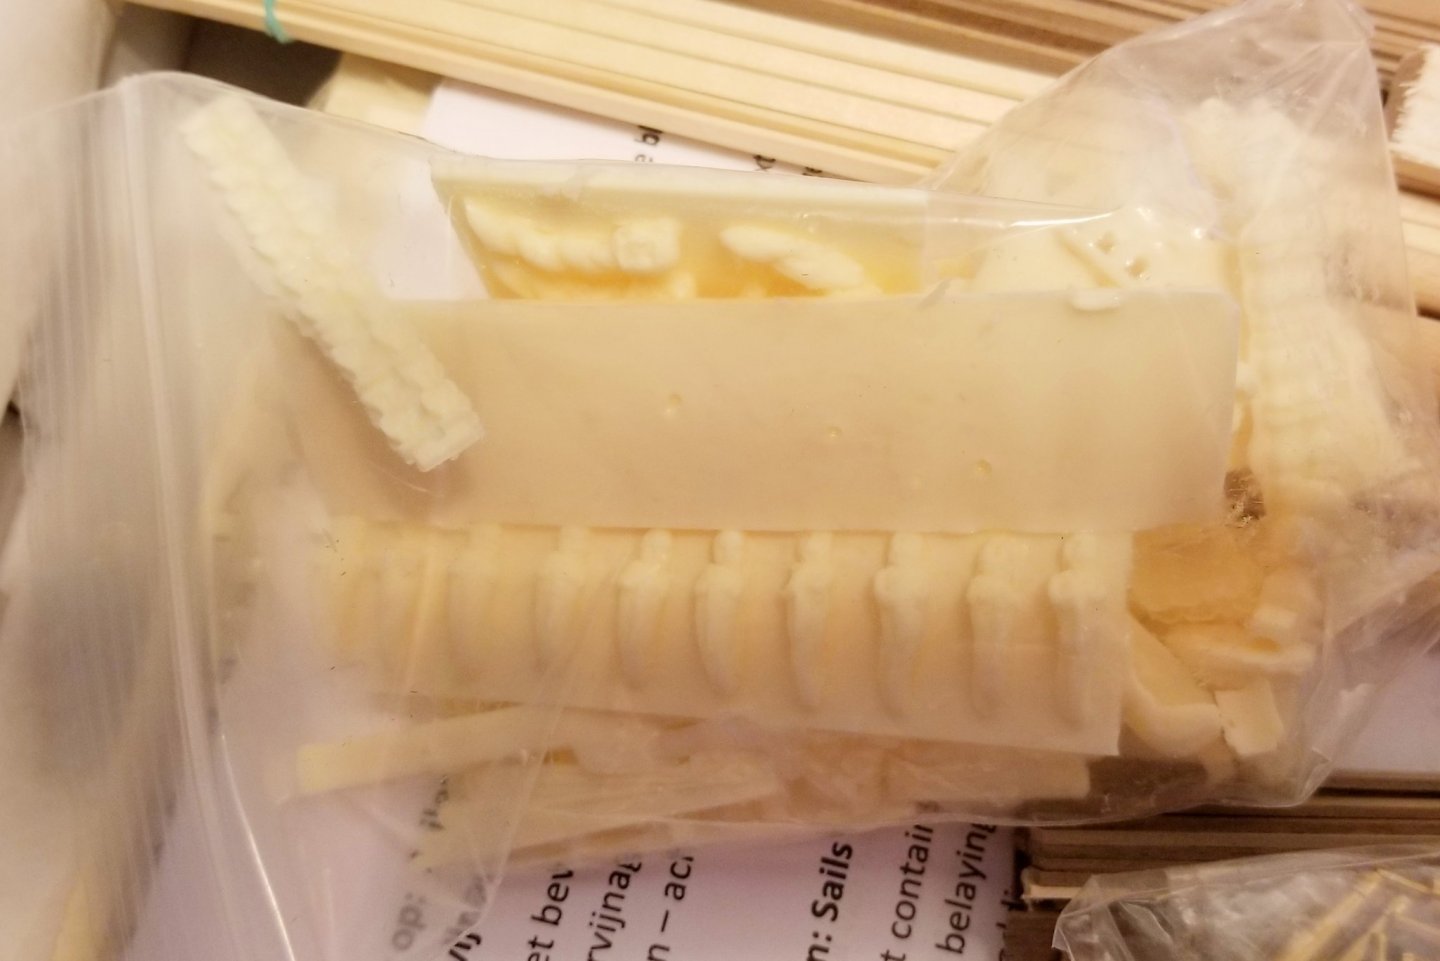
 Charles: The five parts on the right are part of the lower yard attachments. They attach to the yards (5 of them) through the center hole, and the two holes on the "wings" are for a pin that goes through a brass part attached to the mast to create a swivel. There are drawings of this somewhere on the mast or yard plans. I had a very difficult time attaching those to the yards without them coming loose, and finally resorted to lashing them to the yards, and gluing the lashings, which worked well. I think there's an entry about that somewhere in my build log. The other parts I'm not sure of, but they look like they might possibly be part of the two deck winches. Have you built those yet? If the parts on the left are hollow inside, then I think they are the ends of a winch axle made from a dowel that fits into the hollows. I call these "winches" but the manual may have a different name for them -- but there are two on deck, one in front of the fore mast and one in front of the main mast. They have a lot of brass parts. The center parts might also be part of those winch assemblies, or they could be the body of small cranked winches that mount on the side of the channels. Hope this is helpful. Regards, David
 -
Chris: It's a single-plank ship, so lots of bulkheads is a good thing. Regards, David
- 136 replies
-
- 2
-

-
- kolderstok
- batavia
- (and 1 more)
-
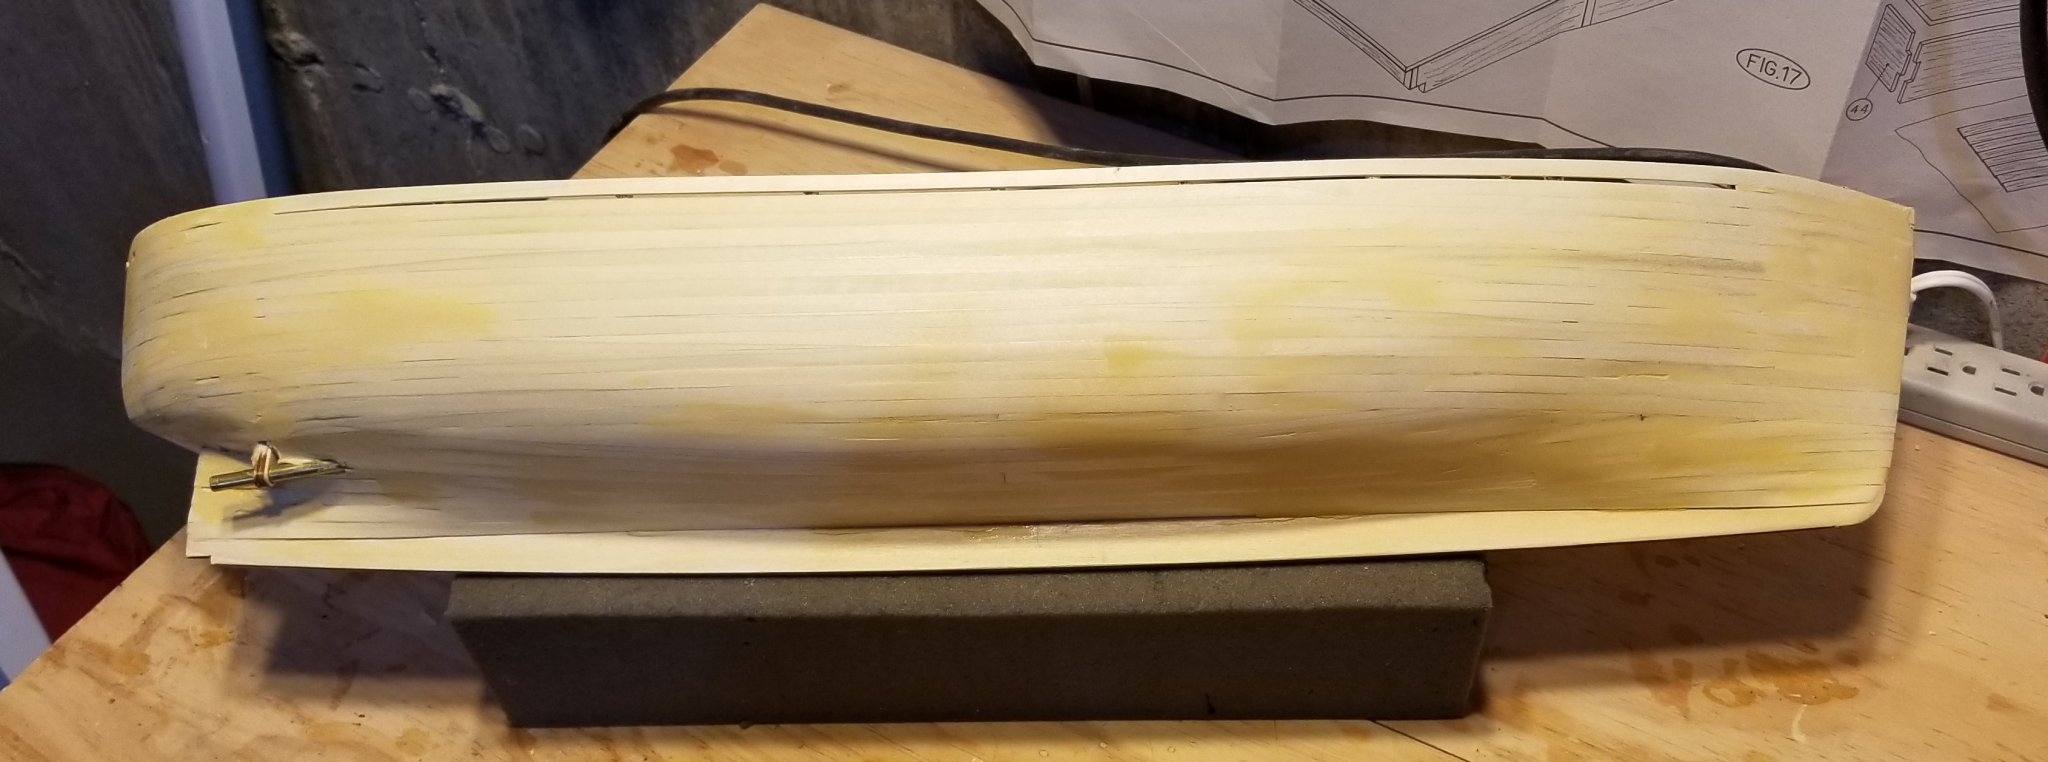
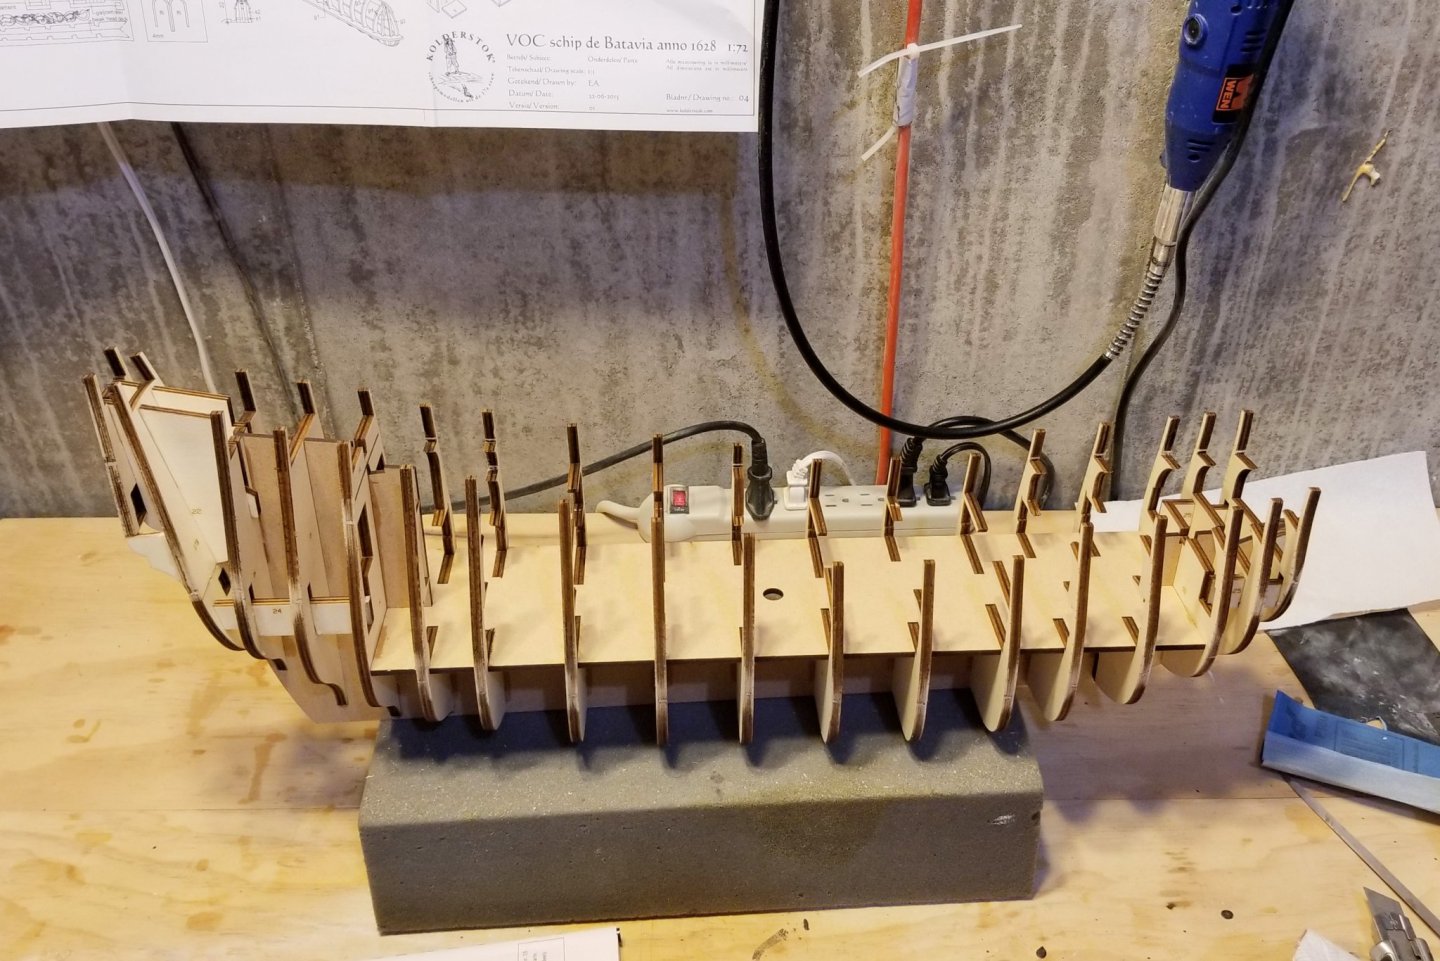
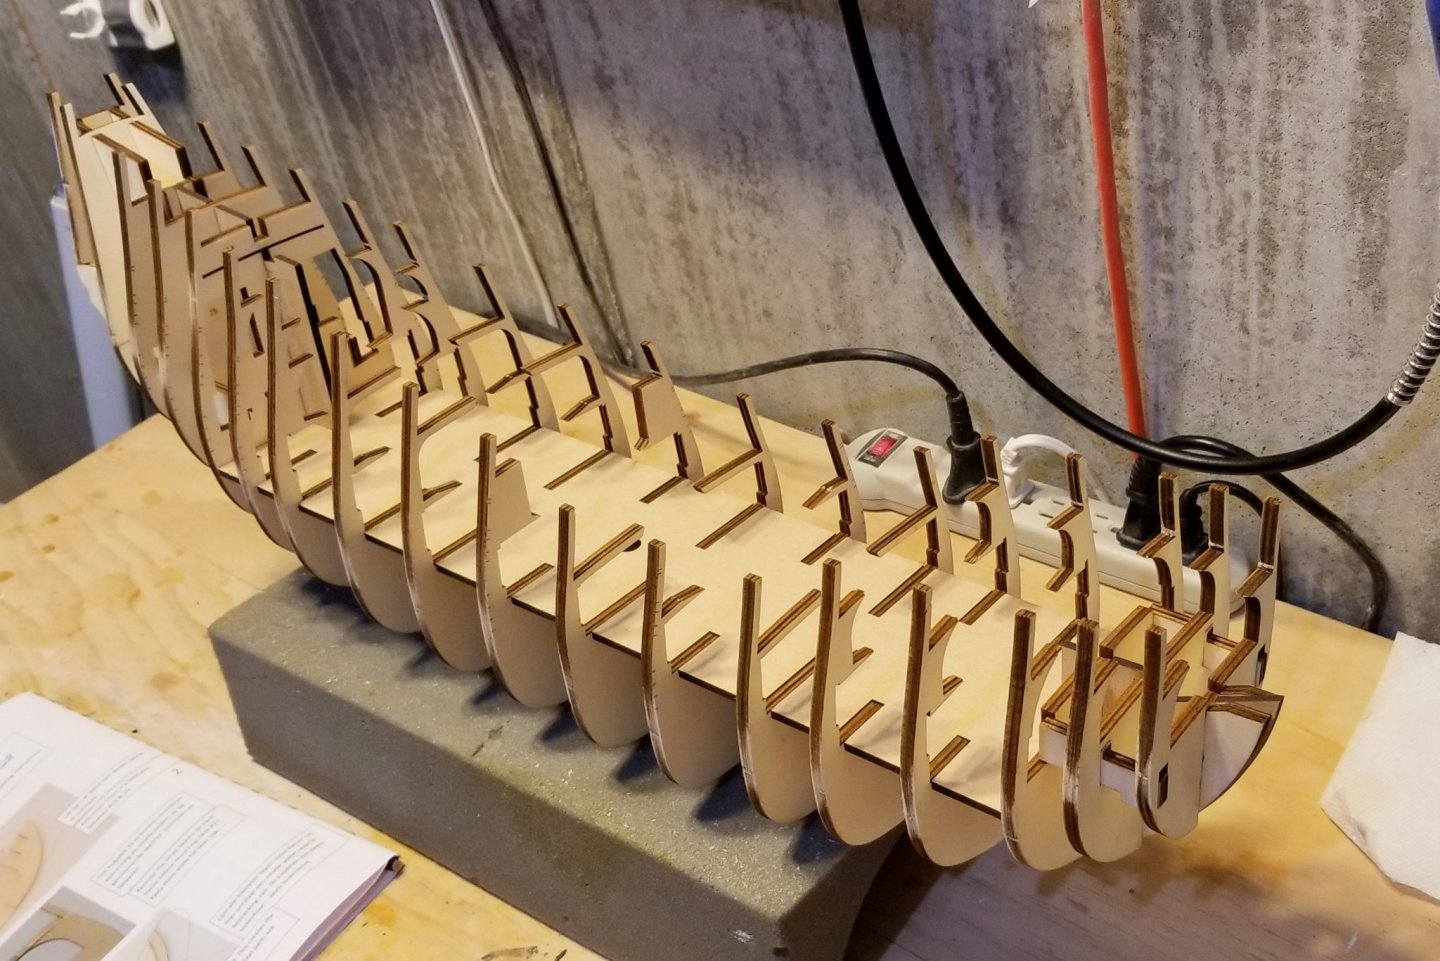
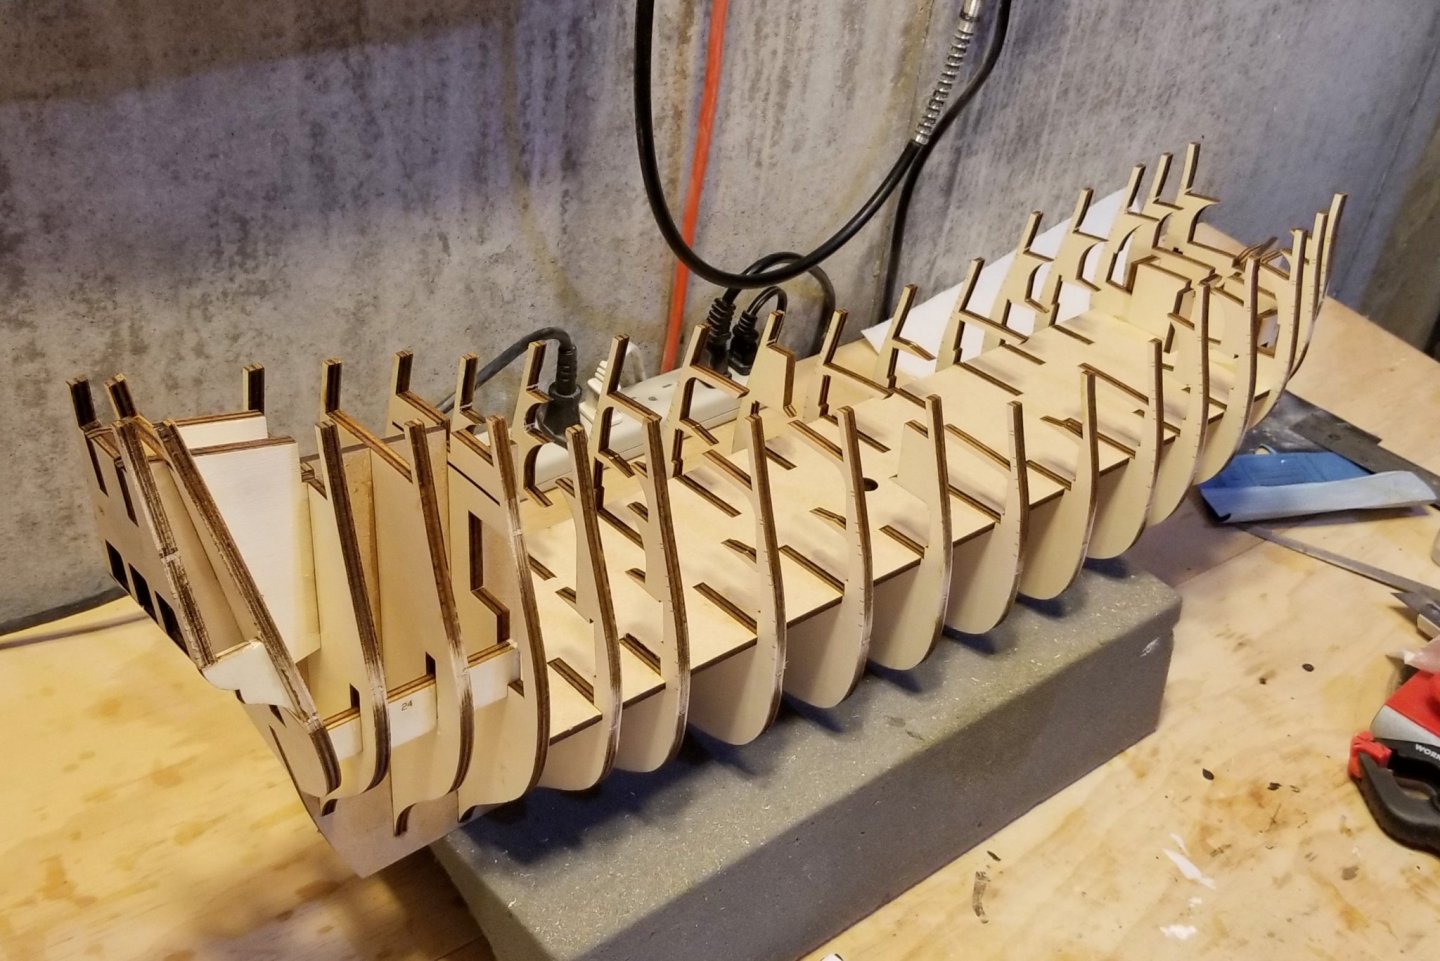
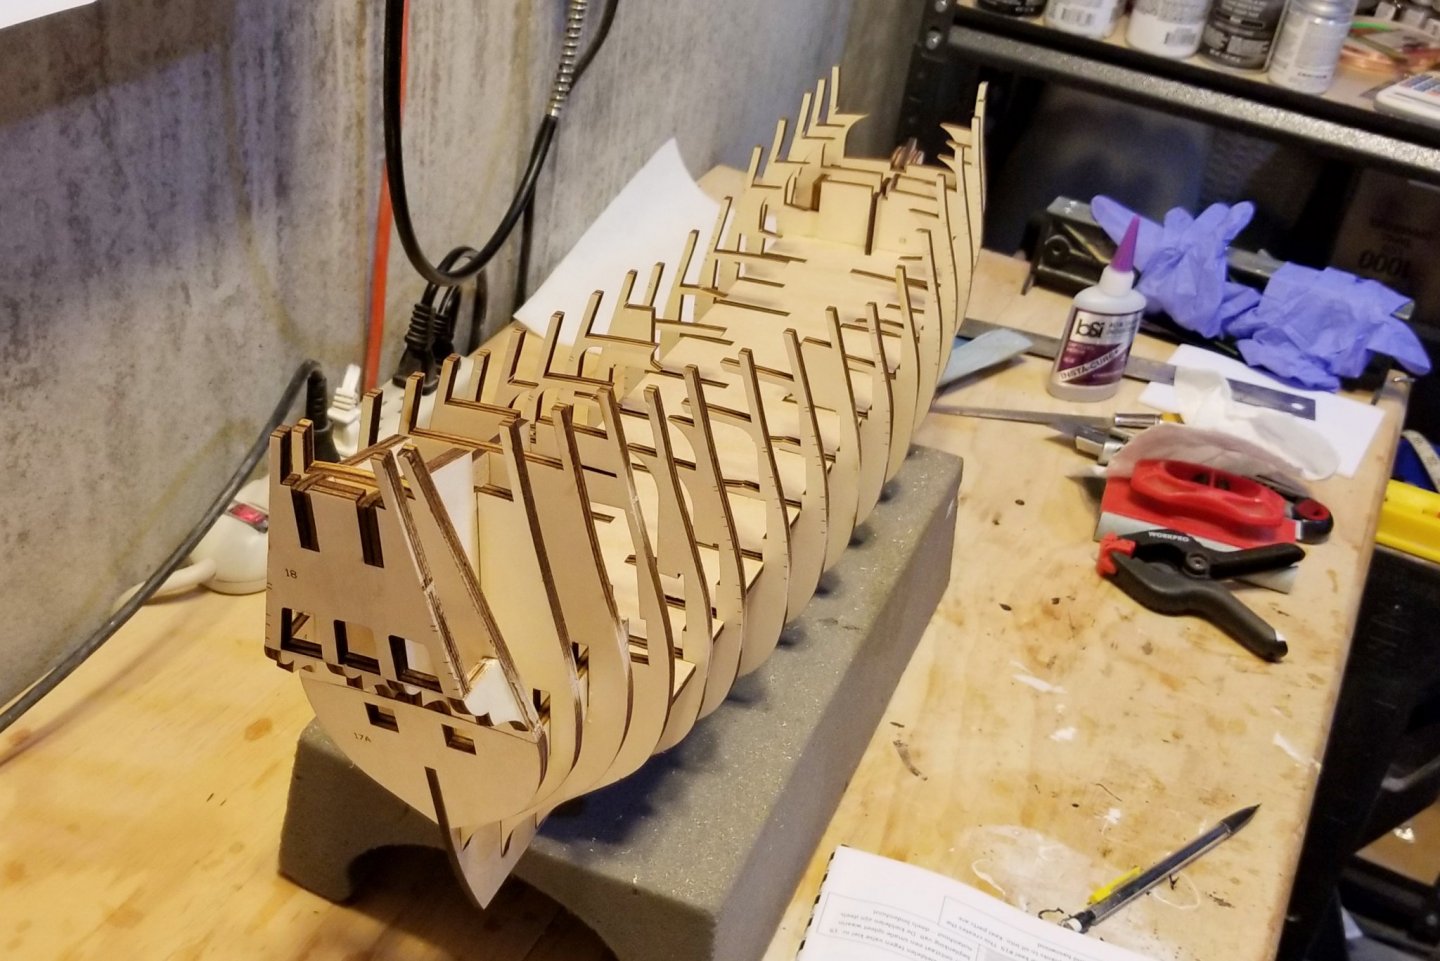
The basic hull structure is complete, although I still need to do: keel parts, sanding frames, balsa blocks, and reinforcing rib replacement. I built this by dry-fitting everything you see in the pictures before gluing anything, which was important as there were a couple of tight deck slots that needed to be opened, and the alignment of the stern parts depends on having them all installed. Then I glued from the front back, using CA gel along the joints. Regards, David
- 136 replies
-
- 11
-
-
- kolderstok
- batavia
- (and 1 more)
-
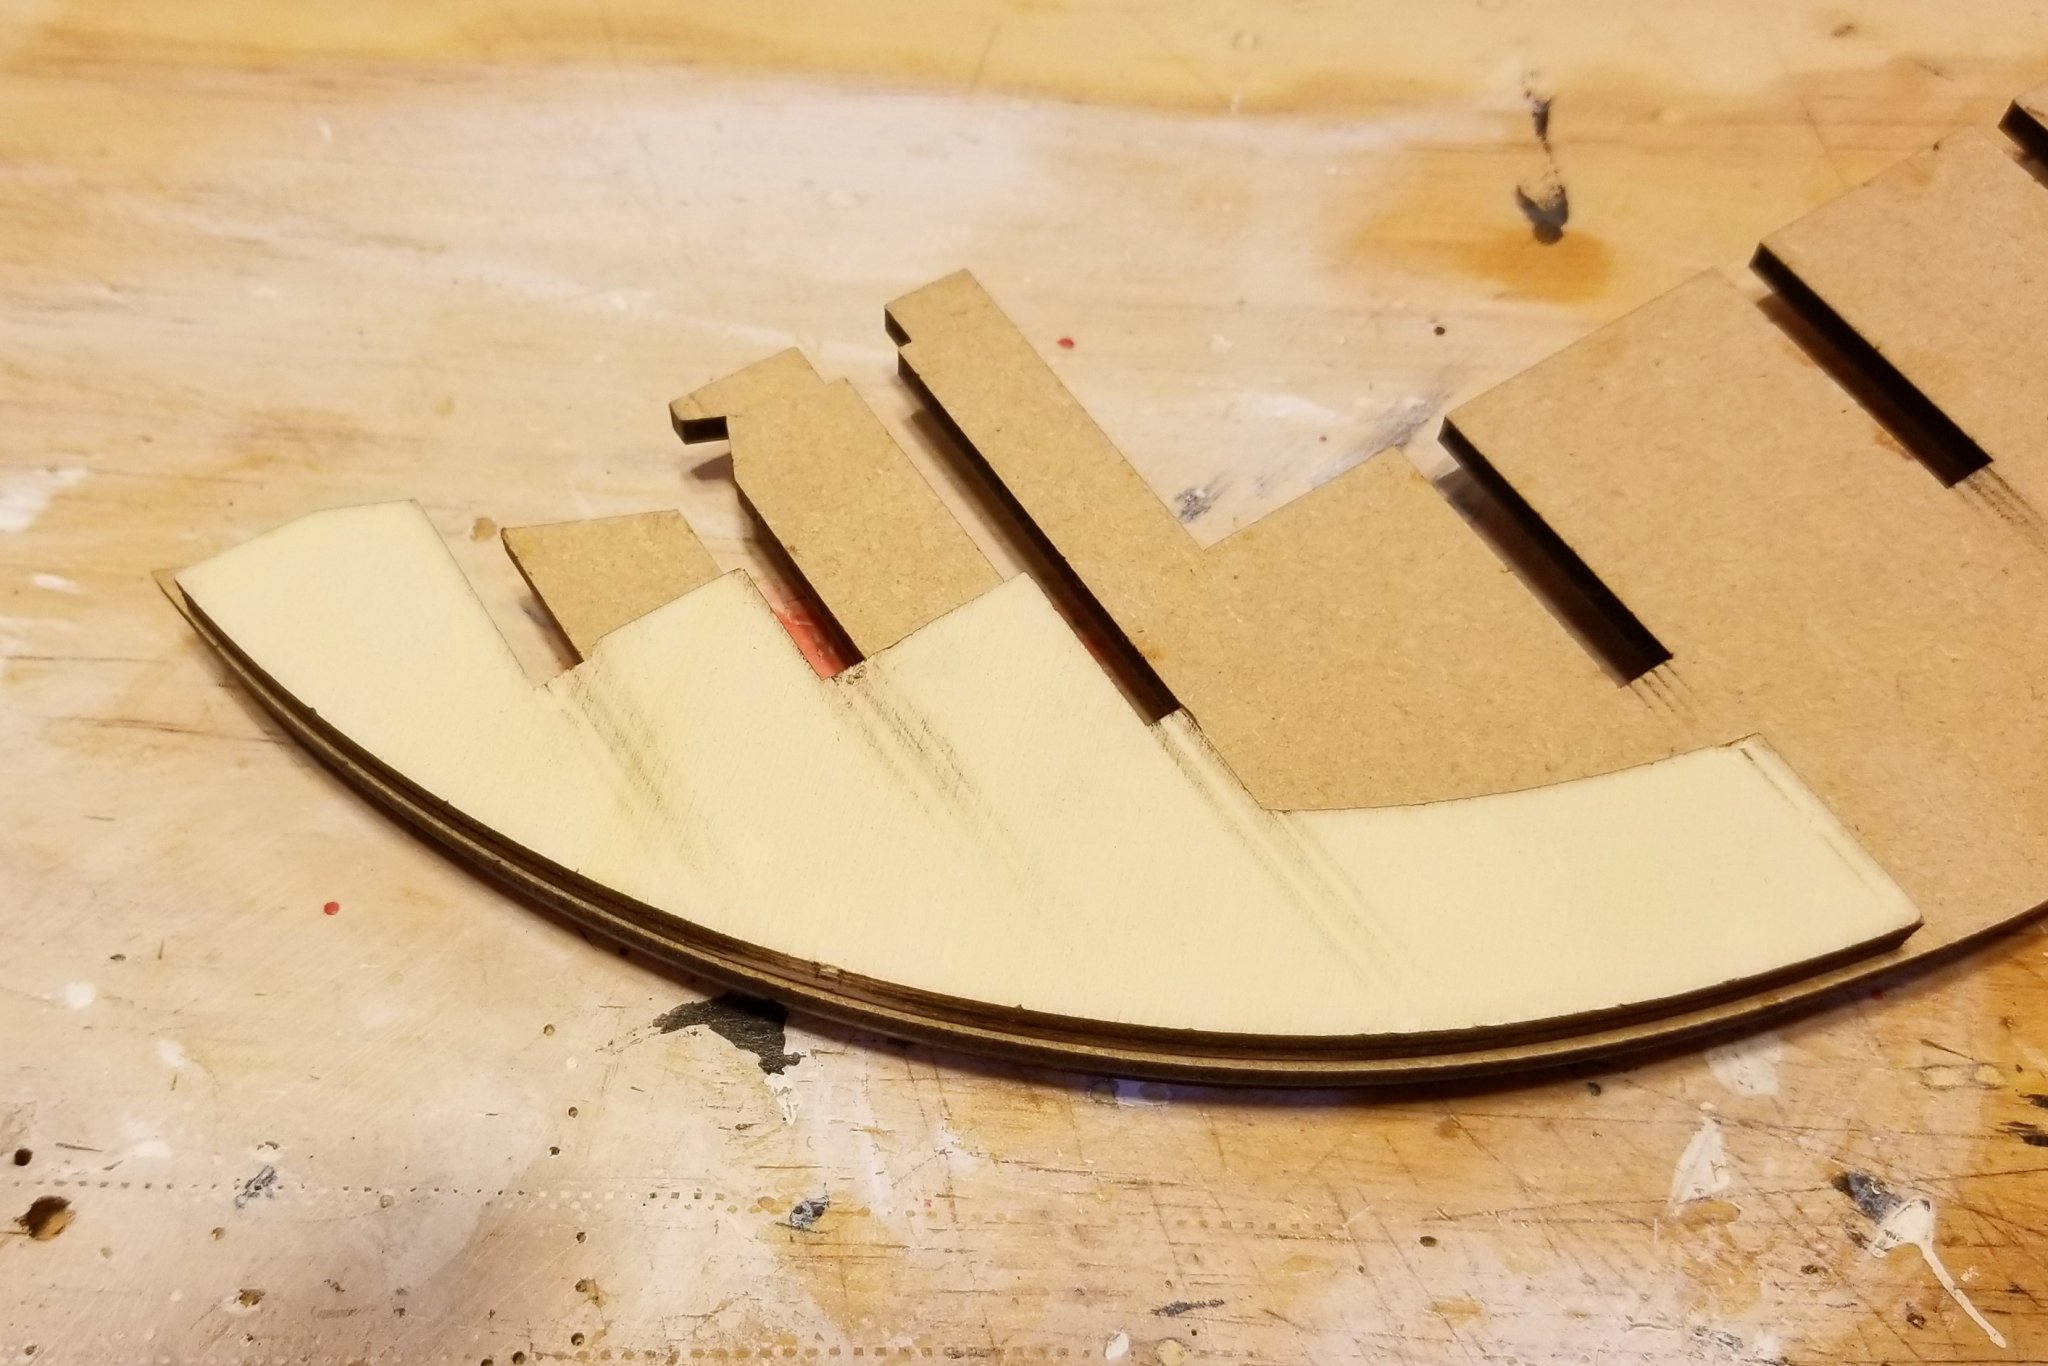
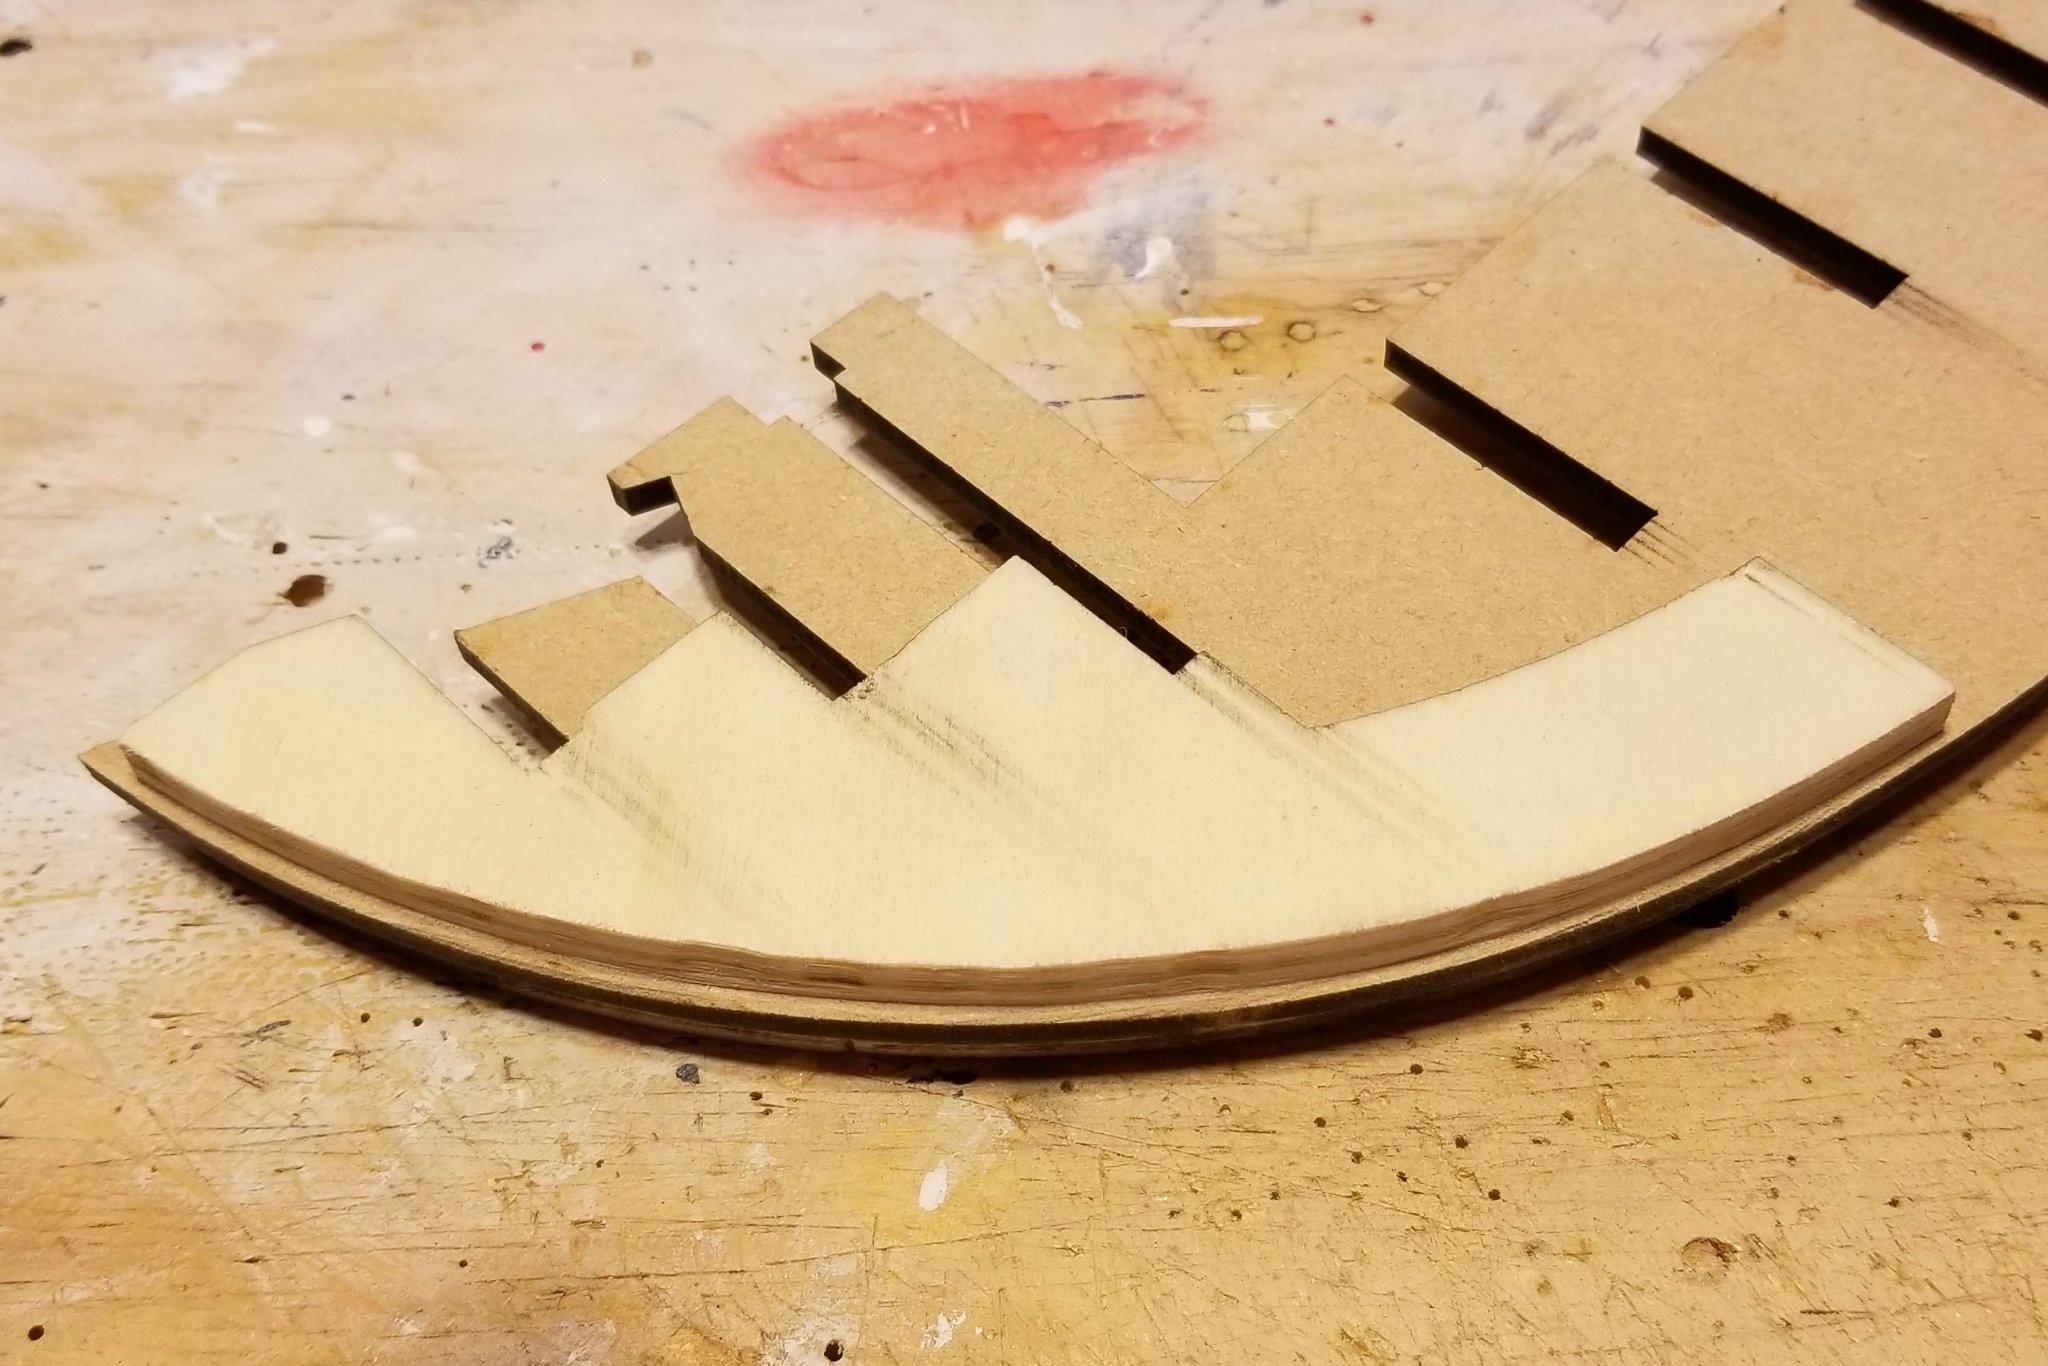
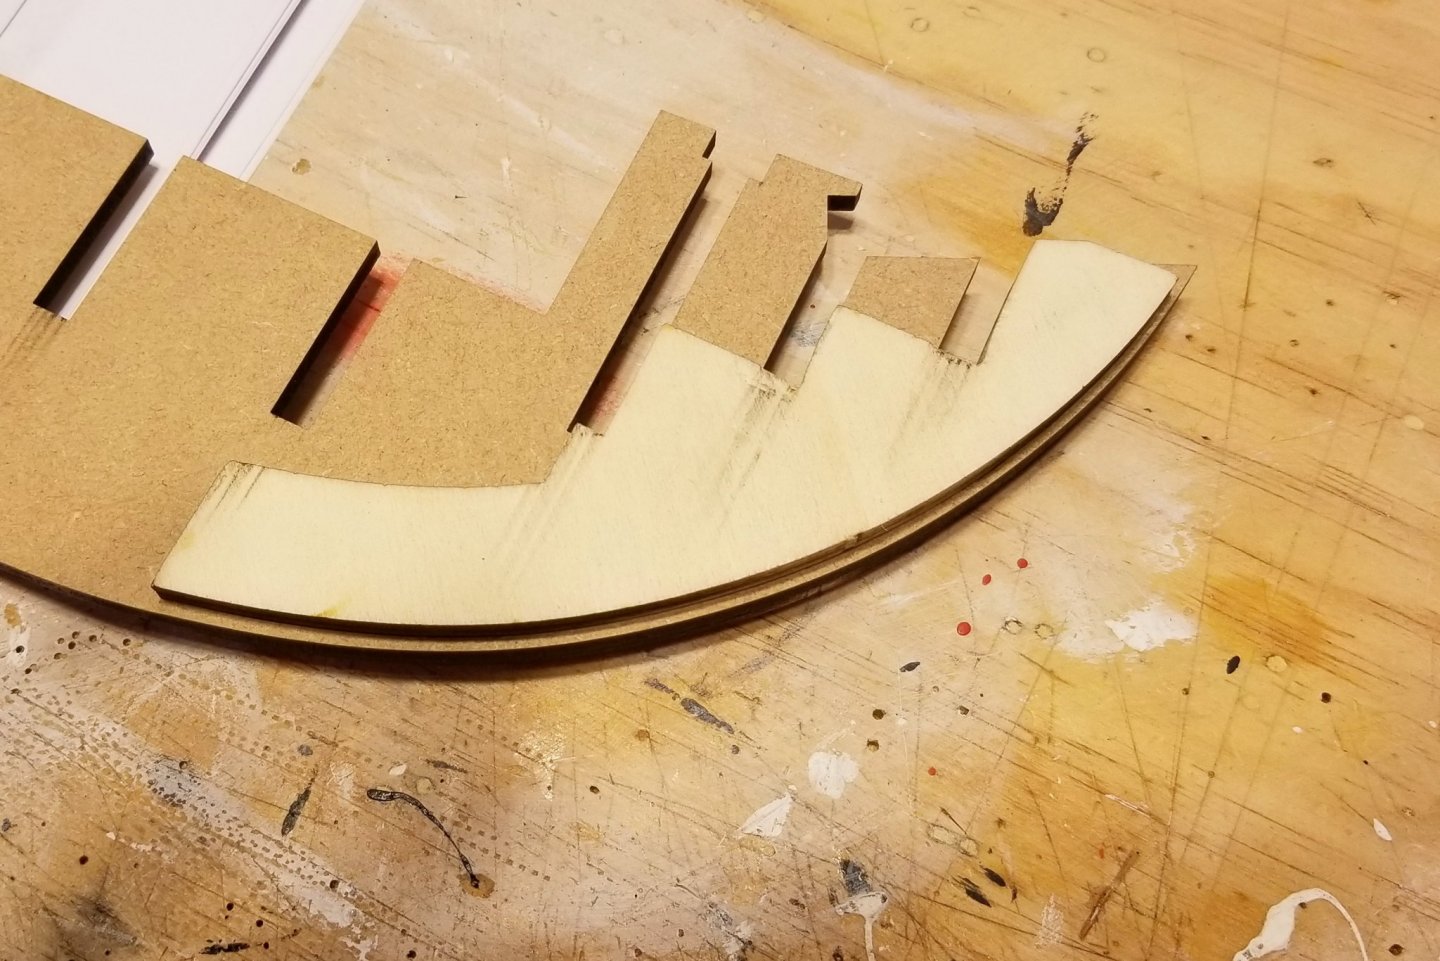
The first step is to add two pieces to the keel at the bow, and the alignment of those is very tricky. It wasn't until after I had mounted them that I looked ahead and realized that there needed to be a constant gap of 1.5-2.0mm where the bow curves. This is to provide a slot for the frames once a slightly wider keel piece is installed. On the starboard one (Bow Piece 1), I got the gap right (more or less by accident) but had to do some filing to get the slots perfectly aligned, although I thought I had accomplished that when I mounted it. Then on the port one (Bow Piece 2), I got the slots aligned but the gap along the curve disappears at the top. So after studying the fit of the slightly wider keel pieces, I sanded and filed it down to create the right gap (Bow Piece 3). I mention all this because that sanding/filing operation has to be done, if needed, before the frames are mounted. I have also started dry-fitting the frames and they are made of very nice plywood, and fit perfectly. Regards, David


- 136 replies
-
- 9
-
-
- kolderstok
- batavia
- (and 1 more)
-
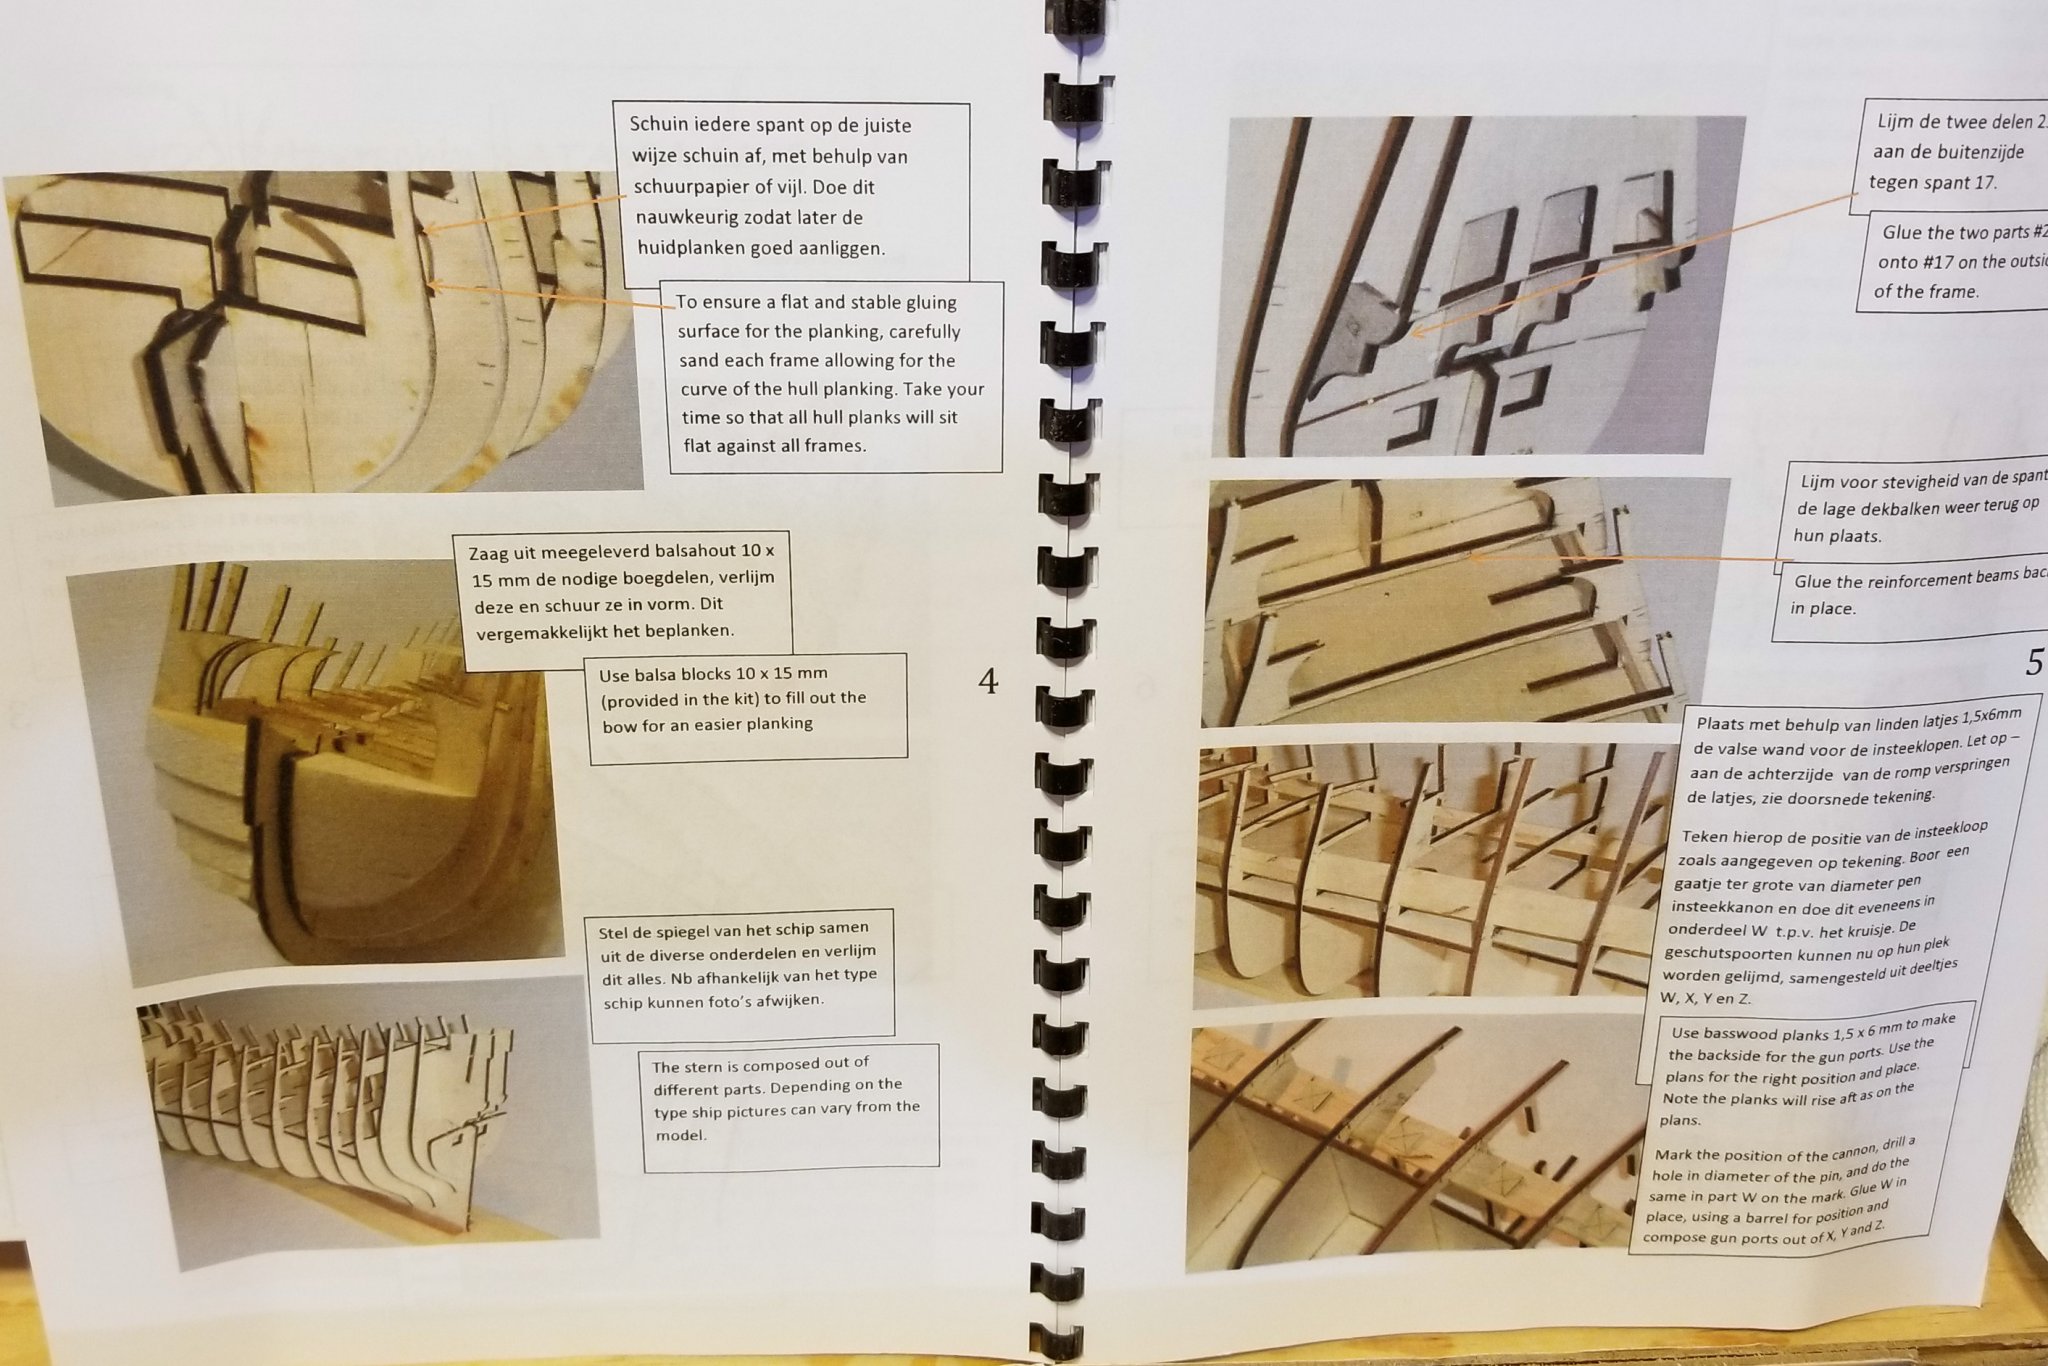
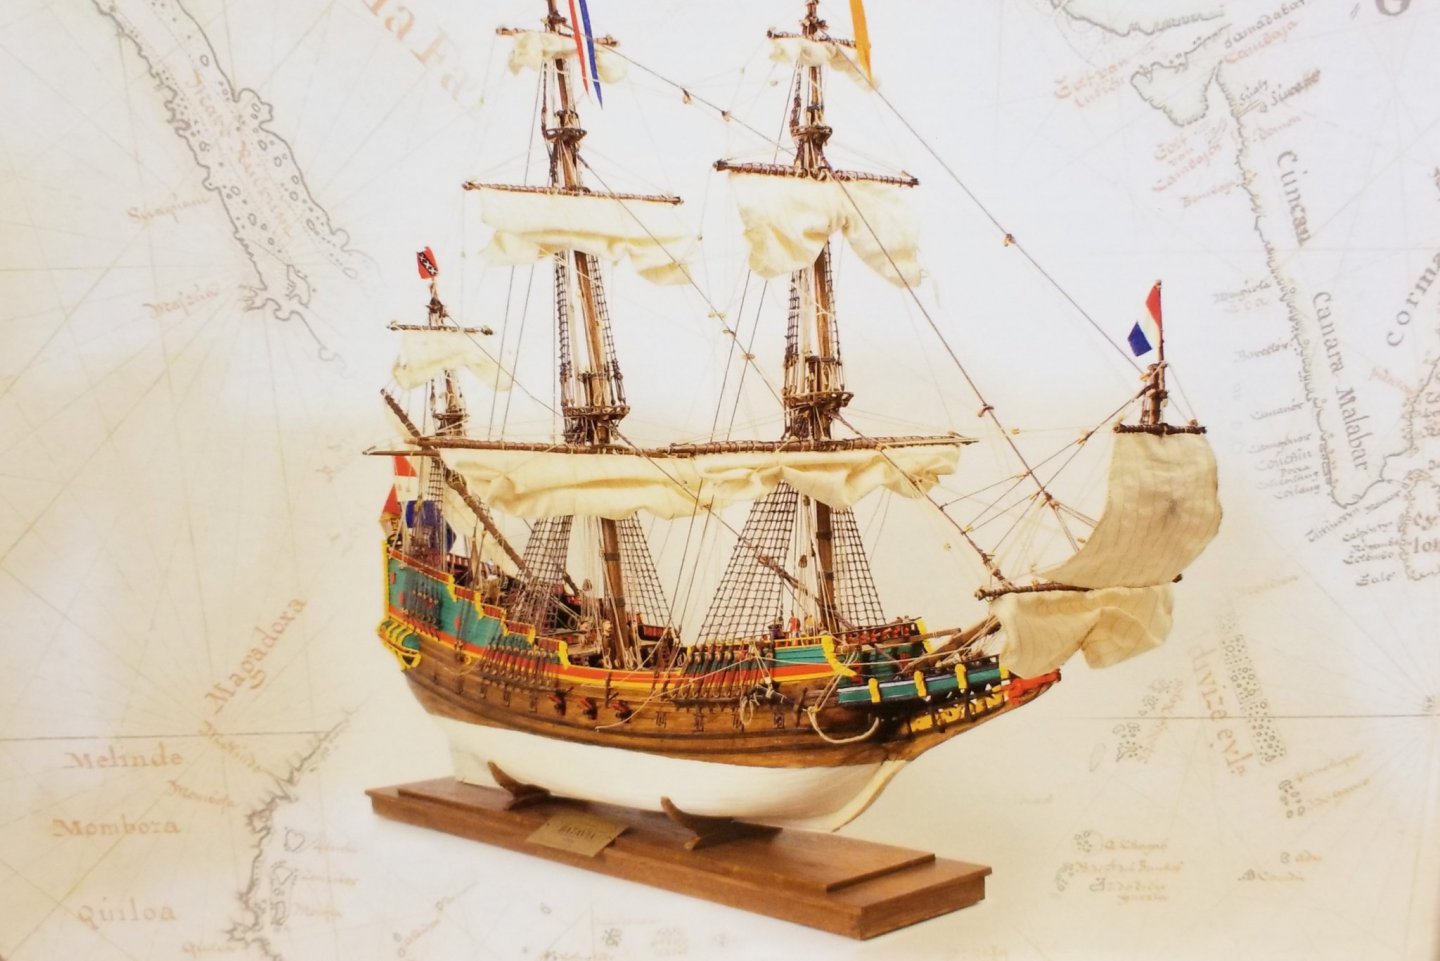
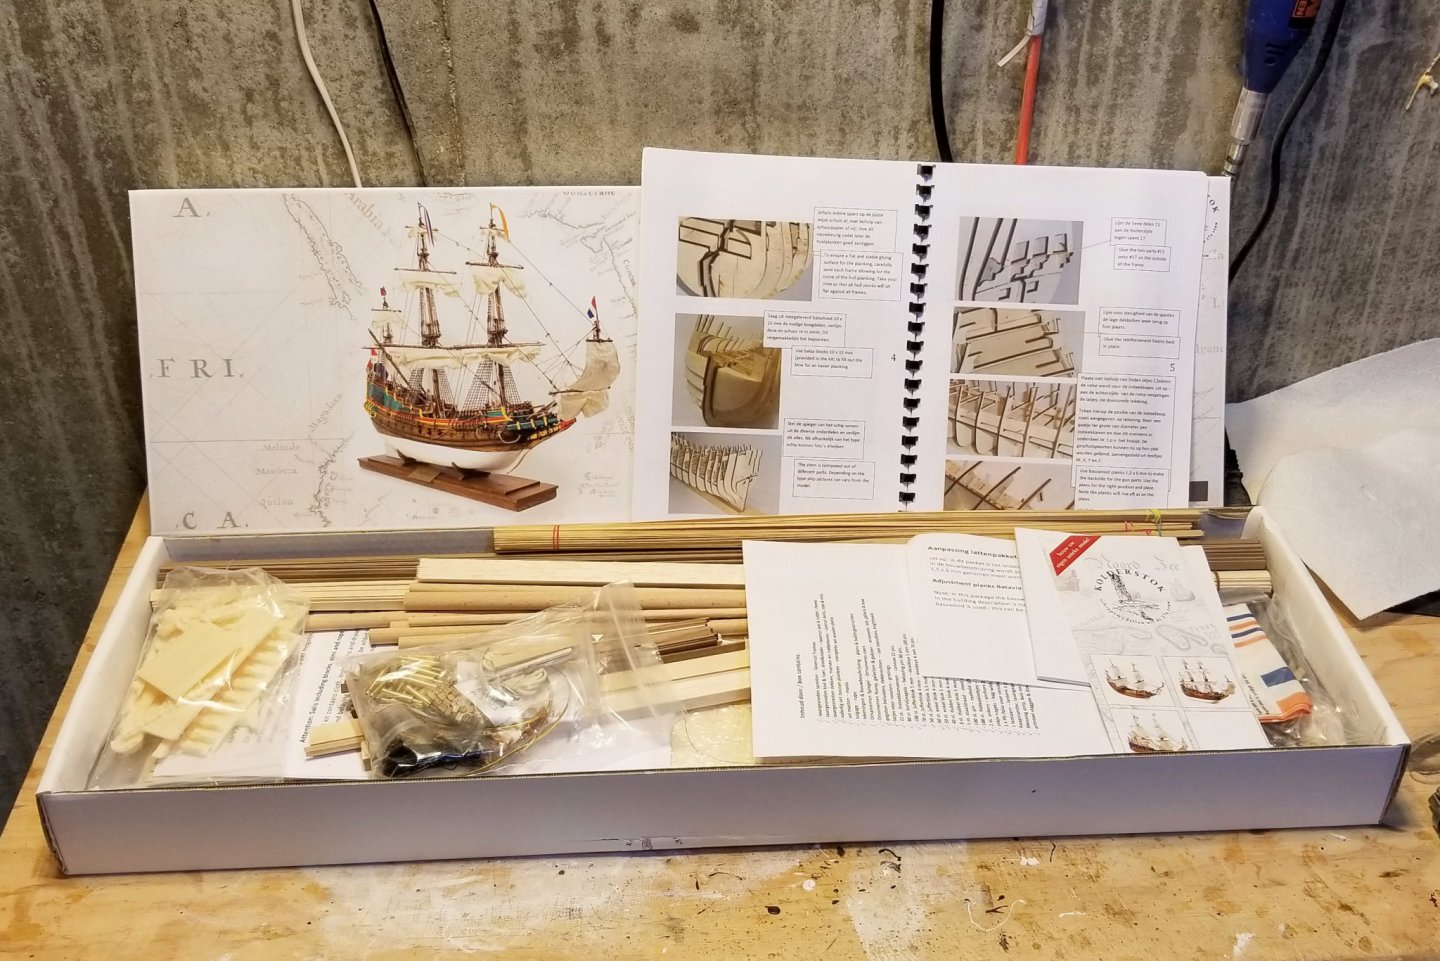
I'm going to start on the Batavia by Kolderstok. I was attracted to this model because of the colors (see Pic #1), and also because I wanted to try out a Kolderstok model. What's in the box: Laser cut boards Lots of wood Parts Instruction manual and plan sheets Note the manual -- I really like manuals with accompanying pictures. There's also an interesting parts bag with white resin-like parts. I haven't seen this before. Either it's injection molded, or possibly done on a 3D printer, which would be a first for me. I ordered this model directly from Kolderstok (http://www.kolderstok-models.com/index.en.html), and I want to particularly commend the wonderful pre-sale service I received from Hans van Nieuwkoop. I had outstanding communication from him via email, and he offered me several different customization options, one of which (an all-walnut second-planking) I took, because I like the look of all-wood hulls vs. painted hulls. Really excellent service and professional shipping. So here we go on another one. I haven't seen any logs on Batavia, so I hope this one contributes. Regards, David

- 136 replies
-
- 12
-
-
- kolderstok
- batavia
- (and 1 more)
-
Rick: Here's the quotation from Mantua's writeup on the boat: "This is a lovely scale reproduction of an ocean going fishing boat, converted into a pleasure yacht" Regards, David
-
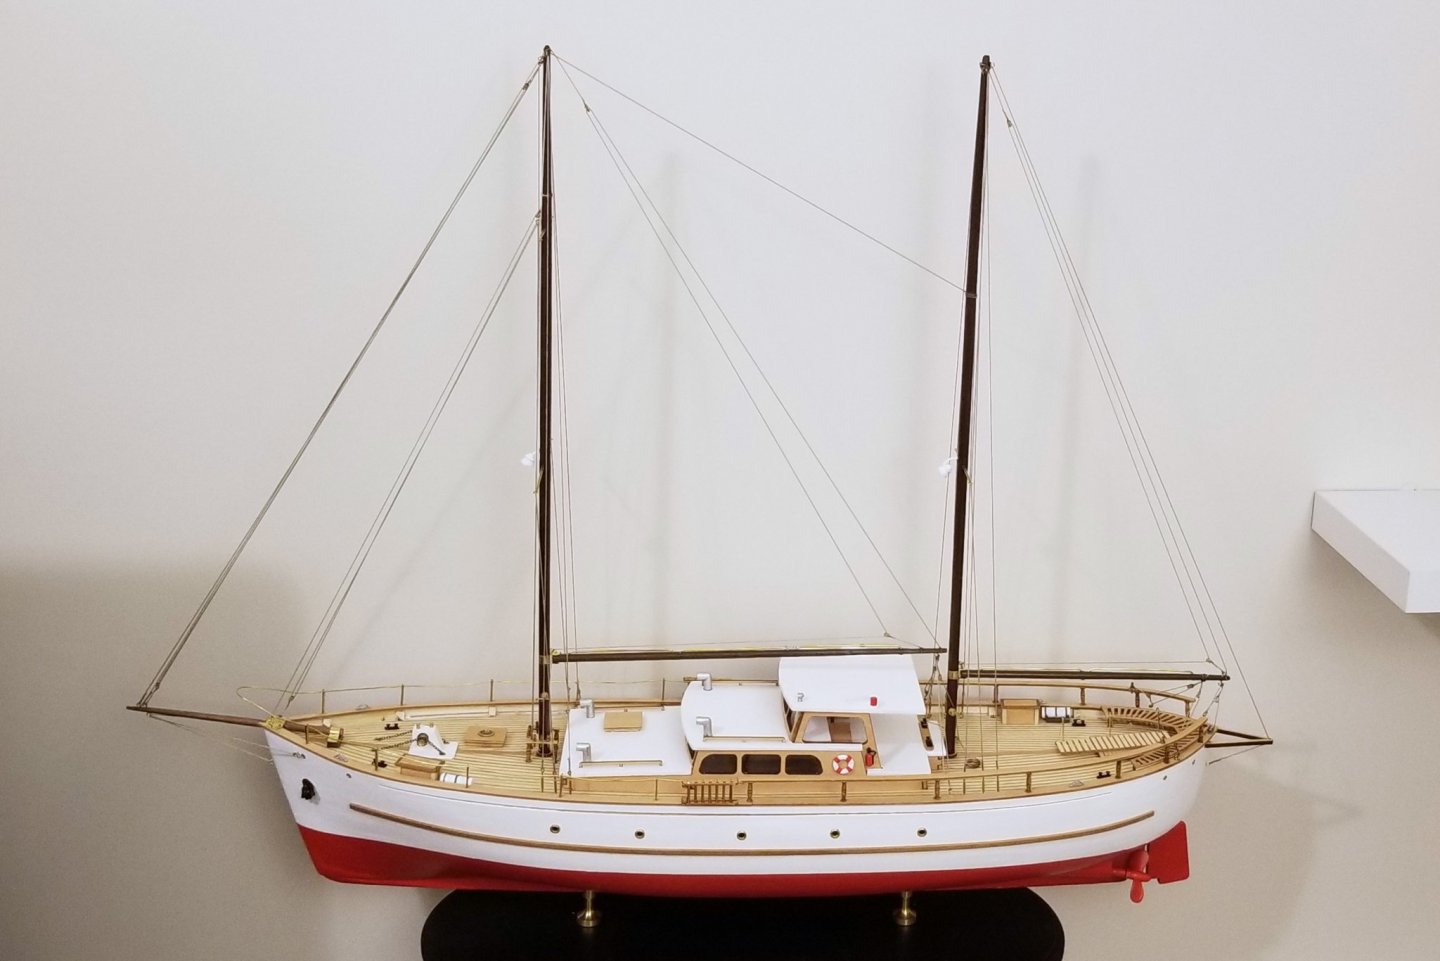
The Bruma is complete. I've posted a set of completion photos in the kit-built ship gallery. This was a relatively easy kit, which was my intention after building the Cutty Sark and laying all of those copper plates! A few comments on the kit: A number of missing small parts, none of them fatal. I was able to go to my spare wood/parts store and improvise. There is one rigging diagram, and while the rigging isn't complex, the diagram is very hard to read. You need to pull all the photos you can find from the internet and use them as a reference to be sure what goes where. Regards, David
- 47 replies
-
- 10
-
-
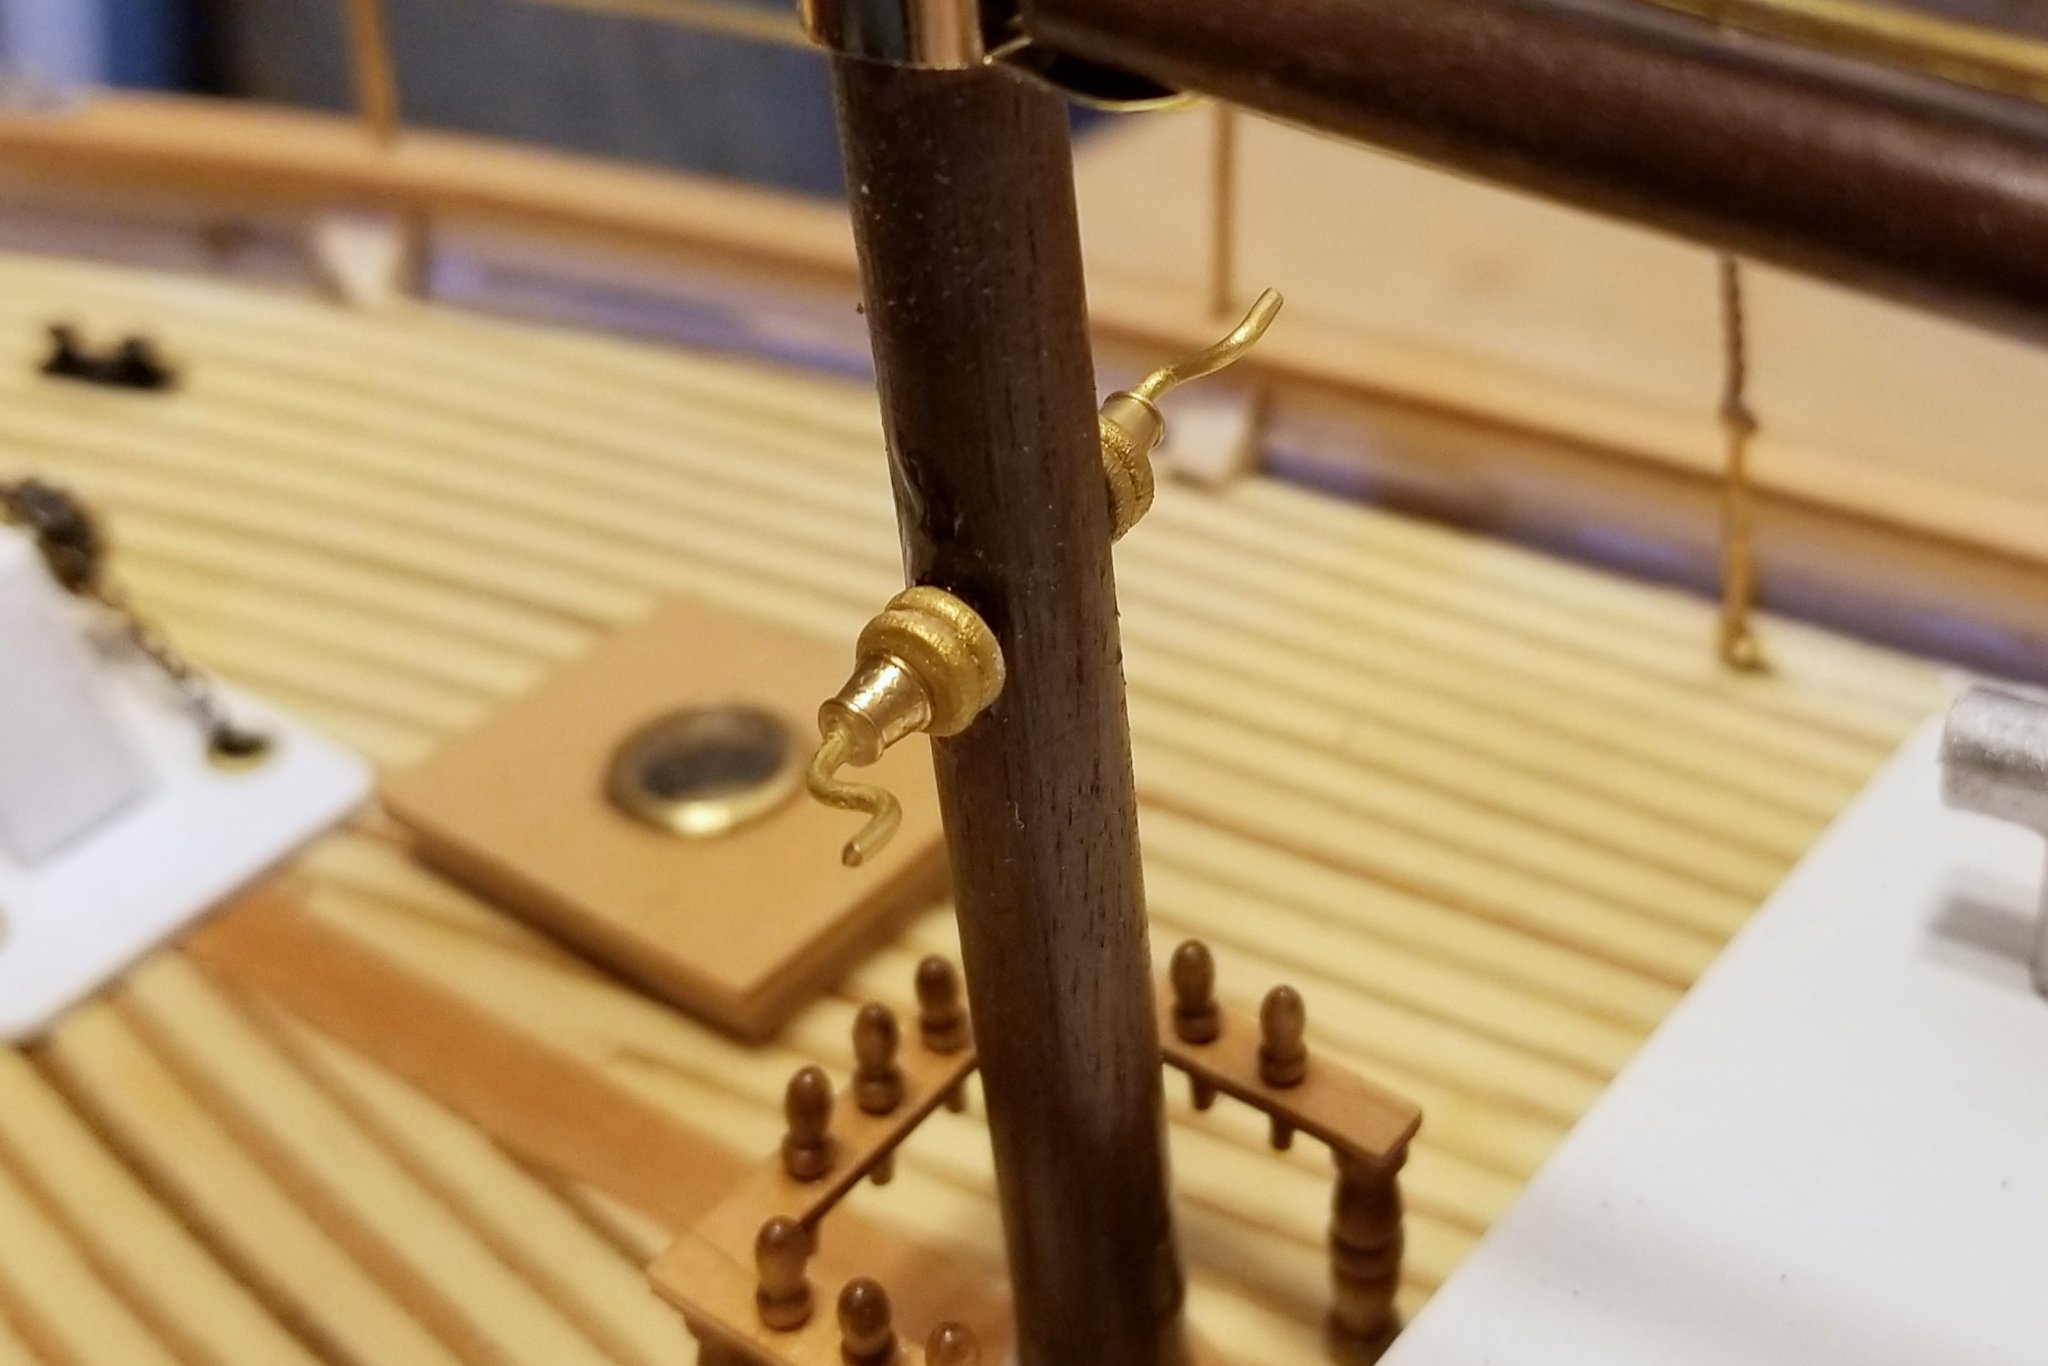
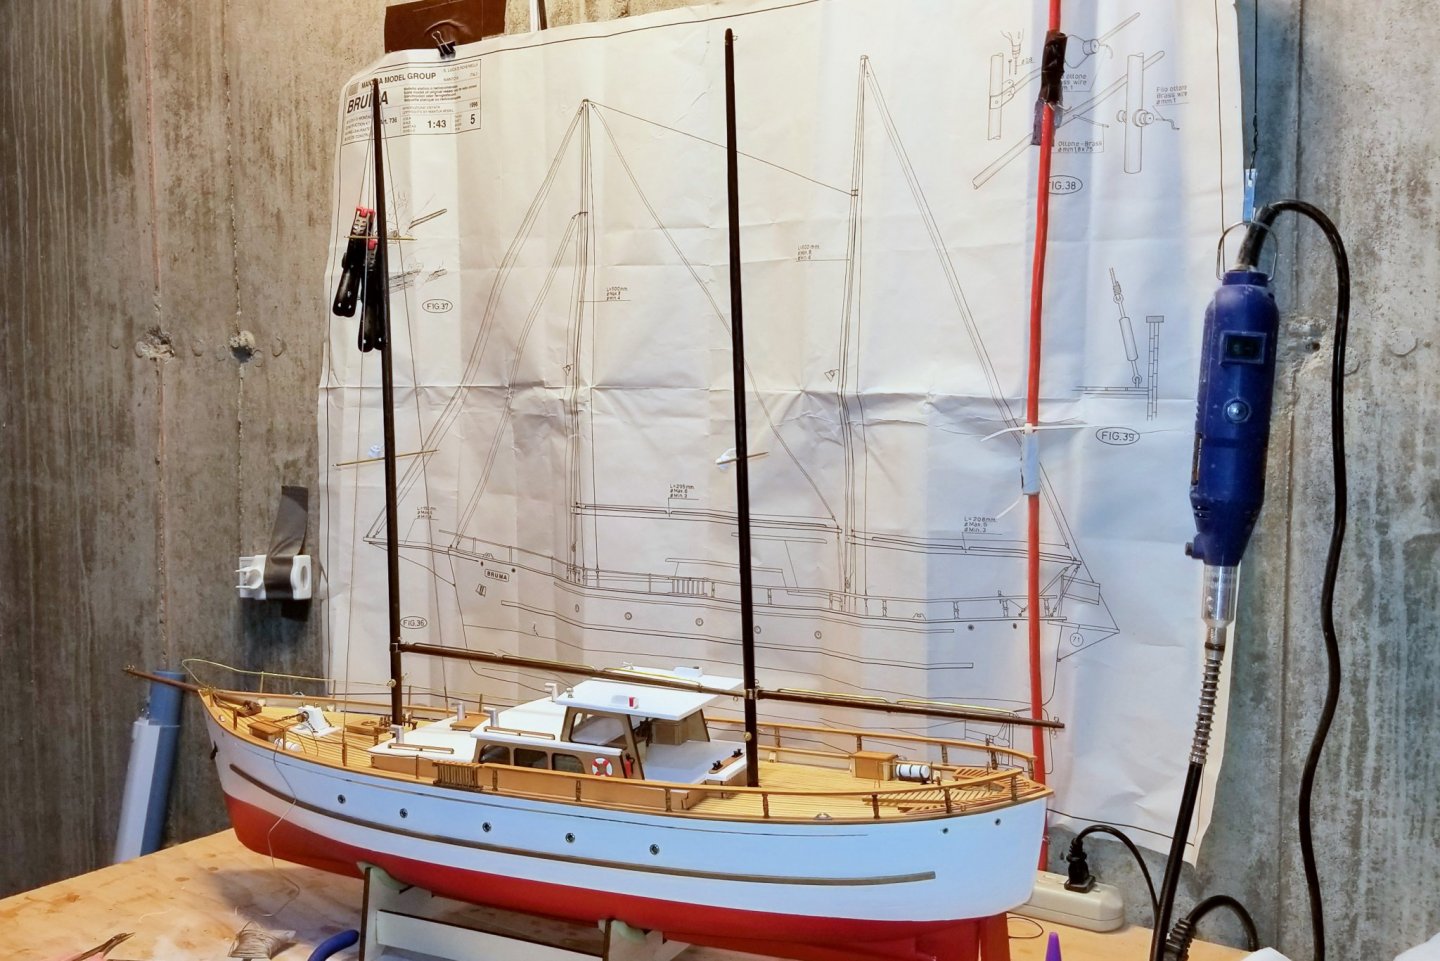
Masts, booms and bowsprit are shaped and mounted, and I'm now starting on the rigging. One of the detail drawings indicates that brass winches were supplied, but I can't find them anywhere, so I made them from my spare parts stock using deadeyes, filled with wood filler and painted gold, some brass parts that I think were supposed to be deck buckets, and wire. Regards, David

-
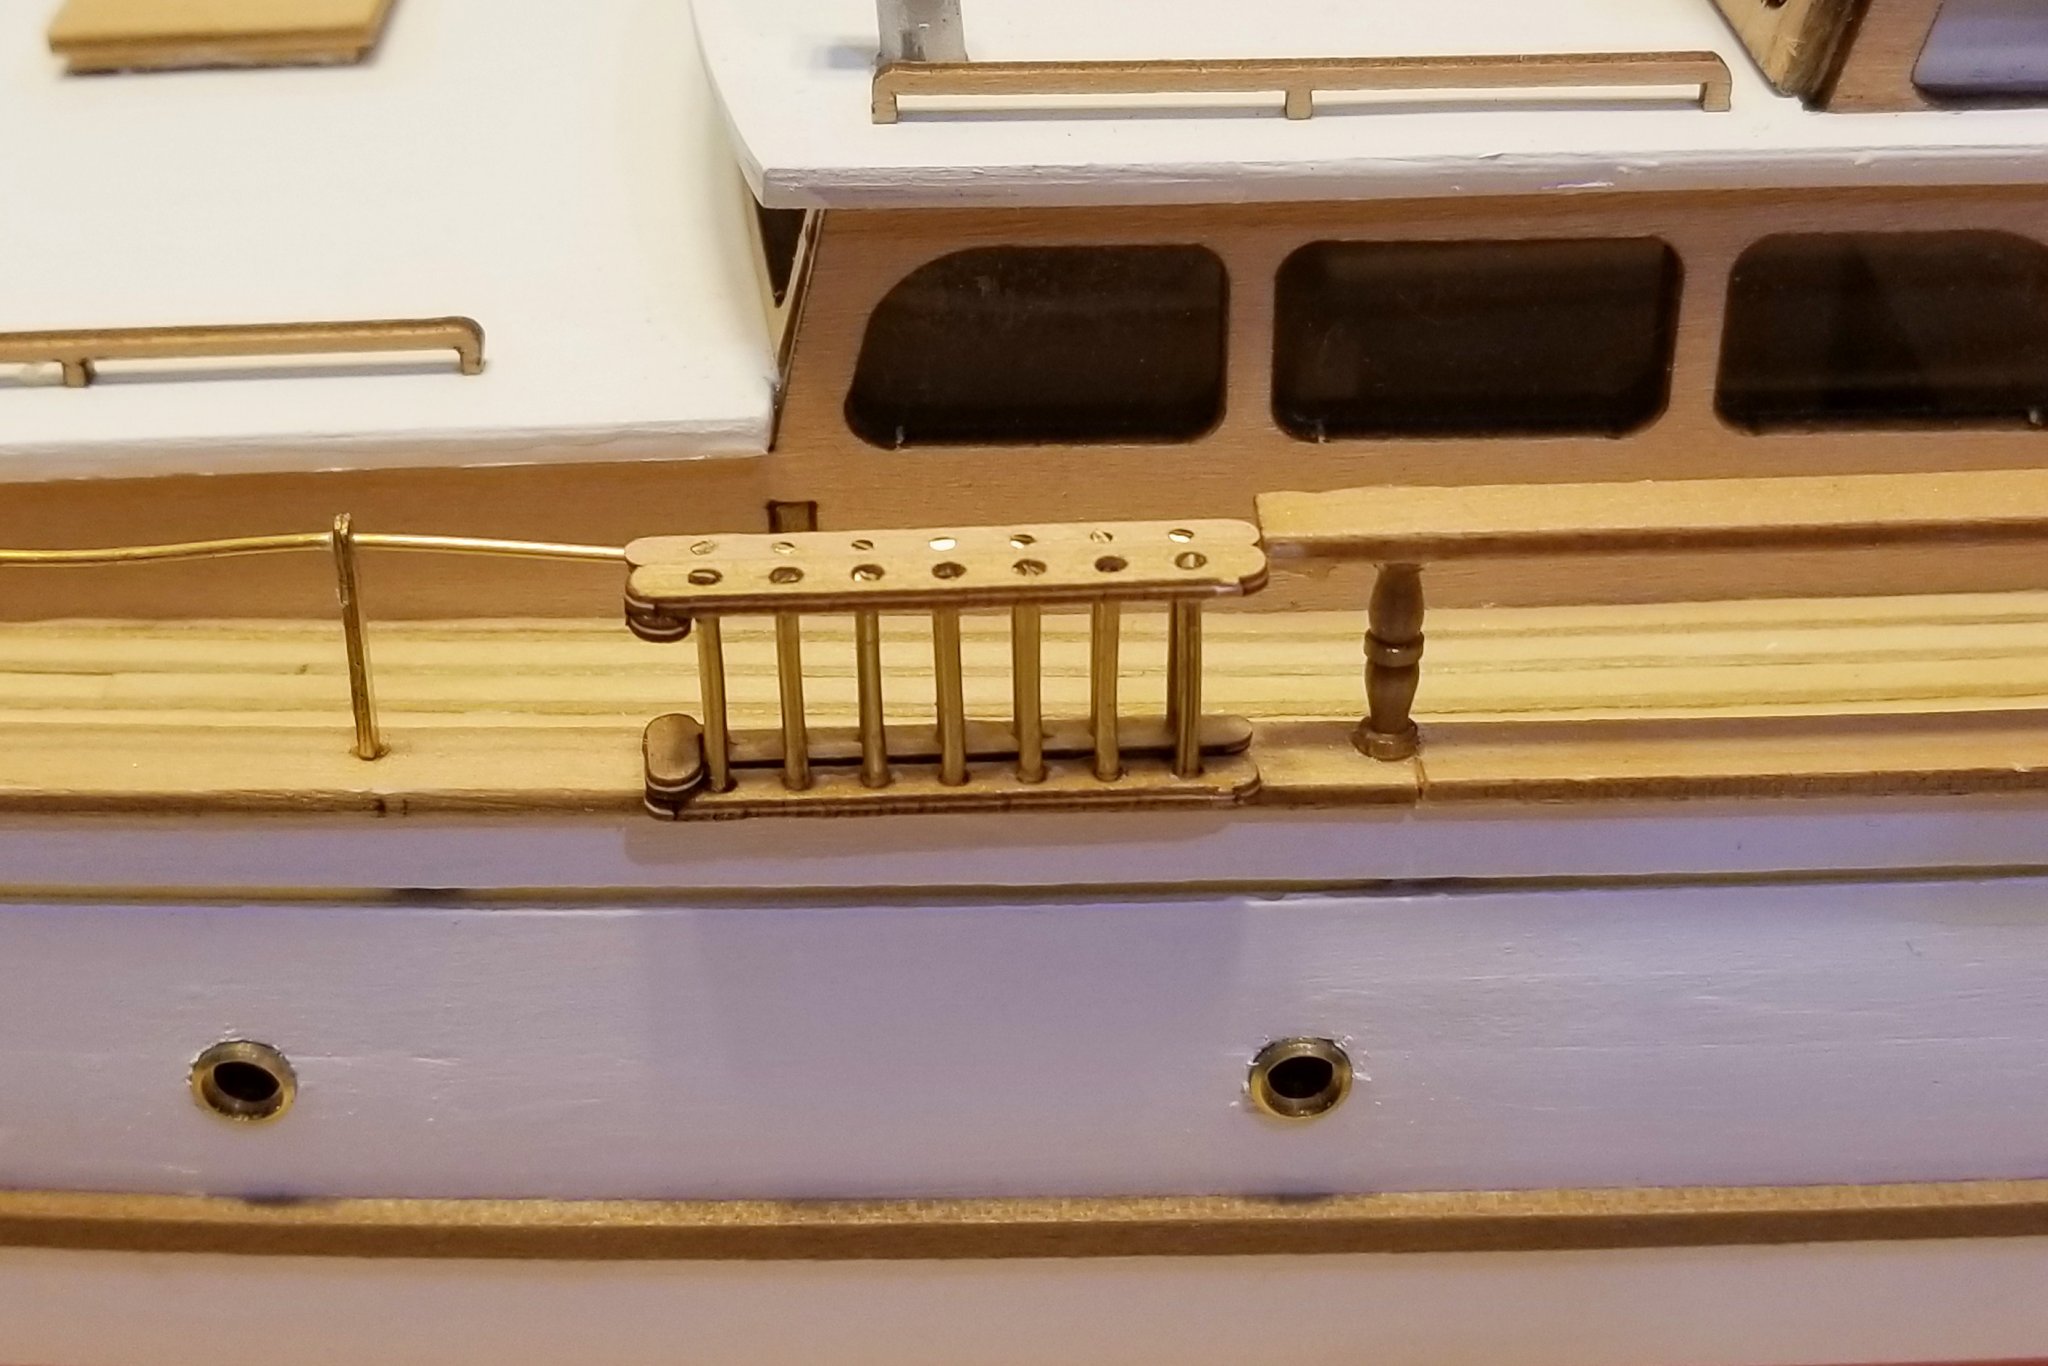
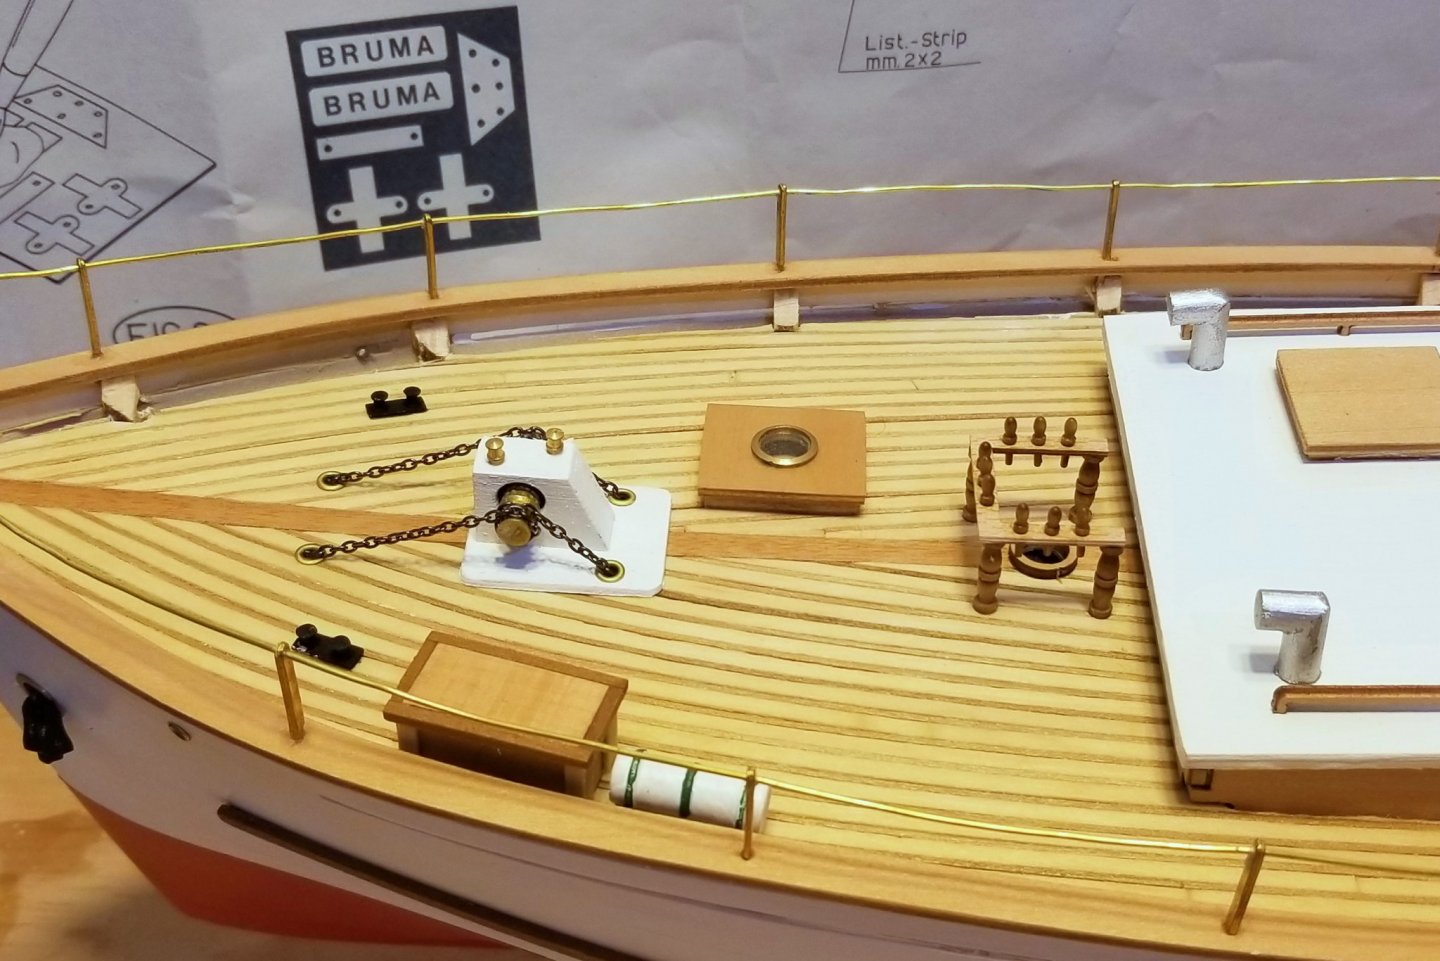
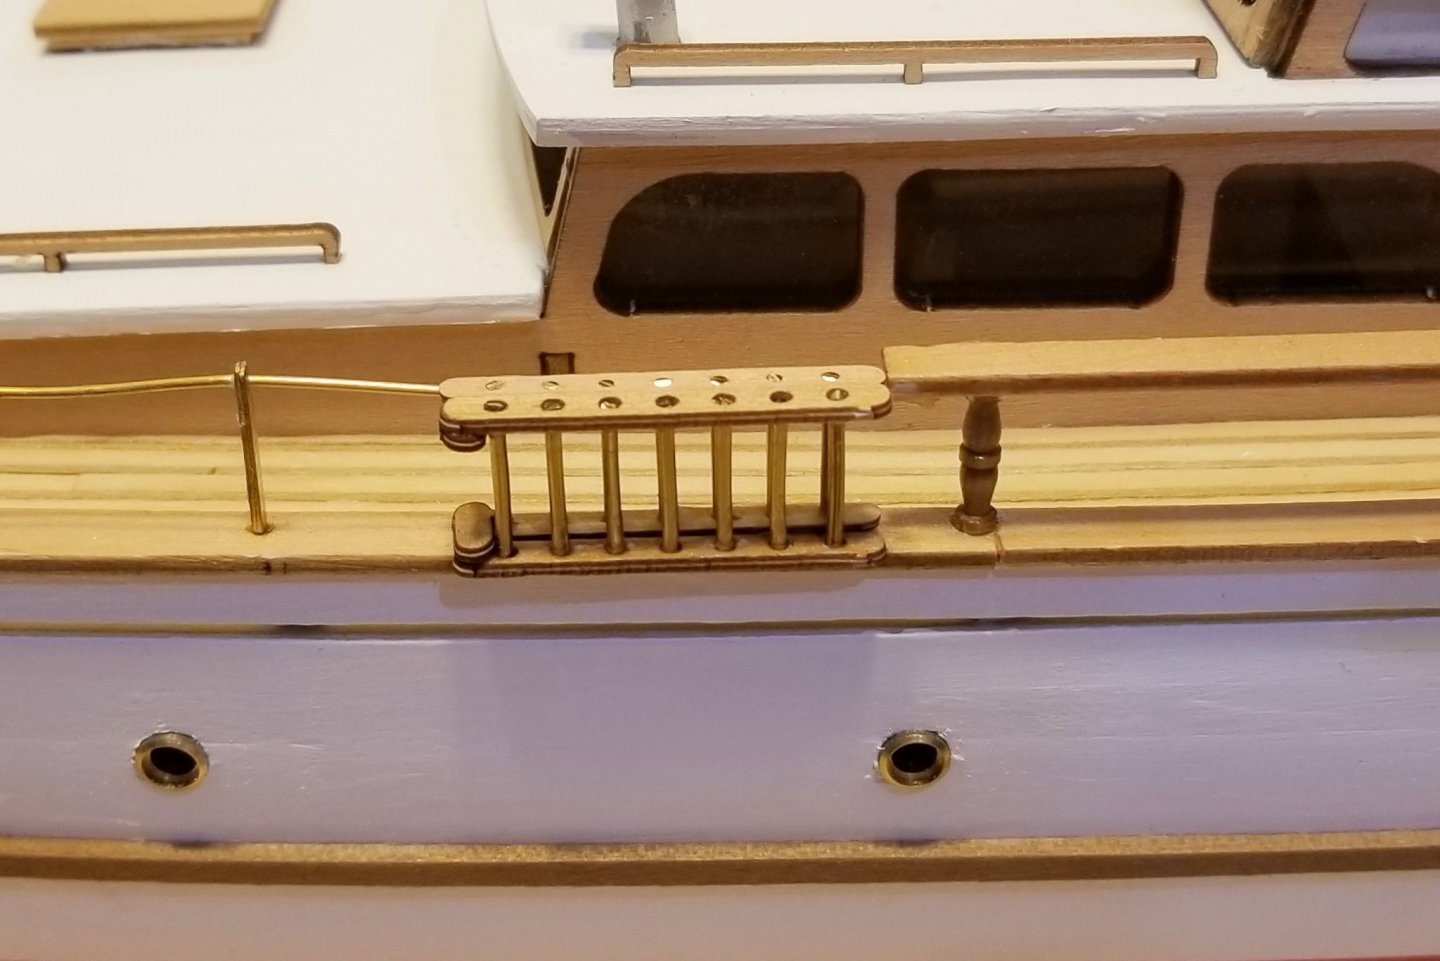
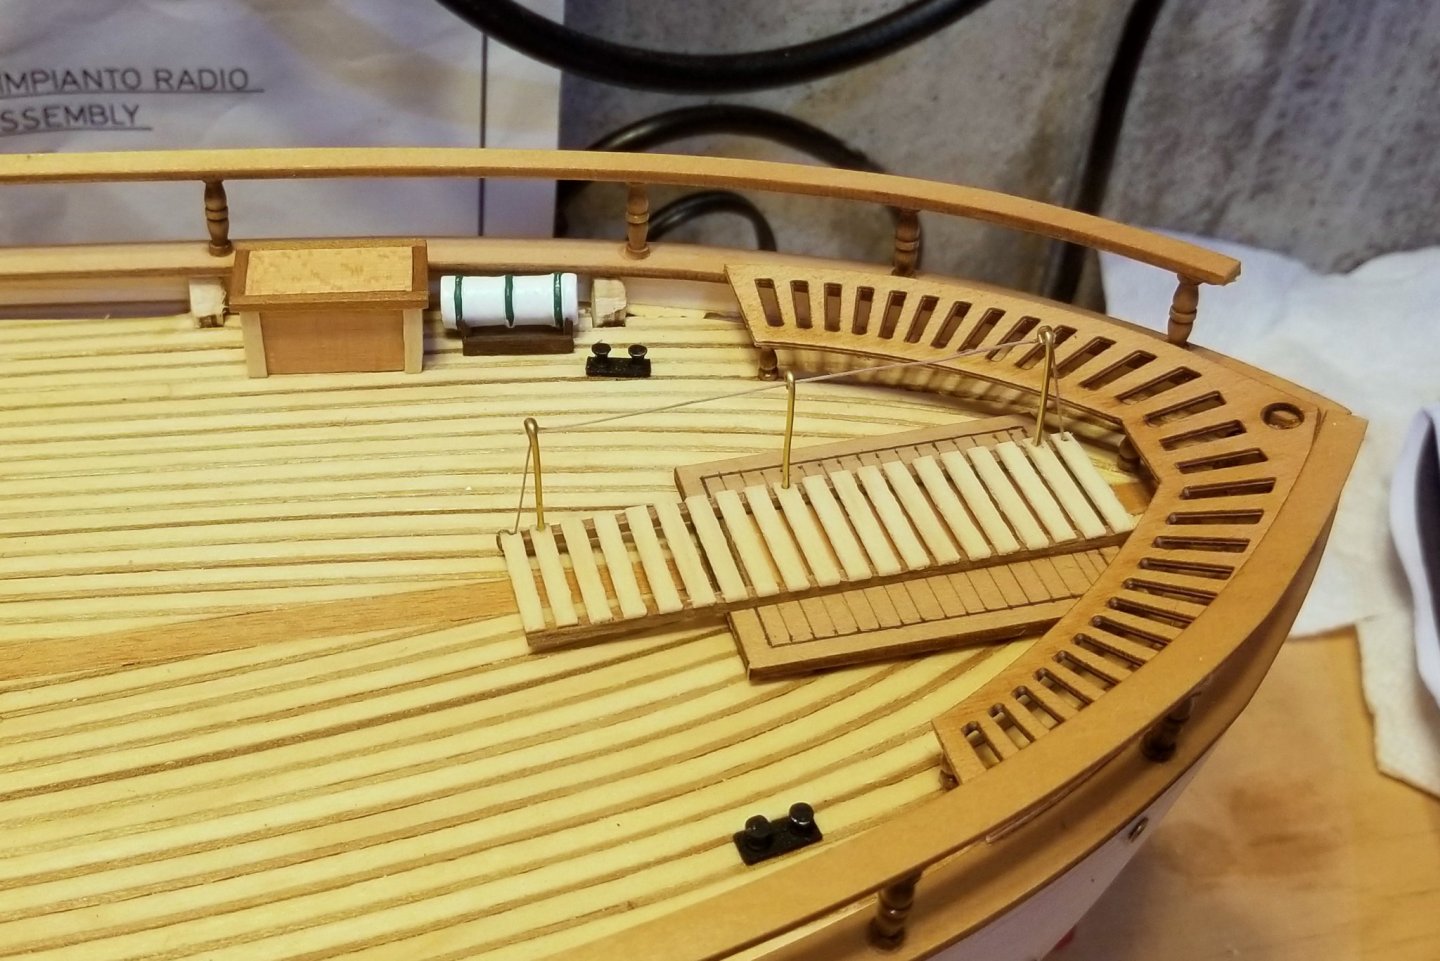
All of the deck detail is now complete. Pictures show bow area with capstan, life preserver containers, small tables, hatch covers, ladder, boarding walkway and stern seat. That's it for the hull -- now on to the masts and rigging. Regards, David
-
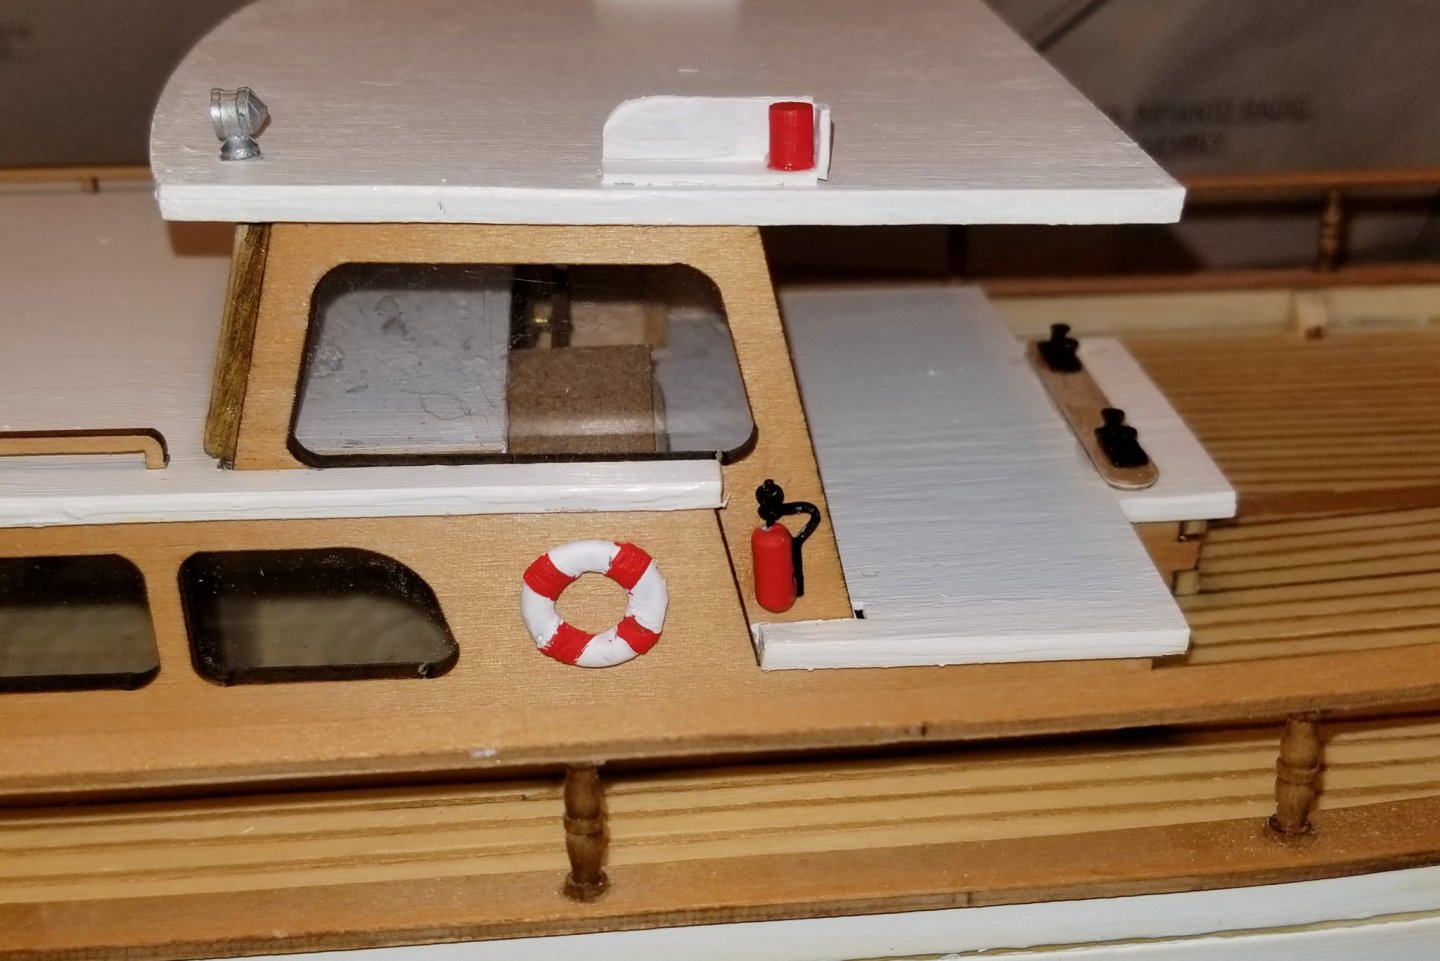
Back to work on the Bruma after a couple of weeks in Florida. Finished the cabin exterior details including handrails, vents, horn and light, and fire extinguishers and life rings. Tricky paint work on the extinguishers. Regards, David

-
John -- Yes, it does angle back just a bit. Just the way it came out when I drilled the hole for the mounting. Regards, David
-
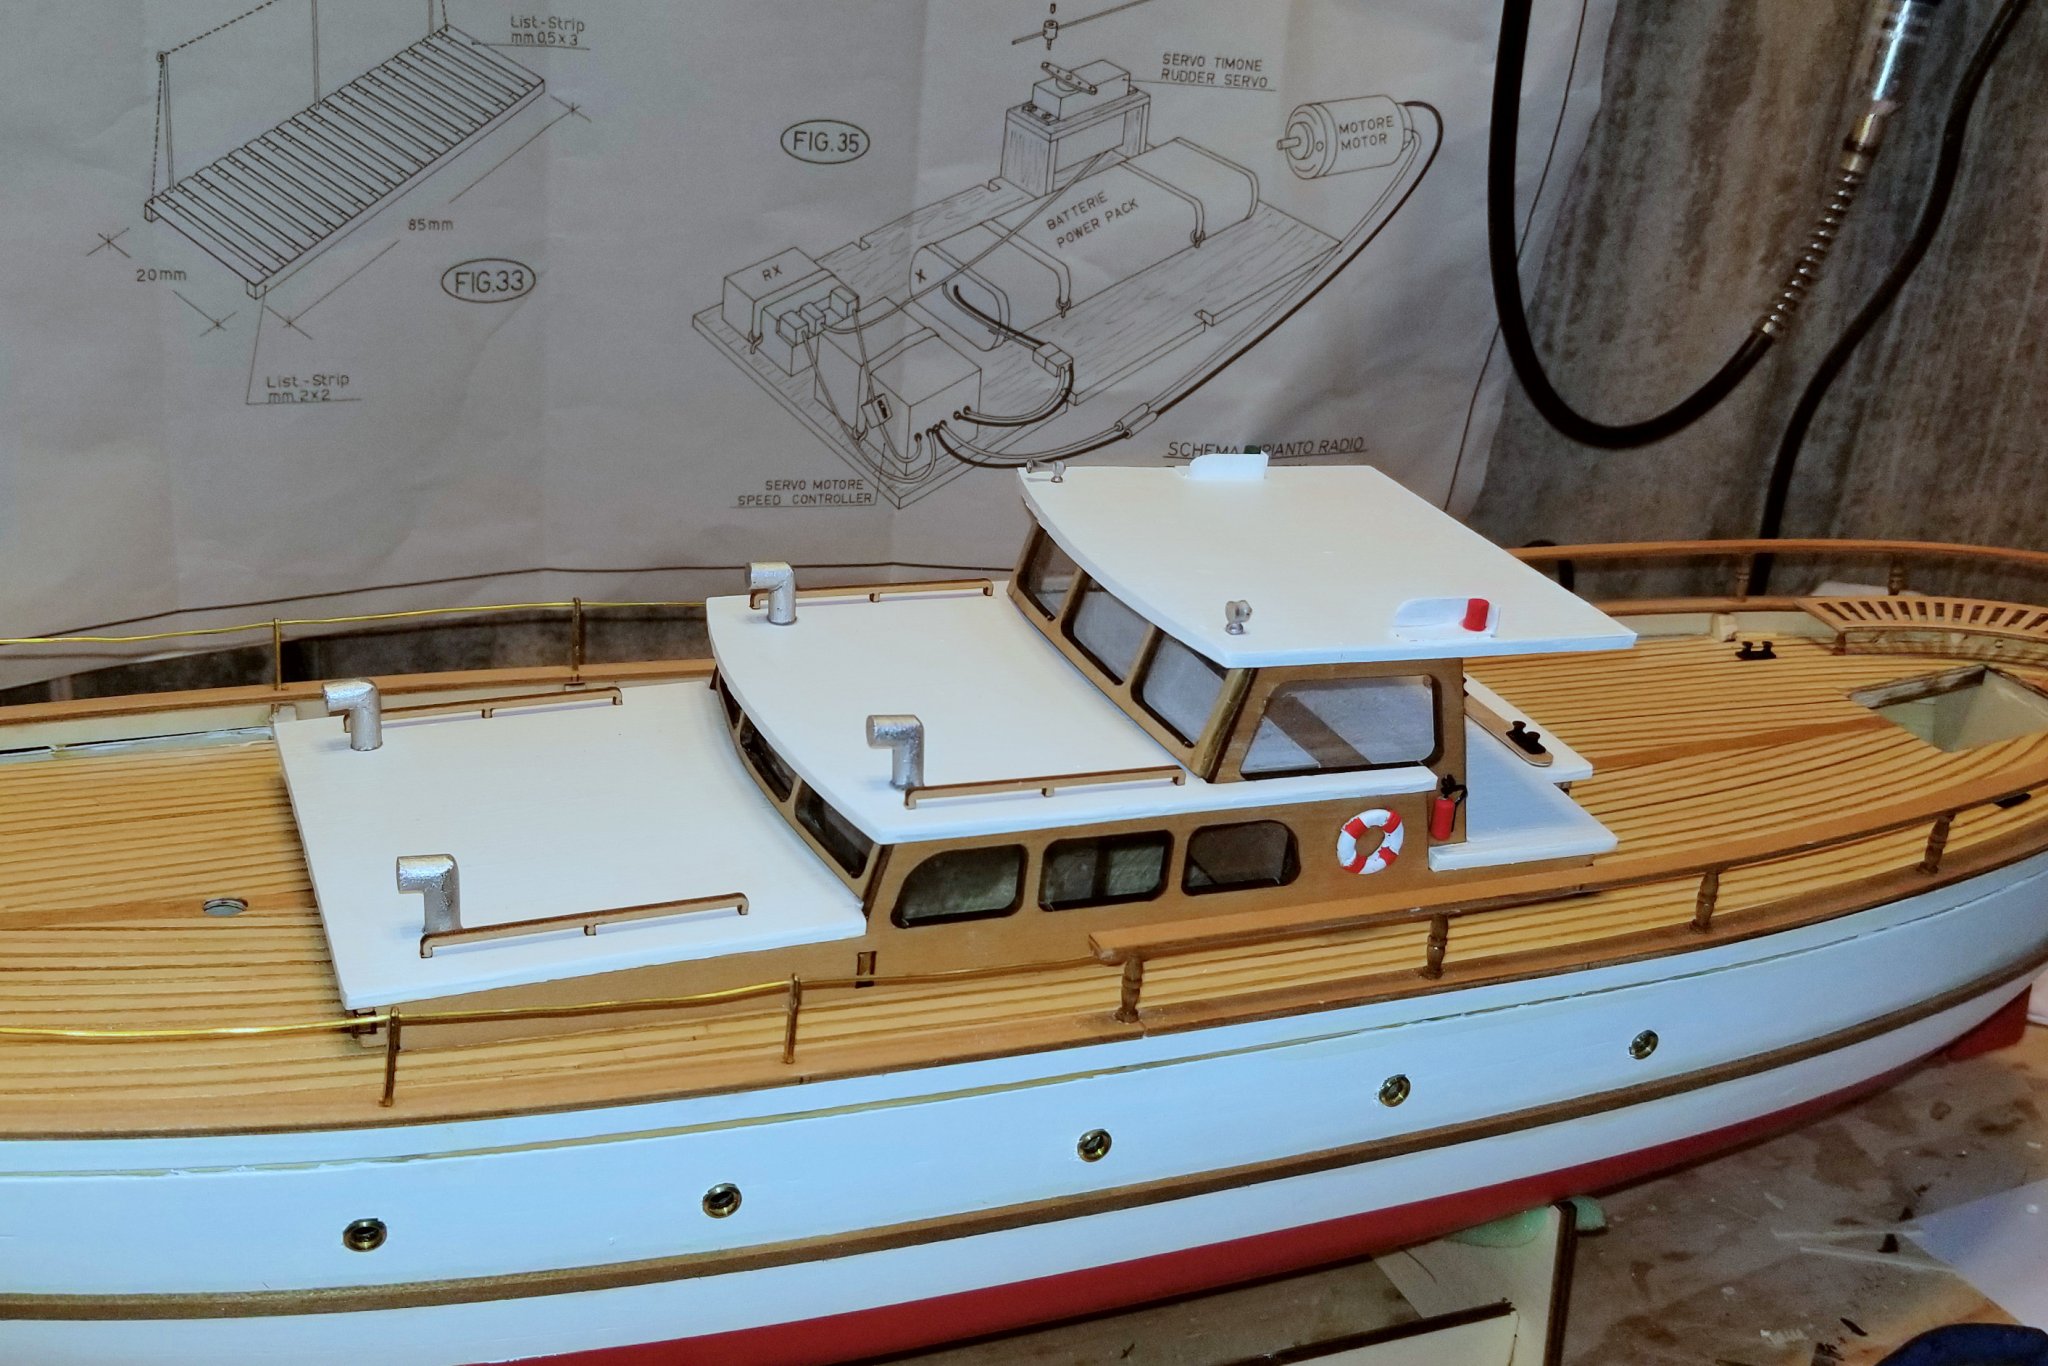
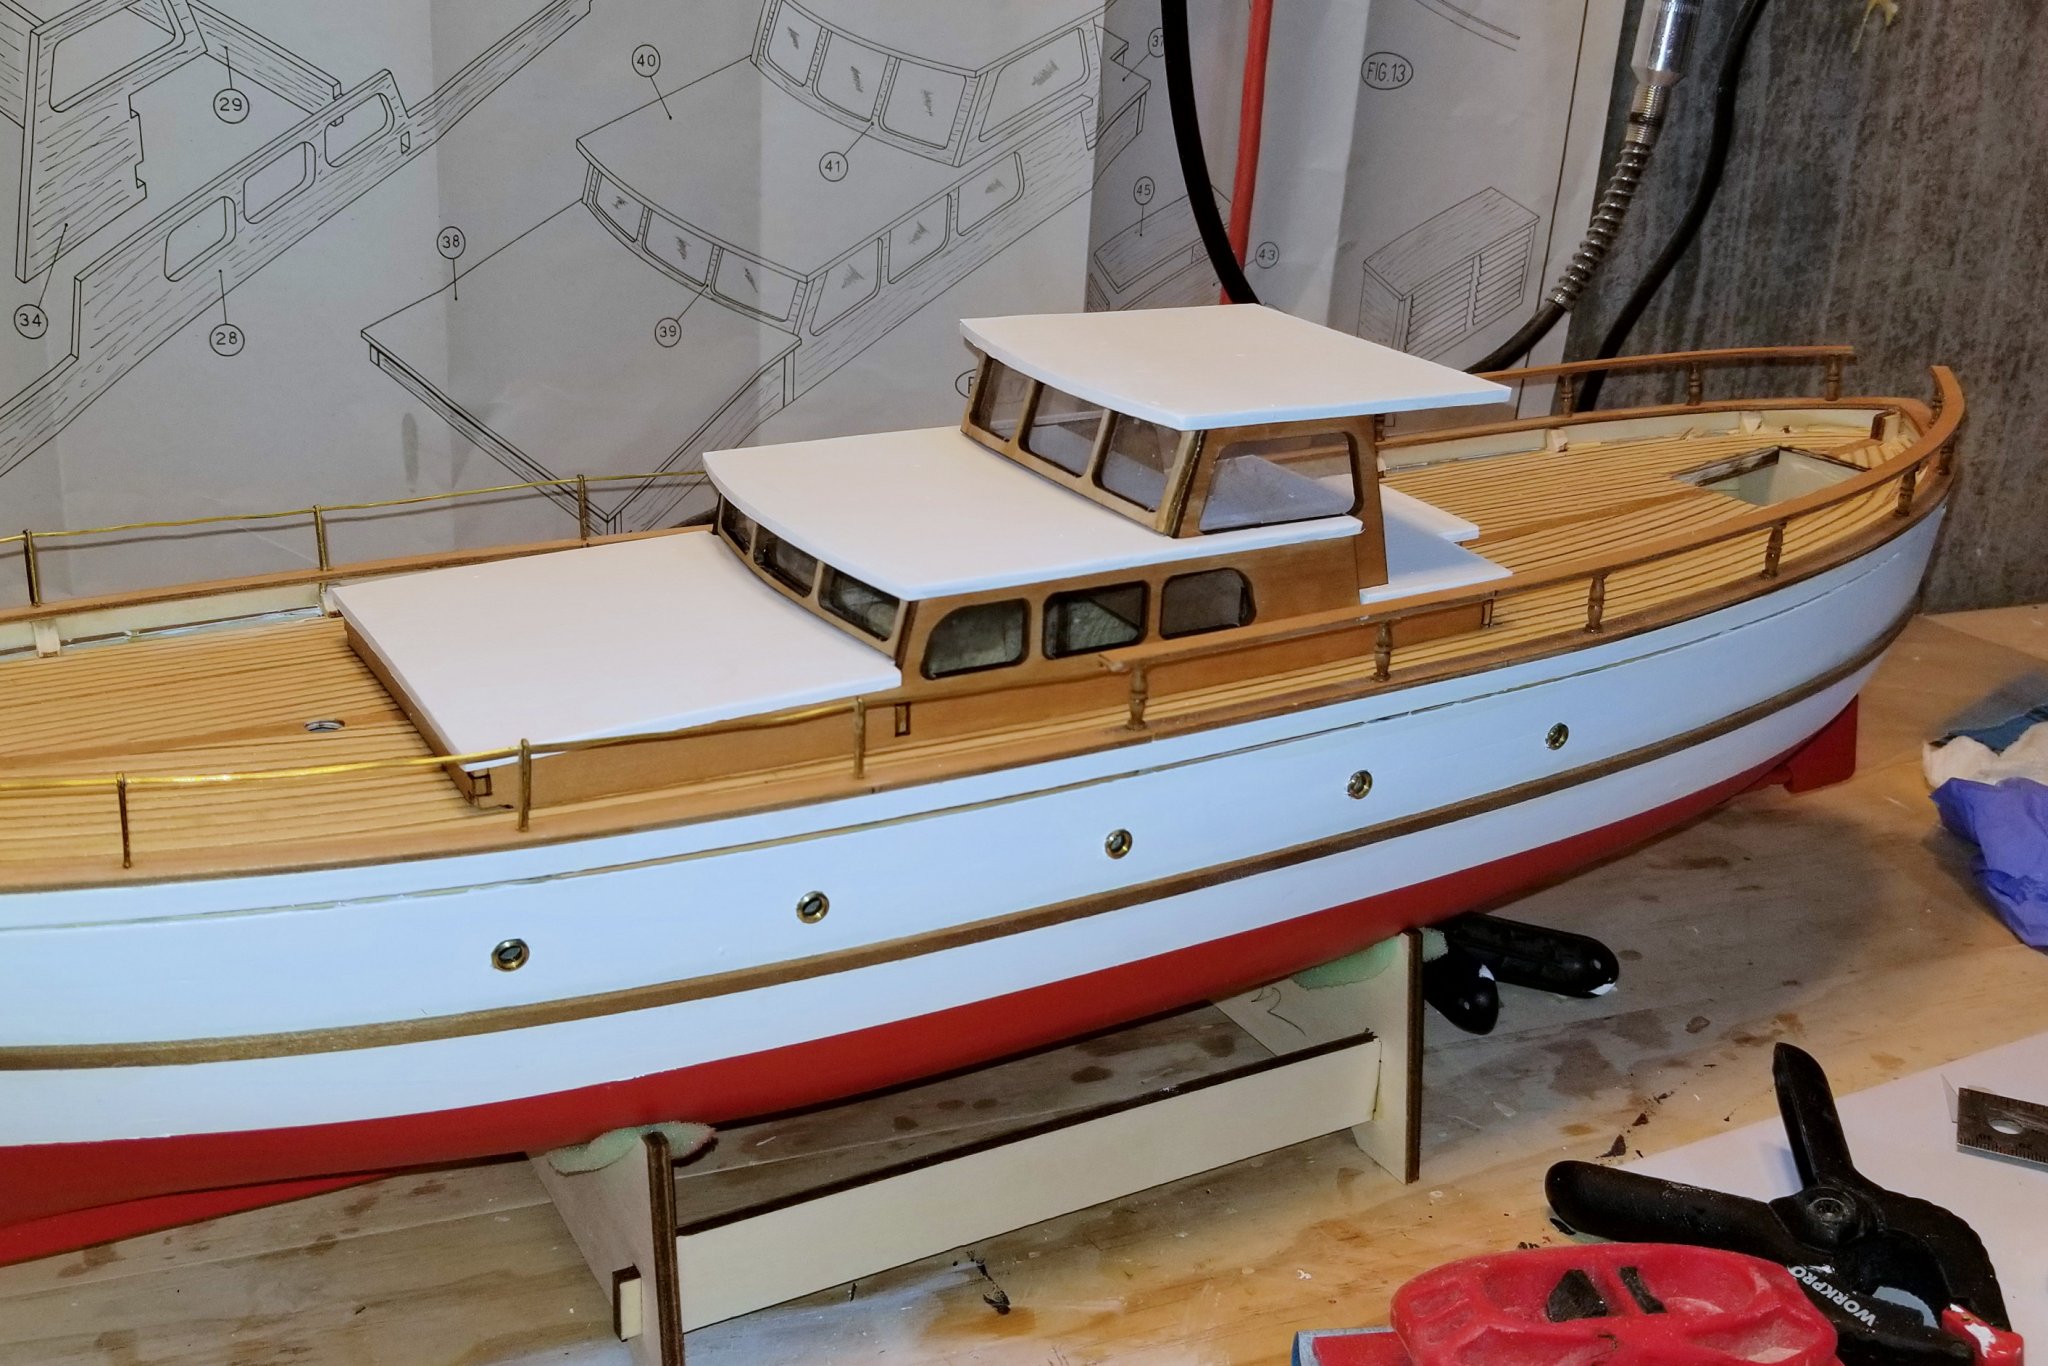
Assembled and mounted the cabin structure. Building this takes some forward planning, to get the subassemblies right and square, and then paint and assemble things in a workable order. The instruction sequence isn't the best. Regards, David

-
Bob: It works better than a brush to get a really smooth surface, but the main way I avoided lap marks is to use 5 coats. That's what it took to get a uniform color. The paint was just a good quality hardware store flat acrylic interior paint. Regards, David
-
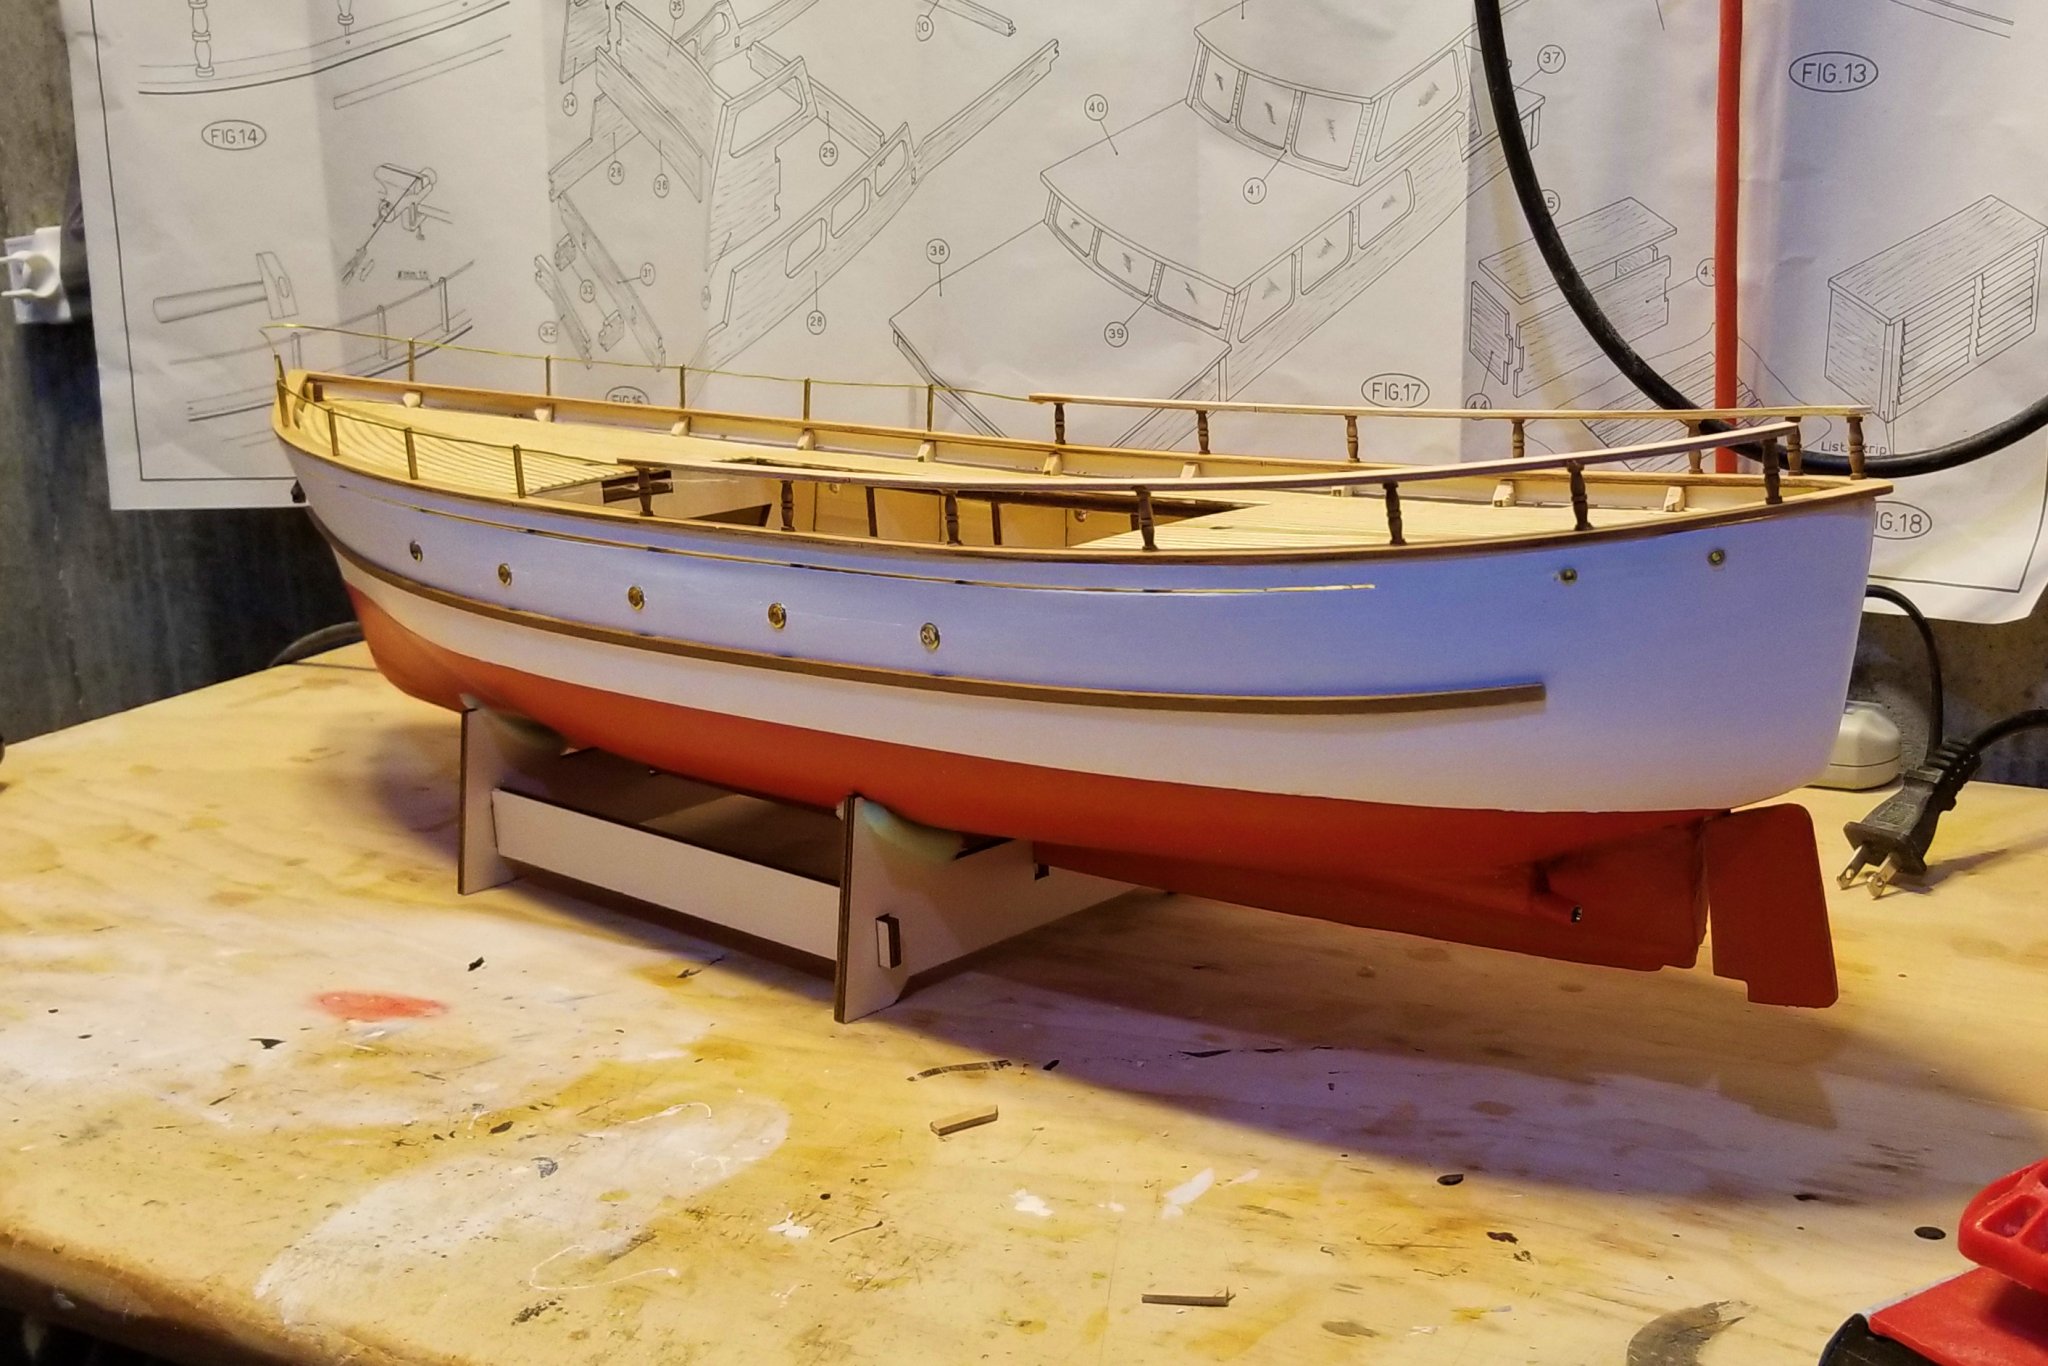
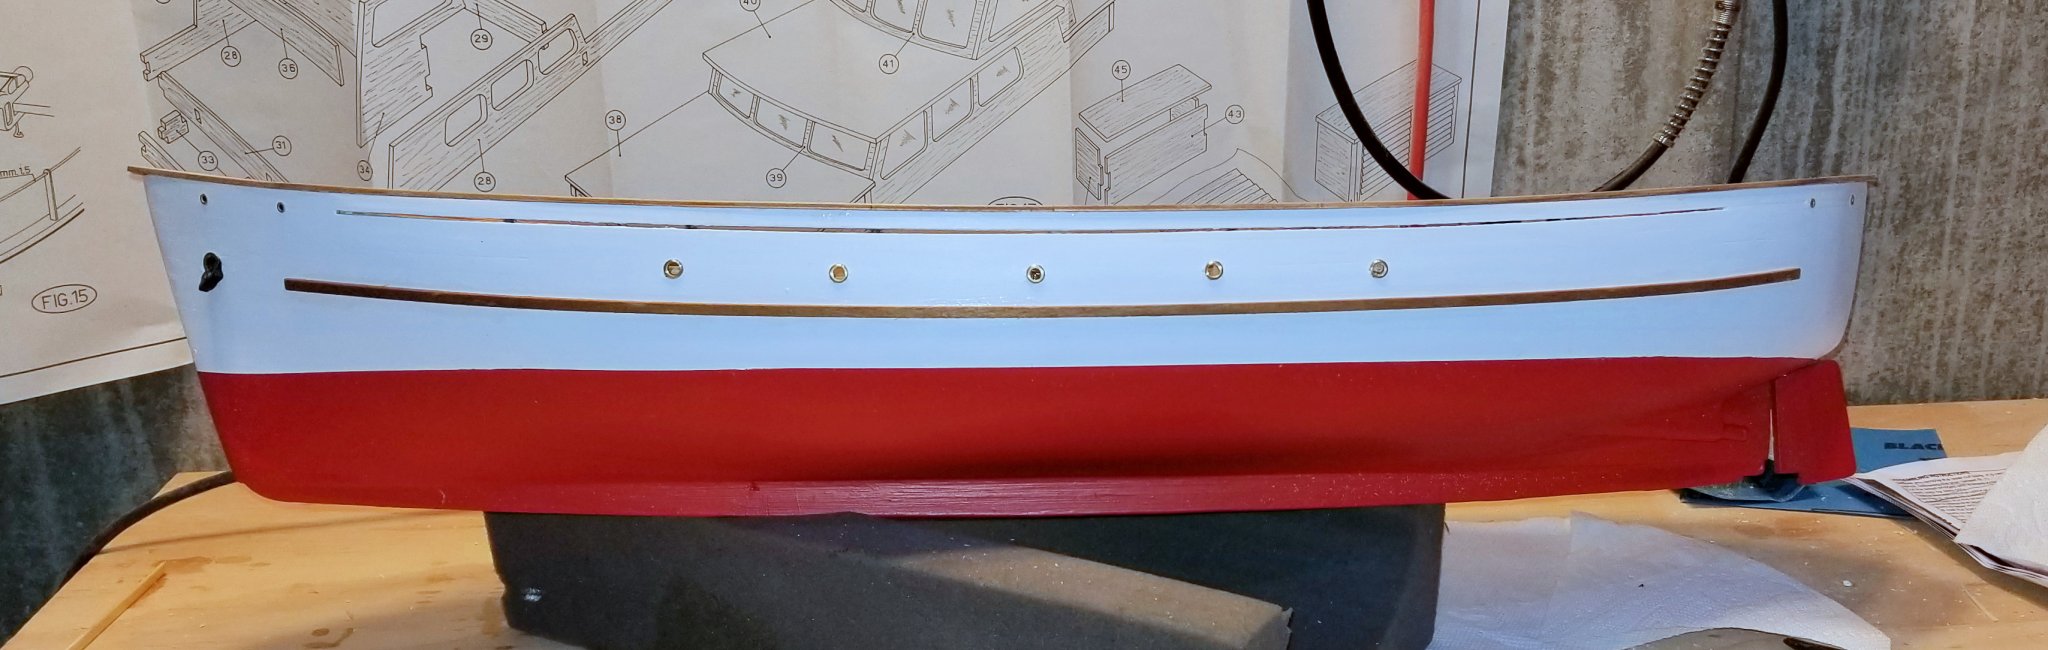
I've painted the hull. Two boats ago, I got fed up with spray paint because of the unavoidable mess it makes in my workroom (spray particles out from the spray area and onto the floor), and problems with tracking it out of there and into the house. Can spray outside in summer, but not in winter (which is much of the time here in Boston. So this is brushed on with a foam brush and 5 coats of white and 5 coats of red. Looks good up close, and no mess! Regards, David

-
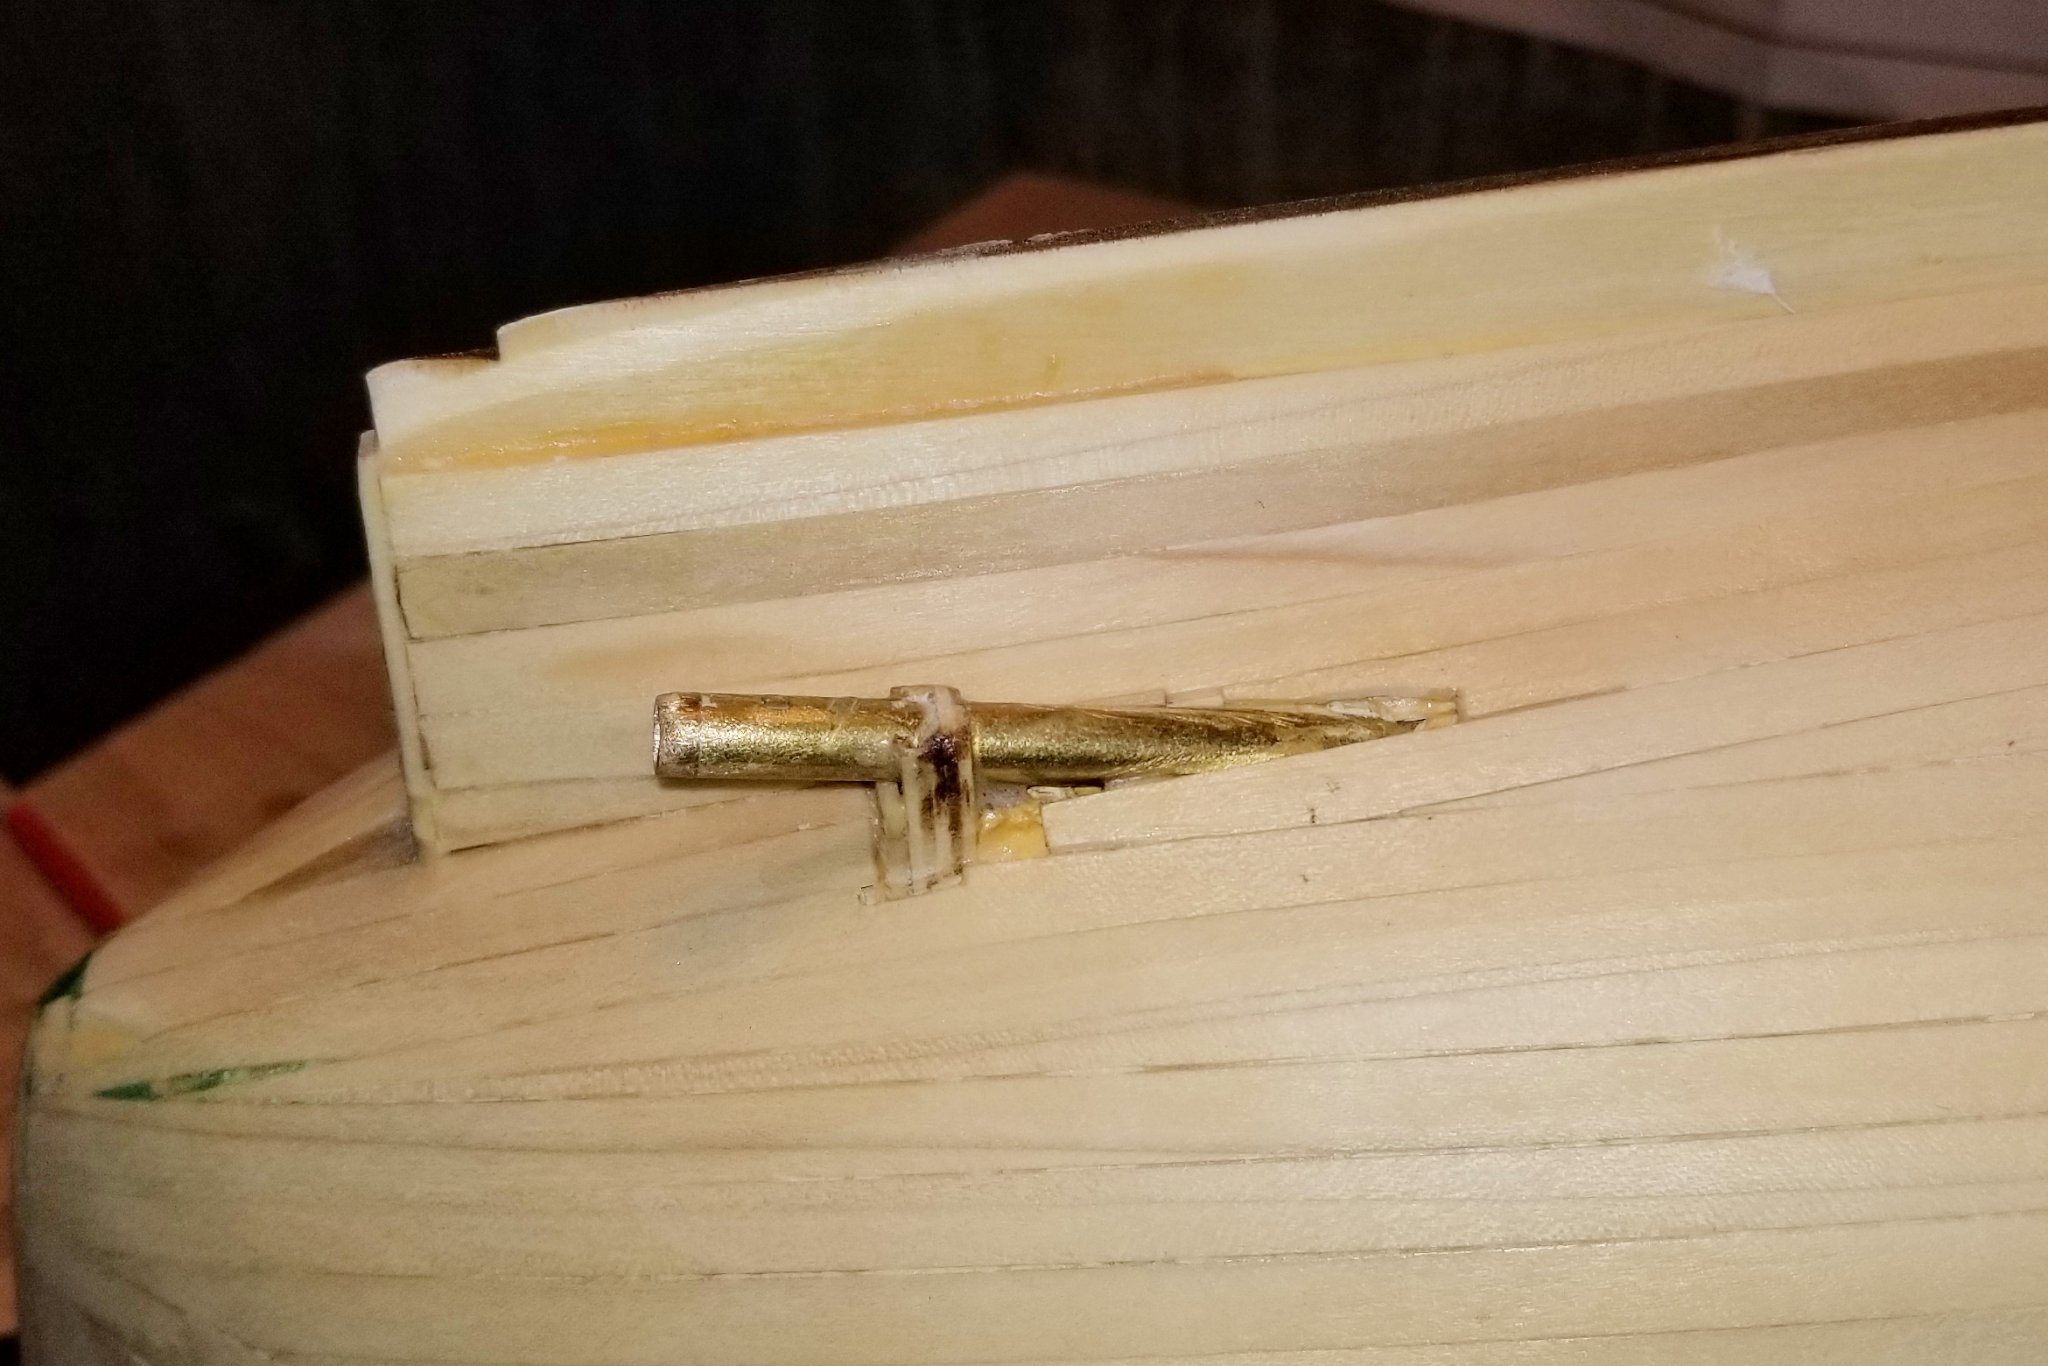
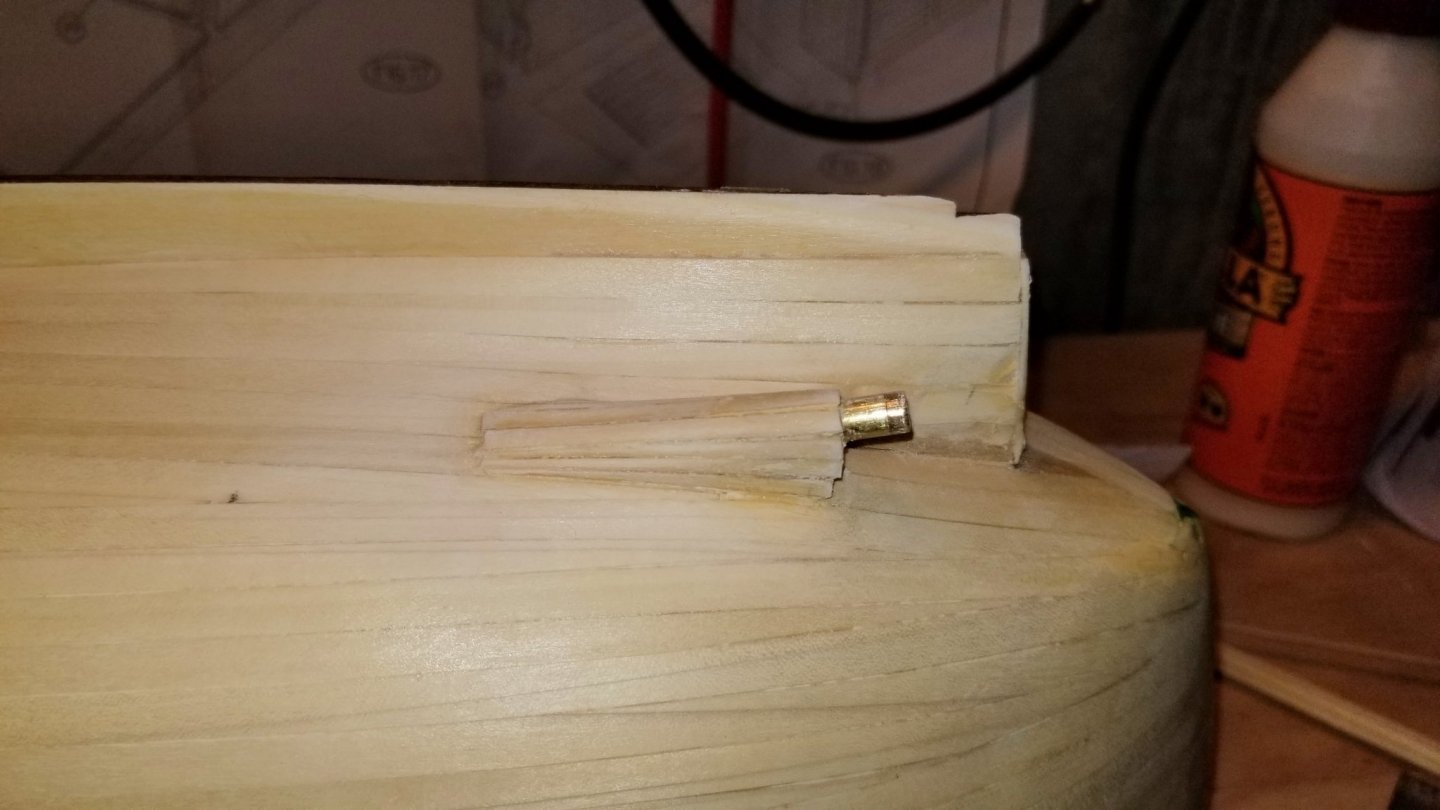
Started on the propeller shaft housings. I've done one. Here are pictures of the unfinished one, and the one I've done. Regards, David

-
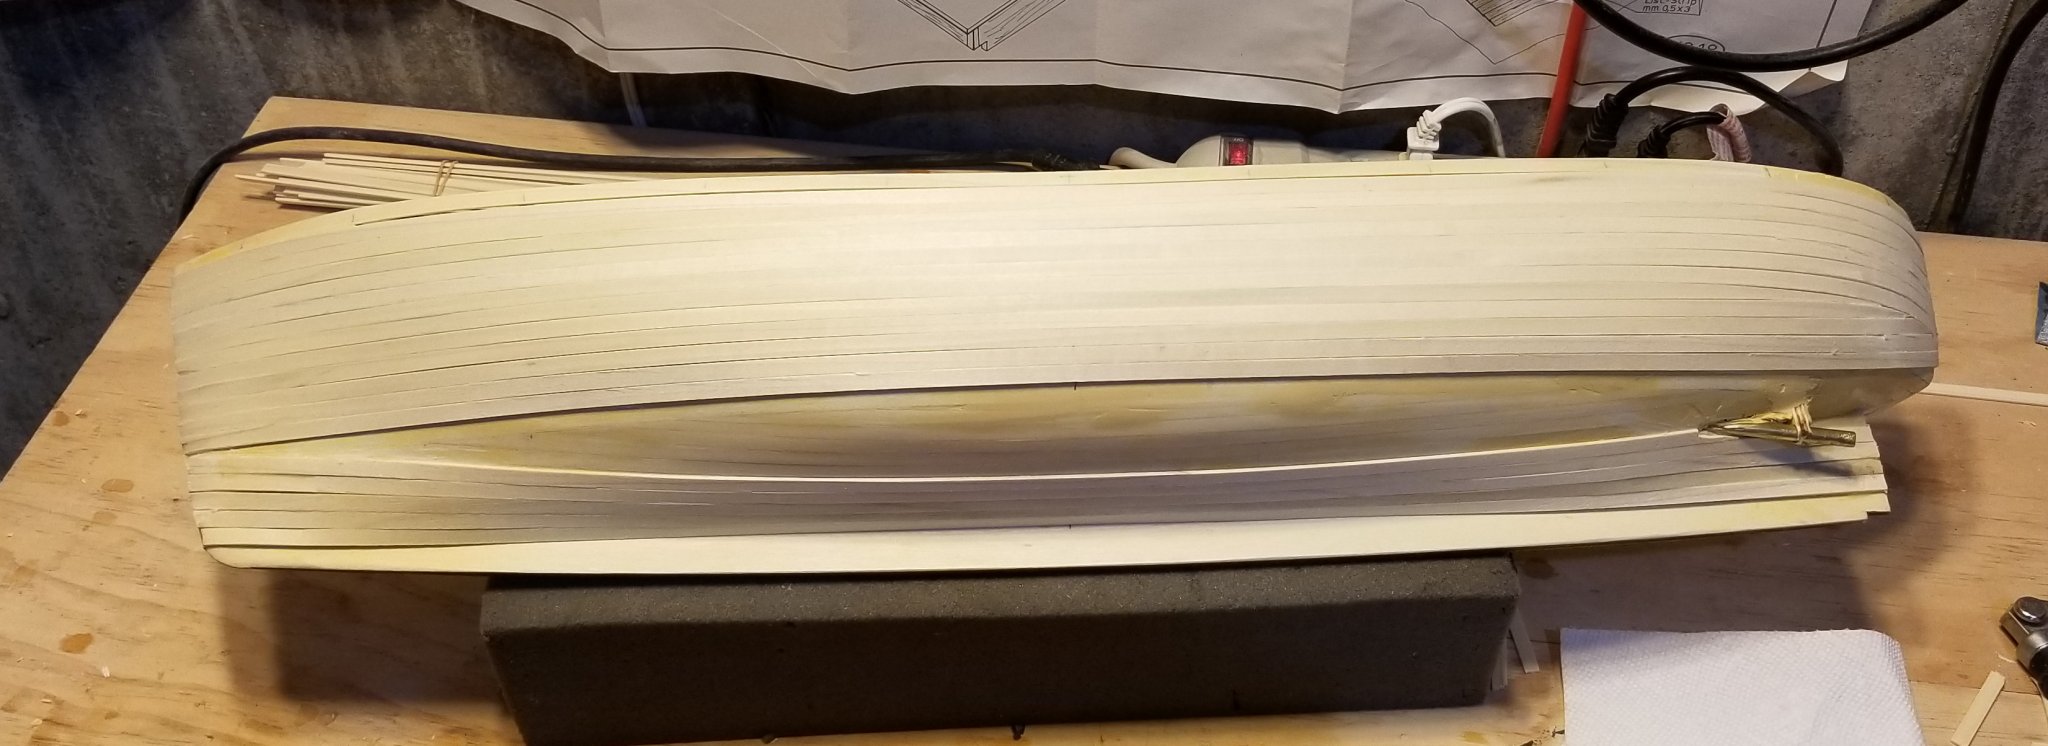
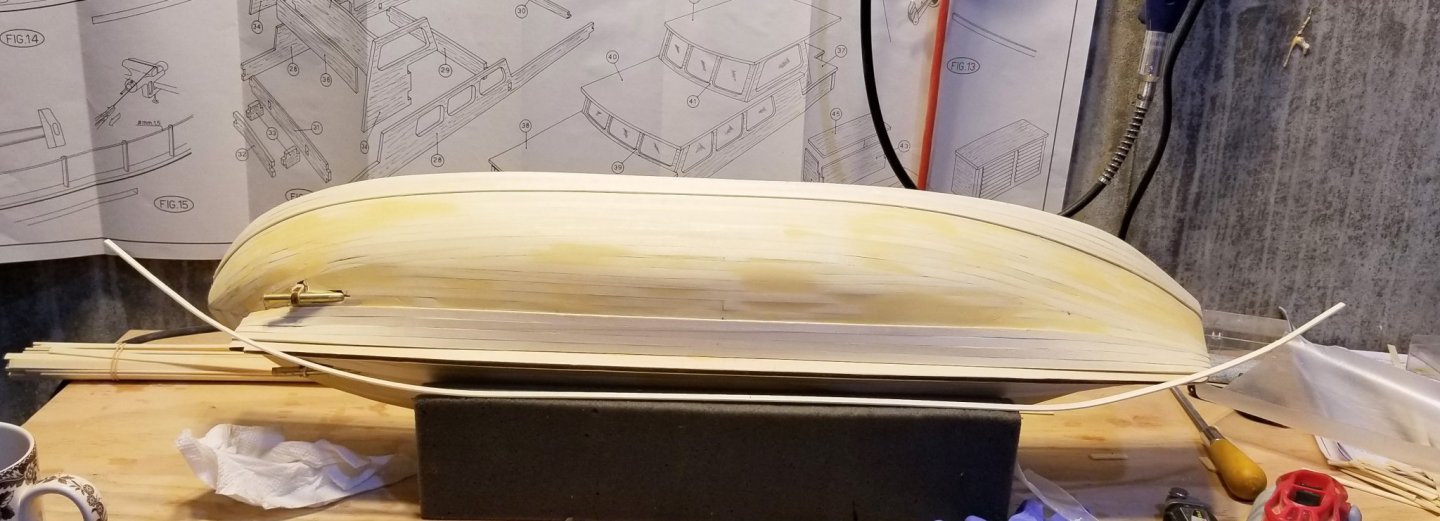
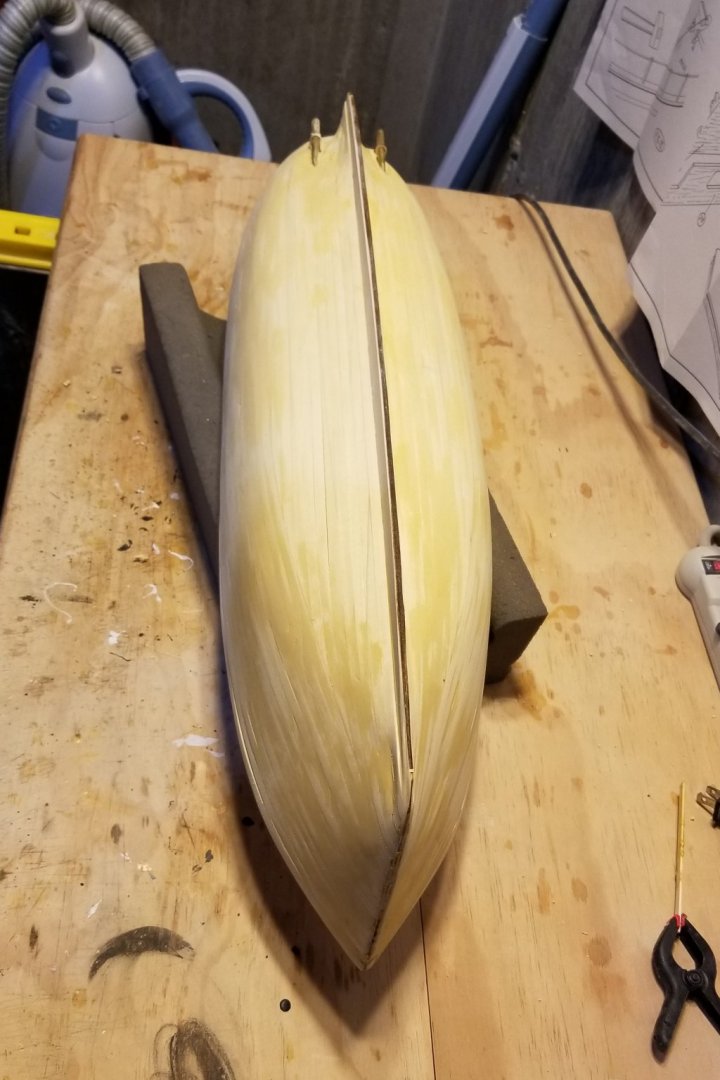
I've now finished the second planking -- the picture here shows it sanded with a coat of varnish. Next step is to build the fairings over the propeller shafts, which are made of wood strips. Then some painting. Regards, David
-
Cornish: I'm now building the Bruma from Mantua. Here's the log. https://modelshipworld.com/topic/22550-bruma-by-drobinson02199-mantuapanart-scale-143/?tab=comments#comment-670233 Regards, David
-
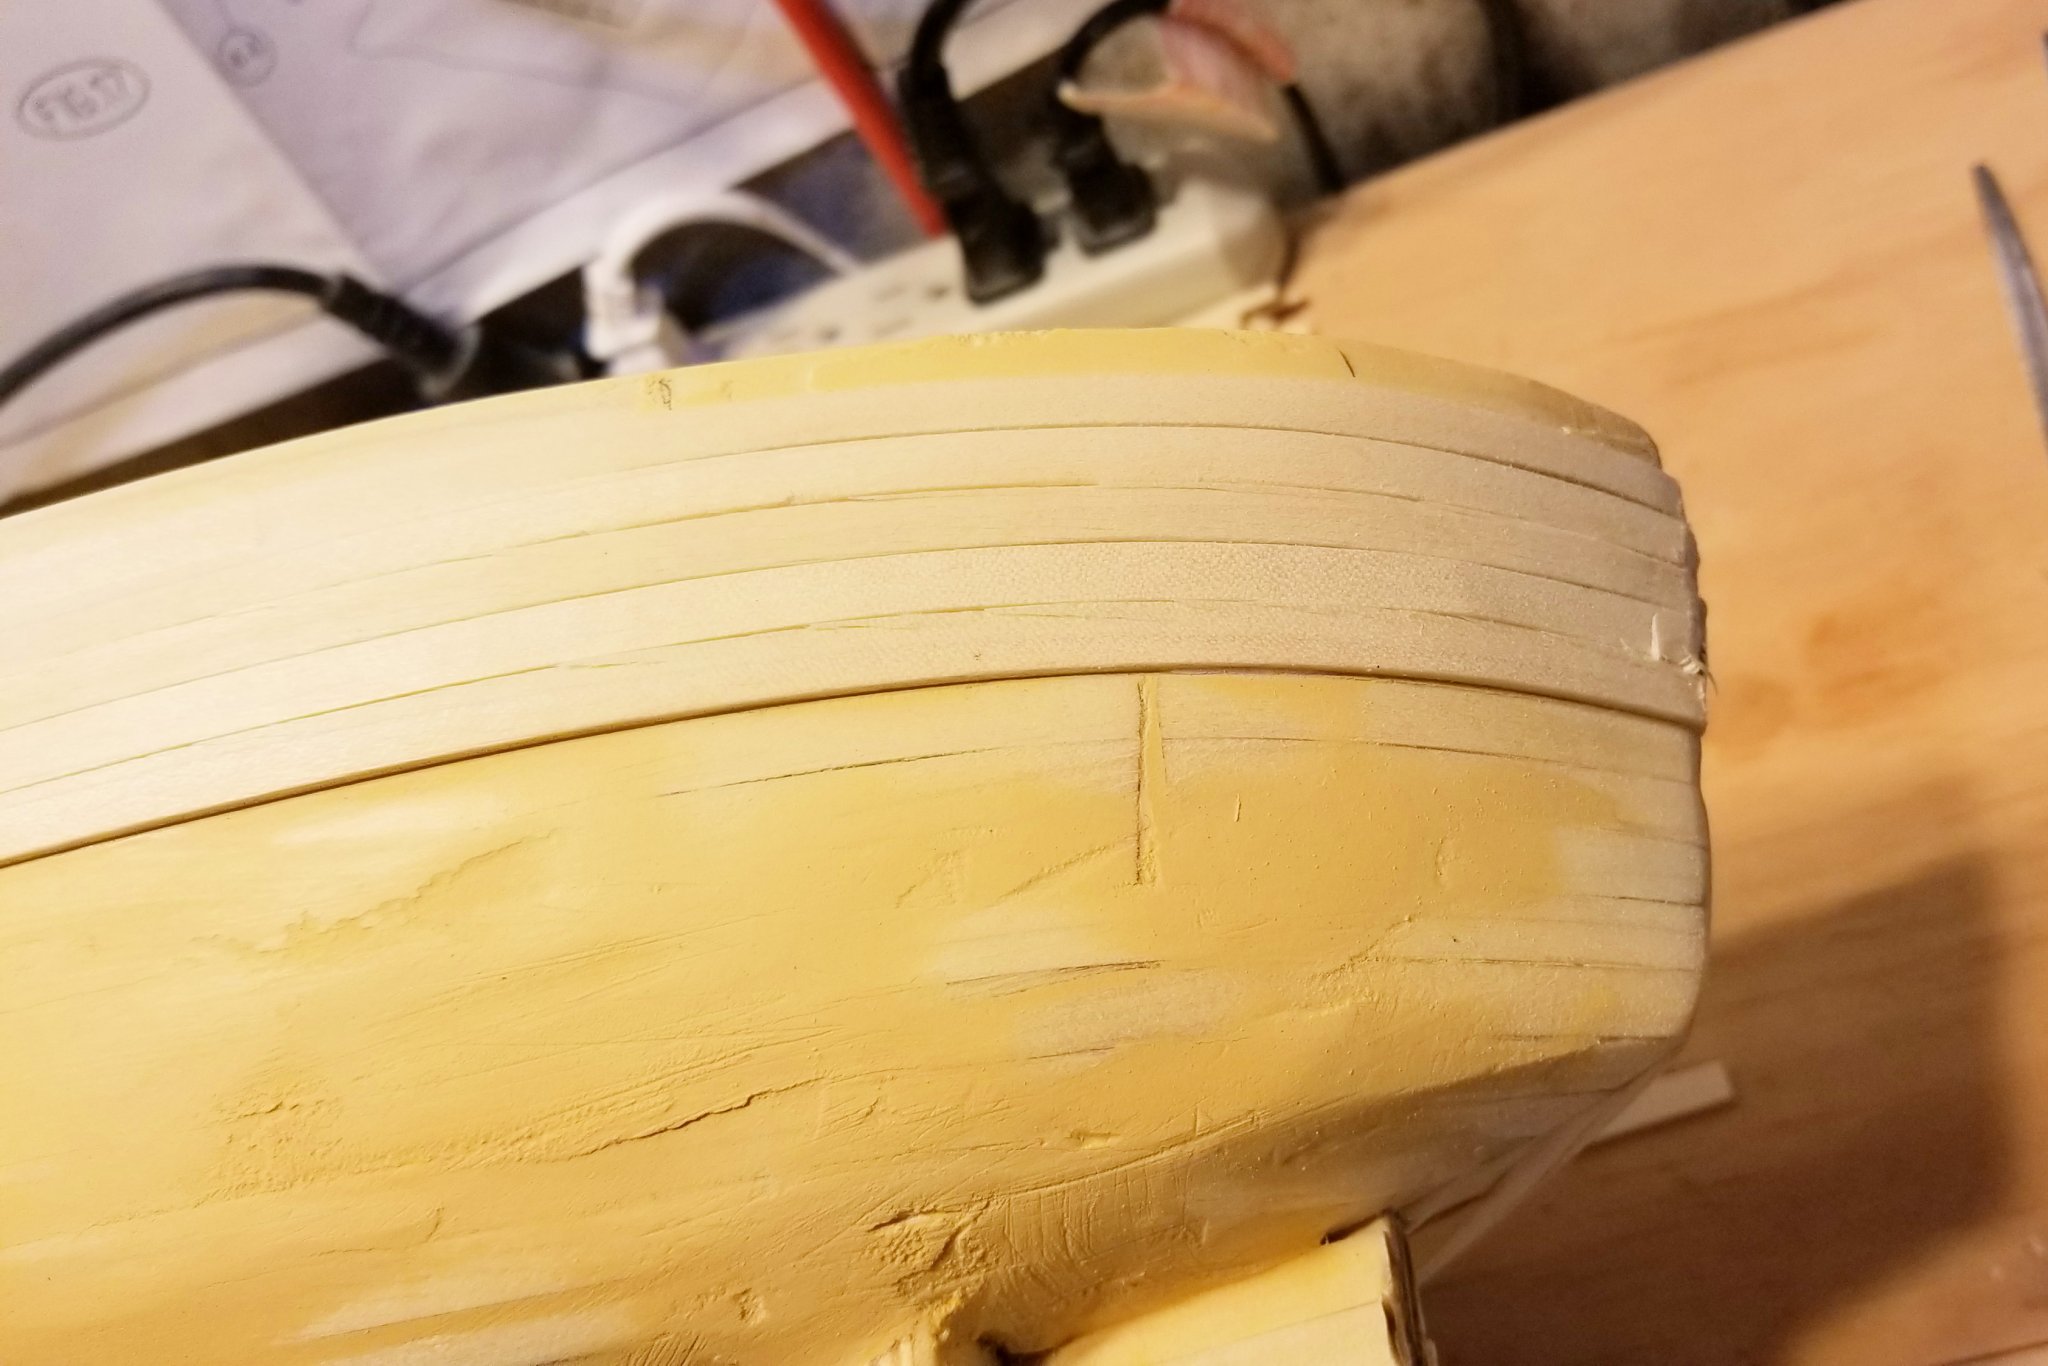
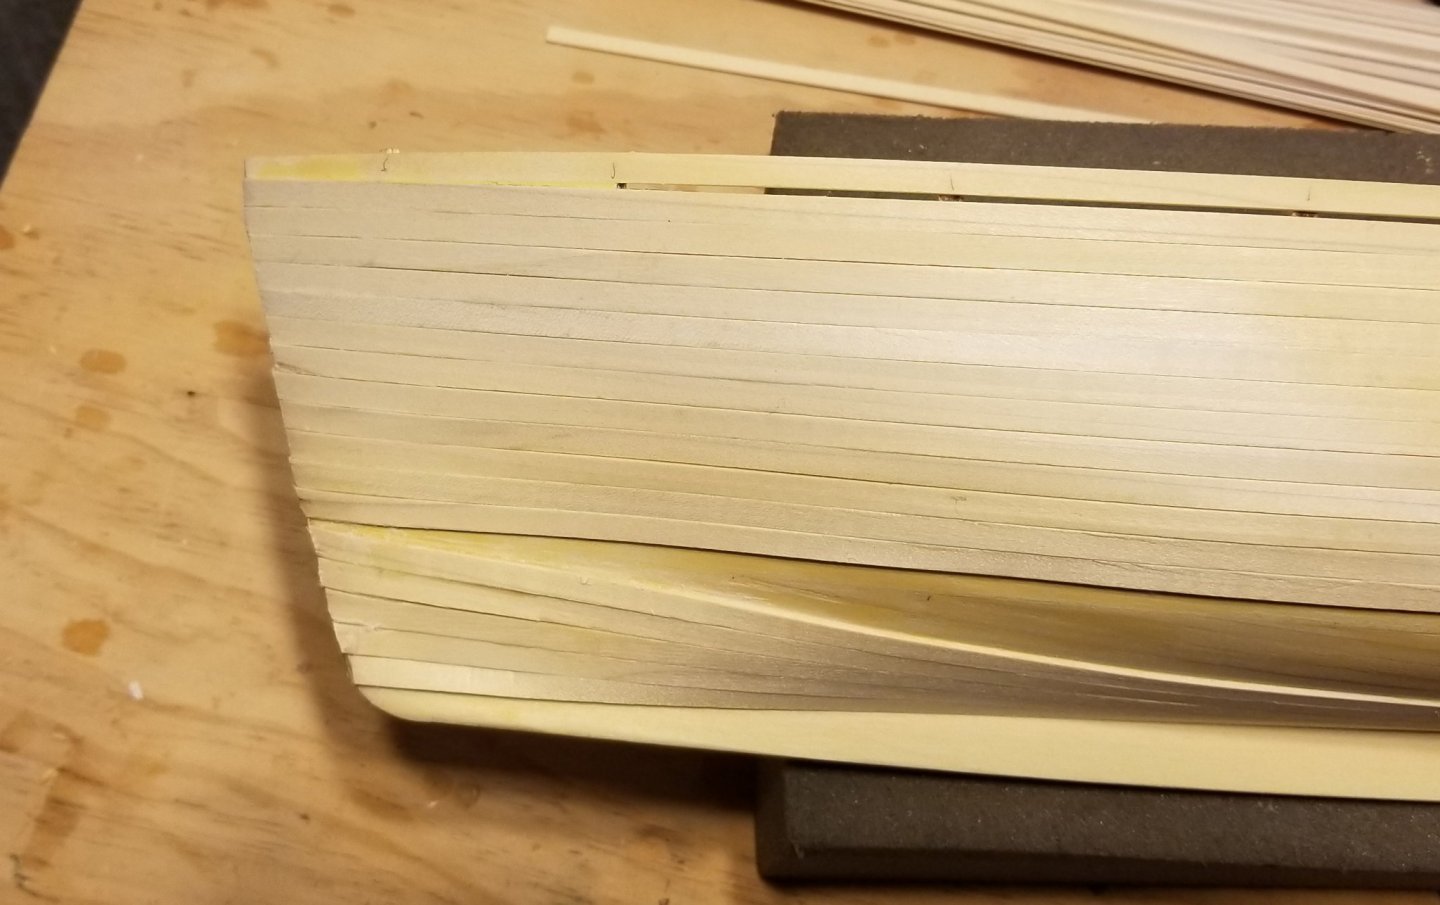
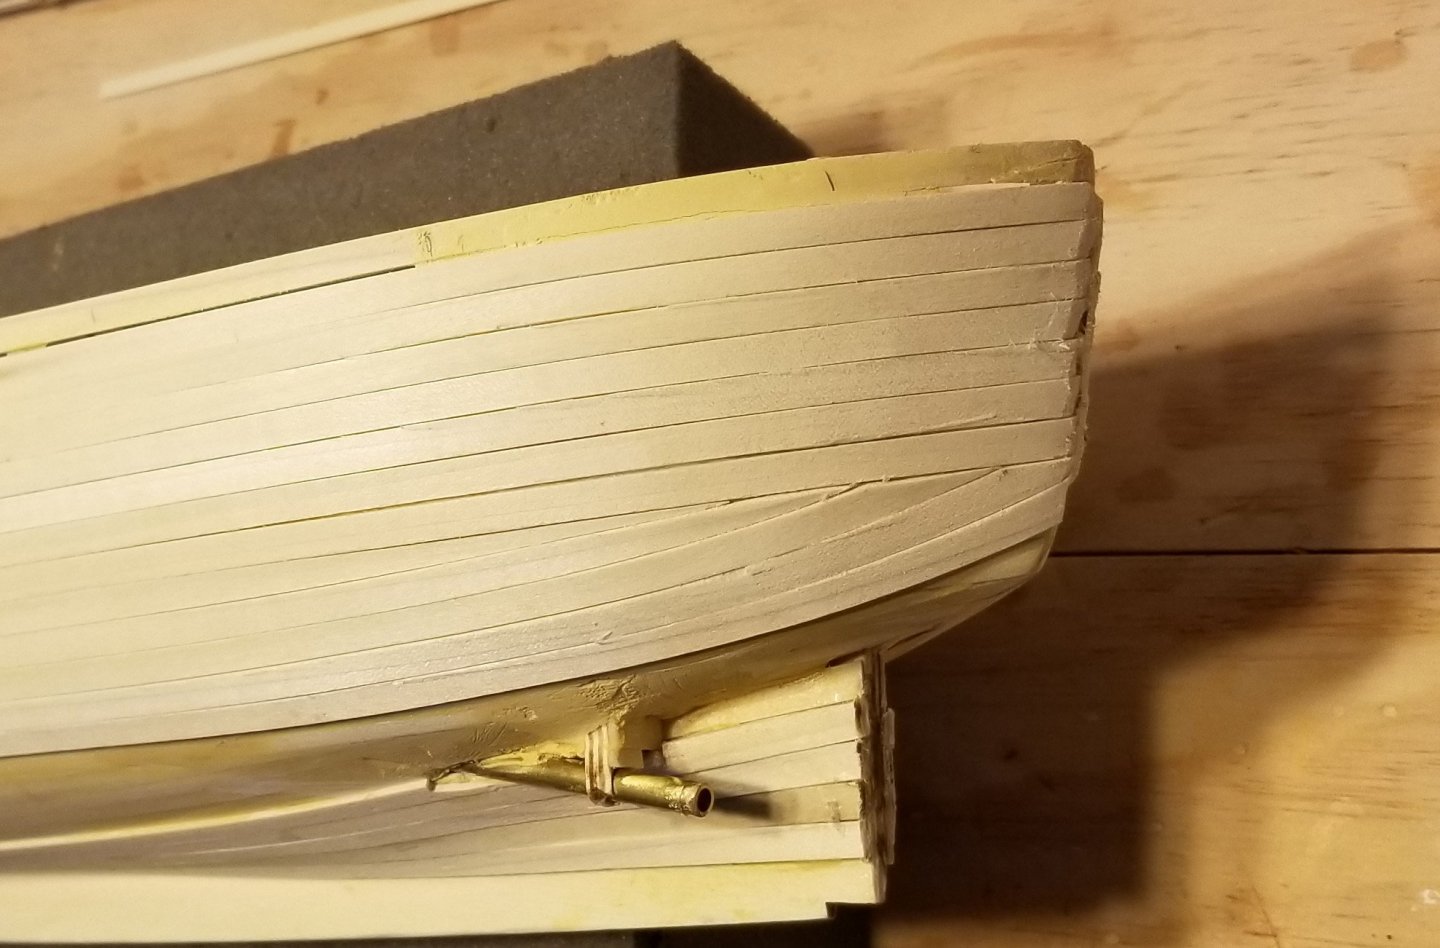
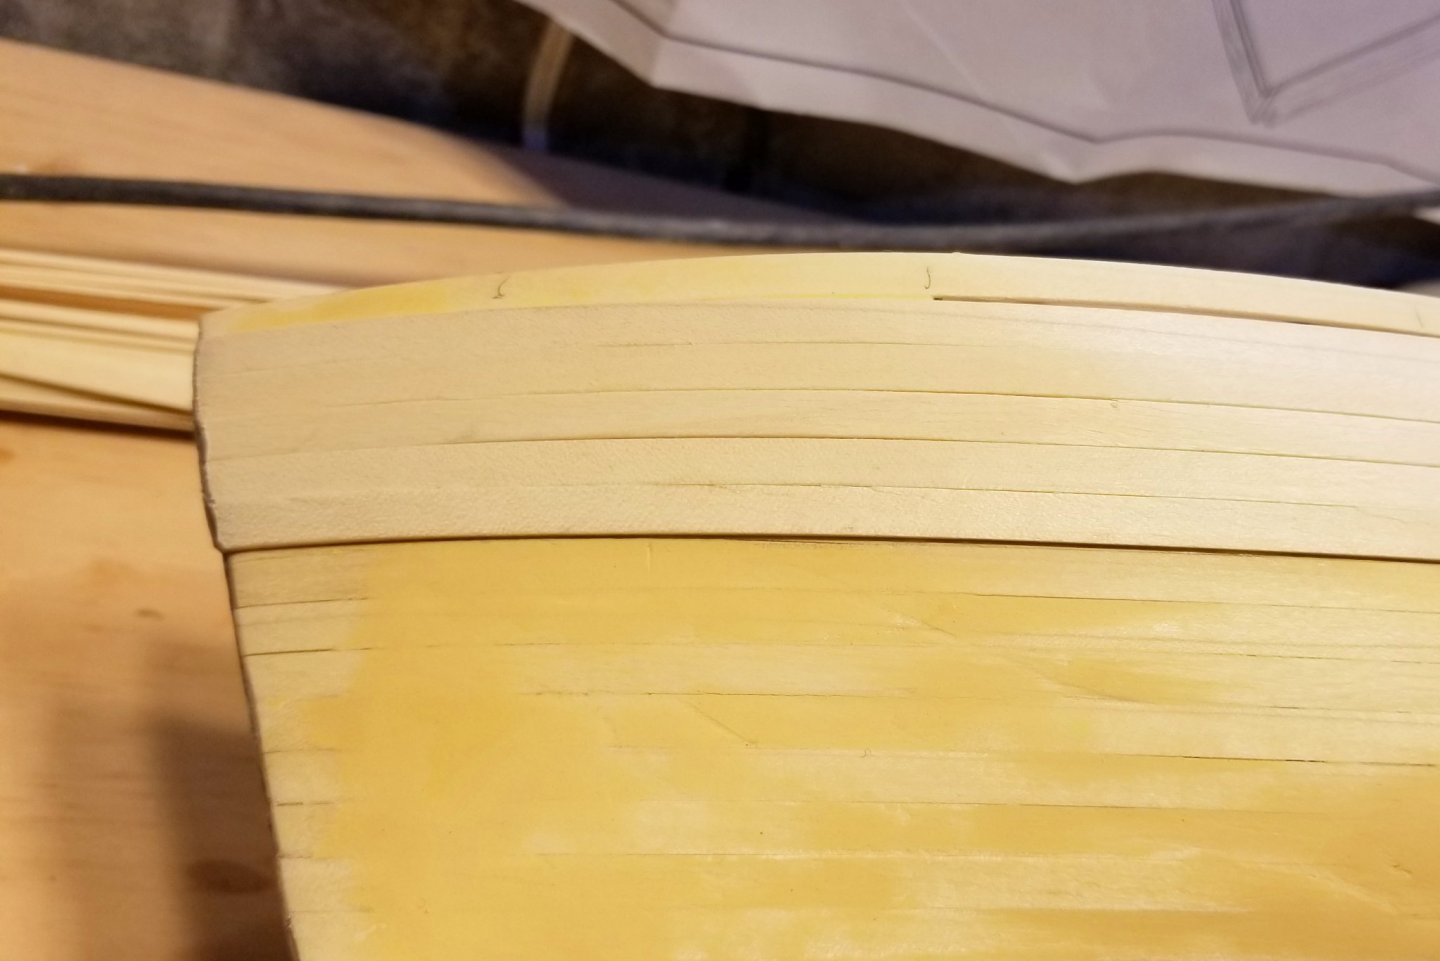
Working further on the second planking, at the bow the planks hold pretty straight, but as the hull curves under, I couldn't hold that at the stern and had to shift to a "lay of the plank" approach. You can see that in the stern detail below. Not sure how much more I'll do on this before leaving for a two week trip. Regards, David

-
Bob: Here's a picture of it. The brand is "Steam Genie". If you look closely at the area coming out of the nozzles, you can just barely see steam. The steam flow is pretty strong, and one of the nice things about this is that you can aim it -- so if you have a piece of wood that's partly mounted and the unmounted part won't sit properly, you can steam it on the model. With these basswood planks, which are soft, I just hold sections in the steam jet and bend gently until I get the amount of bend I want. Regards, David

-
Now working on the second planking and using my trusty steamer to pre-bend the planks. With that done, they really sit down nicely. I like a steamer much better than a mechanical plank bender, because the benders leave crimp marks on the underside that can "leak" out at the seams and mar the smooth finish. Regards, David

-
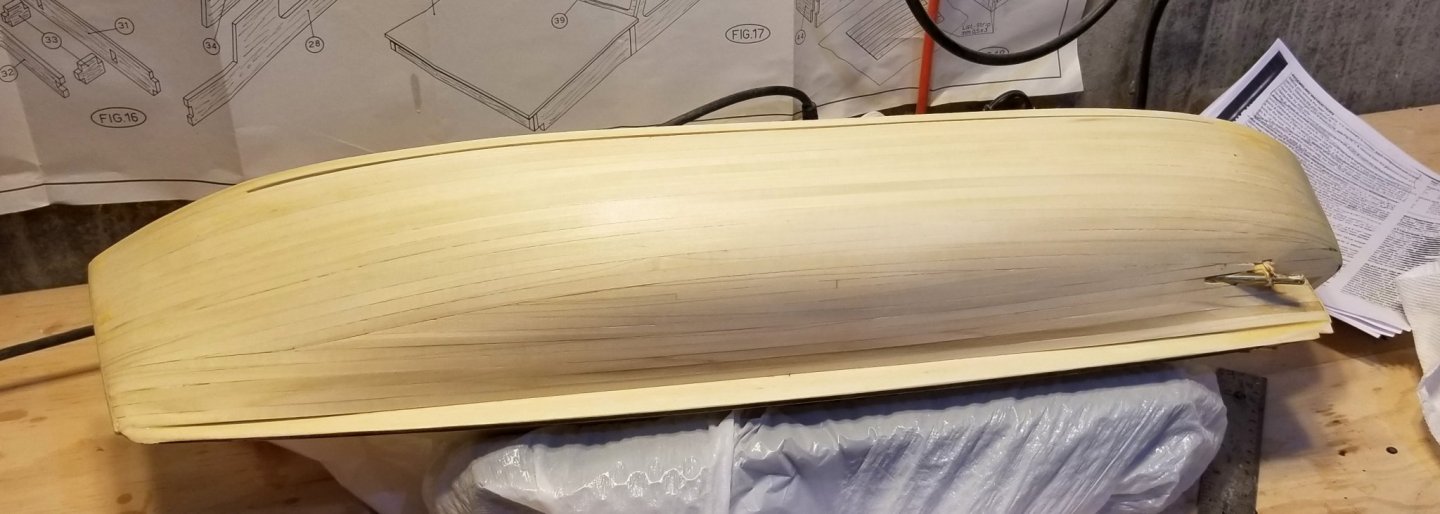
After a couple of weeks away, I have finally finished the first planking. What you see is wood filled, sanded and varnished. Next is second planking, which is the same wood since this hull will be painted. Regards, David

-
Cornish Pirate: As I mentioned in my post, Ages of Sail in California, from whom I bought the kit, always honors shortages and did for me. I know that Mantua UK has a physical shop in Windsor. Since you are in the UK, I wonder if they were the seller of your kit, and if so, you could contact them to make up the shortage. My log might serve as support that the kit is under-supplied. One thing to do is not go by the 2,400 count, but instead measure your "empty" area and calculate what you really need -- might trim the cost if you have to pay. But if https://www.mantuamodel.co.uk/ is where you bought it, they should honor it and make it good. Even if you didn't buy it from them, here's what they say on their website: "Mantua Model UK Ltd was formed in 1997 as part of the Mantua Model group of Italy, one of the largest model manufacturers in the world. Mantua Model manufacture all types of boat, ship, aircraft and car kits, and are renowned for their wooden model ship kits." So according to them, they are part of Mother Mantua -- and therefore I would think they should honor the shortage regardless. Good luck! Regards, David