drobinson02199
-
Posts
1,079 -
Joined
-
Last visited
Content Type
Profiles
Forums
Gallery
Events
Everything posted by drobinson02199
-
 Thanks, Spyglass. I realize that it's a deviation from "real practice", but I think my models are probably full of deviations. I've never been able to motivate myself to go from "looks good" to "historically accurate". Regards, David
- 126 replies
-
- 2
-

-
- fly
- victory models
- (and 1 more)
-
Chris: Thanks so much for that Facebook reference. It's a very detailed log, and will help me a lot when I'm trying to figure out something that isn't clear in the drawings. Regards, David
- 126 replies
-
- 1
-
-
- fly
- victory models
- (and 1 more)
-
Mike: When I built the Grand Banks Heritage 46 it had laser cut planks, and I noticed that narrow-wide-narrow plank shape. Here's the way I did it on the Revenge, and the approach I'm planning to use here. I did taper, but I changed the planking pattern partway down (working top to bottom), and it's that first changed plank that I was referring to when I said 6 inches back. Regards, David

- 126 replies
-
- 2
-
-
- fly
- victory models
- (and 1 more)
-
Dave: Right -- Chuck Passaro was the one. For what it's worth, using a steamer and then a hair dryer works well for me, and I don't need as much hair dryer time as he was using (I'm impatient too ). This steamer I'm using now is reasonably new, and it puts out a lot of steam. Regards, David
- 126 replies
-
- 1
-
-
- fly
- victory models
- (and 1 more)
-
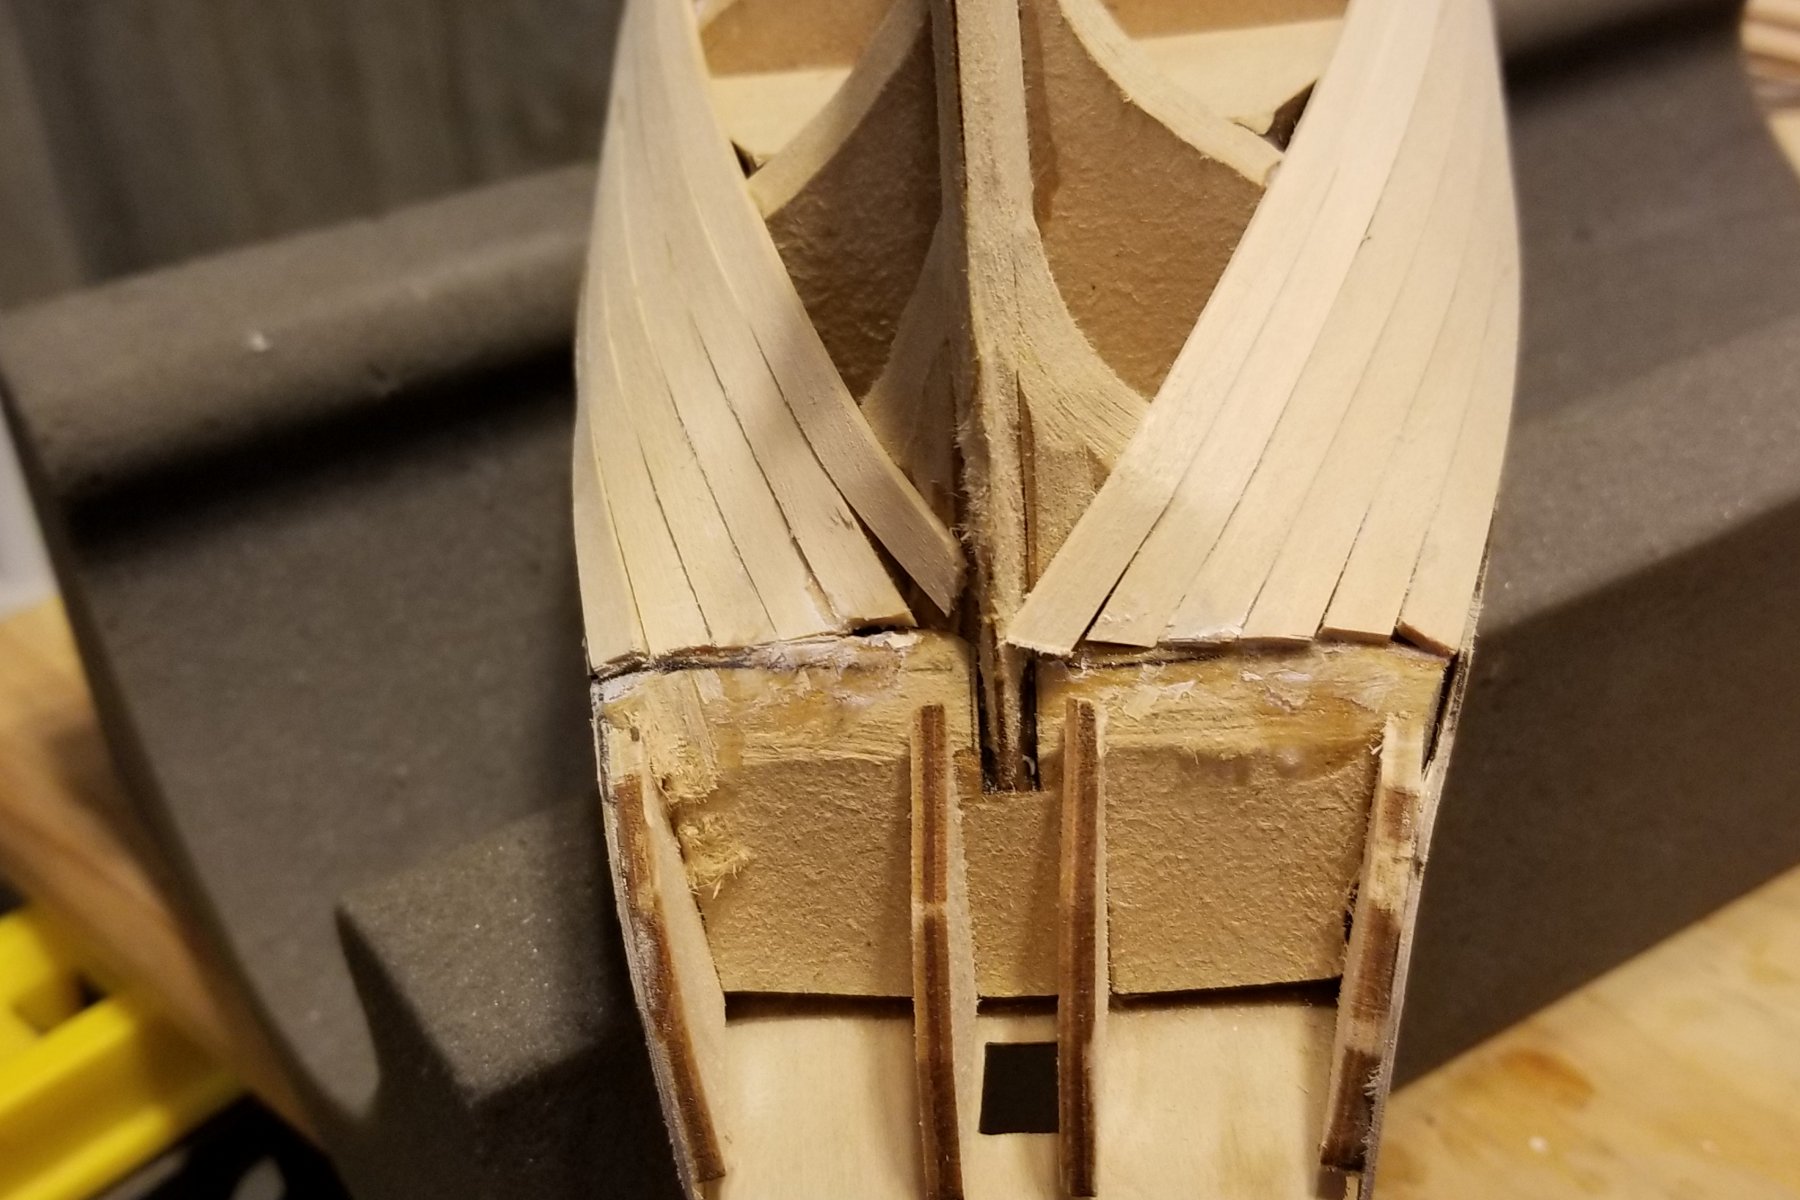
Thanks, Dave. I'm keeping an eye on that. Overall at the bow, I'm going to use the same planking plan I did for the Revenge, in which about 1/3 of the way down I stop the edge bending and start terminating the planks according to their natural run, so that the next plank will end flush with and against the plank above, about 6 or so inches from the bow. Then the next plank terminates the same way but closer to the bow, and so forth. Once I reach the bow I start running down the keel at the front. All of those planks will be tapered as I reach the bow, and I start measuring the amount of taper so it will work out (hopefully!!). I'll also start tapering the edge bent planks after the next couple are laid. I'm trying to follow the same proportions I used on the Revenge, where it worked out really well. Regards, David
- 126 replies
-
- 1
-
-
- fly
- victory models
- (and 1 more)
-
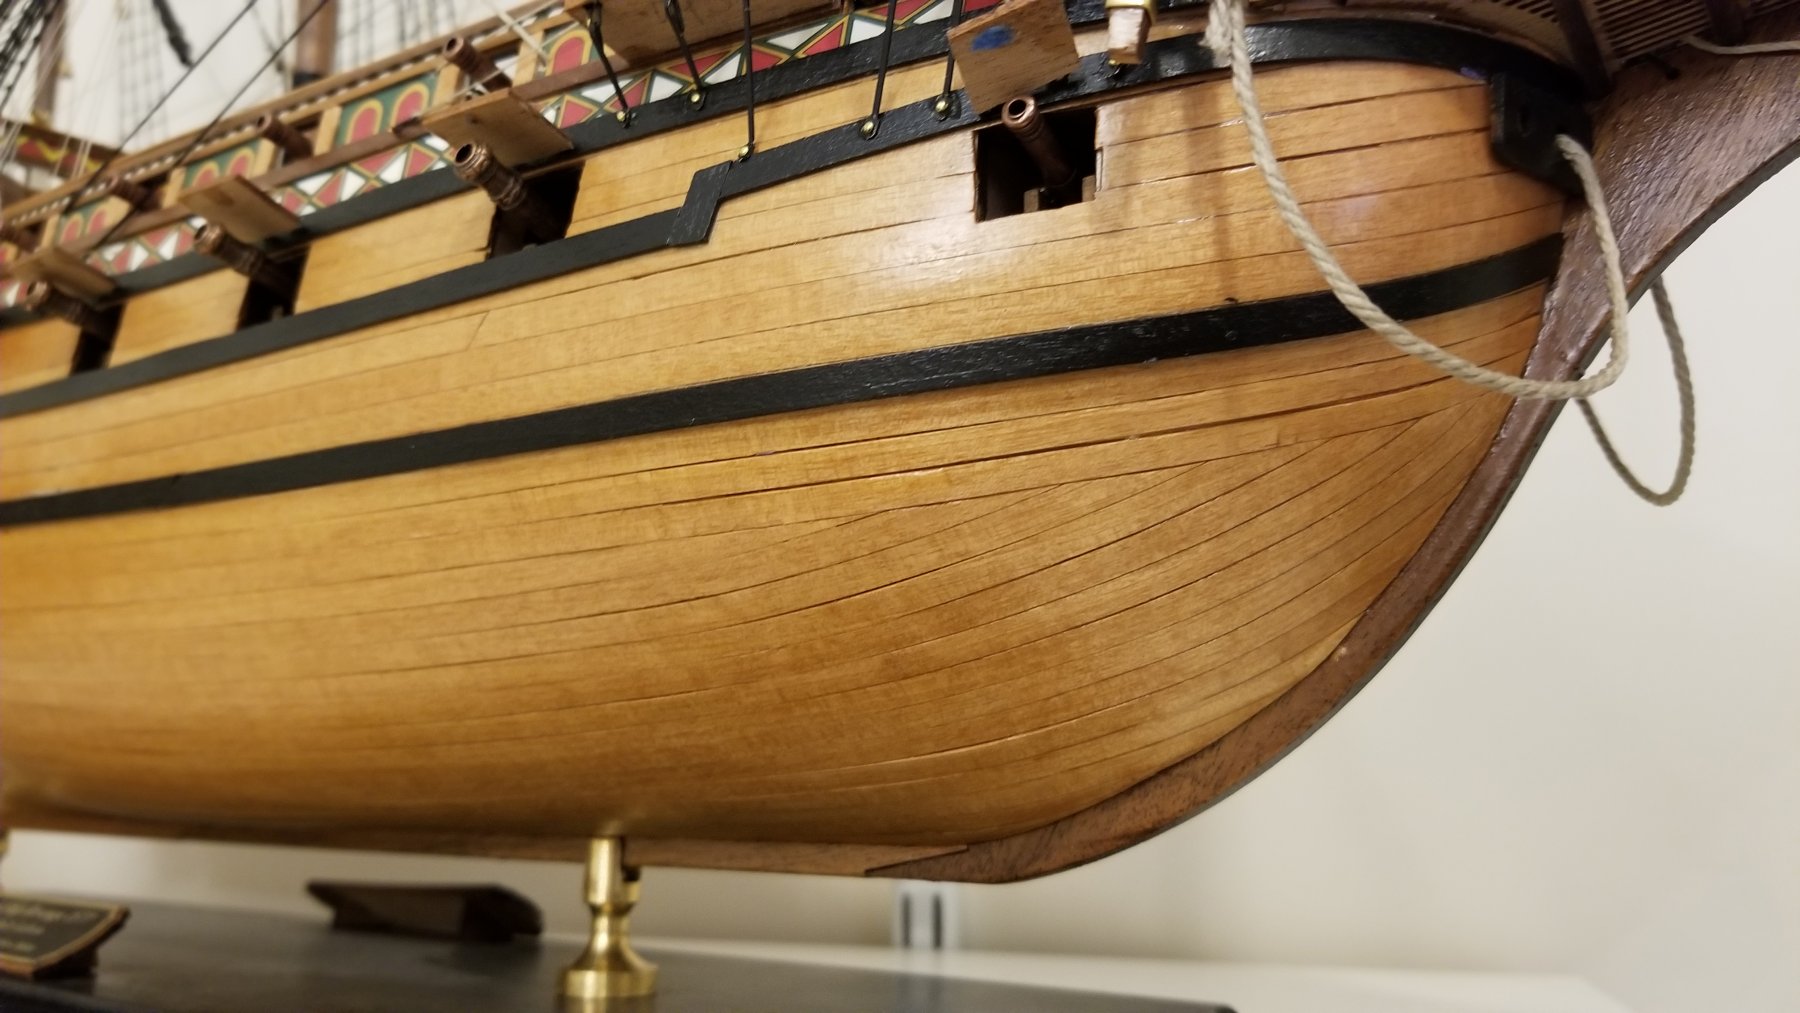
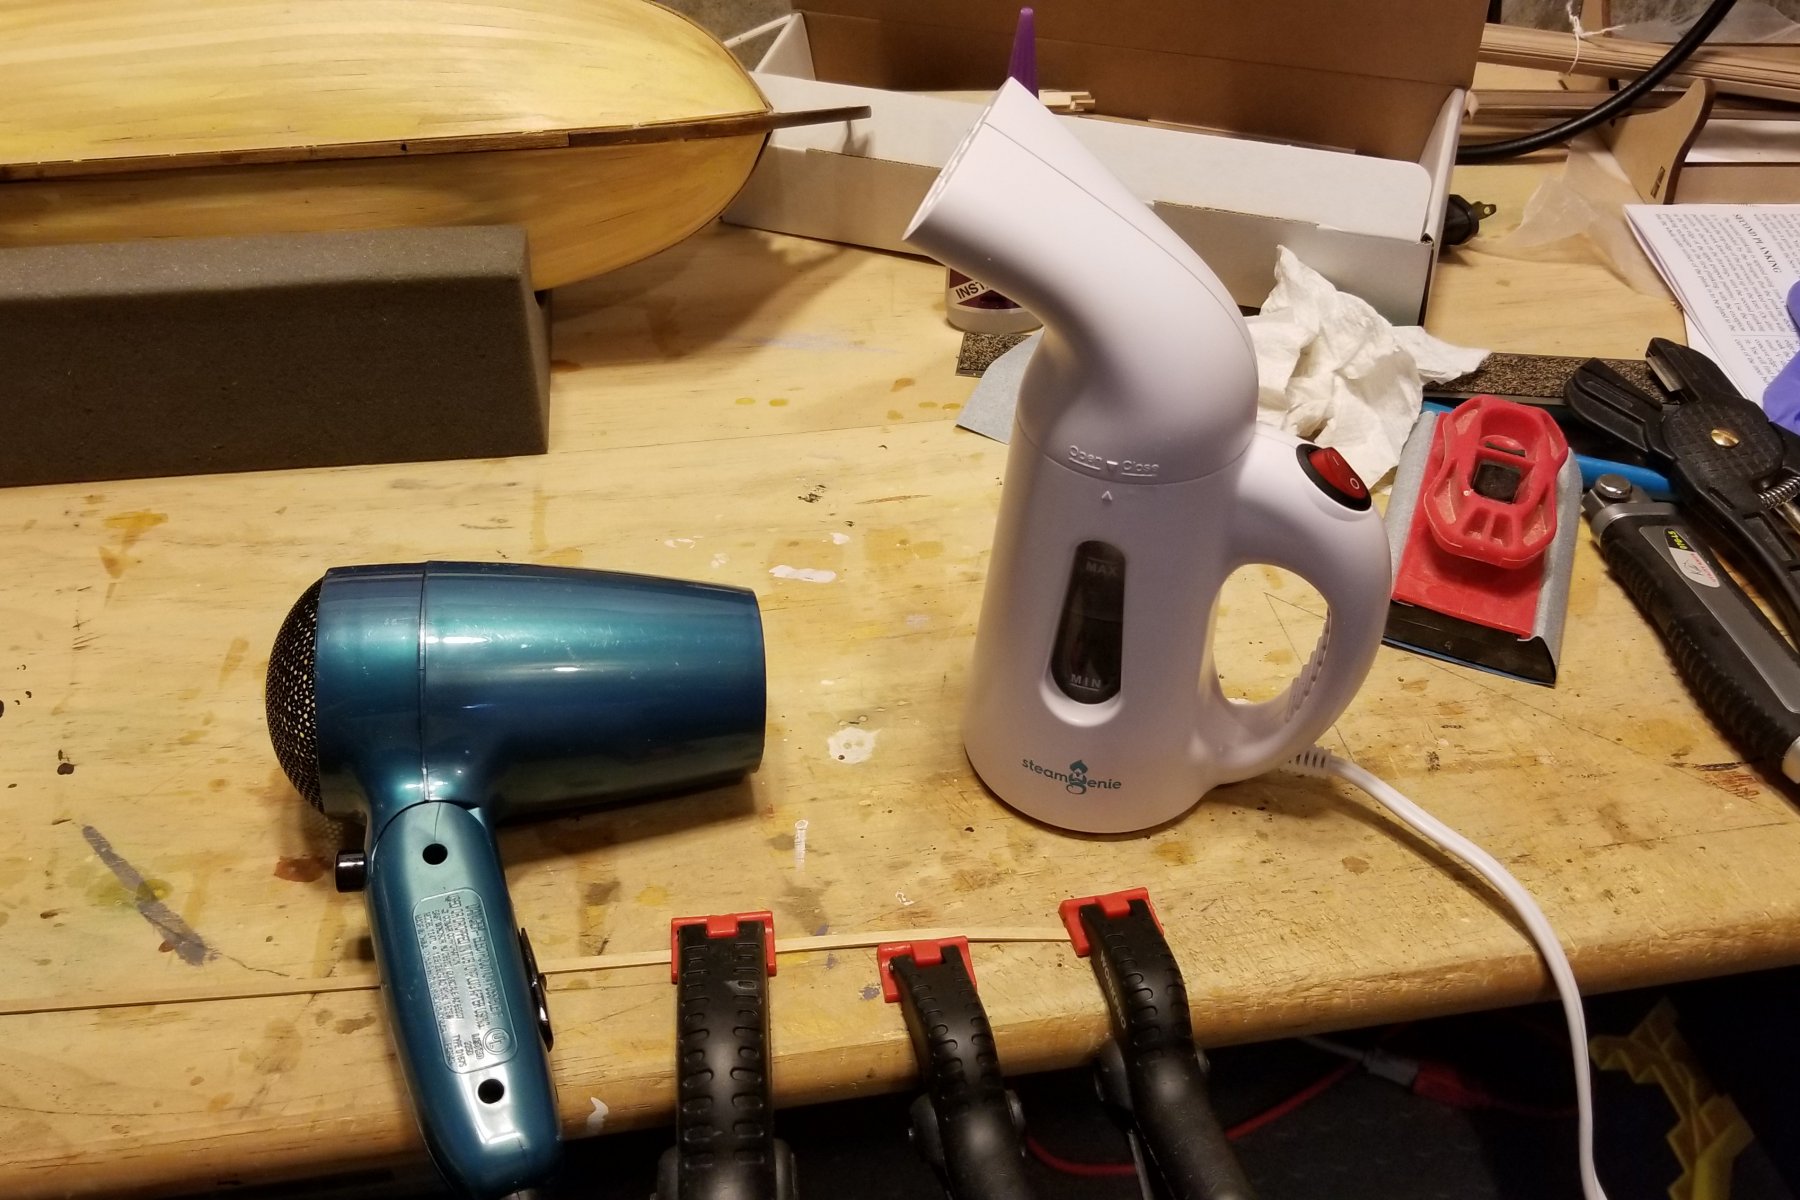
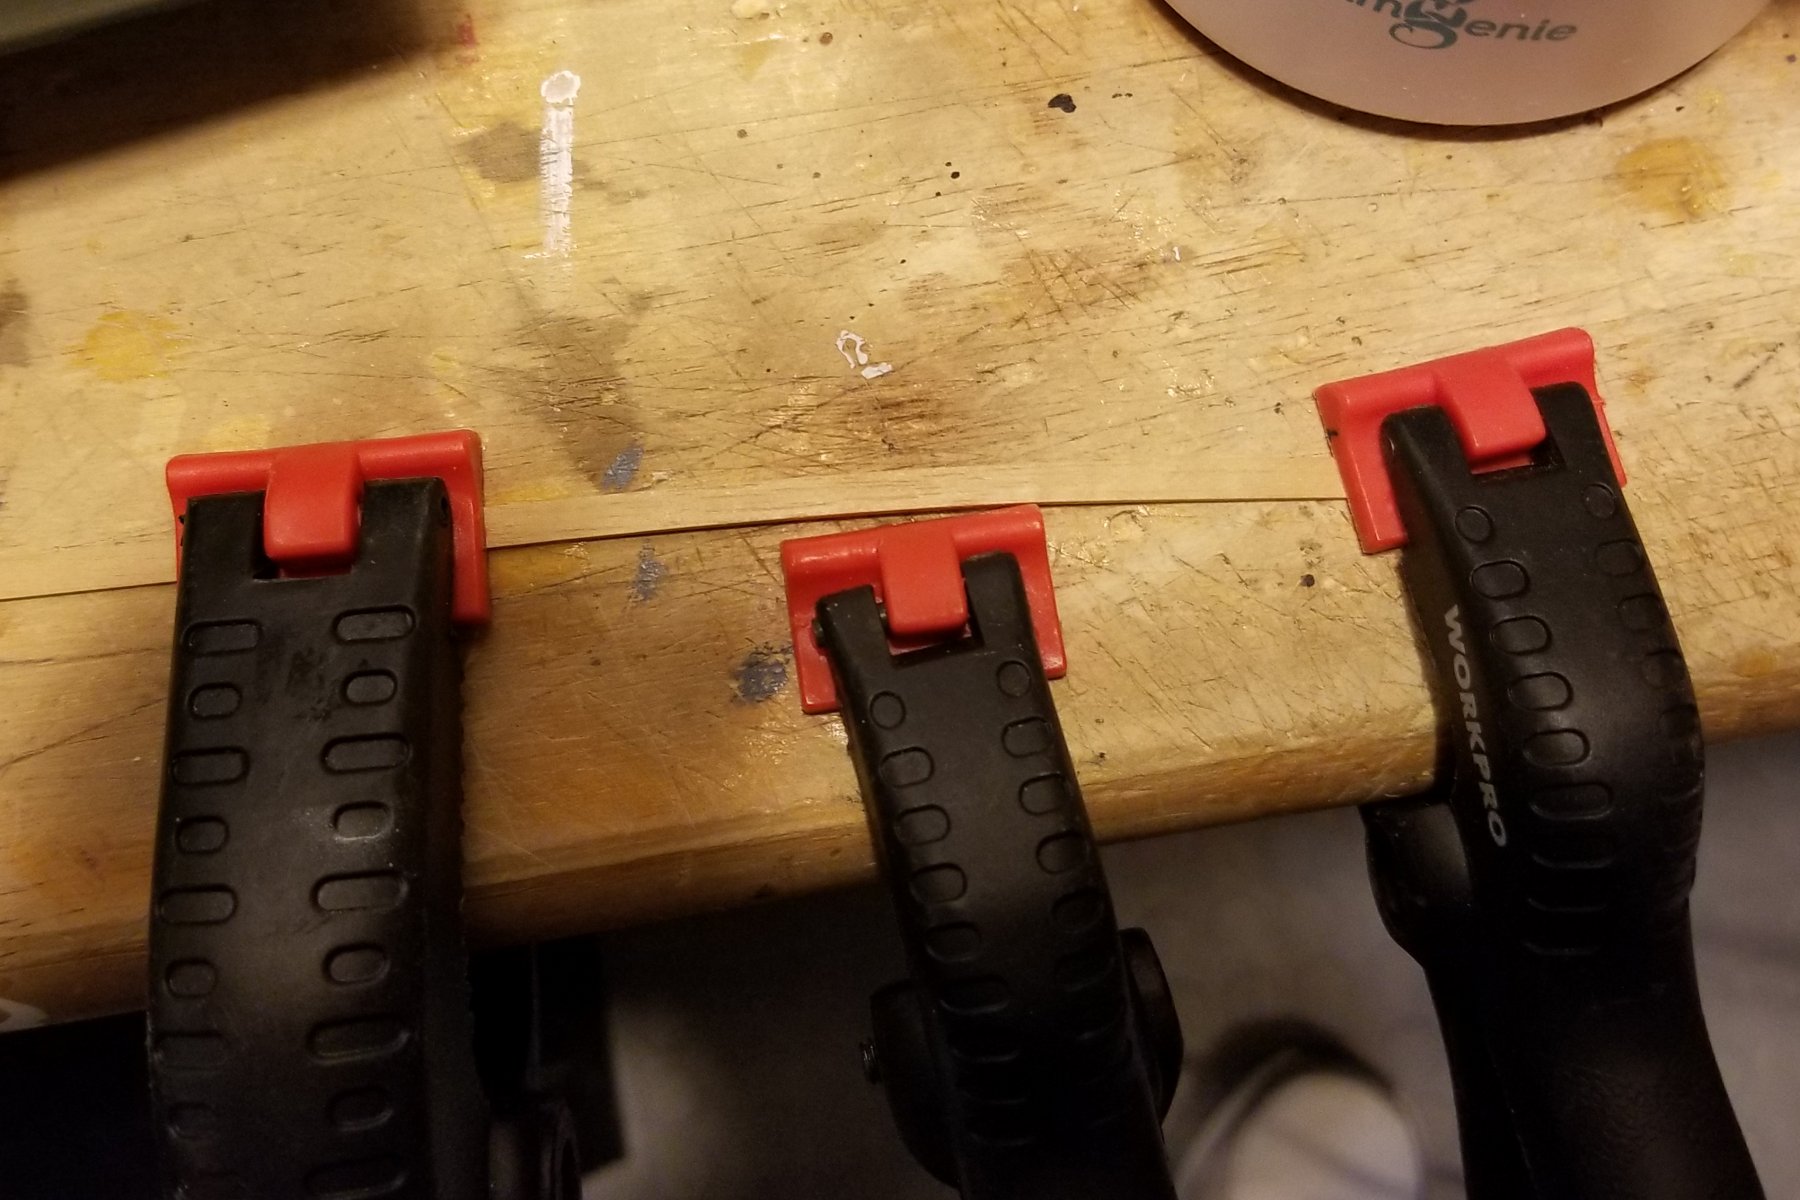
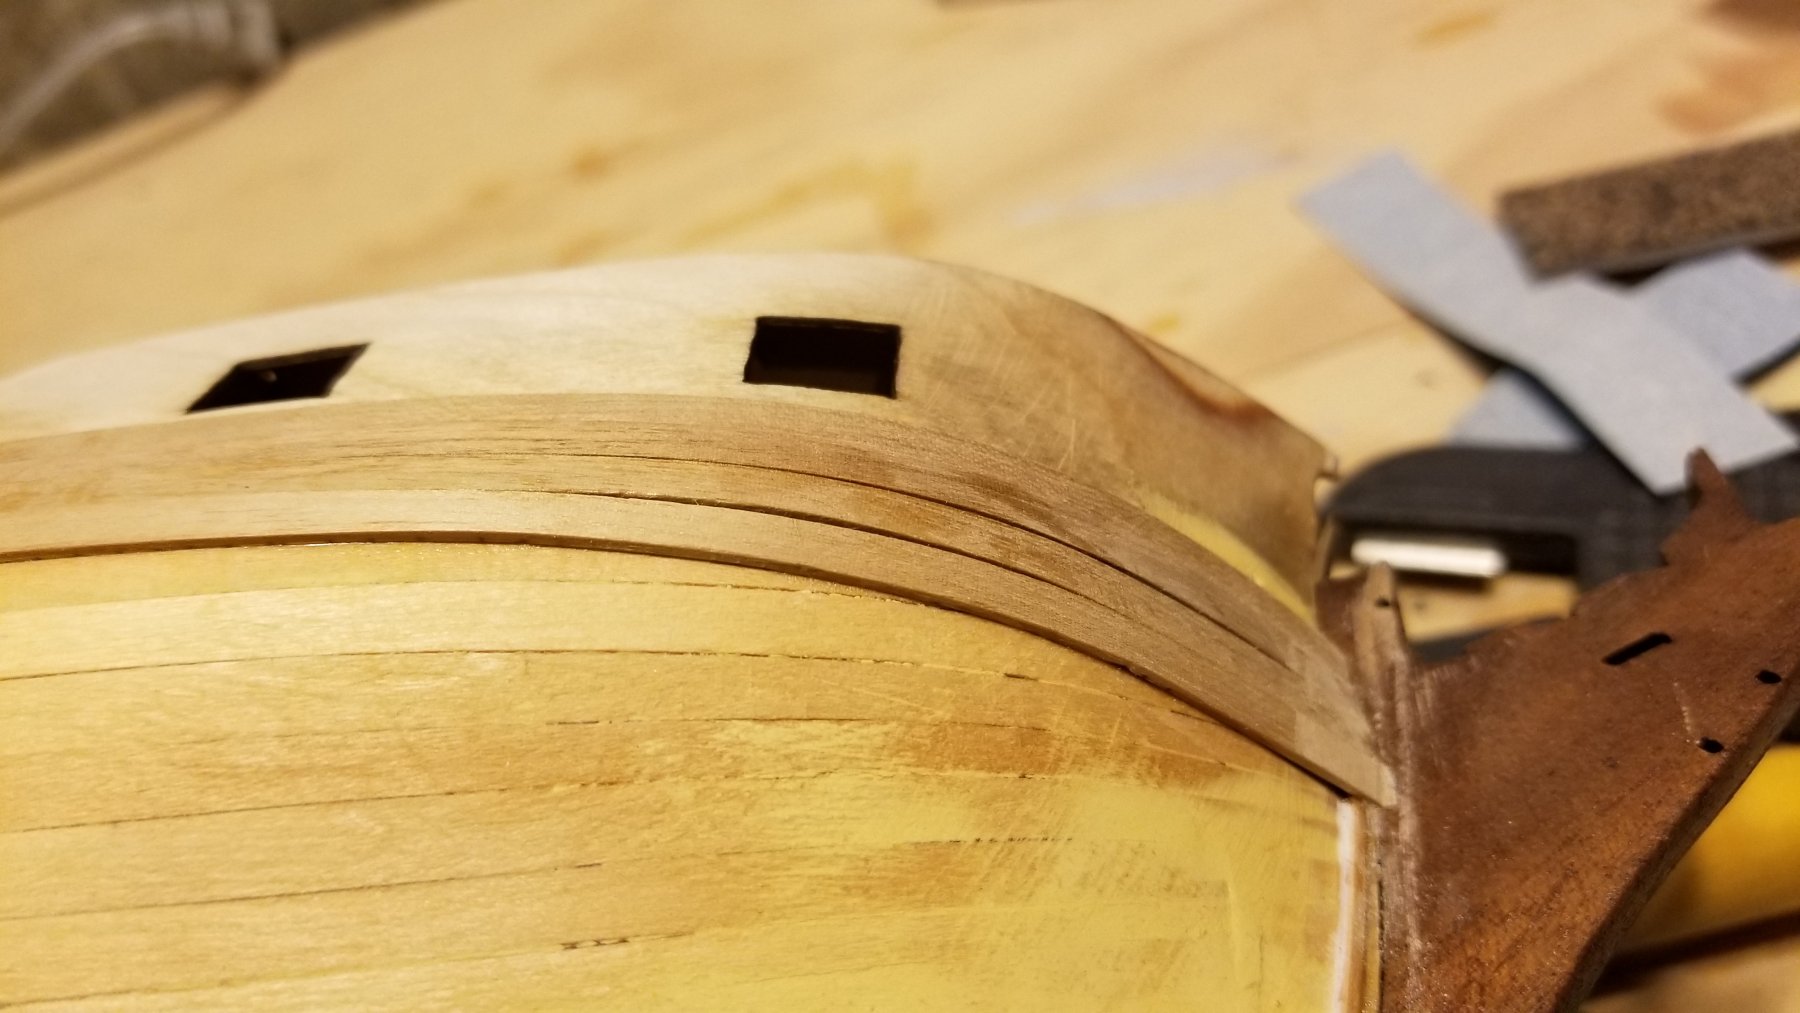
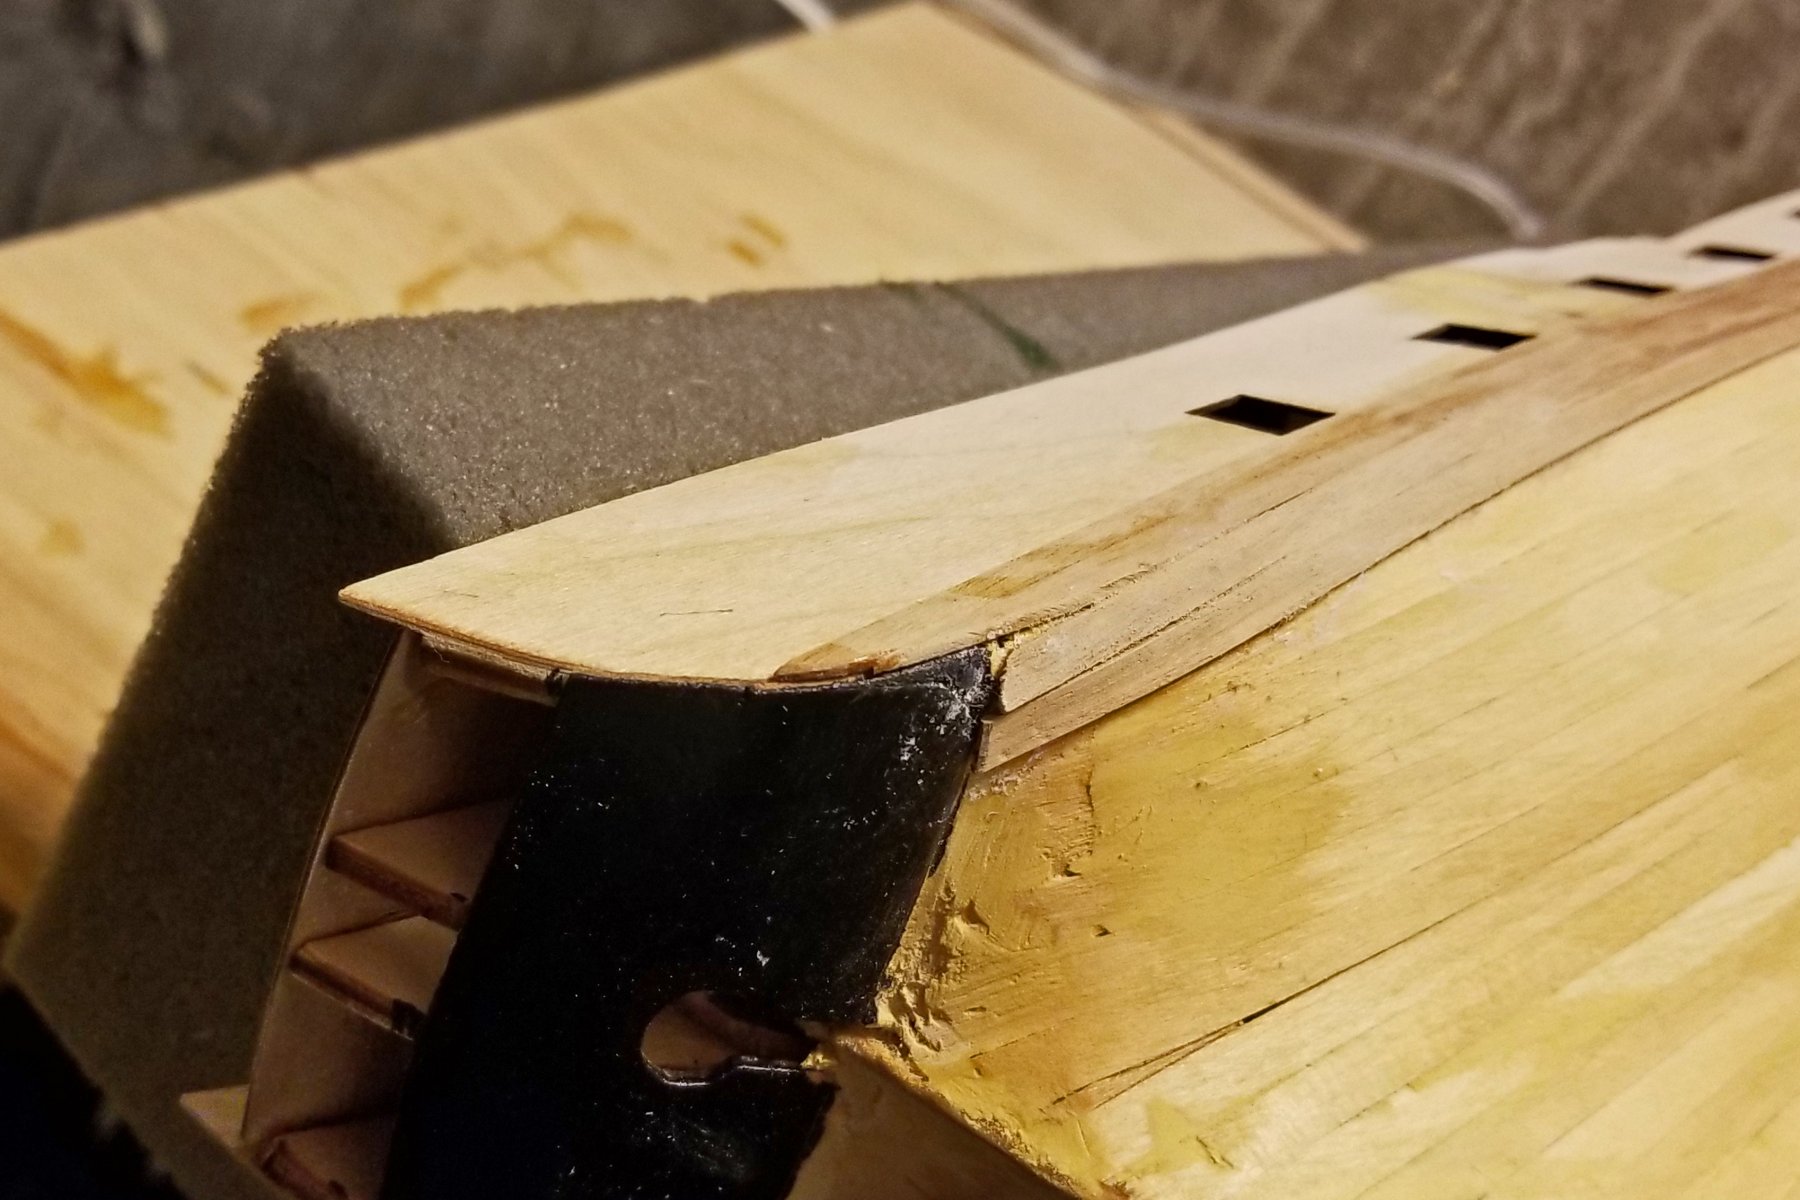
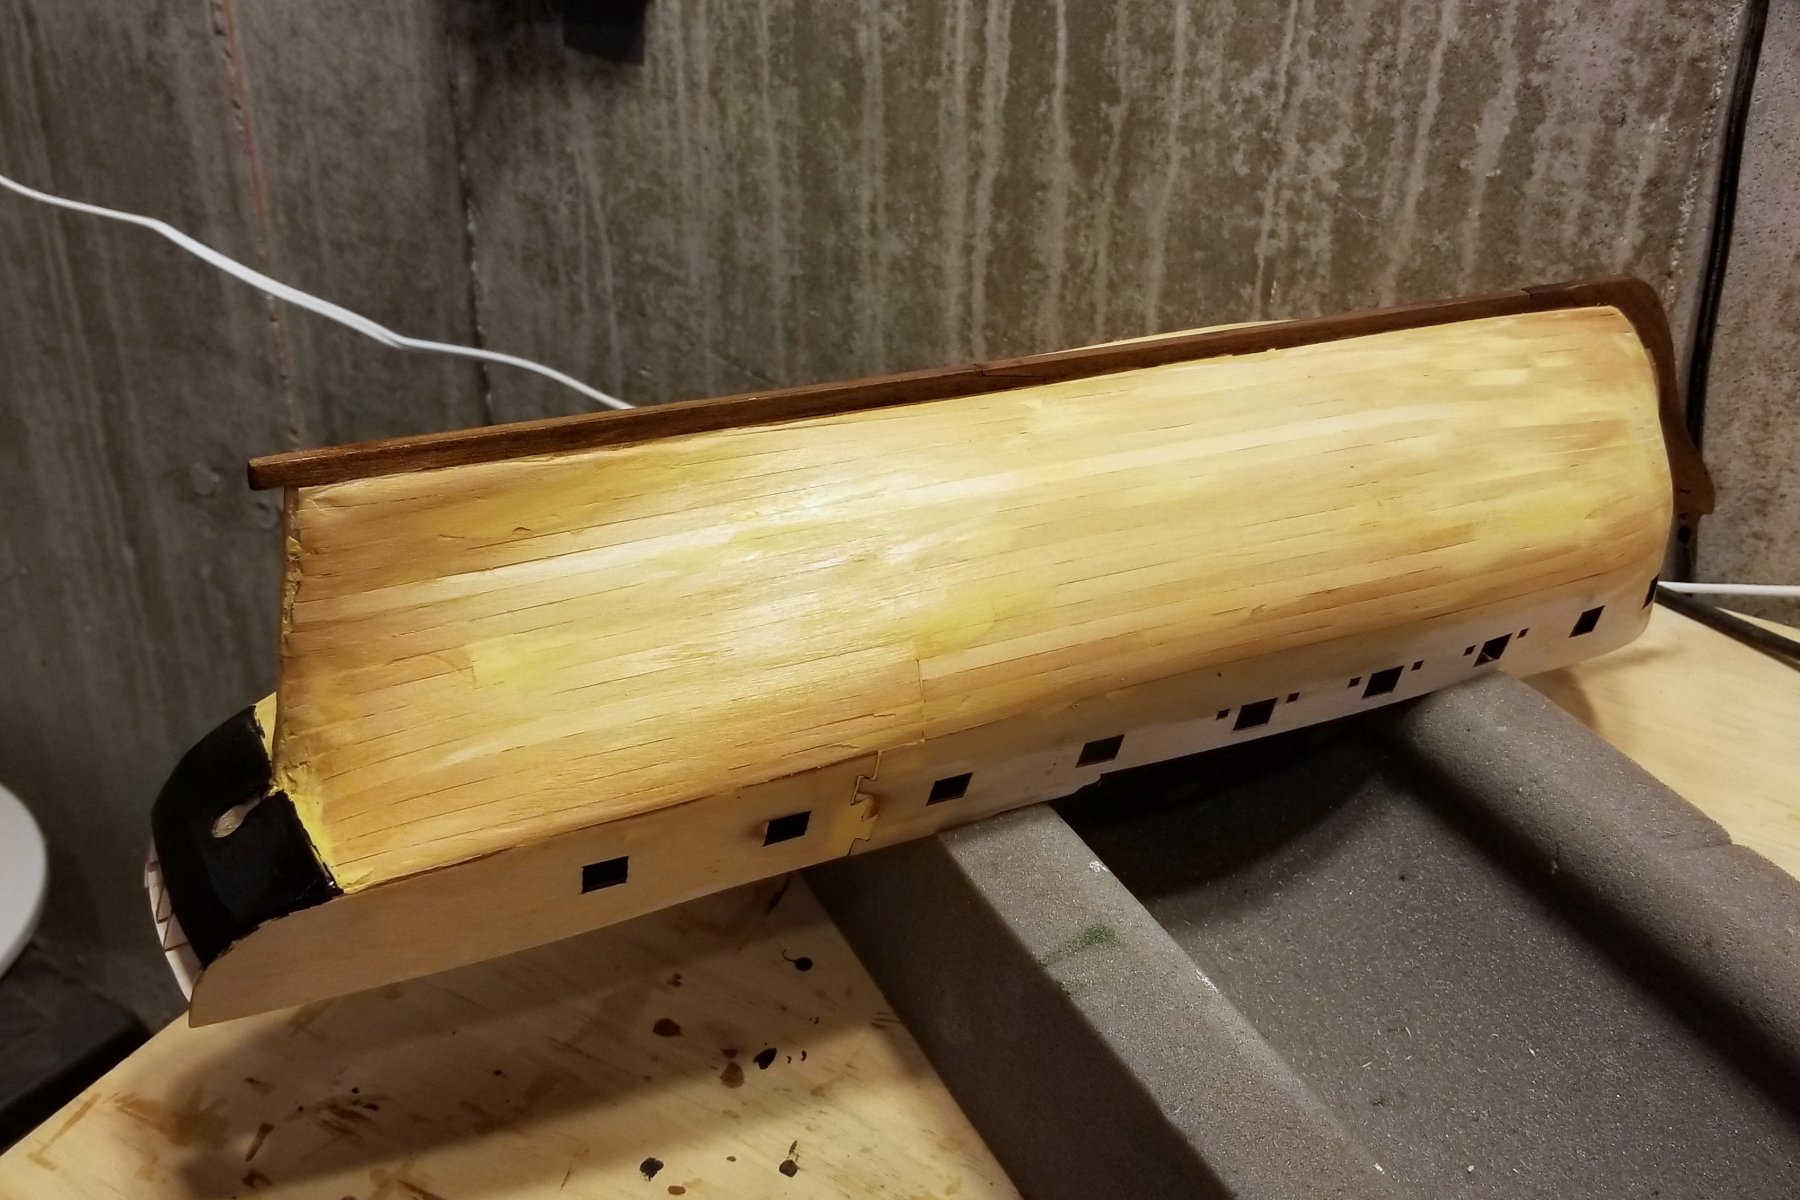
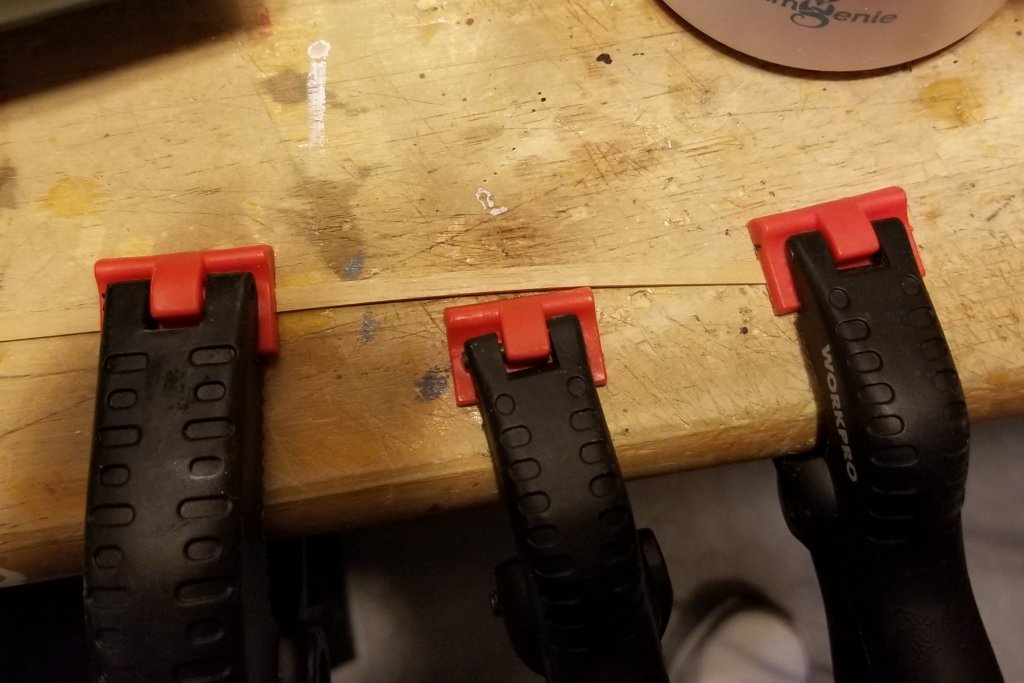
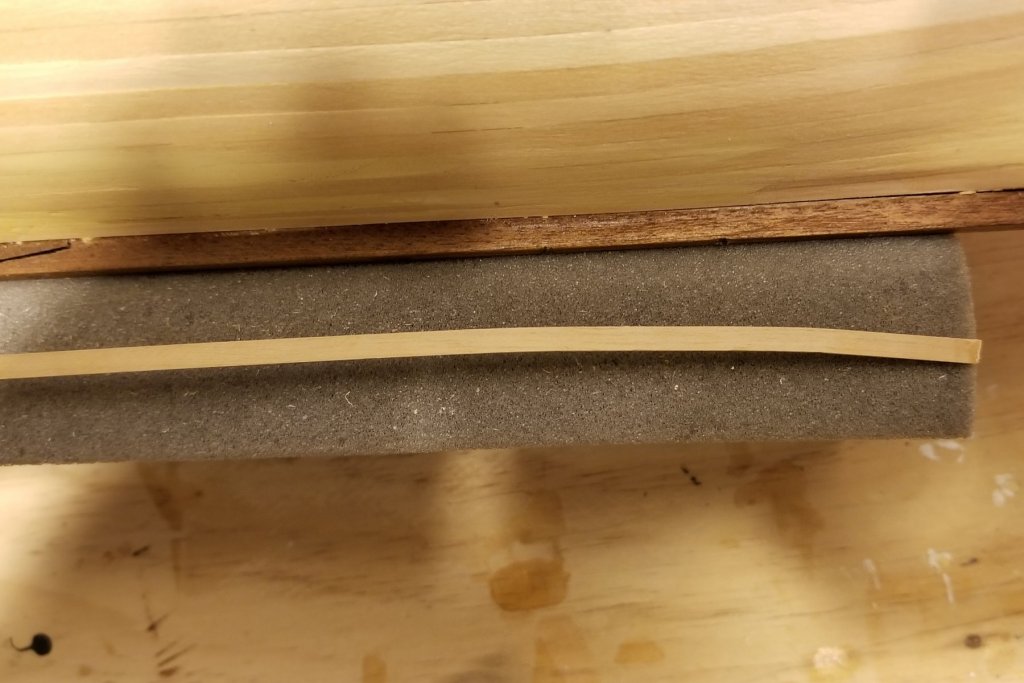
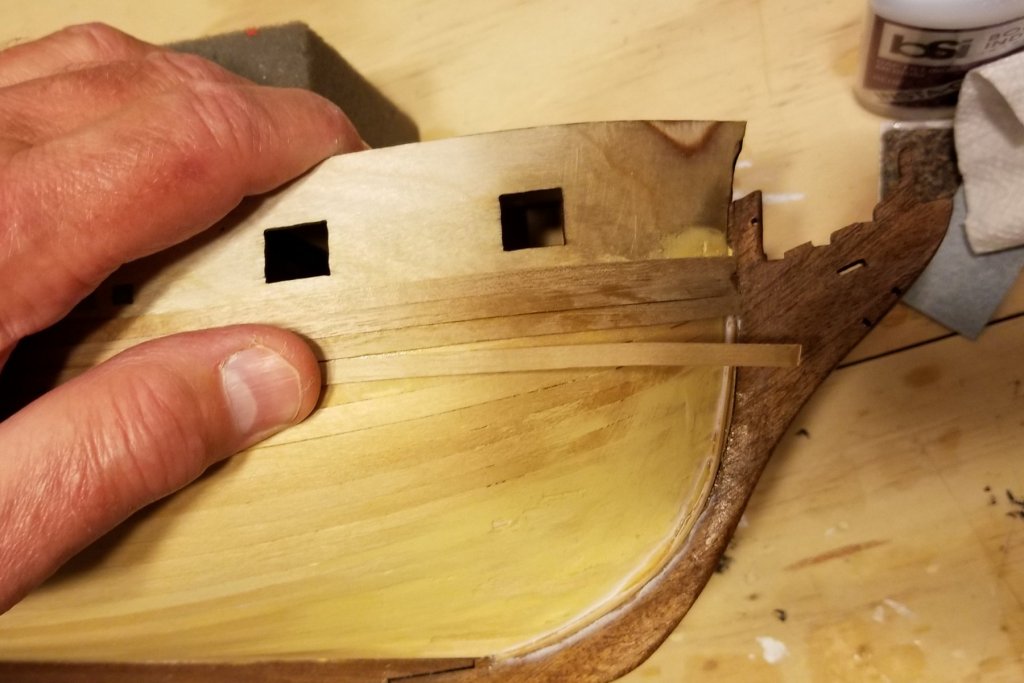
This is my edge bending setup for the second layer. I got this from a video that I found somewhere in MSW, that was done by an expert modeler at one of the MSW shows. He used a hair dryer only -- I use steam and then a hair dryer. Plank clamped on my worktable with the center clamp imparting a bend (it's just up against the side of the plank -- not gripping it). This pic also shows my steamer and hair dryer. The routine is clamp, steam, increase the bend once the wood is wet, steam again, then hair dryer for 30 seconds per section. Close up of bend. The plank after two bending passes. The plank on the boat before gluing -- note that it bends away from the planks above it. The plank now glued. Note that it's flat to the hull, with not very much edge showing on the plank above -- easily sanded. I also find that the steamer really works well on this walnut to soften it for bending. See the stern bend here, which is a 90 degree twist. The steamer only takes 5-10 seconds to soften the wood. Regards, David


- 126 replies
-
- 4
-
-
- fly
- victory models
- (and 1 more)
-
Chris: The wood filler is easily damaged if left "naked" on the hull, and varnish seals it in. Varnish also gives me a surface that grips the second layer just a bit more slowly, so I have time to align things. But the sealing of the filler is the main reason. Regards, David
- 126 replies
-
- 2
-
-
- fly
- victory models
- (and 1 more)
-
Wood filler and sanding applied to first planking, plus a coat of varnish. Now ready for second planking. Regards, David

- 126 replies
-
- 6
-
-
- fly
- victory models
- (and 1 more)
-
First planking done with one rough sanding pass. Now wood filler and sand, sand, sand. Regards, David
- 126 replies
-
- 3
-
-
- fly
- victory models
- (and 1 more)
-
Antony: Just found this fabulous build, and I'm on board to watch the rest of the way. Your prowess (and ambition) with scratch builds is terrific. Regards, David
-
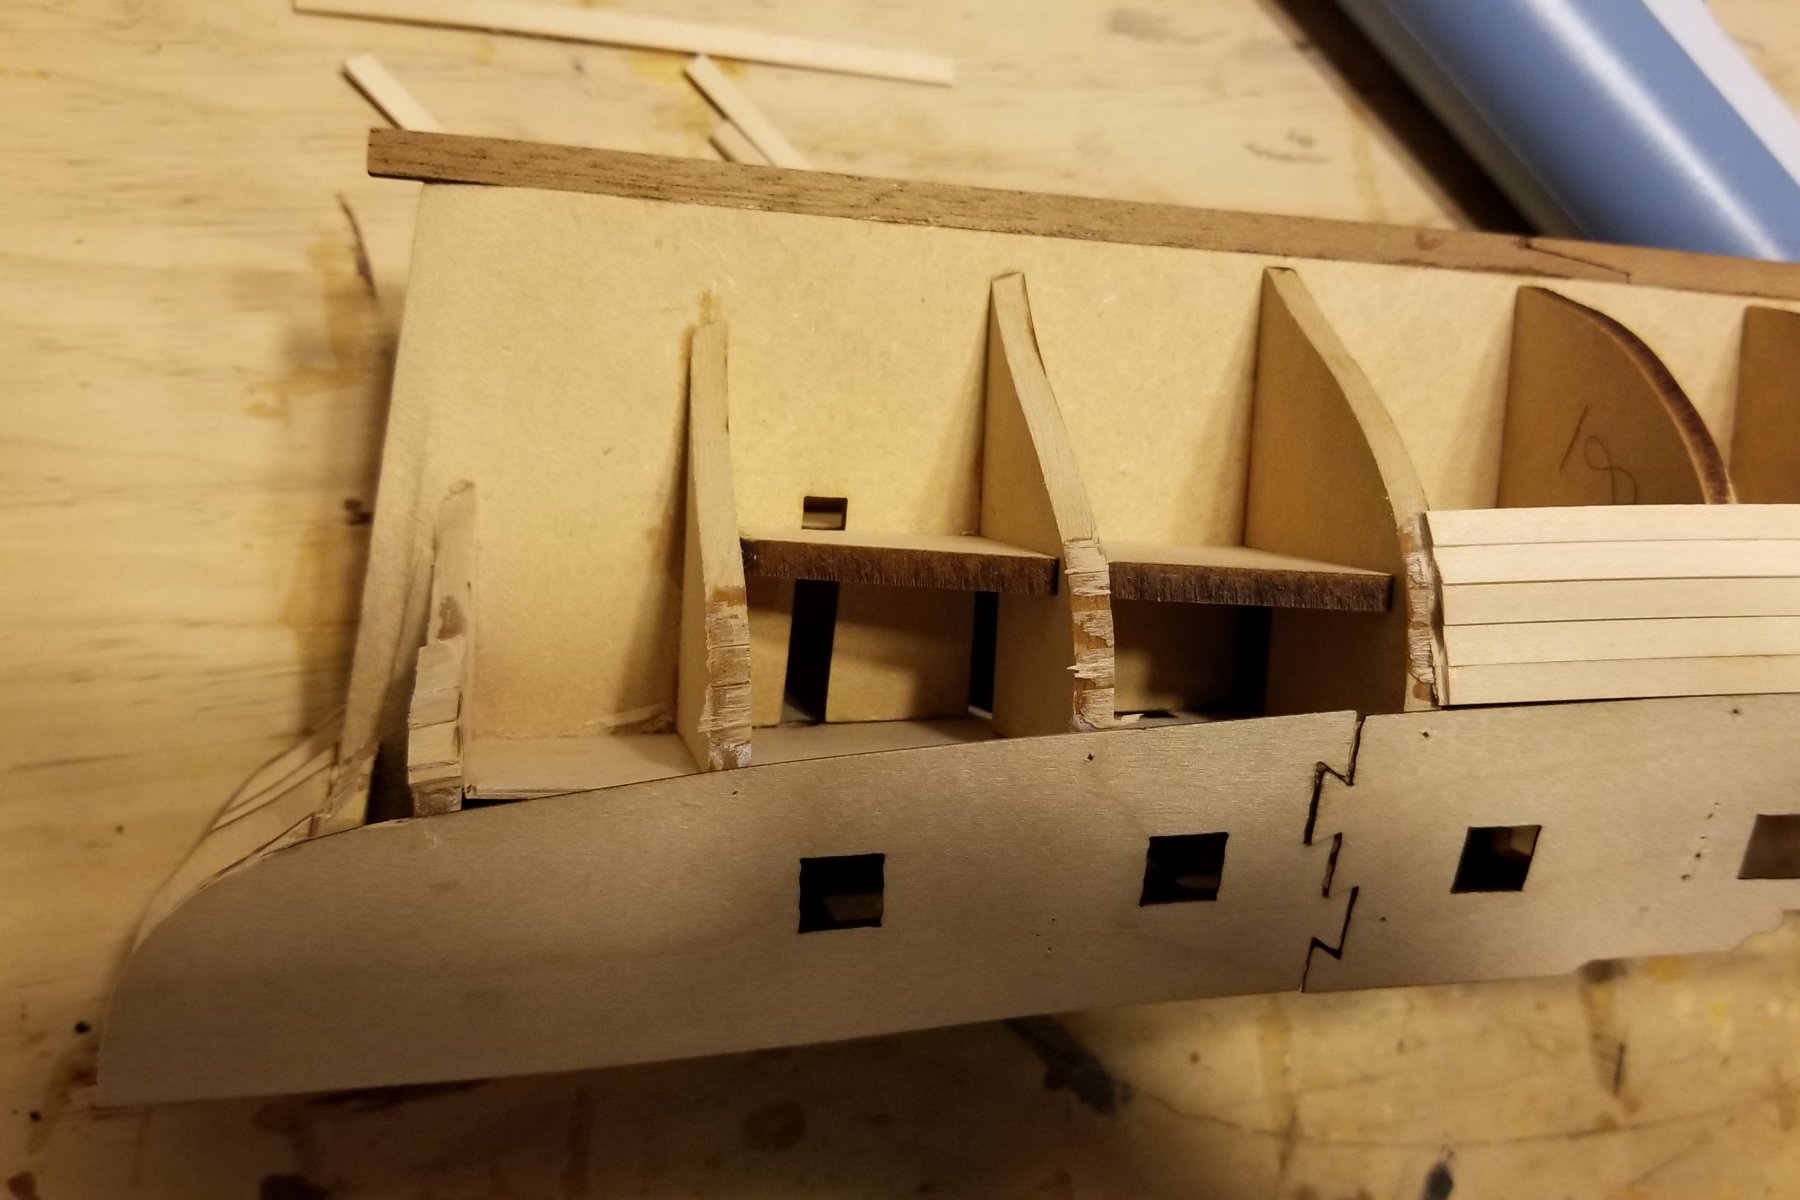
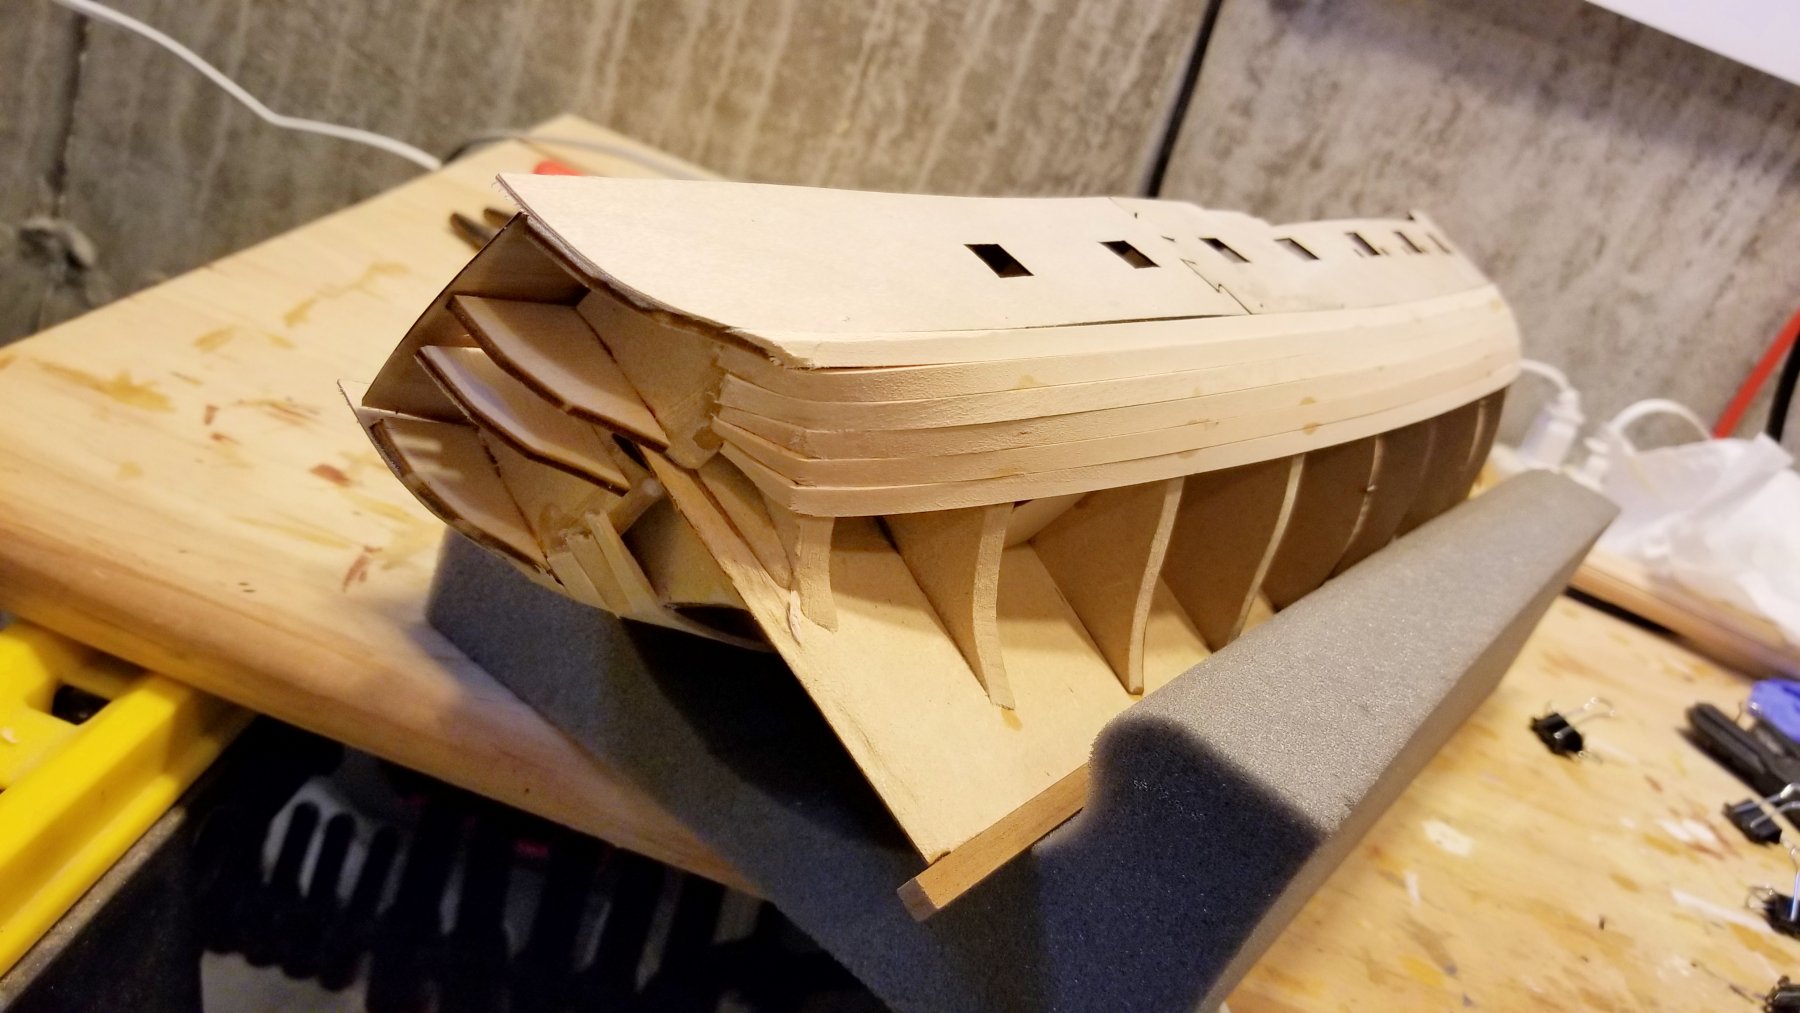
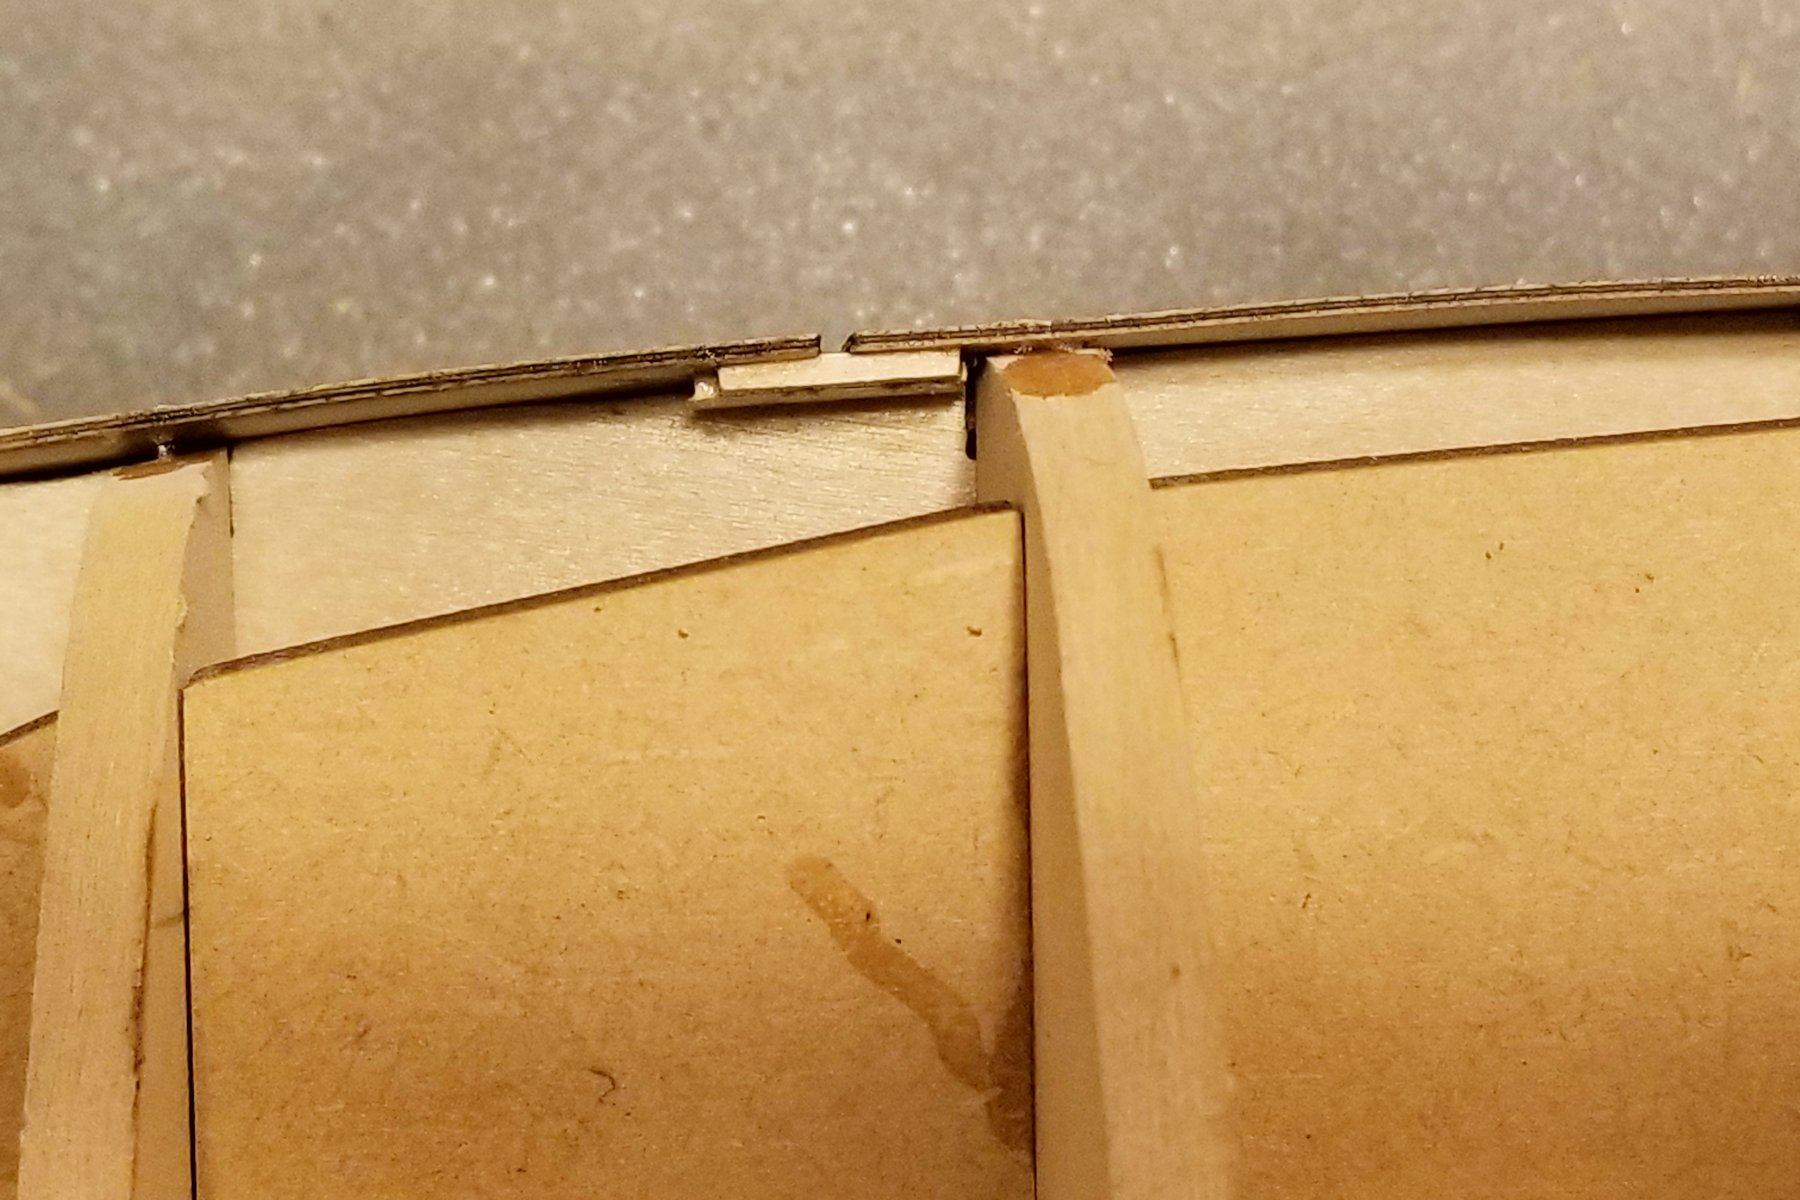
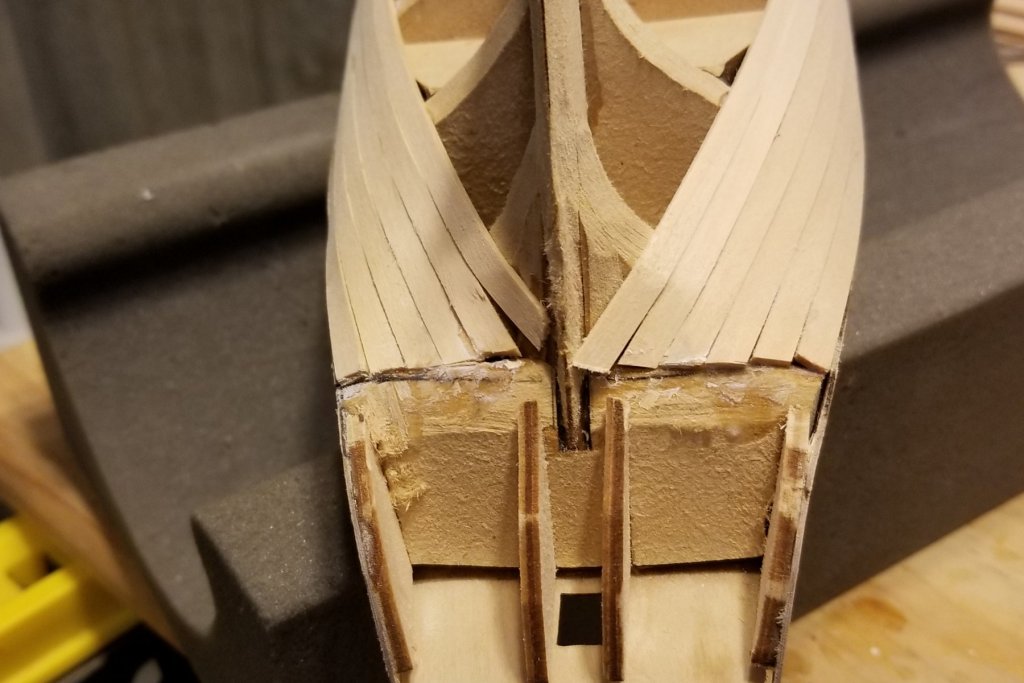
I want to thank Blue Ensign for his really great advice -- and for stating it strongly so that I'd have the motivation to rip out planks and go back. So I did just what B.E. recommended above. You can see the removal and the re-do in the pics below. Much, much better plank line, and I can see how the former one would have not just "led to problems down the line", but actually have been a disaster. I have to confess that I found the drawings not very helpful in understanding how the stern should look, and I was also led astray by the initial size of the second bulkhead. I assumed (wrongly) that it would have been made closer to its target size. What helped a lot was scouring all of the build logs on Fly, which helped me understand how the lower stern counter mates with the planking. The drawings were just a mystery to me. Again, thanks and kudos to Blue Ensign. Regards, David
- 126 replies
-
- 8
-
-
- fly
- victory models
- (and 1 more)
-
Mike: Thank you so much for the substantial time you put into that post. I have been tapering the planks at the bow, but I may start further back as you suggest. Your stern bend on the Pegasus looks shallower than mine on the Fly. That's either because the ships are different in that regard, or maybe I should have beveled that last bulkhead more to create a shallower drop -- but it's too late now. I see what you mean about the stealers. I have looked at the other Fly logs and can't get a good handle on whether their bend is as steep as mine. I haven't worried a lot about the side effect of pulling the stern planks over to align them, again because sanding and wood filler are my best friends on layer 1. Not so with the second planking. When I built the Revenge, I edge bent the second planks using clamps, a steamer and a hair dryer. It takes a long time, but they really lay well when I get it right. Lots of snake-like S-bent planks! Also lots of stealers where needed. Regards, David
- 126 replies
-
- 4
-
-
- fly
- victory models
- (and 1 more)
-
Mike: Thanks for all of this. Sanding and filler is in fact my very best friend -- I just think that I may for a change end up with more planks than filler on the first planking. You should see my earlier attempts -- tubs of filler You are right about the clinking, but these first planks are 1.5mm so plenty of room for sanding. On the stern: the sharp bend is there whether I try to align with the plank above or not. I have a really good steamer, and the cracks you see are partly a function of me being too impatient and not steaming enough. When I do steam enough, I can really move the planks where I want them. I have studied pictures and build logs to be sure I understand the run of planks at the stern -- and I think I do, although the plans are not terribly helpful on that score. From what I can figure out, that sharp bend is part of the deal on this boat. The stealer count will go up with the second planking. You said "from what I can recall." Have you built the Fly? I only see the Pegasus in your signature. If you have built the Fly, or if the Pegasus is similar, how did you handle the bend at the stern? (just the bend -- not the alignment part). Regards, David
- 126 replies
-
- 4
-
-
- fly
- victory models
- (and 1 more)
-
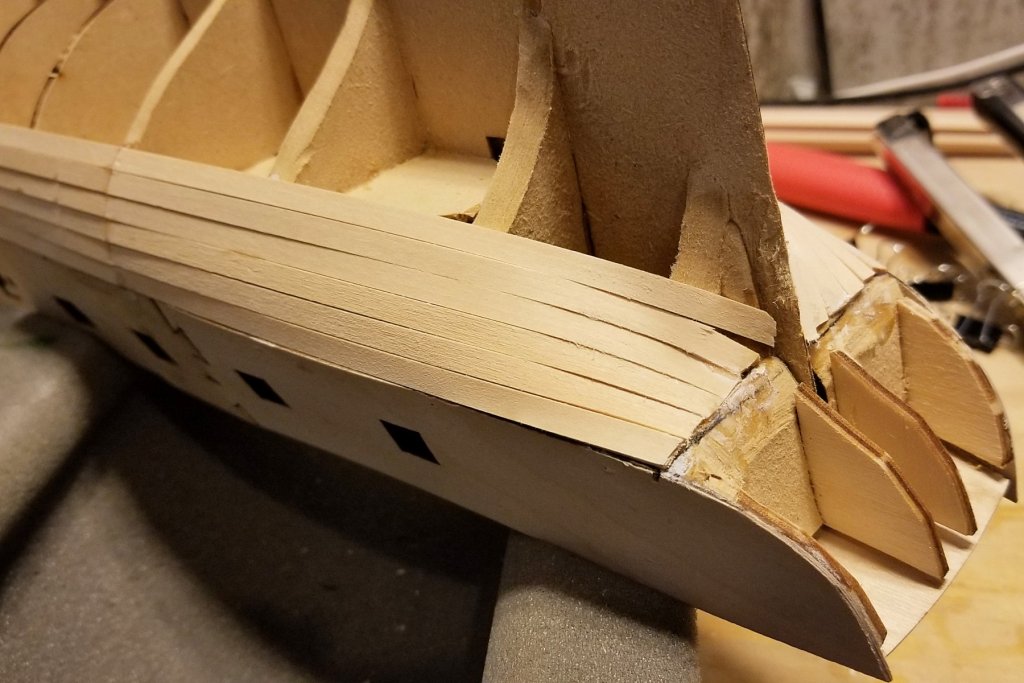
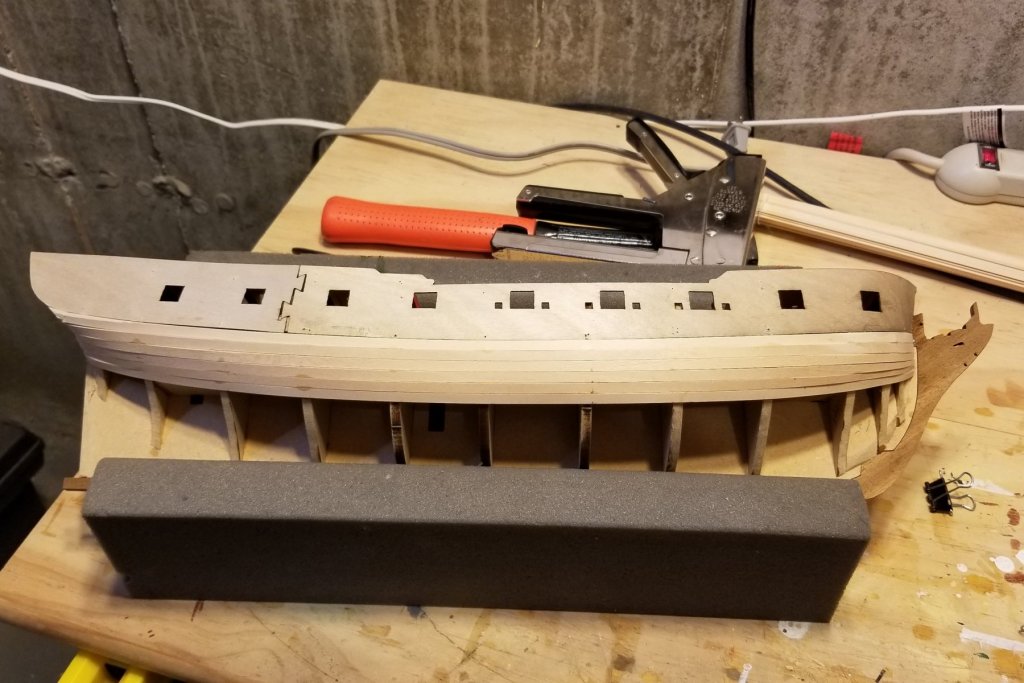
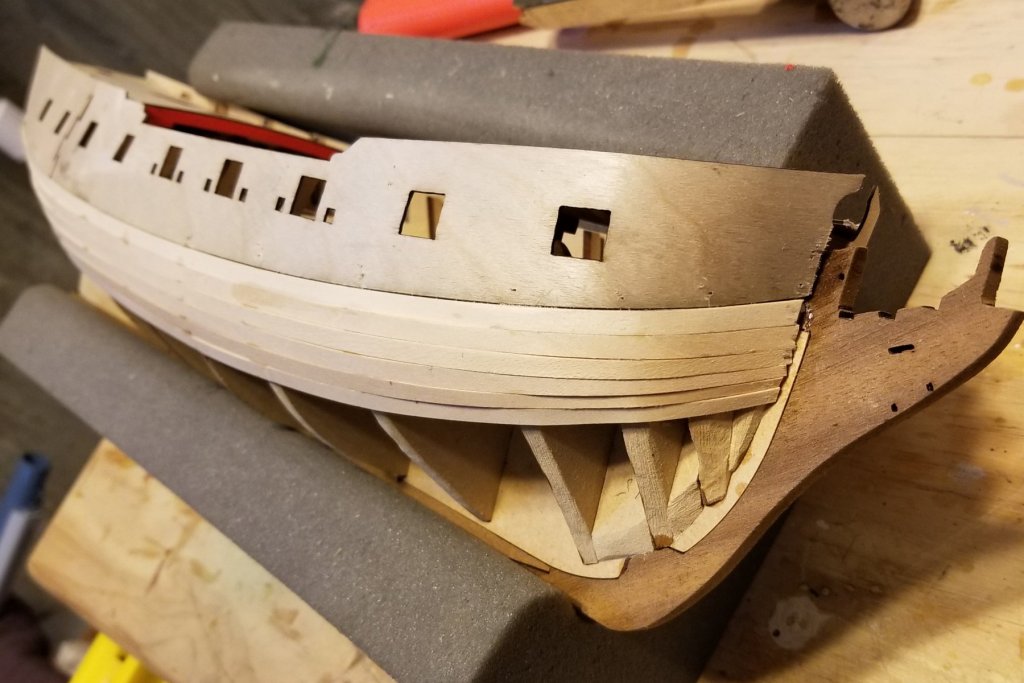
First planking underway. This is the smoothest and best-fitting first planking I've done to date, and I think the reason is that I beveled each bulkhead separately off the ship before installing it and gluing it it, testing each one with a test plank for fit. So far, things are lying nicely. Regards, David

- 126 replies
-
- 5
-
-
- fly
- victory models
- (and 1 more)
-
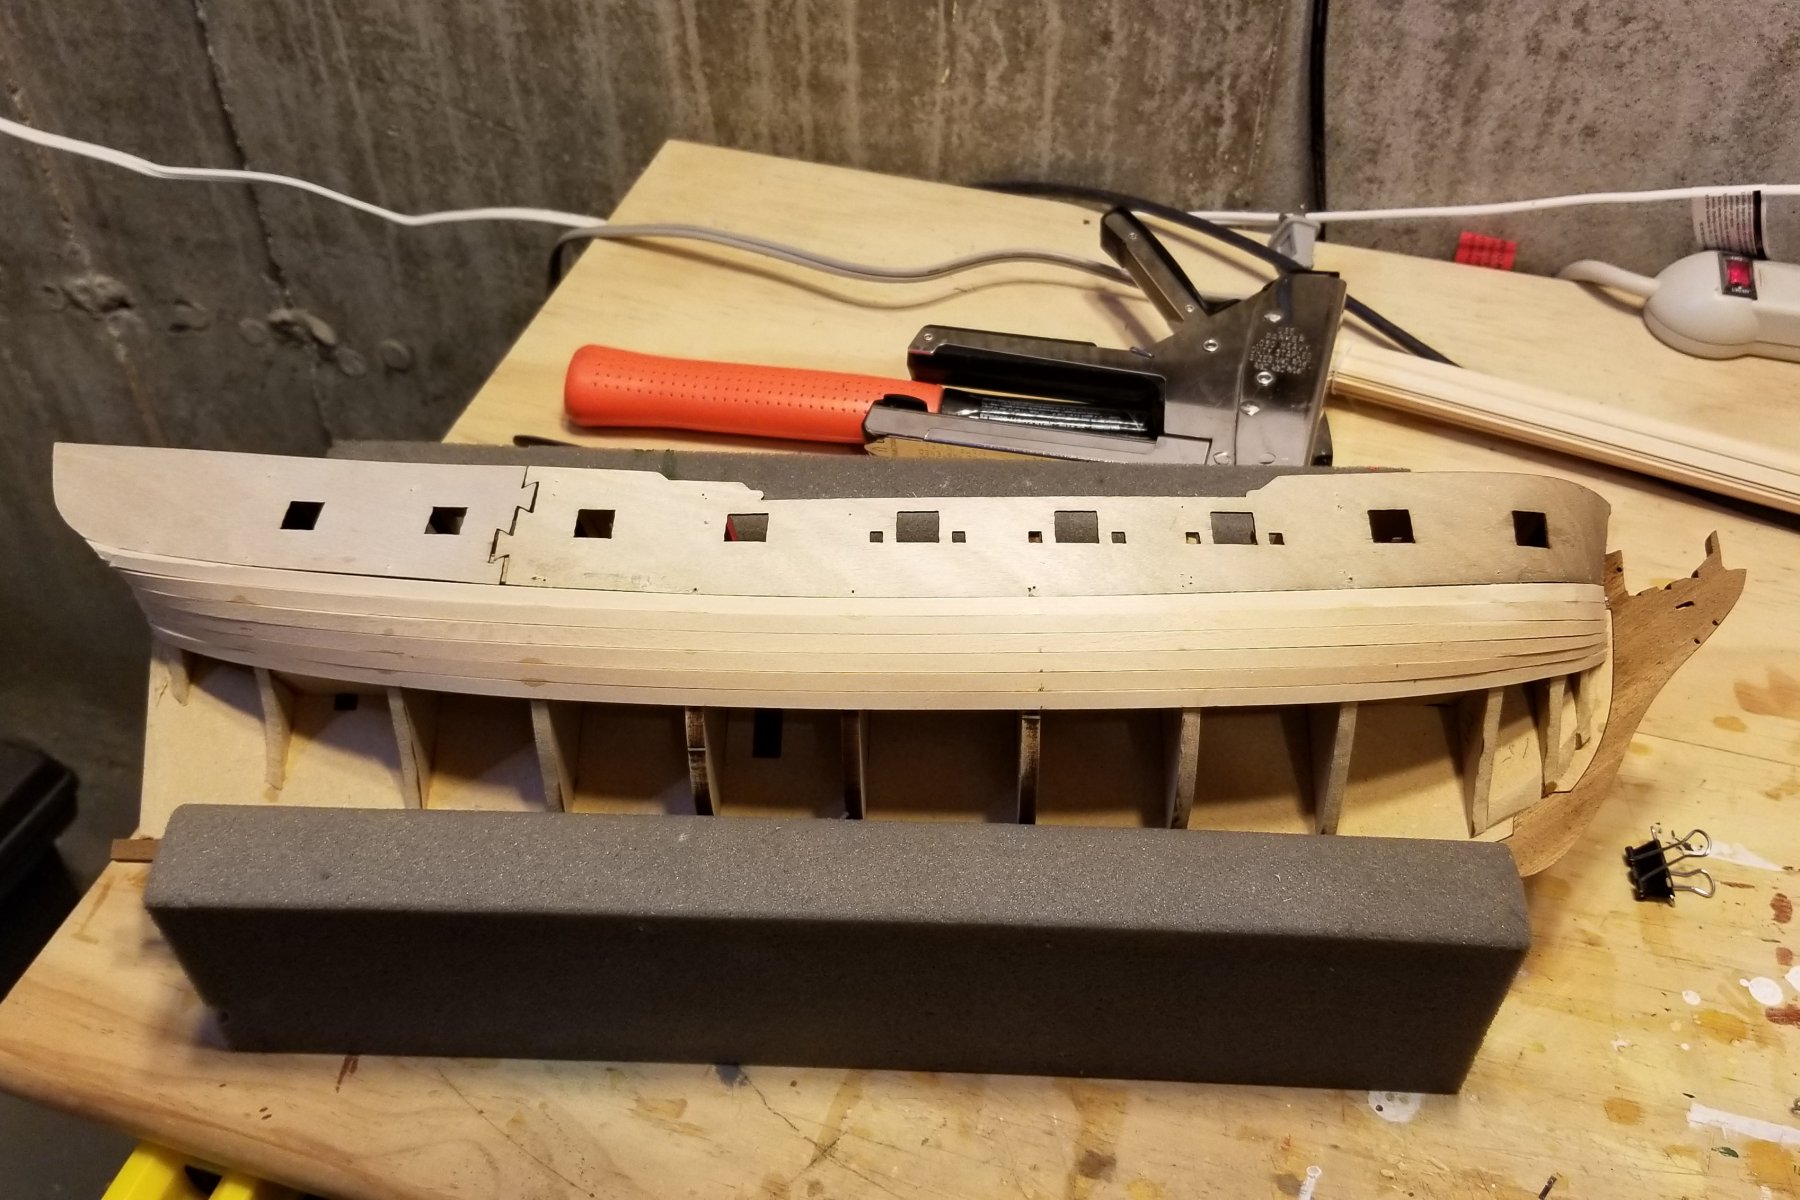
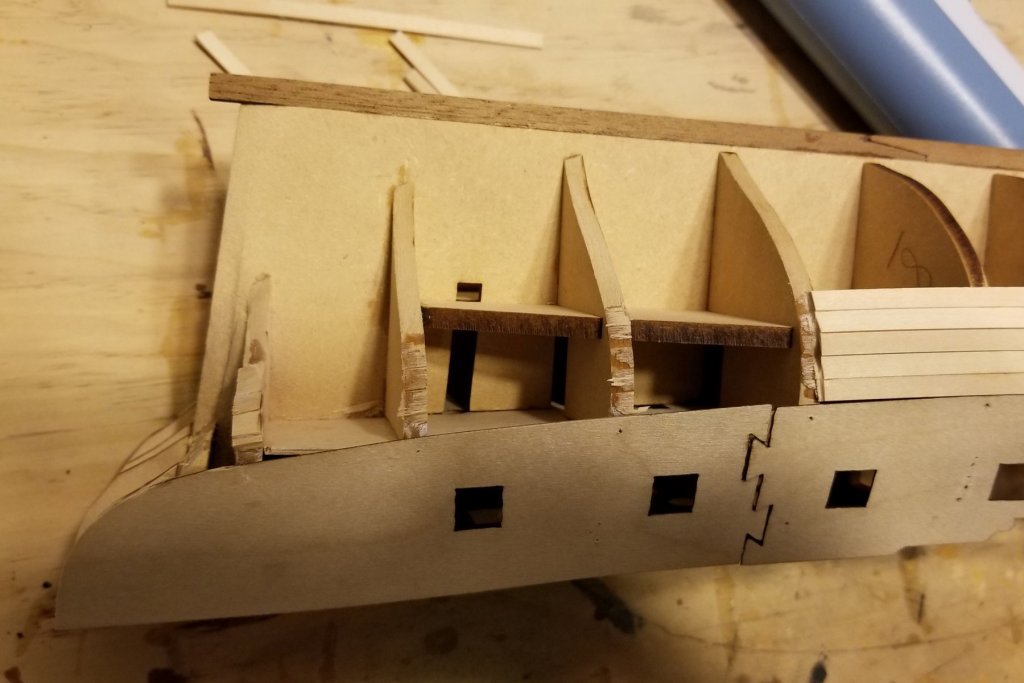
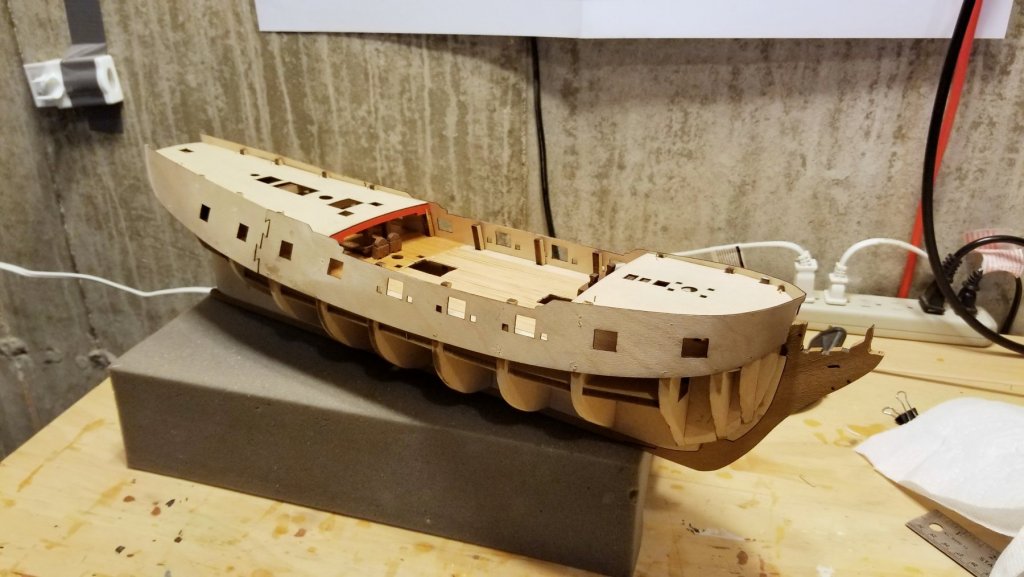
Bulwarks on and ready for first planking. The bottom edge of the rear bulkhead was springing out where it joins the front bulkhead, so I added a small stiffener behind it. Second picture. Mindful of advice above from Mike and Chris, I considered gluing down the top decks at this point (the instructions say to do it after both plankings). I finally decided to wait, on the off chance that while manipulating the hull so much during planking, I'd knock one of the cannon carriages loose. Speaking of the cannon carriages: the original ones are metal with some interesting detail, while the ones supplied in the upgrade kit are wood with smooth sides. I think that's because the wood allows for the fancier cannon rigging as eyes can be installed in the carriages, but I like the look of the metal ones, so I'll use those and the simpler rigging. Regards, David

- 126 replies
-
- 2
-
-
- fly
- victory models
- (and 1 more)
-
Looks great, Chris. You are really making progress now. Regards, David
-
Chris Coyle: Yes, I can see from some of the build logs on Fly that others have just done one continuous planking run, but they are on there now with fittings glued on top, so on they stay. Chris Vossy: Speaking of materials, my Fly kit only has "natural" thread at the thickness needed for ratlines. I looked at all of the Fly pics I could find, and all show black thread, so I think I'm expected to dye the natural thread black. No way -- I bought some black thread for the ratlines. I also agree with you about things not being mentioned or being assumed -- these instructions are a bit sketchy compared to the Revenge ones, which were magnificent. Both Chris Watton -- just different time periods. Regards, David
- 126 replies
-
- 1
-
-
- fly
- victory models
- (and 1 more)
-
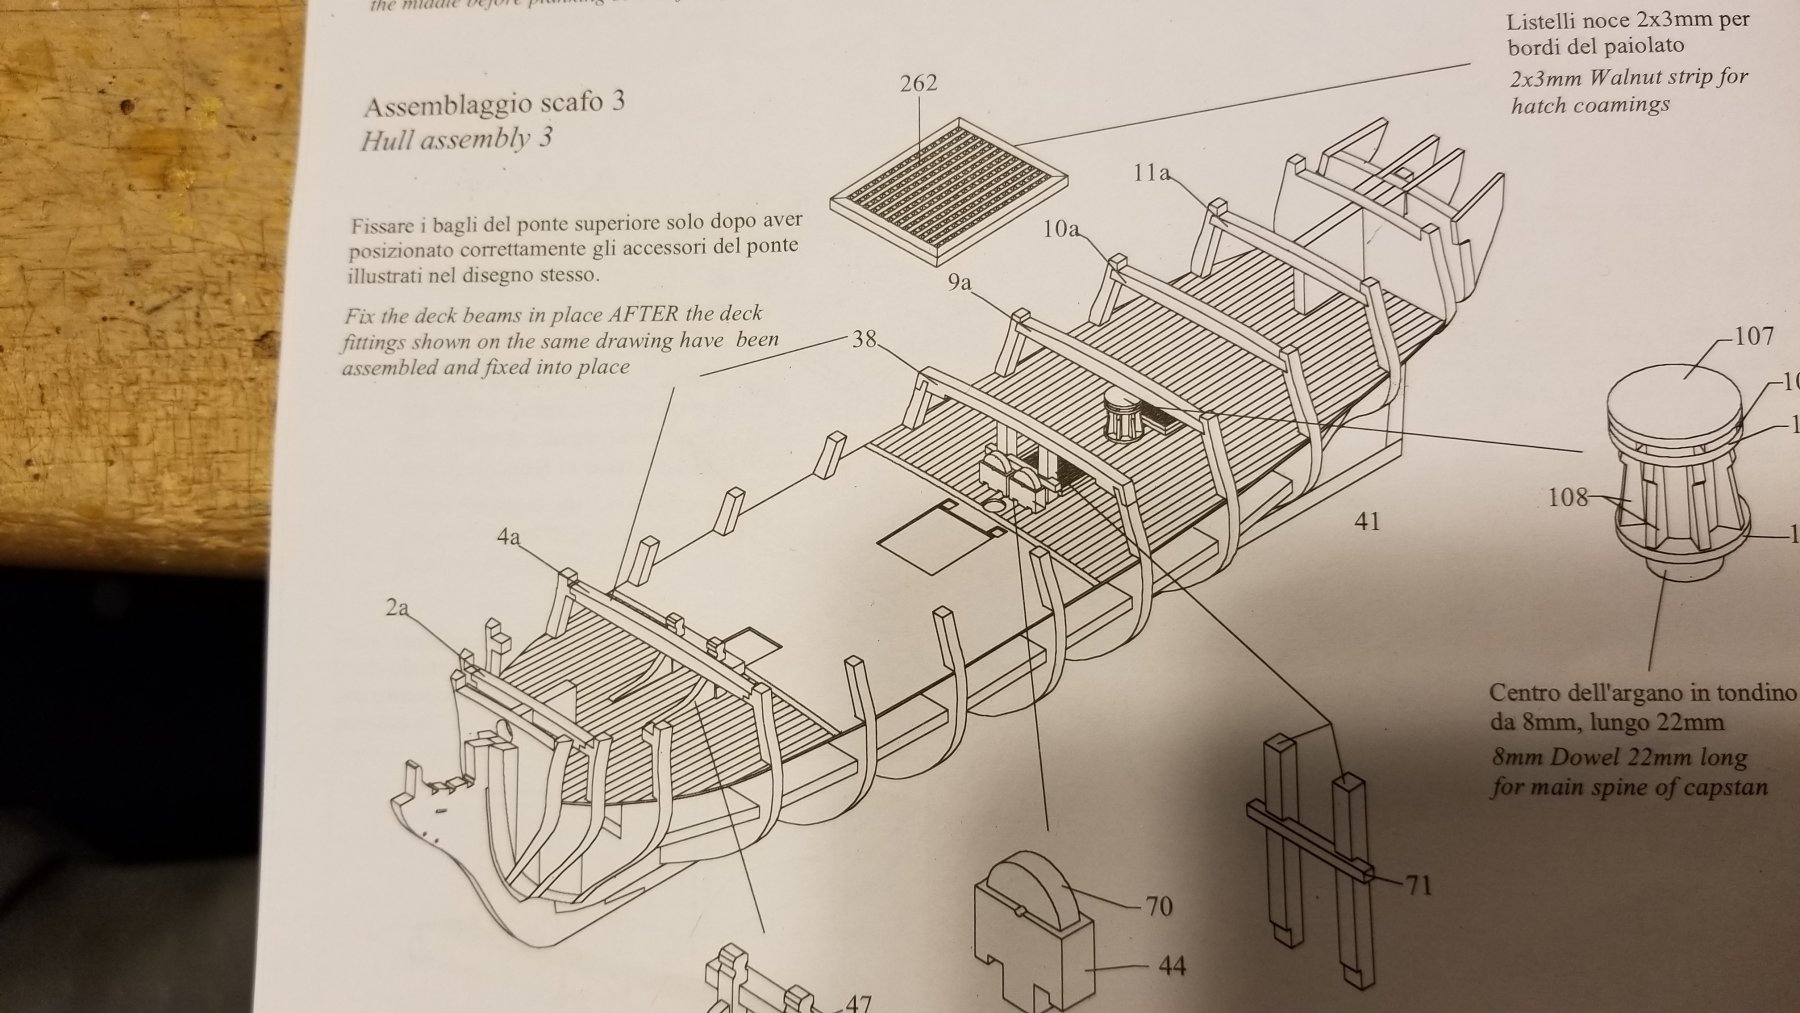
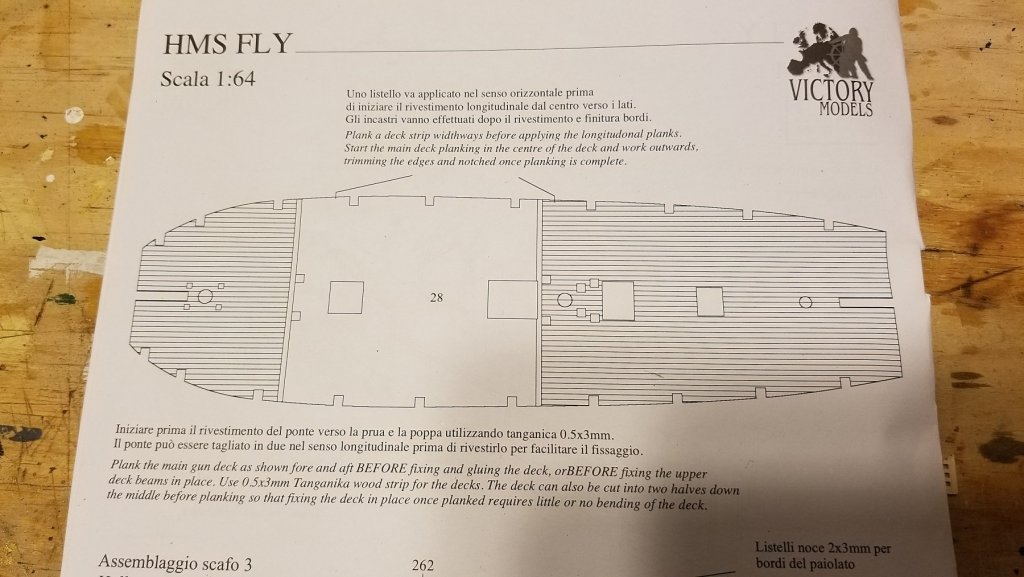
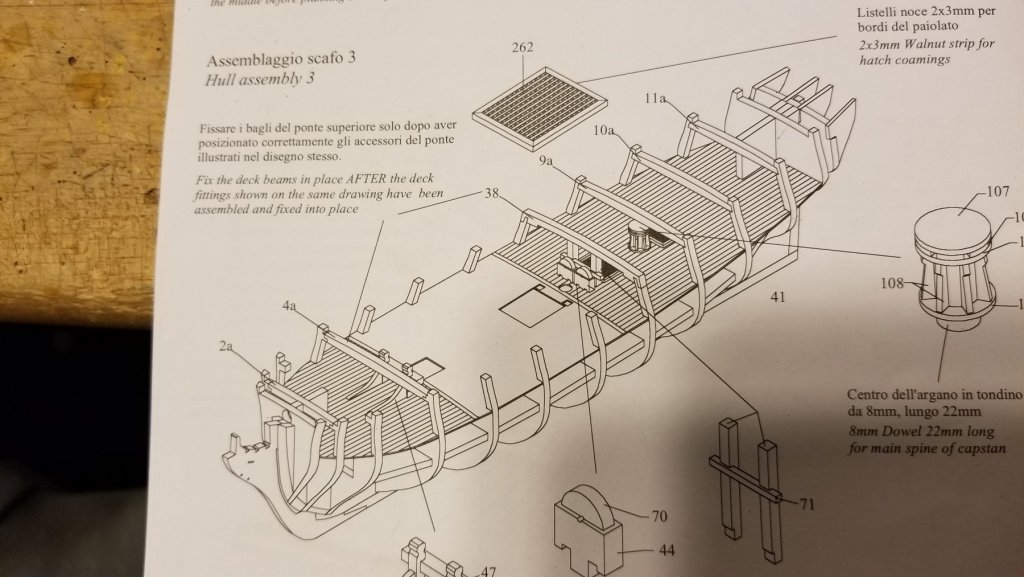
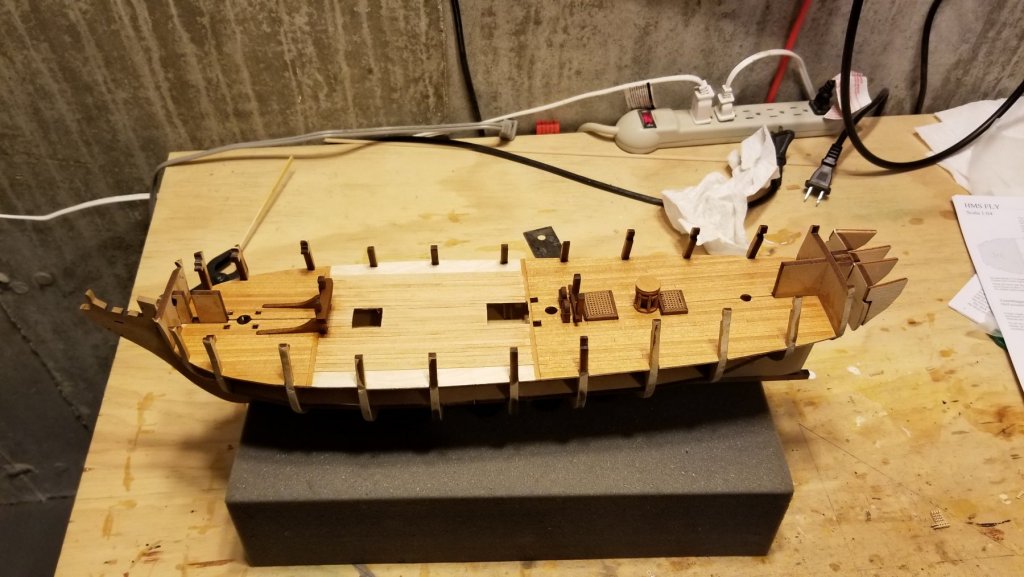
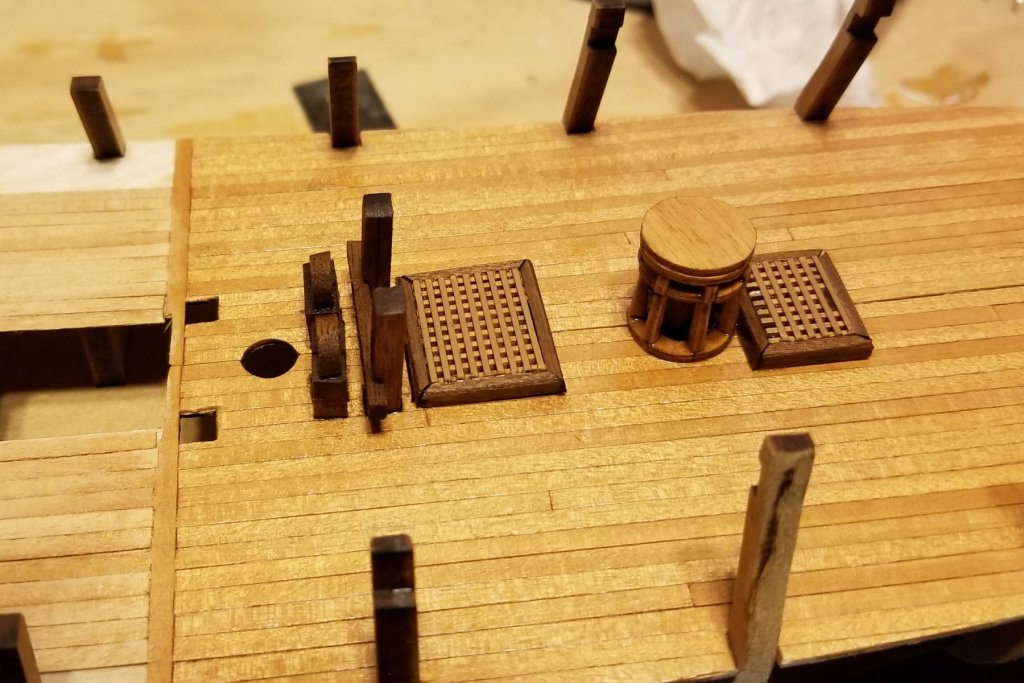
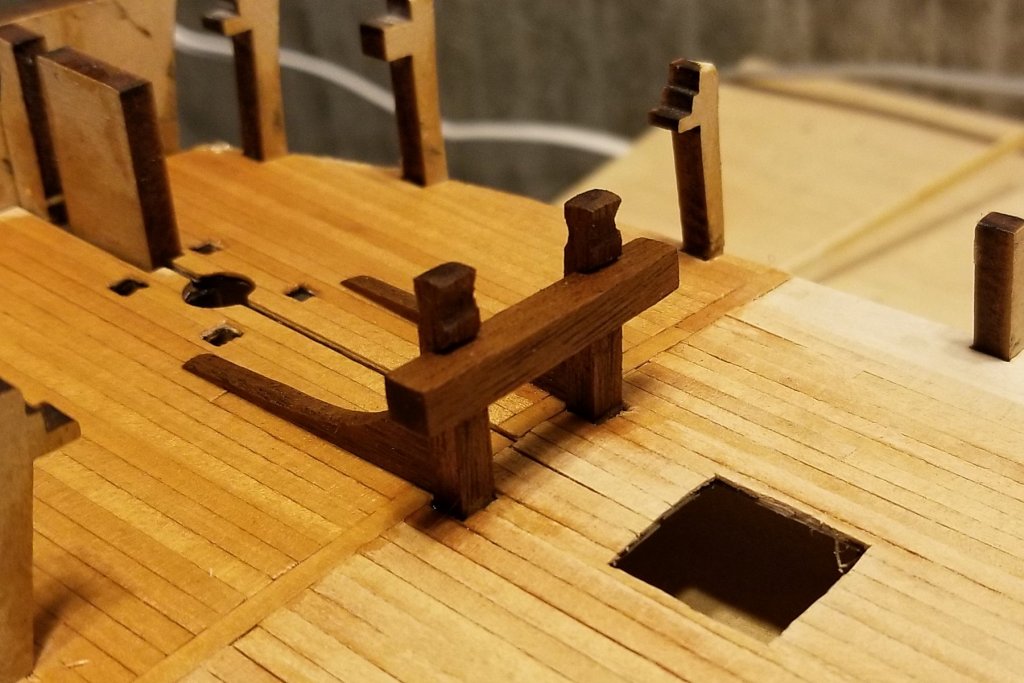
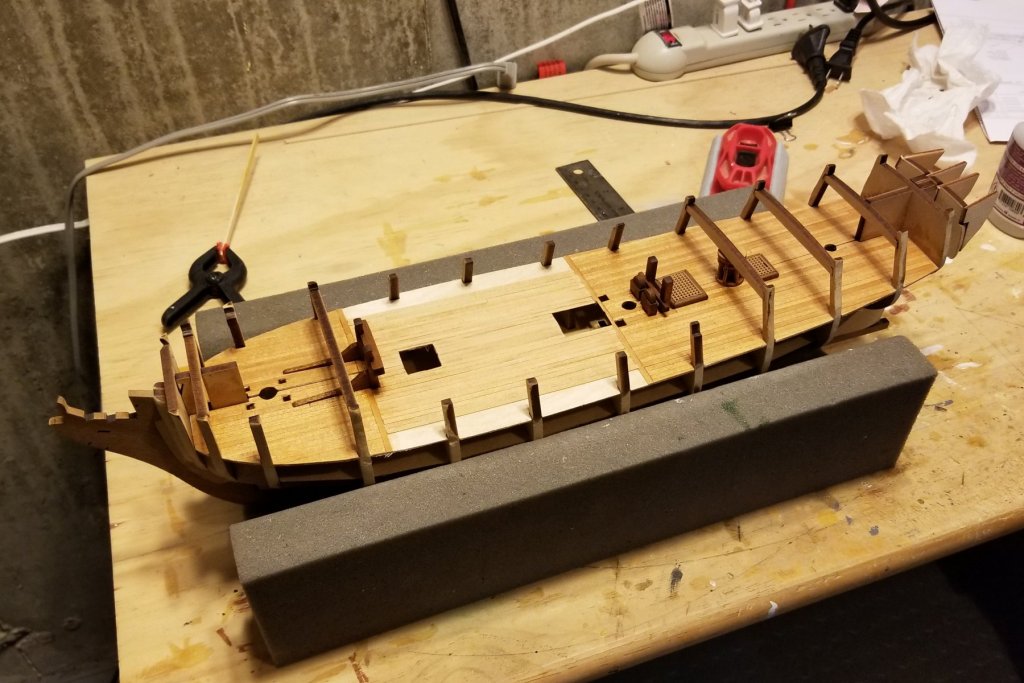
This last stage I've finished wasn't helped by the instructions. Look at the two drawings below. The first one shows how the gun deck should be initially planked, and I placed those lateral planks where indicated. Now look below, and you'll see that they have moved. The issue is that one of the deck fittings straddles the planks I installed and the center section, so as a fix I had to go ahead and plank the center portion out to just before the "tear off" bulkheads, so that I could fit that forward part across planked deck. You can see it in the pictures that follow -- I haven't varnished the center section yet and won't until I finish planking it out to the bulkheads. At the end of the day, I'm fine with how this turned out, but it's an interesting inconsistency on the same page of the instructions. The final picture shows the deck beams installed. The deck fittings I left natural -- partly because I love the look of varnished walnut, and partly because I don't want to overload the look of the boat with red fittings. The capstan you see won't be visible. I'll paint the other one on the deck above it red. You can see one of the fittings straddling old and new planking because of the way the lateral planks were drawn on the large deck diagram as noted above. The instructions also say to cut the deck in half before planking and installing -- but mine came with the deck laser cut in two halves already. I planked them before installing. The kit must have been updated. At the end of the day, I'm sort of glad that I ran into this issue, because if I had waited to plank the center section to the point called for in the instructions, I'd be working around the installed deck support beams, and that would be much more difficult. I ordered some red paint on express delivery, because the red I have is too "cherry", and that is supposed to be delivered tomorrow, which is good, because I need to start painting some things red to keep going. Regards, David
- 126 replies
-
- 3
-
-
- fly
- victory models
- (and 1 more)
-
Thanks, Doc. That's a great link and very helpful to know about it. Regards, David
- 126 replies
-
- 1
-
-
- fly
- victory models
- (and 1 more)
-
Perfect scale, Chris. Regards, David
-
Chris: I never know -- but a series of winter vacations has now come to an end, so I have more time to work on the model. I can't tell yet how complex this one will be. I know that it has fewer decks than the Revenge did. I expect to hit hull planking within a few days. Regards, David
- 126 replies
-
- 3
-
-
- fly
- victory models
- (and 1 more)
-
Brilliant! Regards, David