


Bob Cleek
-
Posts
3,341 -
Joined
-
Last visited
Content Type
Profiles
Forums
Gallery
Events
Everything posted by Bob Cleek
-
USS Iowa BB-61: Anybody knows the structure midship?
Bob Cleek replied to JackSix's topic in Nautical/Naval History
Yes. As explained in the old post below, the signals lockers are on the signals bridge and the lockers, port and starboard, will always be found on any ship by following the signal halyards down from the signals mast to the deck. -
How to "unstick" this chuck from the mill spindle?
Bob Cleek replied to rlb's topic in Modeling tools and Workshop Equipment
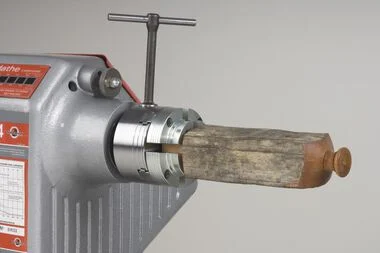
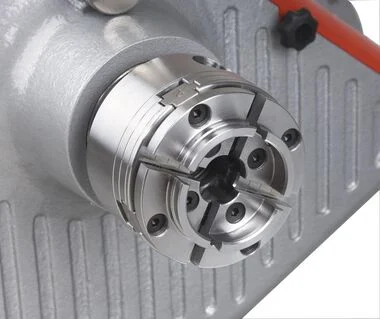
Exactamente! And I believe that the threads on the spindle above the Jacobs chuck accommodate a threaded collet holder for your milling bits. A Morse or Jacobs taper arbor would likely not hold the tapered arbor when side-loaded by milling forces and the arbor and chuck would fall out of the spindle at speed, which might not be pretty. The Jacobs chuck is for vertical drilling, not milling processes. You will have to purchase wedges to match the size of your Jacobs chuck. -
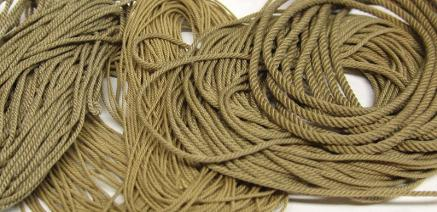
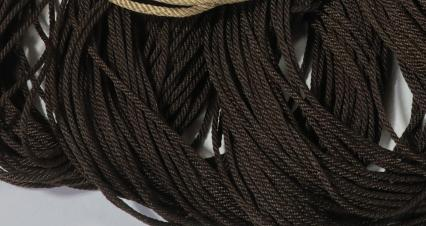
Gregory's comment is spot on. Not all polyester threads are necessarily the same for purposes of spinning scale cordage! I want to be sure I have not misled you when I said in my post #18 that, "As mentioned, the museum curators who care for the finest museum models in Europe say that Gutermann Mara MicroCore Spun Polyester thread passed their tests for archival quality. Any decent quality spun polyester thread should be a reasonable choice if you are impatient, but the price of impatience could be the inability to get what you want in the colors and weights you want from a home-sewing store." That statement was in response to your question at post #17, "all great info friends. but the question is what can i use that is available at the simple joanns that has logevity? im stuck here. cotton over polyester or nylon?" It was not my intention to convey simply that "Any decent quality spun polyester thread should be a reasonable choice..." Rather, in the context of your question, "...what can i use that is available at the simple joanns that has logevity? im stuck here. cotton over polyester or nylon?" my statement was qualified: 1) "As mentioned, the museum curators who care for the finest museum models in Europe say that Gutermann Mara MicroCore Spun Polyester thread passed their tests for archival quality." and "Any decent quality spun polyester thread should be a reasonable choice if you are impatient, but the price of impatience could be the inability to get what you want in the colors and weights you want from a home-sewing store." Perhaps I should have answered your question more clearly, by saying, "If for some reason you cannot obtain from the Wawak Sewing Company the Gutermann Mara MicroCore Spun Polyester thread discussed in the forum's Discussions about Rope Making - Model Ship World™ section, any other decent quality spun polyester thread should be chosen as a reasonable substitute ahead of any thread made of any other currently available material." You can rig your model with whatever thread you wish, obtained from wherever you wish. If you're asking which currently readily available thread has the best archival qualities and where it can be obtained, the best answer I can give you are those to be found at Discussions about Rope Making - Model Ship World™.
-
Bingo! Ironically, when I first saw your question, this set immediately came to mind. I have had one for a long time and use them quite regularly, usually to set up the fence on table saws I want to rip to their dimensions, or multiples thereof. However, i mistakenly thought you were looking for something longer to replicate the length of the round ones with handles that you'd posted a photo of. At least now I have a collection of links to "brass bar stock" in my "favorites" file!
-
As mentioned, the museum curators who care for the finest museum models in Europe say that Gutermann Mara MicroCore Spun Polyester thread passed their tests for archival quality. Any decent quality spun polyester thread should be a reasonable choice if you are impatient, but the price of impatience could be the inability to get what you want in the colors and weights you want from a home-sewing store. As I mentioned, the home-sewing stores carry Tex 30 thead because it works the best in home sewing machines. If you don't mind waiting less than a week for your order to be sent from Wawak Sewing Supplies, you can get Gutermann Mara "industrial strength" thread from Wawak in any of the eleven sizes and God only knows how many colors to choose from online right now at https://www.wawak.com/thread/thread-by-use/all-purpose/gutermann-mara-100-poly-wrapped-poly-core-thread-tex-30/#sku=gtda000 You can use cotton as well, but it doesn't have the longevity of polyester. You can dye cotton rather easily. The synthetics are another story on that score. It's best to get synthetics that were colored when the fibers were made. Stay away from nylon and any single strand "fishing line" sort of plastic stuff.
-
Square key stock in various lengths and assorted sizes is available at Brass Key Stock - Grainger Industrial Supply Additional square bar stock, all types and cut to length at Buy Square Bar Online (onlinemetals.com) This material is usually sold in one foot lengths from which lengths are cut off as needed, so I expect most any machine shop would have a supply of various sizes on hand and would cut you off a length priced by the inch.
-
Here's a pretty good downloadable universal thread weight conversion chart: wawak.com/globalassets/documents/waw_pim/gtda/gtdamp/thread-size-conversion-chart/
-
The Guterman linen thread seems to only be offered in No. 30 thickness and from their product description is a rather large thread used "for sewing heavy and strong fabrics such as leather and canvas tarpaulins." It might possibly be suitable for ship models, but with only one size of thread, one would have a hard time getting much of a range of scale sizes out of it. It's also apparently out of stock at the moment, through Amazon, at least. See: Linen thread from Gütermann creativ | Linen thread (guetermann.com) Hemp thread should be an interesting alternative to explore. I've read that hemp and flax (linen) fibers are virtually indistinguishable with hemp being preferred for rope making. There are various grades of thread, though, and any particular product will have to be examined for its suitability. Lower grades of linen thread, for example, can be "lumpy" and not of uniform diameter, which will not yield good rigging rope. I'm sorry if your "A" has a "P" in it at the moment, but it's only begun to ache. You're almost certainly barking up the wrong tree if you are looking to buy thread in your local Joann's Fabrics or the equivalent home-sewing store. I'll try to give you the very basics and then a link to make your life much easier. Due to the unavailability of suitable linen thread on the world market, some highly respected European museum curators have given their blessing to the use of "microcore spun polyester" thread in ship model restoration work. For that reason alone, I wouldn't look any farther than that. Like everybody else, I've looked high and low on the internet for linen thread without success, at least as far as suitable size and quality for ship model rope making is concerned. The brand of thread now being recommended for making ship model rigging is "Gutermann Mara." That's just enough information to get you into real trouble because there are actually two sources for Gutermann Mara thread and they each sell different ranges of it. Stay with me now... Because ship modelers rig small scale models with varying sizes, or "weights," of thread, as they're called in the trade, or spin varying sizes of thread into scale rope, where thread of different weights can be found. Retail home-sewing stores will only carry Gutermann Mara thread in a single weight and on spools to fit home sewing machines, and not in the whole range of thread weights we need to make ship model rigging cordage of varying scale sizes. Don't waste your time looking for it at Joann's or Beverley Fabrics. The Gutermann Mara thread we need in a wide range of sizes is sold to their industrial distributors by Gutermann's industrial division in cases of spools of a single color or wound on large "cones" of thread used on industrial sewing machines. Ship modelers have to buy their Gutermann Mara thread from Gutermann's industrial distributors which service commercial customers. It won't be found at a retail home-sewing and fabrics store. +++++++++++++++++++++++++++++++++++++++++++++++++++++++++++++++++++++++++++++++ This is the "inside dope" from Gutermann's National Sales Manager on this end of the thread business: The difference between Mara from the Retail segment of Gutermann compared to the Industrial segment of Gutermann "Most fabric stores carry Gutermann Sew All which is a Mara thread and the most common size is Tex 30. Mara is a MicroCore Spun Polyester thread and Tex 30 is the most popular Tex size sold in the home-sewing market. The spool sizes are smaller, have a different 'weight' per cone and are more suited to domestic machines. Mara from the Industrial division is the same thread construction, MicroCore Polyester, but the Industrial segment has Tex 19, 25, 30, 40, 60, 100, 200 265 and 400. The spool is different, and the Tex sizes are produced for various fabric weights, stitch types and seaming requirements. The Industrial products are made for use on Industrial machines and often the cones will not run correctly on a domestic or home machine. Industrial Distributors are set up to service small manufacturers, designers, and workrooms who buy a variety of thread types and need a variety of colors - while the Industrial Division of Gutermann sells only by the box of a color or in larger cone sizes compared to the Retail Division. In some cases there are similar products available from both divisions but in general, the Industrial Division is supplying the manufacturing segment of the business." Difference Between Gutermann and Mara Thread sewing discussion topic @ PatternReview.com +++++++++++++++++++++++++++++++++++++++++++++++++++++++++++++++++++++++++++++++ The thread industry uses a rather confusing system of different thread sizing systems to designate the size of their thread. Some even use one sizing system for natural fiber thread sizing and another system for sizing synthetic fiber thread. Gutermann uses one of the more common thread sizing systems, so as long as you are buying Gutermann thread, the "Tex" system is the only one you need to worry about. Just remember, the higher the Tex number, the thicker the thread size. (Important! Don't confuse Gutermann's in-house "Mara product number" weight grading system with the Tex grading system! The Gutermann "Mara number" system is the reverse of the Tex system. The higher the "Mara product number," the lighter or thinner the thread.) Fortunately for us, the Wawak Sewing Supply Company, in New Jersey, I believe, sells the entire range of standard colors and weights of Gutermann Mara poly wrapped poly core thread in eleven graduated thread "weights" (sizes) online. Their service is great and their prices reasonable. (Tip: order a range of thread weights at the same time, based on your desired size scale rigging cordage and pay only their one shipping charge per order.) See: Gutermann Mara 100 Poly Wrapped Poly Core Thread - Tex 30 - WAWAK Sewing Supplies Review all the threads stored at Discussions about Rope Making - Model Ship World™ to find a "cookbook" full of specific "recipes" for spinning specific scale sizes of model ship cordage from specific sizes of thread as well as a collection of rope making "tricks of the trade." There will be instructions on the sizes of Gutermann Mara thread to buy, and a selection of Gutermann color code numbers for standing and running rigging. Everything you need to know is to be found in this MSW forum sub-topic.
-
No trouble. Google is my friend. Whenever I look up something like that, I always learn something new along the way, so whatever time I spend is time well spent. Have you considered simply using some square metal bar stock, AKA "key stock?" It comes in many dimensions and types of metal and it shouldn't be expensive if you go to a local machine shop and ask them to cut you six or eight inches of whatever size you want off of some they should have in stock. They might even let you just scrounge through their off-cuts scrap bin for a few bucks worth. All you'd have to do then was to fashion a handle for them or even just dip one end in some of that "dip and grip" plastic handle coating stuff.
-
Aside from a few exceptions such as Byrnes Model Machines, Syren "Rope Rocket" and Domanoff's rope-making machines, Sherline and Taig mini lathes and mini milling machines, which are probably the best of their type available, you will generally find that tools made for sale to the "home hobbyist" can often cost more for a much lower quality product than the same tool purchased from a source catering to a professional clientele in an allied craft or trade. For example, the Foredom flex-shaft rotary tools or any of the slow, belt driven dental engines (now used for fabricating dental appliances in dental labs and not for drilling teeth, thank God!) and their handpieces will do a much better job than under-powered high-speed / low-torque Dremel or Proxxon Mototools and the like. I don't suppose Proxxon tools are substandard for what they are and they do have their fans (particularly in parts of the world where nothing else is available,) but they frequently strike me as being overly specialized in some instances and "more sizzle than steak." (Who needs a 1/4" hand held belt sander?) Lathes and milling machines are a separate category, but one should be aware that "hobby" retailers such as MicroMark, Model Expo, and Proxxon will frequently sell much higher priced "house branded" versions of tools which can be obtained from other sources at lower prices. The Chinese manufacture identical power tools such as mini lathes, mini milling machines, and rotary tools, etc., and wholesale these at varying prices based on the degree of fit, finish, and quality control, providing their wholesale customers with custom paint colors and branding. Grizzly is one US retailer that sells higher quality Chinese-built power tools at a somewhat higher price than the same tool will sell for at "Horror Fright," but the Grizzly tool will have a better fit and finish and have been fettled, tuned, and tested, while the Harbor Freight version will quite possibly have casting sand in the cosmoline grease it was coated in before it was shipped in from China. It's best to do what research you can on YouTube watching "unboxing" and "review" videos before you pull the pin and buy any Chinese made power tool. The bottom line is that you will not go too far wrong keeping in mind that "you get what you pay for." You will almost certainly find that the highest quality tools will be found in the professional suppliers' catalogs for the various trades and professions. For example, look for hand tools in commercial jewelry supply house catalogs and medical instrument supply house catalogs. Keep in mind, however, that it is possible to spend too much in the professional catalogs. A lower quality Pakistani surgical or dental instrument will often be entirely adequate for modeling work, while the same instrument made by a top of the line US or European manufacturer may exceed the quality requirements of a ship modeler.
-
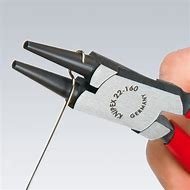
I have never seen "square mandrels" like those. It would seem that anyone requiring one would simply cut a stick of wood if they needed one or use a pliers suitable for bending the shape if need be. The mandrels pictured are somewhat odd, as well. They are probably intended for use by jewelry makers, but jeweler's or orthodontist's wire-forming pliers pliers are far more useful tools for ship modeling. Wire rings are easily formed in exact sizes by wrapping the wire around the smooth end of a suitably-sized drill bit. A standard set of drill bits will provide a wide range of sizes. After wrapping around the shaft of the bit, the wire can be cut free with a diagonal cutting pliers and slid off the bit shaft. Jeweler's wire forming pliers are made in a variety of sizes, shapes, and styles and are quite reasonably priced. They can be found on eBay and in jewelry supply house and orthodontic instrument catalogs. See: Amazon.com : forming pliers
-
Yes, it's the same stuff. While different grades of quality may still exist as in the olden days ("Stockholm" being "finestkind,") pine tar is still pine tar. It's readily available online and its primary modern-day uses are still as a wood and natural fiber rope preservative, especially in traditional maritime applications, as an ingredient in certain soaps, and in veterinary, and even human, medicine, as a topical antiseptic for the treatment of dermatological conditions. Notably, due to pine tar's long-lasting stickiness, it is also applied to wooden handles, baseball bats being a famous example, to improve a user's grip. I can't imagine anyone using it on a ship model, though. Aside from its agreeable aroma, it's a rather nasty, sticky substance of extremely dark brown color that gets all over everything and is slow to polymerize, so it stays sticky for a long while. The British sailors were called "tars" because they became covered with the icky stuff in the course of their shipboard duties. Critically, in the Age of Sail, pine tar was an essential naval store, access to which determined the effectiveness of European navies, and the Swedish crown's monopoly on the production of the largest quantity of the highest quality pine tar gave them advantageous leverage in European international relations until the British Admiralty discovered that the abundant pine forests of their American colony of North Carolina produced pine tar of equal or better quality than the "Stockholm tar" the Swedes made from their Baltic pines. Once British pine tar production ramped up in North Carolina, her residents became known as "Tar Heels," and have been ever since, because once you are around the stuff any amount of time, you will get it on your feet and track the stuff all over the place.  Applying thinned pine tar to your model ship rigging will probably give your model and anywhere it is displayed a highly authentic "yarr!" aroma for a good long while, but by the time it's finished both you and your model will likely be stained dark brown to black from stem to stern, just like its prototype was. Pine tar on a baseball bat. 
-
From all recent reports, linen thread of sufficient quality for rigging line material has become extremely difficult to reliably source in recent times. There is reportedly some NOS (“new, old stock”) linen thread offered on eBay, but the size and quality are “catch as catch can.” Modelers currently using it are probably using “stashes” of linen thread they purchased ages ago. A Google search will provide a number of retailers offering linen thread, but much of what they are offering is specialty material, such as heavy pre-waxed thread for leather working or bookbinding. Other online retailers don’t indicate thread size. When just checking now, I was surprised to see that Guttermann offers a waxed linen thread. You may want to research what Guttermann has to offer in terms of linen thread in their line. See: https://www.amazon.com/Gutermann-Waxed-Strong-Sewing-Thread/dp/B019HRLE1A/ref=asc_df_B019HRLE1A&mcid=c6045ff257ee34edb6ad3599ab063d4d?tag=bingshoppinga-20&linkCode=df0&hvadid=80058380336600&hvnetw=o&hvqmt=e&hvbmt=be&hvdev=c&hvlocint=&hvlocphy=&hvtargid=pla-4583657849049970&psc=1&msclkid=998cf52caad914ea2e15909d34b77174 I expect that anyone who has a lead on where suitable linen thread can be purchased will share it in due course. Yes, shellac applied to thread will make the thread stiff once the alcohol solvent evaporates, which it does quickly. This is one of its main advantages when used as a rigging material. A drop will cement a knot and prevent its accidental untying when the “bitter end” is cut short. A bit of alcohol will soften it so a shellacked knot can be untied if necessary. When applied to a slack line or to a coil of line, the line can be formed as desired to shape the coil or form a catenary in a slack line. As the alcohol evaporates, the degree of stiffening increases, so it can be easily “worked” to a desired shape. We’re talking about applying thinned shellac of two or three pound cut (as it is diluted when sold premixed in cans.) Repeated applications of shellac on top of previous dried applications will build up a usually undesirable thick coating with a gloss finish. When only one or two applications of thinned shellac are applied, these will soak into the surface and be invisible when dry.
-
Current post on the Model Machines website: We are in the process of personal and corporate recovery after the loss of Jim ... We will not be accepting orders for machines until further notice, but you may still order accessories. We need to complete an inventory and business reorganization, which we hope to accomplish in the next few weeks. Thank you for your understanding and continued support ... Donna Byrnes Word on the MSW forum also reported a conversation with Donna Byrnes confirming they would be back to filling orders shortly. Keep an eye on their website for a formal announcement.
-
Consider wrapping it on a larger diameter cylindrical shapes. This avoids the line taking a set at the sharp edges when wrapped around square shapes and a curved shape tends to keep the tension in the line equally distributed while stored for long periods. I've used empty cans sometimes as big around as coffee cans. Tape one end of the line to the can and wrap it neatly without overlaps and then tape the other end to the can. You can put a fair amount on a single can and see at a glance how much you have if you don't overlap the turns on top of each other. Even smaller cylindrical shapes work fine. Empty toilet paper rolls work really well. They are easy to write on to note the size of the line wrapped on them and easier to store than coffee cans. (If you have a lady or two living in your home, there should never be any shortage of empty toilet paper rolls. When I once worked part-time as a school janitor, we used to figure as a rule of thumb a ratio of three to one between the girls' and the boys' lavatories when filling the toilet paper dispensers and despite decades of living with a wife and three daughters, I've never unraveled the mystery of why this is so, but it seems to be one of life's immutable truths. ) I've also seen some guys who have used longer cylinders such as empty paper towel rolls mounted on a row of horizontal spindles in the same manner as a single paper towel roll holder. From this arrangement, they can at a glance choose which type of line in their stock supply they wish to use, measure off a length and cut it from the roll.
-
I was thinking the same thing. I agree completely with Jaager's sage advice. We are kindred spirits when it comes to using premixed canned 2 or 3 pound cut clear shellac for sealing wood, cementing knots, shaping line into coils and catenaries, making flags look like they are flying, shaping cardstock, and when thickened, even as an adhesive under certain circumstances. (In fact, they also use thinned shellac in food processing to make jellybeans and apples and citrus fruit shiny.) I don't think we are necessarily in the majority of modelers who use shellac for so many things, but I'd expect many of the "geriatric set" do, having discovered that nobody's really come up with a better material to use for any and all of these purposes. And, as an additional benefit, shellac is easily removed (and rigging knots requiring adjustment easily untied) by simply wiping it off with an alcohol-soaked cotton swab or piece of cloth, since the hardened shellac immediately dissolves in contact with alcohol, the all-purpose solvent used to thicken and thin shellac and easily clean up after use. I think that a "sanding sealer" is somewhat of an oxymoron, given that there isn't much point in sealing a surface if you are going to sand it, since that sanding is going to remove some, if not all, of the sealer which doesn't soak into any wood species very deeply (and practically not at all on the flat of the grain.) The only application I can think of which calls for sealing a surface before sanding, and then only at the very end of the surface preparation exercise, is to "harden" a soft wood such as basswood at the last step and apply a very fine light sanding to remove the "fuzz" from the surface of woods that tend to "fuzz" when sanded. Thinned shellac, which penetrates the word surface as far as anything does, and that's not much, binds the fine wood fibers together and permits a fine sanding that doesn't raise "fuzz." In doing so, you have to be careful not to sand through the sealer coat to bare wood. Not only would this wood be unsealed if the sealer-permeated wood "crust" is sanded through, but also, subsequent coats of paint will soak into the bare wood, resulting in a painted surface which betrays this fact. In the case of gloss finishes, the unsealed (unprimed) spots will show as flat (matte), instead of gloss to one degree or another. The inexperienced will often apply additional finish paint before the first coat is uniformly dry in an attempt to "gloss up" such flat spots and, as more experienced painters know from hard experience, "going over" anything applied wet before it dries thoroughly rarely comes to any good end. To cover a base that may have been missed, I realize that many, rightly or wrongly, refer to "plastering" a piece (usually a hull) with, literally, plaster or drywall "mud," Bondo, (tm)" epoxy putty, or "fairing paste" made up of epoxy resin and various proprietary "sanding (or "fairing," or "surfacing") additives (e.g., "micro balloons.") after assembly of the wooden substrate and then "hogging off" as much "surfacing" material as is necessary to fair the piece and leave the remainder of the surfacing material to fill the cracks, craters, and even canyons on the original as-built surface. In a perfect world, everybody's planking jobs would look like those of we-know-who here on MSW, but for most of us, that's not going to happen in our lifetimes and "filling", or "fairing" is a routine task which is of great value in covering a multitude of errors. It's essential to obtaining a "smooth-as-a-baby's-bottom" finish if open grain woods are used. (All those whose drill instructor used a different simile to describe for this desired level of smoothness, raise your hands. ) There's a use for shellac here, as well. There are many products marketed for filling grain and minor surface imperfections. They are usually overpriced and of varying degrees of usefulness. There is a very simple traditional and certainly archival method of filling minor surface imperfections using shellac. In the manner similar to "French polishing," when a surface is sanded sufficiently fair, it can thereafter be rubbed with a felt and/or cloth pad containing an oil (e.g. linseed oil, raw or boiled,) and pumice (powdered volcanic glass,) This process will cause the pumice to abrade the sealed shellack-sealed surface while at the same time filling the open pores of the wood grain with a slurry of shellac sealer and pumice, which being glass, becomes transparent. Repeating this process as with French polishing, will result in a perfectly smooth surface. If one wishes, the same can be done using fine grit "wet or dry" sandpaper. See: Wikipedia on "French polish" for an explanation of how it's done. It isn't rocket science and the learning curve is practically a flat line, but, unfortuntely, it's not about skill as much as it is perseverance. French polish - Wikipedia There's also a ton of YouTube videos on it. It's a good, easy to learn skill to have in your tool box. If we are talking about a lot of filling needing to be done, sealing with thinned shellac may be advisable before the fairing material is applied. The shellac provides a stable base that is more effective for many putties and plasters adhering to than bare wood. This initial sealing before filling is highly advisable with "wet" materials that contain water which will more readily be absorbed by bare wood which will result in a "cure" of the surfacing material and a "damp" subsurface where the wood and plaster or other surfacing material meet due to water absorption from the surfacing material. This may result in shrinkage of the surfacing material requiring multiple applications, weak adhesion, especially on thickly applied areas, or even mold and other unwanted issues. Surfacing materials with resinous binders such as Bondo and epoxy adhesive resin with "sanding additives," are not prone to having their solvents "sucked out of them" by their contact with bare wood, as occurs with the water in surfacing materials containing water. One parenthetical caveat: Many are familiar with automotive body and fender "fillers," such as Bondo. Bondo and however many of its similarly compounded competitors is designed to adhere to metal, not wood regardless how well it might do so in any event, or whatever the instructions on the can may state or imply. Bondo is hygroscopic. This means that when water "seeks its lowest level," Bondo is part of that equation. "Bondo" attracts and holds, which is to say "absorbs," water from the air. If the moisture content of cured "Bondo" is lower than the ambient air, the "Bondo" will absorb the difference until equilibrium is reached between the drier "Bondo" and humid air. Similarly, if "Bondo" is applied to wood, and the moisture content of the wood is lower than that of the Bondo," the wood will suck the moisture out of the "Bondo" until the wood's moisture content reaches equilibrium with the "Bondo" and, in turn, the ambient air. Now, for models that will live in glass cases in cozy, climate-controlled homes, there may be little point in worrying about this bit of physics (or is it chemistry, or both?) There may just not be that much moisture involved in the environment in which the model will exist to cause any problem at all. However, in the real-life full-scale world of wooden ships and boats, Bondo and other polyester resins are frowned upon because in the marine environment there is certainly enough ambient moisture around on a regular basis to cause the wood beneath Bondo patches to become wet, soft, and infected with fungal decay in such a way that the Bondo no longer holds very aggressively to the wood and, eventually, the wood decays. It is not likely many of our models will survive much longer than any life-in-being on the day we die. We will all eventually become that grandparent or great-grandparent or other relative who "died before I was born" and who "I never knew." Unless we were royalty, National Enquirer level celebrities, or left them a large trust fund with a specific endowment to fund the preservation of our model collections, the majority of our descendants who are born after we have died aren't going to be the slightest bit interested in preserving our handiwork. (Indeed, I personally know at least one modeler's spouse who's highly likely to dispose of all her late husband's "damned boat junk" as soon as the opportunity presents itself! ) However, maybe... just maybe, one of our models survives, by virtue or happenstance, and if that happens, I've come to conclude that using state of the art archival materials and practices whenever possible is a good thing because, if and when that ever happens, it may well be in large measure because it has simply lasted longer than the rest. If you sense a bit of the Luddite in all this, I'll plead guilty. Since this is all "mature technology," I have to say it's all been thoroughly "Beta-tested." Using lasting materials makes sense because so much time is invested in a model that lasting materials are well-warranted. In closing, let me add, "avoid water-based materials. The water soaks into the wood and it raises the grain no matter what you do. Always seal with a good sealer. Shellac is one of the best natural, non-toxic sealers around and one of the less expensive. Stick to tubed artist's oils, linseed oil, turpentine, and Japan drier to mix your own colors or at least to condition unmixed colors. You'll save money and your work will endure if at all possible. Build using safe, "organic" materials and avoid becoming too dependent upon the synthetic chemical industry.
-
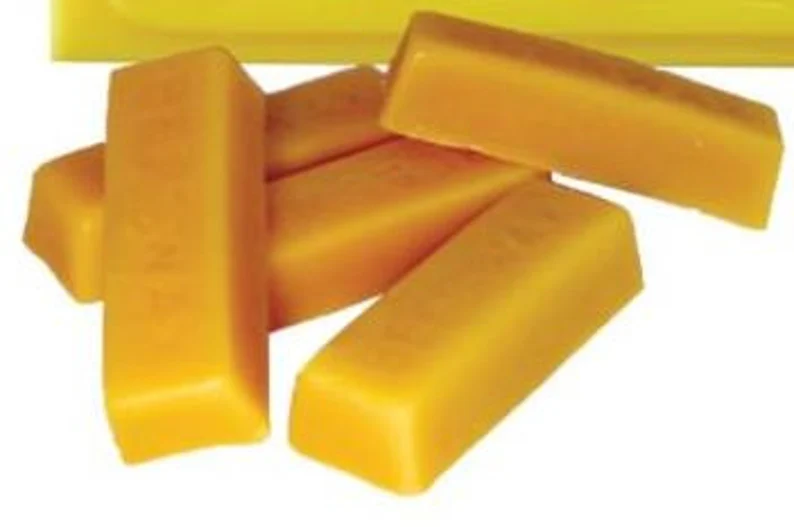
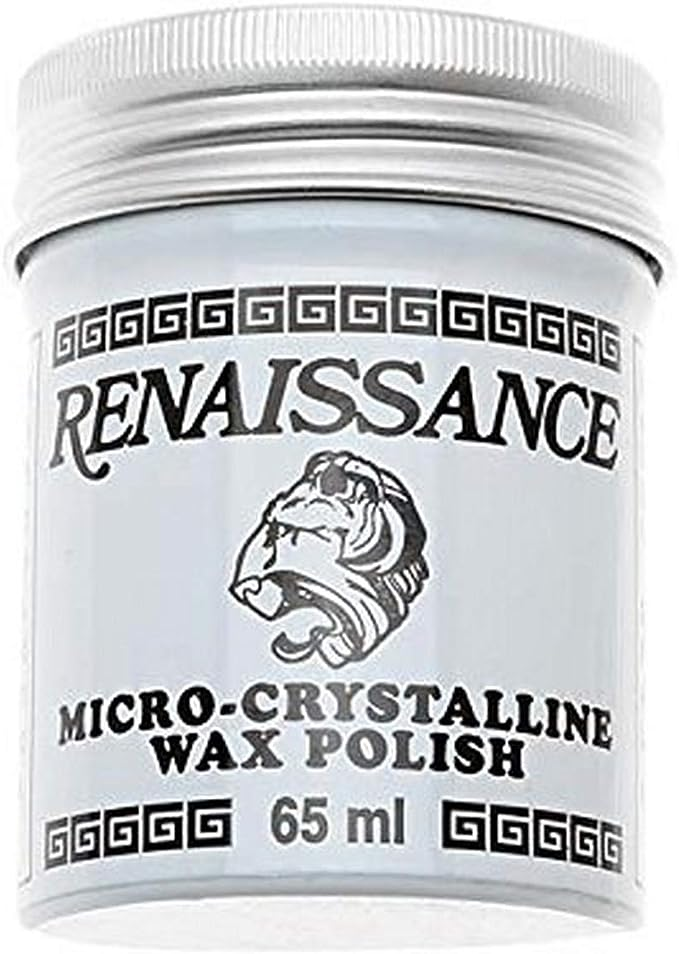
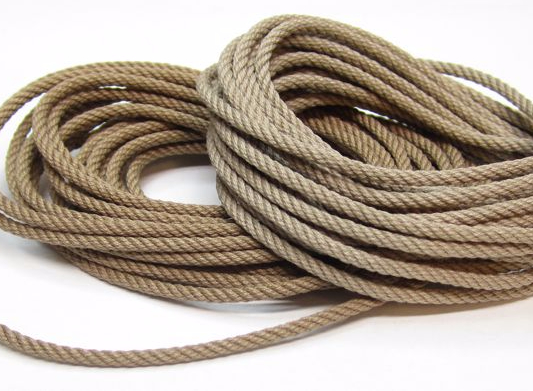
Well, actually, your "bees wax" looks more like paraffin wax, the stuff they use for pouring over the top a jam and jelly in canning jars. There is a white beeswax, but I've never seen it in the flesh, as it were. All the beeswax I've ever seen is yellowish brown. Using beeswax on model ship rigging is questioned these days due to concern regarding the acidity of it contributing to the deterioration of models over time and beeswax's propensity for collecting dust. The general opinion among professional museum curators seems to be that microcrystalline "conservator's wax" is the better option. Many still use beeswax, though. You might find this thread of interest: Speaking of thread, the recent acceptance of Dacron and Dacron-blend thread for model ship rigging cordage, which has been "blessed" as acceptably archival for museum use by some of the major museums, has gone a long way to solve the problem of "the fuzzies." Formerly, line had to be "flamed" (passed through a flame) to remove this fuzz and wax used to keep it from reappearing, but the synthetic thread cordage doesn't seem to have the problem, the synthetic fibers being much longer than the natural ones. (Finally! No split ends! ) I know you are a way along with some of your rigging, but what they have provided in the kit is really junk and way oversized and out of scale from all appearances. It's your call, but before you start getting into the rigging with a vengeance, you may want to consider getting into spinning your own properly scaled rope or purchasing aftermarket rope from Syren Ship Model Company (an MSW sponsor.) Syren rope has no fuzz and doesn't unravel. It's easily "stiffened" and knots secured with a touch of thinned PVA or clear shellac. (The shellac is easier to remove with alcohol if you want to undo a knot if a mistake is made or an adjustment necessary.) (See the pictures and URL below.) This is what correctly made scale rope should look like in the correct sizes. It is also so much easier to work with. When I looked at what they gave you for gun tackle line, I thought, "Oh, the poor guy!" You did a lot better job with what you had to work with than I ever could, but how you got that loose, oversized stuff through your blocks is beyond me! Your rigging skills look fine. It's the quality of the line you are using that's holding you back from achieving a much better result and with a lot less work! Poor rigging line is a common frustrating defect with kits. If you've decided to go with photoetched detail (finestkind!) you may as well match that quality with good rigging line. In for a penny, in for a pound. See: Scale Miniature rope for Rigging Ship Models - Hand made rigging line for ship model builders (syrenshipmodelcompany.com)
-
Tiny "precision" drill press
Bob Cleek replied to Ron Burns's topic in Modeling tools and Workshop Equipment
Looking forward to your review! -
Tiny "precision" drill press
Bob Cleek replied to Ron Burns's topic in Modeling tools and Workshop Equipment
I came across this mini drill press the other day, It isn't as elegant looking as the one above, but it's rated at 120W/450 RPM as compared to the one above at 30W/4800 RPM, has a drilling depth (quill stroke) of 42mm (1.65") versus 13mm on the above one, and it has an adjustable depth stop on it. $67.00 (w/ free shipping from Los Angeles) Mini Bench Drill Press Precision Table Milling Machine Portable Driller DIY 120W | eBay I would suggest that anybody who is thinking of a mini drill press and an x/y table might want to consider Vanda Lay Industries' offerings. They started with a CNC'd aluminum mini drill press that holds a Dremel moto-tool (or any other rotary tool including the 1" Foredom flex shaft handpieces (which I'd consider a much better alternative than the Dremel) and their "system" has grown now to include a milling machine that doubles as a drill press and has x, y, and z tables, as well as a mini lathe option. I have their drill press with a Dremel in it and it is a high-quality piece of equipment, perhaps more than the Dremel moto-tool deserves. The Foredom handpieces would provide more accuracy and torque at lower speeds than the Dremel. See: HOME (vanda-layindustries.com)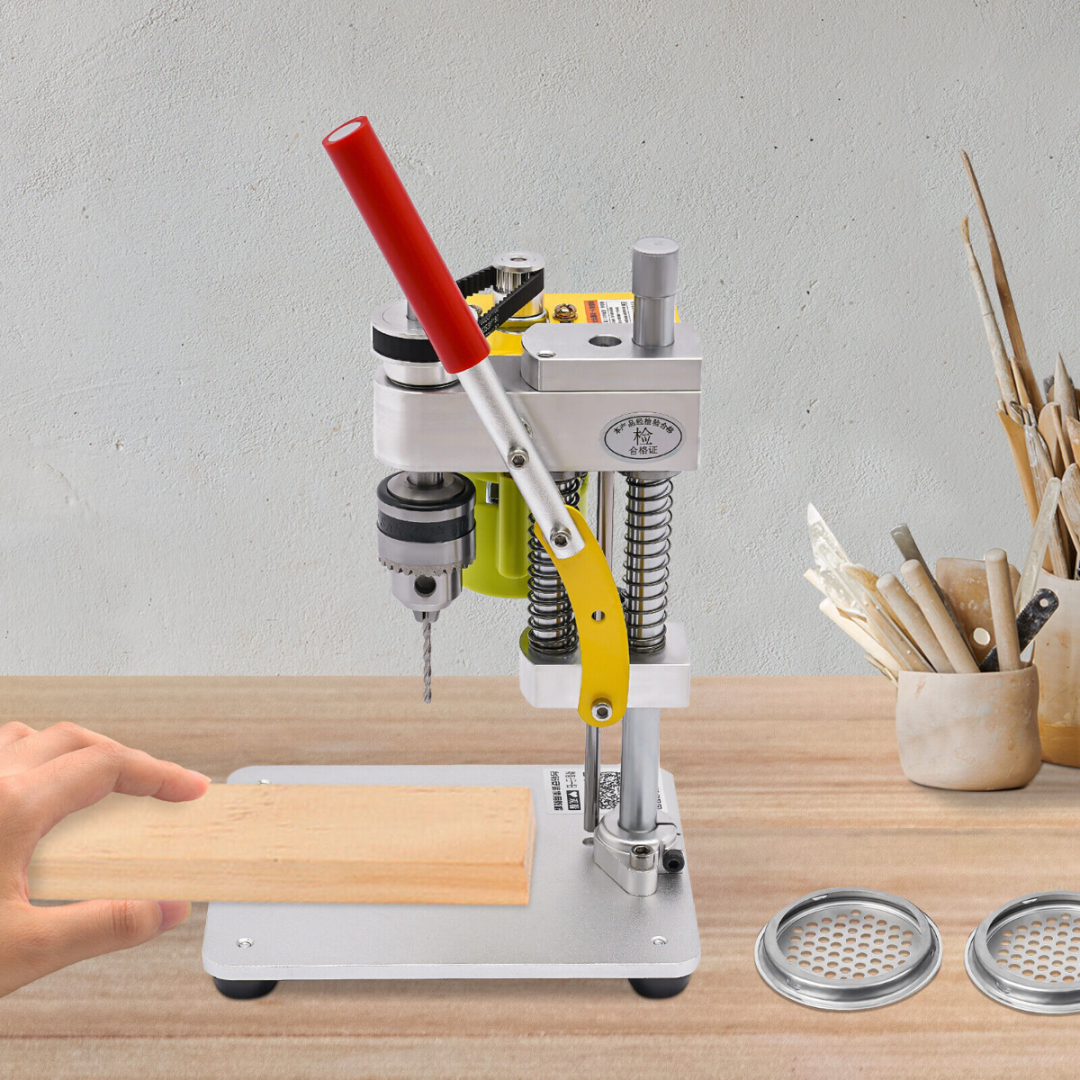
-
Great job! An interesting vessel and a model that is truly a work of art. By that I mean that it's details, particularly the figures, convey a sense of warmth and charm, a sense of "life," if you will, that doesn't seem possible to achieve with our highly accurate, but, frankly, "lifeless and antiseptic," "as built" technical modeling masterpieces. This model demonstrates how a viewer can indeed be "drawn into the reality" of a ship; by viewing a model of it. This isn't a criticism of technical "as built" models at all. They are a different thing entirely and magnificent in their own right. This model, though, really exemplifies that quality that distinguishes art from craftsmanship in ship modeling, two equally respectable qualities, which I've tried with only limited success to explain to others from time to time. What I'm talking about here is exemplified by the photo below. Nobody who's ever been to sea can fail to recall the feeling of facing into the wind that this tableau conveys:

- 330 replies
-
- 11
-

-

-
Yes he is. An SL or DB (same thing, different model numbers.)
-
Pulled the Trigger == Lathe coming
Bob Cleek replied to kgstakes's topic in Modeling tools and Workshop Equipment
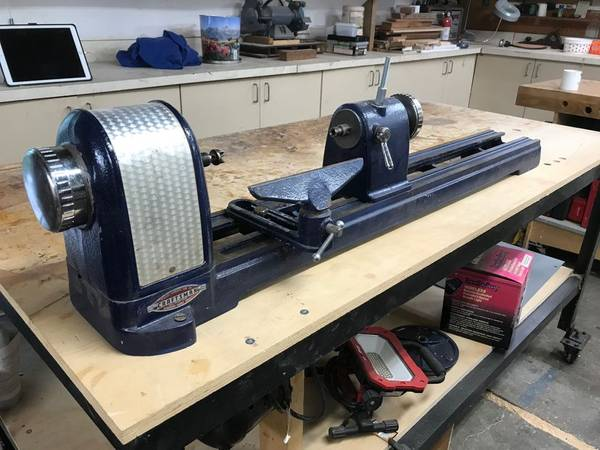
Being that a machinist's lathe is about the most versatile machine there is, there's a tremendous amount that can be learned about operating one. As a self-teaching lathe operator who has only scratched the surface of what can be known, the best advice anyone ever gave me about leaning to run my 12" Atlas-Craftsman lathe was to get a copy of The Manual of Lathe Operation & Machinists Tables published by the Atlas Press Co., maker of the Atlas-Craftsman lathes. It is not only specific to the Atlas-Craftsman lathes, but to all machinist's lathes in general and has all the information one could need. Fortunately, the 23rd Edition (which I think was the last) published in 1967 is available as a free PDF download from VintageMachinery.org. See: Atlas Press Co. - Publication Reprints - Manual of Lathe Operation & Machinists Tables (MOLO) 23rd Edition | VintageMachinery.org Just below the lower left hand corner of th picture of the front of the book ("Publication Preview") is a link: "View PDF" in blue printing. Click on that and the whole book should come up on your screen. It may take a few seconds because it's a long 273 page download. Scroll down to read it. There are also some excellent U.S. military training manuals which are available as free PDF's you can google up. I found those very helpful because the military does an excellent job of teaching the average idiot like me who knows nothing about a subject how to do highly technical things. -
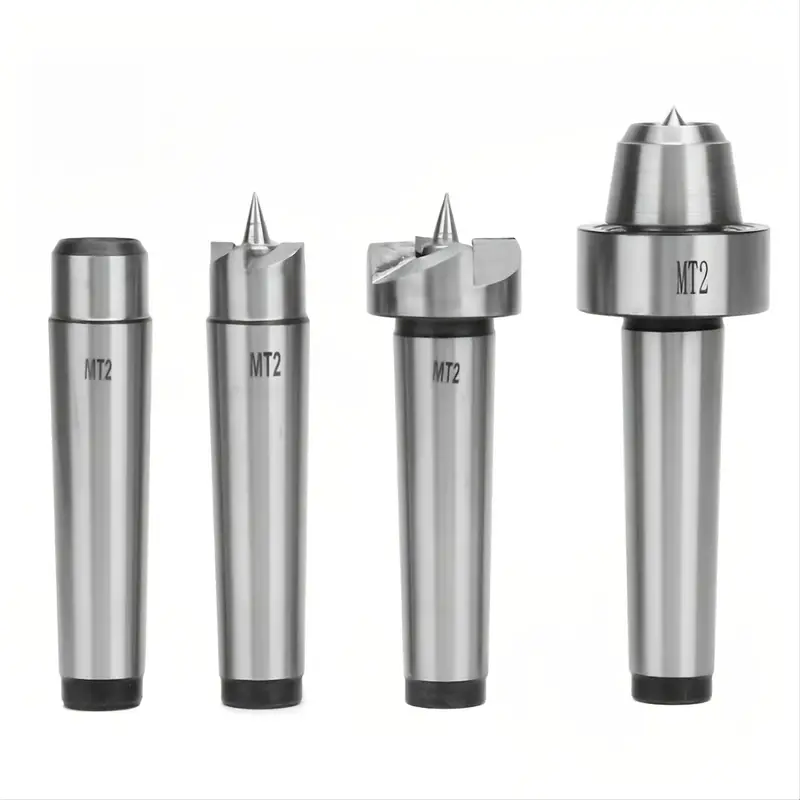
In the United States, you have a 12" lathe. Hereabouts, lathes are described in terms of their "swing." "Swing" is the largest diameter that the lathe will hold and turn. It's not an exact measurement, but rather is usually rounded off to the nearest inch. On the other hand, if you were in the UK or Europe, lathes there are described in terms of their "centre height," this being the measurement between the ways and the center of the spindle or "half the swing." Your lathe is a 6" lathe on the other side of the Pond and a 12" lathe in the U.S. The babitt bearings on the Atlas 12" lathes have shims in place which are intended to be removed over time to compensate for bearing wear. Your lathe probably doesn't have enough "miles" on it to need the babbit bearings re-poured. There are Atlas 12" instruction manuals all over the internet that you should check out, including the manuals for the older machines. See: https://www.hobby-machinist.com/ They have an active forum section on the Atlas/Craftsman lathes and seem very helpful and welcoming to novice owners of these lathes. They also have an extensive library of manuals and parts diagrams in PDF format. (I believe you have to register to download them.) The Tubal Cain / Mr.Pete222 YouTube video I posted above in post #21 shows how to engage the back gear on the Atlas 12". Watch the video. The procedure is not particularly intuitive. Pay attention to all the cautions about setting pins in the headstock gearing and how easy it is to break them if you aren't careful which he mentions in that video as well. It bears mentioning that machinists' lathes are one of the most dangerous stationary power tools of all and should not be approached by anyone who has not at least thoroughly read the operator's manual for the particular lathe they are dealing with and familiarized themselves with its operation. We all have "oops moments" now and again. The problem with a machinists' lathe of any size is that just about any "oops moment" can risk the total destruction of the lathe or its operator! There are all sorts of copies of the manuals and parts lists for the Atlas Craftsman lathes. http://vintagemachinery.org is a valuable resource. They have an extensive collection of manuals in PDF format and, as far as I know, they are accessible for downloading and printing without cost. (Many of the internet manual services charge for manual downloads.) Here's the link to download the 1937 edition of the classic Atlas Manual of Lathe Operation. (A "bible" of the trade often referred to by its initials as "MOLO.") This book tells you how to operate and maintain your Atlas/Craftsman lathe. Please read it and consult it before you have another "oops moment!" http://www.vintagemachinery.org/pubs/51/18169.pdf Groups.io also has a specific Atlas/Craftsman lathe group that is worth checking out: https://groups.io/g/atlas-craftsman As mentioned, it is a 12" lathe here in the U.S. Atlas also made a small 6" lathe which is a different machine. It appears that you looked up the Morse taper sizes for an Atlas 6" lathe. The 12" inch lathe takes a #3 MT in the headstock and (I presume) a #2 in the tail stock. Watch the Tubal Cain video I posted above. He goes over the 12" headstock in detail. Staying clear of the chuck is a good thing! A smaller chuck provides more room to work closer to the chuck. That said, a smaller chuck is no substitute for being careful. If you are turning wood, you don't need a chuck at all. Simply using a drive spur and live center on a suitably sized MT post and you're good to go. Wood turning is done at relatively high speeds, and you are in contact with the workpiece through the cutting tool held in your hand. Far better to avoid a chuck in any event. Moreover, a proper wood lathe chuck is a different animal from a metal lathe chuck. The wood lathe chuck generally doesn't have protruding jaws like the metal lathe chucks do so there is much less risk of contact with spinning jaws. Certainly, you can use a metal lathe chuck for turning, but it's another example of not using the right tool for the job posing certain increased risks. Wood turning chuck: Spur drives and live center for wood turning: Using a machinist's lathe to turn wood can be done, but if you are going to do a lot of it, I would suggest you consider getting a dedicated wood turning lathe and leave your Atlas 12" for metal and plastics work. If one takes a pass on all the questionably necessary electronic bells and whistles, a wood turning lathe need not be expensive to acquire and there is much less need for tooling and accessories for a wood turning lathe, as well. A little Grizzly 8"X13" tabletop "pen turner" bench top wood lathe can be had for as little as $118 if you shop around online. 8" x 13" Variable-Speed Benchtop Wood Lathe at Grizzly.com A larger basic Grizzly 12"X18" variable speed benchtop wood lathe with drive spurs and live center can be had for less than $400 new. (For another $100, a 22" bed extension is available for it.) 10" x 18" Variable-Speed Benchtop Wood Lathe at Grizzly.com Then also, small wood lathes seem to be one of those items that people buy with grand intentions and then, for whatever reason, lose interest in it. There are lots of wood lathes for sale in the local online "garage sale" sites like Craigslist. A decent used wood lathe isn't hard to come by at all and most are very reasonably priced. The "bulletproof" full-size bench top 1950's cast iron Craftsman wood lathes are fairly plentiful and run around $100 to $300 with the sears motor. Again, in comparison to a machinists lathe, there's very little that a user can do to hurt a wood lathe. (Although the wood lathe can still do a pretty good job of hurting you!) Having a dedicated wood lathe would probably make your life a whole lot less complicated. 1950's cast iron wood turning lathe:
-
The early ones did. They were first made in the early 1930's and were in production into the late '70's or early '80's. While they remained the same basic machine, they evolved in various ways during the span of their production. I believe that only the early pre-War models had the poured babbit bearings. Thereafter, the headstock bearings were bronze Timkin roller bearings.
-
Agreed! A smaller lathe would be a more convenient option for doing a lot of small part modeling work, as I discussed in my post above, although the cost of buying and tooling up two different sized lathes which couldn't share at least some of their tooling may make a second lathe an unaffordable luxury. Unfortunately, in terms of the advantages of collets you mentioned, the 12" Atlas/Craftsman lathes do have a #3 Morse taper headstock spindle which of course will accept smaller MT sizes with an adapter sleeve, but the spindle won't handle anything larger than a 3AT collet or the equivalent in the collet chuck designed for it because the chuck draw bar that runs through the spindle is limited by the size of the spindle hole, so the far more common and much less expensive (for the "bargain models at least) 5C collets won't work in the 12" Atlas/Craftsman lathes. I suppose one could devise a collet chuck that screwed onto the spindle or could be mounted on a #3 or #2 MT, but if one were going to want to use a wide range of small diameter collets, my guess is that they could probably buy one of the Chinese made Sieg "7 bys" and a set of small Chinese made collets for it with the savings realized from not having to buy 3AT collets at $35 or $40 bucks a pop for the Atlas/Craftsman draw bar collet holder! Proprietary collets are very expensive. The Unimat has a screw-on collet chuck which takes hard to find collets. A "basic" set of perhaps a dozen collets and the chuck for the Unimat SL/DBs runs between $1,000 and $1,500 used on eBay if you can find one! I agree about turning wood on a metal working lathe. When I have occasion to do so, which isn't often, I wrap my Atlas/Craftsman (and my Unimat, for that matter) up tightly as you describes with aluminum foil and masking tape. I do the same when I am working with any sort of abrasives such as my tool post grinder. It's not a big job to "gift wrap" it, considering how much work it is to break it down for a thorough cleaning when it's full of solidly packed oil soaked sawdust!
