HOLIDAY DONATION DRIVE - SUPPORT MSW - DO YOUR PART TO KEEP THIS GREAT FORUM GOING! (Only 13 donations so far - C'mon guys!)
×


myxyzptlyk2003
-
Posts
172 -
Joined
-
Last visited
Content Type
Profiles
Forums
Gallery
Events
Everything posted by myxyzptlyk2003
-
in order to not hijack this thread any further. From the pictures the original author posted, it looks like if his planks where tapered a bit more he wouldn't have the issues he is seeing now. I think if he looks closely at the instruction pictures more closely he will see that the planks require a fair amount of tapering.
- 152 replies
-
- 4
-

-
- Vanguard Models
- Cutter
- (and 2 more)
-
Jack-in-the-blue On a real ship absolutely. On these models it definitely doesn't make any difference. I would guess that all models are not "historically" accurate in all aspects down to each plank dimension. We all make changes to suit our experience/skills.
- 152 replies
-
- 4
-
-
- Vanguard Models
- Cutter
- (and 2 more)
-
Over the years I also have found that tapering by at least 50% at the bow that most planking works out pretty well. Still, on occasion have to use stealers and smaller pieces but not very often.
- 152 replies
-
- 3
-
-
- Vanguard Models
- Cutter
- (and 2 more)
-
I feel your pain. I have been building these wooden kits for 30 plus years and I still cannot get the 1st planking to work like the "experts". My planking NEVER is uniform. But I don't worry too much as the 2nd planking always covers up these imperfections. I just aim for a solid,smooth first planking to serve as a good base for the second planking. I try and try and try and try to follow the directions but still have issues. As I look at your pictures it seems that the tapering of your planks appears to be insufficient. On some of my planks the tapering sometimes needs to start almost half way towards the stern. And then sometimes almost 80% for the end of the plank is cut off. I think a lot of our issues has to do with our fairing of the frames. Again, I wouldn't worry too much about your result not looking like the instruction book. Fill in those spaces and just provide a good solid base for the 2nd planking. But then, maybe, taper your second planks a bit more.
- 152 replies
-
- 3
-
-
- Vanguard Models
- Cutter
- (and 2 more)
-
Would you buy pre-owned wooden kits?
myxyzptlyk2003 replied to Frank Burroughs's topic in Wood ship model kits
No easy answer to this one. As you state you have not been a wood model builder before, I would absolutely advise you to stick with a "modern"kit. One of the Vanguard models would be an ideal beginner kit for someone with only basic to moderate skills. As stated previously, older kits just don't meet the standards/features that have been developed over the recent years. There have been so many advances in kit quality. As to part quality I think most older kits are generally OK. Case in point. About 30 years ago I built the AMATI HMS Prince kit. At the time it was a superb kit and resulted in a beautiful model. Last year I was able to pick up the same kit, complete and unused. Upon inspection everything looked good. But then I remembered that with this kit NONE of the frames were precut. There were NO precut pieces. Everything was preprinted on the wood stock but I am going to have to cut out each piece. All newer kits have all of those pieces precut. Overall, this 25-30 year old kit held up well to "aging". I suppose depending on storage some wood may deteriorate but in my experience that has not been much of a factor. And then, you can fairly easily replace any "bad" wood. -
Not sure how many years I have left for ship modeling but it sure looks like Vanguard is going to keep me well supplied for the remaining years! Order has been placed for Cutter Trial,
-
Currently on step 69 of my Grecian. Please note that the two parts noted in step 69 ( 57 and 58) are labeled 58P and 5SS on my 1mm wood sheet. As a future upgrade it would have been nice to see a close up picture of the bow tapering at this point in order to get the proper taper and alignment at the bow. (I did find a useful close up at step 115)
- 80 replies
-
- 1
-
-
- Grecian
- Vanguard Models
- (and 3 more)
-
Will be ordering as soon as it is available. I'm just entering retirement. All home projects are caught up so I should be able to spend a lot of time with these models. I may even get two or three models going at the same time. Work on one what waiting for glues to set on another kit.. Presently have just completed step 65 of the Vanguard Flirt. Can't wait.
- 57 replies
-
- 4
-
-
- Trial
- Vanguard Models
- (and 1 more)
-
Will be ordering as soon as it is available. Hope it's soon!
- 80 replies
-
- 5
-
-
- Grecian
- Vanguard Models
- (and 3 more)
-
While I can't vouch for the "comic" version, do not judge the original 2005 book by this version even though it is by the same author. The original 2005 book is an excellent and riveting account of the Battle of Samar and the US destroyers involved in it. The original book does an excellent job of telling the story of the bravery and heroism of the original "tin can sailors". As to reviews, almost all reviews I have read about the original book are 4 or 5 star reviews. If you haven't read the original book I would highly recommend it.
-
What I did for my windows was to place a very tiny drop of a thick superglue on 2 opposite edges of the window. Worked beautifully. As the think glue stayed completely on the edge of the window there was no fogging of the window.
- 505 replies
-
- 4
-
-
- vanguard models
- Sphinx
- (and 1 more)
-
It's been a very long time since I have adding anything to this thread. And that is because of my extreme disappoint in my inability to build the small ship's boats I have basically ceased working on the model. The hull was completed except for those boats. And since I was never going to rig the model I have just put the hull in a display case and moved on to my next model (Vanguard's Duchess). My attempt to use Caldercraft kit boats was not very satisfactory. (although I now note Chris has some 3d printed boats which I am probably going to try)/ But that brings me to a question. In real life, how would these ship's boats be carried? I can't imagine that they would be stowed upright as rain water would pool inside continually. If stowed upright maybe there would be a tarp covering the boats? Or would they be stowed upside down?
-
I guess I have to respectfully disagree with the statement above that if you get the Sphinx you should have the skills to build the kit boats. The following may sound a bit weird but part of the "fault" is that you have made such a wonderfully, buildable kit that the skills required for those small kit boats may often be beyond the skills of many modelers. I for one really had little problem with the main ship, but I failed miserably with the small boats. My failure was to the extent that I actually quit the build at that point and have put the hull on display without the boats. (Note I never intended to rig the model as I don't have room for any more fully rigged model ships). I have followed most (if not all) of the build logs for the Sphinx and I have yet to see any results for the small boats other than by Jim (whose skill level I will never attain). I do have Caldercraft kit small boats and am not totally pleased with the result. It looks like your new small boats may be a partial answer to my lack of skills.
-
For the Jotika boats, I am using the 32 foot pinnace 23 foot launch 24 foot cutter. As stated previously, the launch and cutter look to have almost the same shape and dimensions as the kit provided boats. The pinnace is a bit too long but does fit nicely on the model. Building is pretty slow at this point as I am using the wood provided in the kit to build all the internal structures. I can only apply a few wood ribs at a time as I need to clamp them in place to allow the glue to hold. Once the ribs are in it should be a much faster process. I will be interested in how my fellow modelers do with the kit boats. They were definitely well beyond my skill level.
-
At this point I remember using the CC 32 foot pinnace. I will be doing some modifying of the build to make it as close as possible to the incredible quality that James showed with his boats. I won't come real close but again, it will be better than nothing. The 32 foot pinnace is a bit too long but I have test fitted it and to my eye it looks pretty good. The other 2 I don't remember off the top of my head. I'll get the details this weekend. But with those other two the dimensions of the boats look to be close to exactly the same as the kit boats. \ One modification that I am working with is using the wood ribs from the kit on the resin hull. CC supplies some black construction paper to mimic those ribs. Basically, I will be using only the resin hulls. While I know doing this is a huge compromise over the kit boats, there is no one other than those on this forum who are going to see this finished model and will notice any difference.
-
Well. I have failed miserably with the ship's boats. Just so fragile and tiny planking. What I am going to do is use some precast resin hulls from Jotika and fit most of the pieces from this kit to those hulls. So far it is going pretty well. It will be better than nothing. I have dry fitted the photo etched pieces to the pinnace and so far they are a very close fit.
-
True. But since I am not rigging this model due to storage limitations those joints would be fairly visible.
-
Given the results I am seeing here compared to my poor attempt, I am very tempted to get another kit and give these methods a go. Or I will wait until Chris's next larger model?
-
Cutting those pieces up would scare me no end. Any actual cutting would remove some (albeit small) amount of material making the cut up piece "smaller"than the original. The only way I could think of with these delicate pieces is to maybe score them and then break them gently?
-
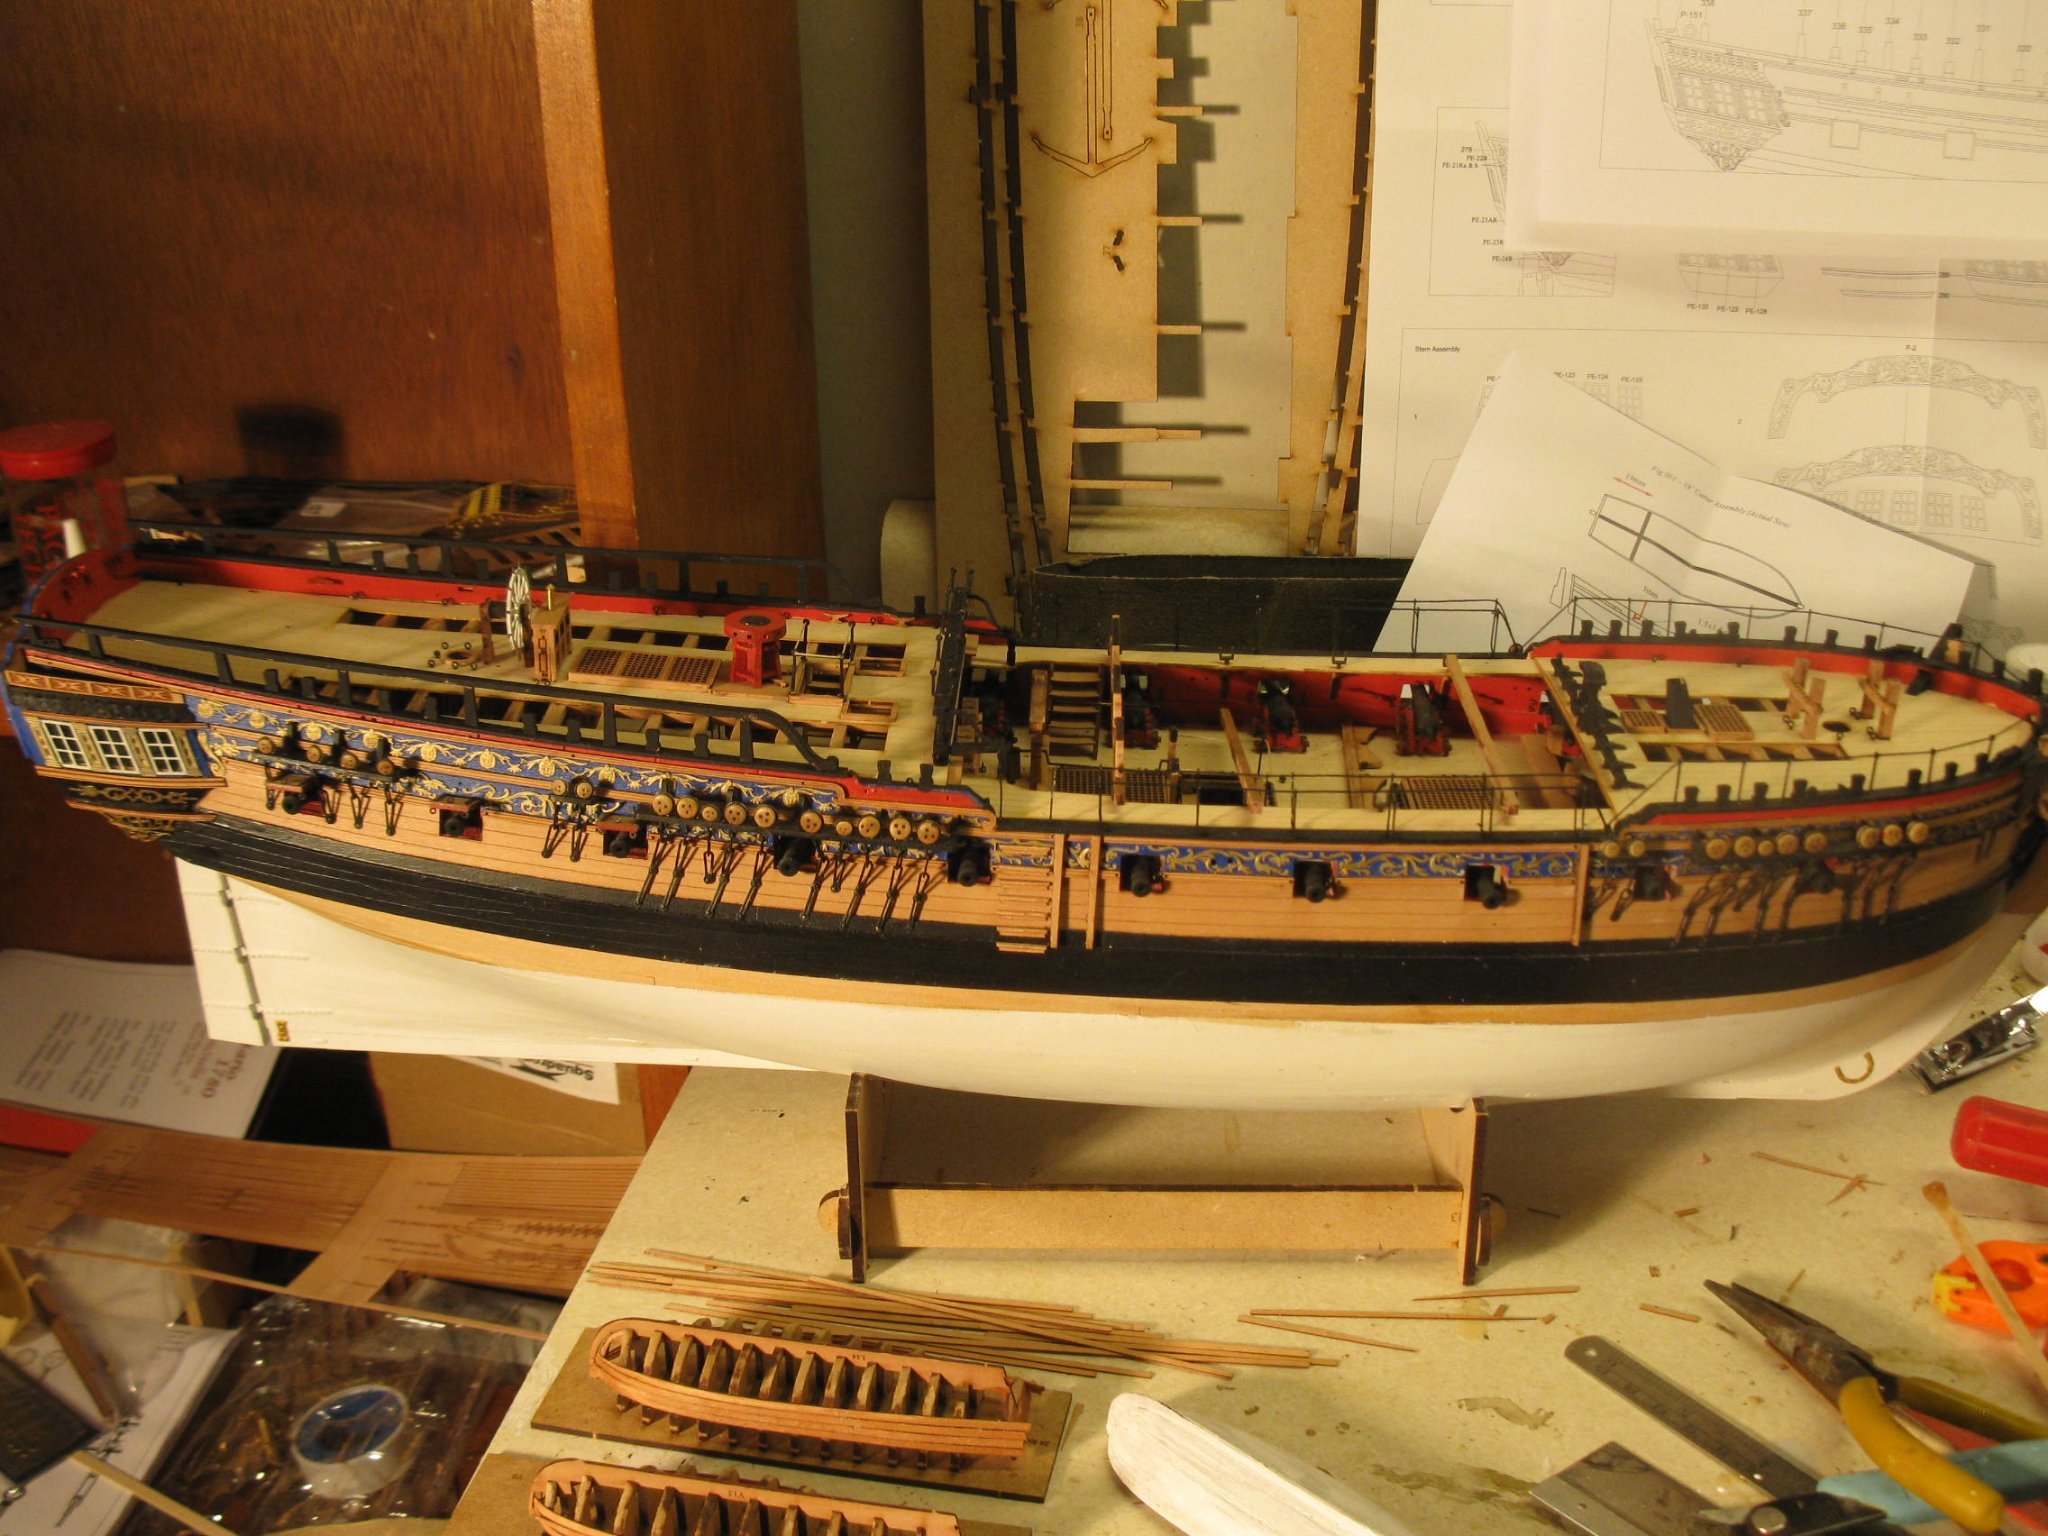
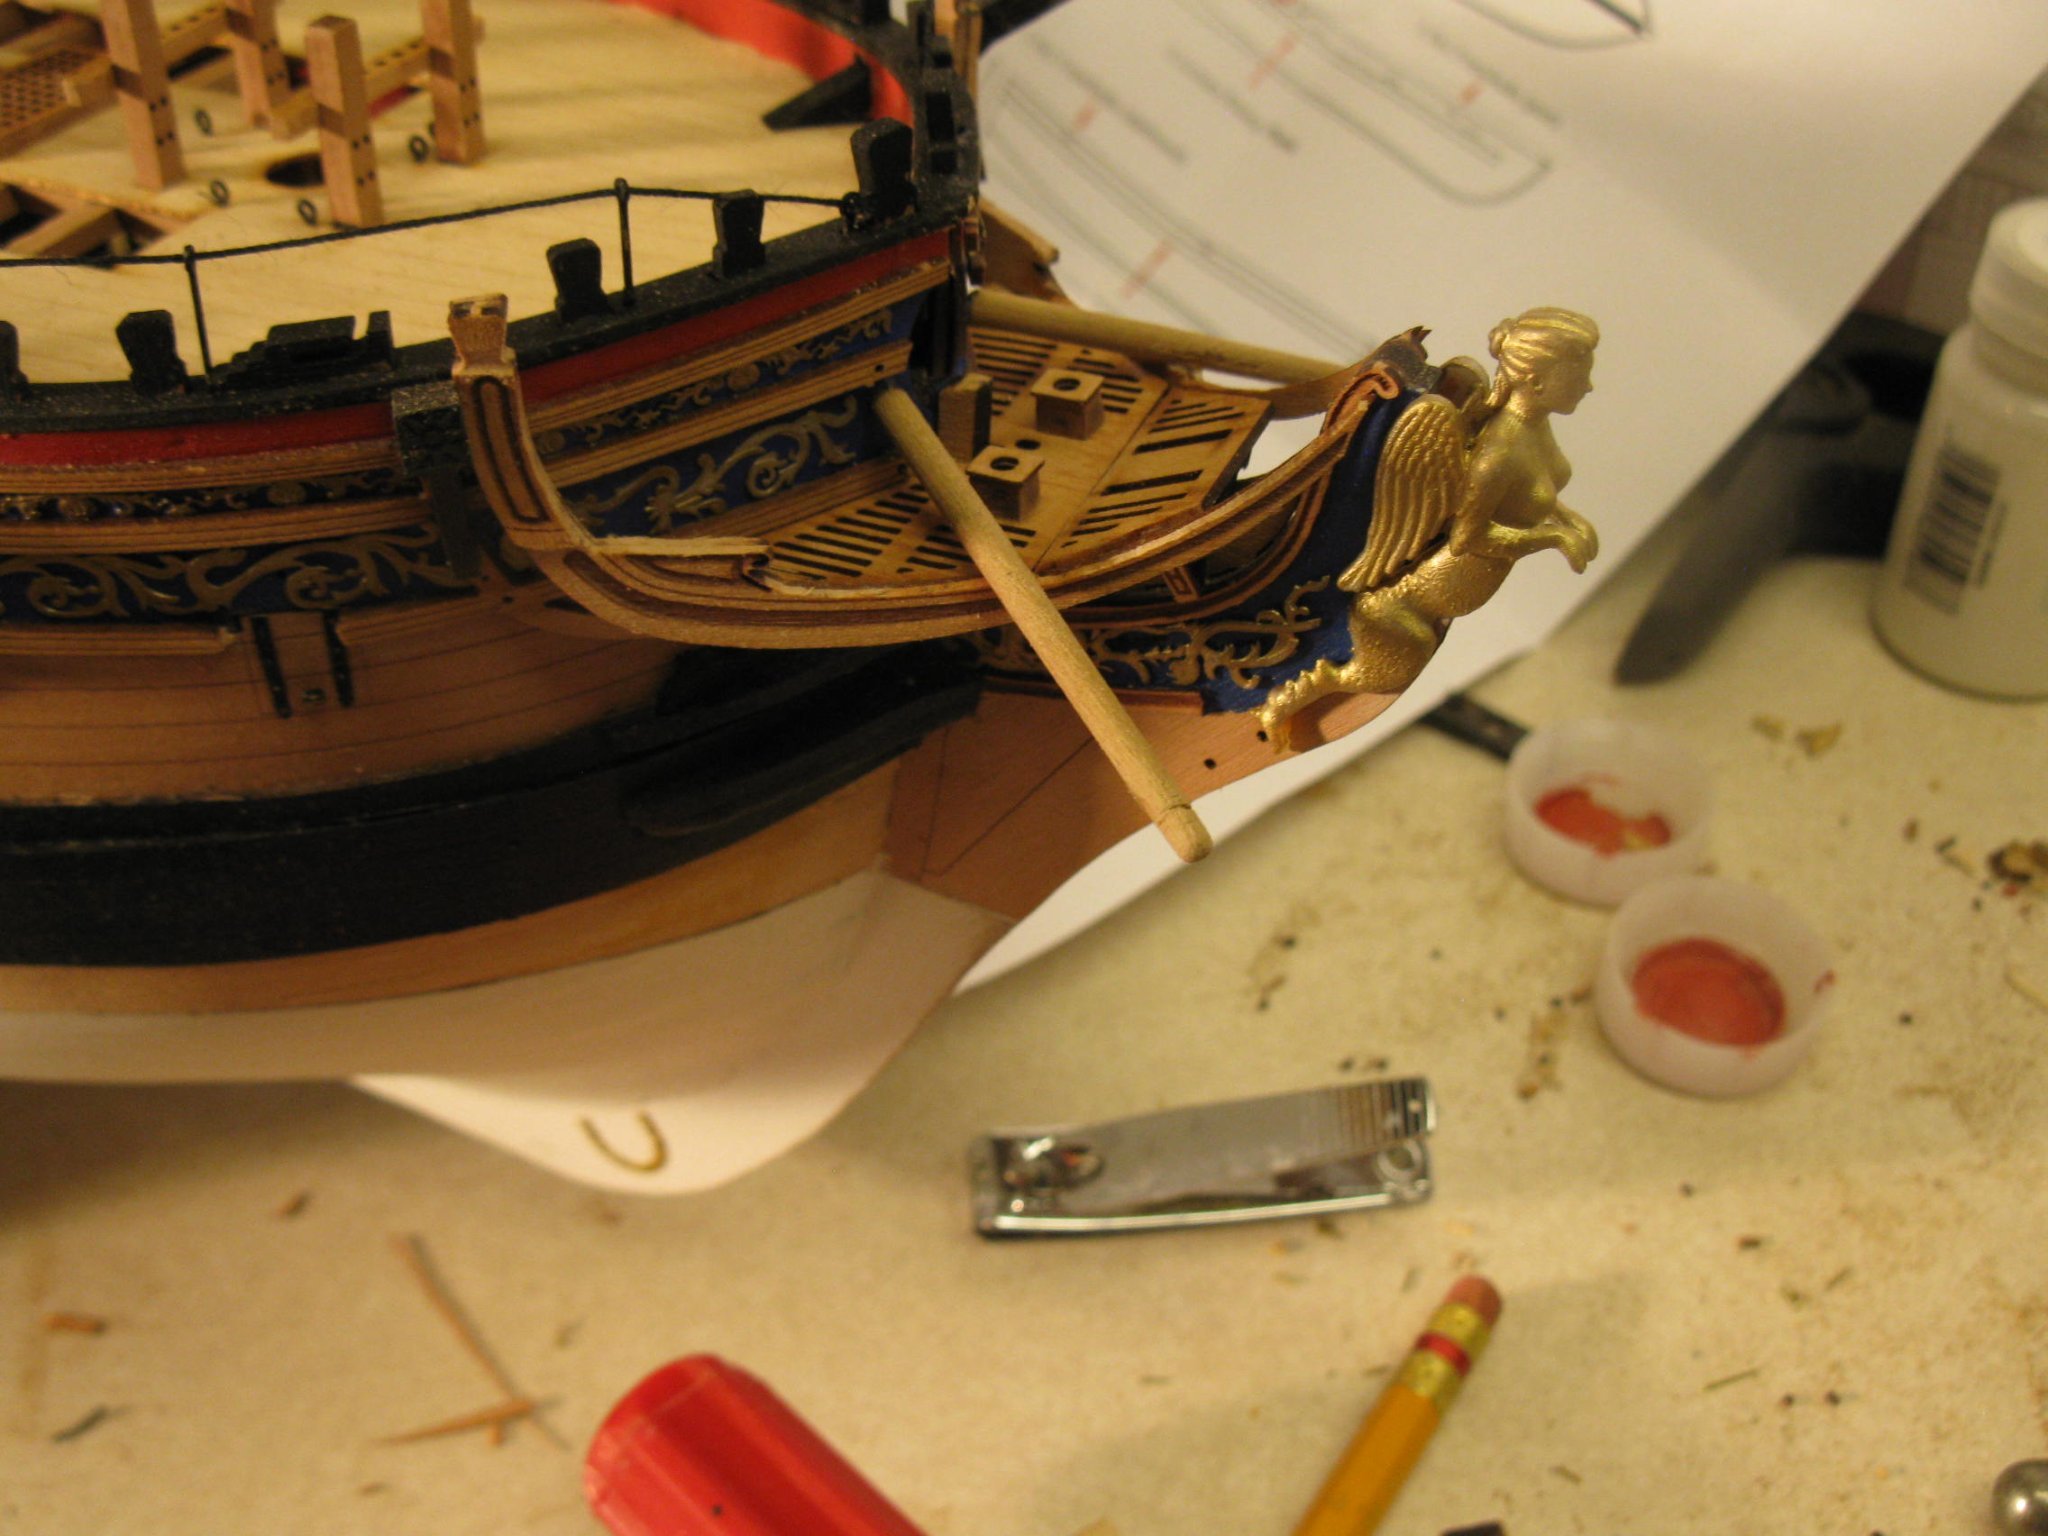
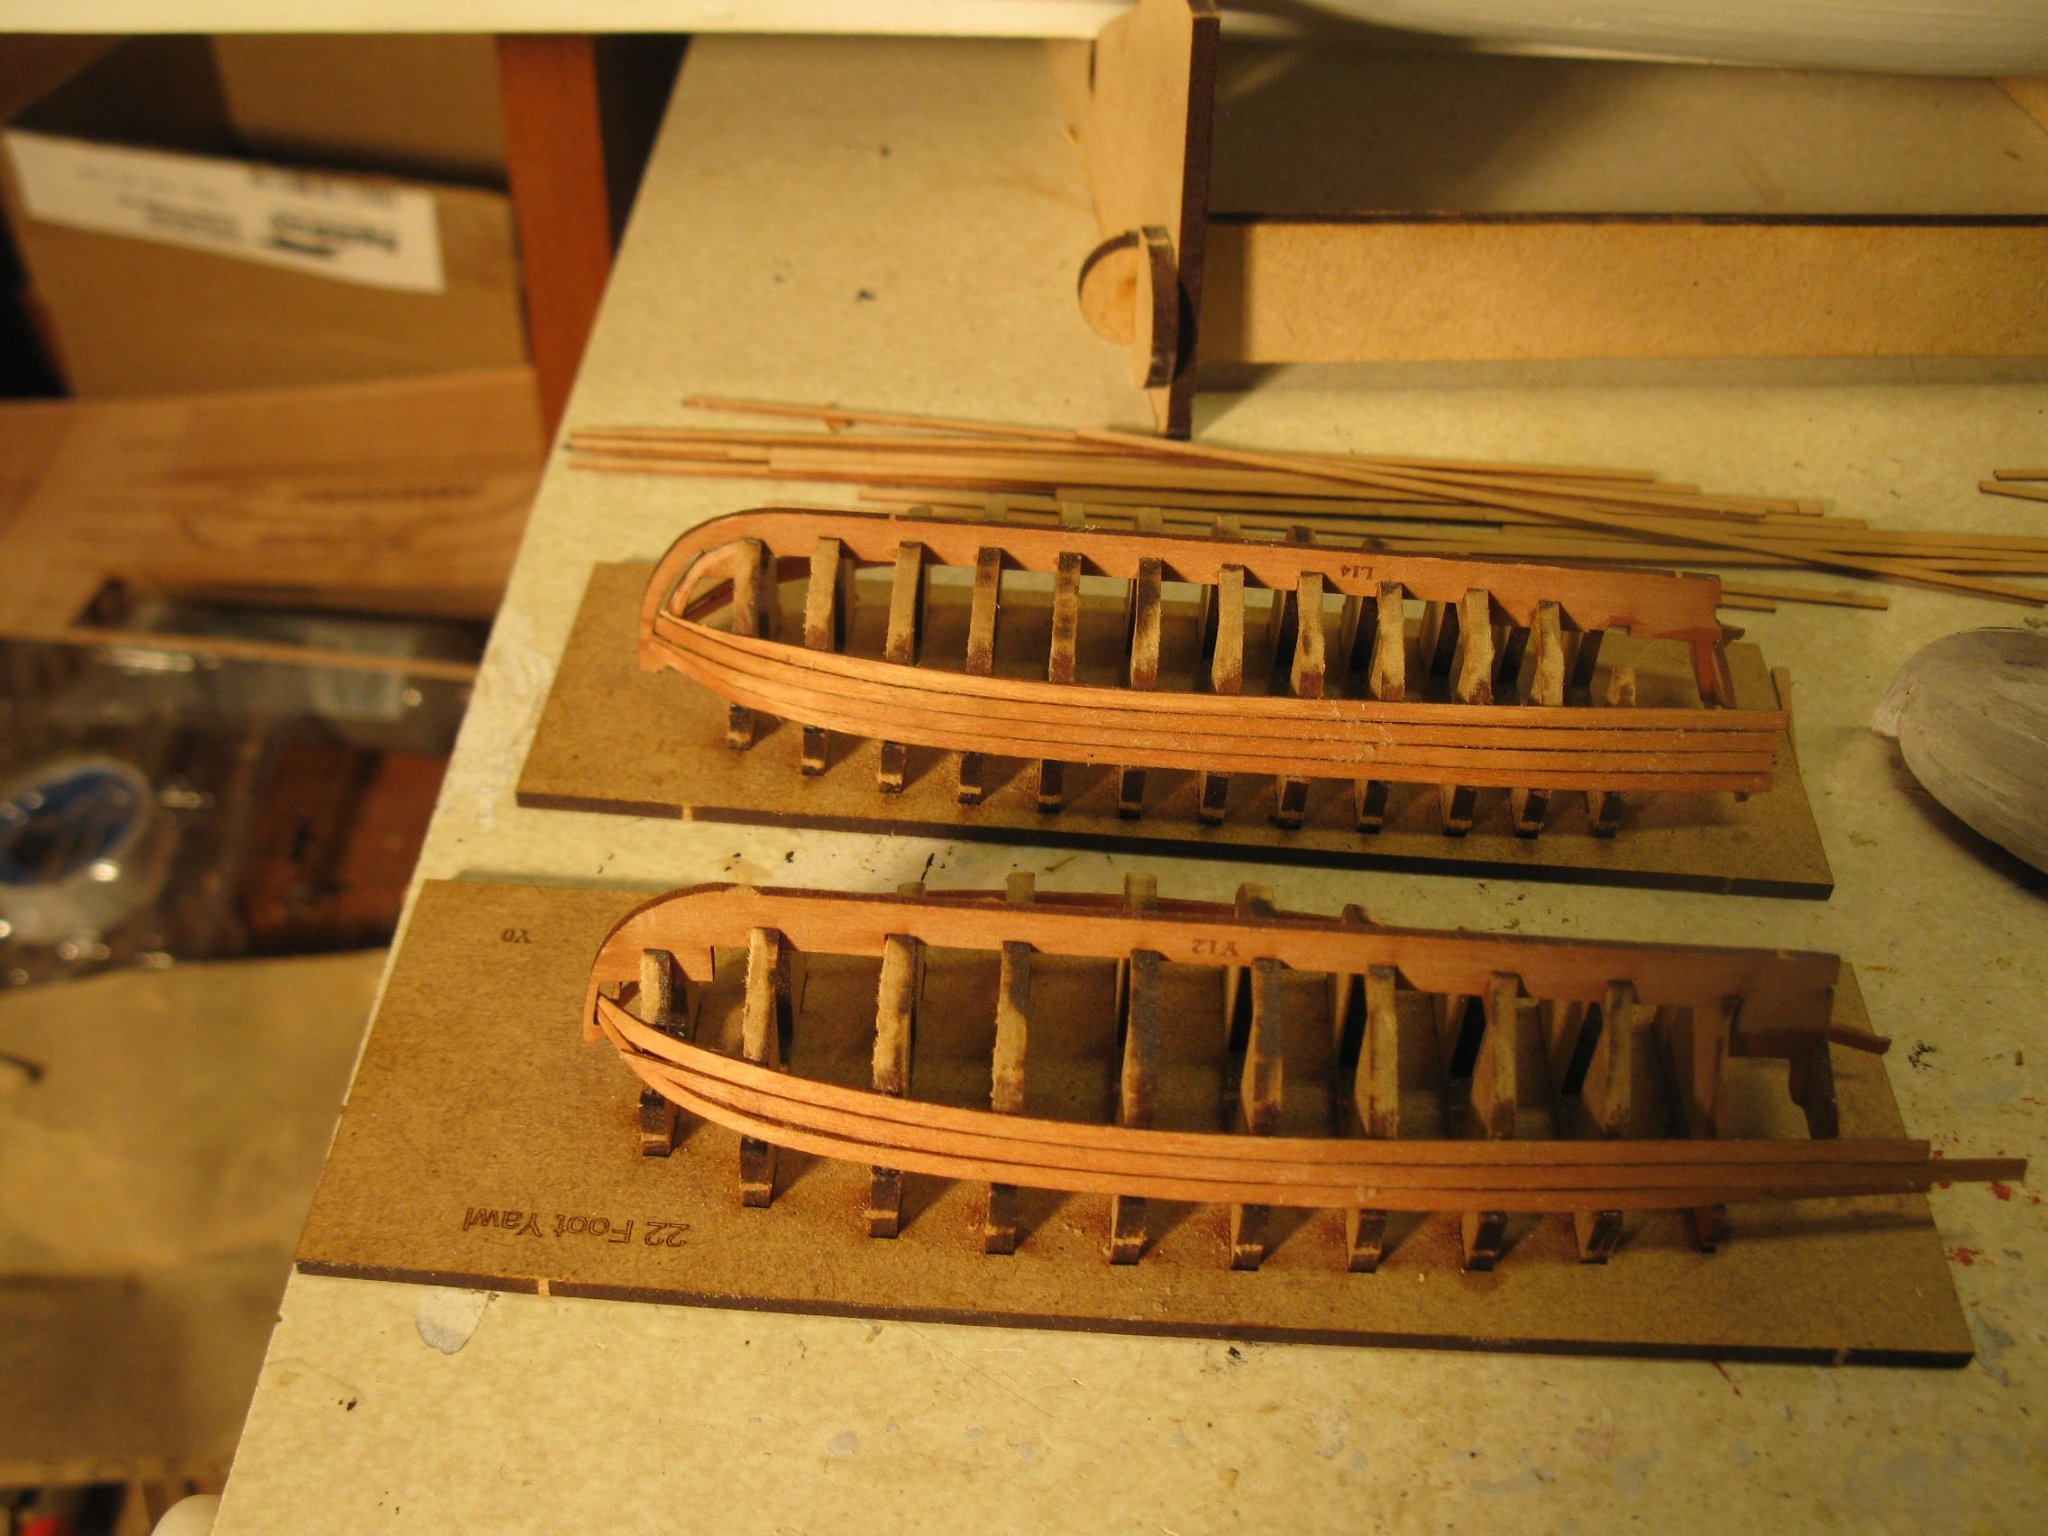
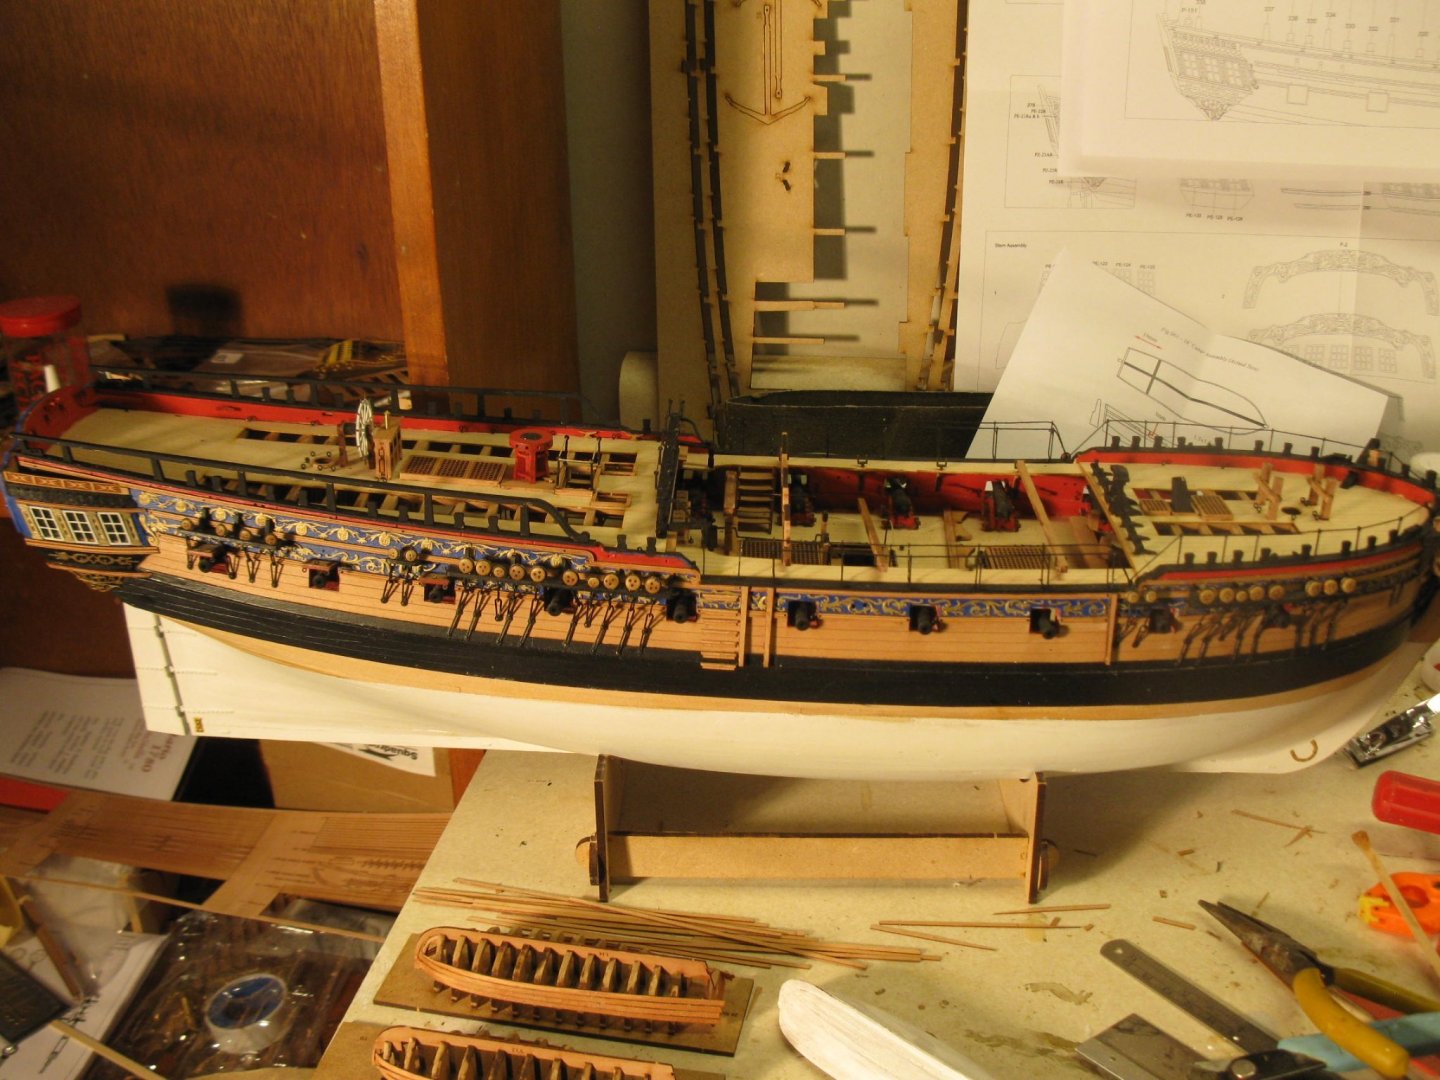
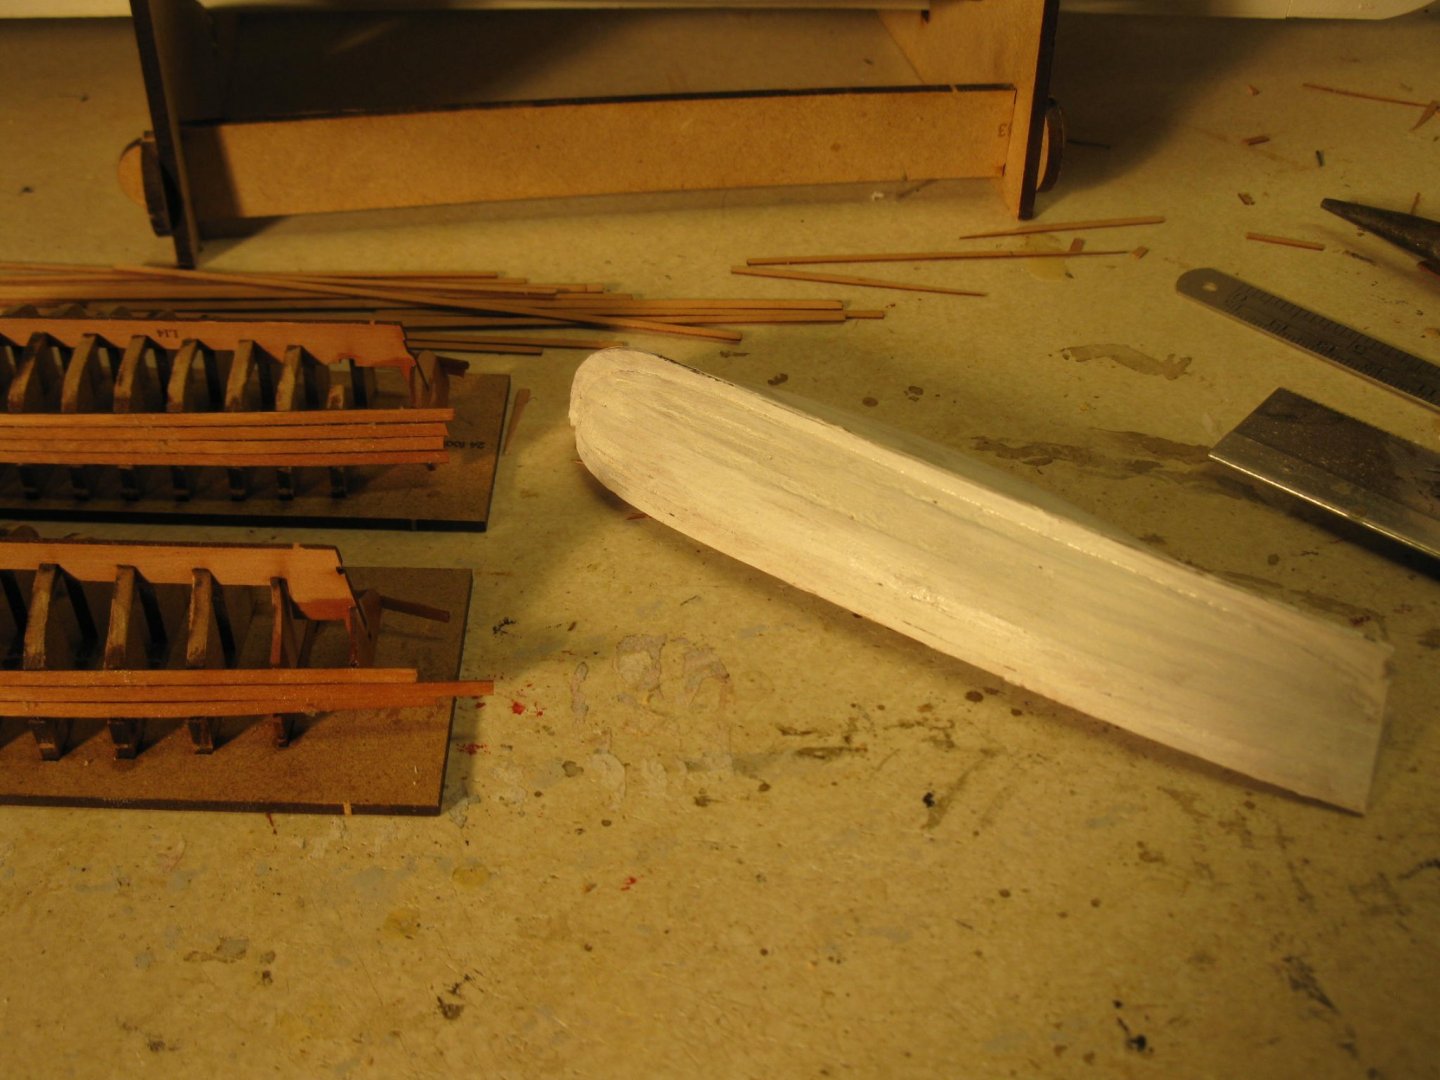
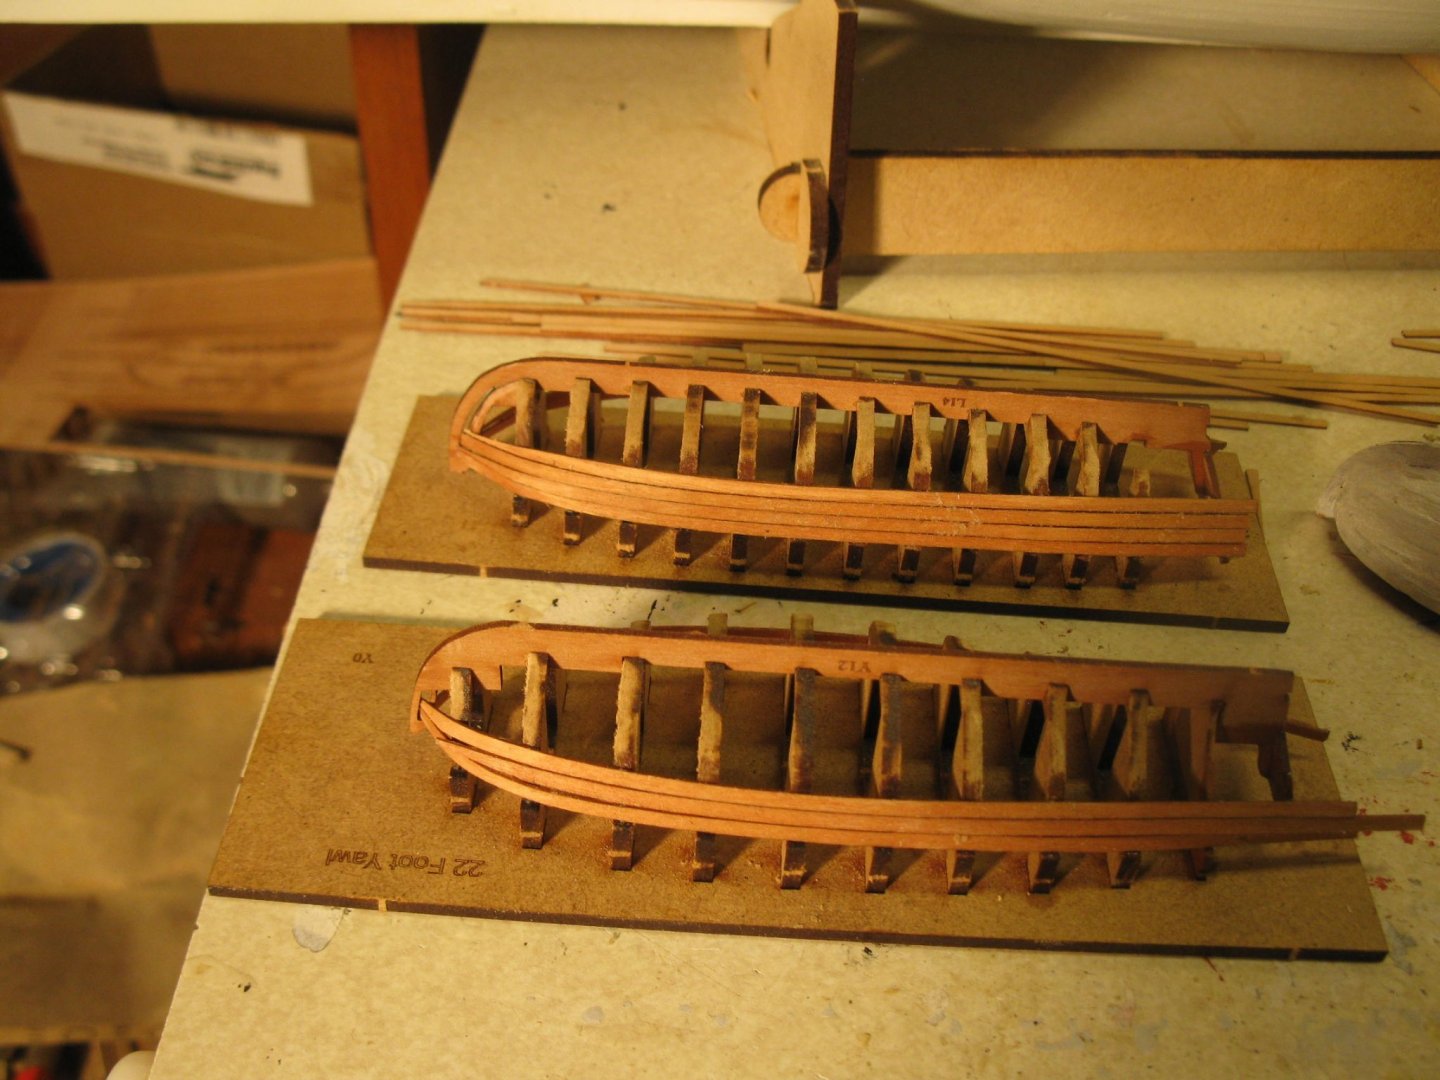
Building is slowly progressing. The hull is essentially finished with just some touchups to do. Especially on the stern decorations. (just ordered some very fine brushes to accomplish this). The ship's boats are the last stage for me as I am not going to mast/rig this model. Those boats being a single plank affair are a real challenge for me as you can see by the pictures. I have always used the second planking to cover up my many defects. Not so with these. I have the pinnace planking done now have to work on the interior. Also will need to do lots of cosmetic touching up to the hull. I had never really done any fine single planking before so I learned a lot which will be applied to the yawl and launch which you can see are under construction. With these boats I have only been able to do a few planks at a time. The structures are pretty fragile at the stern so I have not been to find a way to use clamps. That necessitated my holding the planks in position until the glue set up. Thin CA is hard to use as it soaks into the MDF pretty quickly, A medium CA is a bit better but does take a while to hold. What I found that works best for me is kind of a combination of the yellow glue I use plus some thin CA. I apply the yellow glue to the plank and then the CA to the rib and quickly place the plank. I have found this method give a pretty good hold of the plank in about a minute.

-
While I don't remove all the char on places that it won't show like under black paint, I do lightly sand the pieces smooth. Almost all the time you can get it pretty smooth but there is a significant amount of char left. With this kit there are a fair amount of pieces that are very fragile. I think I just looked at the galley frame and it broke. It would be interesting to know how char is removed from those very fragile pieces. (And that type of removal should not be classified as a very basic skill!)
-
One of the pictures of an example of removing the char was of the railing area amidships leading down to the gangway. Those very fragile parts are going to be painted black. And while you (or someone) stated that the char will still show through black, I completely disagree with that. Vallejo black out of the bottle will cover just about everything. Why waste time removing char from areas where it will never show?
-
I agree with Glen. We are all different people with different goals and personalities. For someone like me, while those skills may be basic they still take time and in the end it comes down to do I want to spend that time "improving" things. There are lots of time that "good enough" is good enough and it's not worth the extra effort to strive for perfection. Example, fully rigged cannons. Most of the time you can't see them as they are under decks but there is no way I am going to spend the time on doing that. It's a basic skill but just not worth it for me and my goals.
-
Rather than hijack someone else's thread I would like to make a few comments that were made about this model on another thread. In summary, the poster was lamenting how much better some of the models can/should be due to the poster's perceived deficiencies (removing char, sanding, speed of build, etc). Note that the deficiencies sited are legit. But the poster is maybe missing some points. I don't build these kits with the goal of achieving museum quality models. Can they be done better? Absolutely. Do I want to make them better? Probably not. For 70+ years I have had a consuming love of building models of all types. And in many if not all cases the result has never come close to the best. But for me the satisfaction is there with the physical 'build' and I never dwell on the deficiencies that some may point out. I will never make the perfect model nor do I strive to achieve that. All of the people who are going to see my finished models ( they probably number in the single digits) all marvel at how great they look They look at and see the overall effect and don't focus on the small, individual sections. And given the relatively few years I have left on this planet and with so many models to build, speed kind of is a priority. I know there are plenty of sayings about quality vs quantity. But there is something to be said for quantity also. Model building is a large hobby. There is room for all levels of achievement and quality. Not everyone has the same goal in mind.
-
Chuck Definitely good points. But as to removing all the char, some of those parts are so fragile I can almost guarantee that you will break them with what might be unnecessary sanding as a number of those parts are painted anyway or are covered up.