usedtosail
-
Posts
2,424 -
Joined
-
Last visited
Content Type
Profiles
Forums
Gallery
Events
Everything posted by usedtosail
-
 Thanks for the kind words. I had no idea the current ship has the chain plates parallel like that. I envy you Tom. Back in the day Hobie Catting in Hawaii was a dream for me that never came to pass. The cold Atlantic off New England, even in the Summer, was just not the same, but we had a blast anyway. As for rigging, I always set up the shrouds first so that the masts are stabilized before adding the running rigging. I put my masts in slightly larger holes in the decks then use the shrouds to set the mast angle and center them side to side. I wouldn't want to try tightening running rigging with the masts flopping around. But that's just how I do it. I add the running rigging with long tweezers through and around the shrouds, which is a pain sometimes. I know some builders add the running rigging to the masts and yards before they add them to the model so that at least you have one end secured off the model. I have tried that but don't like trying to keep all those lines untangled, even if I coil them until I need them. I am also able to do seizings in mid air which makes adding running rigging lines to masts and yards after they are installed a little easier for me.
- 163 replies
-
- 1
-

-
- Model Shipways
- Constitution
- (and 2 more)
-
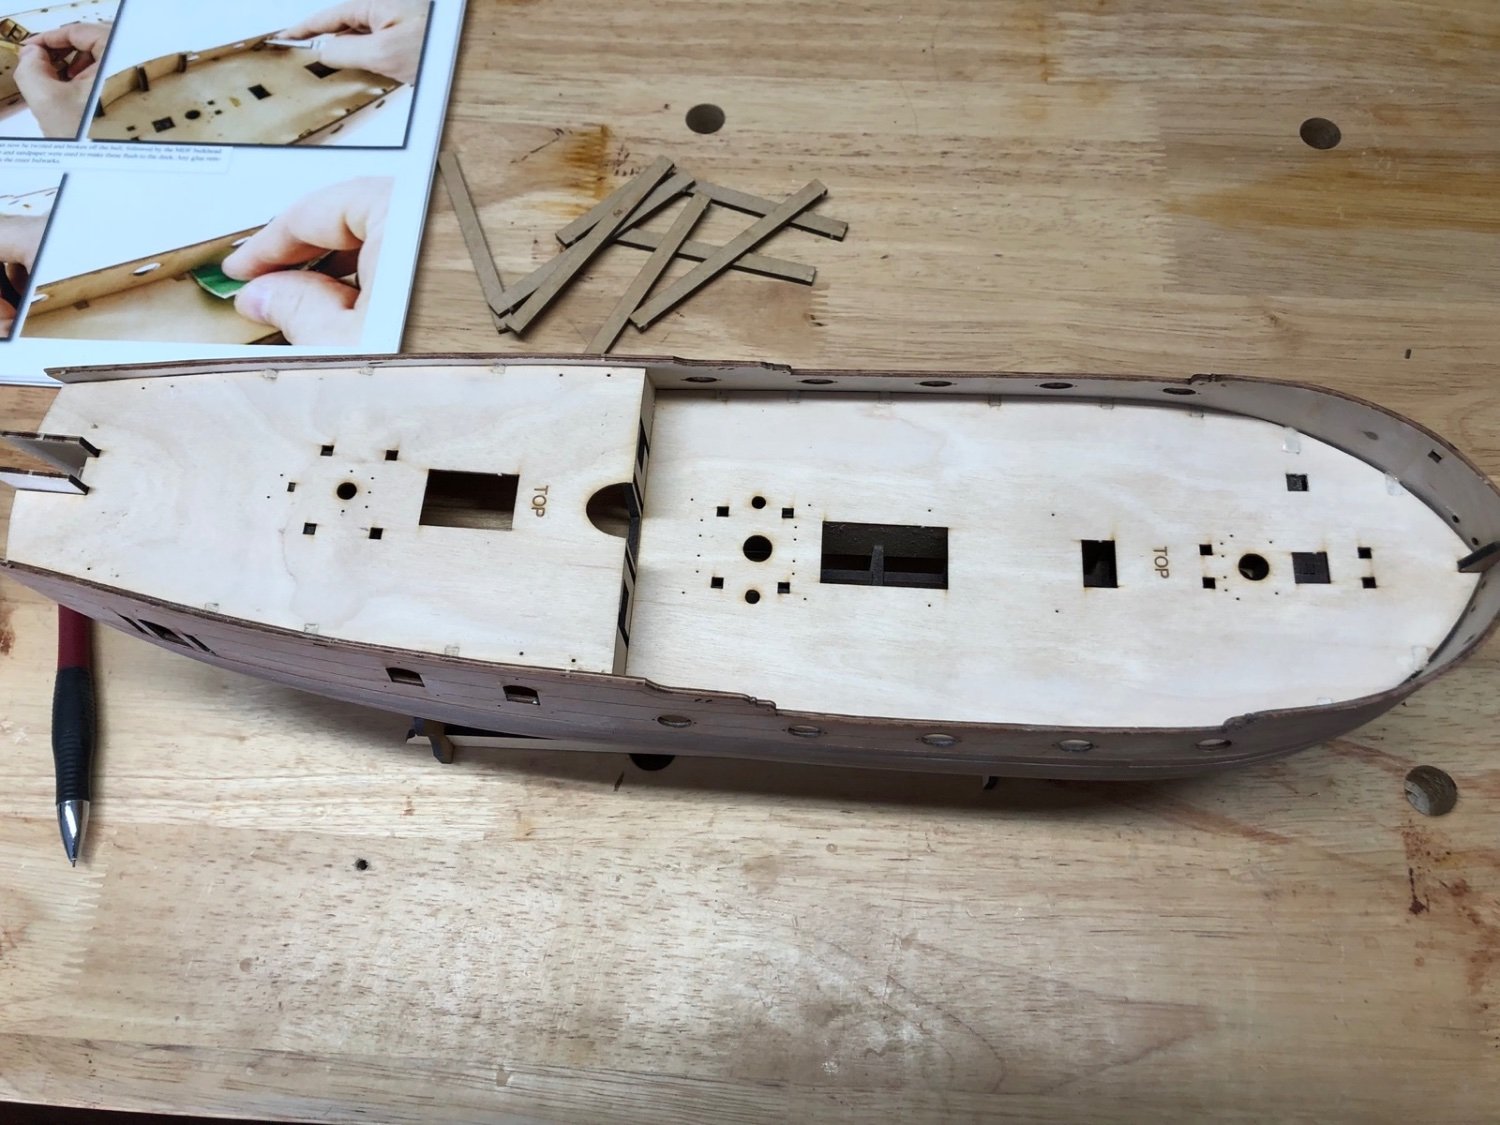
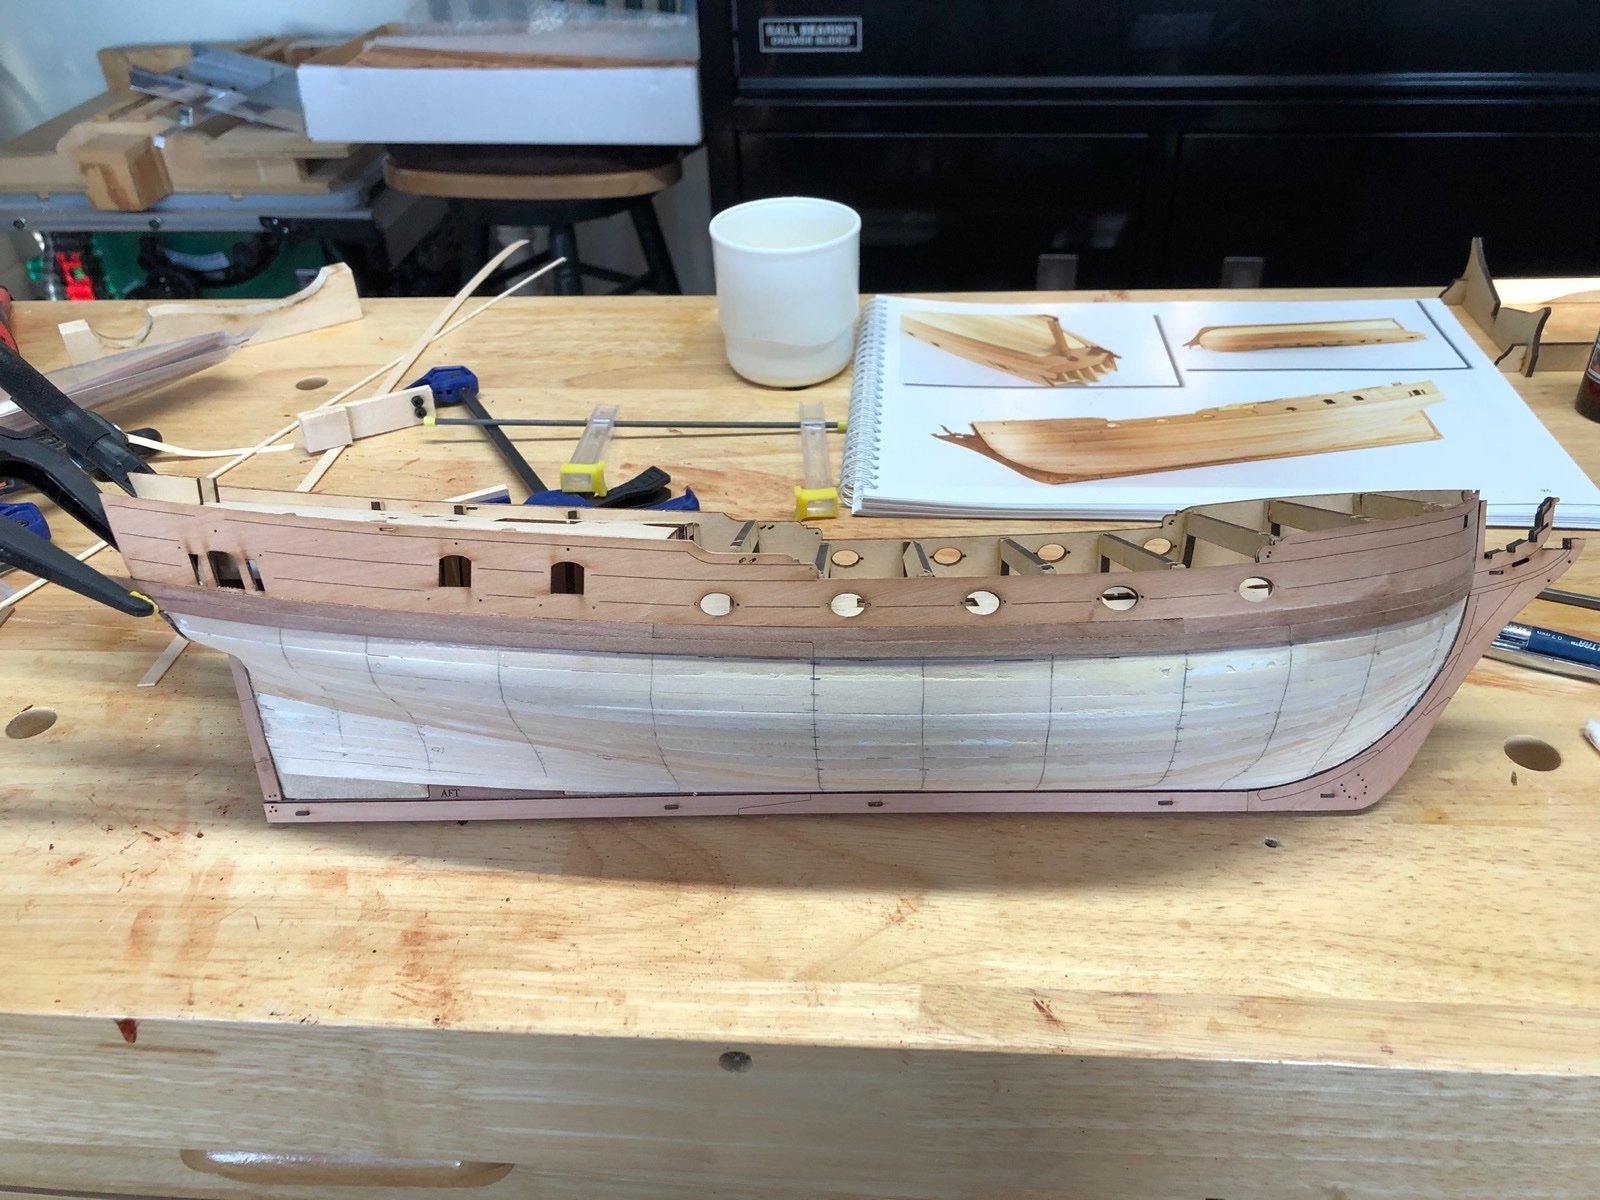
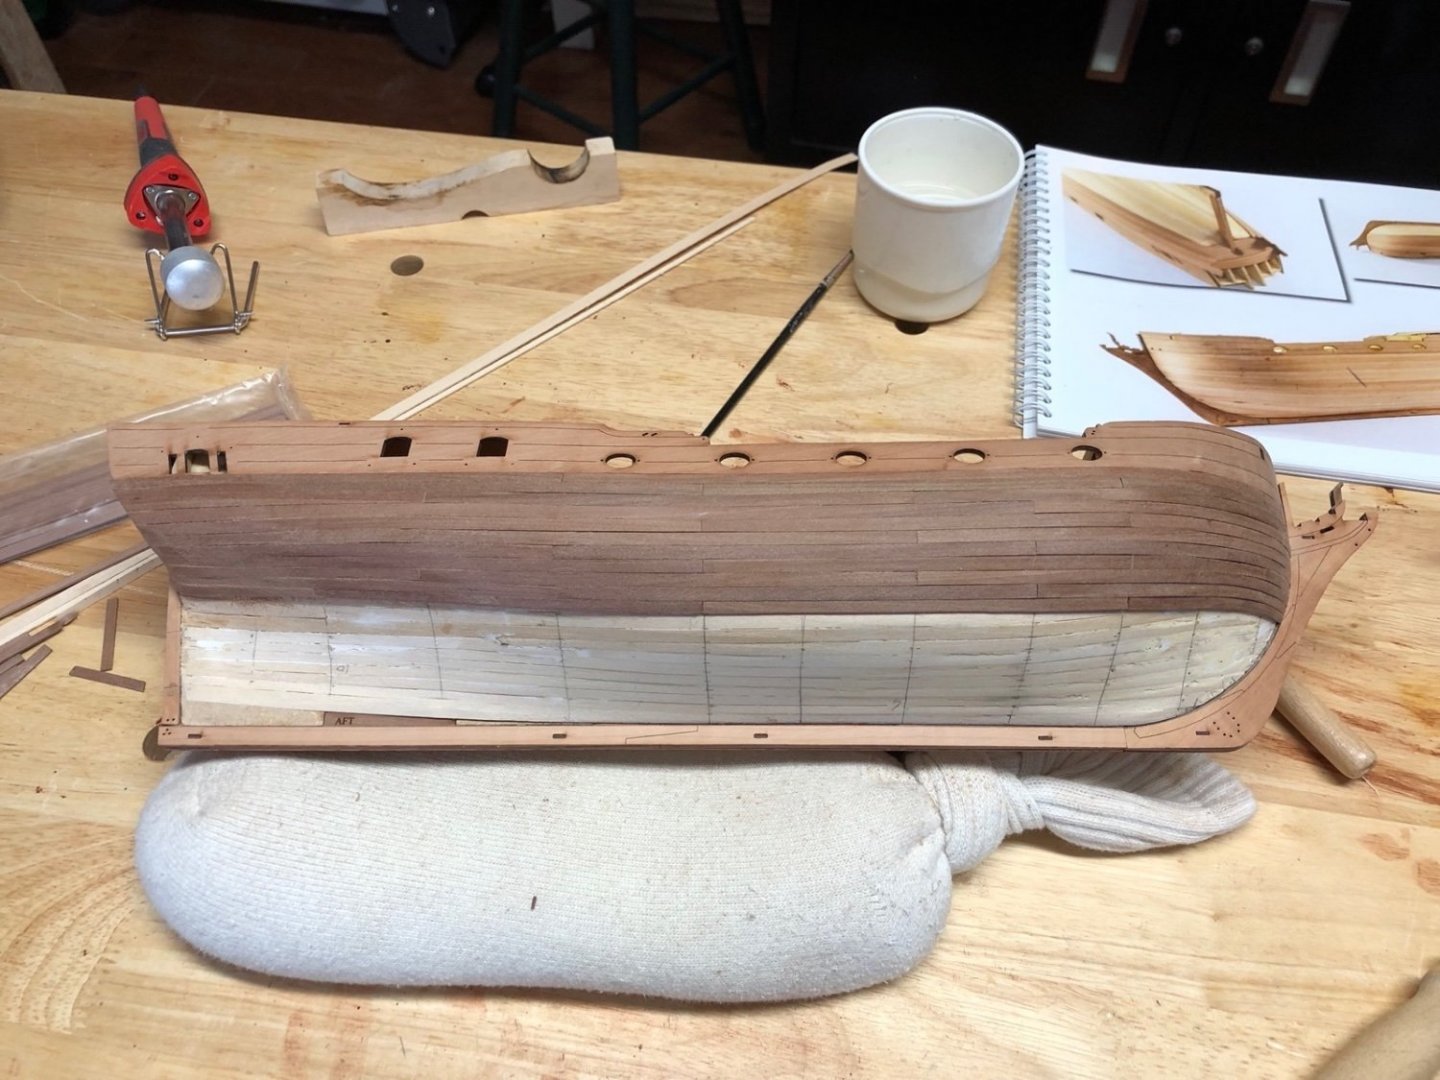
I finished sanding both sides of the hull after using a little more of the sawdust in diluted wood glue in the gaps. I finished with 400 grit sandpaper and wiped the hull down with a tack cloth. I then removed the bulwark supports and extensions. I used a chisel to remove the extensions at the deck level then finished up with files and sandpaper. The inner bulwark pieces are soaking in hot water and I will clamp them to the bulwarks next to curve and dry.


- 118 replies
-
- 6
-

-
- Duchess Of Kingston
- Finished
- (and 1 more)
-
Nice job with the chain plates Tom. They are a bit tricky. One thing to consider is that they should not be perpendicular to the waterline or parallel to each other, but they should follow the line of the shroud that is attached to each one, so they angle to the mast increases the further away from the mast the chain plate is. On the cross section the difference to what you have is probably pretty minor but something to keep in mind for future models.
-
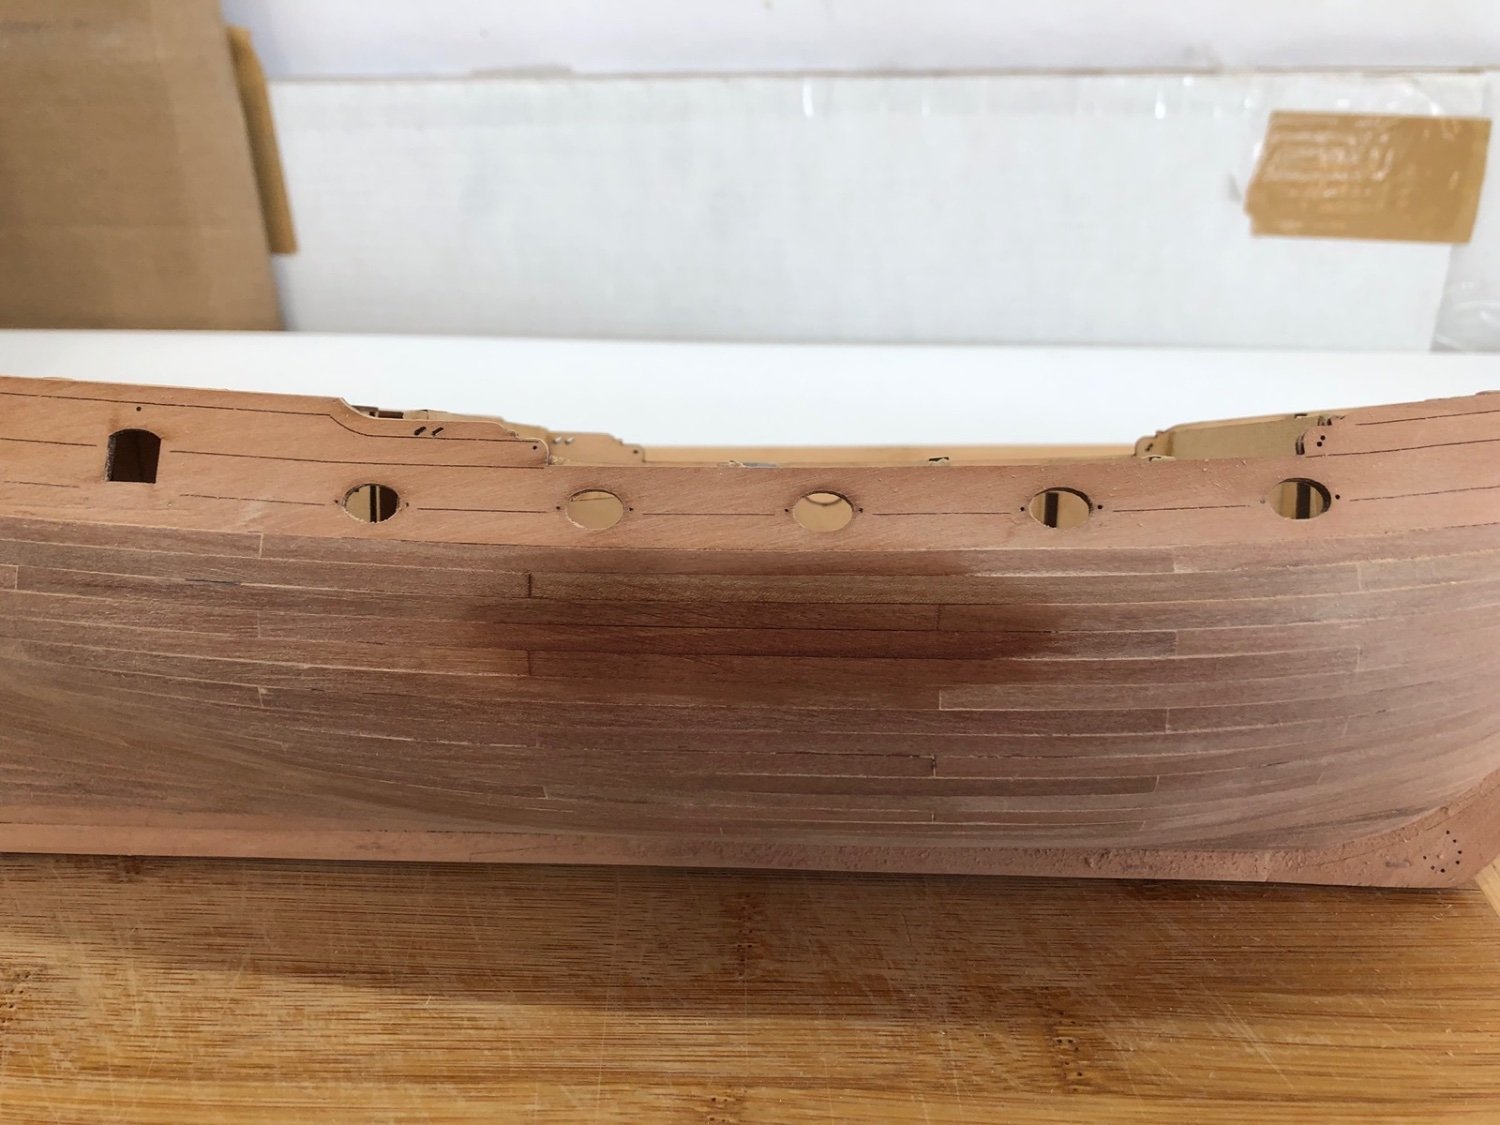
I have been slowly sanding the second planking but we finally got a good snow storm last week and I have also spent a lot of time playing in it - skiing and snowmobiling mostly. I saved the saw dust from the rough sanding and made a thin paste with it to fill the gaps in the planking. I then sanded down the starboard side with medium and fine sandpaper. I was a little concerned with the color of the filler so I wiped a section with a tack cloth and rubbed on some wipe on poly. I was very pleased with the test section. I now will sand down the port side and probably will have to do a little more filling before the final sanding. I am now pretty sure I will leave the hull clear below the waterline instead of painting it white.
- 118 replies
-
- 6
-
-
- Duchess Of Kingston
- Finished
- (and 1 more)
-
Very nice upgrades Derek. I will remember these when I get to make these bitts.
- 345 replies
-
- 1
-
-
- Duchess Of Kingston
- Vanguard Models
- (and 1 more)
-
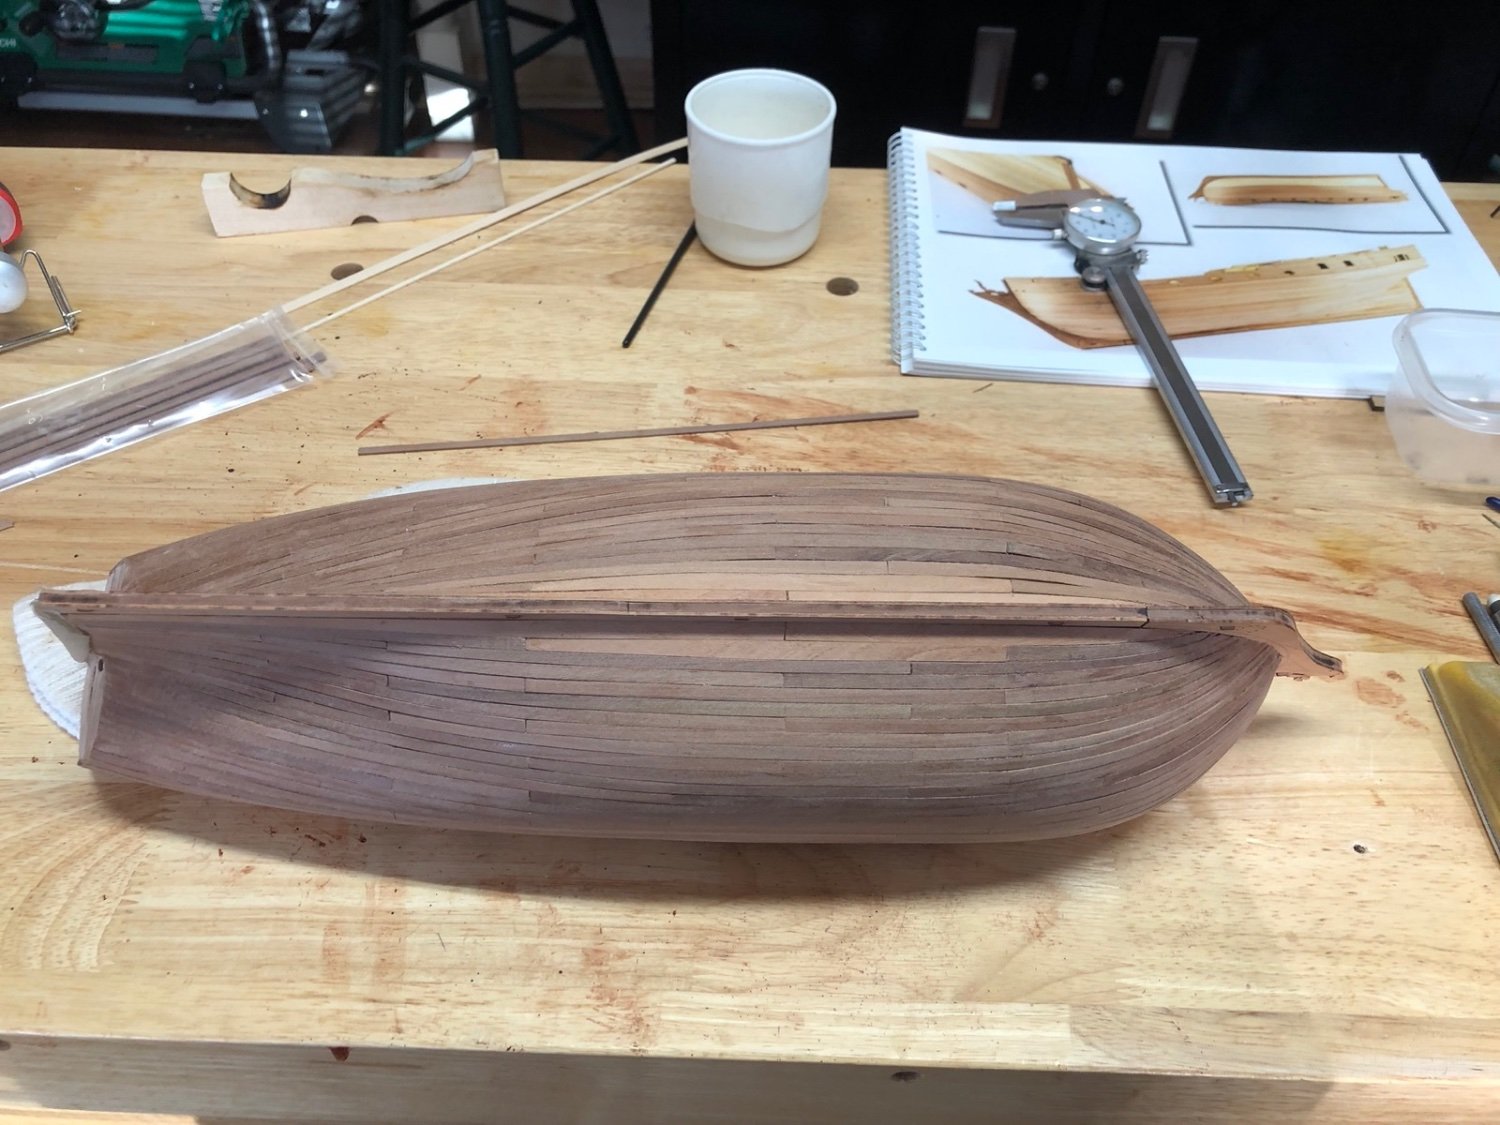
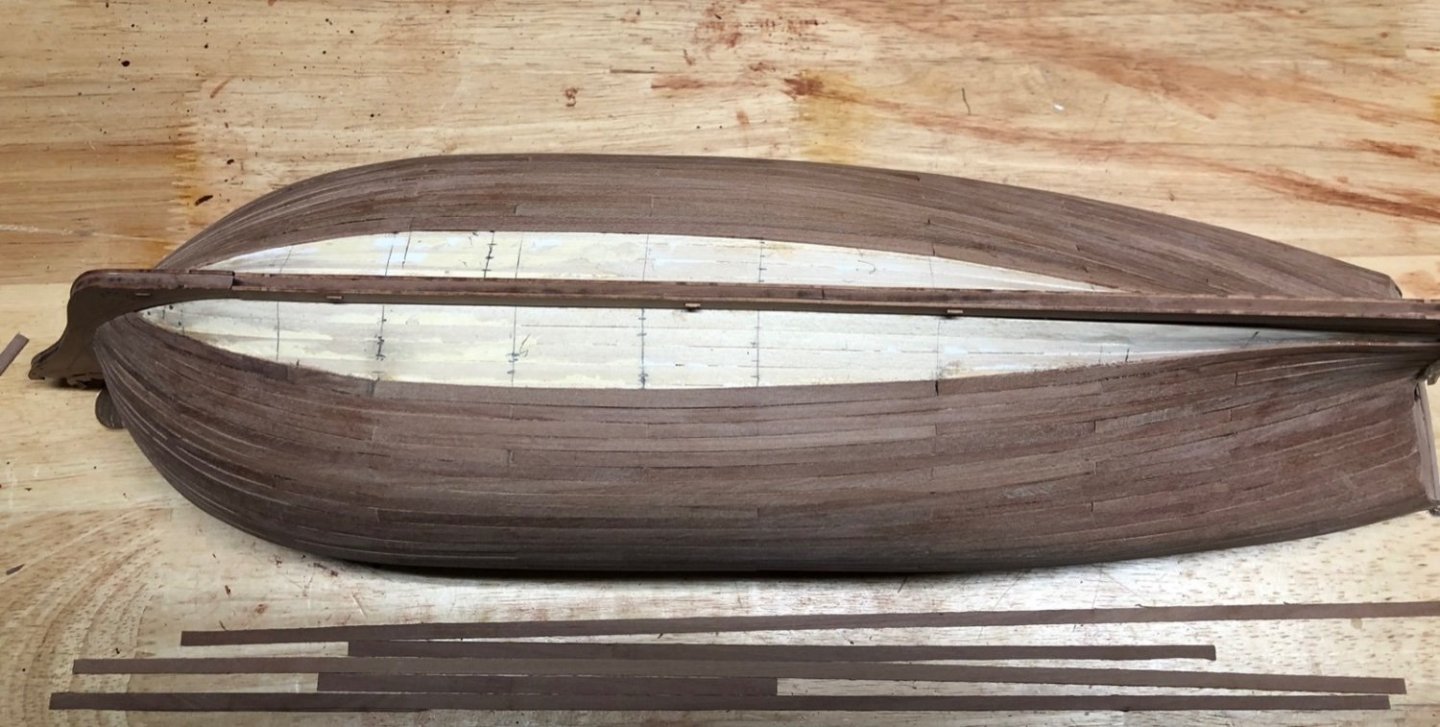
I finished the second planking today, although I have only started sanding the upper planks. I also have some small gaps to fill. I was very happy with the fit of the final row of planks. I always have a hard time filling that last gap neatly. You can see I used some wider plank material near the keel but that area doesn't show much. It feels good to get the planking installed even if it is not sanded and finished yet.

- 118 replies
-
- 6
-
-
- Duchess Of Kingston
- Finished
- (and 1 more)
-
I am getting close to completing the second planking. I currently have three rows left which includes the garboard strakes. I have again adjusted the widths of the final planks so that I don't end up with very thin sections of some planks. I cut 5 mm width planks from the edges of the 1mm laser cut pear sheets which I am using for the middle sections. I had to replace my plank bender (again) but since I bought the original many years ago I replace them with regular soldering irons that have exchangeable tips and use the large round tip from the original plank bender. Works great. Not much bending at the bow needed now but still mostly edge bending.

- 118 replies
-
- 5
-
-
- Duchess Of Kingston
- Finished
- (and 1 more)
-
Its been a long time since I built this kit but for most kits you should be able to measure the angles of the masts to the deck or waterline from the plans. As for the sizes I am pretty sure Model Expo includes scale drawings of the masts in the rigging plan. Maybe you are missing those plans? If so, send me a PM and I'll see what I can do, as I still have the plans.
-
I remeasured the remaining distances at each bulkhead and adjusted the plank widths slightly going forward. I added the next row of plank sections using the new widths and all went well . Happy New Year everyone.
- 118 replies
-
- 3
-
-
- Duchess Of Kingston
- Finished
- (and 1 more)
-
I was having troubles getting the right bend or bends on the next plank bow sections so I went back to first principals. Edge bending is really just spilling (spileing?) without using wider wood strips. To get the shape of a spiled plank you use clear tape to trace the edge of the previous plank, so that's what I did. I then edge bent to that curve and the plank section fit nicely. I now have ten rows of planks so I think I will check the remaining space and recalculate the remaining plank widths.
- 118 replies
-
- 1
-
-
- Duchess Of Kingston
- Finished
- (and 1 more)
-
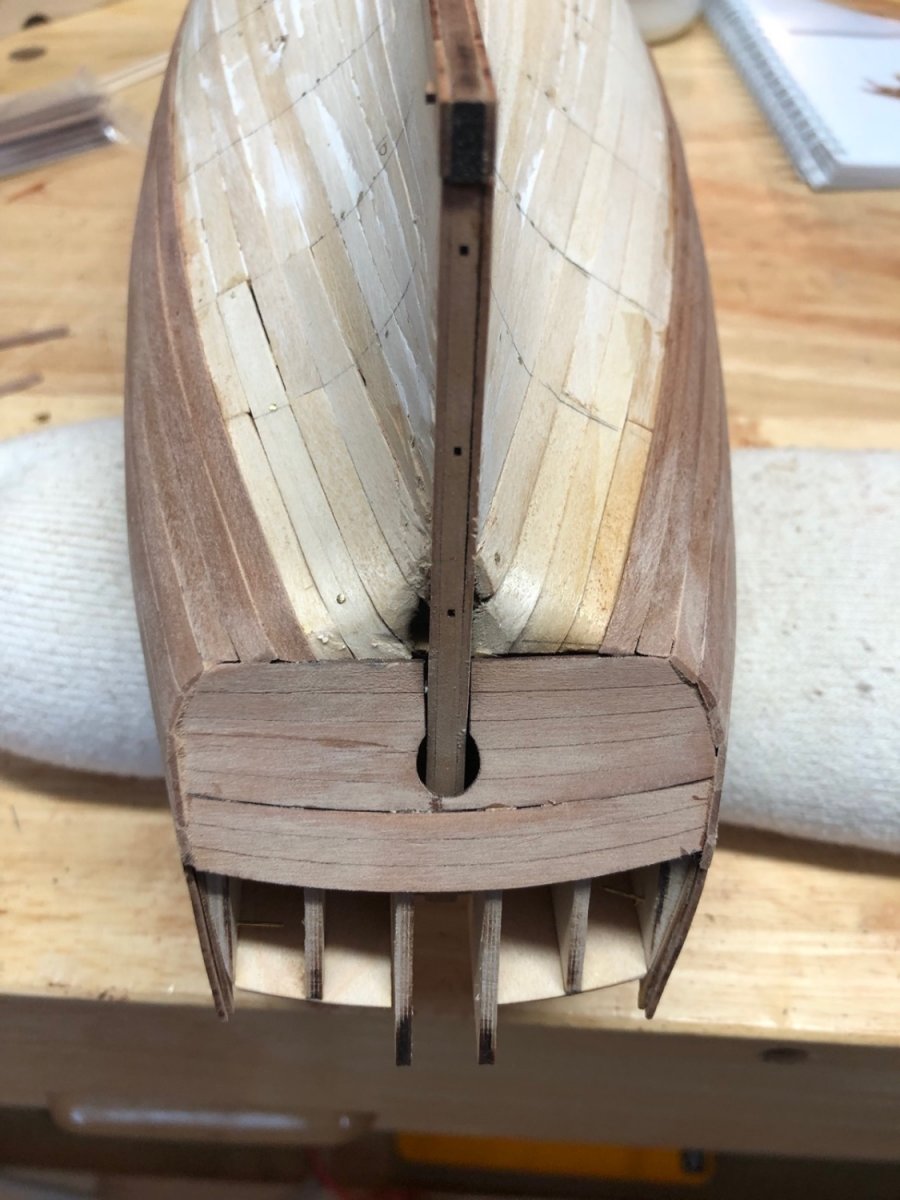
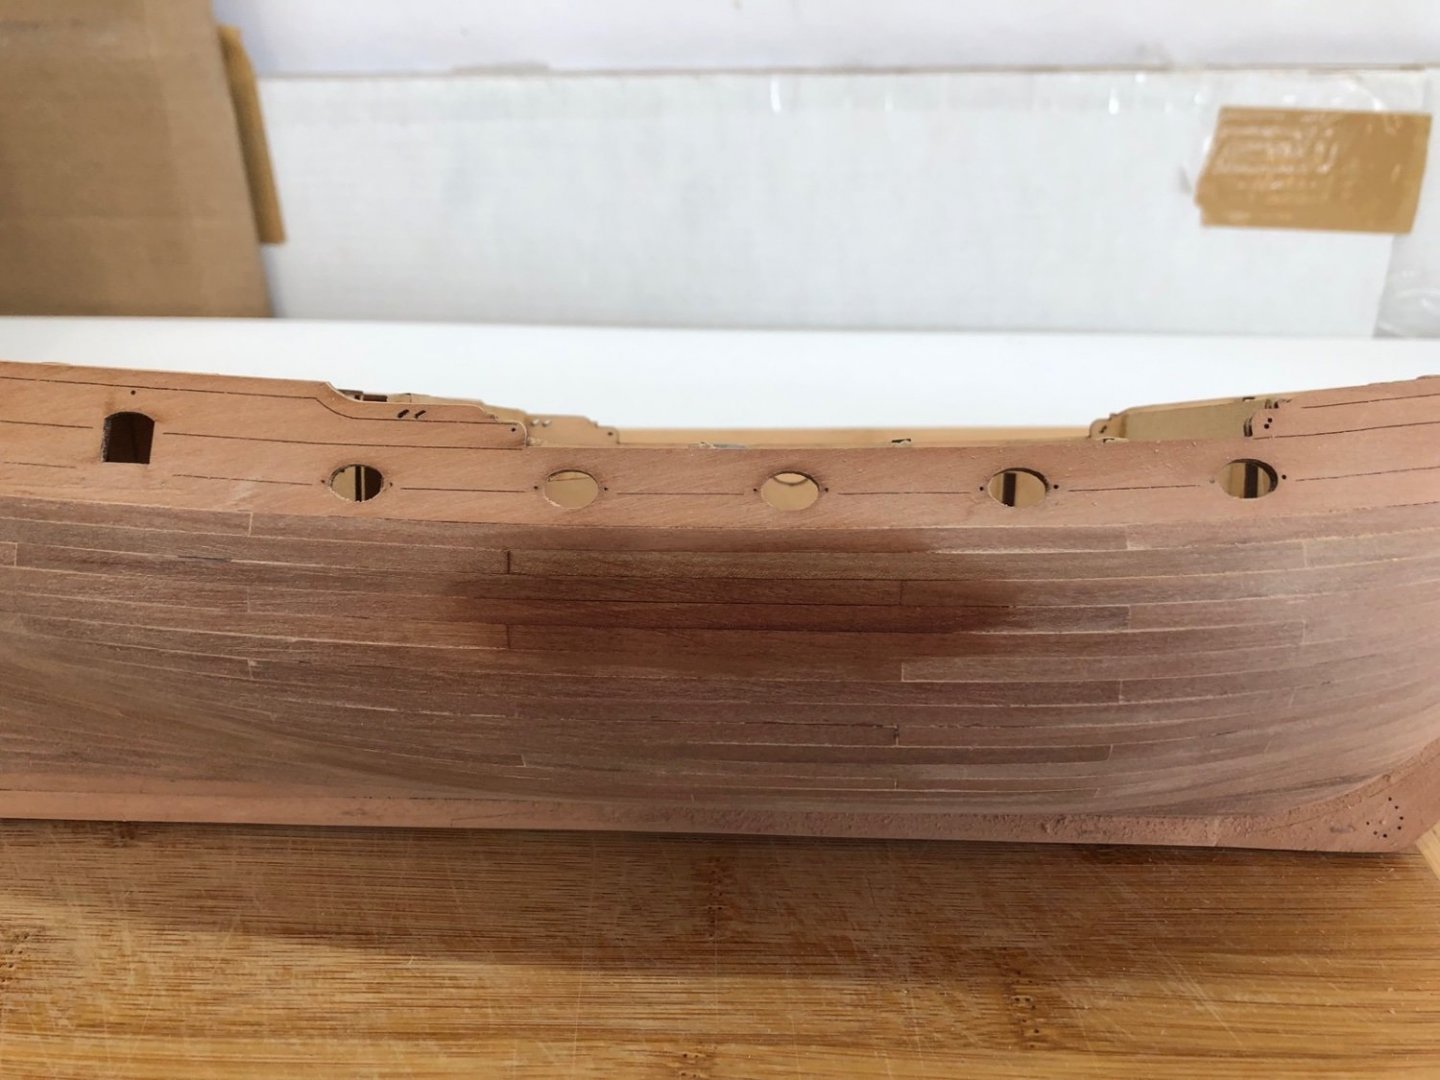
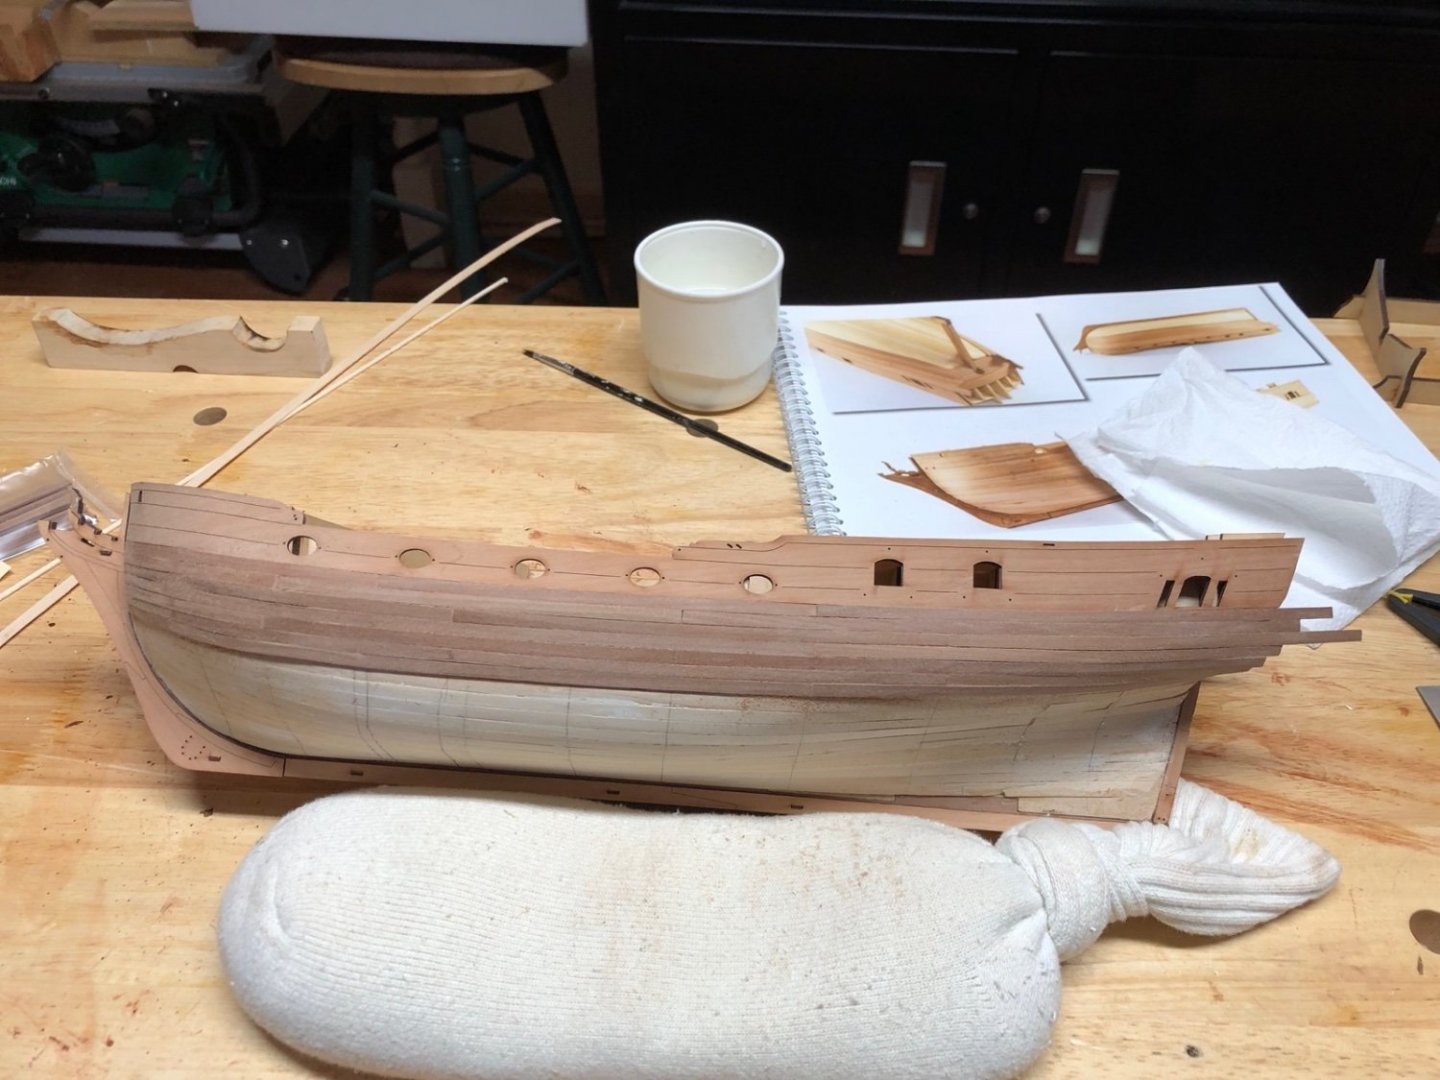
Thanks Glenn. I have measured out the planks with tick strips - I just didn't mark them on the hull. I added another row and again the edge bend changed direction. Very strange to me but it is working. I trimmed the planks at the transom and sanded them back to the transom. Here is how this area looks so far.
- 118 replies
-
- 3
-
-
- Duchess Of Kingston
- Finished
- (and 1 more)
-
Second planking continues. I was having no problems with the bow planks lying flat until the sixth and seventh planks, but I found that if I edge bent them in the opposite direction then I bent the previous planks they laid down flatter. I have not seen that before. I am also just to the point at the stern that I need to add a bend up to the transom. So far that is going well. Here is the state of the planking so far.
- 118 replies
-
- 9
-
-
- Duchess Of Kingston
- Finished
- (and 1 more)
-
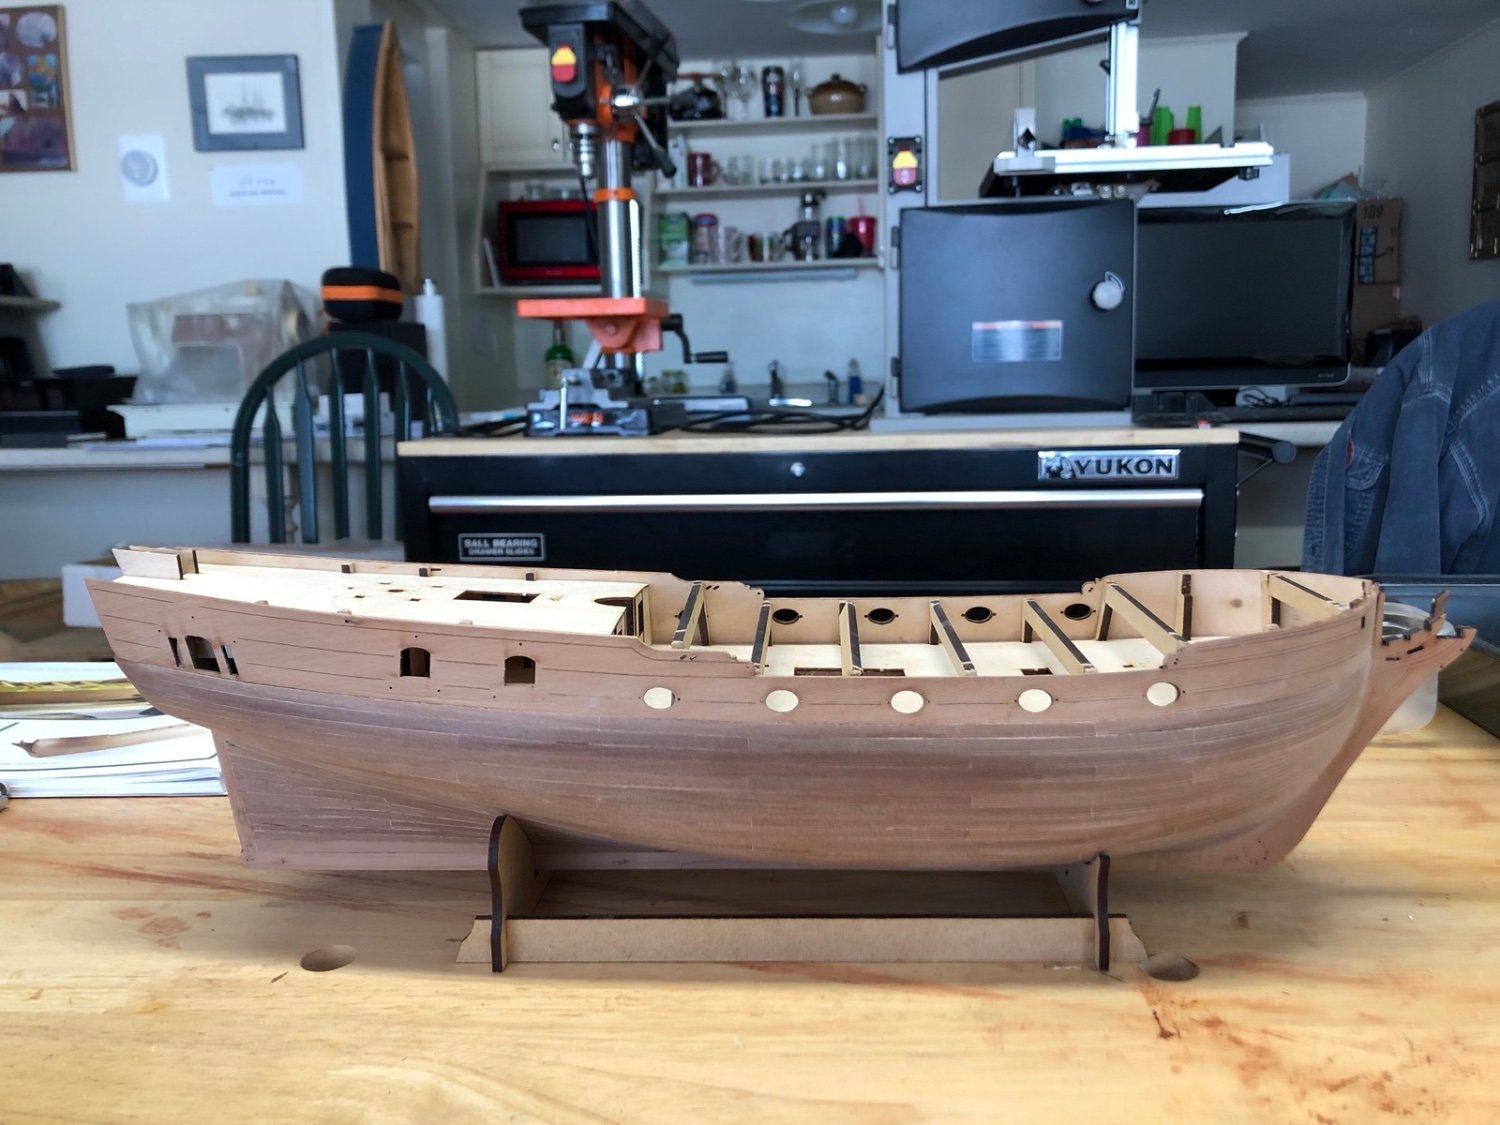
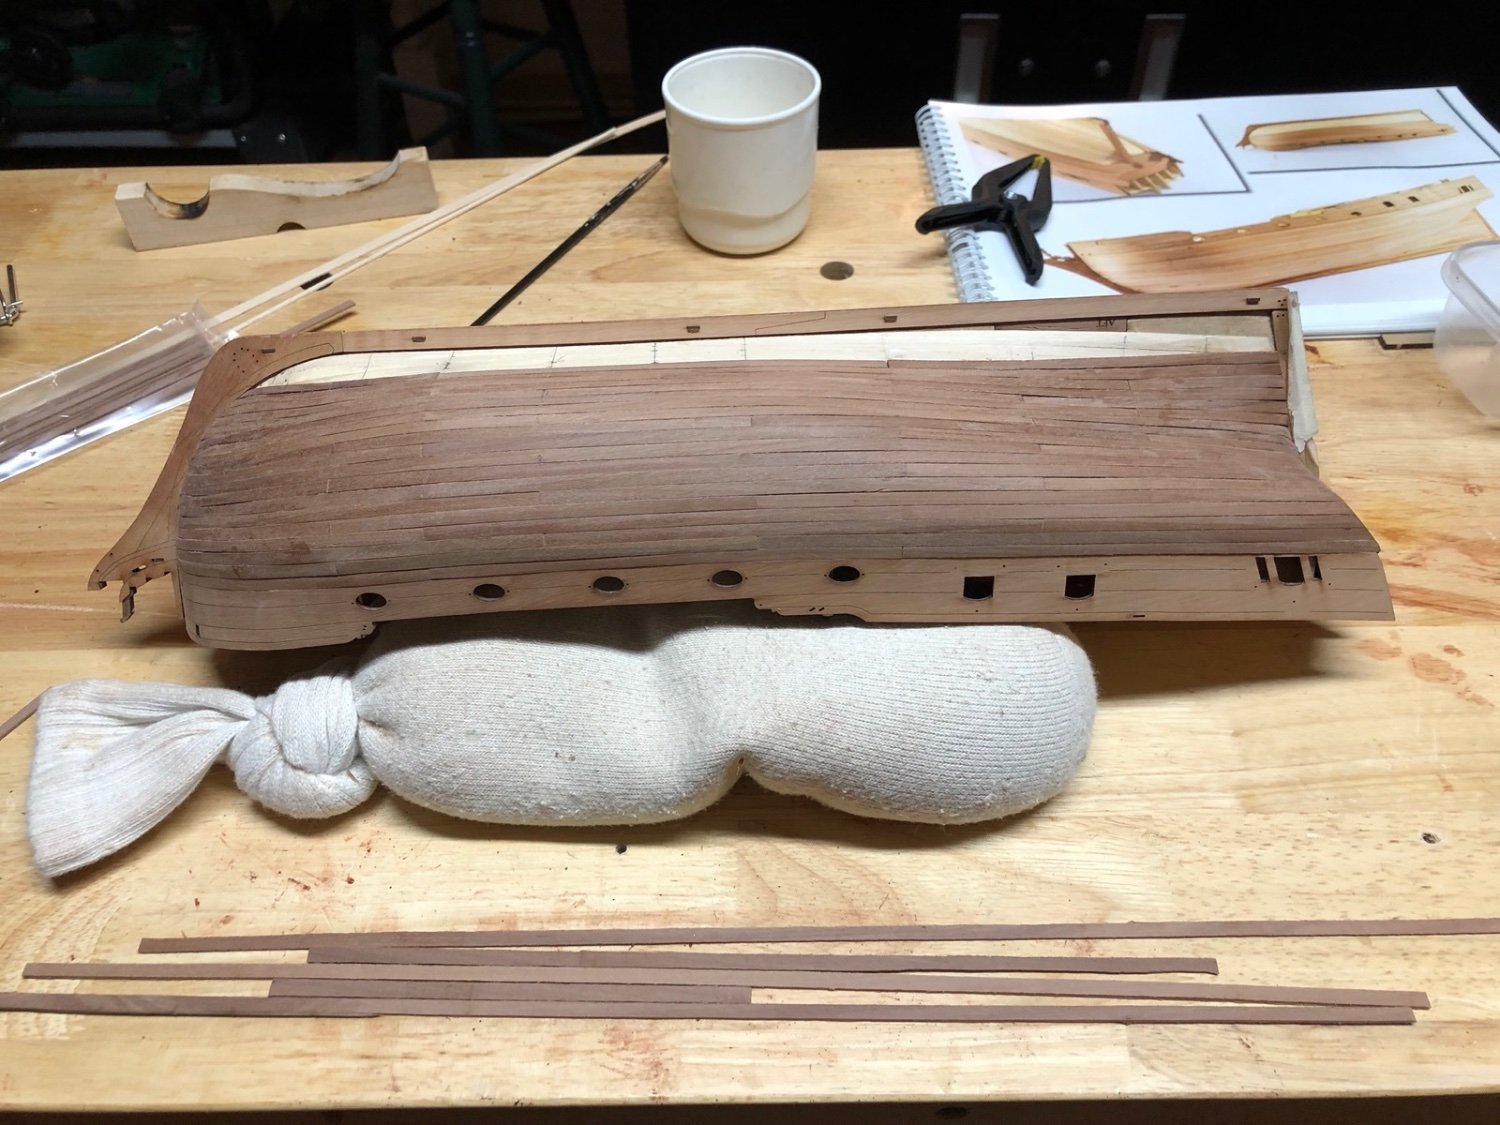
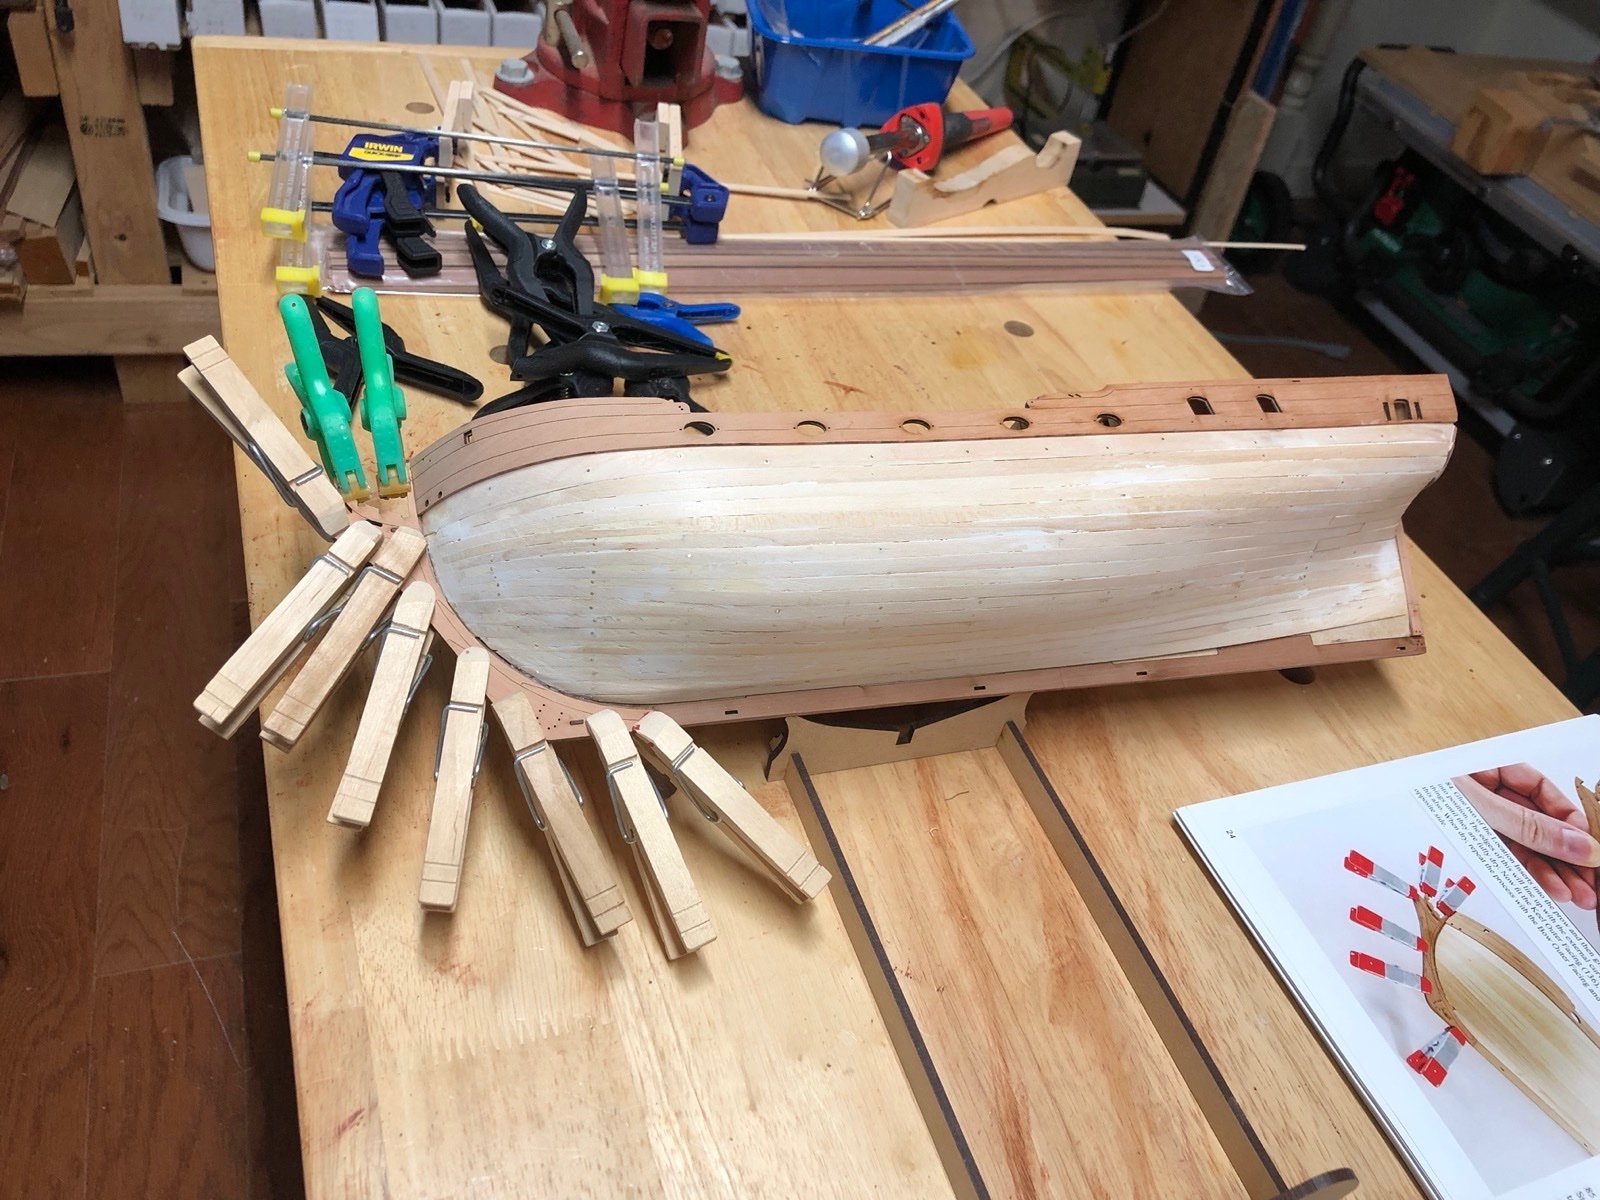
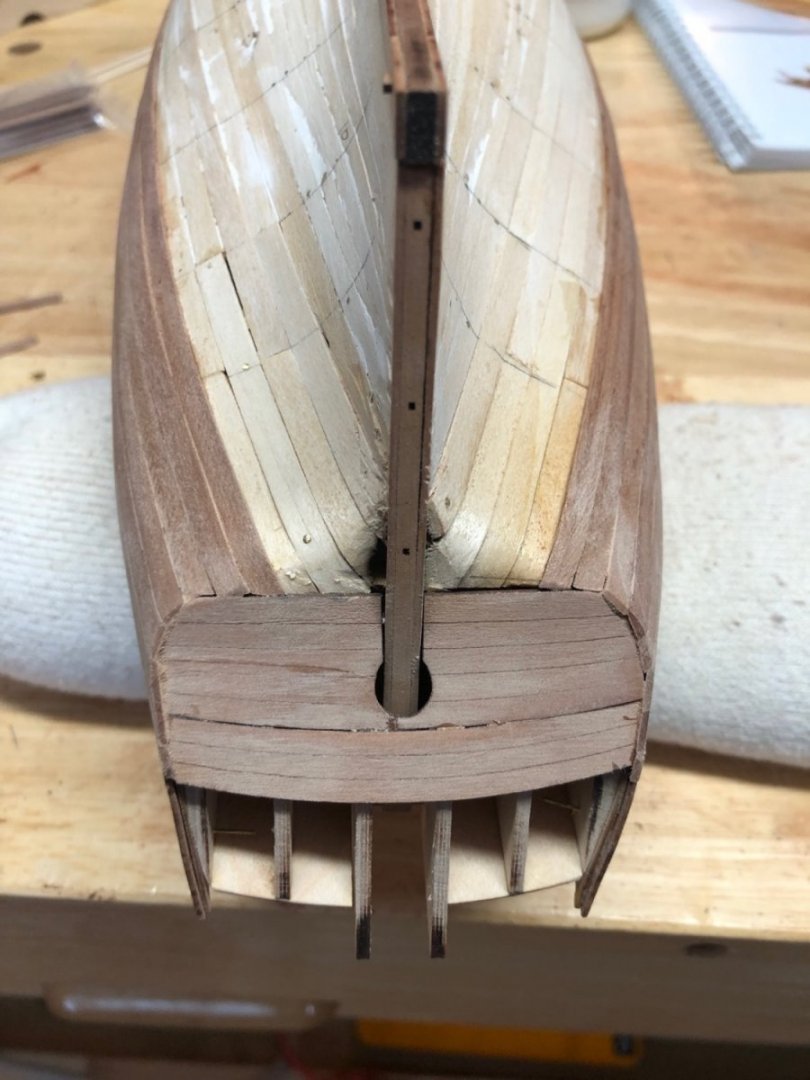
Thanks Bob and for the likes. After all four stem and keel outer pieces were glued on I took some time to clean up all the rabbets along the stem and stern post. I used chisels to thin down the first planks along the stern post so the second layer planks have room to fit into the rabbet. With that done I started the second planking using the provided pear strips. I usually soak my planks before I bend them, but since other builders have been having success bending them without soaking I thought I would give it a try. It worked very nicely. I am doing the second planking in three sections per plank. For the bow section I first do an edge bend then the larger bend for the curvature of the bow. For the other two sections I just give them a bit of an edge bend. The nice thing with dry bending is that the plank is ready to glue on shortly after bending instead of the next day. And I am using medium CA to glue them on so no clamps are required, although I use them when I can, and again I don't have to wait long for the glue to dry. I have the first two planks done and I am really happy with the result so far. I am using the planks full width except for a taper at the bow. I should be able to hold to that all the way down but I will recheck as I go.

- 118 replies
-
- 5
-
-
- Duchess Of Kingston
- Finished
- (and 1 more)
-
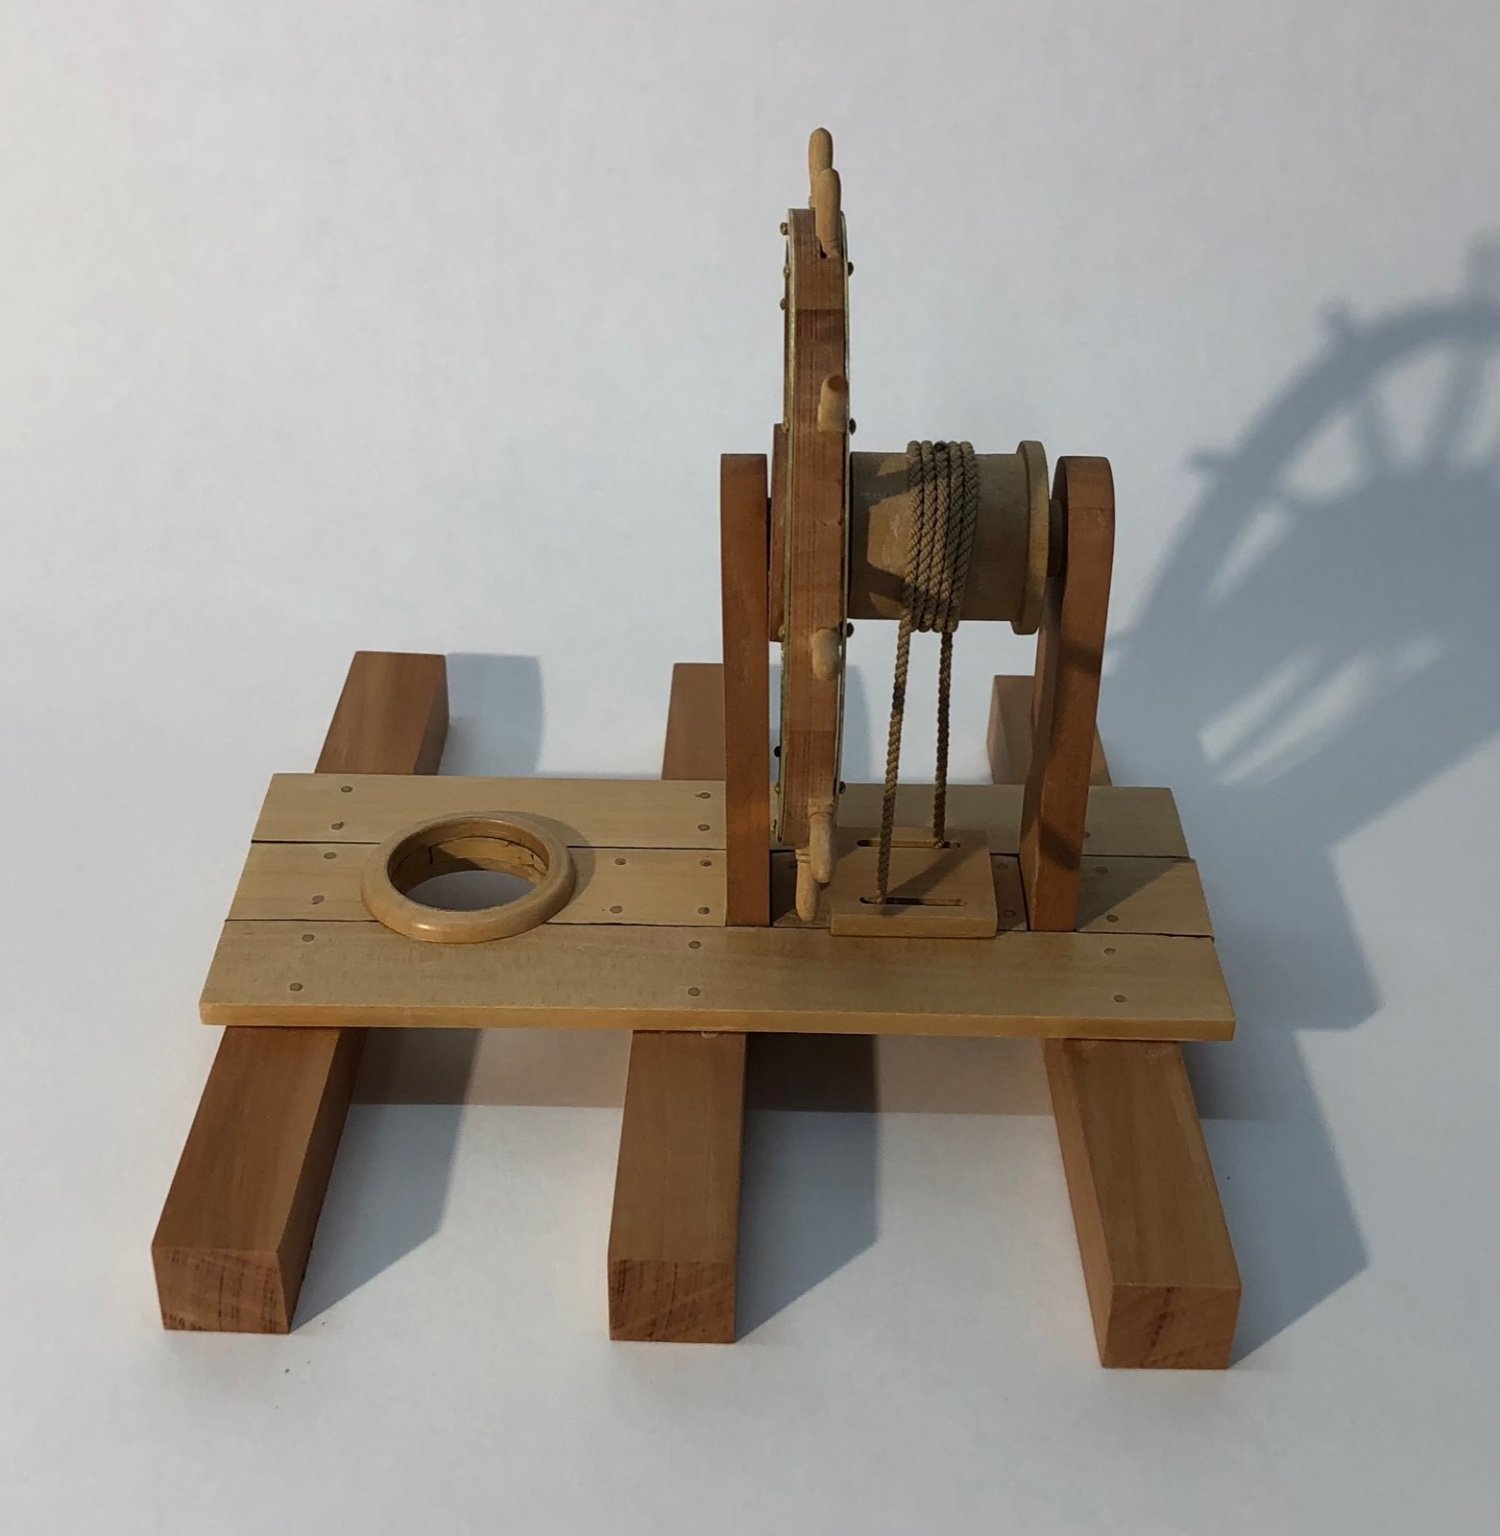
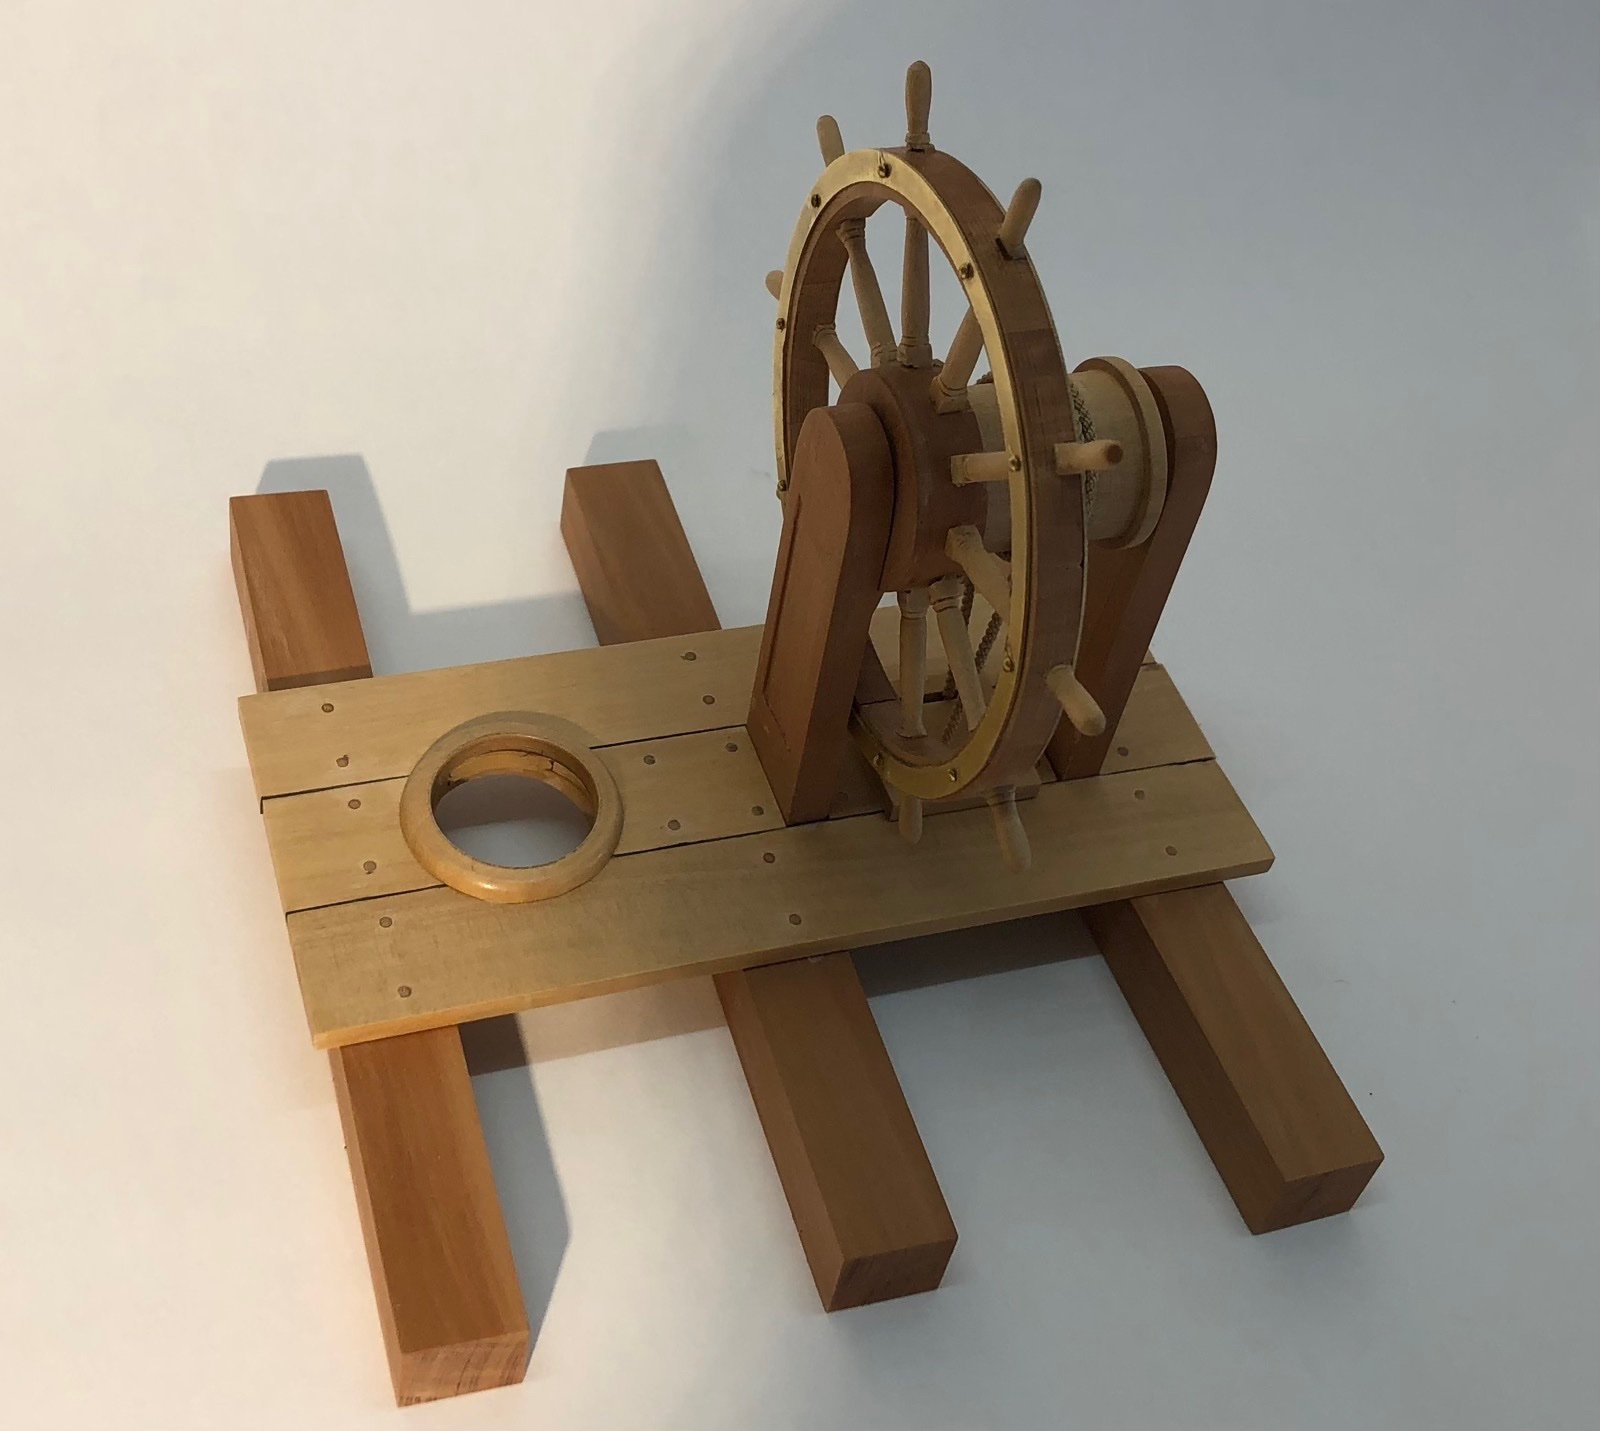
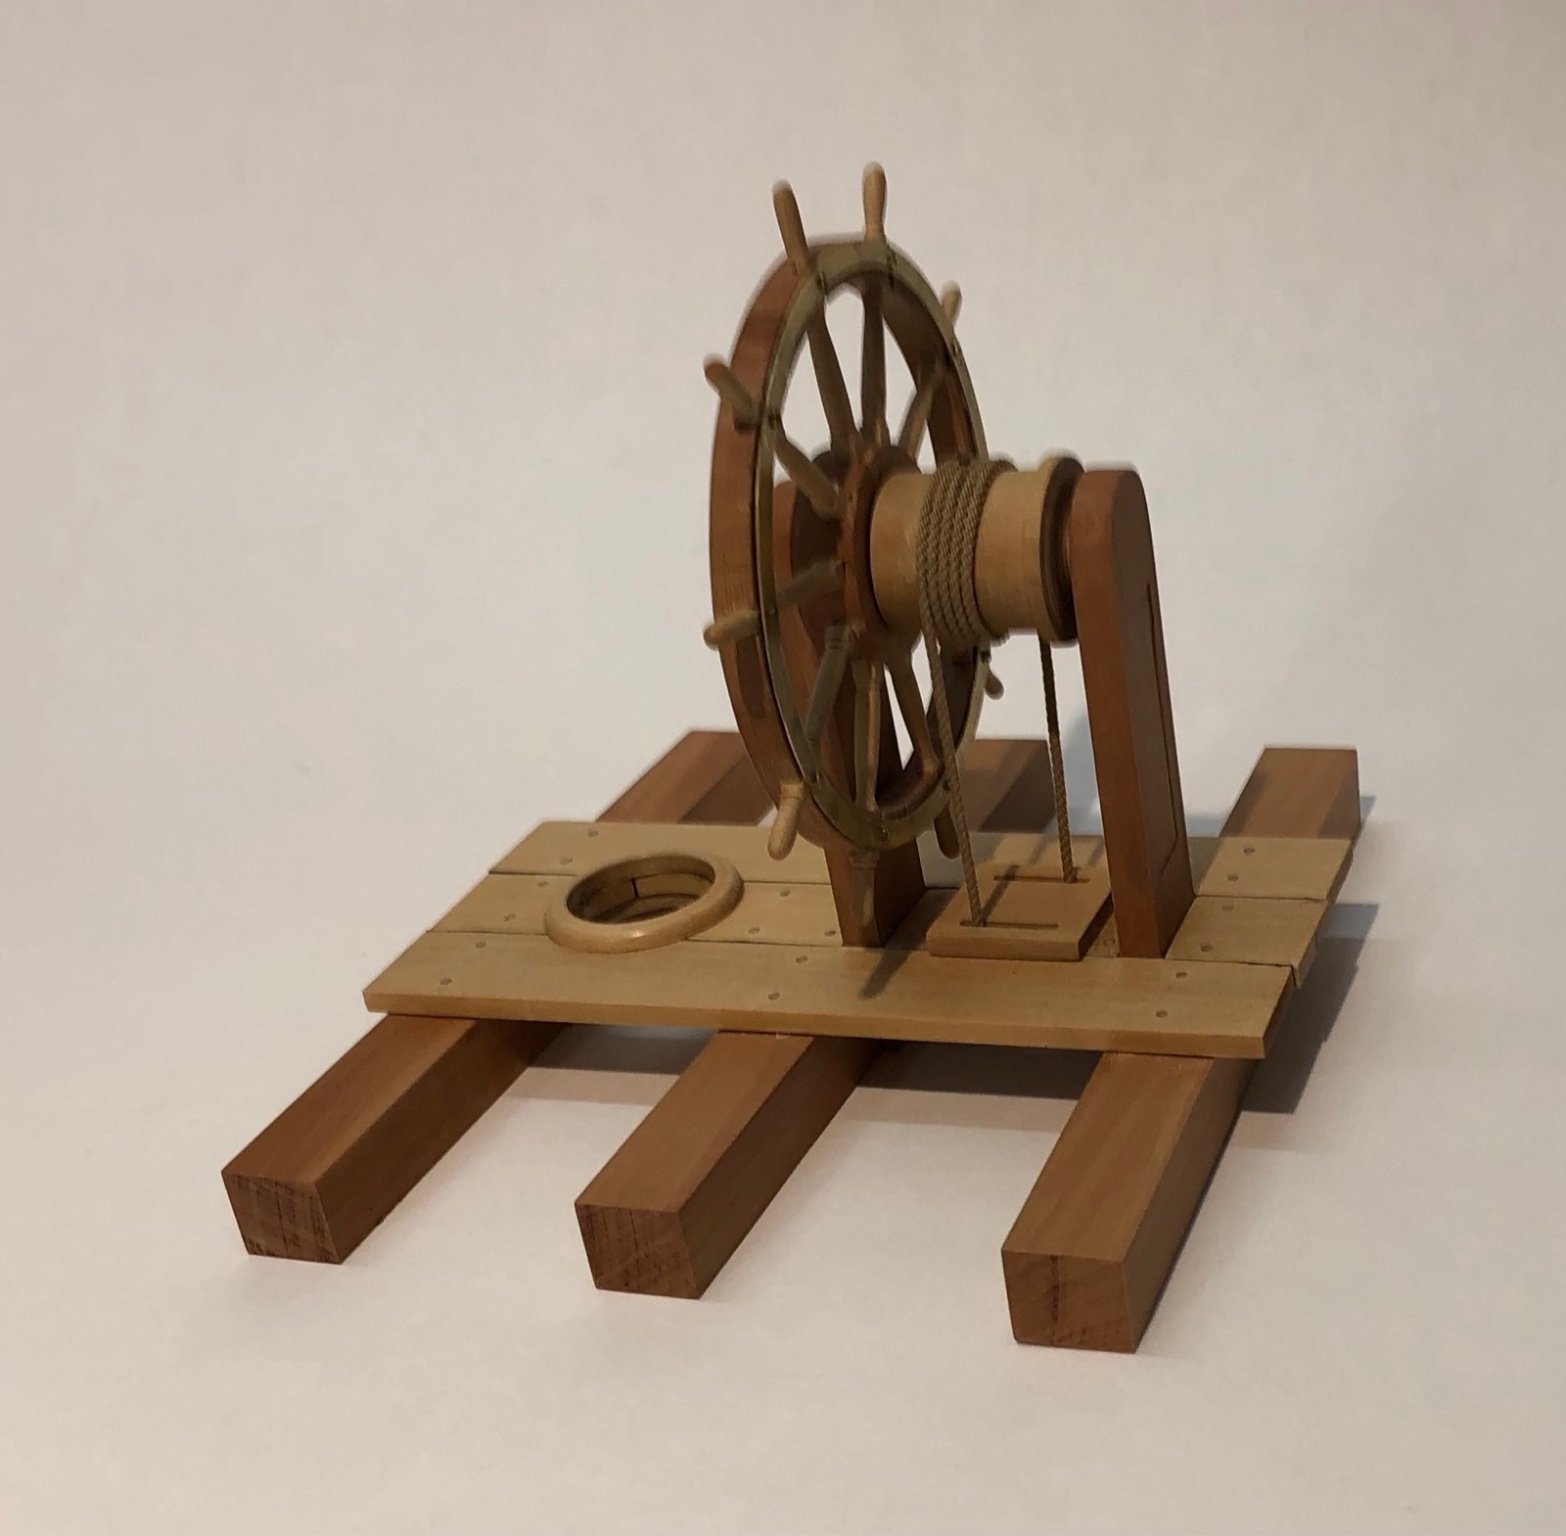
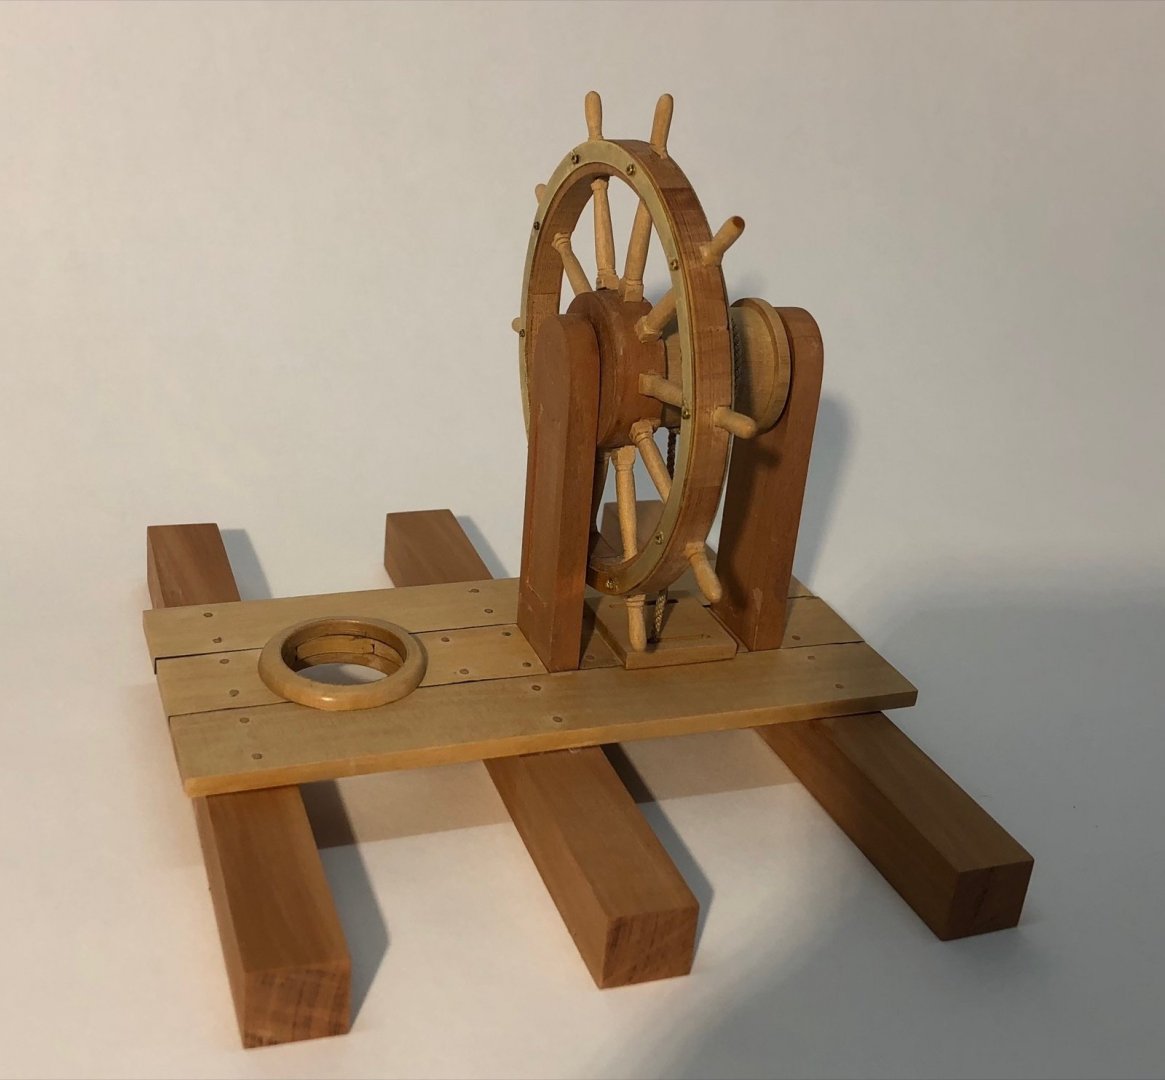
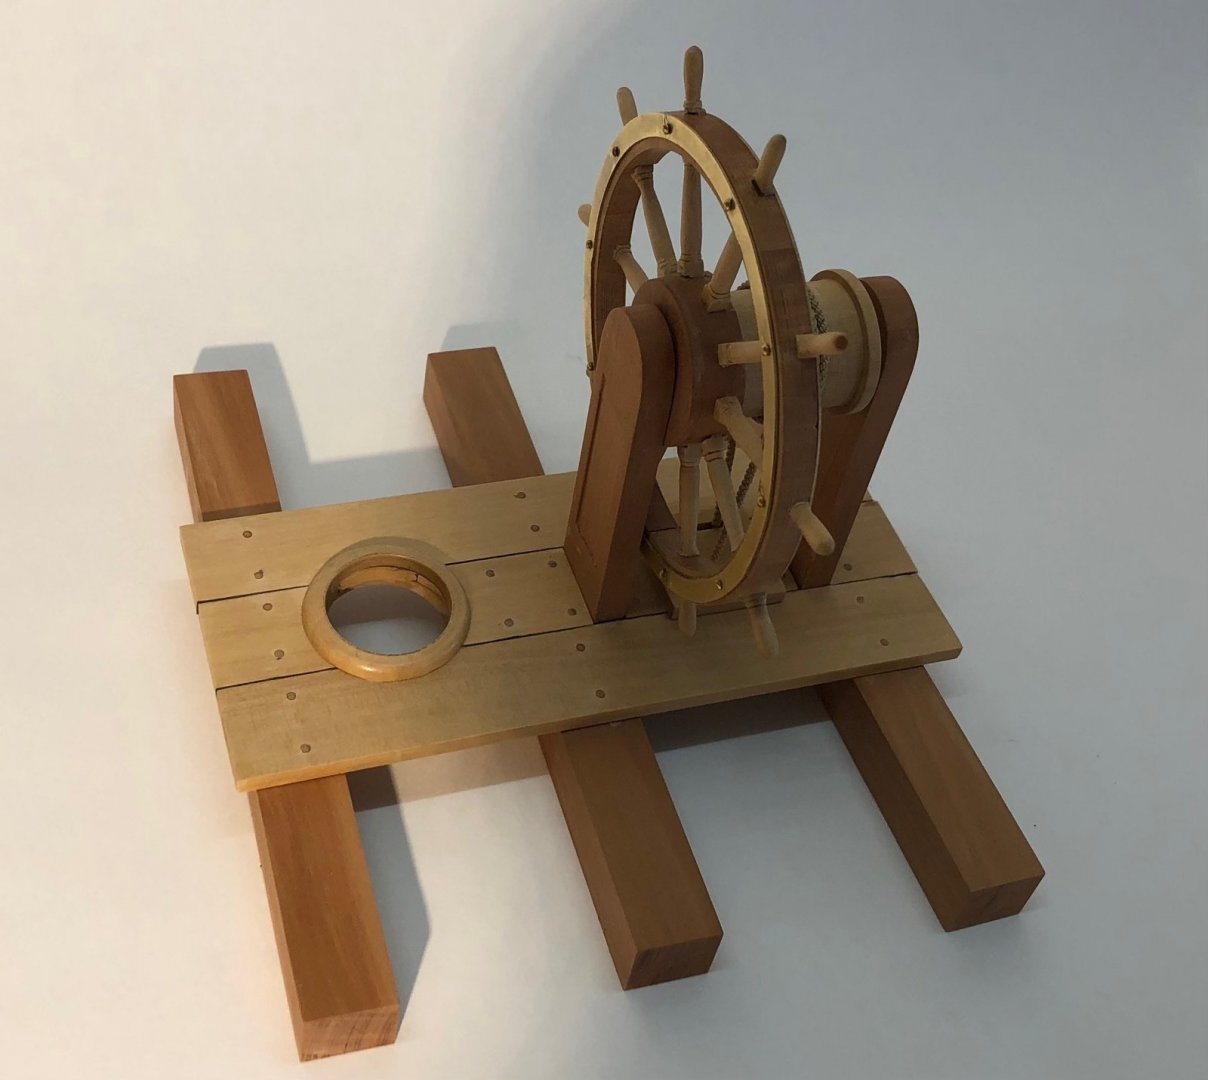
And here is the finished project. This was fun and I am displaying it next to the capstan which is in the same scale. If I was still working I'd put them on my desk but I don't have one of those anymore more (which is a good thing). I am not sure what my next scratch build project will be but for now I will be putting all my attention on the Duchess of Kingston build. Thanks for watching.


-
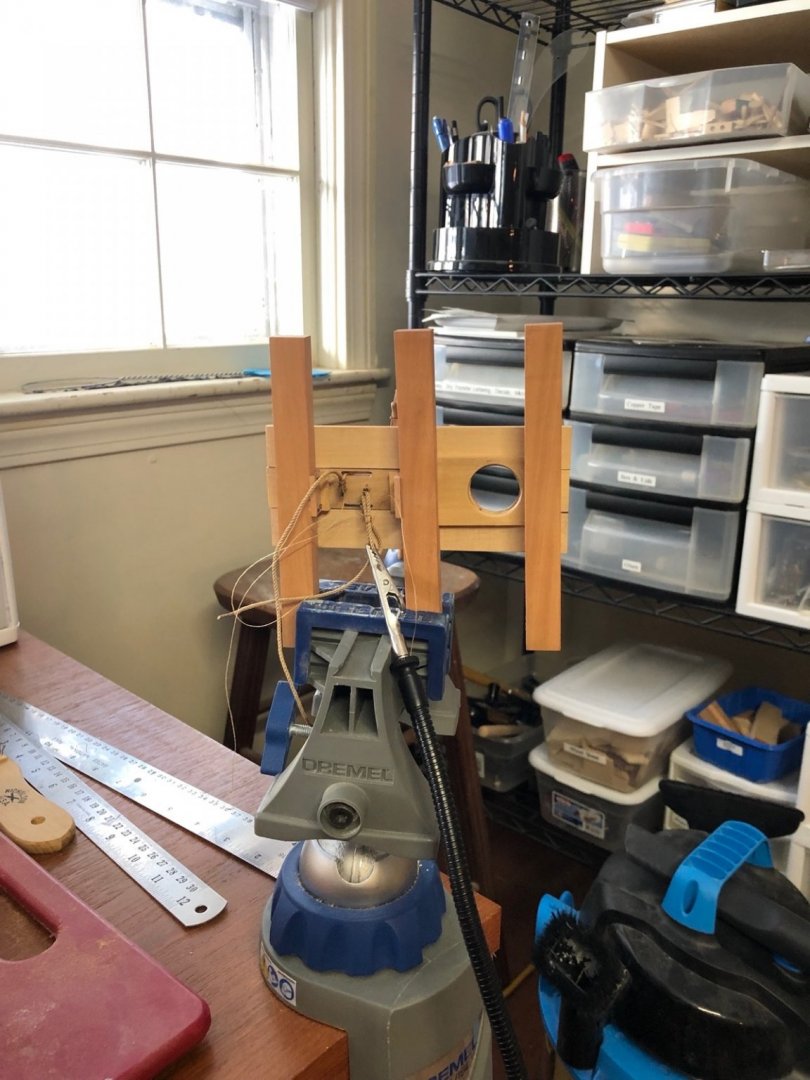
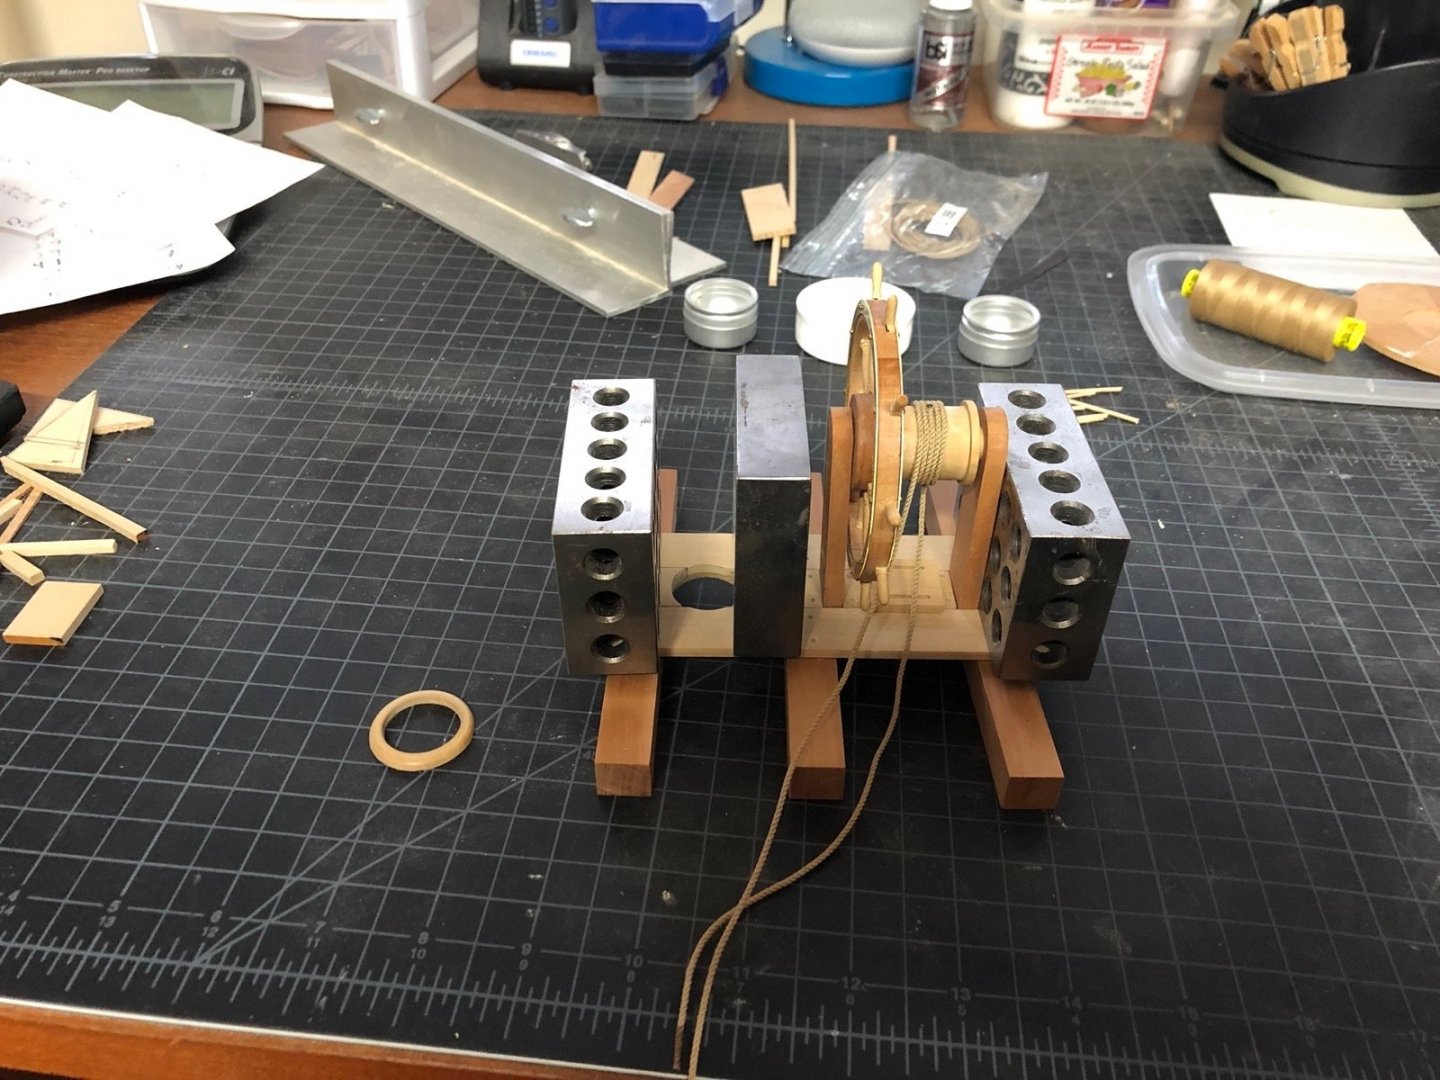
Here is the last step. I put the beams in a vise and threaded the tiller line ends through the guide and into the eyebolts I had placed under the plank. I seized the ends, pulled everything tight, and covered the seizings with Dullcote lacquer. When they are dry I'll trim the excess and the project will be done.
-
Thanks Bob and Yves. I'd need an addition on the house for a ship that size!
-
I cleaned up the excess length of the treenails and sanded the planks smooth. I glued the tiller rope to the barrel and then glued the planks to the beams. I used weights to hold them down while the glue is drying.
-
Both upper hull pieces are now glued on. I glued them in thirds to make sure they stuck well all along the length. I then cleaned up the outer bow and keel pieces and have glued on the port bow piece.

- 118 replies
-
- 5
-
-
- Duchess Of Kingston
- Finished
- (and 1 more)
-
B.E. I think the extra work you put into those quarter galleries really paid off. They look great.
- 857 replies
-
- 3
-
-
- Sphinx
- Vanguard Models
- (and 1 more)
-
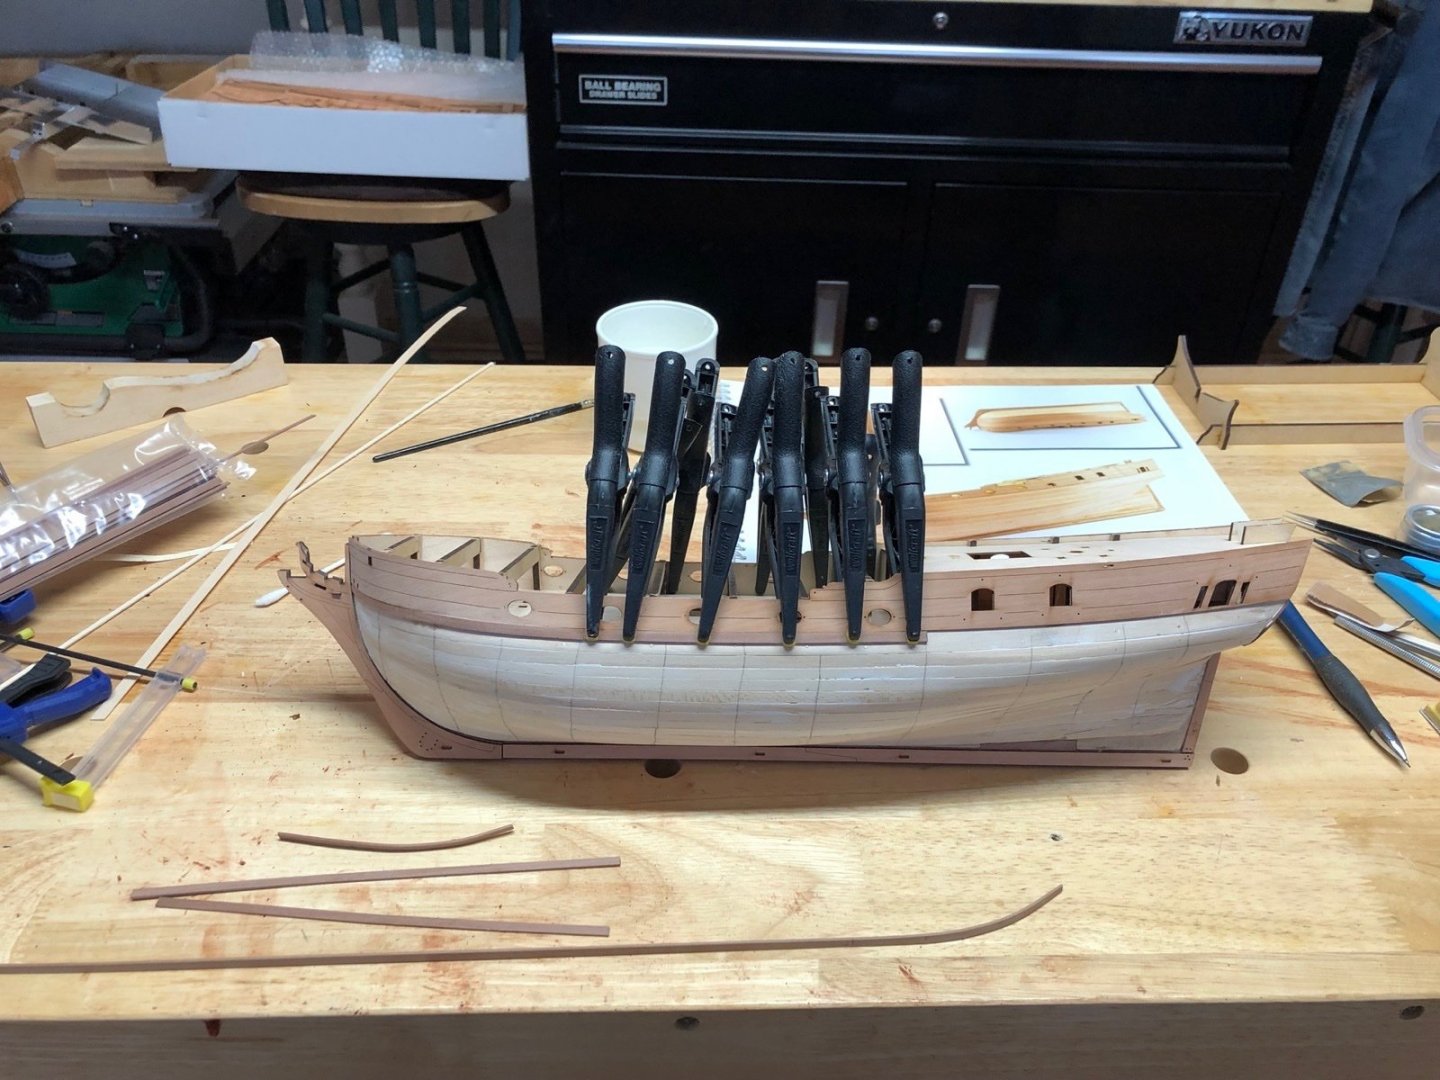
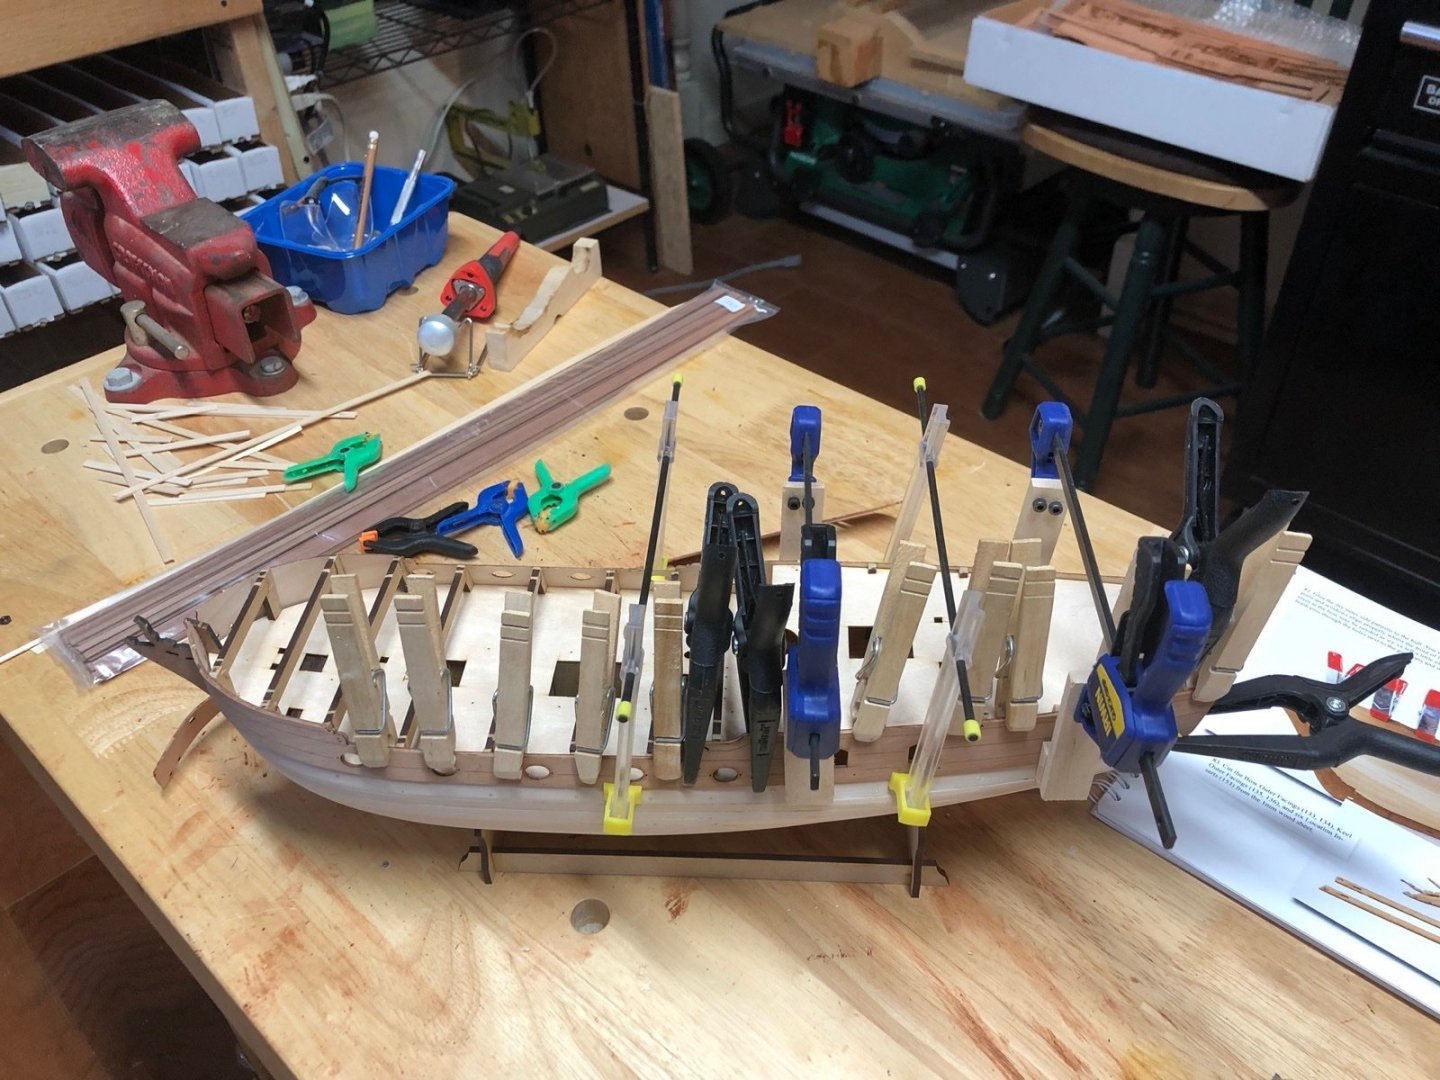
Yesterday I glued the bow portion of the port upper hull piece to the hull after sanding the front edge so the openings lined up. I have to say having those holes in the pieces so you can align them with the brass pins is just brilliant. Thanks @chris watton! It just makes aligning those pieces so much easier. Today I glued the rest of that piece to the hull. I needed lots of clamps, including longer reach clamps to make sure the bottom edge was held tight to the hull until the glue set. I had a couple and I modified some others with pieces of basswood which worked great. When this dries I'll do the same thing to the starboard side piece.
- 118 replies
-
- 7
-
-
- Duchess Of Kingston
- Finished
- (and 1 more)