DONATION DRIVE - SUPPORT MSW - DO YOUR PART TO KEEP THIS GREAT FORUM GOING!
×


usedtosail
-
Posts
2,417 -
Joined
-
Last visited
Content Type
Profiles
Forums
Gallery
Events
Everything posted by usedtosail
-
 Very nice upgrades Derek. I will remember these when I get to make these bitts.
- 345 replies
-
- 1
-

-
- Duchess Of Kingston
- Vanguard Models
- (and 1 more)
-
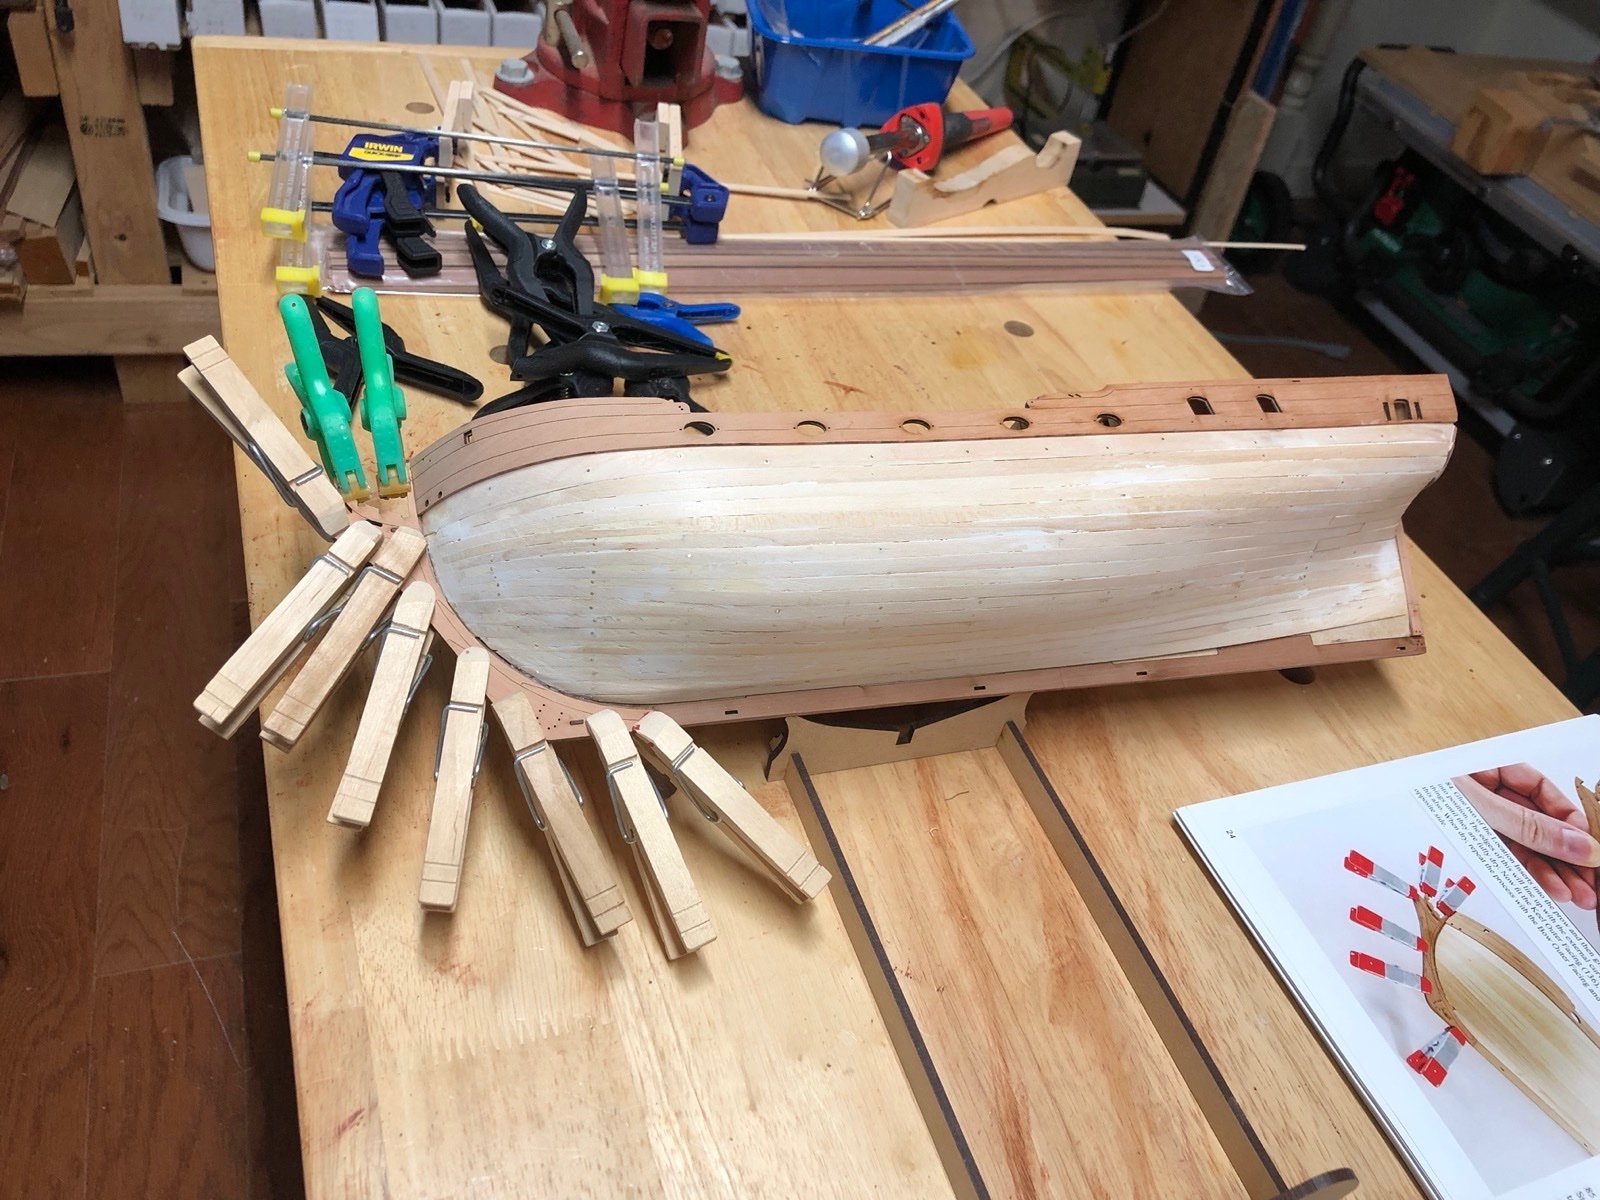
I finished the second planking today, although I have only started sanding the upper planks. I also have some small gaps to fill. I was very happy with the fit of the final row of planks. I always have a hard time filling that last gap neatly. You can see I used some wider plank material near the keel but that area doesn't show much. It feels good to get the planking installed even if it is not sanded and finished yet.

- 118 replies
-
- 6
-

-
- Duchess Of Kingston
- Finished
- (and 1 more)
-
I am getting close to completing the second planking. I currently have three rows left which includes the garboard strakes. I have again adjusted the widths of the final planks so that I don't end up with very thin sections of some planks. I cut 5 mm width planks from the edges of the 1mm laser cut pear sheets which I am using for the middle sections. I had to replace my plank bender (again) but since I bought the original many years ago I replace them with regular soldering irons that have exchangeable tips and use the large round tip from the original plank bender. Works great. Not much bending at the bow needed now but still mostly edge bending.

- 118 replies
-
- 5
-
-
- Duchess Of Kingston
- Finished
- (and 1 more)
-
Its been a long time since I built this kit but for most kits you should be able to measure the angles of the masts to the deck or waterline from the plans. As for the sizes I am pretty sure Model Expo includes scale drawings of the masts in the rigging plan. Maybe you are missing those plans? If so, send me a PM and I'll see what I can do, as I still have the plans.
-
I remeasured the remaining distances at each bulkhead and adjusted the plank widths slightly going forward. I added the next row of plank sections using the new widths and all went well . Happy New Year everyone.
- 118 replies
-
- 3
-
-
- Duchess Of Kingston
- Finished
- (and 1 more)
-
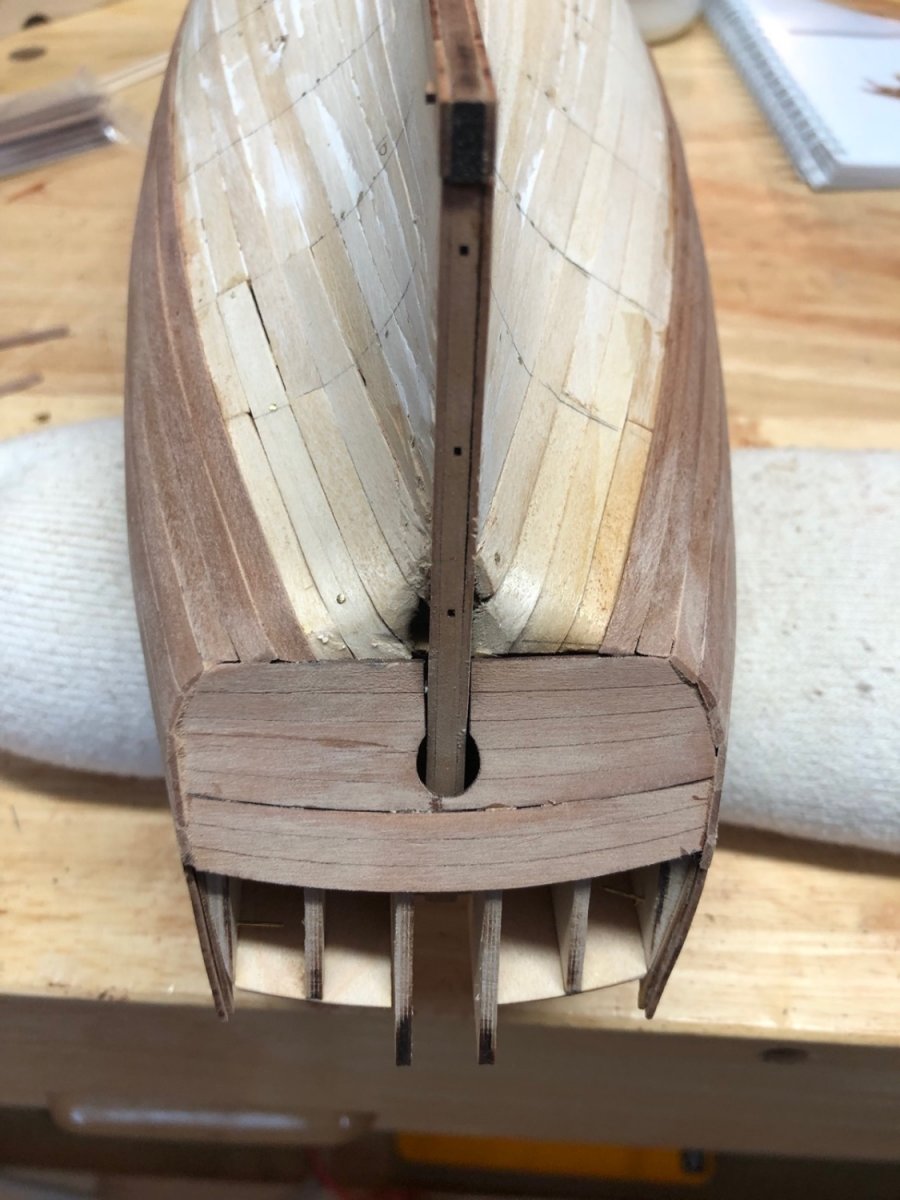
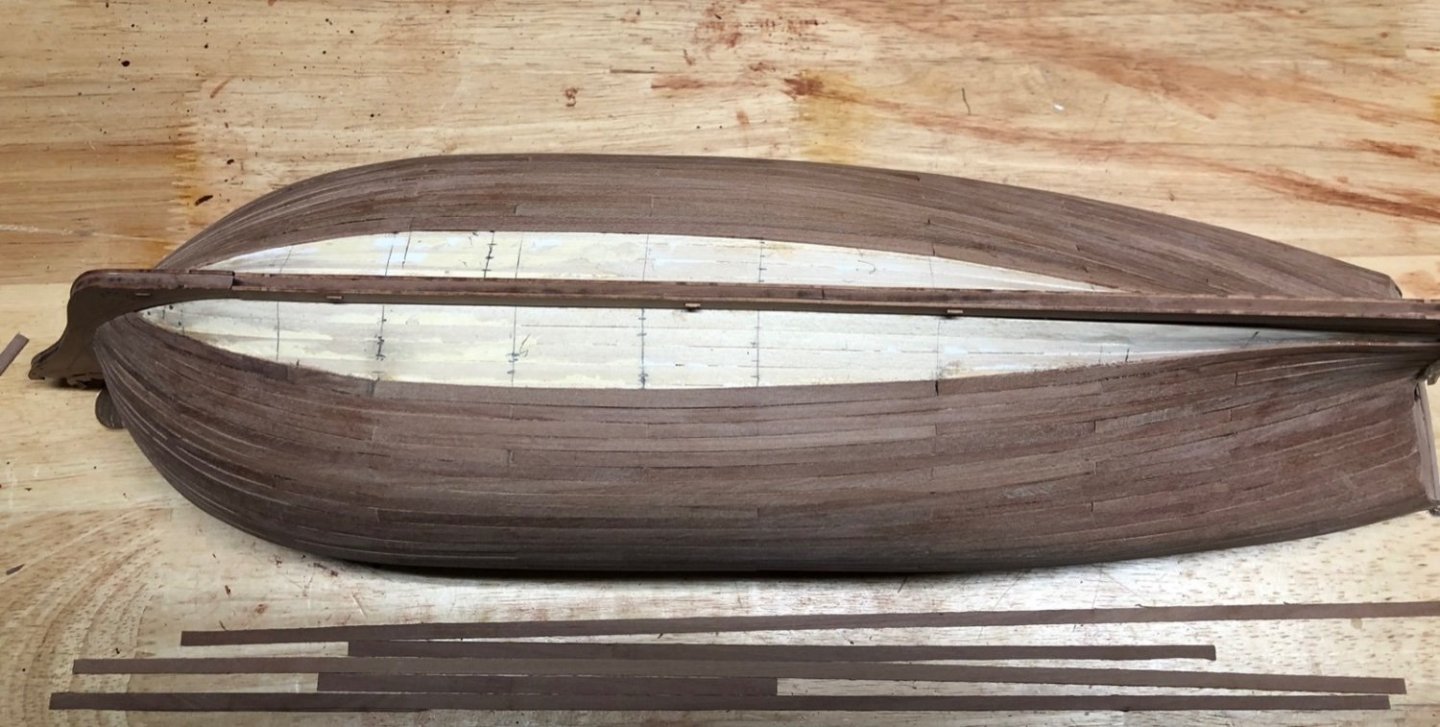
I was having troubles getting the right bend or bends on the next plank bow sections so I went back to first principals. Edge bending is really just spilling (spileing?) without using wider wood strips. To get the shape of a spiled plank you use clear tape to trace the edge of the previous plank, so that's what I did. I then edge bent to that curve and the plank section fit nicely. I now have ten rows of planks so I think I will check the remaining space and recalculate the remaining plank widths.
- 118 replies
-
- 1
-
-
- Duchess Of Kingston
- Finished
- (and 1 more)
-
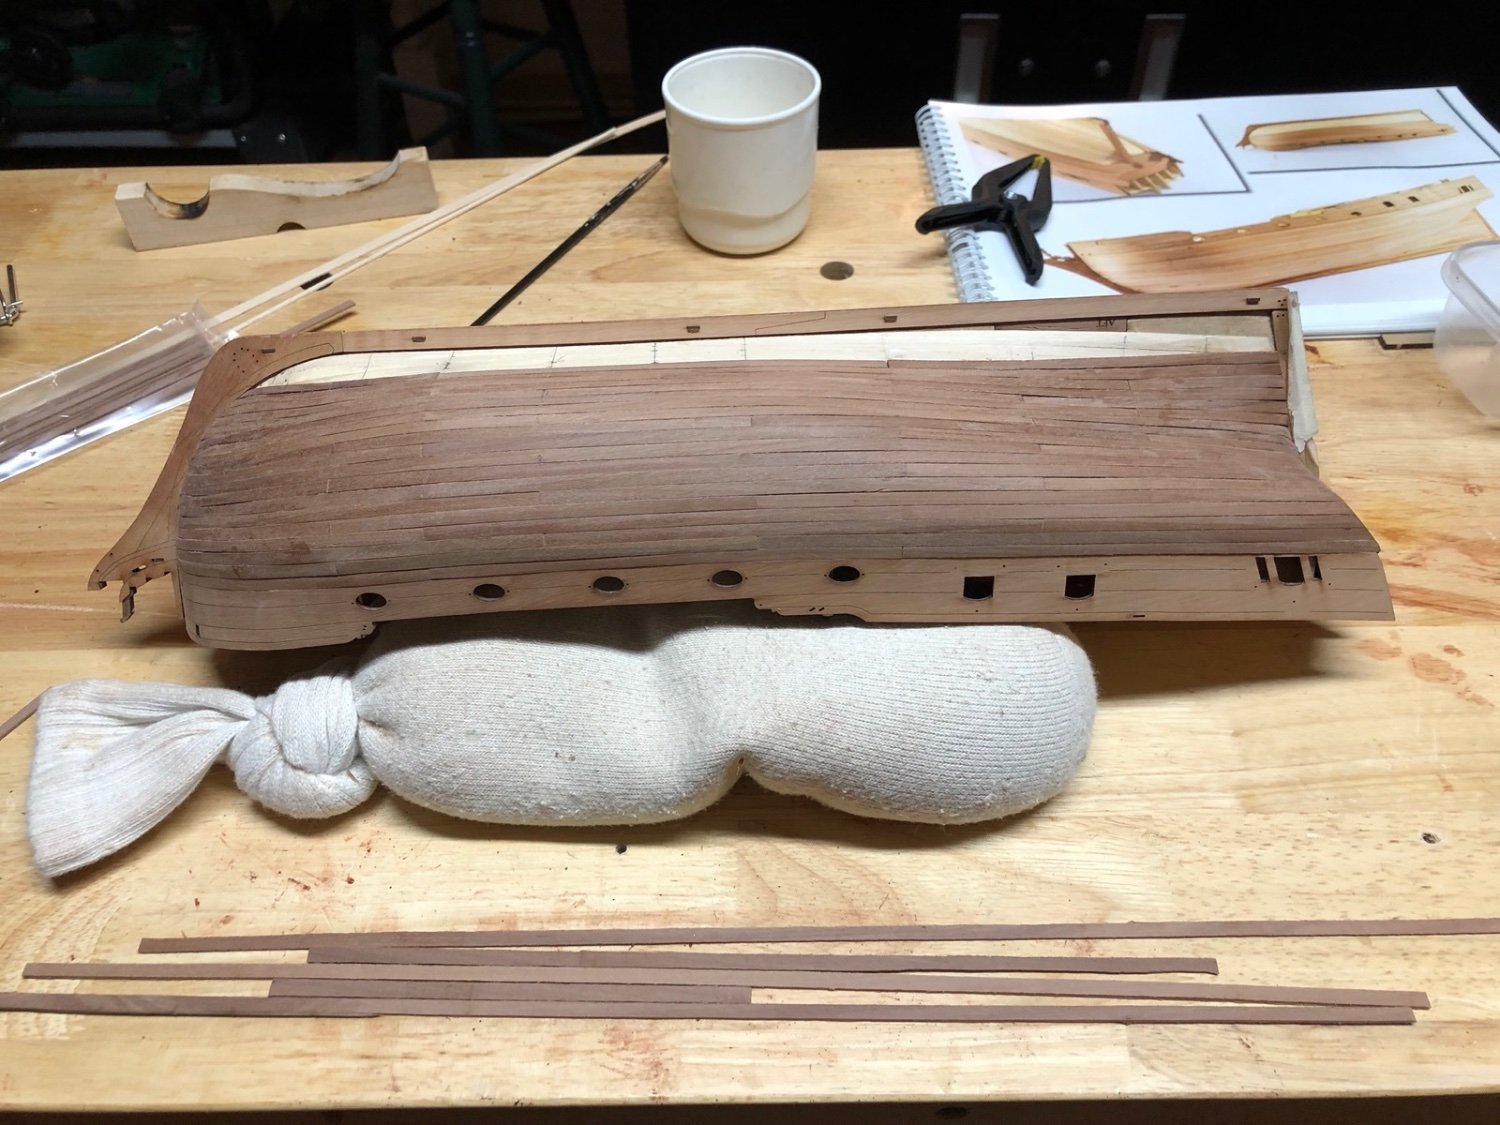
Thanks Glenn. I have measured out the planks with tick strips - I just didn't mark them on the hull. I added another row and again the edge bend changed direction. Very strange to me but it is working. I trimmed the planks at the transom and sanded them back to the transom. Here is how this area looks so far.
- 118 replies
-
- 3
-
-
- Duchess Of Kingston
- Finished
- (and 1 more)
-
Second planking continues. I was having no problems with the bow planks lying flat until the sixth and seventh planks, but I found that if I edge bent them in the opposite direction then I bent the previous planks they laid down flatter. I have not seen that before. I am also just to the point at the stern that I need to add a bend up to the transom. So far that is going well. Here is the state of the planking so far.
- 118 replies
-
- 9
-
-
- Duchess Of Kingston
- Finished
- (and 1 more)
-
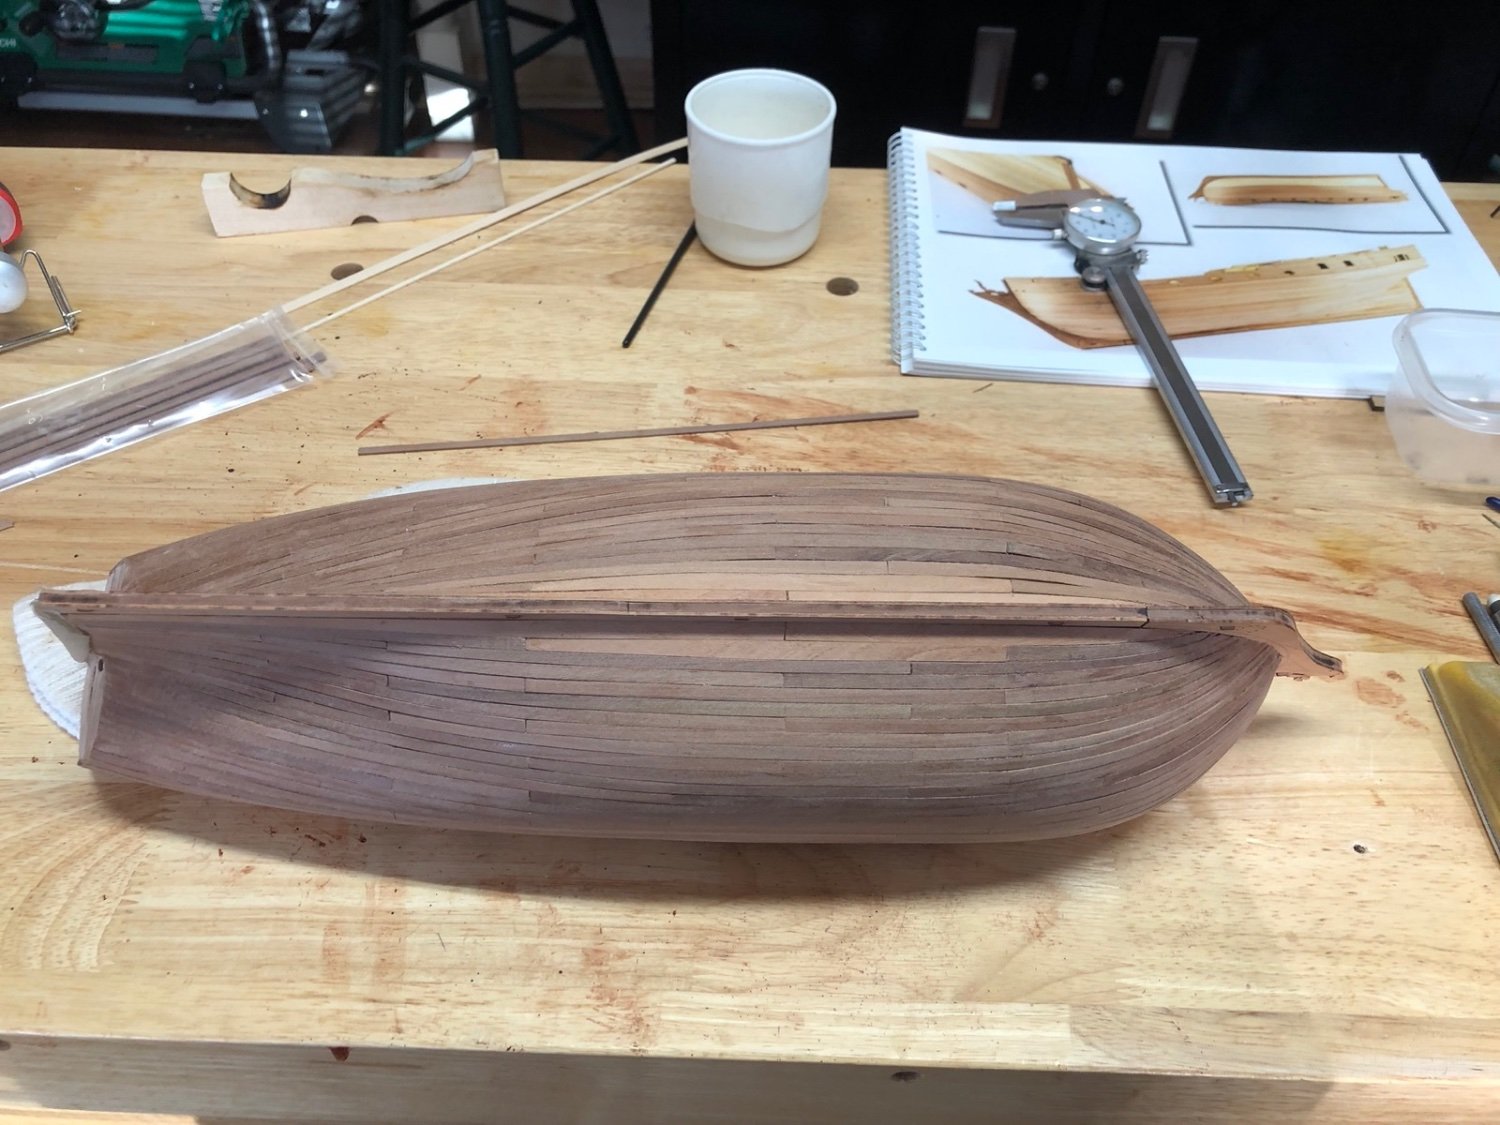
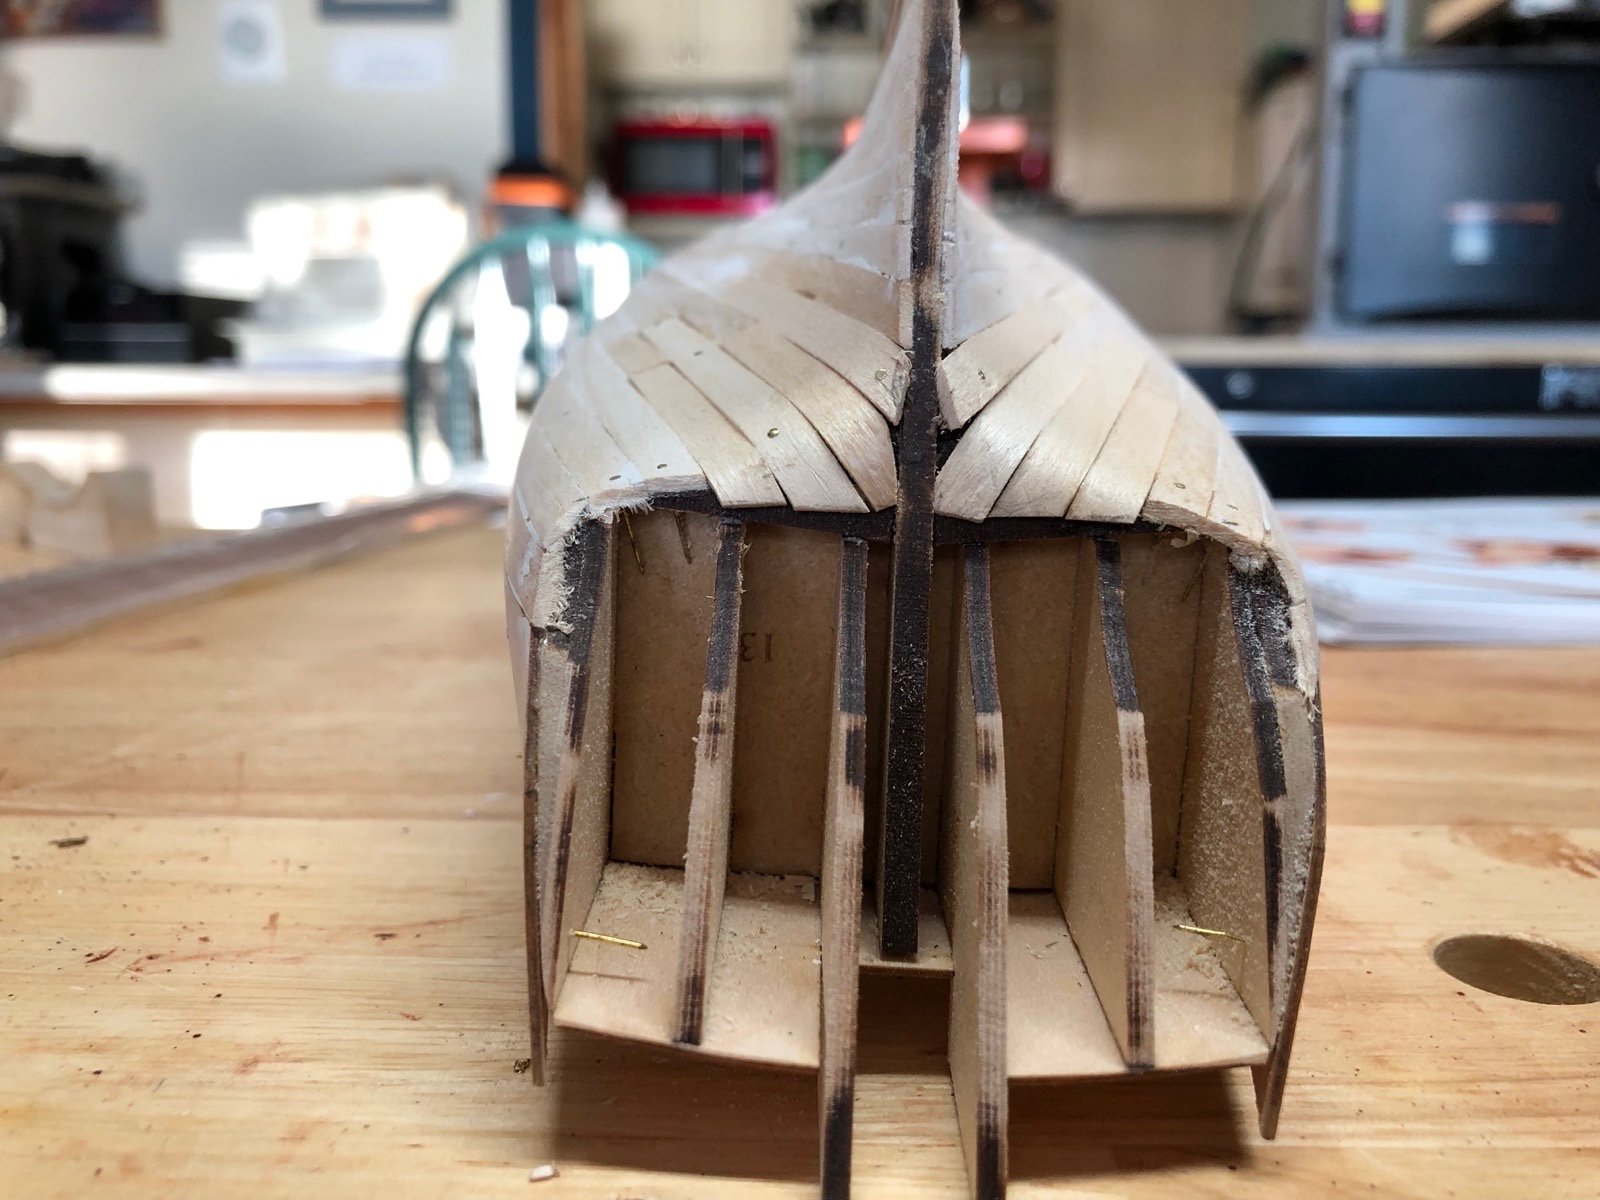
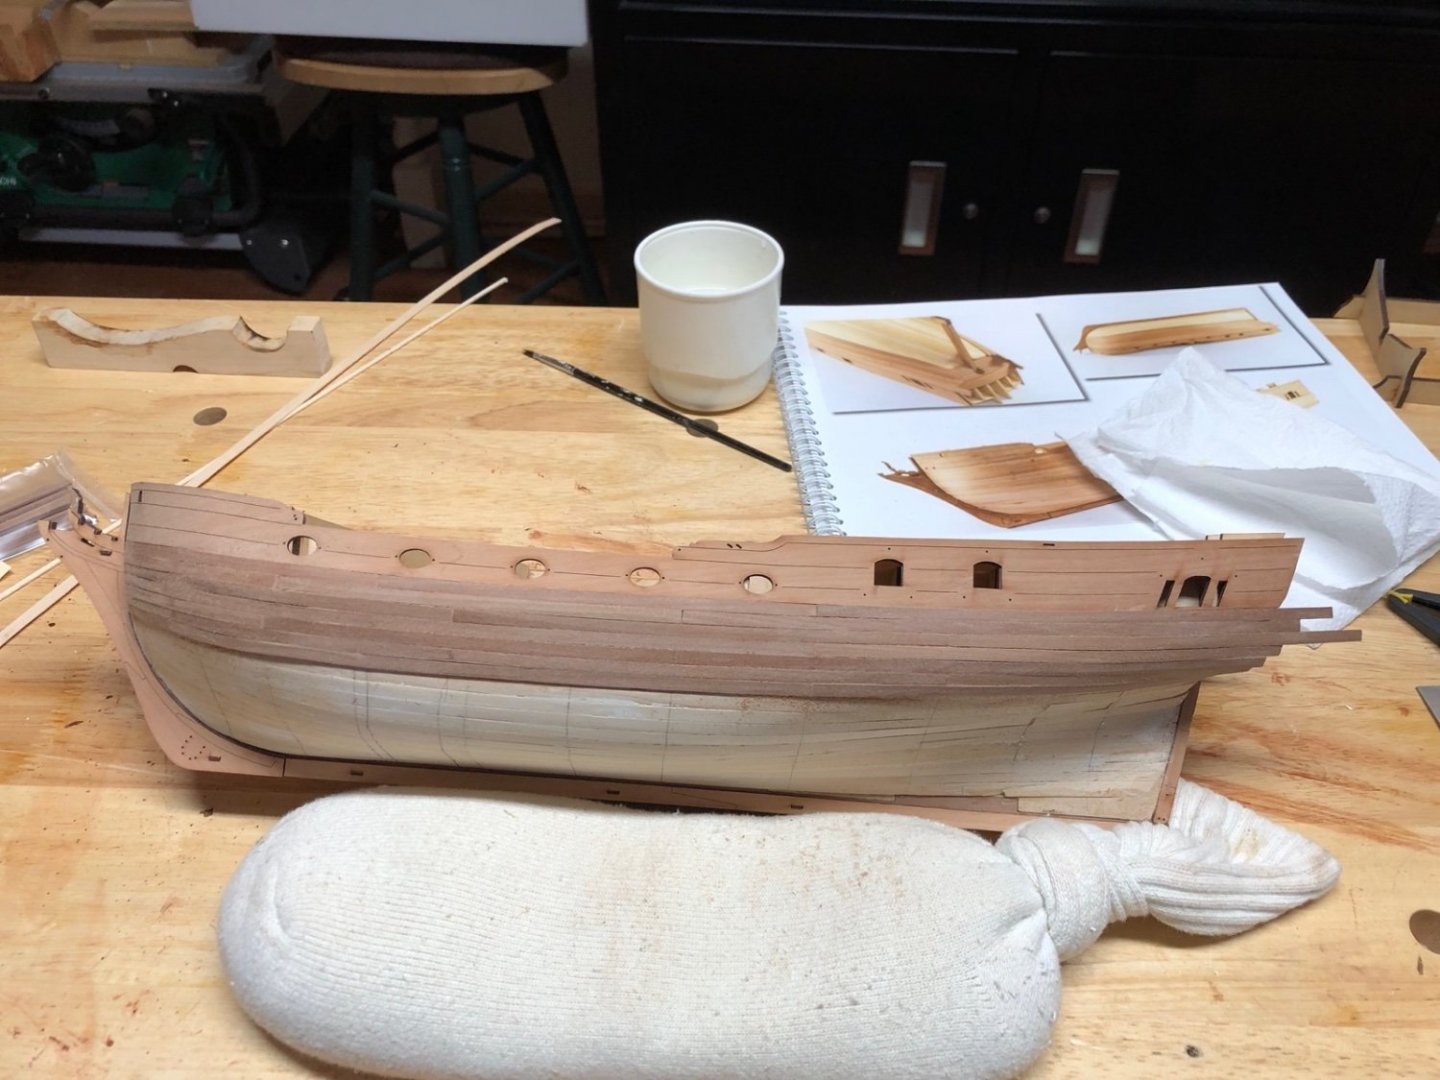
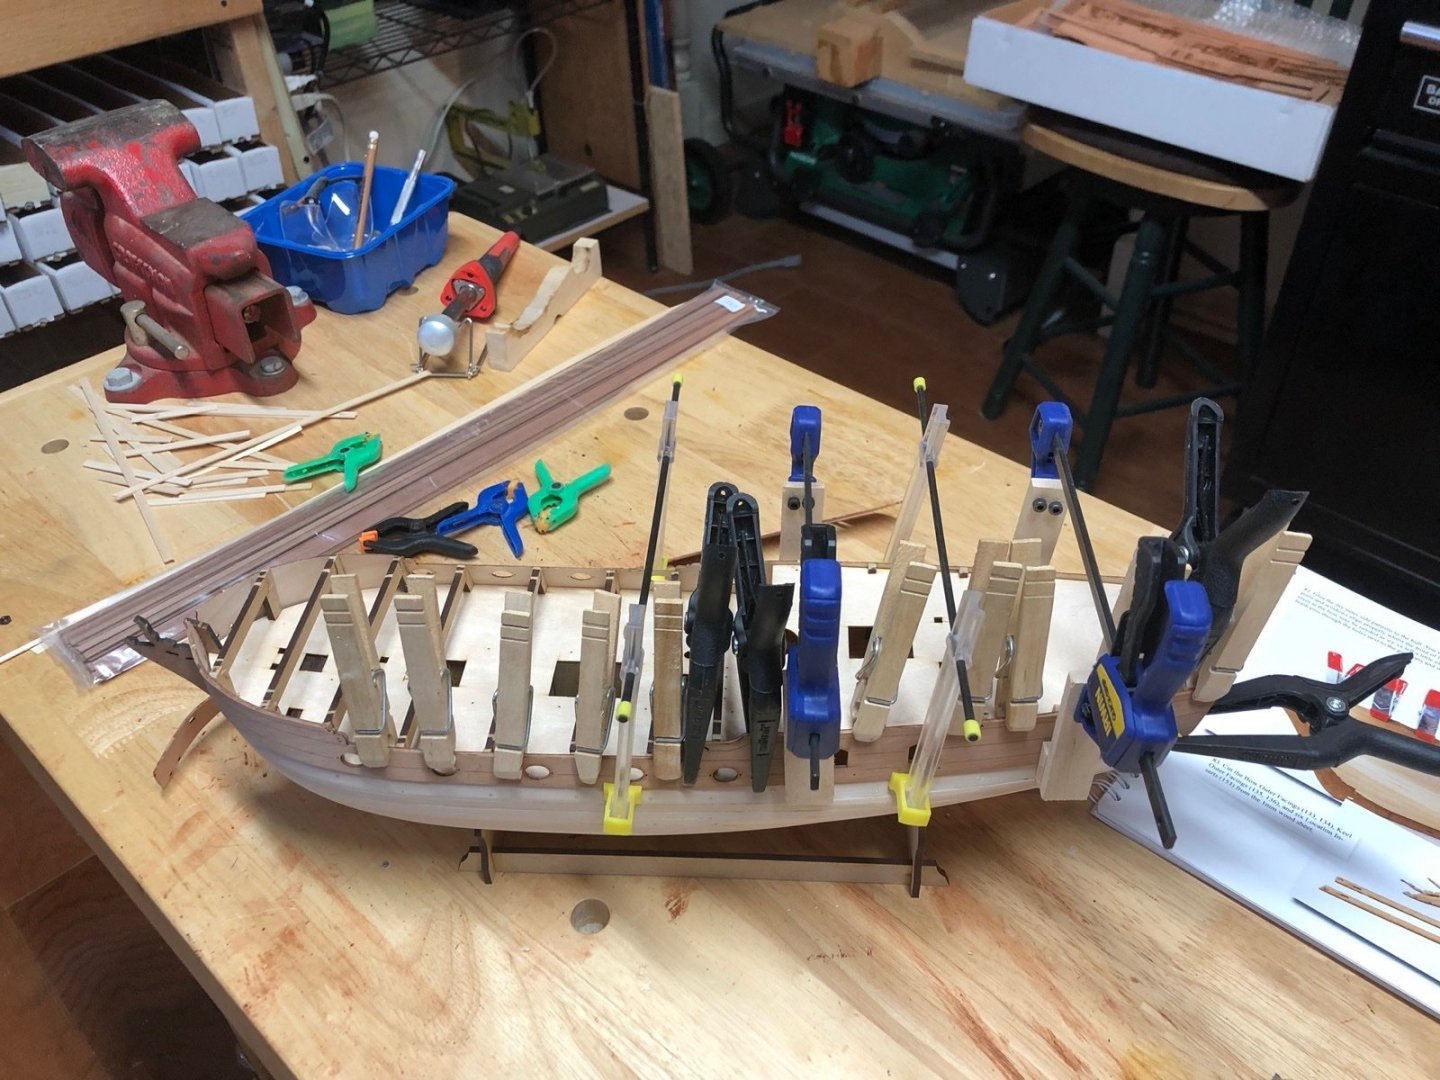
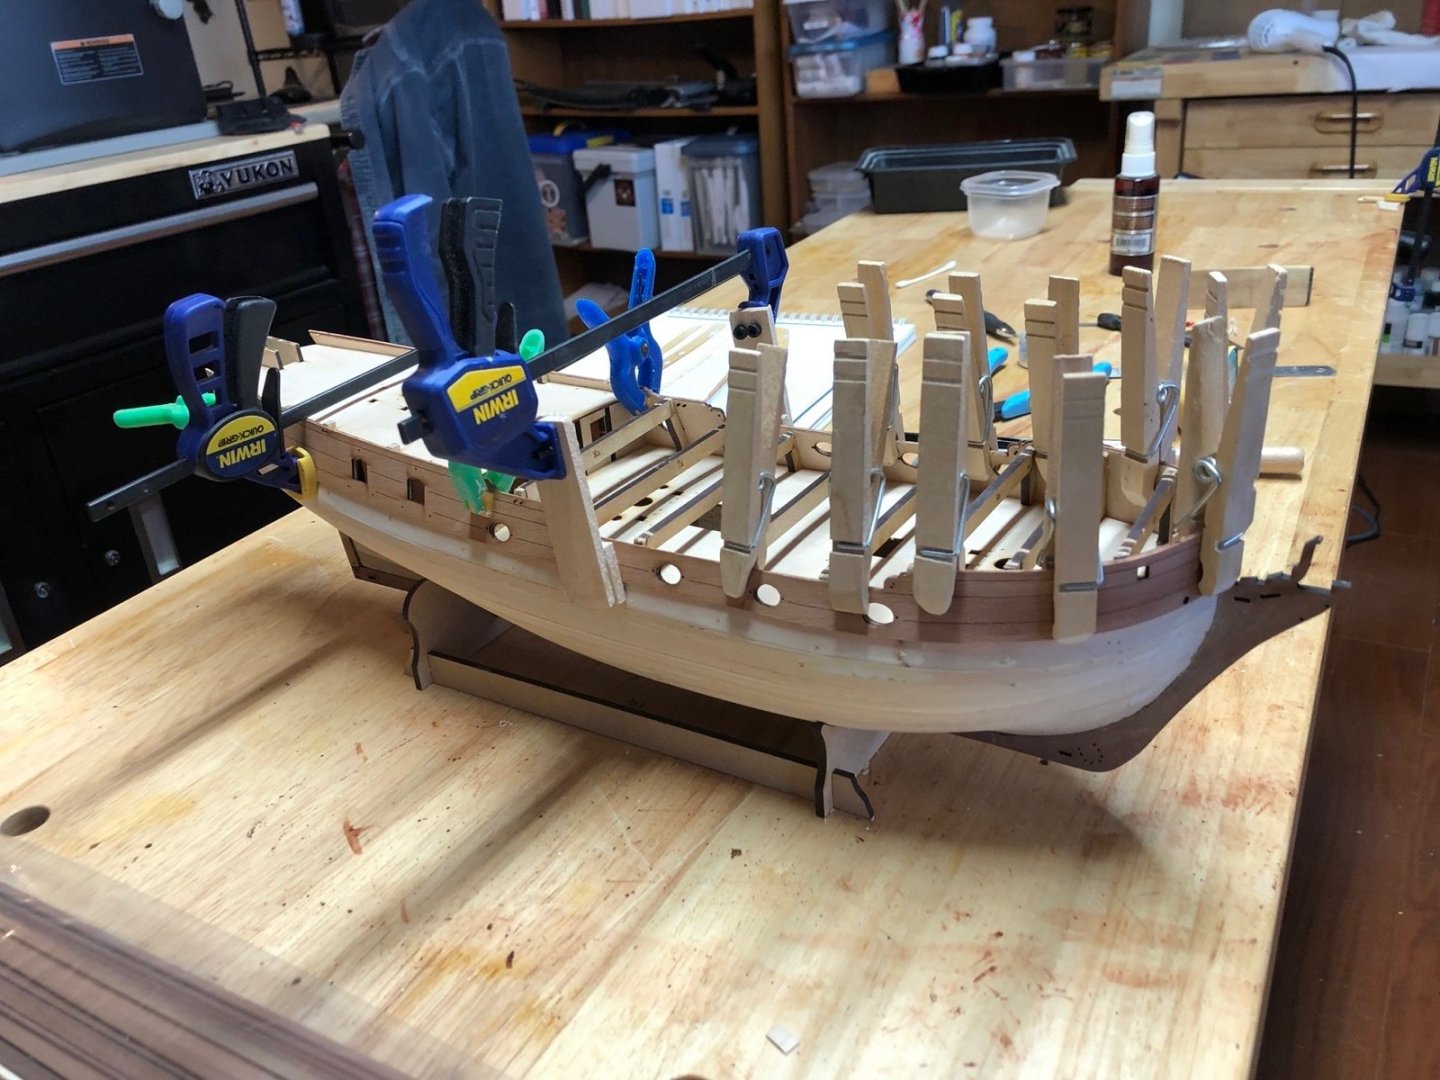
Thanks Bob and for the likes. After all four stem and keel outer pieces were glued on I took some time to clean up all the rabbets along the stem and stern post. I used chisels to thin down the first planks along the stern post so the second layer planks have room to fit into the rabbet. With that done I started the second planking using the provided pear strips. I usually soak my planks before I bend them, but since other builders have been having success bending them without soaking I thought I would give it a try. It worked very nicely. I am doing the second planking in three sections per plank. For the bow section I first do an edge bend then the larger bend for the curvature of the bow. For the other two sections I just give them a bit of an edge bend. The nice thing with dry bending is that the plank is ready to glue on shortly after bending instead of the next day. And I am using medium CA to glue them on so no clamps are required, although I use them when I can, and again I don't have to wait long for the glue to dry. I have the first two planks done and I am really happy with the result so far. I am using the planks full width except for a taper at the bow. I should be able to hold to that all the way down but I will recheck as I go.

- 118 replies
-
- 5
-
-
- Duchess Of Kingston
- Finished
- (and 1 more)
-
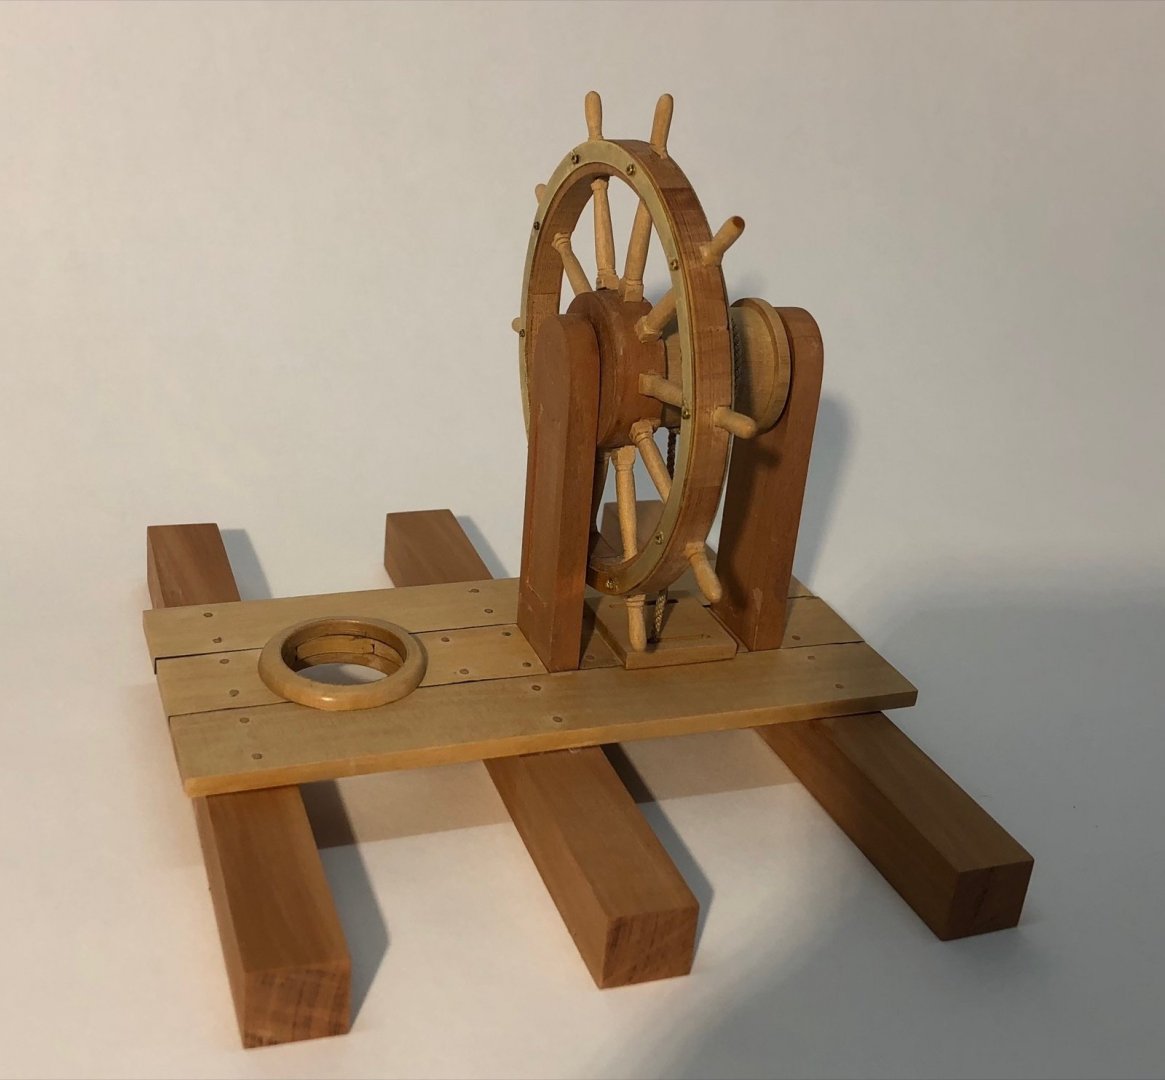
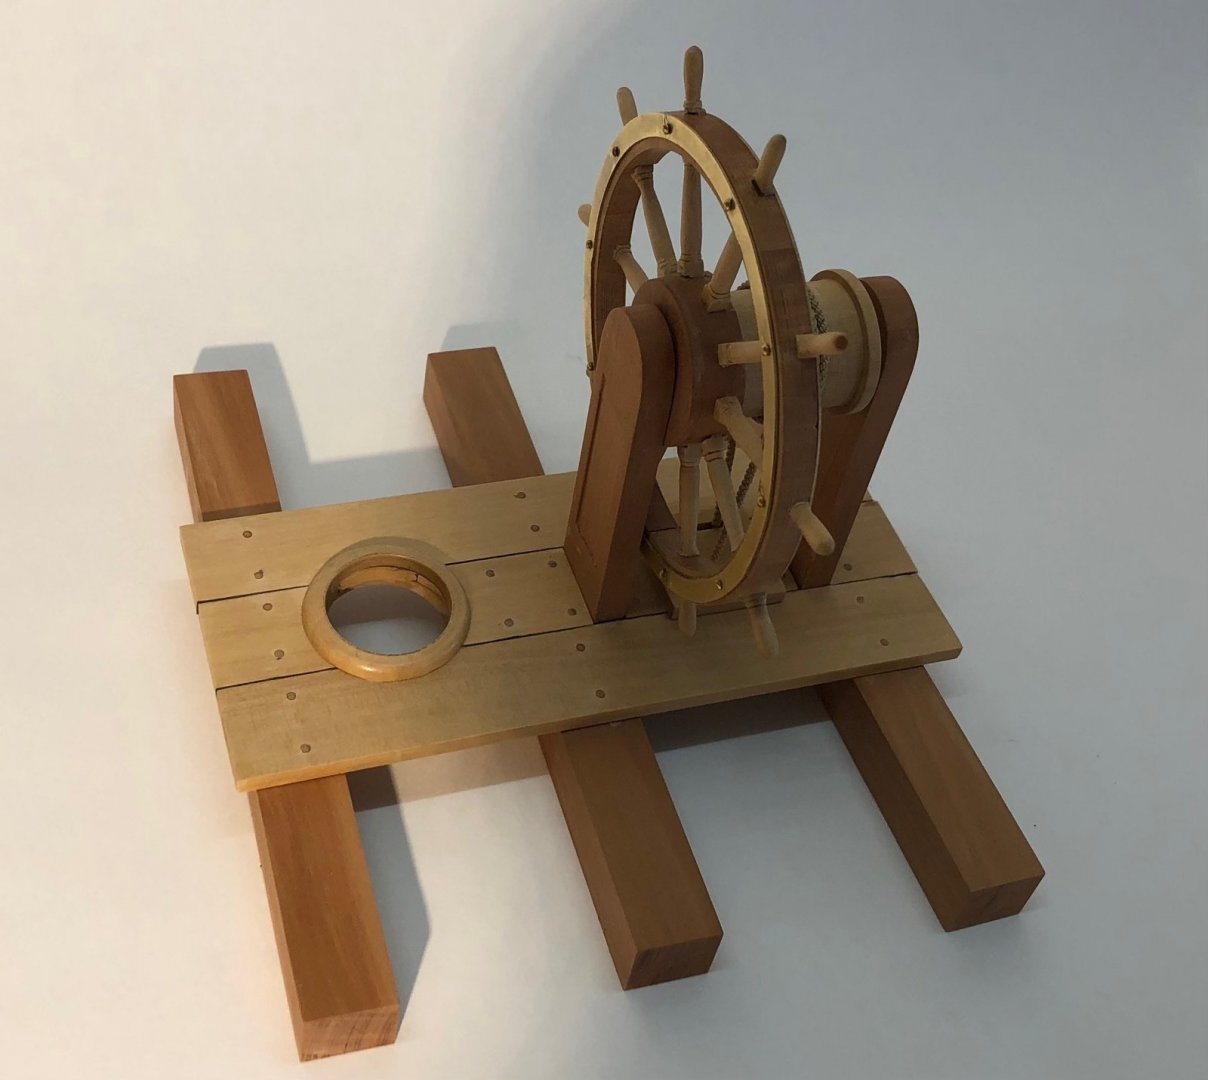
And here is the finished project. This was fun and I am displaying it next to the capstan which is in the same scale. If I was still working I'd put them on my desk but I don't have one of those anymore more (which is a good thing). I am not sure what my next scratch build project will be but for now I will be putting all my attention on the Duchess of Kingston build. Thanks for watching.


-
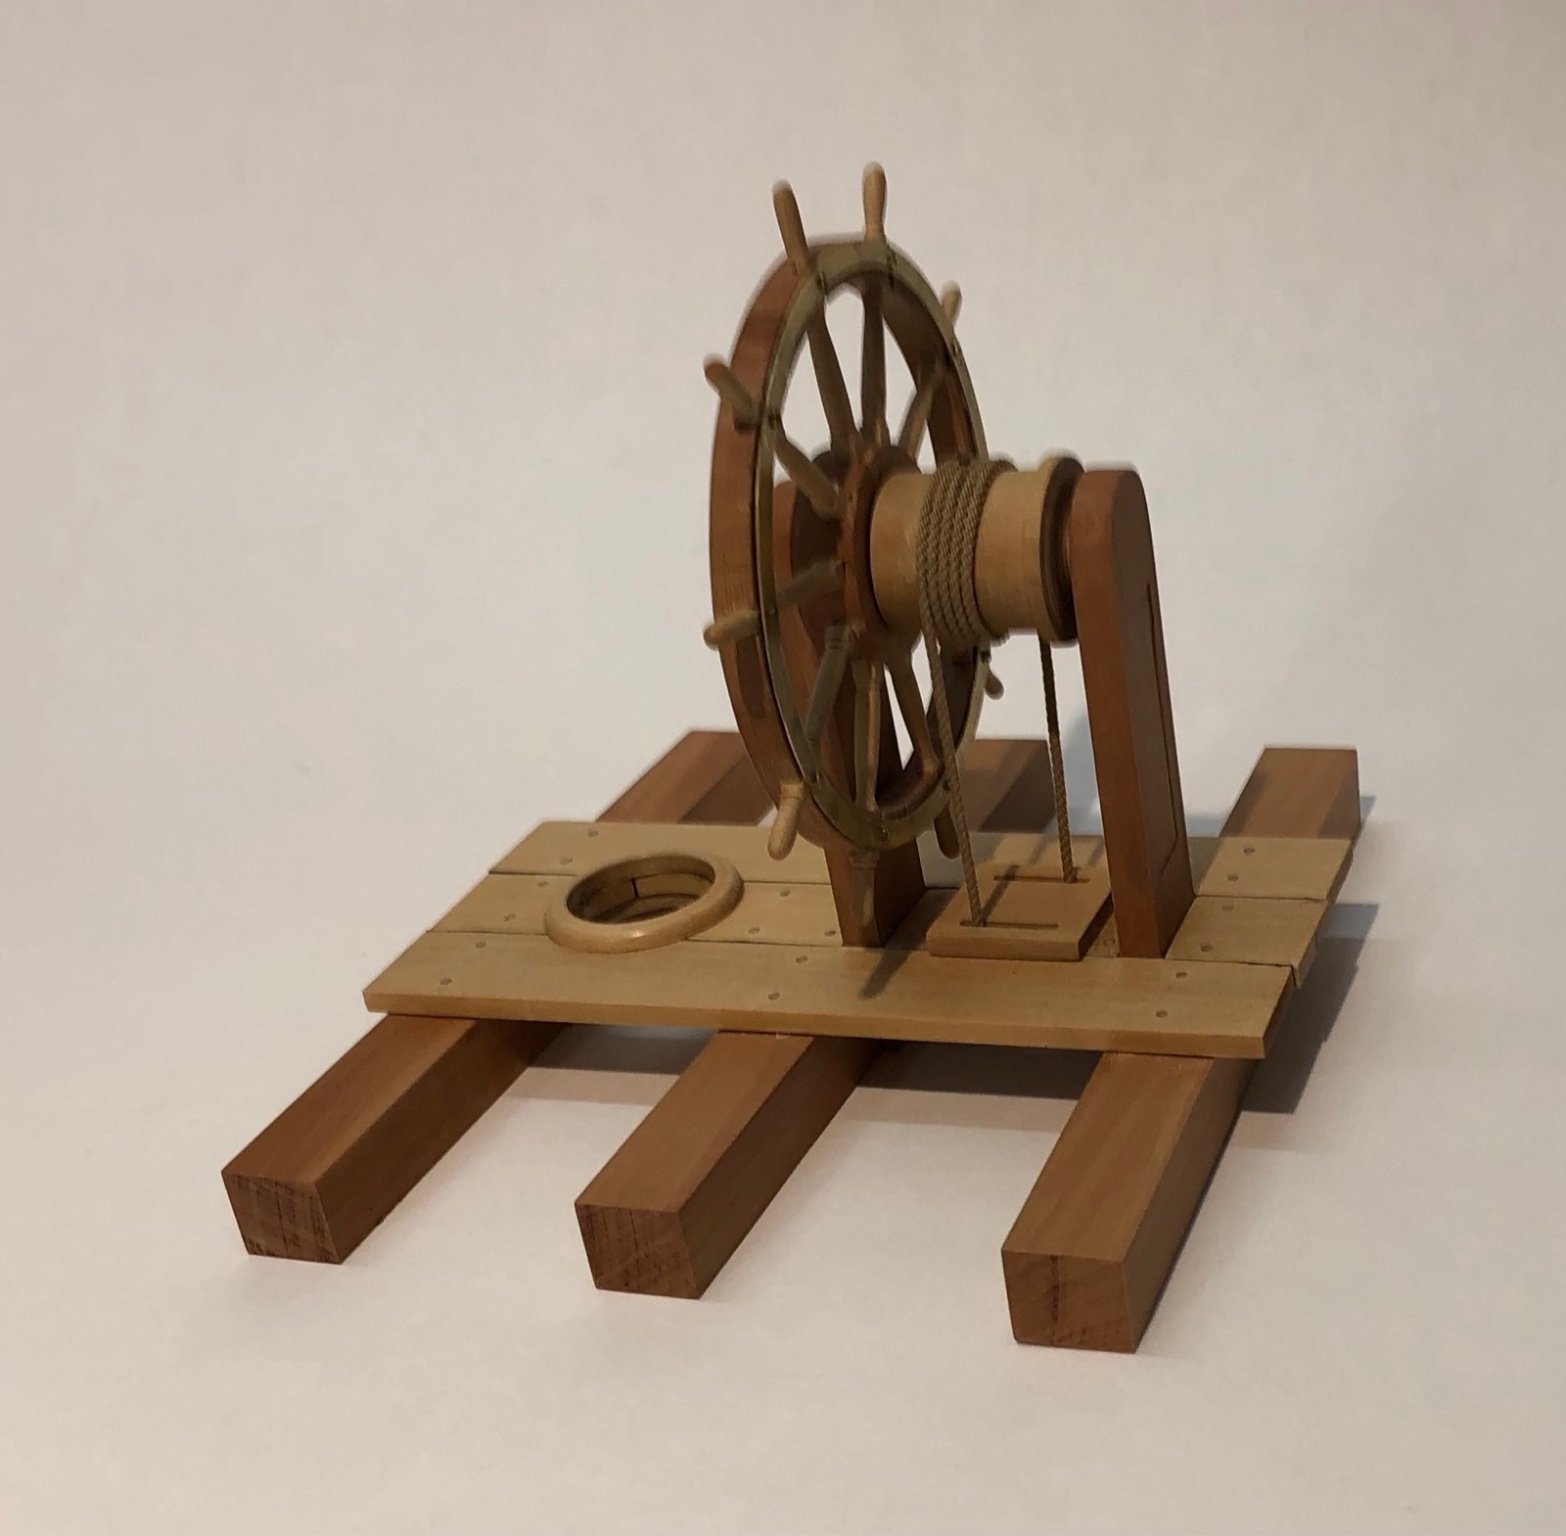
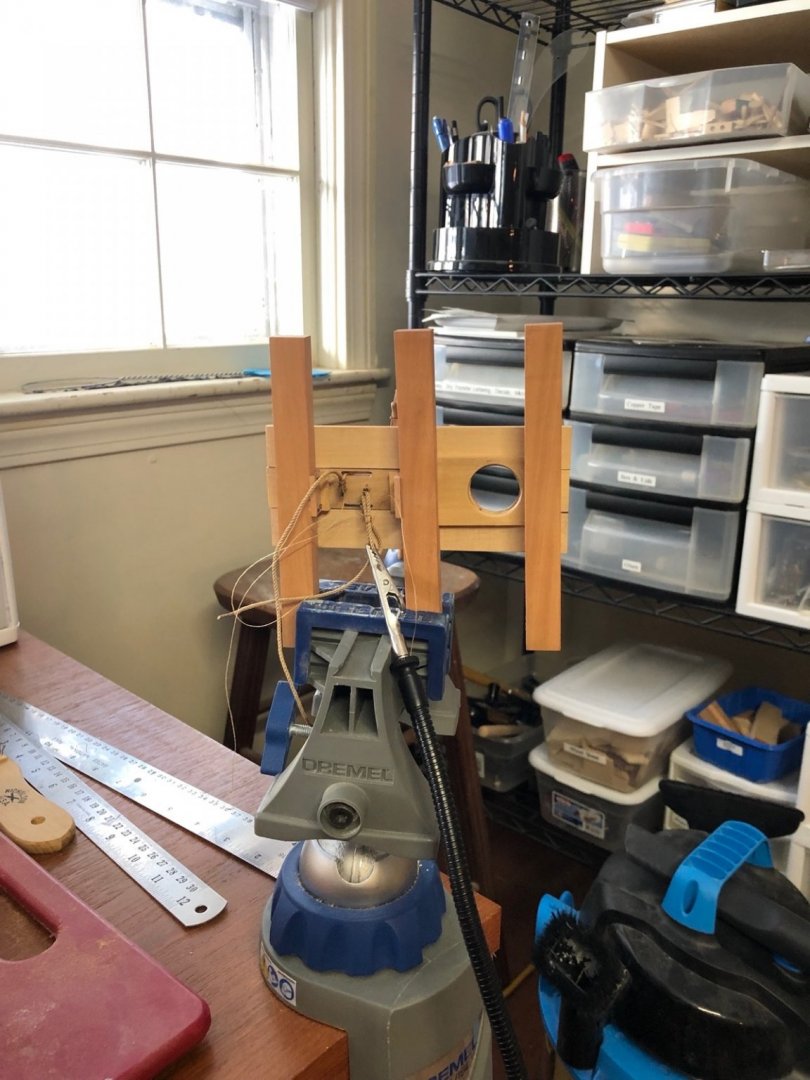
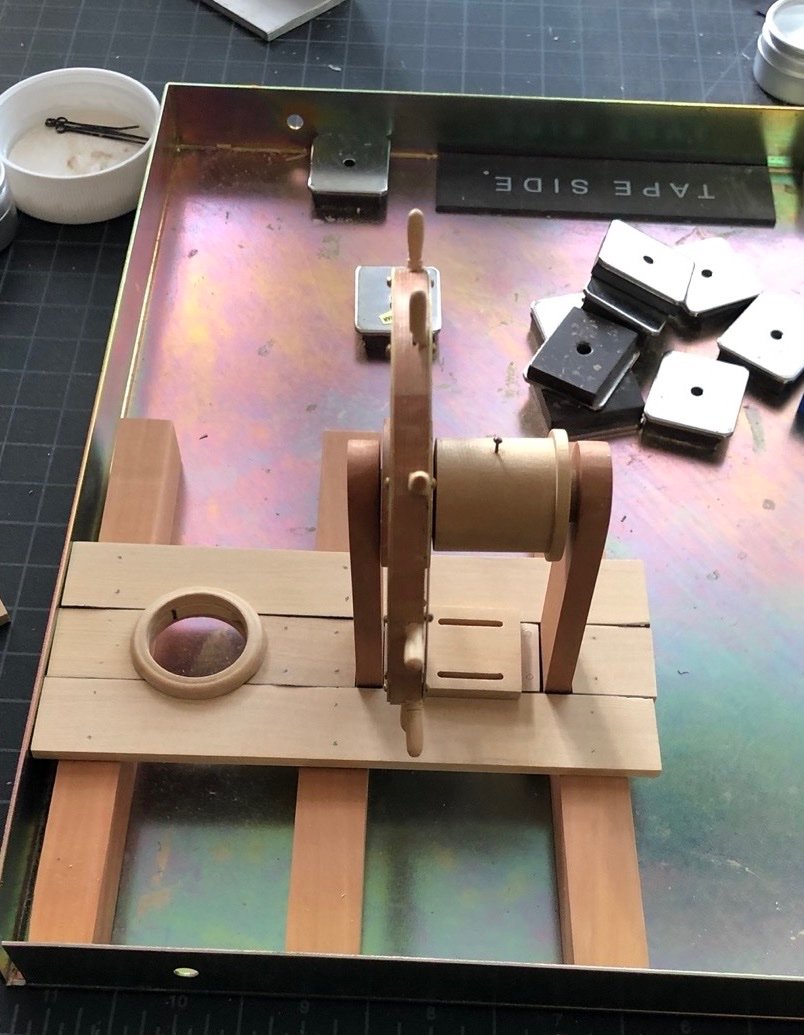
Here is the last step. I put the beams in a vise and threaded the tiller line ends through the guide and into the eyebolts I had placed under the plank. I seized the ends, pulled everything tight, and covered the seizings with Dullcote lacquer. When they are dry I'll trim the excess and the project will be done.
-
Thanks Bob and Yves. I'd need an addition on the house for a ship that size!
-
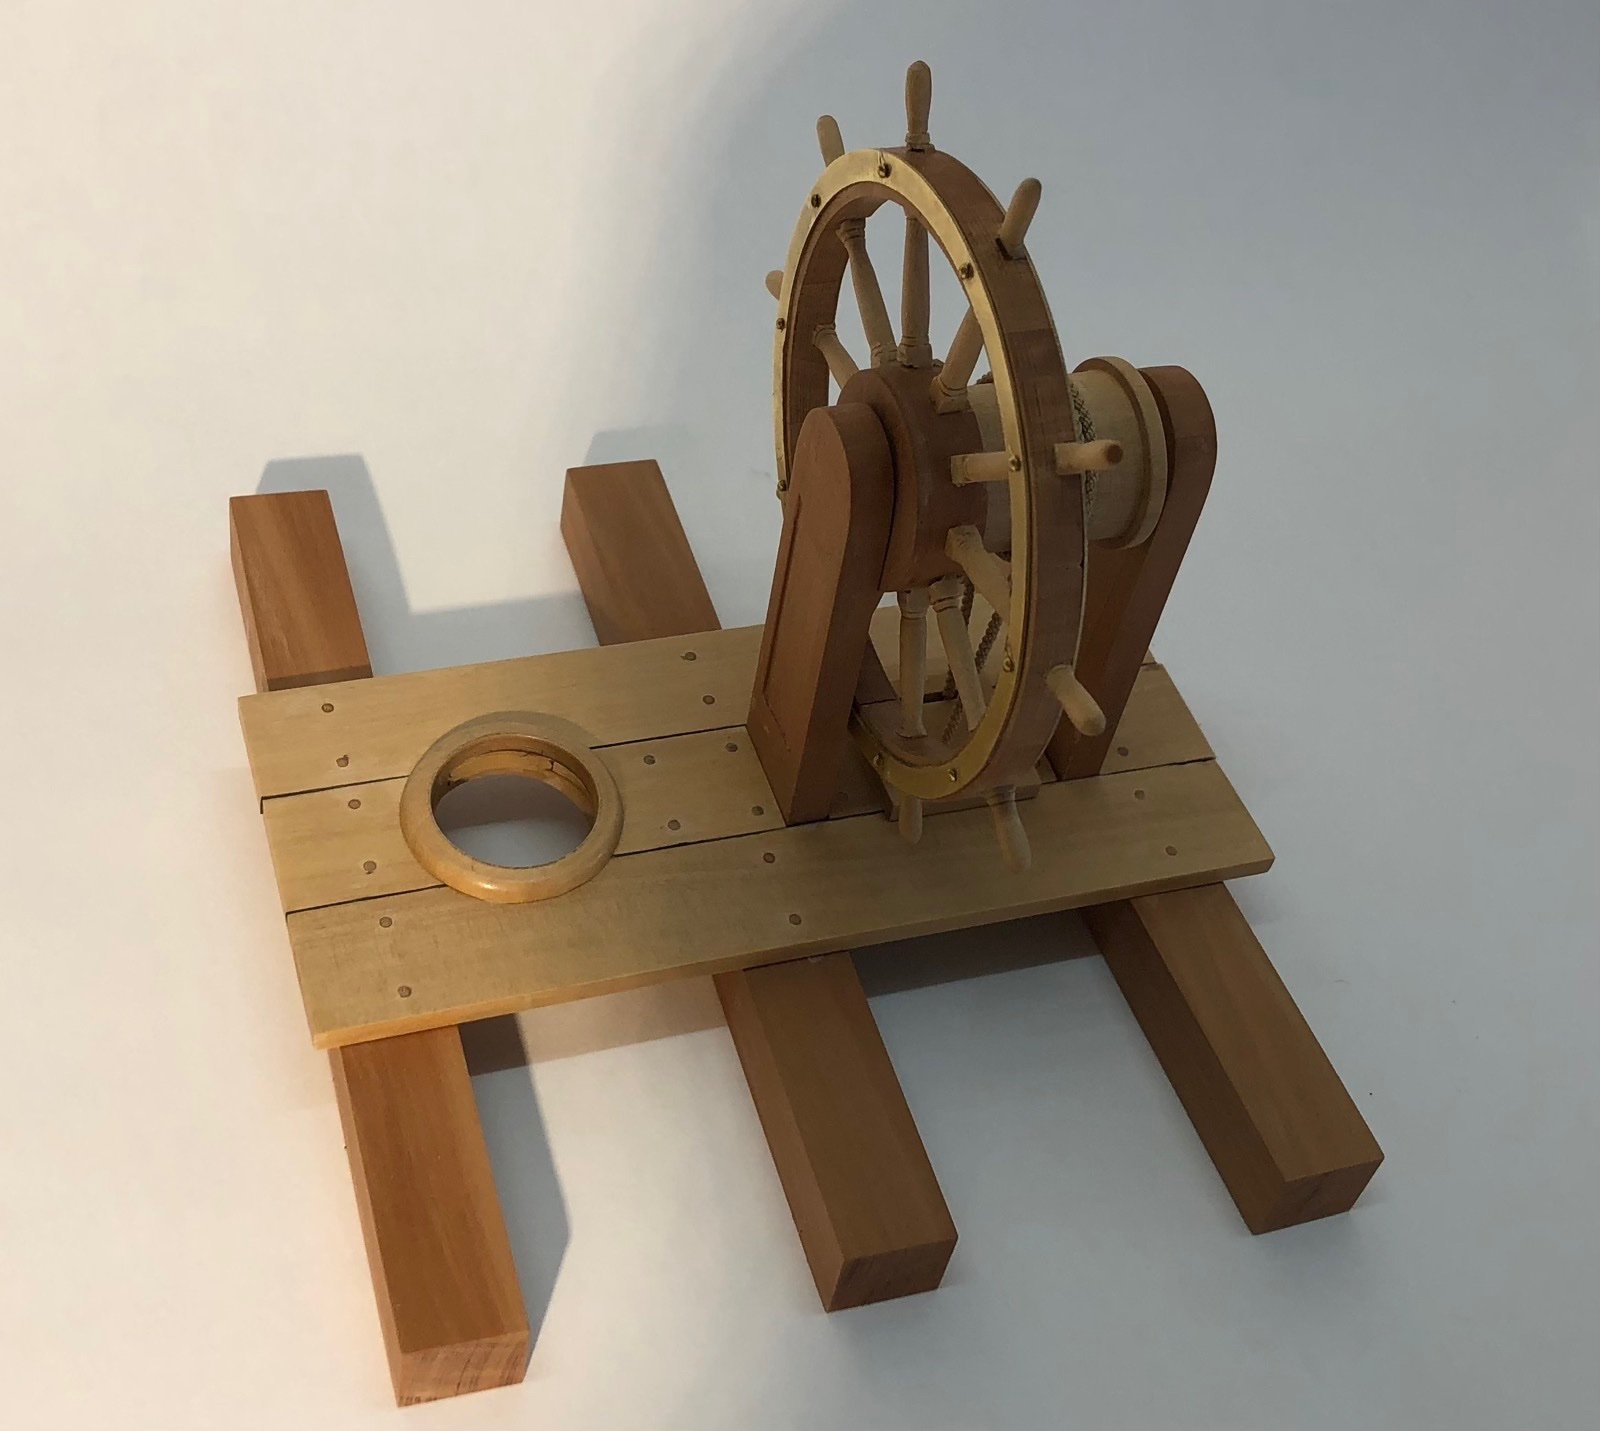
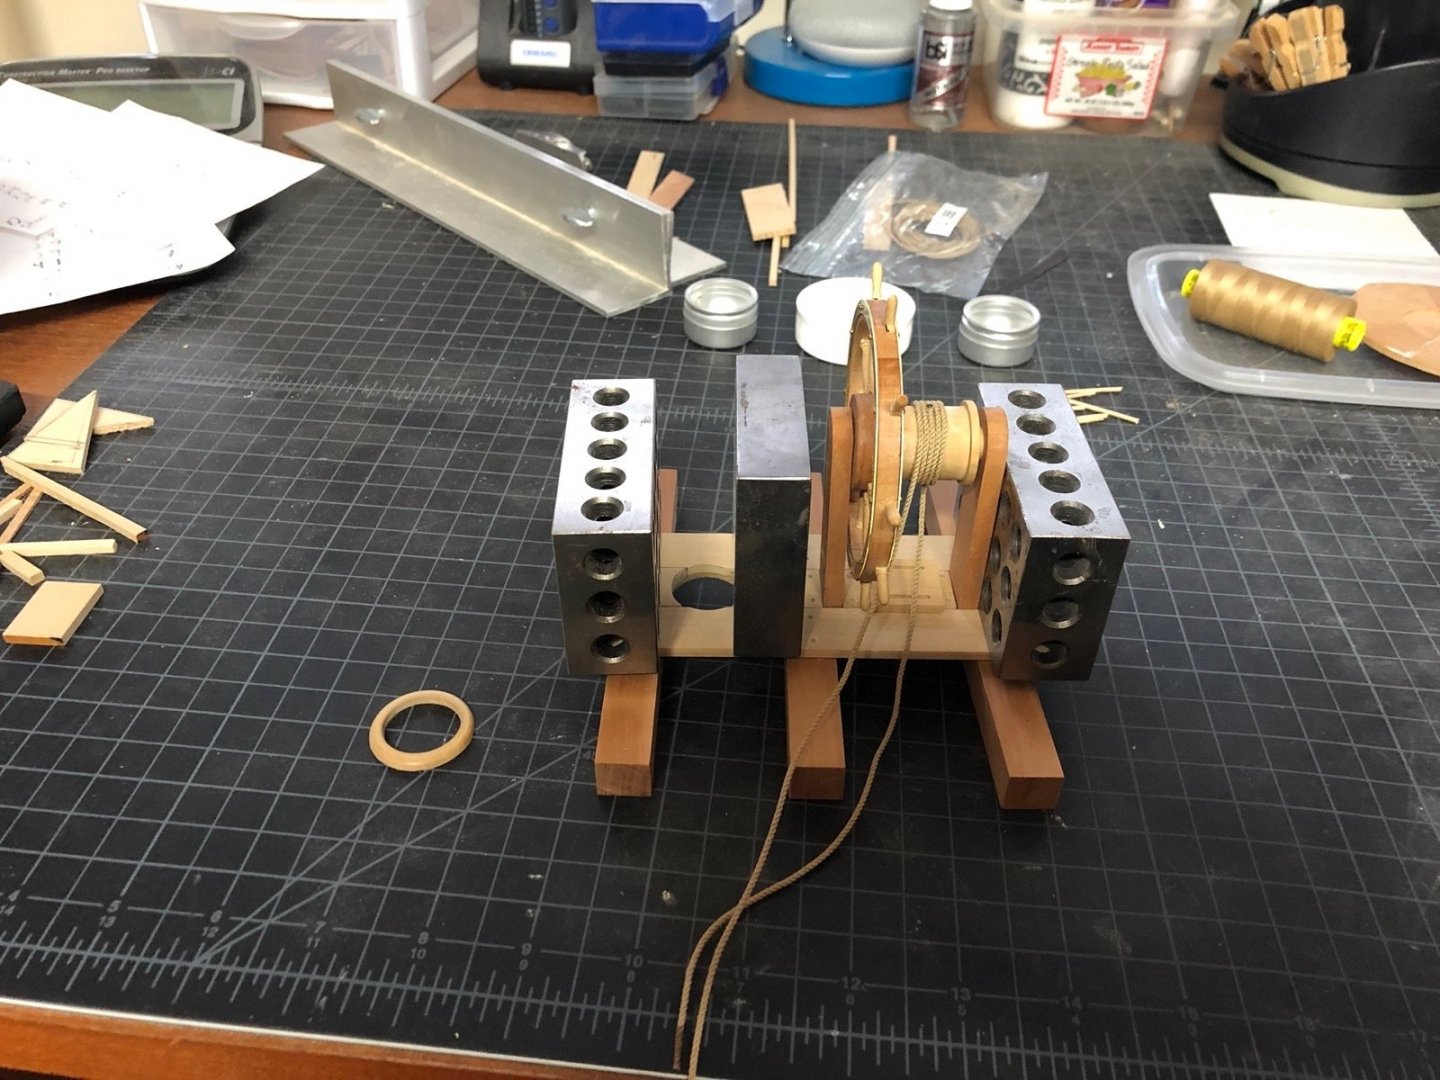
I cleaned up the excess length of the treenails and sanded the planks smooth. I glued the tiller rope to the barrel and then glued the planks to the beams. I used weights to hold them down while the glue is drying.
-
Both upper hull pieces are now glued on. I glued them in thirds to make sure they stuck well all along the length. I then cleaned up the outer bow and keel pieces and have glued on the port bow piece.

- 118 replies
-
- 5
-
-
- Duchess Of Kingston
- Finished
- (and 1 more)
-
B.E. I think the extra work you put into those quarter galleries really paid off. They look great.
- 857 replies
-
- 3
-
-
- Sphinx
- Vanguard Models
- (and 1 more)
-
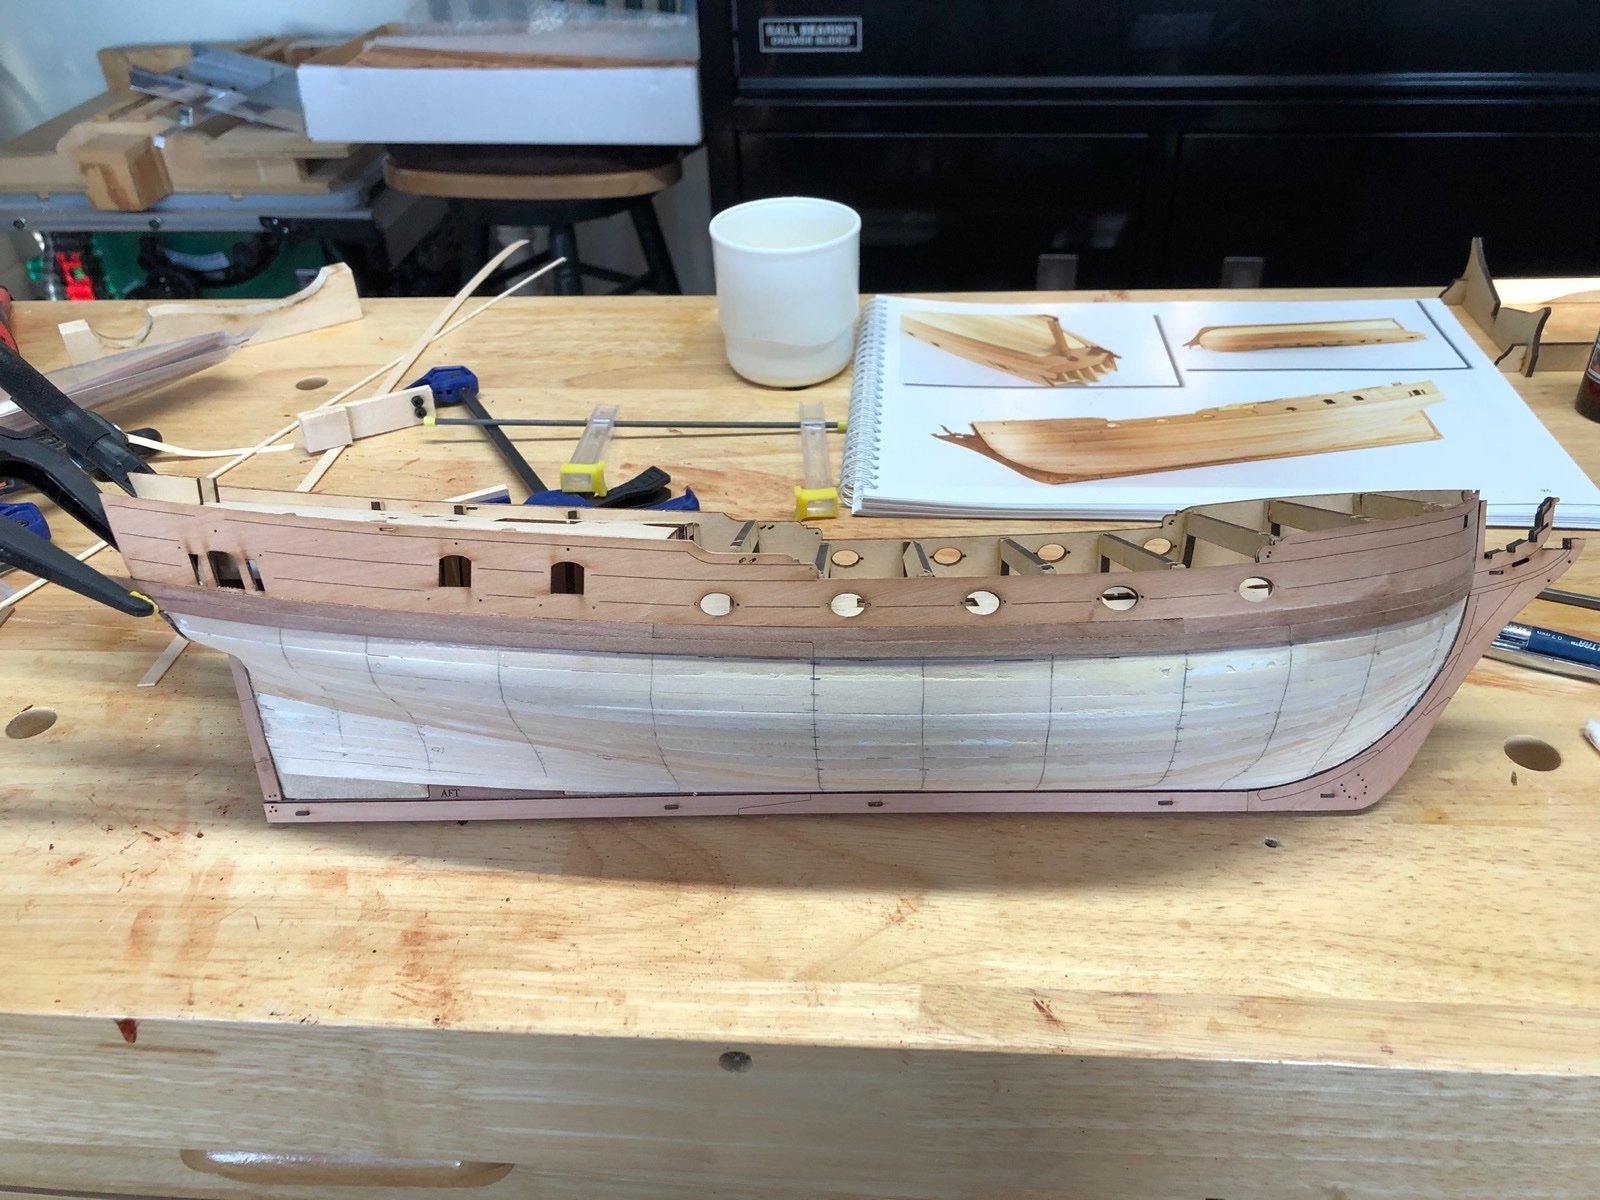
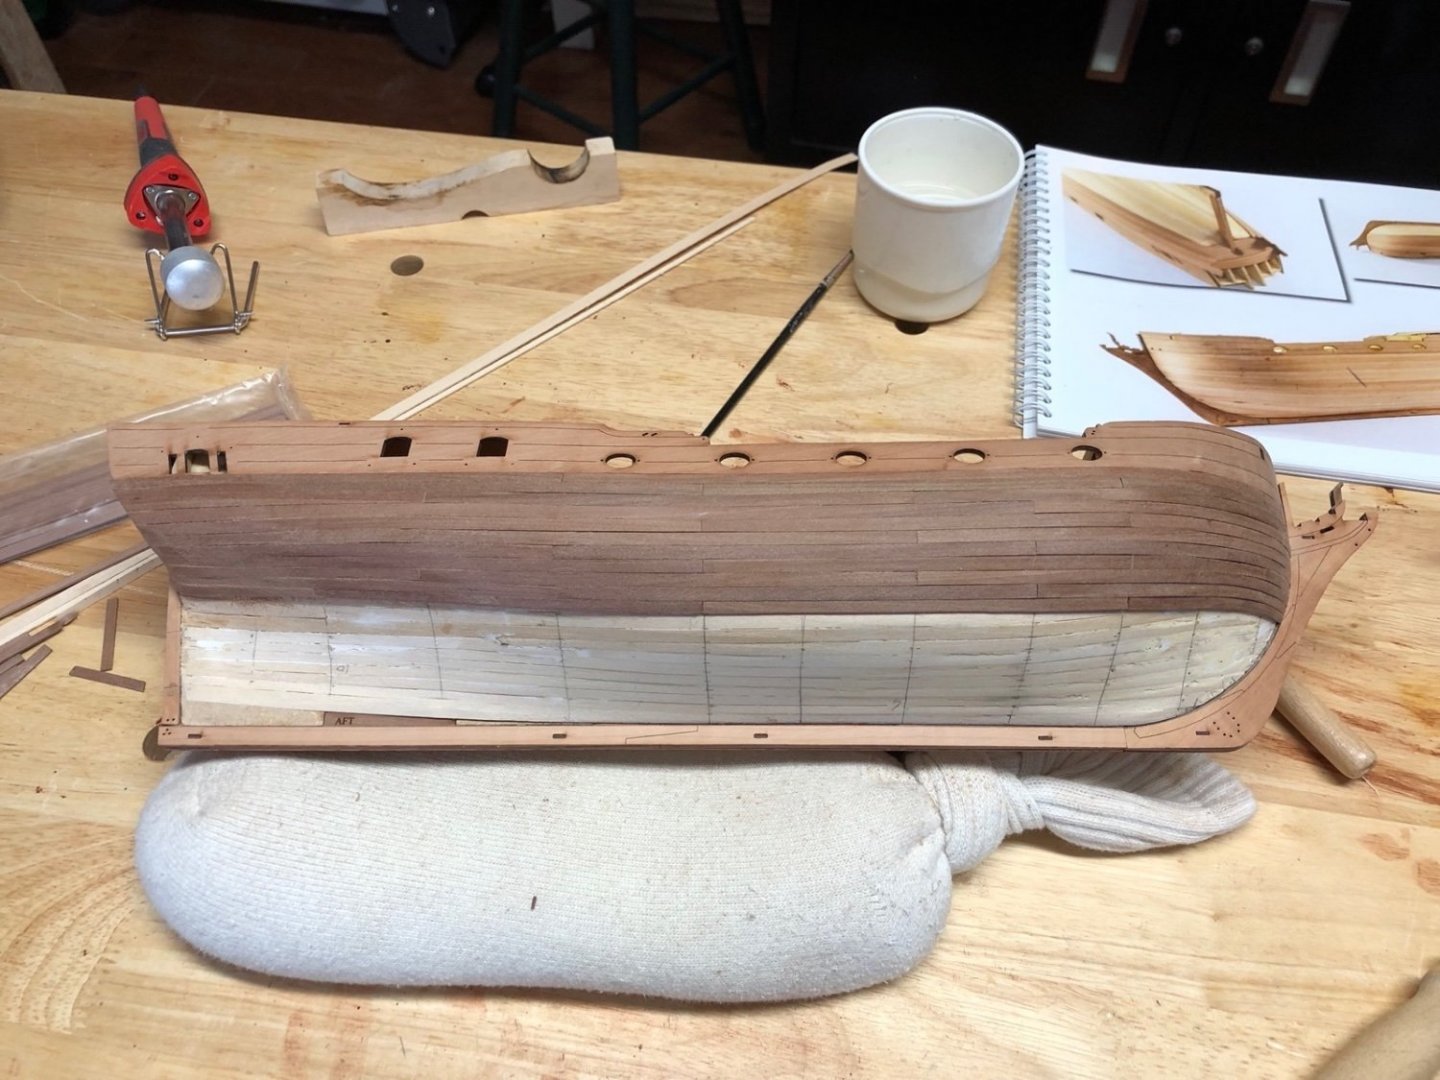
Yesterday I glued the bow portion of the port upper hull piece to the hull after sanding the front edge so the openings lined up. I have to say having those holes in the pieces so you can align them with the brass pins is just brilliant. Thanks @chris watton! It just makes aligning those pieces so much easier. Today I glued the rest of that piece to the hull. I needed lots of clamps, including longer reach clamps to make sure the bottom edge was held tight to the hull until the glue set. I had a couple and I modified some others with pieces of basswood which worked great. When this dries I'll do the same thing to the starboard side piece.
- 118 replies
-
- 7
-
-
- Duchess Of Kingston
- Finished
- (and 1 more)
-
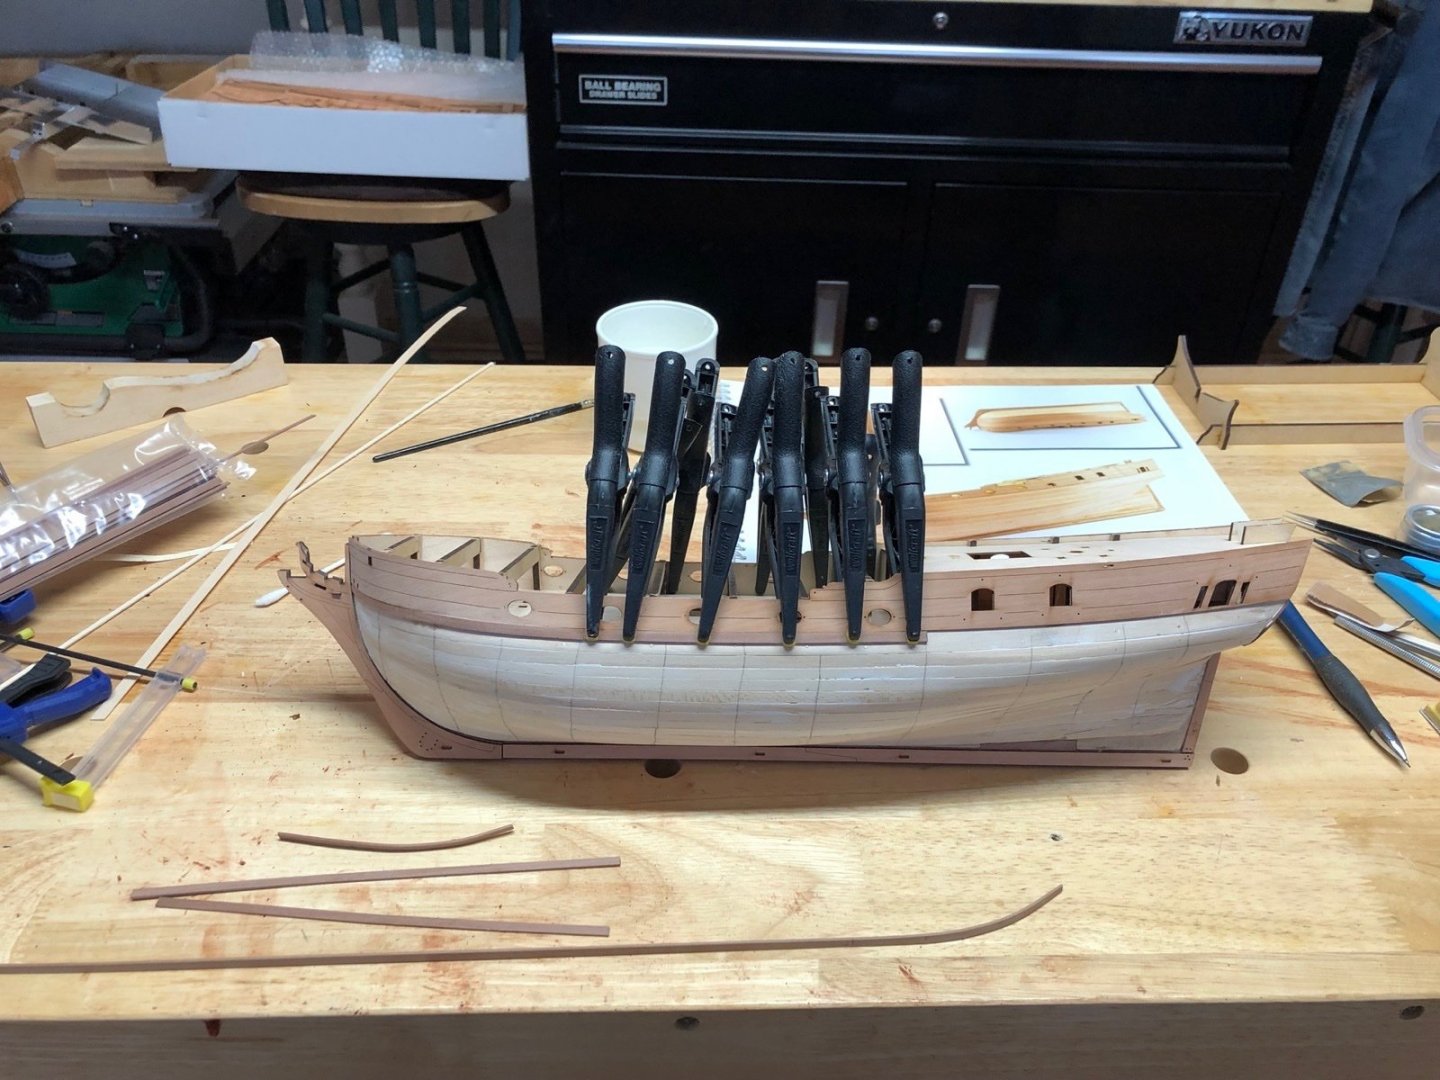
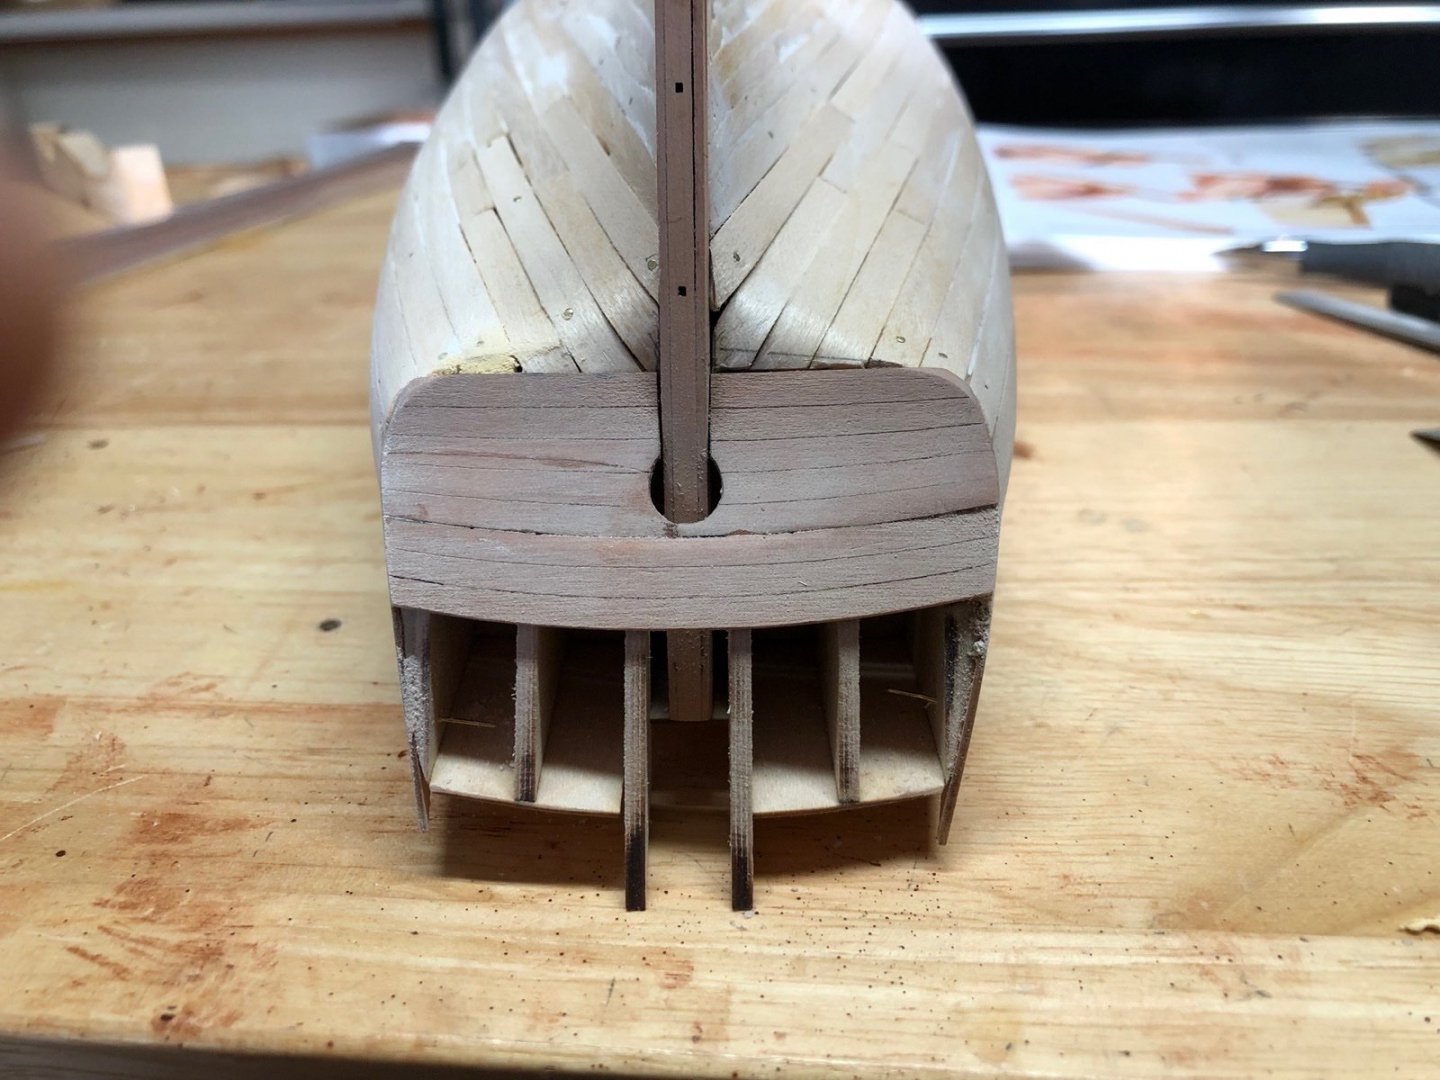
I was able to bend the lower counter piece but not without a few breaks when trying to figure out how I was going to bend it. I was able to bend the individual pieces and glue them back together before installing it, which made it easier to align the pieces. I had to do a little more trimming of the plank ends along the sides of the transom to get it to fit right. I used the upper counter piece to make sure I had it at the right height on the transom. I then sanded the edges so they were flush with the planks, bevelled the upper counter piece and glued it in place, then sanded its edges. Here is how that all came out. I also filled the gap at the ends of the starboard planks with some wood filler. Today I soaked the bow areas of the upper hull pieces and clamped them to the hull to dry. I heated up water in the microwave for 3 minutes then poured it into a coffee can and put the pieces in bow first for 30 minutes. They bent very easily after that. I will let these dry for a good 24 hours before I remove the clamps.
- 118 replies
-
- 7
-
-
- Duchess Of Kingston
- Finished
- (and 1 more)
-
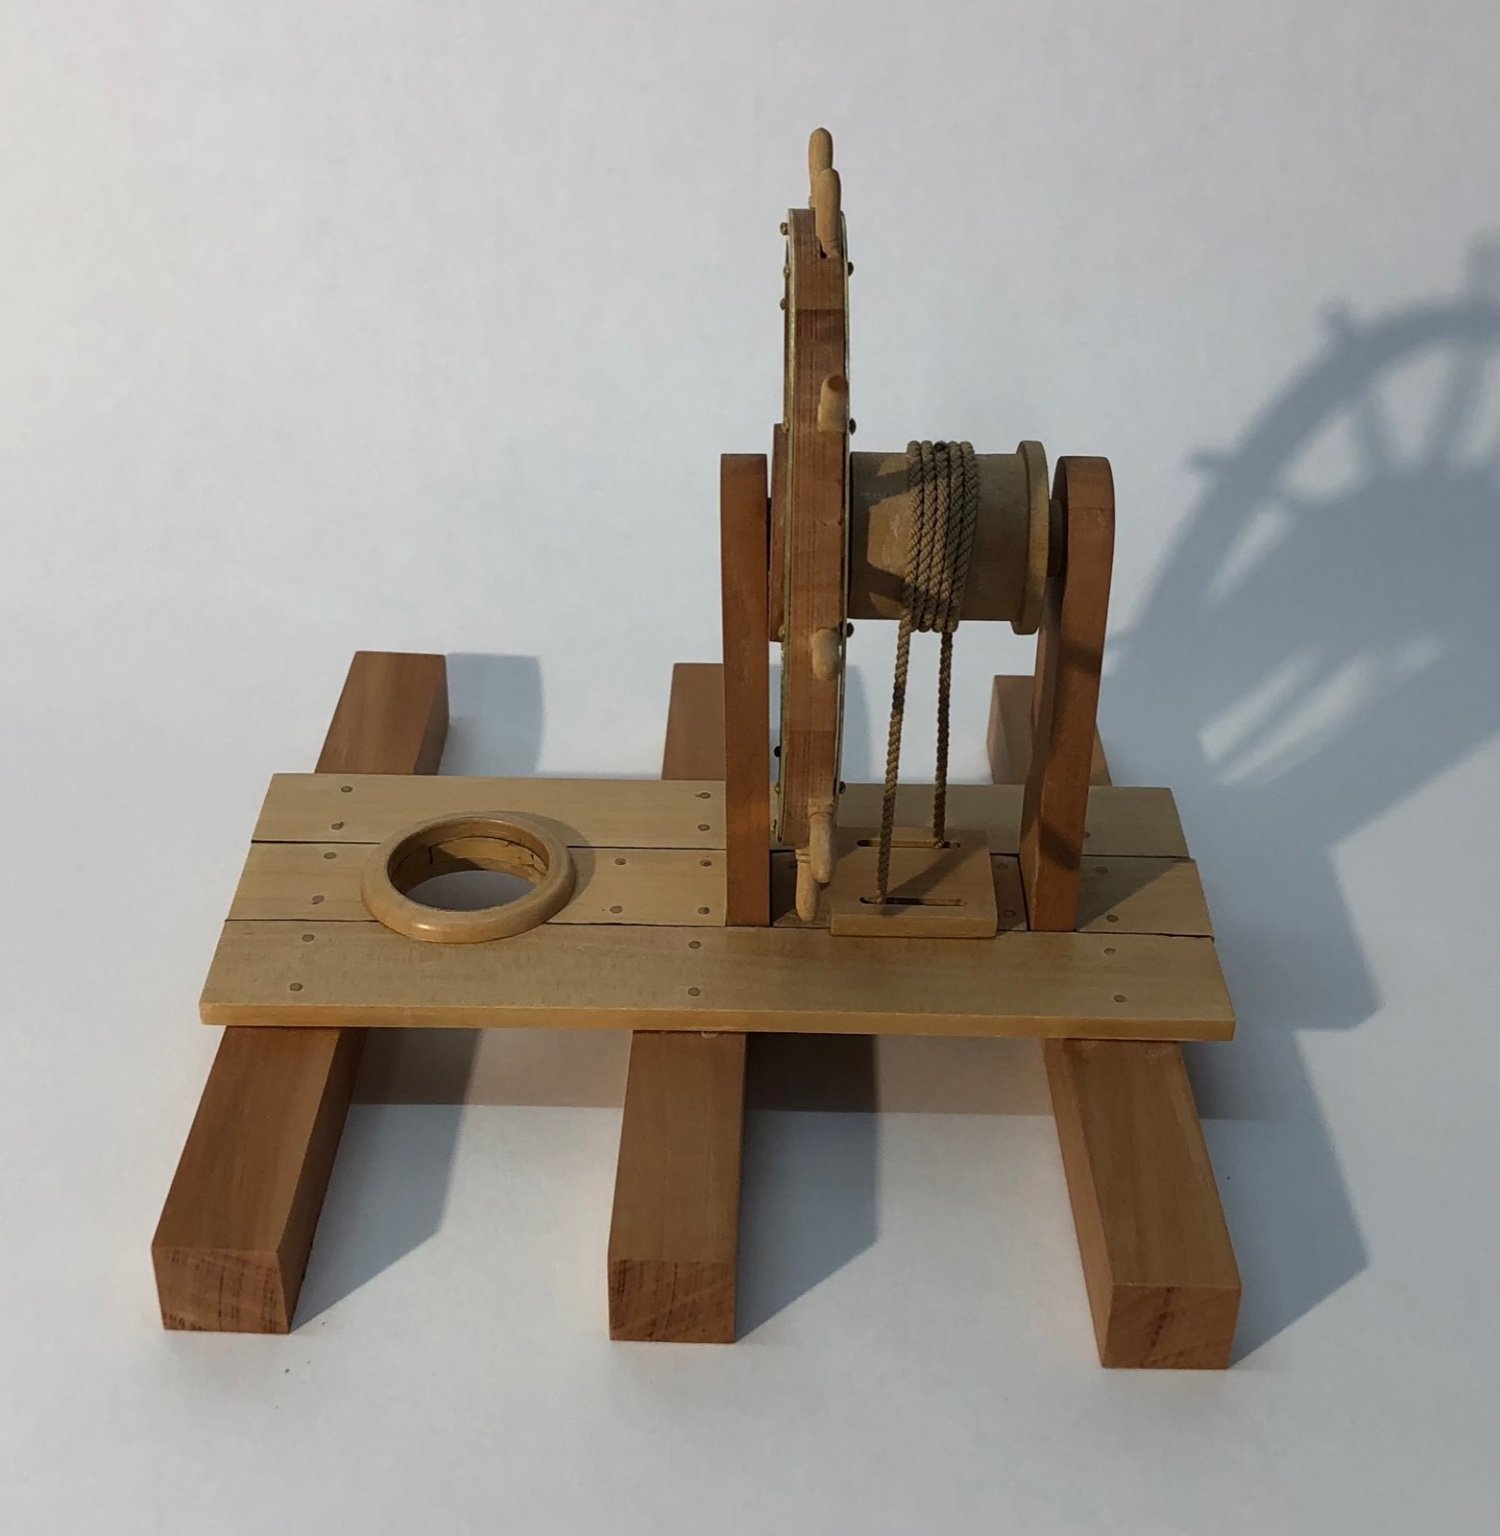
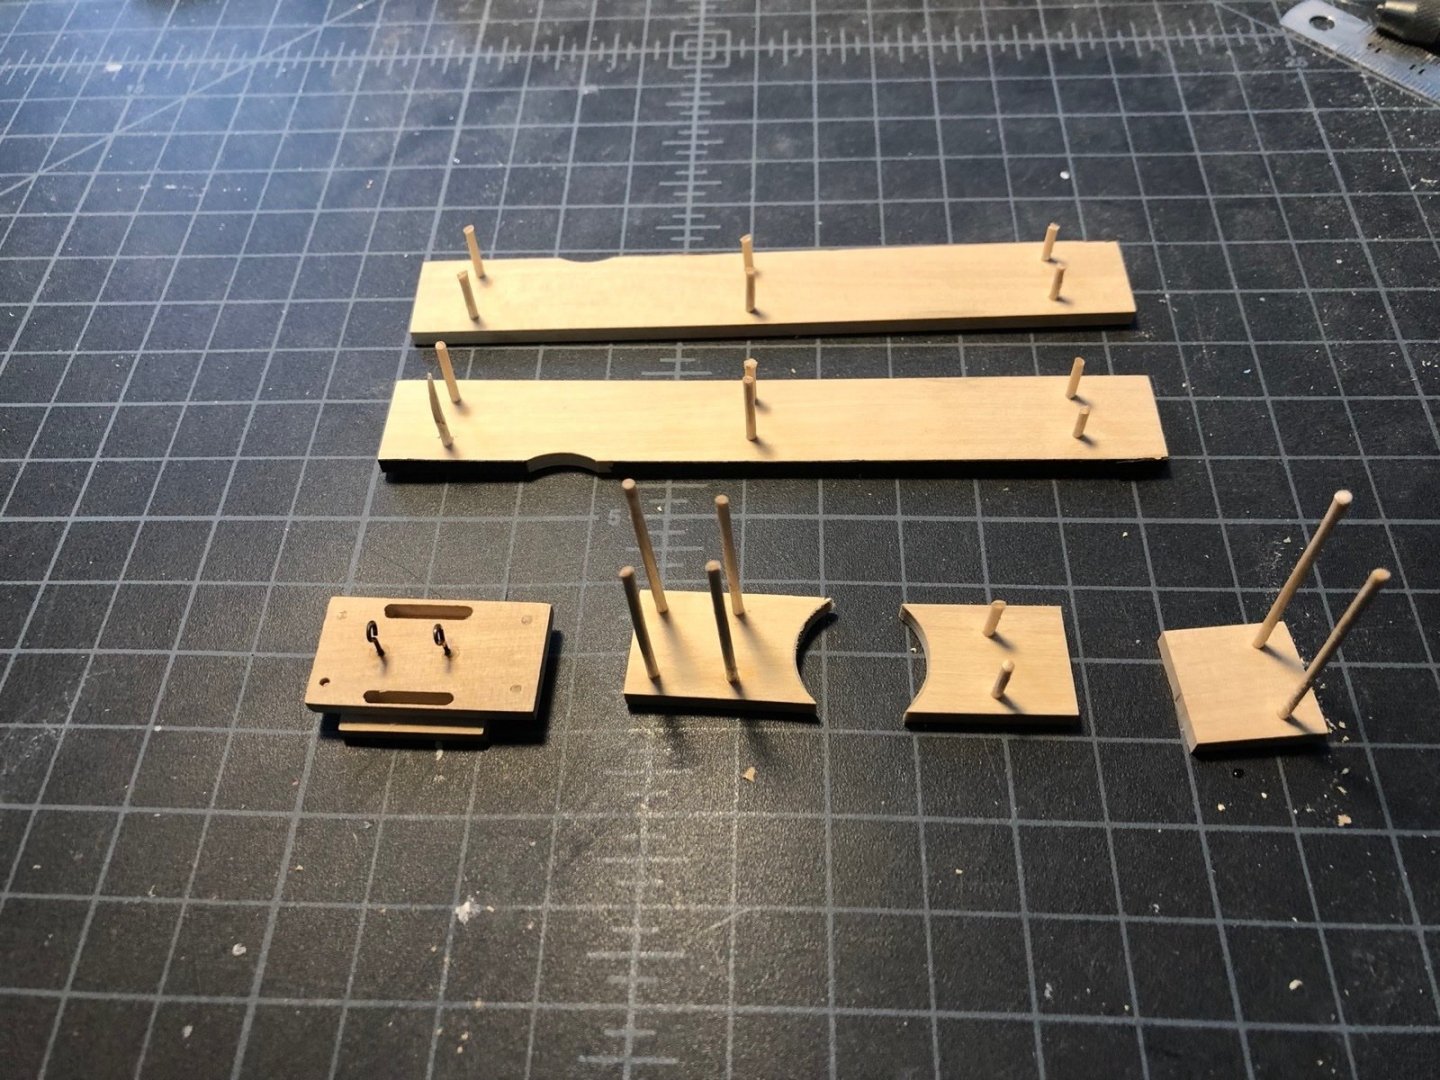
I have cut all the planks to length and around the mast hole. Here they are dry fit to the beams. I drilled holes for the treenails and glued them in. I also added two blackened eyebolts under the plank with the tiller rope guides to use to tie off the ends of the tiller rope. I also pushed the nail from the barrel through the middle of the tiller rope and glued it back into the barrel. Next I will wrap the rope around the barrel and fix it with some diluted white glue to the barrel.
-
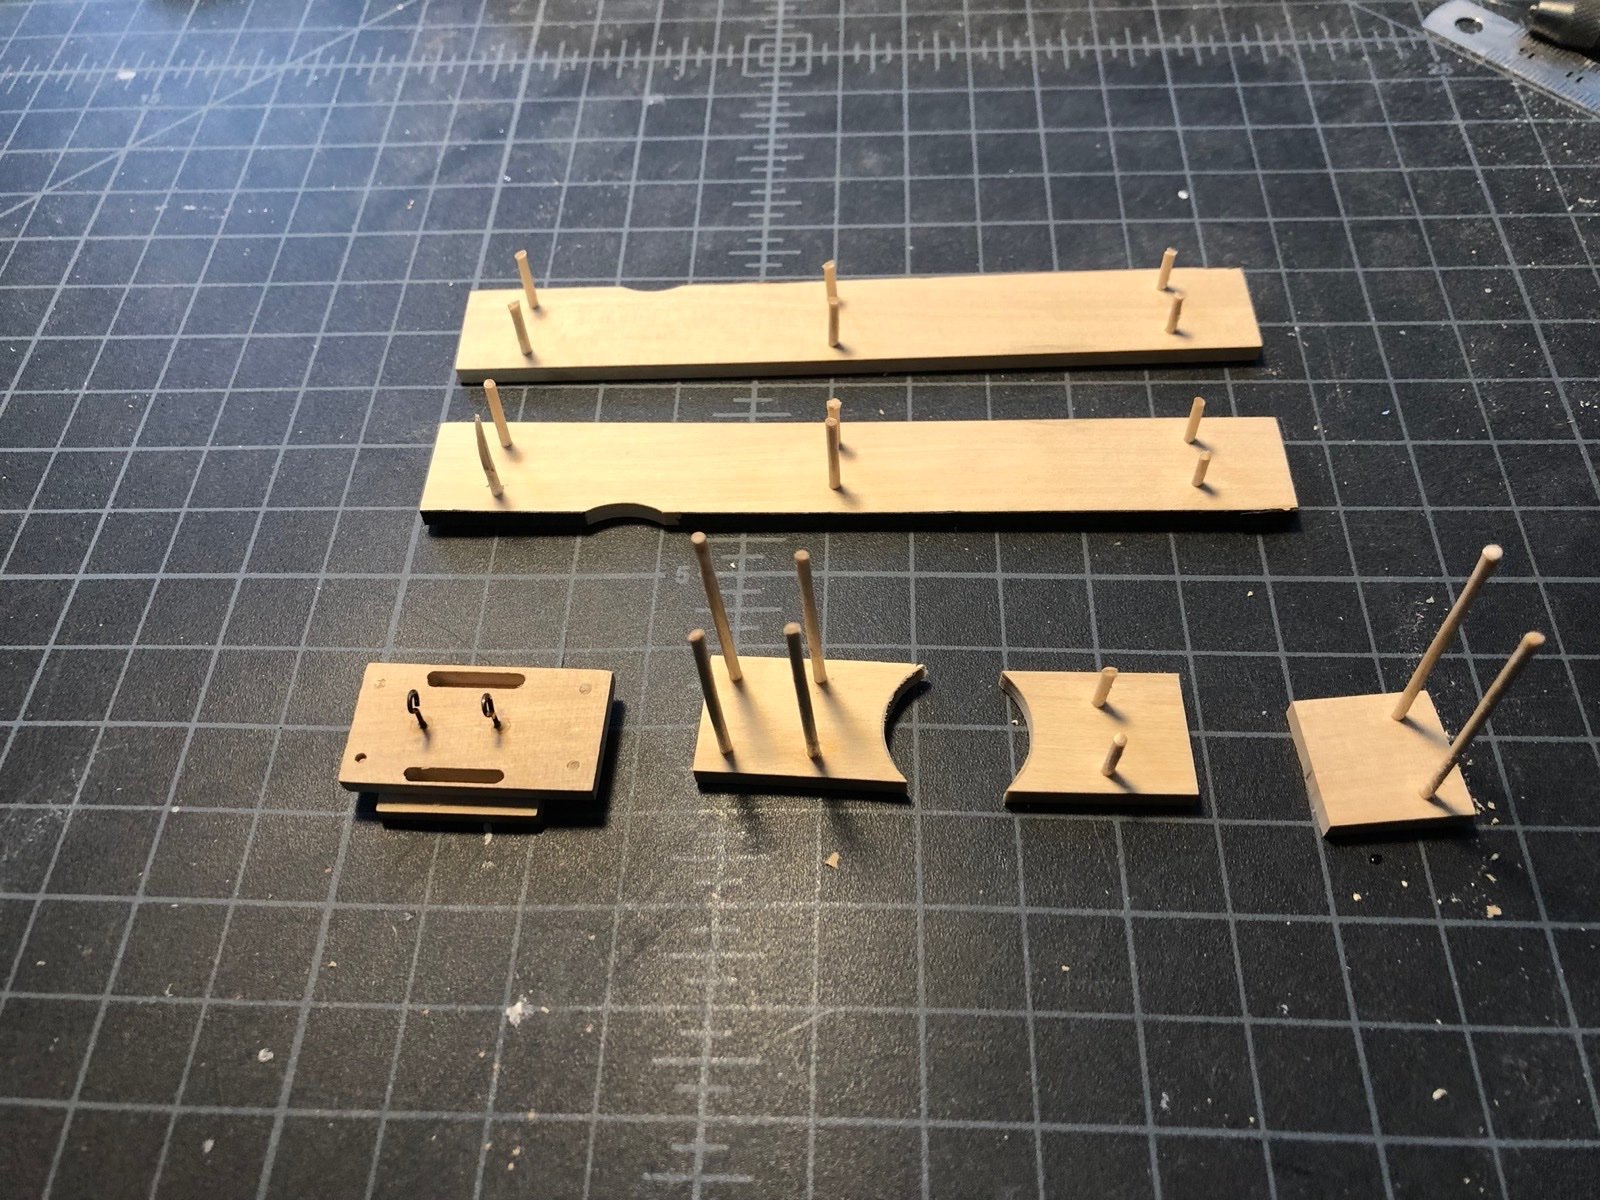
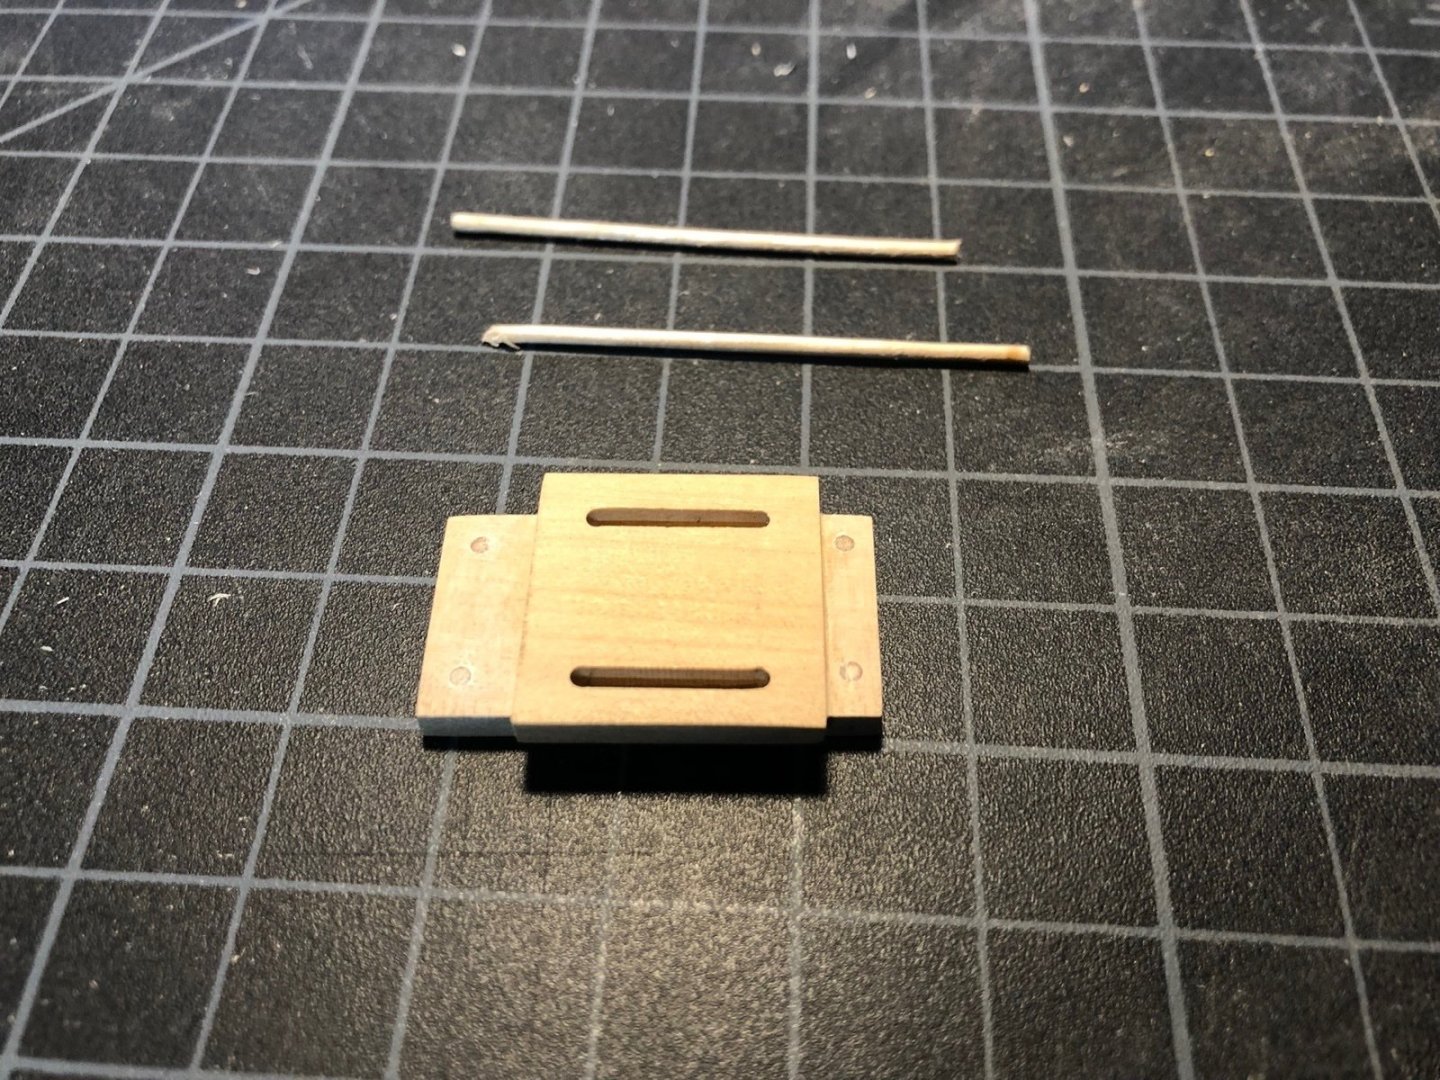
I wasn't happy with the way the wheel was sitting on the barrel so I carefully removed it with some isopropyl, did some filing on the inside of the barrel and re-glued the wheel on. It looks much better. I also removed the stanchions and re-glued them back onto the beams so the mizzen mast hole was centered under the planks. I milled slots in the plank piece that will go under the barrel with the tiller rope guide piece on top, then glued them together and added treenails to the corners. I couldn't find my draw plate (it may have been lost in the move three years ago) so I made the treenails by chucking some small dowels in the Dremel and turning them down with a pin vise. This worked really well. Here they are installed on the plank. These are just decorative so I can add them before installing the planks. I think I an finally ready to put all the pieces together.

-
Hi Keith. I think it came out quite nice. You can see the finished ship in the photos above or in the gallery. It took me just about a full year to build. If you do decide to build it please start a build log and let me know. I would love to follow along.
-
Yes I would also be interested in a POF kit. Probably the only way I would tackle such a project.
- 1,784 replies
-
- 2
-
-
- winchelsea
- Syren Ship Model Company
- (and 1 more)
-
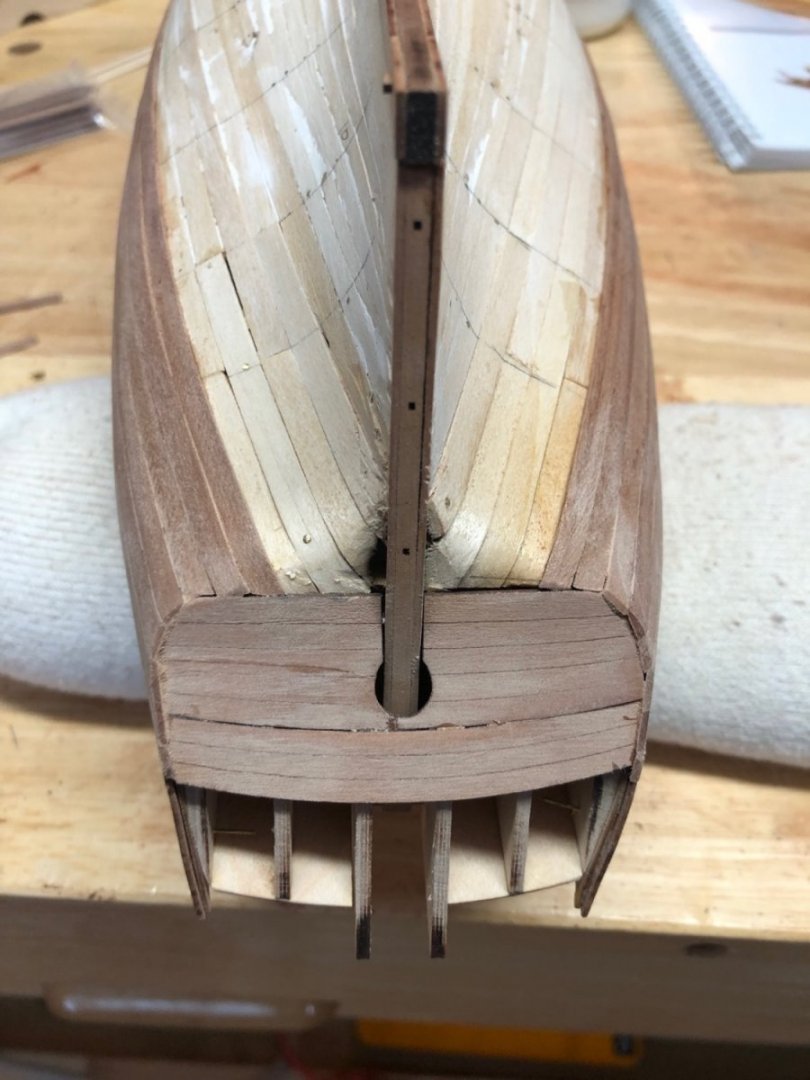
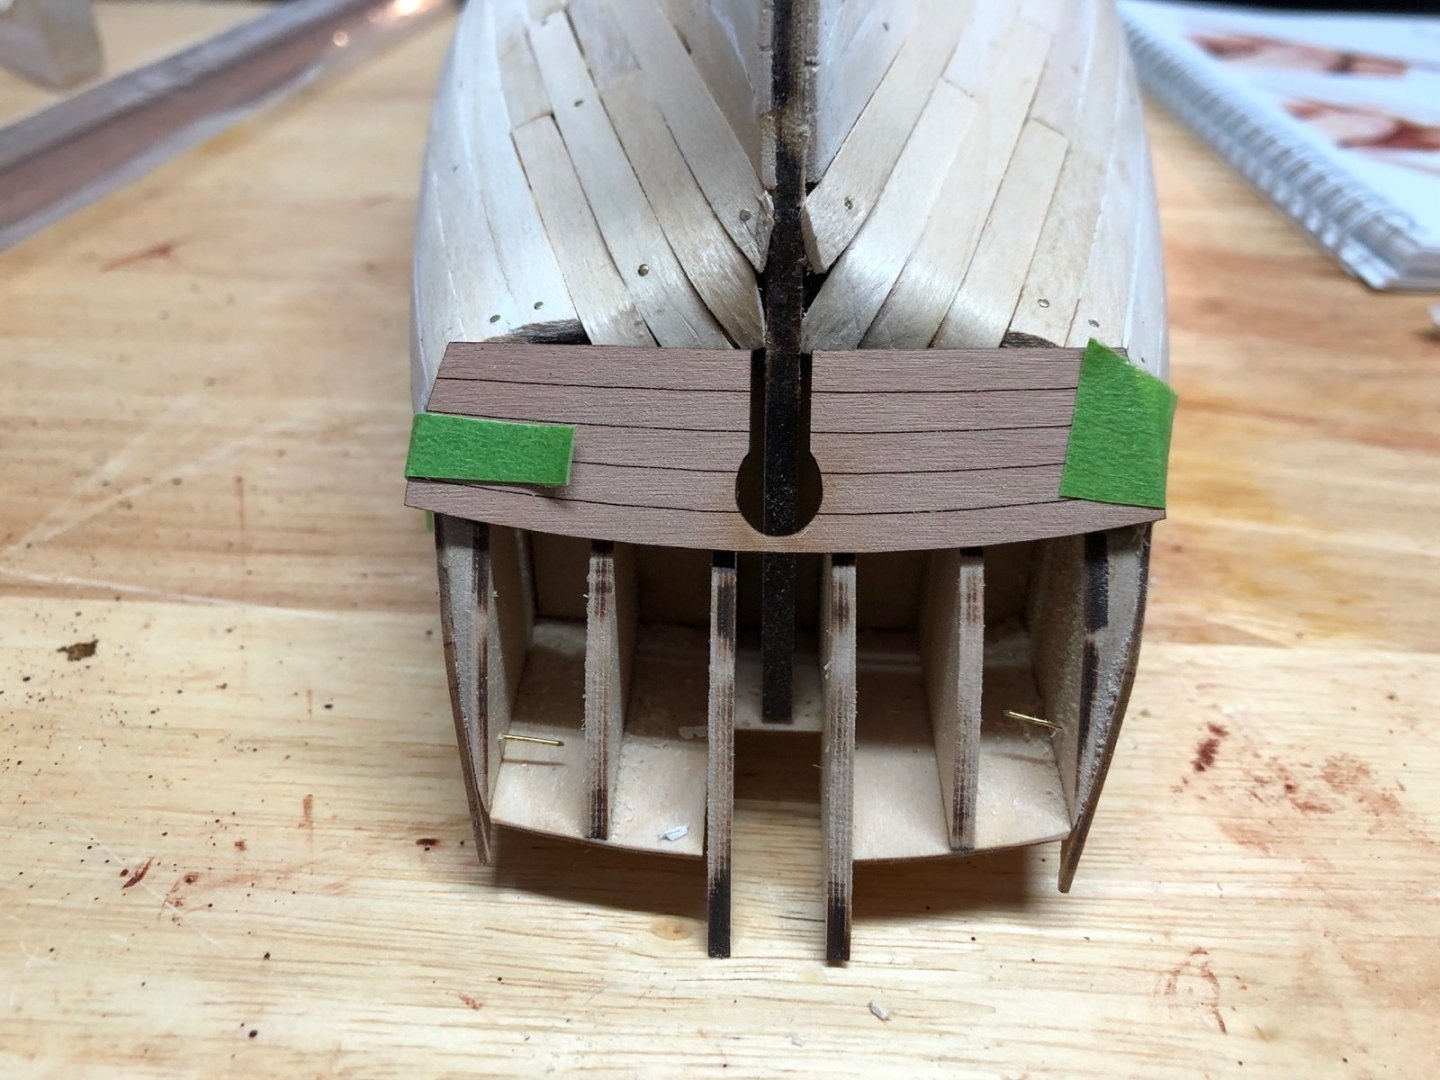
I am happy to report that the patient has had a full recovery. I had pre-bent all of the planks I needed yesterday so today I was able to trim them and glue them in place. I used medium CA for this so that let me do all the planks in a few hours. Here is how the stern ends of the planks now look. If you look carefully you can see that there is a horizontal frame just under the plank ends that the planks need to cover vertically. Keep that in mind if you build this model in the future. And here is the counter piece just taped across the stern. I have not bent it to fit the frames yet. You can see that I could have extended one more plank on each side, but I'll just use some wood filler in those holes since this is just the first planking. I think the bottom of the counter piece stands proud of the plank ends and acts as a rabbet for the second planking.

- 118 replies
-
- 7
-
-
- Duchess Of Kingston
- Finished
- (and 1 more)