usedtosail
-
Posts
2,421 -
Joined
-
Last visited
Content Type
Profiles
Forums
Gallery
Events
Everything posted by usedtosail
-
 I cut out some rough blanks for the chocks and used a disk sander to angle the sides of one of each size. The upper chocks fit pretty well into the grooves I cut in the whelps but the lower chocks are a lot thicker and the grooves were too small. I used the same file I used to cut them initially to expand them for the bigger chocks and they fit well now. I then glued the whelps to the barrel making sure they were straight. I will give them a good 24 hours to dry before I start fitting the whelps.
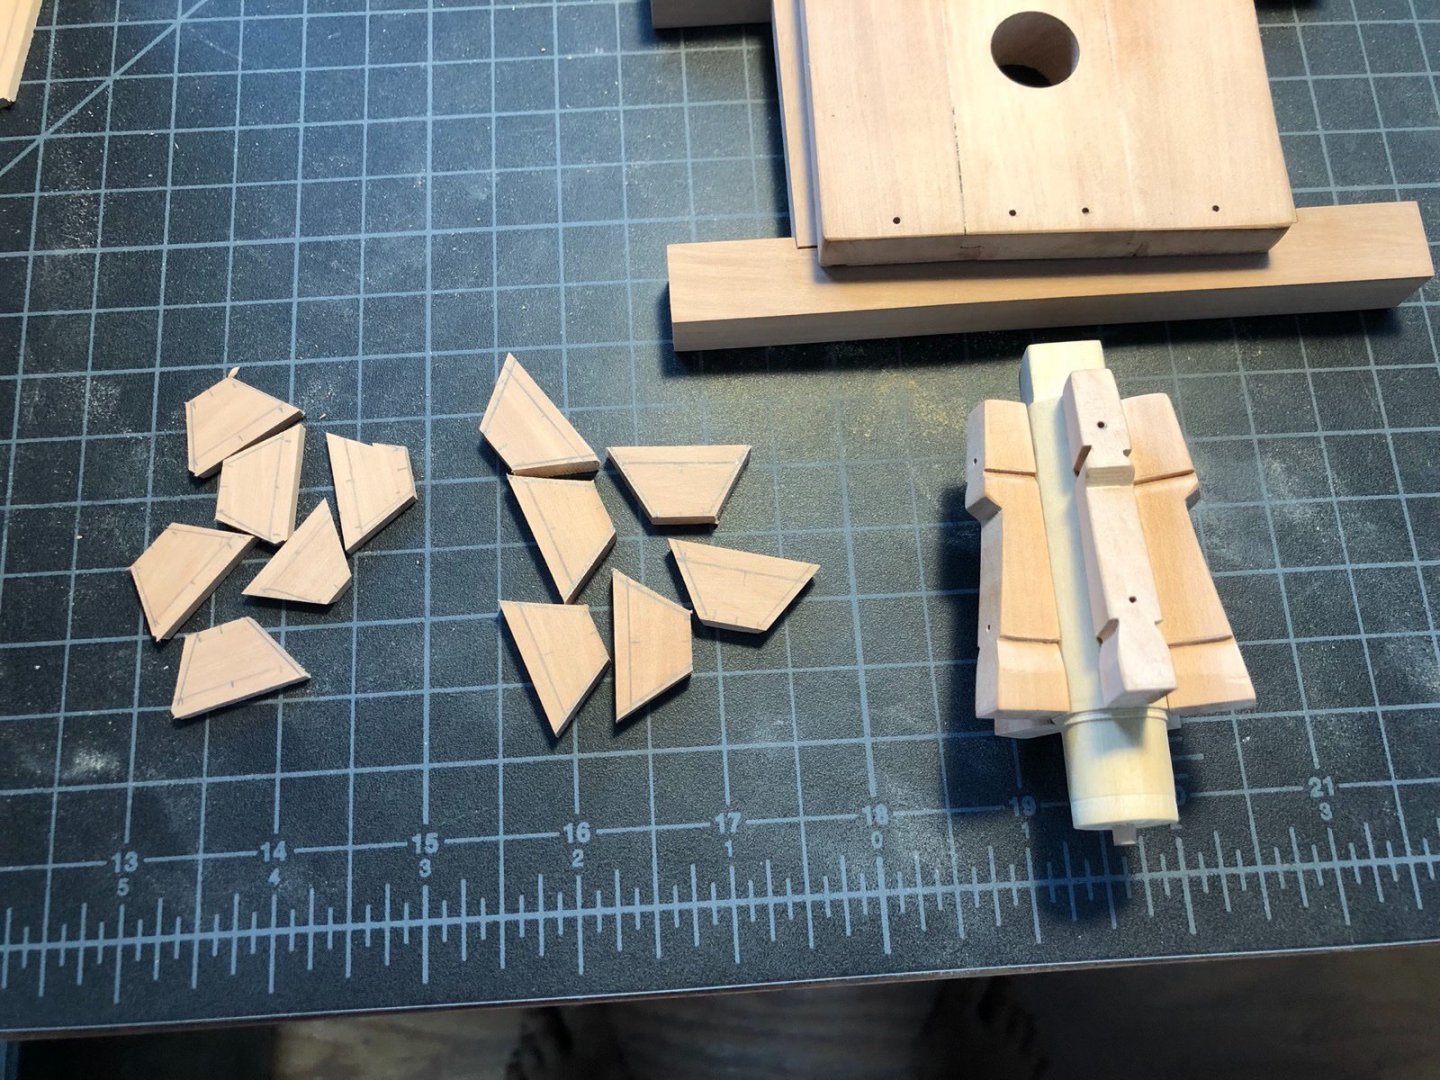
-
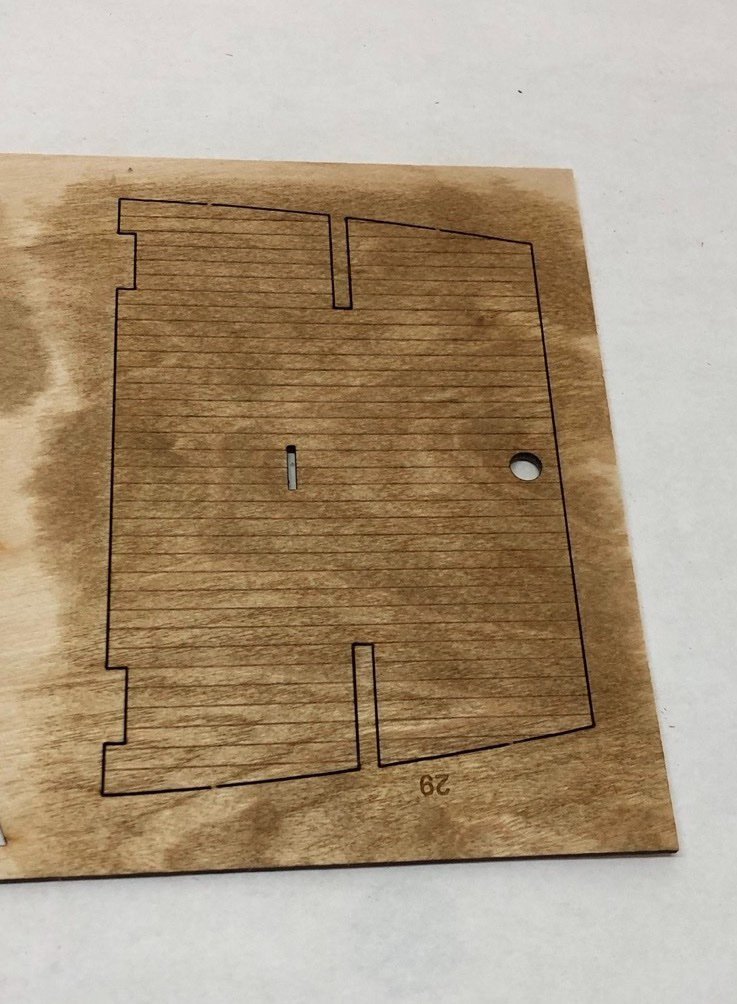
Here is the first progress post. I am just about finished putting the frame together and had no real difficulties at all. Everything fit very well together and nothing got broken. The MDF is really easy to work with and all the parts came off the laser cut sheets with very little effort. The next step is to add the lower deck but before I add it I cleaned it up by sanding it to remove some char, which did not affect the laser etching at all. I then gave it a coat of Golden Oak stain and a coat of wipe on poly, so it is now ready to install.
- 118 replies
-
- 7
-

-
- Duchess Of Kingston
- Finished
- (and 1 more)
-
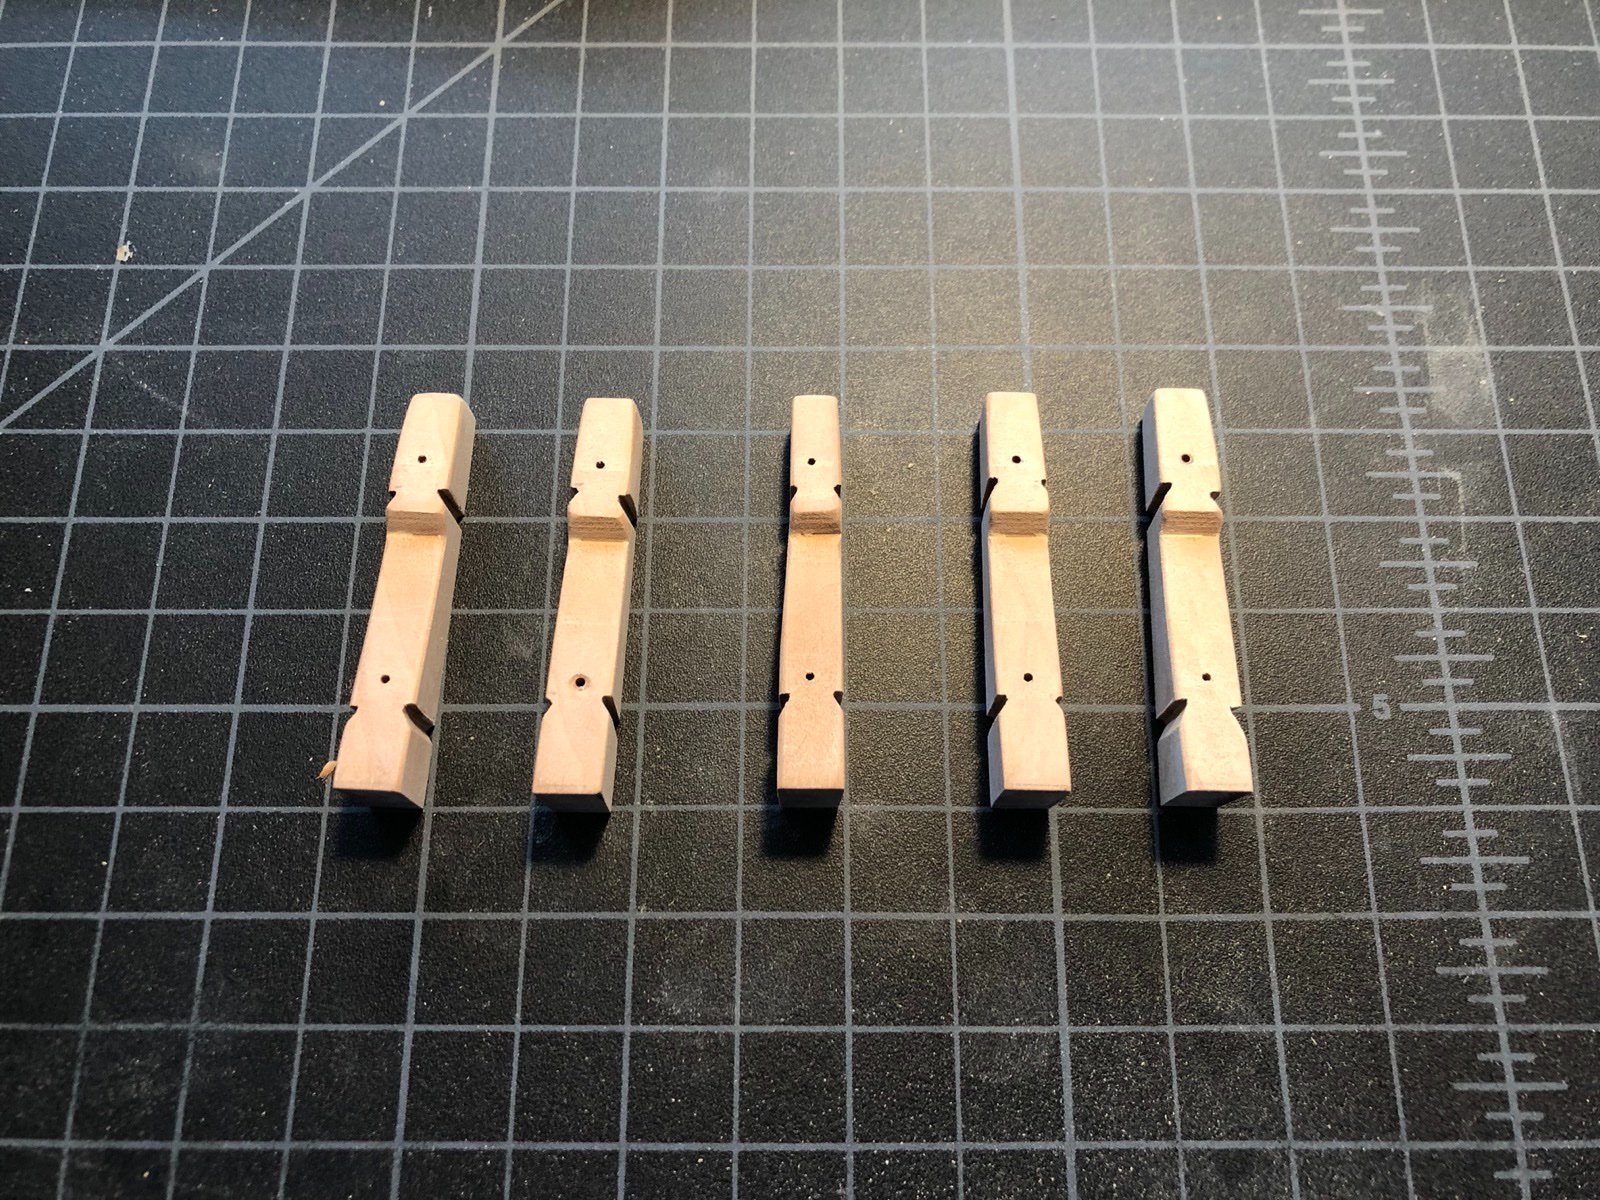
I drilled the bolt holes in the whelps then sanded the two tapers on each one. For the long taper (top to bottom) I used a disk sander and for the short taper (front to back) I used an angled sanding block. I then marked the grooves for the chocks and cut them with a triangular file, with one face of the file vertical. I first scored the location of the vertical face with an X-Acto knife to guide the file at the start. I cleaned up the inside with a small flat file. I rounded all the exposed edges and cleaned up the faces with sandpaper. Next up are the chocks.

-
I am joining the other Duchess build logs as I get started on this kit. I had ordered it a few months ago and I am finally ready to start it. I am currently building the frame but I won't go into detail here as it is very straight forward and many other build logs have gone through the process. I will add more content when I start planking or earlier if I run into problems.
- 118 replies
-
- 3
-
-
- Duchess Of Kingston
- Finished
- (and 1 more)
-
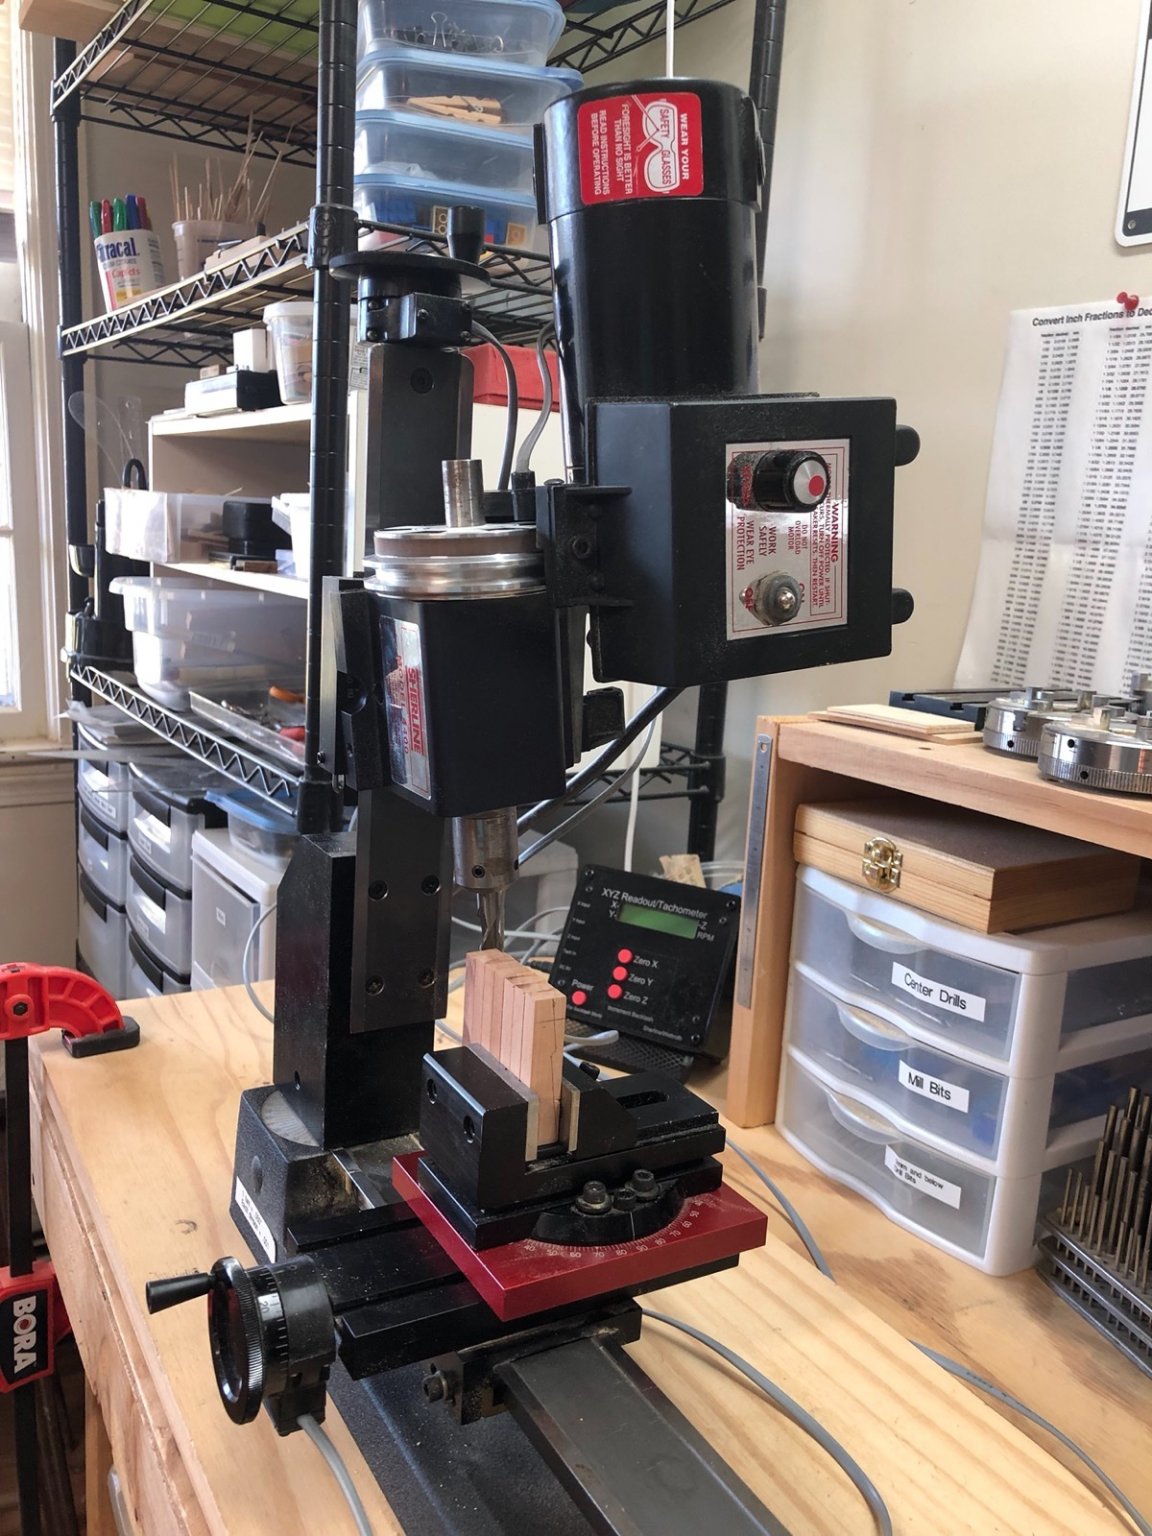
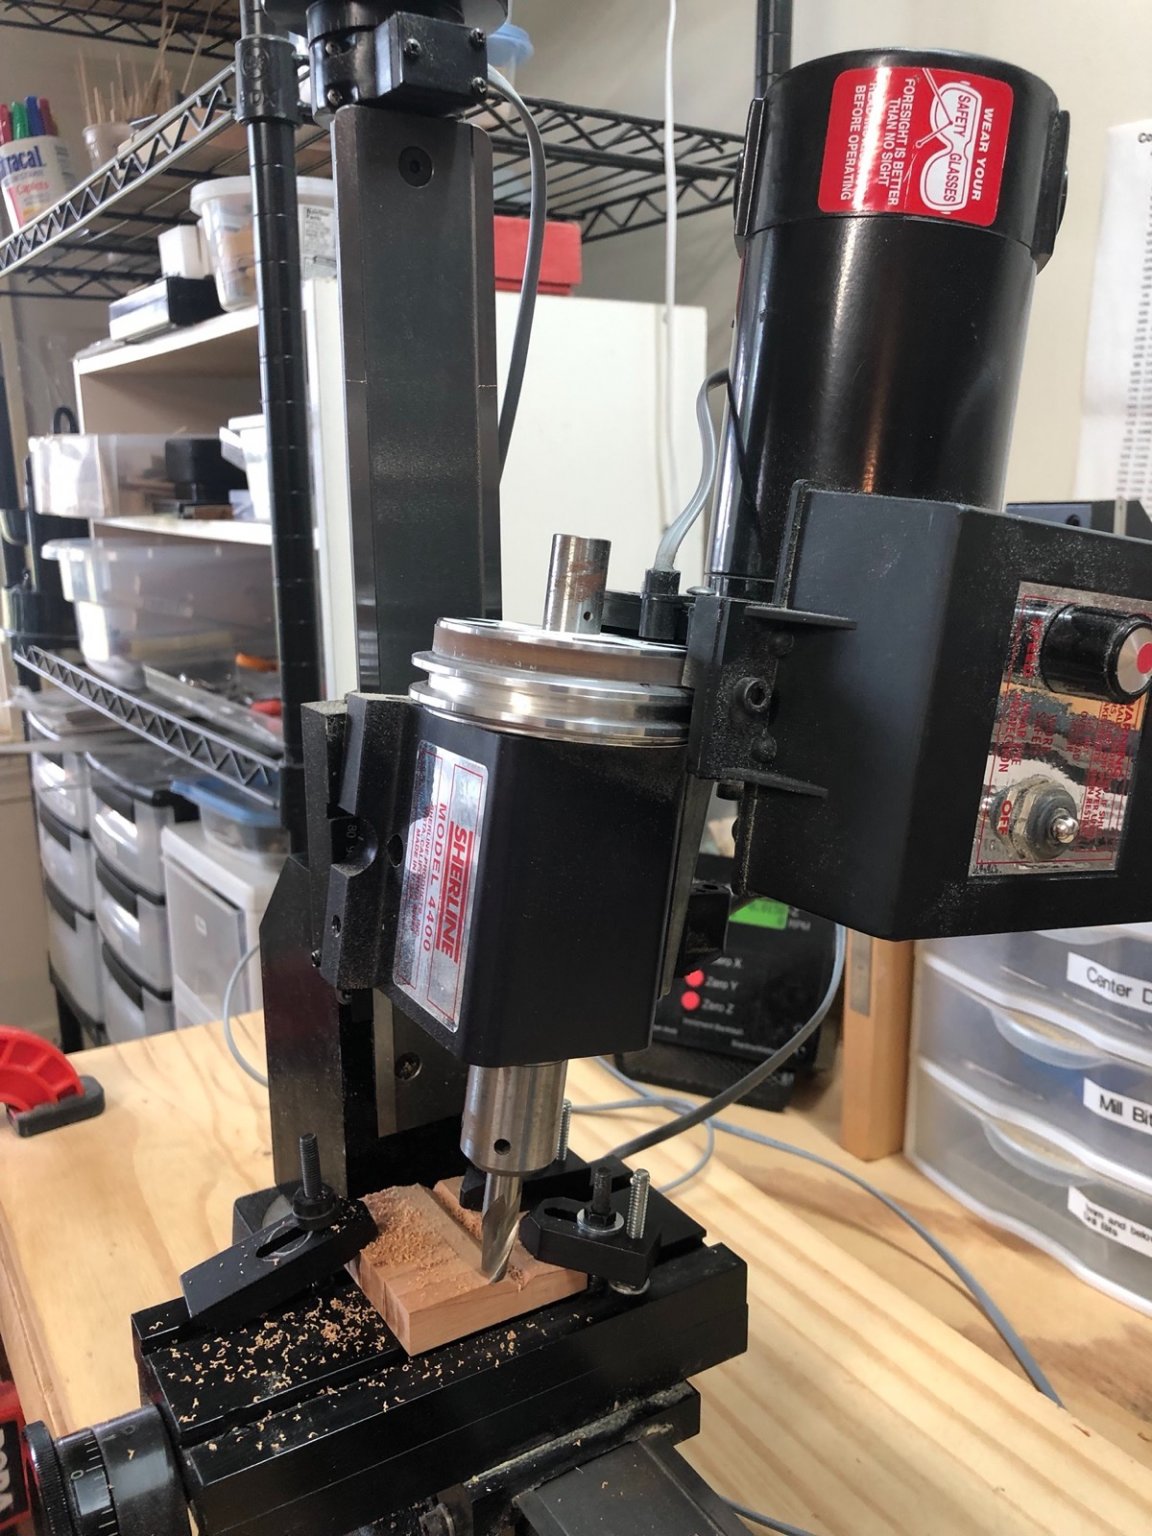
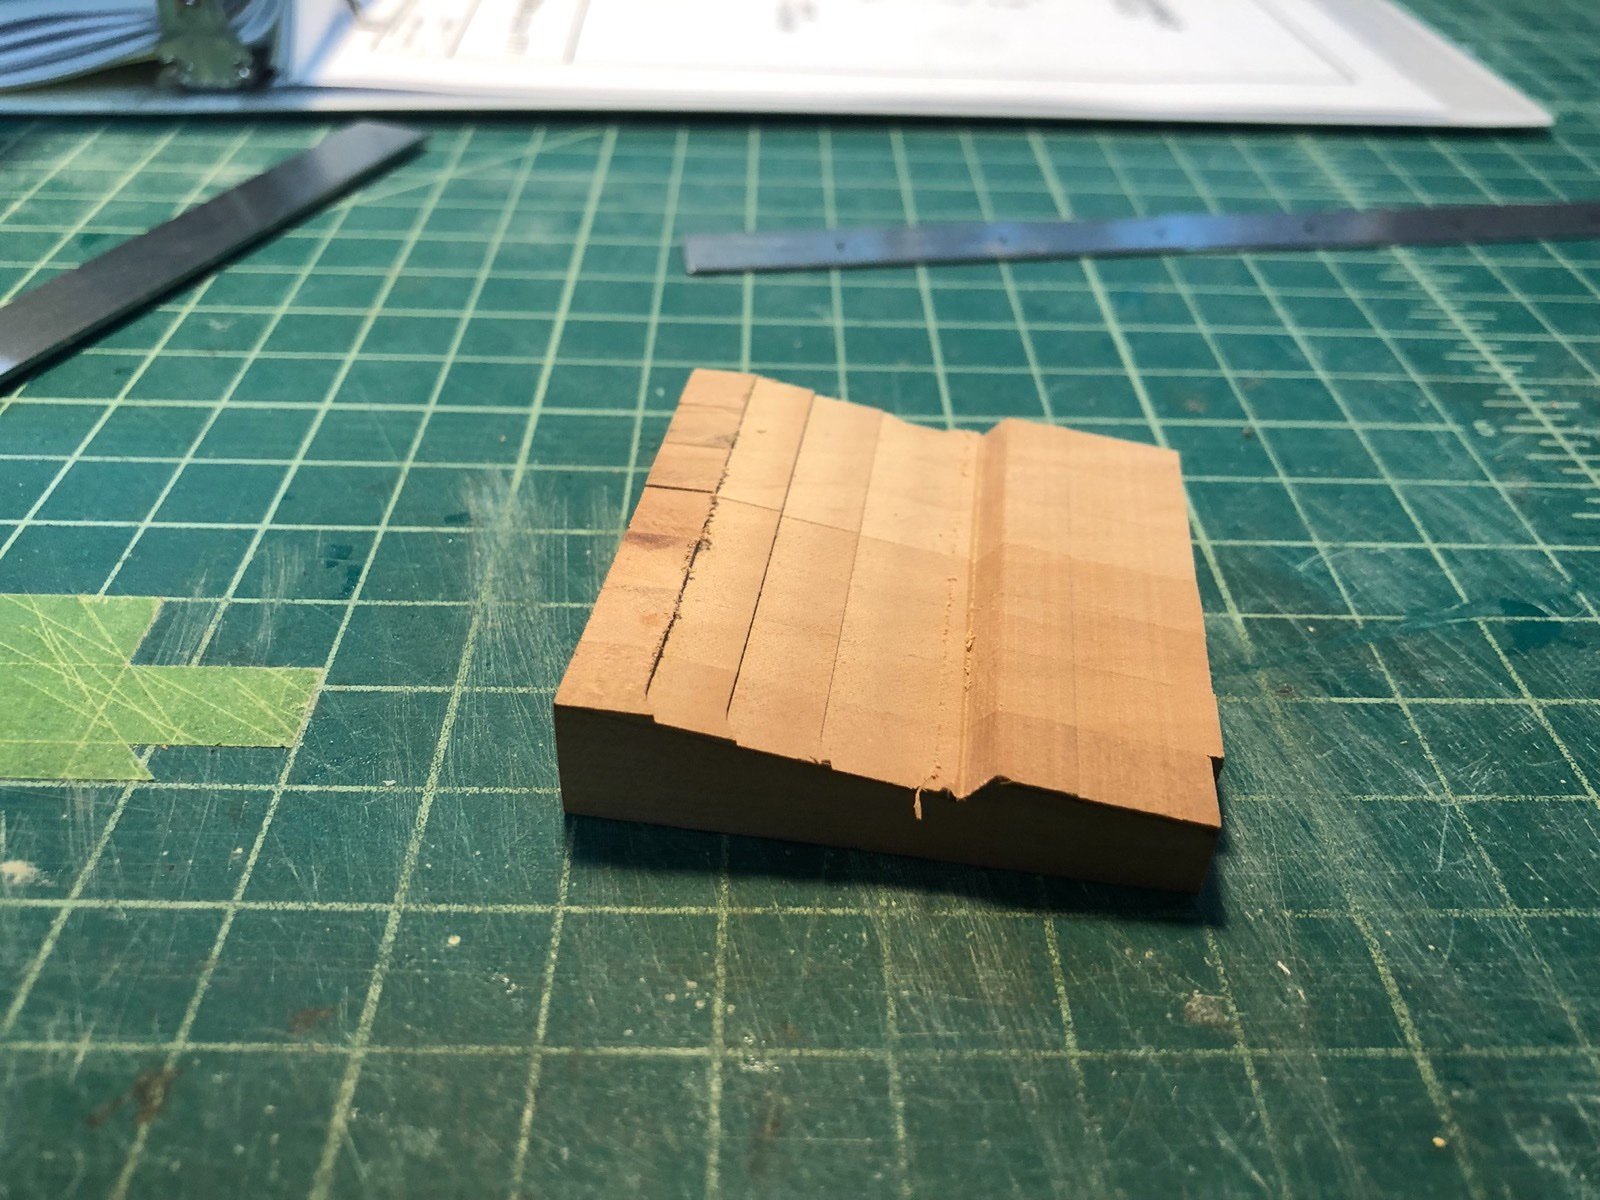
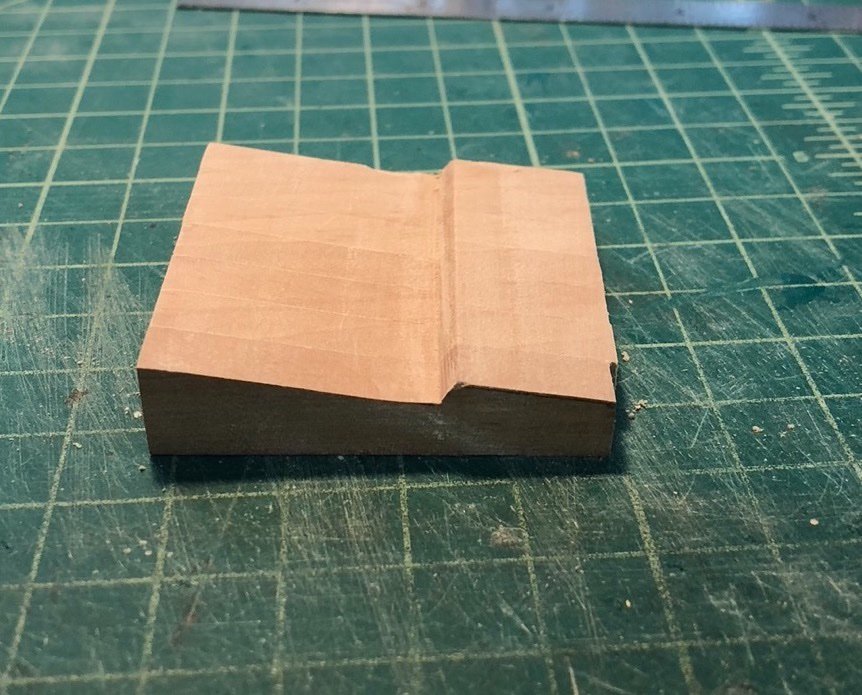
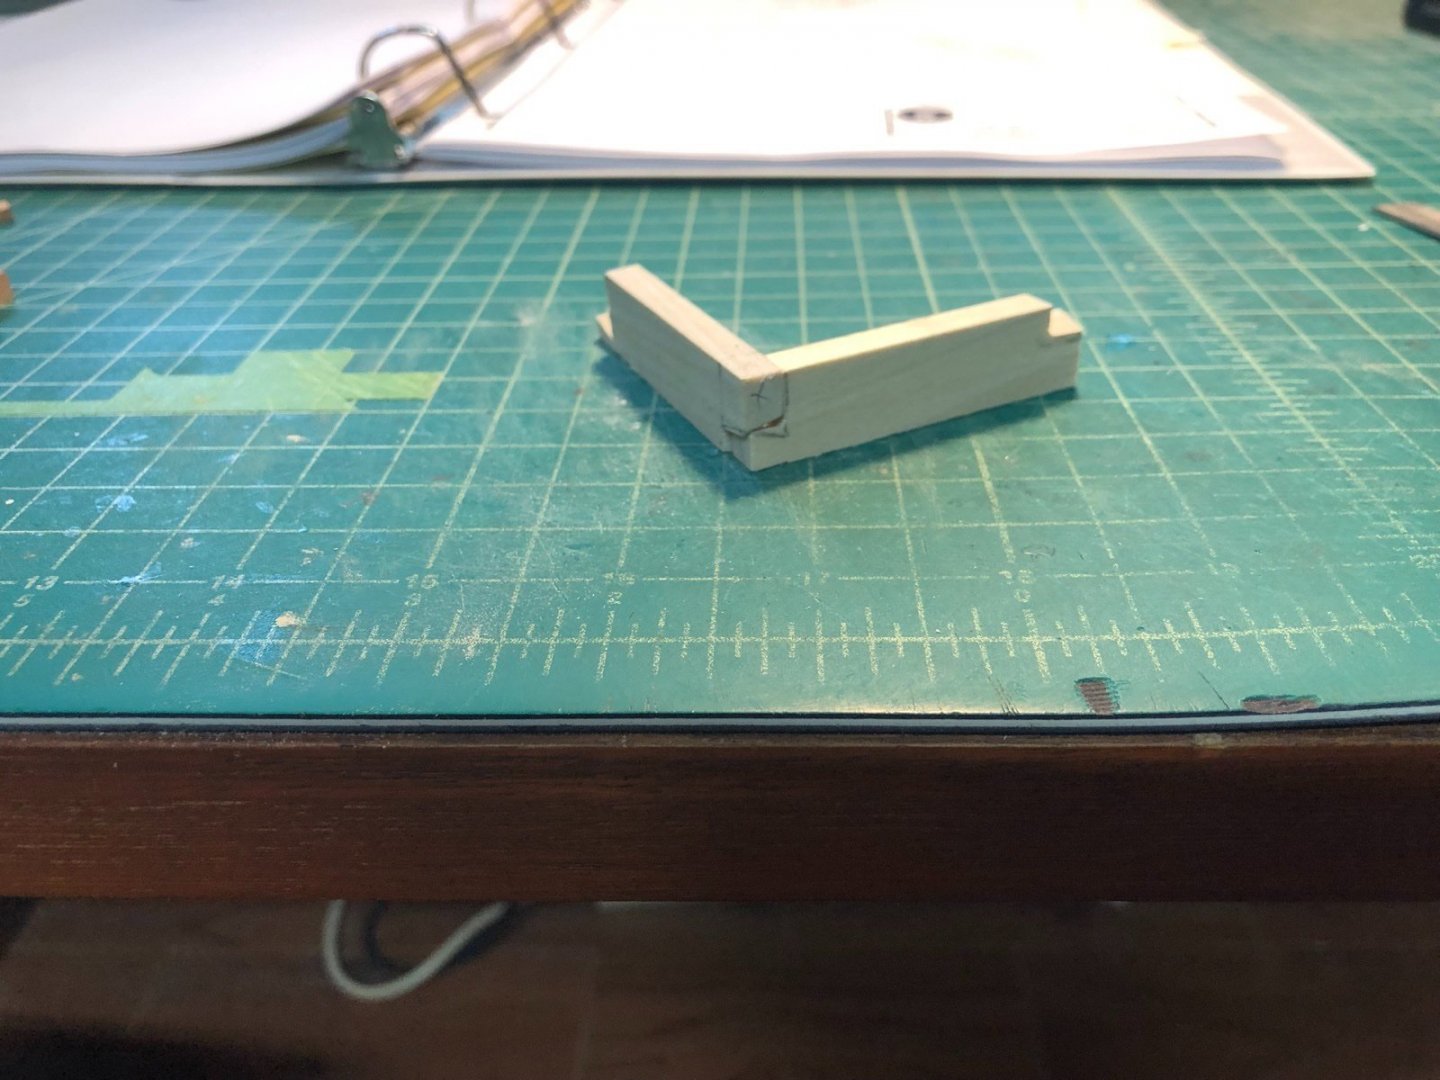
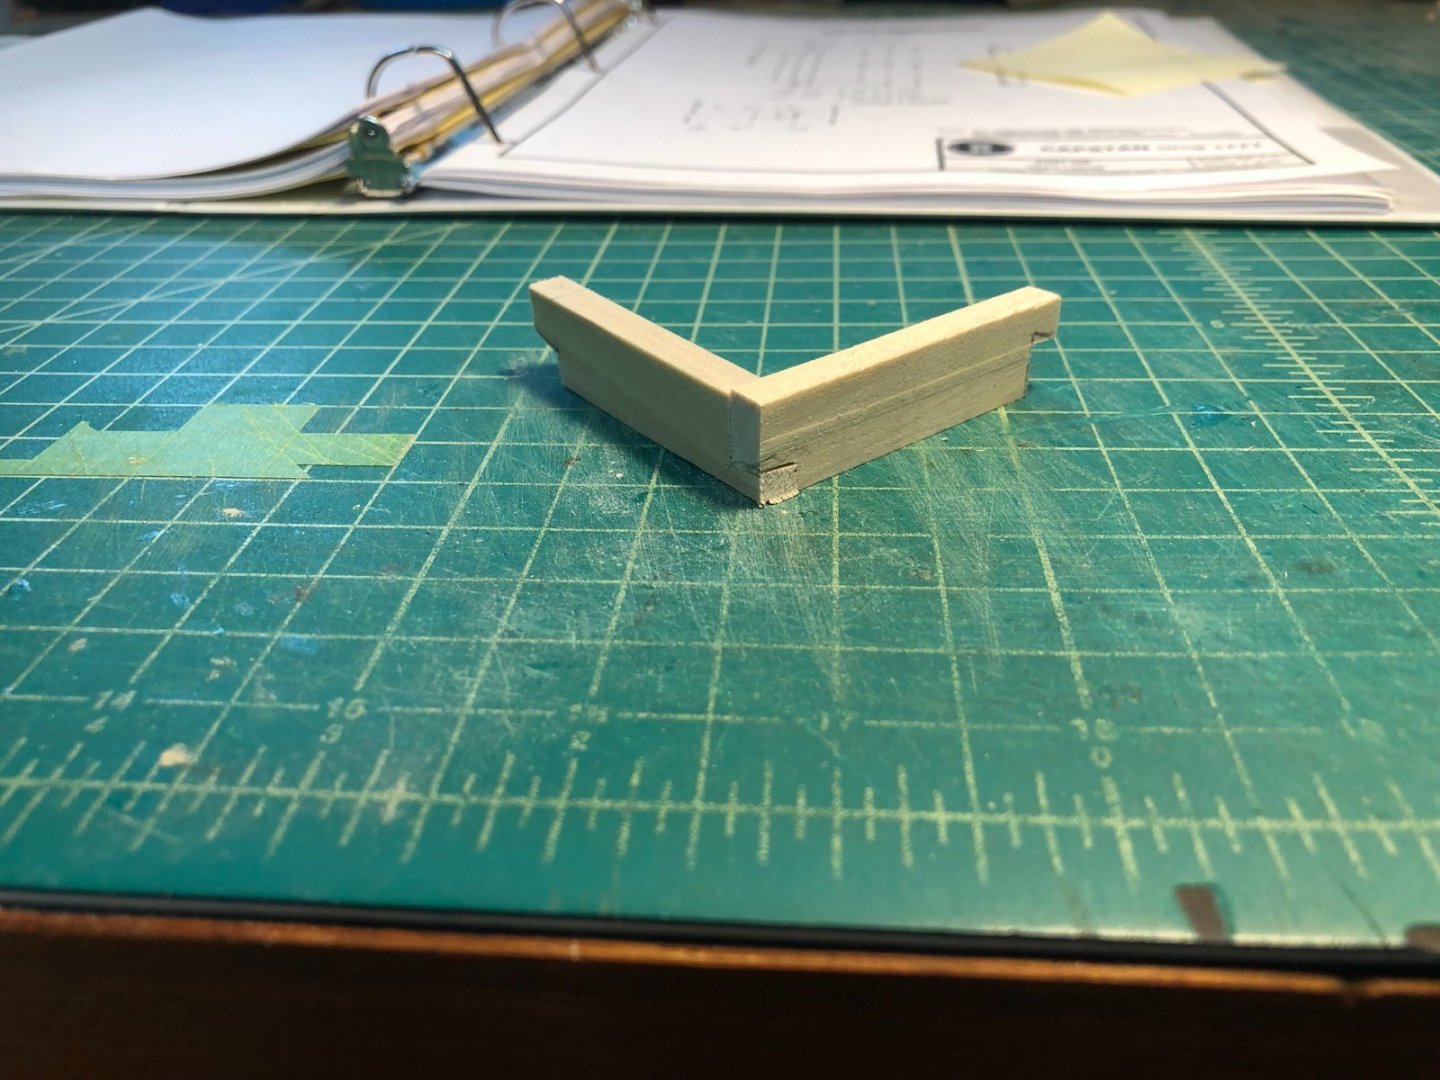
I cut blanks for the whelps with a few extras from one of the pear sheets I cut at the beginning of this project, then glued them together with a few spots of wood glue on each one. After the blank dried I put it in the mill vise and set up the mill to cut the three faces. As per the instructions, I milled the top face first, then the small face in the middle. For the third face the blank was too big to fit in the vise, so I clamped it to the cross slide table instead and then milled most of the face. Here is how the blank looked when I removed it from the mill. And here is how it turned out after cleaning up the faces with some files. I soaked the blank in isopropyl alcohol and separated the individual whelps. I still have a bunch of work for the various tapers on the whelps which will be next.


-
Thanks for the info Alex. This piece will be hidden under the base so not seen.
-
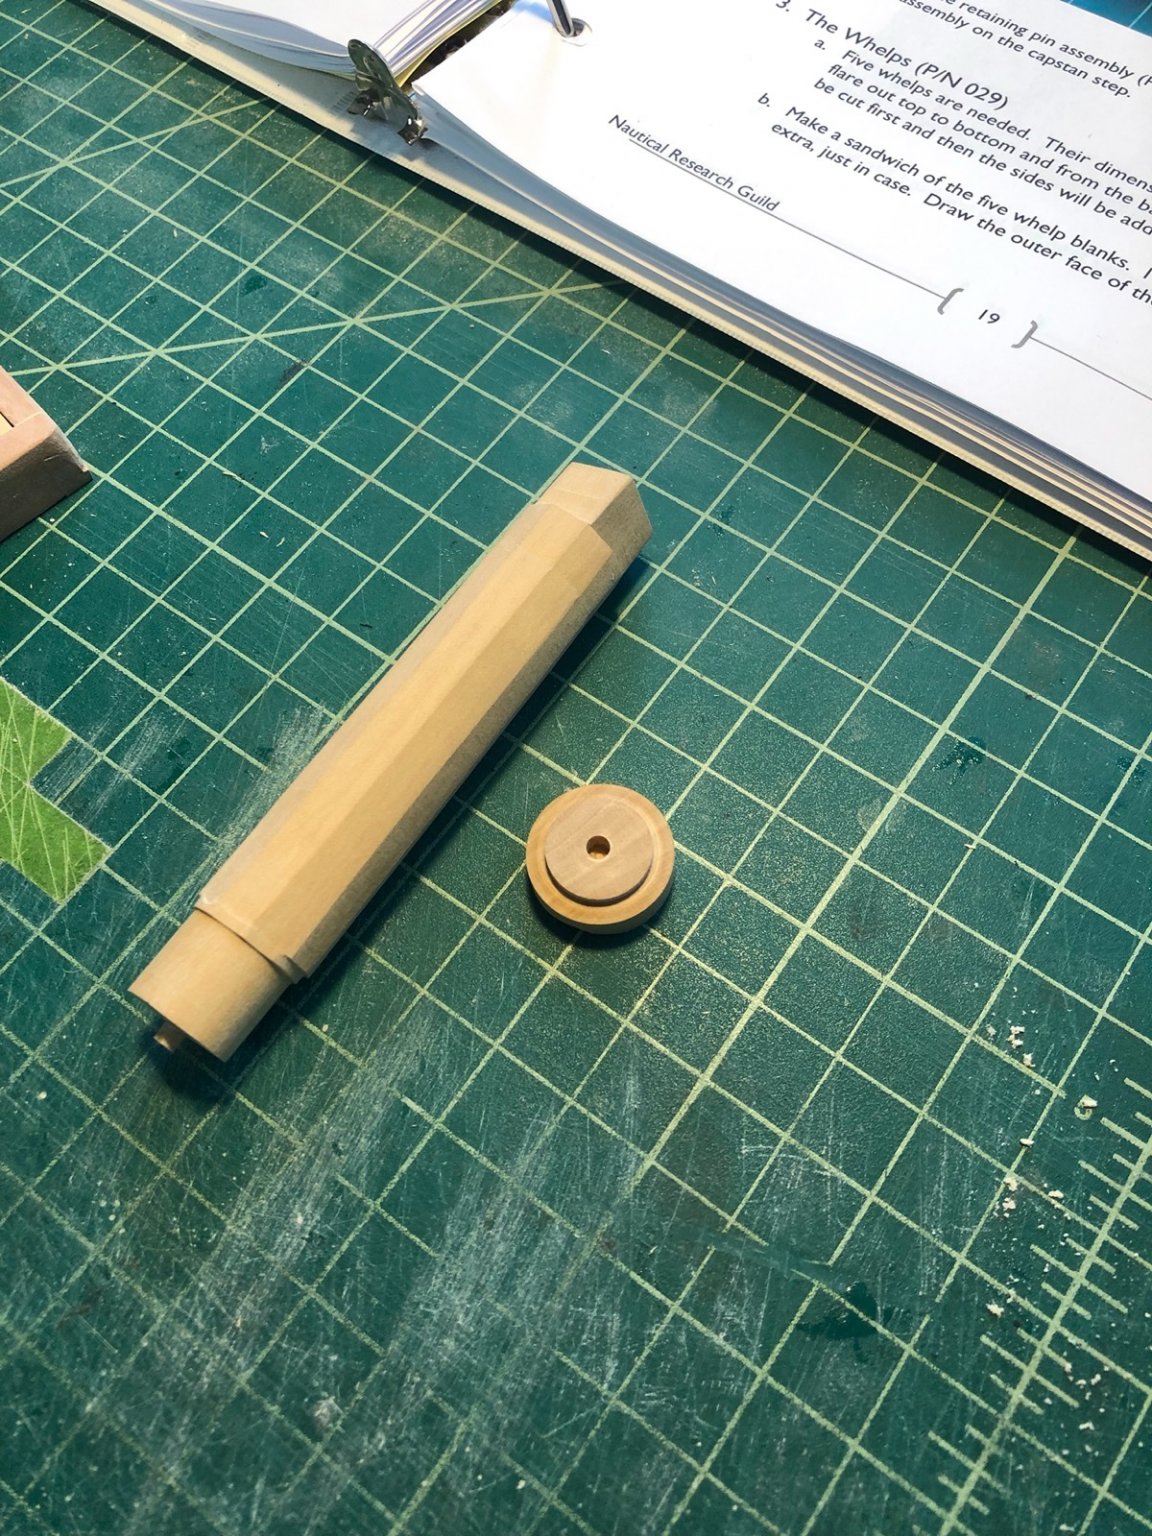
Thanks Toni. While starting to make the whelps I realized I made the flat section of the barrel too long. So I chucked it back into the lathe and turned a new gasket and bottom section. This time I had enough length to make the bottom section the same length as the depth of the hole in the base. I cut the barrel to the correct length and redrilled the hole in the bottom for the retaining pin. I also put the pin base back in the lathe and cut off the inset portion I had added to it as it was no longer needed. It all fit together nicely and now the whelps will fit correctly to the flats. This scratch build stuff is challenging!
-
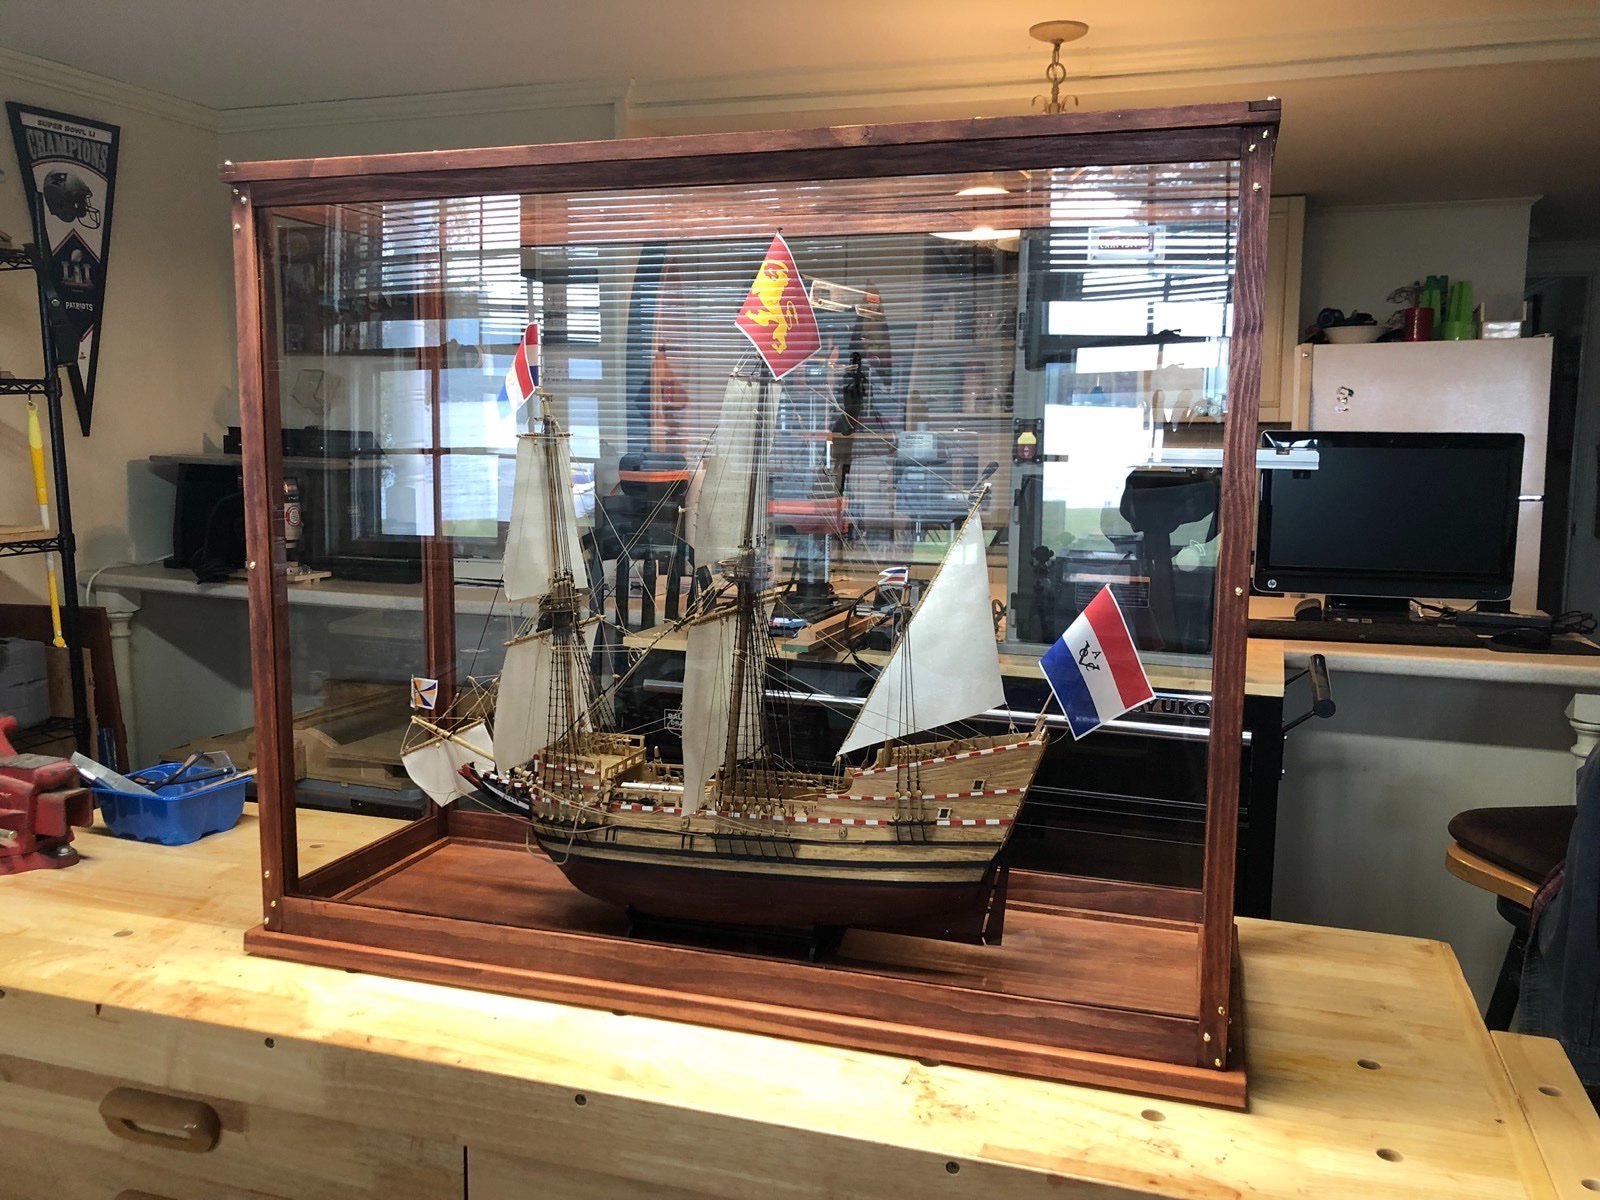
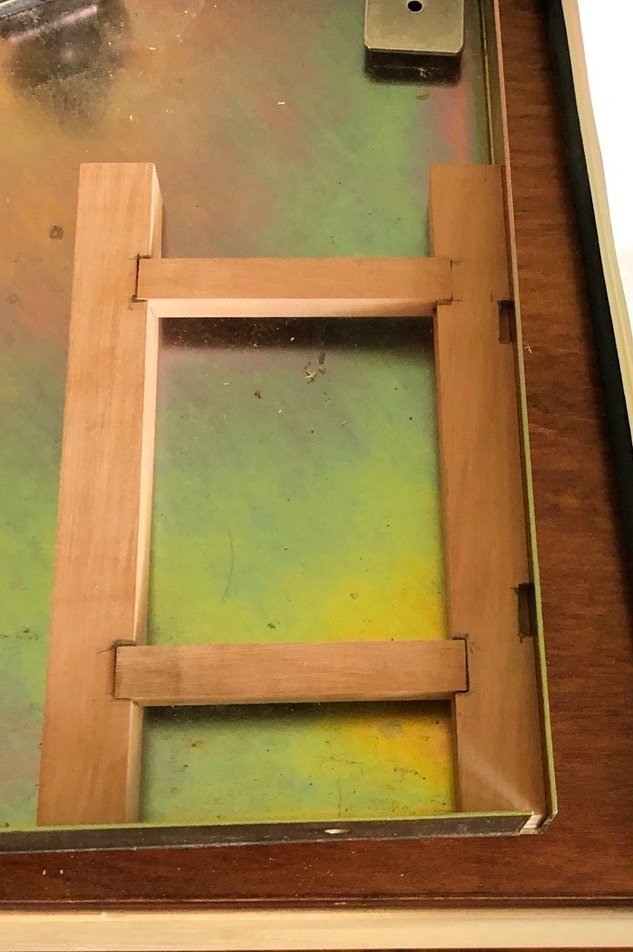
One last post showing the ship in the case I made for it. Now to deliver it to my friend Dennis who graciously accepted to display it at his new home.

- 135 replies
-
- 3
-

-
-
- billing boats
- half moon
- (and 1 more)
-
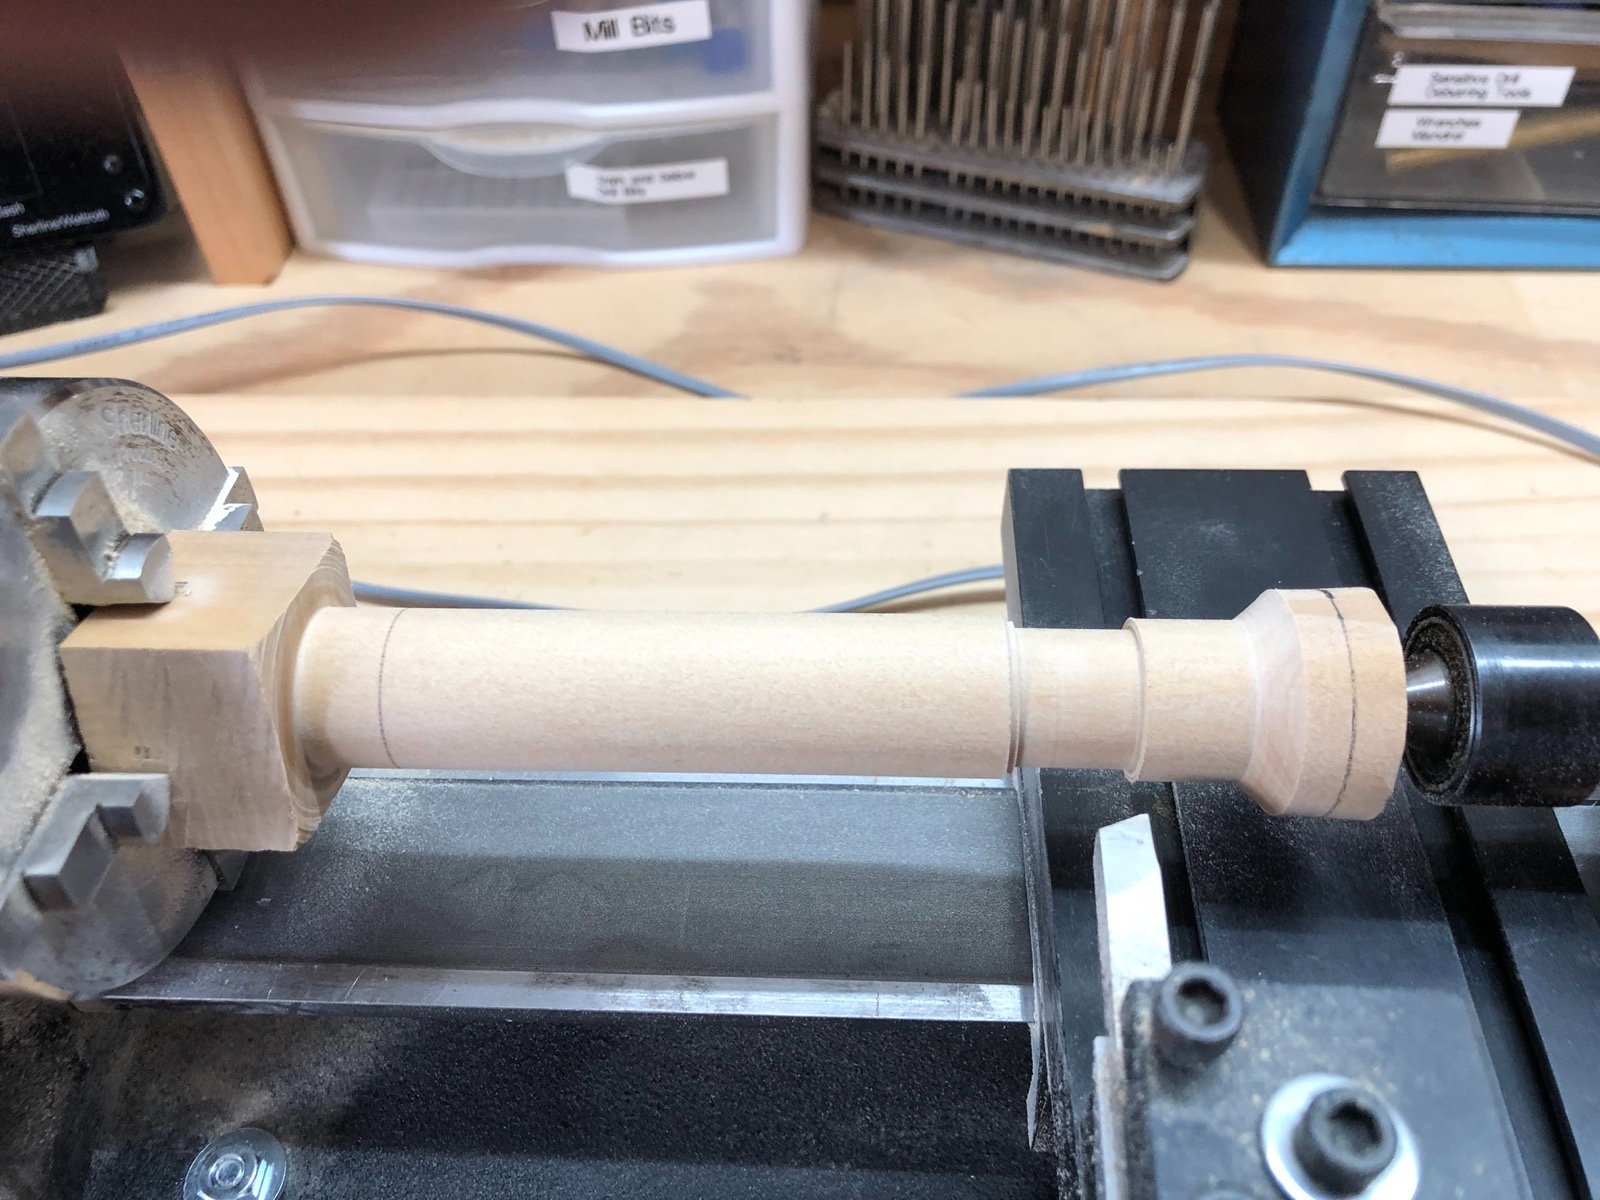
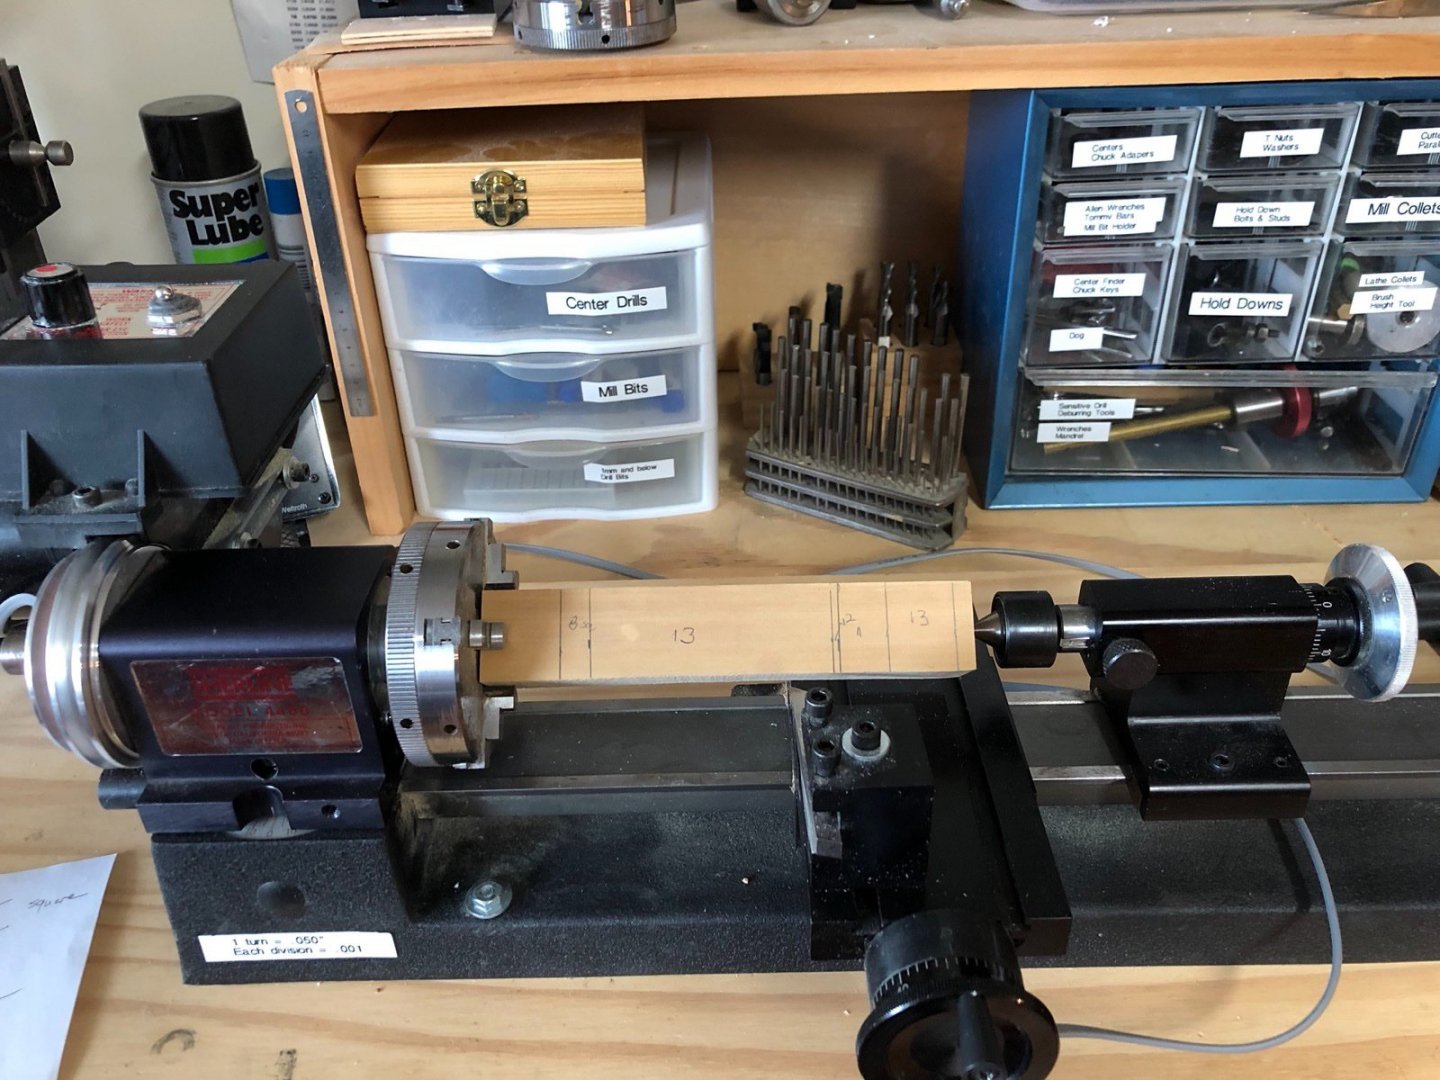
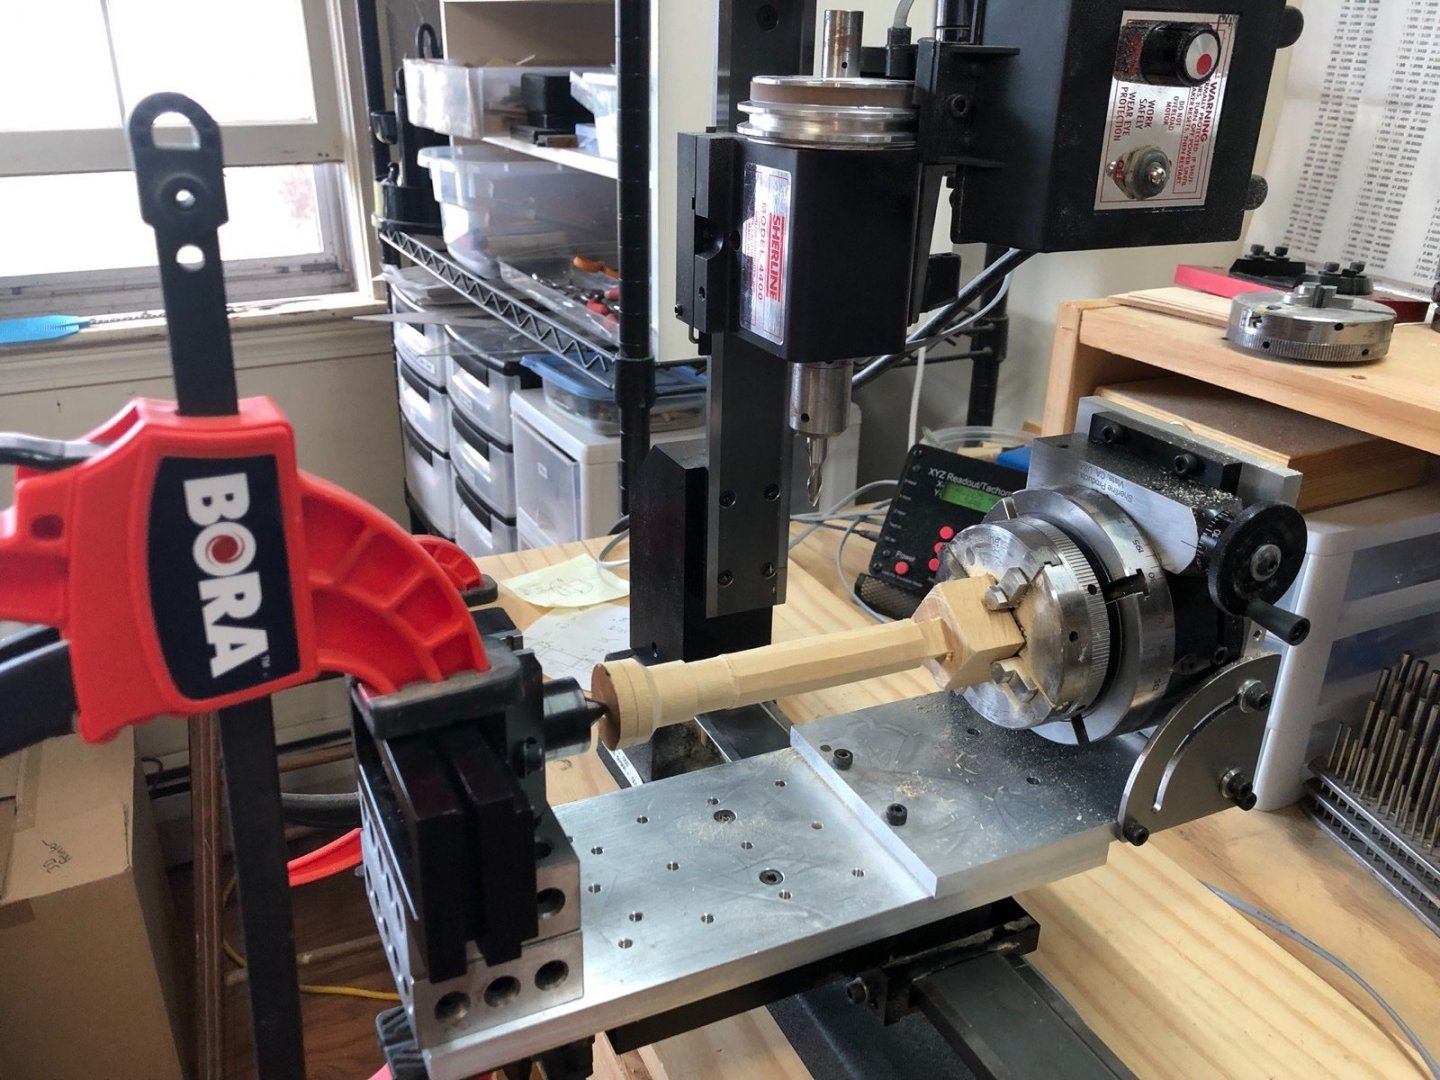
Thank you Toni. I had cut stock in pear for the whelps at the beginning of the project so I will go with that. I spent yesterday and today making the capstan barrel and retaining cap, using the lathe and mill method described in the instructions. I measured the various sections onto the boxwood blank and chucked it into the lathe with a live center on the end. I then rounded the whole length to 13" actual and cut the gasket and bottom sections an inch and 2" thinner. It was then time to move the chuck and the live center to the mill to mill the flat sections. Here is where it got interesting. I have the mill attachment for the Sherline lathe which has a pretty small cross slide. For this application I needed to mount the rotary table on the 90 degree stand on the cross slide with enough room on the other side to clamp the vise with the live center in it. I do have a second cross slide insert and a longer plate that I was able to use to get enough length on the cross slide but I had to mount the plate over the X crank which made turning the crank a bit difficult. There was just enough room so that I could mill the 3" of the 10 sided section without having to remount anything but it took a while to get there. The real problem I had was getting the blank to be parallel to the cross slide which I thought I had done but it was a little off. I was able to clean things up with some files after milling with the the blank still in the rotary table. I milled the top square without any problems. I cut the barrel and retaining pin off the blank and test fit the barrel into the base. I ended up putting the barrel back into the lathe to reduce the bottom slightly so the the barrel could fit and turn in the base. My bottom was a little too short so I made a new retaining pin with a lip that fits into the hole. A piece of 1/8" dowel fits between the barrel and the pin to hold them in place on the base. Next up is making the whelps.


-
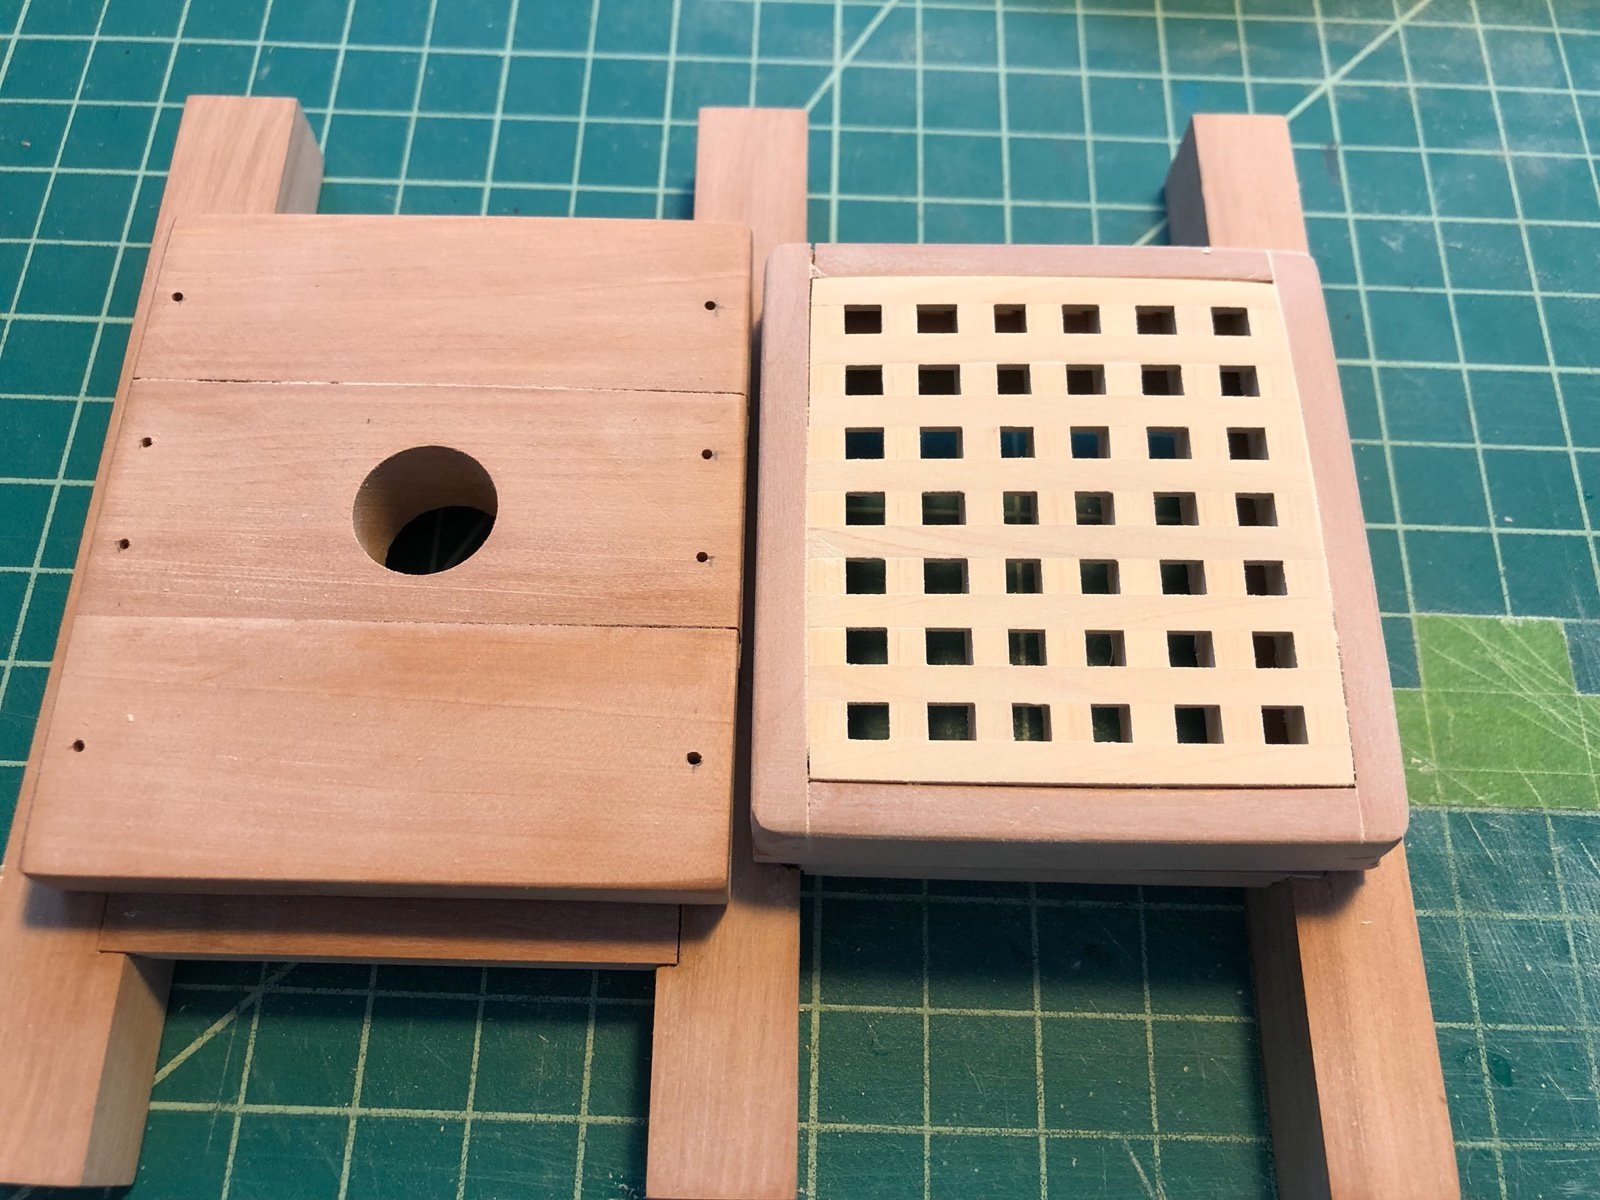
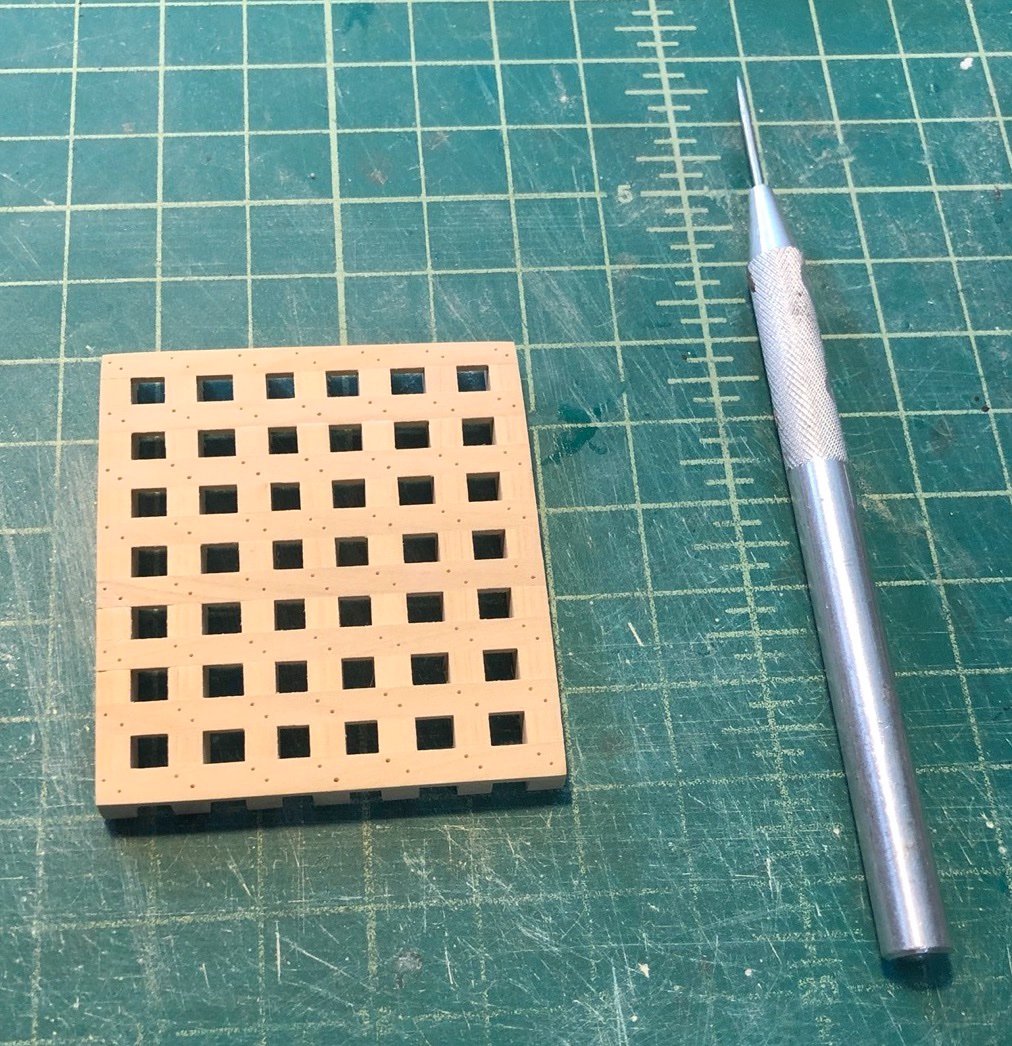
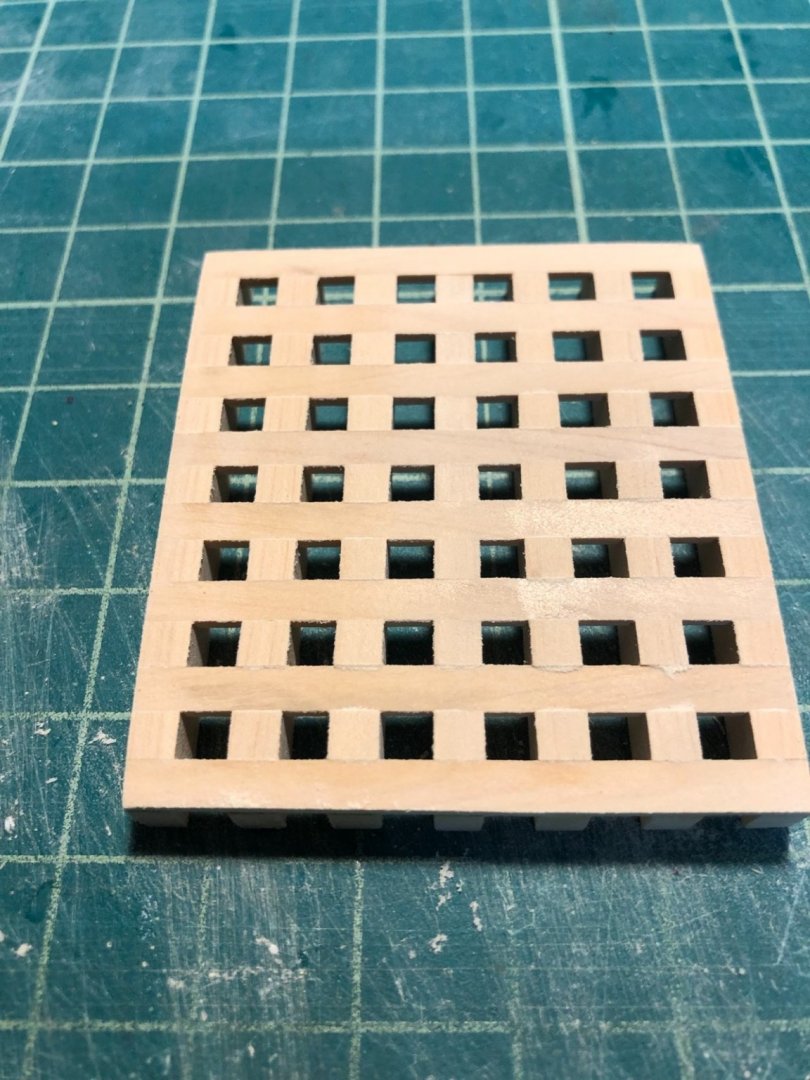
One more picture of the grating after I used an awl to make holes to simulate the fasteners. I did not fill the holes with a pencil as I wanted a more subtle look. Next is on to the capstan barrel. I have a blank of boxwood that I will cut down to use for it. I am not sure at this time if I will go with pear or boxwood for the welps but I have both that I can use. Any opinions?
-
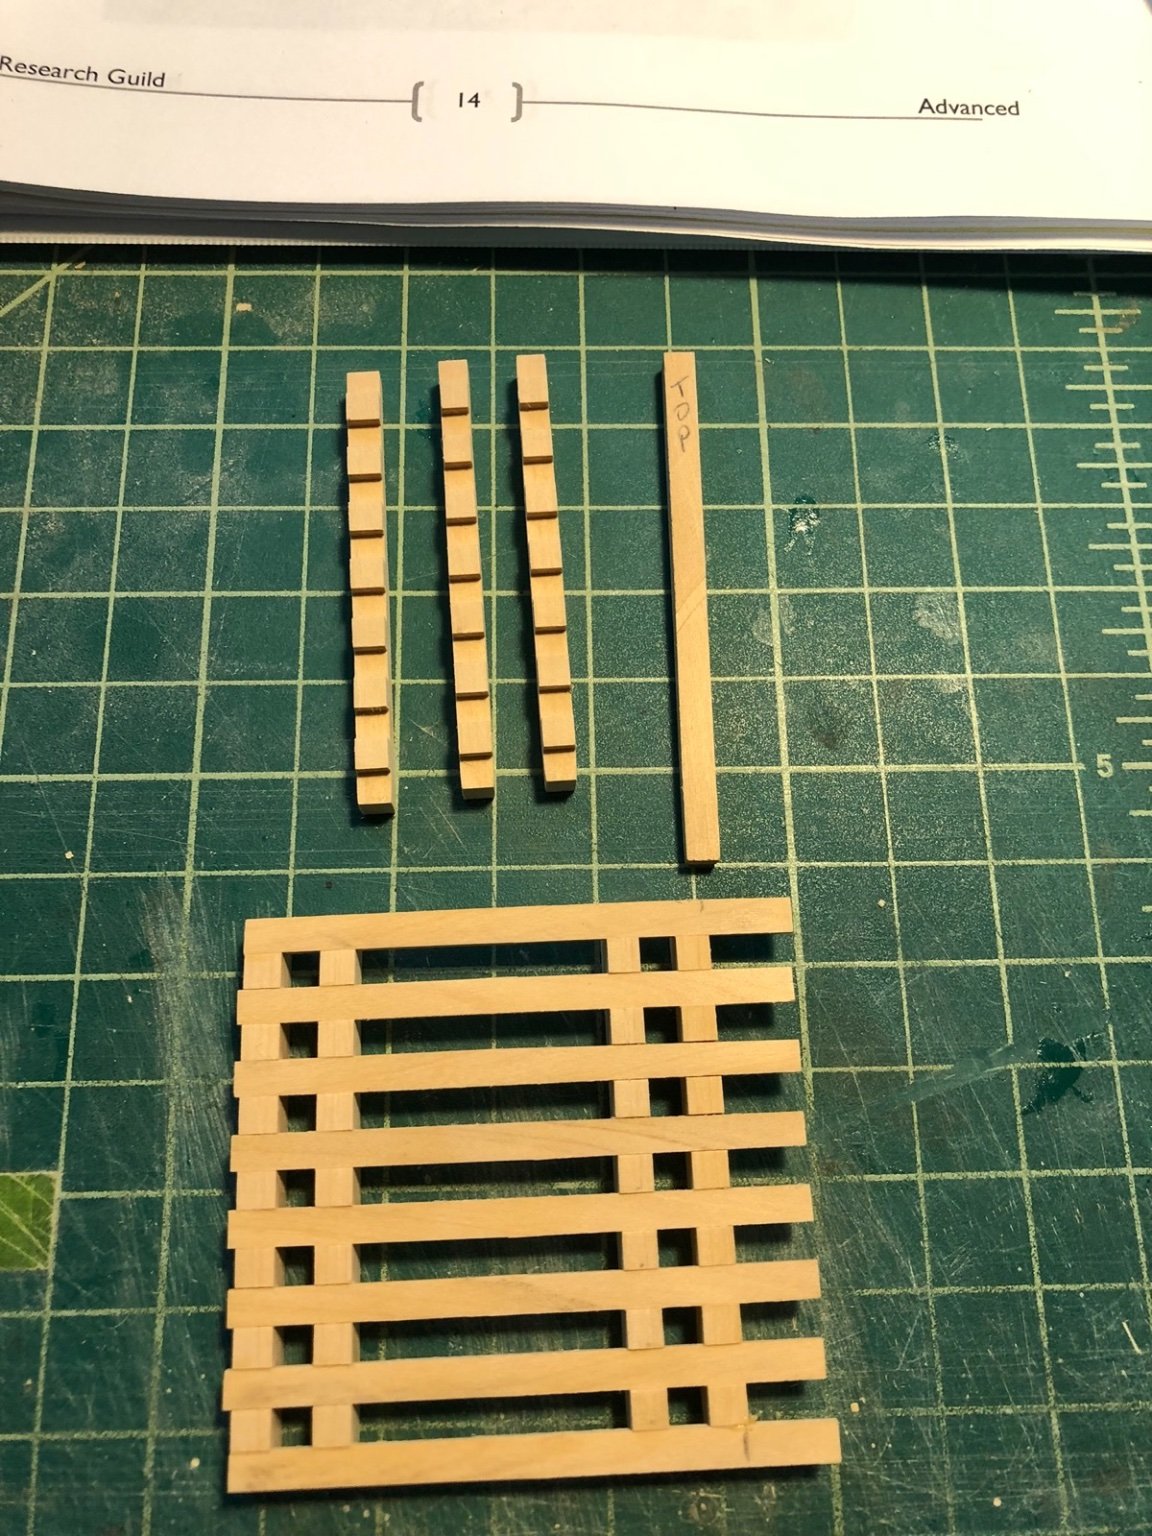
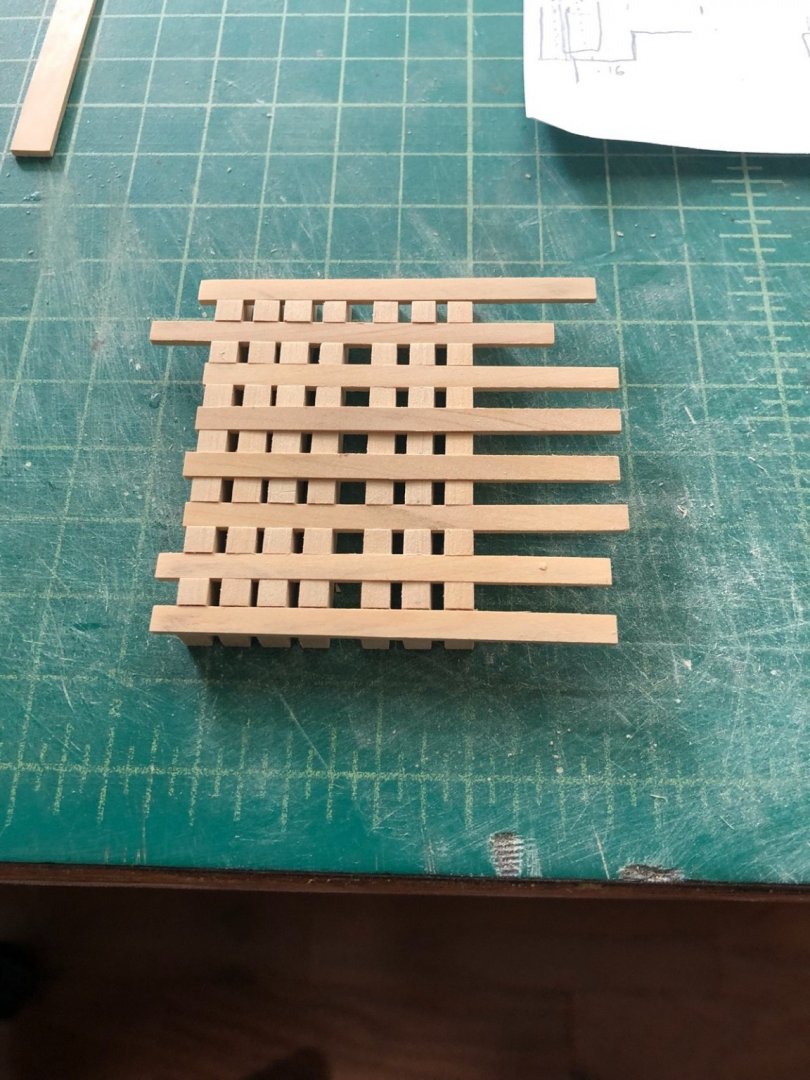
I created a spacer to space the ledges and glued the rest of the ledges to the battens. I trimmed the ends of the battens and sanded the battens down to the level of the ledges. I also sanded the sides of the grating to fit the coaming. I then sanded down the bottoms of the ledges using the thickness sander and a sanding block to get the top of the grating level with the coaming. Here is everything so far dry fit together. I will next add the fasteners to the battens using the needle method in the instructions.


-
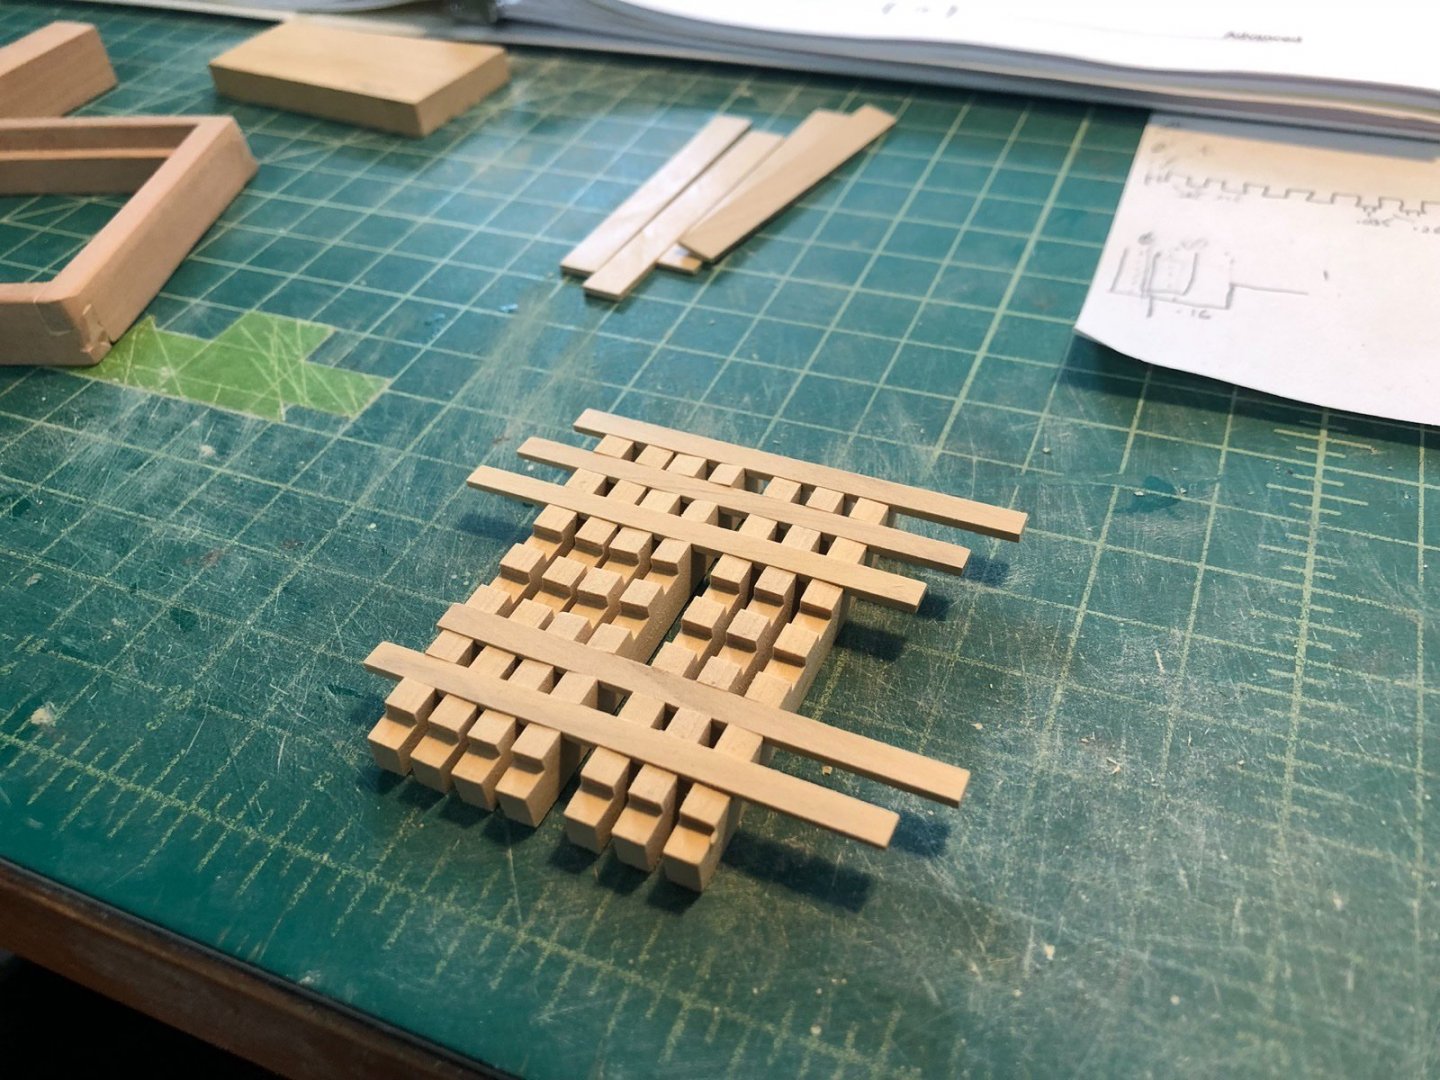
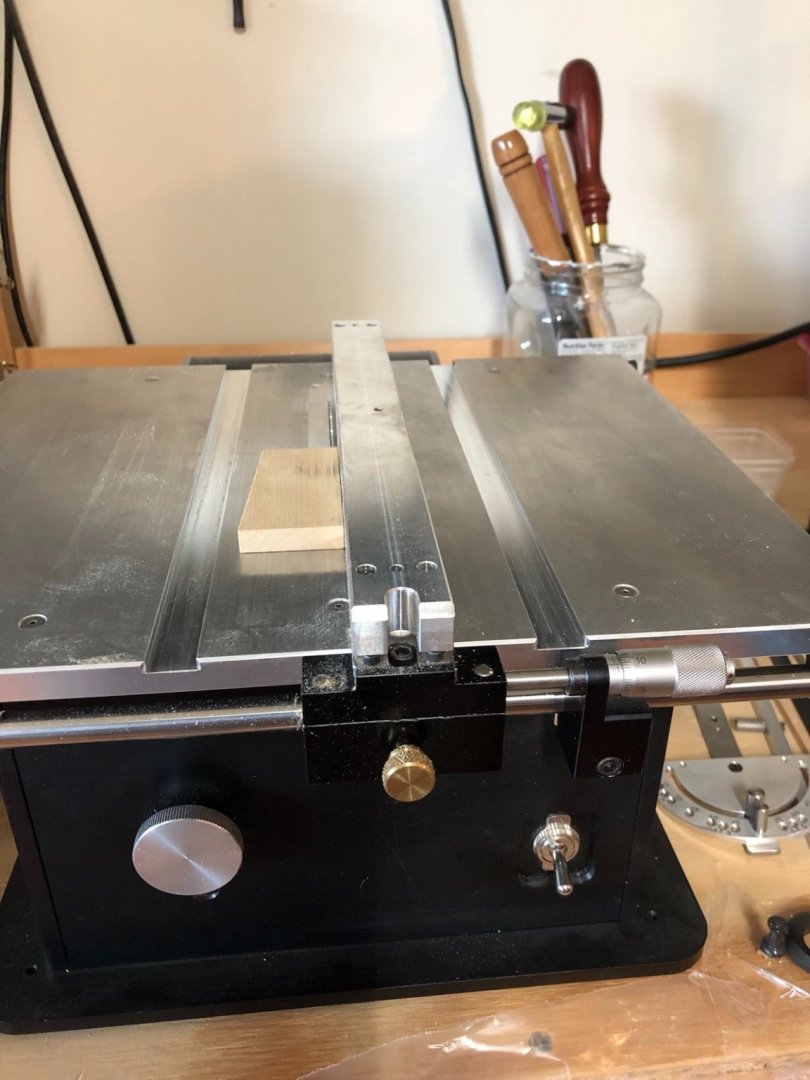
So this morning I cut and fit the battens to the slots in the ledges. I again used the micrometer on the table saw to adjust the fence to get a tight fit in the slots. The spacing of the ledges is not set yet but I wanted to make sure I could fit all the battens first. Next I can start assembling and gluing the grate.
-
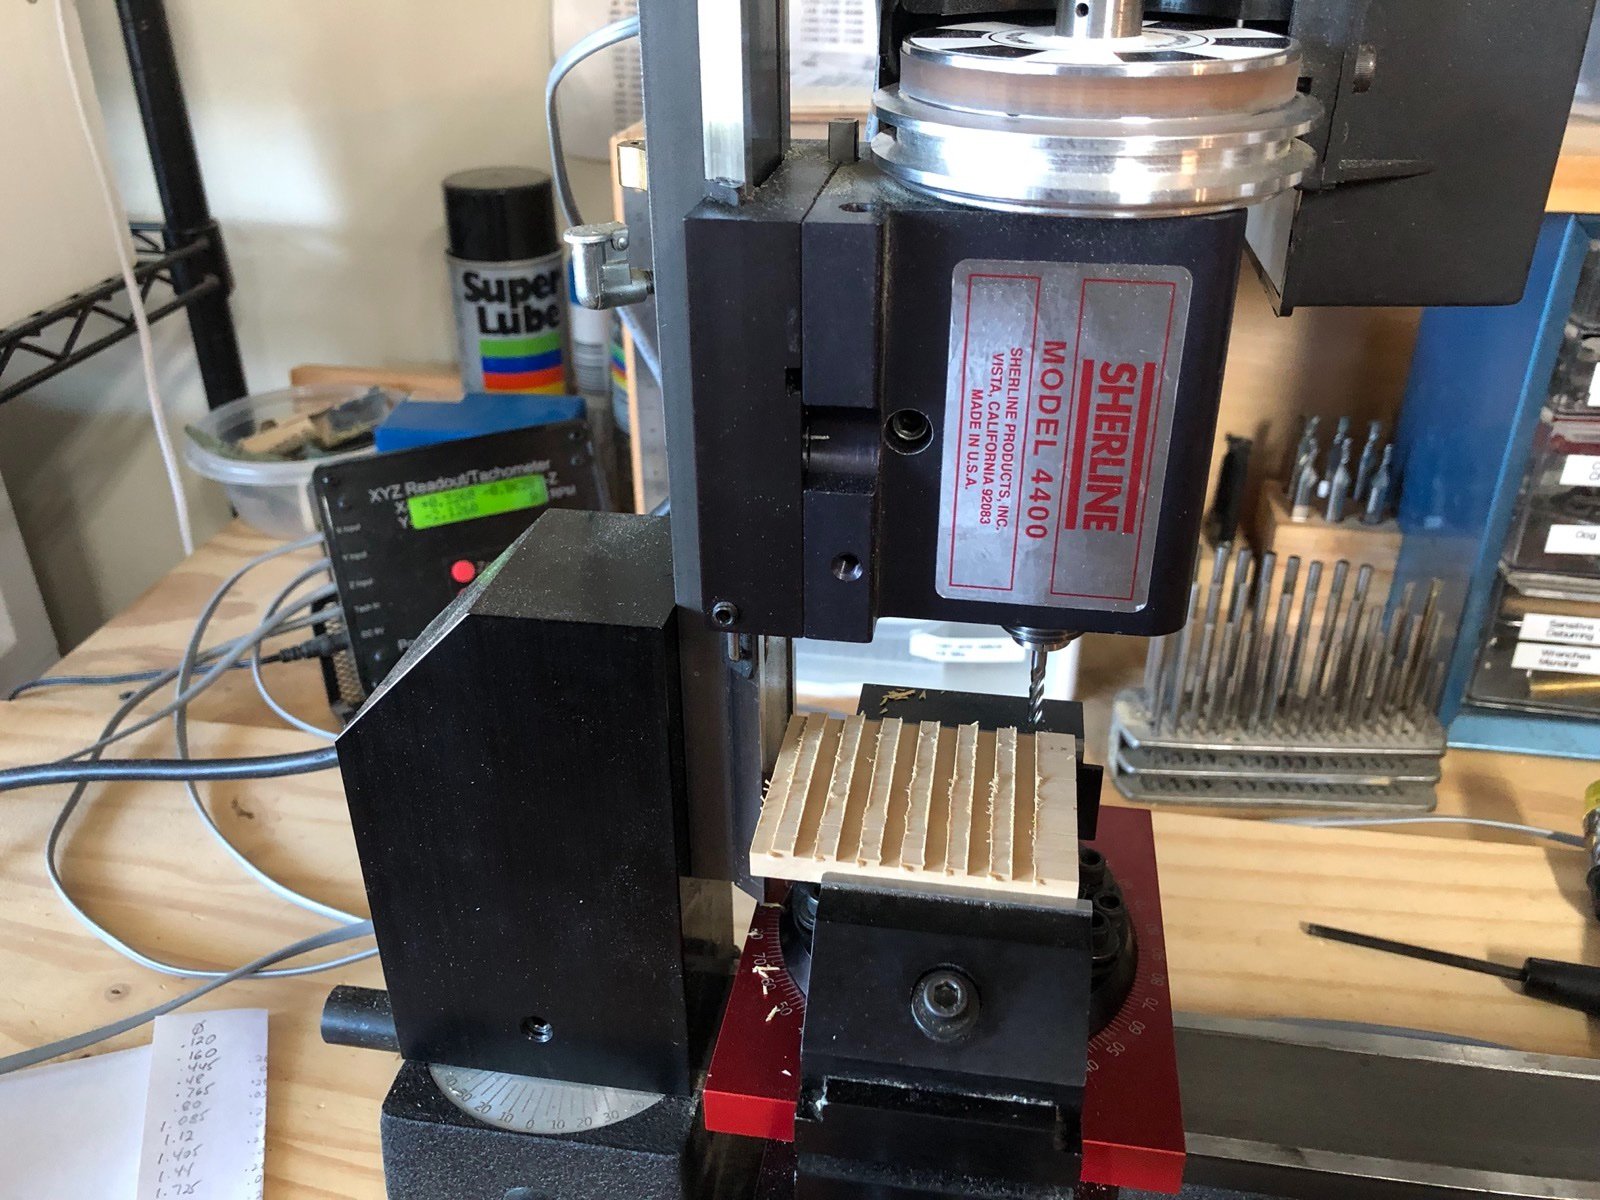
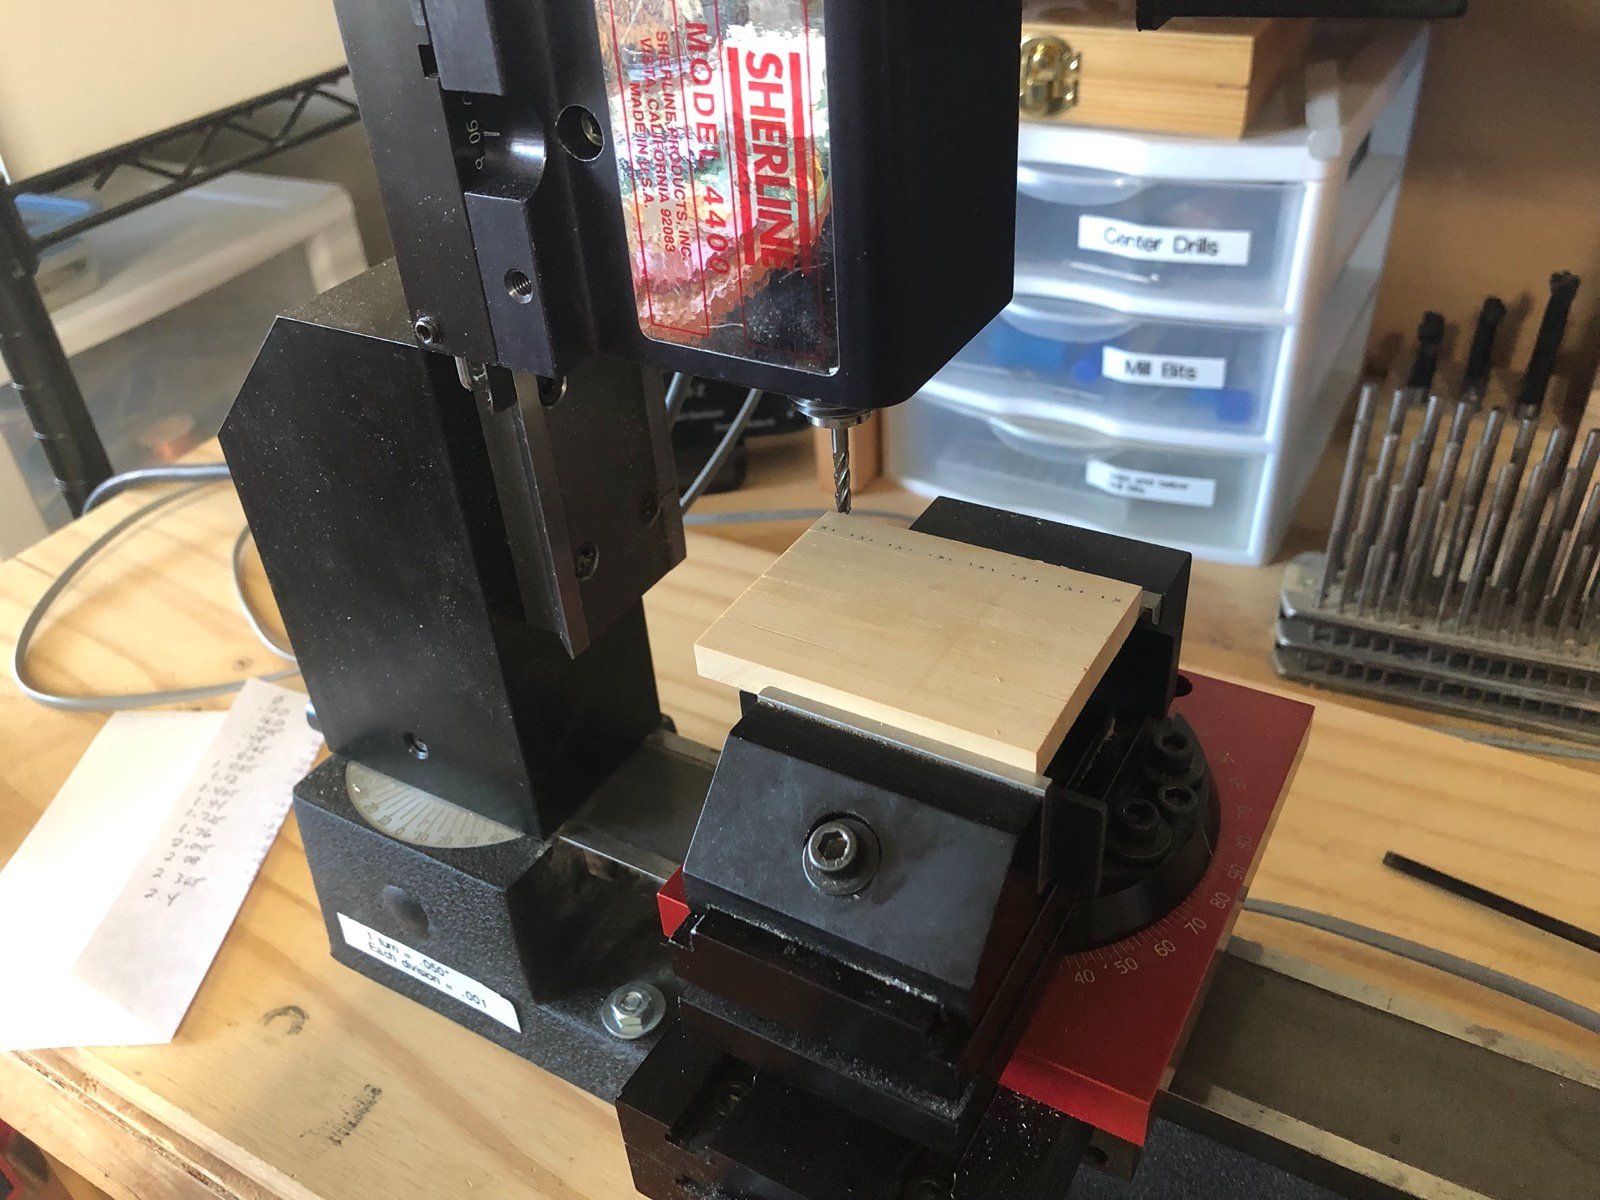
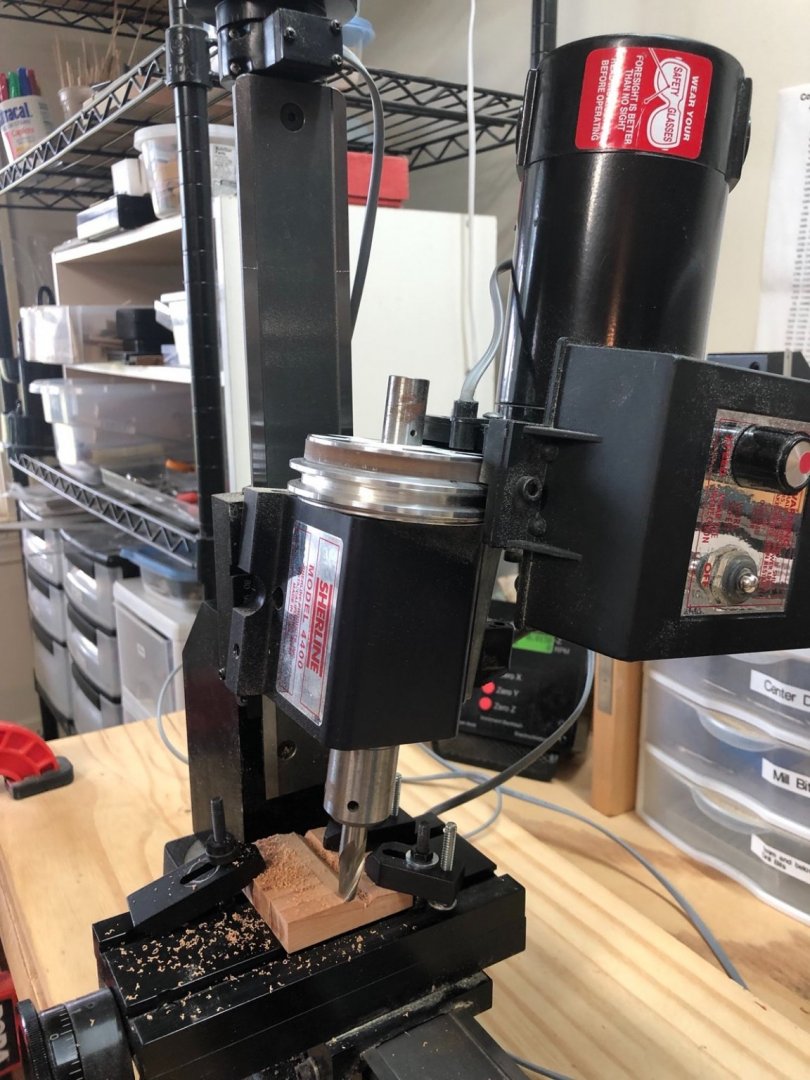
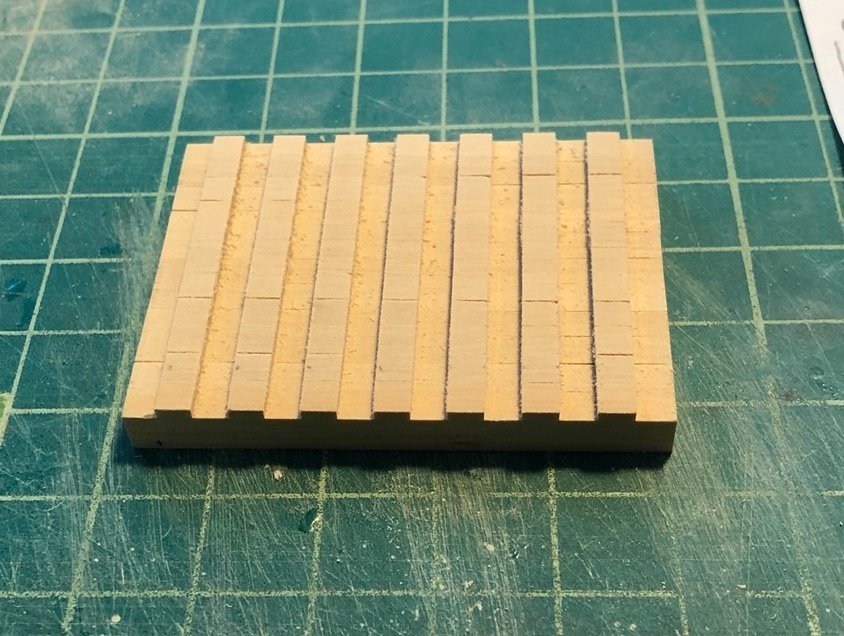
Thank you Toni and for the likes. First step in making the grating was to cut the boxwood strips for the grating ledges using the table saw. I then glued them edge to edge and sanded the top and bottom flat using the thickness sander. I cut the ends to fit into the coaming and now came the tricky part - cutting the slots for the battens. I purposely left the grating ledges high so that if I messed up I might be able to sand it down and try again. The instructions provide a couple of different methods for the cutting the slots, both manually and with a table saw. I really wanted to use the table saw method but my slots are pretty wide so I would have to use multiple cuts for each slot, which required making a jig. I thought about doing it that way but then I also thought to use the mill to make the slots. I didn't have a bit the exact size so I chucked up a 1/8" (0.125) end mill bit and practiced on some scrap basswood. I sat down and calculated the Y movement for each cut I made a list of the movements. My mill has DRO so I could just crank to the next number and make the cut. I used a couple of parallels under the blank in the machine vise and made sure it was level and orientated correctly then started to cut. I made the cuts a little deeper than the batten height so I could sand them down when the grating is assembled. Here is how it came out after a small bit of cleaning with a flat file and sandpaper. I then soaked the whole blank in isopropyl alcohol and separated the batten ledges. I cut blanks for the battens on the table saw after switching to a slitting blade. I also used the micrometer on the saw to measure distance from the fence to the blade. Again I made the battens a little higher to fit into the deeper slots. Next up I start assembling the grating.


-
I added the rabbets and gave the whole coaming a good sanding. I then tapered the sides from 2" up using a sanding block. I rounded the corners from 1" up by making a stop cut with a razor saw at the 1" mark, then using a flat file to file off the edges at each corner. I then rounded each corner with a sanding block. I then gave the whole coaming a sanding with fine sandpaper, and here is how it looks on the beams. Next up is the grating. I am going to try making it out of boxwood to get some contrast.
-
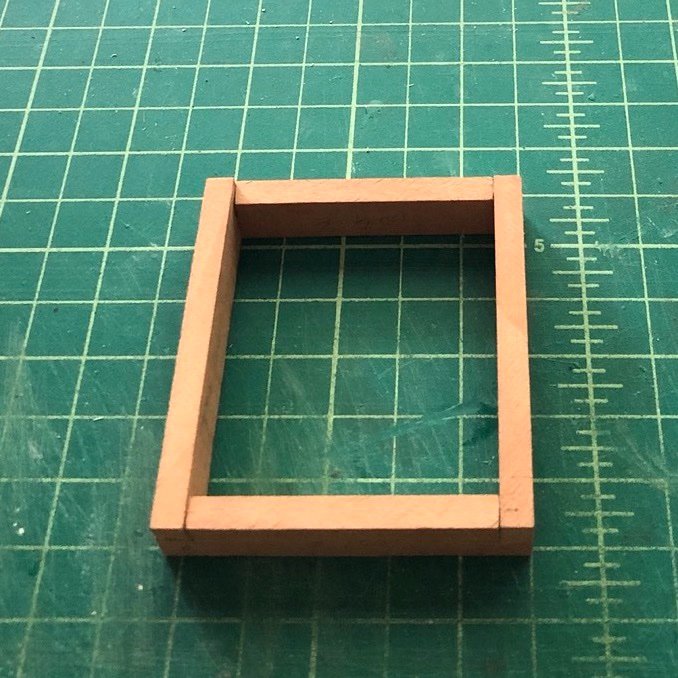
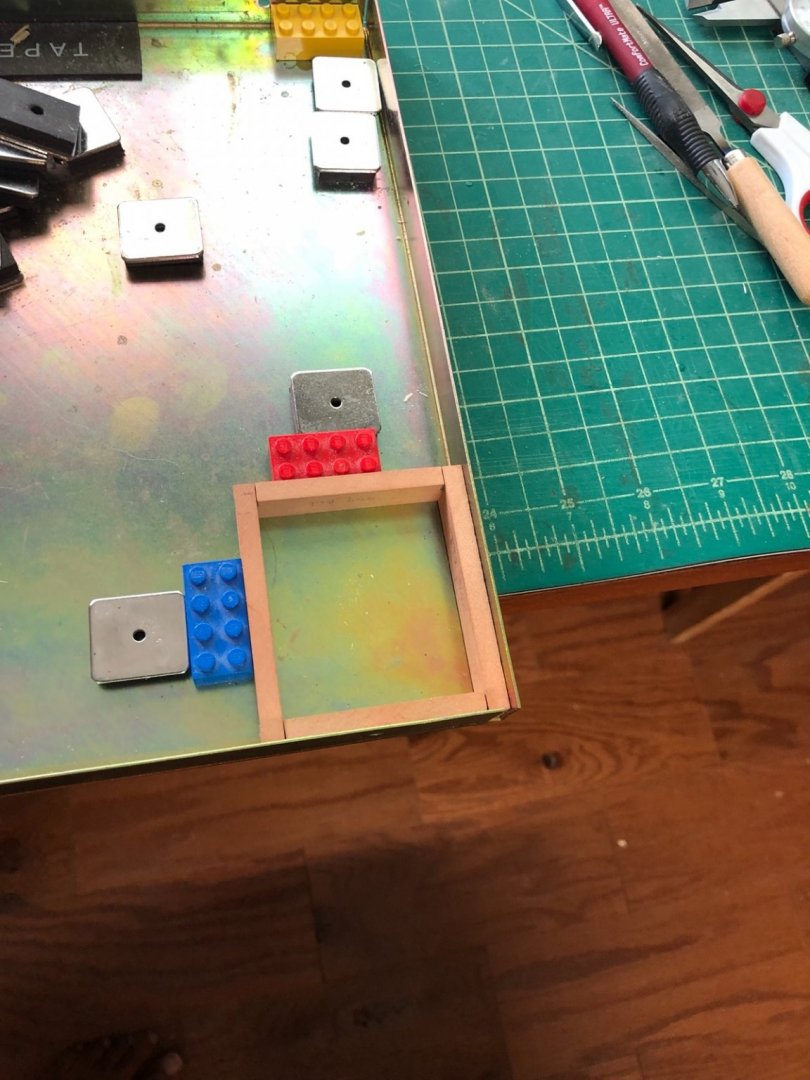
So after the practice joints I marked the pear pieces I cut for the coaming and cut the real joints out with a razor saw, then used files to get the final fit. Not perfect by a long shot but OK. I made sure to mark each joint so I could get them matched to the correct joint on the other pieces when it came time to assemble the coaming. Here are the individual pieces and them dry fit together. I then glued the pieces together in the magnetic gluing jig. I still have to add the rabbets, do a finish sanding on these pieces then sand in the taper and round the edges. The head ledges were slightly too long so I cheated a bit and made the rabbet pieces from slightly thicker stock so they will be flush with the carlings. I found that once you cut those joints you can't make those pieces shorter because the angle of the joints would need. more material not less.

-
Thank you Toni and druxey. On to the coaming. In Toni's build log, druxy suggested to practice those tricky joints so I cut some basswood scrap to practice on. My first attempt was totally off but the second attempt at least looked closer to the pictures. My third attempt came out better. For this one I cut one joint with a razor saw then rough cut the other side and filed it to fit. Still not there yet so I am going to try a few more times before I start cutting the pear. I did cut out the four coaming pieces and the two coaming rabbet pieces so I have them ready to go when I feel comfortable with the practice joints.
-
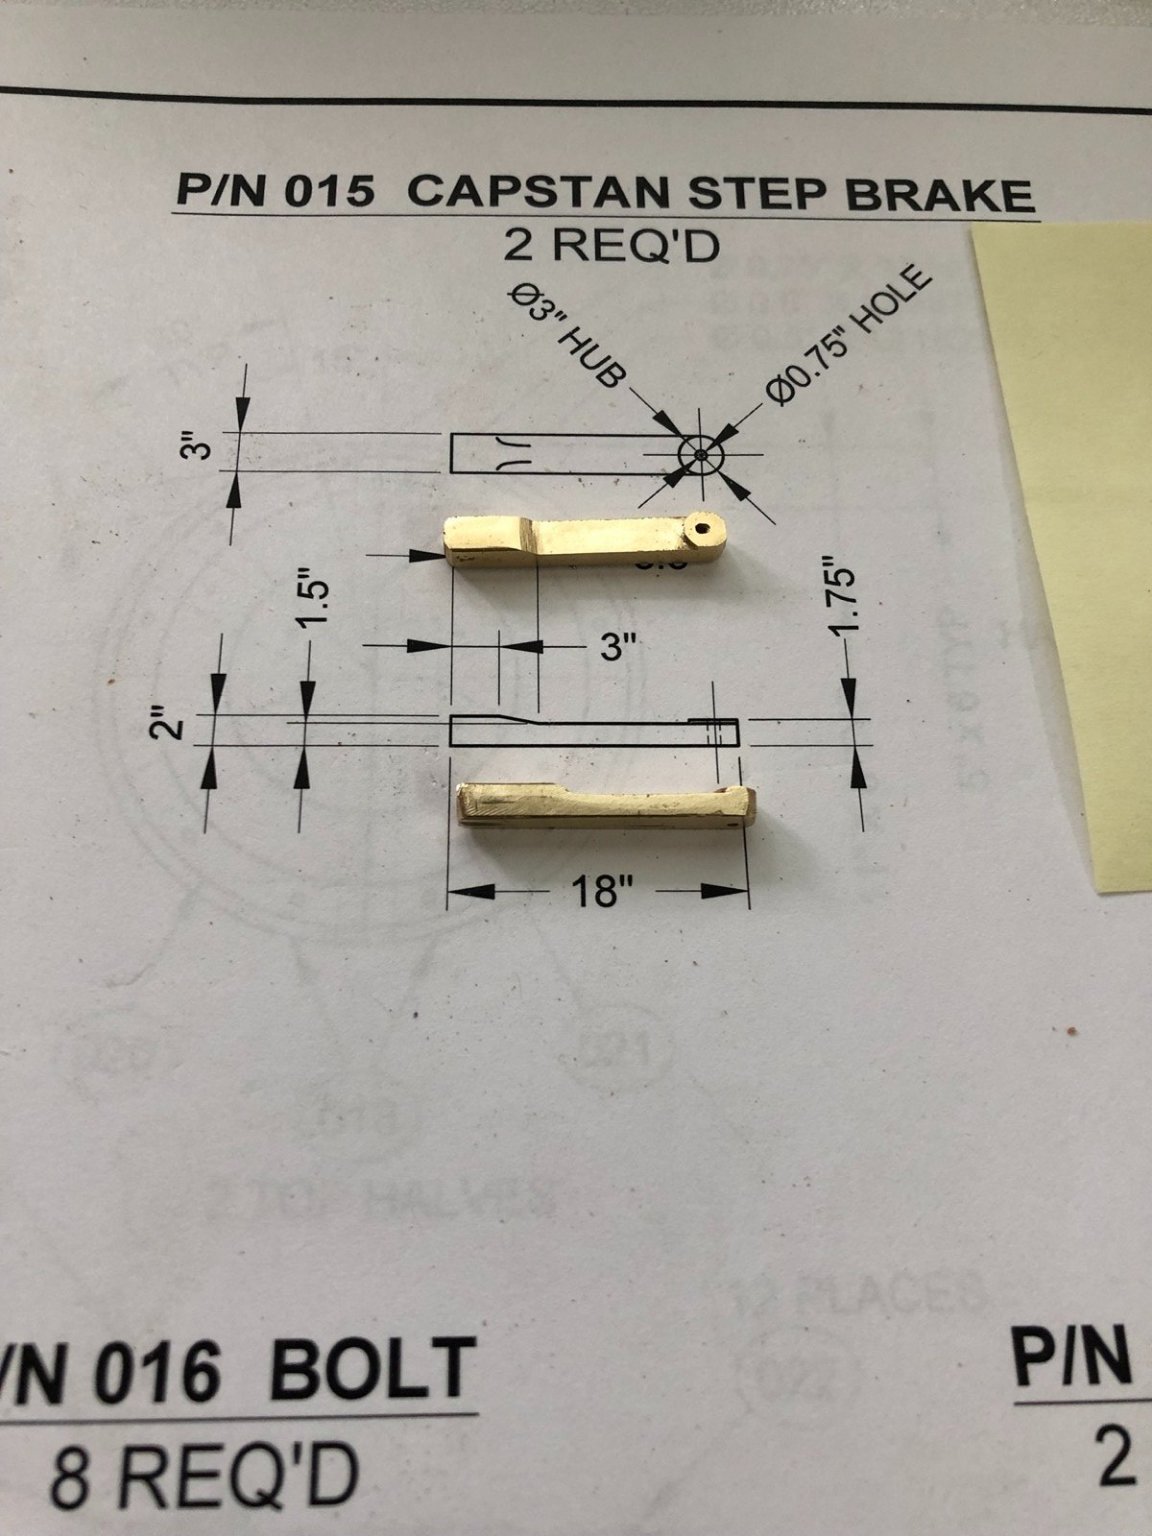
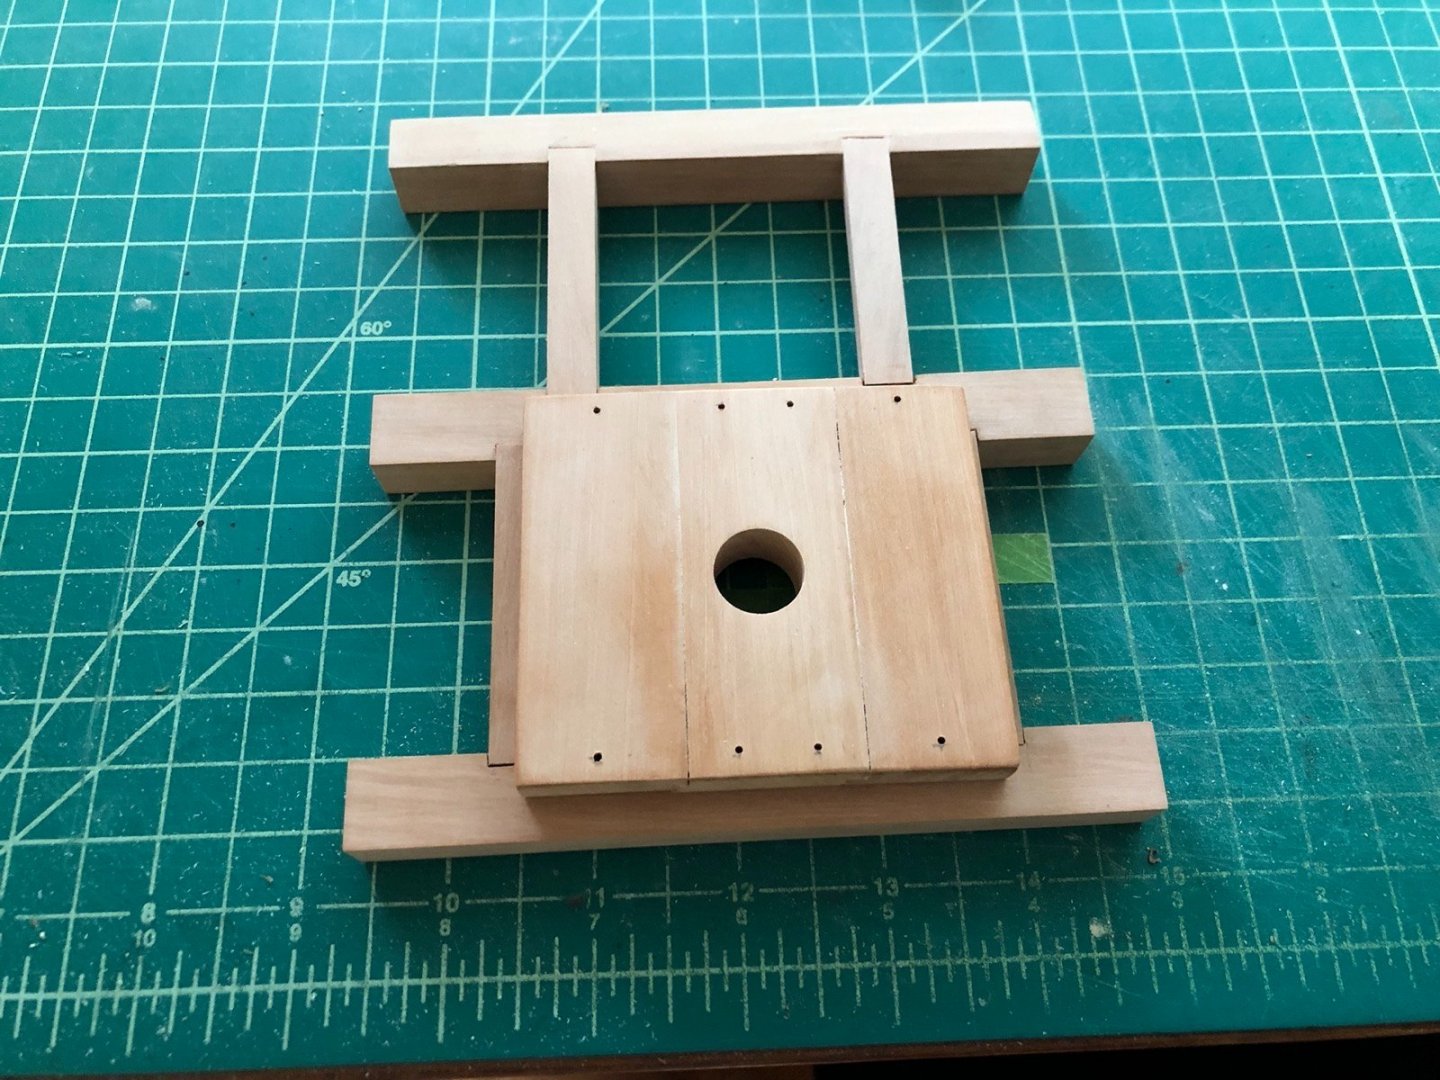
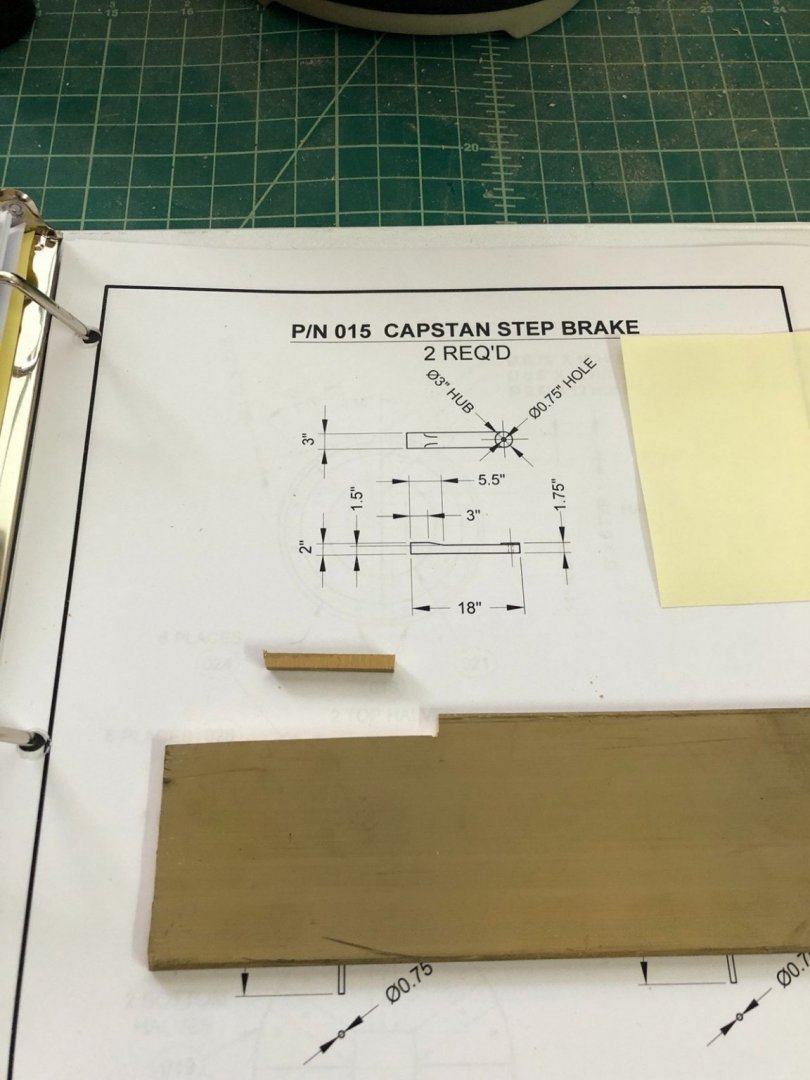
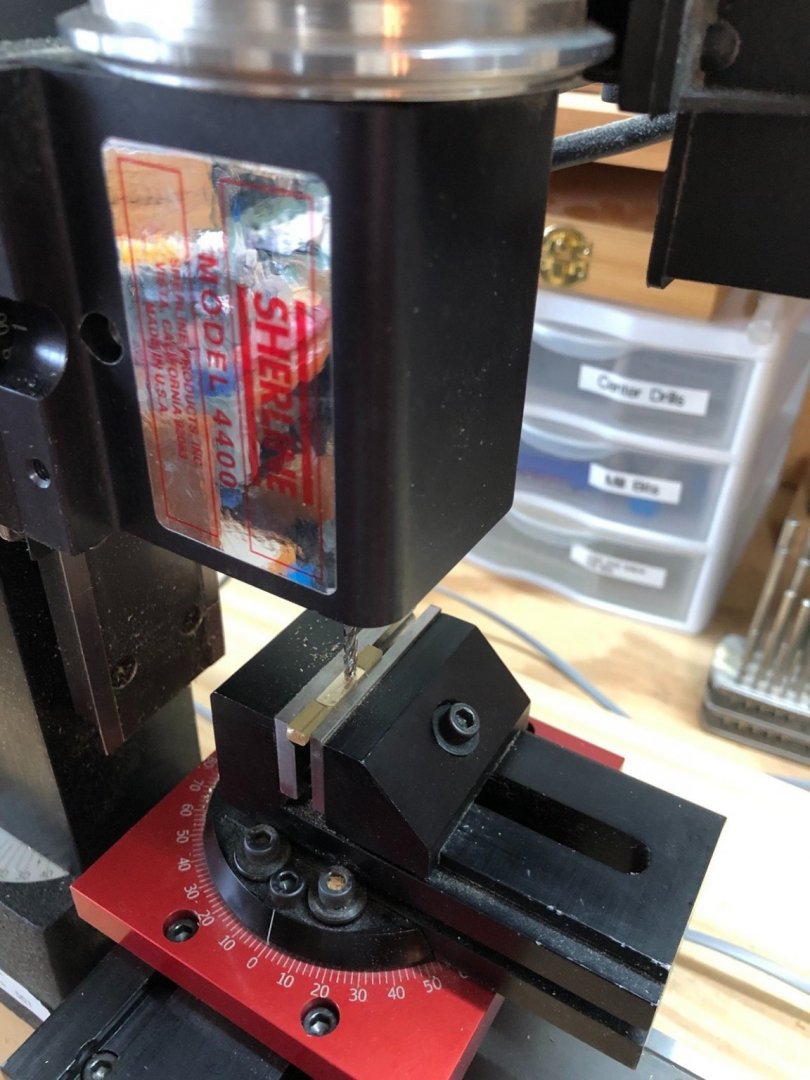
Thanks Toni. BTW I just signed up for your upcoming workshop on kit bashing. Even though I have bashed a few kits I am sure I will learn some great new things from an expert model builder. I finished drilling the holes through the capstan base into the beams, and separated the base from the beams. One problem I had was that the glue tacks came undone after I drilled all the holes on one side and one hole on the other side. I tacked the base back onto the beams, using metal pins to line up the holes already drilled. I had no trouble drilling the rest of the holes. Here is the base sitting on the beams but not glued on yet. The next step was to build the brakes. Instead of building them from three pieces of brass, I made them from single pieces that I cut off a piece of thick brass sheet. I used the mill to reduce the width in the middle of the brass piece, and also to make the round extension at the pin end. I made the extension by first drilling the pin hole, then milling 45 degrees off the corners and using a file to shape the circle. I also used files to slightly round the brake end and to add the 45 degree slope on the inside of the brake. I then cleaned up each piece with a fine file. I will leave these to blacken until I have other brass parts to blacken too. This was a fun little project in itself as I haven't done very much milling on brass before.

-
Thanks Toni. I have been using the measurements on the drawings but in this case I thought I would use the plan for part 104 as a template for drilling the bolt holes and that's when I saw the discrepancy. Using the measurements for the holes instead worked out just fine.
-
Well I am sorry to say that in the above picture the base is shown 90 degrees to how it should be on the beams. The problem was I had forgotten to cut the ends of the middle piece to fit between the beams before gluing the base pieces together. Luckily I could mount the base in the mill upside down and used a large end mill to cut the notches into the middle piece. Now the base fit the correct way but something else was wrong as there was too much room between the middle piece and the beams. I went back and compared the carlings to the plans and they were all too long. I have no idea how a messed that up but better too long then too short. I used Iso Alcohol to loosen the glue joints between the beams and carlings and was able to separate them after about a half hour. When they were dried I cut one end of each carling so they were the correct length, then milled a new rabbet into the cut ends. When I was happy with the fit I re-glued them to the beams. I have to be more careful with measurements as I continue.

-
Here is how it came out after a light sanding. I still need to round the edges and add the bolt holes.

-
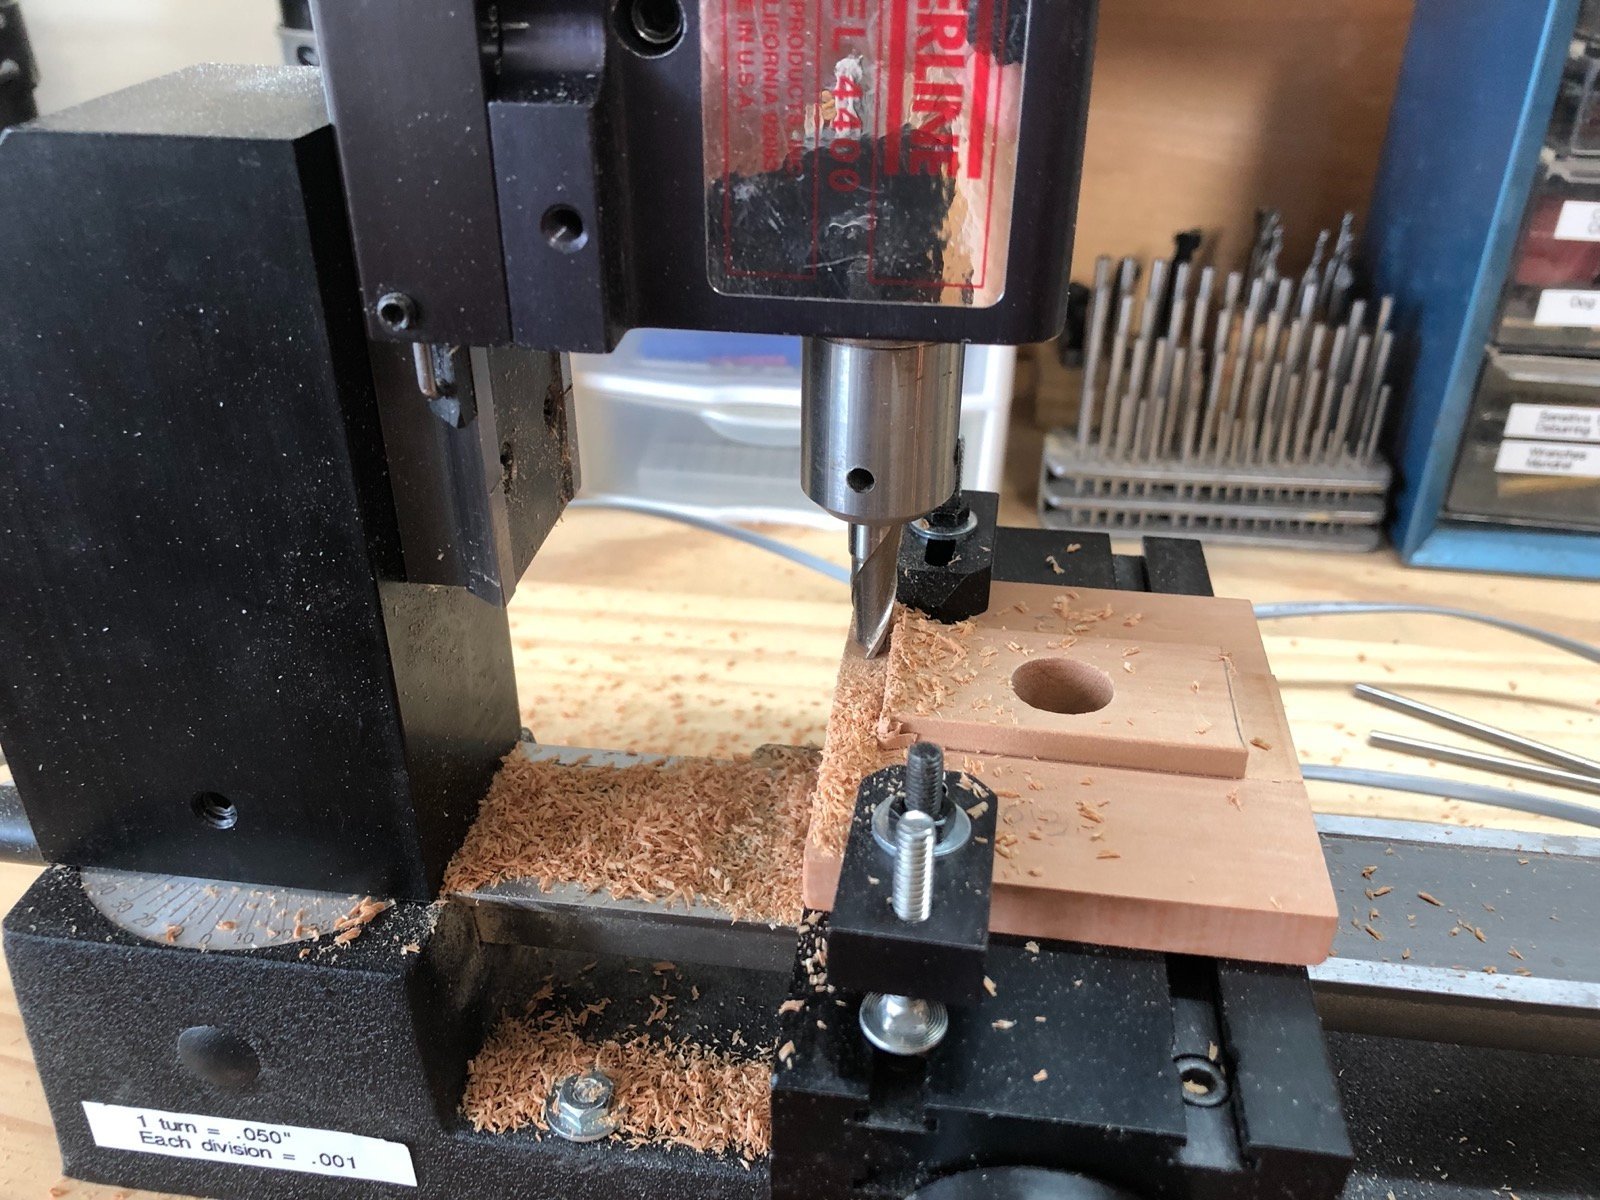
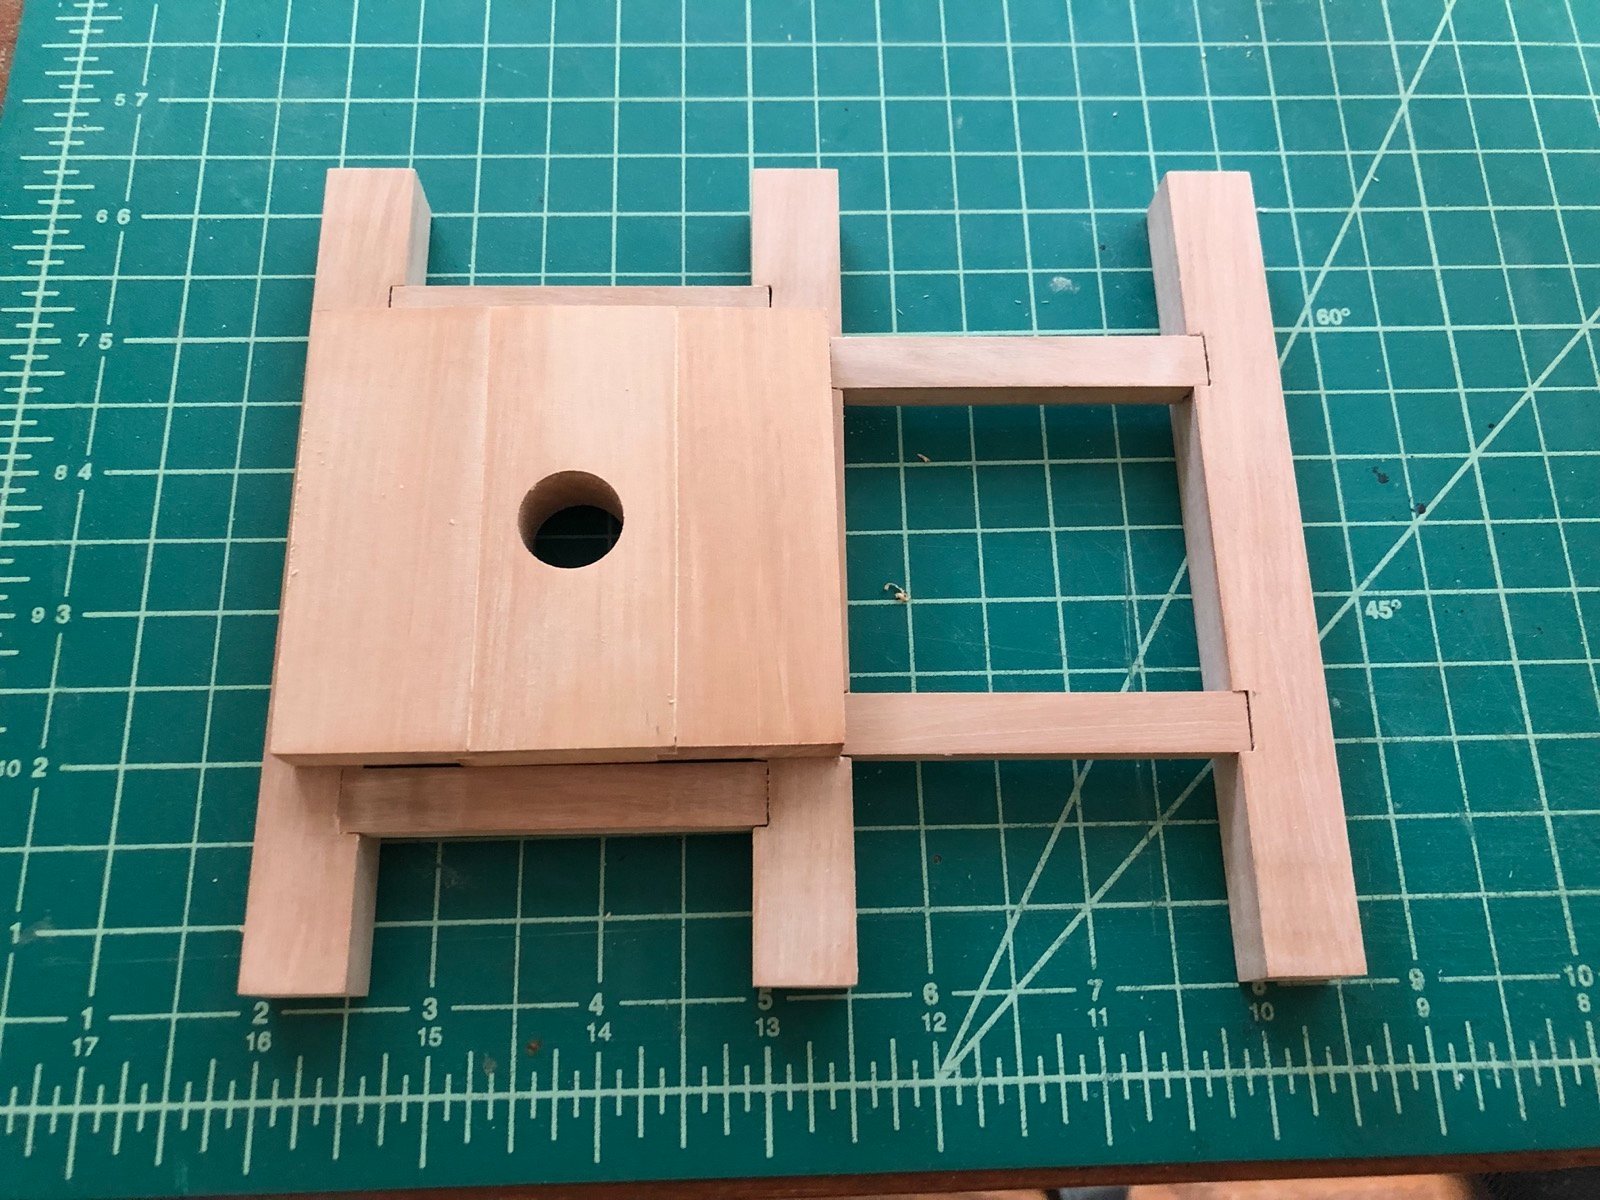
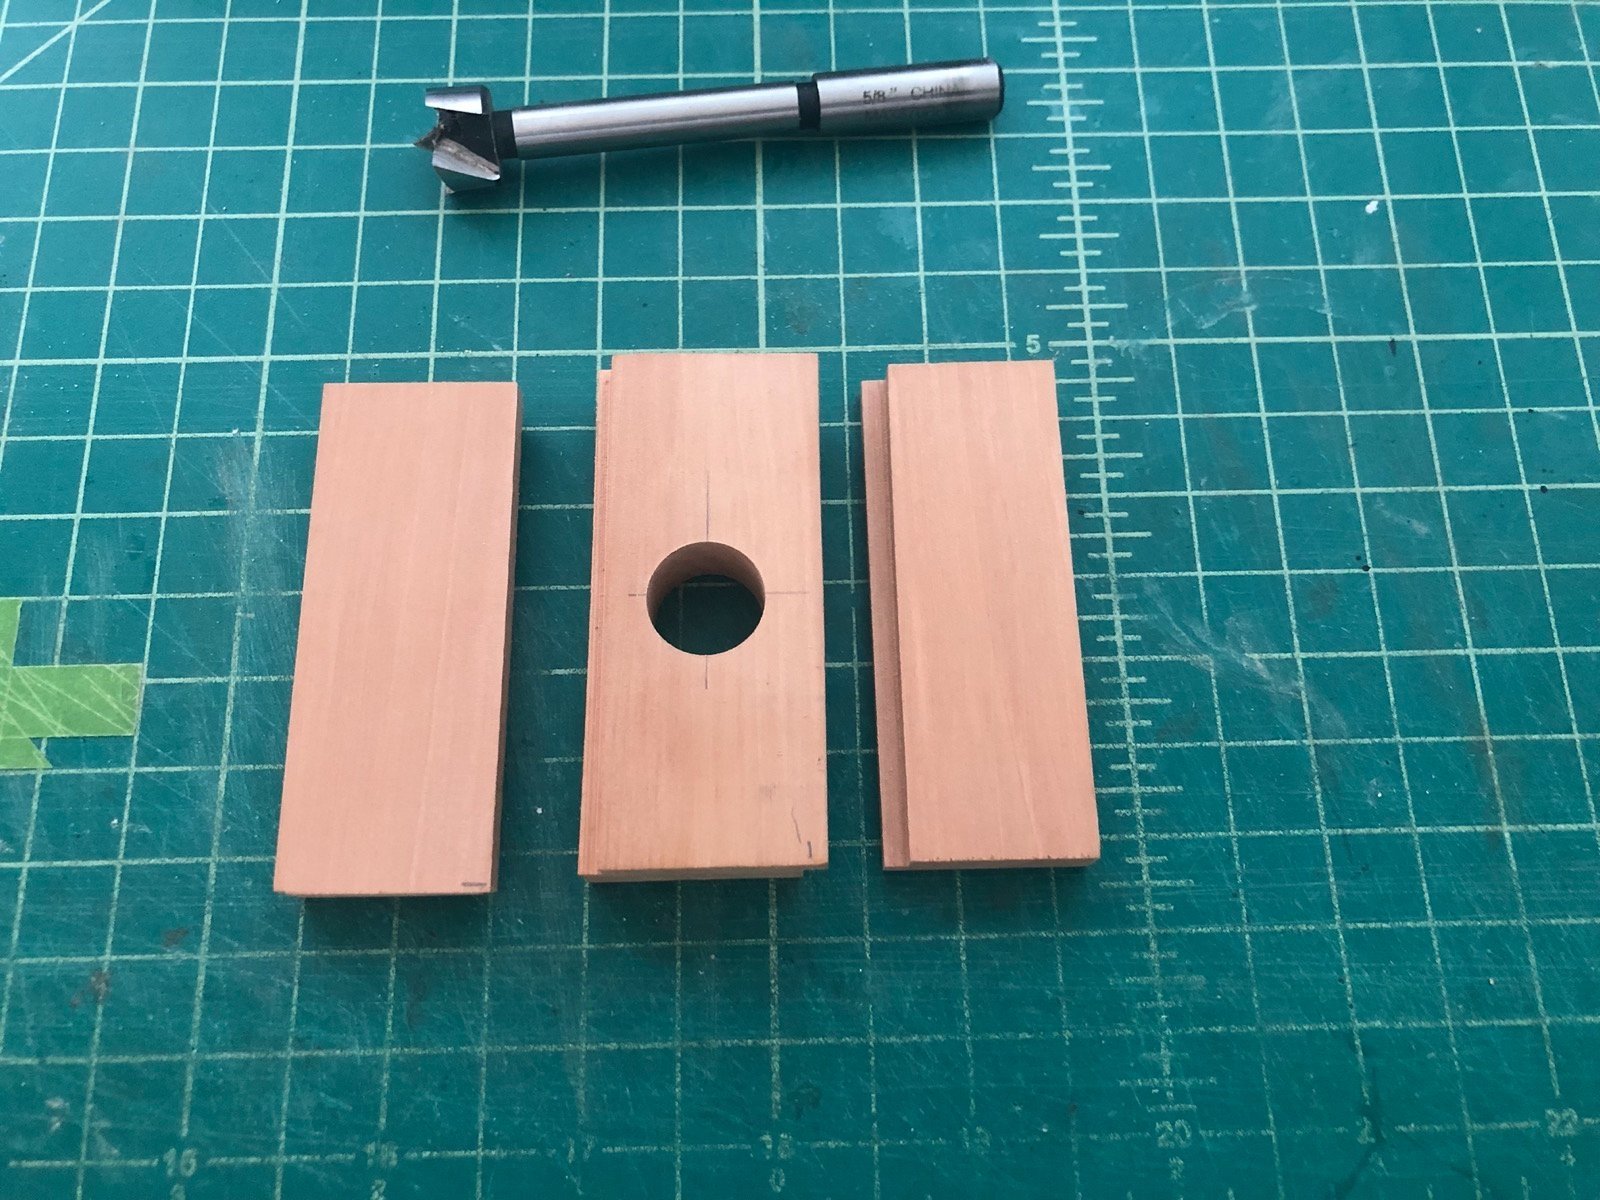
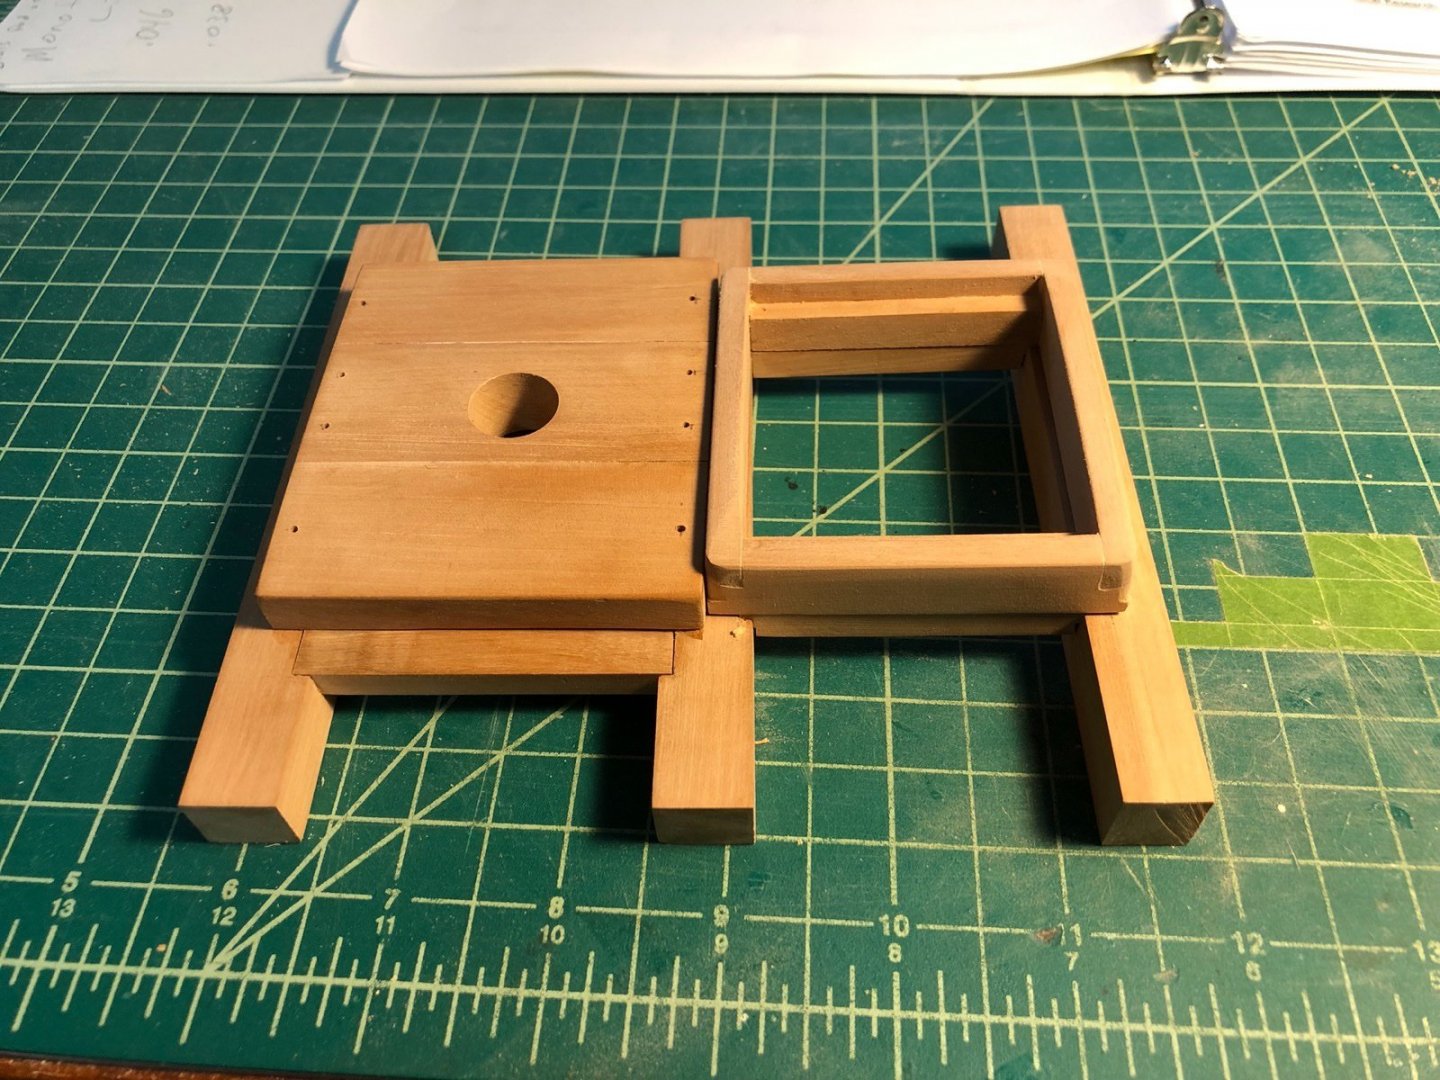
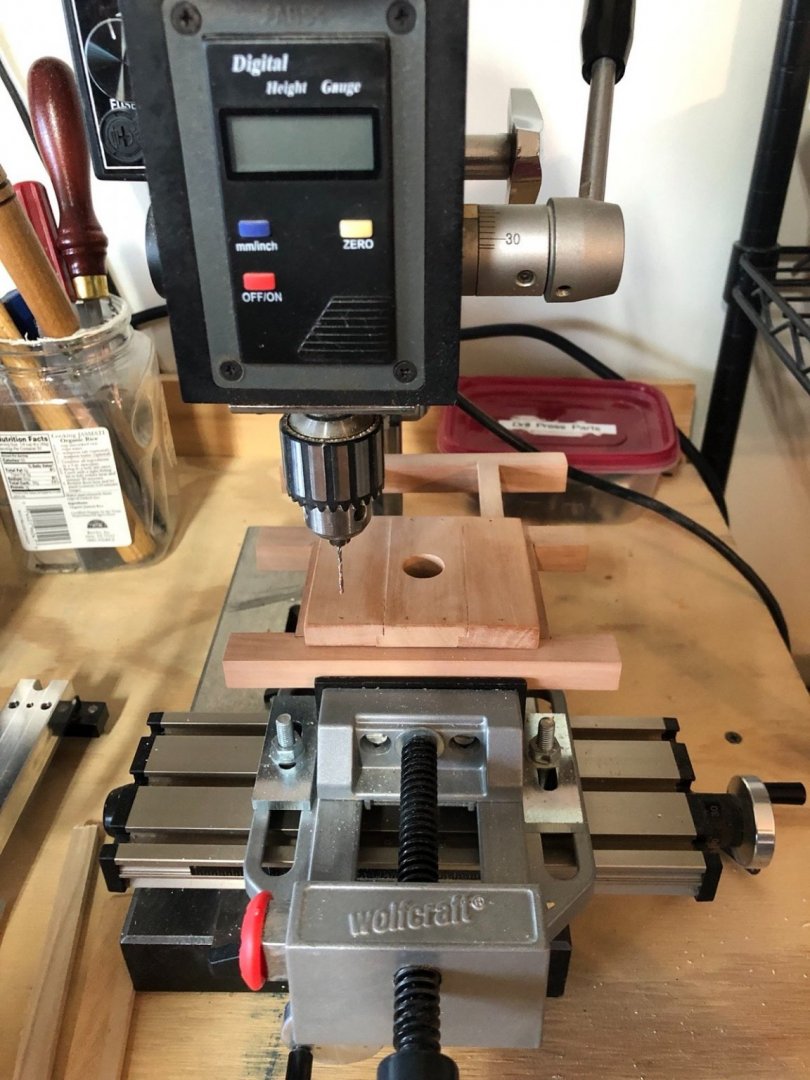
Thanks G.L. and the likes. The next step was to make the capstan base from three pieces of wider stock. I first cut the three pieces then marked them for the rabbets and hole for the barrel. I then cut the rabbets on the Byrnes saw, using the same technique I use when making lap joints for the display cases I have built. I started by making sure the blade height was just half way up for the narrower pieces, then I set the width of the cut on the cross cut sled. This let me cut all but one of the rabbets, as the one side of the middle piece was cut deeper. This just meant I had change the blade height for that one cut. I then drilled the hole using a large hole bit in the drill press. I had first tried setting up the mill with a rotary table to mill the hole but that proved too frustrating to get perfectly centered. I then glued up the three pieces. I did this upside down so the tops would be flush, and used a couple of clamps to hold the pieces while they dried. I take another picture later when the glue dries and I remove the clamps.


-
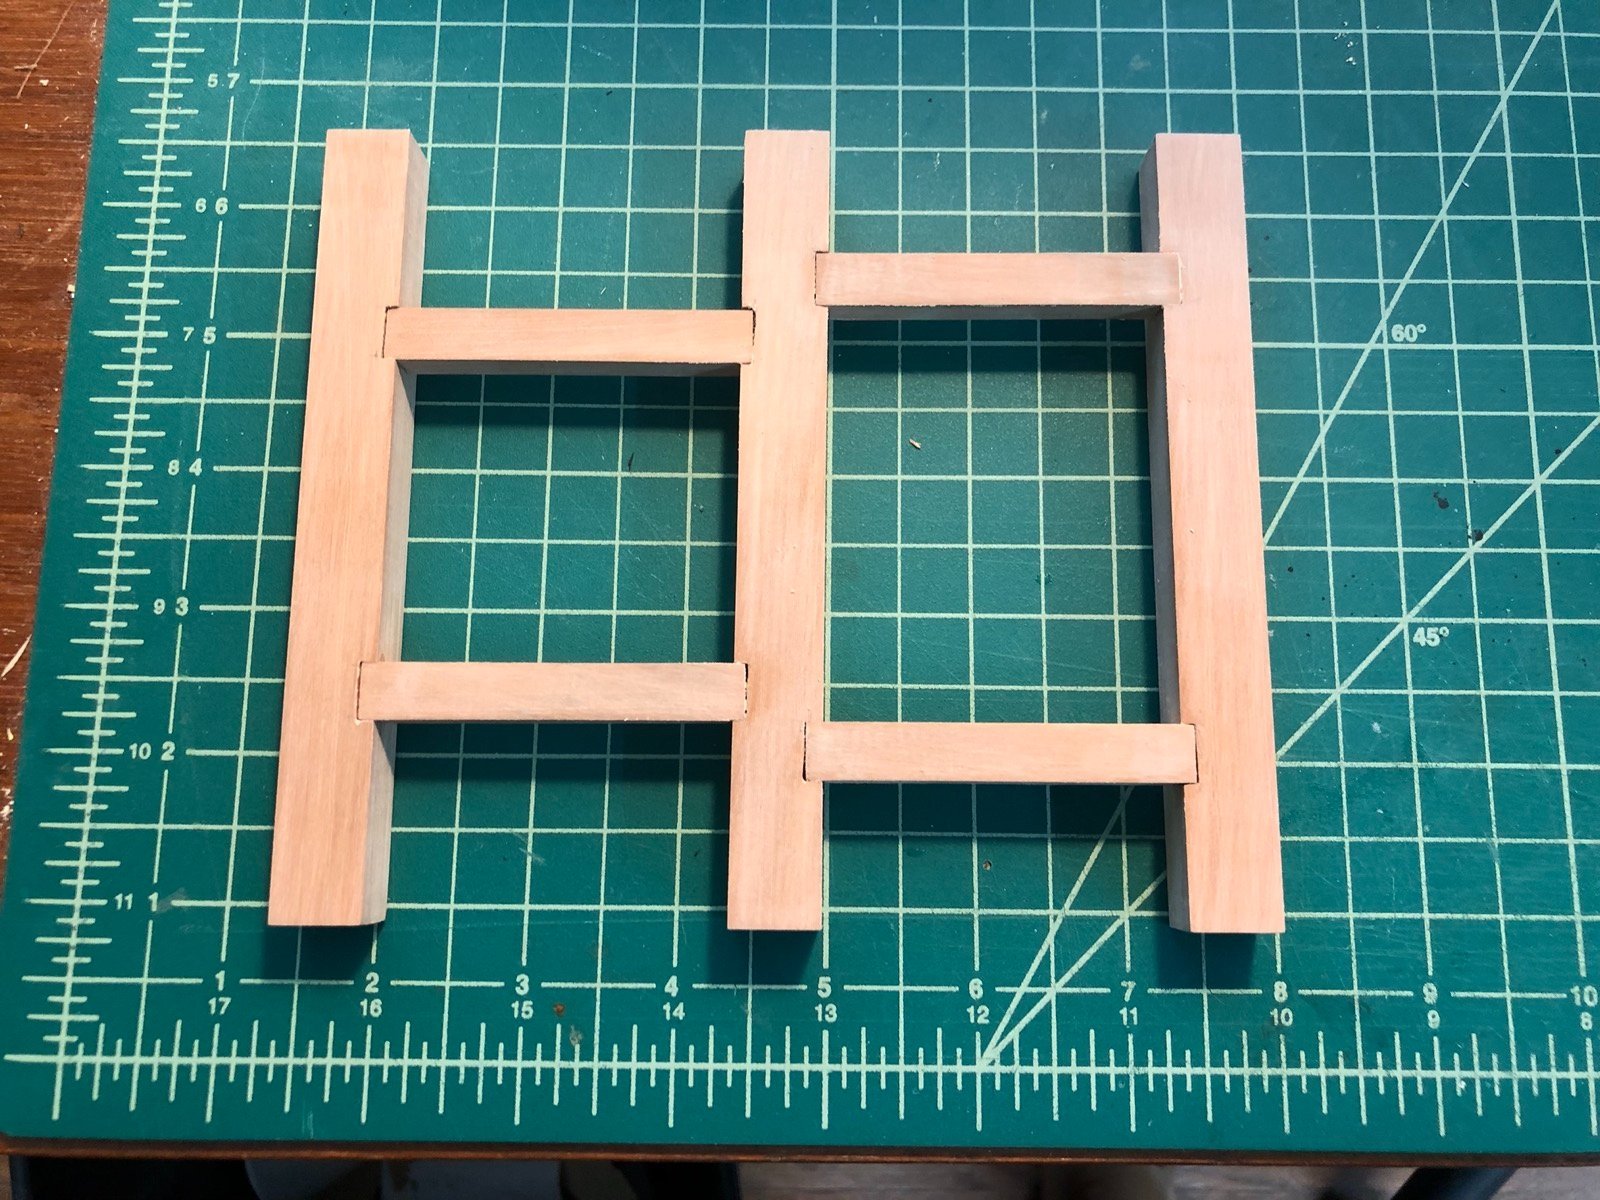
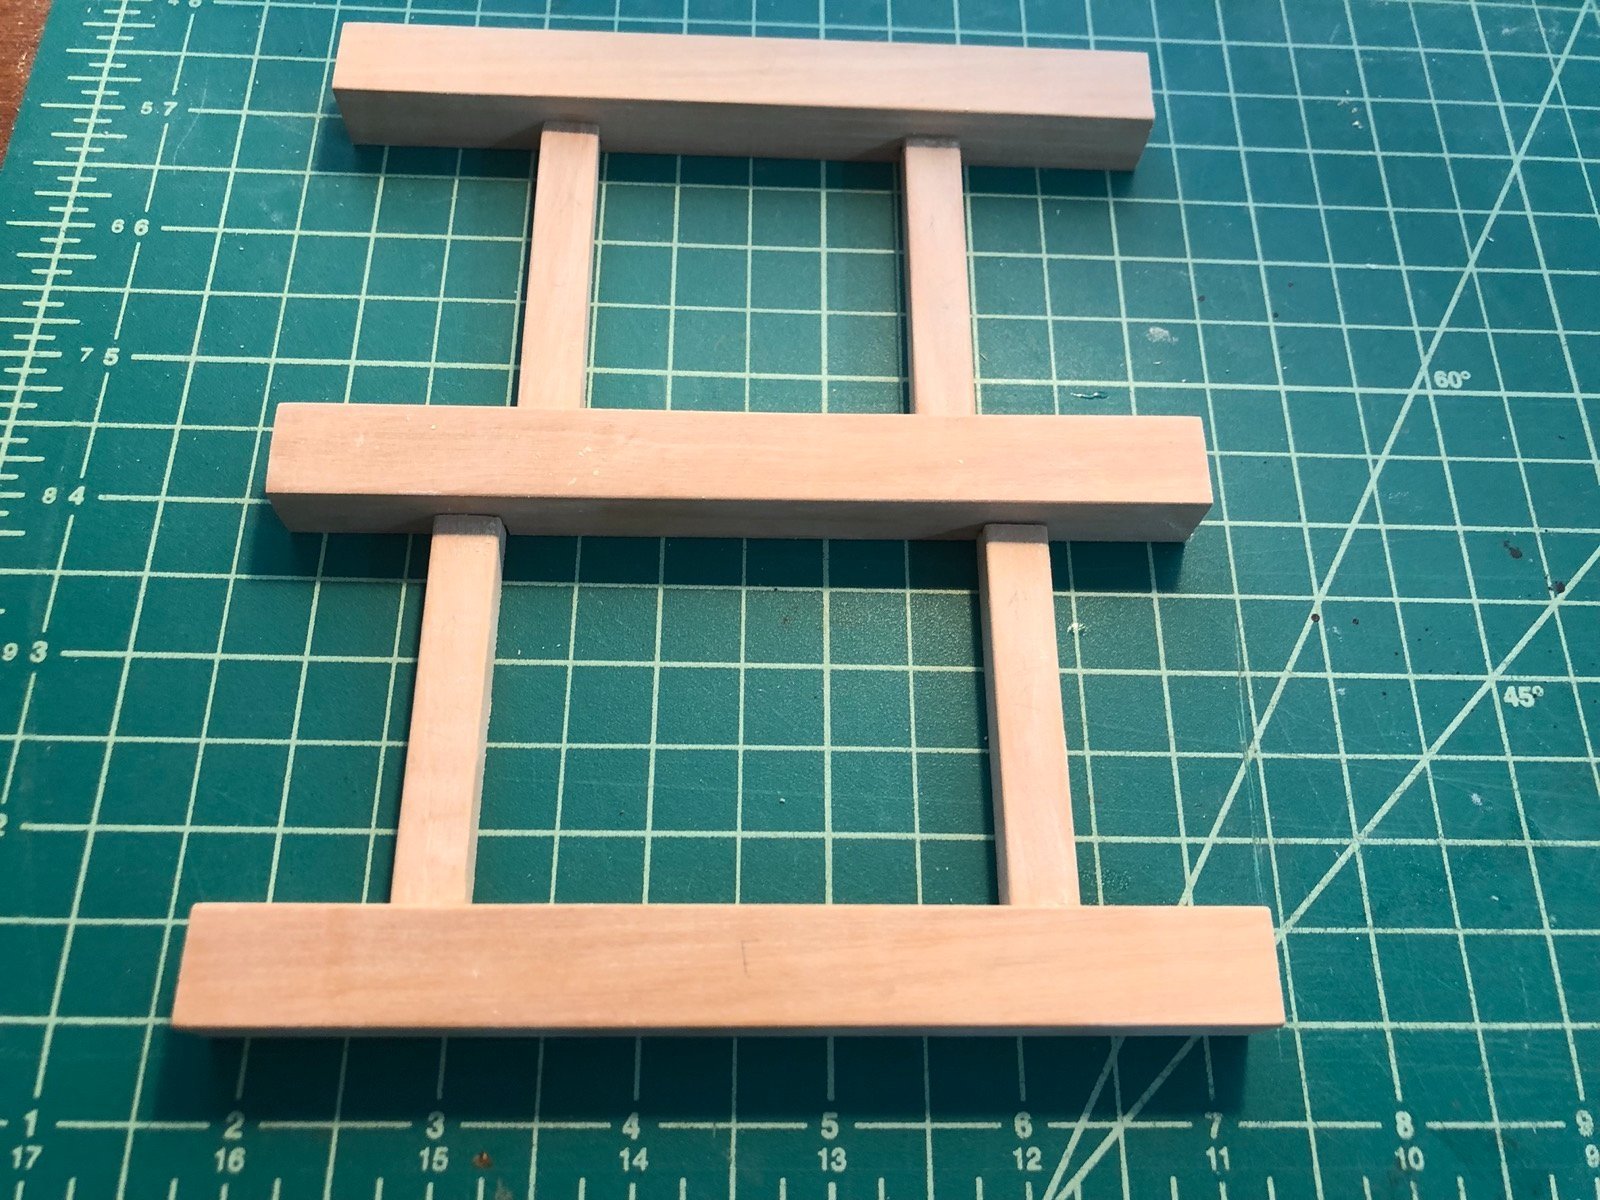
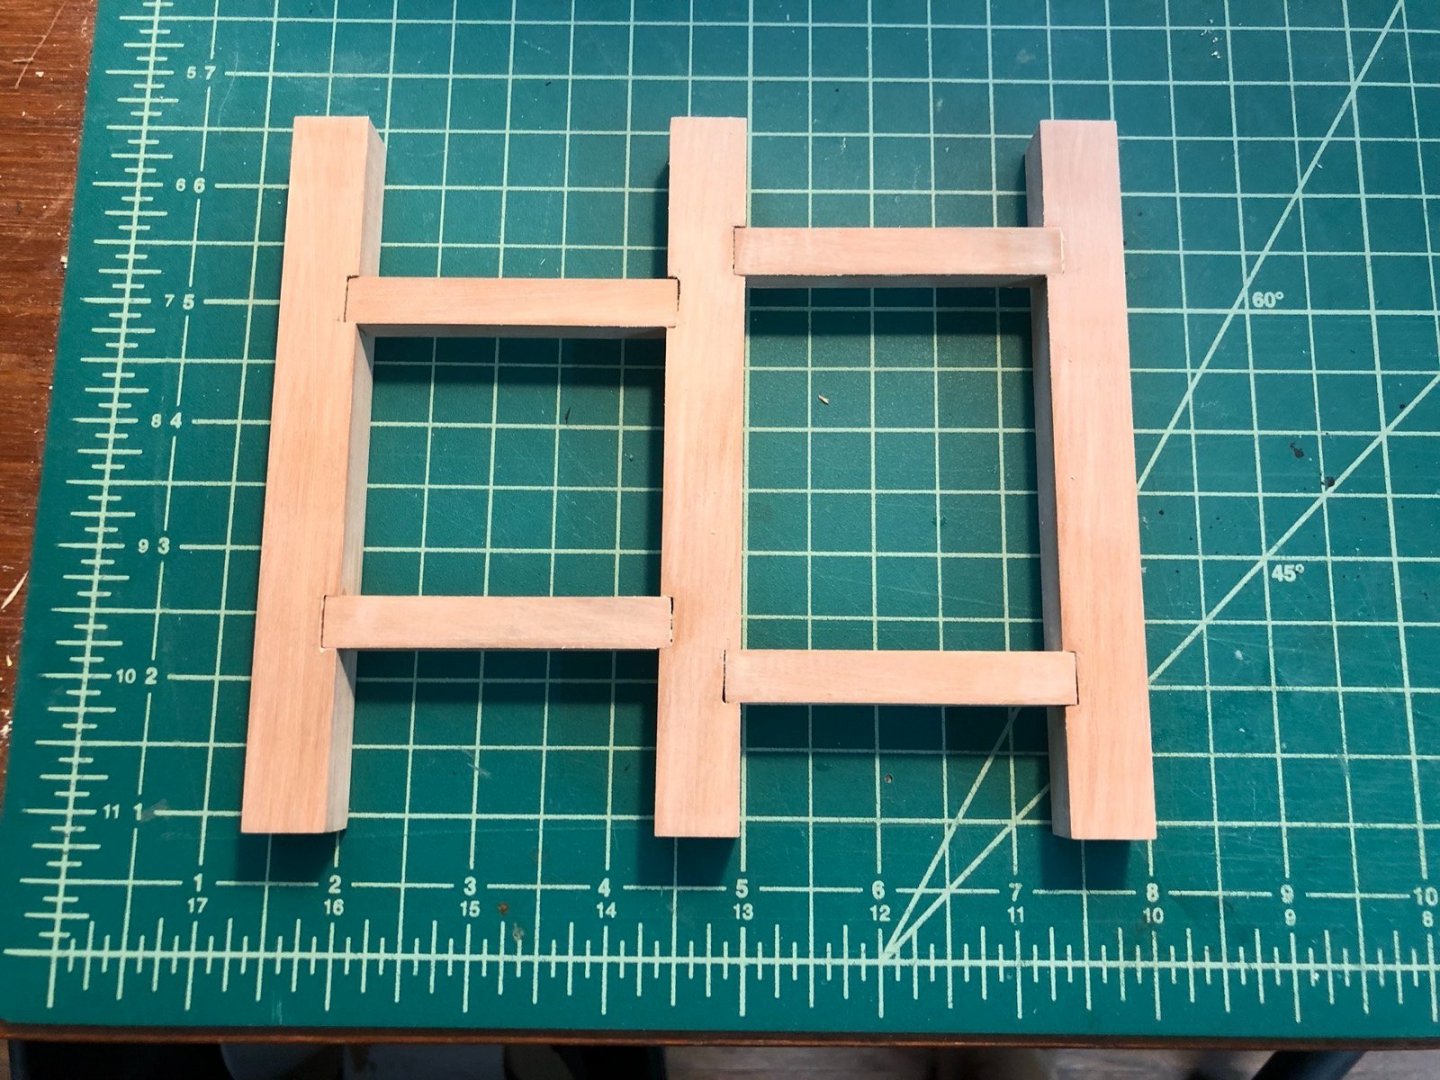
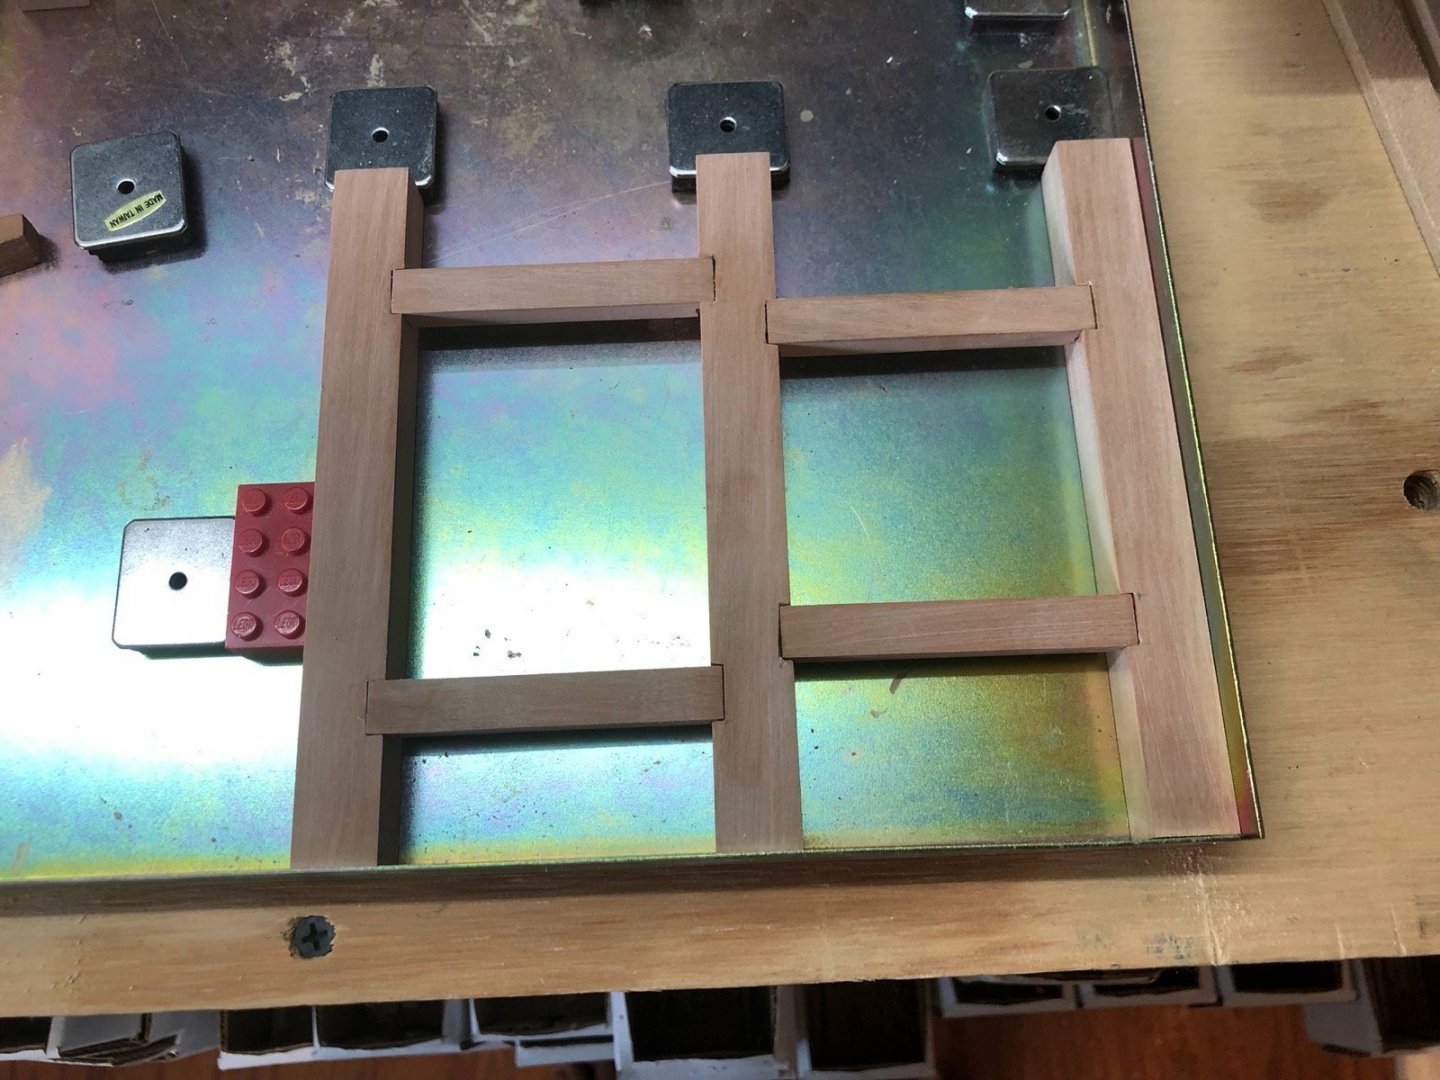
So here is how the beams and carlings came out. I gave them a light sanding after gluing. I had rounded the bottom edges of the pieces before gluing. The top: And bottom: Now for the capstan base.

-
Thanks Jeff. I am lucky to have the room to devote to a shop but with two projects on going it is feeling a bit cramped. I finished the tenons on the other carlings and glued them up with the beams.
-
Thanks Toni and the likes. I cut the tenons on two of the carlings using the mill with an end mill bit, and fit them to the aft and middle beams. I will use this jig to hold them when I glue them to keep them square but this is how they look just set in place. I need to do a bit more fitting , especially the heights of the carlings. I am pretty happy so far.
-
Hi Jeff. Just found your build log and your Connie looks great so far. I did not use PolyAcrylic on mine but I did use diluted Gesso as a primer, which helped me visualize the areas of the hull that needed more sanding or filler, especially where the copper plates will go. It made a good base for the adhesive on the copper tape.