usedtosail
-
Posts
2,421 -
Joined
-
Last visited
Content Type
Profiles
Forums
Gallery
Events
Everything posted by usedtosail
-
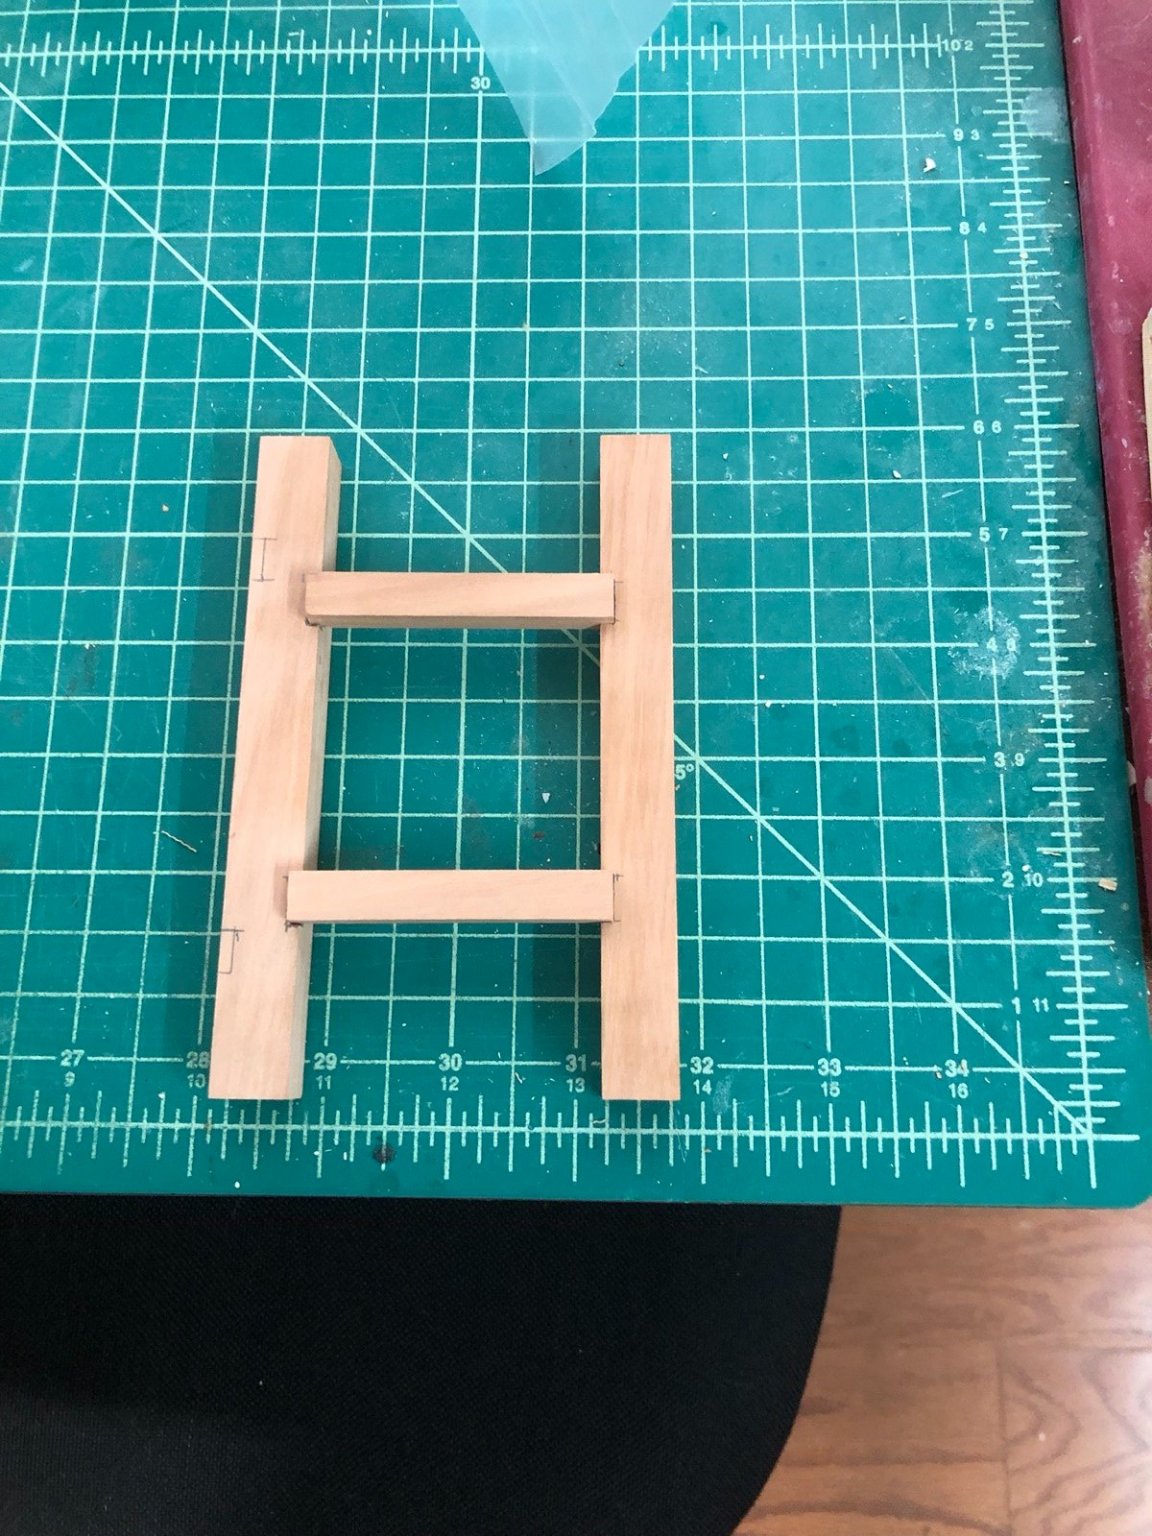
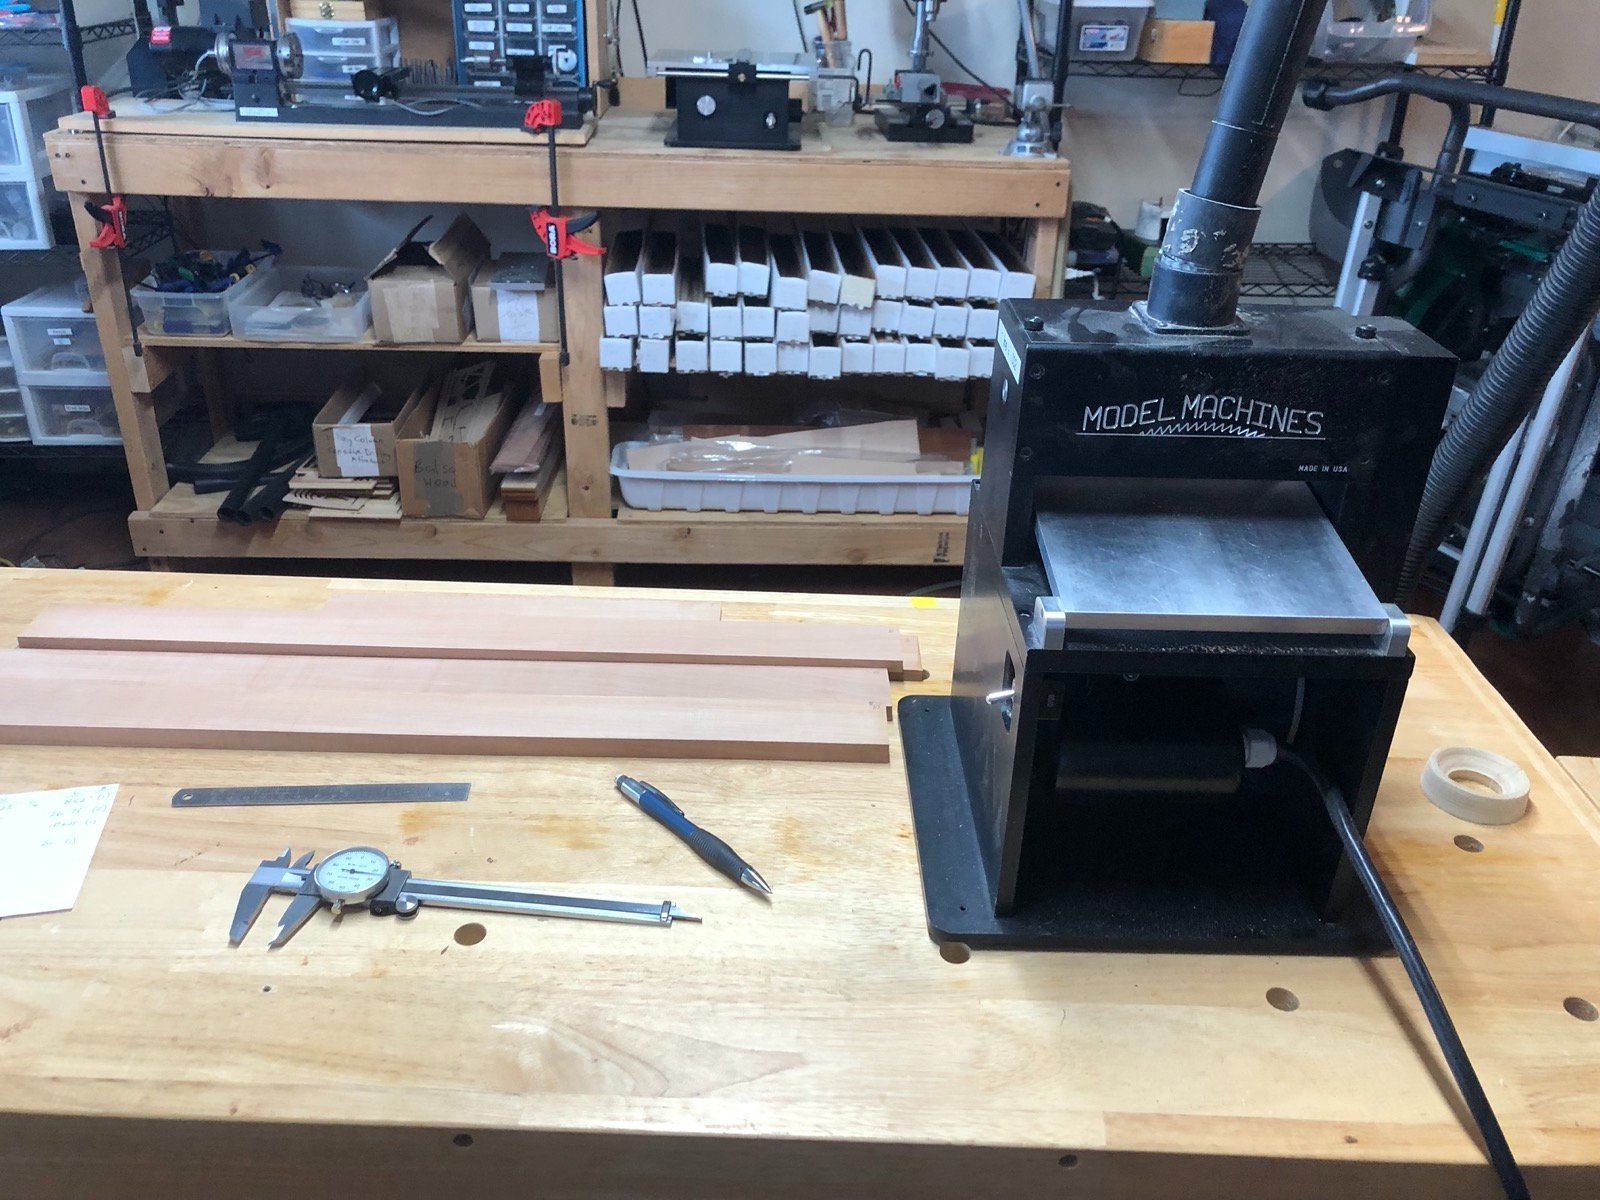
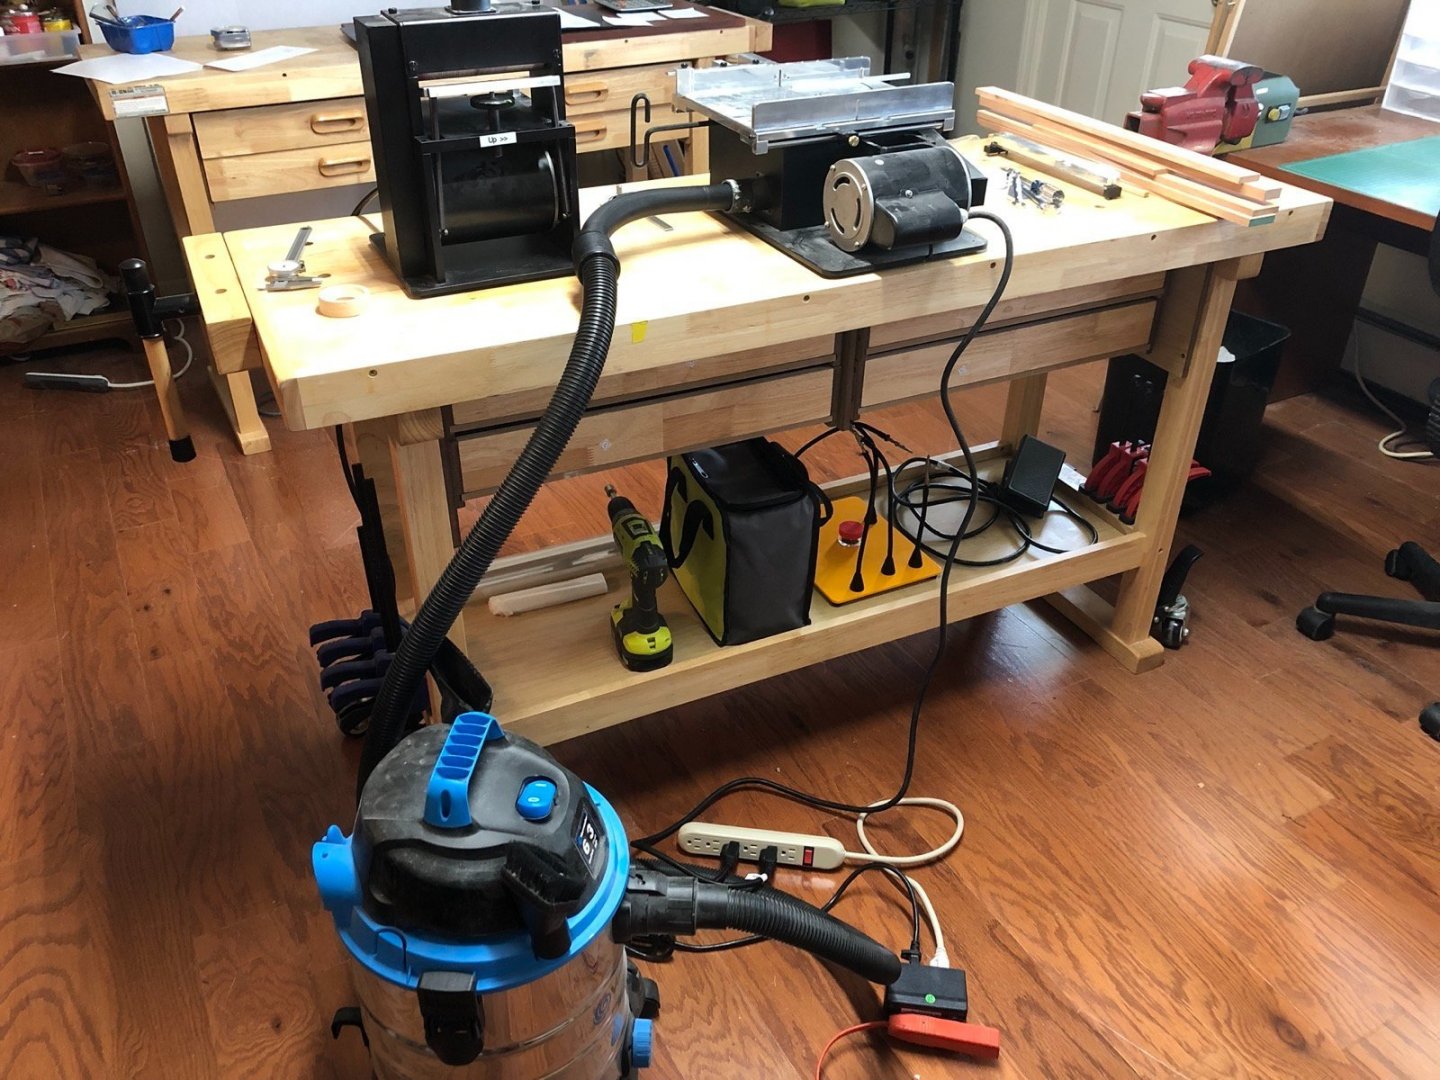
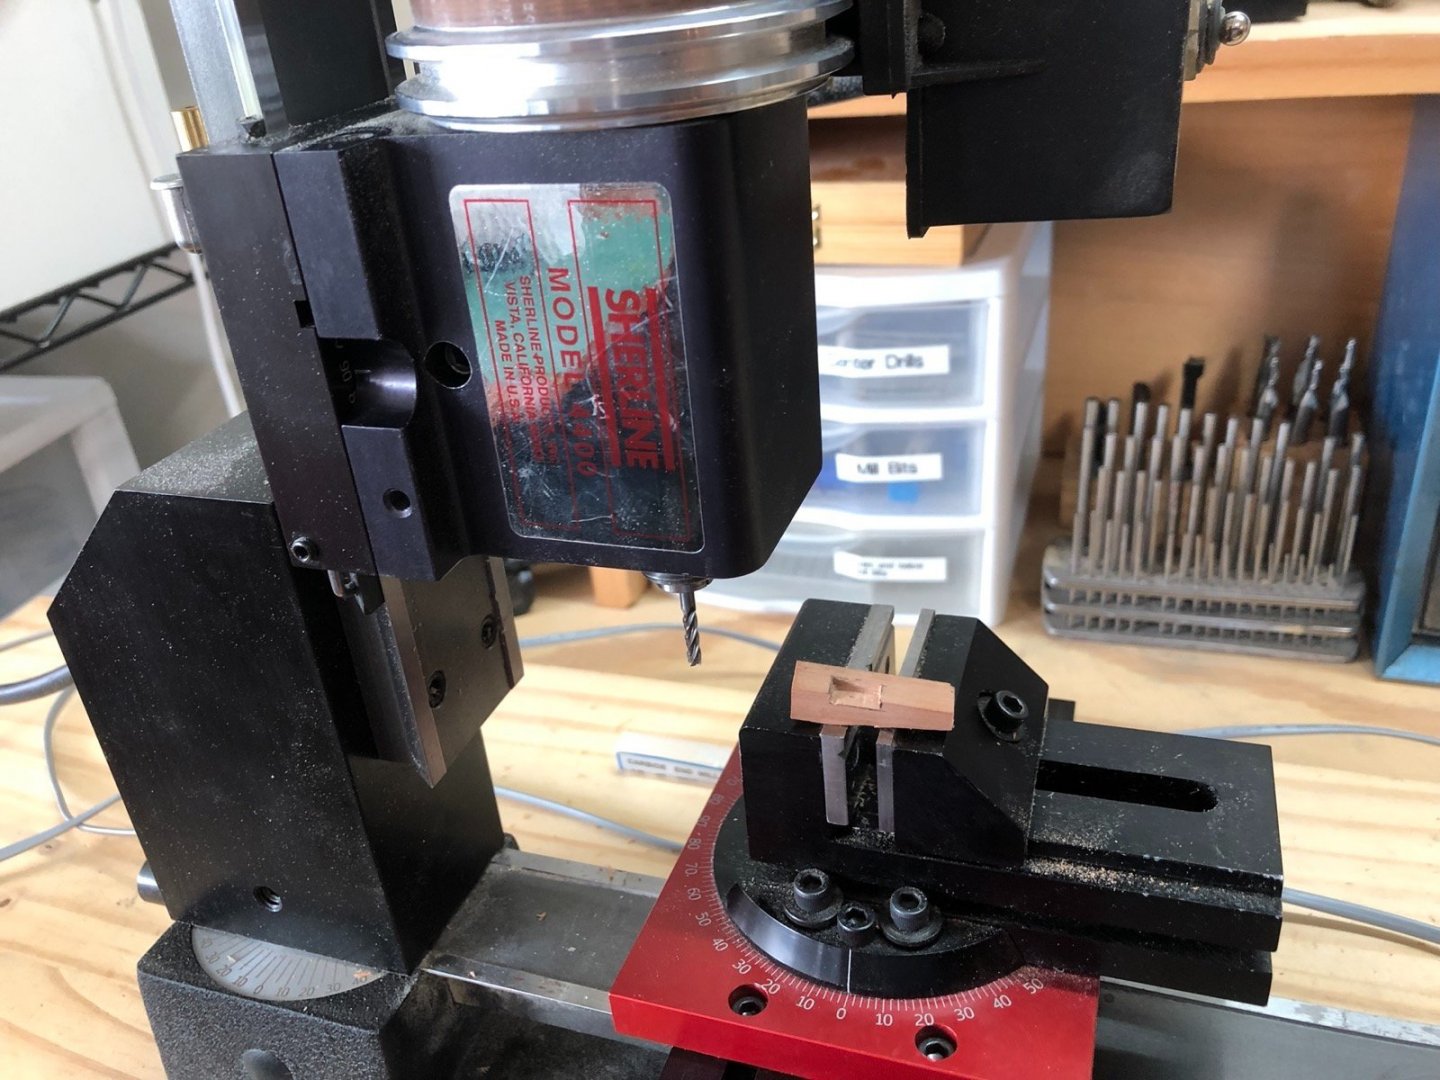
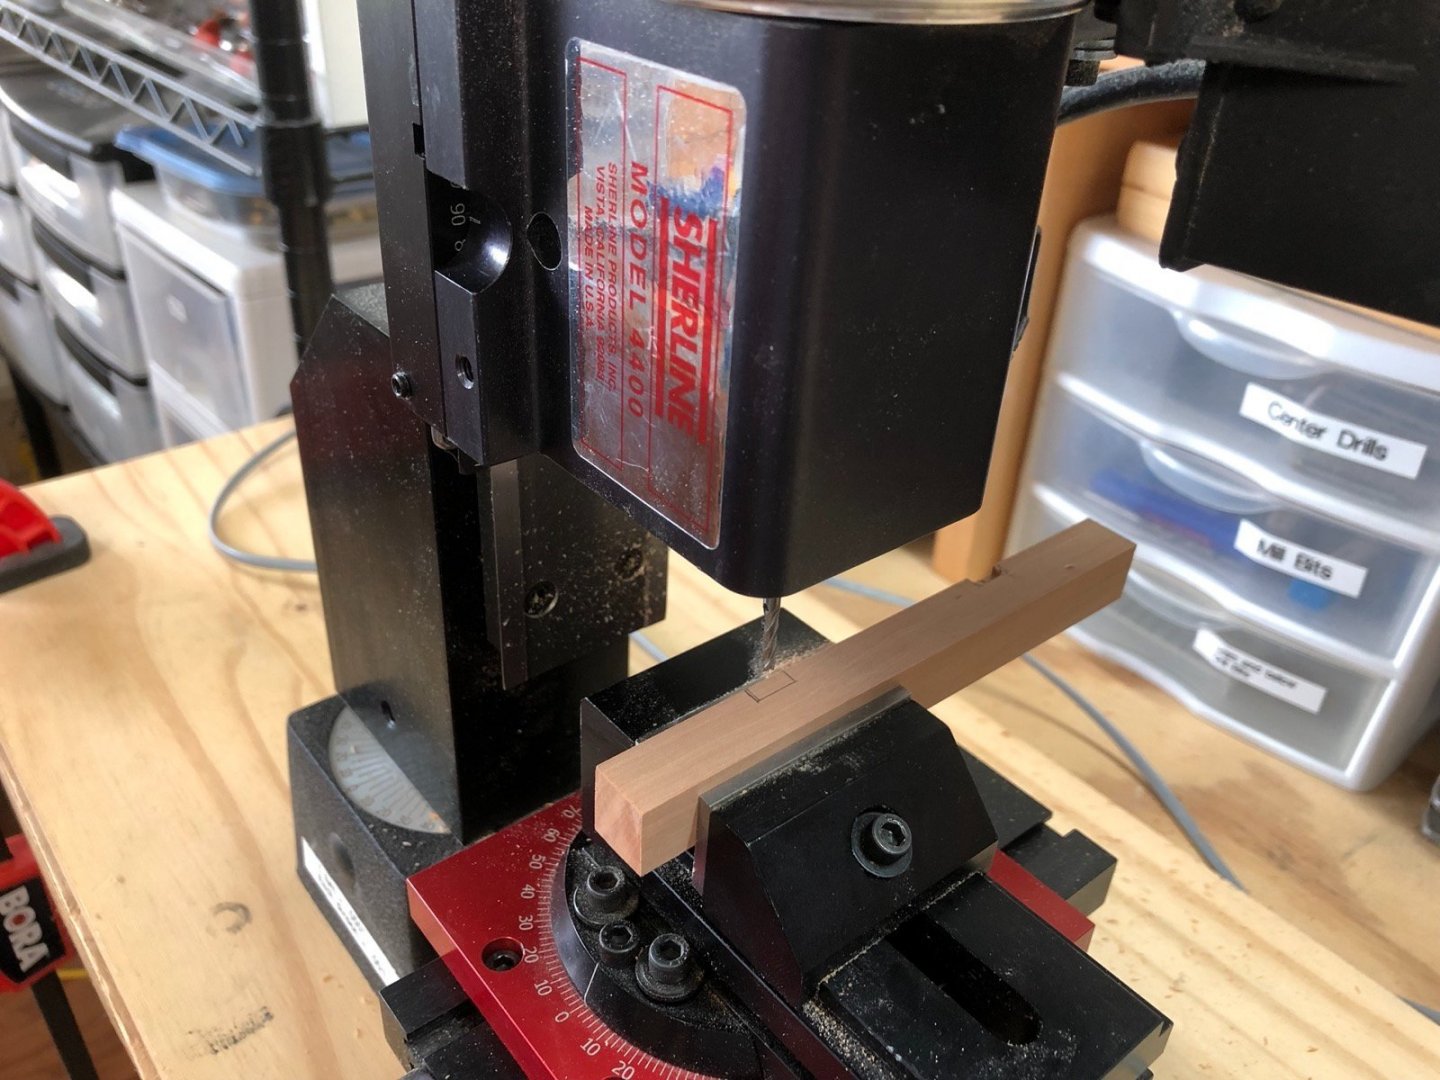
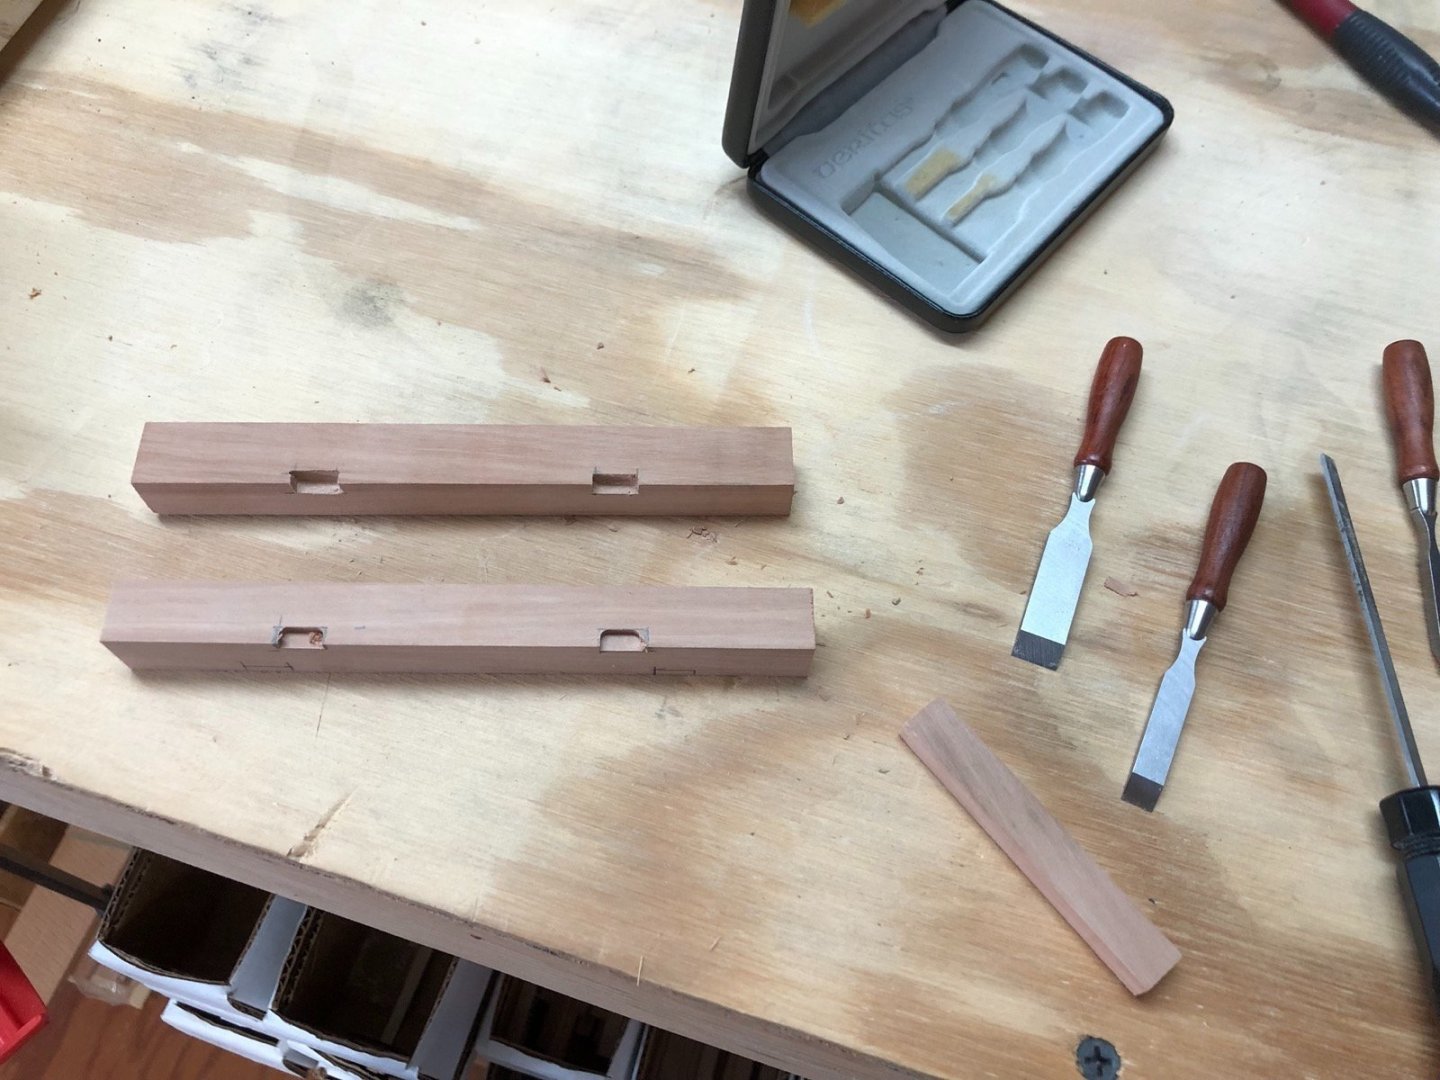
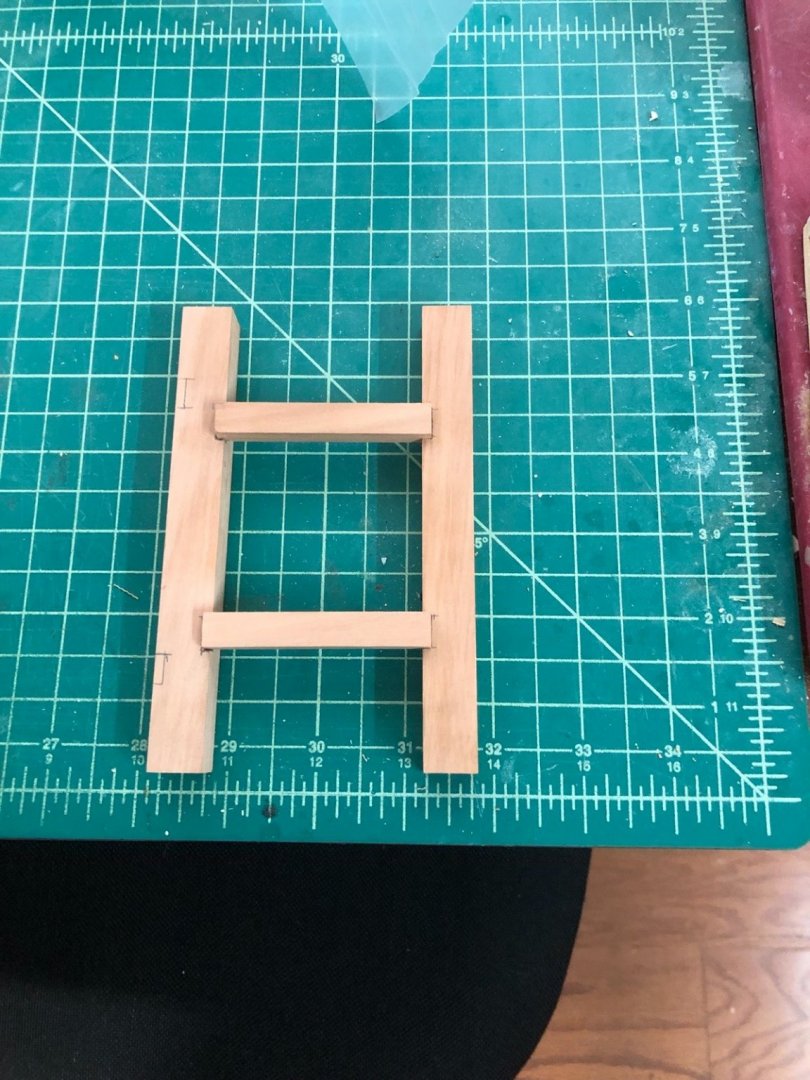
 Welcome all. Thanks for following along. I hope I don't disappoint. From the 10" and 6" sheets I cut the strips for the beams and carlings on the Byrnes saw, which zipped through the pear with no problems. There are 2 more carlings not shown above. Here is my set up for controlling dust with these tools. I have a shop vac with an adapter to fit the thickness sander and the saw. These are plugged into a power strip which is plugged into a box I bought from Amazon that senses when one of these tools is drawing current and automatically turns on the vac, and turns it off a few seconds after the tool is turned off. It works very well for me as long as I remember to move the vac hose to the tool I am about to use. Now comes the part that has kept me up at night - cutting the mortises for the carlings. I experimented on some scrap first by cutting along the lines and using chisels to clean out the mortise, which worked OK but not great. I then tried using the mill and cleaning up the slot with chisels. This worked much better for me but still not perfect. So I put one of the beams into the vise and milled a slot, then used some better but smaller files to clean it up. I was pretty happy with the result so I continued on the other 3 mortises for 2 of the carlings. As I am writing this I realize I could have cut the two matching mortises at the same time by putting both beams in the vise together, but I did then one at a time. I did use the first beam to check the marks on the second beam before I cut them out of the second beam though. Here is a finished beam and one right out of the mill before clean up. And here is how they look cleaned up with the carling strips just fit in before I cut them to fit flush. Now to do the other set of mortises for the other 2 carlings.
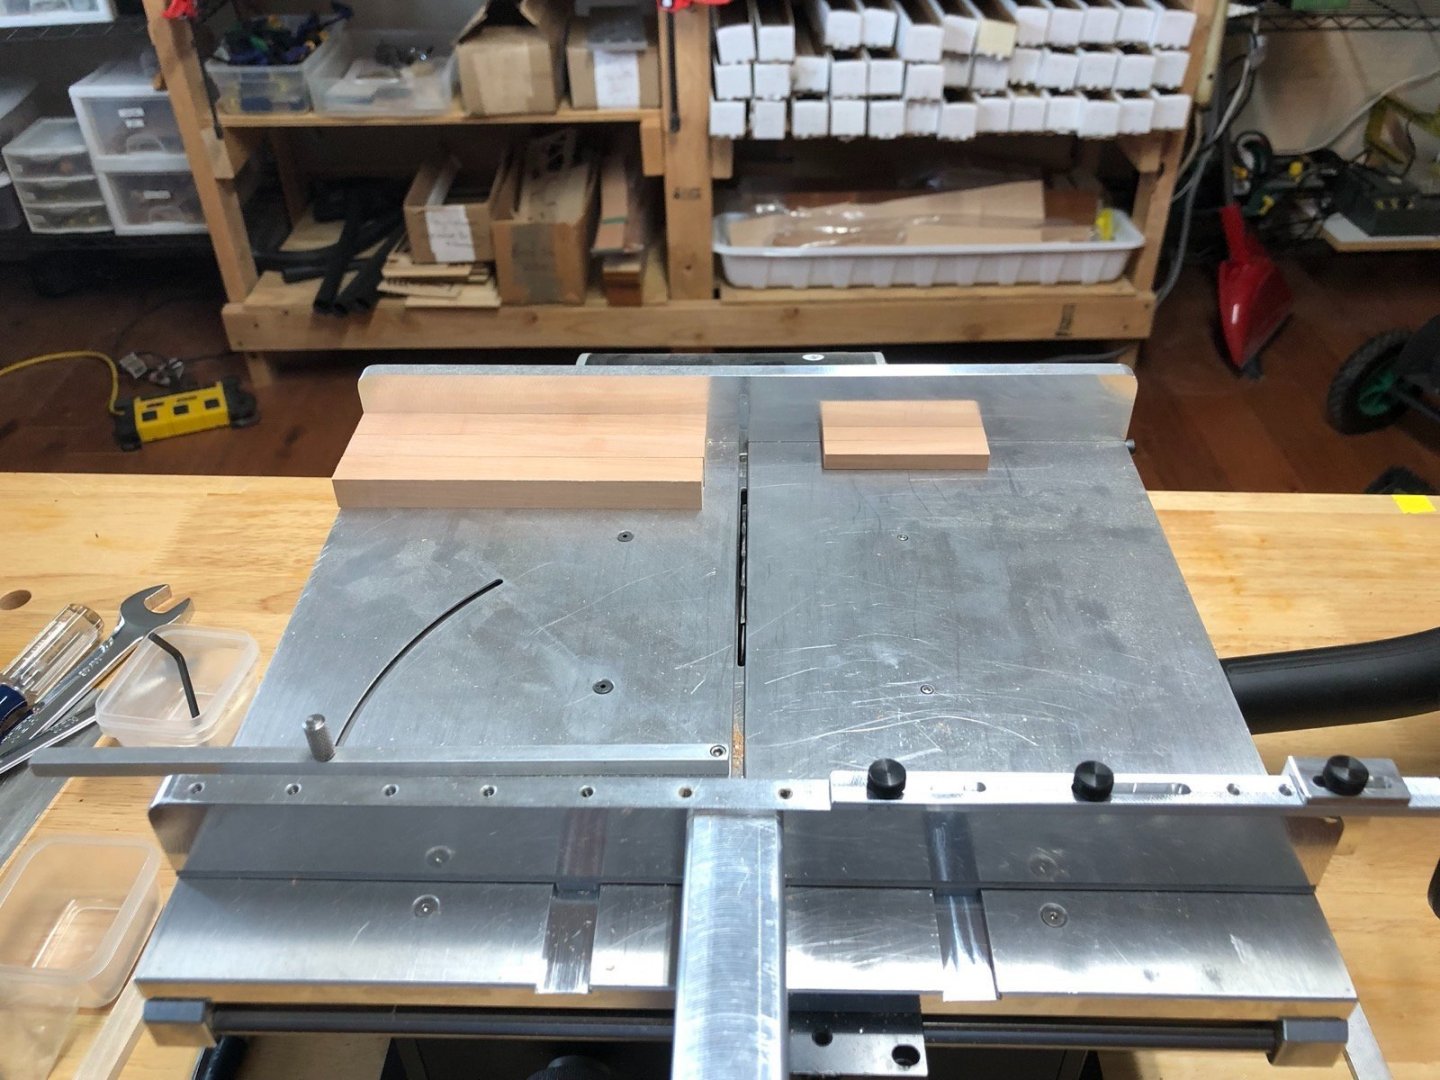
-
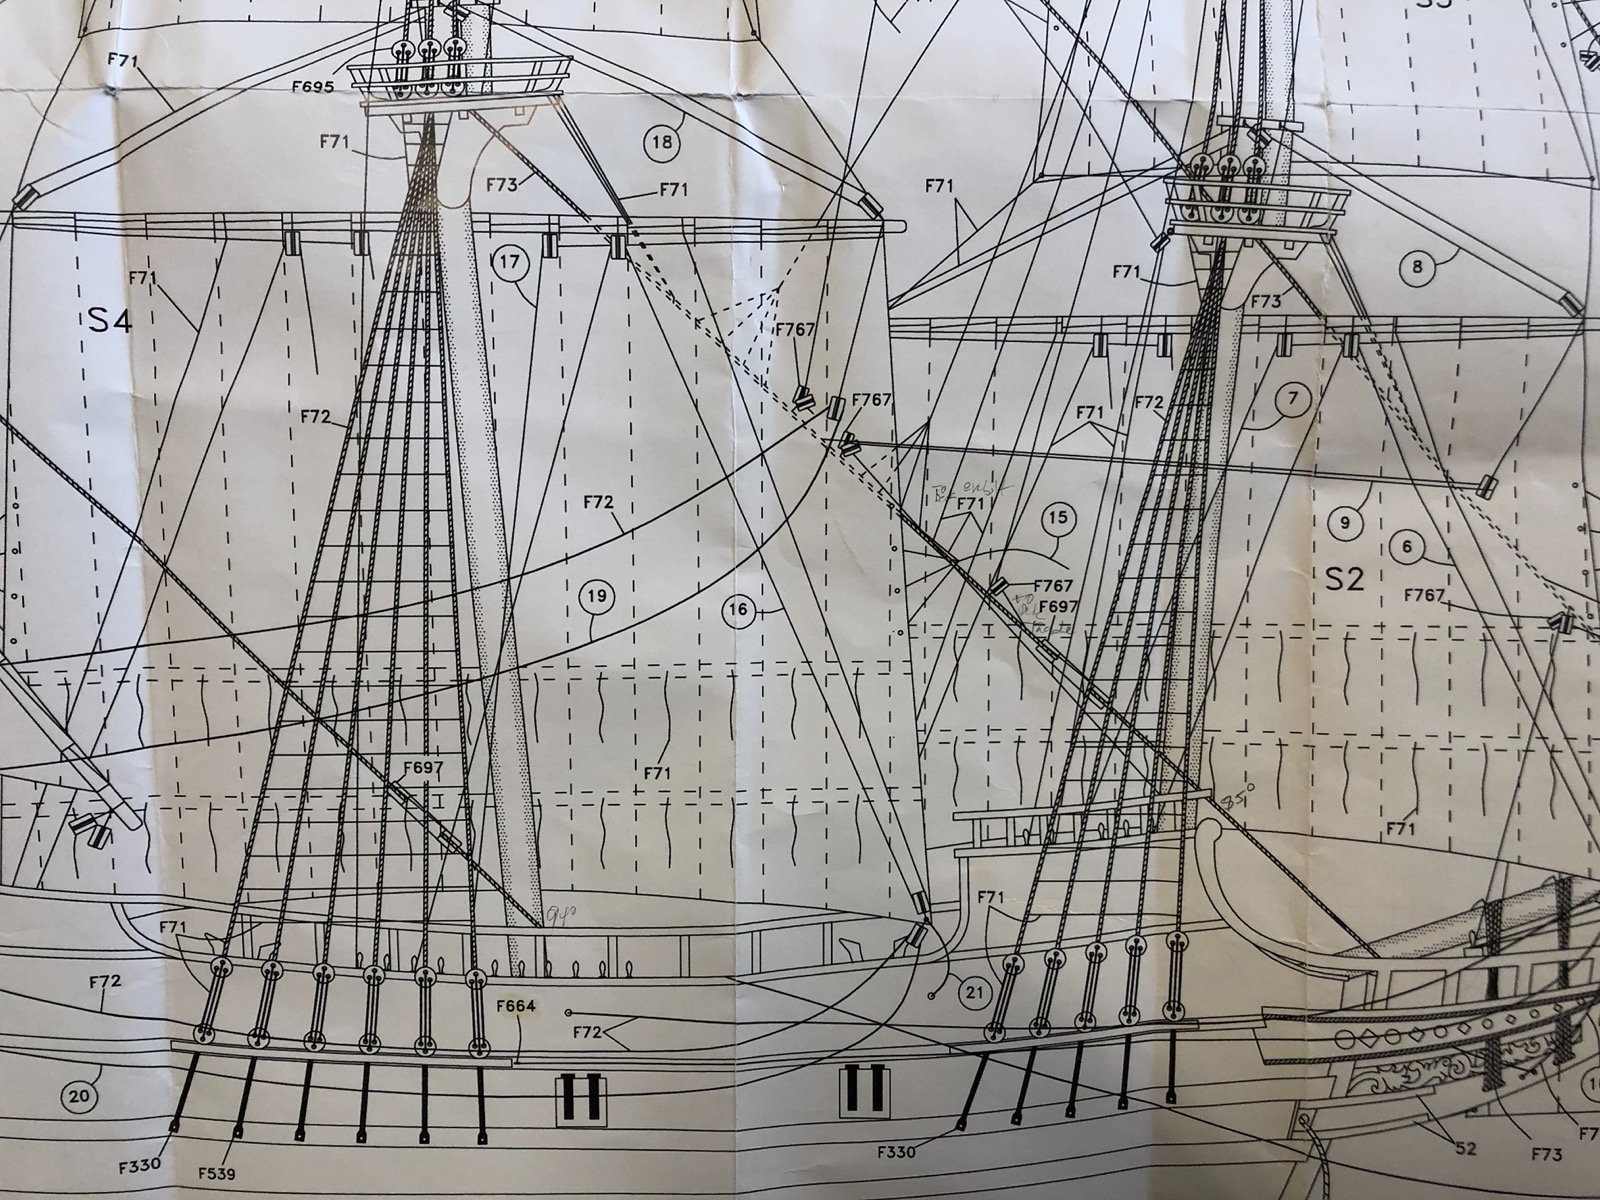
1:16 scale so I am using the plans as printed
-
NRG Capstan Project
usedtosail replied to tlevine's topic in - Build logs for subjects built 1751 - 1800
I have started a build log here: https://modelshipworld.com/topic/29396-nrg-capstan-project-by-usedtosail-116/ -
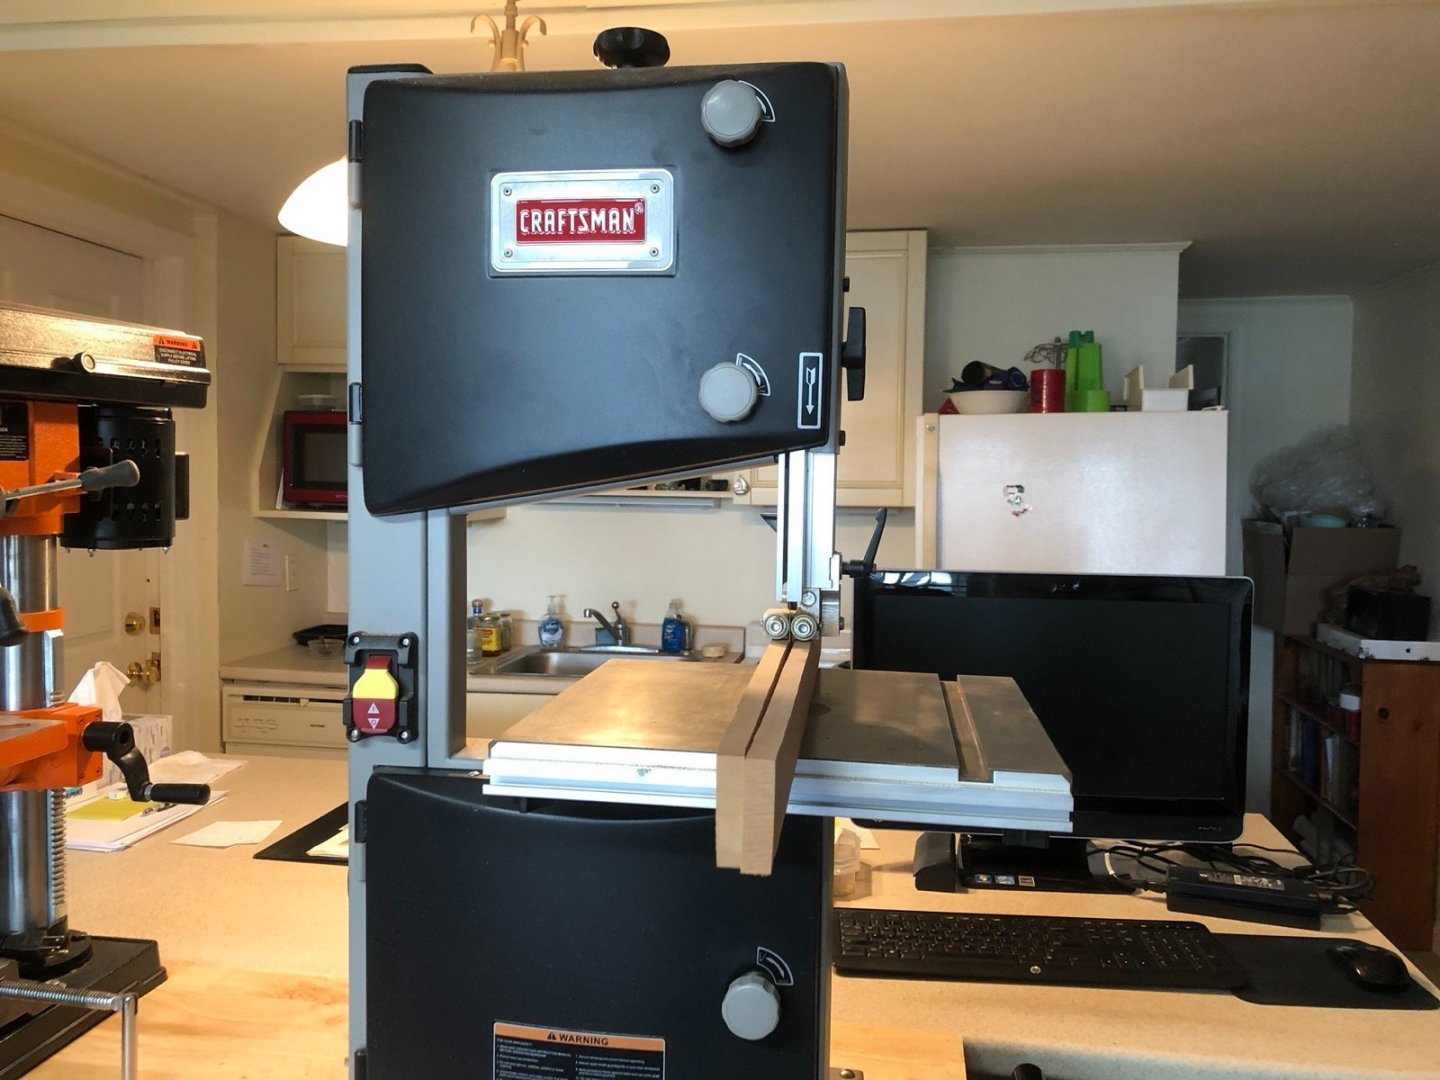
So I am between ship models but we are having a pretty crappy Summer weatherwise so far so I decided to try my hand at scratch building the capstan model from the NRG plans and instructions by Tony Levine. I have the tools so I am going to try to build the Advanced version of the model but may drop back to the Intermediate version if I am having trouble. I downloaded the instructions and plans from the NRG site and printed it so I have it all in front of me as I go. I started the build by rough cutting sheets of pear wood from a billet I had in scale 10", 7.25", 6", and 5" thicknesses on my small band saw. I already had a 4" thick sheet. I had gone through the plans and found these to be the thicknesses needed for the majority of the parts. I do have some boxwood that I may use as a contrast but for now everything will be pear. I then ran the sheets through the course side of the thickness sander until I had the saw marks out and then through the fine side until I had the correct thicknesses. I imagine this is pretty basic stuff for you scratch builders but this is the first time I have started a scratch project. The next step will be cutting strips from these sheets for the beams and carlings.

-
NRG Capstan Project
usedtosail replied to tlevine's topic in - Build logs for subjects built 1751 - 1800
Since I am between ship models and I am interested in scratch building in the future and the weather has been very rainy this Summer, I decided to try to build this capstan model. I have the tools so I am going to try the advanced version. I am in the process of getting the wood together. I can start a build log for this if people are interested. -
Thank you Bill, zappto, KH, and Michael, and for the likes. I really appreciate the comments.
-
I love the detail you are adding to this build.
-
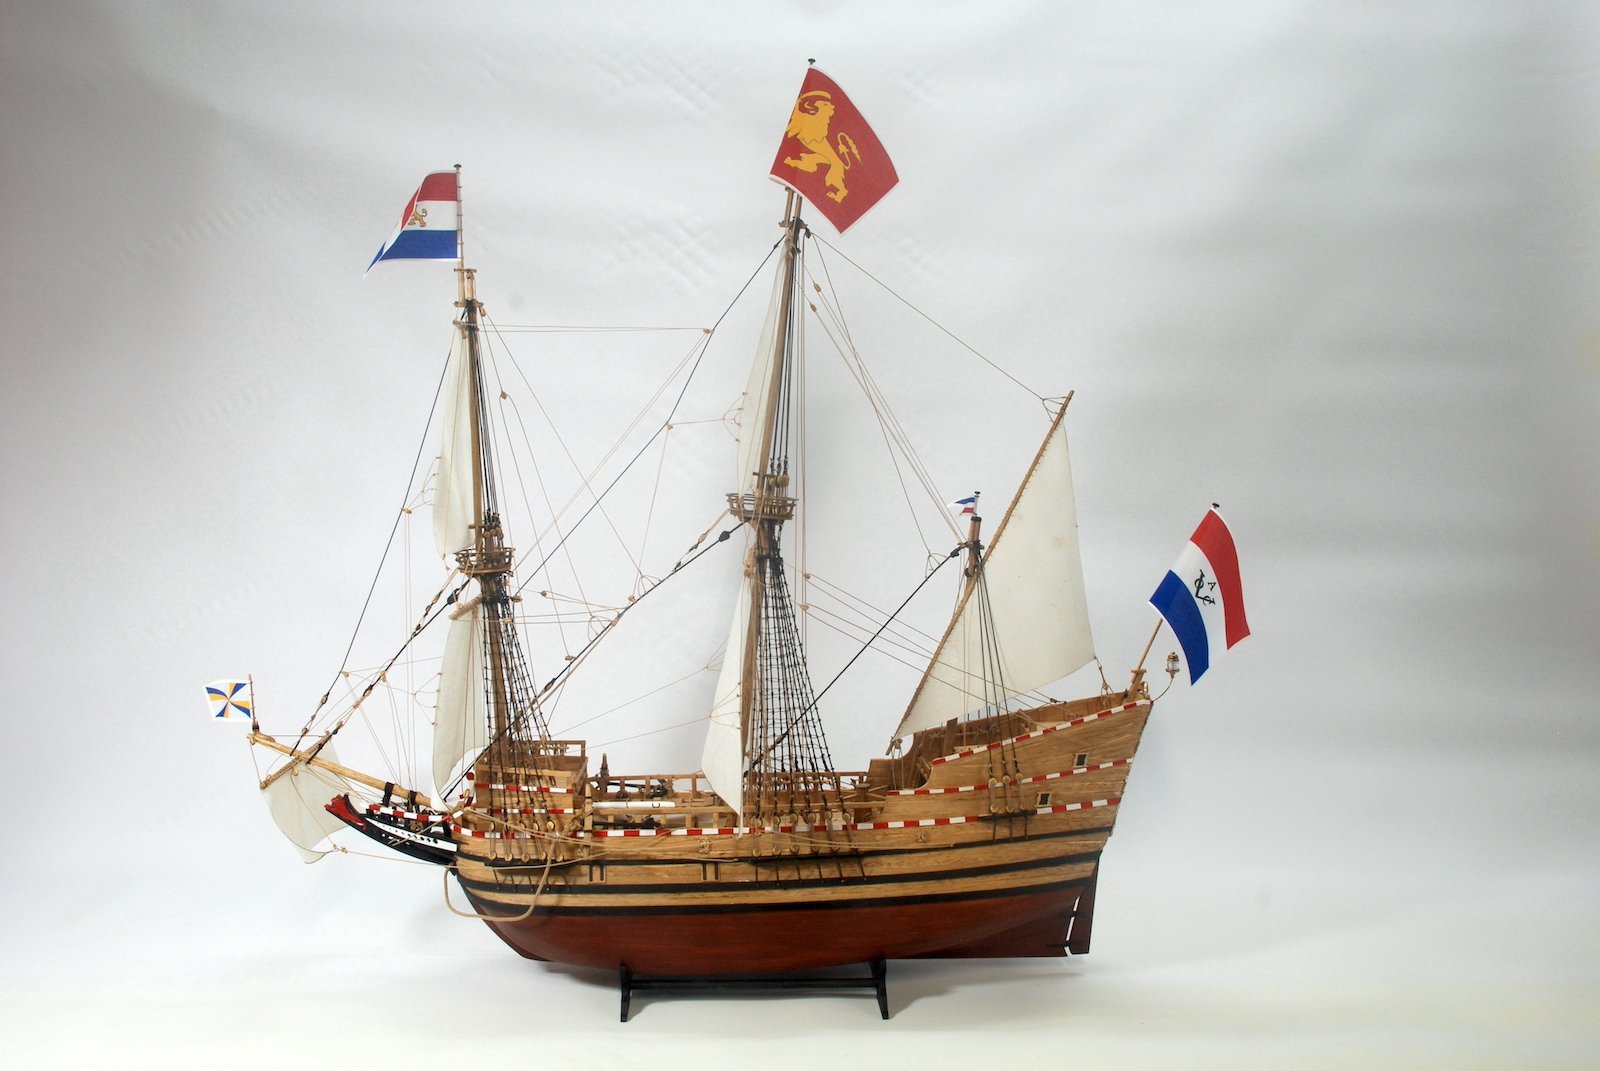
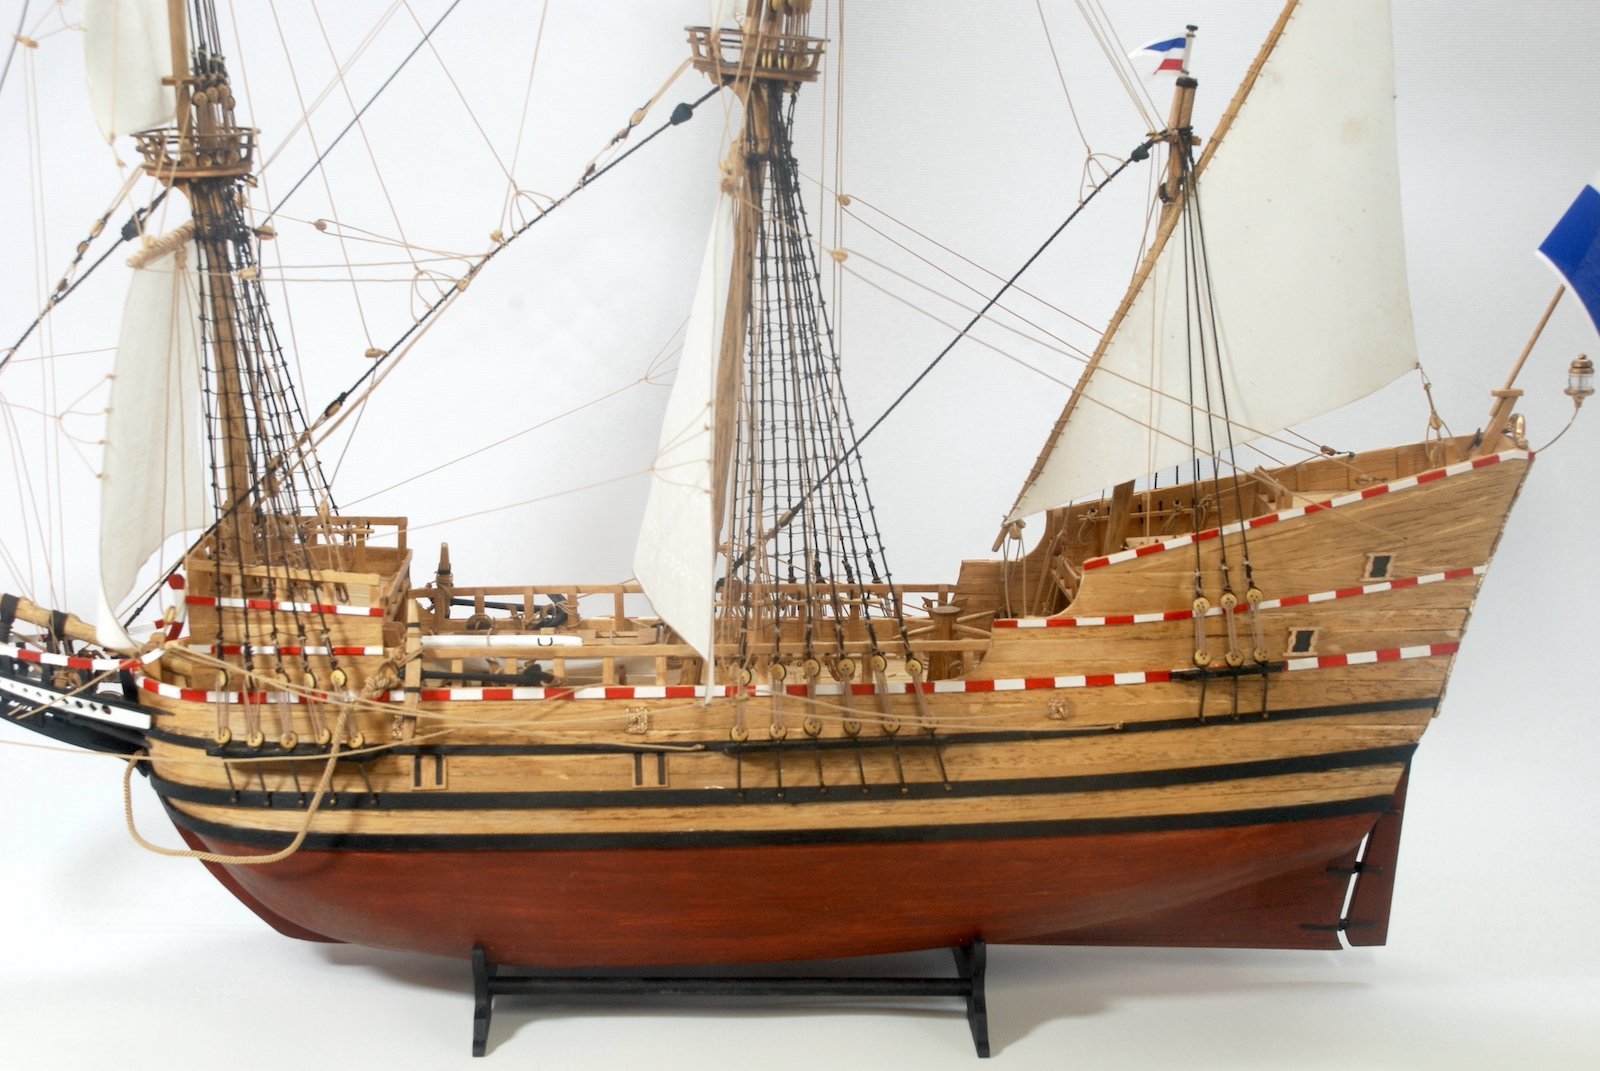
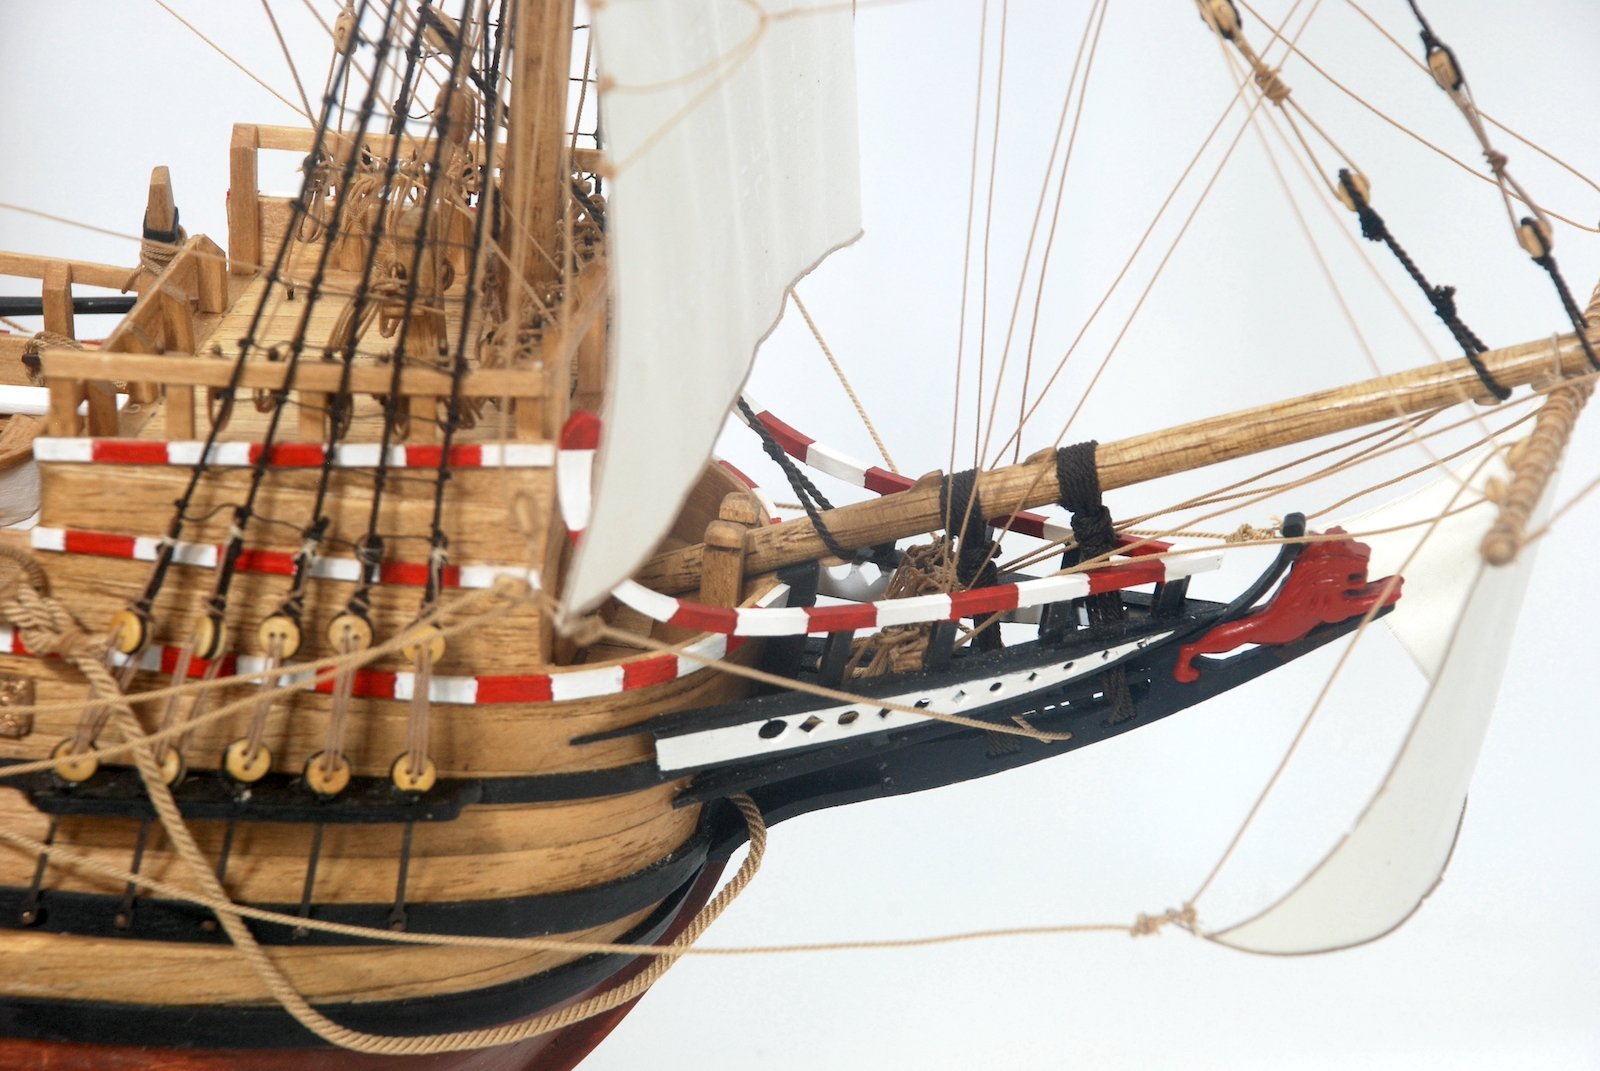
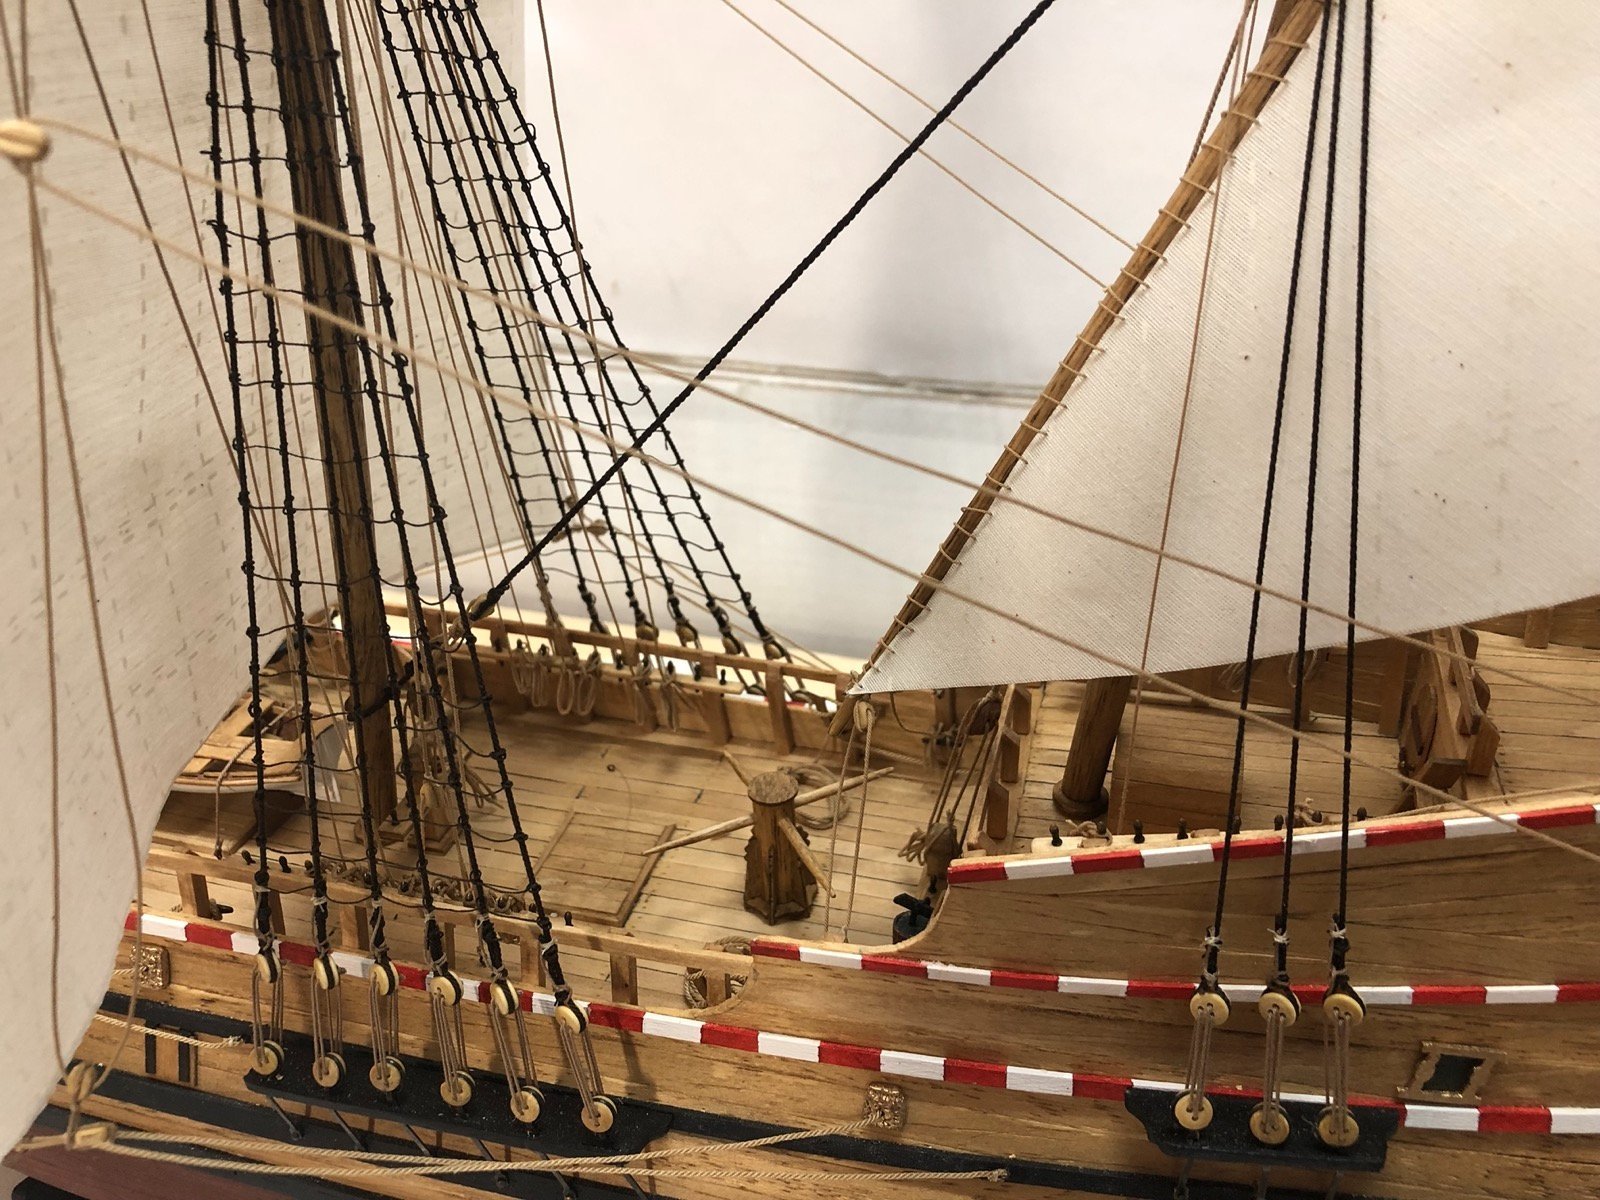
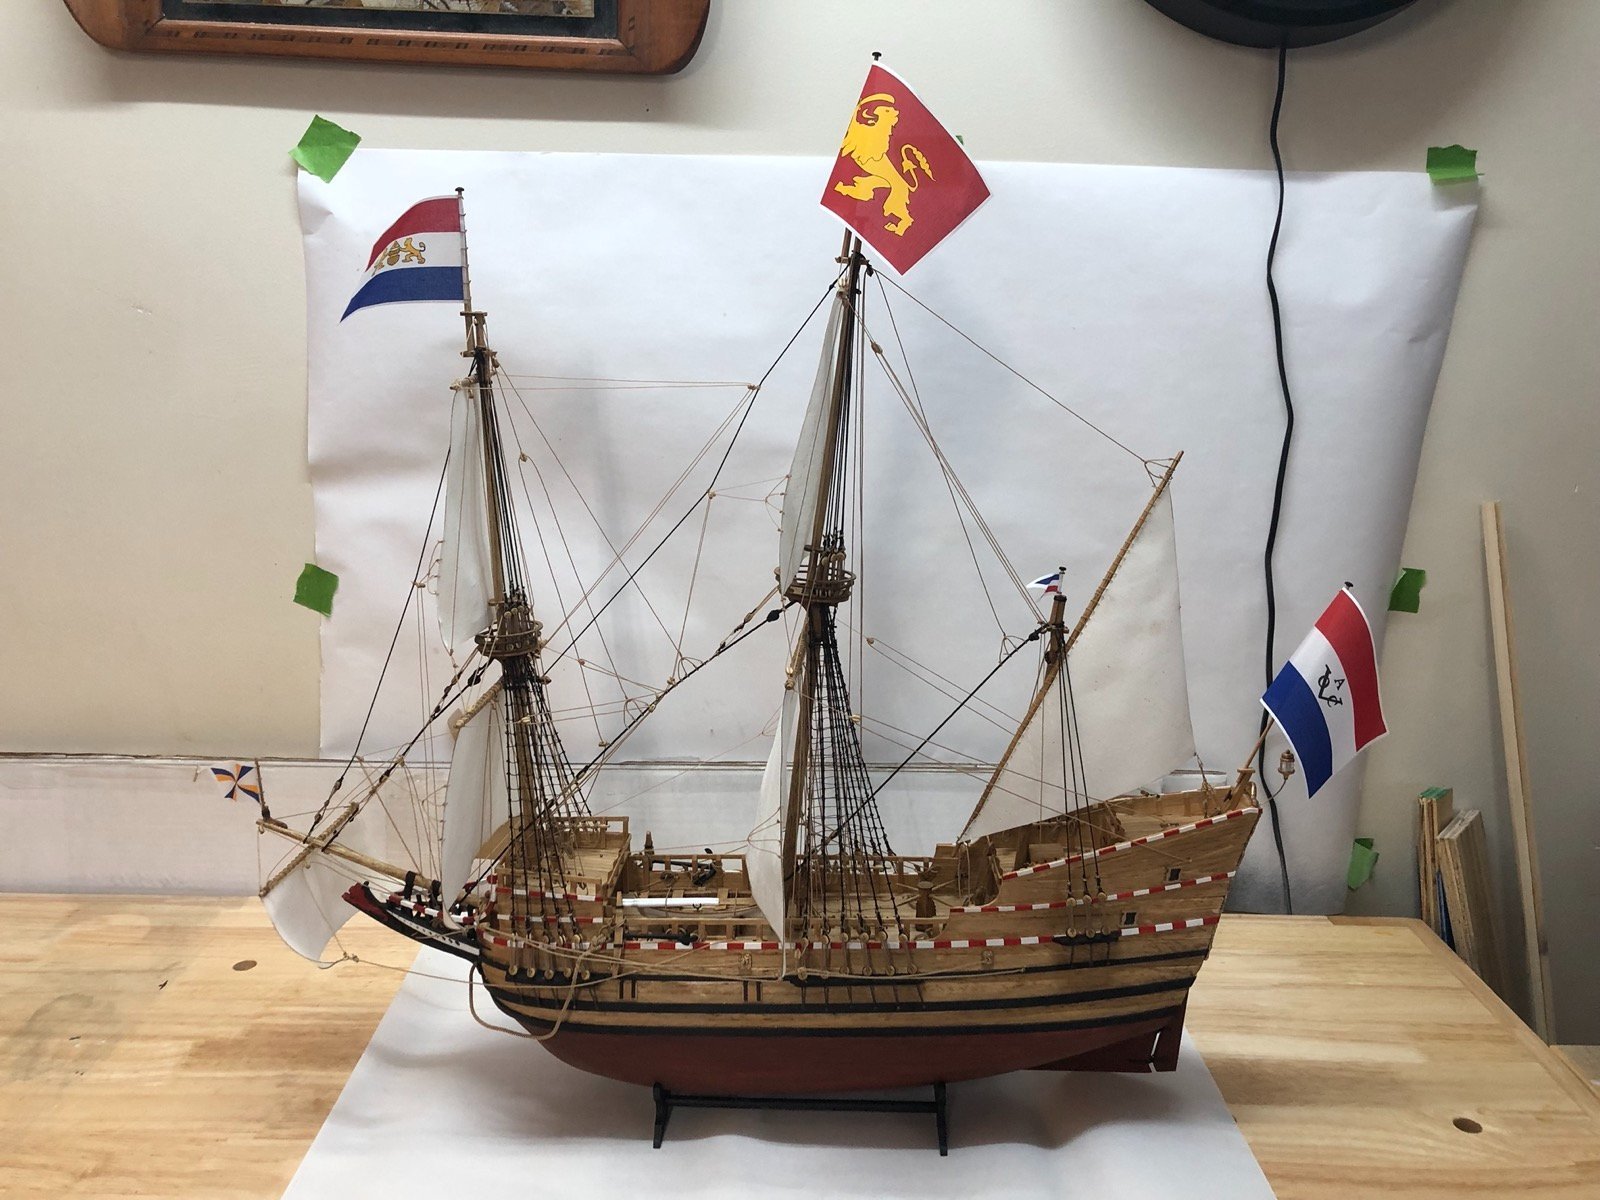
Thank you GrandpaPhil and Backer, and the likes. Here are some better pics of the completed model, with more in the gallery.


- 135 replies
-
- 10
-

-

-
- billing boats
- half moon
- (and 1 more)
-
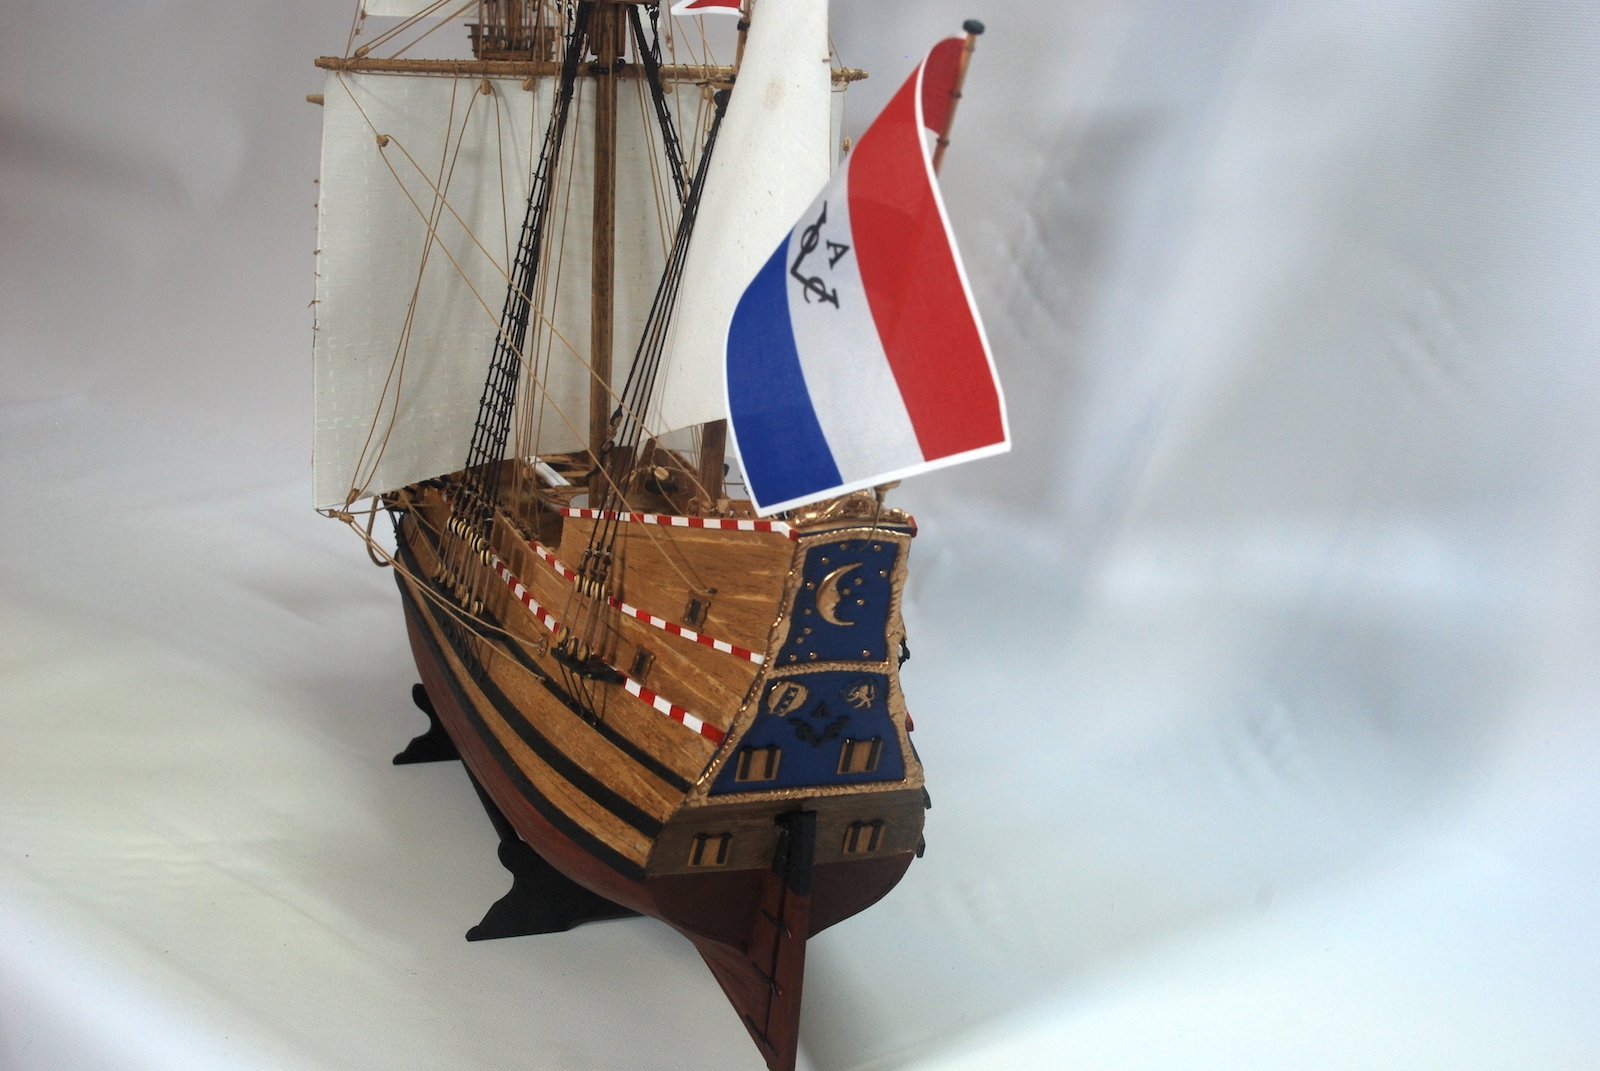
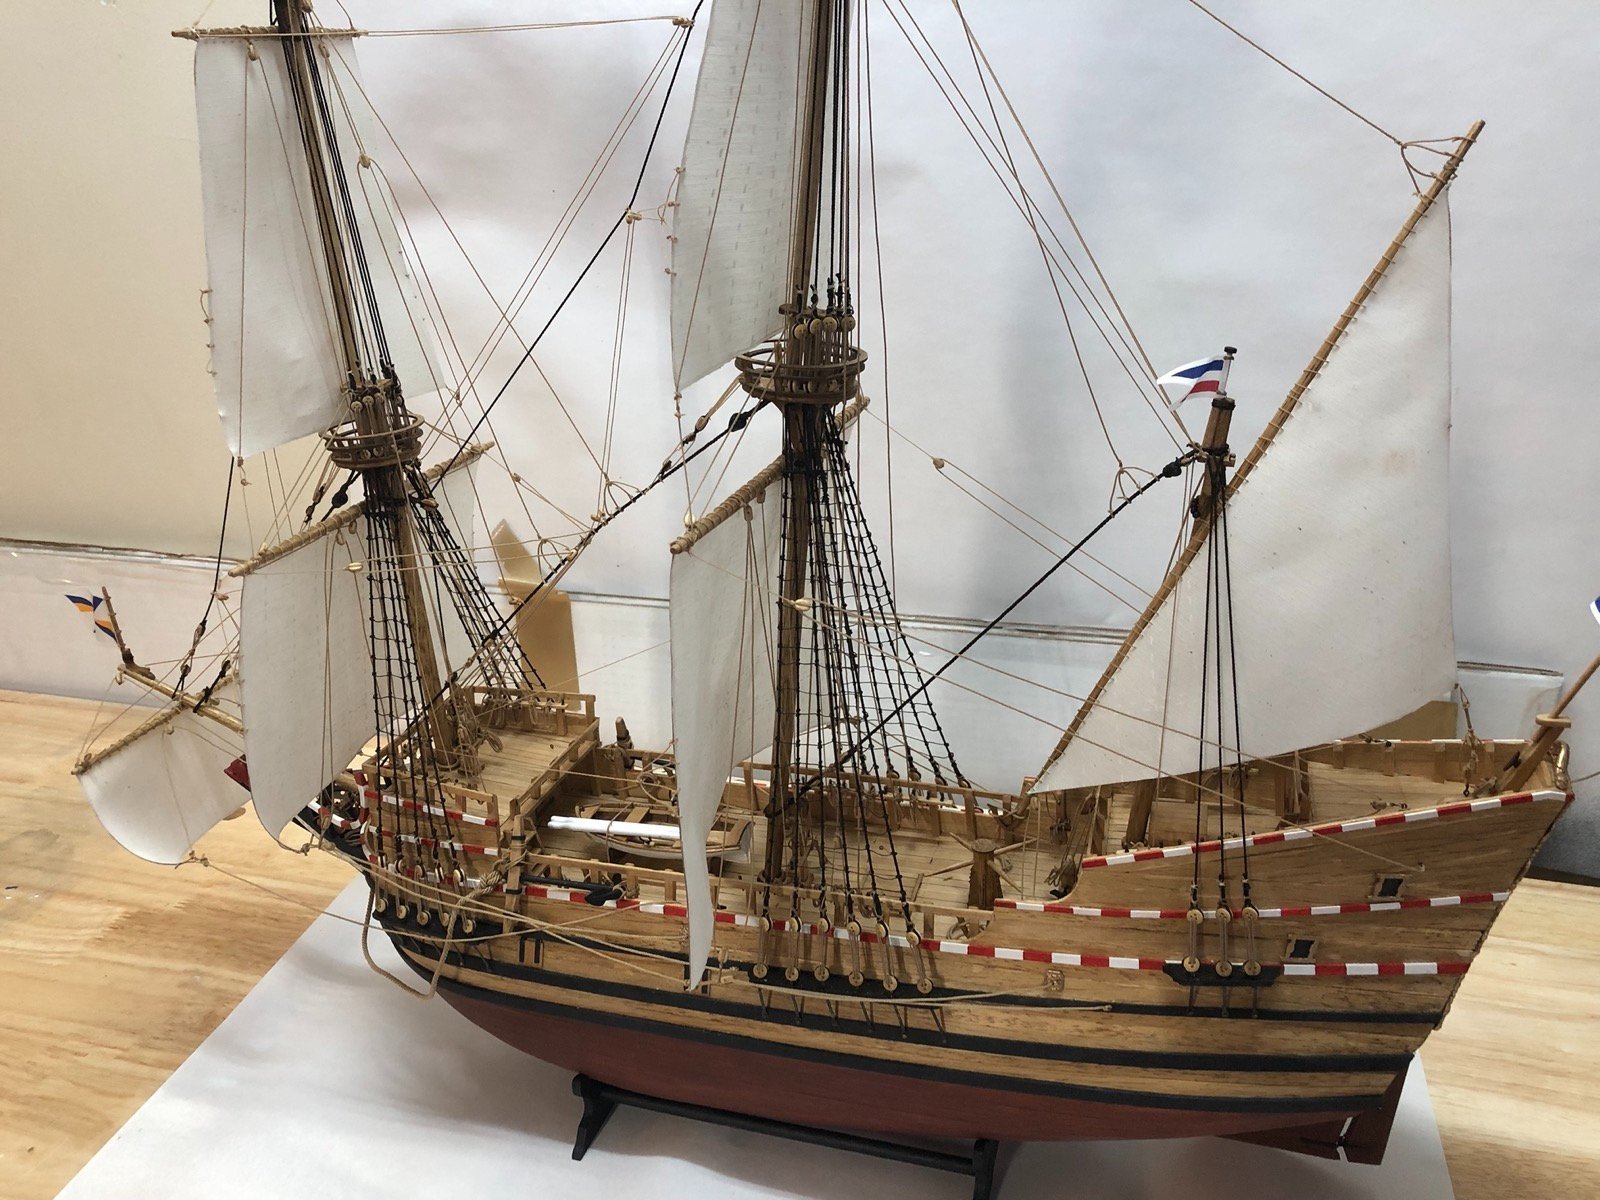
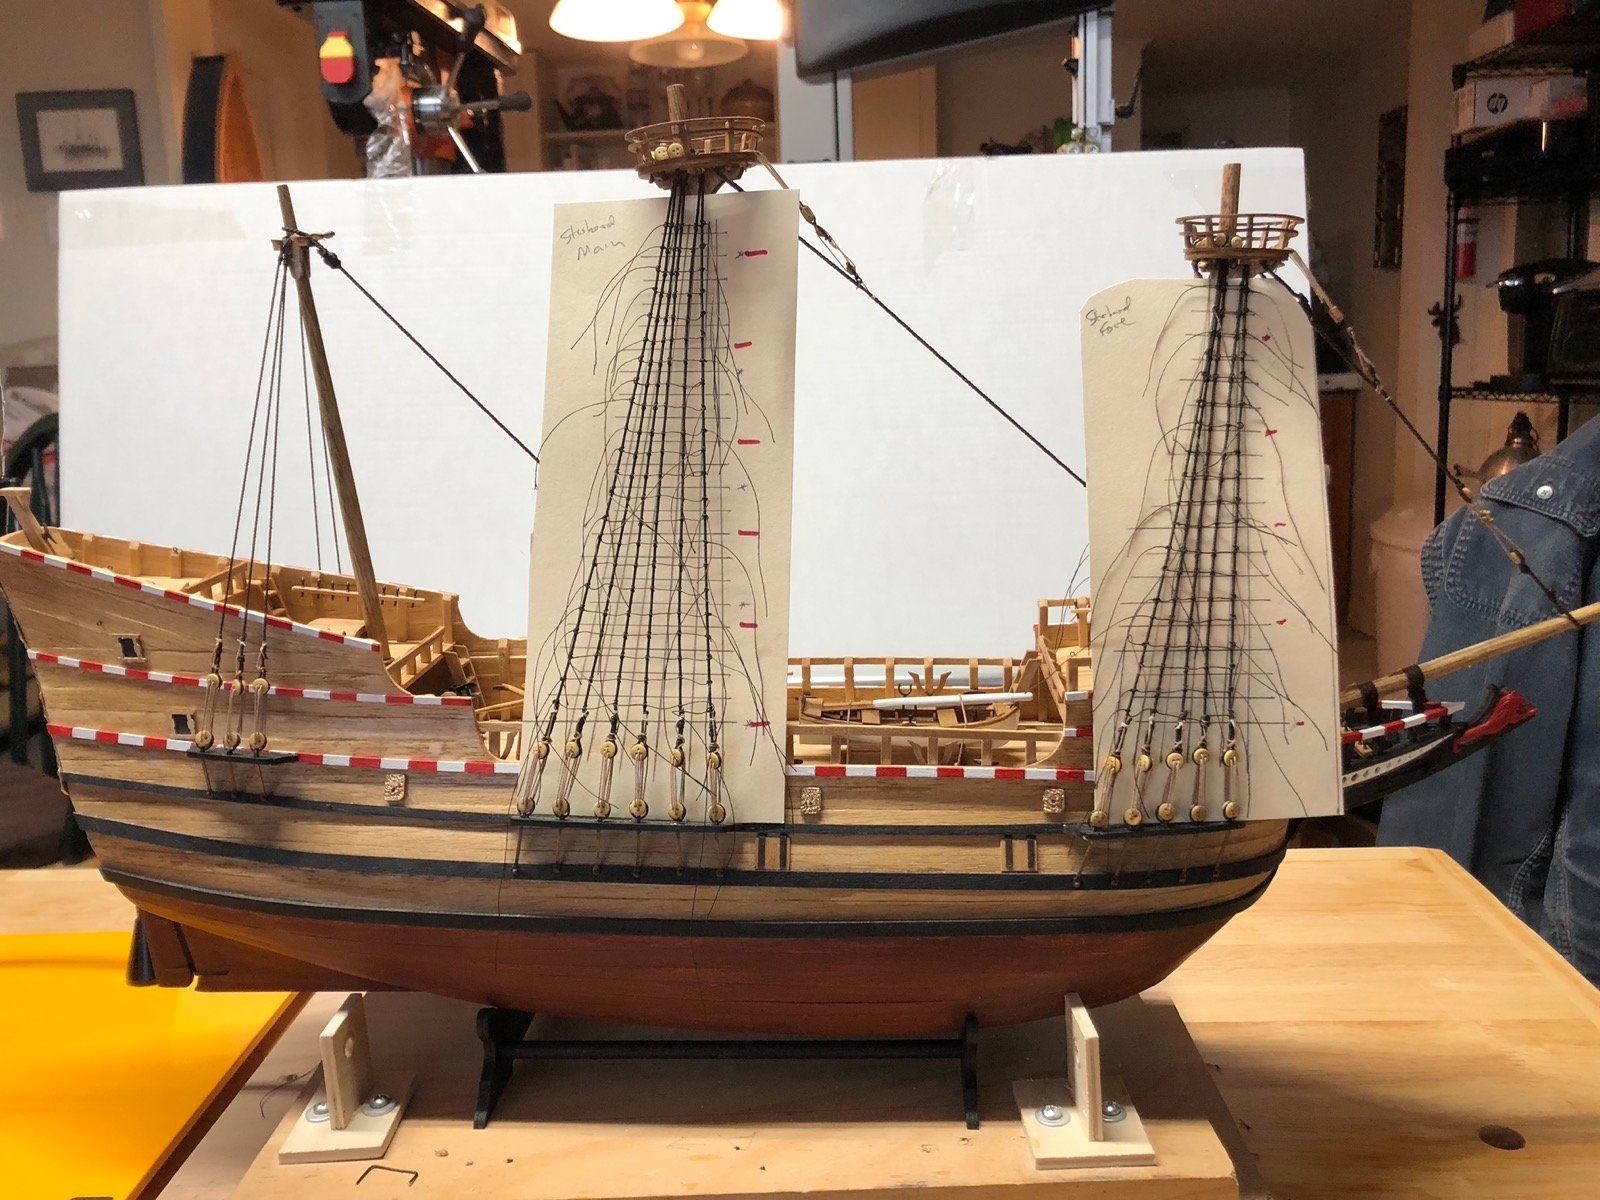
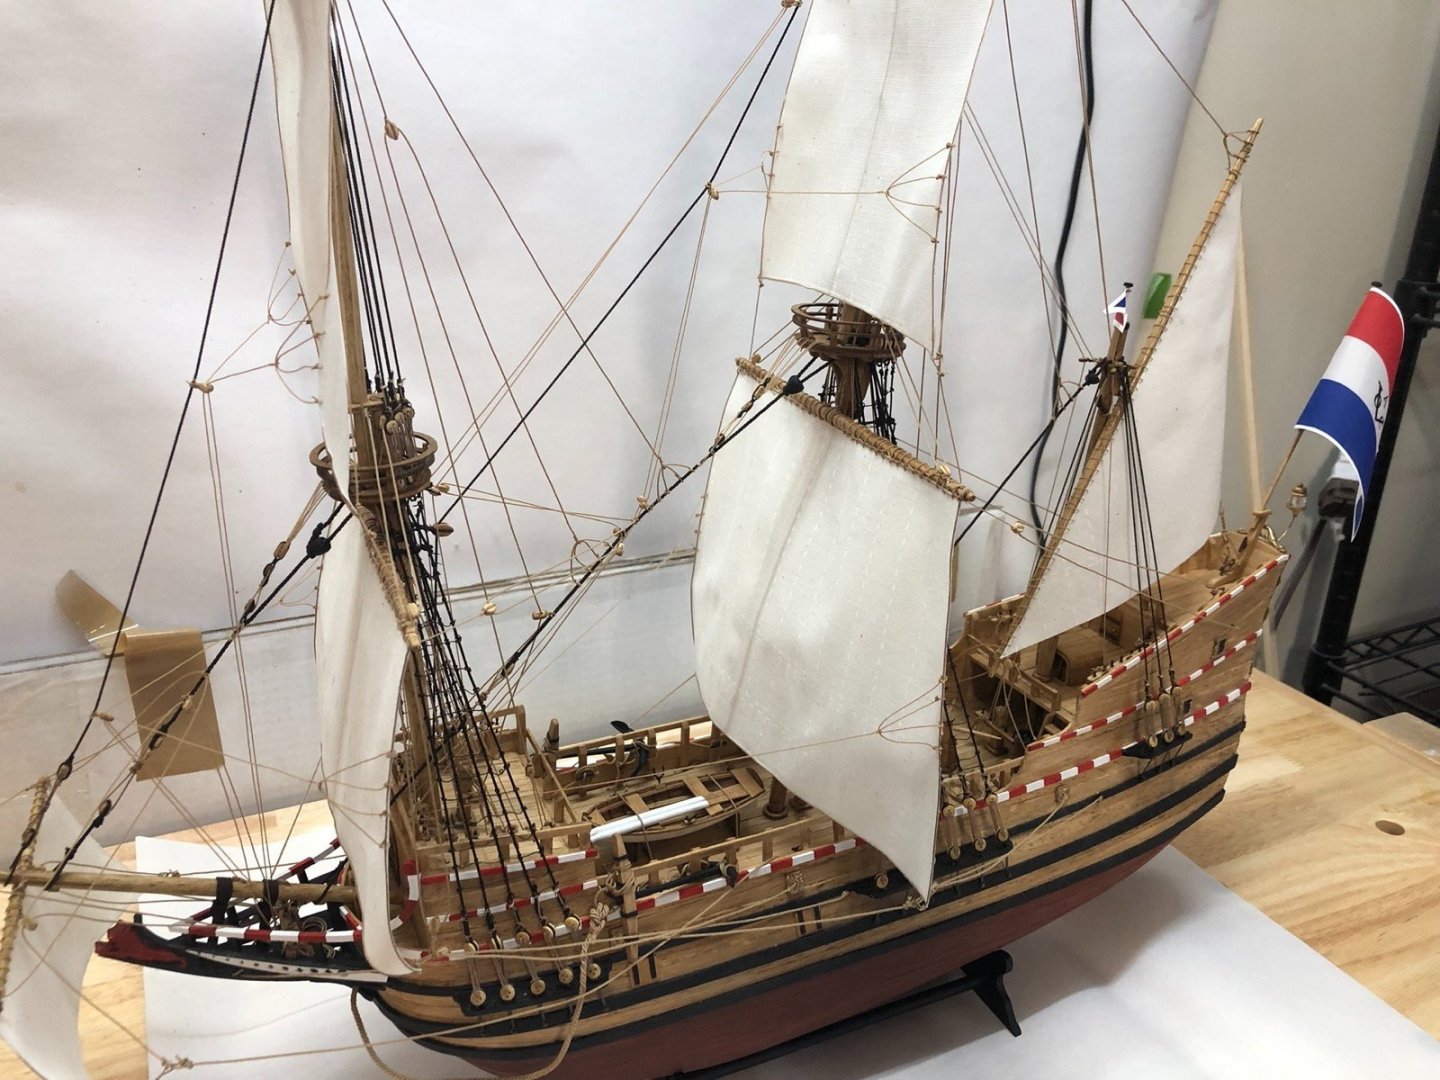
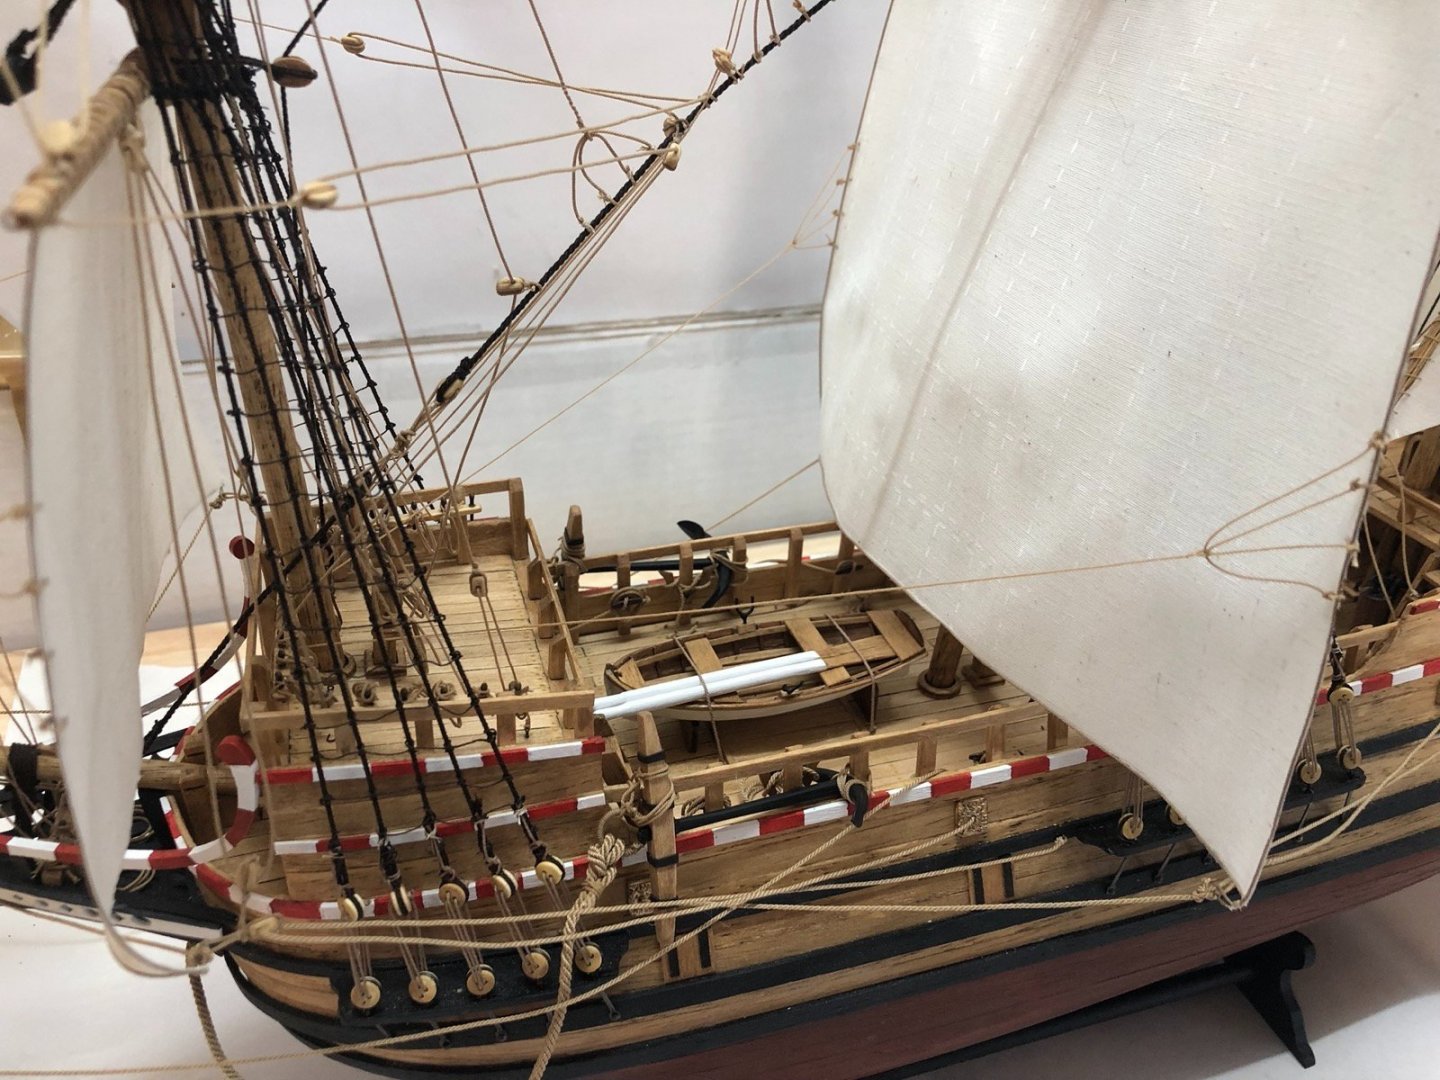
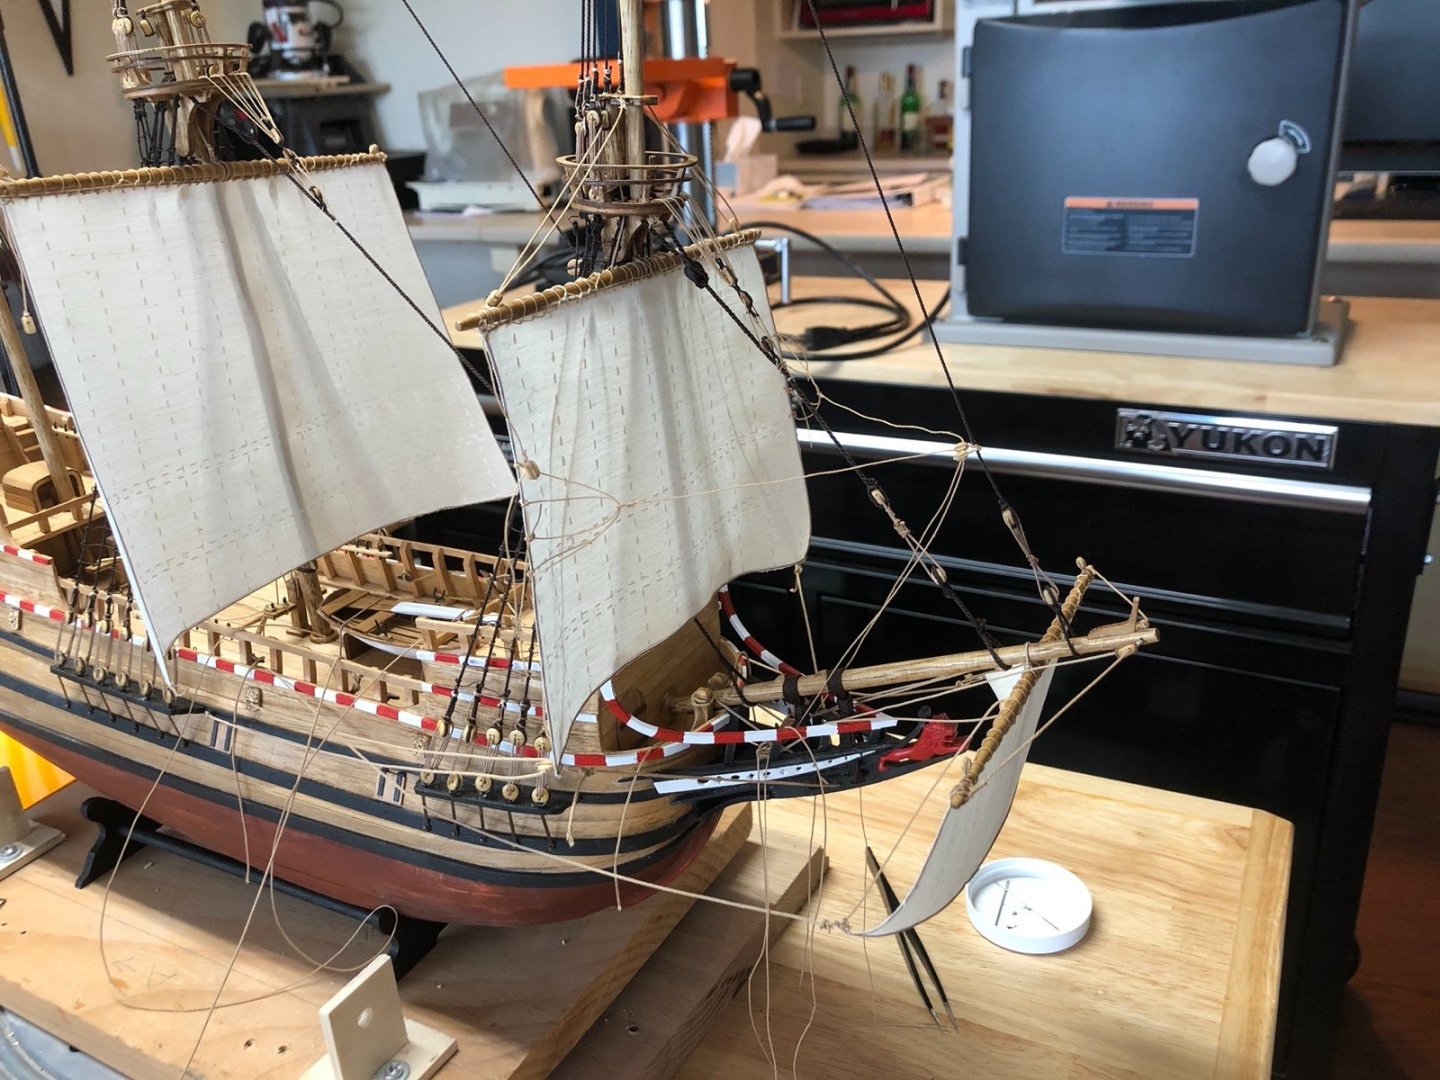
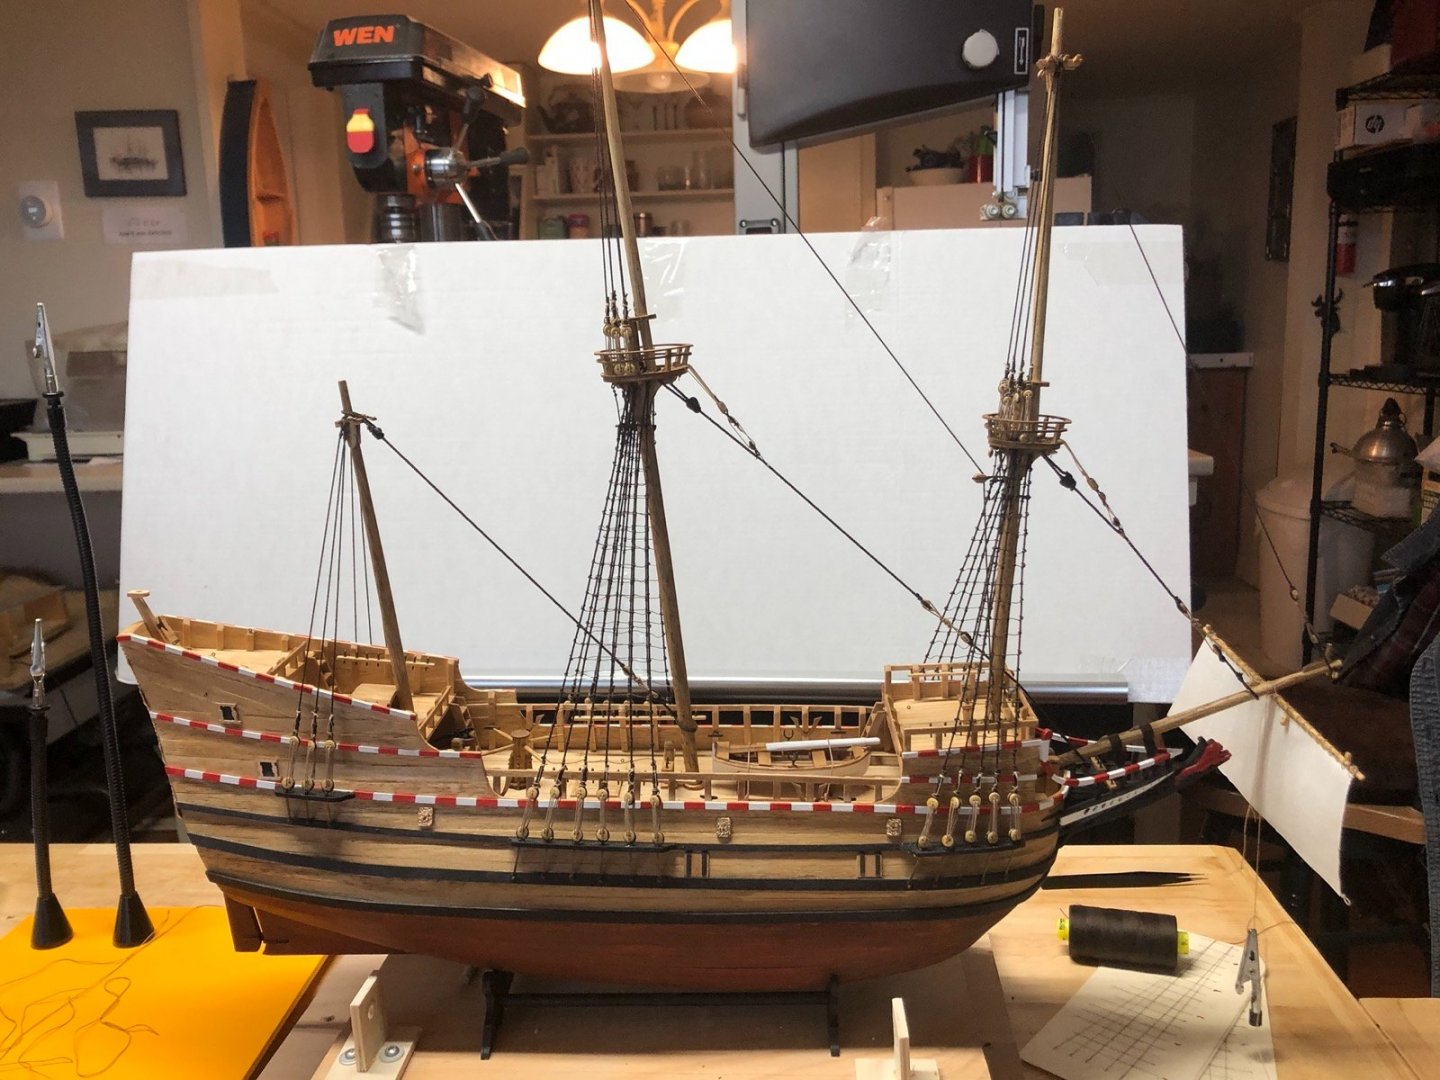
I added the rest of the flags, the lantern and stern rail decoration , then lashed the anchors to the rails. The model is now completed. Here are just a few teaser photos until I can take some good ones with a good background. I'll post those in the gallery. This is the tenth wooden ship model that I have made. This one had some firsts for me. It is the first 17th century ship I have built and it is the first to include crows feet and bowlines. This is the first model where I made all of the rope for the rigging myself, except for seizing line and the ratlines, which I used thread for. This is also the first time I have used polyester for the line. I have made some line for other models, but it was made from nylon thread which was much stiffer than this line and didn't hang as nicely. This is also the first model where I didn't use CA to fix the knots in the rigging. For this model I used Dullcote Lacquer to fix the knots, which took a little time to get used to. I found that I just needed to leave the rigging alone after applying the lacquer for about 24 hours to make sure it was really dry. Then it held as well as the CA. And this is the first square rigged model where I added full sails. I still need to make more realistic sails for a future model but I like how these came out. Once I make a case for the Half Moon I will be delivering it to my friend Dennis, who is retiring today, and his wife Mary. Not that I planned to finish it today but it will take a month or so to complete the case. I wish I could deliver it to them today. I will be building the Duchess of Kingston as my next model but won't start that until the case for the Half Moon is finished and the shop is cleaned out, probably late August or so. Thanks for watching and thanks for all the encouragement and comments.


- 135 replies
-
- 9
-
-
- billing boats
- half moon
- (and 1 more)
-
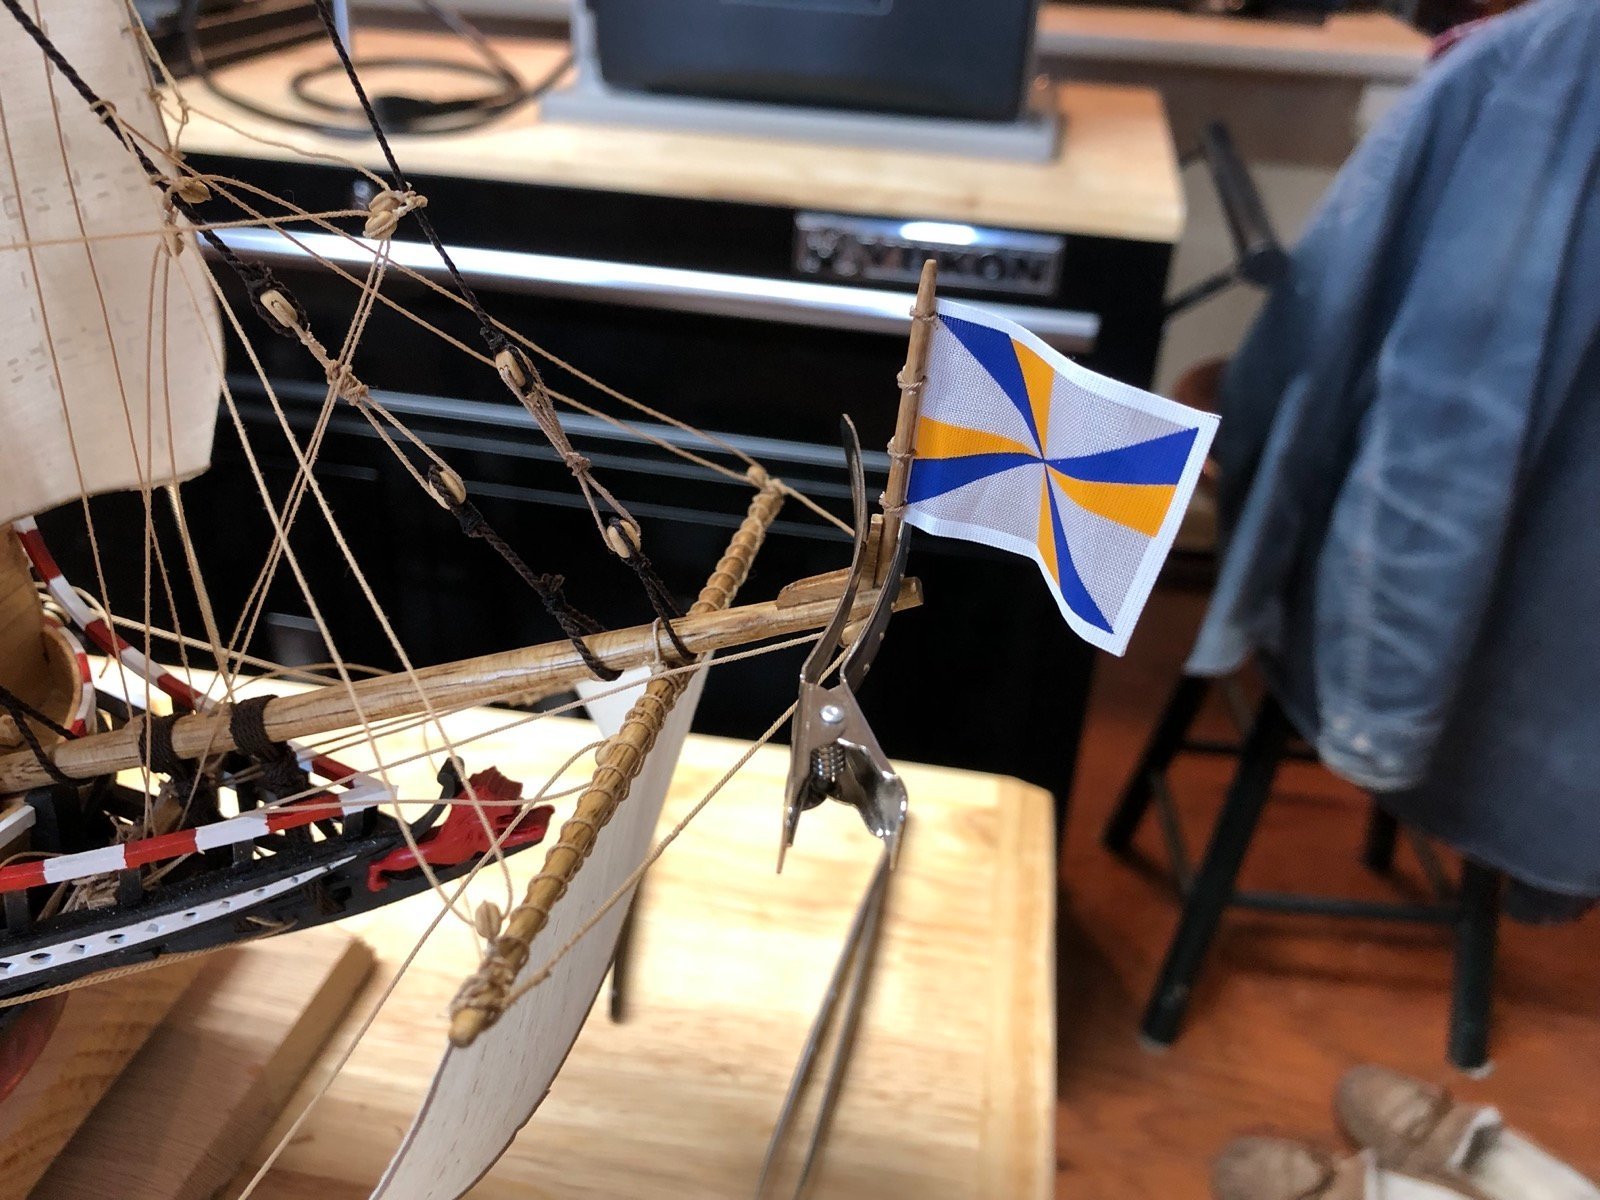
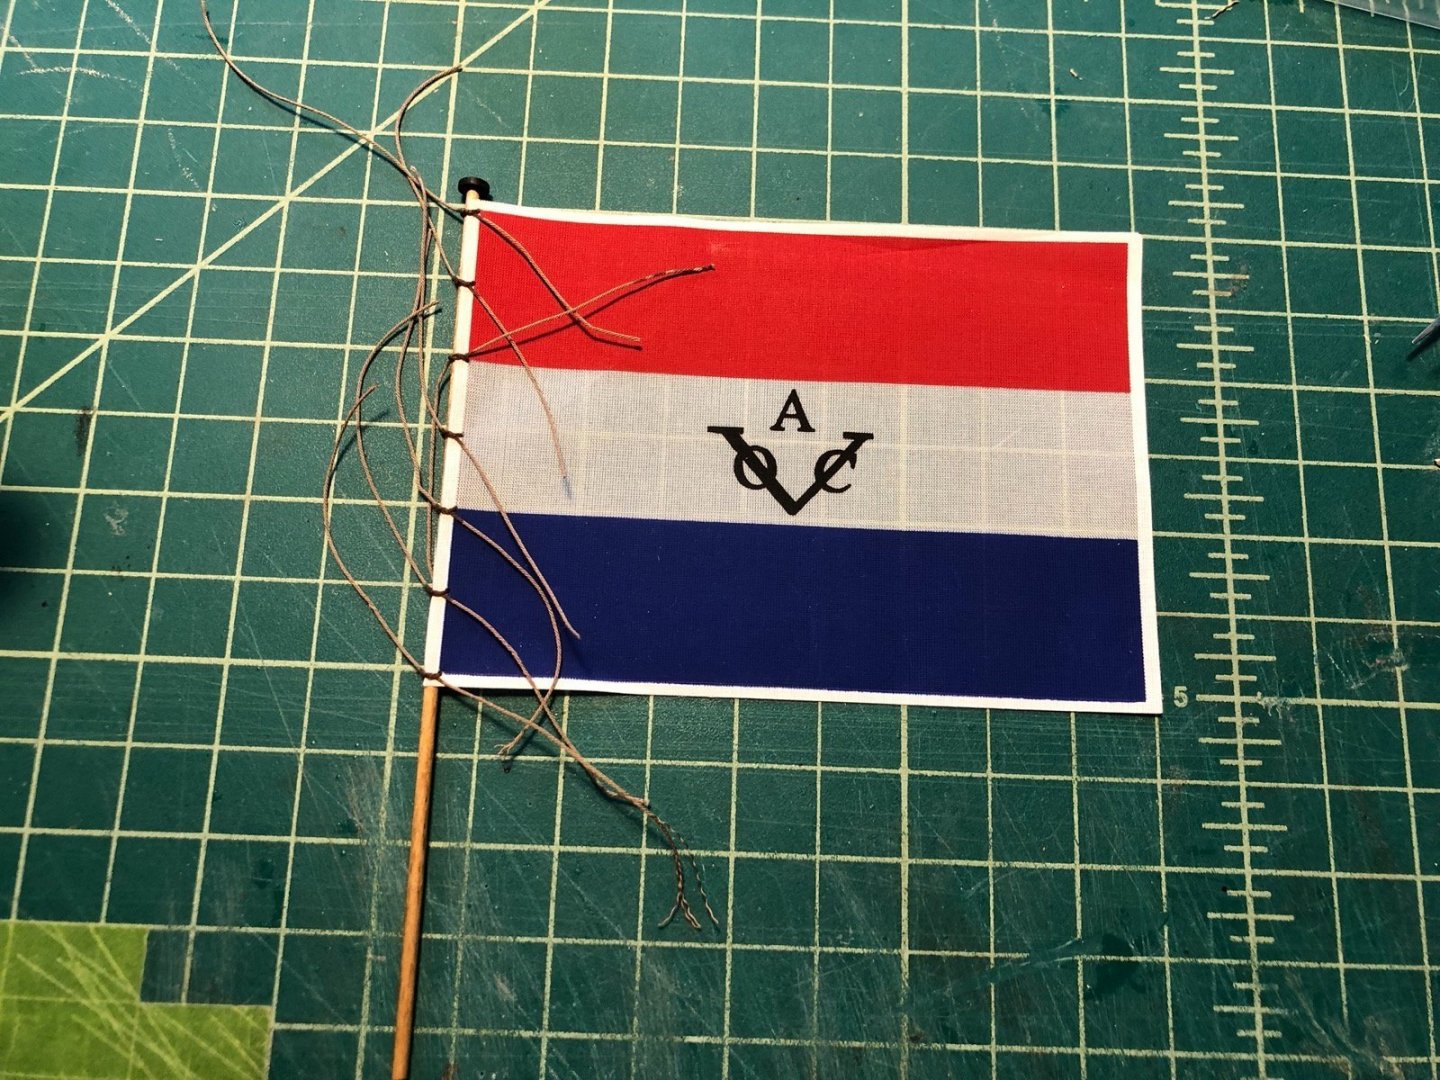
Thanks Popeye. It is coming together now. While working on the braces I have also started adding the flags and flag poles. Here is the bow sprit flag pole with a small flag on it being glued to its support. The plans show it lashed to the support, which I will do when the glue dries. You can also see the sprit yard braces in this picture. I also tied the large VOC flag to the stern flag pole. I am just using short pieces of line to tie these flags to the poles, which may be a simplified version of how they really were attached.

- 135 replies
-
- 4
-
-
- billing boats
- half moon
- (and 1 more)
-
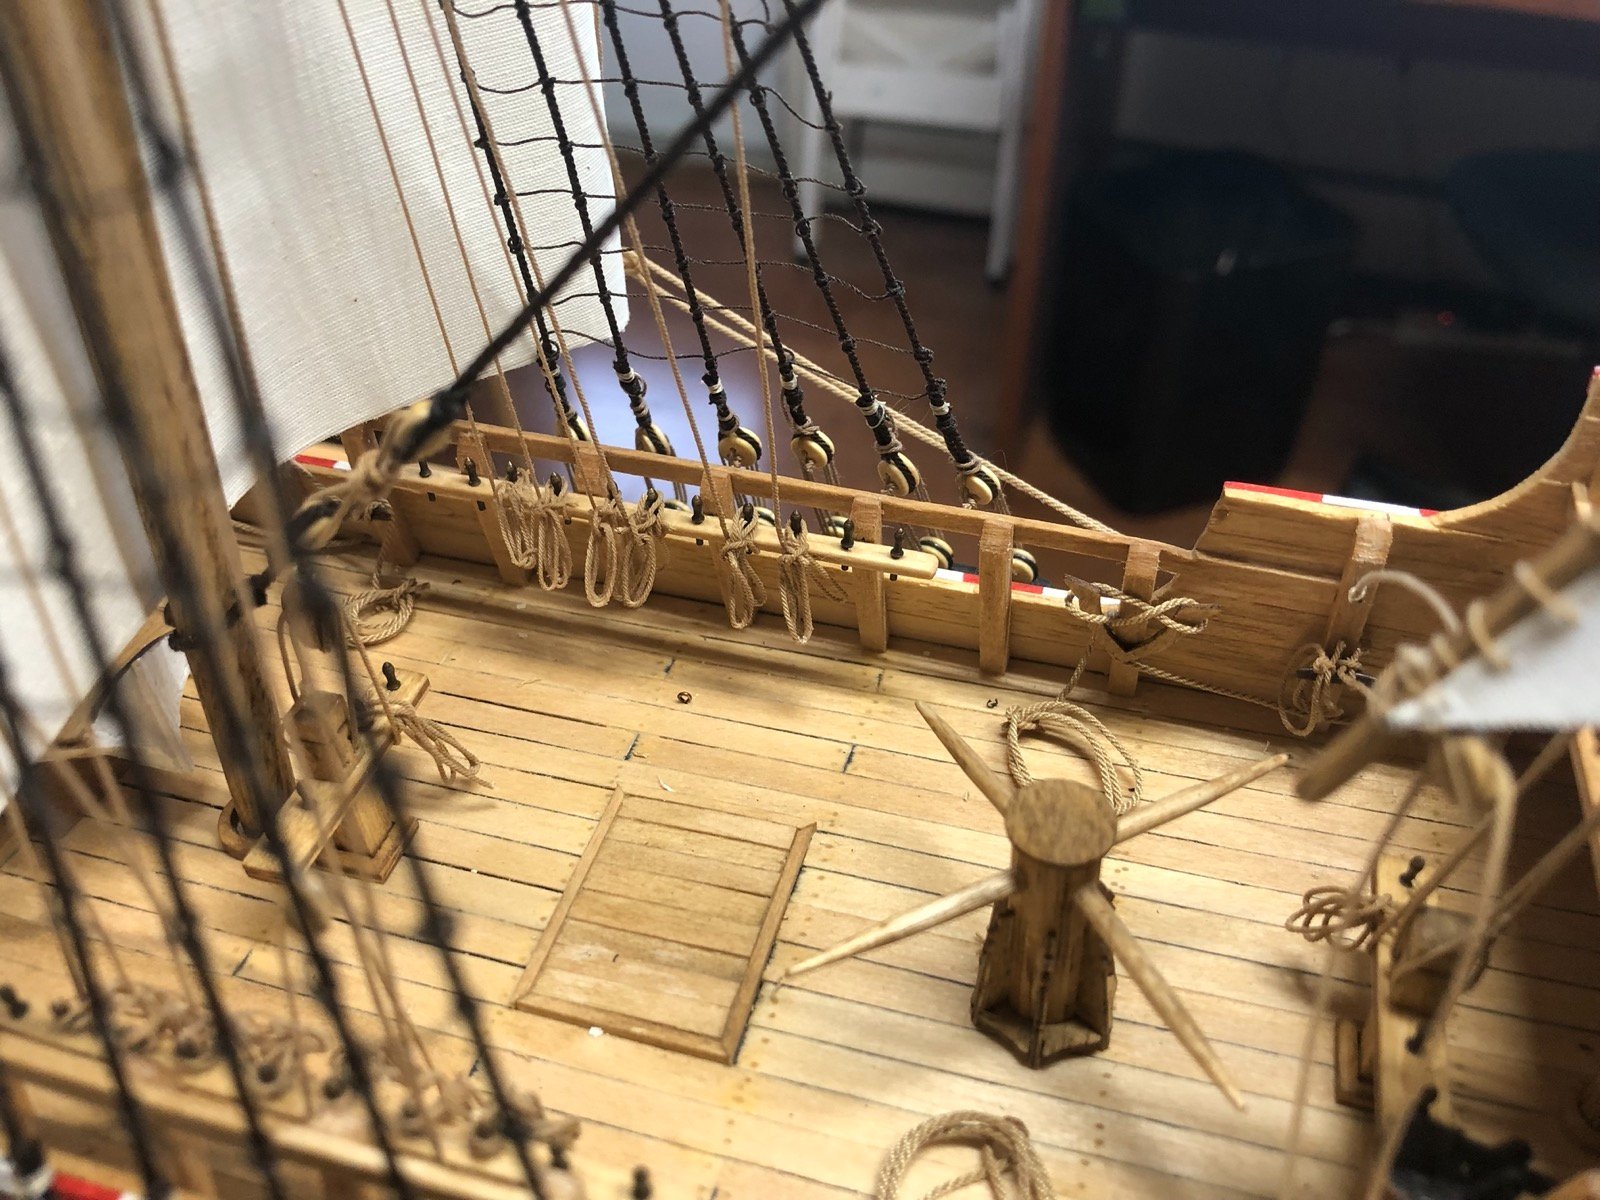
I have added rope coils to all the belaying pins and cleats with lines on them before I start adding the braces. My rope coils suck. I know how to make them they just don't come out like they should. Braces are next then this ship will be almost finished.

- 135 replies
-
- 3
-
-
- billing boats
- half moon
- (and 1 more)
-
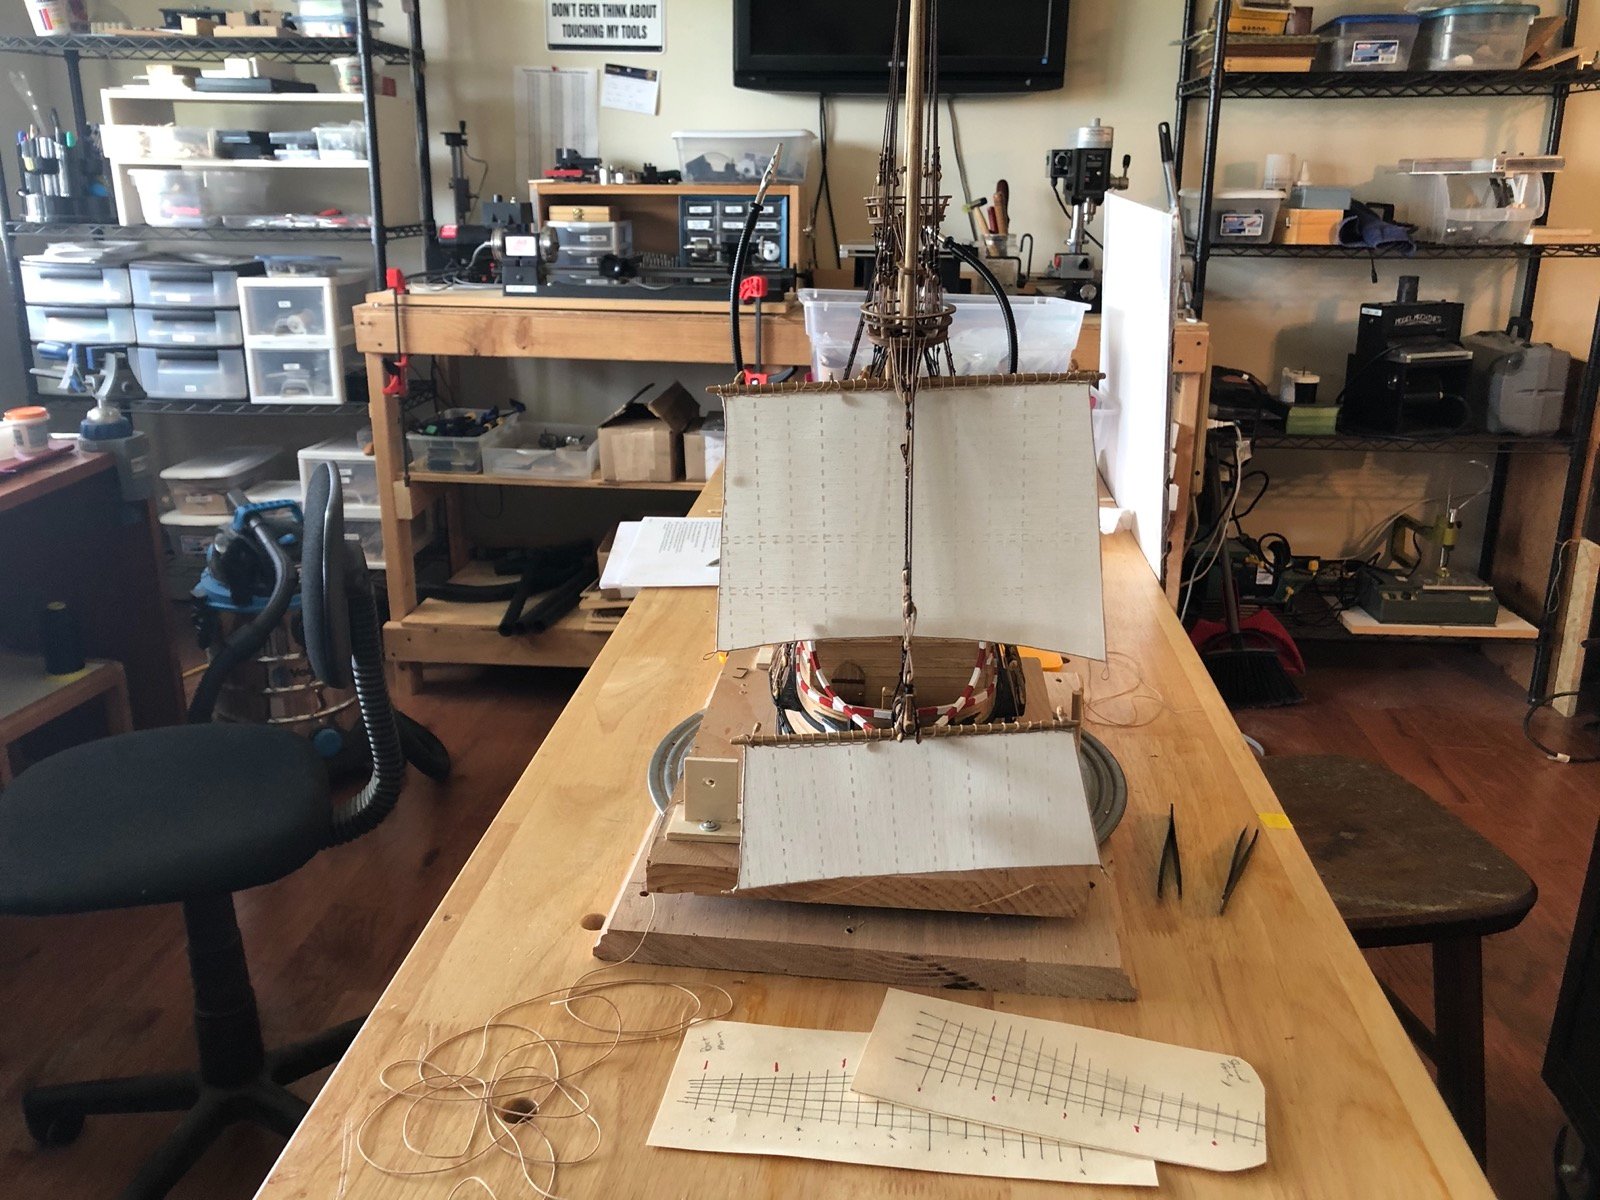
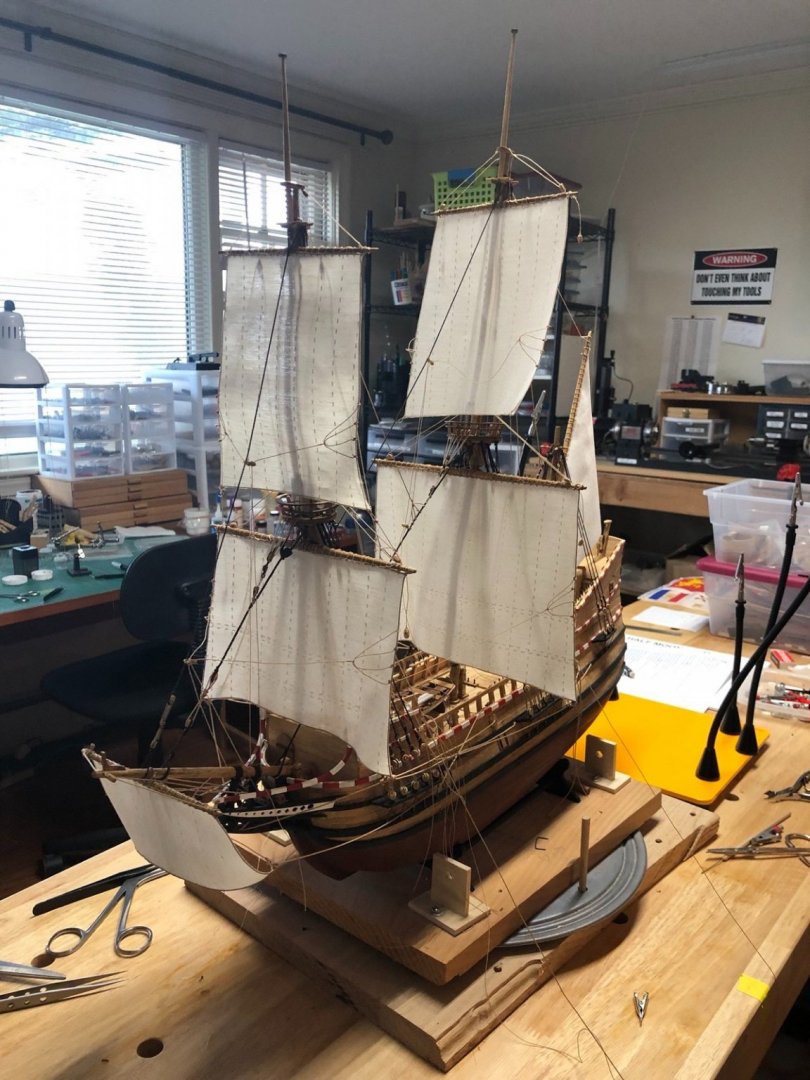
Sorry for the delay in updates. I was working on getting the sails installed and rigged but then had to take break when the weather got really hot here for a few days, then my son got married weekend before last and we had guests staying with us last week. Now I am back at it with the lower sails and fore topsail all rigged and the main topsail in progress.
- 135 replies
-
- 5
-
-
- billing boats
- half moon
- (and 1 more)
-
So one more change on those anchors. Instead of the line you see tied to them, which came with the kit and is a bit too loosely wound for me, I made my own anchor line. As per Chuck Passaro's excellent instructions, I put 4 strands of MARA 30 thread on all four hooks of the rope machine and wound it for a very short time, as the machine couldn't continue to wind it anymore because of the tension. The resulting rope was .076" diameter which was perfect for the anchor lines. I was skeptical that this technique would work but I was pleasantly surprised when it did. As for the ship I have been busy rigging the various running rigging lines on the sprit sail and fore sail, including the sheets, tacks, clew lines, and lifts. I have also added the bowlines to the fore sail, which I have never rigged before. All of the lines are not fixed to the cleats or belaying pins yet so I can continue to adjust them as needed. I also have not trimmed the excess on most of these lines yet either.
- 135 replies
-
- 4
-
-
- billing boats
- half moon
- (and 1 more)
-
Your Beagle looks great and the figures really add to that look. I too have reactions to CA but more allergy than cold symptoms. Claritin-D clears it up though.
-
Oops. I was wondering why something didn't look quite right. I was able to fix that without too much trouble. Thanks.
- 135 replies
-
- 3
-
-
- billing boats
- half moon
- (and 1 more)
-
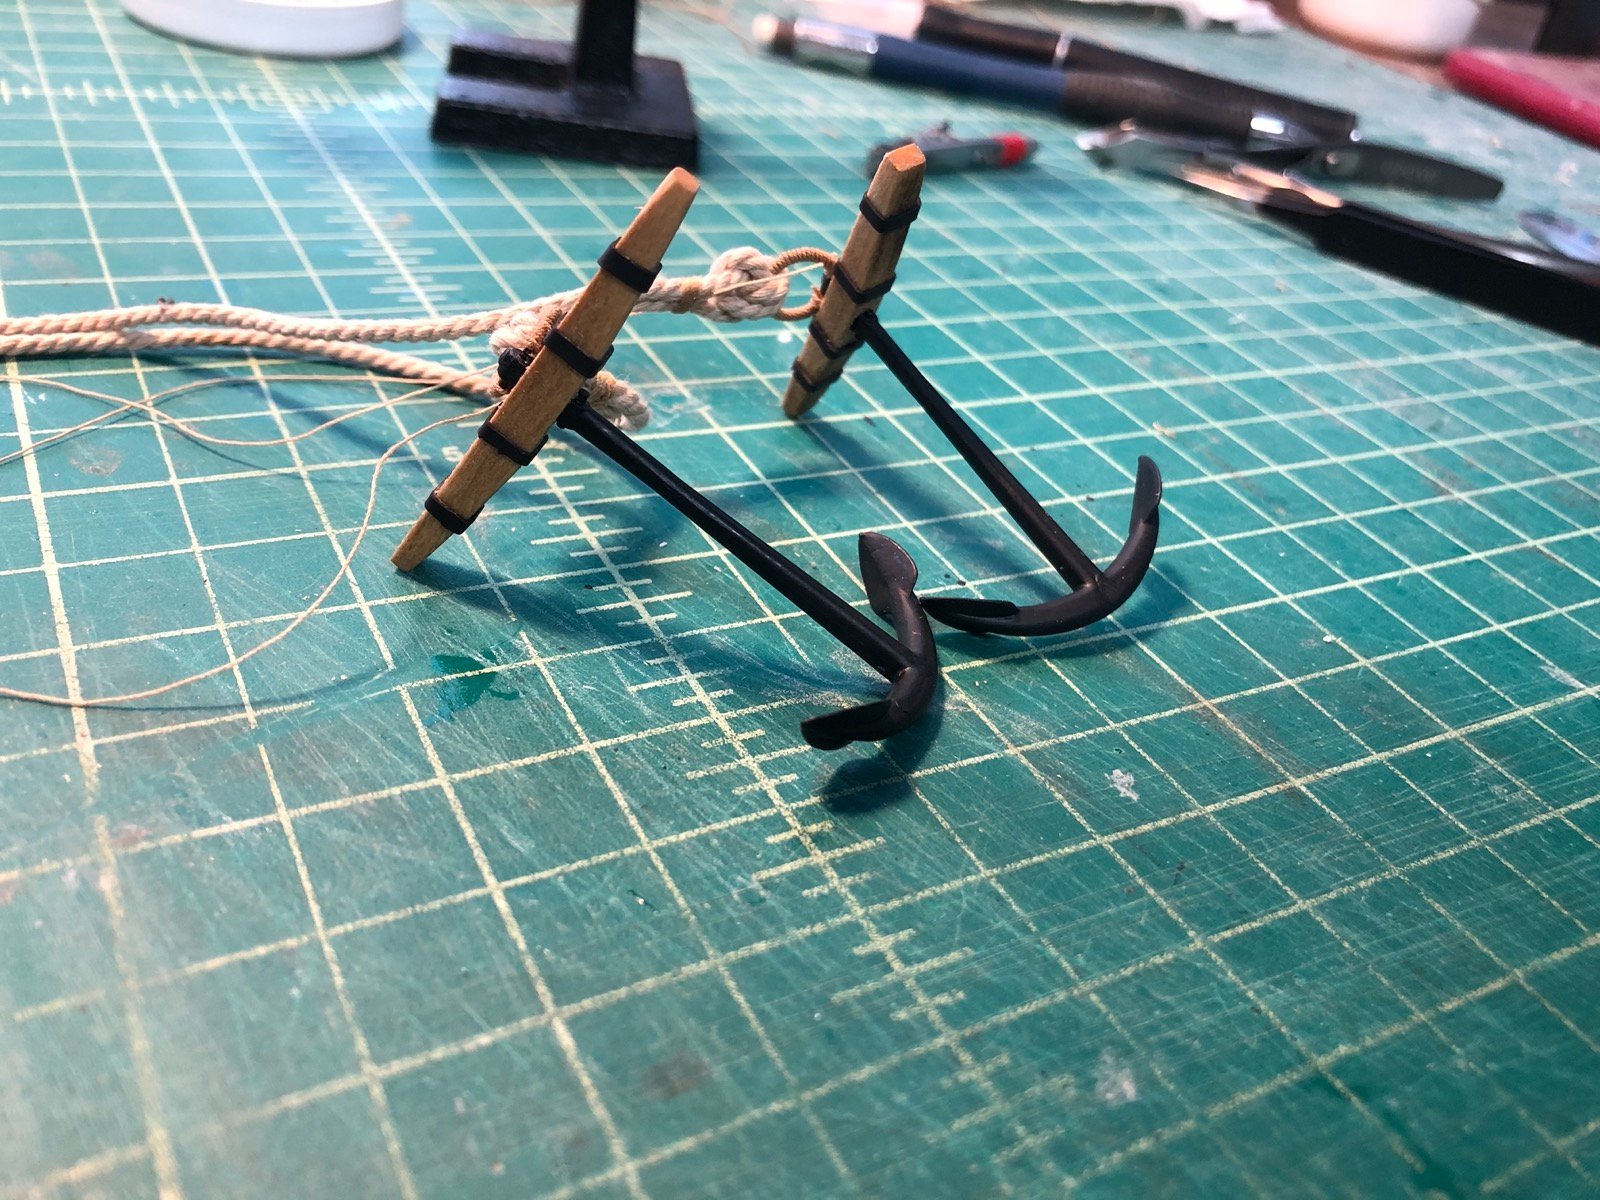
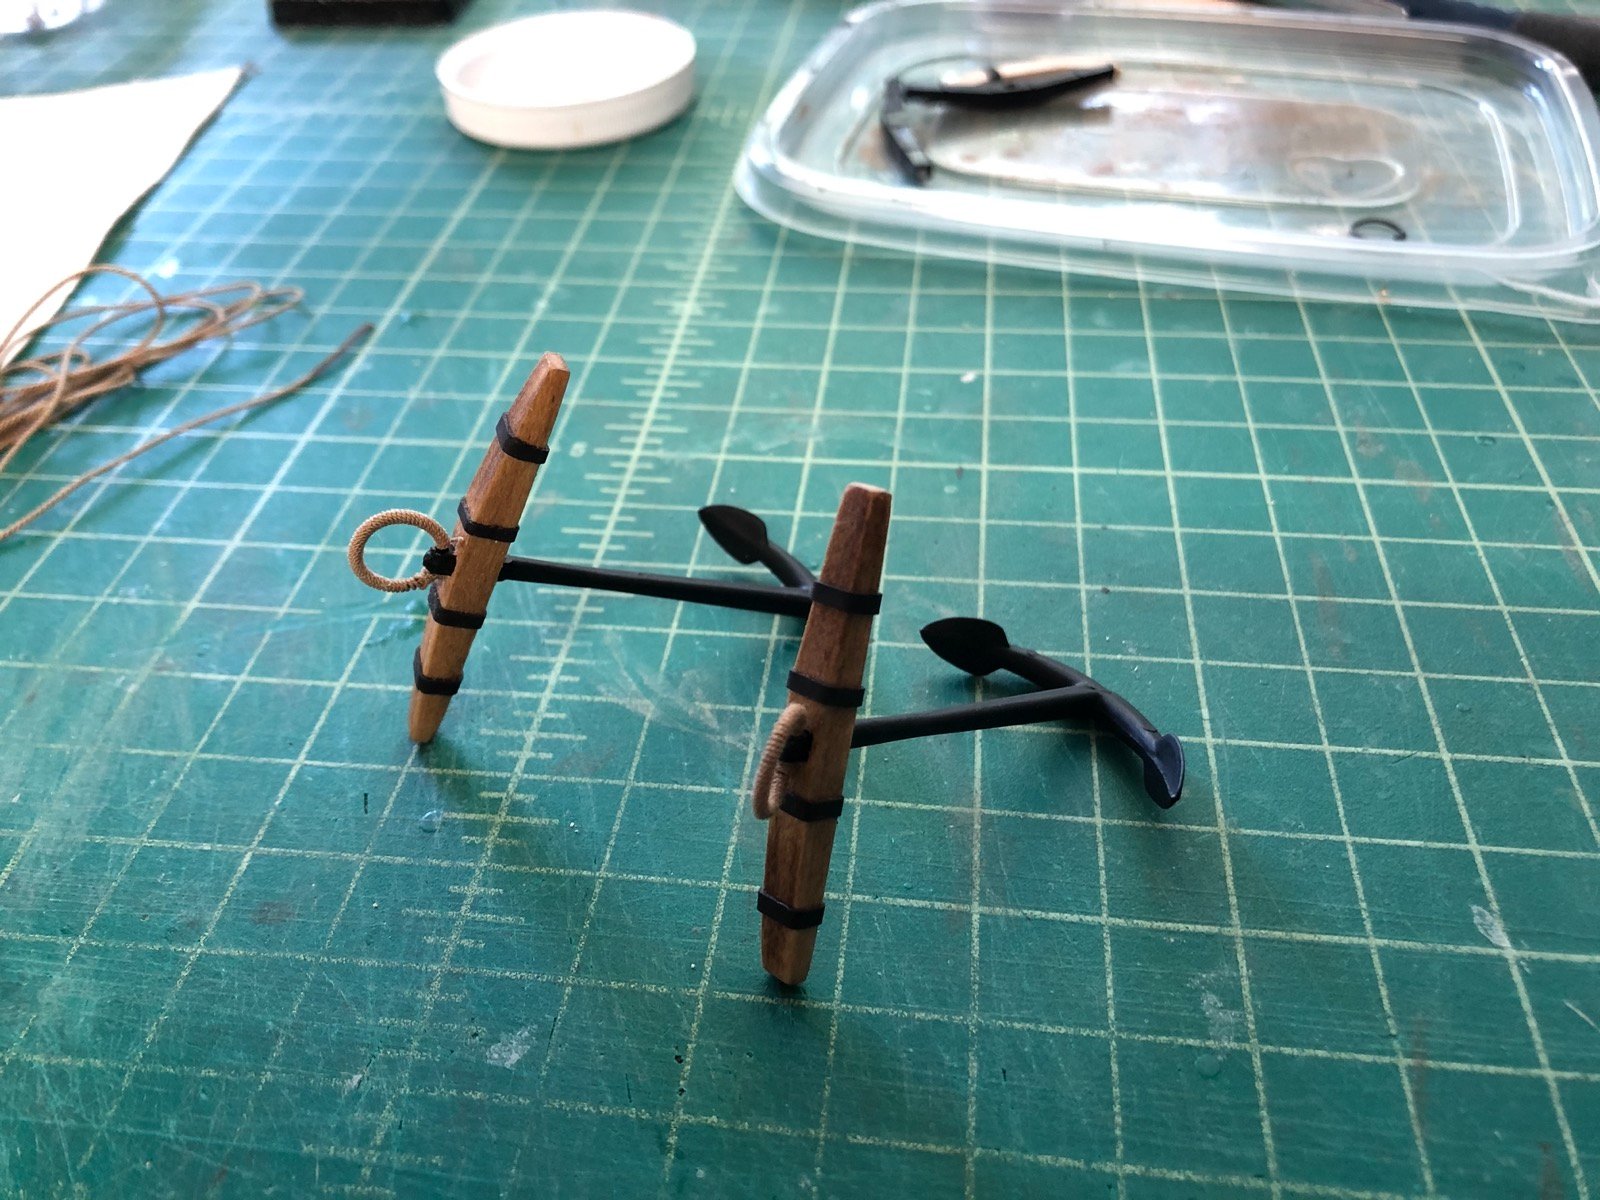
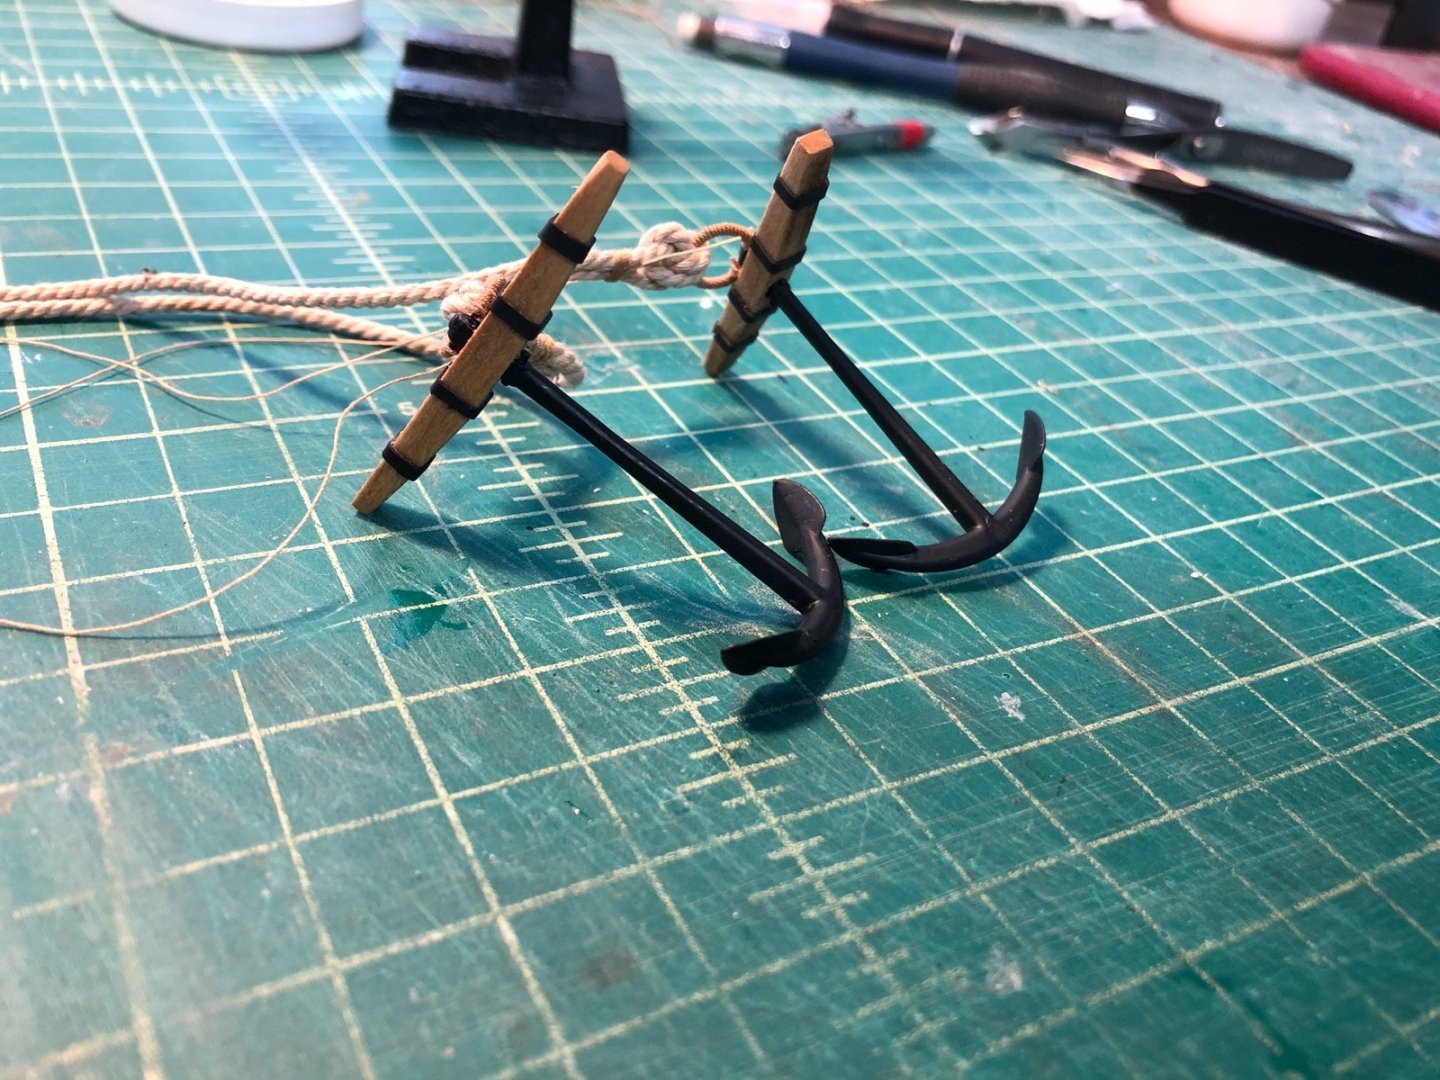
In between sail production I decided to take a look at the supplied anchors. They are in two pieces, both black plastic. The anchor shaft pieces weren't too bad, just some depressions that I filled with putty, then painted the whole thing with flat black paint, as the plastic was very shiny. The stock pieces were terrible however, so I made new ones from 3/32" square basswood which I cut and sanded to shape. I had to file a square hole through them but that was not too hard with some small square files. I stained the new stock pieces then used some black shrink wrap tubing that I sliced into thin rings for the iron bands. I made rings from wire and wrapped them in rope, using lacquer to hold the rop in place. Here is how they came out.

- 135 replies
-
- 3
-
-
- billing boats
- half moon
- (and 1 more)
-
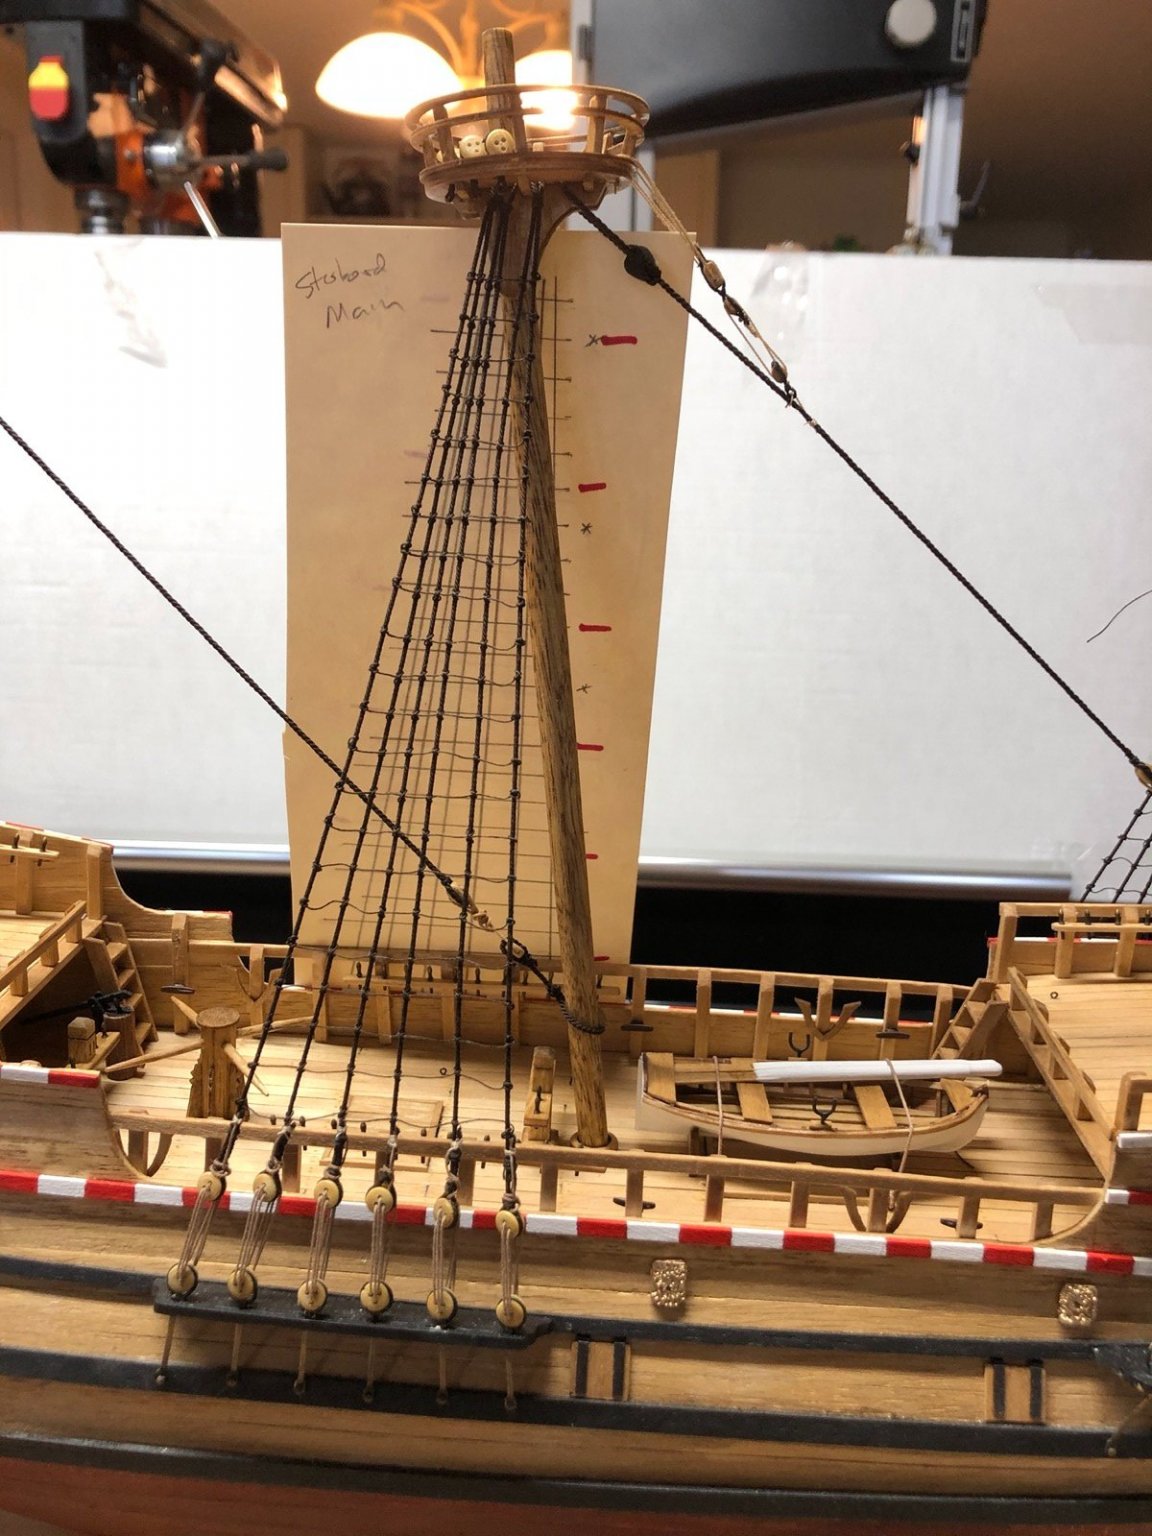
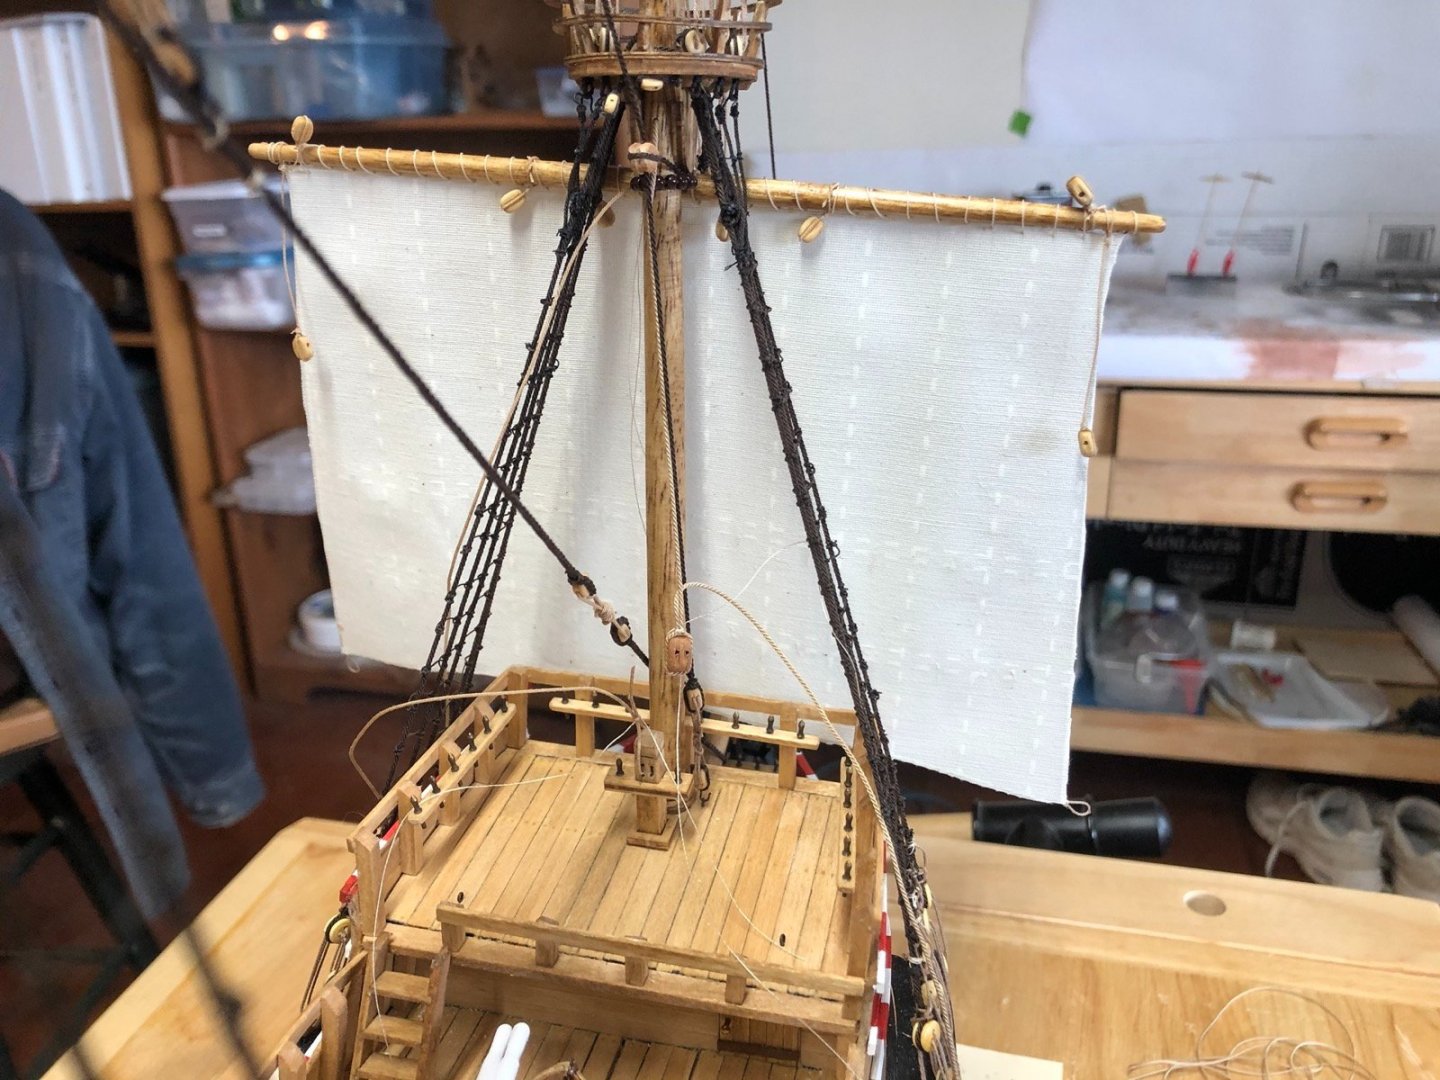
Here is the back of the fore sail with the reef points removed and the blocks, halyard and tie line added to the yard. I put the straight pin through the tie line to hold the parrels on the line while I add the yard to the mast. Here are the fore sail and sprit sails on the model but without any other running rigging yet. I rigged the fore yard tie around the mast and added the second seizing to hold it in place with the parrels. I started rigging the fore yard halyard by threading it through a hole in the mast and seizing a large double block to the end. I also seized the tackle line to one of the sheaves in the fore bitt and will put these together after the seizing lines are fixed. The other sails are in various stages of production so this series of steps will be repeated for them as they are ready. The main sail is next and I have already started adding the blocks to the main yard.


- 135 replies
-
- 4
-
-
- billing boats
- half moon
- (and 1 more)
-
You guys convinced me to not show them on the sails. I was able to remove a few easily this morning so I'll take the rest off. Thanks for the info.
- 135 replies
-
- 1
-
-
- billing boats
- half moon
- (and 1 more)
-
A beautiful build Glenn. I too will be referring to your build log when I start this kit later this year.
- 382 replies
-
- 1
-
-
- Vanguard Models
- Duchess of Kingston
- (and 1 more)
-
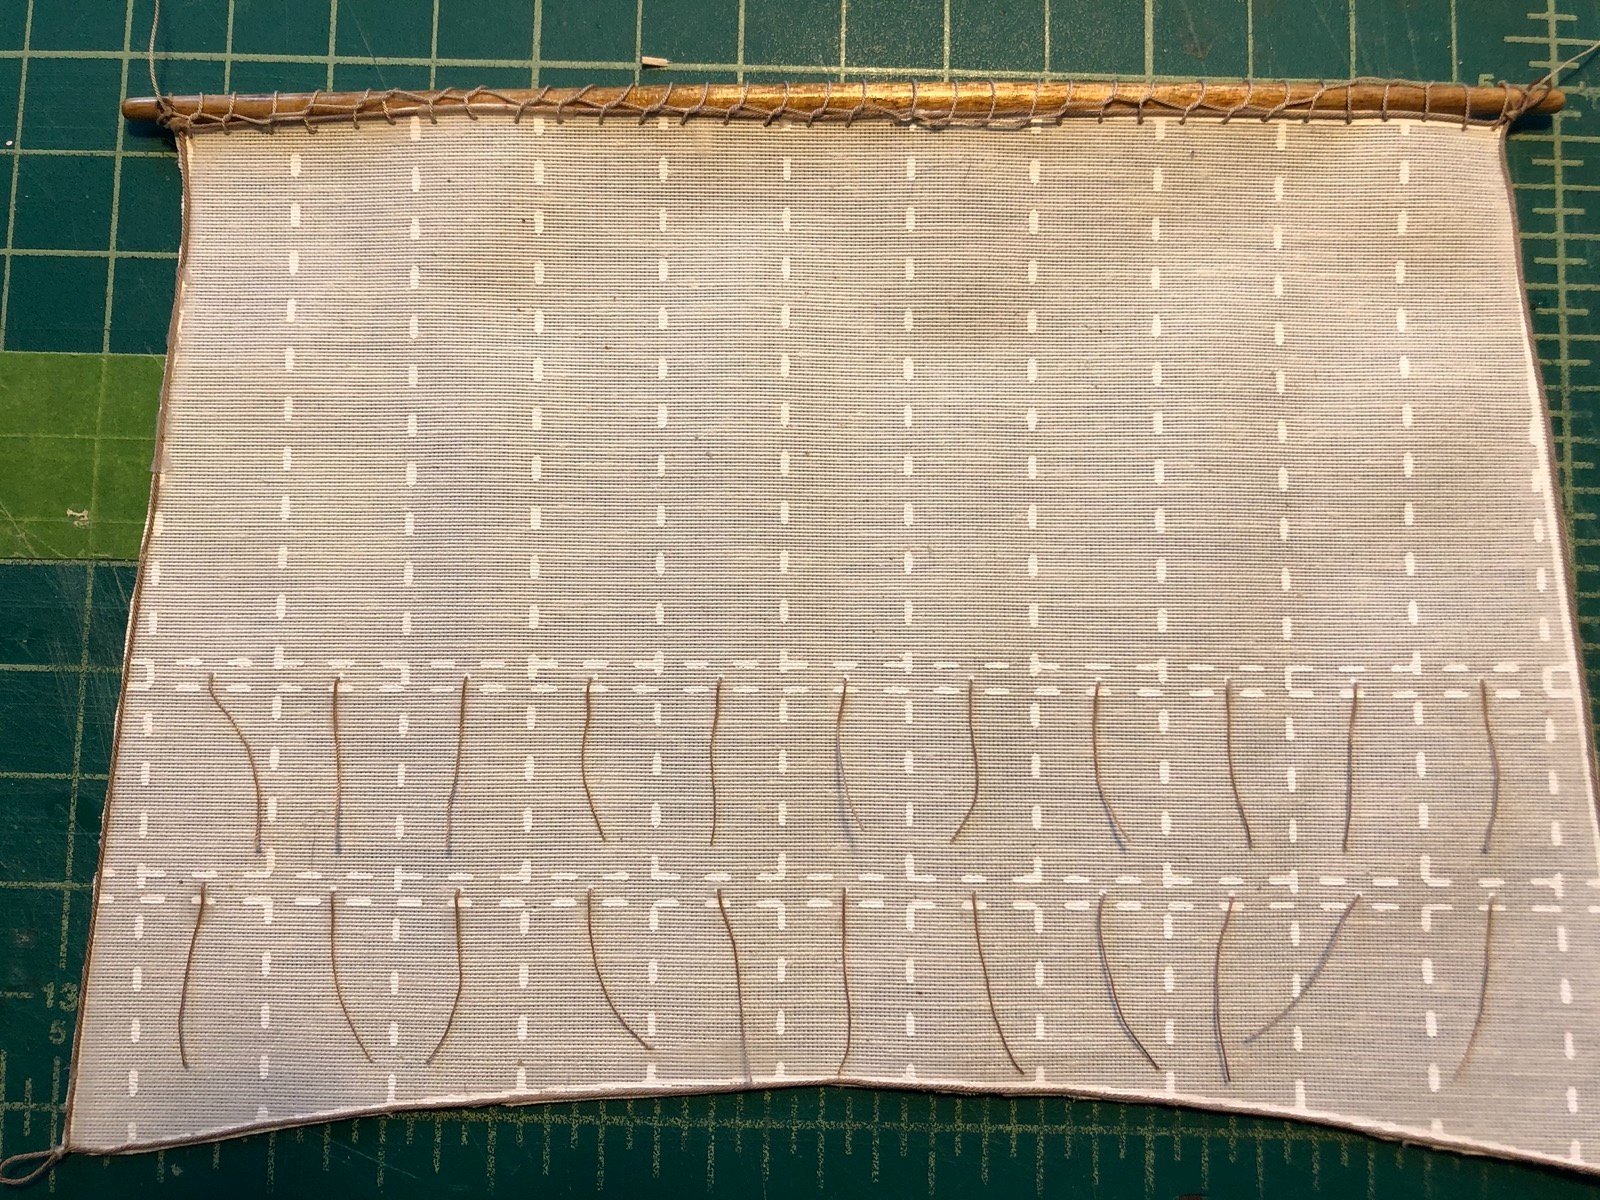
Kirill, they are shown on the plans that came with the kit. They are also mentioned in a book I am using called Rigging in the Age of the Sprit Sail 1600-1720. I like the look so I am going to keep them. Here is the fore sail tied to the fore yard, as promised to show the chain stitch I am using.


- 135 replies
-
- 3
-
-
- billing boats
- half moon
- (and 1 more)
-
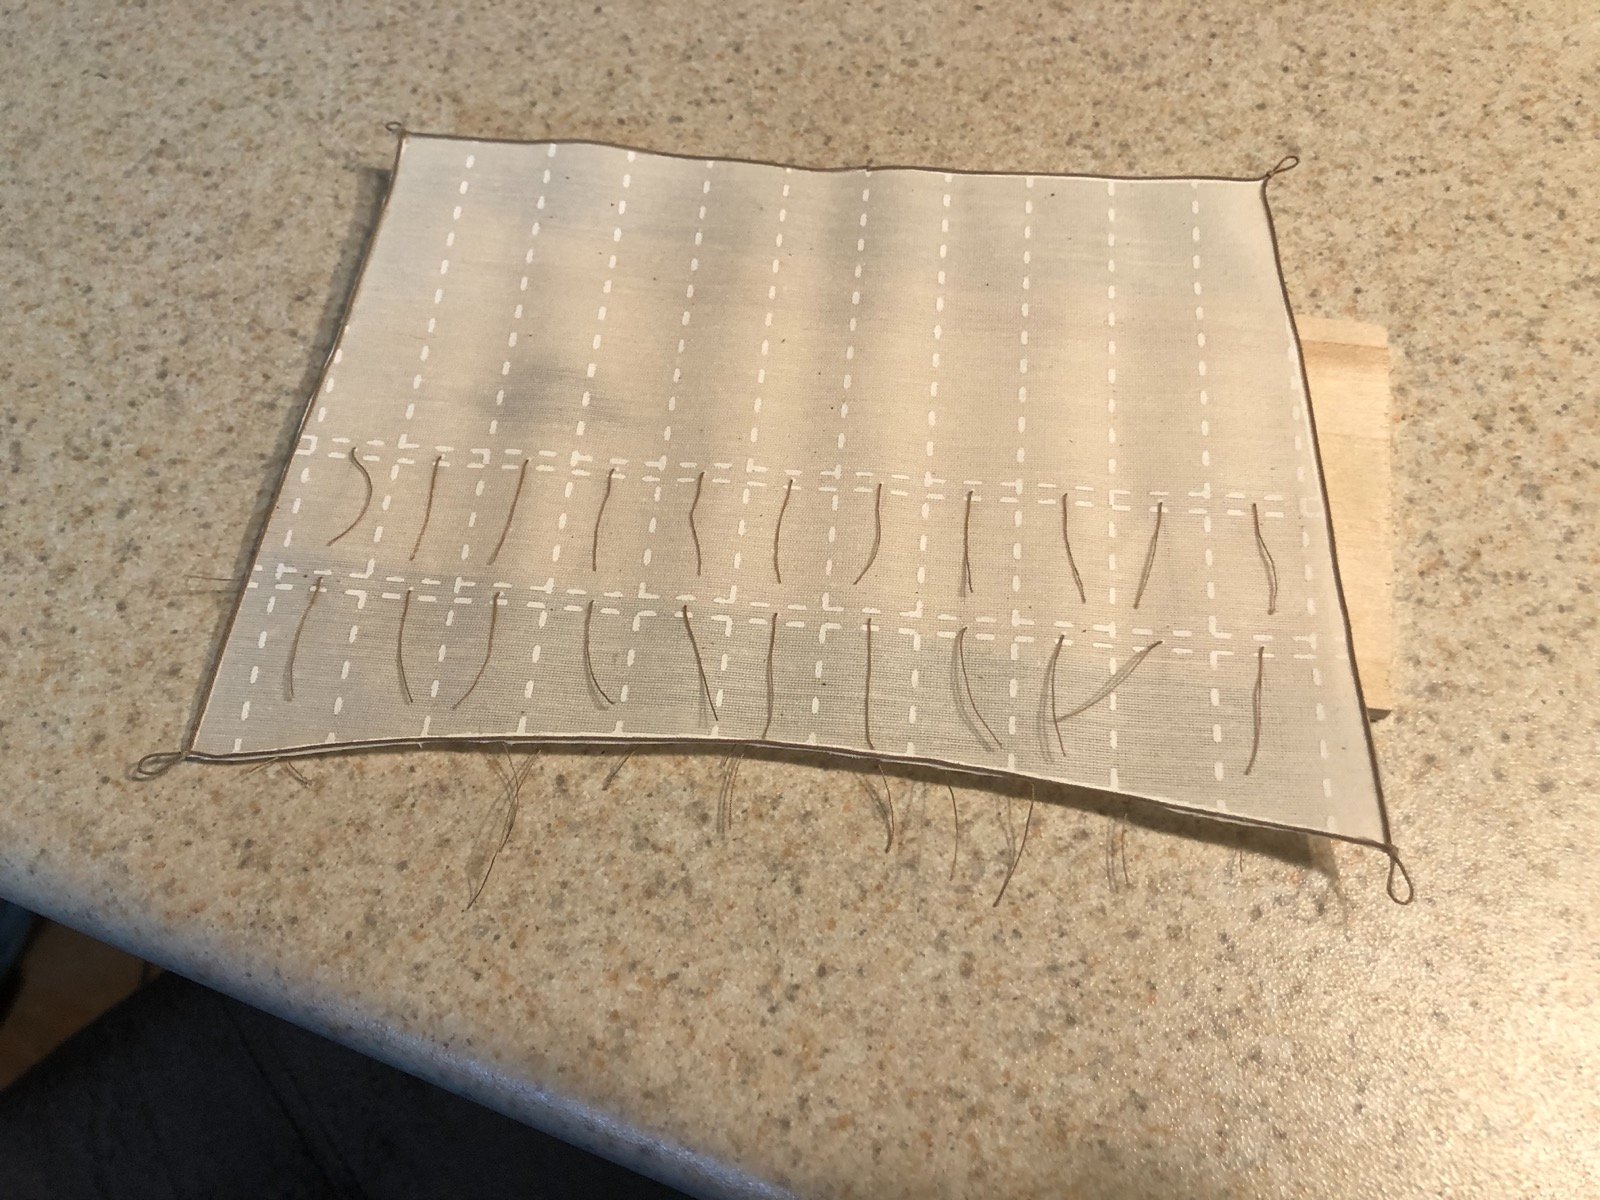
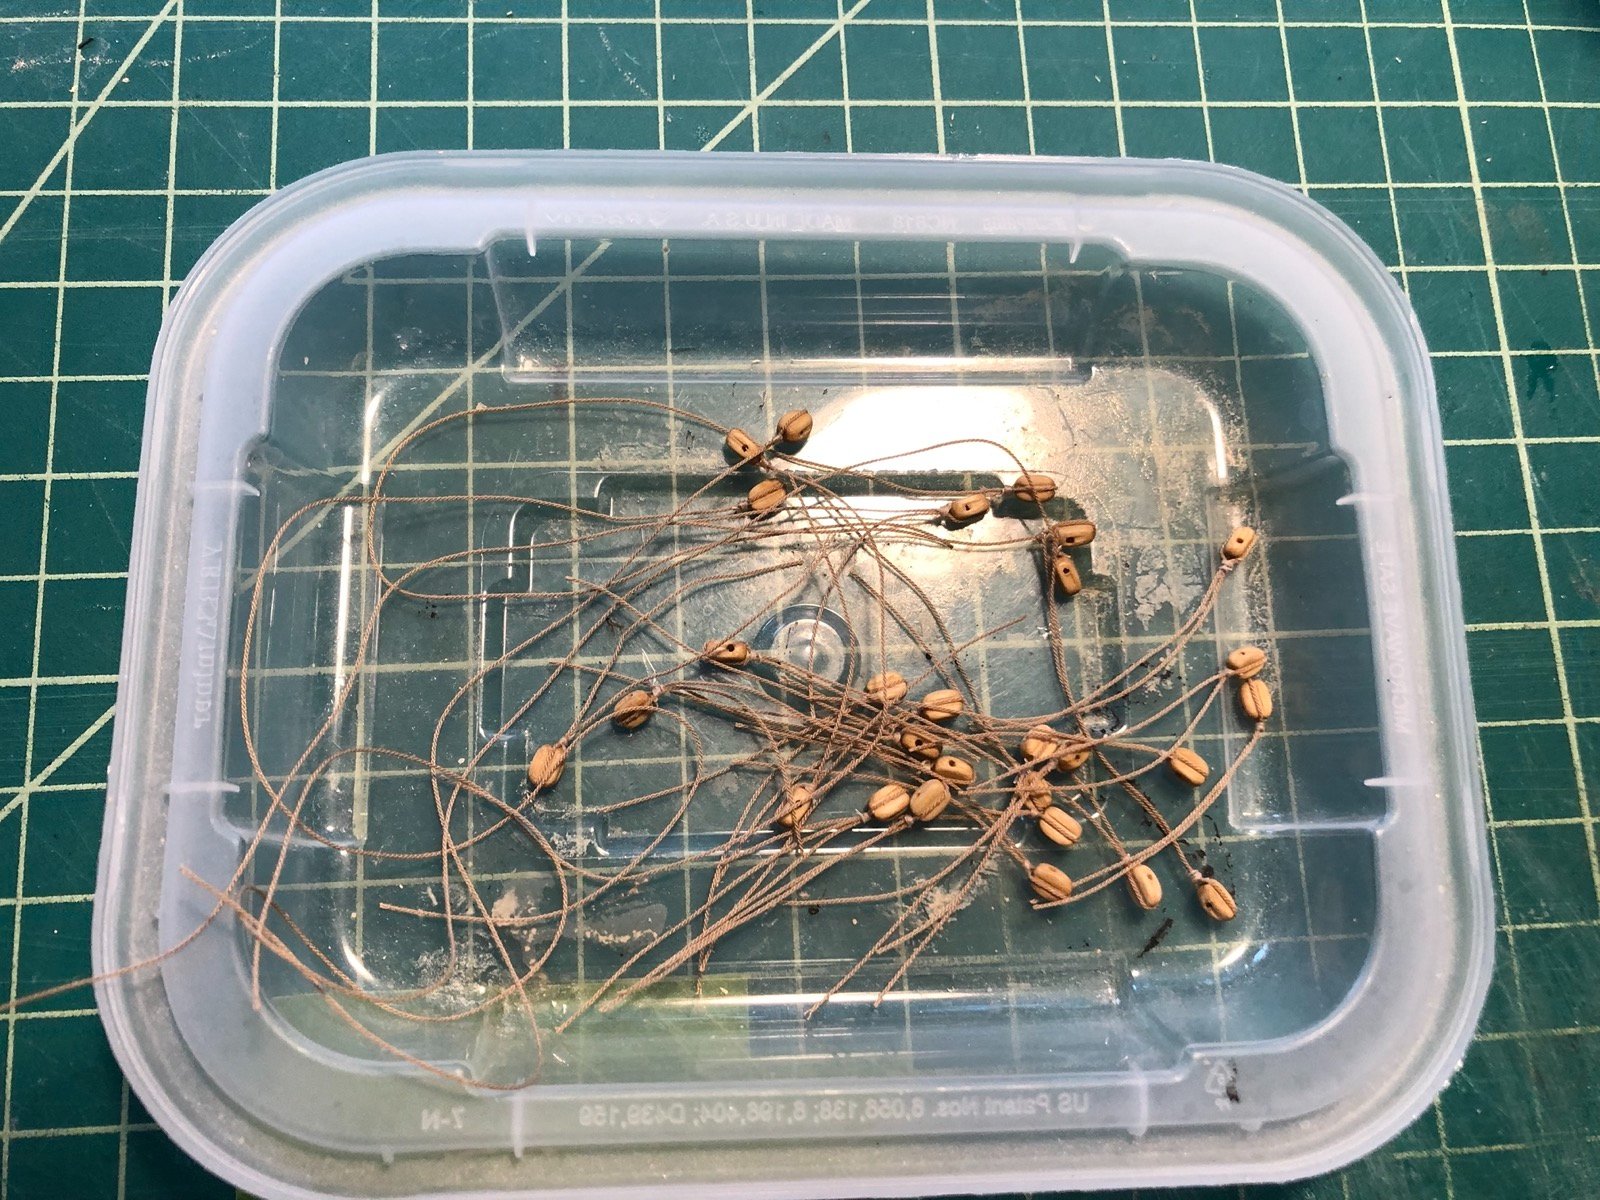
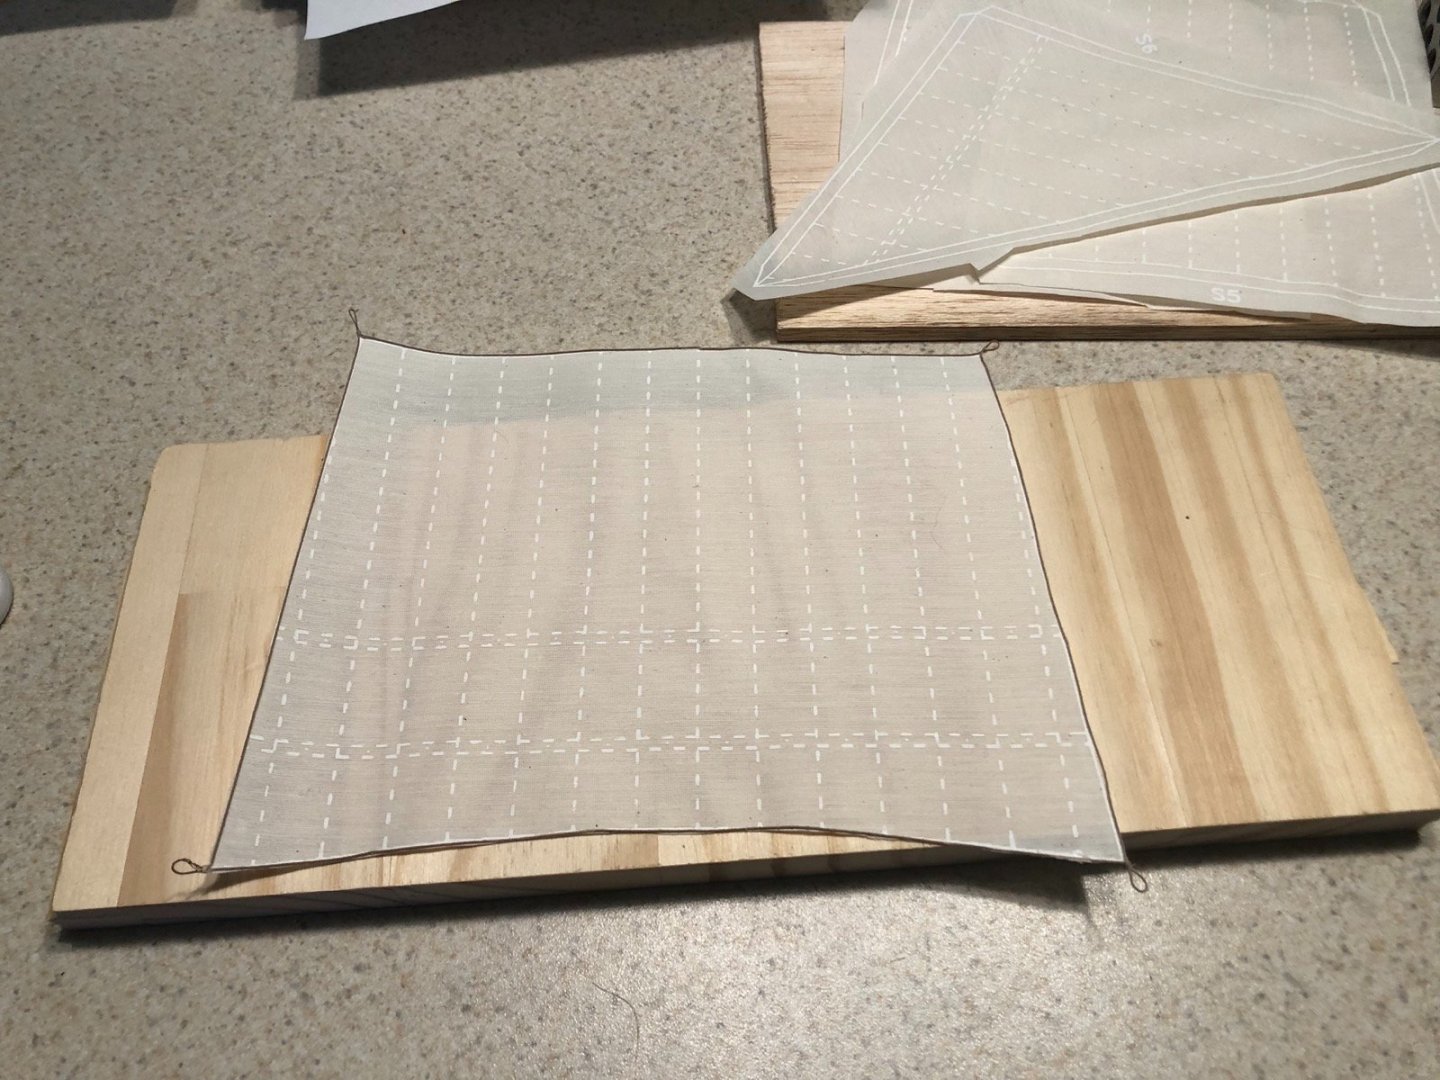
Good news on the tool front - I received a replacement cuticle cutter in record time so I was back in business quickly. I also ordered a second one as a back up. I finished up the lower shrouds and ratlines, then added the topmast shrouds and stays. It was a bit tricky threading the lanyards through the deadeyes in the crows nests. I am now finished with the standing rigging. As you can see I have started making the yards and sails, starting with the sprit yard and sail under the bow sprit. I am using the sails supplied in the kit, which are a bit heavy material so not to scale at all, but that is OK for this model, as there are lots of simplifications elsewhere too. I start by gluing a bolt rope around the edge of the sail before cutting the sail from the material. I make a loop in one corner with a seizing and fix that seizing, then add loops for the other corners but do not fix those seizings yet. I start gluing the bolt rope with acrylic matte medium starting at the fixed corner, and adjust the other loops and seizings as I get to those corners, using the matte medium to fix those seizings. Once the bolt rope is attached I cut along the outside of it with a sharp X-Acto blade. Here is the main sail with the bolt rope glued on. The main, fore and mizzen sails have reef points, so for those I use a needle to pull a piece of thread through the sail and tie and overhand knot on the back side of the sail. I then use some matte medium on both sides to "fix" the tops of the reef points so they hang down the sail. To trim them I place a metal ruler over them at the right length, then pull them up with tweezers and cut them off at the ruler with the cuticle cutter. Here is the fore sail with the reef points trimmed on one side. The next step will be to tie this sail to the fore yard. i first punch a series of holes inside the bolt rope along the head of the sail, then use a beading needle which does not have an eye to thread line around the yard through those holes, using a chain stitch. After the sail is attached to the yard, I'll add the various blocks to the yard for the running rigging. Here are all the stropped blocks needed for the yards.


- 135 replies
-
- 3
-
-
- billing boats
- half moon
- (and 1 more)
-
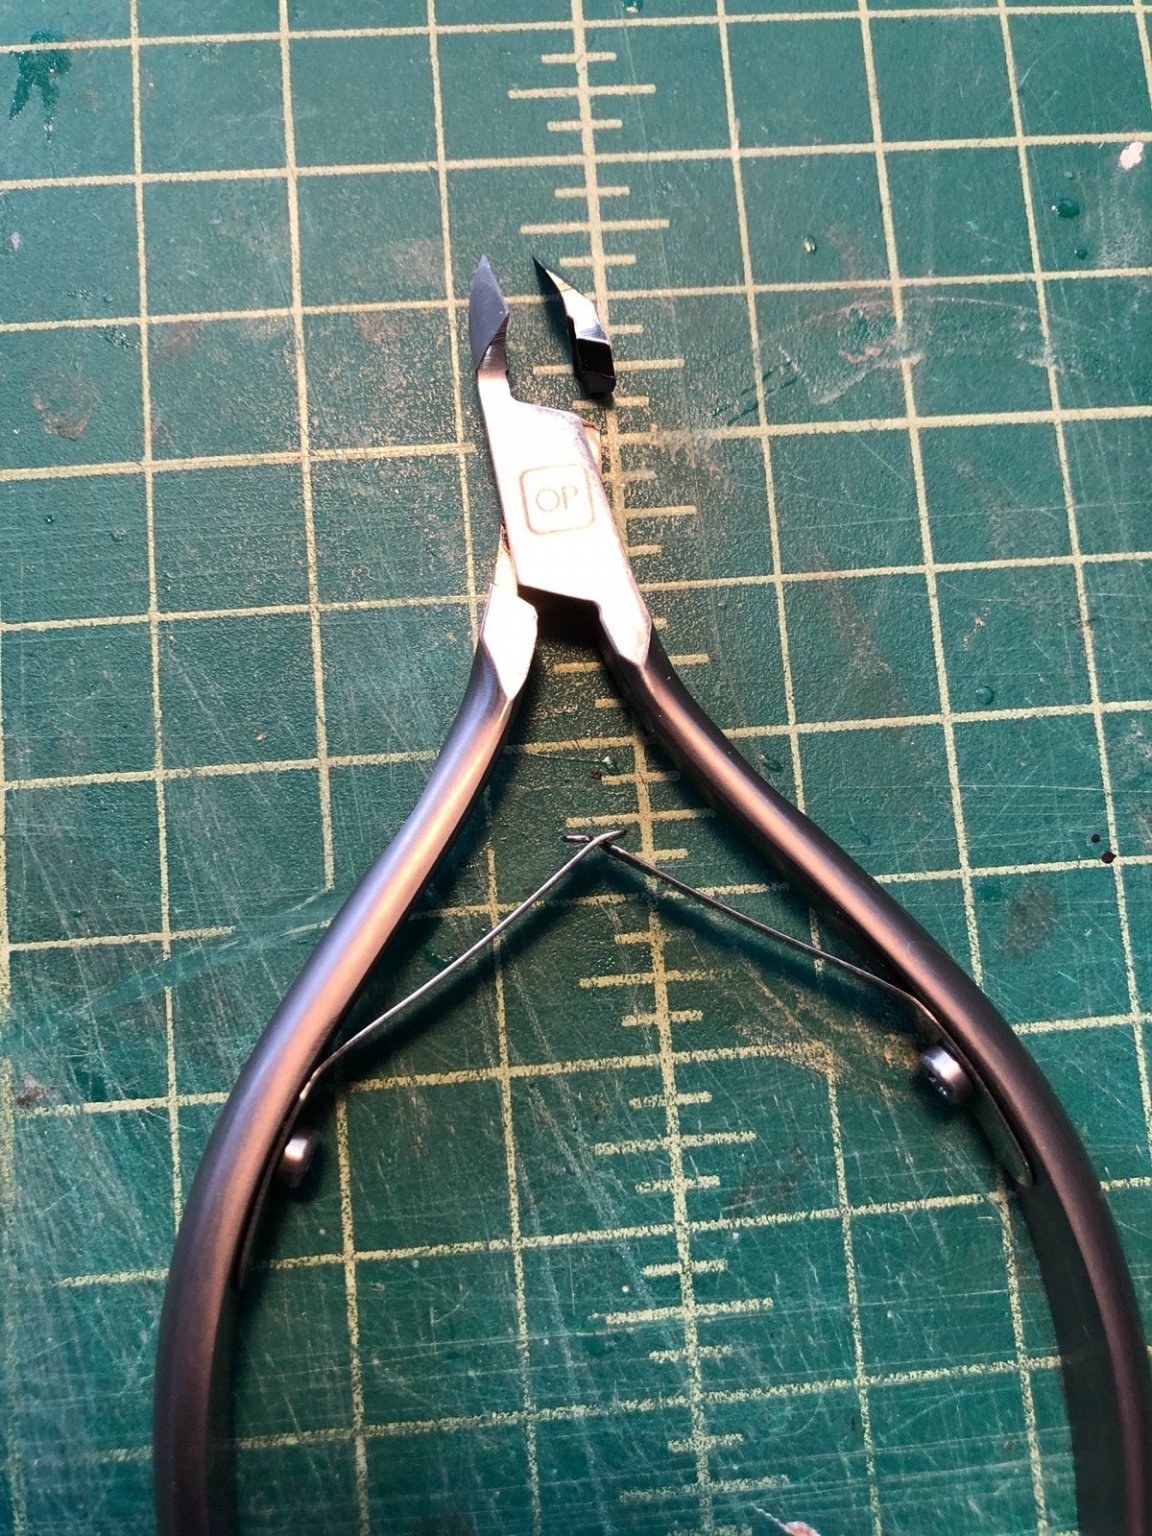
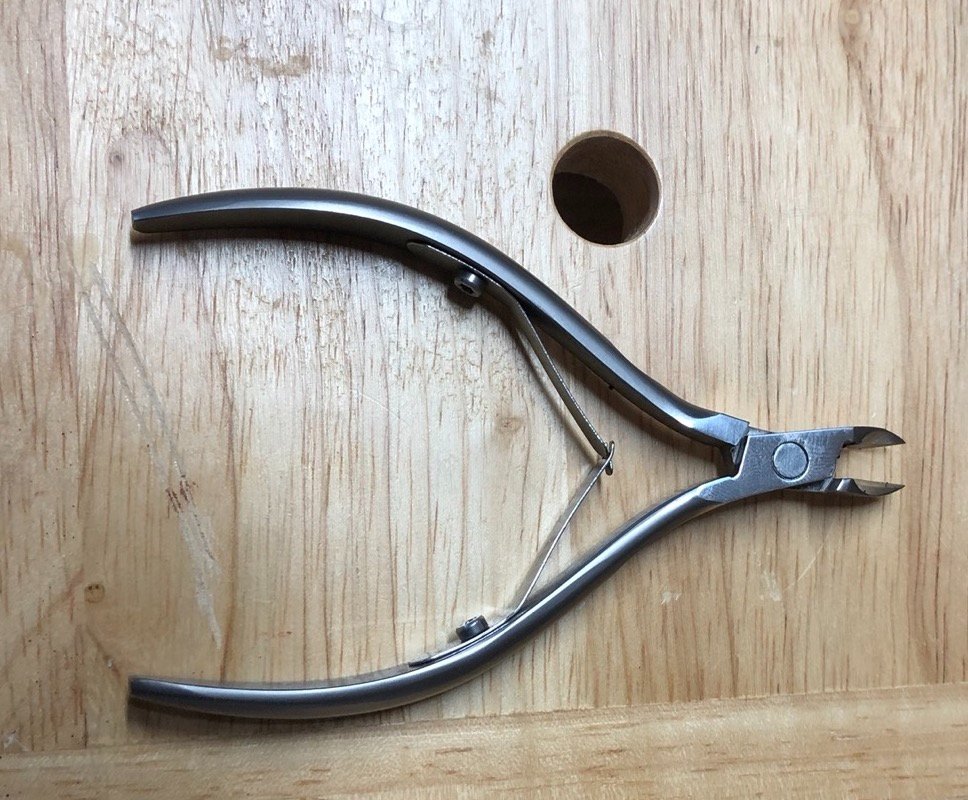
Well it did cut very well on the first try and very flush but somehow I managed to break off one of the jaws. I guess I pressed too hard. I will be returning this set to Amazon and will order a different brand.

- 135 replies
-
- 1
-
-
- billing boats
- half moon
- (and 1 more)
-
Thank you Kirill. As for the shroud loops, they are placed as first the two starboard shrouds have a loop at the top that is looped around the mast head, then the first two port shrouds, etc. The fore mast only has five shrouds so the last shroud on each side is connected to each other with a cut splice that is looped around the mast head. I do believe this is the correct way to do odd number shrouds. I think what you are seeing is that I put the first shroud pair through a different hole in the crows nest than the other pairs, so they are shifted forward. I wasn't sure i could get all the shrouds through one hole. Here is my new favorite rigging tool, a cuticle cutter. I used it to cut the ends of the ratlines and it did a great job, making nice flush cuts.

- 135 replies
-
- 4
-
-
- billing boats
- half moon
- (and 1 more)
-
Here are the starboard ratlines after tying and fixing the knots. I ordered some cuticle cutters which I will use to clip the excess line when they arrive. Port ratlines are coming along and I have started making the futtock shrouds.

- 135 replies
-
- 5
-
-
- billing boats
- half moon
- (and 1 more)