


usedtosail
-
Posts
2,418 -
Joined
-
Last visited
Content Type
Profiles
Forums
Gallery
Events
Everything posted by usedtosail
-
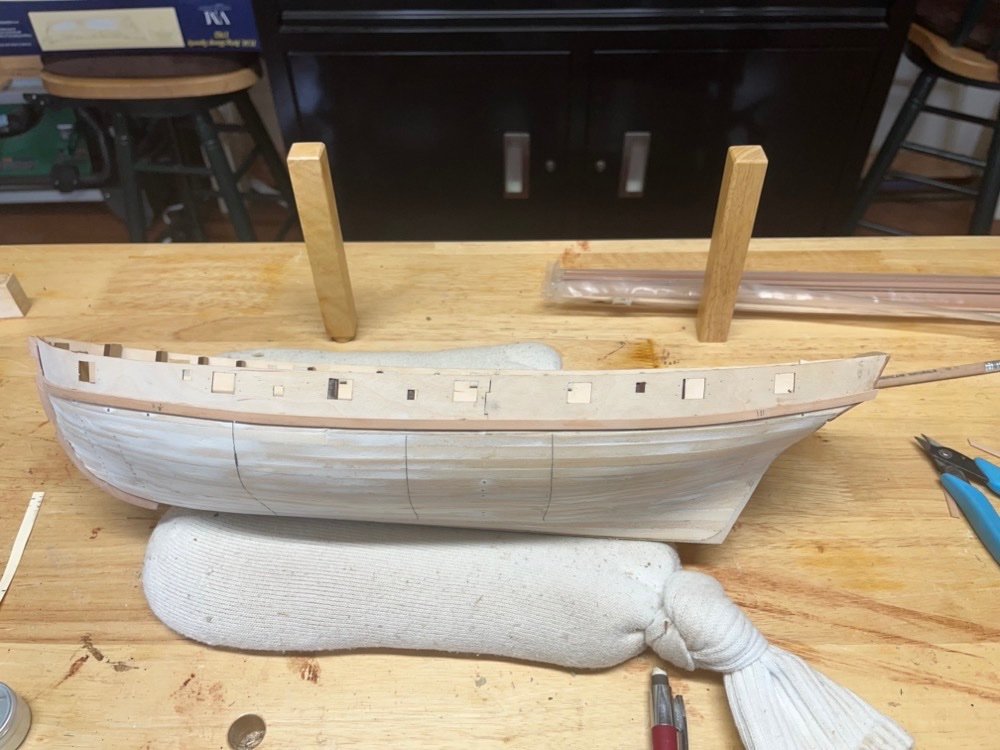
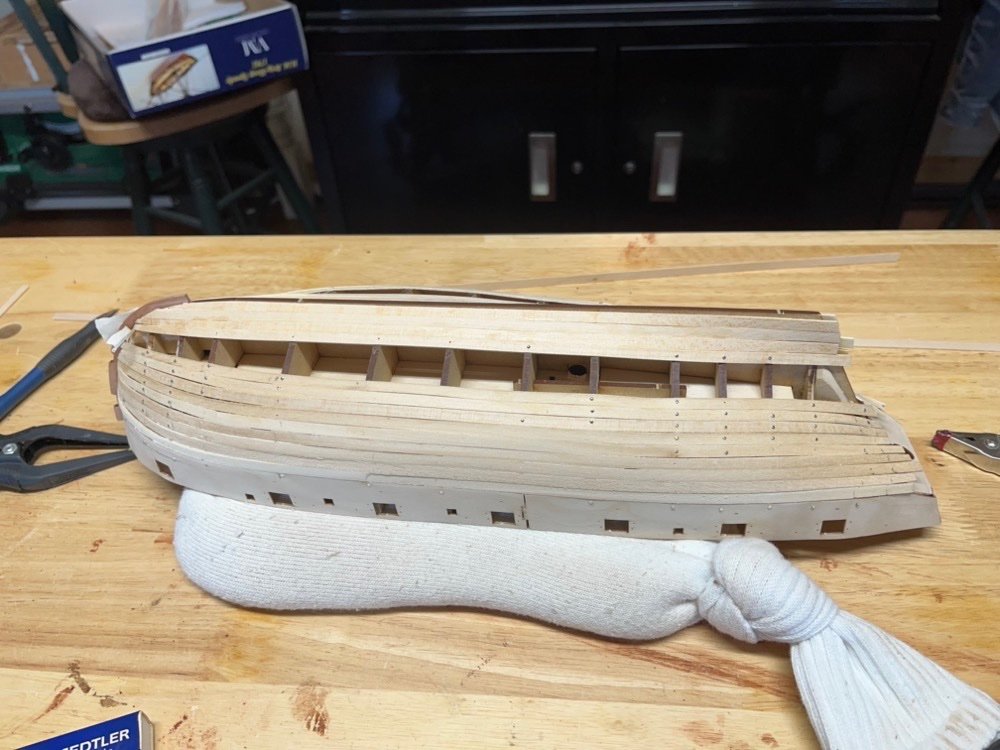
 Thanks mugje. It took a while to get there but I am happy with the result. Moving on now, I removed the bulwark extensions above the false deck and sanded the excess down flush with the deck. I also sanded the excess glue off the insides of the bulwarks where I had glued the gun port pieces to the extensions. I then painted the inside bow and transom using a few coats of diluted MS Bulwarks Red paint. I cut the insets from the planked deck piece and lightly sanded it to remove the char but not the details, and gave it a coat of wipe on poly before I fit it and install it. While waiting for things to dry I have been blackening the small PE parts, like the eyebolts and hooks. When I built the Duchess of Kingston I painted these parts with black paint, but I found that process very tedious. I can blacken each kind of part all at once with much less effort and the result looks nicer to me than the painted parts.
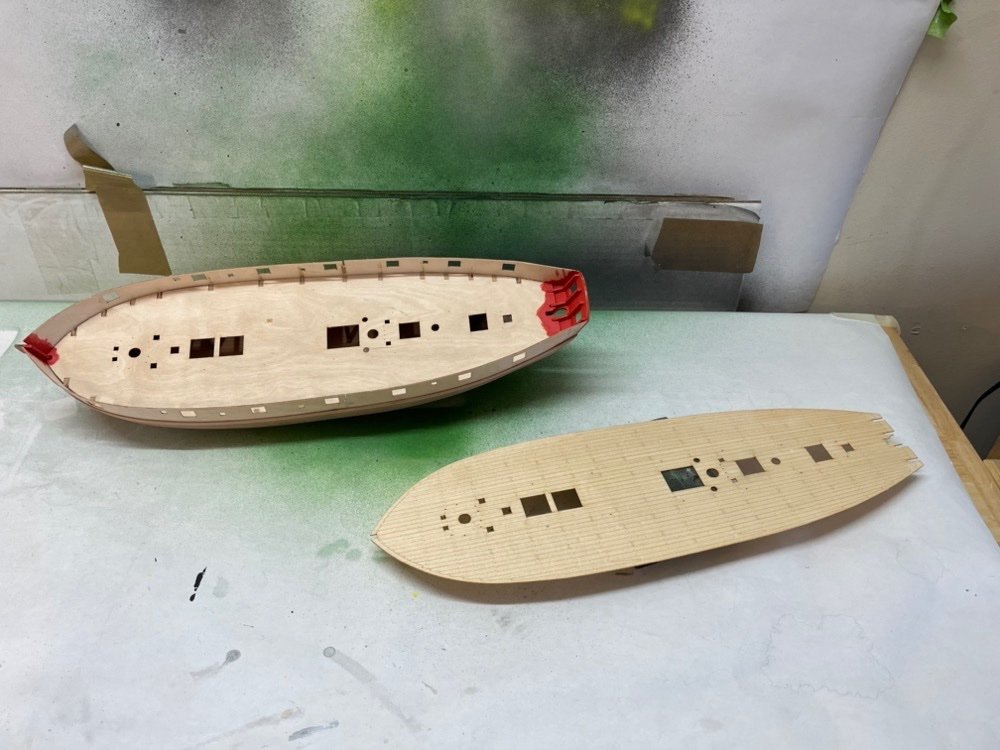
- 144 replies
-
- 7
-

-
- HMS Speedy
- Vanguard Models
- (and 1 more)
-
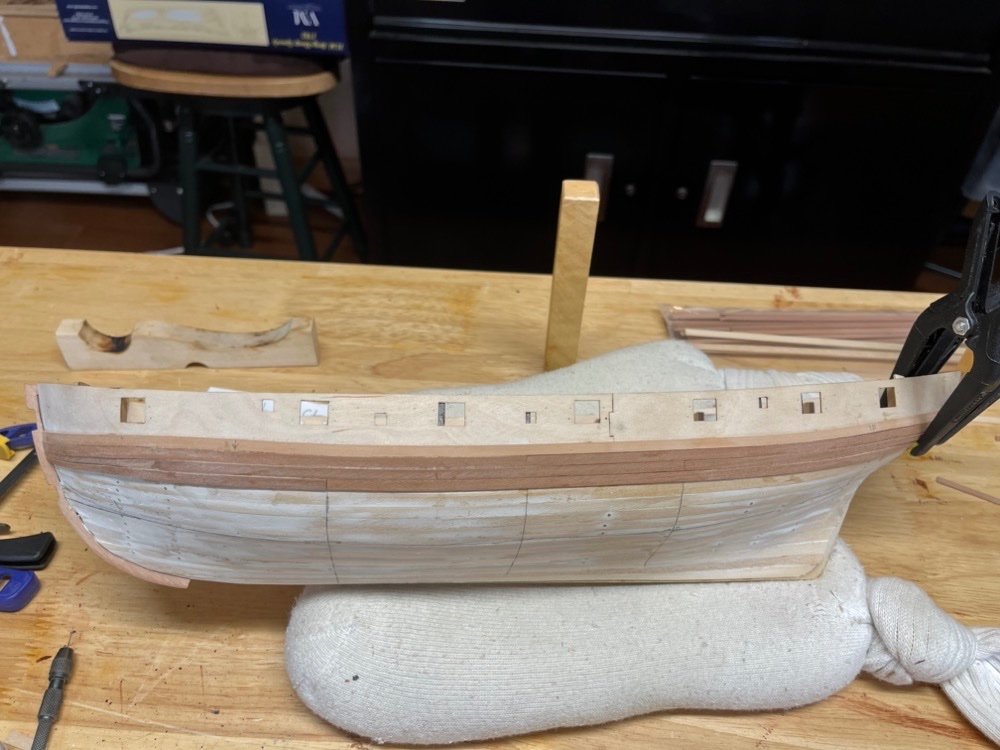
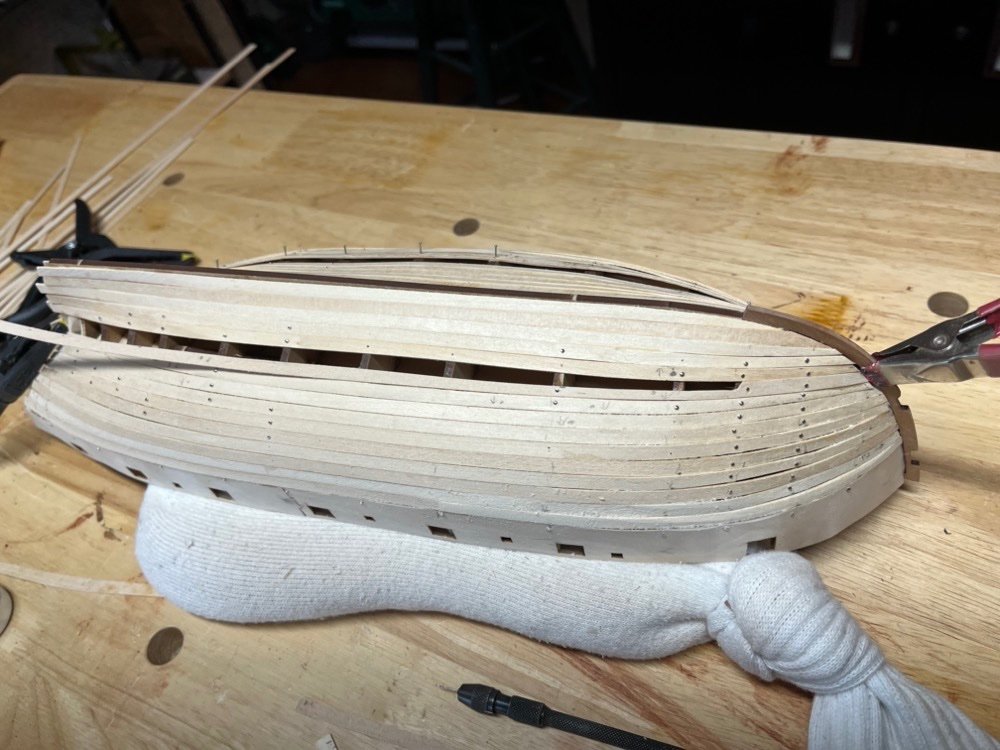
Thanks Theodosius. After my families' vacations here at the lake, I finally have some time for Speedy. I gave the second planking a final rough sanding. I thought I had done a good job planking but I still I had a lot of sanding to do and some filling of the seams with fine saw dust. I am ready to move on to the next step though.
- 144 replies
-
- 9
-
-
- HMS Speedy
- Vanguard Models
- (and 1 more)
-
Very good work so far. I will definitely follow along your build log. I used a combination of lathe and mill to shape the bow sprit. I think you should be able recreate the process with hand tools but it will take longer. As for the bulkhead extensions, I did exactly what you suggest - adding small strips to even them out. You should try to get the widths between the inner and outer planking as even as possible, because you will see that distance in the sides of the gun ports.
-
I concur with all the book series mentioned here. I have read them all and am re-reading the O'Brian books since they were my favorites.
-
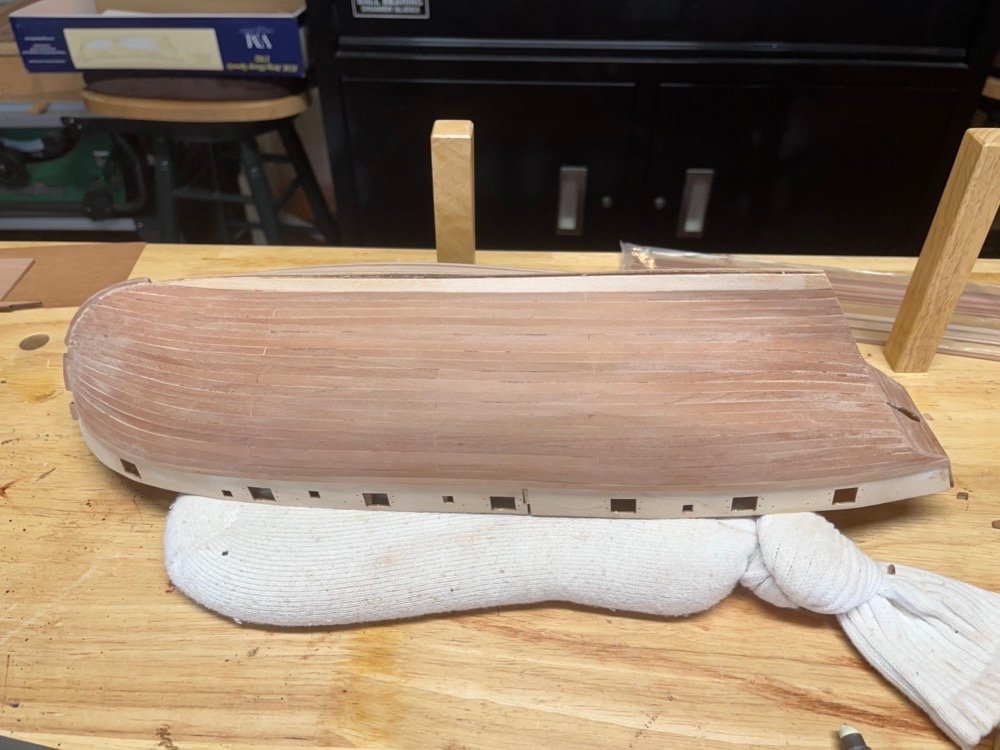
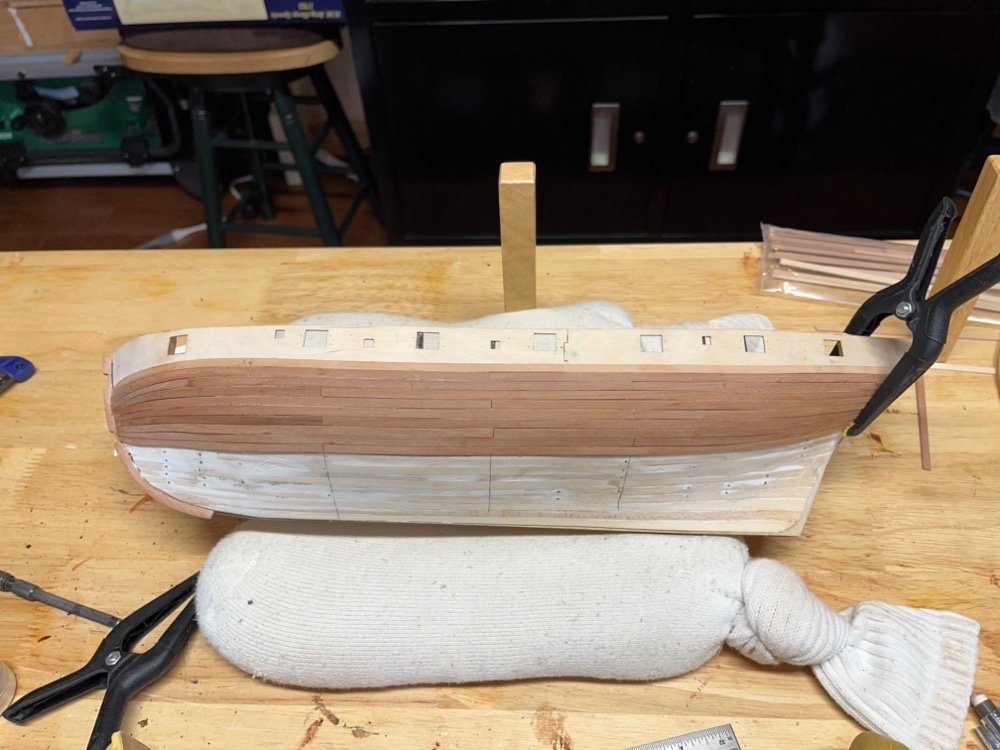
Thanks Sjors. The Conny took me five years to build. This one should be about a year, so yes a big difference. I have completed the second planking on both sides. The starboard side came out much better than the port side. In fact, I think it is the best planking I have ever done. I am very happy with the result and will use the starboard side as the "show" side. I now need to trim up the excess planking so I can fit the stern post, then scrape and sand these planks to smooth them all up.

- 144 replies
-
- 6
-
-
- HMS Speedy
- Vanguard Models
- (and 1 more)
-
Hi Sjors. I just found your build log and I am flattered that you are using my log to help. I have to say that this part was very tricky for me but things got easier later. I added the lower deck (gun deck) in order to add full cannons for some of the guns instead of using the false guns throughout. Also it was a challenge to me so I was curious to try it. There are a lot of good MS Constitution built logs on this site so I hope you are looking at those too, XKens is especially good but there are others that are very good too.
-
Thank you Allan. The trick for me was being able to edge bend that second plank up enough to fit tight to the first one at the bow end. It was a fairly sharp bend. I have completed the second planking on the port side down from the wales. I am really pleased with how this came out. I have some sanding to do but much less than I usually do. Now to complete the second planking on the starboard side.
- 144 replies
-
- 6
-
-
- HMS Speedy
- Vanguard Models
- (and 1 more)
-
Welcome from another New Hampshire modeler.
-
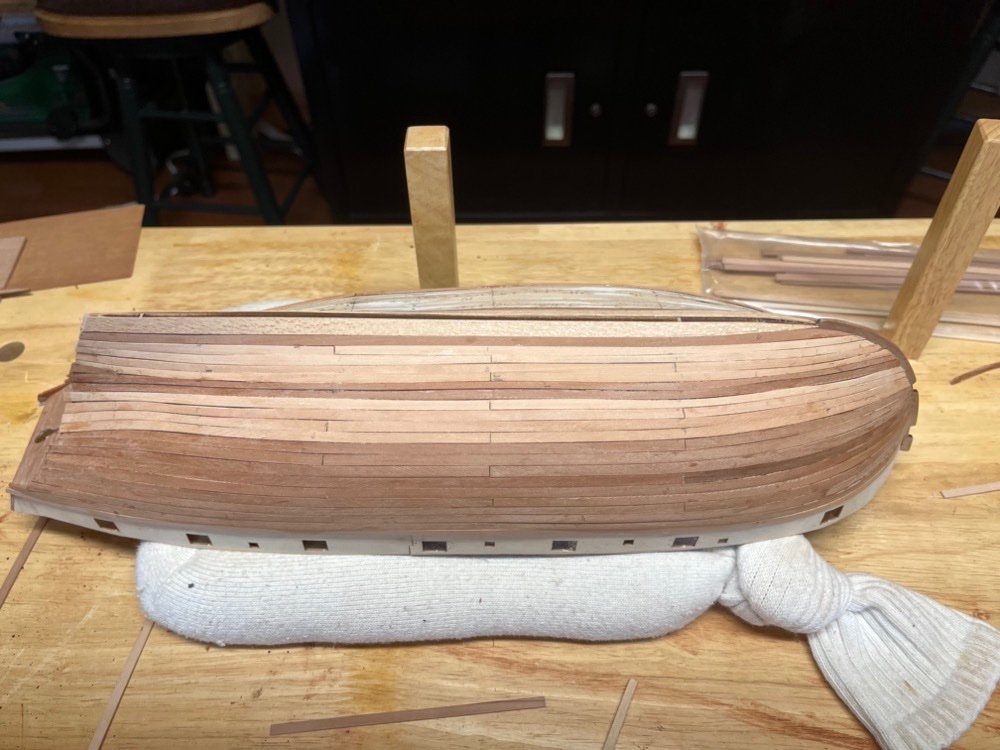
I guess I should call this build the classic Speedy kit, as Vanguard is about to release an updated version which is quite a bit different in construction. I have been planking away on both sides of the hull. I added 10 planks to the starboard side, then added the garboard planks. I used a wider plank for the planks next to the keel as this will allow me to use an even number of full width planks down the middle of the hull. I then added five more planks down from the top of the hull on the port side, which is where I am as of today. These planks cover all the area on the port side that won't be covered with copper tape. I will now add the remaining five planks starting at the keel and working up, so if the last plank is funky shaped it will be covered in copper foil.
- 144 replies
-
- 8
-
-
- HMS Speedy
- Vanguard Models
- (and 1 more)
-
Thanks Sjors. I would be happy to answer any questions you have. It has been a few years since I built this model but I took good notes as I built it. Thank you too Der Alte. Take your time and don't be afraid to do something over again if you are not happy with it. Also I found the first chapter of Robert Hunt's practicum, which you can get for free, helpful to get started but I didn't buy any of the other chapters. There is a lot of useful information in the build logs on this site as you have found and most of the builders that wrote them are still active on the site. And the most important thing is to start a build log as that is the best way to get advice when you need it, I have found.
- 1,350 replies
-
- 1
-
-
- constitution
- model shipways
- (and 1 more)
-
I finished adding the first 10 planks on the port side. These are not scraped/sanded yet. I am now doing the same to the starboard side.
- 144 replies
-
- 4
-
-
- HMS Speedy
- Vanguard Models
- (and 1 more)
-
Here are the first four planks on the port side. I have started tapering them at the bow and stern. I measured down 10 planks in the middle section, then used a batten to extend the line to the bow and stern. I only had to taper about the first inch and a half at the bow and inch at the stern. These pear planks take to @Chuck's edge bending technique really well, using only a small iron.
- 144 replies
-
- 5
-
-
- HMS Speedy
- Vanguard Models
- (and 1 more)
-
I started planking the port side of the hull. I am using a full length plank for the wale so I bent one to fit and used the laser cut marks on the bulwark to align it. I used medium CA to glue it on, a small section at a time. Happy Father's Day to all you Dads out there.
- 144 replies
-
- 4
-
-
- HMS Speedy
- Vanguard Models
- (and 1 more)
-
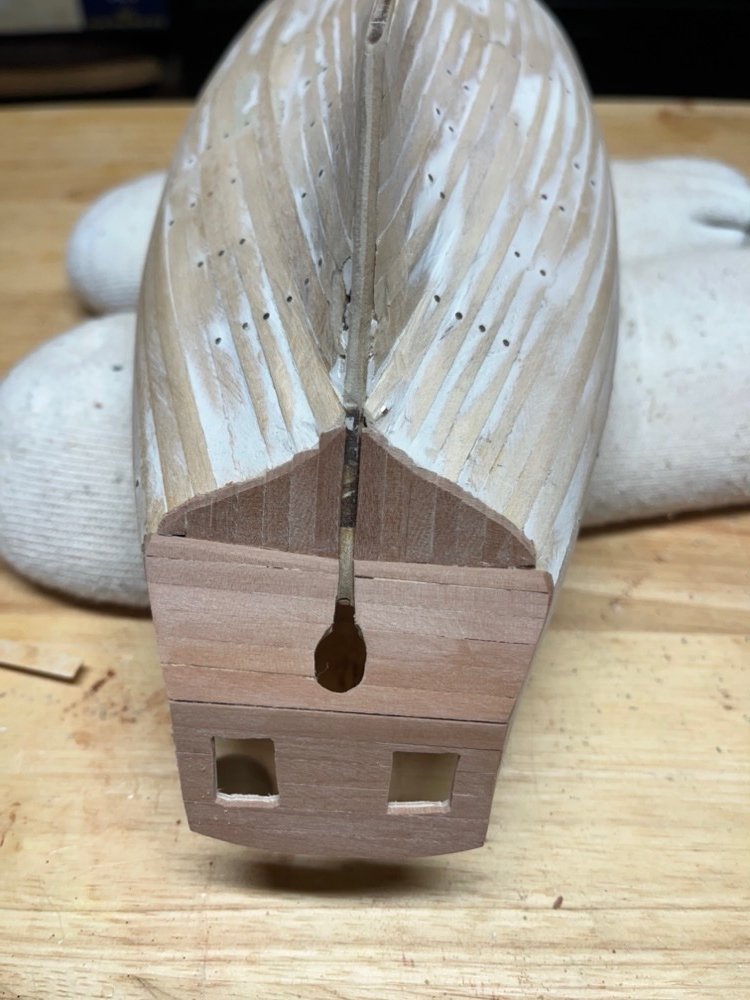
I planked the whole counter and transom with the pear strips. I used vertical planks for the lowest section, but deviated from the instructions and used horizontal planks for the upper transom as well as the counter. Mostly this was an aesthetic issue for me but also it made this task a little easier. I used small files to clean up the excess plank lengths in the gun ports and rudder opening, and a Dremel with a sanding disk, files, and sanding block to sand the excess plank ends to be flush with the first planking. I also filed the back edge of the keel piece down to 1.5mm so the second planks with fit somewhat flush with the stern post. At this point I am ready to start the second planking of the hull. I started marking off the hull for these planks which are 1 mm thinner than the first planking. I'll figure out the tapers at the bow and maybe the stern before I start. I also marked three bulkheads to use for a 3 butt shift as I will not be using full length planks for the second planking.
- 144 replies
-
- 4
-
-
- HMS Speedy
- Vanguard Models
- (and 1 more)
-
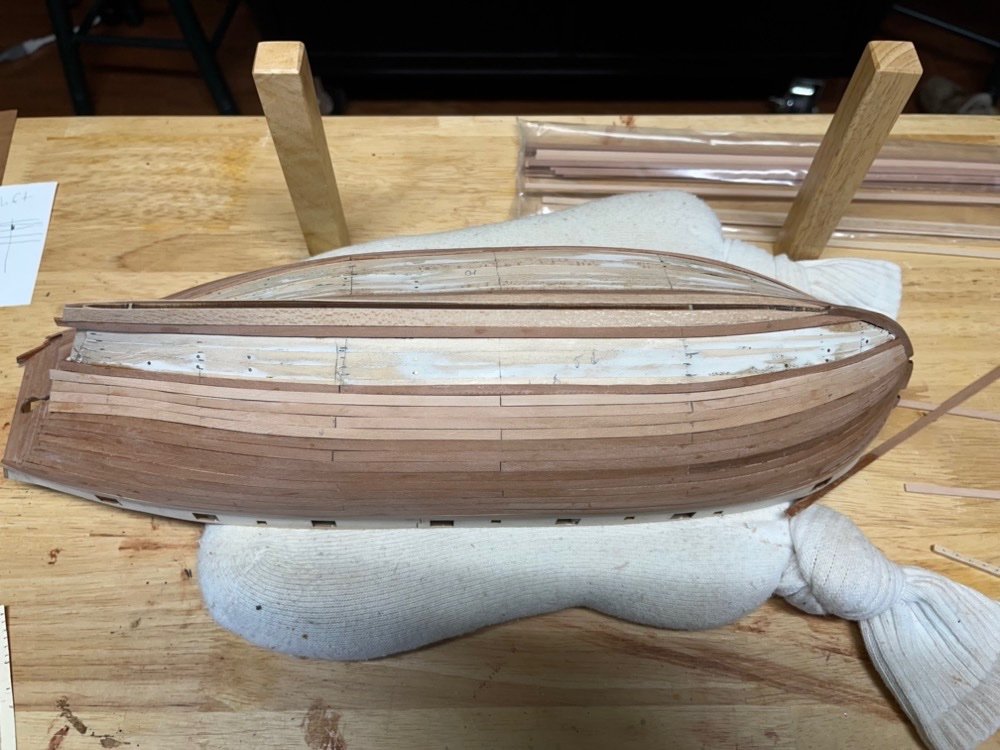
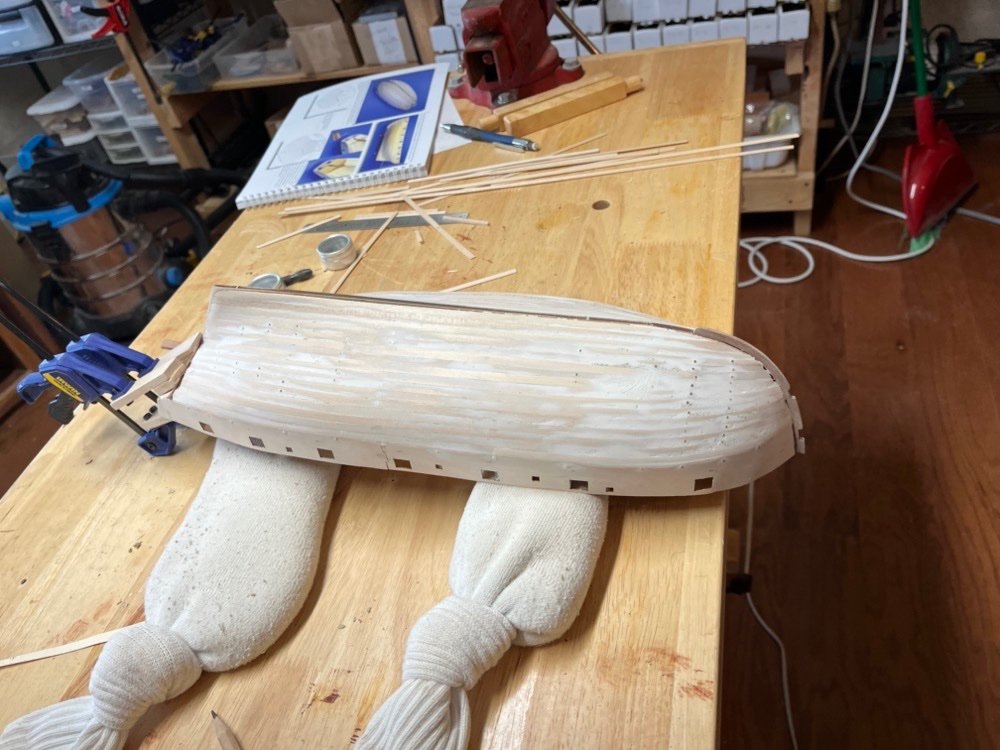
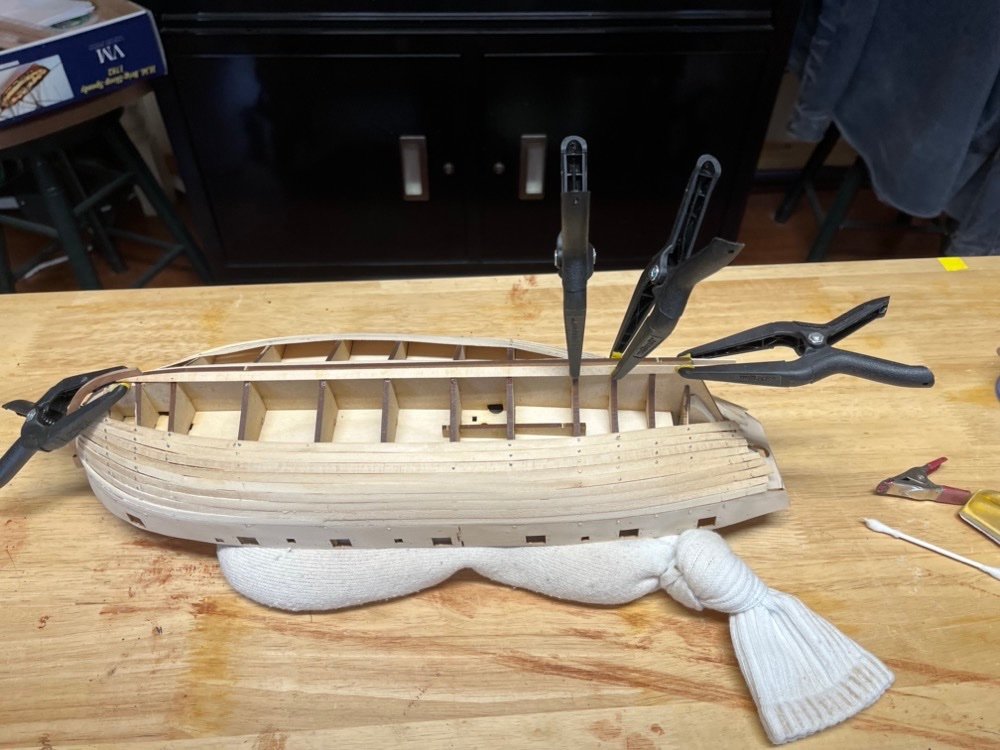
I have completed the first planking. I filled the low spots with diluted wood putty then sanded everything smooth, then did that two more times to fill any remaining low spots. I used a Dremel to cut and sand down the ends of the planks at the transom. I also filed down the nail heads but left them in place. I think it came out OK for a first planking but the second planking has to be a lot better. I then used the second planking strips, which are pear, to start planking the transom. These strips need to be cut and sanded flush with the first planks before I can start adding the second planks over the first.
- 144 replies
-
- 5
-
-
- HMS Speedy
- Vanguard Models
- (and 1 more)
-
Thanks Thukydides. I planked part of the way up from the garboard strakes until I had a gap of about three planks left. At this point I was again having to bend the planks a lot, so I decide I would add a drop plank in this gap. I added one more full length plank then the drop plank. You can see one on the bench in the next image. It still has a good bend through most of the length but fit pretty well. And here it is being installed. I have since cut the planks to fill the remaining gap on each side and am in the process of gluing them in place. I have also started filling in the low spots on all the planks with wood putty and will start sanding the hull when that is completed. Not the prettiest planking job but OK for the first layer. This will all be covered with the second layer, which will be pear. The pear strips are not as wide as these planks so I am not sure if they will be easier to bend and fit. I hope they will be but we shall find out soon enough.
- 144 replies
-
- 6
-
-
- HMS Speedy
- Vanguard Models
- (and 1 more)
-
I put about half the planks from the gun ports down, but then I decided to add the garboard strakes and plank up to what I had already done. Here are the garboard strakes being glued in place. I first glued the planks to the middle bulkheads using medium CA glue since I couldn't plank them to anything. I then glued the fore and aft ends to those bulkheads, which I was able to clamp.
- 144 replies
-
- 7
-
-
- HMS Speedy
- Vanguard Models
- (and 1 more)
-
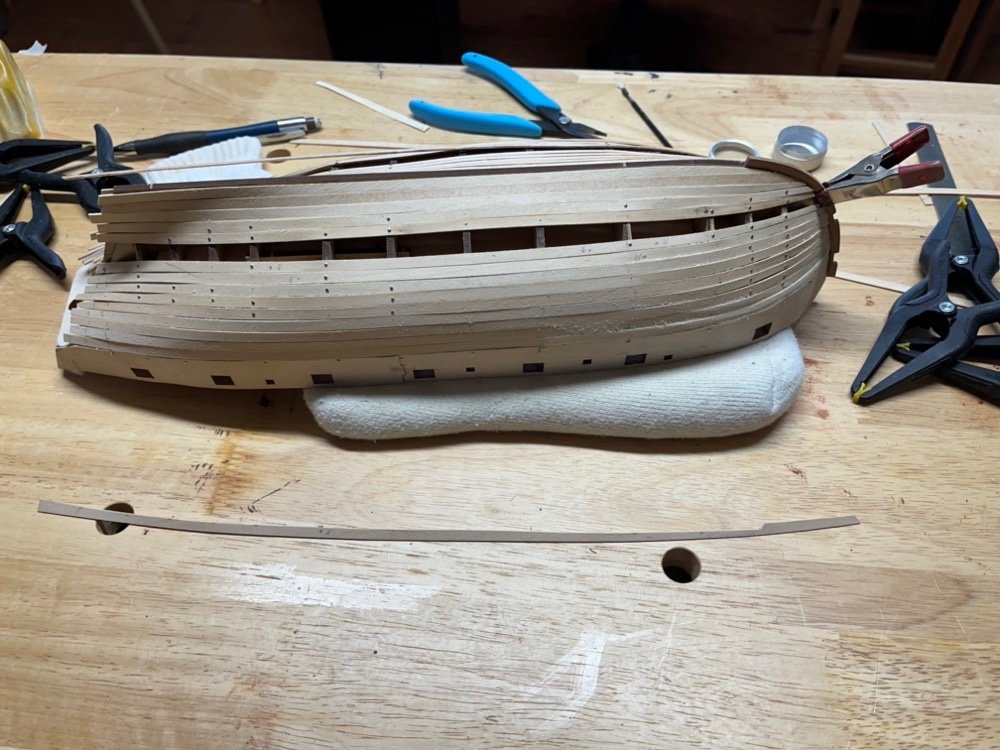
The gun port pieces came out pretty well but there were two issues. At the transom the gun port pieces were pinched in between the last bulkhead and the transom. I determined that I had not sanded the transom piece enough so it was causing the ends of the gun port pieces to be out too far. I carefully released the glue joints between them and the transom pieces, then used a Dremel sanding disk to reduce the width of the upper transom piece. When I re-glued the gun port pieces to the transom piece, I also put a spacer between them to push them outward a bit. When the glue dried the gunk port pieces came out much straighter. I am also not worried about that joint, as medium CA seems to hold it very well. The other problem I had was that at the bow the bottoms of the gun port pieces were a little too far away from the first 5 or so bulkheads. The planking strips provided for the first planking are pretty thin so I was worried that I would sand through them getting them flush with the bottom of the gun port pieces. My solution was to use a thicker planking strip for the bow area of the first plank below the gun port pieces. This should give me enough meat to sand without getting too thin. I can also use wood filler in this area if I need to to fill in any gaps that might show up. So the first planking has started. I measured each bulkhead using a tick strip to determine the number and width of the planks at each bulkhead. The planks need some tapering at the first 5 bulkheads at the bow and at the last bulkhead and transom at the stern. I tapered two thicker strips for the first plank at the bow and two regular width strips for the rest of the first plank, soaked them for just a few minutes, used a plank bender to bend in curve at the bow, then clamped them to the bulkheads to dry. Once they are dry I will glue and clamp them in place. One plank down, many more to go.
- 144 replies
-
- 7
-
-
- HMS Speedy
- Vanguard Models
- (and 1 more)
-
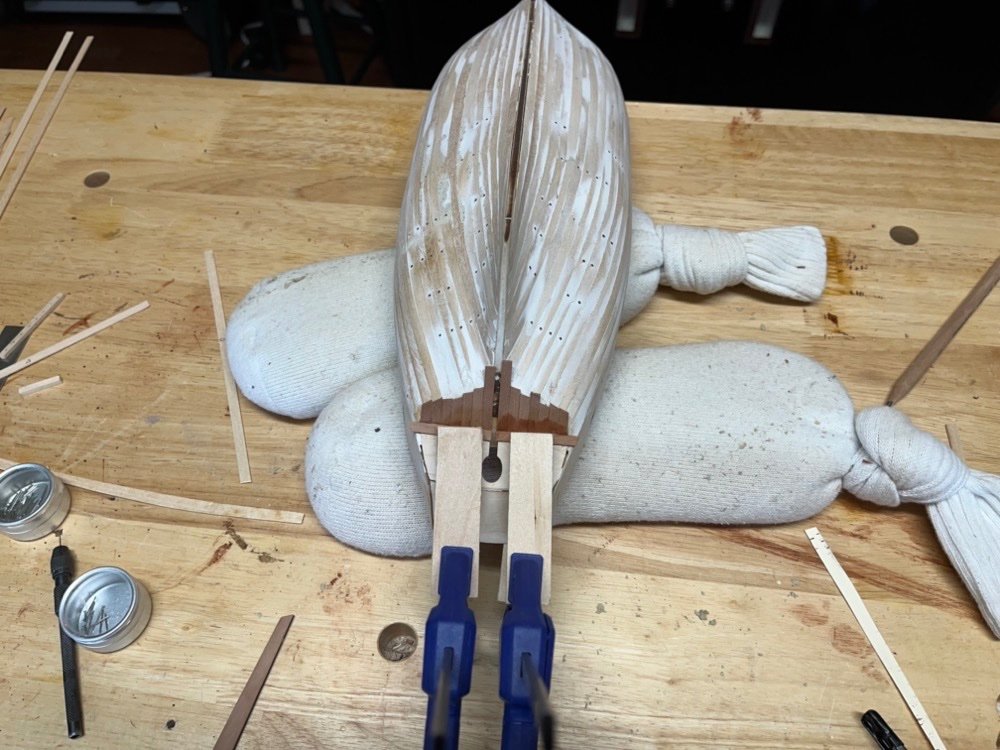
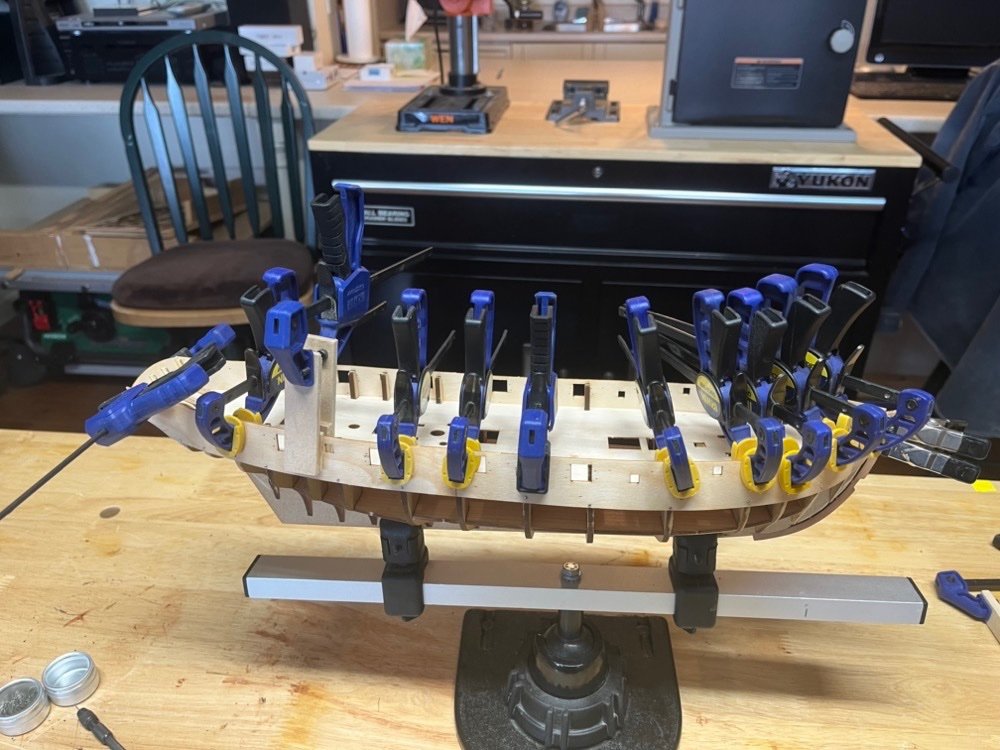
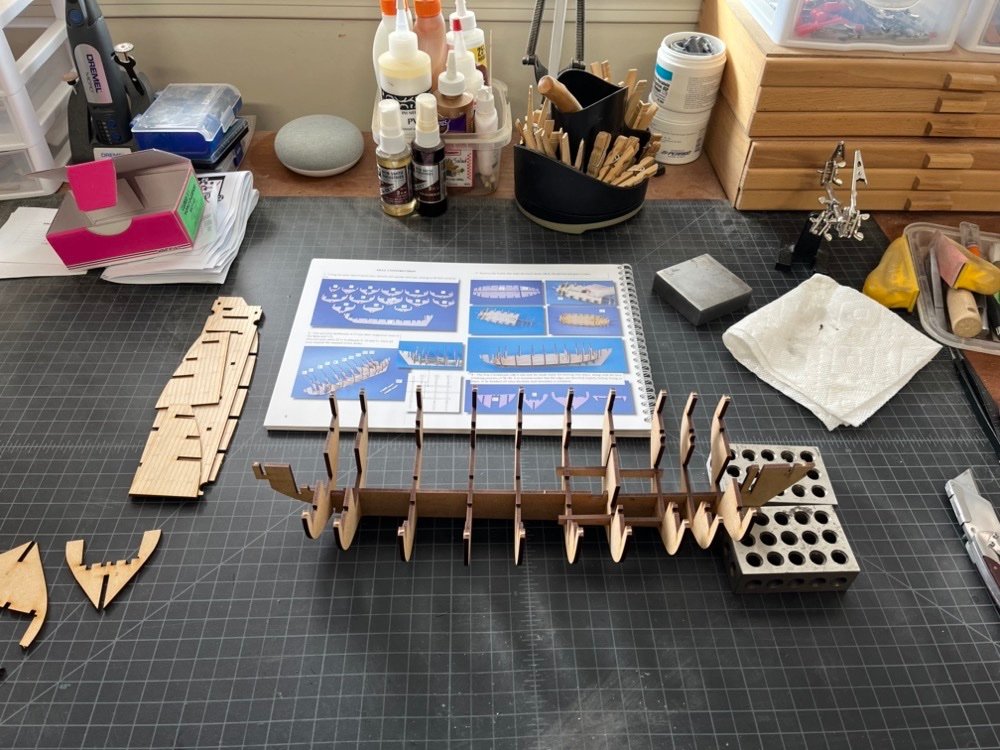
After adding the transom pieces, it was time to fair the bulkheads, add the stem piece, then add the gun port pieces. The gun port pieces had to be soaked then bent to the bulkheads. As per the instructions, I pinned the bottoms and clamped the tops to the bulkheads, let them dry overnight, then glued and pinned them back into place. I did the port side pieces first, and I now have the starboard pieces soaked and drying. I am worried about where the aft gun port pieces are glued to the transom pieces, as this is a very thin gluing area and I don't see anything coming up that will help hold these joints. I did use medium CA to hold these joints which should help.
- 144 replies
-
- 3
-
-
- HMS Speedy
- Vanguard Models
- (and 1 more)
-
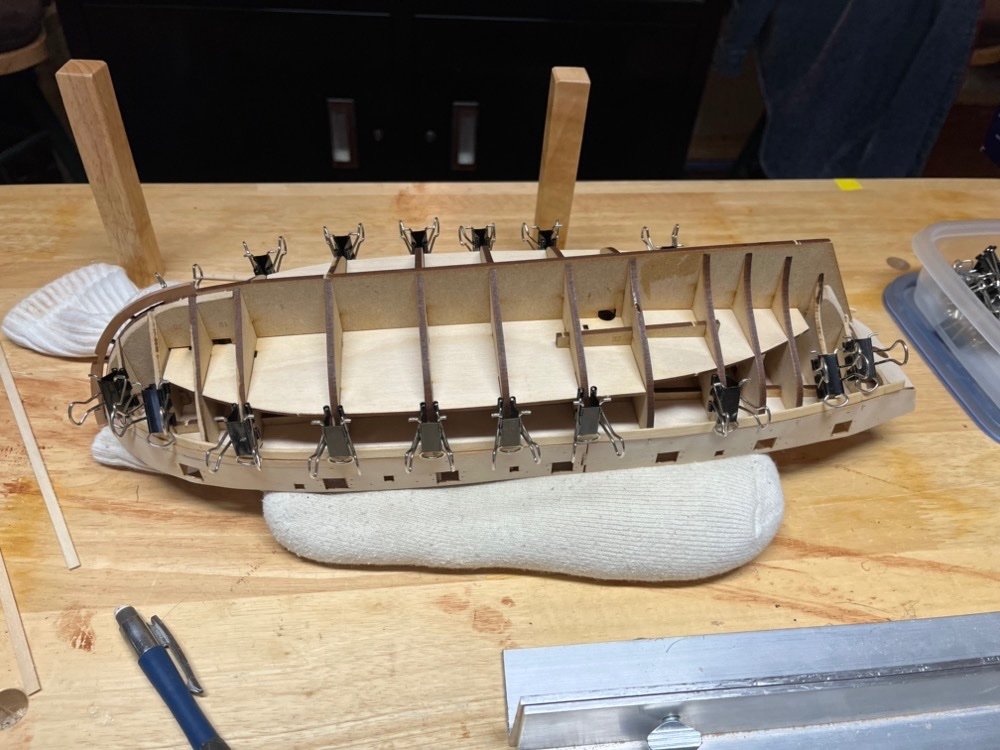
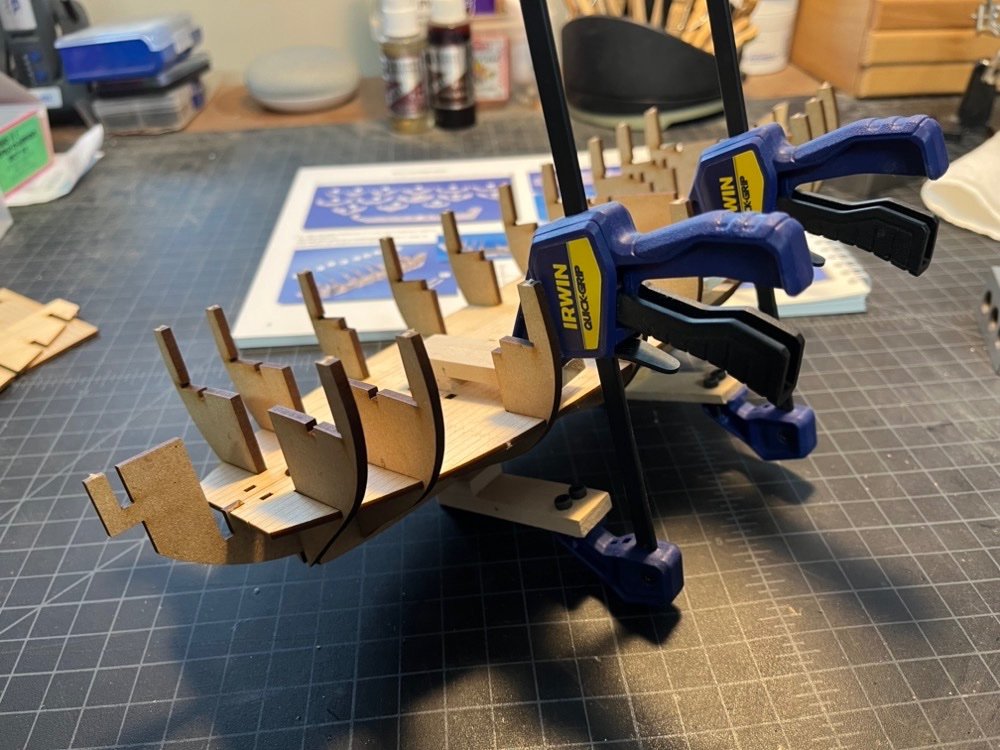
Thanks Eric and the likes. I continue putting the frame together and this was the trickiest part - adding the base for the upper deck. It has to be bent just enough to get between the frames and those very fragile transom supports. I managed to get it in place and glued to the bulwarks and used some clamps to hold the middle of the deck sown while it dries. The next step is to add those transom pieces, to protect those transom supports.
- 144 replies
-
- 5
-
-
- HMS Speedy
- Vanguard Models
- (and 1 more)
-
Really nice looking cable Ron.
-
I have been using Dullcoat Lacquer on the Mara polyester ropes I make for the past 5 years with good results.
-
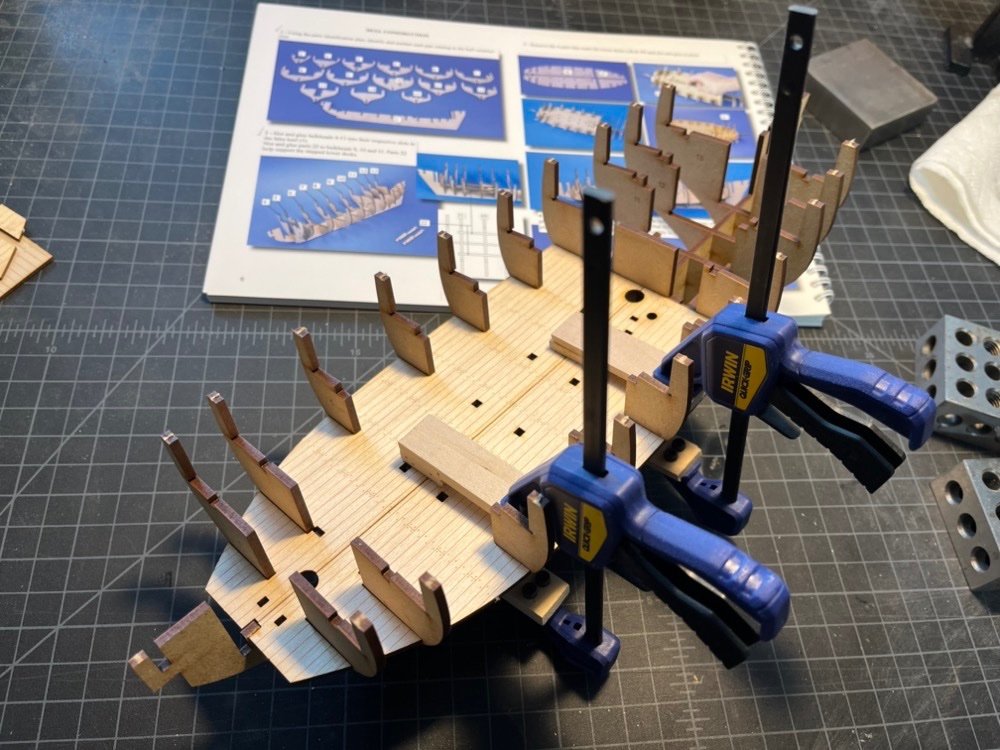
I glued two of the lower deck sections to the bulkhead. Because there is a curvature to the deck, I used these modified clamps to hold them while gluing which worked great.
- 144 replies
-
- 7
-
-
- HMS Speedy
- Vanguard Models
- (and 1 more)
-
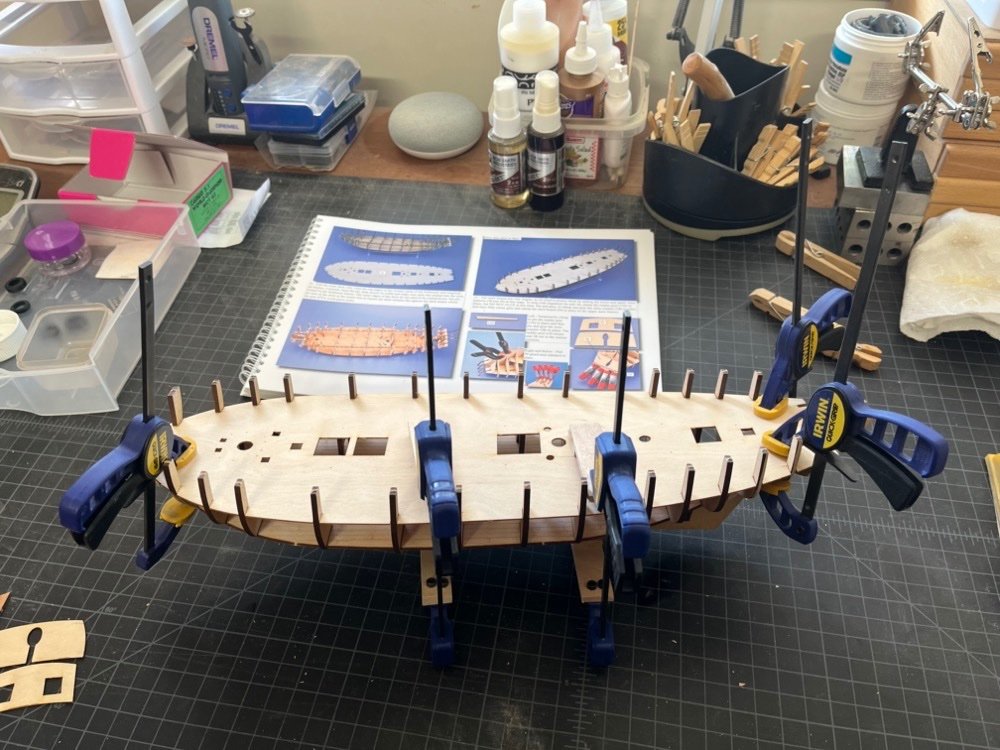
Thanks EvanKeel. I will follow along with your Bounty Launch build. I really liked that kit too. Just your typical shot of gluing the bulkheads to the keel. Of course everything fit together like they were made for each other.
- 144 replies
-
- 5
-
-
- HMS Speedy
- Vanguard Models
- (and 1 more)
-
This will be my second Vanguard kit. I have wanted to build this ship model ever since it was released. I will be building it for our new first grandson, Thomas Joseph. His nursery is a nautical theme so the completed model will go in there when he is older. I have to include a picture of the little guy. The sailer suit was actually his father's, our son, from when he was a baby. Ok enough of that. I have unboxed the kit and started cutting out the bulkheads and keel. Pictures of the actual model coming soon.

- 144 replies
-
- 5
-
-
- HMS Speedy
- Vanguard Models
- (and 1 more)