fnkershner
-
Posts
1,595 -
Joined
-
Last visited
Content Type
Profiles
Forums
Gallery
Events
Everything posted by fnkershner
-
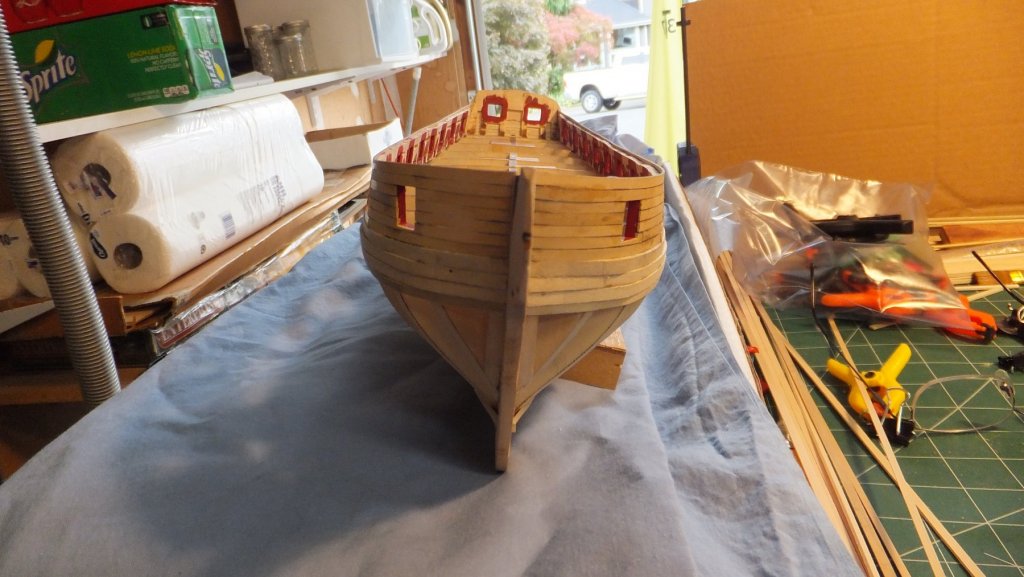
Ok elsewhere on this web site there is mention of feeling stupid. Now that is me. As mentioned above I carefully used the tic strip to calculate the number of planking strips and the amount of taper I would need. Note to Self: There are 4 1/32 in 1/8 not 8! So as I mentioned I was concerned that I would not be able to accurately taper just 1 1/32 from each plank so I instead tapered 1/16th from every 5th plank. When I should have tapered 1/16th from every other plank. So progress report: Port side is 1/2 done but all planks from now on will need significant tapering. Also a note to the Syren club. I noted much to late that when Rich did his planking he did it before he did the counter. I would suggest every one think this over very carefully. when I get home from work tonight I will take pictures to explain. But if the counter is finished there is no where to hide the butt end of the hull planks. I believe I will need to remove 1 or 2 planks from the counter, sand the hull flush and then replace those planks. Needless to say but the "assembly line" of soaked and bent planks has come to a halt for now.
-
Today I got off work early and the sun was shinning so what did I do? I began Planking the hull. I had intended to finish the Treenailing first but I realized that the Treenailing was exactly the thing to keep me busy while Planks were soaking and bending. So I started an assembly line. Below is the results. Using Chuck's suggestions about measure and calculating the Taper of the planks. I discovered I needed 21 planks on each side and that at the bow they each needed to be tapered down 1/32". Now I don't know about you but my tapering is not that accurate. So I decided that since I needed to reduce the width by 20 X 1/32 I would just remove 1/2 of the width every 5th plank. Not exact but as we all know that last planking is always a strange shape anyway. So I soaked 5 planks at a time in my trusty PVC pipe. and 1 of those planks was tapered first. After soaking for 30 min. they it was time for 30 min on the planking board. and the next set of planks was soaking and bending while I installed the current set. In a 2 hour period I have added 10 planks! I am really pleased with my treenailing. I have broken 4 drill bits so far. And the Port side is almost complete. the starboard is 1/2 way. Since I ran out of number 75 bits I switched to number 76. I have also resisted using the dremel. the drilling is not bad its just the number of holes. I also opted to not do as many holes as Chuck suggested. It just seemed to cluttered.


-
I am very familiar with the feeling like an idiot part. This Hobby can be humbling.
- 242 replies
-
- 3
-

-
- syren
- model shipways
- (and 1 more)
-
Peter - I did the same thing which led to my removing and replacing. I think the key is did you make this mistake for both the sills & lintels. If so you will have issues with the Lintels. the Bulwarks will be too tall. And possibly you may not have enough material to sand the correct curve at the bow.
-
Rich - If I can take you back a bit. How did you do the bending of hull planks for the stern? As you know I have a planking board for the bow. but I am trying to work out a pattern for the stern. Suggestions?
- 1,135 replies
-
- 1
-
-
- model shipways
- syren
- (and 2 more)
-
Mine did not fit the proper space on the model. It's been a while, but as I remember they were too short and not tall enough.
- 242 replies
-
- 1
-
-
- syren
- model shipways
- (and 1 more)
-
Peter - it has been my experience that the Carronades provided are the wrong size. You might check yours. My kit is several years old.
- 242 replies
-
- 1
-
-
- syren
- model shipways
- (and 1 more)
-
Jesse - I know it is too late for you but for everyone else in the Syren Club Chuck makes some great Cleats out of boxwood.
- 1,306 replies
-
- 7
-
-
- syren
- model shipways
- (and 1 more)
-
I once asked a professional Photographer what the difference is between an amateur and a professional. He said "The pro never shows his mistakes and gets people to pay for his work." Everyone has lots of "Do overs".
-
Eric - Do you have Chuck's instructions for the Coppering jig? I seem to have misplaced them. Also can you tell me what you used for the nails? Keep up the great work. I am right behind you.
-
Peter - Great work! Keep bending and PS yes there is more sanding.
- 242 replies
-
- 1
-
-
- syren
- model shipways
- (and 1 more)
-
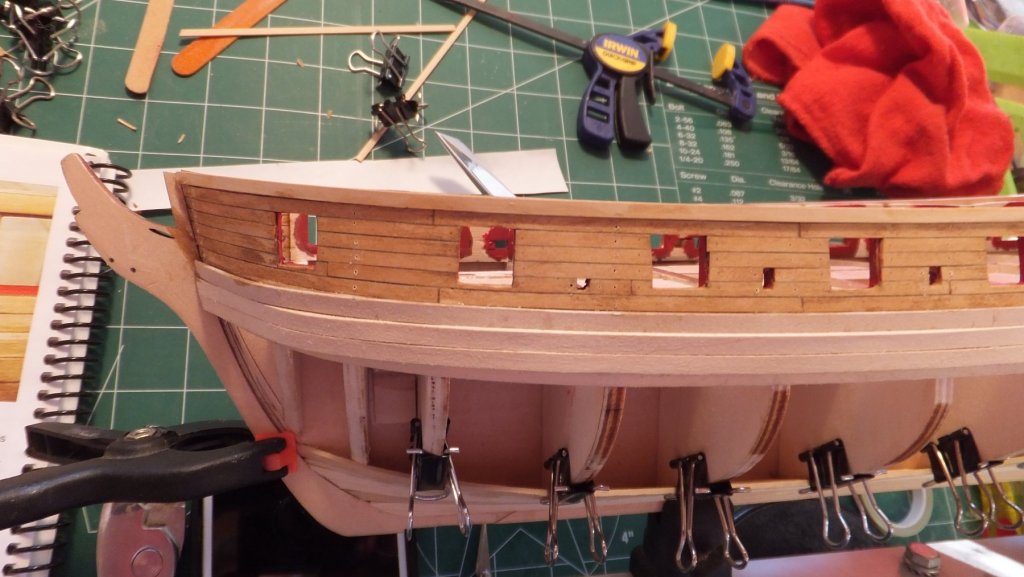
Ok so now we have finished steps 1,2,3, & 4 of chapter 5. Step 5 is Treenails and 6 is the rest of the hull planking. all that remains is cleanup and sanding in many places before the Treenailing begins. So let me talk about the treenailing a bit. First thanks to everyone who contributed to the selection of drill bits. I have settled on the number 75. In the picture you will see a few different sizes used. I also experimented with different stains. I have some Danish Oil that I like very much and on the left side you will see that used. I also had some putty that I wanted to try. On the right side is the Minwax golden oak stain and golden oak putty. I think I like this combo the best. I also had a problem with the drill wandering in my Dremel. I solved this with the help of Dr. Per by using a push pin first as a drill punch. It also lets me see the pattern before I drill. it appears the flash washed out the treenaling picture the stain does look very different. especially on Boxwood. PS I am sure there are members of the Syren Club who will notice I got carried away and added 1 too many planks on the garboard.


-
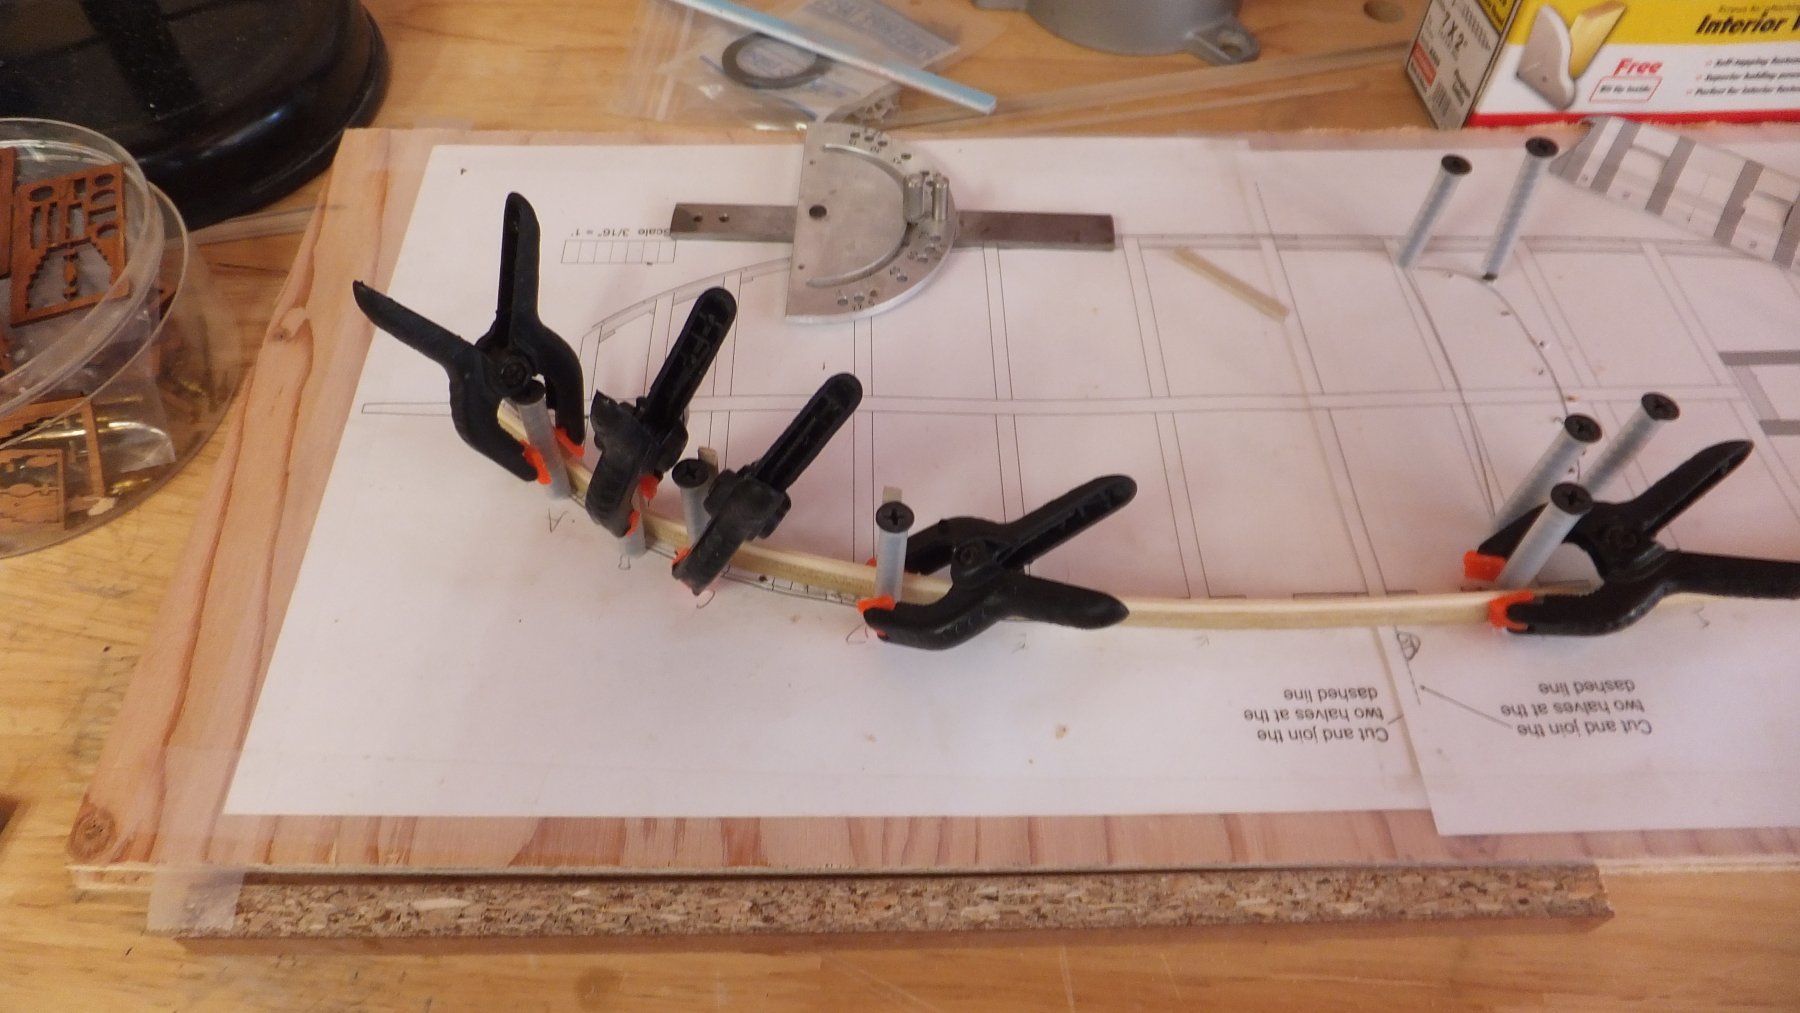
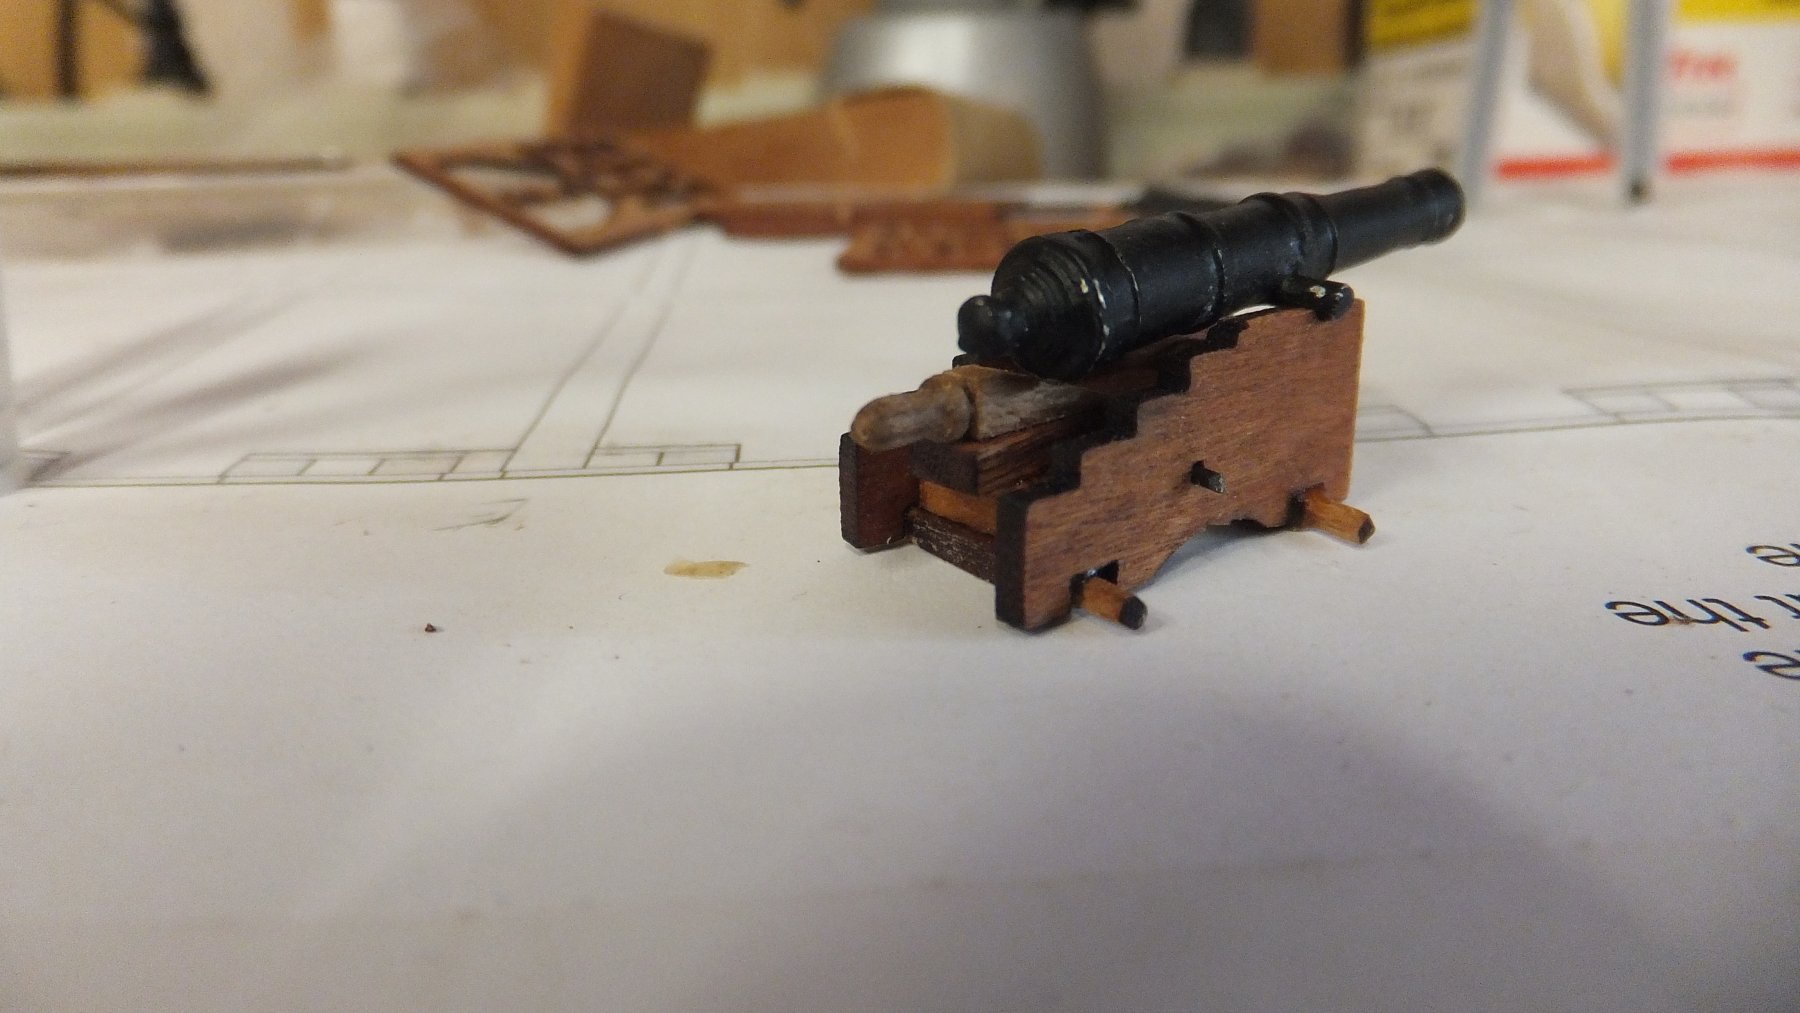
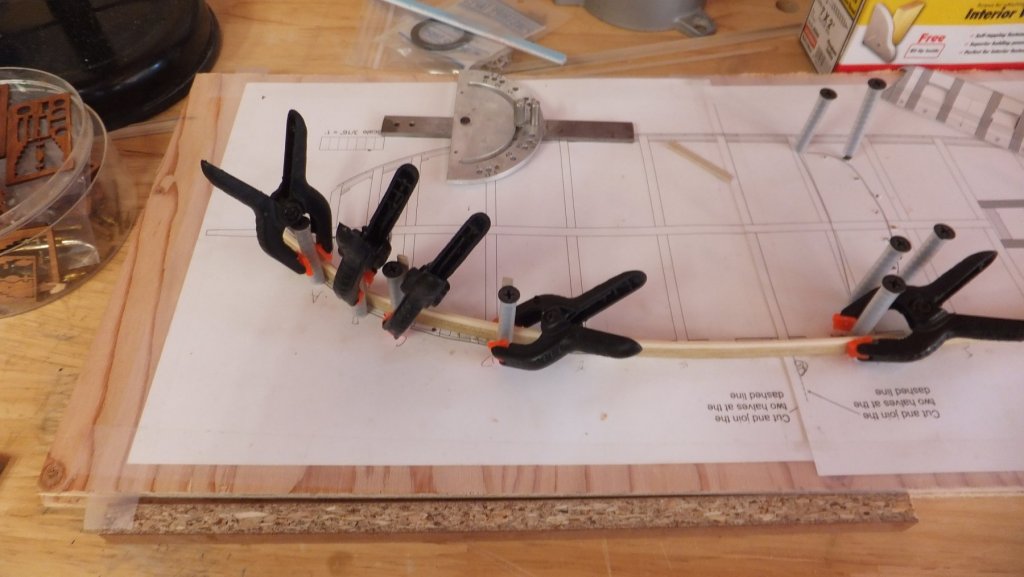
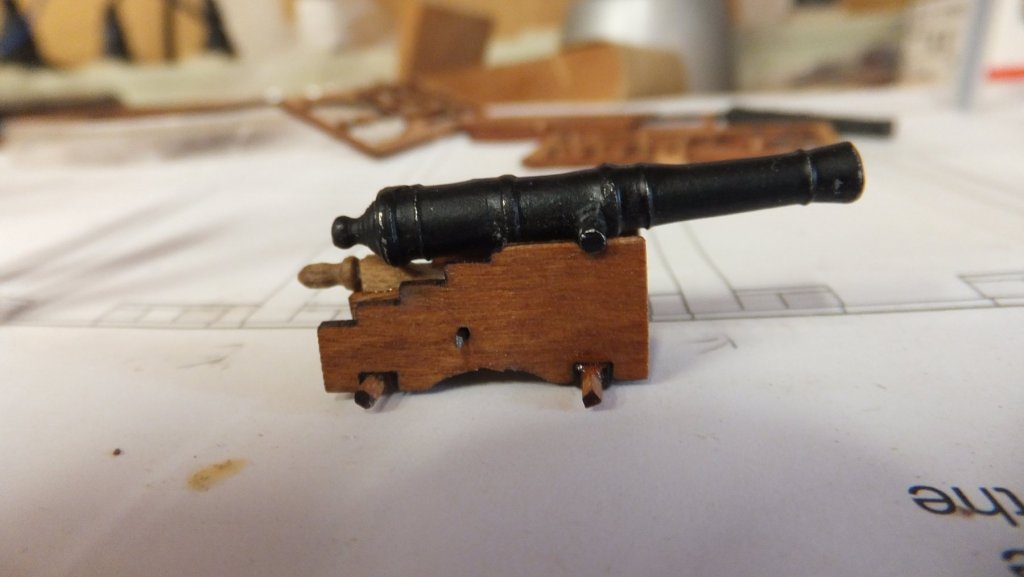
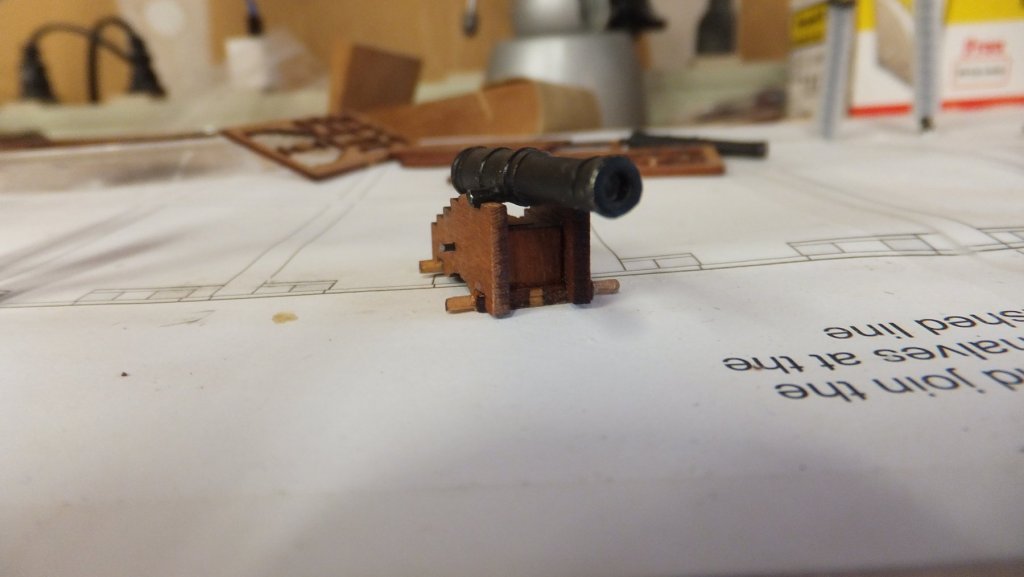
Attention Syren Club!! Here is a big update. (I am taking a break before I begin all that sanding). First let me share with you my jig for bending the planking strips for the counter. Ok with the latest version of this blog I don't seem to be able to intersperse pictures with text. So the next set of pictures is a little project I have been working on while waiting for planks to soak or bend. Or just goofing off. I purchased a couple of Chuck's Cannons for the stern chasers and I was anxious to see how they would look assembled. A couple of notes here for anyone using these cannons - First in the instructions Chuck says to glue the sides to the axles first then add the front and back strips. I found this difficult and very hard to get the angle correct. (the sides are not square) So instead I glued the front a back to the axle first. this gave me a reference point and a larger surface to glue. I still found it challenging at this scale. So I got a rather large diameter wire and used that to hold the sides while they were glued. I then used an old belaying pin and sanded down the handle for the handle on the Quion. Drilling the hole for this was also and interesting challenge. As you can see there are still a few steps left but I am rather pleased with the outcome. I am not sure of the limit on pictures for a post so I am going to close this one and continue on the next post.


-
Eric! I am so glad to see this log. And you have some great stuff that will help me. How much will it cost me to buy your copper jig? Looks like you have done an outstanding job. I am serious if you are no longer interested in your coppering jig. I would be willing to take it off your hands. Did you make 3 patterns as chuck suggests?
-
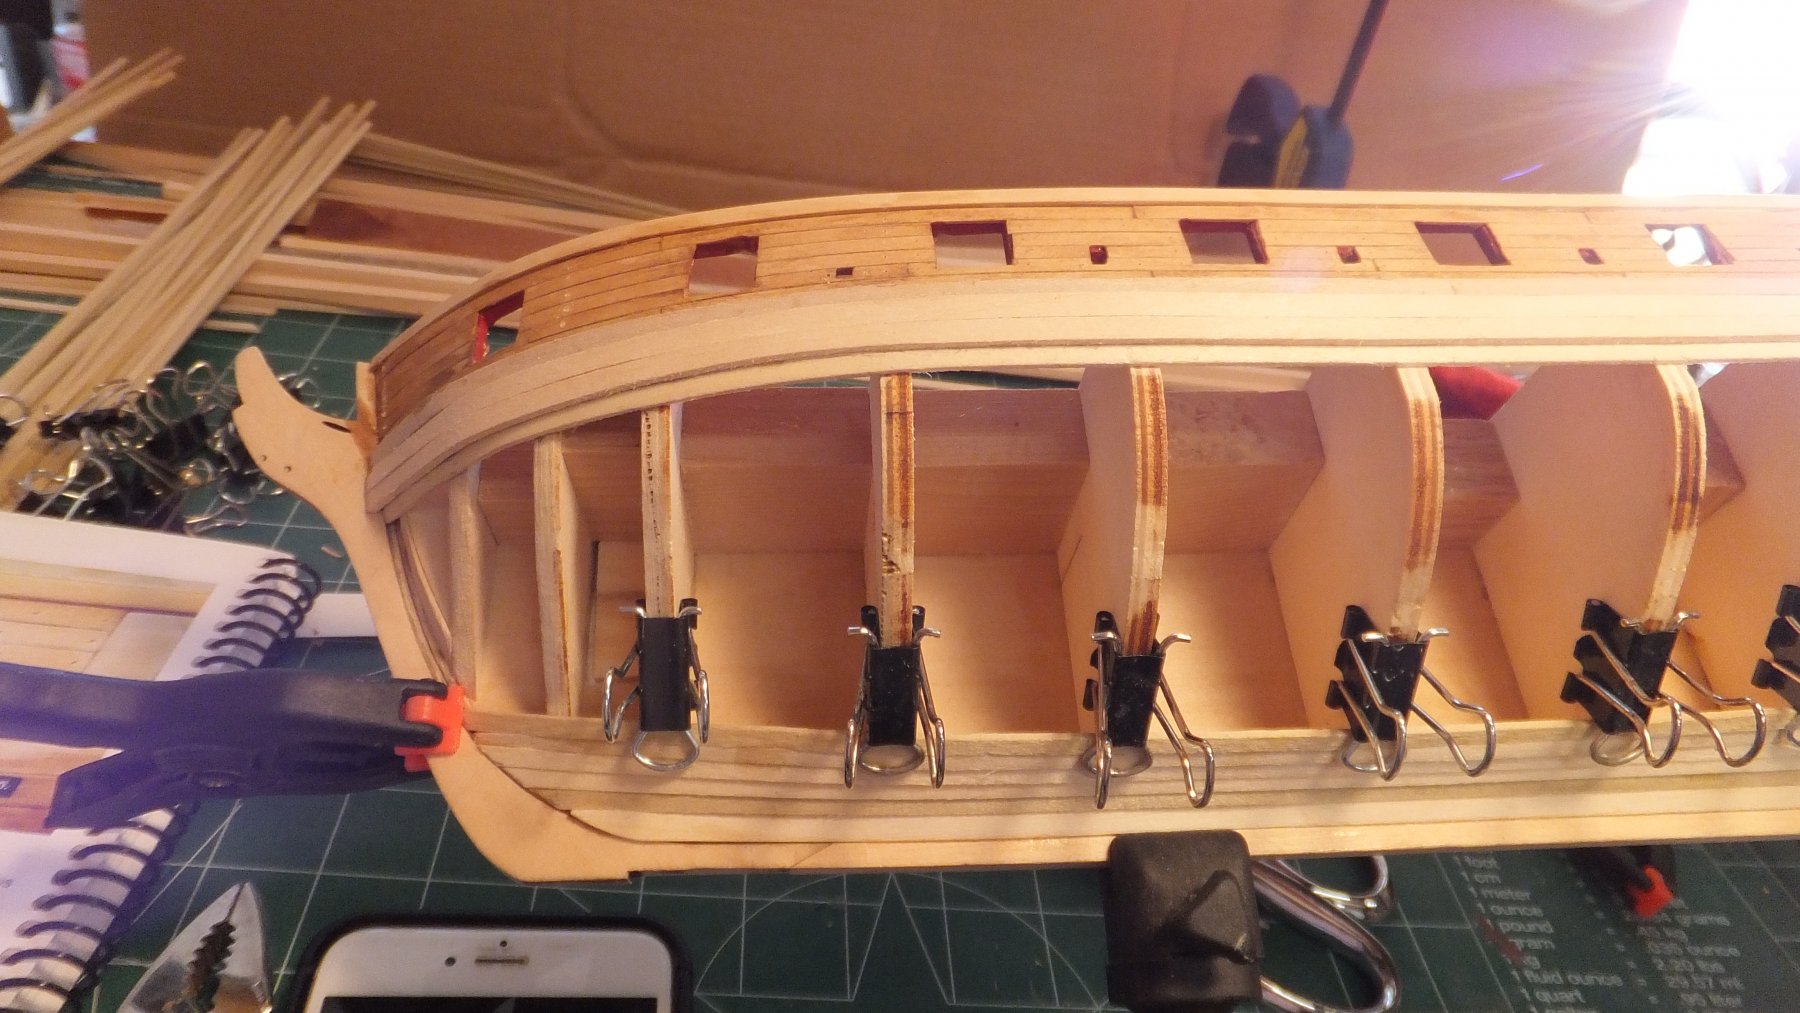
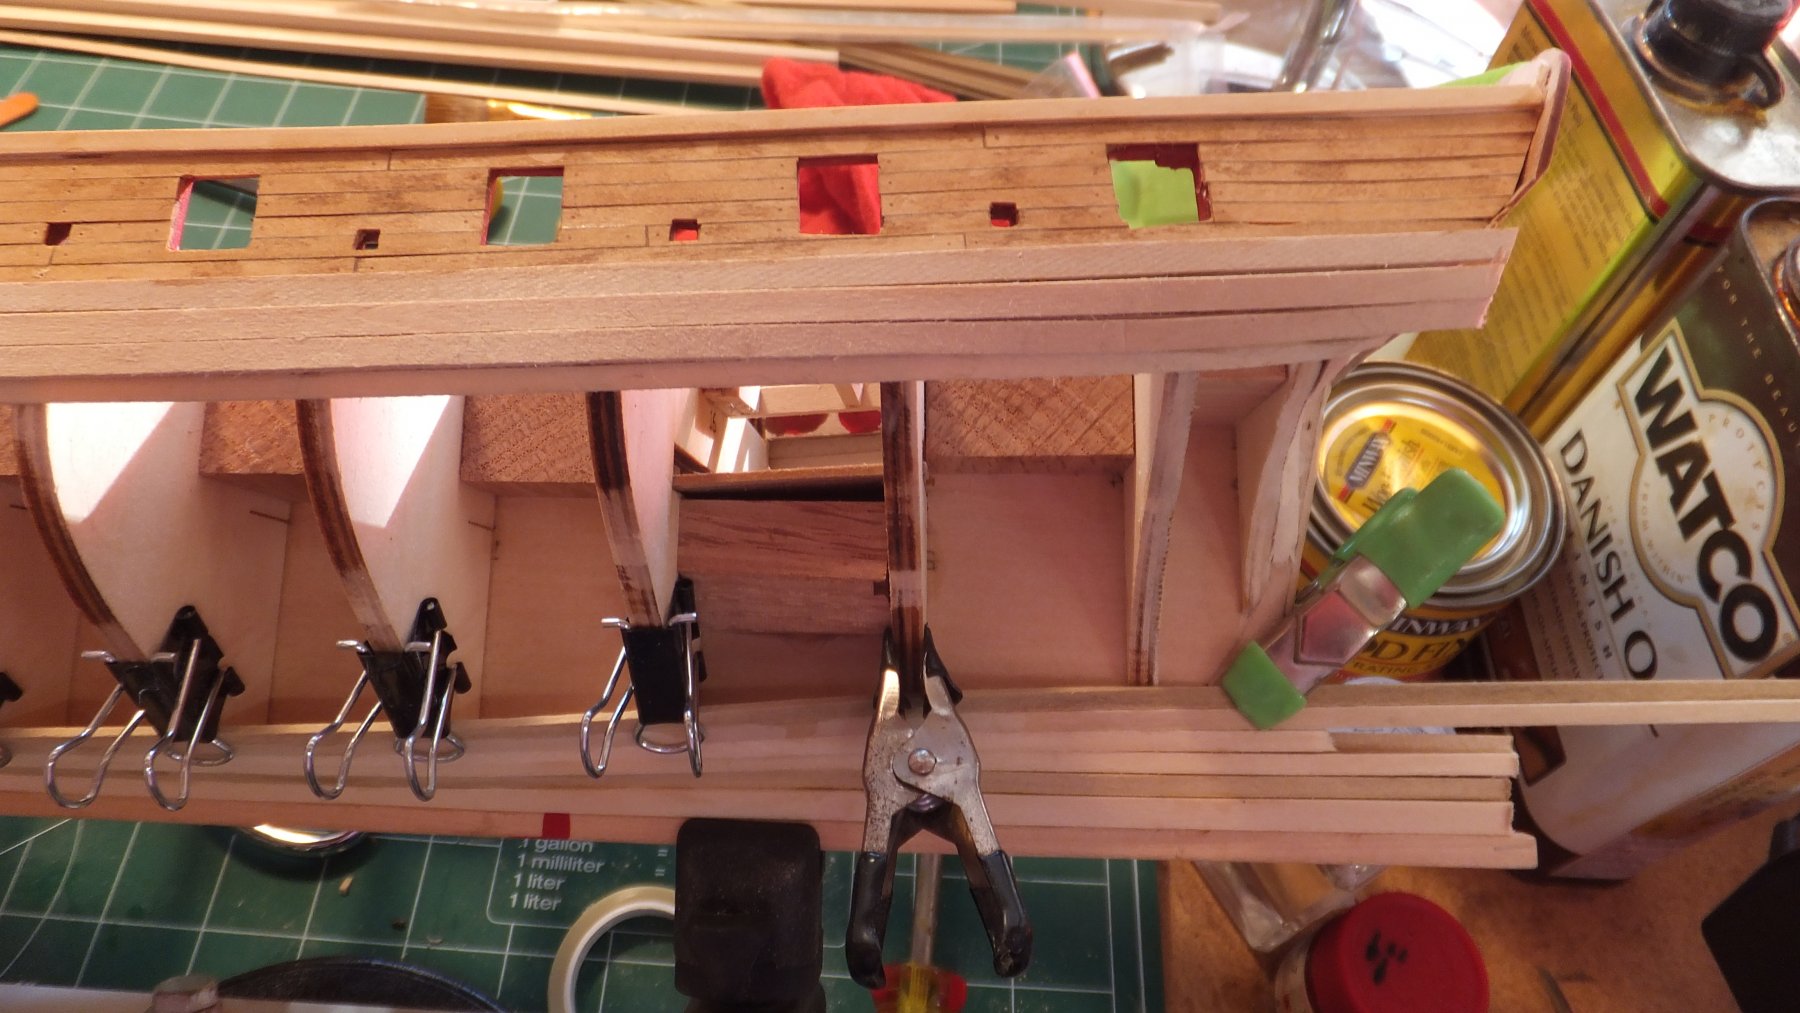
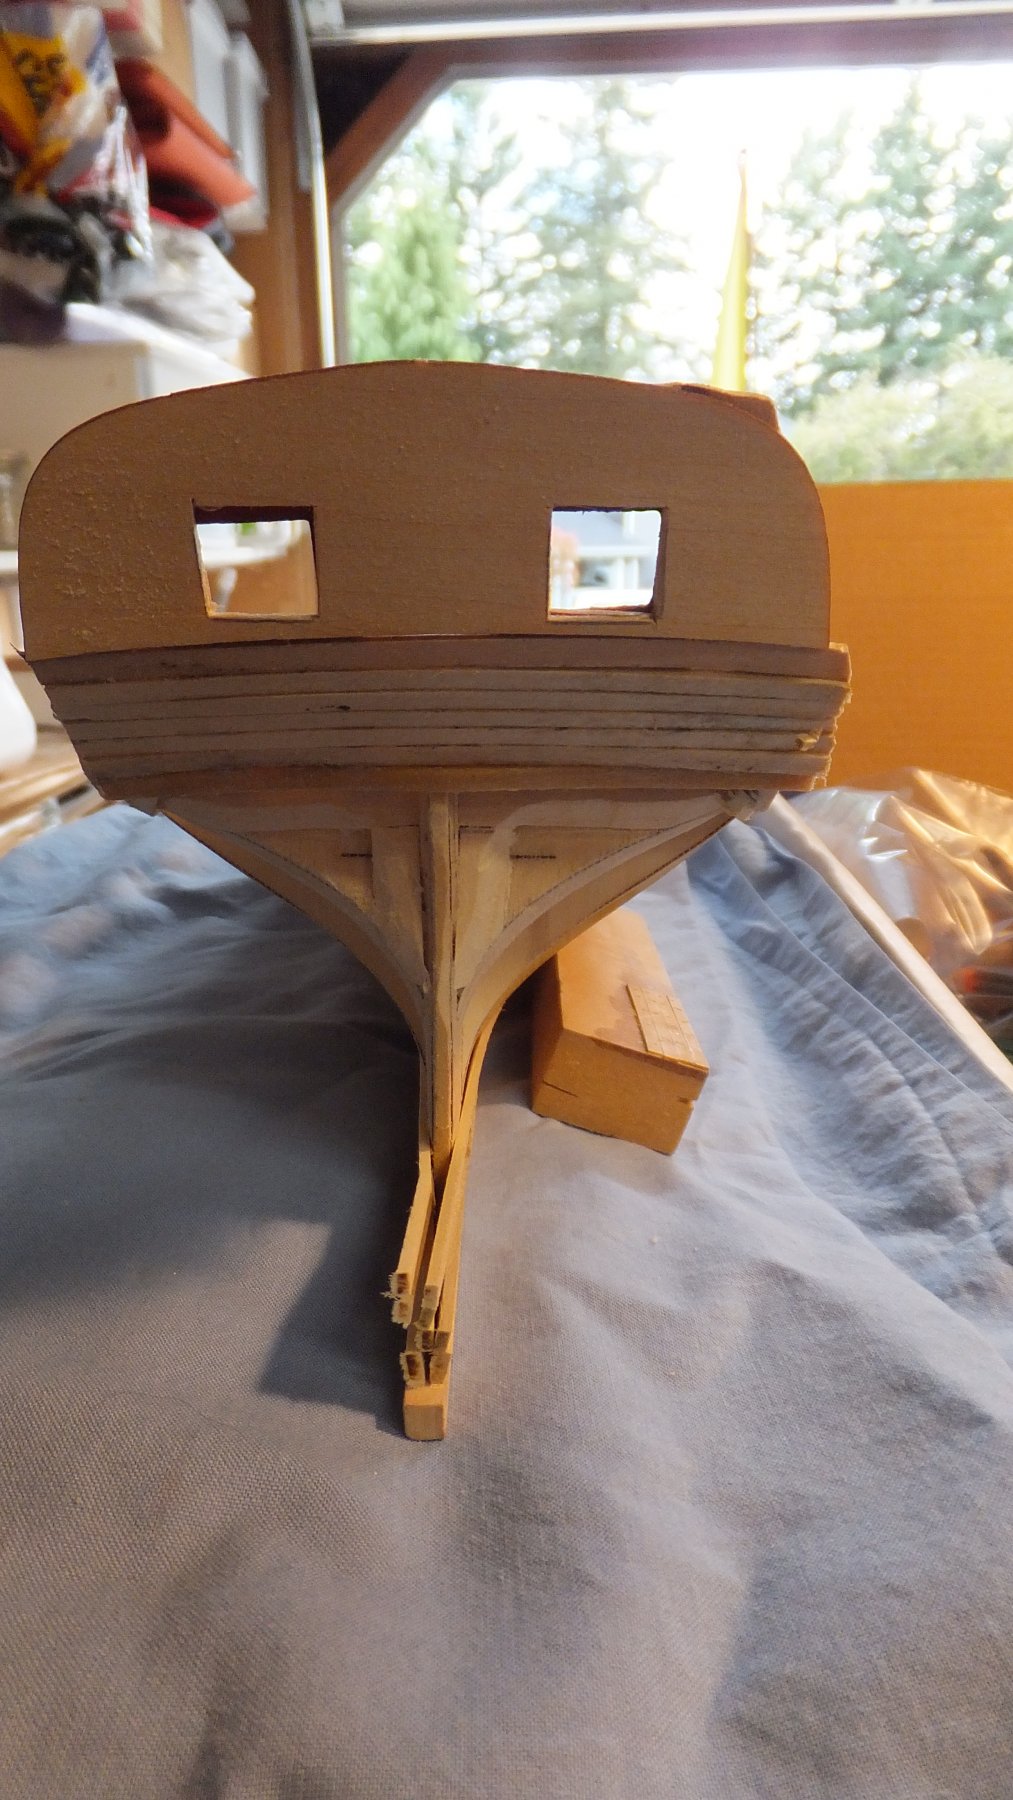
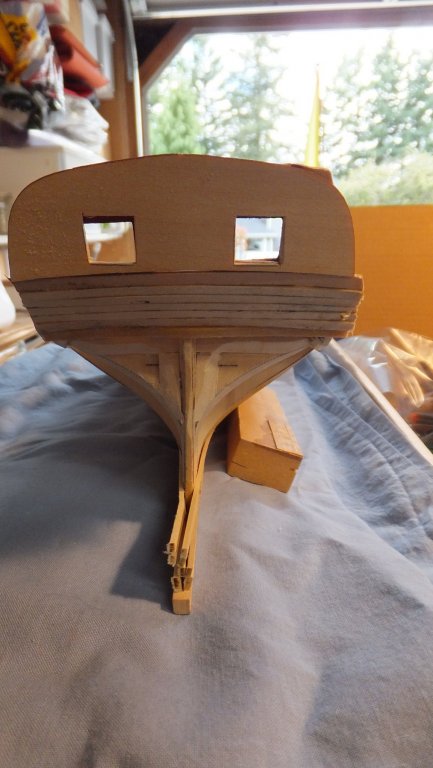
Just a quick update for the Syren club. I am doing the counter and it is slow going. I have all planks soaking but I can only do a lateral bend of one at a time. I have the first 2 in place and the third is bending. 3 more are soaking. In the meantime I have started to work on the garboard strake and the rest of the wale. Note to all Syren Builders - I know in Chapter 5 it says to do the counter then the Wales. but I suggest you do it the other way around. When you lay the wale the plank runs long out the stern. it is easy to cut flush and sand so that the counter covers. It is harder to lay the plank if the counter extends out the side. While I wait for soaking and bending I am also playing with Chuck's cannons for the stern chasers. They are a bit of a challenge to assemble but look great when complete. Pictures on Saturday. Hey Eric! good to see you back. Lets see your log
-
Rich - I have several of Chuck's cannons if you want them. I really enjoying them for the stern chasers.
-
Wow for a former Jar Head you seem to know quite a bit about Sailing! By the way how does a Marine survive 18 months at sea with a bunch of swabbies? Great work you are my primary guide.
- 1,135 replies
-
- 2
-
-
- model shipways
- syren
- (and 2 more)
-
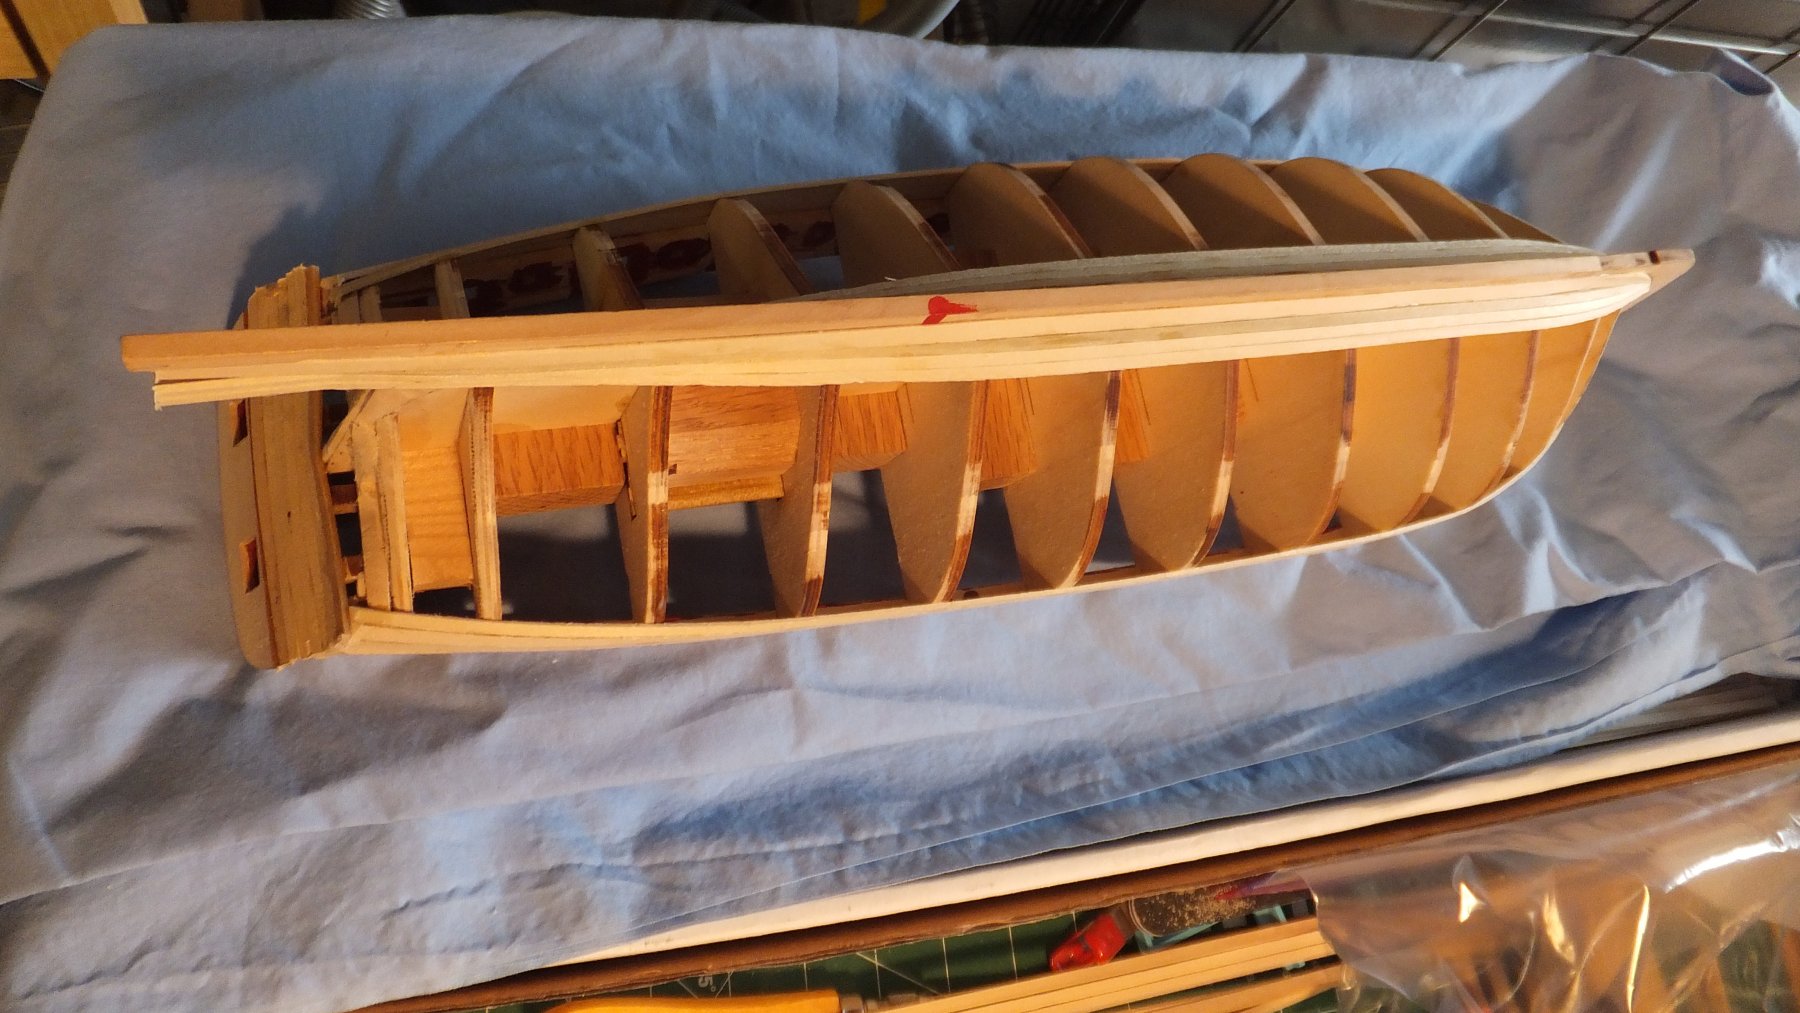
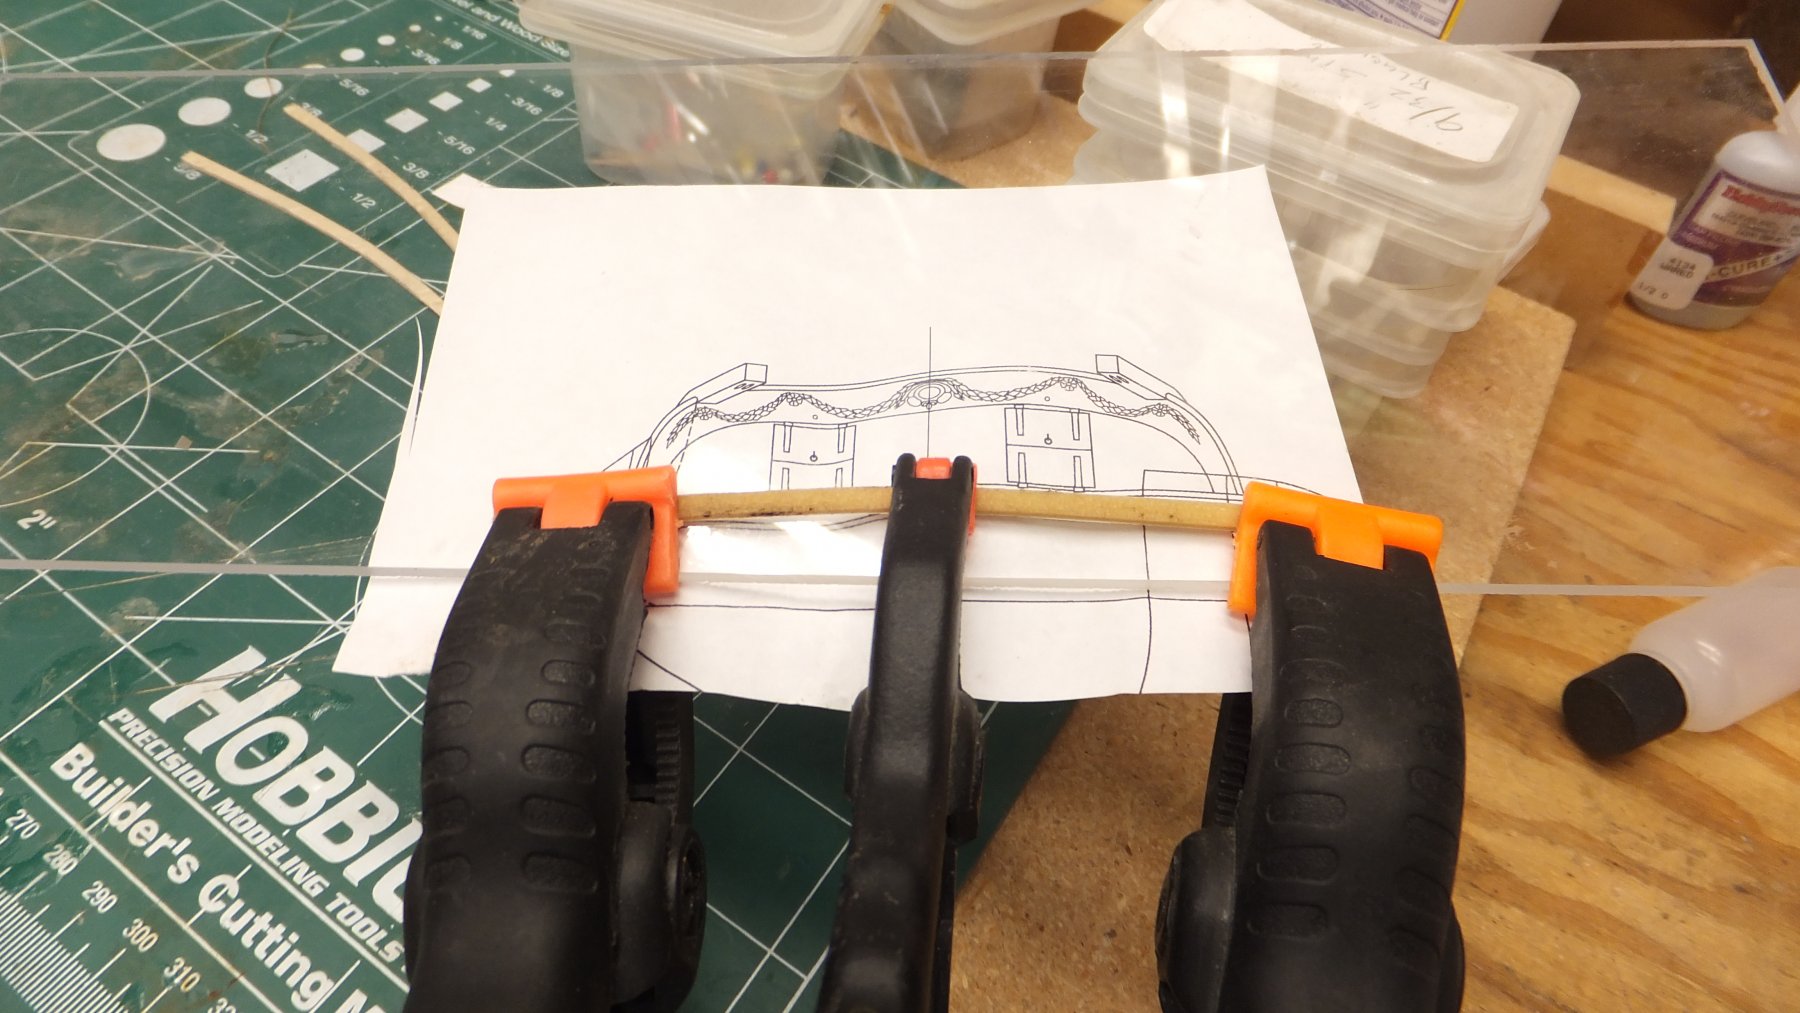
Ok its time for a bit of a mid week update. Step 1 of Chapter 5 is complete. Step 2 calls for bending and planking the counter and transom. I soaked the planks over night and now as before I have cut out the template from the plans and clamped the strips to Plexiglas with the plans underneath. This will have to sit over night. So for now the Syren will take a break. I would like to take this opportunity to talk about the metal parts that come with the Syren and tell you my plans for them and ask your opinion. I do hope the rest of the Syren club will chime in. I will take each part and offer my ideas and I hope you will the same. Ship's Bell - I have ordered from Model Shipways part number MS0426. Which is a pair of copper Bells that are the right size and look so much better than the part that is supplied. Ship's Wheel - I have ordered from Chuck one of his wheel kits. I haven't tried to assemble it yet but it is so much better than the metal thing provided. Figure Head - Unfortunately I have not found a suitable substitute for this item. I doubt my carving skills at up to the task. I am going to try several different painting approaches. if I don't like the result I will order another from Model Expo. Side Badges - These ugly things are in the trash. My Syren will live without. Stern Decorations - Here again I have not found a useful substitute. I will try painting and use them. Stern Chaser Cannons - I have order replacements from Chuck and I am now playing with assembling them. Cannonades - Like most people I intend to replace these if I can find a US source to order them. Cannonade wheels - I am hoping that Paint will deal with the ugly moldings. Over all these guns will need serious attention to be at the same quality as the rest of this model. Metal Belaying pins - I would prefer wood. but I think I may have to stick with these. Is there anything I have overlooked?
-
Eric - Where is your log? There is always room for one more in the Syren Club.
-
Peter - Like you I also work full time (typing this from my desk - Shh don't tell the boss). And I too have an admiral that I must obey. So my modeling work goes in spurts. Good luck and have fun!
- 242 replies
-
- 1
-
-
- syren
- model shipways
- (and 1 more)
-
It looks pretty good to me! One more suggestion - As many other builders have suggested I created a block that was the size of the Cannon port. But I did it slightly differently. I made sure my block was long enough to reach across the deck. This way I not only made sure the cannon ports lined up to each other from Starboard to Port. But I also made sure the sills were flat in relation to the deck. On my first try I had some that were at a bit of an angle. This also helped with alignment of the Lintels. Since you have the binder clamps to you know how to modify them to be planking clamps? They are the cheapest clamps you can find and I think they are the best for planking.
-
And now my chance to chime in Welcome! I look forward to you catching up with me and offering me ideas. Just a curiosity - Why do people feel it is necessary to have a flush sub deck? Also (LOL) why do everyone's bulkhead blocks look so nice and clean?
-
I have finished the planking above the wale on both Port and Starboard. I have some sanding and clean up to do. Shawn - Are you sure about the #54 drill? my drills go from #61 to #80. I did some experimenting and even the #70 looks big. I also found out what happens to supplies when you stop building for a couple years. My Putty is hard. Paint thinner is ... Any way I guess its time to go to the H/W store for stain, thinner, & Putty. I did try some Danish oil on my boxwood planks. I kind of like the effect. I also found a micro square file that works wonders on my sweep ports. Stay tuned for more exciting progress.
-
Thanks for remembering the Cannons. I have not had any luck either. I completely understand. And as I said I screwed up and had to start over.