HOLIDAY DONATION DRIVE - SUPPORT MSW - DO YOUR PART TO KEEP THIS GREAT FORUM GOING! (Only 13 donations so far - C'mon guys!)
×


fnkershner
-
Posts
1,595 -
Joined
-
Last visited
Content Type
Profiles
Forums
Gallery
Events
Everything posted by fnkershner
-
Actually I find the need for both. A work bench that is sitting height and standing height. And when you come to rigging. you will be standing in front of that sitting desk.
-
Shawn - Like you this was a difficult step for me. I did it and then removed the sills and did it over again. Model Shipways may ban me as a customer. So far every kit that I have purchased has required a significant amount of replacement parts. I did this step a bit differently on my 2nd try. I took the colored template that came with the plans and I clamped it to the inside of the bulkheads. This gave me a perfect idea of where the sills had to be in relation to the deck and guns. I did use a batten but mostly to ensure a smooth flow. Also I have found I don't like nails. They always seem to do more damage than help. I use clamps or tape but never nails. When it comes time to install the Wale. You will see that you use the location of the batten for this too. Since I didn't have the batten or mark its location. I had to use the plans again.
-
So now you know what we are celebrating at the Everett Naval Base. I will now allow you to return to your modeling activities. Thank you for your inspiration and the opportunity to deviate from a modeling discussion. I hope to share pictures of the event in my log.
-
Rich - You and your sword are more than welcome to attend November 11th. You could be our speaker! I am sure you have much to contribute and would be a better source than me. Again Thank You for the inspiration. I will get the book.
- 1,135 replies
-
- 1
-

-
- model shipways
- syren
- (and 2 more)
-
Rich - I should tell you that your build of the Argus has aided me it an entirely different direction. In addition to being a member of my local modeling club. I also belong to the Navel Order of the US. We are a group of current & former US Navy, US Marines, Merchant Marine, & Coast Guard. You can be a member if you served or a member of your family served. We meet frequently and often we share something unique about the history of the above mentioned Services. I have been elected Historian of our local Chapter and it is my responsibility to find a topic from history and a speaker for each of our events. Our most recent event was the celebration of the Battle of Midway. This was celebrated as Brunch at the US Navy base in Everett WA. We will be returning to the base in November. I have chosen to tell the story of the Marine Sword. I have also found a Marine officer to share his sword and hope to have my Syren at least far enough built to be presentable. So thank you for the inspiration. In addition to the above I believe we will have a former CNO for a speaker.
- 1,135 replies
-
- 1
-
-
- model shipways
- syren
- (and 2 more)
-
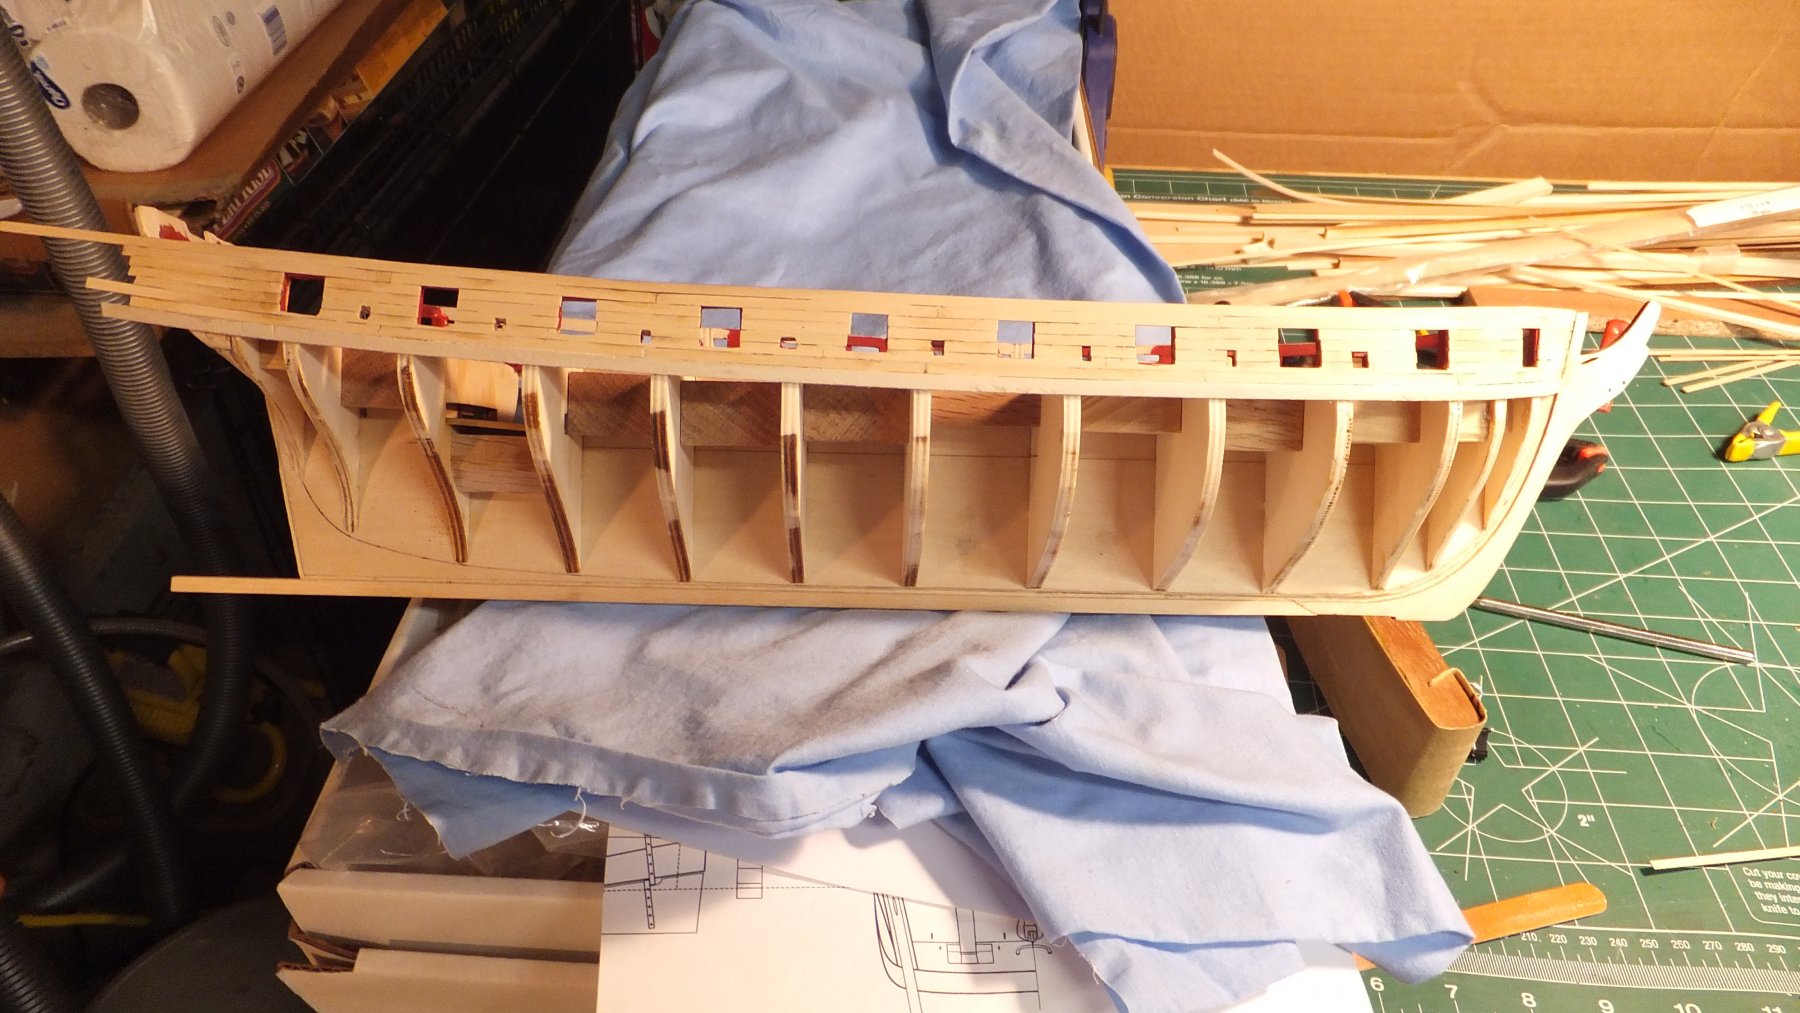
Ok, I guess it is time for the weekly update. It seems quite hard to find time in the shipyard during the week. The Port side is planked above the wale. The starboard side is approx. 1/2 way. You will notice I am having difficulty keeping the sweep ports uniform in size. I should also mention that I seemed to lose the transom some where along the way. I contacted Model Shipways for a replacement. Even with the hurricane they came thru and it arrived this weekend. Very timely since the stern is the next step after the Planking above the wale. I am particularly happy that the planks line up from the bow view. I have never got that right before. So I have a question for you Syren Builders - I want to try my hand at treenailing. This will be my first attempt. Chuck mentions that he used a .055 drill. Anyone know what number that is? I have drills number from 65 to 80. Also if I am not mistaken he says to stain before you drill and putty? Is that correct? So if I get the sequence. It is stain with Golden Oak, drill, putty, sand, & wipe on putty. Sorry I didn't look at the pictures before I posted them. Apparently the flash was over powering. I am on my way to bed but I will retake them and post an update.

-
Are you going to use the razor method to create the groove in these pieces?
- 1,135 replies
-
- 2
-
-
- model shipways
- syren
- (and 2 more)
-
To me this is the scariest part of this build. I can't wait to see what you do.
- 1,135 replies
-
- 2
-
-
- model shipways
- syren
- (and 2 more)
-
Gil - I feel one of the most memorable meetings of PSSM was held at your house. I still remember Shelly playing his violin and all 3 of your excellent models. This one is up to the same standard.
- 60 replies
-
- 3
-
-
- dragon class
- billing boats
- (and 2 more)
-
I have to agree with Mike. The drill lathe is much cheaper. I use it quite a bit. I would also add that I wrap the end of the dowel with tape for 2 reasons: 1. better grip for the drill 2. less scratches
-
Lou - I couldn't have said it better myself. If you are in Everett. We need to meet! I am the President of the Puget Sound Ship Modelers. We hold meetings once a month. PM me with your email and I will send you a Newsletter.
-
Do you care about historical accuracy? If so do not build the San Felipe. This ship did not exist. If it had Spain might have won the war with England. for my money I would build either a kit from Caldercraft or something designed by Chuck. His instructions are the absolute best.
-
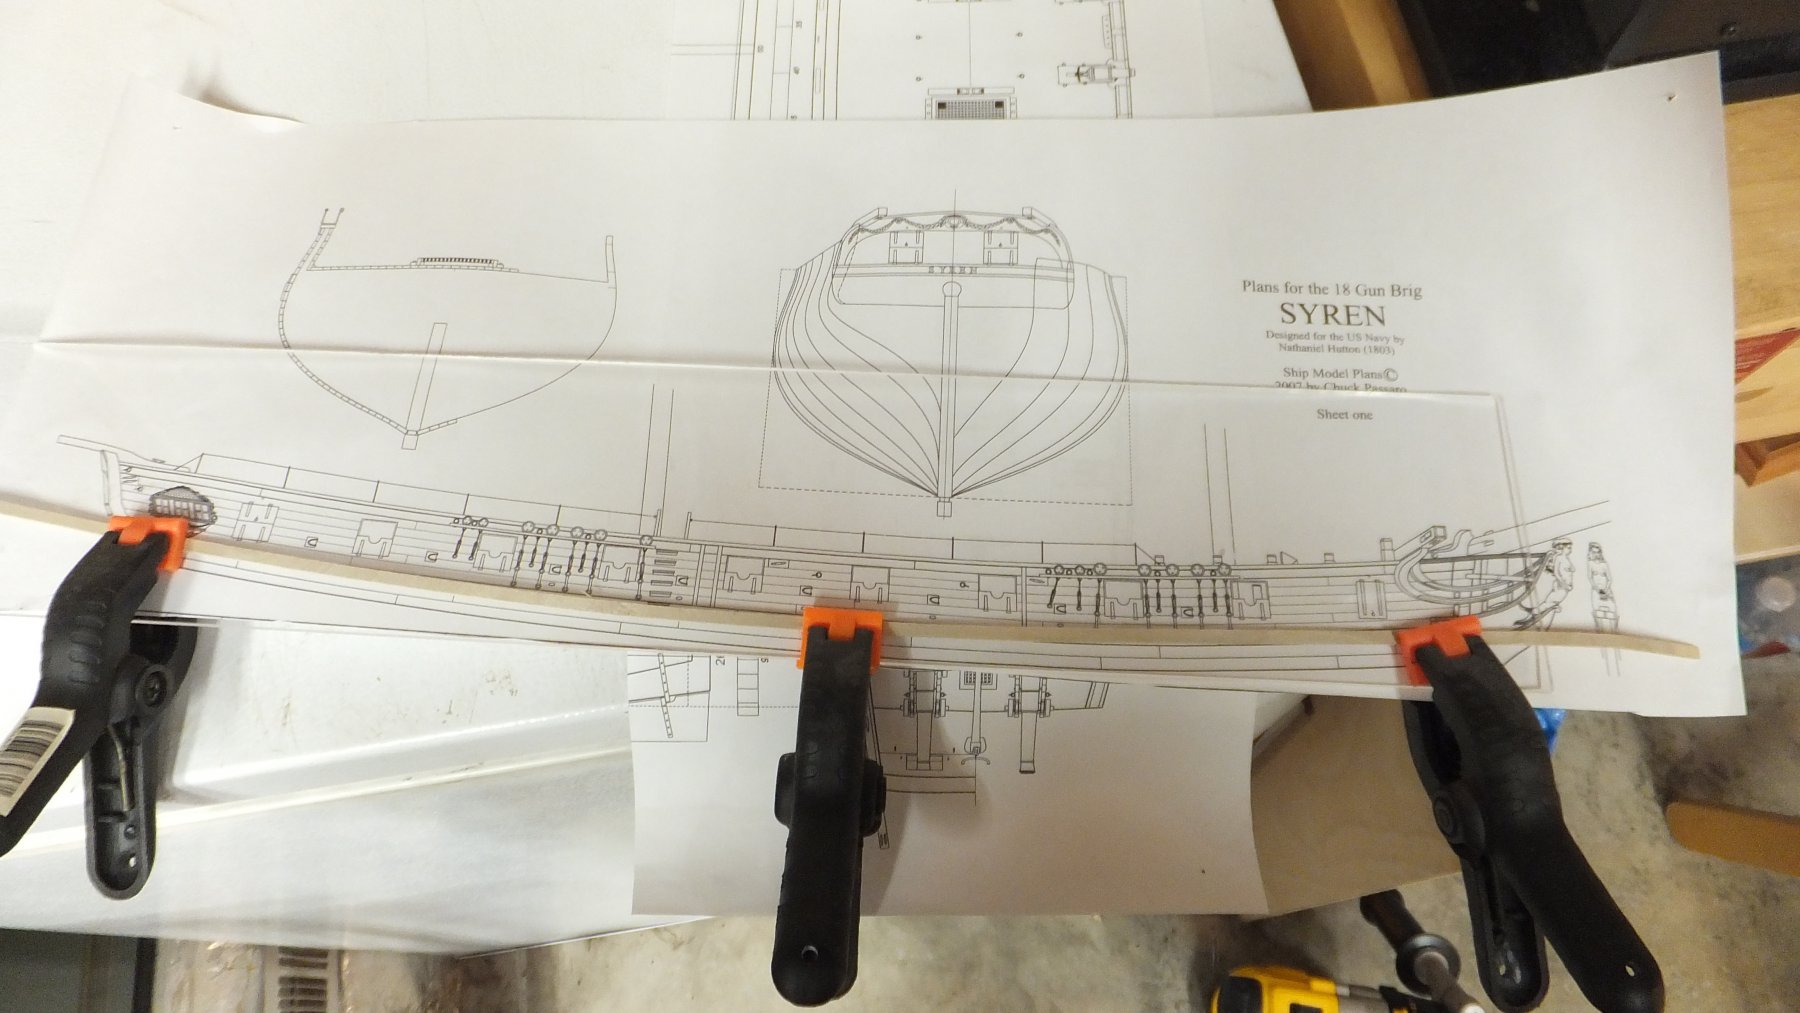
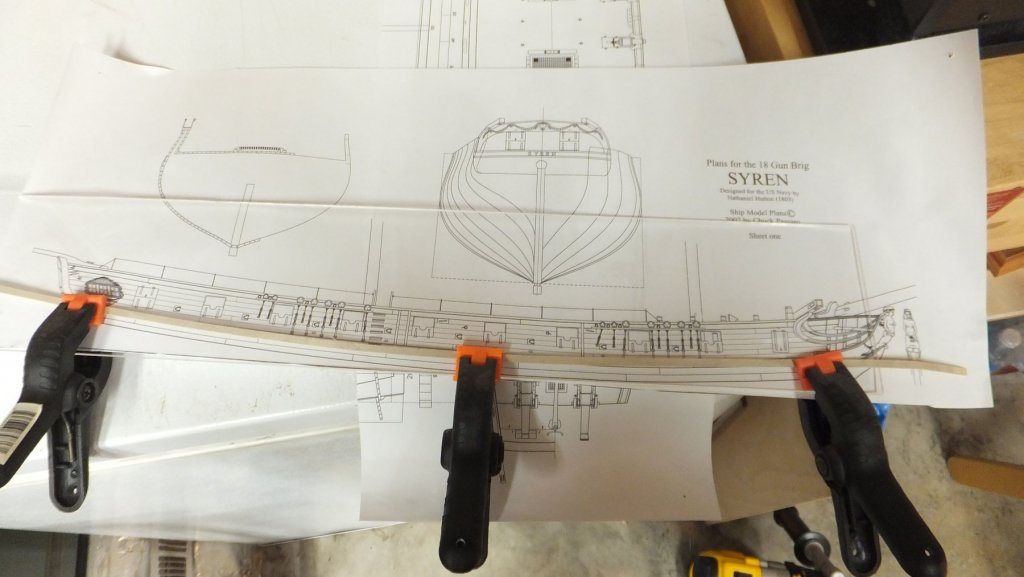
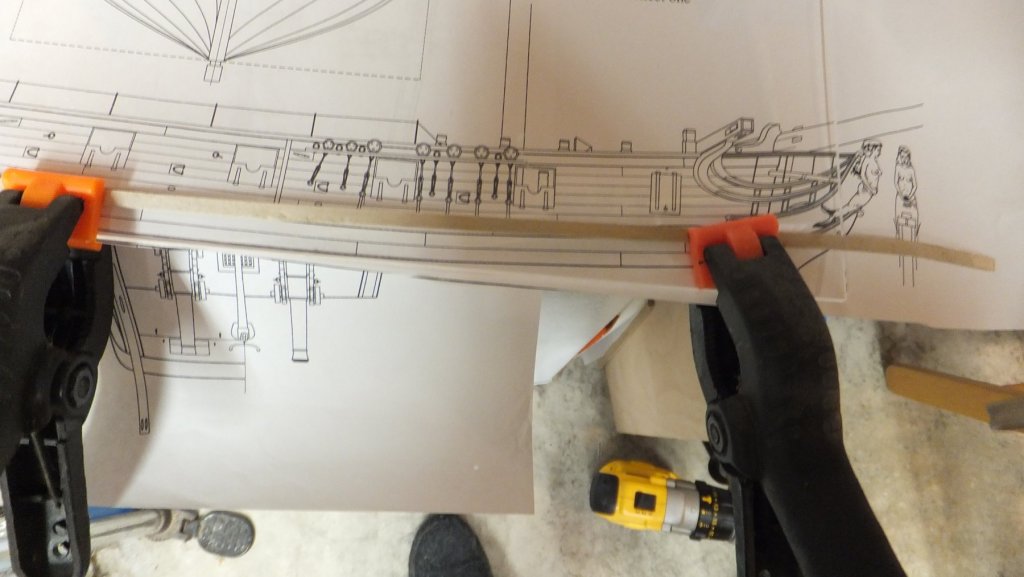
Ok its time for another update. After careful work with the micrometer. I found the need for more sanding. Imagine! I then painted the ports and found that the paint was too brown. So I had to repaint. Next I wanted to be very careful placing the first wale. Since this will determine all the rest of the planking both above and below. I could not find a guide that satisfied me. So the picture will explain what I did. Using some Plexiglas and a copy of the plans. I soaked the wale and shaped it as I wanted. I had to be careful to get both Starboard and Port. Since I had already bent the bow curve into the wales. I need the gentle curve from bow to stern to go in the correct direction. Anyway the picture will make sense.
-
If you find a link to order the Caronnades please share.
-
Chuck's Corronades will not work. They do not use the same Carriage as the Syren.
-
Its great to see another Syren Build. I replaced the stern chasers with long guns from Chuck. And I will likely go to Coldercraft for the Carronades. Anyone have a link? I also suggest you look at Chuck's ships wheel kit and rigging line. I have replaced all the rigging from my Syren with Chucks. I also replaced the ships bell with one I found at Model Expo. And I replaced the hull planking above the wale with Box wood.
-
Rich - I know this is taking you way back. But I need help. As you can see from my log I am about to add the upper wale. I do not see any marks on the bulkheads of my kit nor does Per. so I am not sure where it should lay. How did you make sure it was correct? Planking is my nemesis, and I want this one to be as good as yours.
-
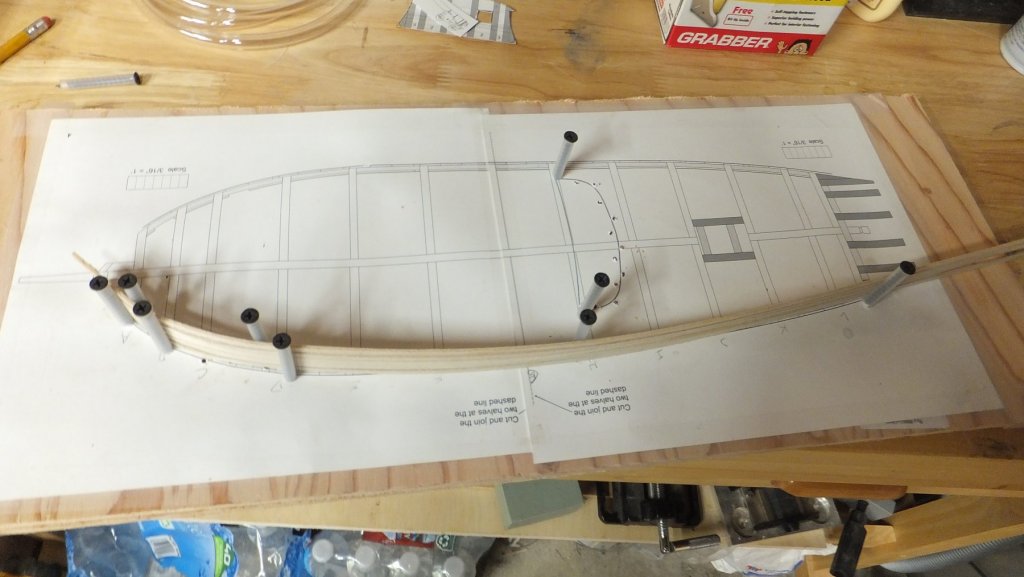
Just a brief Update. thanks to Rich I created a planking Board from some spare Plywood. I also stopped at my local H/W store and picked up some 1/4" tubing. I took the deck layout and screwed some screws covered with sections of tubing and began shaping my Wales. Tonight I plan to thin some MS dull red paint and paint the ports. Tomorrow is Planking! Note: The 2 screws in the middle are for the shaping of the cap rail for the transom. I will be adding screws later.
-
ROFL, I remember the Blue Devil. I used to stand in the store just imagining all the battles I would win with her. And lets here it for Adm Burke's Eager Beavers! You could explain to her the alternatives. Such as a real boat! Tell her how Modeling will keep you home and out of trouble. She might even believe it. PS (for Oldsters who do not know) ROFL = Rolling On the Floor with Laughter
-
LOL Planking board. Note to self: Check spelling before you hit send.
- 1,135 replies
-
- 2
-
-
- model shipways
- syren
- (and 2 more)
-
Thank you. that is exactly what I am looking for.
-
Welcome! what part of the world are you located in?
-
Thomas - Do you have a list of the rigging you have used? I want to get my order into Chuck.
-
Thanks Rich, I found the sheet you mention and the part is missing from the sheet. I guess its time to send a note to Model Shipways. By the way what did you cover your screws with on your blanking board? I am about to begin shaping and bending planks.
- 1,135 replies
-
- 1
-
-
- model shipways
- syren
- (and 2 more)
-
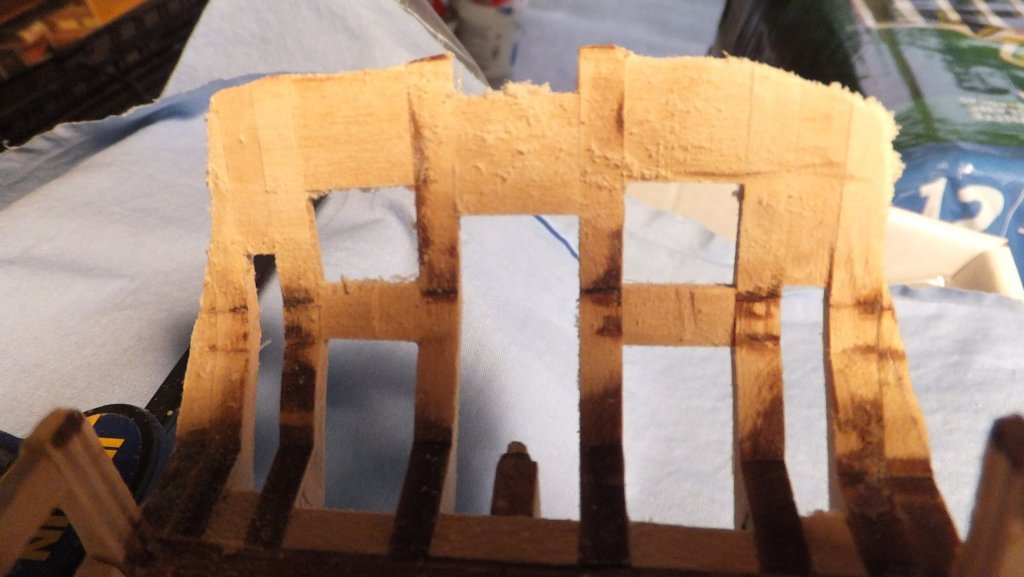
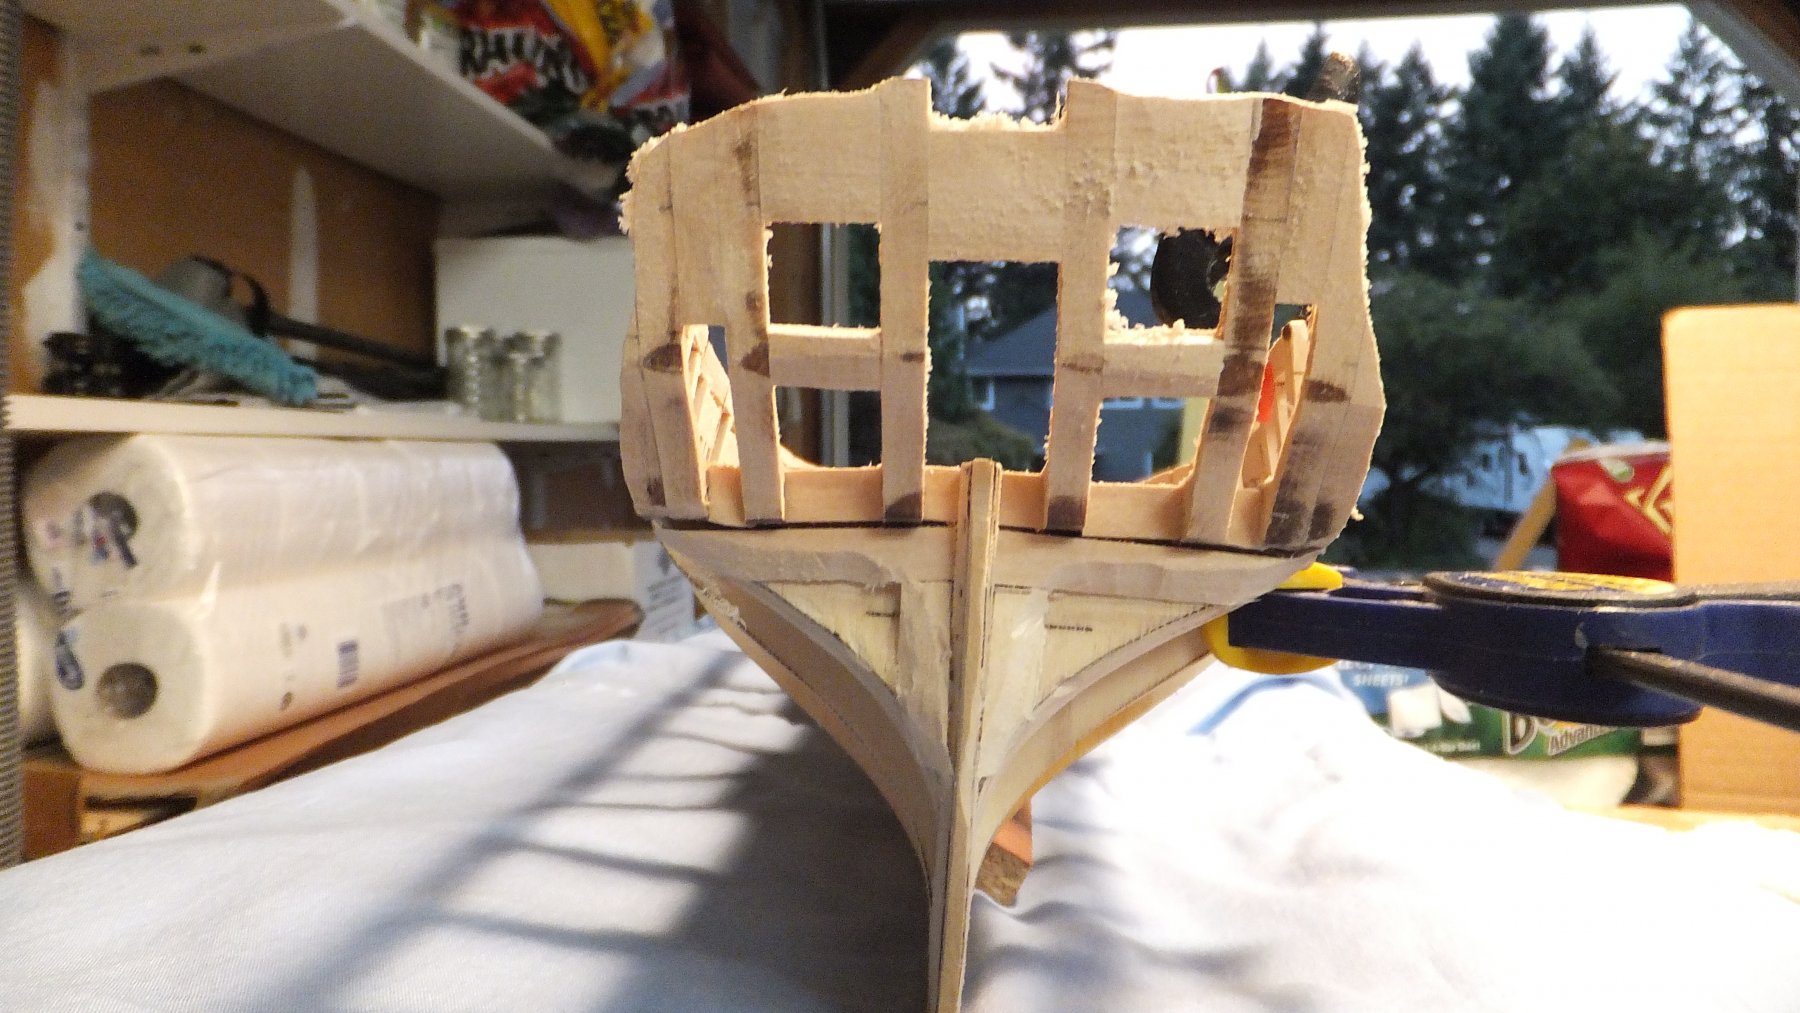
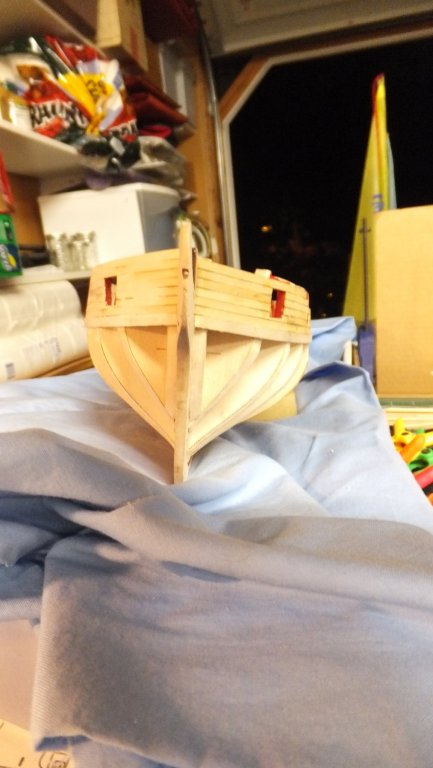
Ok, I think I have finished Chapter 4. They are not kidding when they say things are fragile here. I have had a couple heart stopping moments. I will likely go over everything carefully with a micrometer to ensure that the sanding is done.