fnkershner
-
Posts
1,595 -
Joined
-
Last visited
Content Type
Profiles
Forums
Gallery
Events
Everything posted by fnkershner
-
Like you I am wary of the damage that can be done with a sharp knife both to me and the model. I found a Sander did a great job. I just had to be careful not to take too much. Great start!
- 90 replies
-
- 1
-

-
- syren
- model shipways
- (and 1 more)
-
Thomas - I hope mine looks 1/2 as good in a couple years.
-
You are absolutely correct. If it was not for the wonderful people on this site and the fellow members of my local Club I would have given up long ago.
- 242 replies
-
- 2
-
-
- syren
- model shipways
- (and 1 more)
-
Peter - All I can say is that this is the 5th hull I have planked and none of them have gone well. This seems to be my Achilles Heel. And I have had my share of Viking Burials. I like this kit so much I decided to try to get past the issues. But it has been frustrating and depressing. I must be honest. I would have given up by now if it wasn't going to be covered in copper.
- 242 replies
-
- 1
-
-
- syren
- model shipways
- (and 1 more)
-
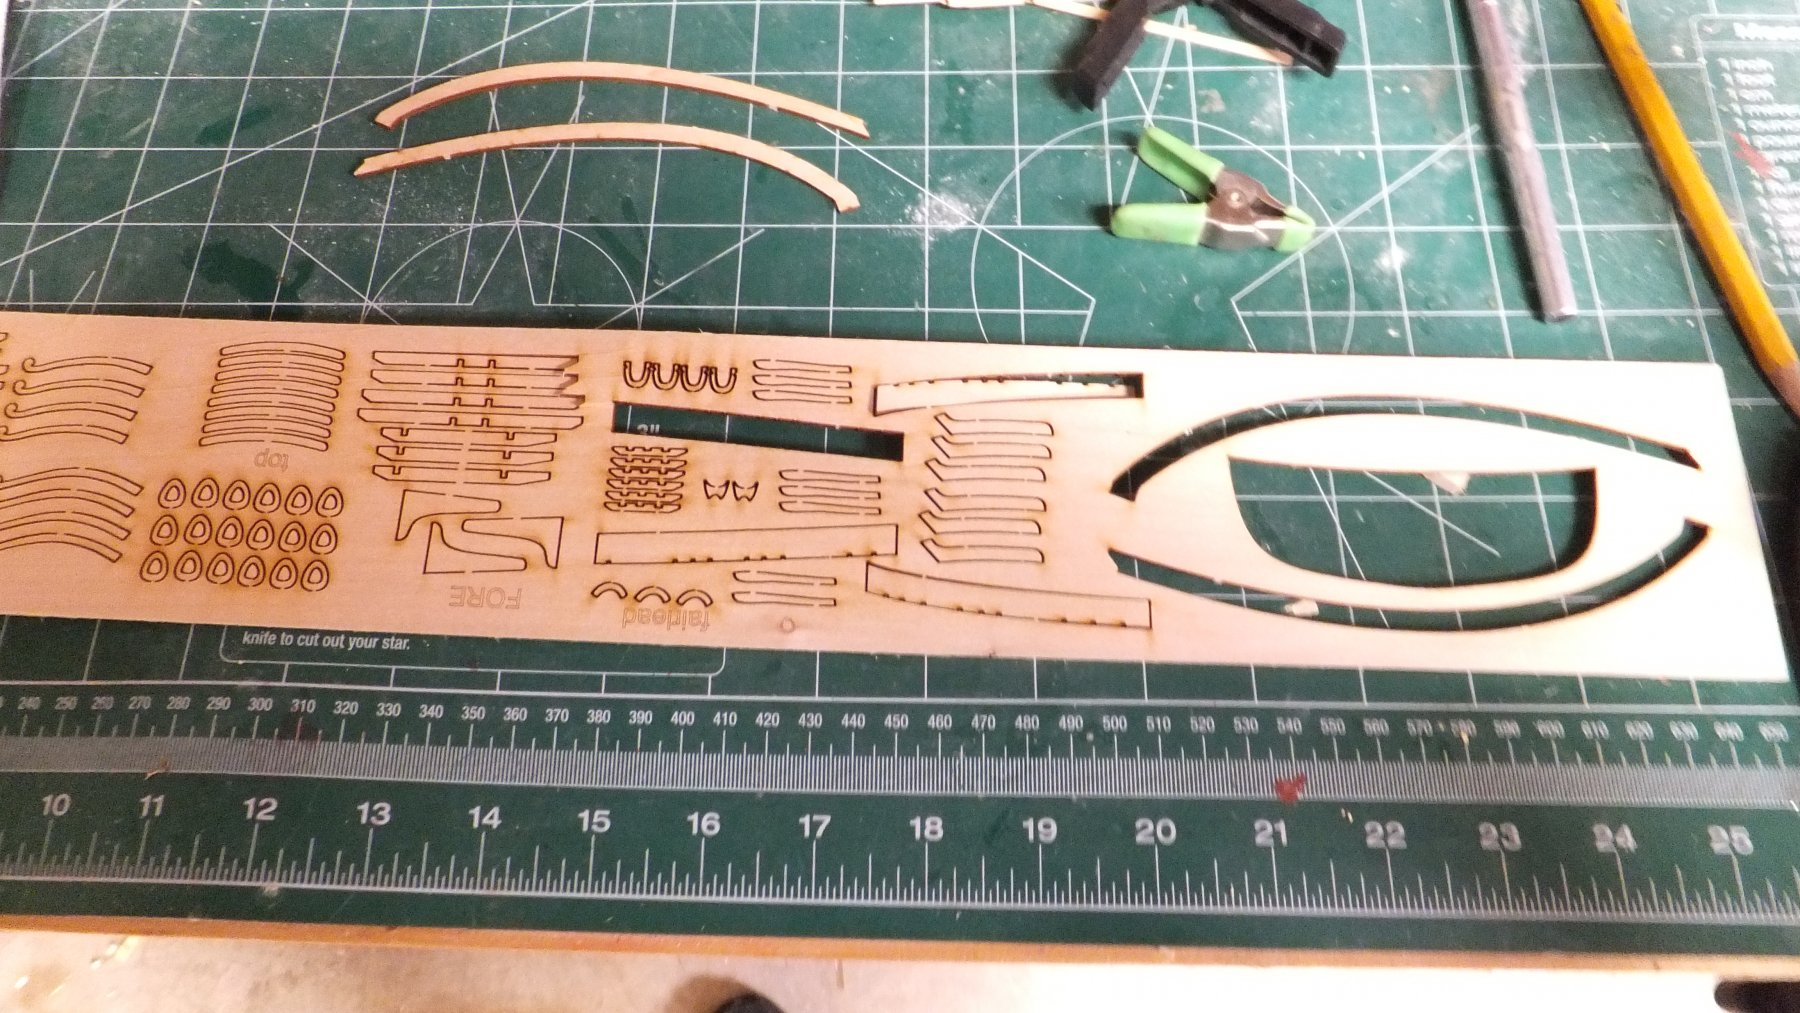
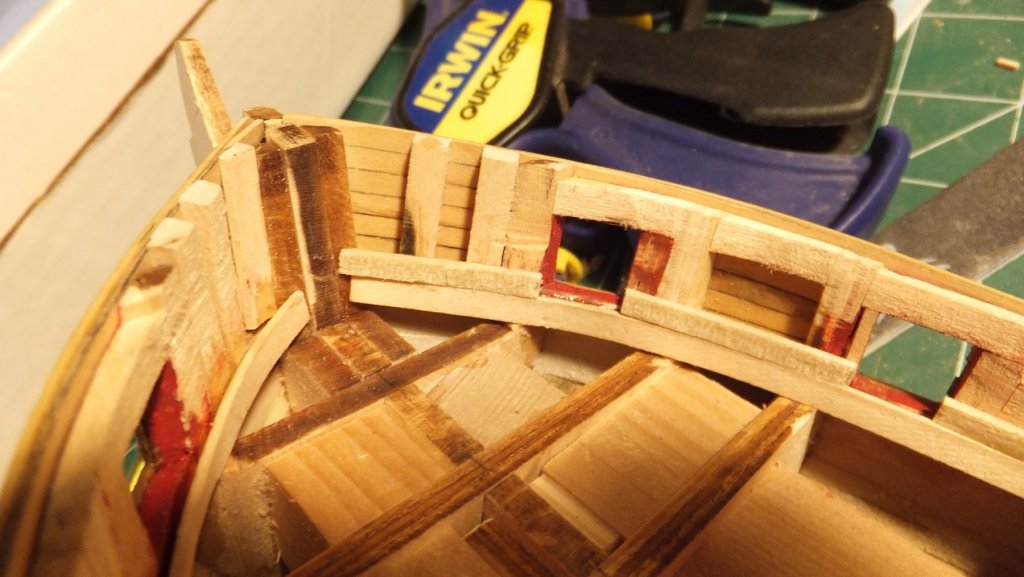
Now a question for the Syren club. In chapter 7 it talks about the Cap Rail for the Bow and sides and it talks about the margin planks for the deck. The instructions say there is a sheet to cut the Cap Rail from. but I don't find anything like this. I also found the parts in the pictures below. I assume these are Margin planks. but they appear to fit the Cap Rail better to me. Ideas?

-
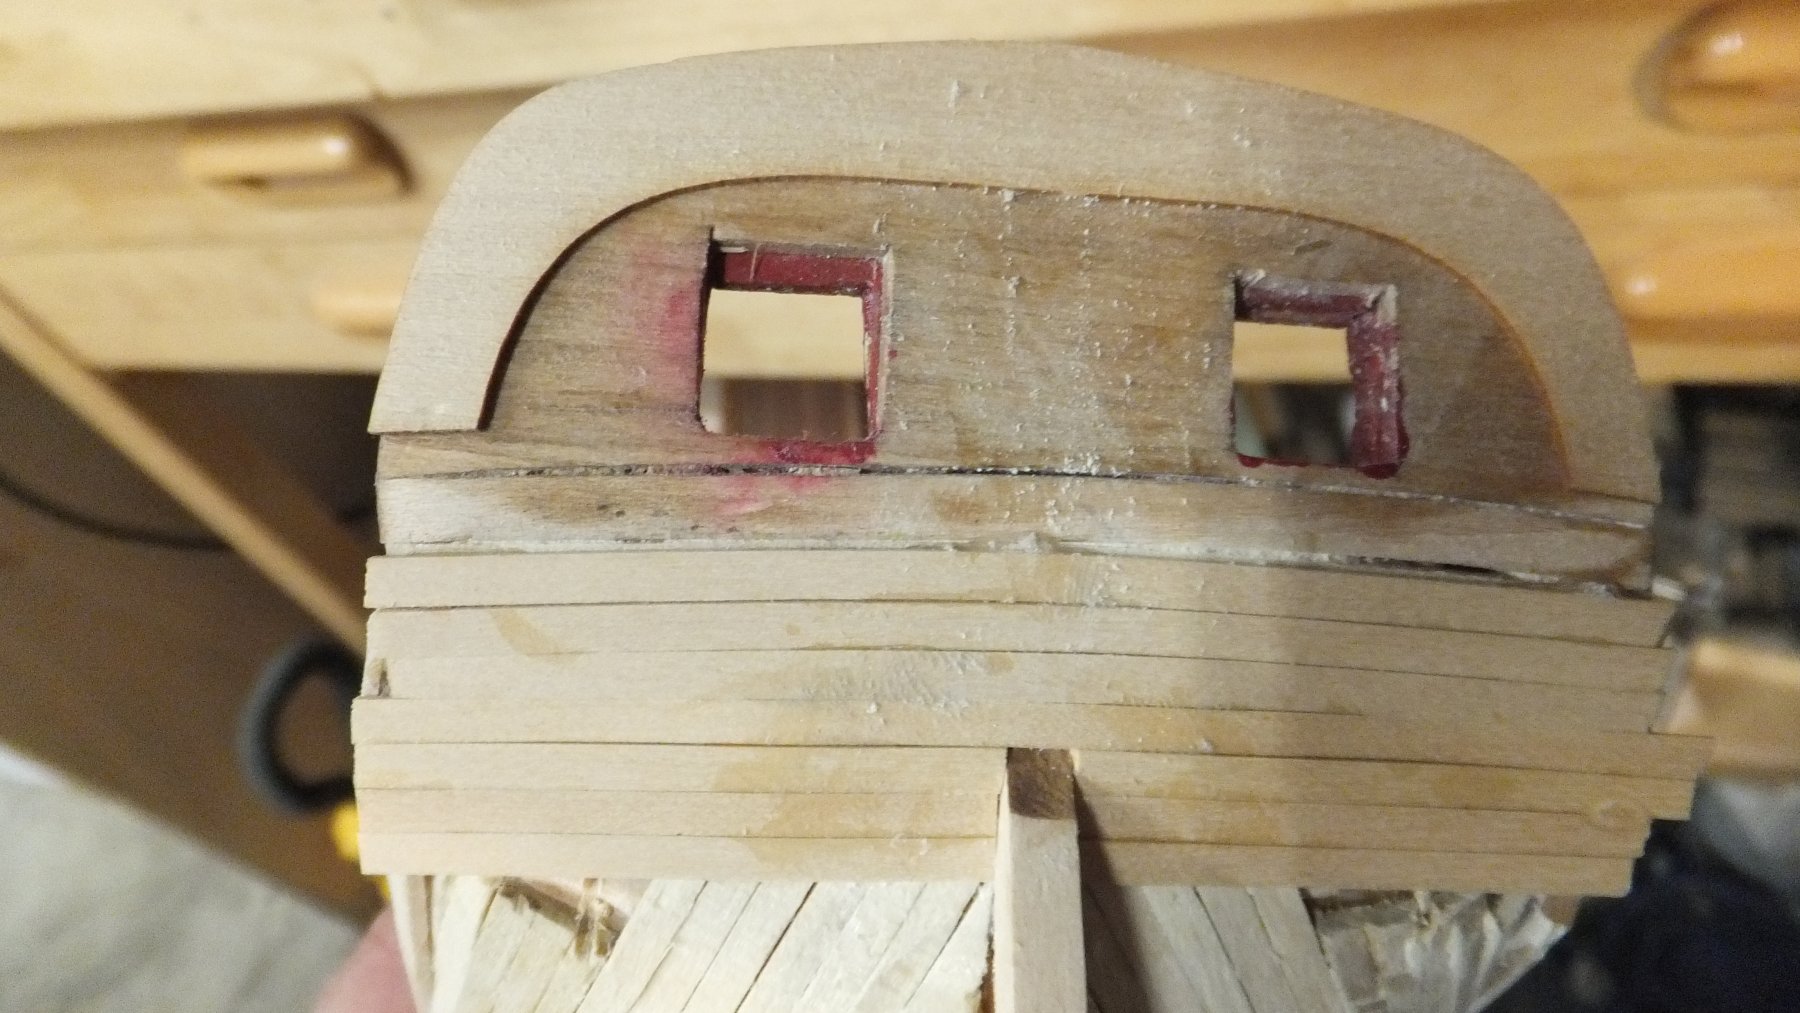
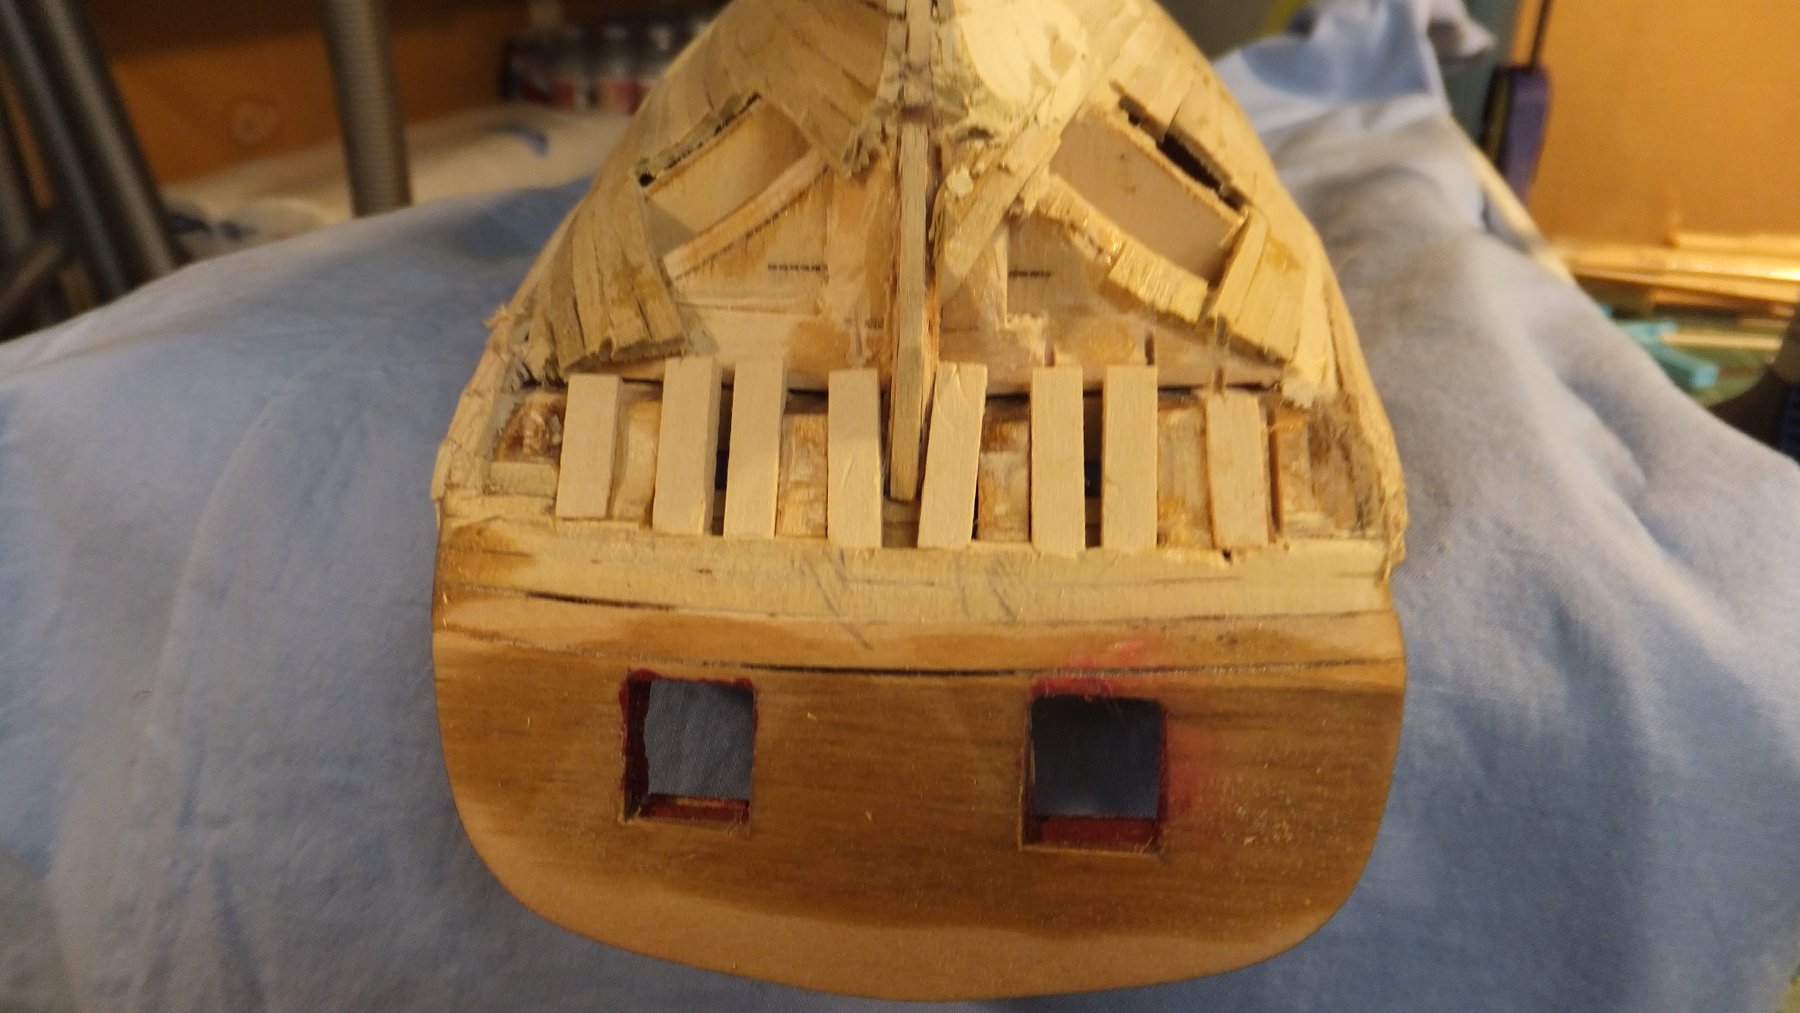
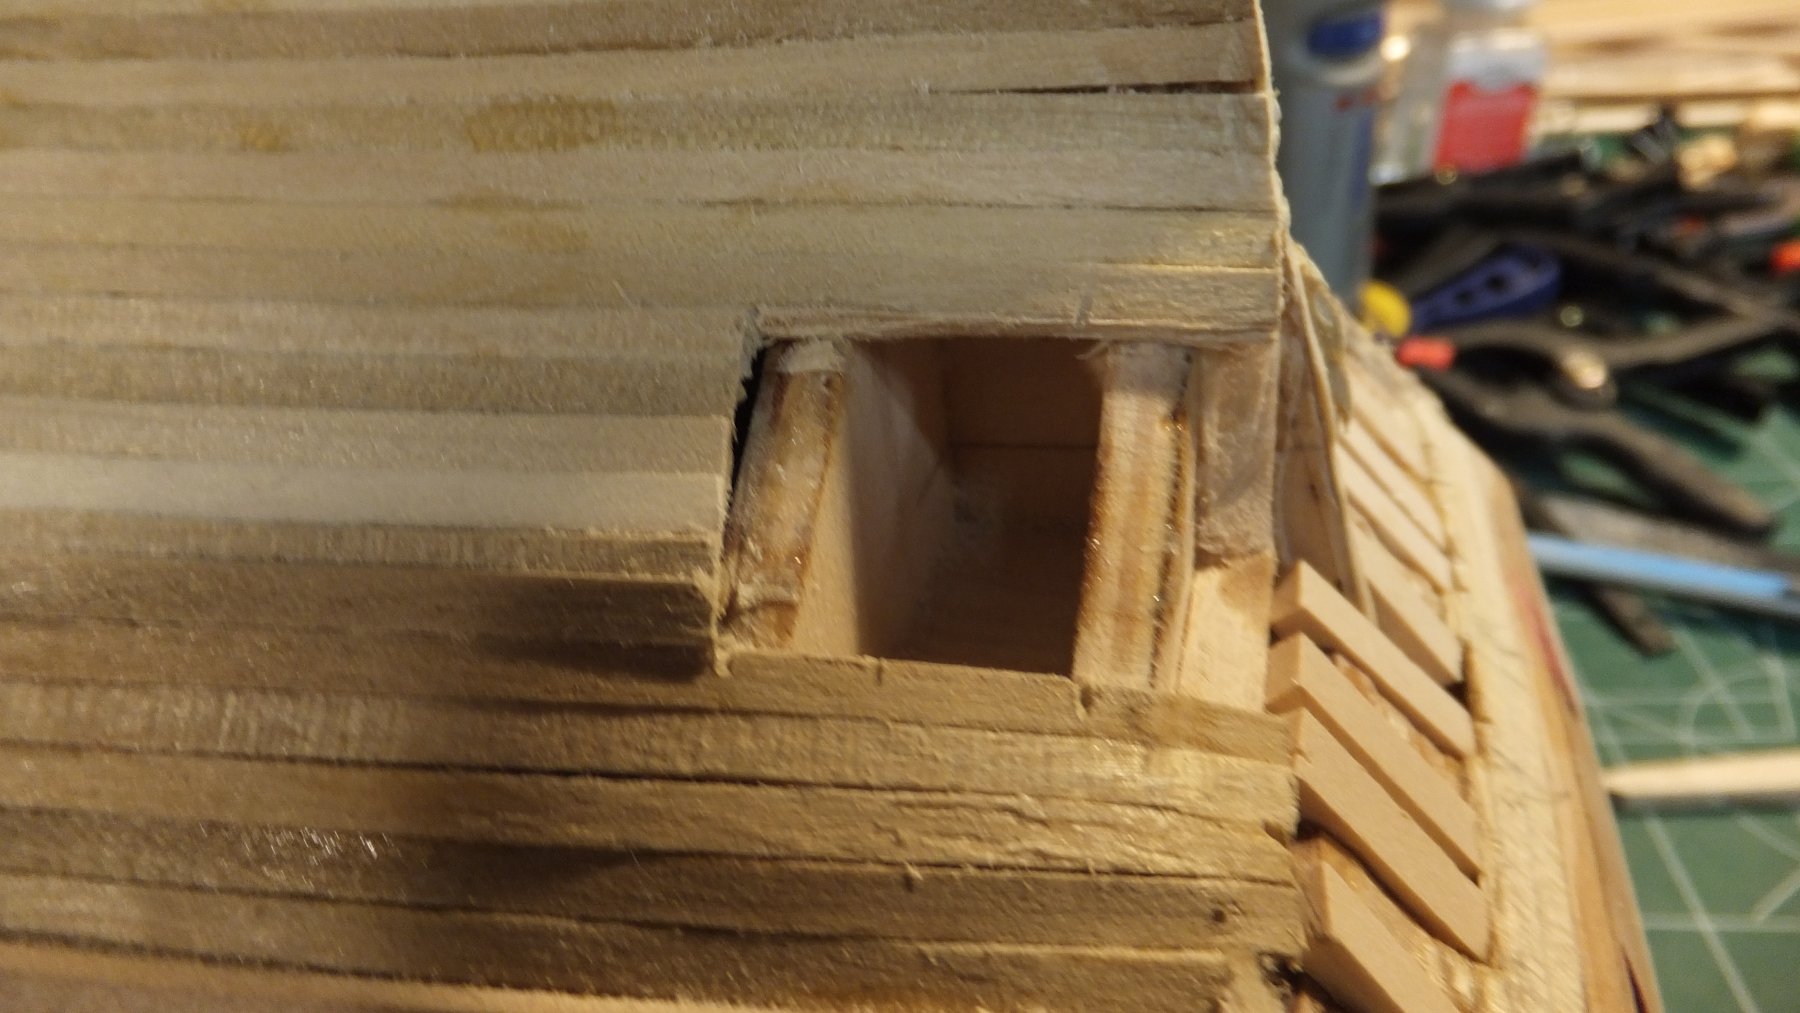
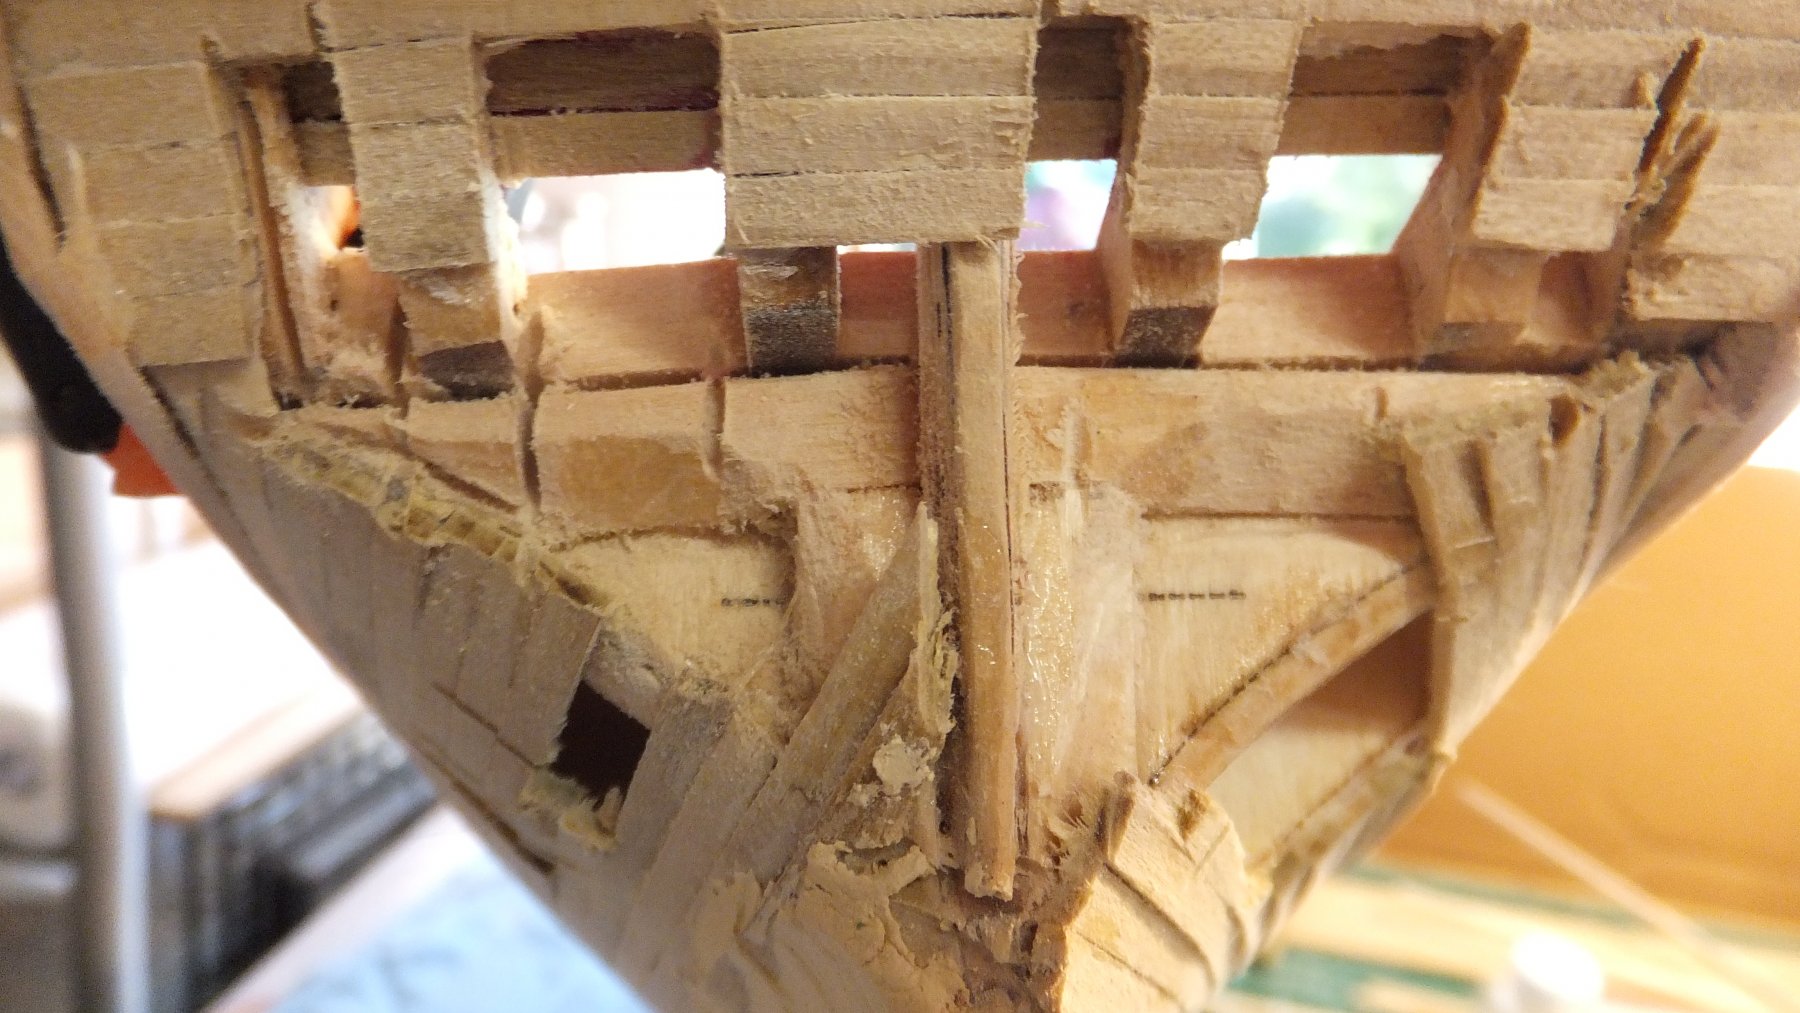
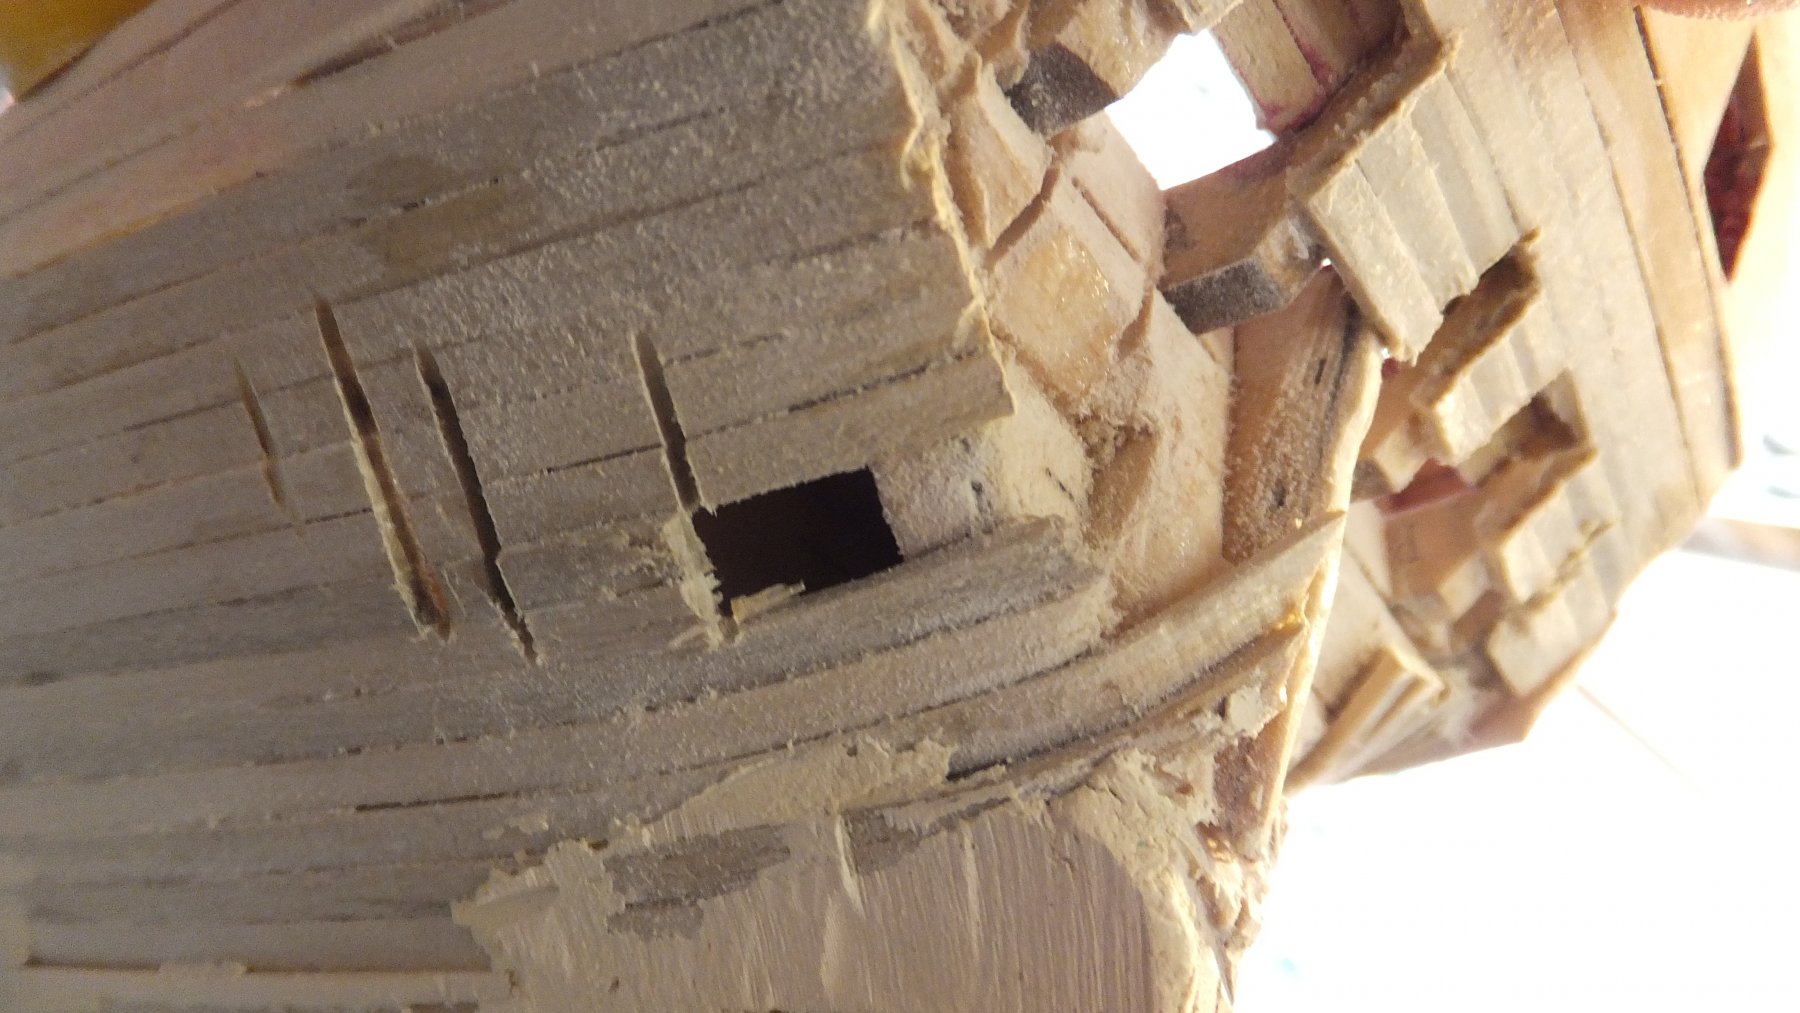
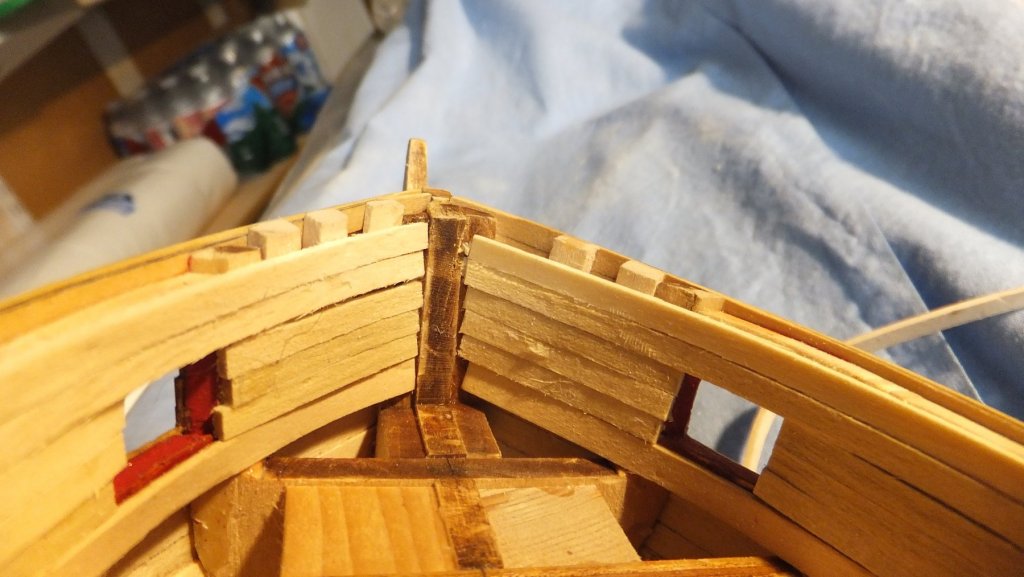
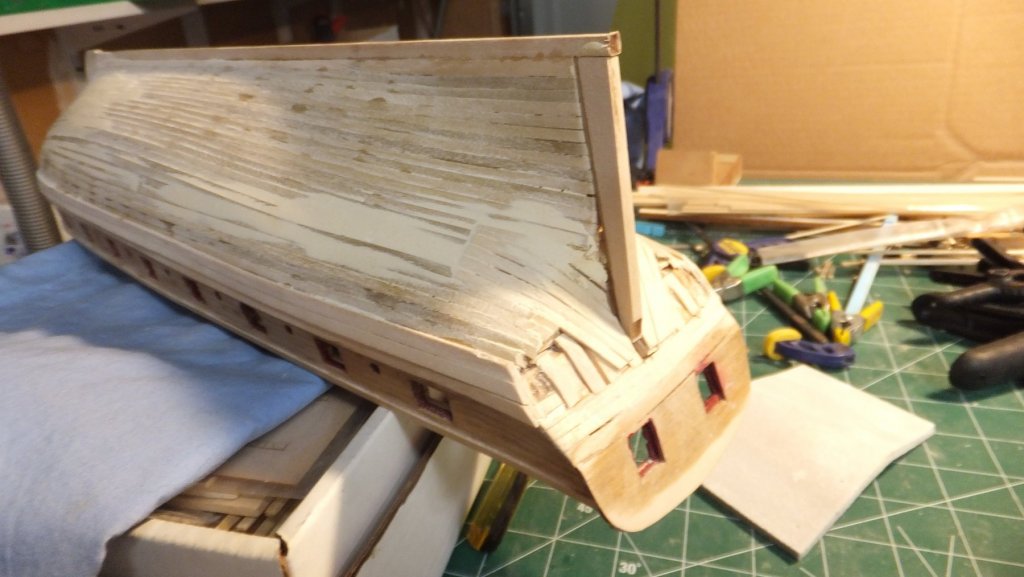
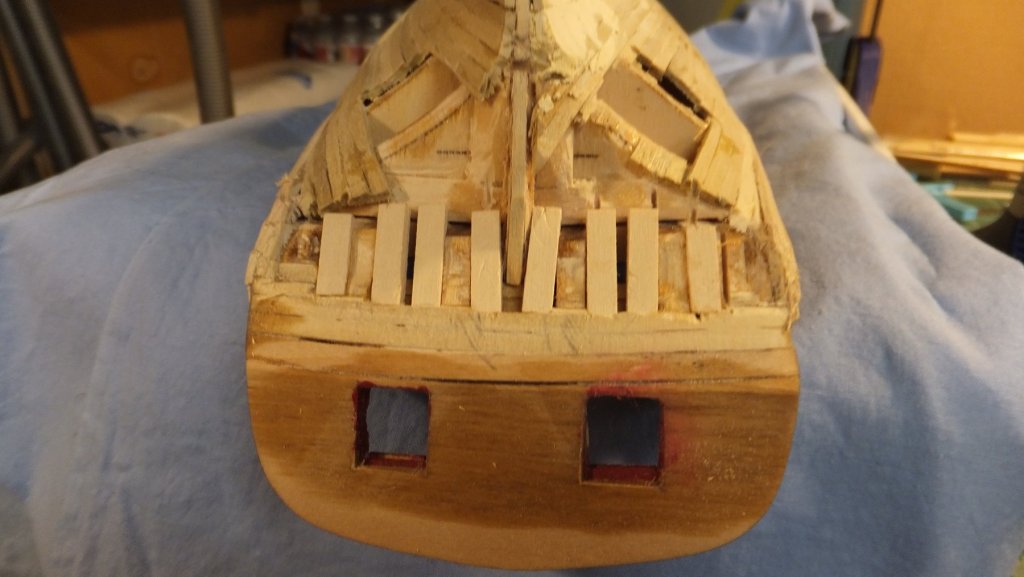
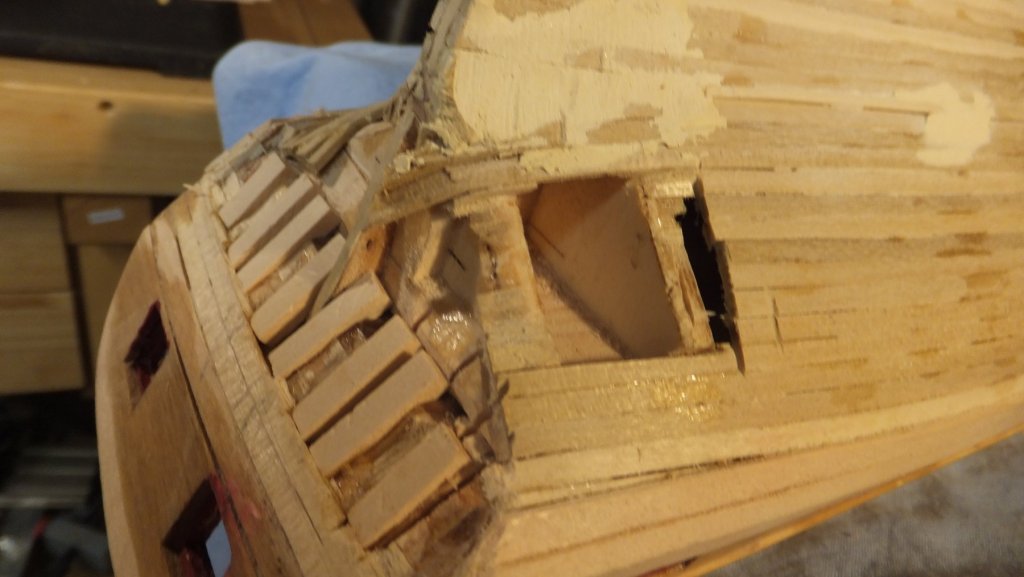
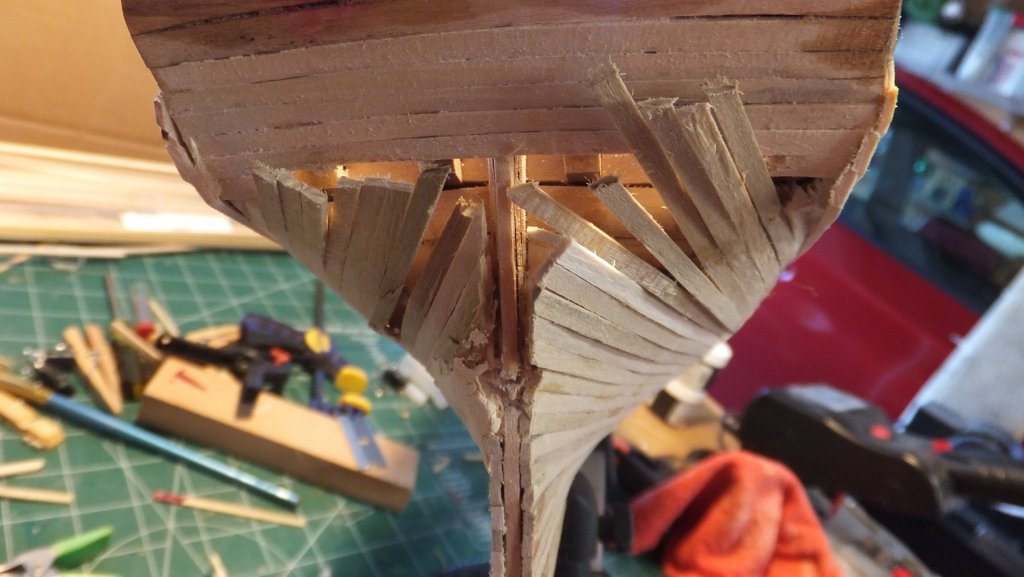
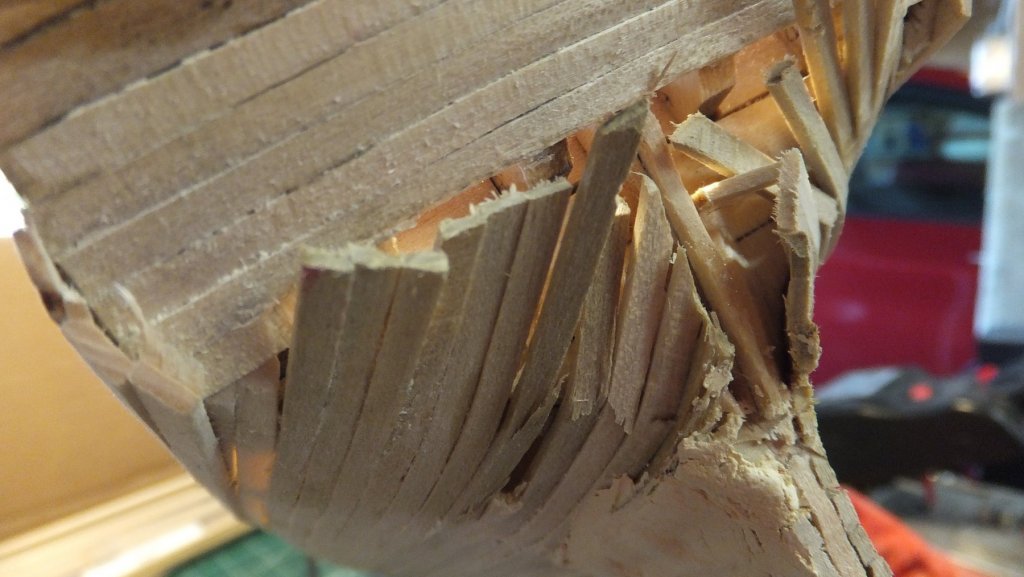
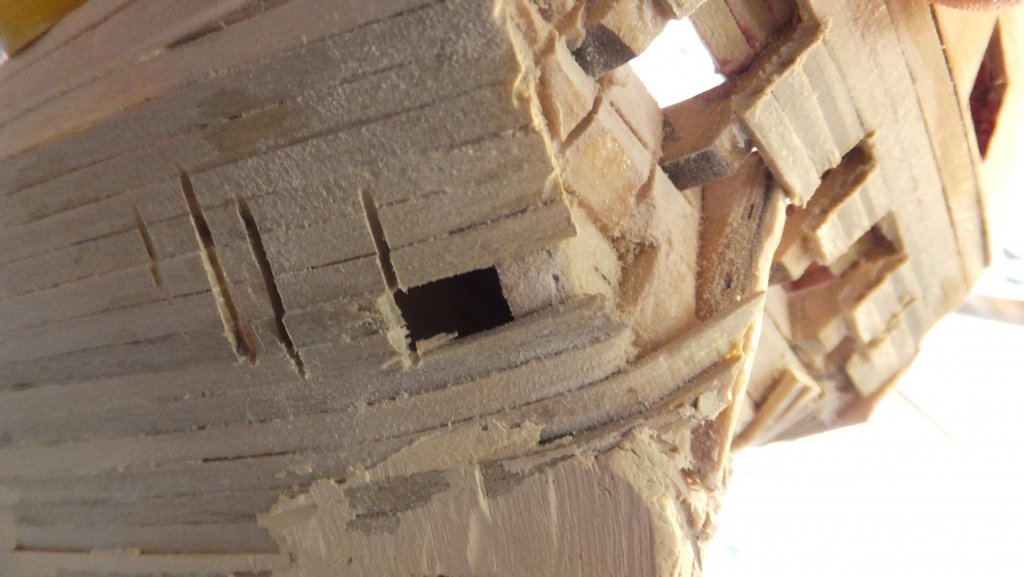
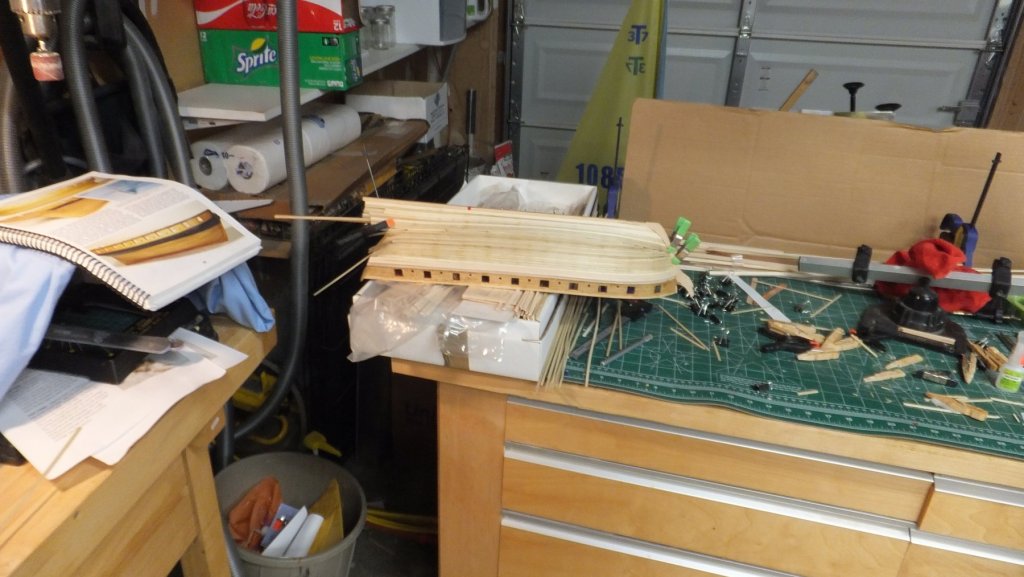
My first picture shows a new problem that I did not catch until it was too late. If you look closely at the picture of the inside of the Bow in the previous post you will find the problem. The first plank did not lie flat against the frame. The next picture show some progress in the repairs. And the final picture shows the new Counter. I used some 1/32" thick Boxwood I had on hand. I also had to add 1 more counter plank than the plans called for. So all that remains is some trimming and sanding. And yes there are a couple of places that will need putty. So as of now Chapter 6 is almost complete, Chapter 7 is 1/2 way. and the dreaded Chapter 5 is coming to a close.

-
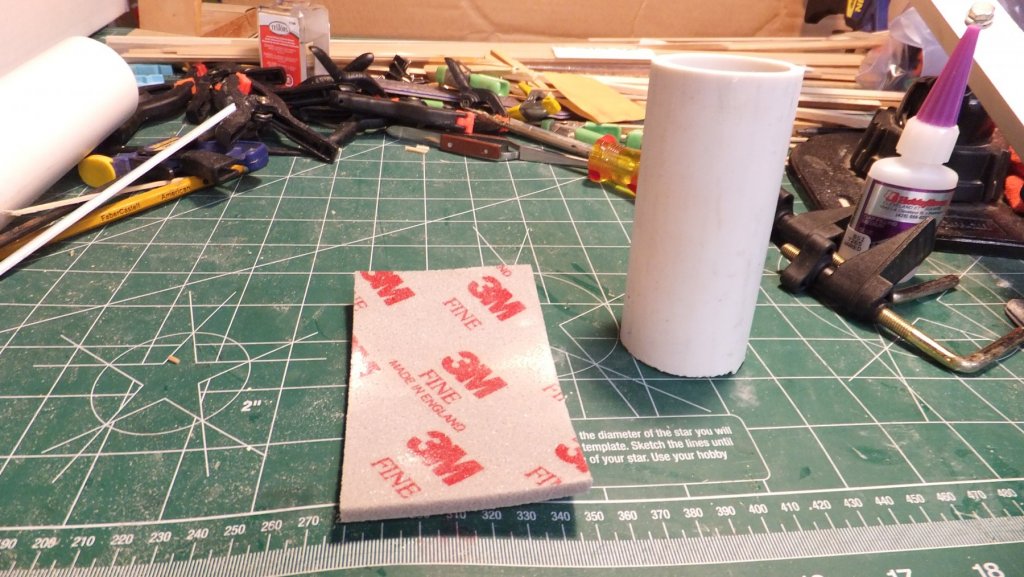
Ok its time for the Weekend update! first some misc. details. A couple of suggestions and a gotcha! The first picture below is my very expensive sanding block. I went to the H/W store and they cut a 4" length of PVC for me. it cost $1. I also got a sanding pad. This has proved quite useful when sanding the hull. The next picture is at the bow. I suggest it is a good idea to add some meat to the bulkheads to glue the blanks too. Last note: I found and error in the instructions! And a very bit THANK YOU for Dr. Per. Since he helped me figure this out. While waiting for planks to soak and putty to dry. I was trying to find other areas to make progress on this build. I decided to work on Chapter 6. On page 26 of the instructions in the first picture on the 2nd row. It show the stern Cap Rail and says it has the dimensions of 1/16" X 5/32". Then on Page 27 in the 3rd paragraph is says the Cap Rail should be made out of 1/16" X 1/4" stock. The picture is incorrect and the text is correct. I discovered this after I had carefully soaked and bent a strip that was 5/32".
-
As to the quality of instructions. I would suggest they very more by who the manufacturer is than the cost or difficulty of the kit itself. I am not suggesting that the Swift is not a good kit for a first build, it is definitely that. It is more the fact that the Swift is built by AL. I would put them near the bottom of quality of kit and level of detail of instructions. I also suggest that you may find it easier on your next build if you go with a manufacturer who is a native English speaker. At least then you will not have to deal with poor translations.
- 9 replies
-
- 2
-
-
- first build
- swift
- (and 2 more)
-
Peter - How do you like your mini Chop Saw? After I saw Per's (Nirvana) I had to get one. Those sills & lintels are just large enough they can't be cut with a razor. I only wish I had a jig to create duplicate sizes. I like your cover for the nose. And I now feel very stupid. I suggested that your Gun port measuring tool go the full width of the model. And did not apply the same idea to the sweep ports. Nice catch!
- 242 replies
-
- 1
-
-
- syren
- model shipways
- (and 1 more)
-
Cool! I ordered both sets today.
-
On a different subject. I borrowed something today. Semper Fi. To all who served my deepest gratitude and respect.
-
Ok after a week of work and avoiding the necessary huge repair job. I am back. My goal is to complete the hull Planking this weekend. First I need to complete the deconstruction. I have found that when I cut away the end of the planks in some cases I cut too close to the False keel and damaged the rabit strip. So this will need to be replaced as well. If not the stern post does not fit. I also sanded and cut away most of the counter planks. Then I began to create the filler pieces for the counter. Next I will replace the Rabit strip and add some blocks to the bulkheads to support the hull planks. Hopefully tomorrow I will start planking again. Sunday is reserved for Sanding. Have I mentioned how much I love Sanding?

-
I would suggest that it really doesn't matter. the only purpose is to add strength while you sand and to help keep the False Keel straight. I just used some 1 X 2 scrap I had laying around. I believe it was Fir.
- 90 replies
-
- 1
-
-
- syren
- model shipways
- (and 1 more)
-
Shawn - I am with you. Beside these Carronades do not have the mounting extrusion below the barrel. I am not excited with Doing what Dirk did. He fashioned a cube of metal, soldered in to the barrel, shaped and drilled it! Huge work. I am going to keep looking for an alternative.
-
Jim Great Idea! I will order a set. Thank you. Shawn - On the Syren there is Molding on the cap rail from stem to stern on both the port & starboard sides. There is also the 2 rows of molding on the stern above and below the name. I am also suggesting that there should be molding on the aft end of the stern cap rail. This will tie in nicely with the 2 rows mentioned here. and finally there is all the fancy work on the bow. So I see lots of opportunity to use these scrapers.
-
Shawn - I would definitely do the transom. It does wonders for the strength of the stern. But as to the counter I suggest you take a look at several builds. I did do the counter as suggested in the instructions. But I have found that it interferes with the stern planking. You might want to plank the hull first. Also keep in mind that you need to hide the butt ends of your planking. This includes the Counter, hull, & wales. so the order you plank will help you decide what shows and what does not. If you plank the counter after the hull. you can just sand the hull planks to form a great gluing surface for the last couple of counter planks. Once you do add the transom you can do the sanding needed for the stern. more sanding! For example, the Counter can cover the ends of the Wale planking and the Stern Cap rail will cover the ends of the counter. Also as I look at pictures it appears that the stern molding is proud of the Cap rail. I think it will look better to add molding to the stern cap rail similar to the cap rail for the sides. Last comment - I have experimented several times using a single sided razor blade to create the rounded edge of the molding. I find that Bass wood becomes stringy and doesn't work very well. Box wood does work but it is very hard to create the correct profile in the razor blade.
-
Welcome to the Syren club! When you mentioned excellent builds I am sure you were not referring to mine. But I will make all the mistakes possible to pave the road for you.
- 90 replies
-
- 4
-
-
- syren
- model shipways
- (and 1 more)
-
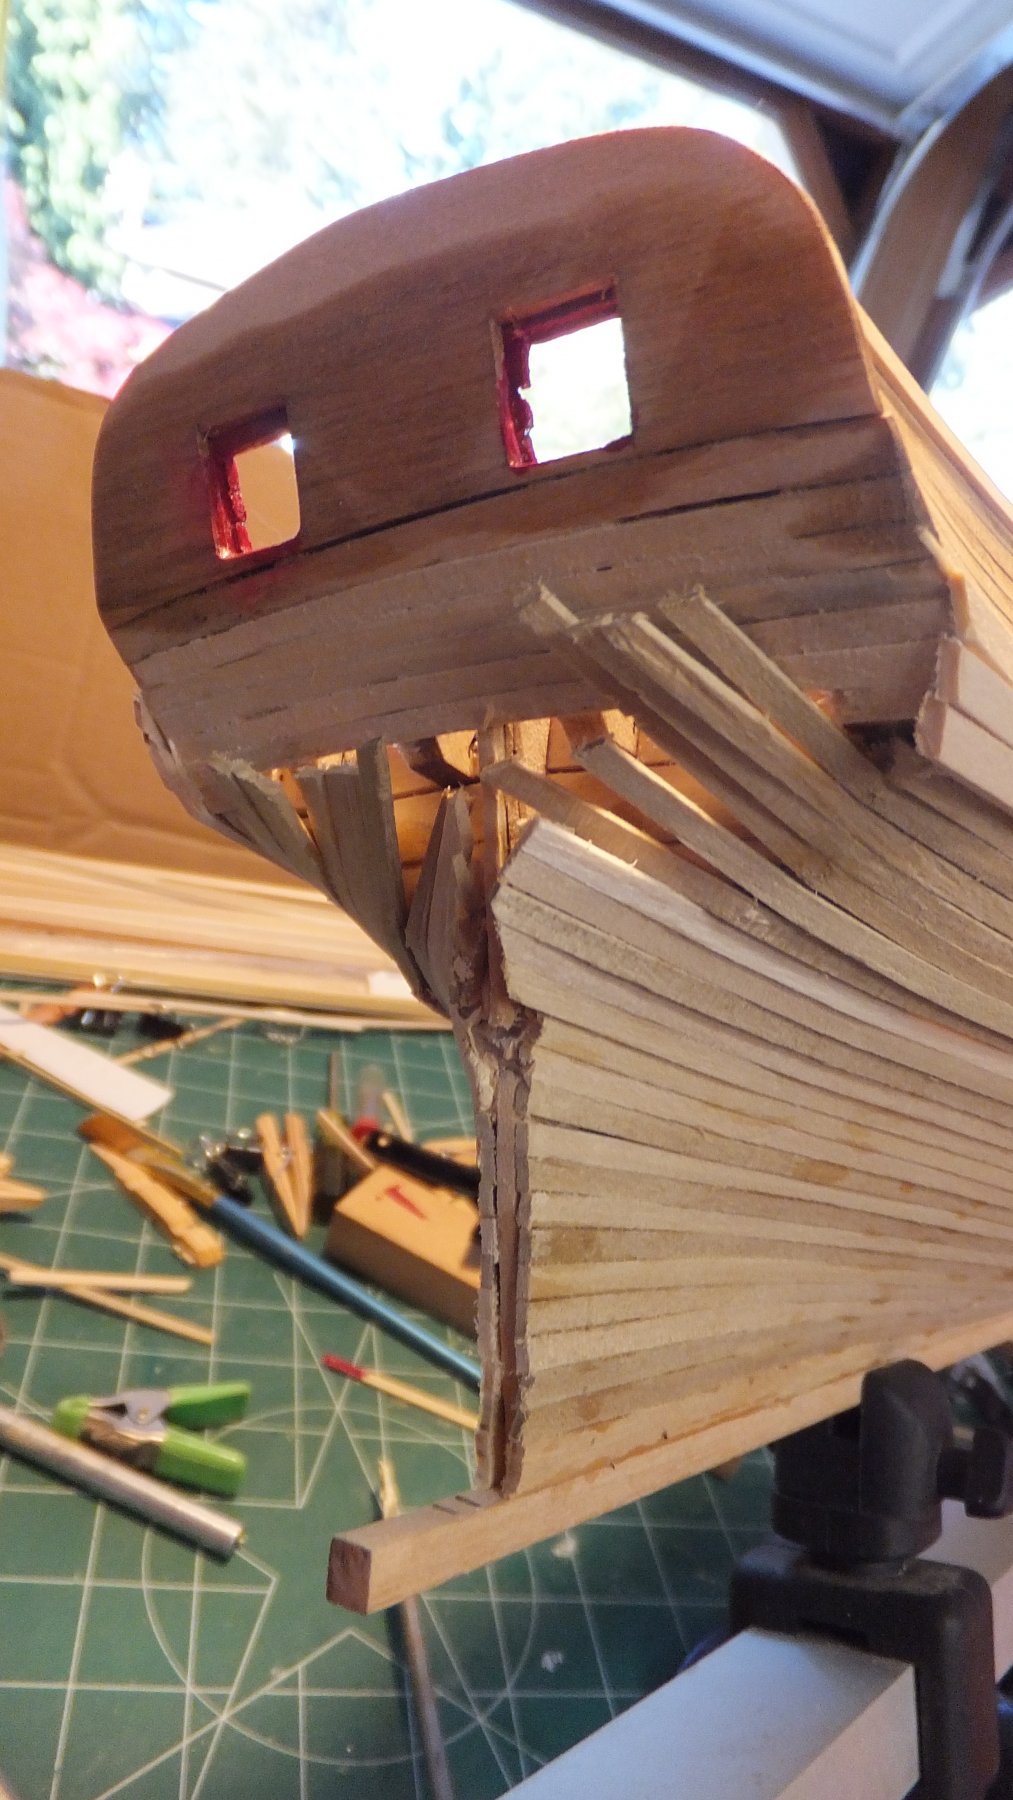
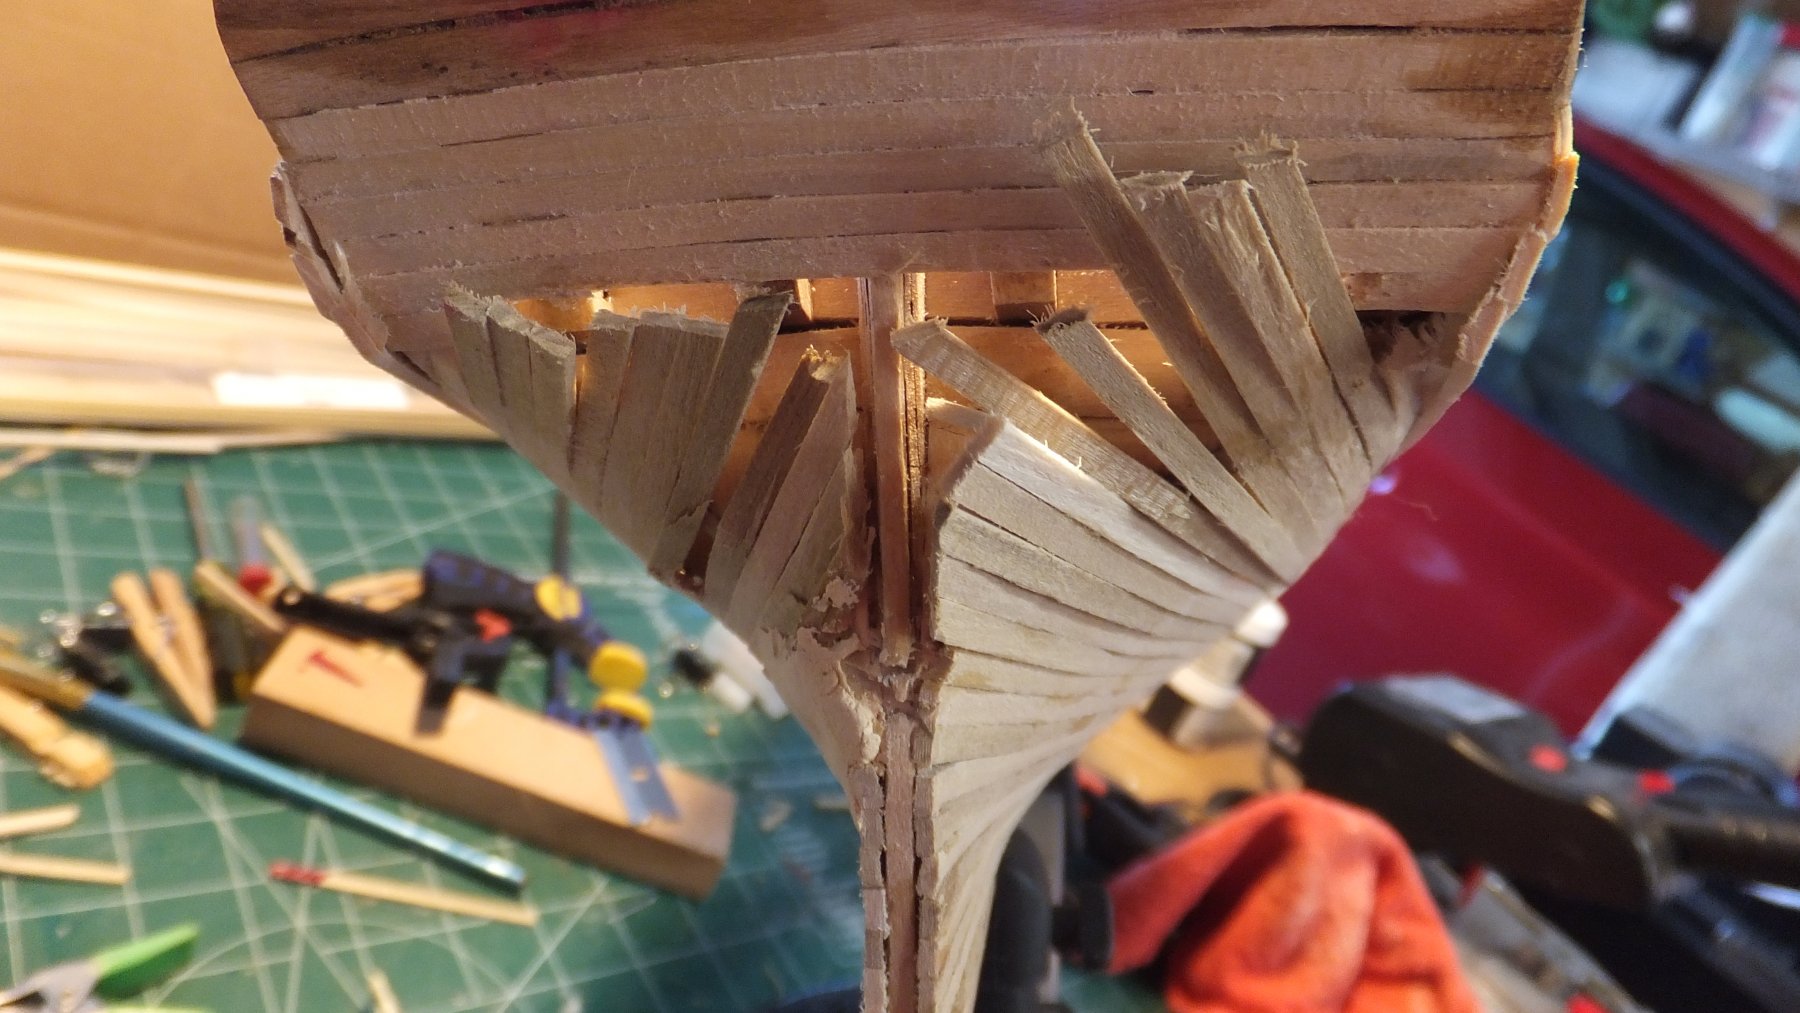
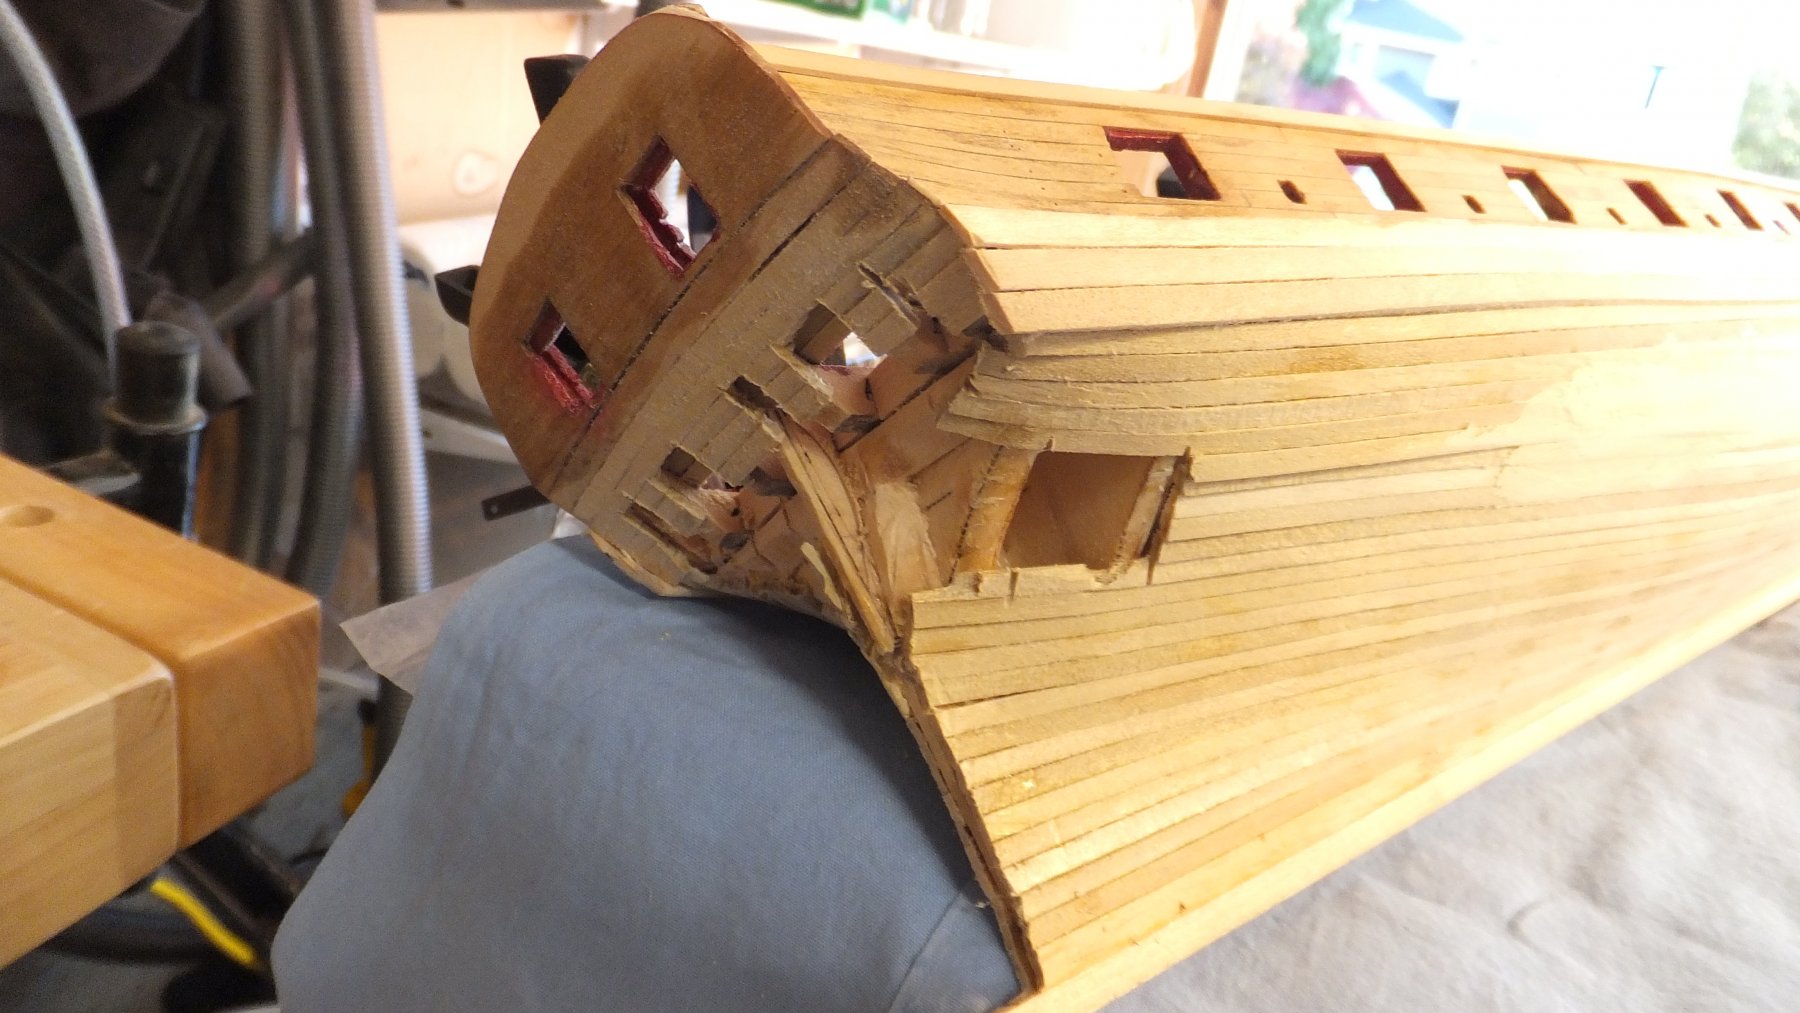
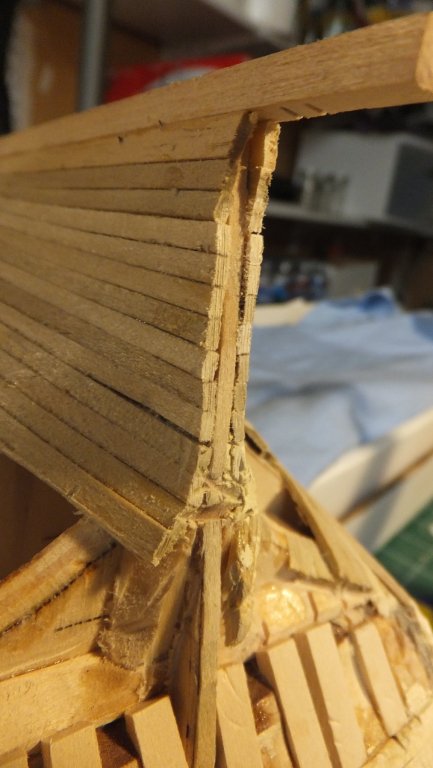
Now let me bring you up to speed on my current progress and share my huge disappointment and the beginnings of my recovery. So first let me describe what I have learned from other logs and my planking experience. I will also comment that this is the 4th time I have done a hull planking and it is still the part of the vessel that I struggle with the most. Knowing this I would not have started the Syren unless I knew ahead of time that I was going to copper the hull and hide most of my efforts. I have also learned that some members of the Syren club did their planking before the counter. I now feel this is the proper solution. I have several errors here and so I decided to cut away some of the counter planks and most of the stern ends of the hull planks. Then redo this part of my hull. The first 3 pictures are before I began repairs. The last 3 pictures is my attempt to recover. I will be struggling with the recovery for most of this week. I suggest to anyone at this stage that filling in with more than just the 2 horizontal and 2 vertical shaped Pieces is advisable. I will be doing that this time. Thus I will have a good gluing surface.


-
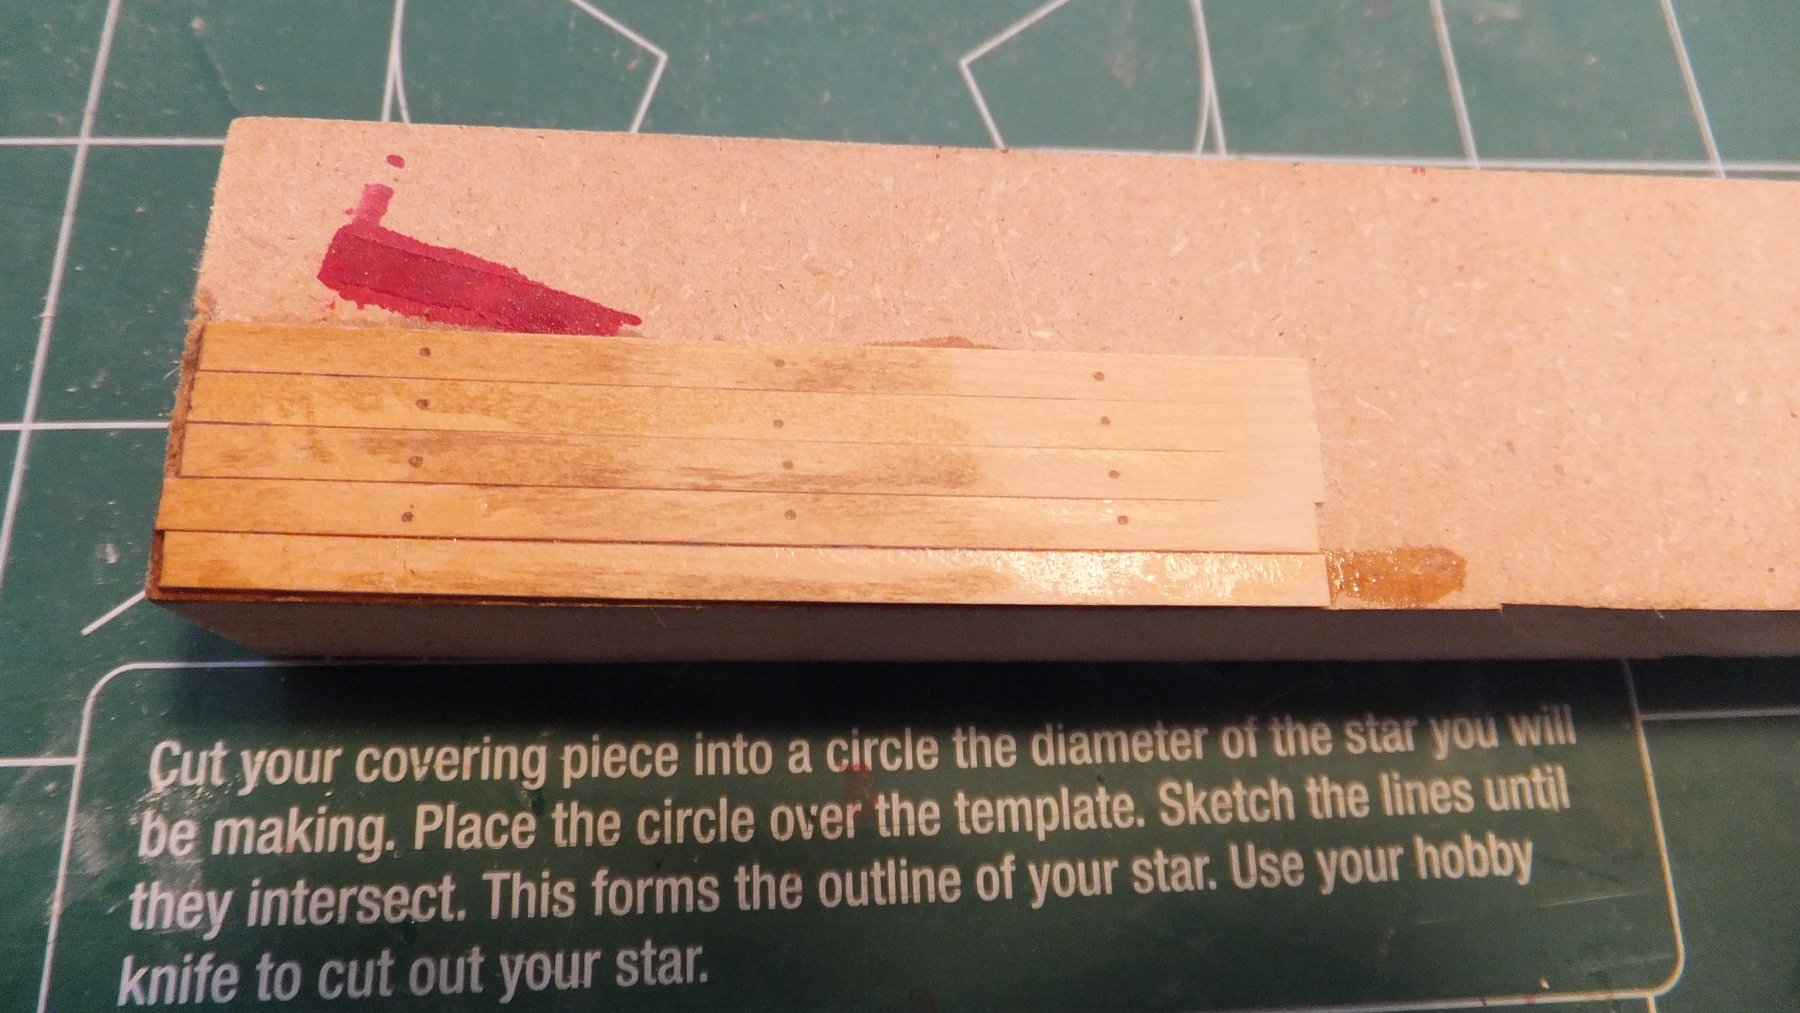
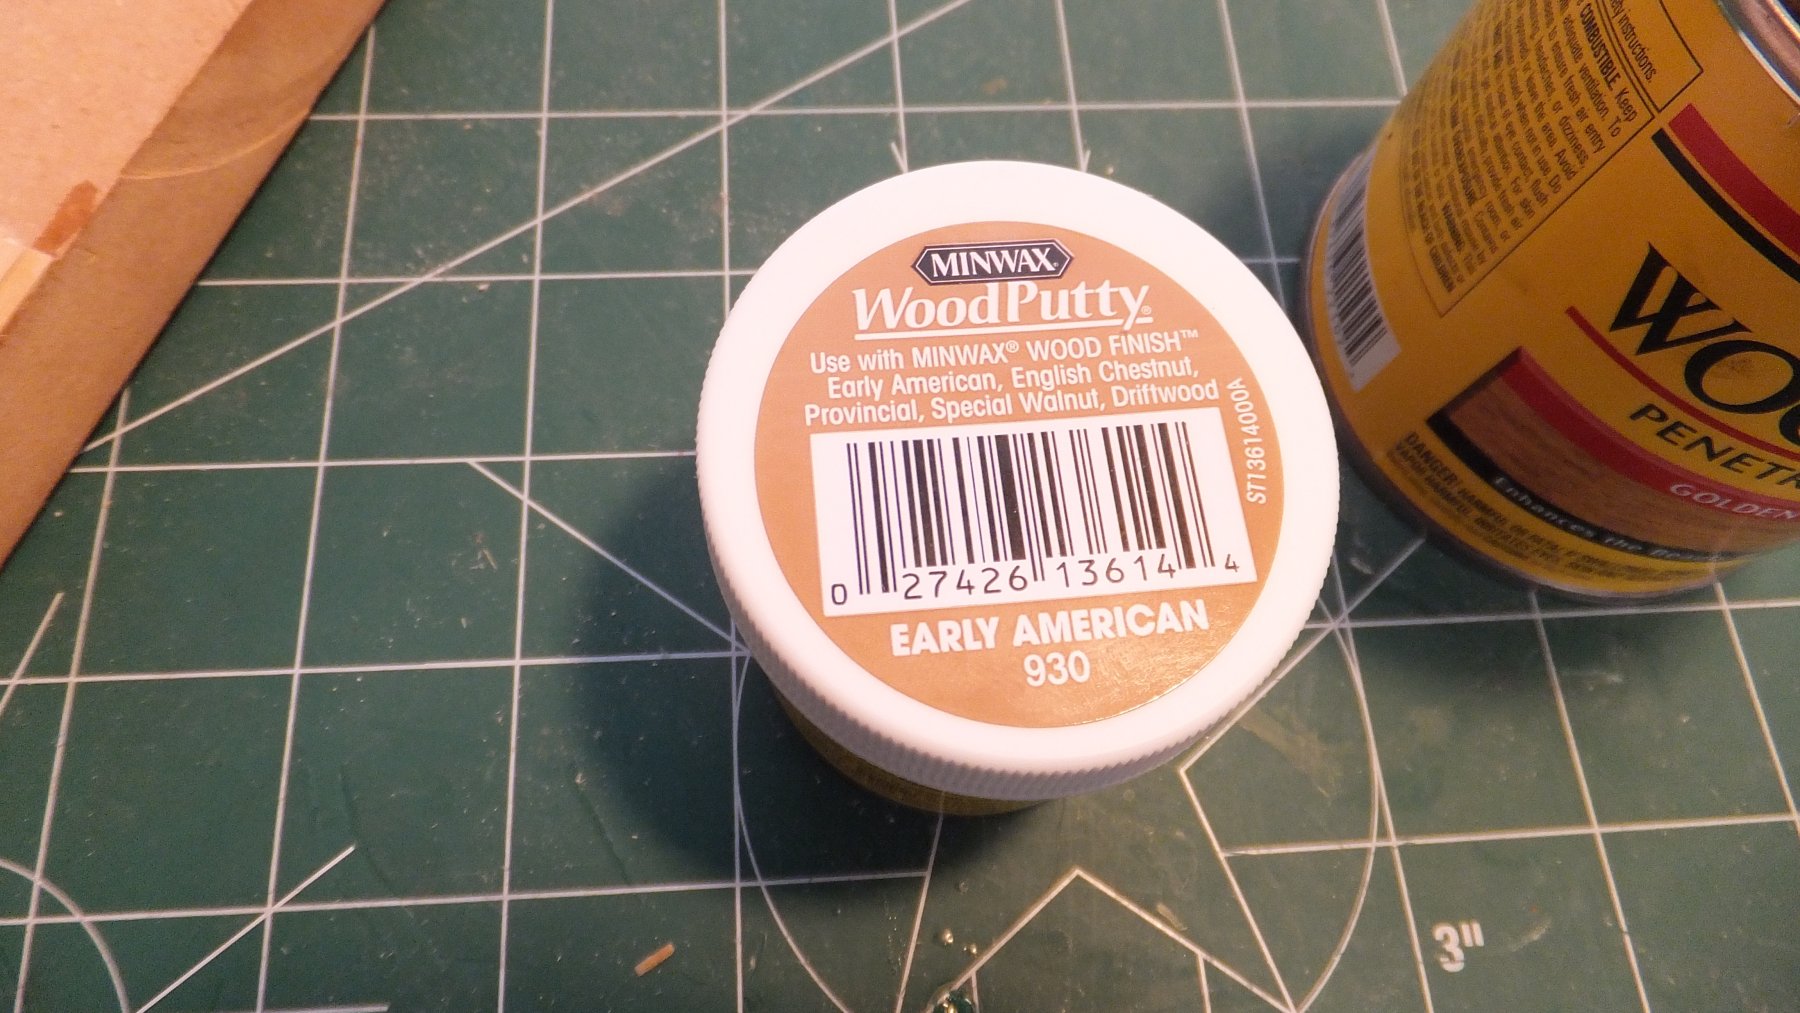
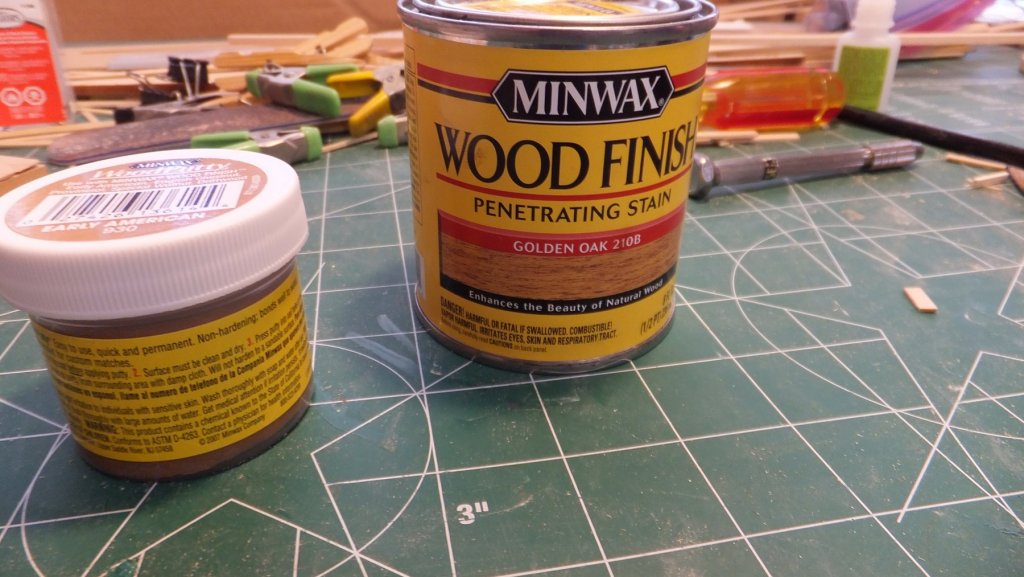
Next a quick post on my solution to treenailing. First I decided to follow Chuck's suggestion of Golden Oak stain. I like the color. I used Boxwood for the planks above the wale. And I stained with Minwax Golden Oak. I really wanted to use my Syren to experiment with treenailing. I have seen some very good work and some poor. I selected to use a number 75 drill. This comes out to a peg that is 1 1/4 inch when scaled up this is about as close as I can come. I also didn't want it to be so obvious. I wanted you to see it but not have it stand out. So I settled on Early American Oak stain. it is very close to the golden oak but just dark enough to be different. From experimentation I have found that I will put 1 coat of Golden Oak on then drill holes and run the Early American in. Wipe everything clean. and finally a 2nd coat of Golden Oak. See for yourself from my sample.

-
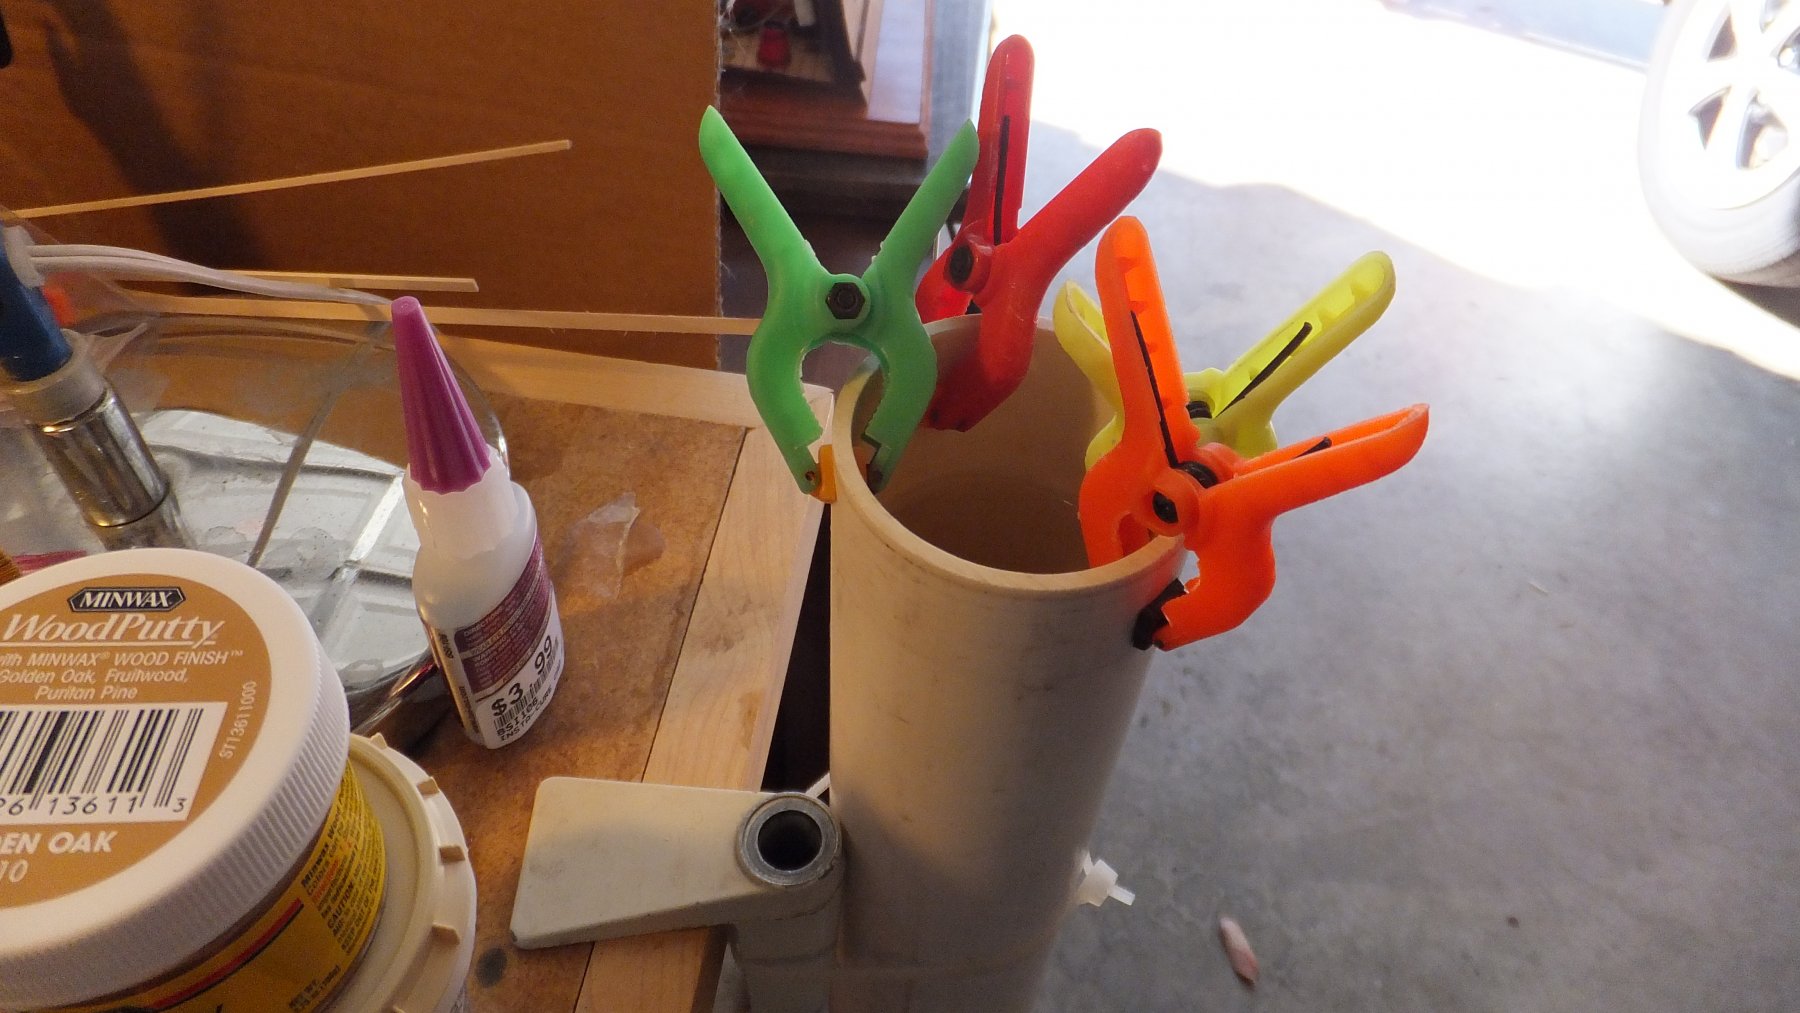
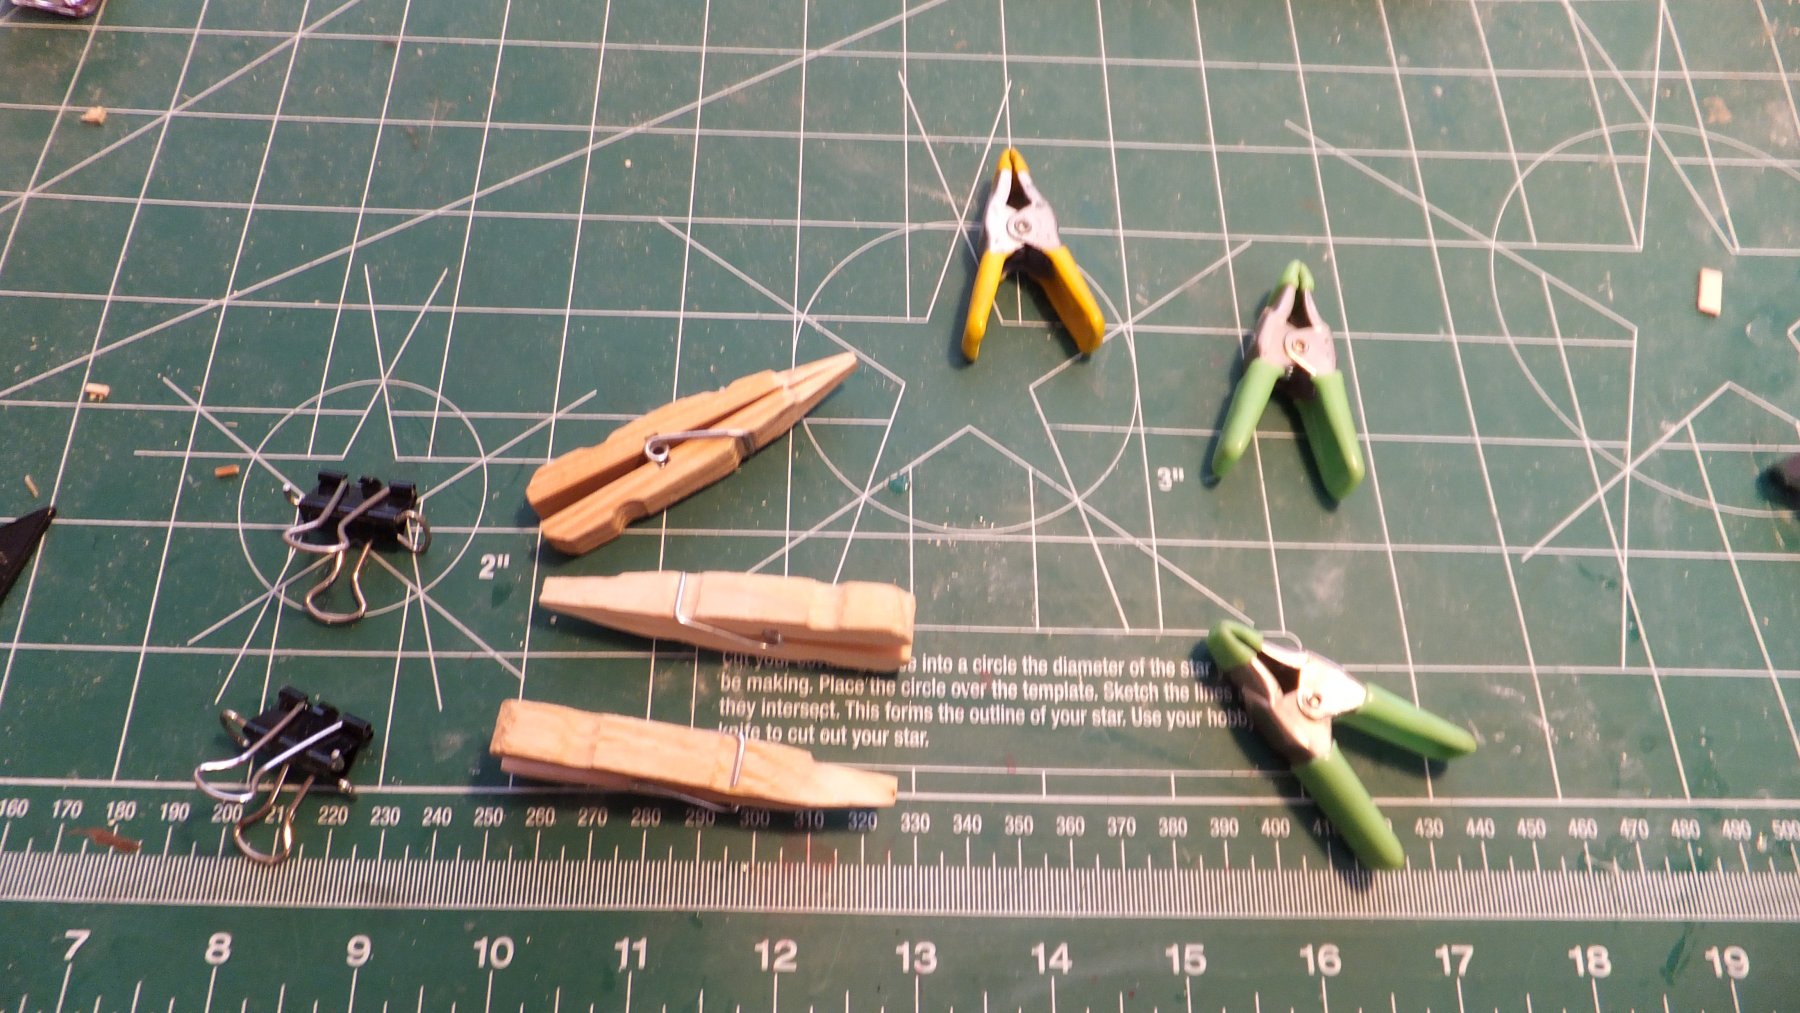
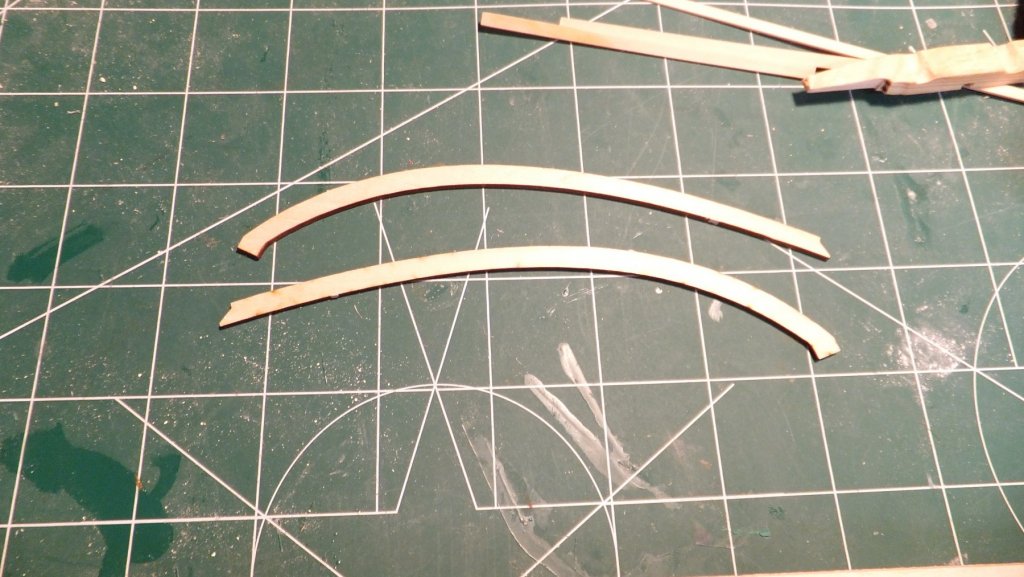
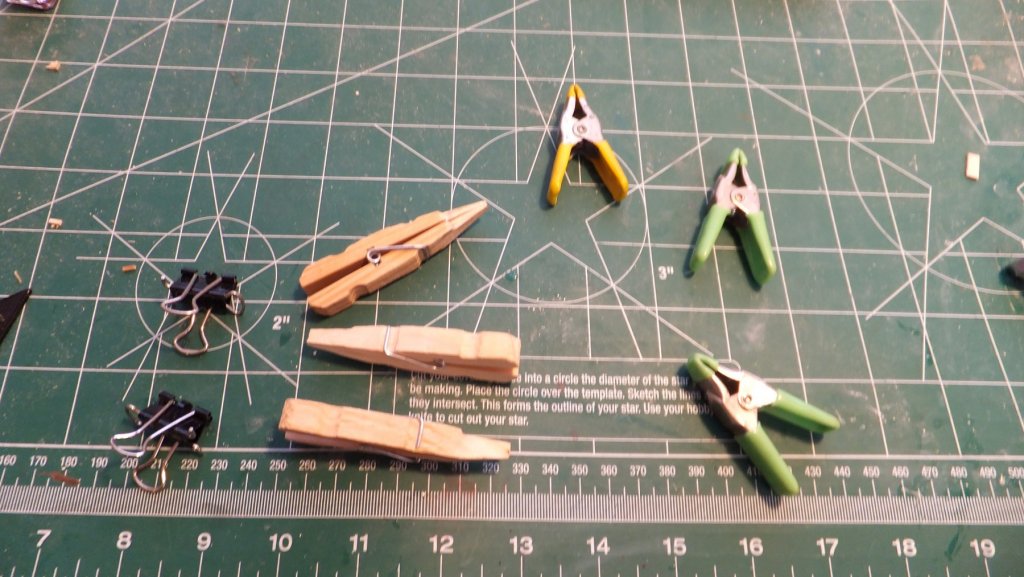
Ok Lots of catching up to do. And thanks to Alan I think I went the same way on the Paint. I have several things to post here so there will likely be 3 different entries. So first I bring you my planking process The photos below show my hull Planking process. First, I use my Byrnes Sander to taper my planks. I am terrible at tapering correctly so I find that using a sander is better for me. I can get a very gradual taper where I need it. and I also get a straight line. Second, I have a piece of 4" PVC that is plugged at one end and filled with water. I use this to soak my planks. the clamps are used to hold the planks in place so that they do not float and later so they do not sink. Third you see an assortment of the clamps I use on the hull. I use these to hold the plank in place while it dries so that it is the correct shape and size before I glue. for the clothes Pins I reverse the wood to give a flat clamping surface. And when I am using clothes pins for Hull Clamping. I cut a notch in to the side to grip the plank. All low cost and easy peasy. And that concludes my planking post.


-
Ok Help needed from the Syren Club. What did you use for Red Paint on the inside of the bulwarks? I ran out of the paint I used for the gun ports and I wasn't sure I liked the shade of red.
-
Rich are you Blackening your copper parts or Painting?
-
Brian - I am confused. I thought you said your hull planks are long enough for the full length of the hull? If so why struggle and stagger the planks. You are going to paint the hull so it doesn't matter how the plank lay on the bulkheads. When I planked my Bluenose it was the easiest planking job I had ever done. Almost no tapering. Just a small amount of beveling. I would suggest take a hull plank and lay it along the bulkheads and see if they run true. I had to add small strips to fill gaps. I think the strips work better than putty and you can sand them to fit in nicely. Are you simulating Caulking? Why don't your planks look like they are fitting more tightly?
-
Ok, So I had hoped to have all the planking done by the end of today. But I have found that with the severe upturn at the stern and all the other twists. I have to taper, soak, then install the wet planks, let it dry in the correct shape, and finally glue. And we won't talk about the number of broken planks before I gave in and did it this way. It means that I can only add 1 plank every 30 to 45 min. The picture below is intentionally taken from a distance. the port side is done but there is lots of sanding and filling to be done. The Starboard side is approx. 1/2 way. and looking much better. Maybe by the time I have planked 1/2 dozen hulls I will figure out how to do it right. Thank god all of this ugly stuff will soon be covered with copper. I should also mention while waiting and waiting for planks to dry. I sanded and planked the inside of the transom. I also went to the local H/W store and found tiny brads 1.2 mm in diameter. I am hoping this is small enough for my coppering jig. Opinions? I am also celebrating what for me is a first in my modeling! I actually used up a bottle of CA before it went bad. This means my modeling is moving at a very uncharacteristic fast pace.
-
Rich - Didn't you say the Argus did not have side badges? (yes I know I am too lazy to look thru your log). On my Syren I have decided to leave them off. They only detract from a very nice model. PS Thanks to you. I have ordered the book.
- 1,135 replies
-
- 2
-
-
- model shipways
- syren
- (and 2 more)