HOLIDAY DONATION DRIVE - SUPPORT MSW - DO YOUR PART TO KEEP THIS GREAT FORUM GOING! (Only 13 donations so far - C'mon guys!)
×


FrankWouts
-
Posts
535 -
Joined
-
Last visited
Content Type
Profiles
Forums
Gallery
Events
Everything posted by FrankWouts
-
 Thanks JJ! I’m mastering a lot of new techniques here while building along… I’m also following your fantastic Portland project with great interest! Frank.
 -
Small update for today. Frank.
-
Wonderful and amazing beautiful work Glenn! No flaws visible to my eye! Frank.
- 840 replies
-
- 2
-

-
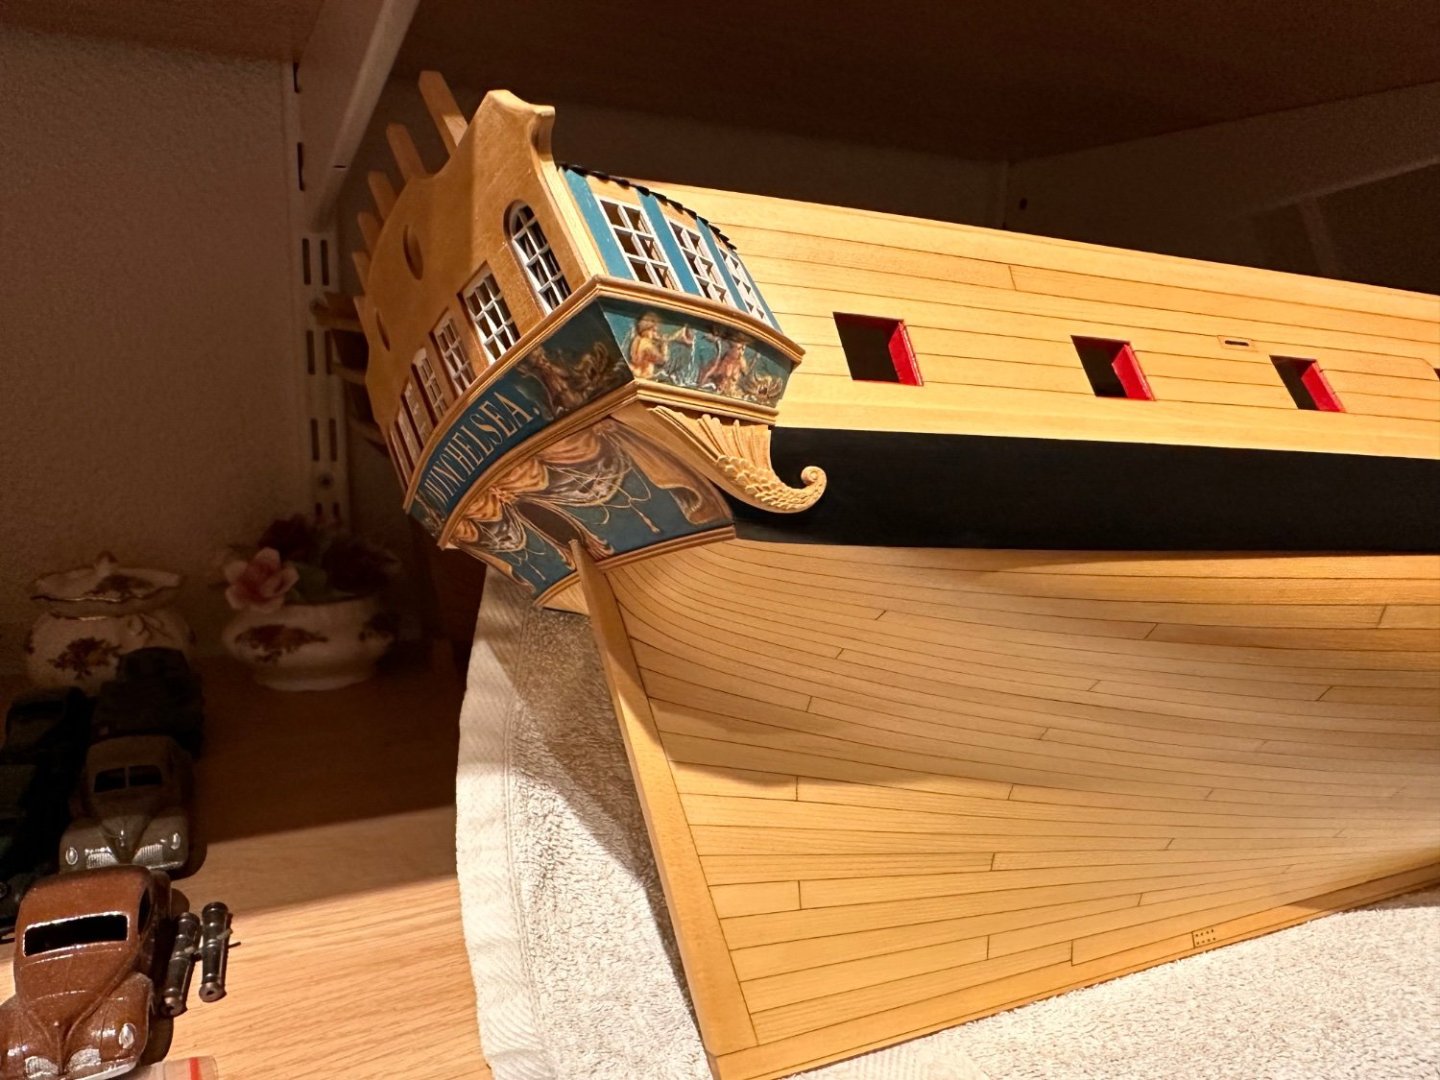
- winchelsea
- Syren Ship Model Company
- (and 1 more)
-
Thanks and looking very sharp in that shirt Chuck! Frank.
-
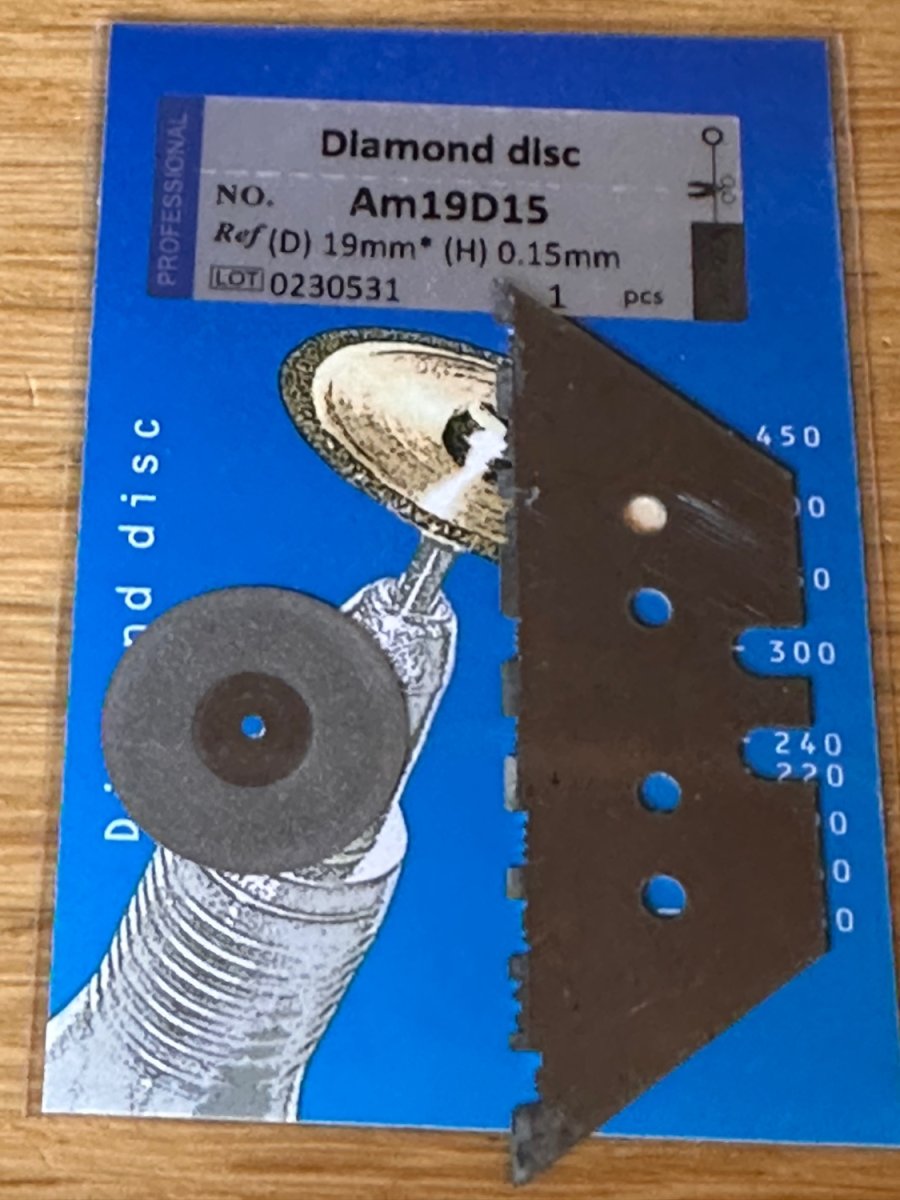
It’s the same with me Jim, the turtle feeling… Check my startdate…I spent over a full week practicing scraping the different fancy molding strips and making the profile on redundant old hobby knives with the 0.15mm thick diamond cutter disks. But it’s like you say, quality over speed. And now I’ve got the hang of things I learned here like sideways bending, scraping, I can put them to work in future builds, hopefully with a little more speed…but with the same quality…at least… Nice progress on your build, you’re going slow but steady, and that’s a good thing! It will be longer in your living room and beyond perhaps in your family than the time you build it, so slow and steady isn’t a problem when contemplating like that. Frank.
-
Hi Shawn, Is that really necessary? Apart from the dead flat transom, your Winnie looks okay to my eye! But a fresh new start maybe feels better for you. Frank.
-
That looks like a perfect angle for the stern and Q-galleries Jim! Well done! I envy you on the Byrnes Disc Sander and such a nice wife though...😉 Cheers, Frank.
-
You're welcome anytime Jim! Thanks, though I'm relatively new to building wooden ships, but trying to learn and adapt fast as the firebrigade...unfortunately that slows me down compared to more experienced builders...a lot...I have the same fears like you, sanding off too much or making unrecoverable errors... I started a wooden ship 30 years ago, kept it all that time and wanted to finish it recently, Corel's Victory, but noticed I was too far off on various points, so maybe sometime I'll start another someday, maybe Amati's coming new one in 1:64 scale...if it ever comes into production.. Frank.
-
That looks like a very educational workshop and indeed a lot of fun! Who is you on the pictures Chuck? I have never met you in person yet, so I won't recognize our own master teacher and instructor I'm afraid... LOL... Frank.
-
Thanks Jim and Glenn and the likes. That’s certainly a very wise advise Glenn, thanks! Frank.
-
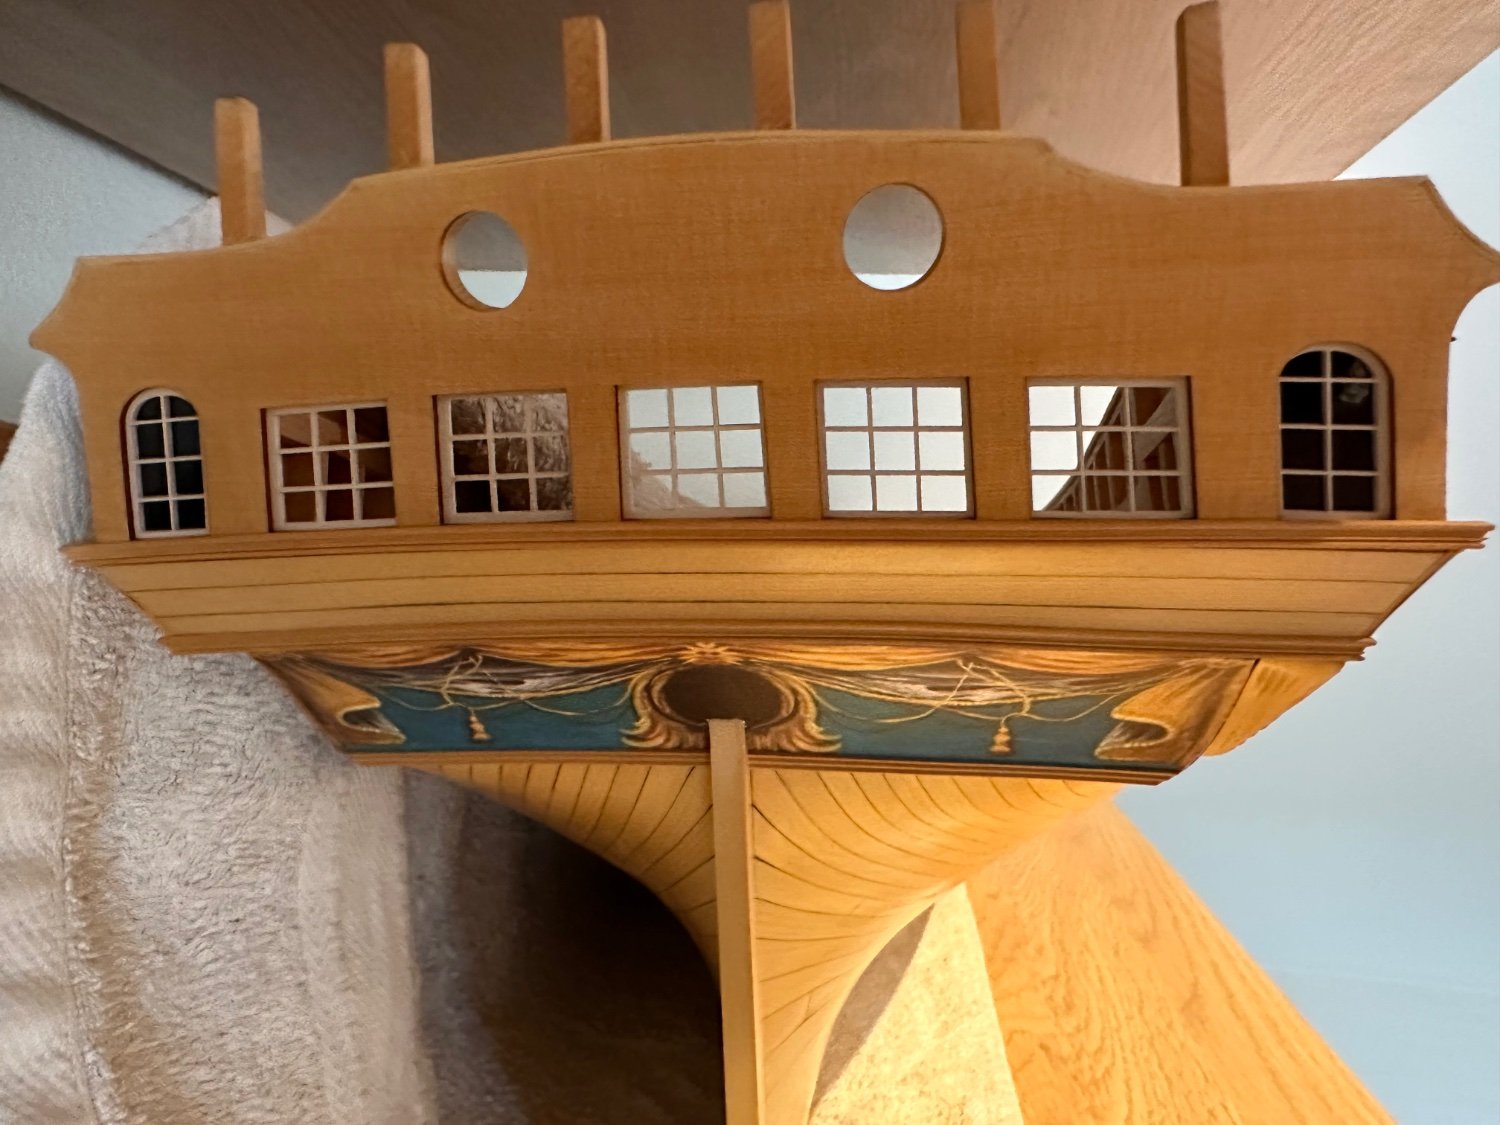
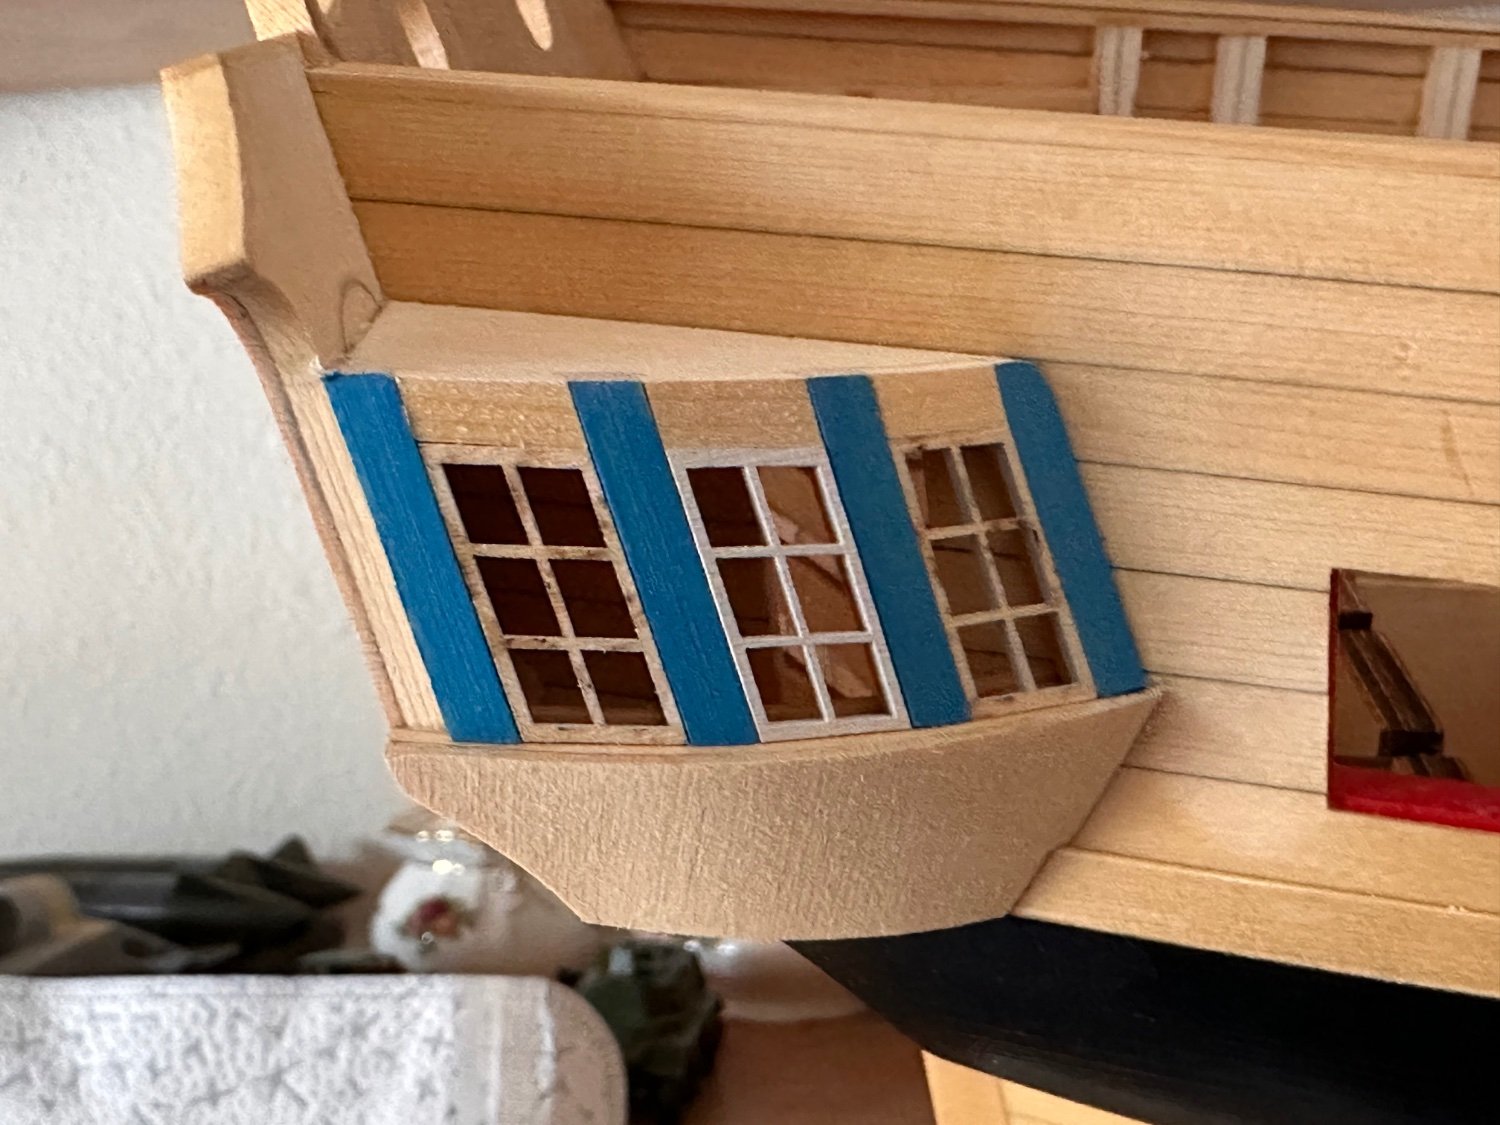
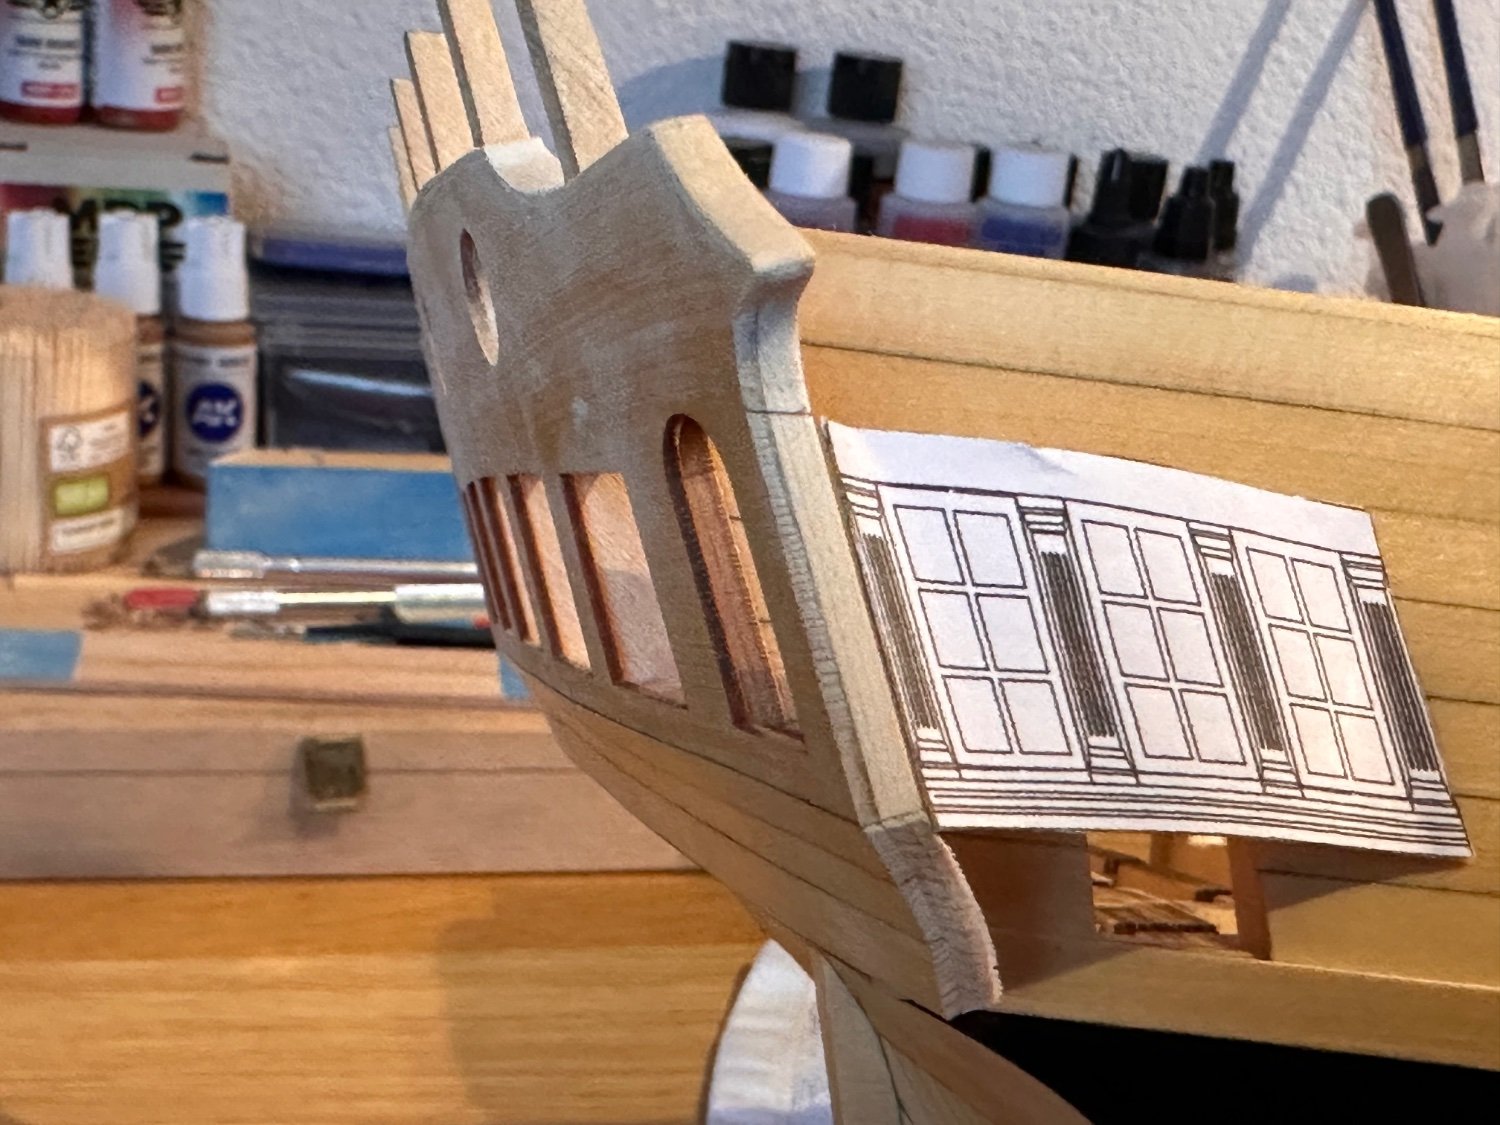
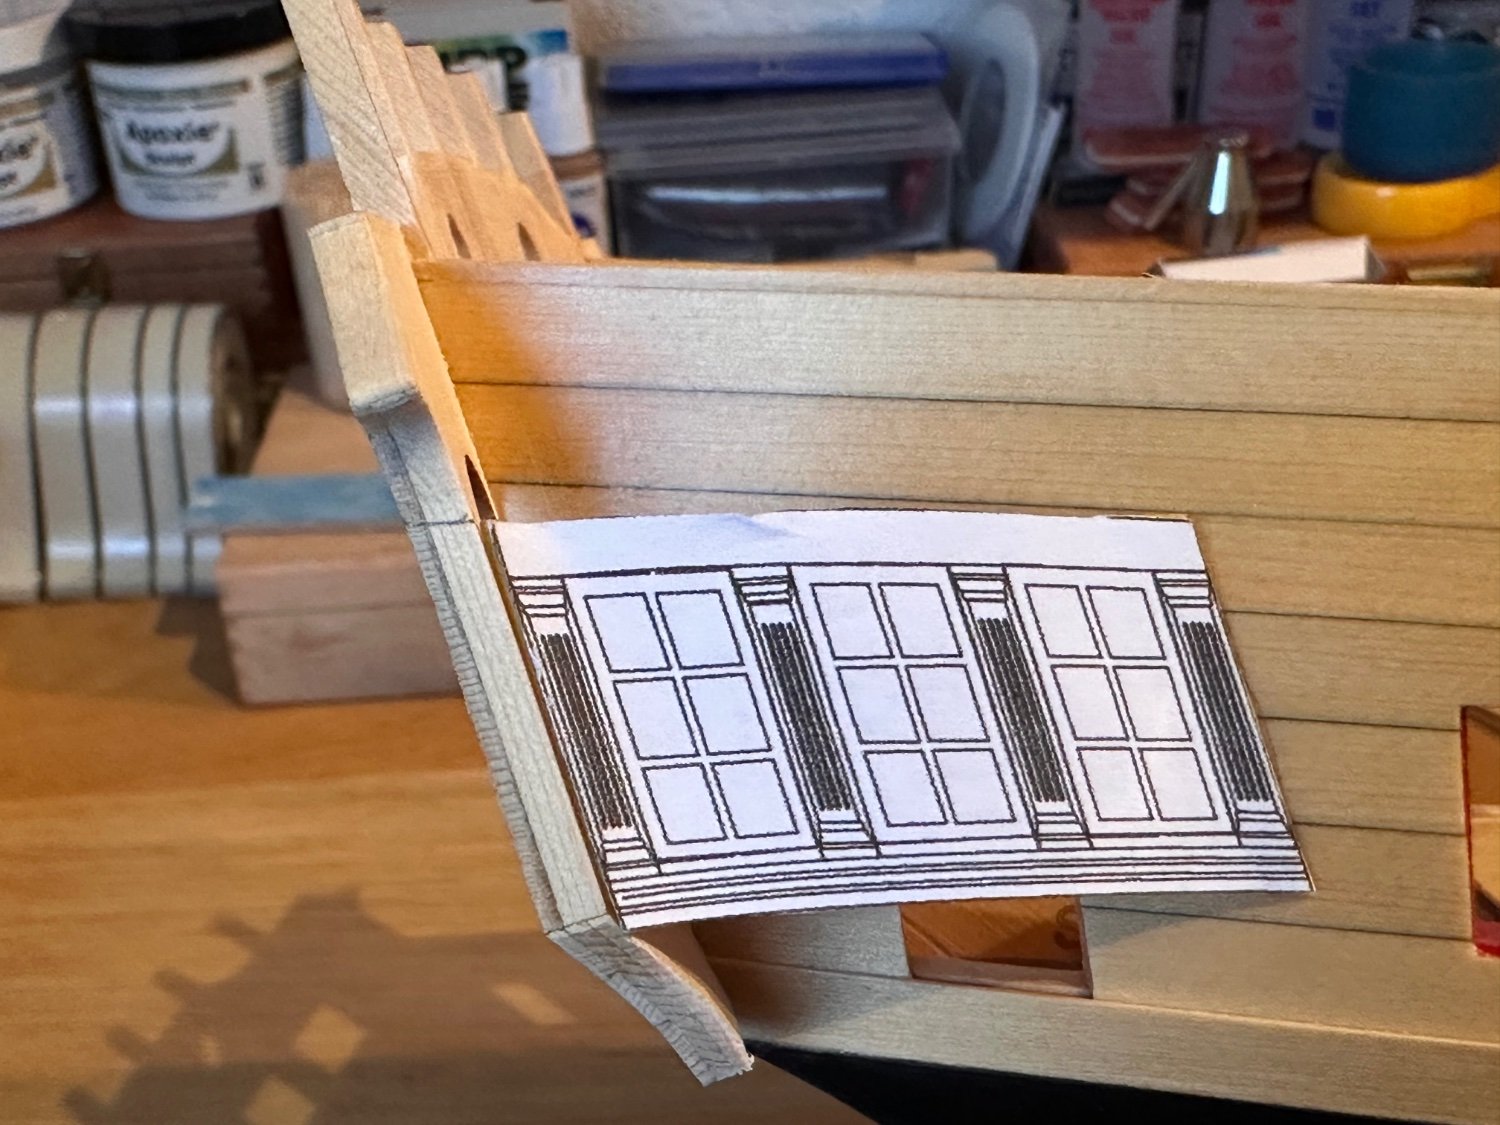
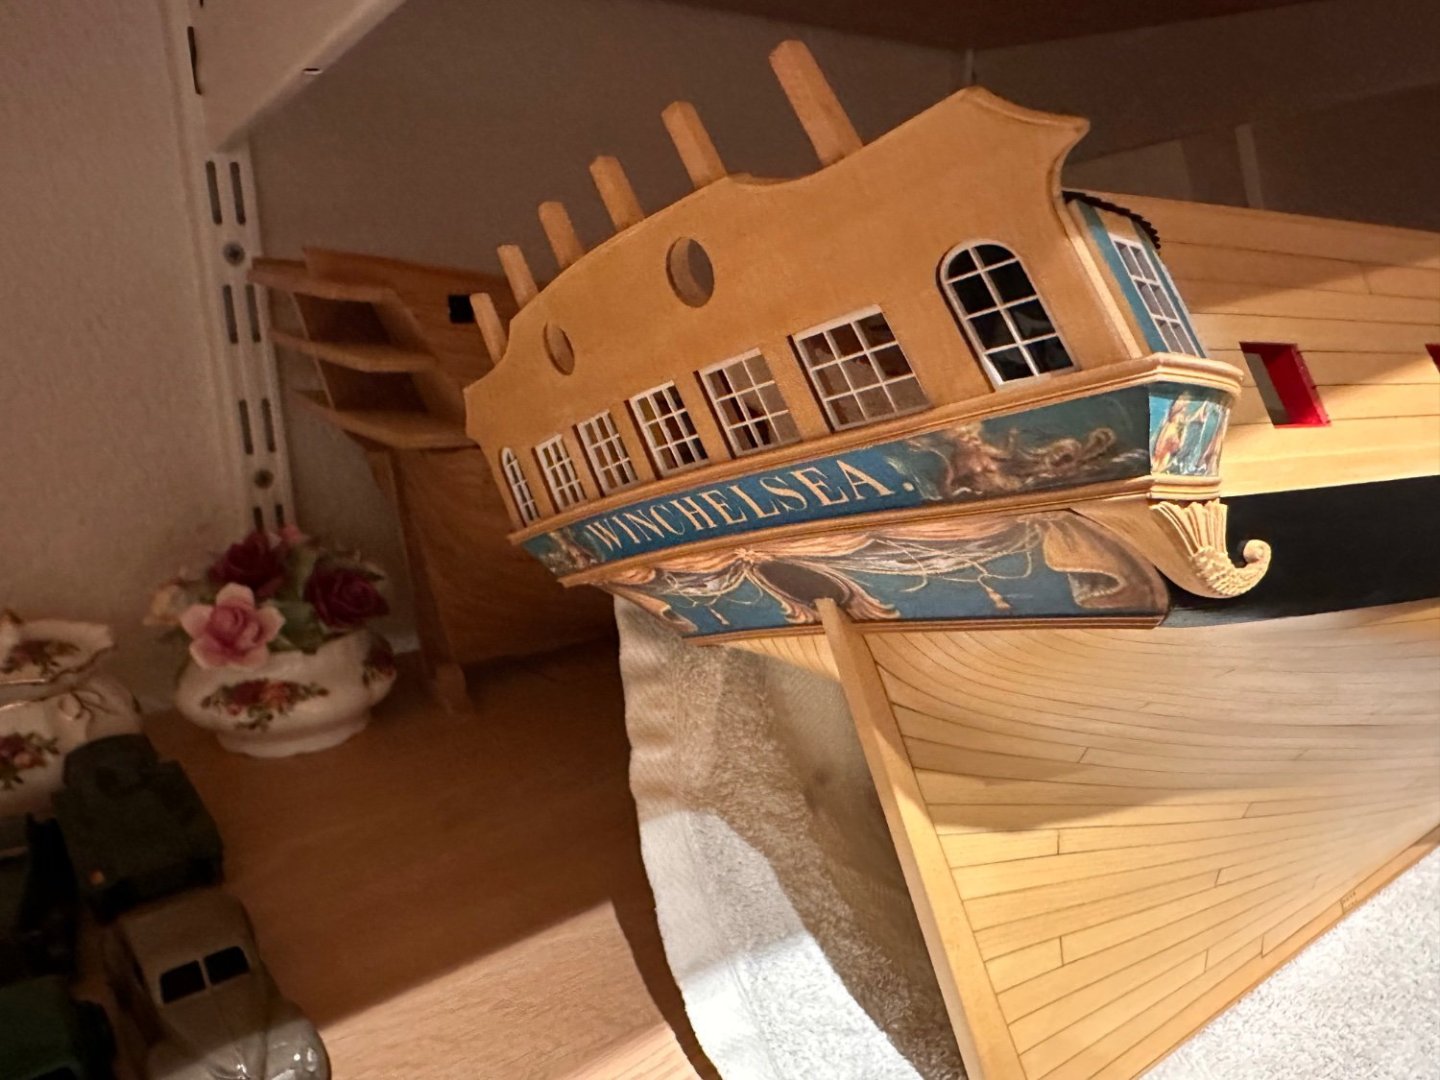
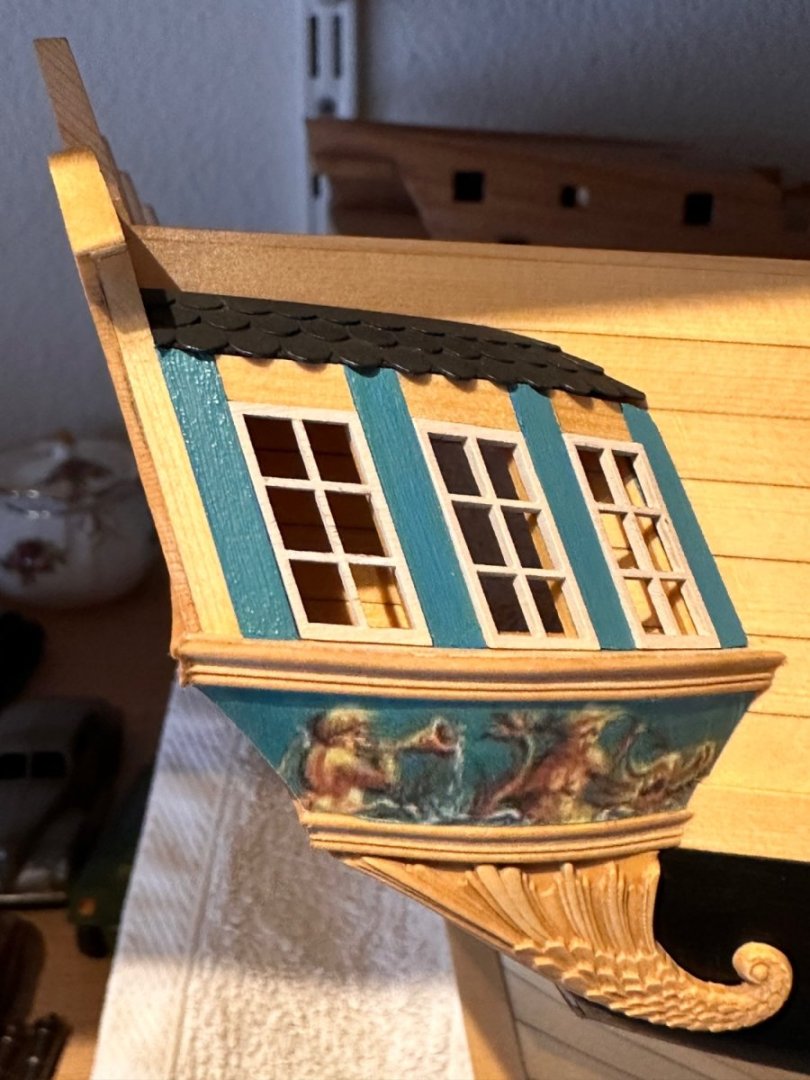
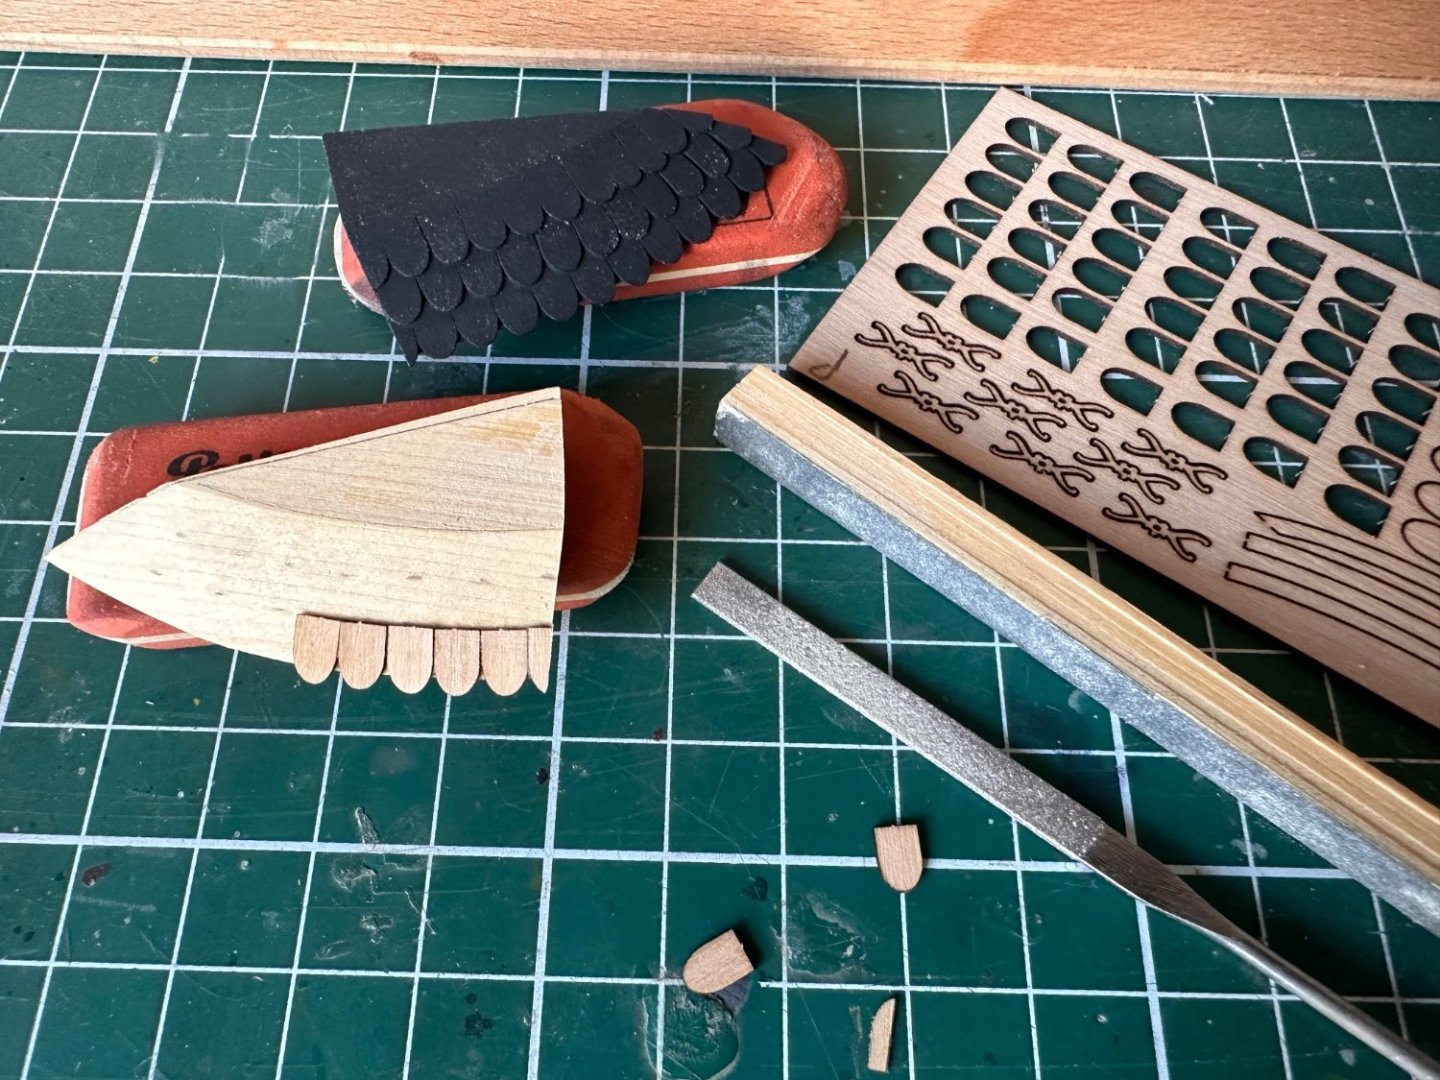
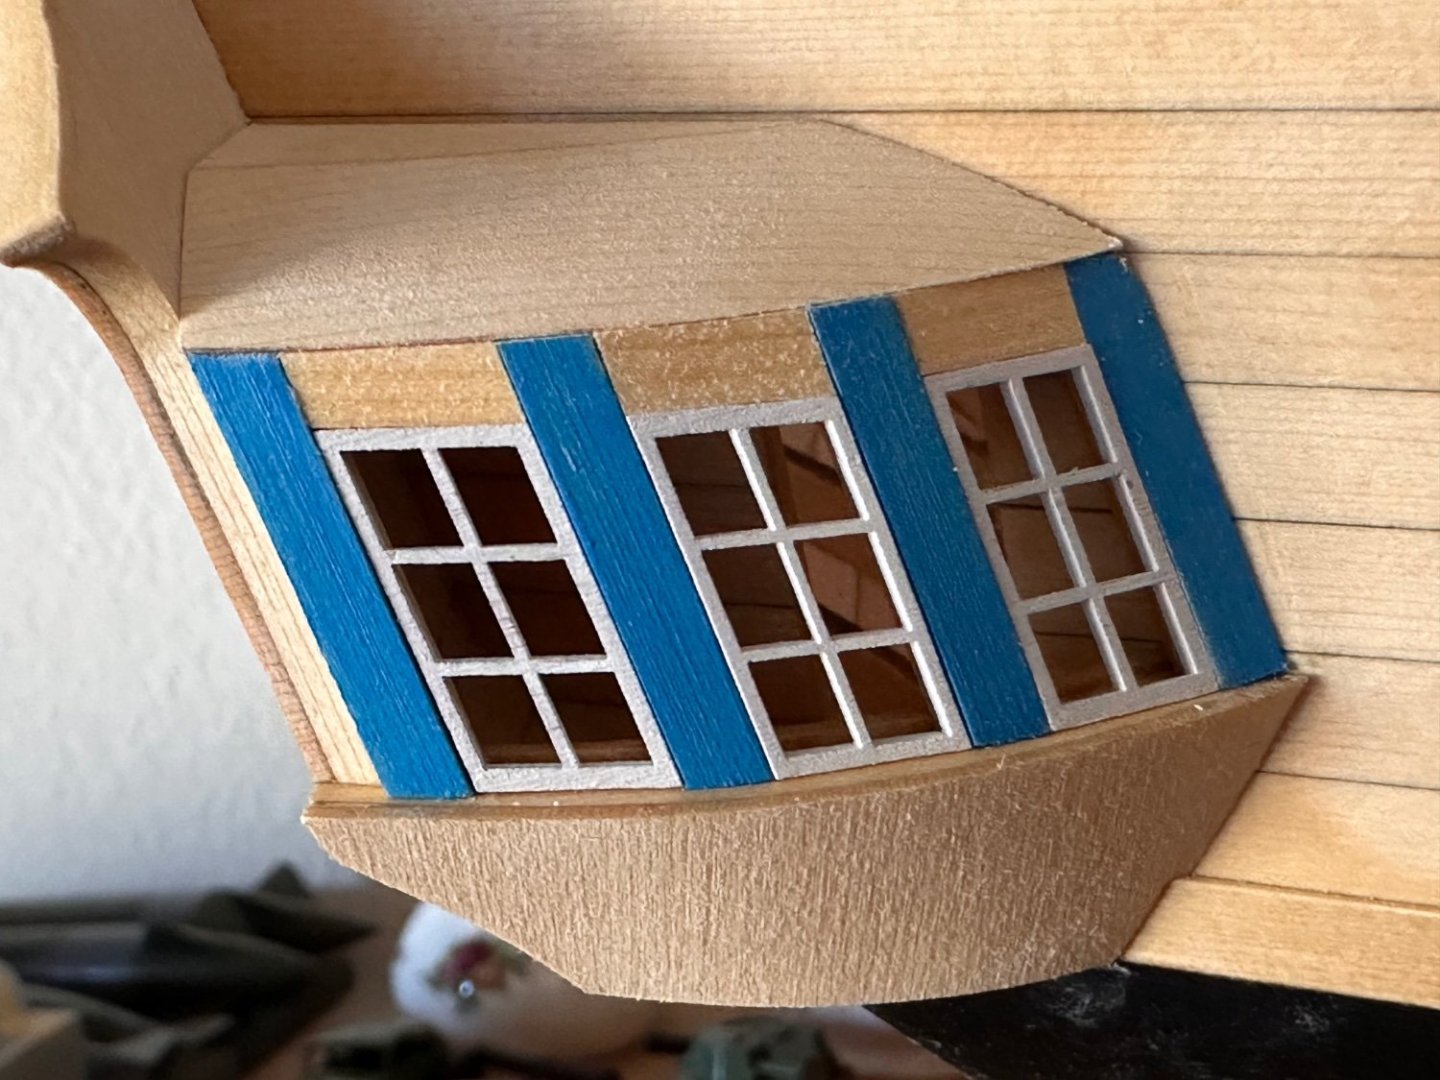
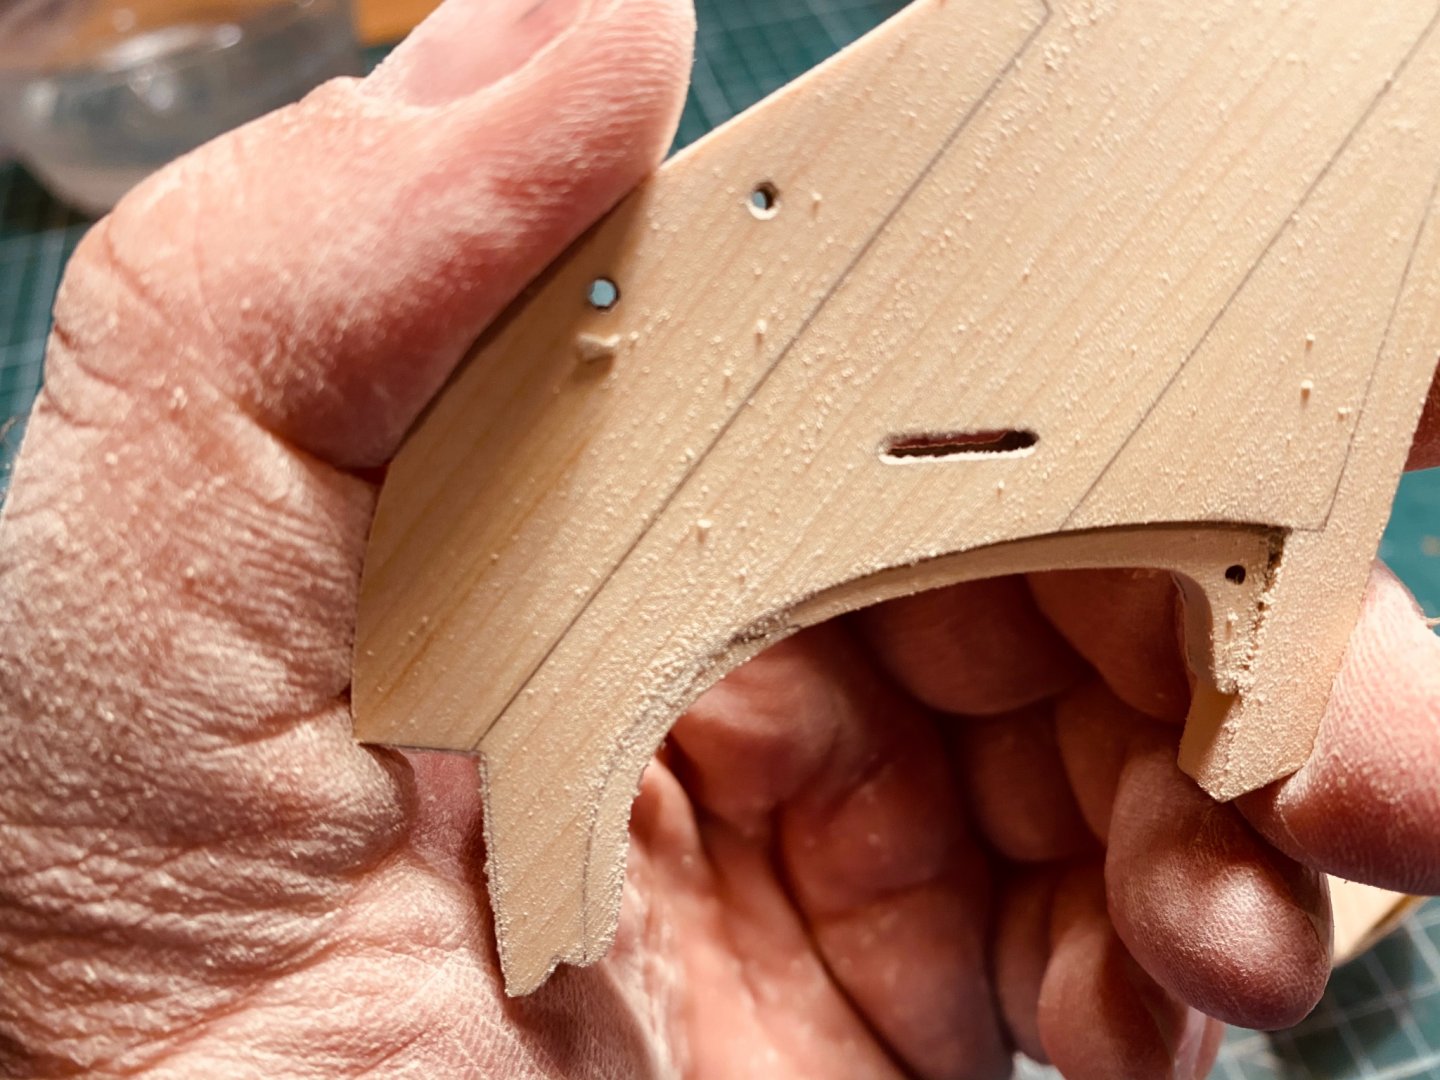
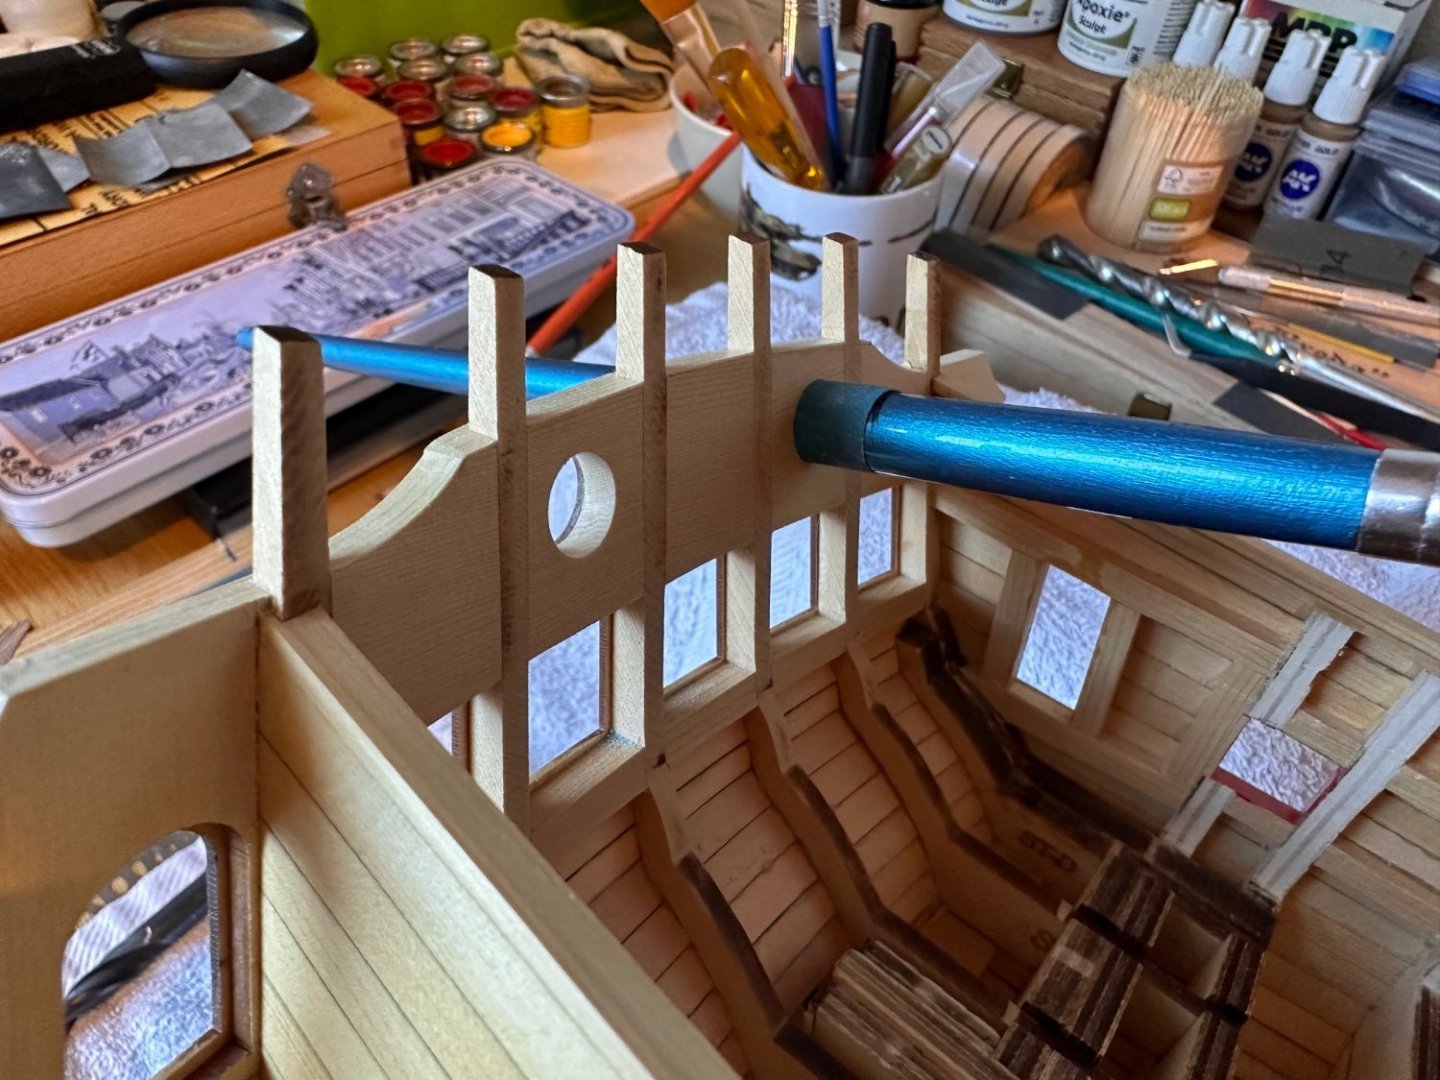
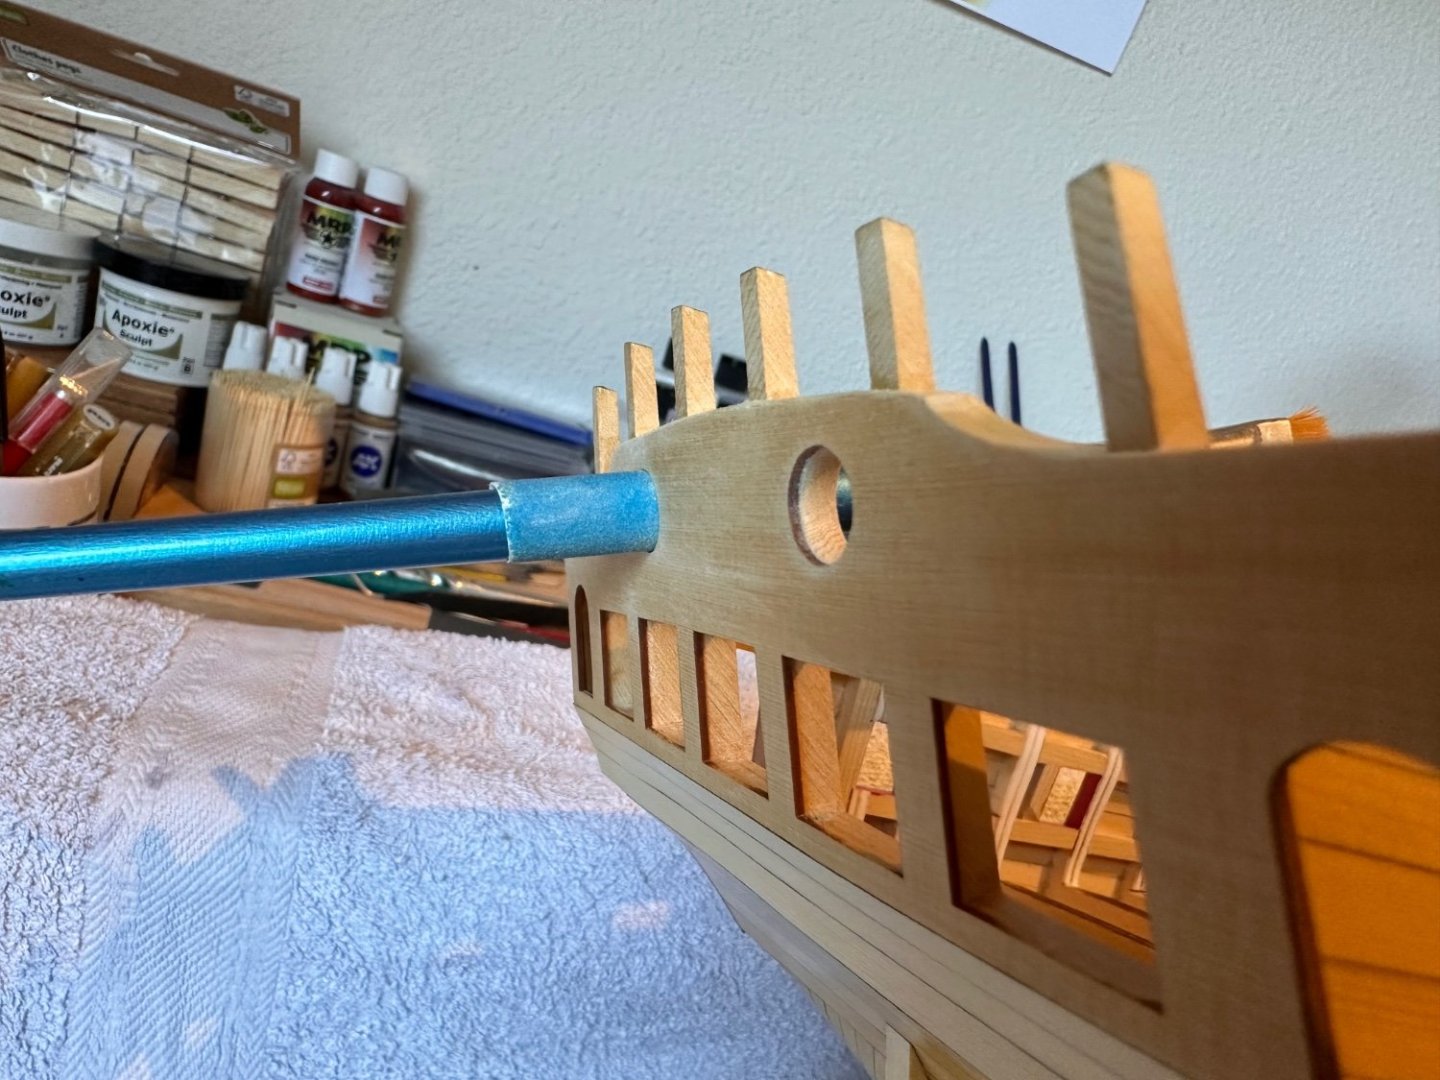
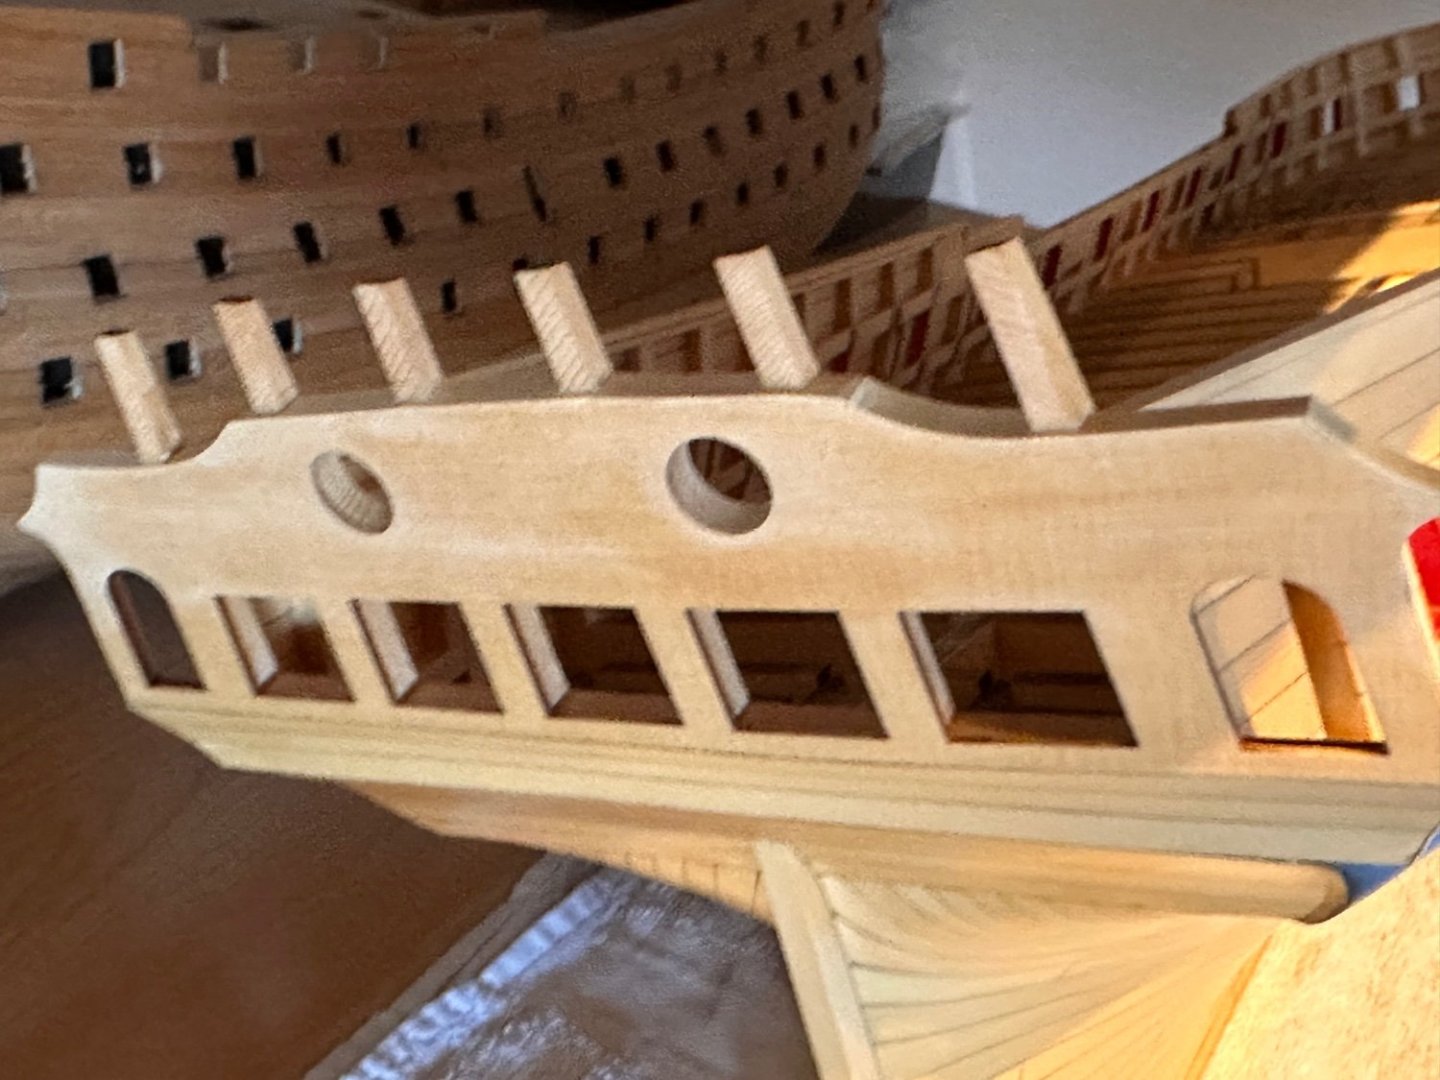
Good morning, A small update on my quarter galleries. I build the roof and made some of the fancy moldings. Scraping the boxwood strips into fancy moldings has now improved enough to be acceptable in my opinion, after hours of practicing on small scrap redundant strips of yellow cedar this weekend. Making the scraping tool was done with a 0.15mm diamond motor tool cutting/grinding disc. Scraping the boxwood strips appeared to much easier, more straight and precise however! Boxwood was chosen for a reason to make the fancy moldings I assume…(!) I changed the cerulean blue on vertical pilars adding more white and a tiny drop of yellow to match the printed artwork better. Here and there an tiny drop of glue still has to be removed, tiny strip of artwork cut away on edges and some careful fine sanding where the fancy moldings meet at the corners I see on my pictures now. Pictures are very unforgiving and a good help being critical on one’s own work. The roof and windows are not yet glued on, as per instructions. Frank.


-
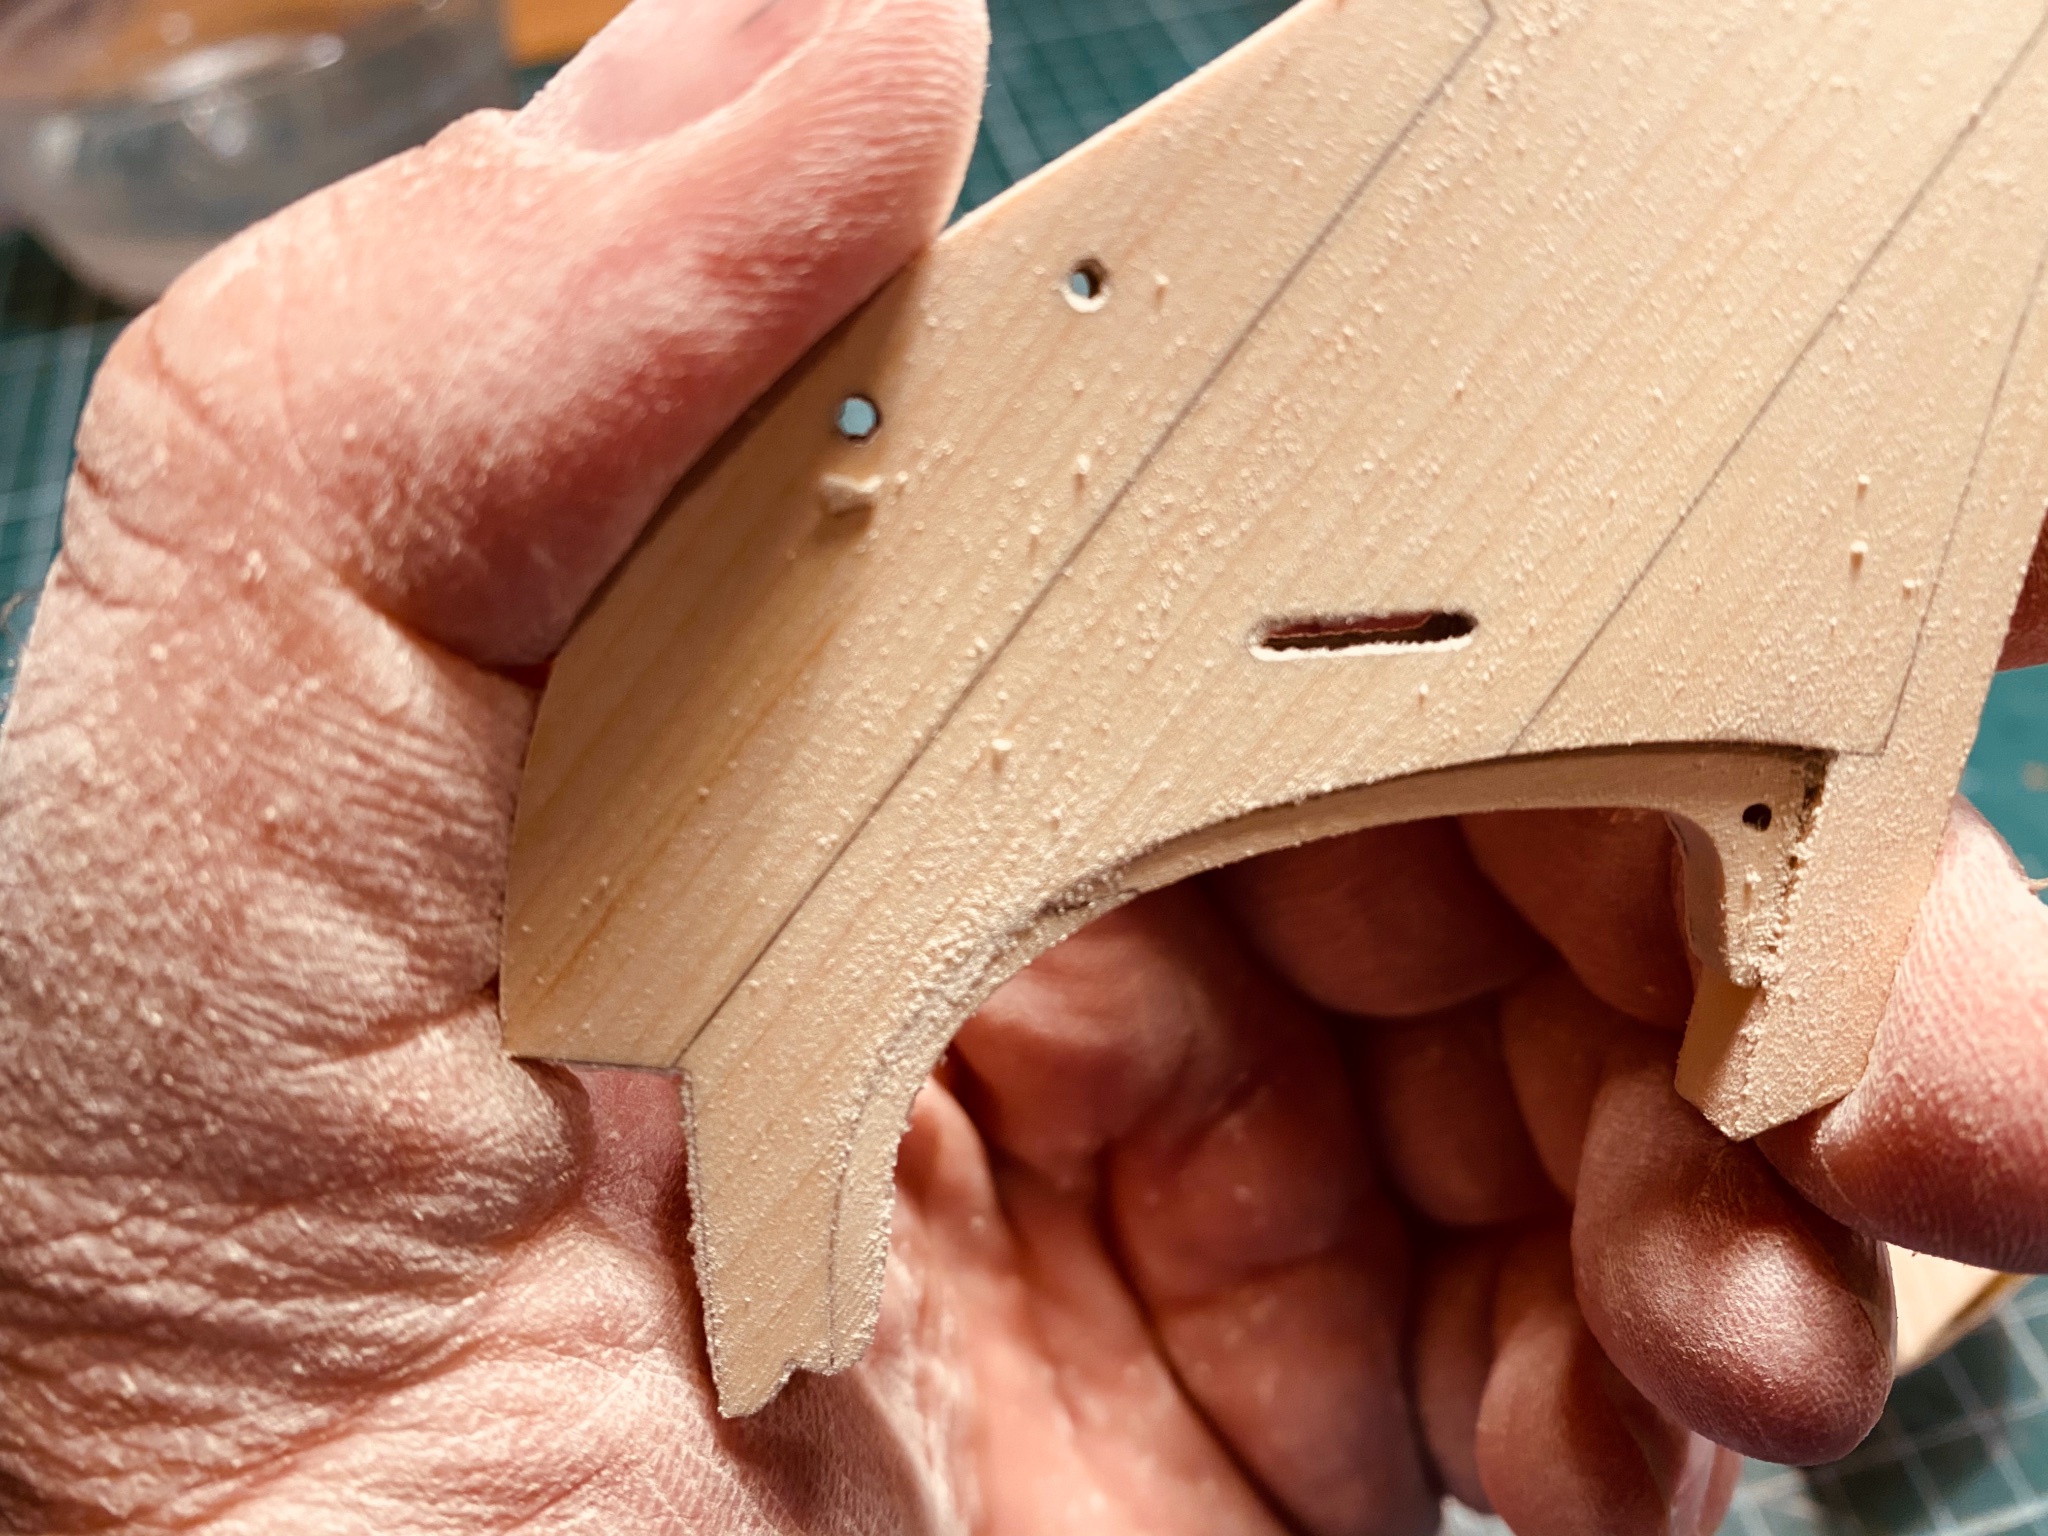
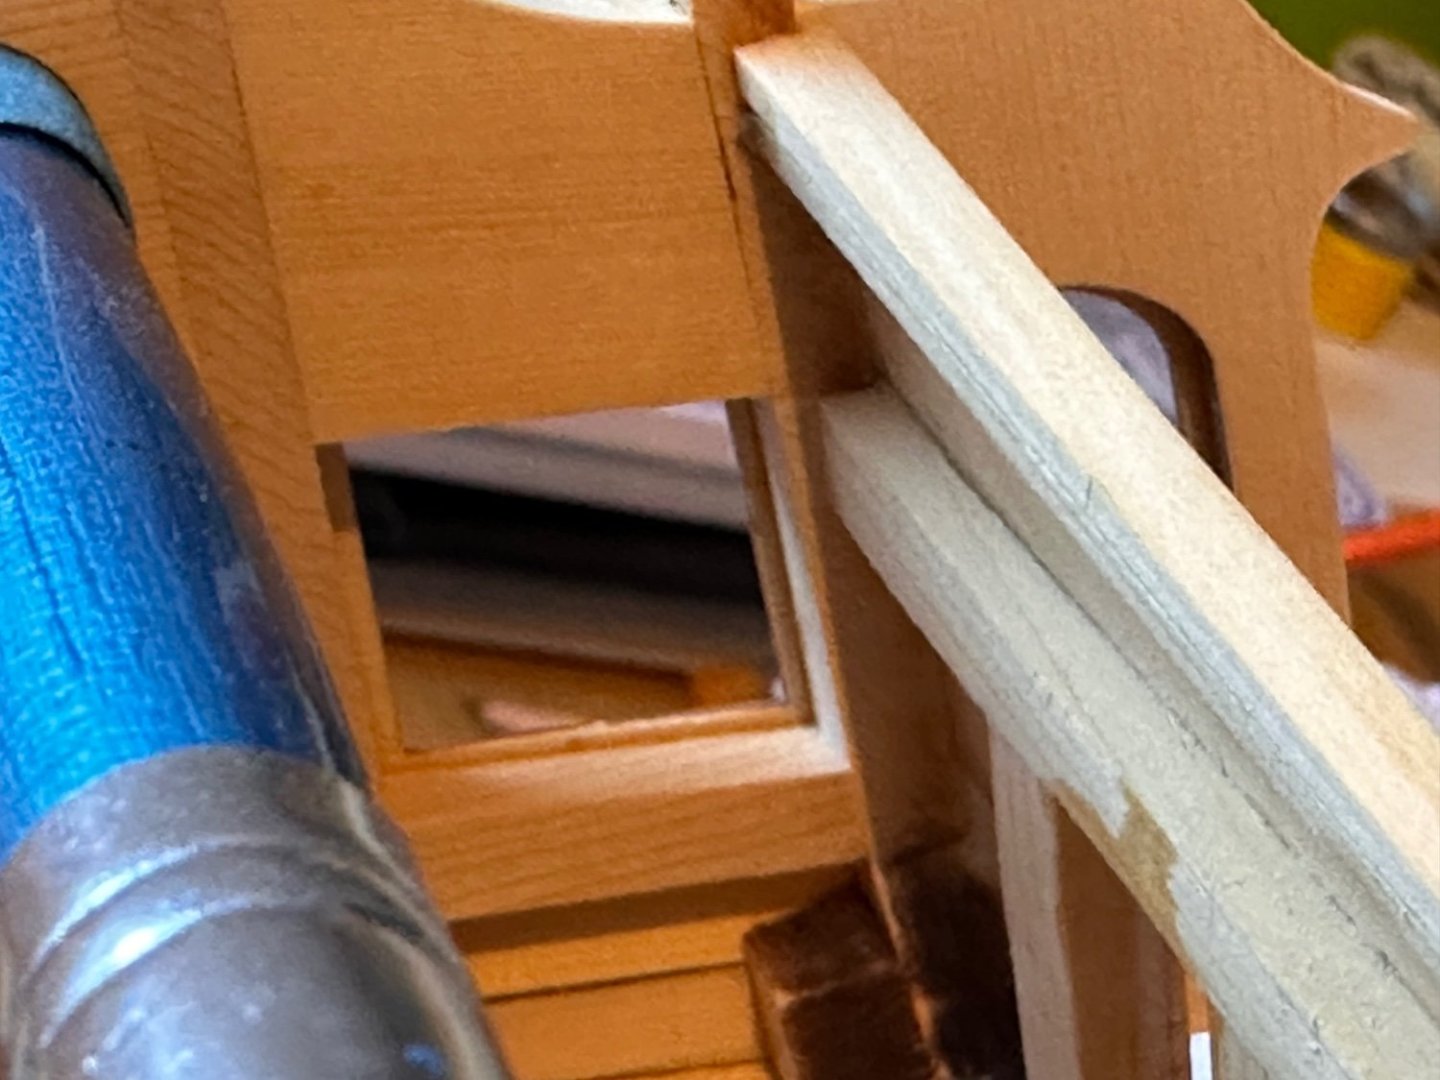
Hi Jim, Yes, they should be as thin as the other stern frames. Orherwise you’ll have trouble making an ‘edge’ to hold the outer two stern windows. Frank


-
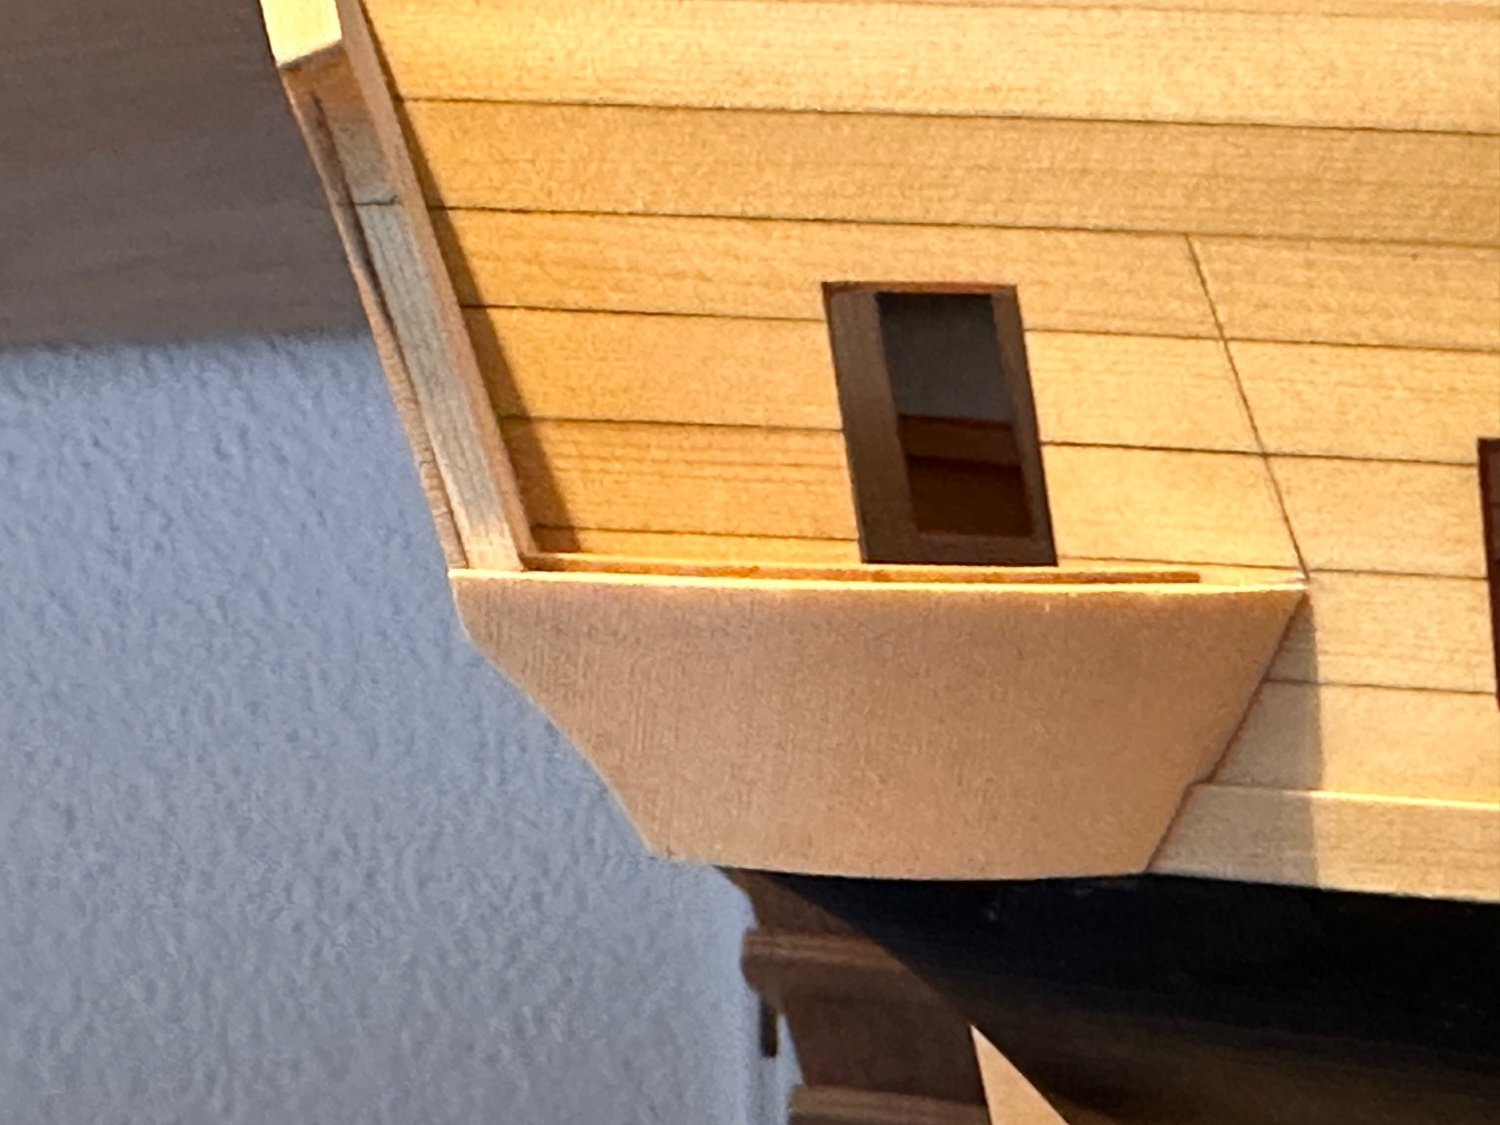
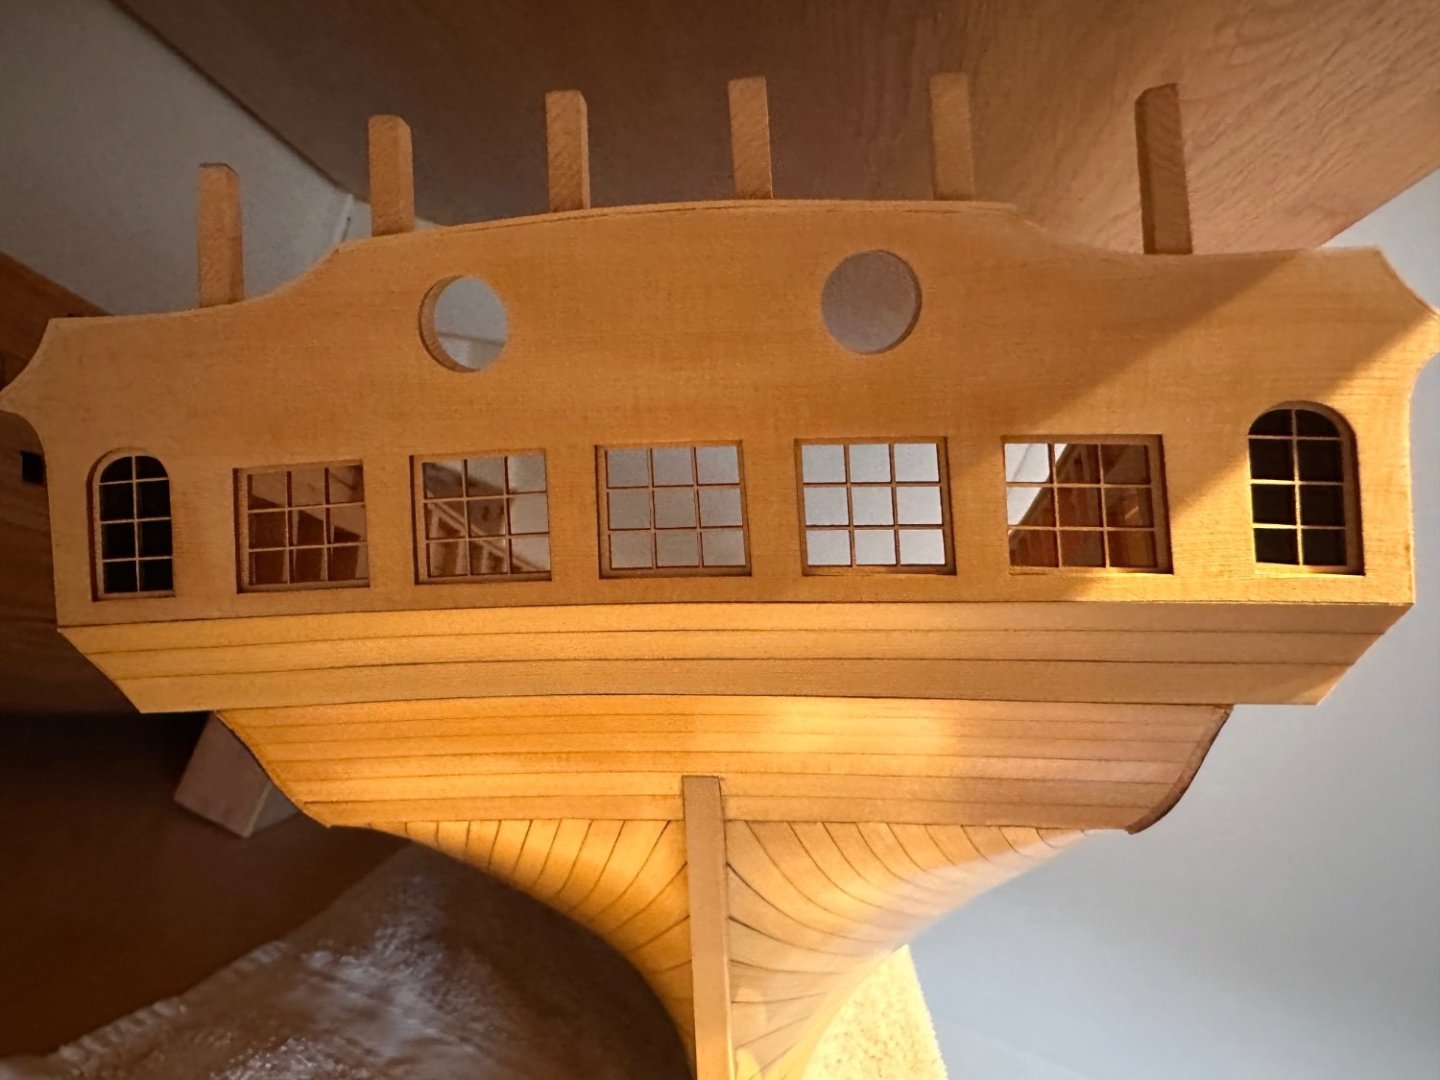
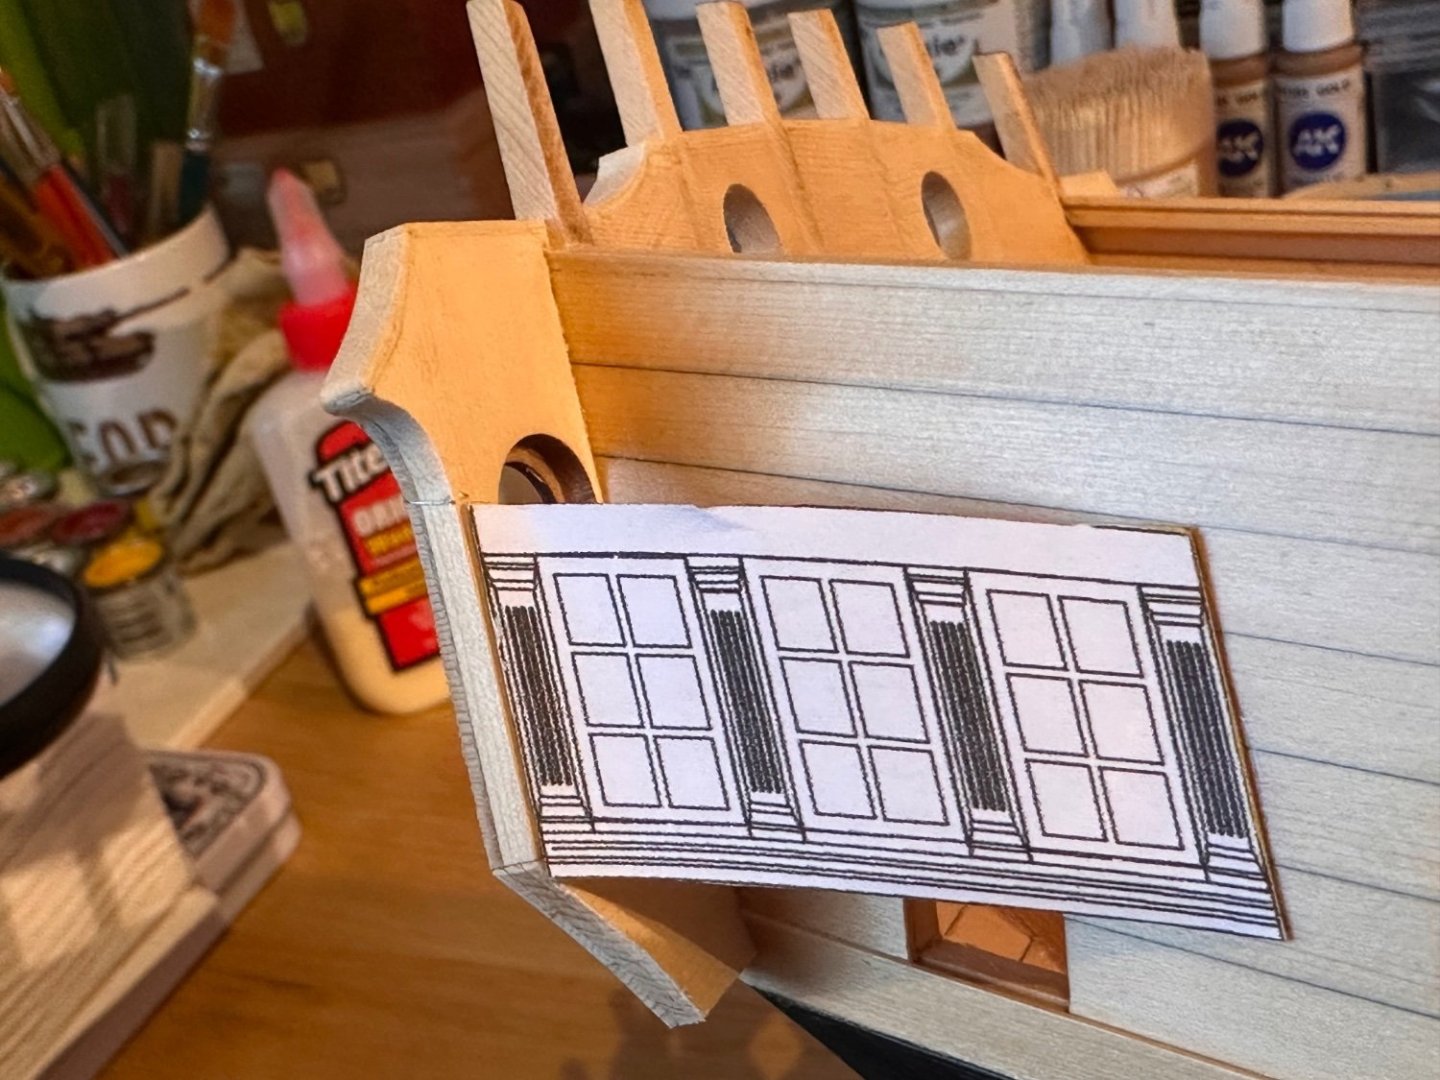
Hi Jim, Very nice progress! Don’t forget to sand down the outer sides of the two outer stern frames until the dotted lines in the drawings… Otherwise the two outer blinded toilet windows in the stern won’t fit. Frank.
-
Very nice progress Archie! Did you taper the upper and front stem parts gradually from front to end? It's not easy to see on your pictures for me, but it looks a bit as a rounded taper to my eye, specially on the third and last picture where they're glued on, tapered and in whipe-on-poly WOP. I think it should be taperd just a little more and in a straight line from front to back. I love your working space: very light and with fresh air! Much better than my dusty attic! Frank.
-
Long time…fit and measure the QG galleries… Meanwhile practicing scraping…which is at less than a beginner level still…any tutorials on that? I’m also waiting on an order of 0.2mm grinder disks, hopefully they will help making beter profiles on my scrapers… Frank


-
Thanks Fred, JJ and the likes! Frank.
-
You’re welcome sitting down anytime Fred!
-
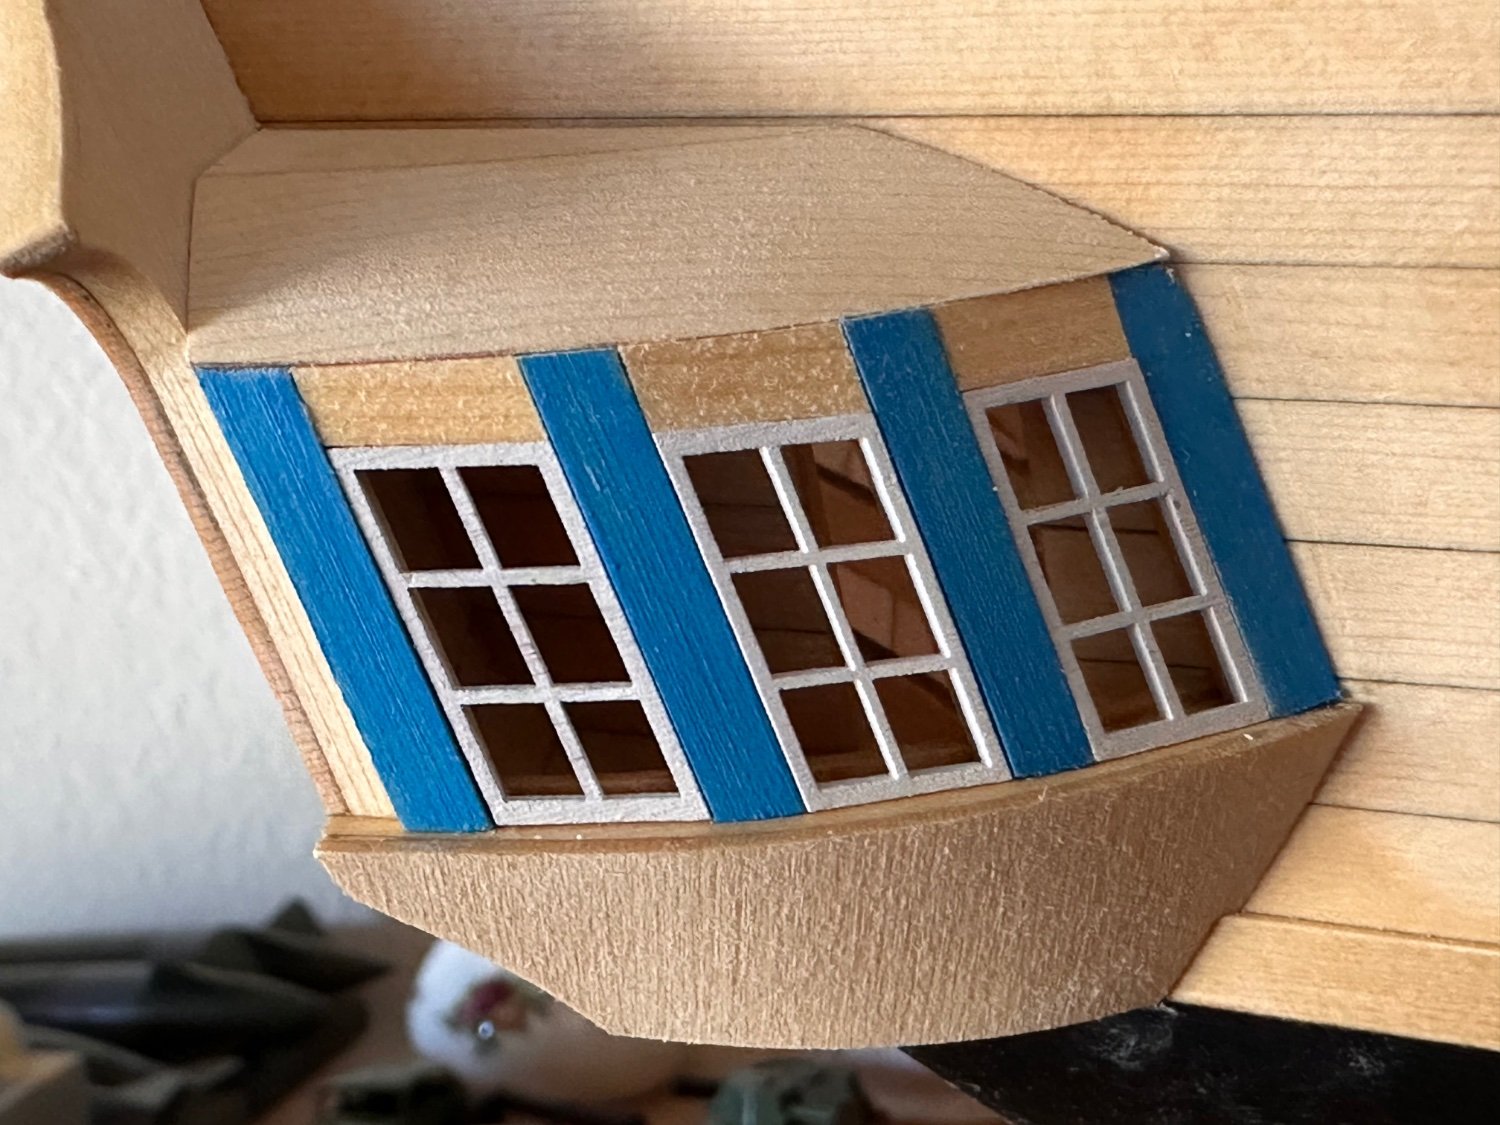
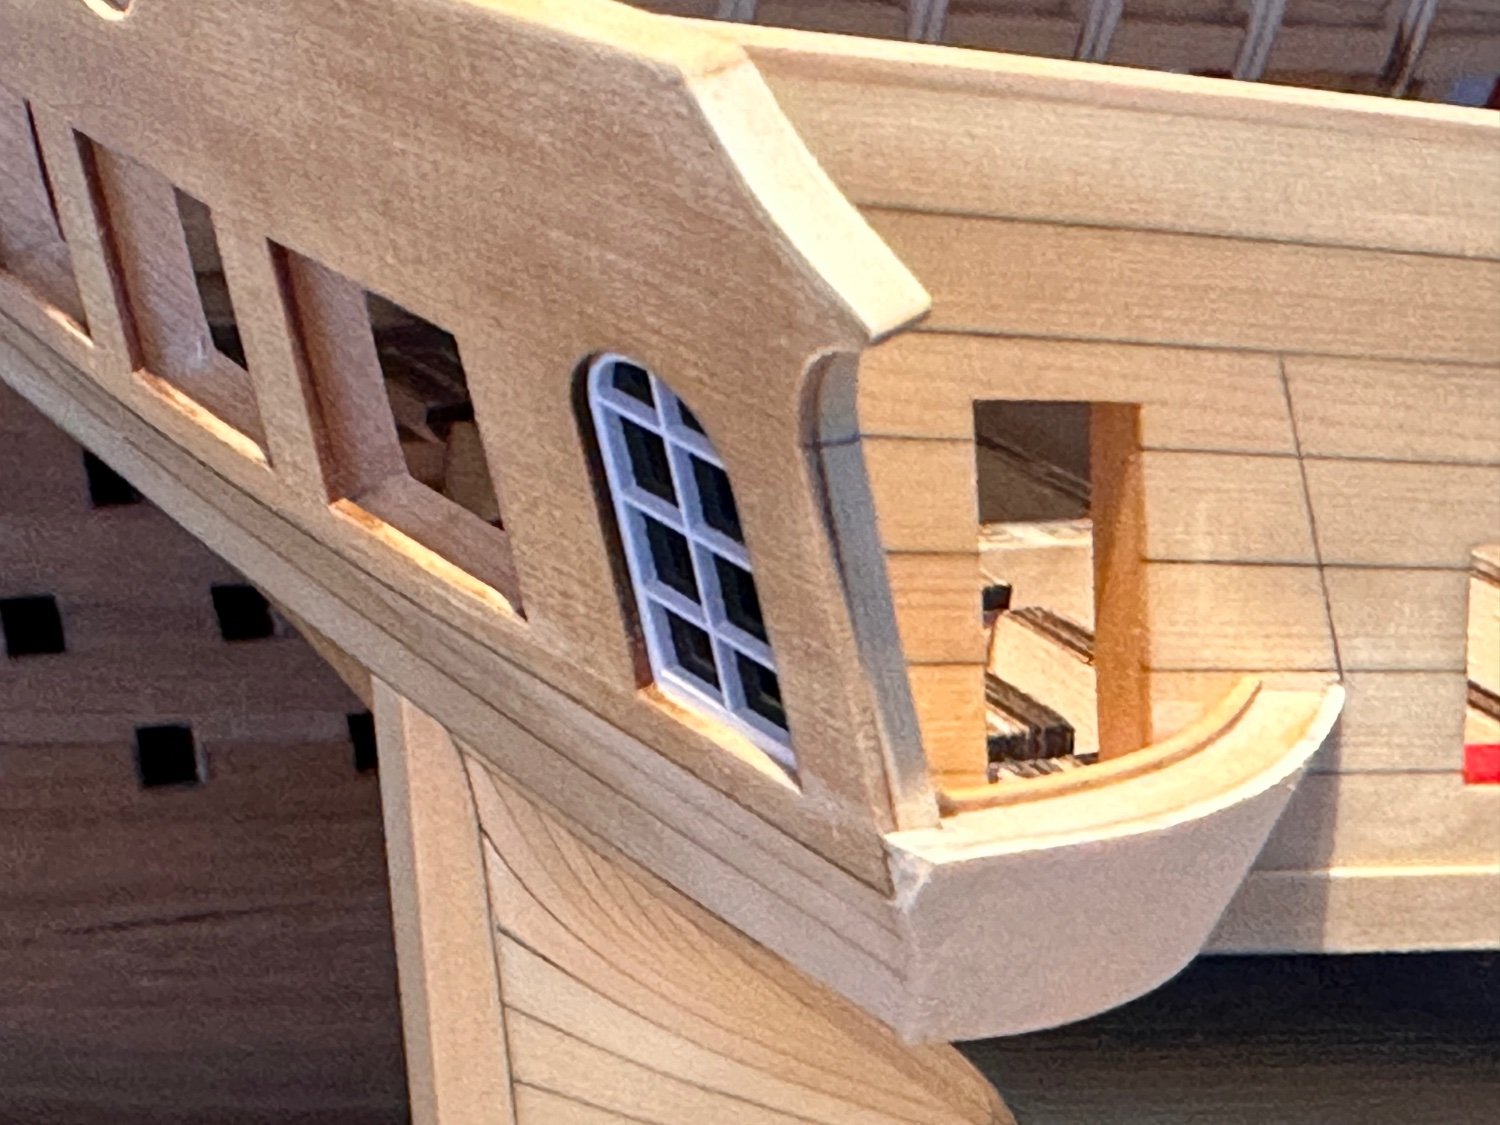
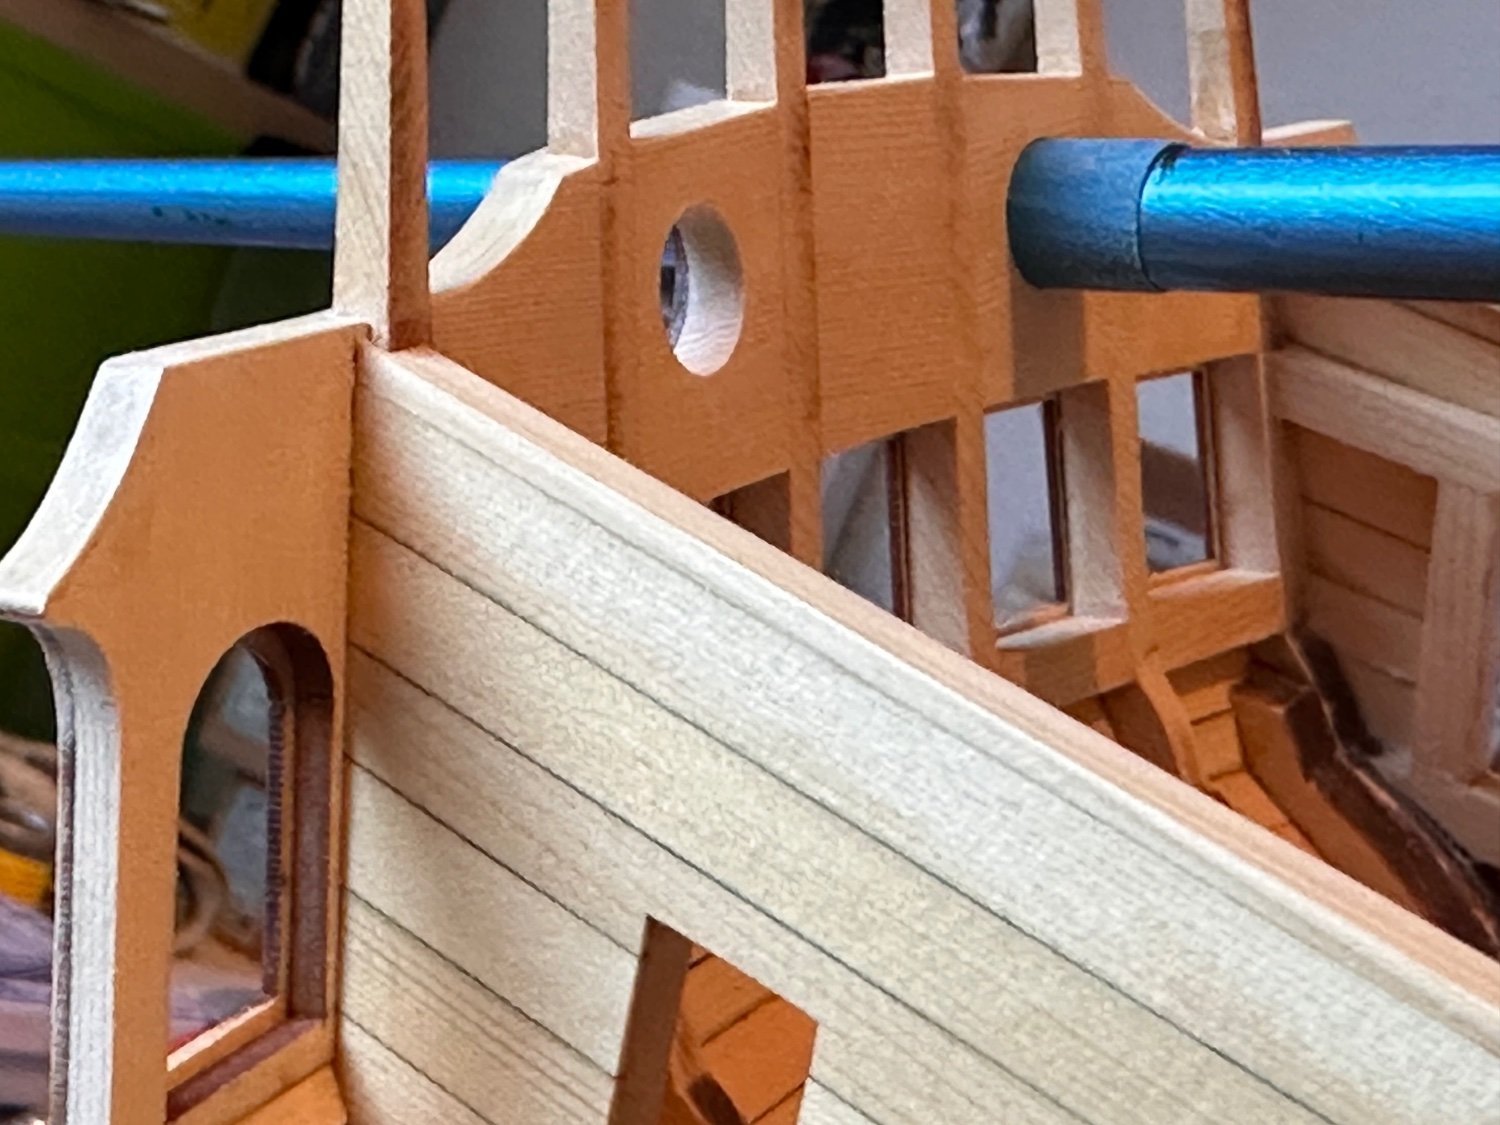
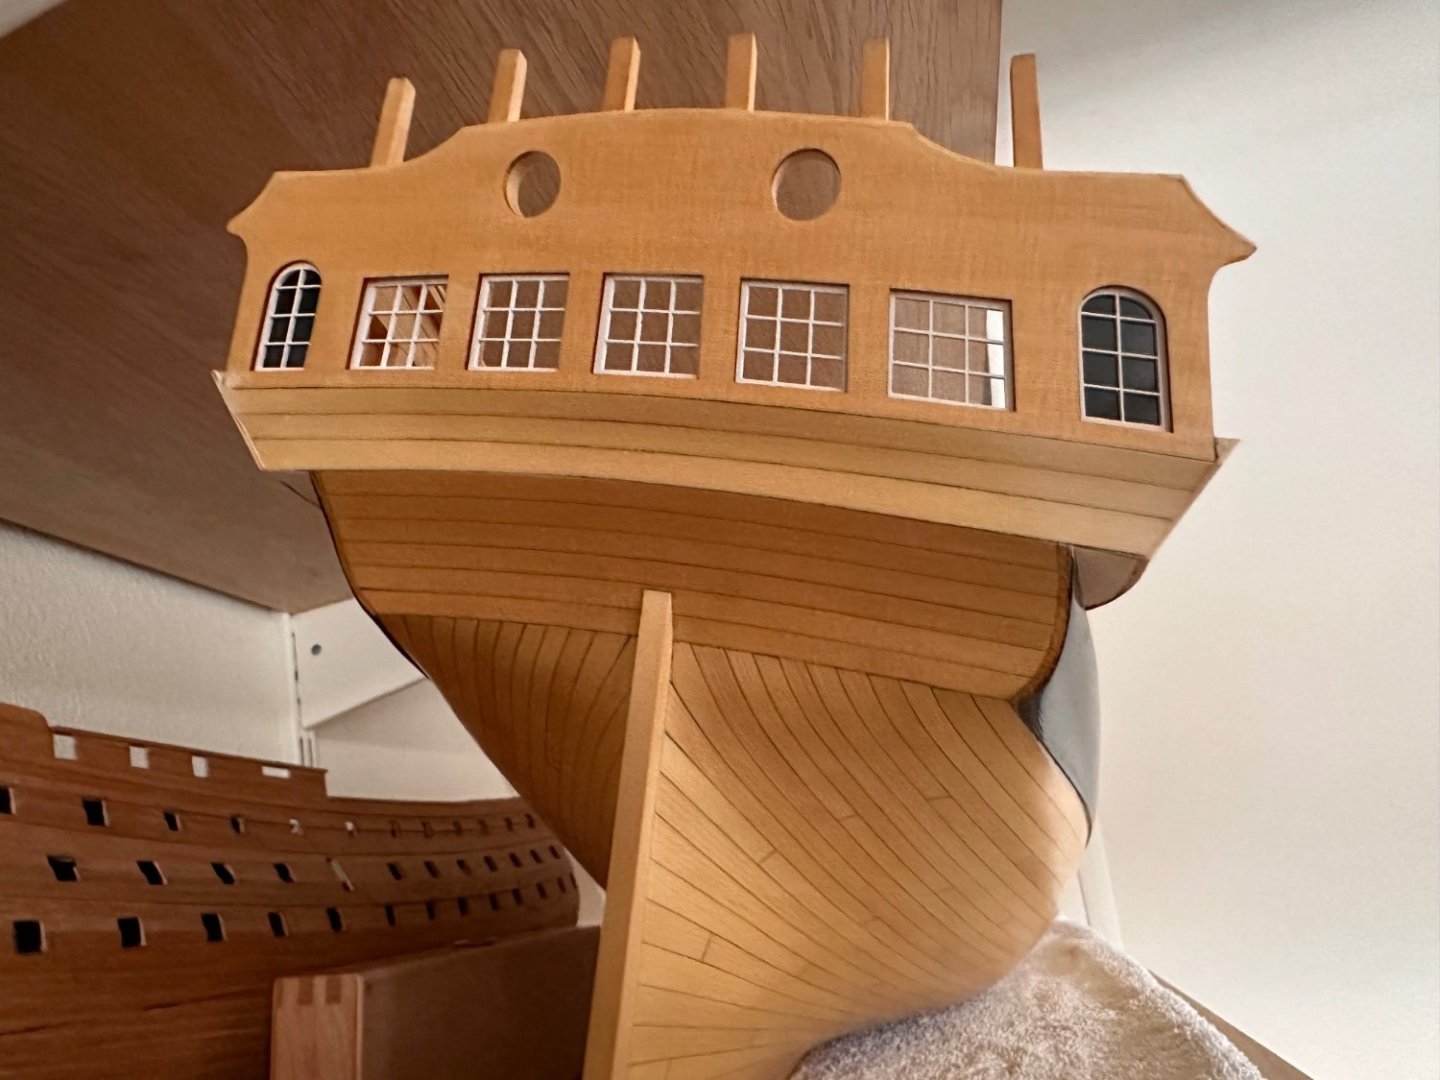
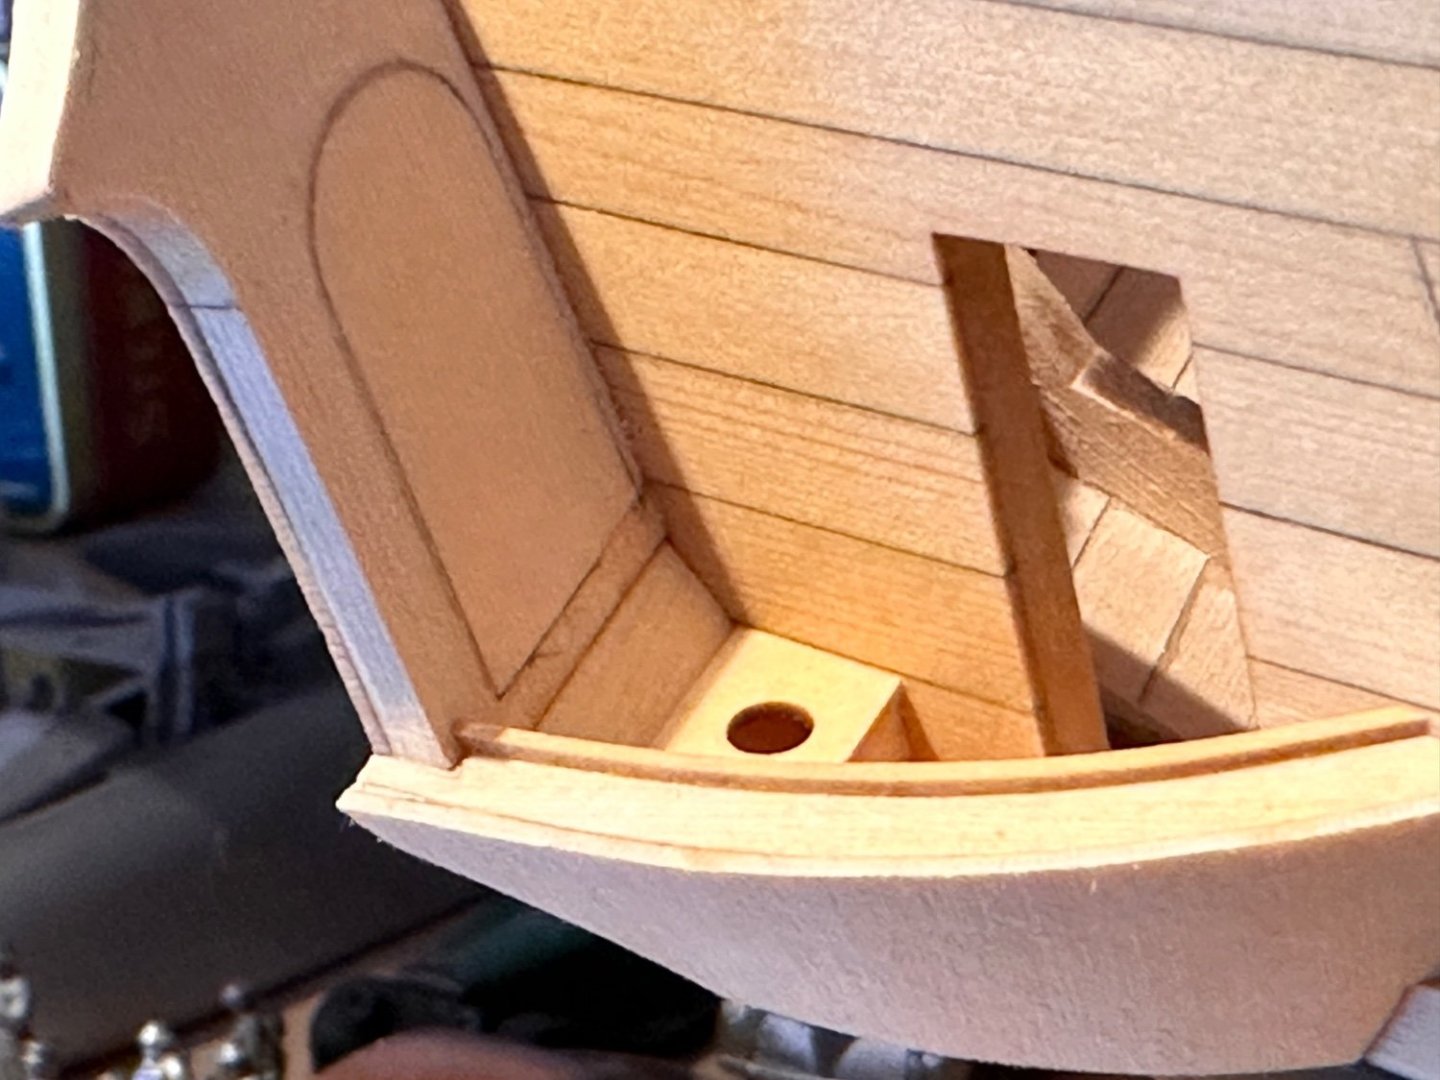
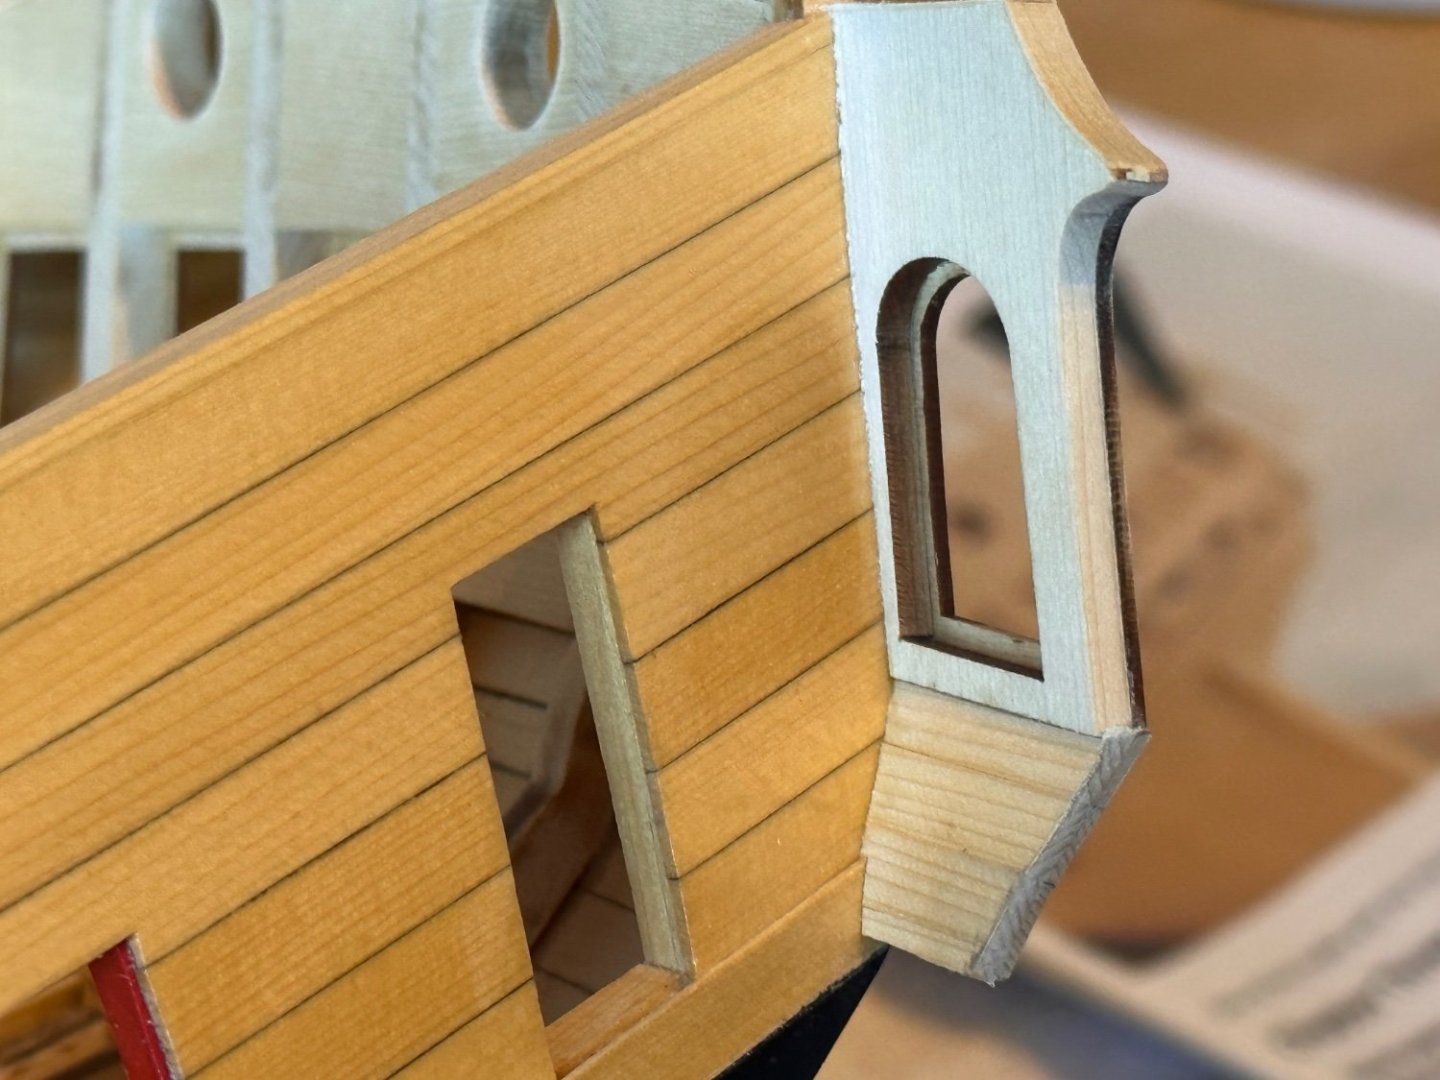
Thanks Glenn and Archie, This is the status today, toilet visits for officers possible from now on. Frank.


-
Thanks Don, Glenn and ofcourse the likes. Always very much appreciated! I hope I got that QG angle right. I read and saw there are multiple QG side windows with slightly diffferent angles so just a little variance should not be a problem… Frank.
-
Good morning, Just a small update to check with you all if my QG template placement and angle is correct. I also sanded down the planking topping a little and added another top layer of 1/64 on top of the transom as suggested by Chuck. Frank.


-
Welcome to the group Archie! That's a very, very great start, the nicest building board for 'HMS Winchelsea' and the most intimidating wooden hammer I've seen thusfar! Bon chance! Frank.
-
Thanks Chuck, I’ll do both. Frank.
-
*************** Chapter 3 *************** Hi all, just a small update of my start of chapter three. Please ring the alarm if you see any anomalies that should be corrected. My planking ends rather high at the top of the transom, compared to e.g. Rustyj’s. Even little higher than Chuck’s. I hope this will not become a problem… Frank.


-
Very consistent progress and beautiful work Gary! Success with your move: keep calm and model on! Frank.
- 389 replies
-
- 2
-
-
- winchelsea
- Syren Ship Model Company
- (and 1 more)
-
Sehr schön Matthias! Very beautiful! Congratulations with such a beautiful result of your long hard and precise and skillfull work! Frank.