
FrankWouts
-
Posts
541 -
Joined
-
Last visited
Content Type
Profiles
Forums
Gallery
Events
Everything posted by FrankWouts
-
 Thanks Edward, Don and Fred and the likes! Almost finished now, I'll post new pictures soon. Frank.
 -
Thanks all, and the likes! I hope to be posting final planking pictures soon…😅🥃
-
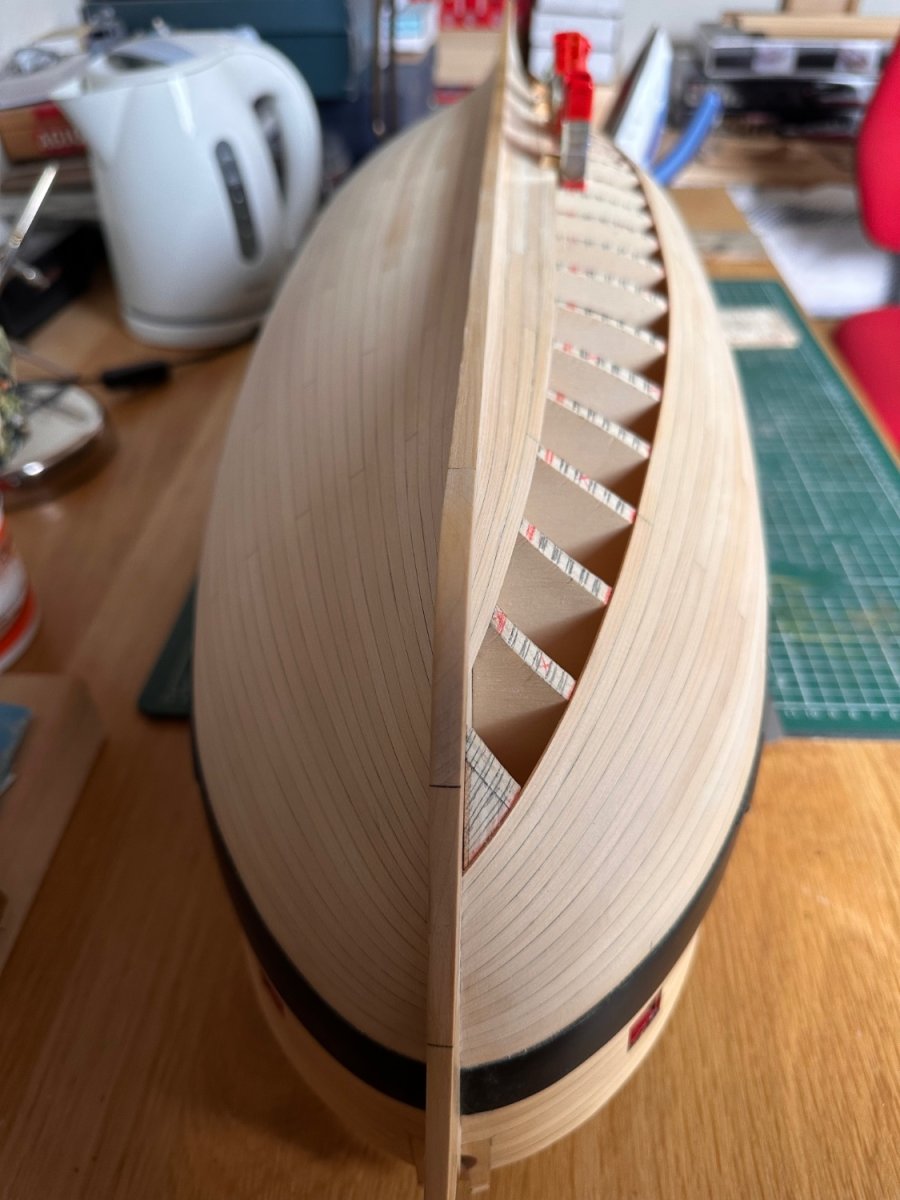
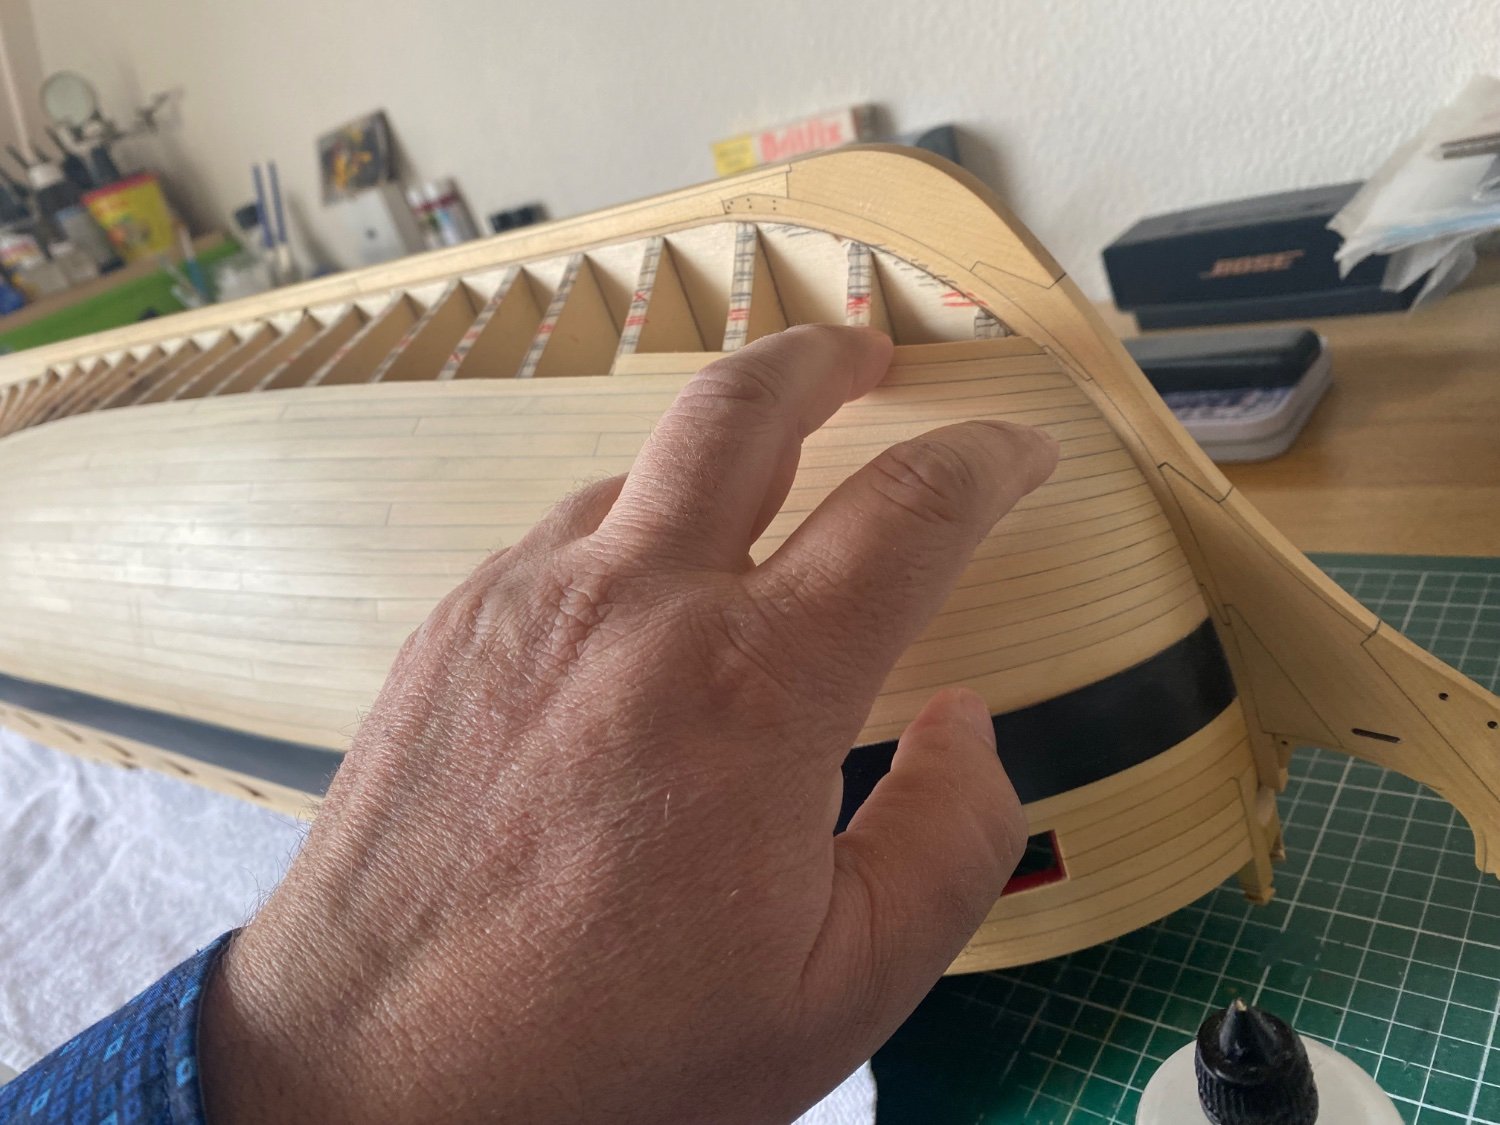
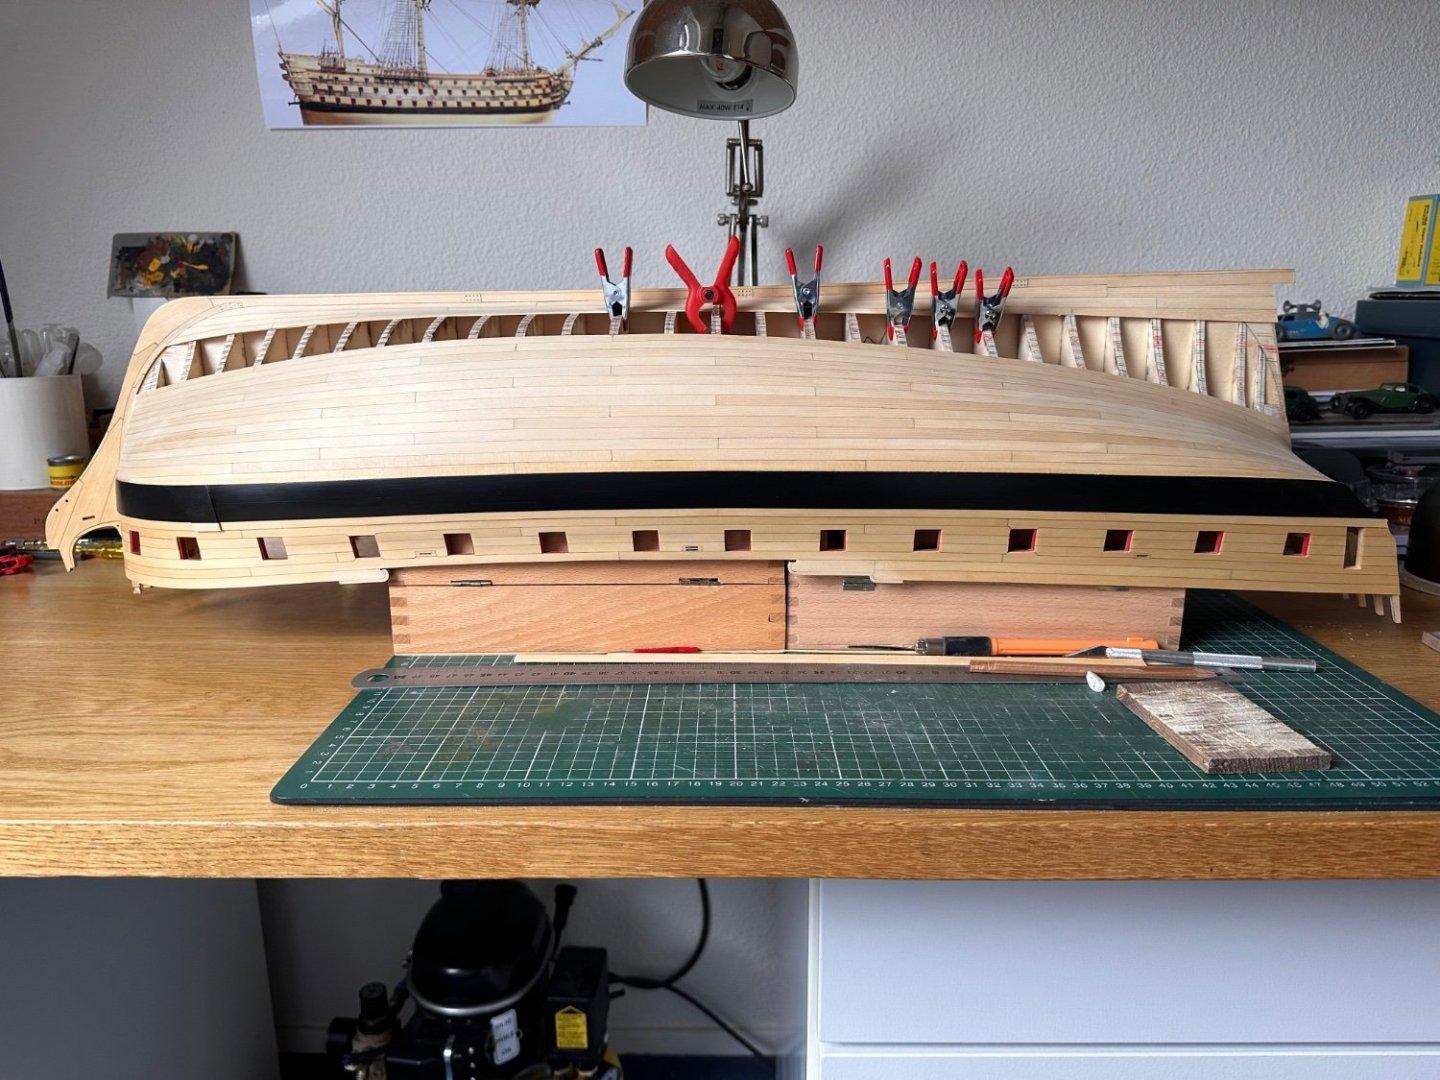
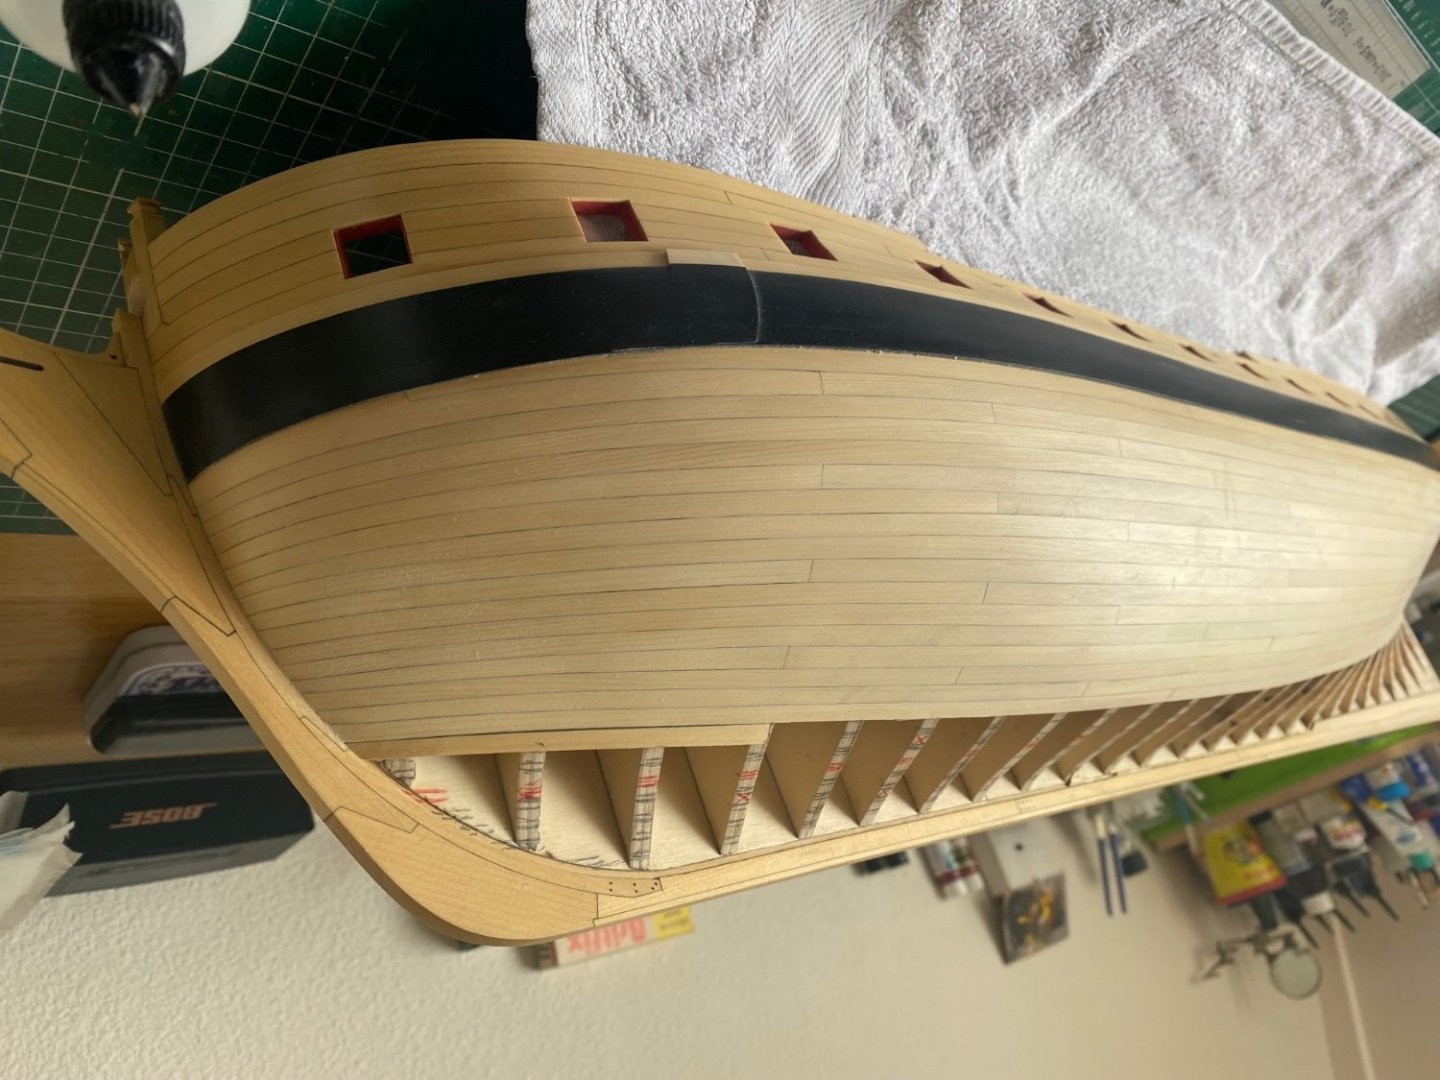
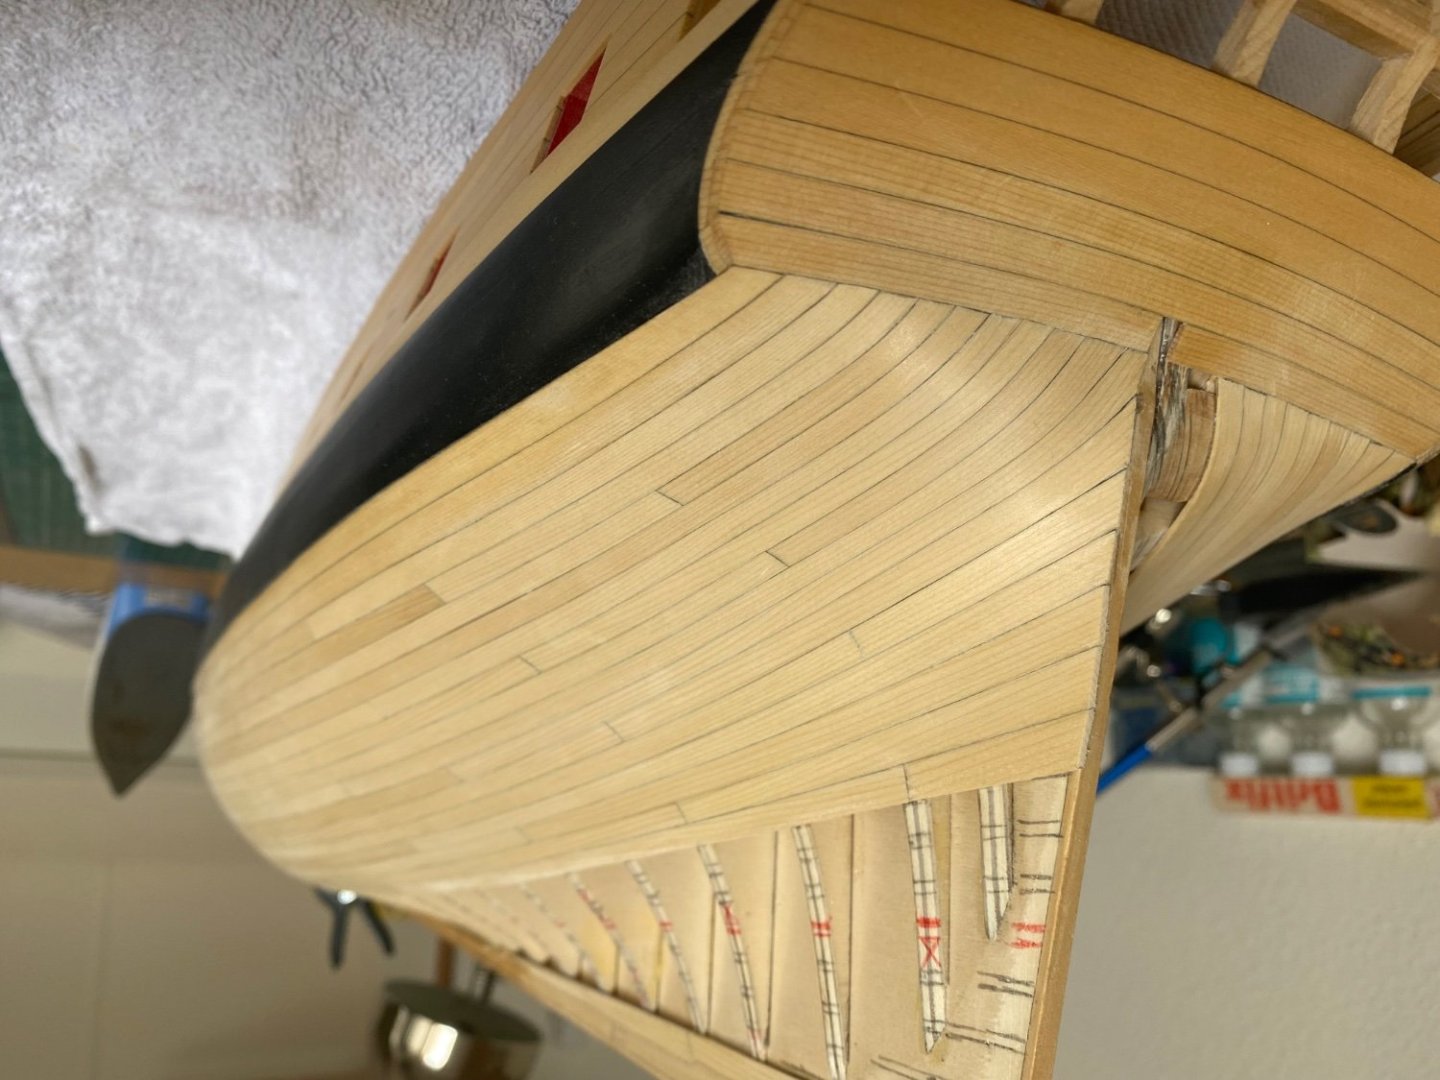
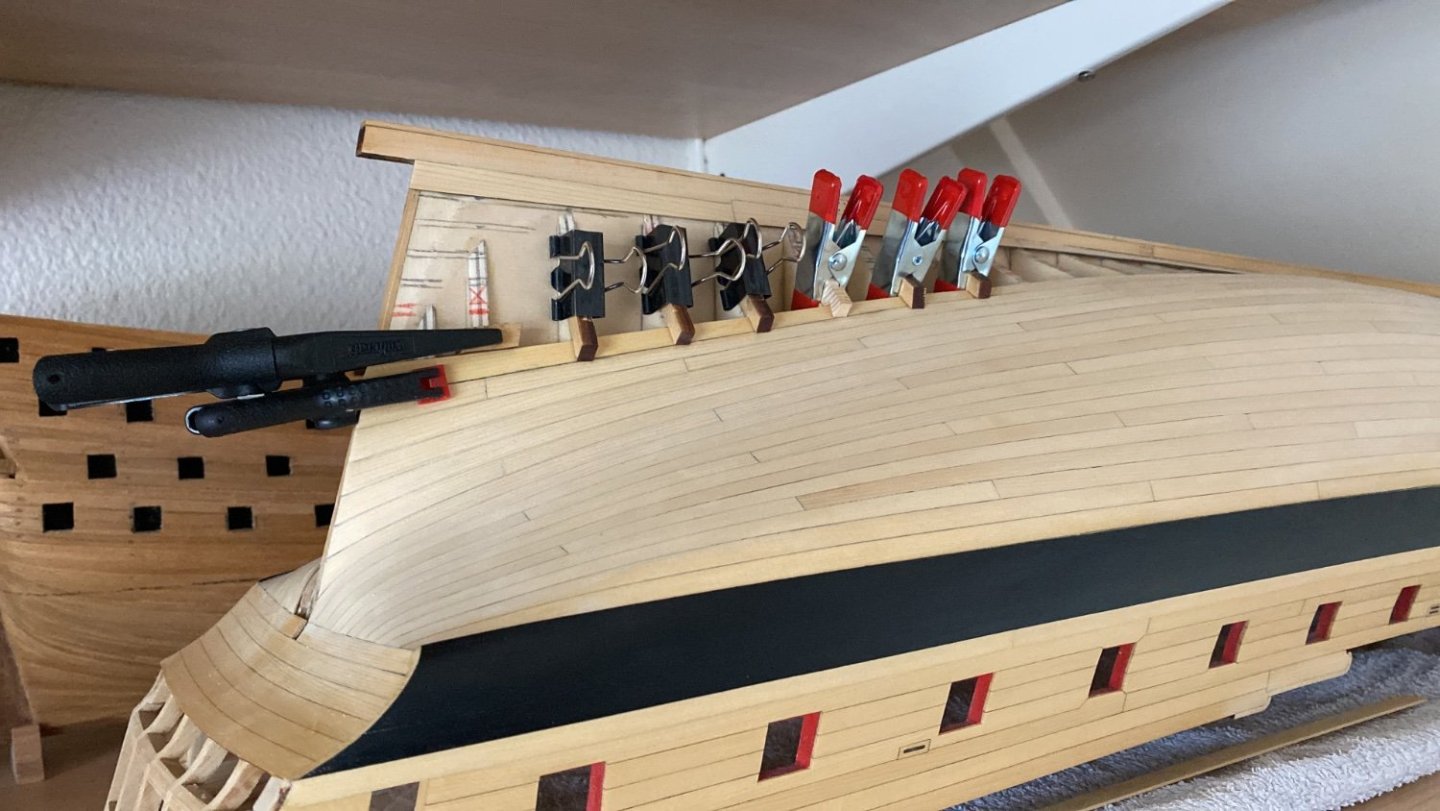
Hi all, just a small update to let you all know I’m also still at it! Though I don’t have much free building time, I’m almost there with planking the hull. Just another week or week or two of fanatic but precise planking before the whisky plank… Frank.

-
Beautiful and ambitious project JJ! I'll be following with great interest. It will be hard to choose what will be my next after I finished Winchelsea.... Frank.
-
Great, beautiful work and another very fine example to follow and being inspired...again... Frank.
-
That's looking really good and beautiful Glenn! Well done! Frank.
- 840 replies
-
- 2
-

-
- winchelsea
- Syren Ship Model Company
- (and 1 more)
-
Beautiful and gorgious work to admire JJ, scrolling back again and again to admire the warm tones, clean lines and crisp details! Frank.
-
Absolutely beautiful and skilled work Matthias! Frank.
-
Nice solutions Steve! Frank.
-
Looking good Tom, no need to start a new one, please keep going on this one and updating us! Frank.
-
Welcome Bill! Looking foward to following your build as well! Frank.
-
Hi Jim, That's a very nice and clean build, simply beautiful and well executed! I'll follow your build for sure! Frank.
-
Congratulations Rusty, outstanding work, build quality and very skilled work of the warmest coloured Winchelsea in the whole group build! Frank.
-
Pitching, and slippery...but there were lots of ropes to hold on to...luckily...😉 Frank.
- 642 replies
-
- 1
-
-
- winchelsea
- Syren Ship Model Company
- (and 1 more)
-
Thanks Steve, Bruce, Scrubby, James and the likes! Just take your time and remove a plank that’s not fully to your standard or liking. It may take an extra hour, but there will be many years you looking at it… Frank.
-
Very nice indeed Rusty! It will be hard to accept any other quality, detail and ease of building when building other models from kits in the future... Frank
- 642 replies
-
- 1
-
-
- winchelsea
- Syren Ship Model Company
- (and 1 more)
-
Thanks Jeff! I had already lots of cups of tea in between... Frank
-
Thanks Peter & Glenn!
-
Thanks Chuck, I’m almost there, but still not in a hurry…as always… 😄👍🏻
-
Hello all, Just a quick update to let you know I’m still on it…planking I mean… Frank


-
Beautiful bollard timbers Steve, wow! Frank.
-
Beautifully done Matt, again! I hope your Admiral gets well soon. Frank.
-
And no concrete and insulation under the deck planking in your Winnie I assume... LOL.... Frank.
-
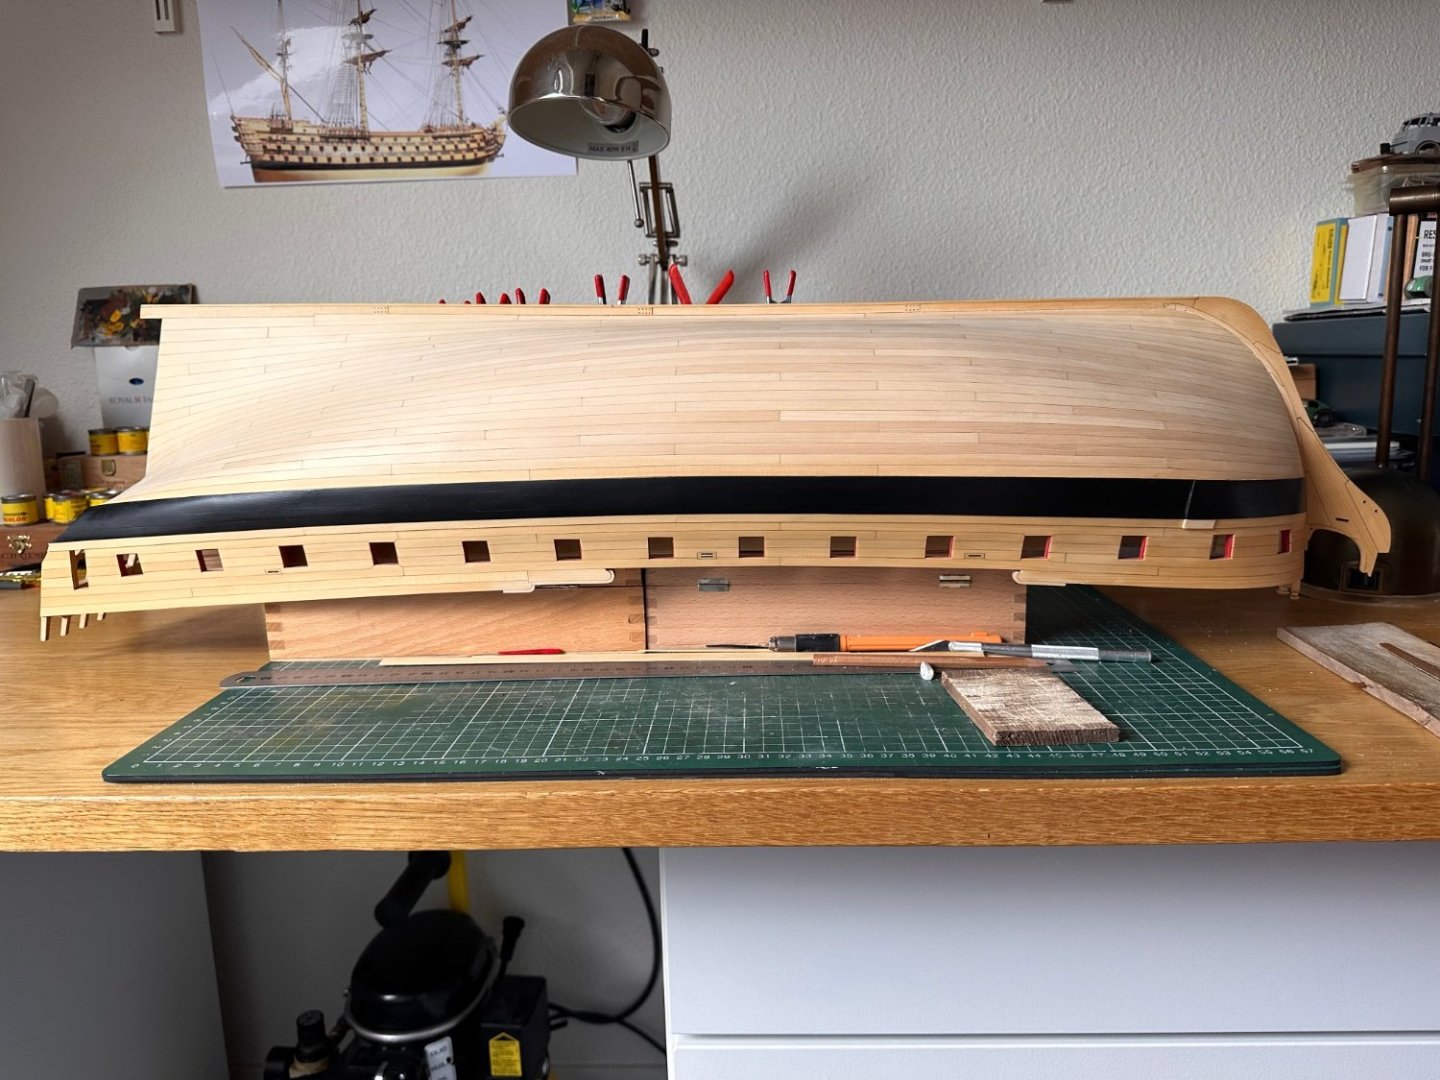
I'm getting hungry, again...what a very nice stove this is as well! Very nicely done! Frank.
- 399 replies
-
- 1
-
-
- winchelsea
- Syren Ship Model Company
- (and 1 more)
-
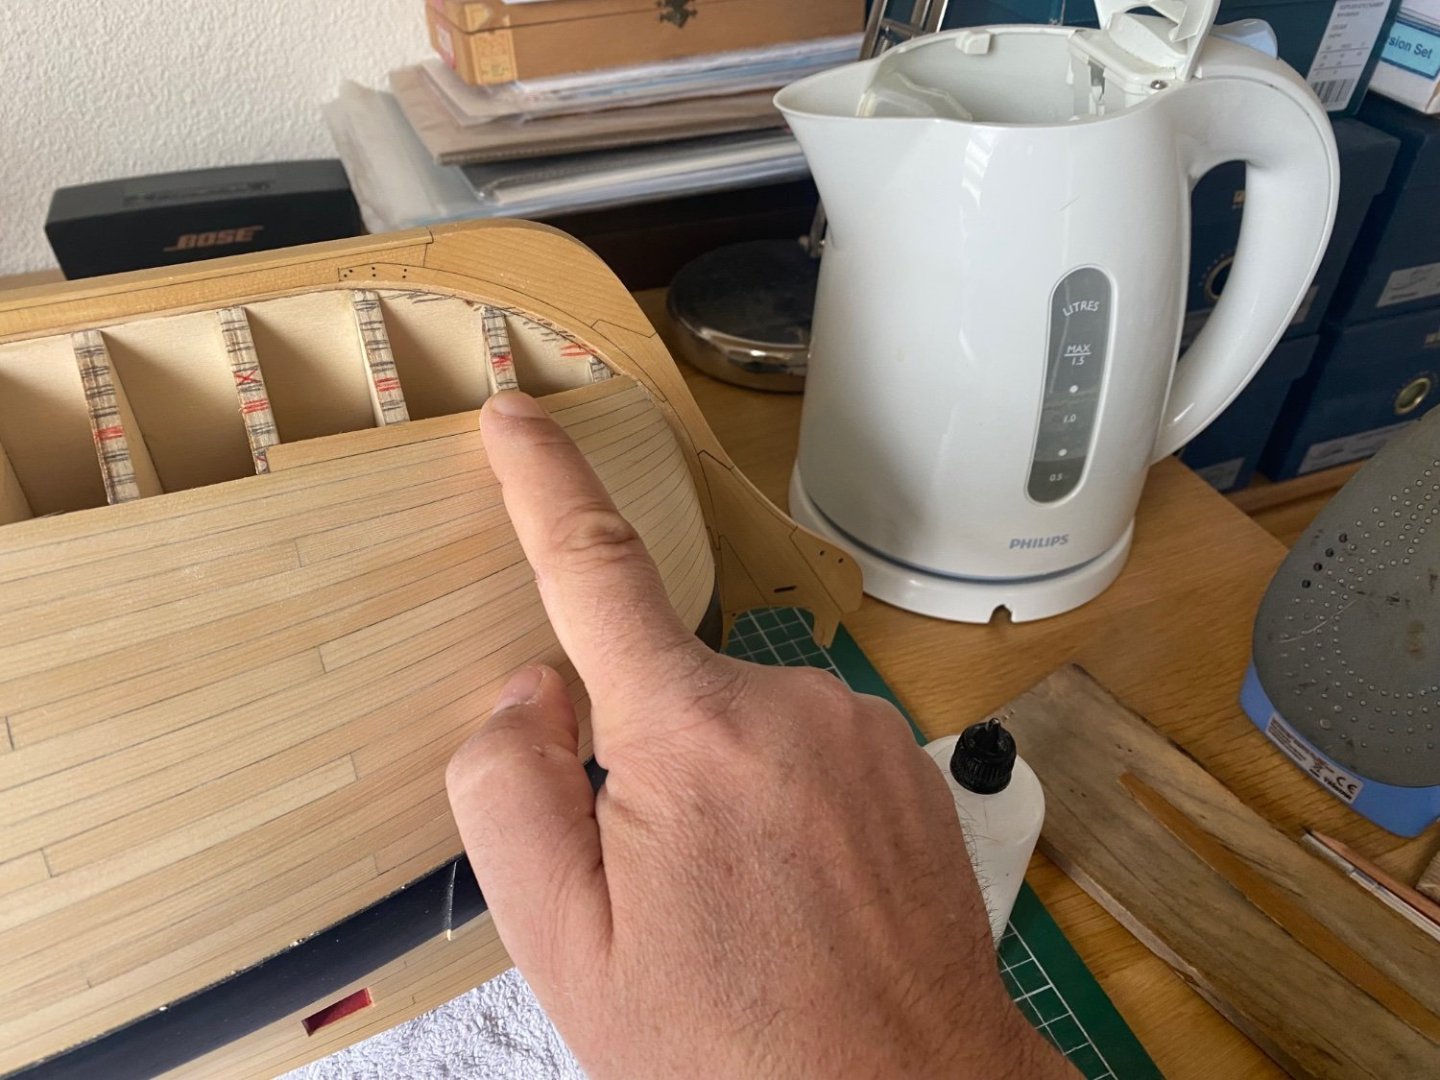
I rather like some color variation, unlike many other builders I know, It gives more variety to the eye, 'on every inch something should happen' ...furthermore, shipyards didn't sort their planks on color I guess, as they were glad to receive the appropriate and enough wood to carry on building I read in one of my many books on English, French and Dutch shipbuilding... Frank.