HOLIDAY DONATION DRIVE - SUPPORT MSW - DO YOUR PART TO KEEP THIS GREAT FORUM GOING! (Only 24 donations so far out of 49,000 members - C'mon guys!)
×


steamschooner
-
Posts
369 -
Joined
-
Last visited
Content Type
Profiles
Forums
Gallery
Events
Everything posted by steamschooner
-
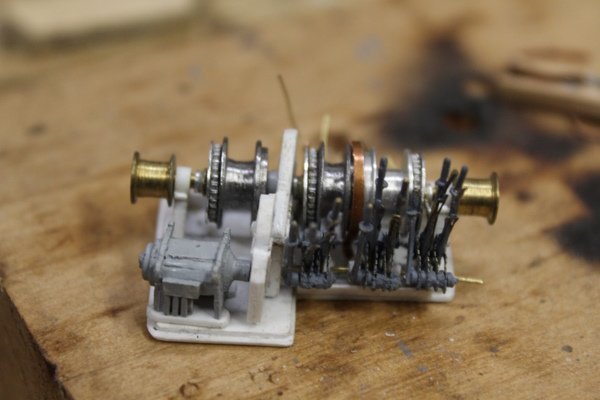
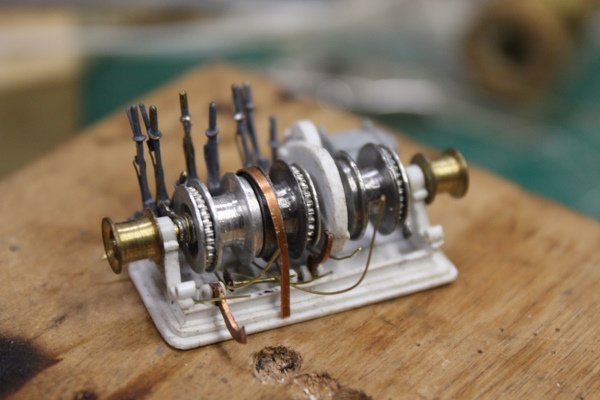
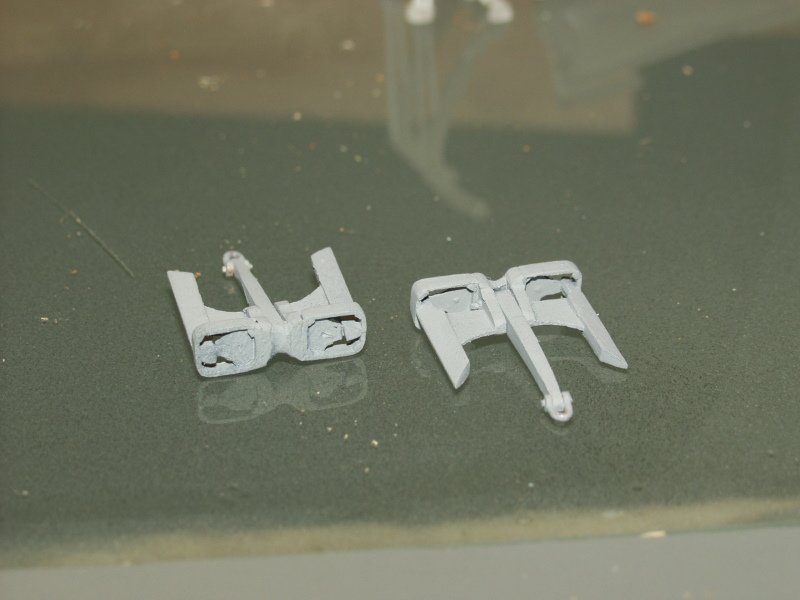
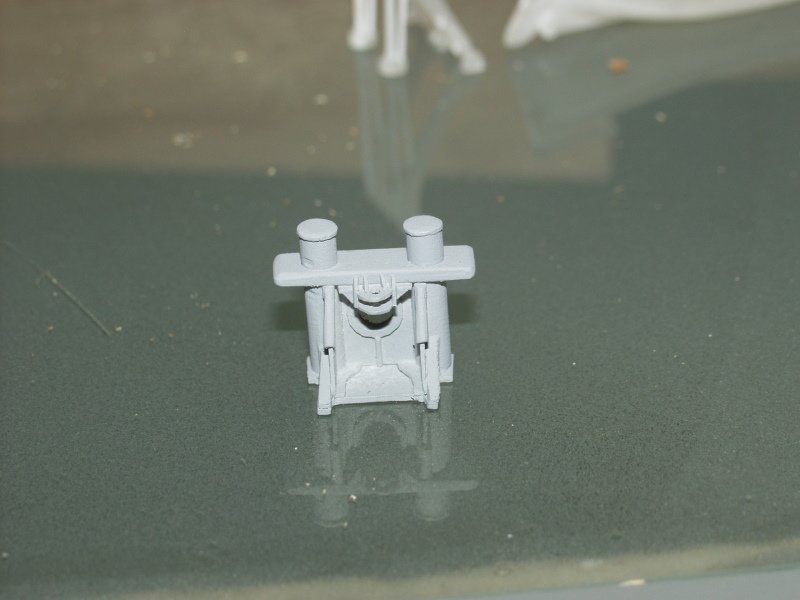
 Gary, The derrick winch is 1 inch wide and 1&5/8's from gypsie drum to gypsie drum. It's a little over 1 inch tall. Levers, drums, gears are turned ( several times on some items). Styrene, brass, copper and aluminum are being used to make parts. Considering I did not have a lines drawing and I had a couple of limited photos. It has been a real bugger but I think I have the rest figured out. I did not realize you had posted a reply so I am catching up. Thanks everyone for stopping by to take a look.
 -
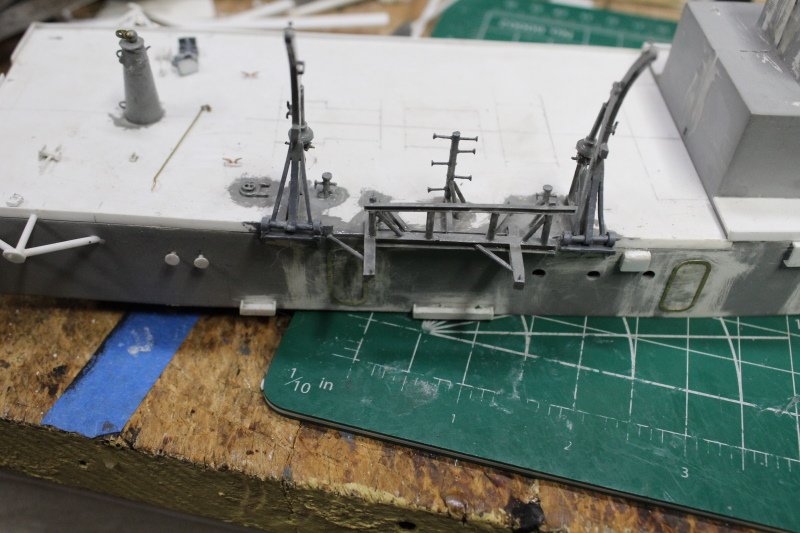
Well it's about time I posted something to show the shipyard is still open. I have not had alot of time to spend working on my project. The following pictures are of the derrick winch that I have been working on. It is not finished yet as you can see in the second picture. All I have for a design is two very poor line drawings and three photos that only show some of the winch. still have much to do
-
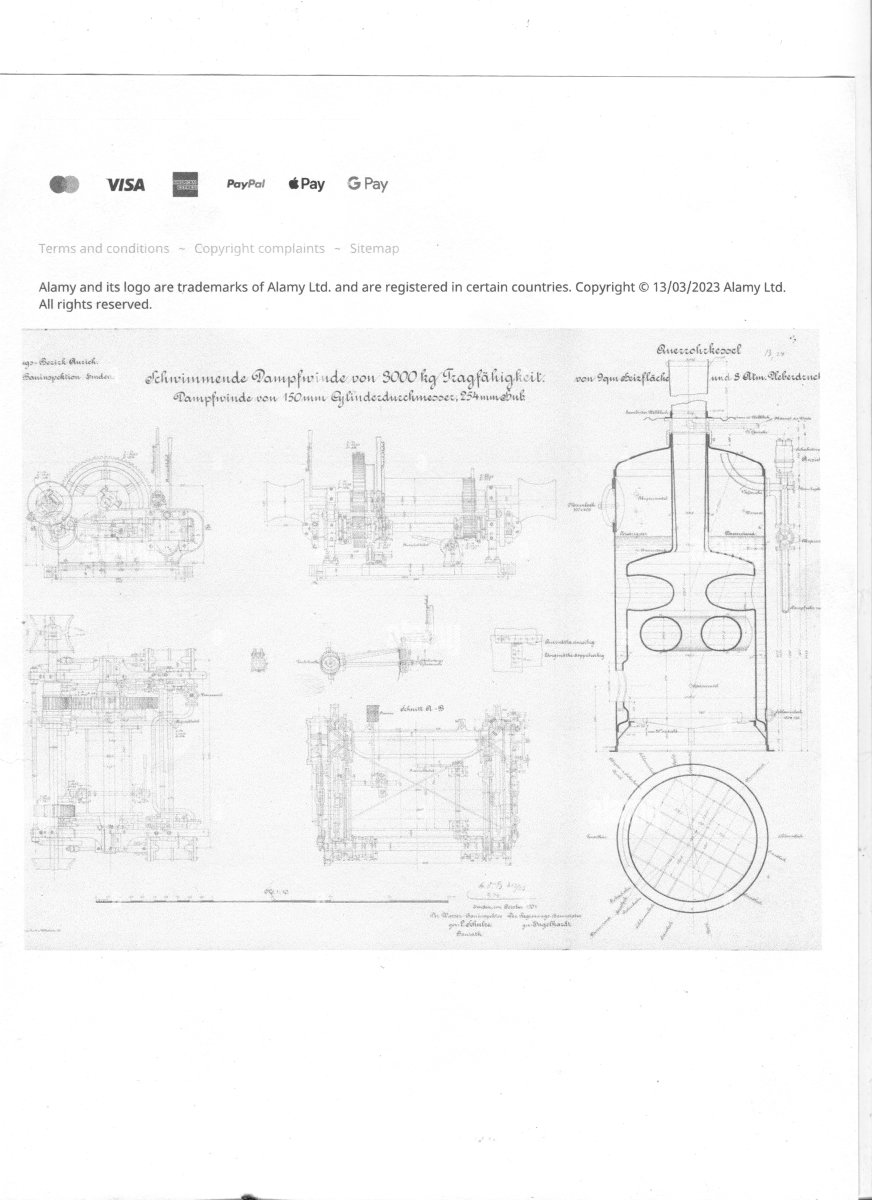
N.N., floating steam winch of the hydraulic engineering inspection, Emden: 3000 kg load capacity: cuts 1:10. Lithograph colored on the cardboard, 53.7 x 75.5 cm (including scan edges) N.N. : Schwimmende Dampfwinde der Wasserbauinspektion, Emden Stock Photo - Alamy If you go to the Alamy site and search N.N. floating steam winch it should bring up the pg I posted. Steve
-
I do not know if this is helpful or not. low rez makes it hard see it clearly. It looks alot like the one you posted picture of. Site sells personal use for 19.99

-
Not alot to show for the last month. I have done some work on the flying bridge. Most of my shipyard time has been spent working on the derrick winch and boom. They are still in many small parts so no pictures yet. Hope everyone had a great Holiday.
-
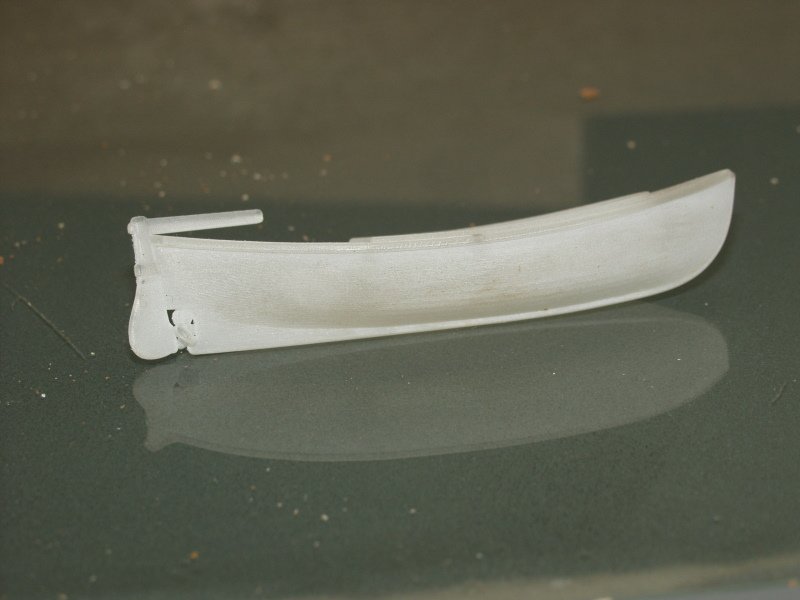
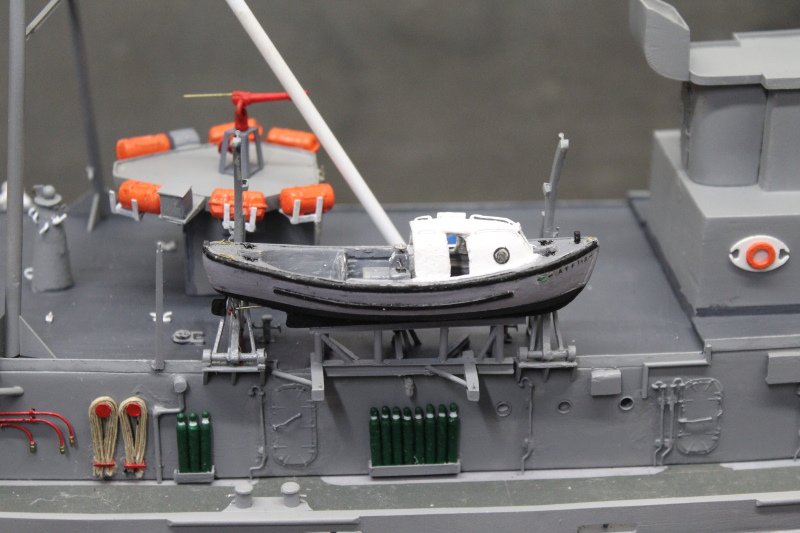
Thanks everyone for the likes and comments. Motor whale boat started out as a shapeways printed boat but was a early version. It had a hinged rudder on the stern. The whale boat I needed was a later version where the stern has been filled out to a more rounded shape and had a canopy. I built the canopy with glue soaked paper on a canopy shaped plug
-
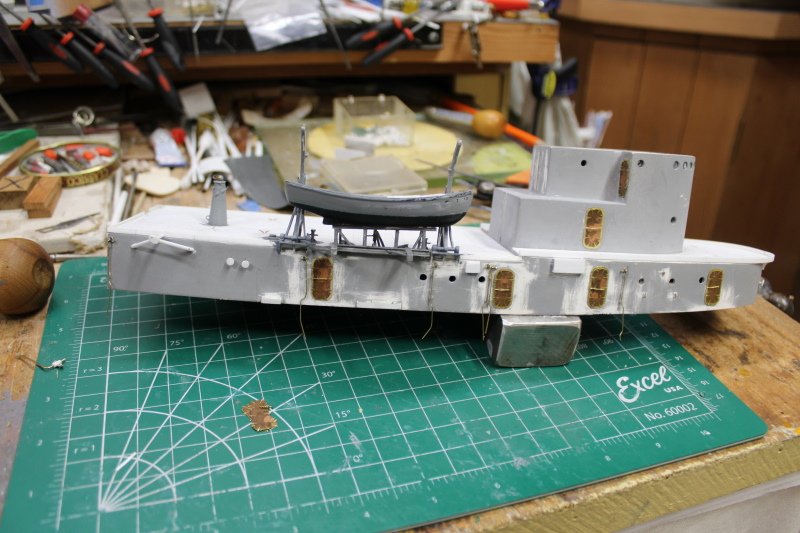
Ok, a little update on my project. I am getting closer to being able to fasten cabin to the deck. A few hoses to drape, couple of fittings to add. Tring to get as much done on cabin while not on model.

-
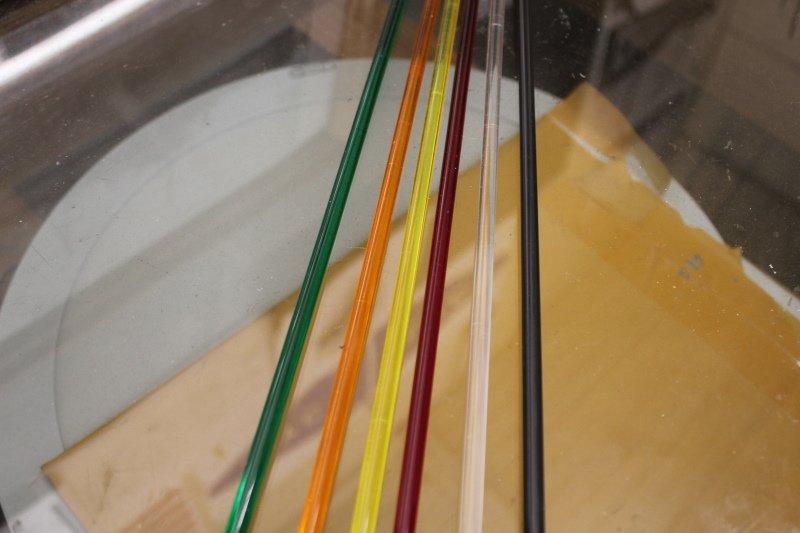
I do not know if this was bought up or not on this site. So I will post this just in case it is useful for others. I recently bought acrylic rod for making running lights, mast lights and who knows what else. My purchase was for 1/4" rod in red, green, and clear I than added amber, yellow, and solid black. With 1/4" rod you get 6 pieces that are 36" long for $11.50. They have rod up to 1" and you get fewer 36" pieces, cost goes up a little. I bought them from Delvies Plastics on esty site. I now have several lifetimes of material for making running/mast lights.
-
- 4
-

-
Keith, You are right they are time comsuming. Things like shackles I will often make them in batches and do not know how long each one takes. I might not want to know, just another step in building my model. making extra's is also good practice. Keeping the shackles the same size is a matter of keeping the eyes the same size and keeping the tails the same length on all of them. Thanks to all that has hit the like button. Steve
-
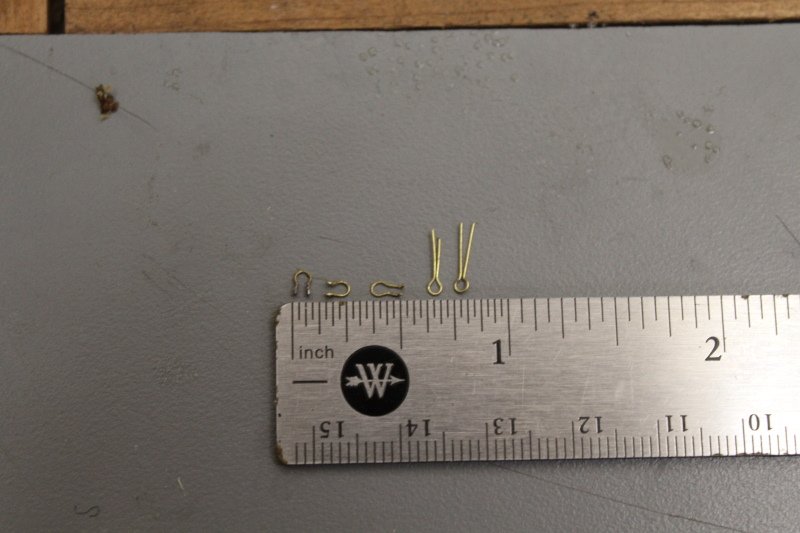
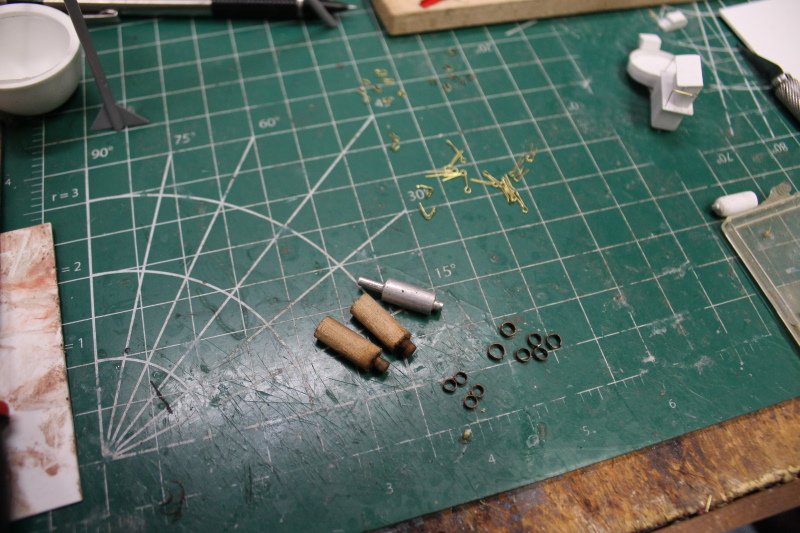
Keith, I am using 28 ga brass wire wrapped around drill bit the desired size. The ends of wire is than pinched forming the two on the right. The ends are than cut back. ( trial & error ) as to how long they need to be. I than fold the ends over on to itself and with the help of a jig I solder the eyes closed. The next step is to drill out the eyes for shackle bolts.
-
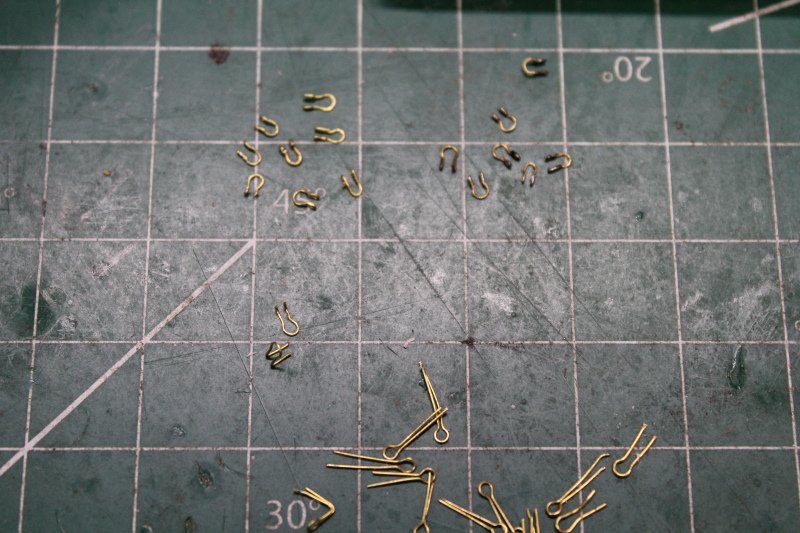
For the port holes I took some flattened copper wire and formed rings of two sizes. I made a couple of mandrels for shaping and soldering the rings. When installed in the holes they were left a little proud of the deck house. I also have been making shackles as there are a good number of them on this model.

-
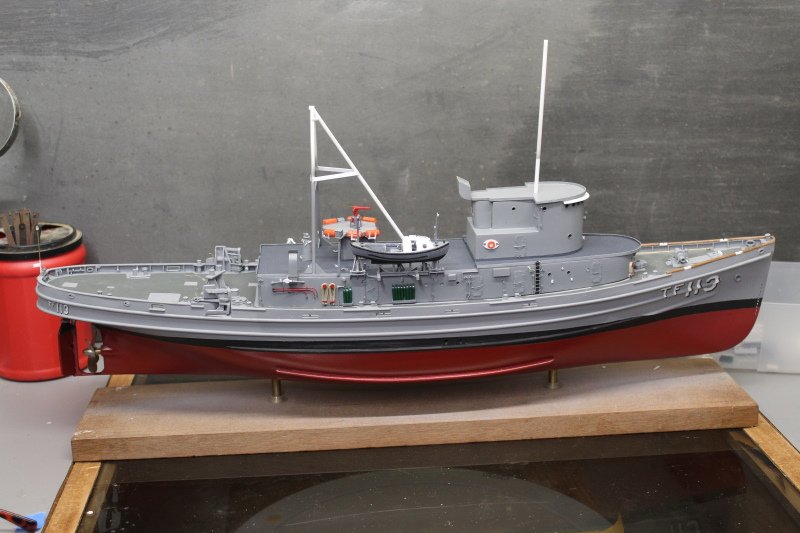
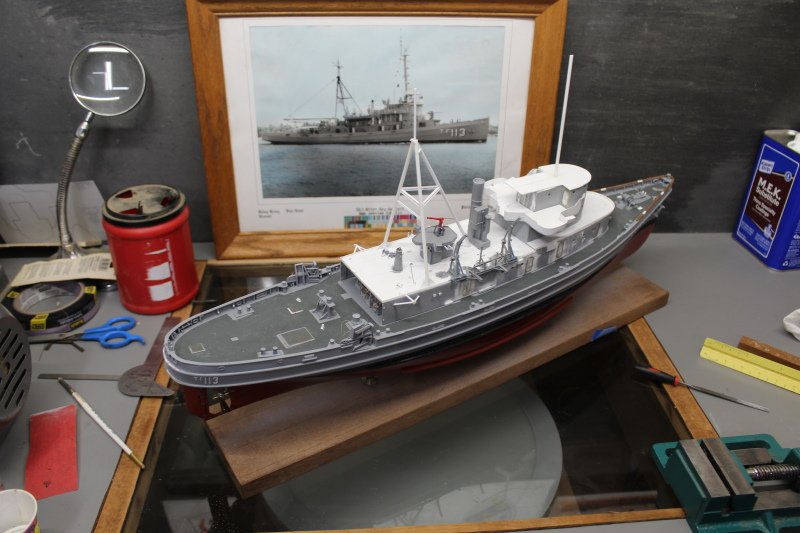
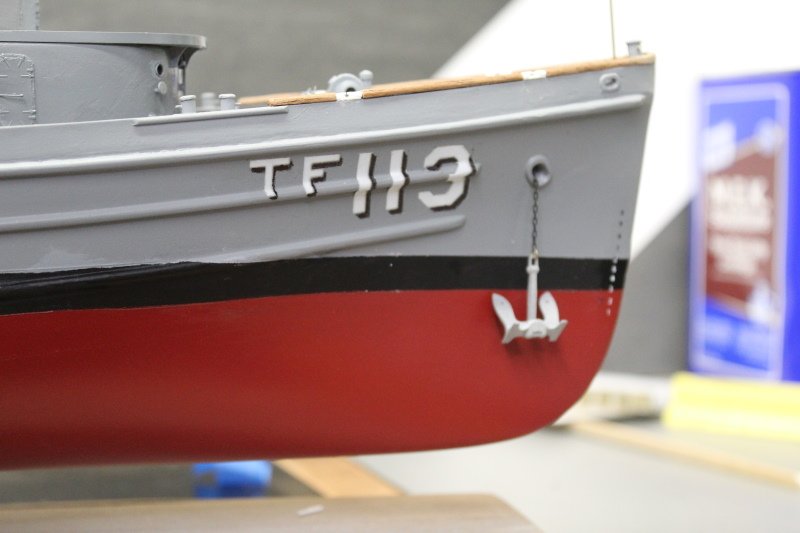
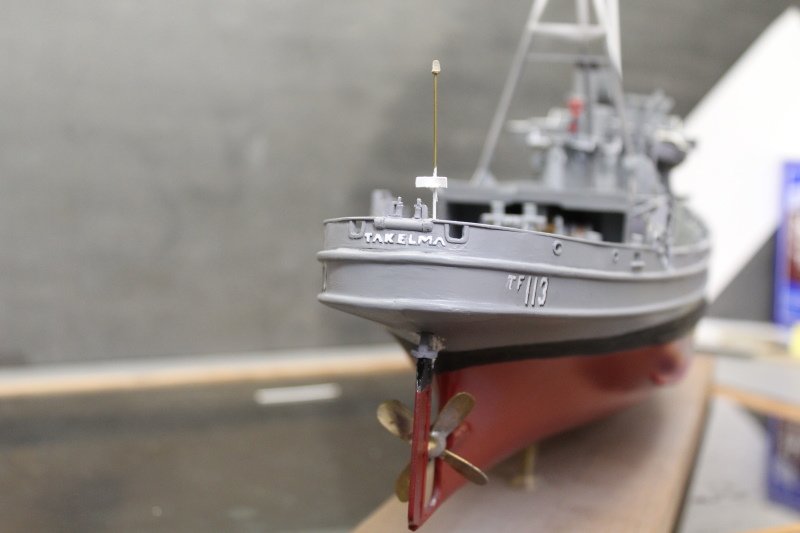
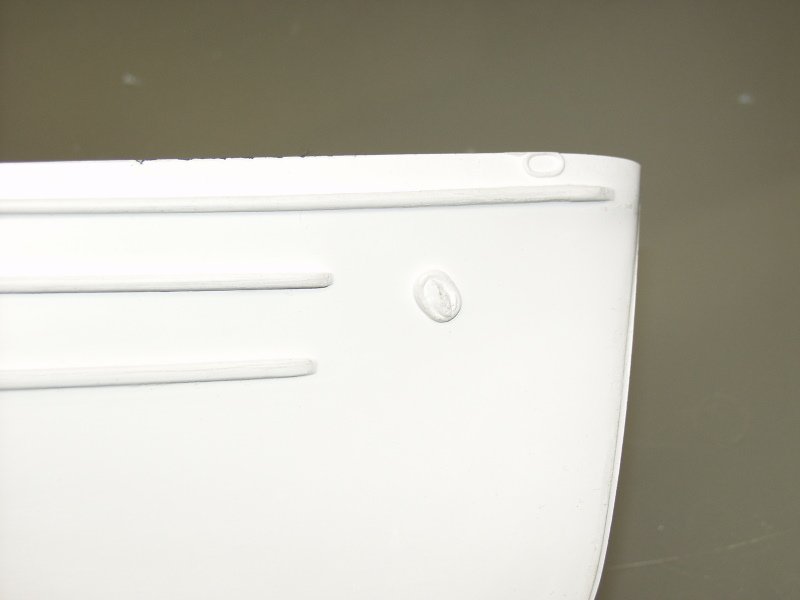
This weeks pictures, I used some 1500 grit paper for the main deck nonskid. Seems it wants to collect every bit of dust. The decals for the hull numbers were made using white backed decal sheets, Each number and letter had to be cut out individually I allways liked the wood rail at the bow, do not know why it was installed maybe a chafing piece for lines or just a fashion piece. Draft markings are dry transfer numbers, oh my looks like I need to clean edge of boot topping. Last we have a mockup of a overview, most pieces are not yet glued down.

-
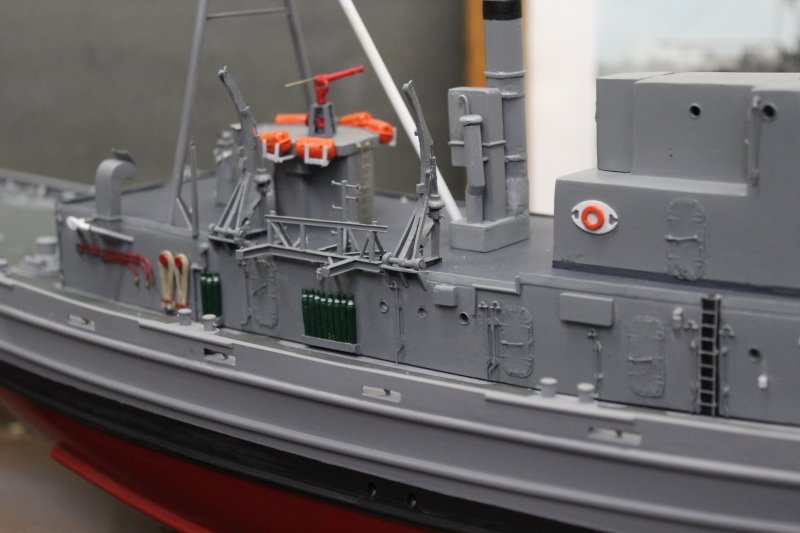
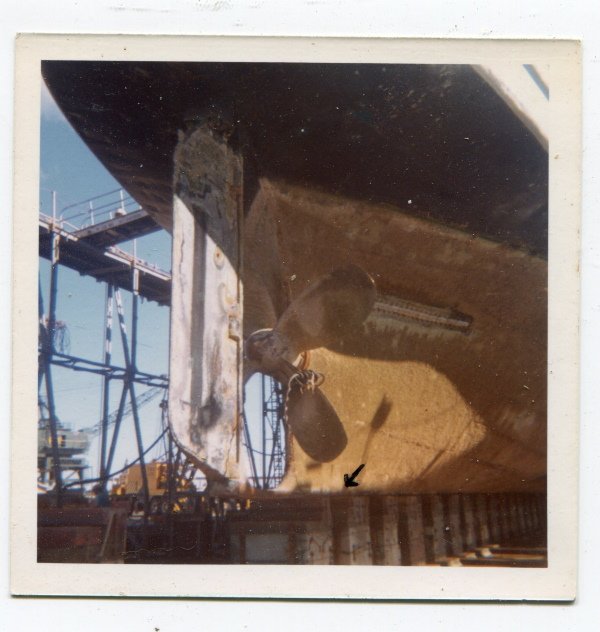
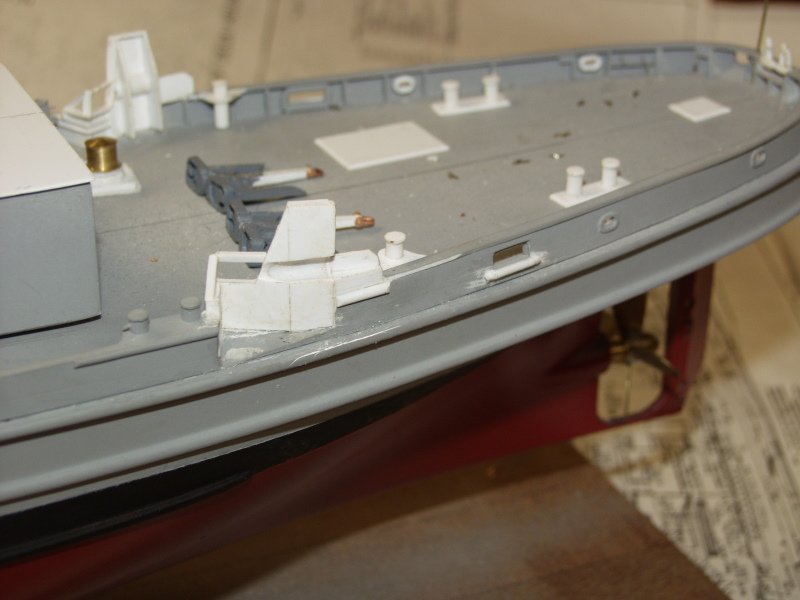
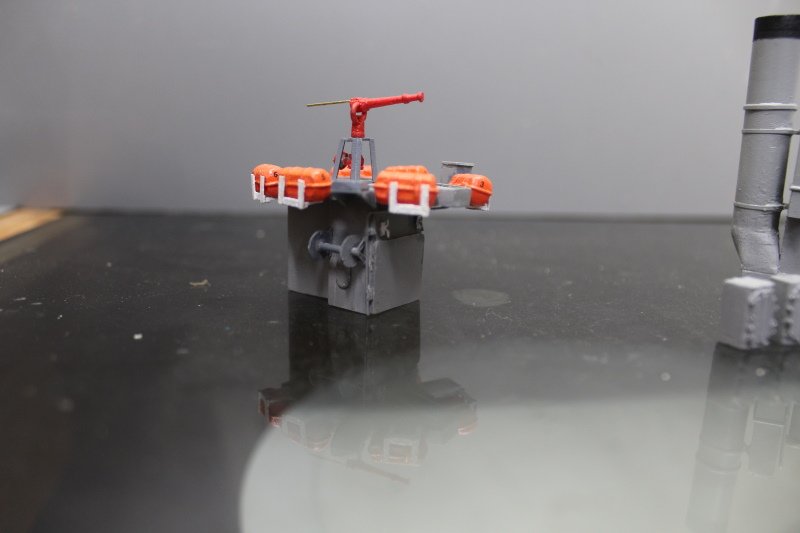
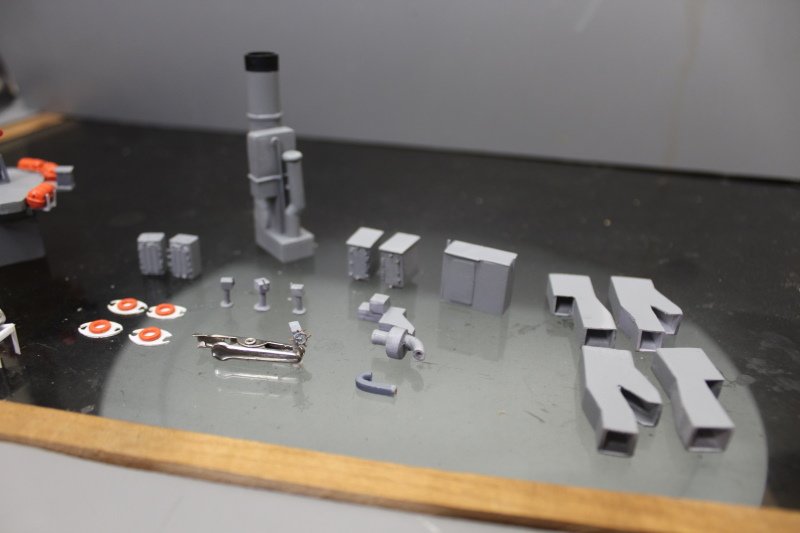
This weeks pictures contain more fittings. So I will start with one of the boo boos I mentioned earlier. It shows the picture of the propeller with a chunk of wire wrapped around one blade of propeller. Black arrow points to one of several holes in bottom. I used this photo to model my models propeller. Bill boards for the beach gear storage were hard to get correct I think this was version 6. The boat davits was another of the hard ones to get right, needs a little more added but needs to have the whale boat mounted first. On the deck house I used some P.E. doors but added the quick acting door levers. installed vent pipes and other bitts. This is the fire monitor platform minus the railings. Life rafts are 3d printed from shapeways. Last is more of the fittings, ammo lockers, engine room vents, boiler stack, and more.
-
Thanks Keith, The winches were a fun challenge as was the other fittings, Most were made using pictures, very little drawings were available. Steve
-
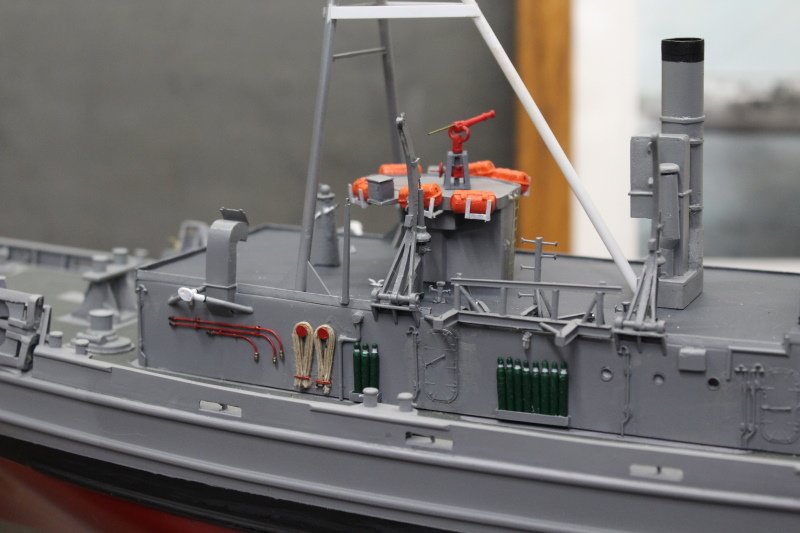
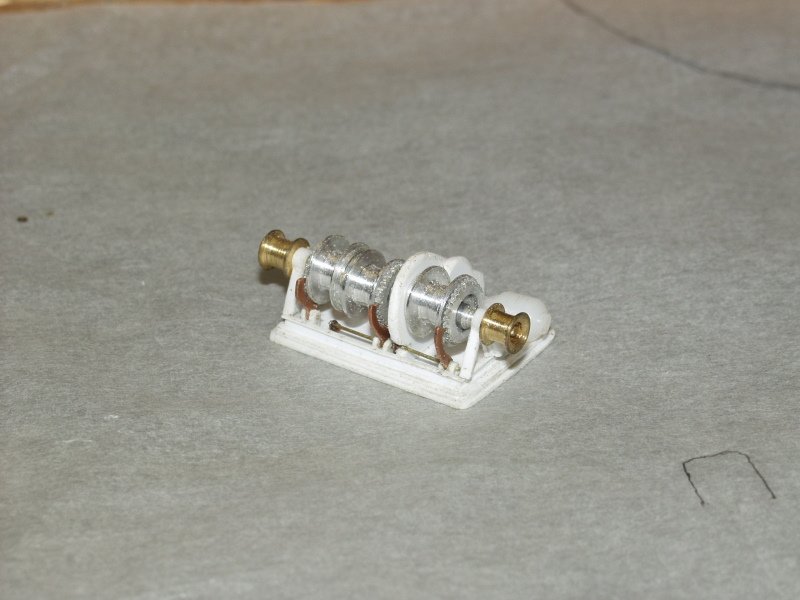
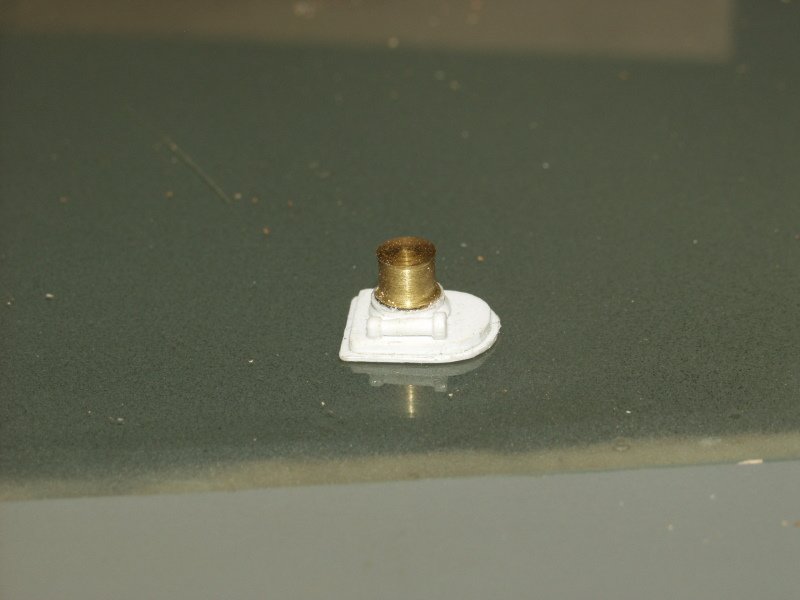
These are a few of the deck fittings. The Ellis anchors were difficult as I did not have a drawing of them. Then I found a drawing of them which I used to make version 5. These anchors were known as beach gear, used in pulling ships off a beach. I had some good photos of the H bitt and anchor winch so they came out first time around. The towing winch was a whole lot tougher to build as I did not have much info. I think my version 3 came out ok. The derrick winch pictured was version 1 it has gone back to the shipyard for some changes. And than there was the capstan which came out the first try.


-
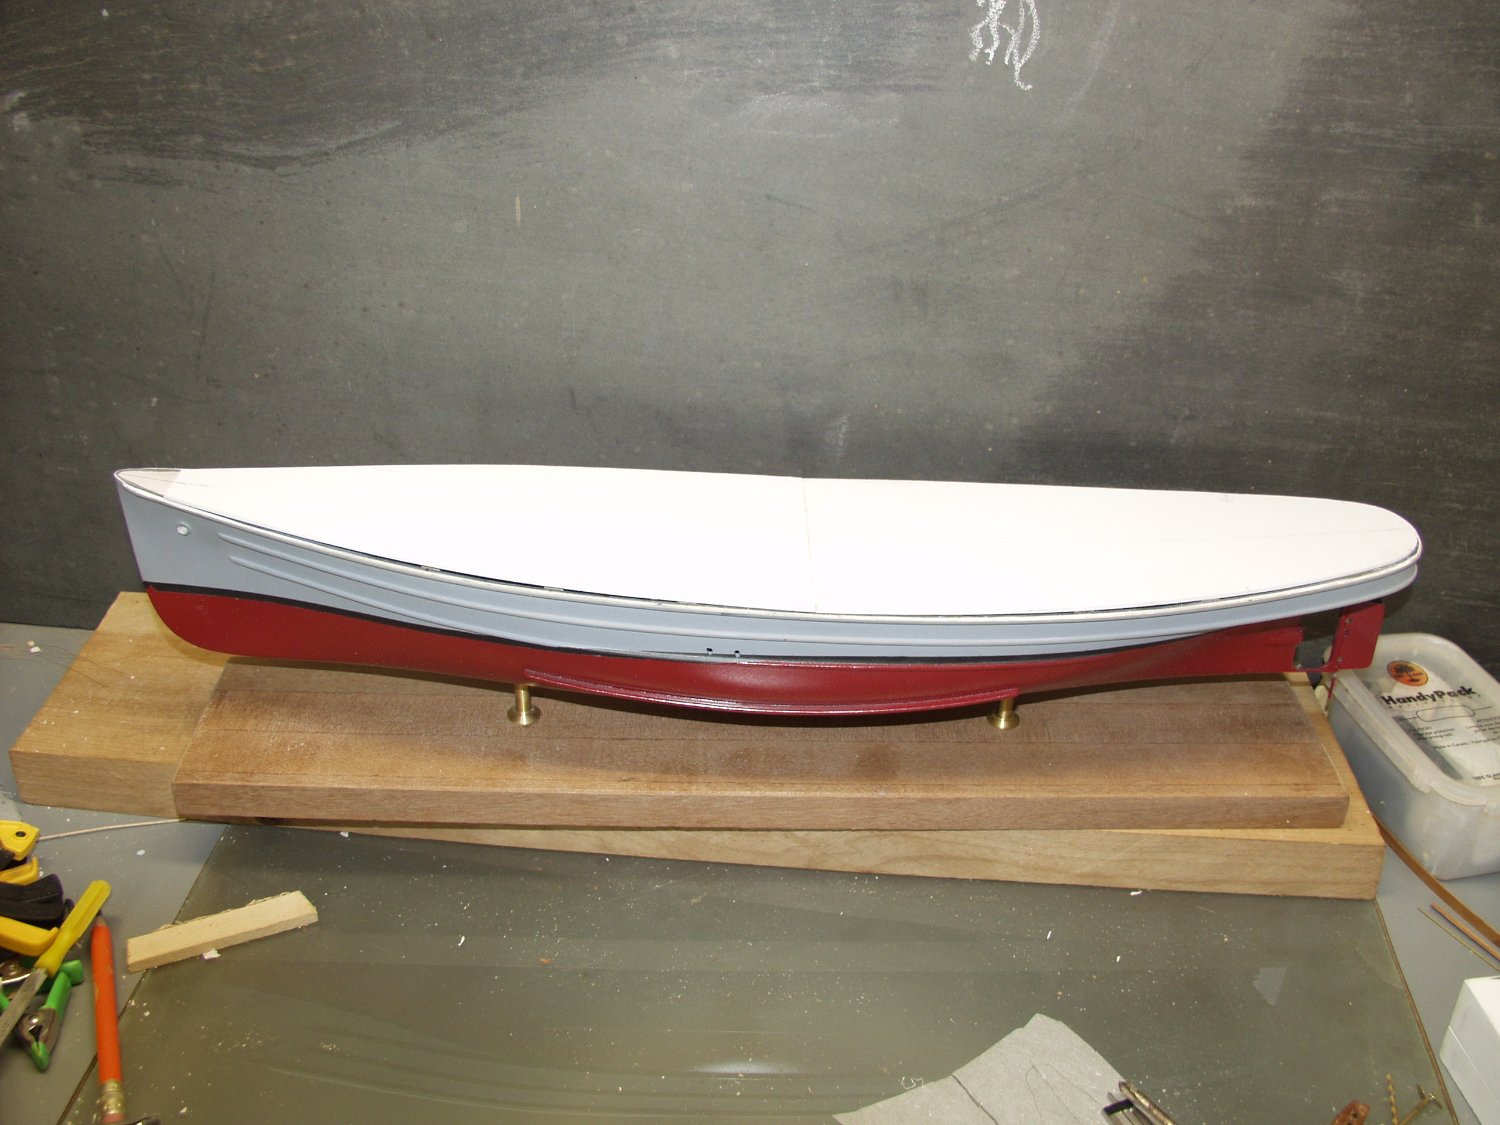
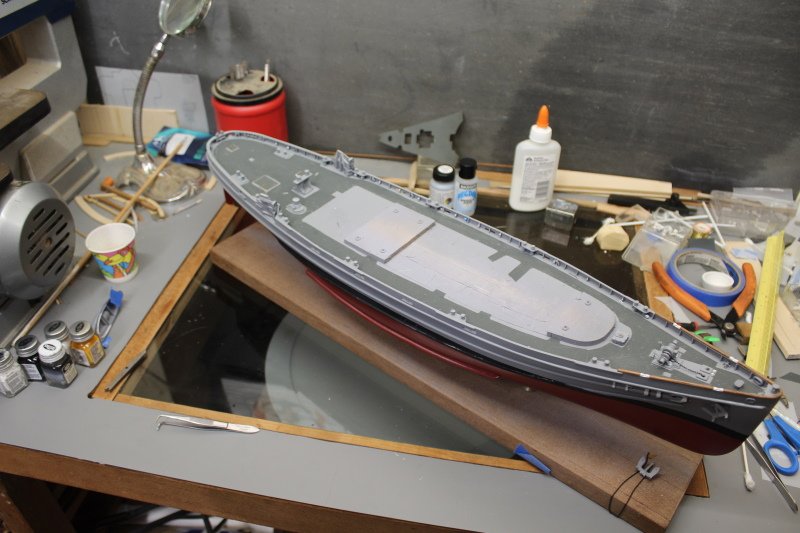
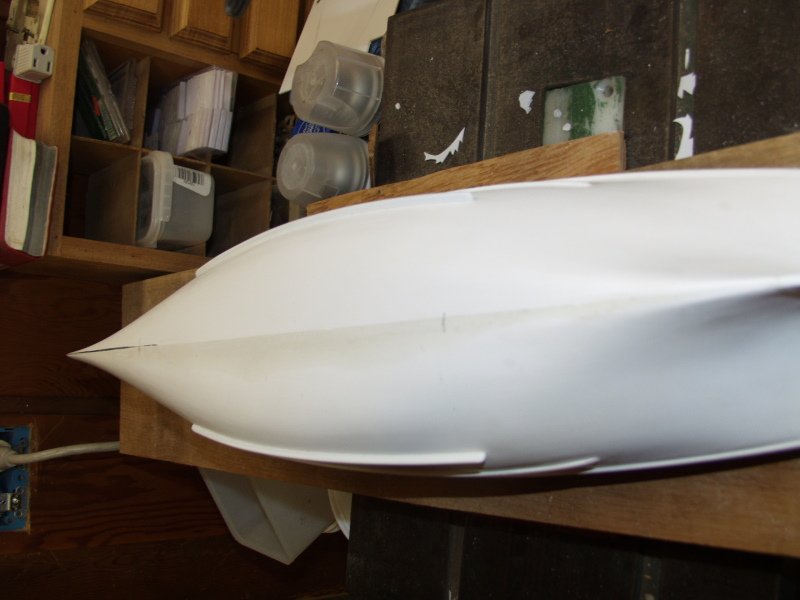
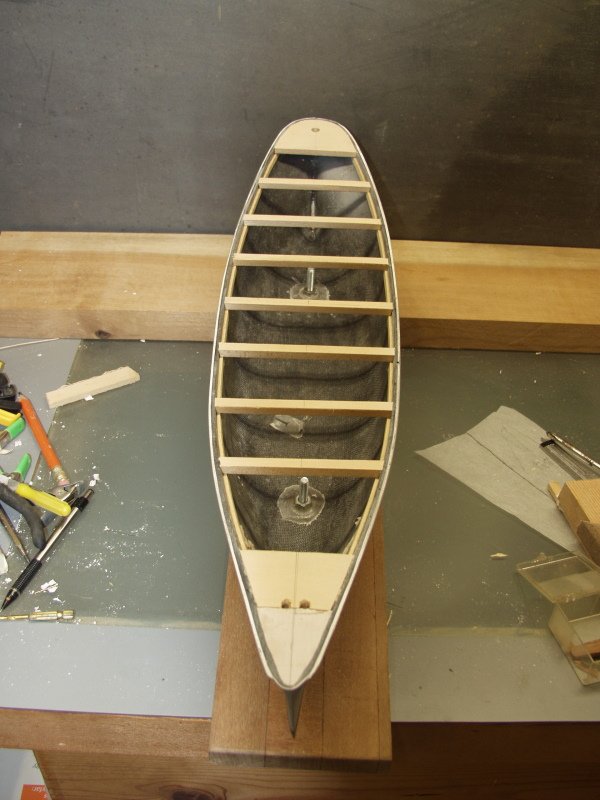
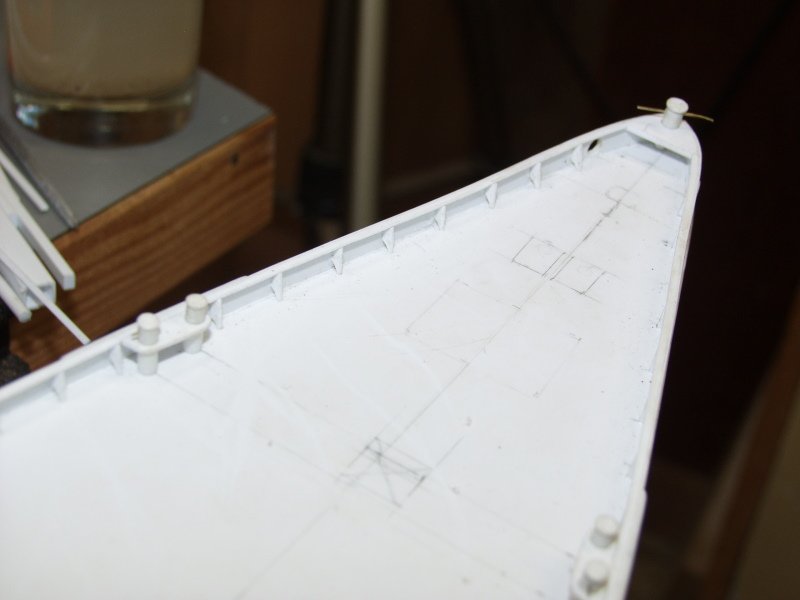
John, yes she was a work horse we did many different tasks. Had a few boo boo's as well. this post I will show some early pictures of the build. The hull is a fiberglass ATF hull from scale shipyards, they do a lot of RC stuff. I bought the main deck house as well but would not do that again. It would be fine for RC but I am building a static model. The bulwarks on the hull were way to thick and needed to be cut off flush with main deck. That and some details were just in the wrong place. I also had to add bilge keels. Added deck supports and mount hull for working on it. Then came the main deck which I used .060 styrene sheet stock. Next came the bulwarks and all the braces and cap rail, scuppers cut out, Side bollards were added at this time. Last we have the primed hull and you can see the rudder support that I had to add to the hull.


-
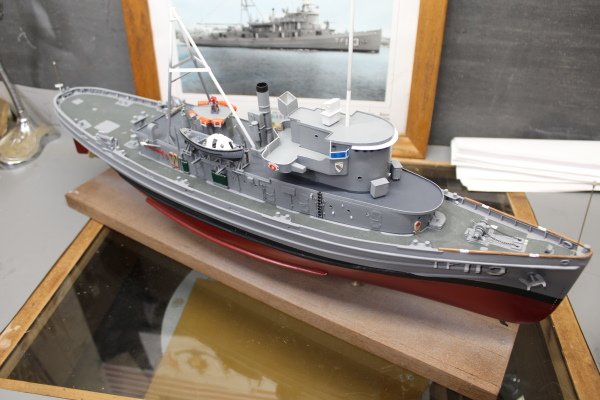
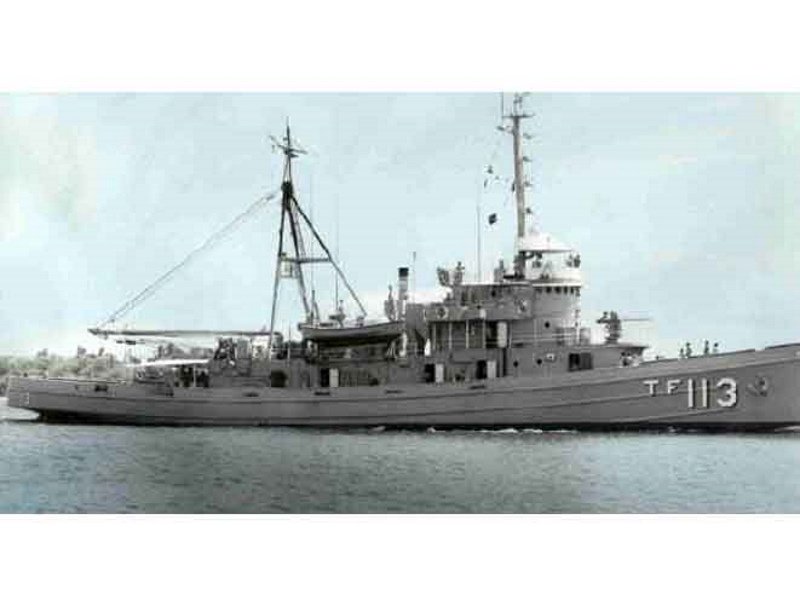
Coming soon to a build log near you. USS Takelma ATF 113 was constructed by United Engineering and Drydock Co. LTD at Alameda, CA. Her keel was laid on 18 sept 1943 and was commissioned on 3 aug 1944. She was a Abnaki class fleet ocean tug. Specs; Length 205' Beam 36'.6" Draft 17' Displacement 1640 tons, complement, 6 officers & 70+ enlisted. During my time onboard we had a 3inch 50 open mount gun. propulsion after yard overhaul was 4 V-16 caterpillar diesel electric motors turning a electric motor on the propeller shaft. I spent 3+ years onboard and was homeported in Pearl Harbor, Hawaii. Made one westpac trip, Pretty good duty for a 18 year old fresh out of school. I keep in contact with some of my ship mates to this day. I was an engineman rating but took care of our boiler and evaps. My model is based on a fiberglass hull from Scale Shipyard of a ATF and is 1/96 scale. I am using styrene, some P.E. some 3d printed parts. This is the first project that I have used styrene I might have the hang of it by time I am done, More to follow as I have been working on her for some time.
-
Chris ,welcome to MSW. There is a group of modelers in your area. PSSM Puget Sound Ship Modelers Contact Floyd Kershner ( he's on this site ) if you are interested in some local help.
-
looking real nice, Gb.
-
I need help repairing an Artesania Latina Dallas 1:50 model
steamschooner replied to Zeus-cat's topic in Wood ship model kits
Carter, I dug out my old unfinished kit of the Dallas.Question1kit parts list two sizes of rigging thread 0.8 and 0.4 as for the bowsprit and jibboom none of my plans sheets have those numbers. It lists a 6mm dia mahogany dowel 6 inches long and a 4 mm dia mahogany dowel for the jibboom and my stock is 10 and 1/4 long. But I believe it needs to be shortened. None of my plans show anything on these parts. -
HSwMS Äran by Nirvana
steamschooner replied to Nirvana's topic in - Build logs for subjects built 1901 - Present Day
Looking very good, Per -
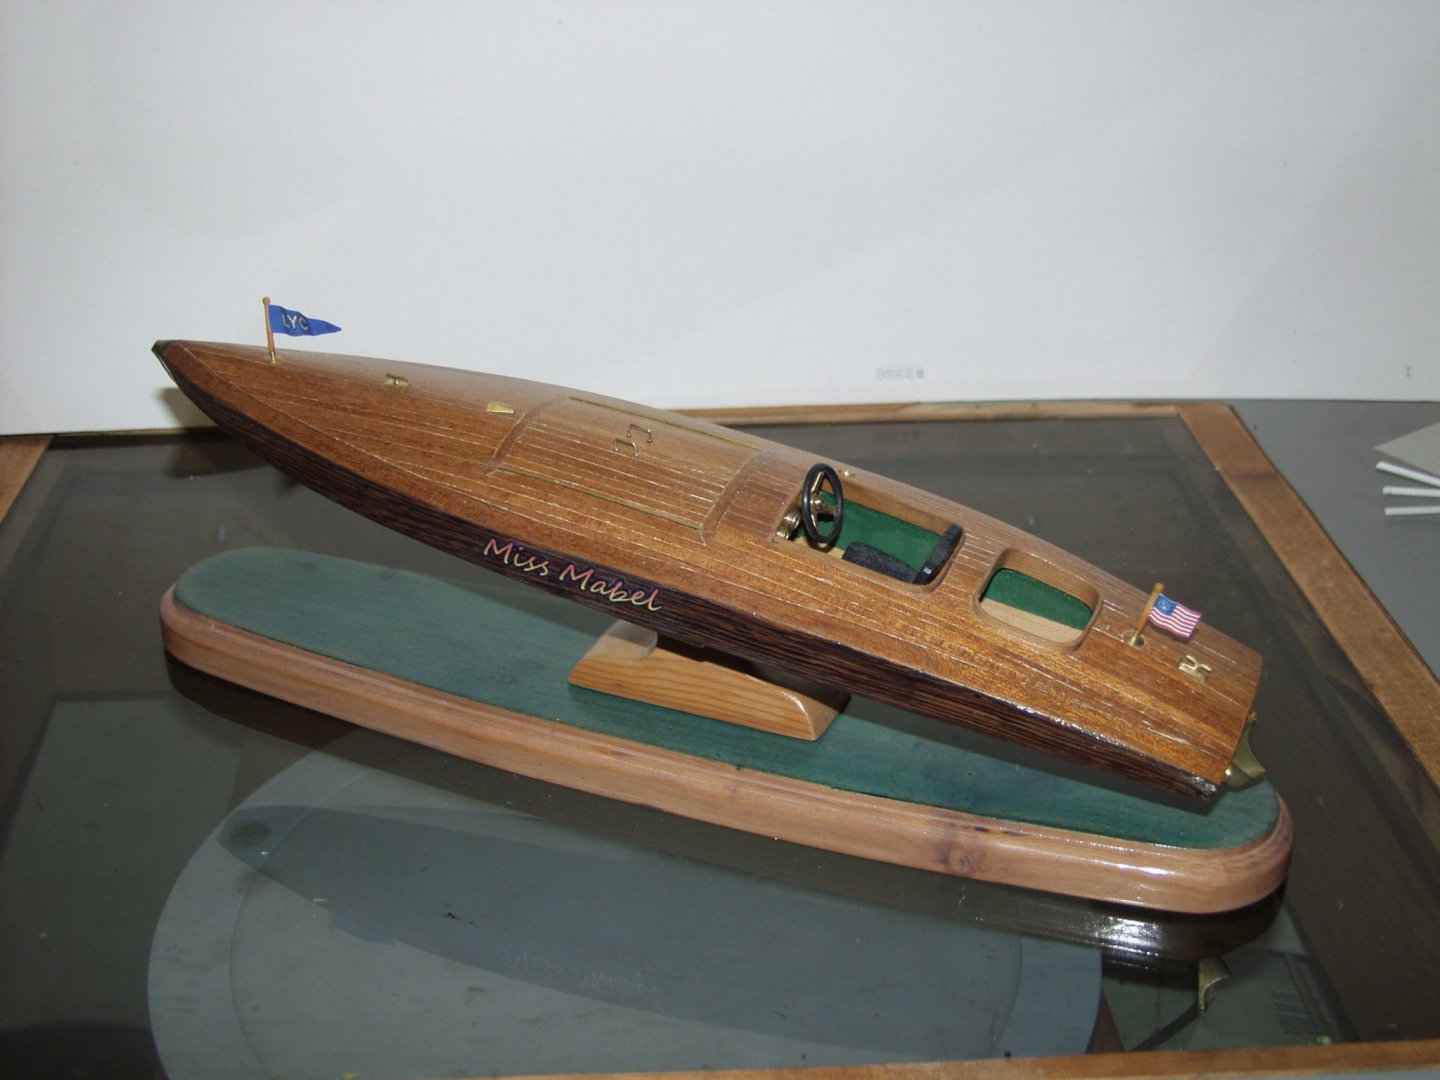
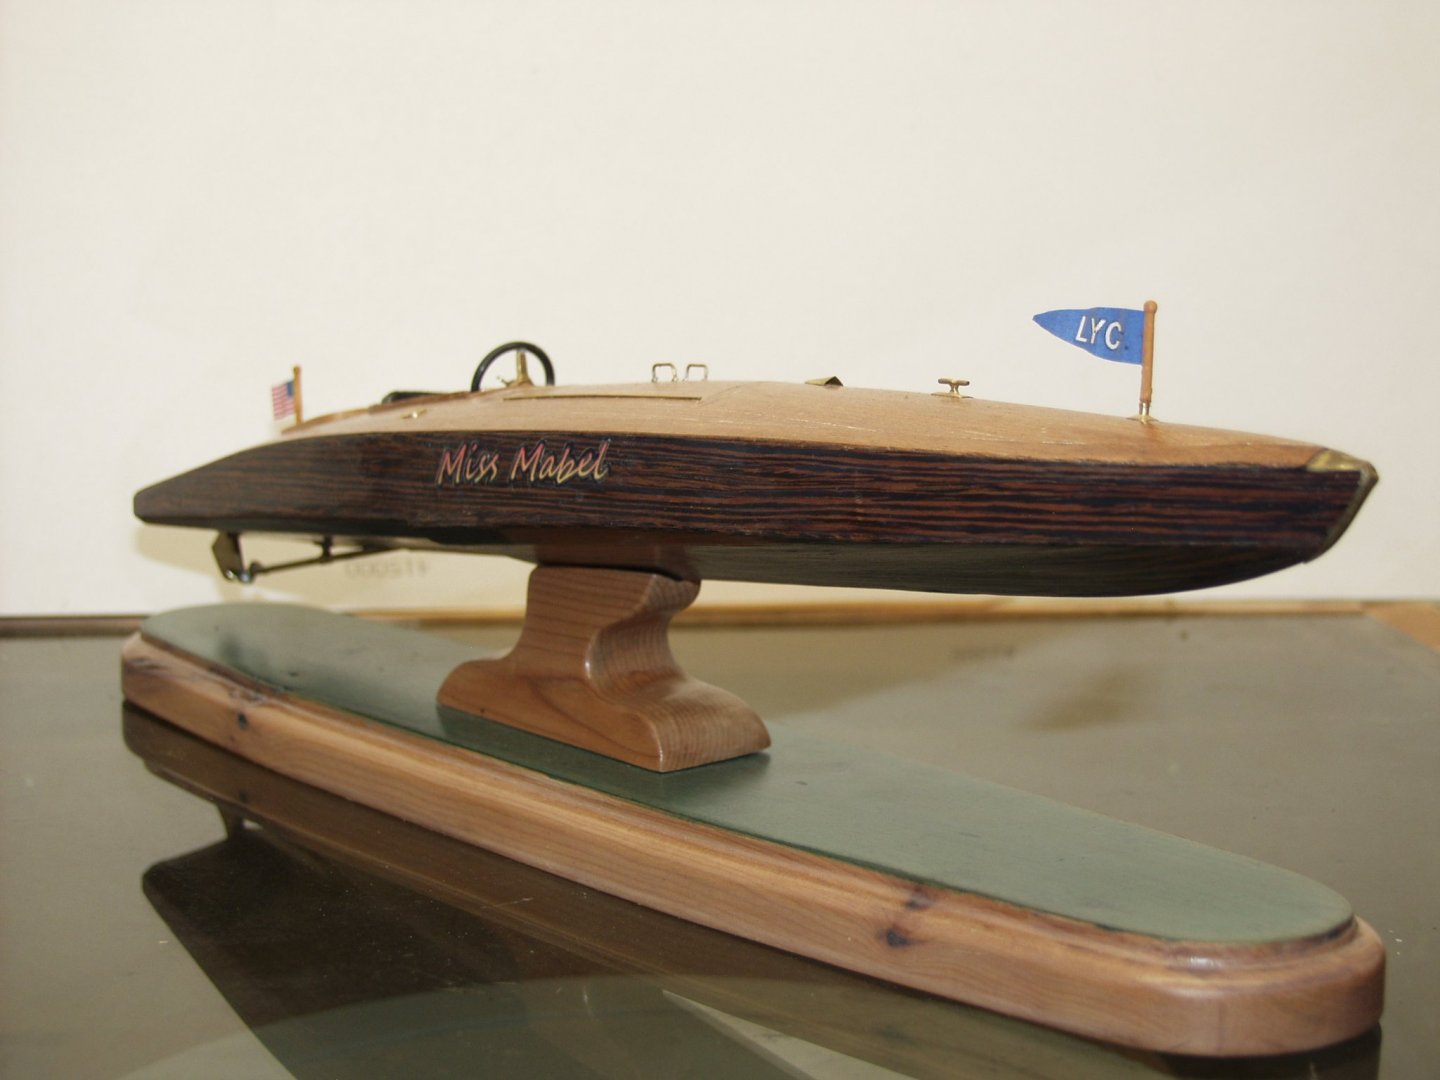
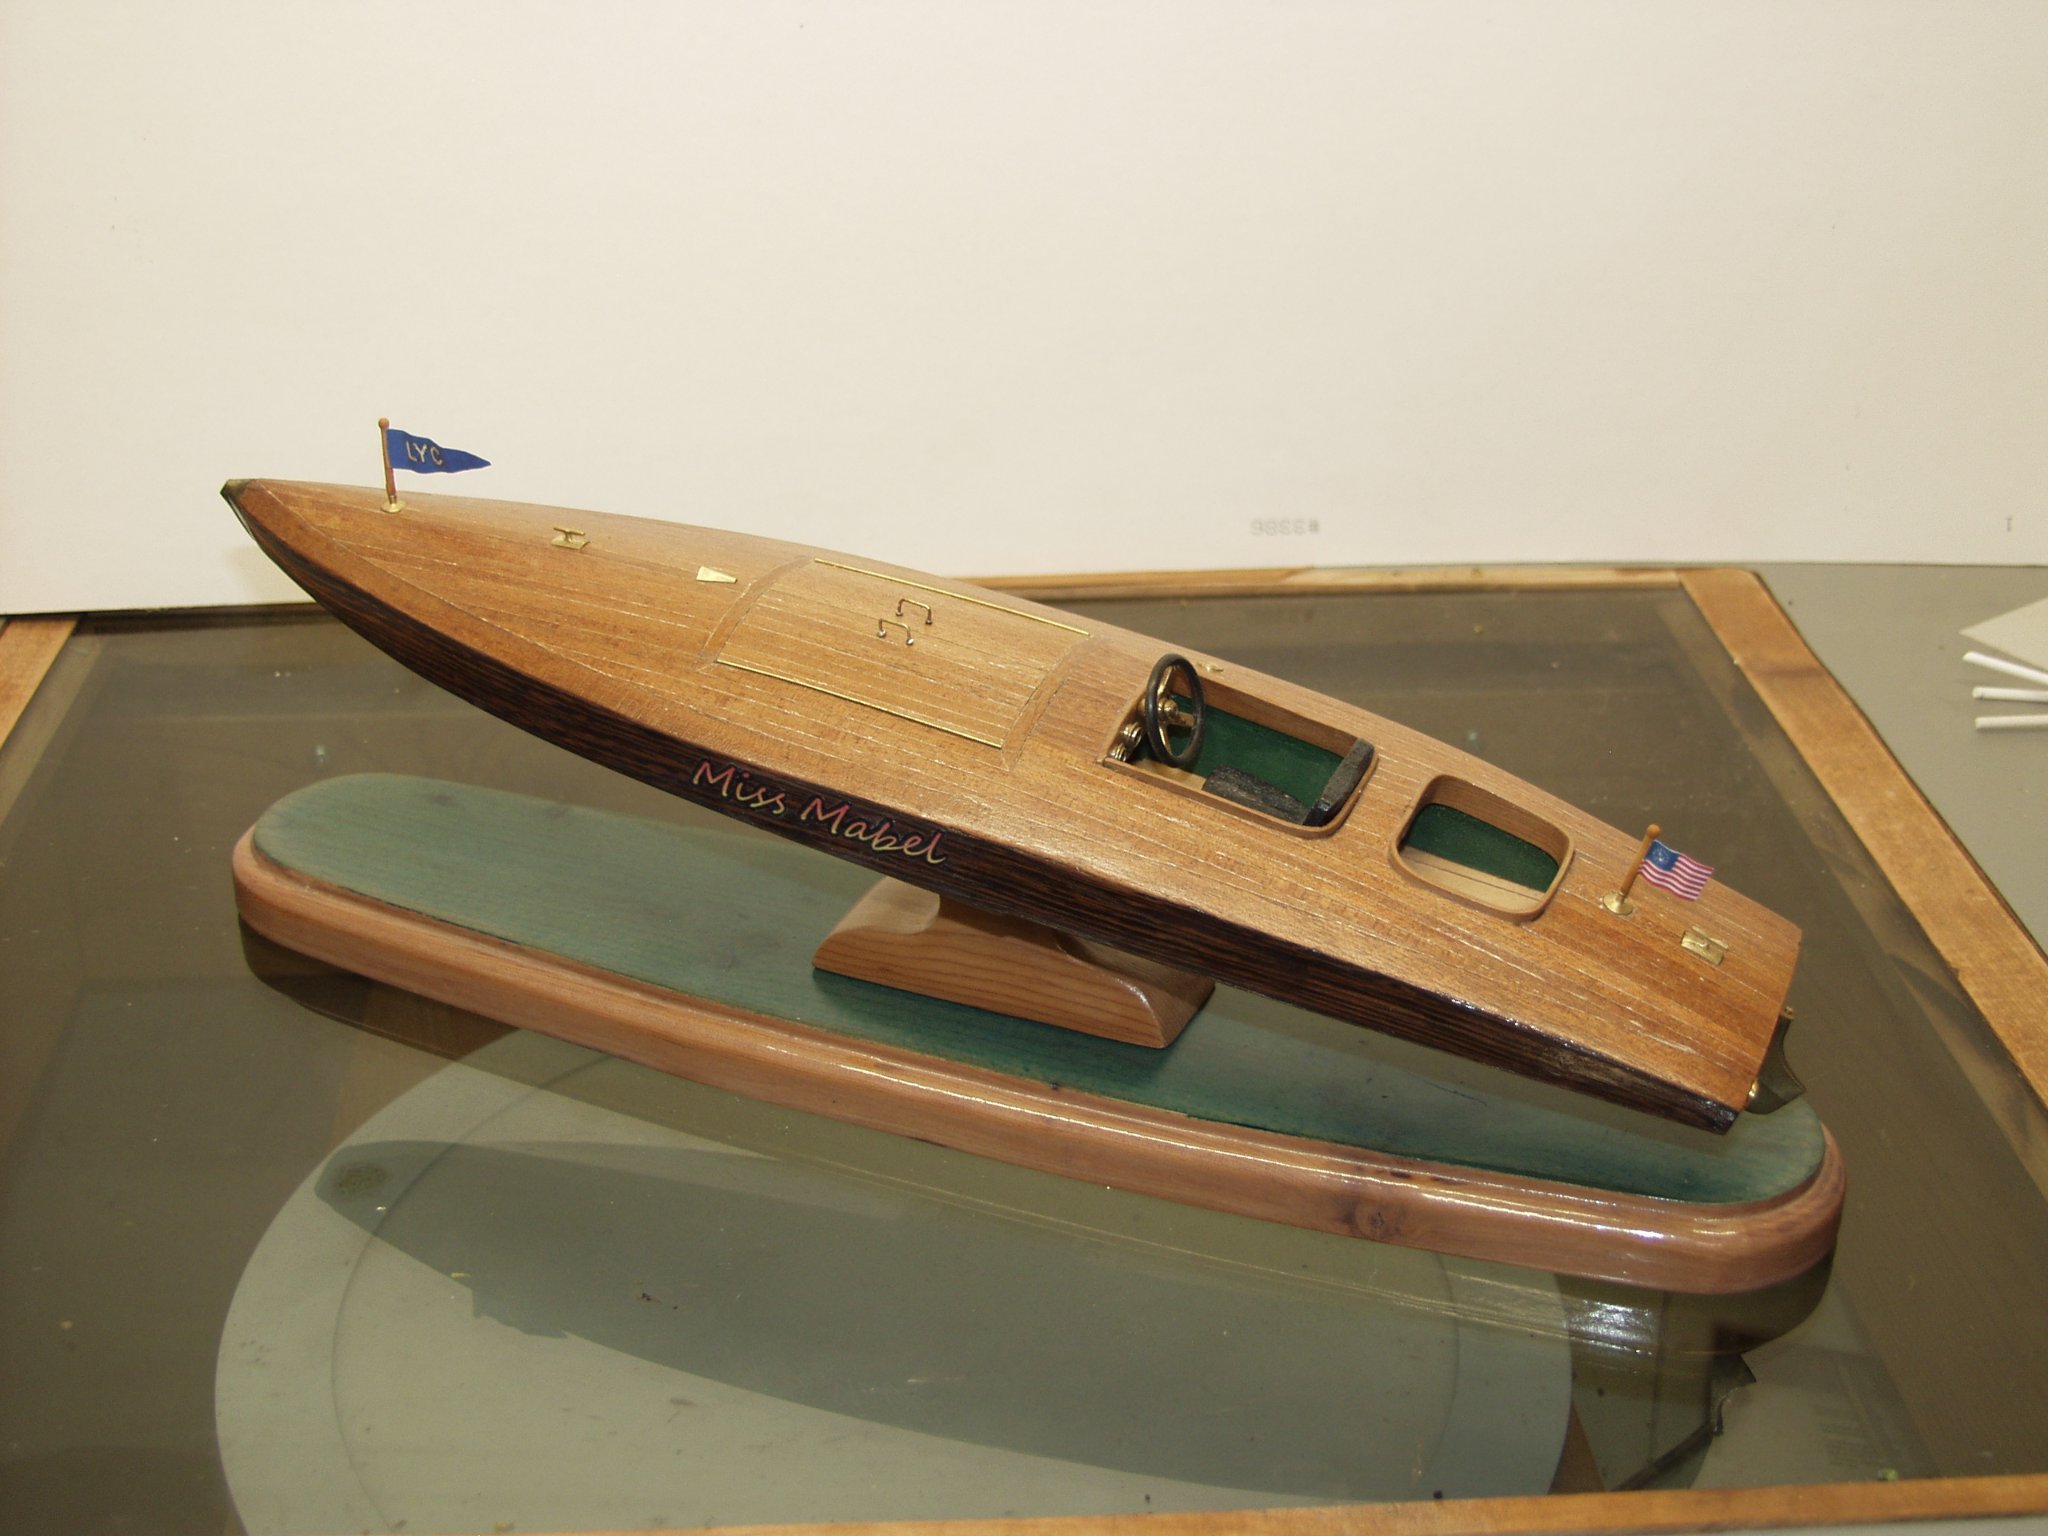
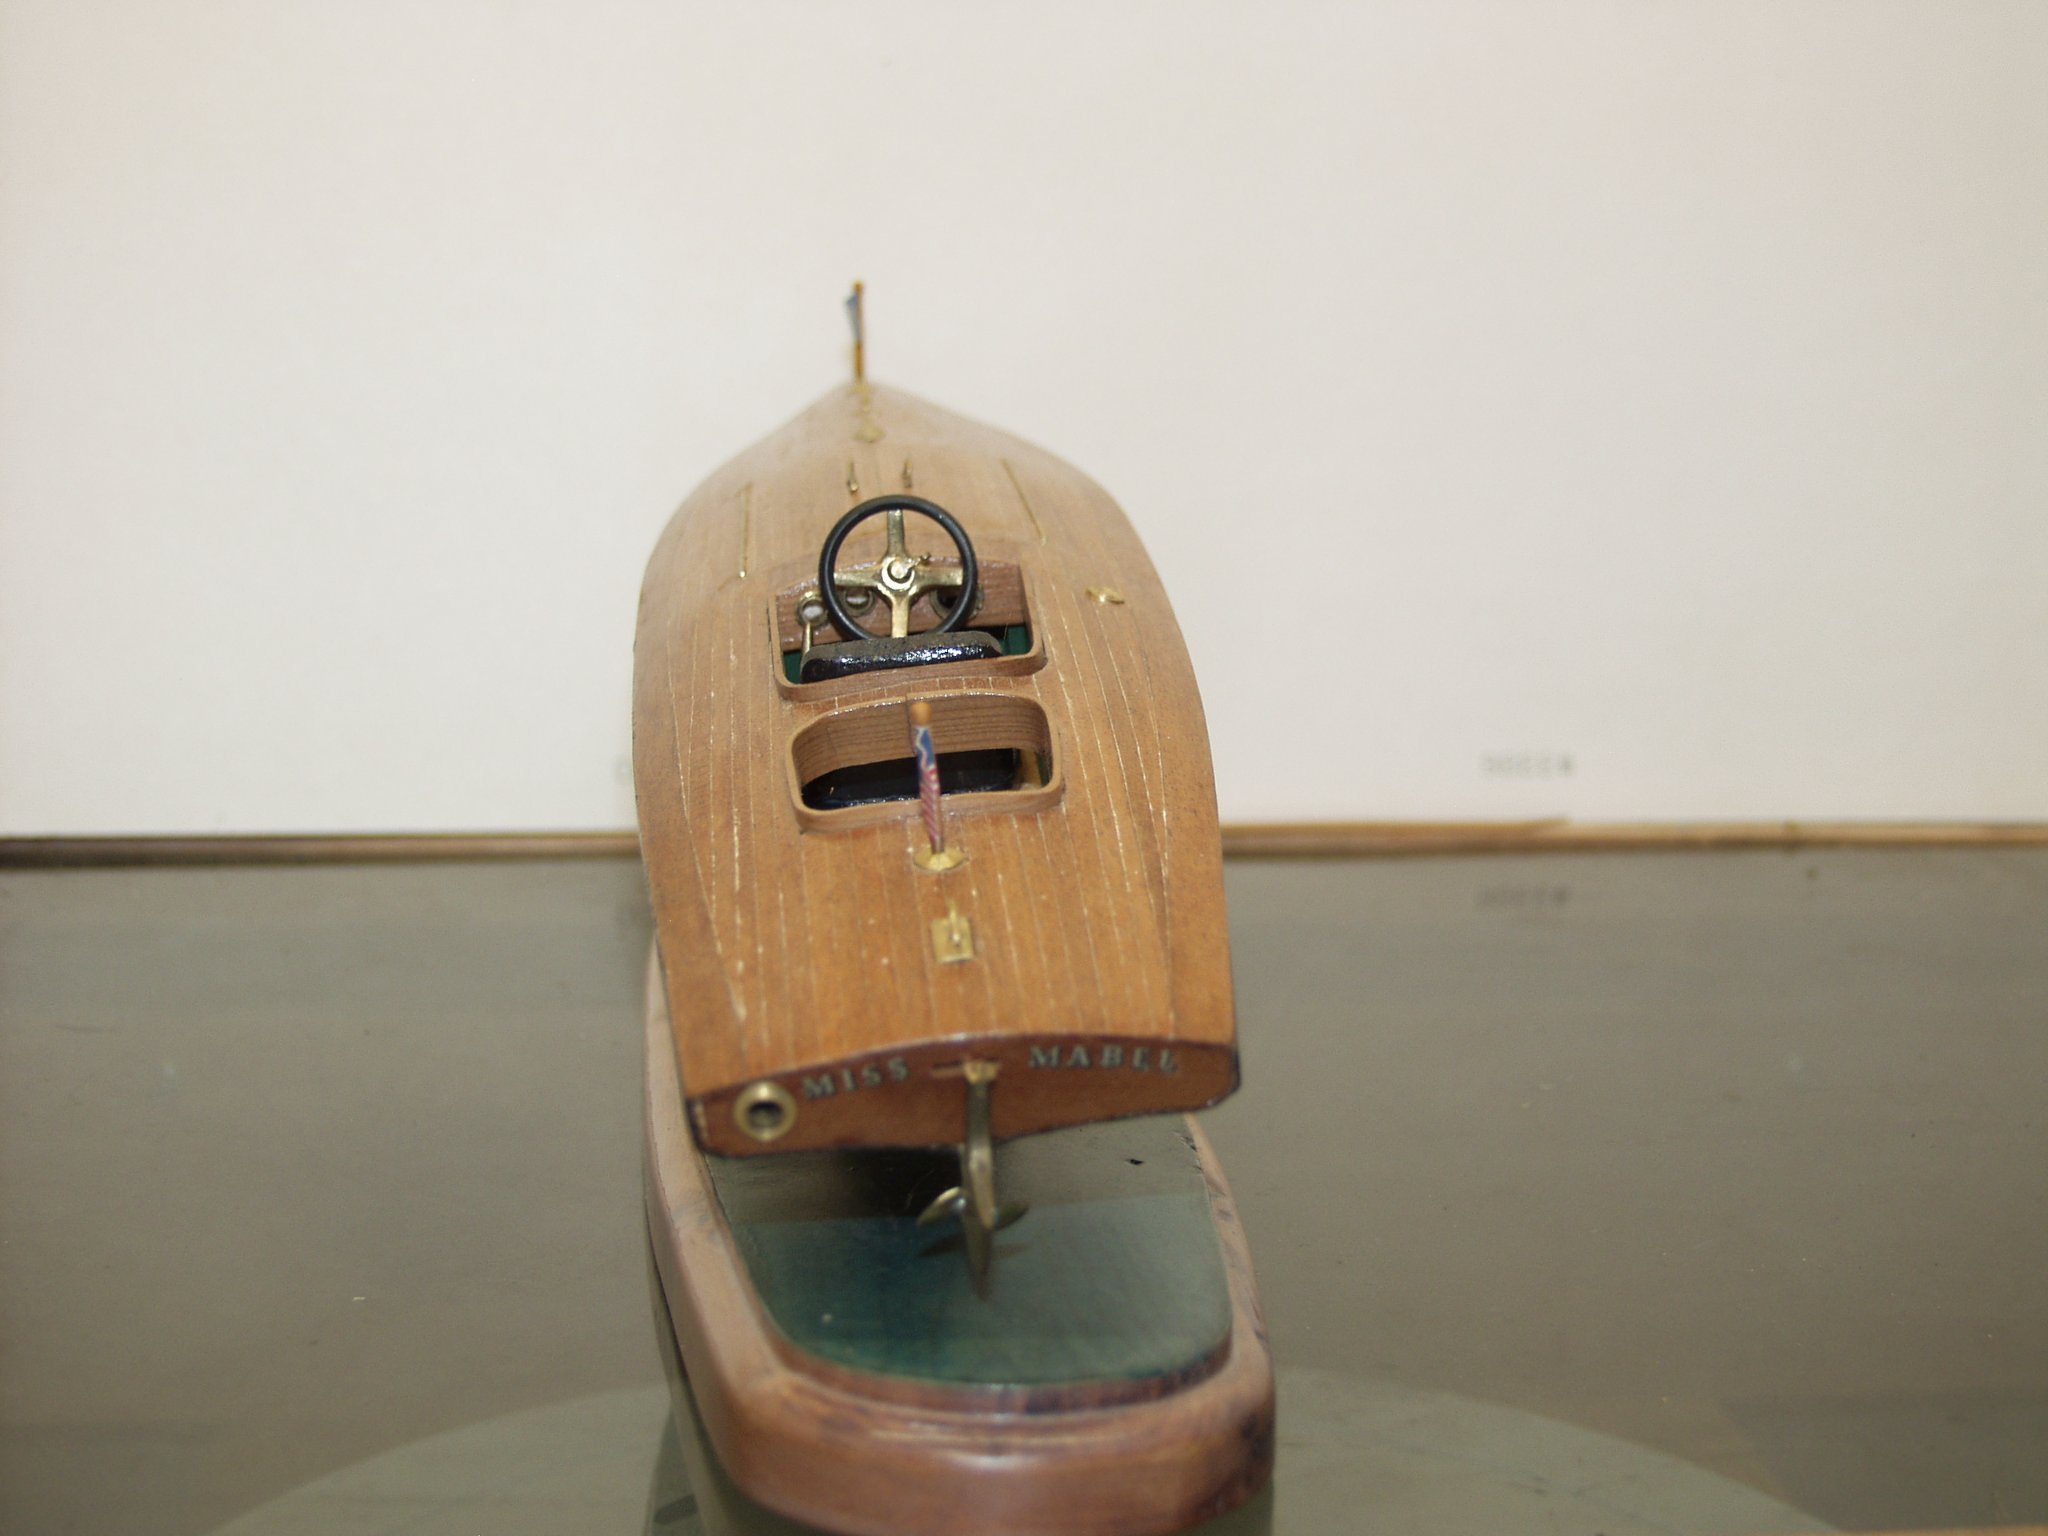
Well it's time I wrap this one up. I have added a Burgee and a club pendent which I made from paper, printed both sides than glued together and mounted on staffs. The boat has been renamed It is now called Miss Mabel. The reason for that is that this little burg I live in is called Lebam. The first postmaster wanted to name this whistle stop after his daughter (Mabel) to which she did not want. So he reversed the spelling and the town of Lebam it became. I thought it only fitting that I rename by boat by reversing Lebam and calling it Miss Mabel. The club pendent letters L.Y.C. stand for Lebam Yacht Club not that there ever was one.