HOLIDAY DONATION DRIVE - SUPPORT MSW - DO YOUR PART TO KEEP THIS GREAT FORUM GOING! (Only 24 donations so far out of 49,000 members - C'mon guys!)
×


steamschooner
-
Posts
369 -
Joined
-
Last visited
Content Type
Profiles
Forums
Gallery
Events
Everything posted by steamschooner
-
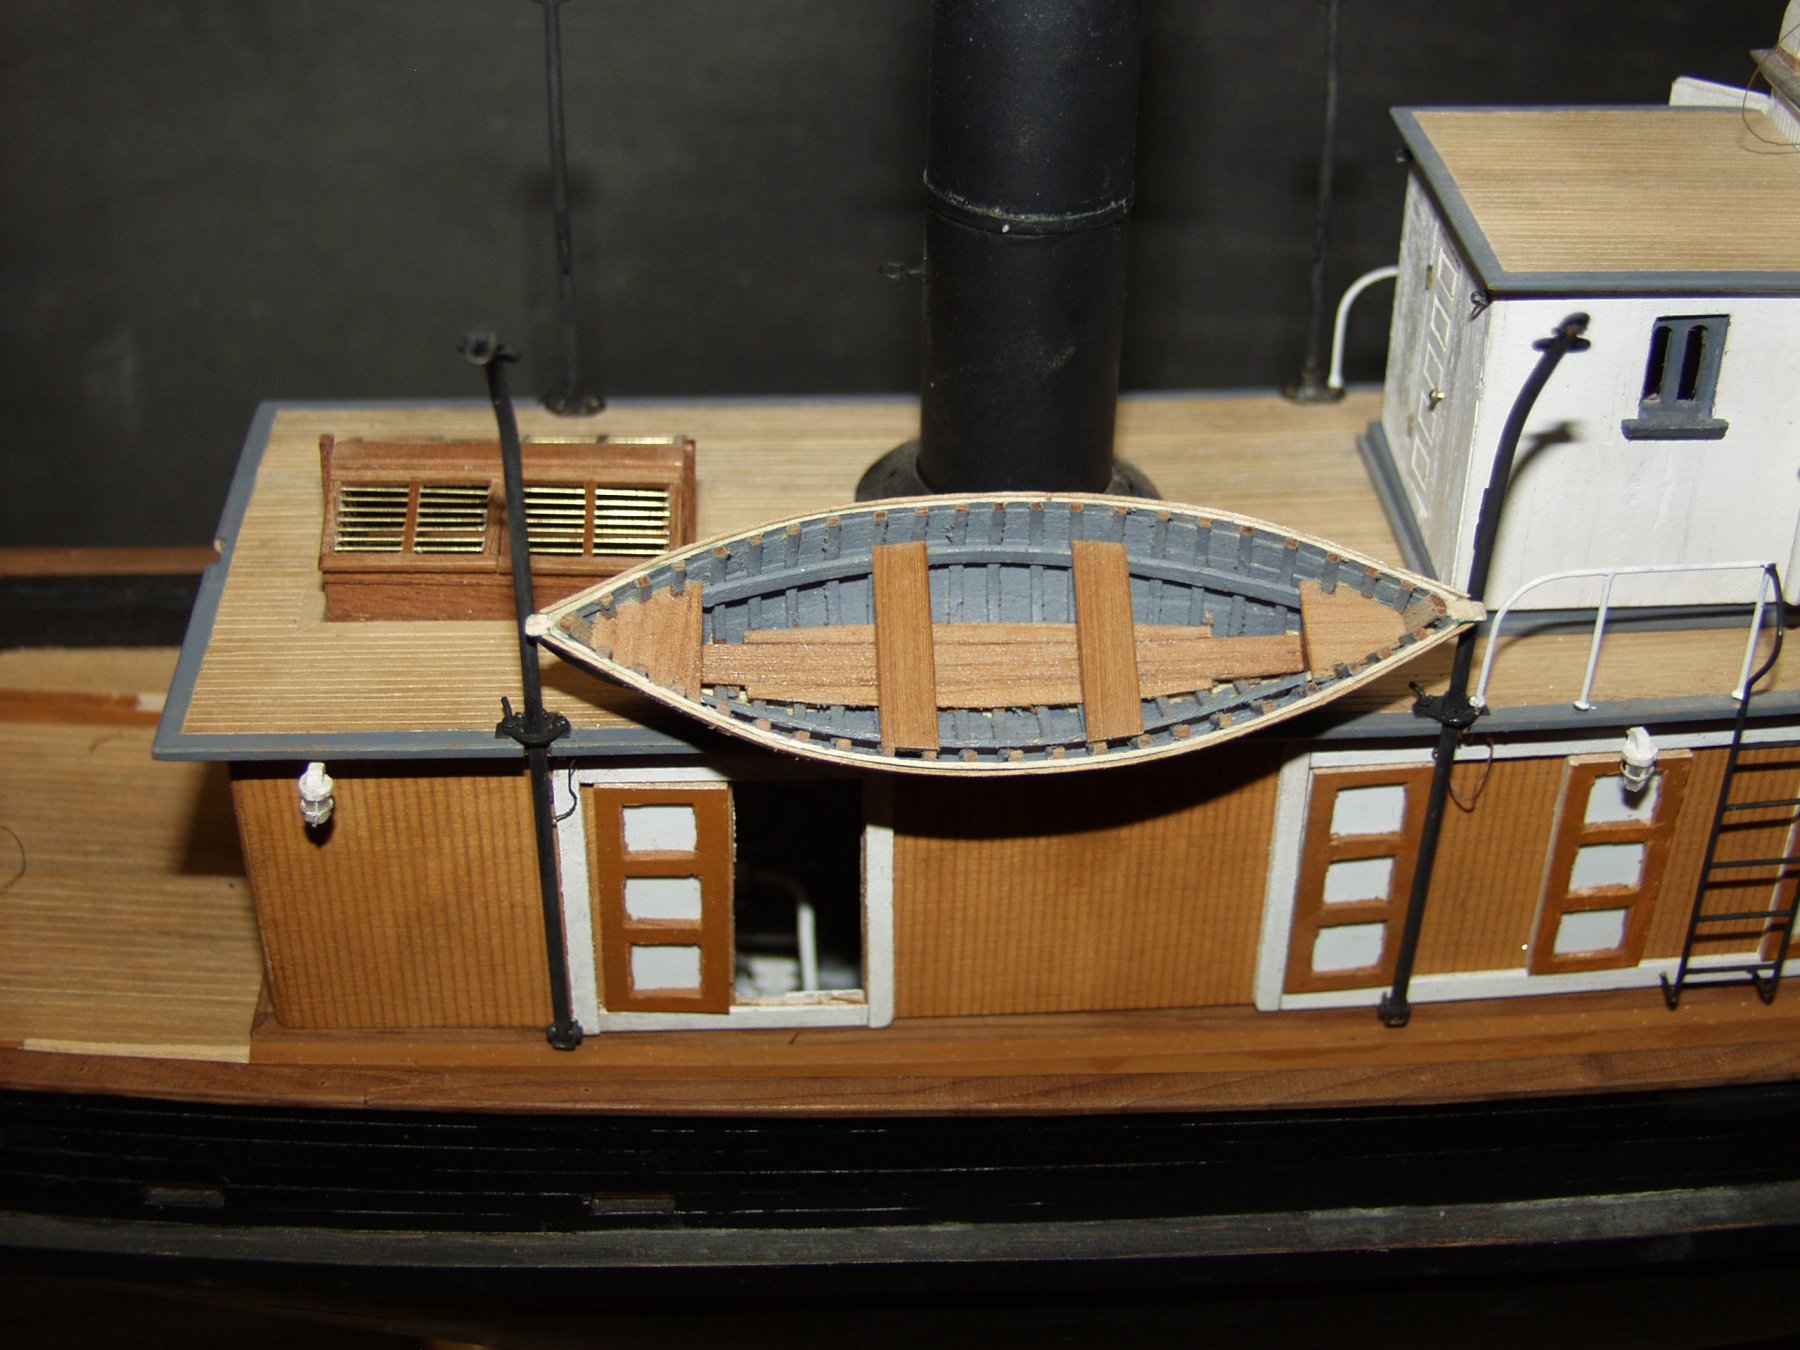
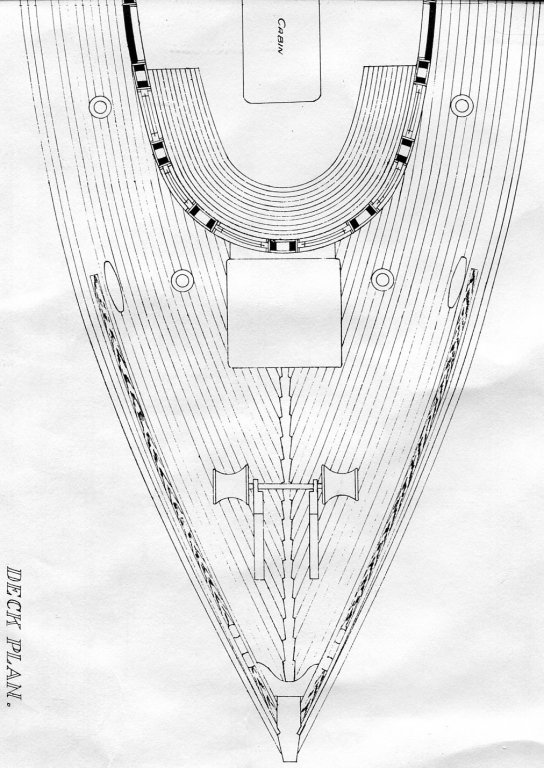
 Kurt, Like John said it's a curved bench seat. Here is what is shown of the stack.
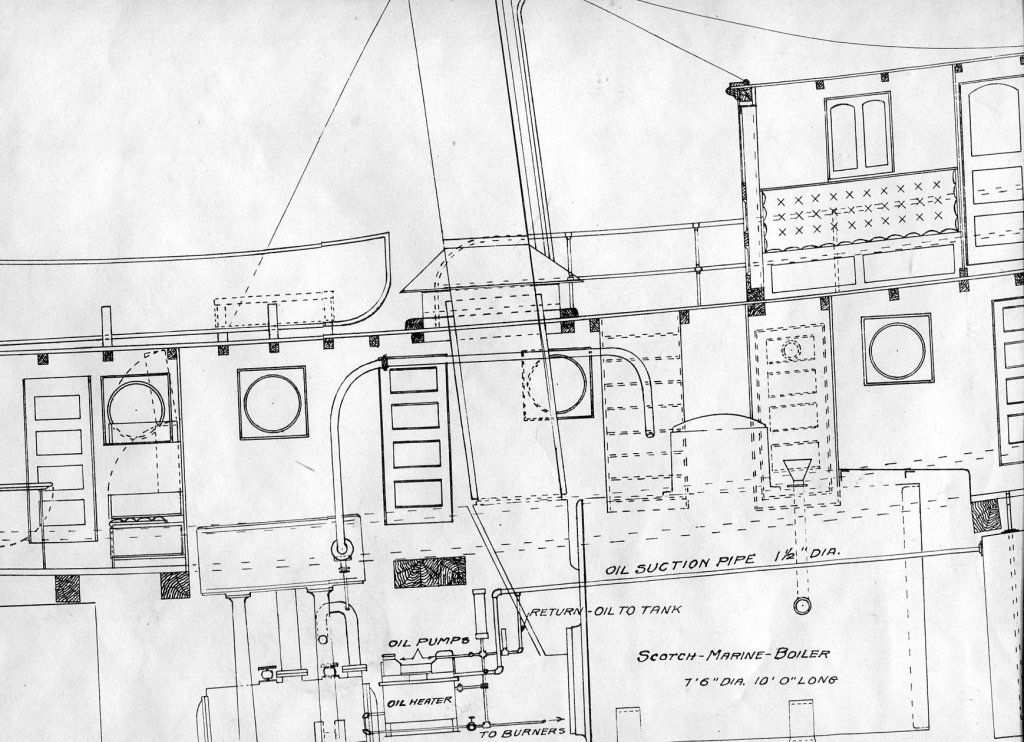

-
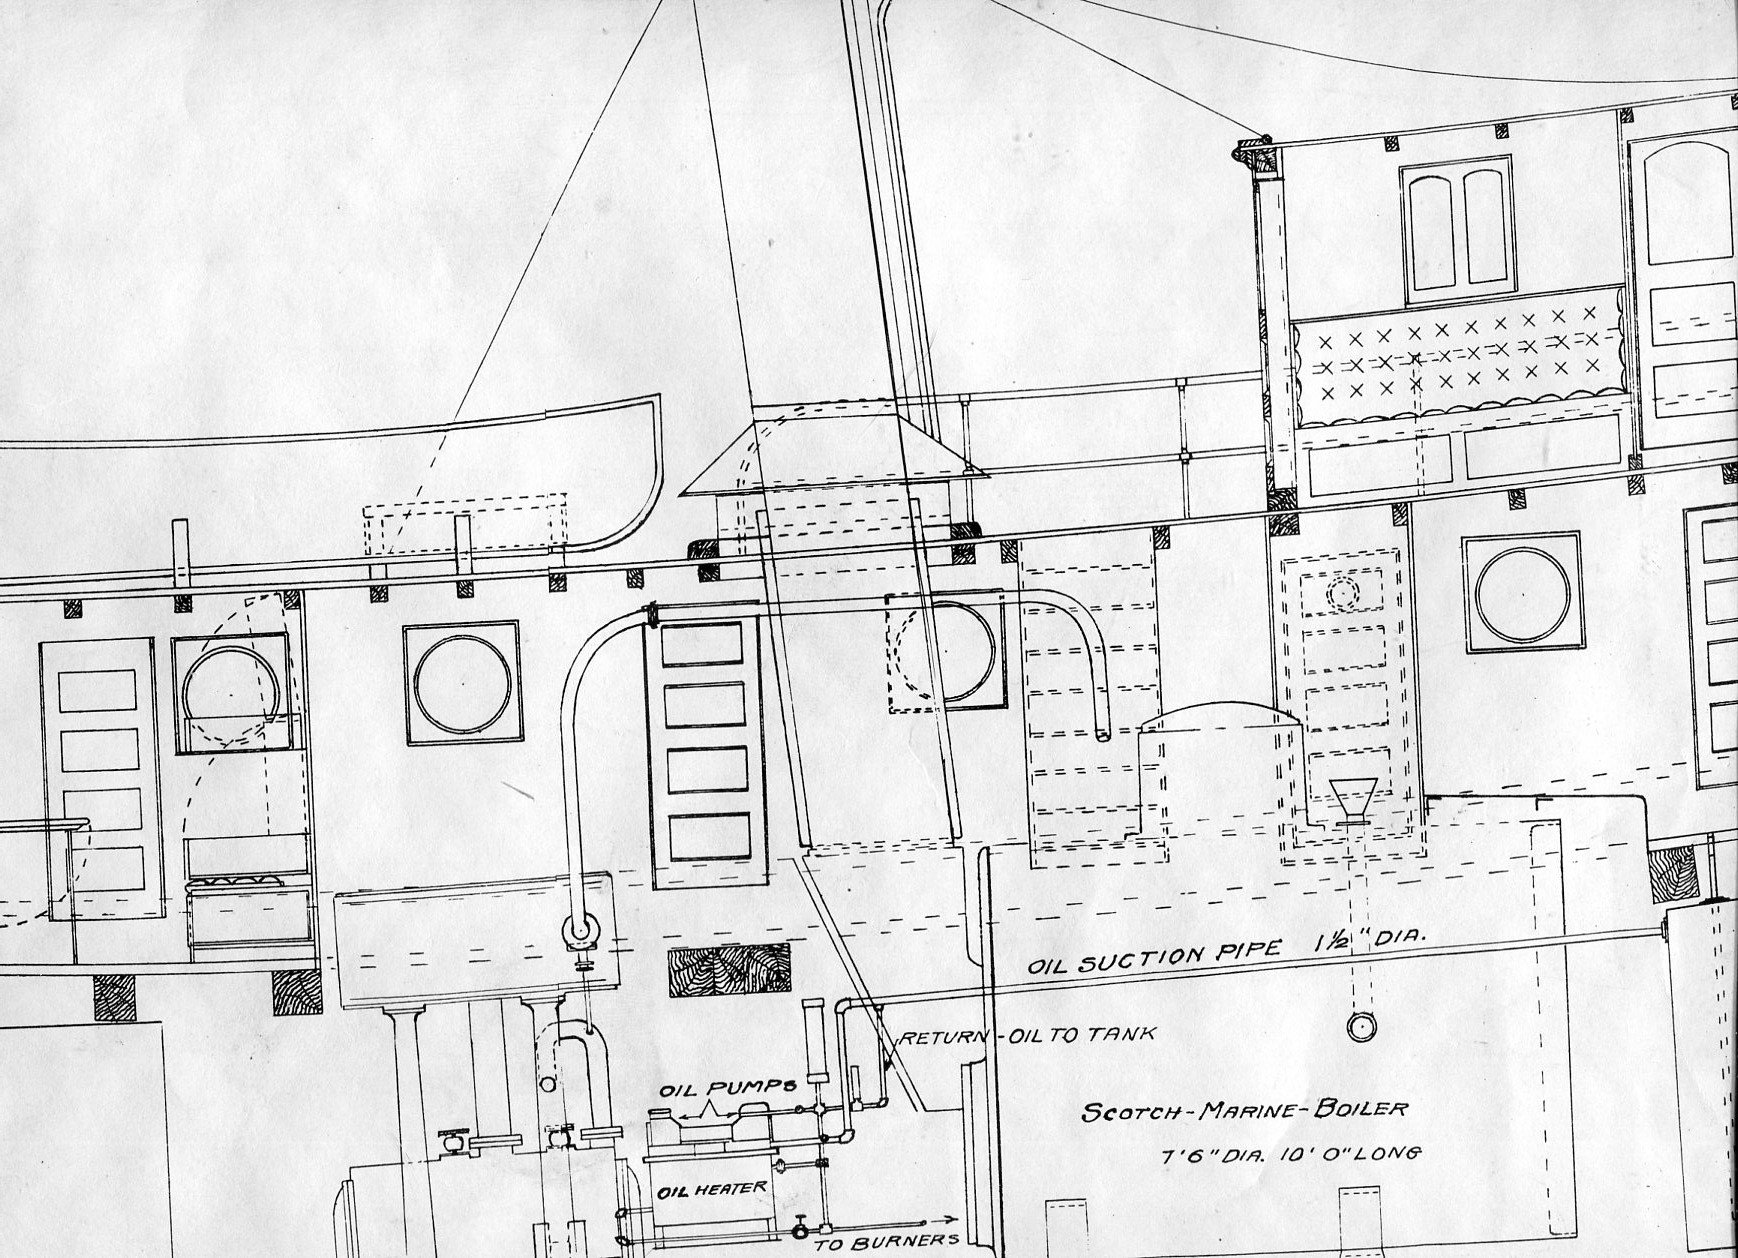
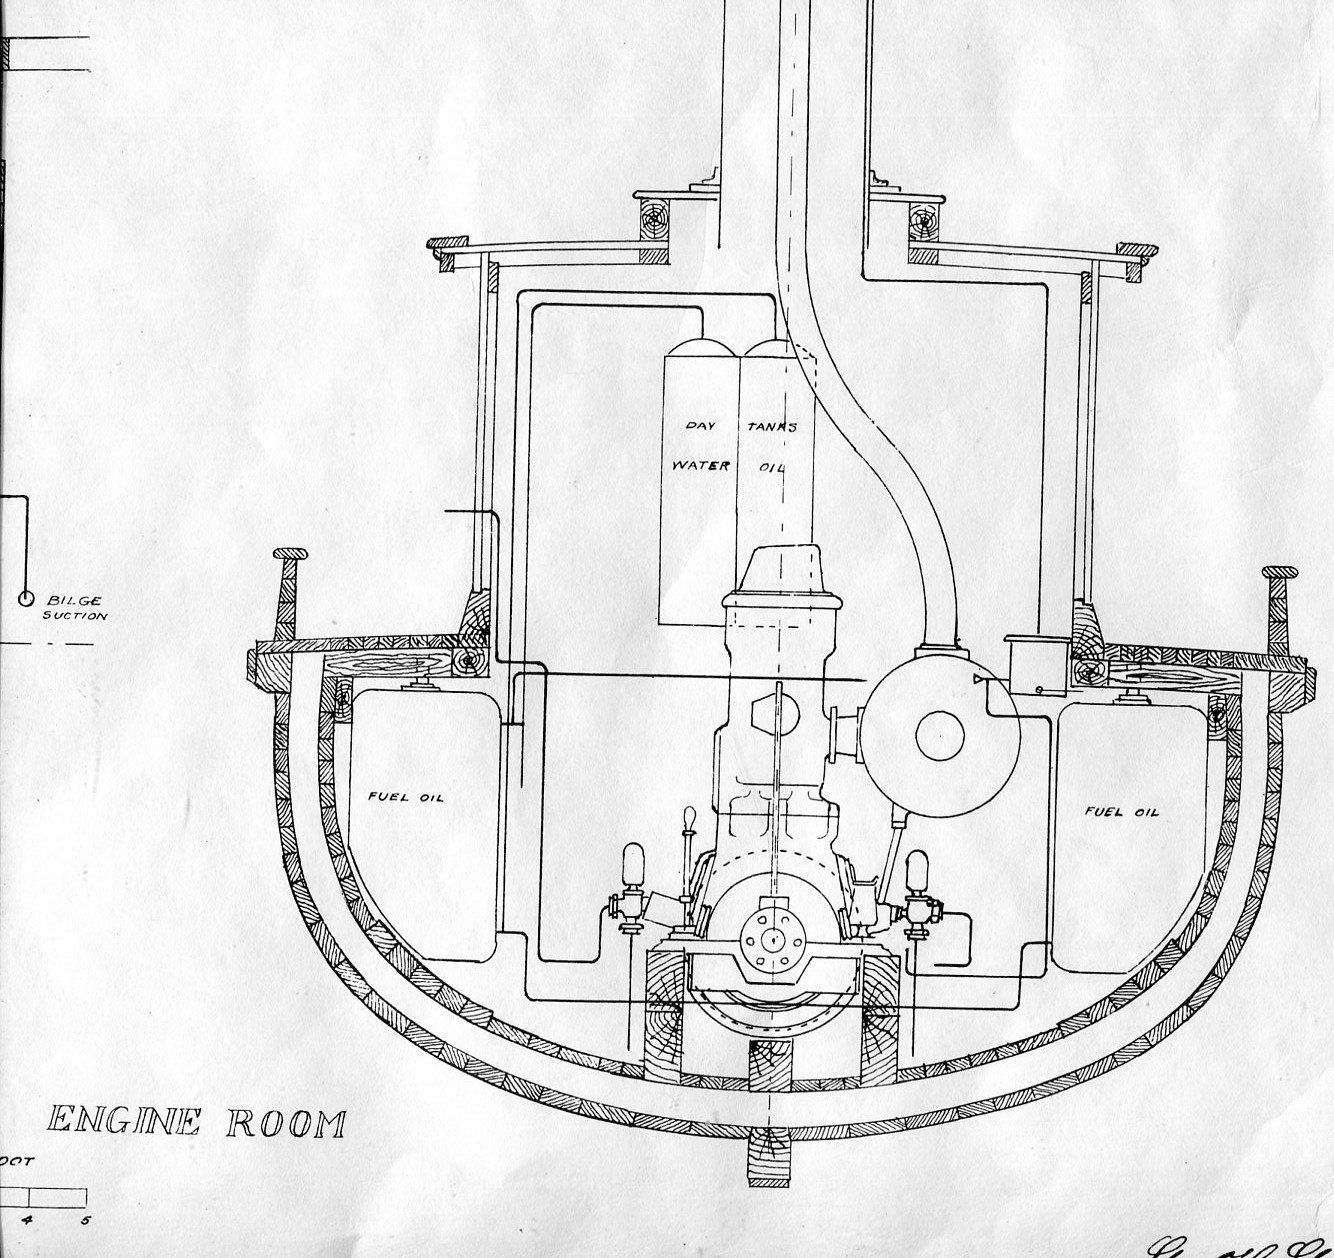
Kurt, Here is a couple of scans of a steamtug plans.
-
Kurt, Glad you stopped by and like my project. Patrick, I have been keeping a eye on things even if I have not been working on my project. Yours is coming along as well !
- 208 replies
-
- 2
-

-
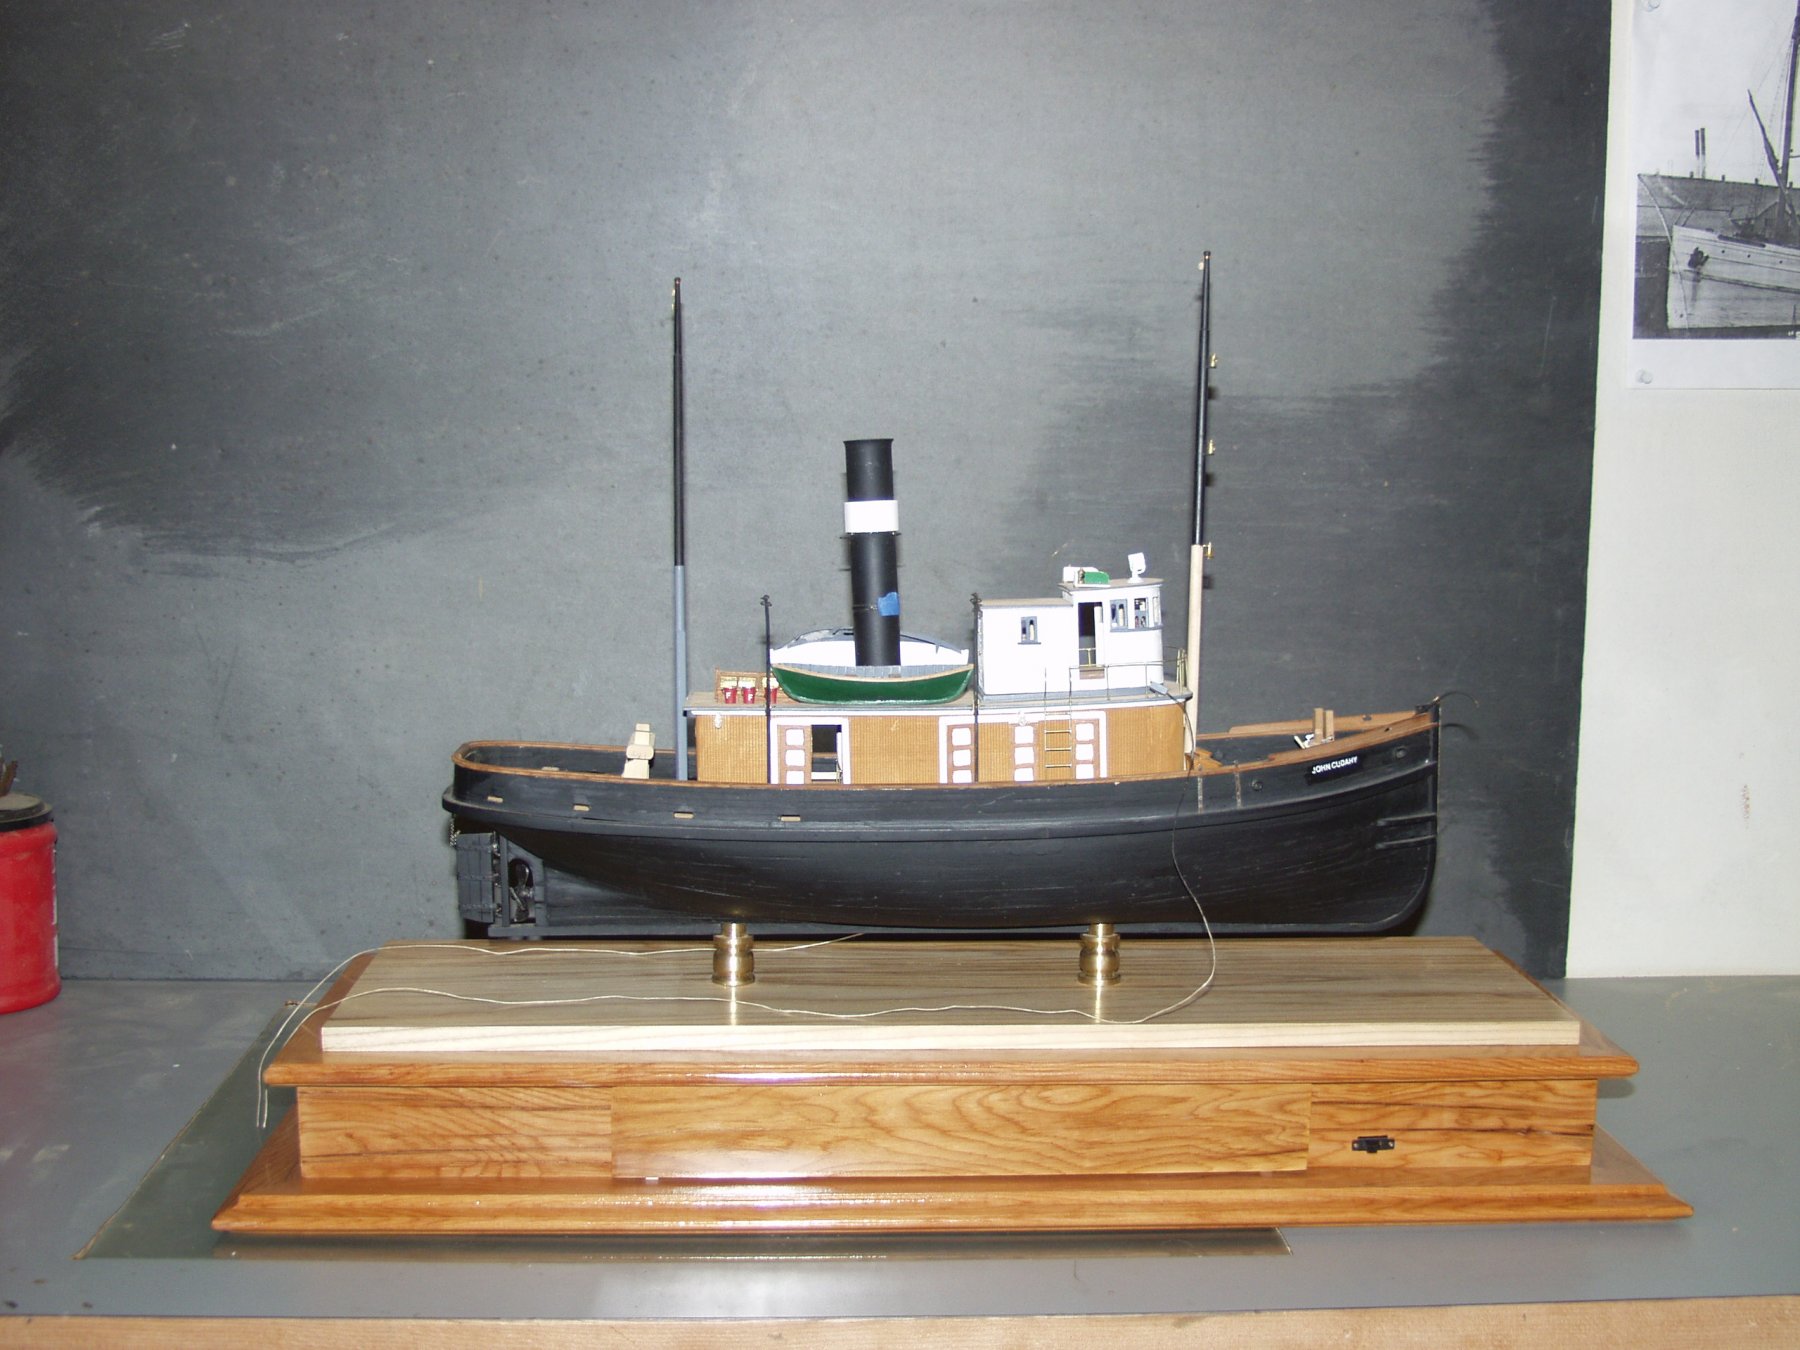
- john cudahy
- finished
- (and 1 more)
-
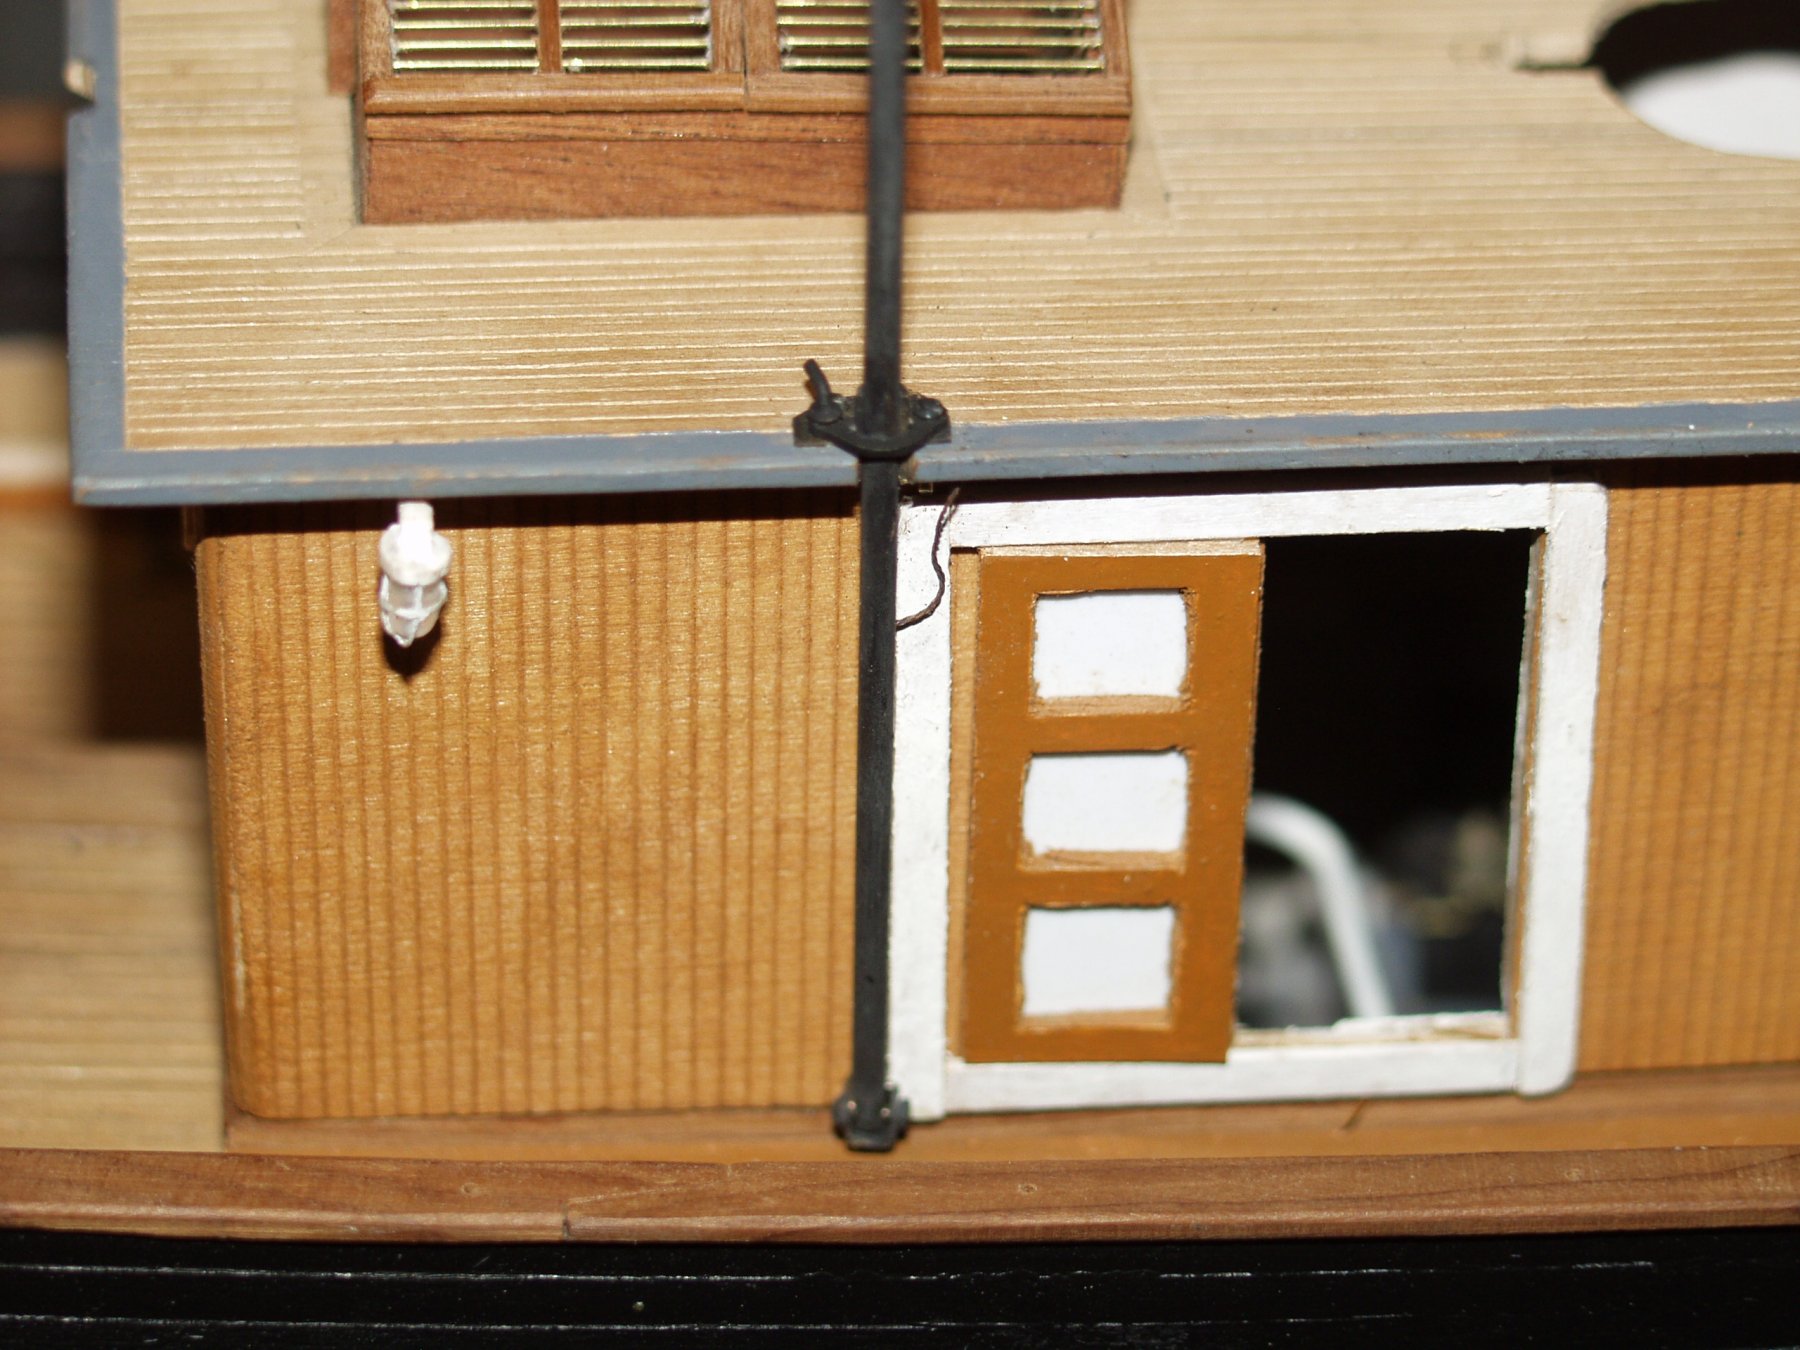
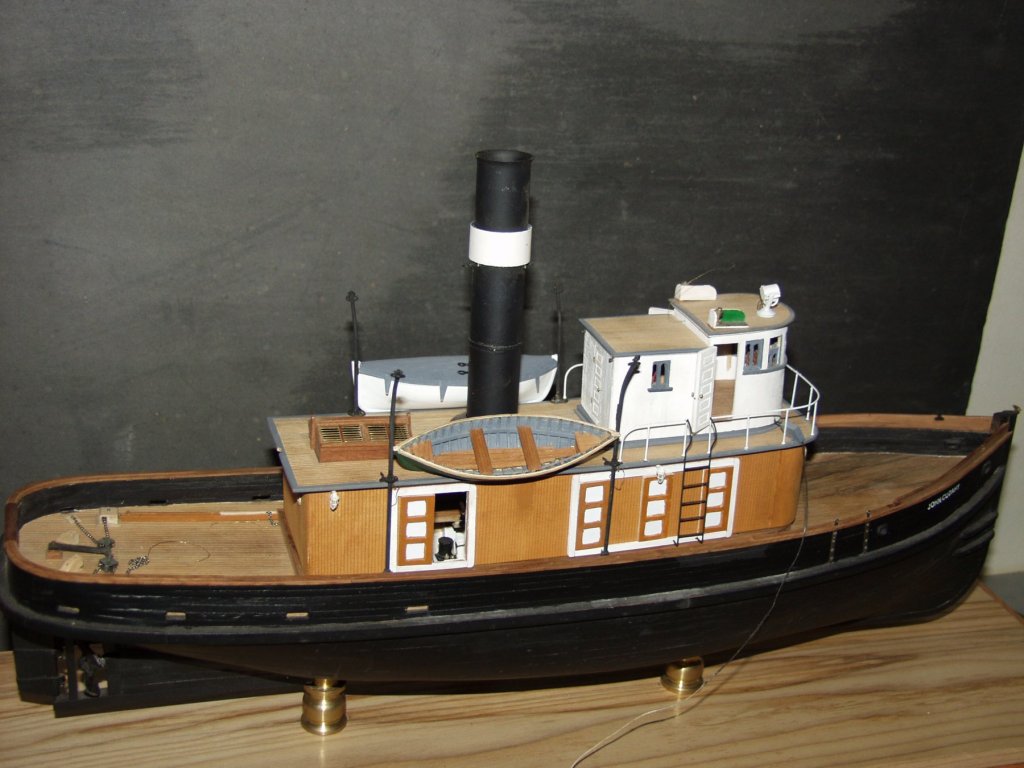
Well now that summer is winding down I have had the chance to get back in the ship yard. Not a lot to show but did get the boat davits installed with their release handles and limit straps. They will still need to be rigged with boat tackles and davit stays ( term? ) Still plenty to do.


- 208 replies
-
- 7
-
-
- john cudahy
- finished
- (and 1 more)
-
Greetings from the Pacific Northwest
steamschooner replied to ErRains's topic in New member Introductions
Eric, Welcome to MSW The group in Portland still meet the third Thursday of the month on board the steamer"Portland" -
Wonderful job!!! Nils congratulations on finishing her.
- 2,625 replies
-
- 3
-
-
- kaiser wilhelm der grosse
- passenger steamer
- (and 1 more)
-
Does anyone have any info on this kit supplier? Are they still active? There is a web site but contacting by phone has been a issue. Thanks for any info
-
Not much of a update but I have my base nearly finished.

- 208 replies
-
- 4
-
-
- john cudahy
- finished
- (and 1 more)
-
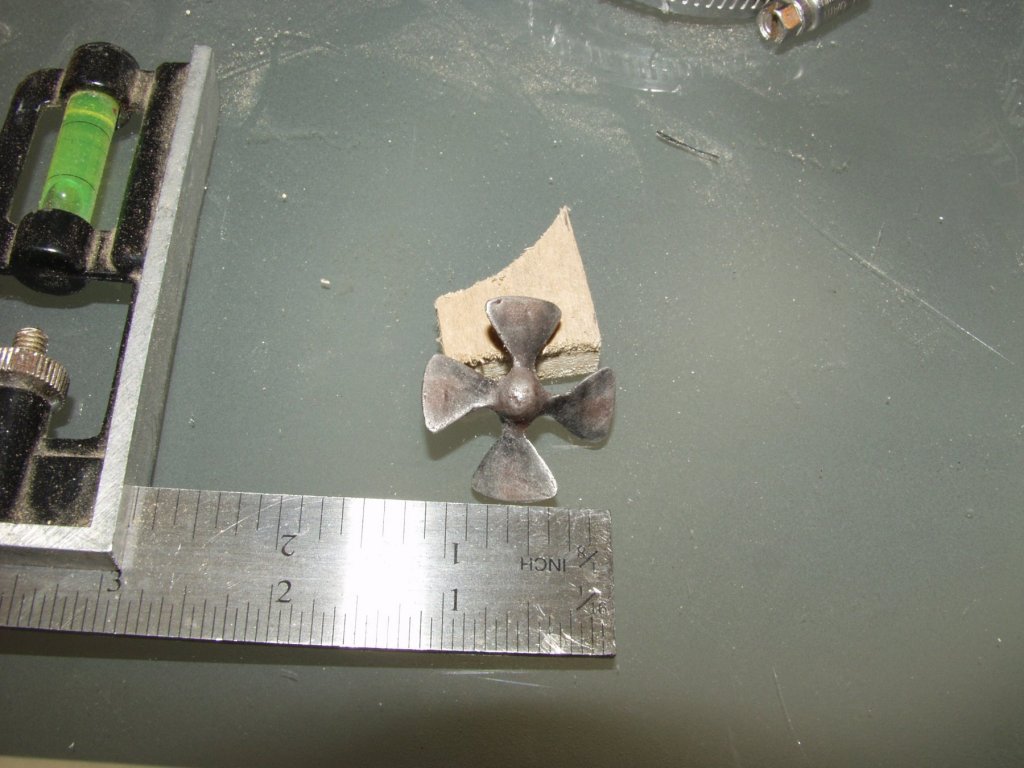
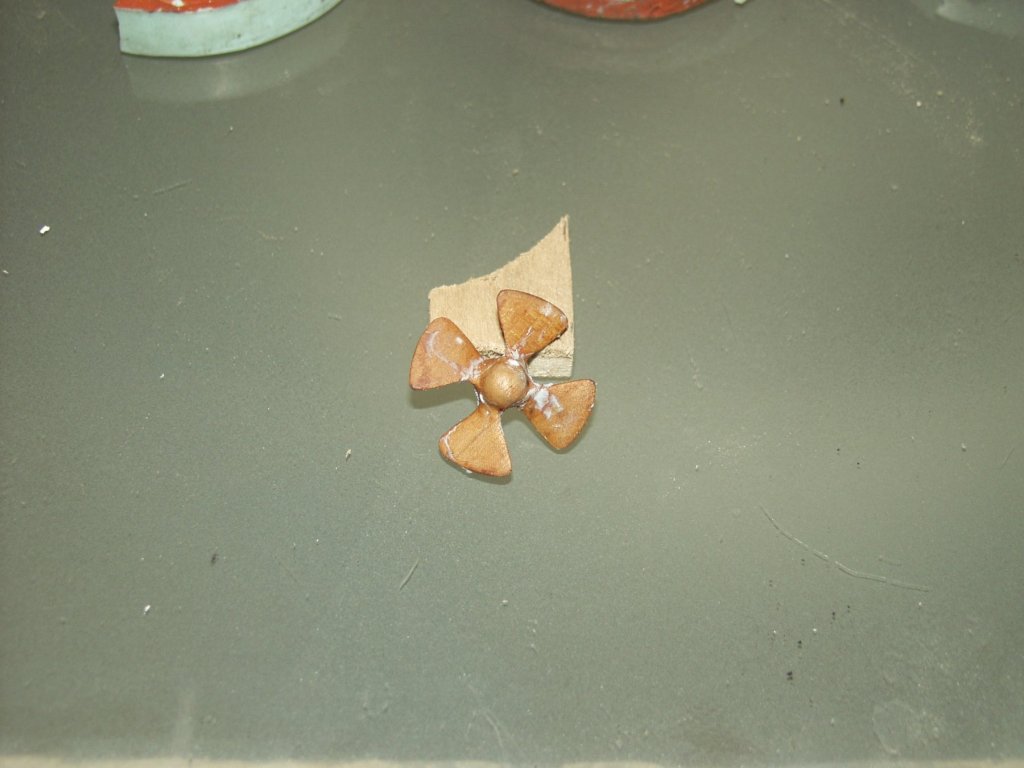
Casting Propellers
steamschooner replied to steamschooner's topic in Metal Work, Soldering and Metal Fittings
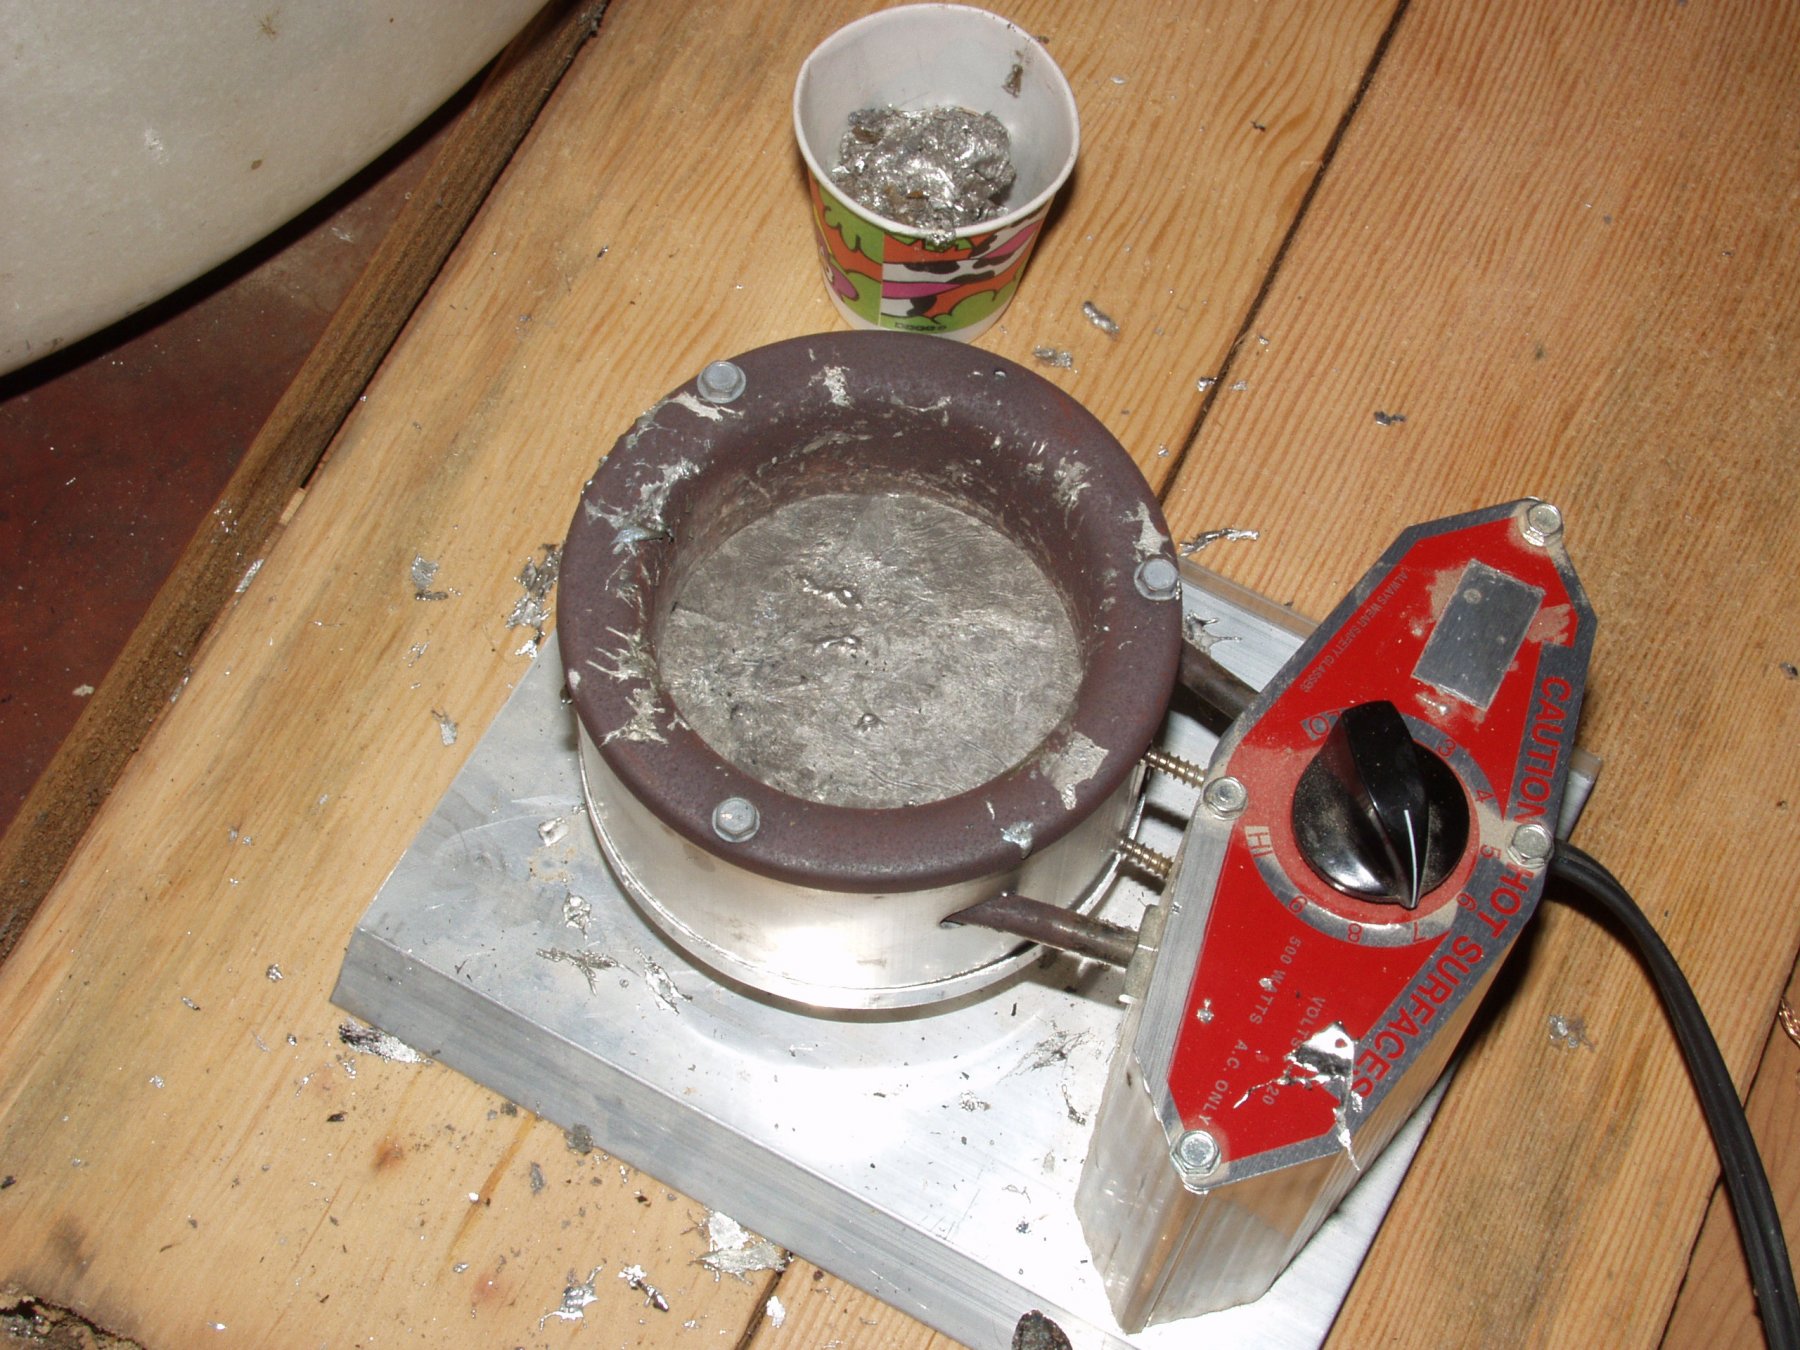
Bill, The melting pot I ordered on line, there are a number of places that sell them. The Contenti Company for one. The centrifugal, A friend in Portland knew of a bare bones used one which I bought. I added the crucible and had a old washing machine tub to put it in. If I start using higher temp metals I will add a lid for safety. I think most large Jewelry making supply places will carry melt pots and centrifigals. The Cerro Cast that I use I bought from a Foundry supply in Portland Oregon. The same place I got the crucible. The vulcanizing rubber, both kinds I purchased from the Contenti Co. Thanks Tom. A big learning curve on this one. -
Patrick, I am blown away every time I stop by. I would be bonkers trying to get that scale of detail.
-
Happy Birthday Bob, Your project is looking good!
-
Casting Propellers
steamschooner replied to steamschooner's topic in Metal Work, Soldering and Metal Fittings
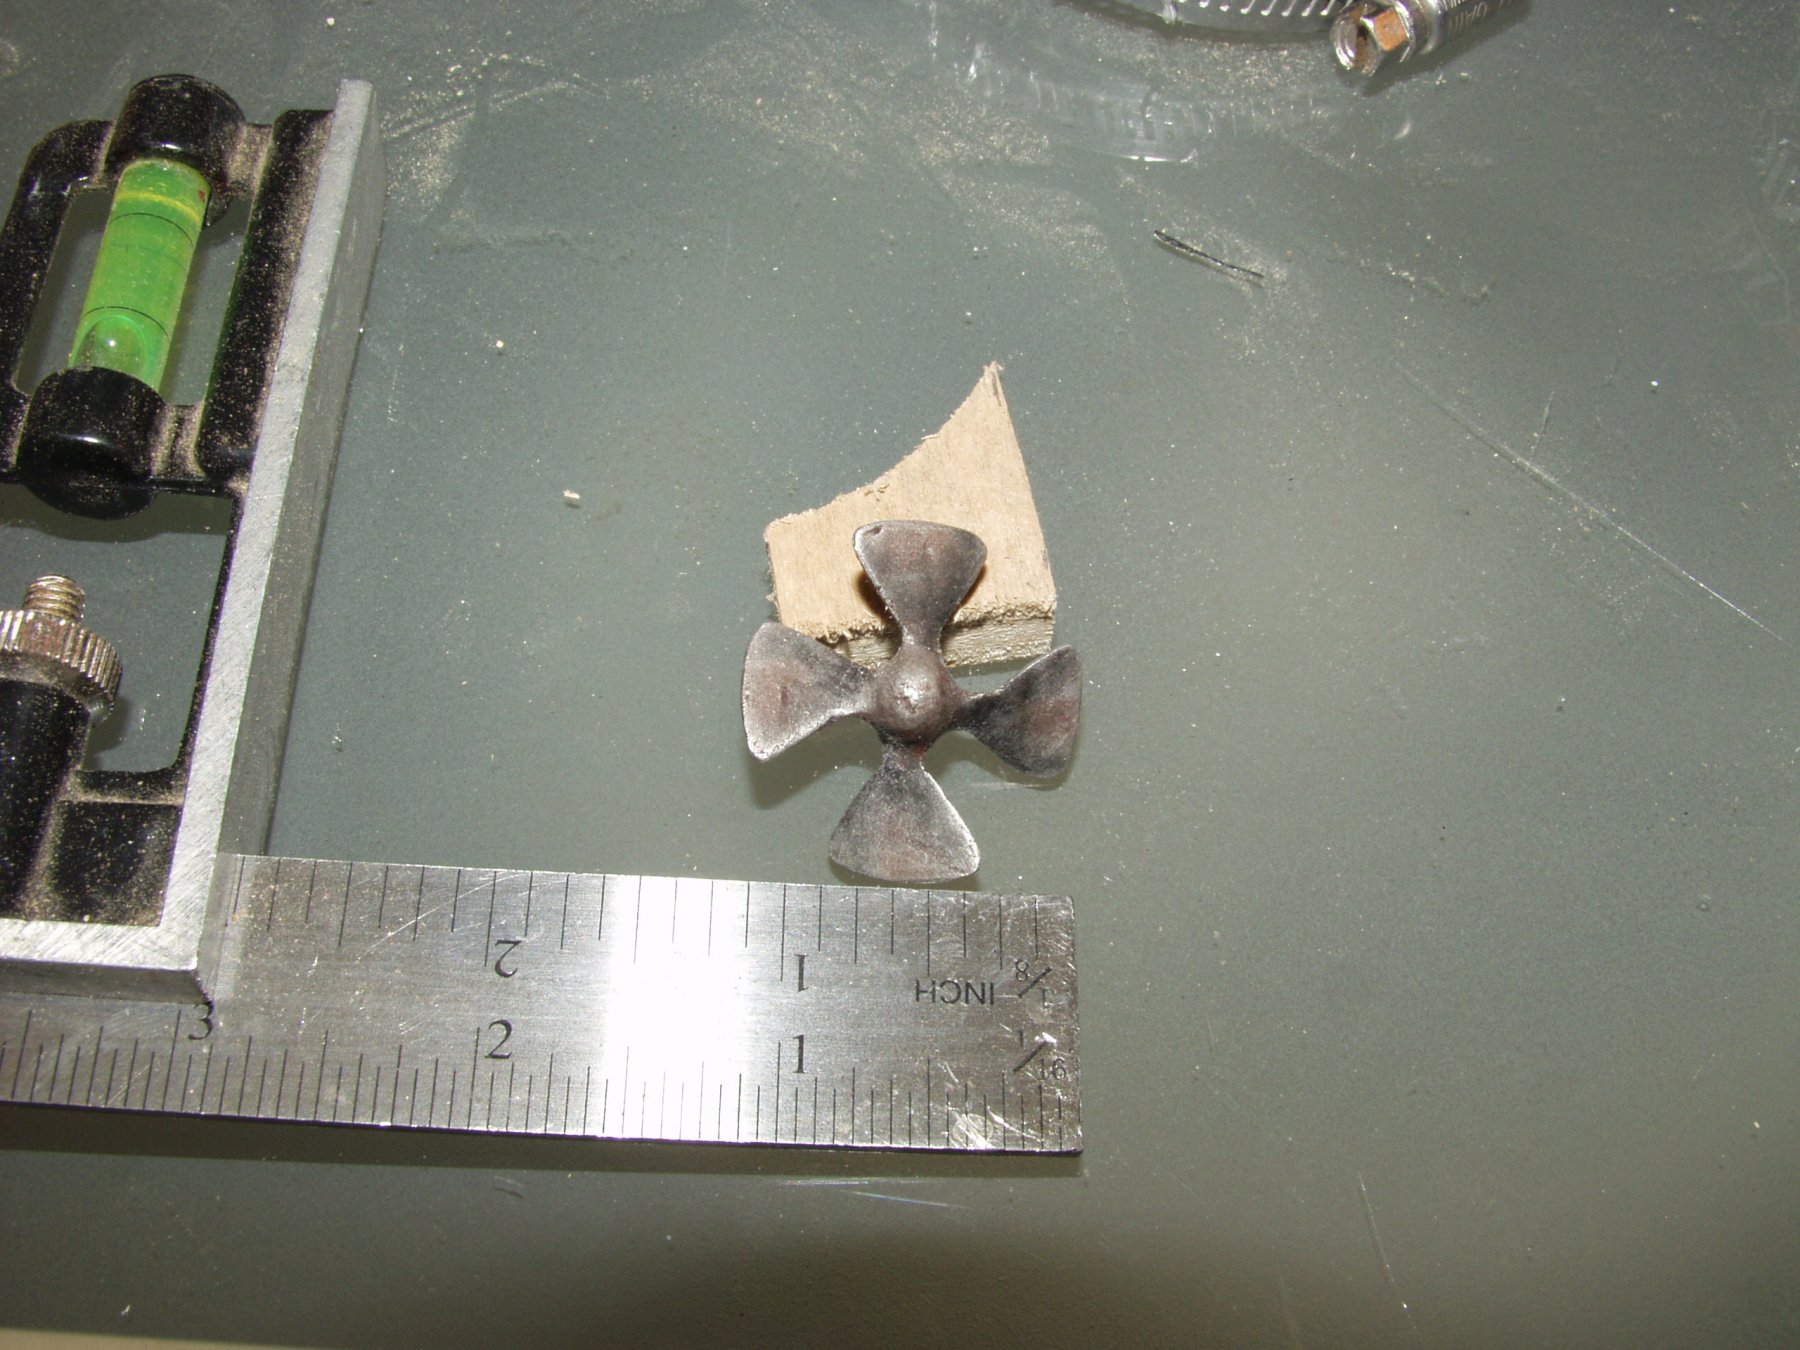
Thank's druxey, I am happy with my results and know I can make more as needed. Here is the one for my " John Cudahy " all colored up and with a ruler.
-
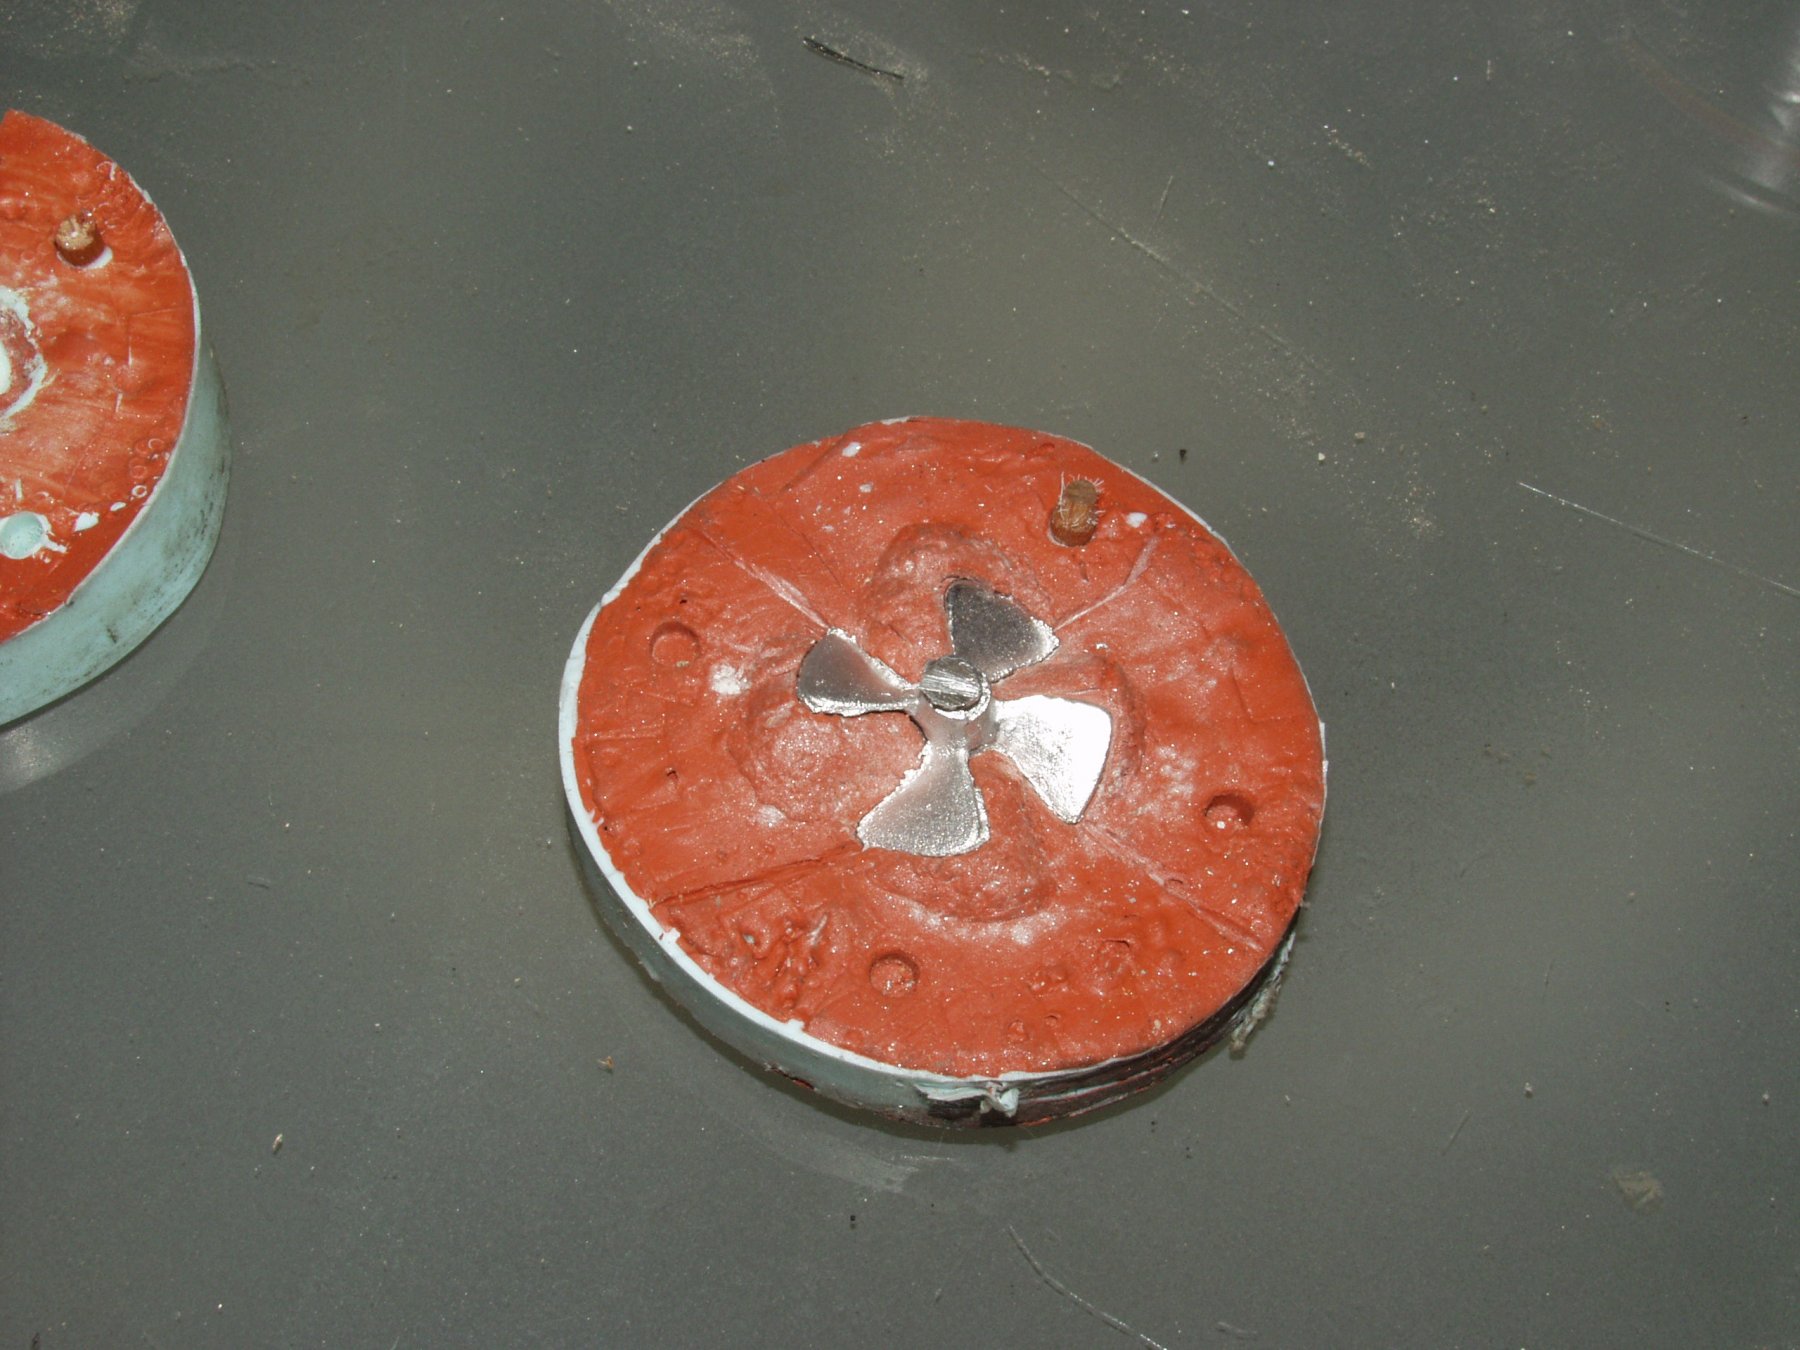
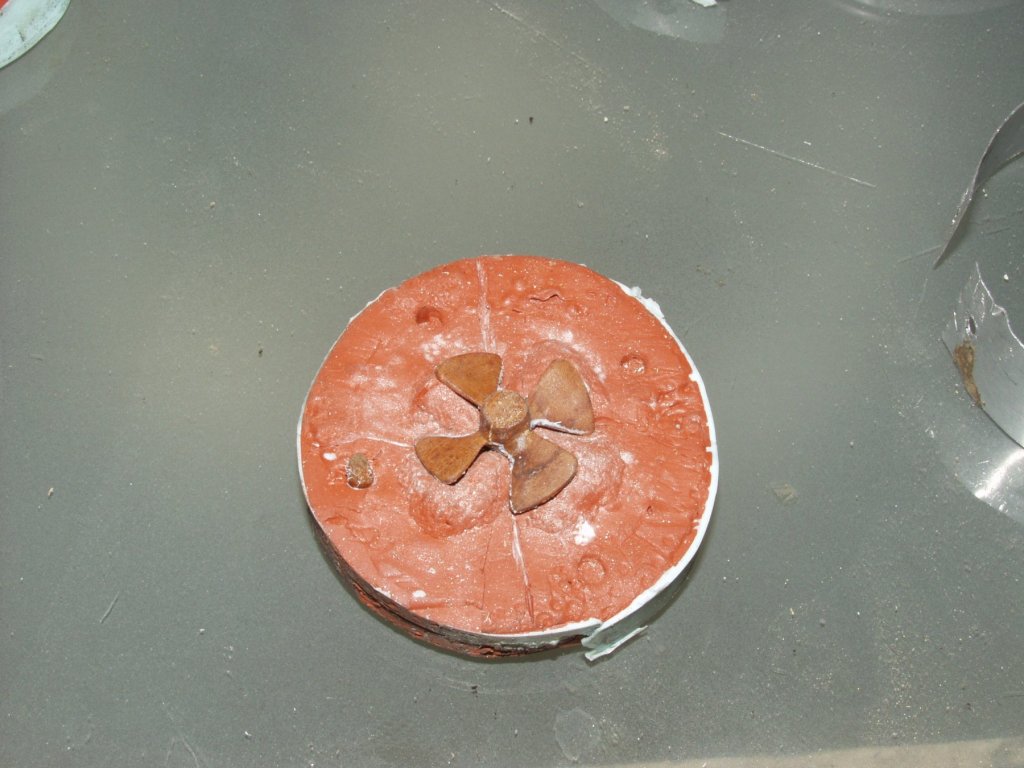
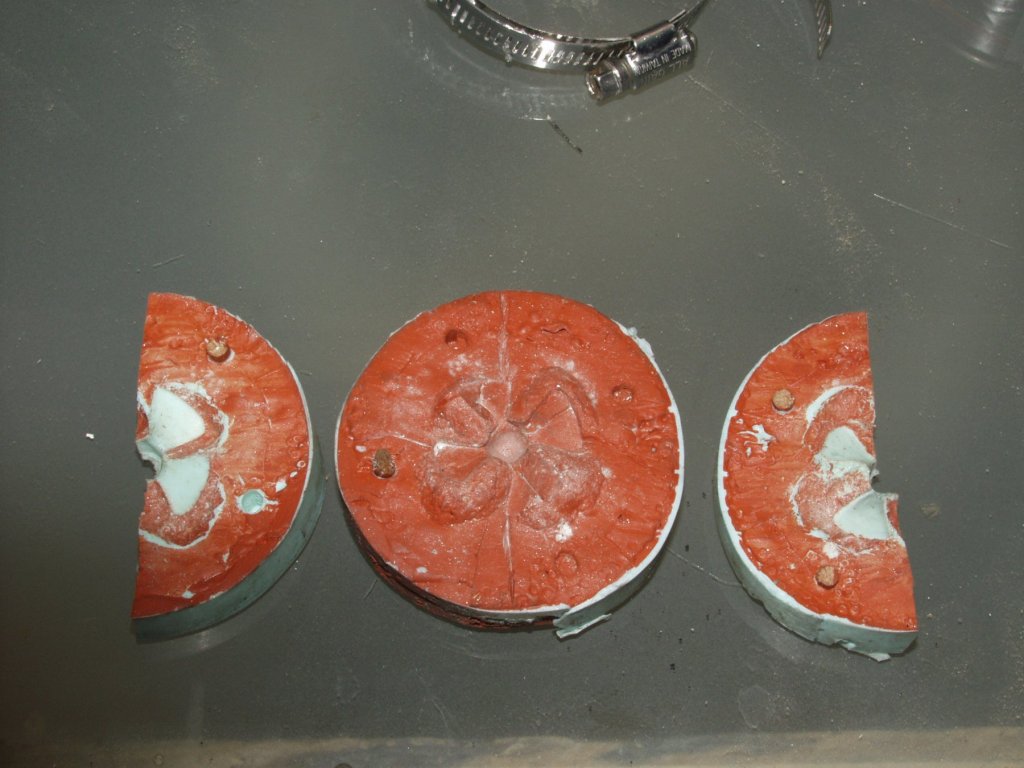
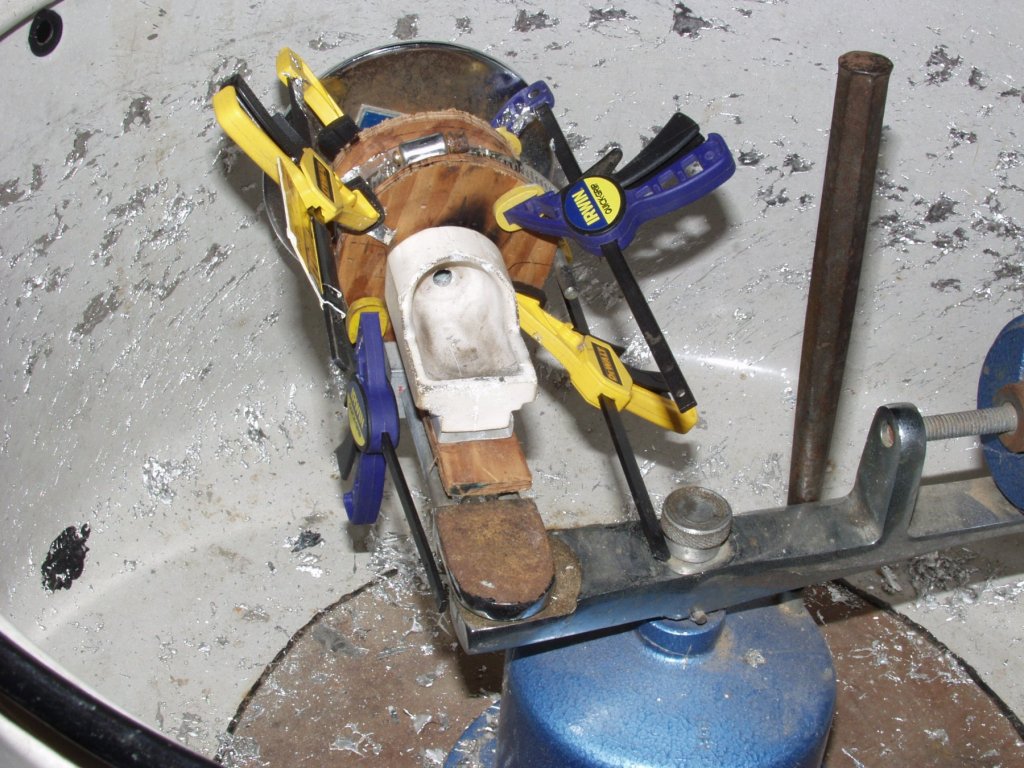
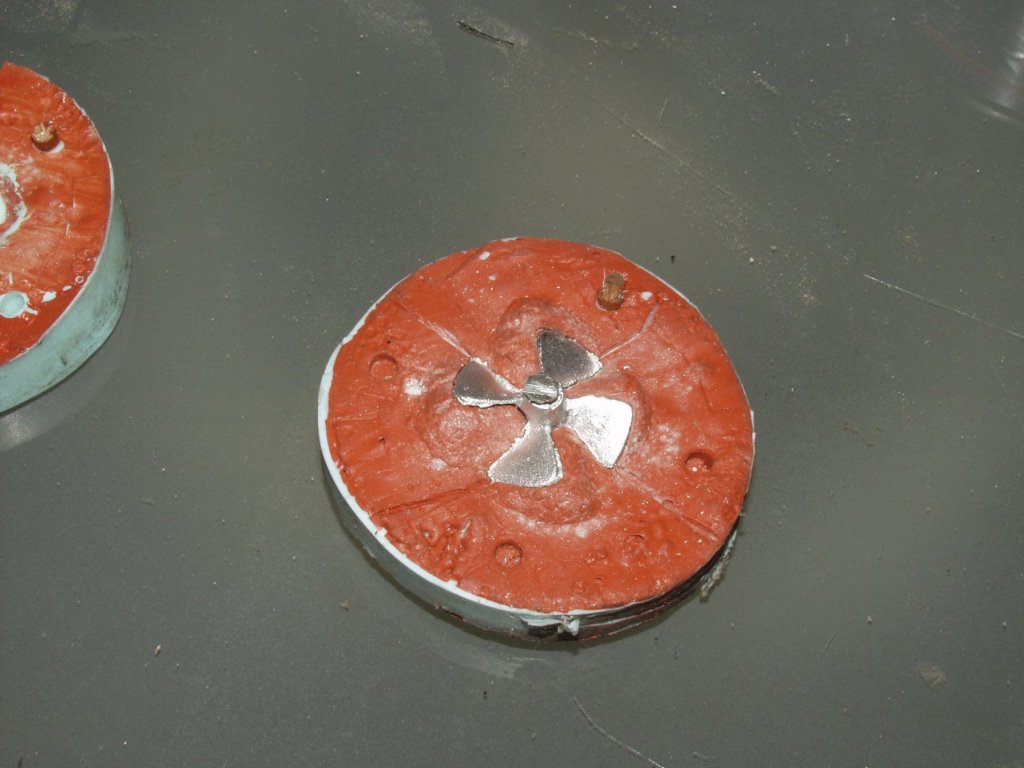
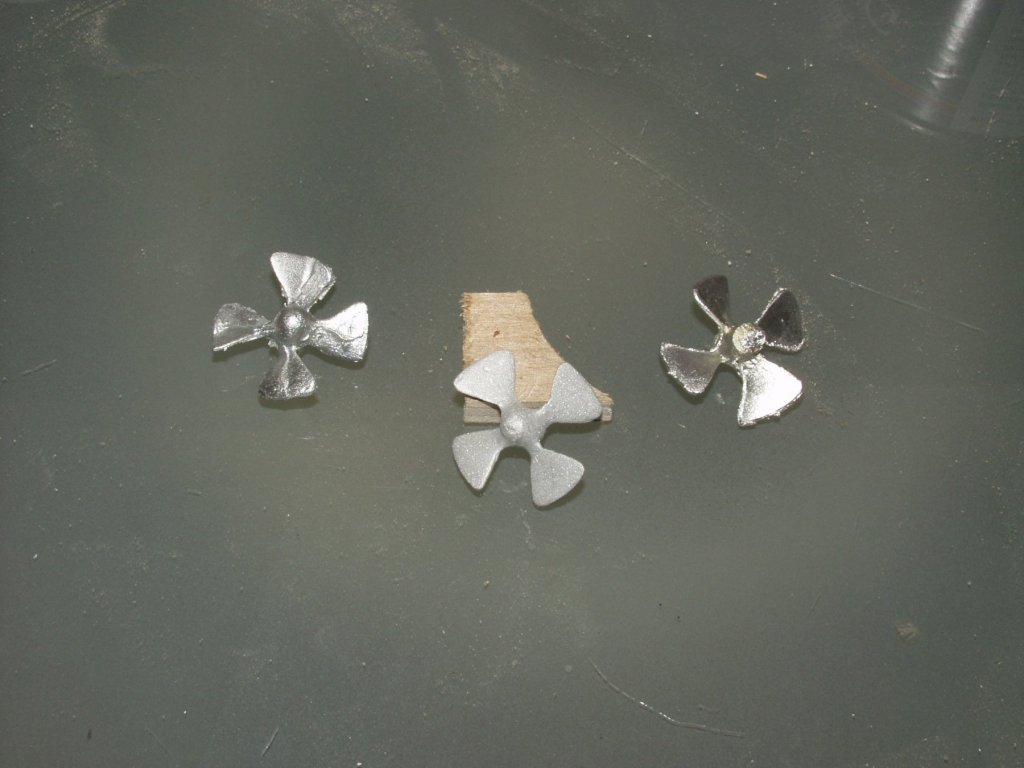
Awhile back I decided I wanted to replace the left handed propeller on my " John Cudahy " project with a right handed prop. So I carved a four blade right hand propeller. Then I thought I might as well see if I could cast some extras. Starting with some vulcanizing rubber and a round mold frame I added a bottom layer of red vulcanizing rubber. I than pressed the master pattern into the rubber as deep as I could and added rubber under the blades. To create a parting line around the edge of all four blades.The prop and rubber was than cooked to harden it up. Once the bottom was done I used a liquid room temp vulcanizing rubber and poured it over the bottom half. It needed several days to set up at which time I cut the softer upper layer in half and removed the master pattern. I had included four position pegs in the mold so it can only be reassembled one way. To mount the mold in the centrifugal I cut two plywood disks just slightly larger than the mold. one for the back side and one with a hole that lined up with the fill hole in the mold. using four quick clamps the mold was mounted in the centrifugal's cradle and lined up with the crucible. In the melt pot I heated up some Cerro Cast alloy to use in the mold. When things were ready I spooned in some liquid cerro cast into the crucible and pulled the pin.Stood back and let it spin. The first few try's showed a couple of kinks which were taken care of.I ended up making four propellers which I can use for other projects. Using some files I cleaned up the flash and did a little more shaping. Once I was happy with it I sandblasted the whole propeller. This was my first time trying to cast a propeller and after tweeking the mold a little I am getting good throws each time.


- 6 replies
-
- 12
-
-
Nils, I have been following along on your build, all I can say is WOW what a great job. First cabin all the way.
- 2,625 replies
-
- 4
-
-
- kaiser wilhelm der grosse
- passenger steamer
- (and 1 more)
-
John & Patrick, I still have some odds and ends to do than I can move topside again. Thanks for checkin things out. Michael, I do have a couple of LEd's down there that might help in seeing some detail. Thanks for stopping by.
- 208 replies
-
- 2
-
-
- john cudahy
- finished
- (and 1 more)
-
Wonderful job, she would look great in anybody's collection
- 745 replies
-
- 3
-
-
- francis pritt
- mission ship
- (and 1 more)
-
Hello from washington state
steamschooner replied to fifeman93514's topic in New member Introductions
Hello John, Welcome to MSW I live up the Willapa Valley about an hour drive from you. Not wet here at the moment. -
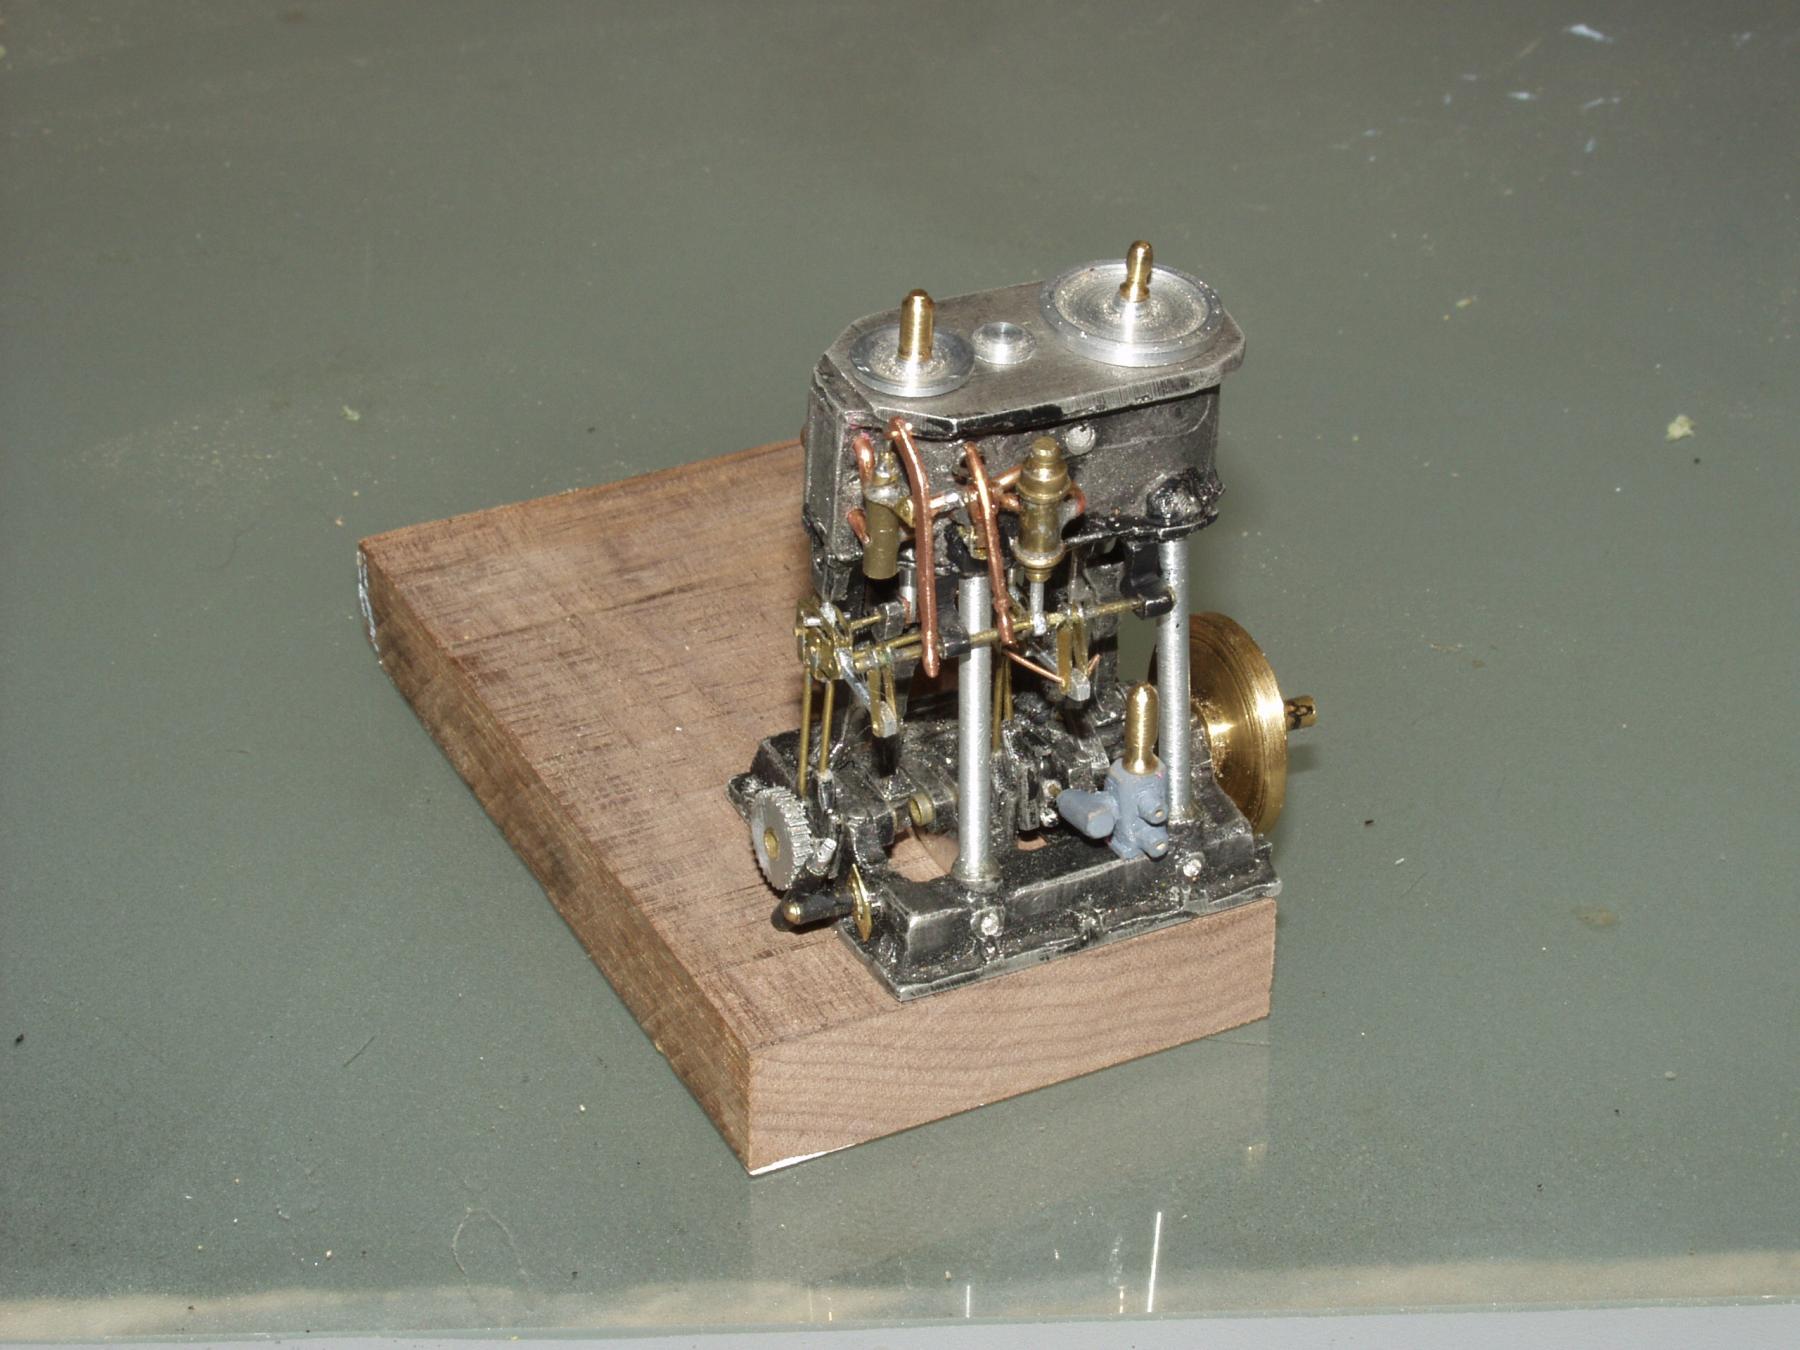
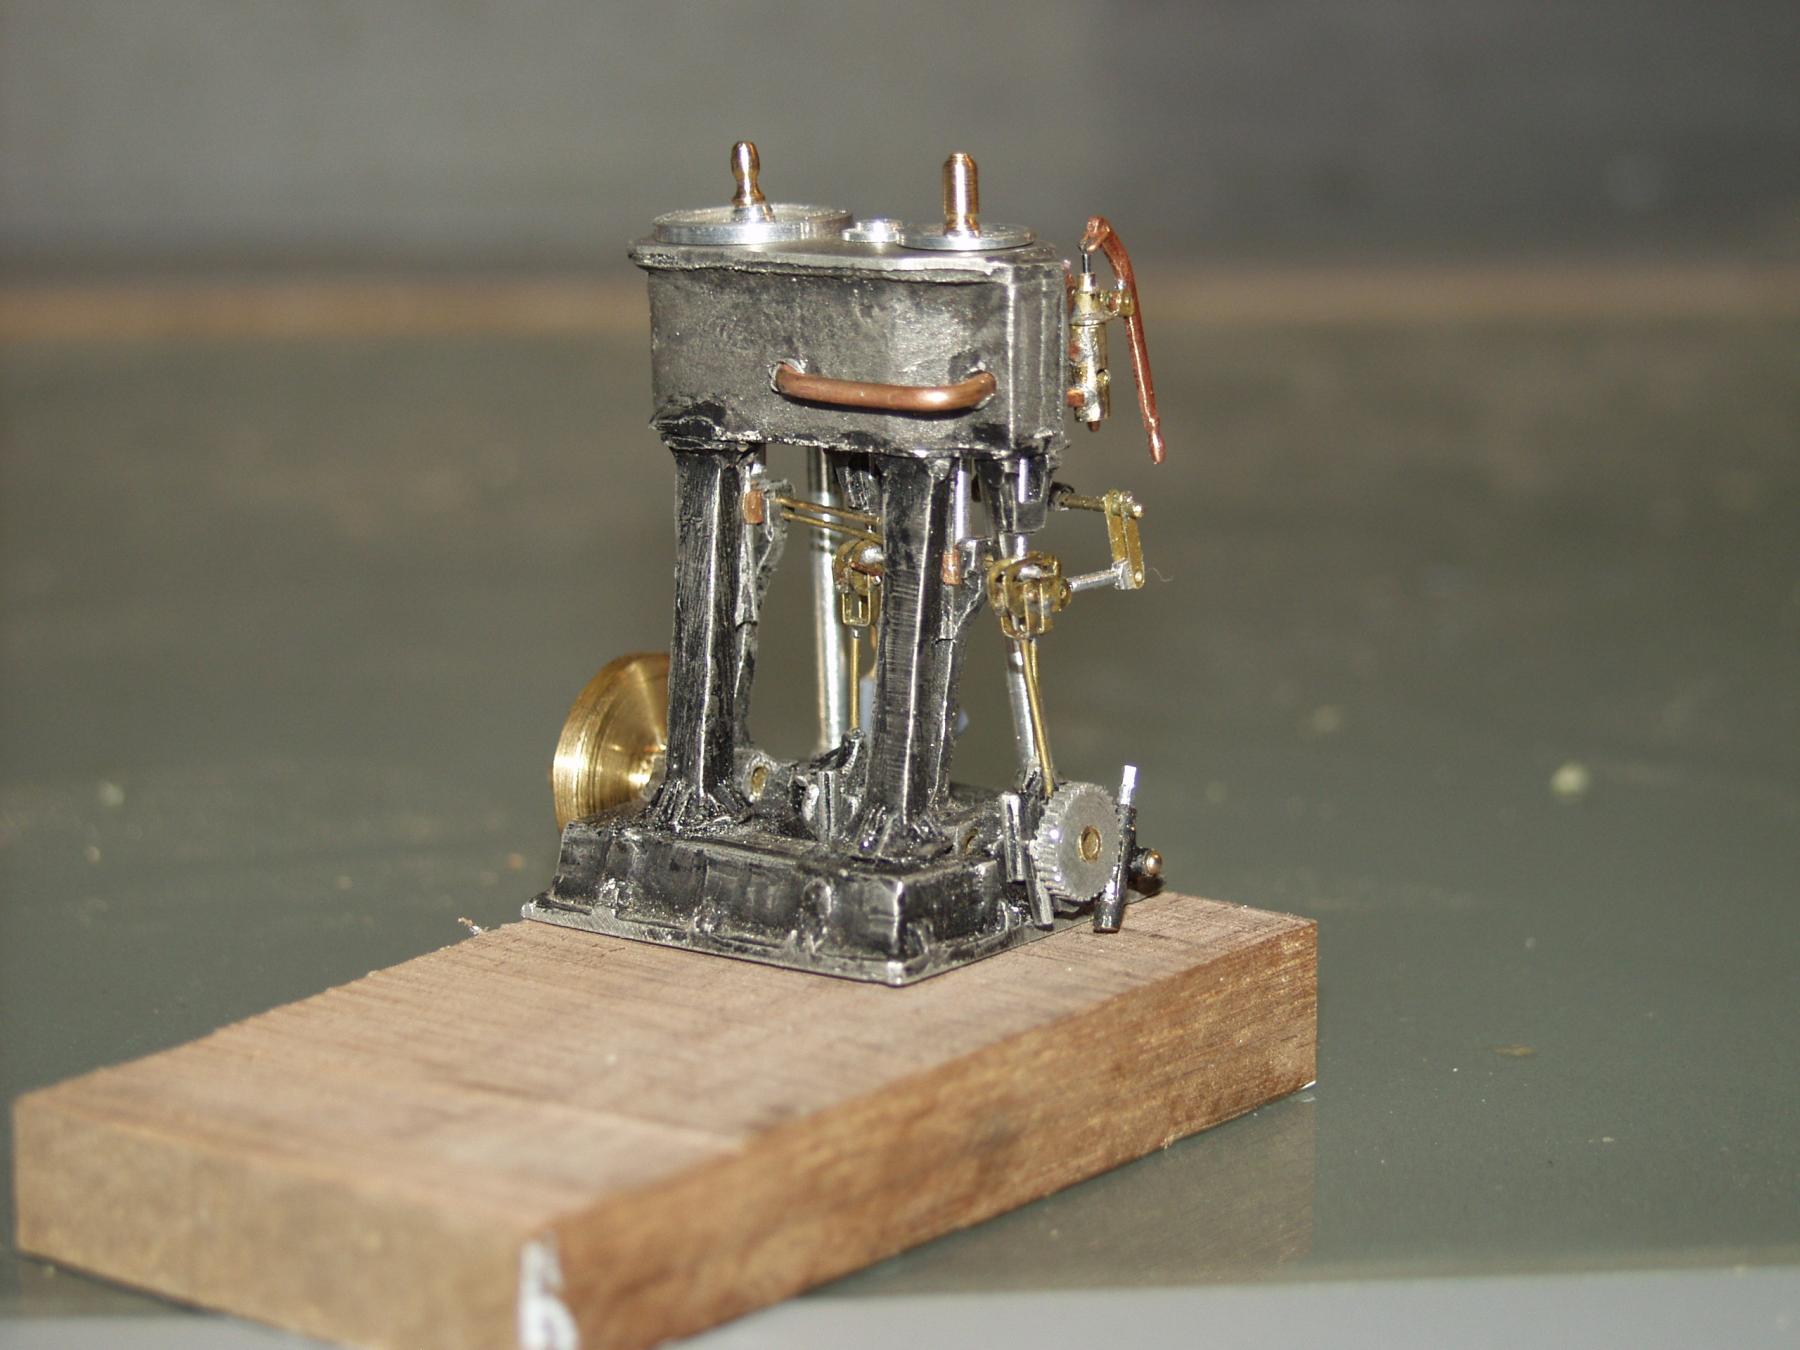
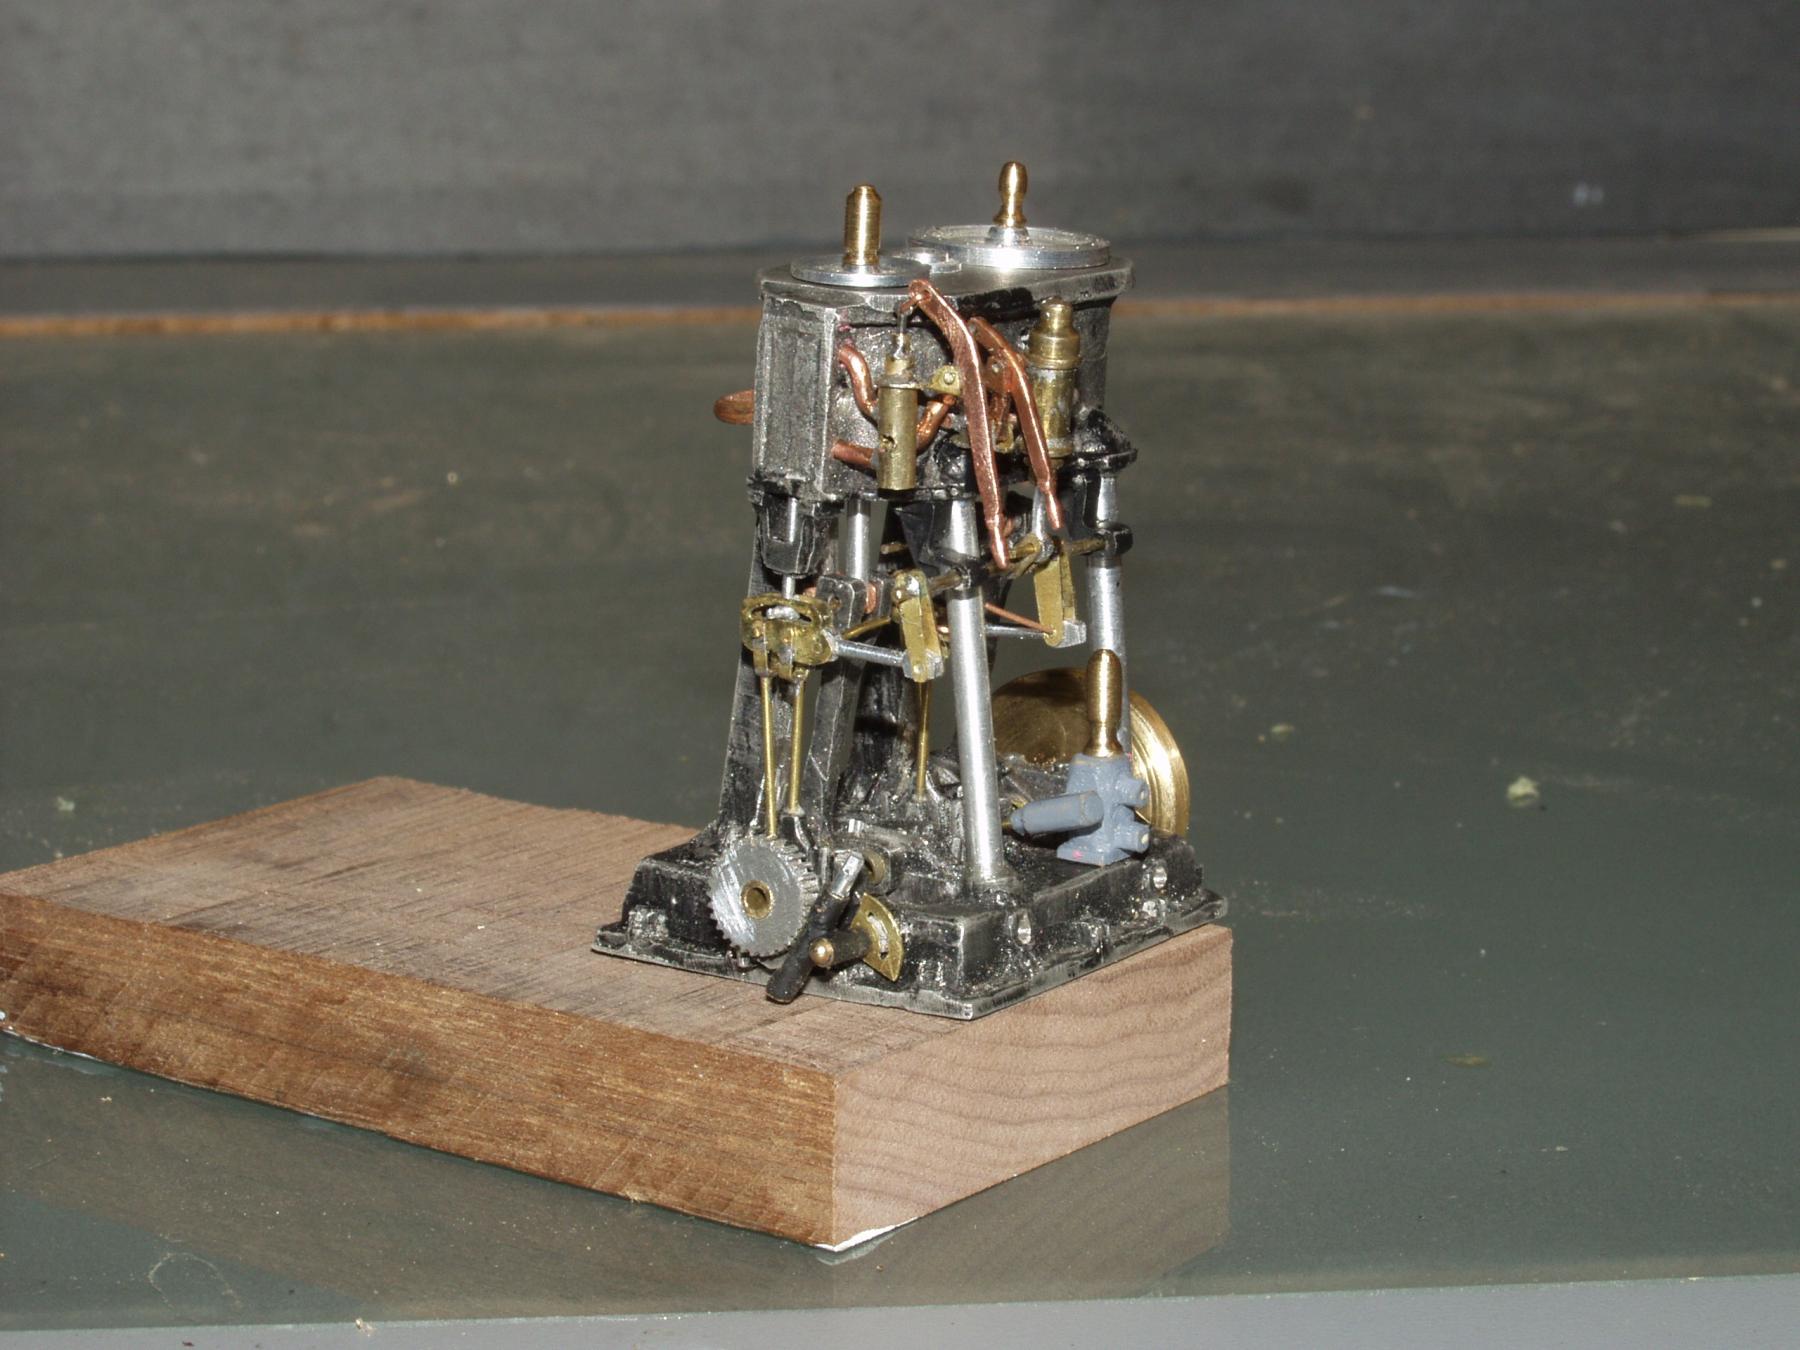
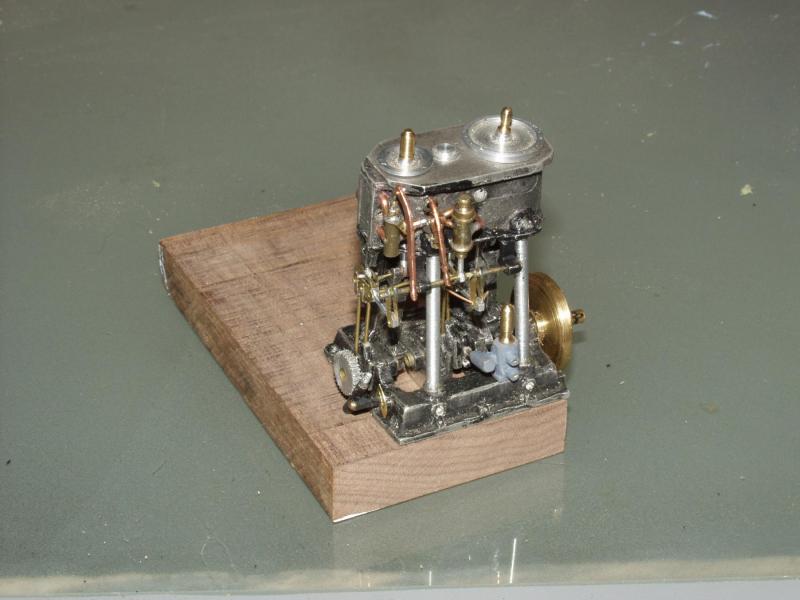
Gary, I used Cerro Cast A low temp alloy in vulcanized rubber molds. Cleaned up with files and sandblasted. Finished with black india ink. You can see more on posts 38-40. Glad you like my little engine.
- 208 replies
-
- 2
-
-
- john cudahy
- finished
- (and 1 more)
-
Thanks everyone for the "likes" Learner a separate build log for the engine would be a lesson in what not to do. So many things did not go the way they should but I am still glad I foraged ahead and built it. John, Thanks for stopping by I have been watching your tug as well, great job.
- 208 replies
-
- 3
-
-
- john cudahy
- finished
- (and 1 more)
-
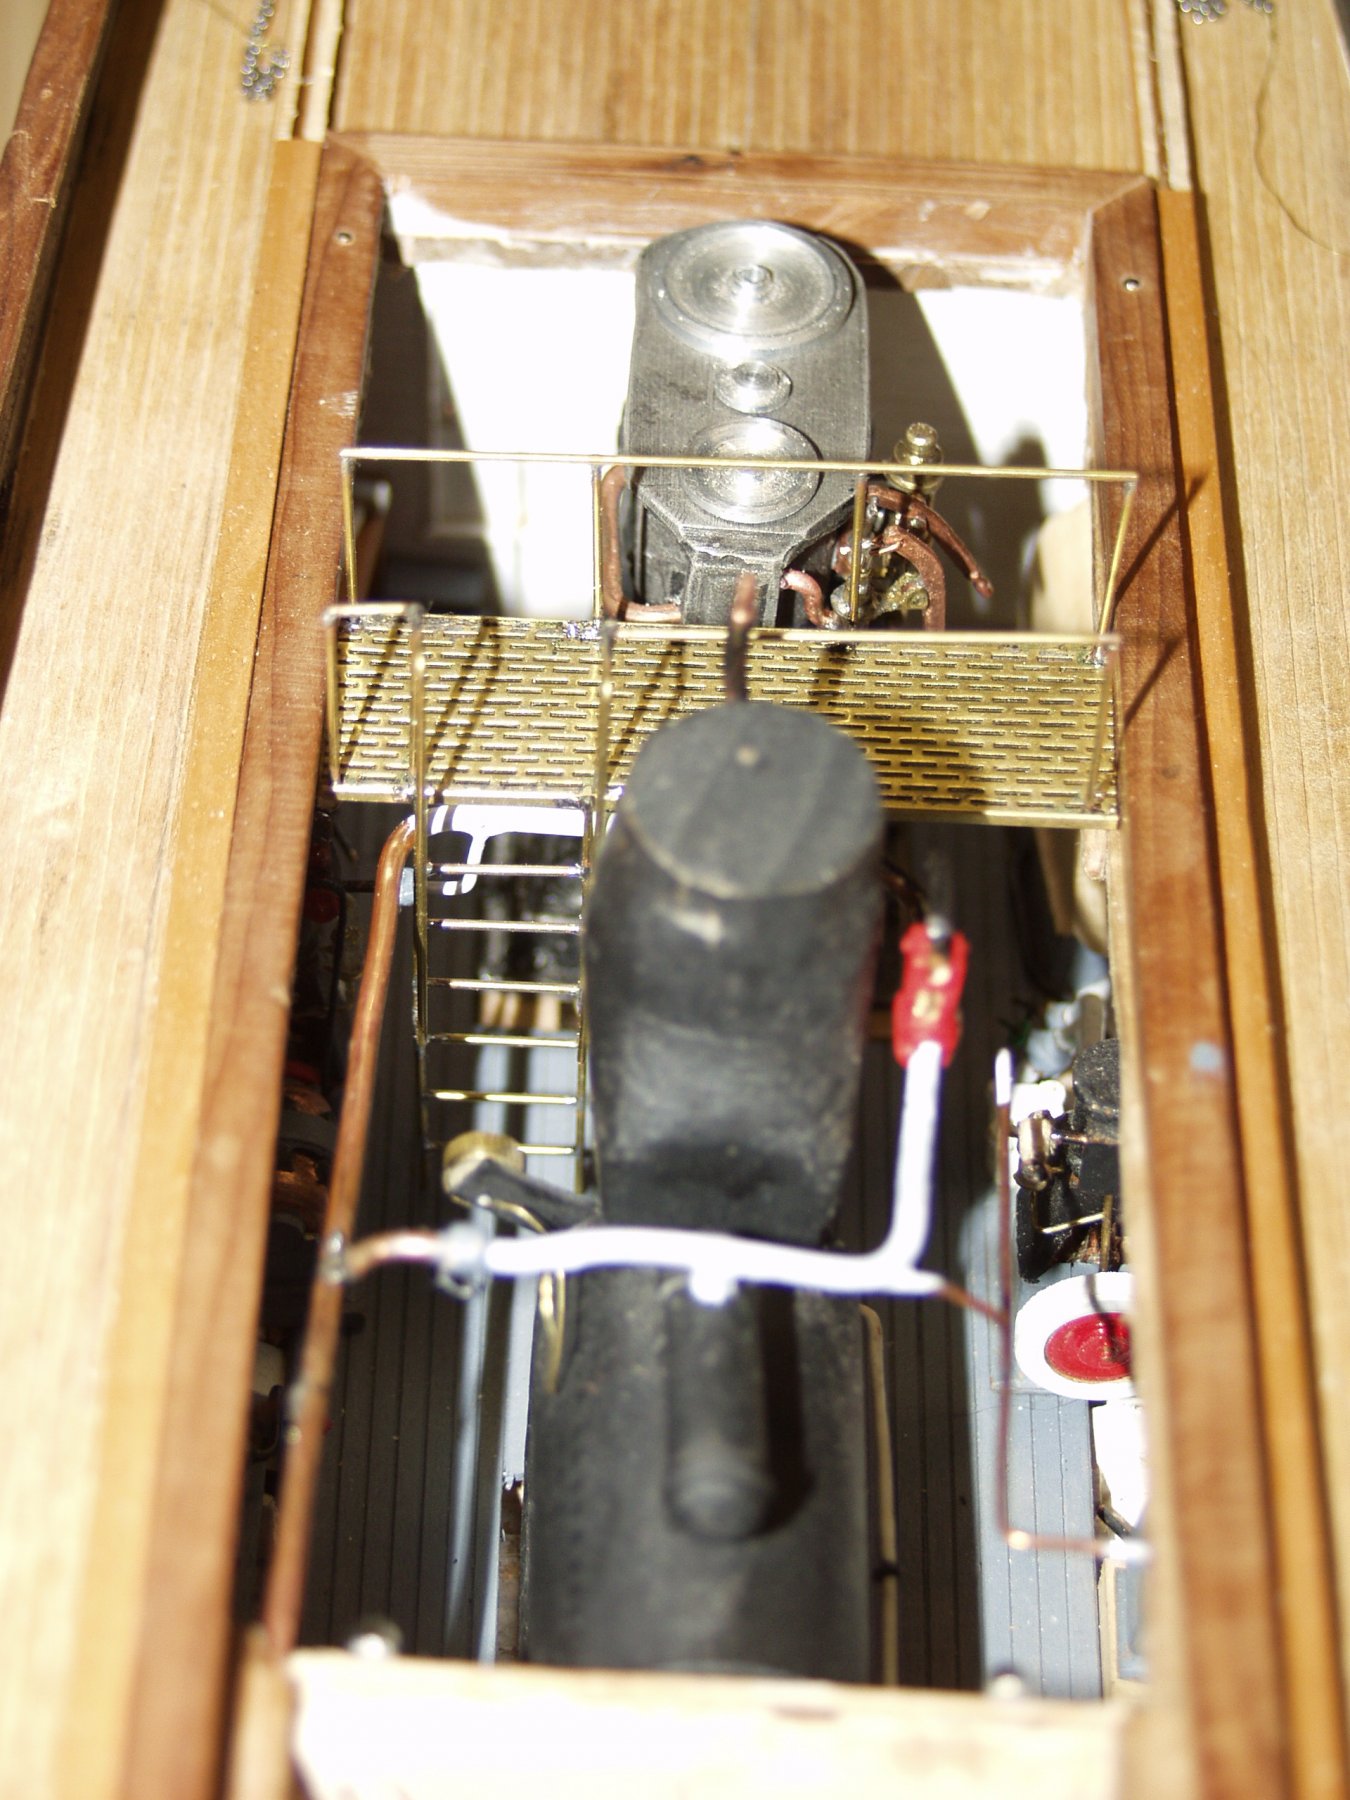
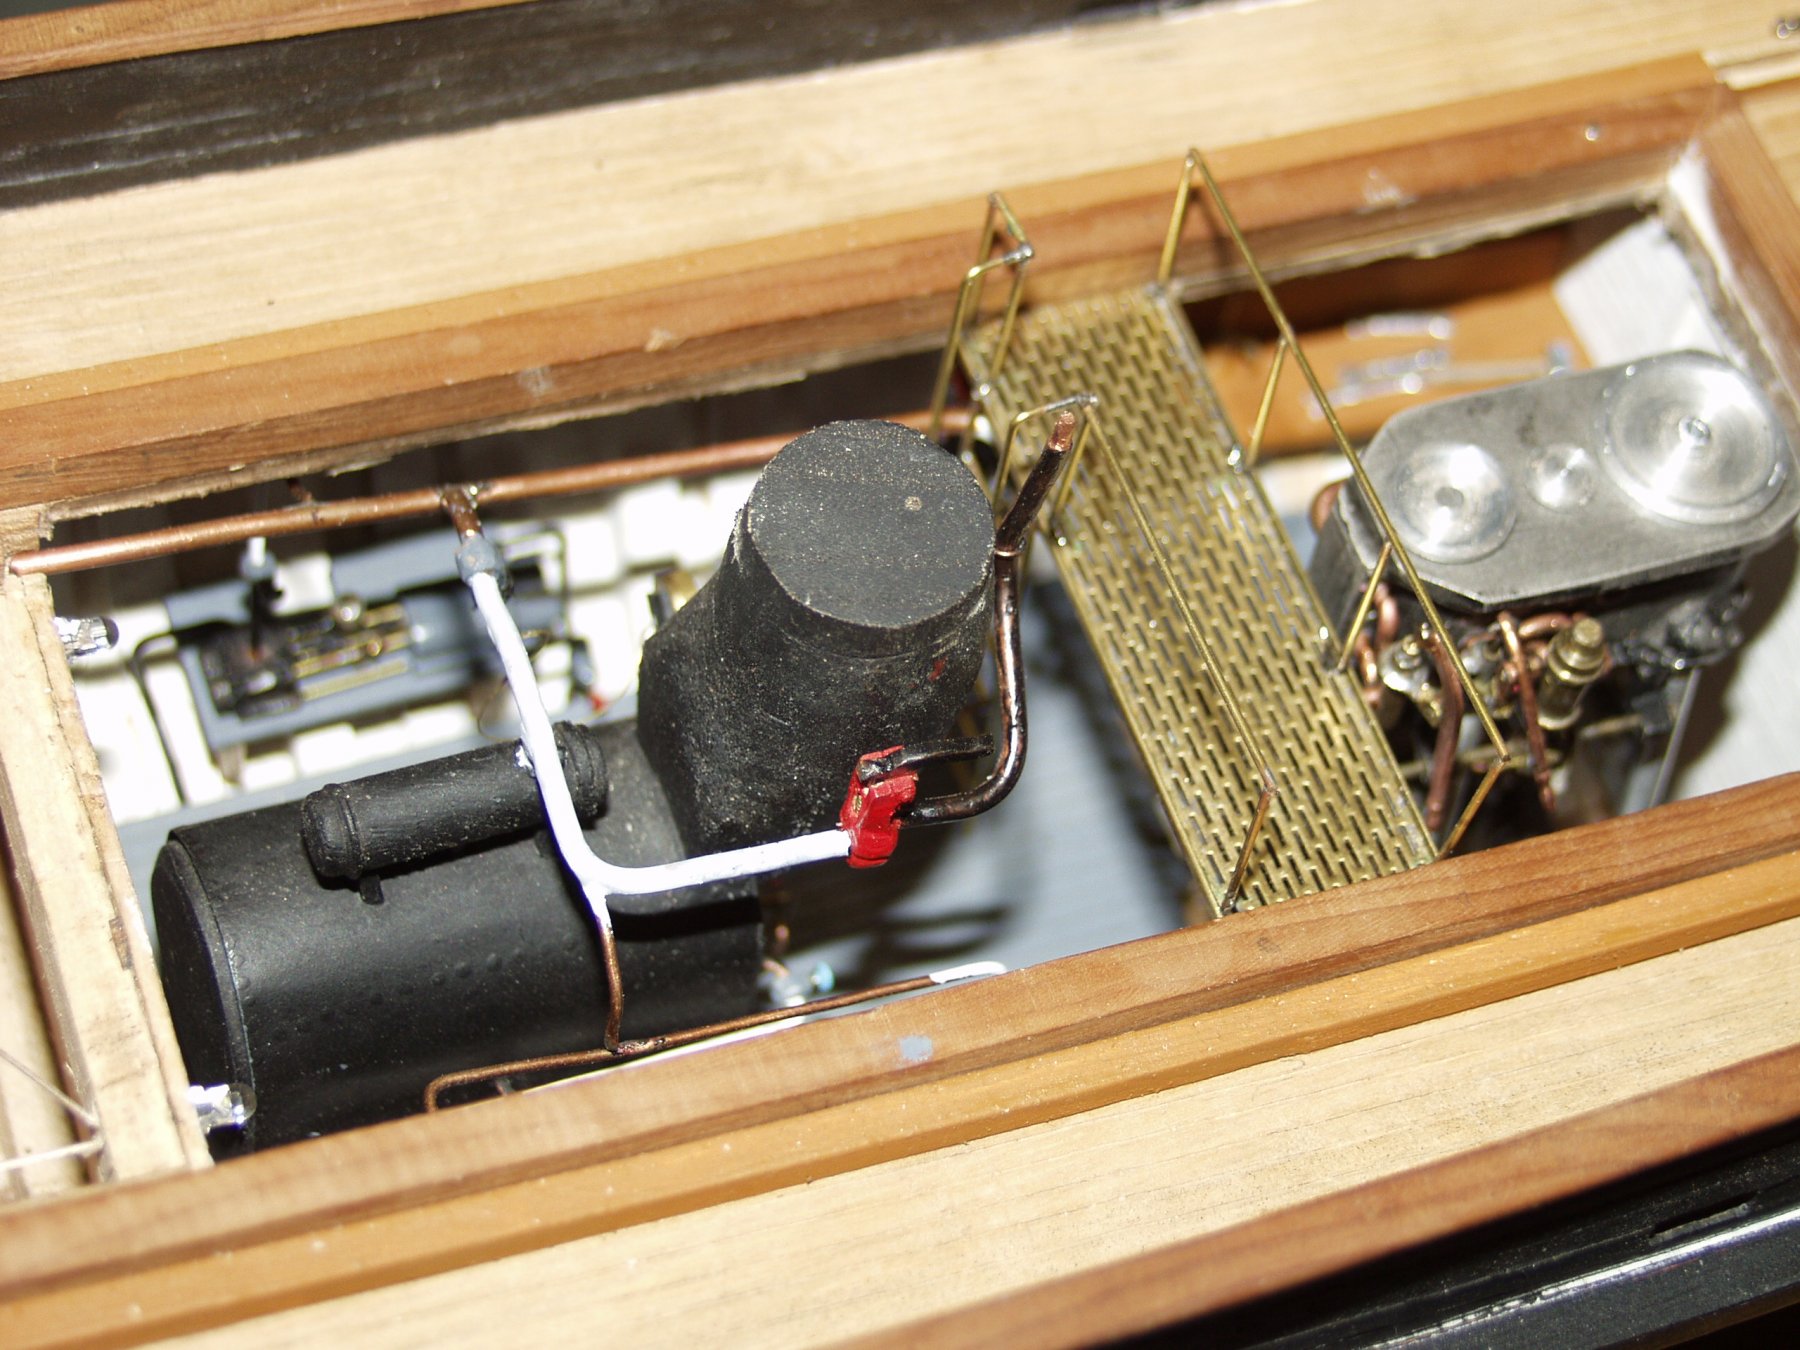
Just a few more shots of the engine, have added a few things have a few to go.


- 208 replies
-
- 16
-
-
- john cudahy
- finished
- (and 1 more)
-
Show me your "Pinky" ... Glad Tidings or ?
steamschooner replied to RFP's topic in Wood ship model kits
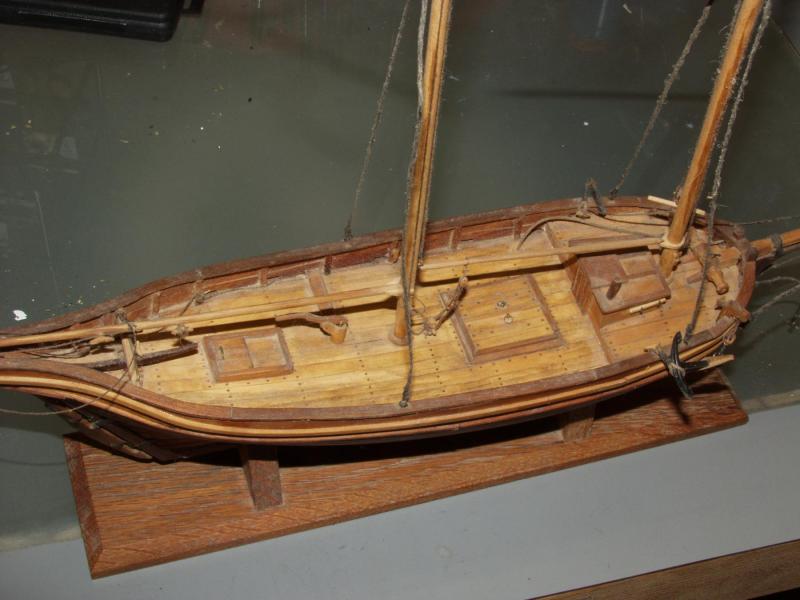
Rob, Here is a model of a pinky that I built many years ago. It's dirty and needs to be rerigged. It was one of my very early scratch builds. I copied the plans out of the book: American Sailing Ships their plans and history by Charles Davis.
-
Nils, Really love your build ! you are doing a splendid job of all the detail which just adds more of that ocean liner charm.
- 2,625 replies
-
- 5
-
-
- kaiser wilhelm der grosse
- passenger steamer
- (and 1 more)
-
John, One can almost smell the hot oil and steam, glad you like my little engine. Patrick,Nothing was/is easy with this little bugger but I am having fun with it.
- 208 replies
-
- 5
-
-
- john cudahy
- finished
- (and 1 more)