Chuck Seiler
-
Posts
1,878 -
Joined
-
Last visited
Content Type
Profiles
Forums
Gallery
Events
Everything posted by Chuck Seiler
-
 I'll be happy when I can get to the shorter planks.
 -
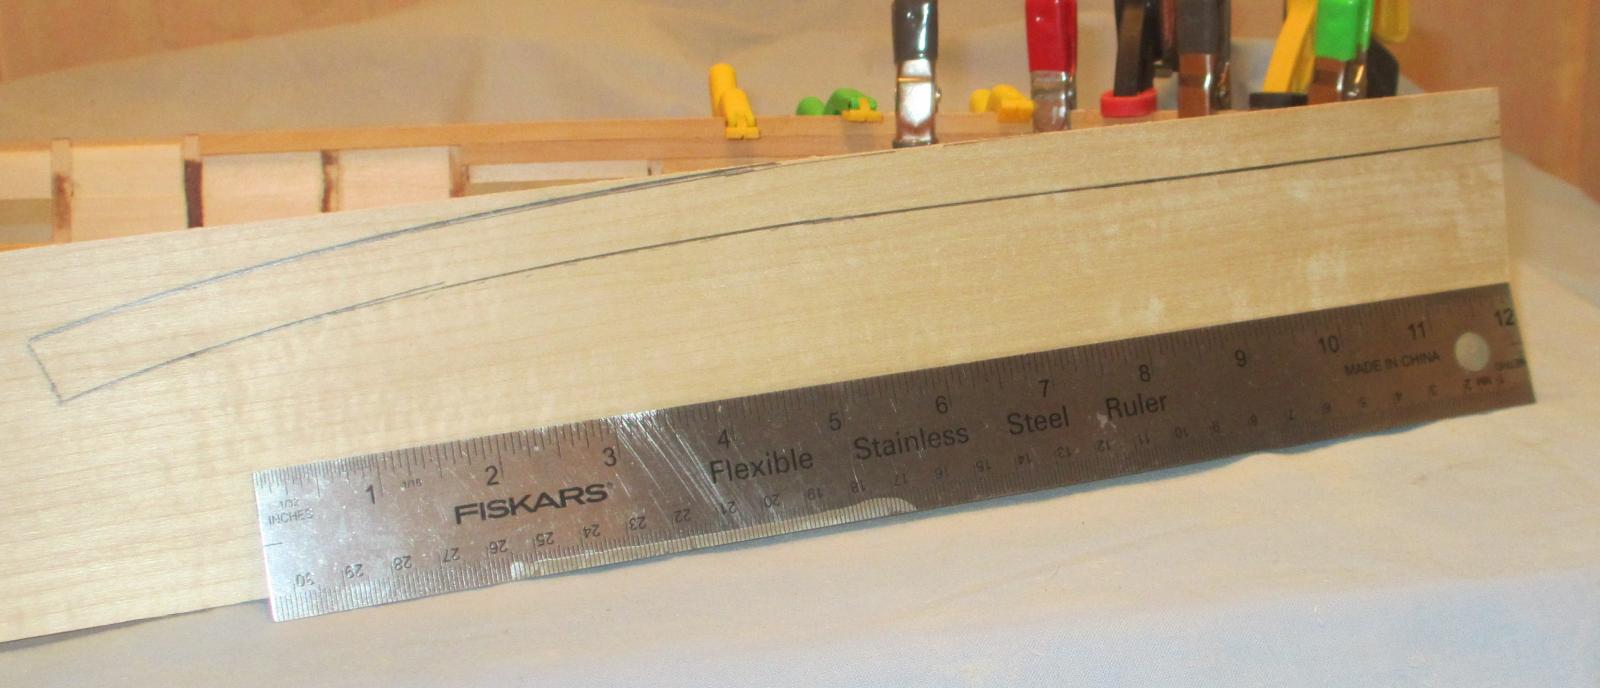
You are correct...the curve is a bit too severe, by 1/8 inch. Easily fixable. I could edge bend it into place, but that defeats the purpose for which intended. The bottom strake does, indeed, have a butt at frame 9, but checking the planking diagram I see that there are joints also at frames 12 and 15. The only plank close to that same length is the after most plank on W+1 at 10 inches. Checking the planking diagram, I had previously checked to see if maybe a joint was obscured by the anchor (sheet 5). However, if you check sheet 6 you see that it does not. Plank 1 of W+1 IS 13 inches. Pressing on..
- 259 replies
-
- 1
-

-
- Gunboat
- Philadelphia
- (and 1 more)
-
Kurt, What am I missing? My planking diagram shows the bow planks to the strake under the wale (W+1) as running from the bow to frame 9. That is over 13 inches long.
-
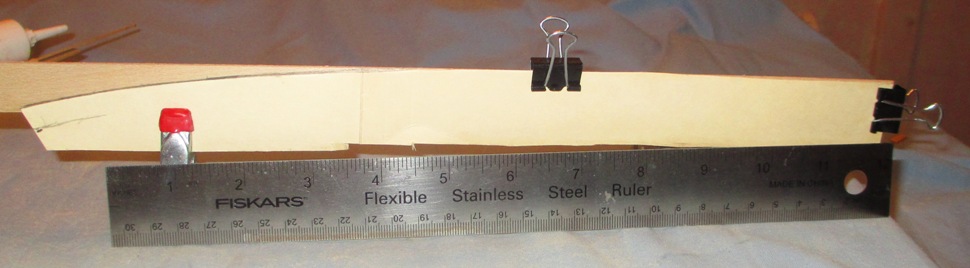
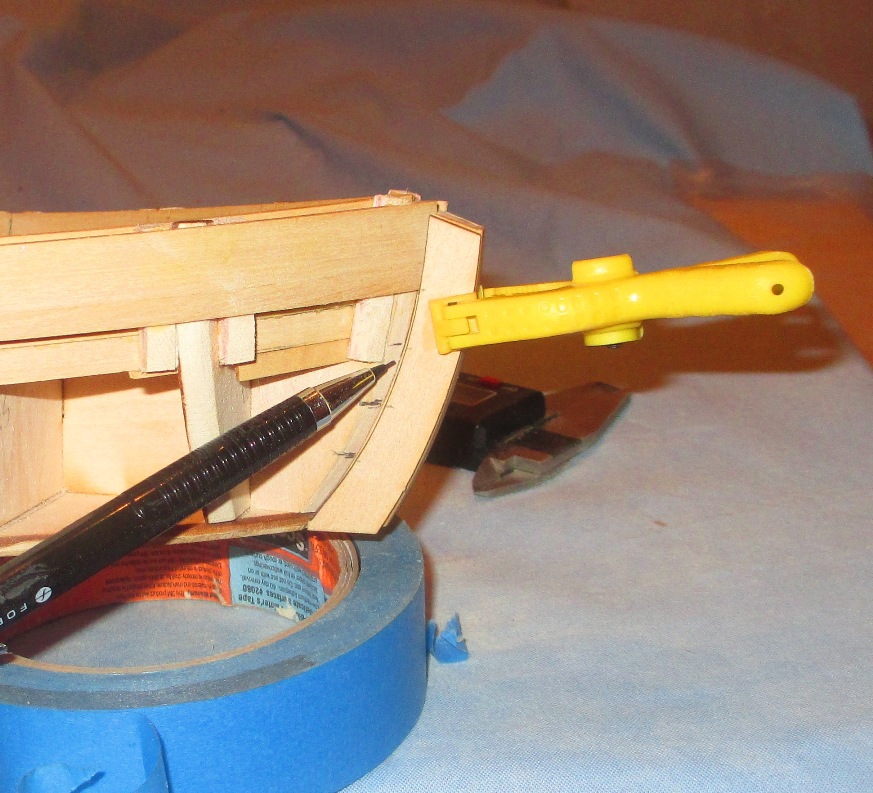
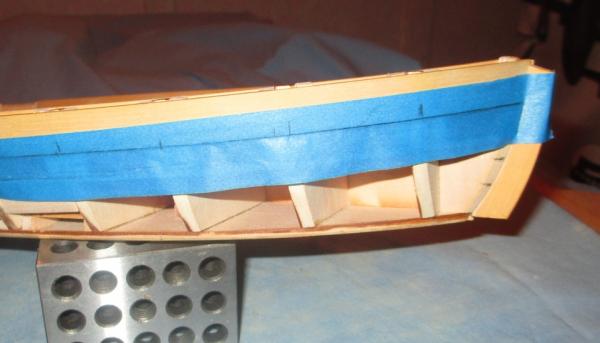
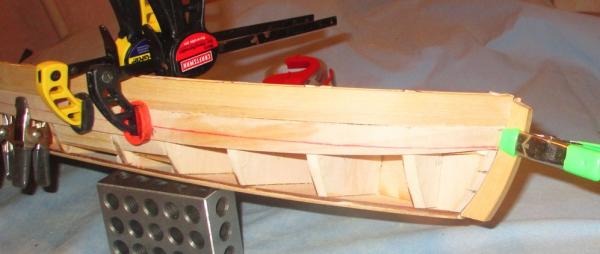
Second attempt at spiling the exterior planking. This time I took a relatively fresh file folder and cut off a couple inches. Unfortunately, that puts the hinge somewhere in the middle, since it is over 14 inches long. No worries. I flat mounted the card stock as best I could for the length of the plank. Clamped in place. Next, I rubbed along the lower edge of the plank above so it was properly marked. I rubbed in a little pencil so it would be better visible. The resulting edge is pointed out by the arrows. I cut along that edge and remounted the card stock. It should have been a close fit. What should have been and what was were two different things. Fortunately card stock is cheap and plentiful, so I marked it again, ensuring it was flat, and pressed on. Here is how it turned out. I fitted it against the hull and it fit great. I'm not sure why I didn't get a picture....I thought I had. In theory, it should fit the other side of the hull too. It fit okay, not great, but I can work with it. This picture has it mounted on 3/4" strip stock with the top edge running along the top edge of the strip. This is well wide of the mark. I estimate it would take at least a 1" wide strip to do t this way. I am not sure how to do it with what is provided in the kit. Mount it cockeyed? Edge-bend it? Make it shorter? Kurt, any thoughts? Close up of the overhang Fortunately, Micheal's has 3" x 1/16" stock. I transferred the curve to this stock and measured a working width of more than what is needed. I won't mark the final dimensions until the top of the plank is PERFECTLY fitted. About 1 1/4" More to follow.


- 259 replies
-
- 3
-
-
- Gunboat
- Philadelphia
- (and 1 more)
-
I checked out Kurt's article in "Ships in Scale" again to see if he had any insight to this. He refered to the instructions and plate 2. I wasn't too wild about those instructions. They might be good for anything towards the middle of the hull, say frame 3 to 13, but completely misses the mark (in my opinion) for the bow and stern areas due to the extreme curve. Kurt also references a couple good books on the subject. The planking instructions here in MSW are pretty good too.
- 259 replies
-
- 1
-
-
- Gunboat
- Philadelphia
- (and 1 more)
-
Thanks Steve. Just think how much mo better it will be when I actually get it right?
- 259 replies
-
- 2
-
-
- Gunboat
- Philadelphia
- (and 1 more)
-
Table Saw Hand Safety
Chuck Seiler replied to rtropp's topic in Modeling tools and Workshop Equipment
Come to think of it, I don't do MANY cuts under 1/8". I look forward to hearing more. -
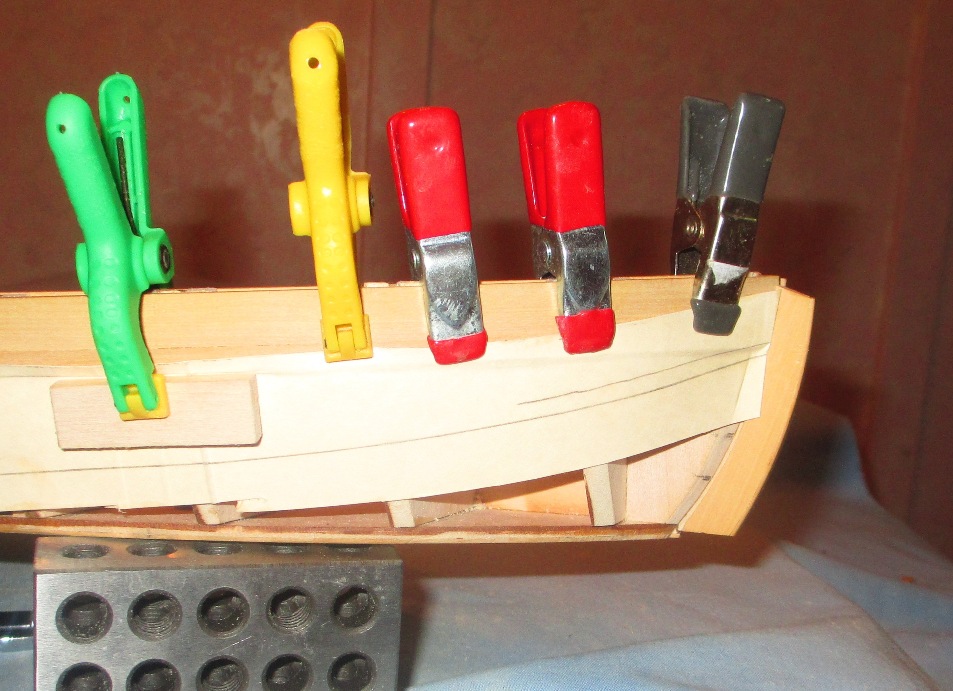
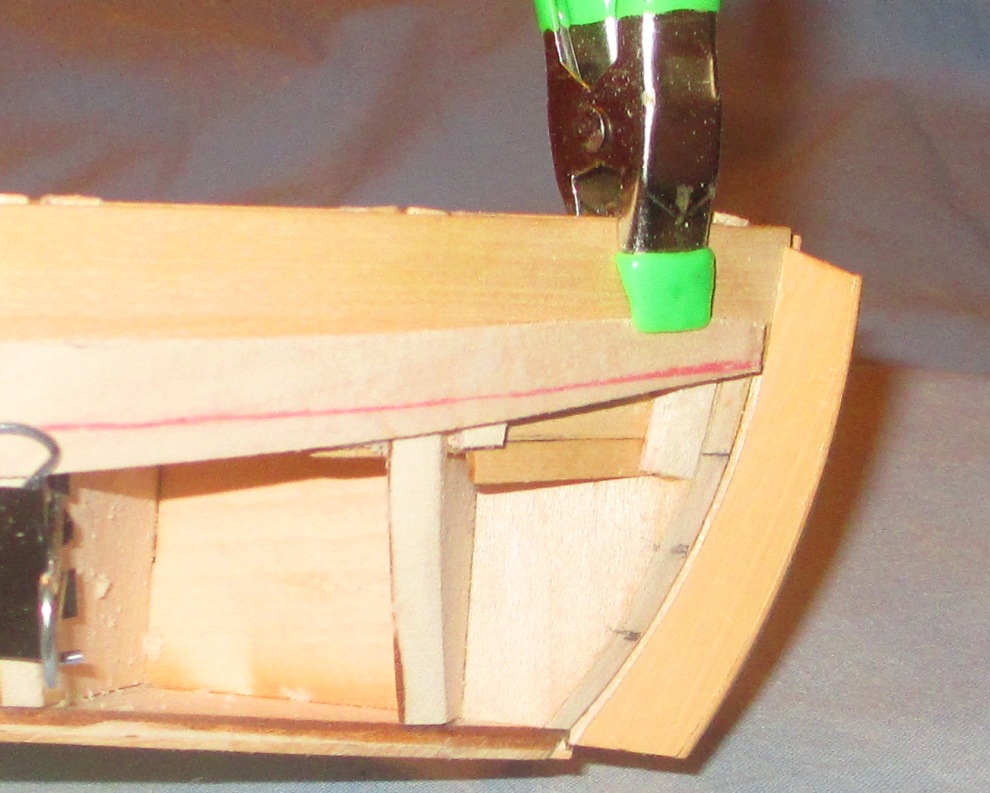
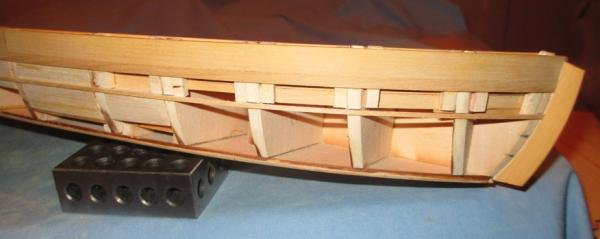
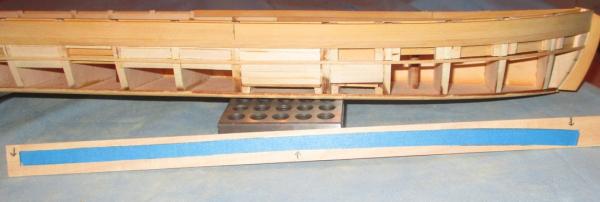
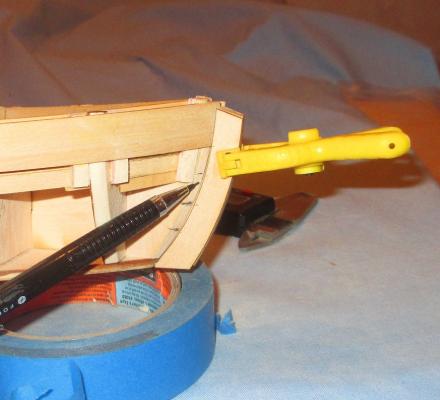
Now I have to make/shape the plank. The desired result will be a plank that fits flat to each frame for the entire length of the plank AND fits snug to the plank above it, without gaps, for the entire length of the plank. Here I am running a batten along the hull at the points marked on the frames. Using my finely calibrated laser beam eyes, I fine tune the batten so it runs smoothly. It is glued in place with little dabs of glue. It will eventually be removed. I then mark the frames and any support pieces indicating the bottom of the first run of planking. If I make the plank correctly, it should fit snugly in between the wale and the batten. Any wagers? Here I am running a length of tape over where the plank will run in order to find its true shape. It is critical that this runs exactly flat and straight. Unfortunately tape bends easily and stretches. I would prefer to use paper, but this plank is over 11 inches long. Perhaps I should get some legal length paper. I purposely left the batten in place in order to see if I could get good plank width from it. Normally, you get the curve of the upper side of the plank, then use your measurements from the hull-line-off to get the width at various points (each frame). Use a French curve or ships curve to connect the dots. You can see by the stretching that the plank will be wider than needed, The tape 'plank' is taped to a section of 3/4" strip stock. I will eventually use boxwood, but I did it this way to: (1) See if I can fit it on the provided stock and (2) Make a decent template before going full boxwood. Ideally, the upper left hand corner would start along the top edge of the strip, running with the top as long as possible before it dips down. Doing it that way requires more than 3/4" width. I compromised by setting it sideways. Batten removed and plank soaked/clamped in place. It is slightly off and there is a slight gap, but sanding should fix that. The red line is the lower limit of the planks as defined by the batten. Oooops. Wait a minute. Closer inspection reveals the plank is not sitting flat to the frames at it approaches the curve. Let's see what happens when I flatted it out. POOP! That forces the bow end to bend further upward so that the red line (bottom of the plank) is almost at the point where the top of the plank should be. This attempt was unsatisfactory. It is not a failure, however, unless I do not learn something from it. Back to the drawing board.

- 259 replies
-
- 5
-
-
- Gunboat
- Philadelphia
- (and 1 more)
-
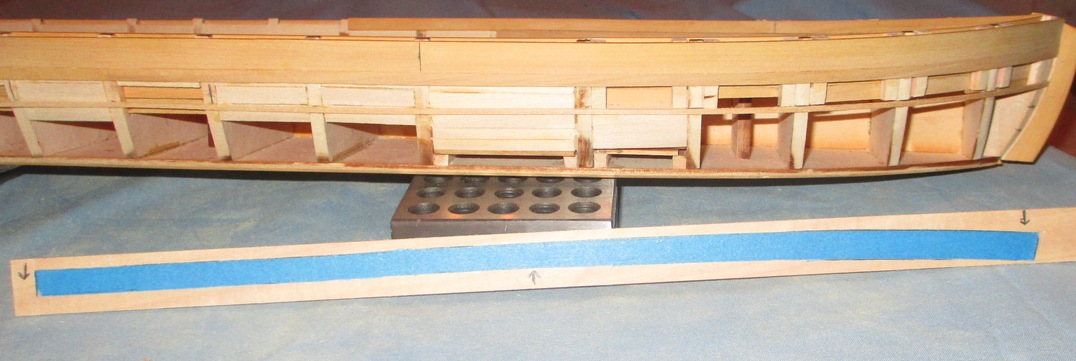
Things have been slow and I wanted to try my hand at/demonstrate spiling of the exterior planking. After the interior planking and top few planks of the exterior, one potentially gets spoiled and somewhat mistaken about how easy planking can be. This is far from true. As we see with the remainder of the planking, the planks are NOT the same width throughout their length (requiring tapering) and they are not straight. Some people (including me) make the mistake of trying to edge bend them into shape. The planks themselves need to be shaped, or spiled. PHILADELPHIA is a good place to learn this. There are few planks and some of the work is already done for us. The problem I am having is that the size (length) of some of the planks causes problems. The first thing to be done is to 'line off the hull'. This is a process where we determine the number of planks required ad the proportional width of the plank thru its entire length. On a complicated model, this is done in sections, or bands. In REAL complicated models you have to account for cheater planks, etc. This is far too complicated to be covered here. There are many books on planking and some good articles on planking here at MSW. Fortunately for us, the lining off has already been done for us. The frames are already marked. The kit comes with a template to mark the appropriate spacing on the stem and stern pieces. Here I mark inside the rabbet based on the template.
- 259 replies
-
- 3
-
-
- Gunboat
- Philadelphia
- (and 1 more)
-
Treenails
Chuck Seiler replied to wallyh's topic in Planking Techniques's Click Here for Topics dedicated to planking!!!!
Generally, deck planks are not trunn'led. They were bolted in place in a counter sunk hole with a wooden plug over top. Wooden trunn'l/wooden plug? What's the diff? Plugs are side grain and tree nails are end grain. At smaller scales it matters not. At larger scales it might. -
Table Saw Hand Safety
Chuck Seiler replied to rtropp's topic in Modeling tools and Workshop Equipment
Mike, The Micro-Jig looks interesting but appears it is not useful for anything under 1/8" wide cut. -
Thanks Kurt. Good luck on a successful conference. I am off to San Antonio, so no building for me for awhile.
- 259 replies
-
- 1
-
-
- Gunboat
- Philadelphia
- (and 1 more)
-
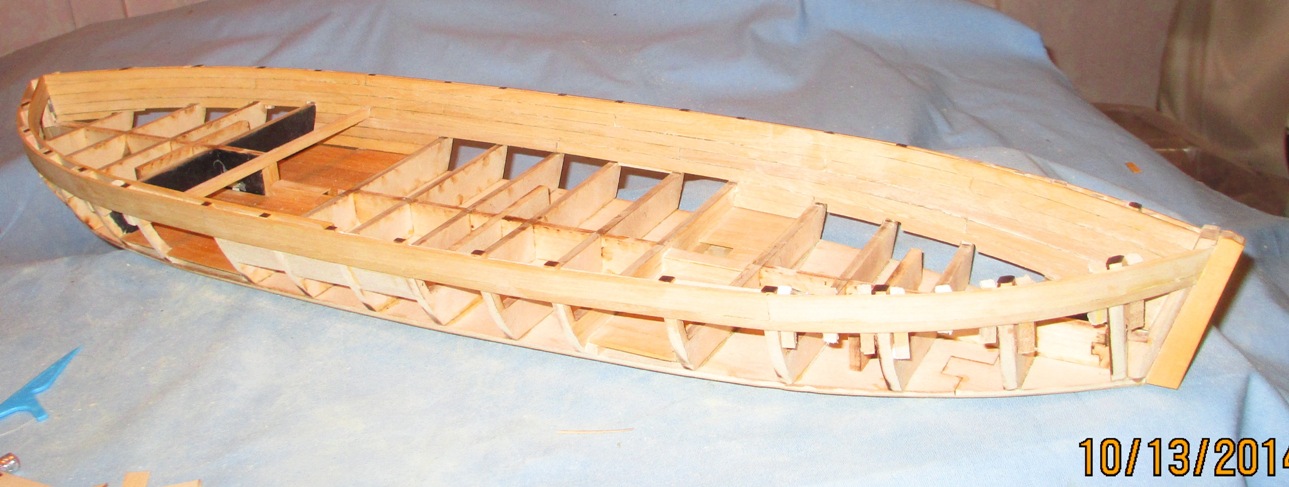
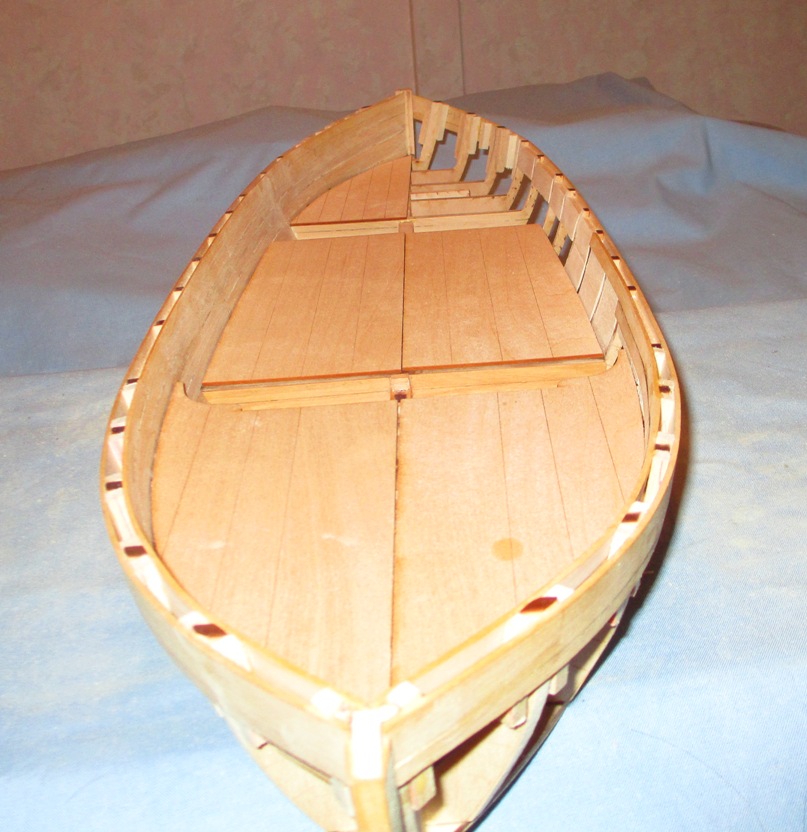
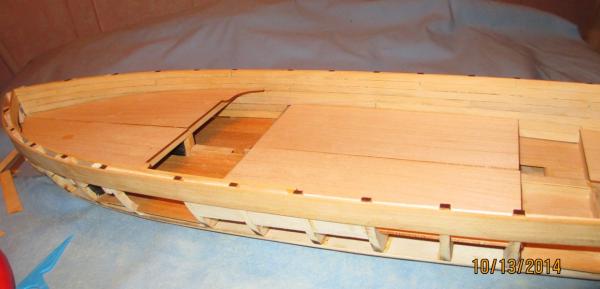
Slow but sure progress. Starboard side ceiling planking complete. Close-up. Planks are in place but alot of sanding yet to be done. Kit deck planking set in place just for look see. Another look.


- 259 replies
-
- 7
-
-
- Gunboat
- Philadelphia
- (and 1 more)
-
For some of us it is not history...we just happened to know somebody that was on it.
- 259 replies
-
- 2
-
-
- Gunboat
- Philadelphia
- (and 1 more)
-
I agree with Kurt. When you look at the drama they went thru to get even carpenters to be on site, it was not a surprise that they didn't have many real ship builders. The over riding plan was to build alot of hulls, get them into the water NOW, don't care what they look like, don't care how long they last as long as they float for a few months, we'll worry about the rest later.
- 259 replies
-
- 2
-
-
- Gunboat
- Philadelphia
- (and 1 more)
-
The critical part is to get the upper curve so it matches the bottom of the plank above it. There are various ways of doing this. I like the tape method. Some use the card stock method. Then using measurements from the lining off process you mark the lower edge. Sand, fit, apply. Sounds easy. Not so easy in practice. Many people transfer their upper curve to card stock (file folder, etc) then measure off the widths at each frame, resulting in a complete plank in card stock. This is then test fitted to the hull. Adjust/trim as necessary. Once you get it the way you want, trace that onto your piece of wood. (You can also determine if this template also works on the other side). Cut wide of the line and gently sand to the line. This should avoid the wavy factor.
-
Steve, There are a couple tutorials in the "planking" section which helps explain spiling. I will be taking off on a road trip next week before I get to the exterior, so it will be awhile before i get to the exterior planking. I plan to post a pic or two of what a spiled plank would look like, although not necessarily how you would get to that point, before I leave.
-
From what I see, the inner planking looks good. The wood filler/paste up at the bow looks like it will work out well. I had recommended to Bart that he use a cover/fashion piece to hide a bad set of joints. Filler is another way to do it. Staining/varnishing of the interior planking before laying the deck depends on whether or not you want the deck to be the same color as the hull. In real life, both the deck and hull planking were white oak. There is no reason they can't be the same. I am going with a different color scheme by using holly for the decks. In that case I will stain to interior planking before adding the deck planking, which will be stained with 'natural'. If I get some natural on the ceiling planking, you won't notice it. Your outer planking looks like you are not beveling the plank before installing it. The top of the lower plank should be beveled slightly so that it fits snug against the plank above it with no gaps. My recommendation is that you do the ol' alcohol soak, pop those planks,bevel and re-install. I may be wrong...it may just be the photo. I will defer to your judgement.
-
Small cover/fashion-piece a few millimeters wide covering the strake ends should solve the problem.
-
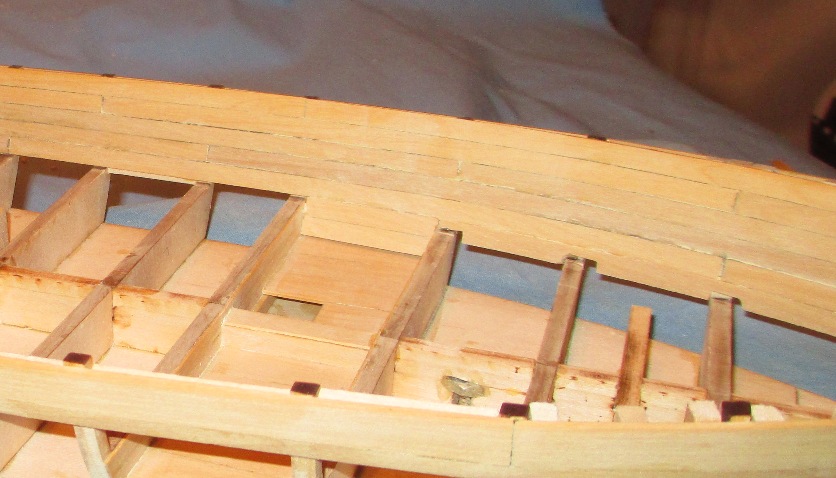
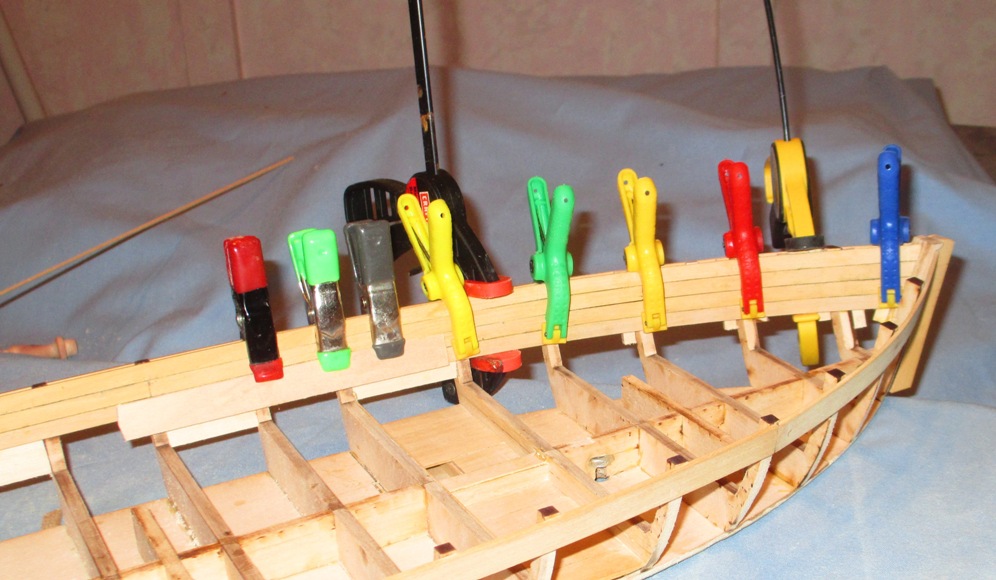
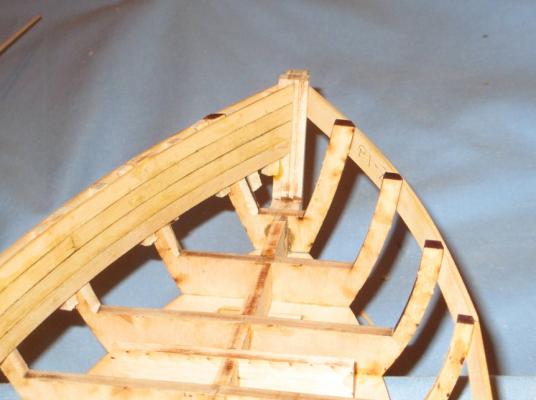
I have been working the last week on the inner/ceiling planking. I am tempted to speed along here since the planking is straight (no spiling) and relatively simple. I have to remember to take my time and get it right. Each time I make a model I have the goal in the back of my mind that 100years from now, the model will be on somebody's mantle piece. With that in mind, a week or two more to ensure everything is good really makes no difference. On the other hand, if I hurry and turn out a crappy model, 5 years from now it will be in somebody/s trashcan. Progress continues on the ceiling planking. The size of the model has reveal a shortfall in my clamps. The metal ones are good down three strakes while the plastics are good down four. I have a limited number of plastic ones so I improvised by using an extender board for my metal clamps. It is getting close to the point where I will start using my five fingered clamps. Note the use of the bar clamps to ensure the lower plank is snug to the upper one. I am pretty happy with how well my strake ends married up with the stern post. I drew a line down the center where I wanted the ends to...well...end. I attached a support beam (you can see it peeking out from under the planking just left of the stern post) to guide the plank. It worked perfectly. The stem looks good as well, but it took more effort.

- 259 replies
-
- 6
-
-
- Gunboat
- Philadelphia
- (and 1 more)
-
Inner planking, of course. Looking good.
-
Use an exacto to rough out the corners, then hand sand to round. I put the axle to be sanded between sand paper between my fingers and twirl. You can do the same by chucking the opposite side axle into a dremel and using a sanding stick, but you have to be careful to avoid taking off too much. I use this method since I have alot of practice making trunnels this way.
-
Thanks Bart. Try as I might; Bing or Google, "Wooden Ship Class" or "woodenshipclass" or "woodenshipclass.blogspot", I am unable to find that on my own. I will take a gander tonight.
-
plywood bulwarks
Chuck Seiler replied to djs's topic in Building, Framing, Planking and plating a ships hull and deck
Dennis, What model? -
Can i live without a BYRNES TABLE SAW
Chuck Seiler replied to shihawk's topic in Modeling tools and Workshop Equipment
I think alot of it depends on where you are as a modeler and the quality of work you want to achieve. For many years my main tools were a Dremel and Exacto. I did fine. Seven years ago I was agonizing over the same issues that you are. I am REAL big on getting stuff and then having them sit and collect dust. That is alot of $$$ for a dust collector. I finally decided to gt one, bought one at the 2007 NRG Conference here in San Diego and never looked back. I have done things with it I had never done before...it has made me a better modeler, but in the same way a set of magnifiers can make you better. It has extended my range. I use it all the time. Could you do it with something other than a Byrnes? Sure, maybe. If I had an older Preac I may feel the same way about it, but I don't. If I had it to do over again and had the opportunity to buy a saw that is 90% as good at half the price would I buy it instead? No. It is all about what you are comfortable with and what you want to do.