Chuck Seiler
-
Posts
1,878 -
Joined
-
Last visited
Content Type
Profiles
Forums
Gallery
Events
Everything posted by Chuck Seiler
-
 Mick/Chuck, Could you explain this a little further? Pictures perhaps? I am still several weeks away from starting the project...still working on the build board...but since the keel is one of the first items to be completed, I wanted to ensure I was clear on the correct process.
- 504 replies
-
- 3
-

-
- washington
- galley
- (and 1 more)
-
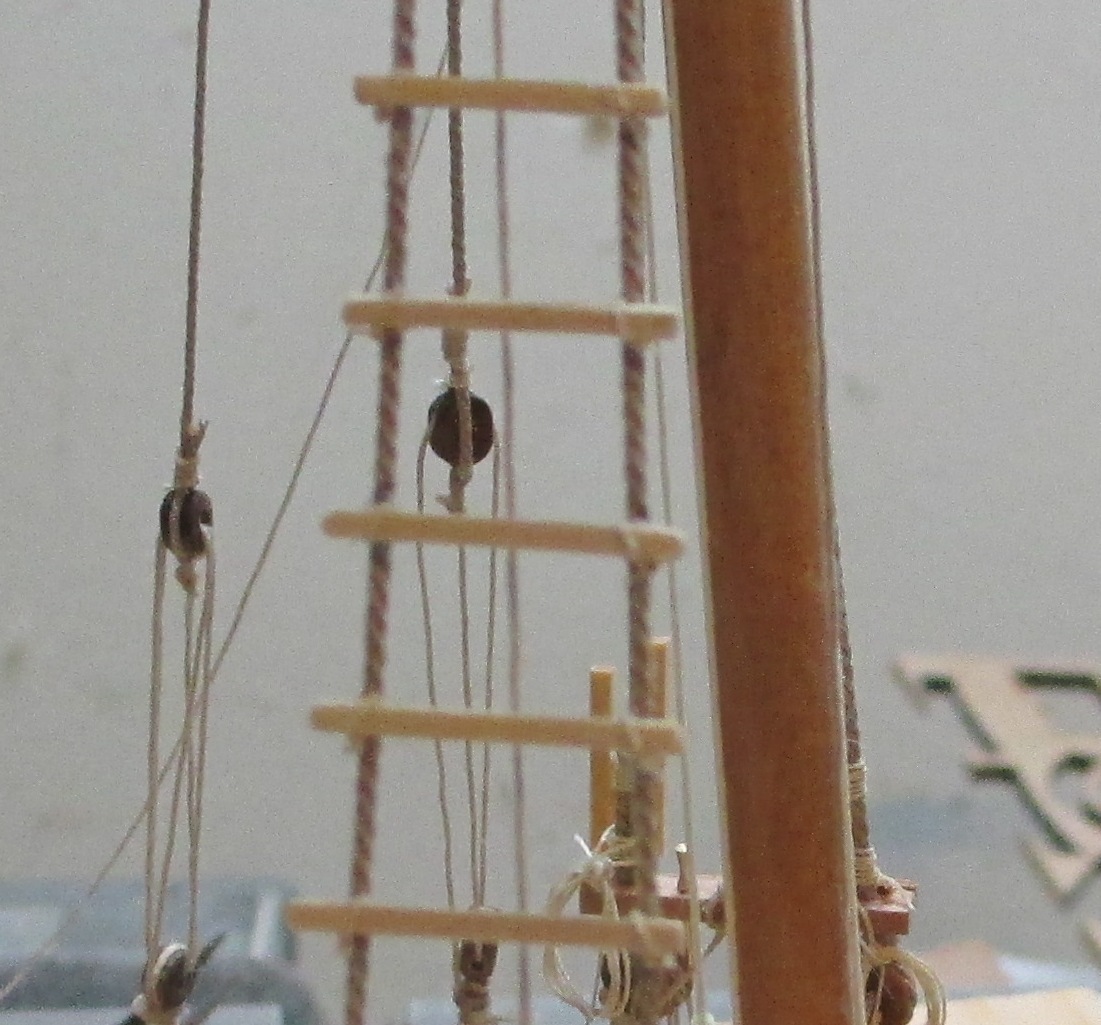
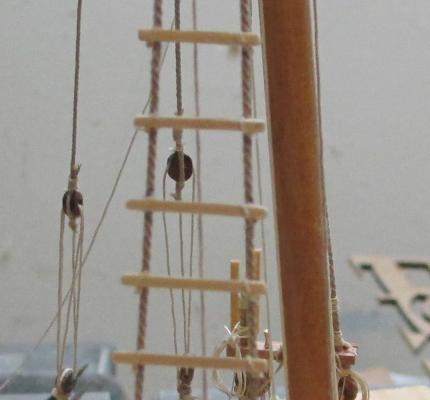
Steve, On Philly 1 I ended up lashing the rungs to the shrouds. The attached pic is not all that clear, since I wasn't taking pictures of the rungs. I'll get some better shots Monday.
- 308 replies
-
- 3
-
-
- finished
- model shipways
- (and 1 more)
-
My wale worked out to be 3 x 1/8" strakes with 6 x 3/32" strakes above it to the cap rail.
-
Steve, Looks good. You will get plenty of opportunity to practice those rope coils before all is said and done.
- 308 replies
-
- 1
-
-
- finished
- model shipways
- (and 1 more)
-
Freeing ports?
-
Micro Drills, Revisited.
Chuck Seiler replied to Modeler12's topic in Modeling tools and Workshop Equipment
jhearl, Many thanks. Holy cow!!! They go up to #97!!! -
Micro Drills, Revisited.
Chuck Seiler replied to Modeler12's topic in Modeling tools and Workshop Equipment
I am looking at the site. I see many categories for "DRILLS" but I cannot find anything approximating "Micro Drills". What should I be looking for? -
By all means, pull up a chair. Senior Old Salt is building PROVIDENCE as well. It appears he is using the same set of plans (although discussion above indicates there are some differences). I am planking on bulkhead/he is doing a modified bread and butter. Mine will be mostly natural with some paint/his will probably be all painted.
-
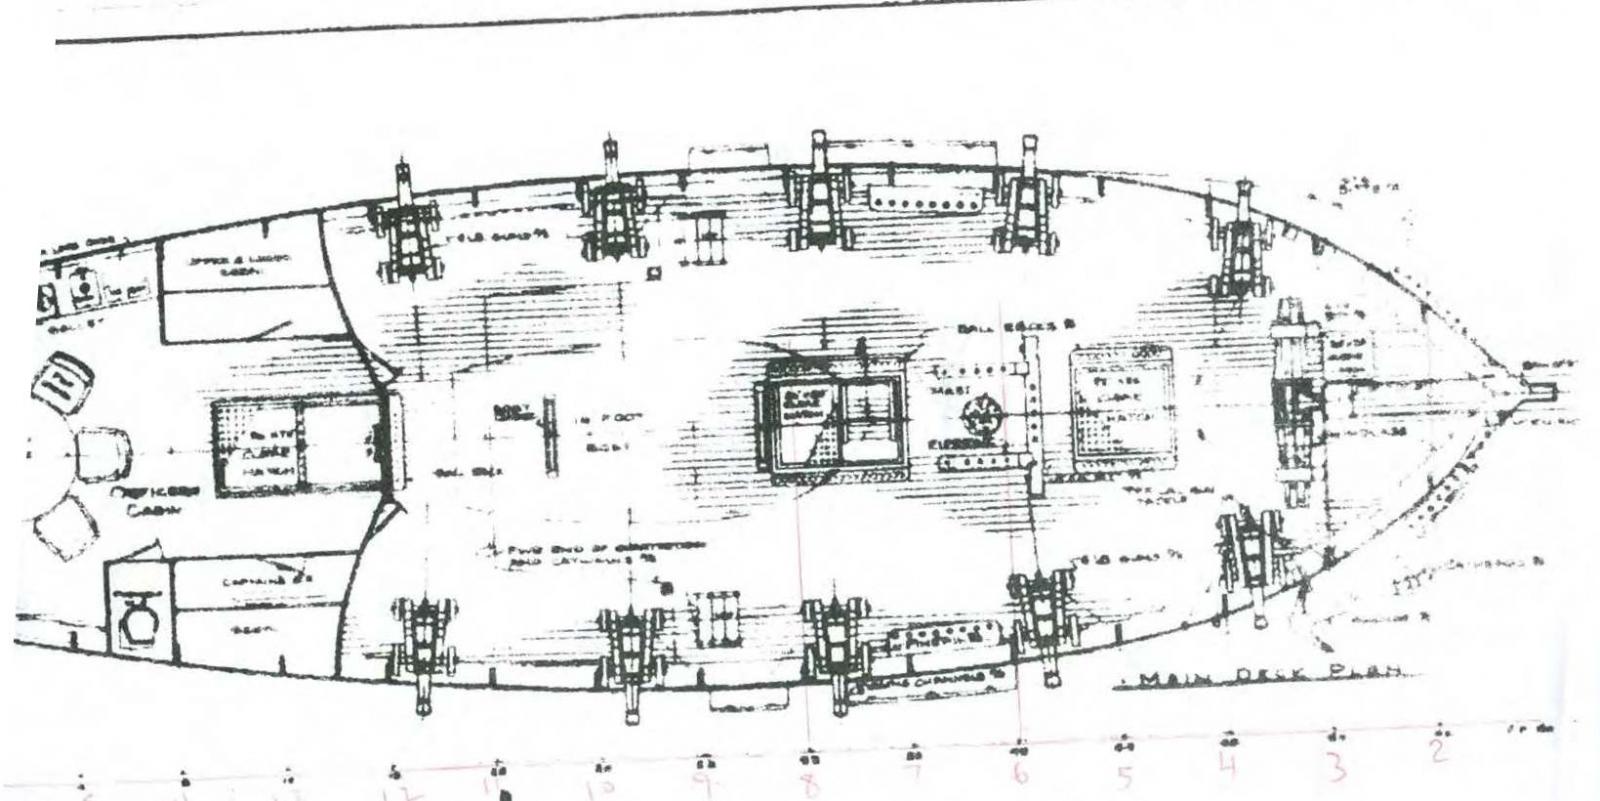
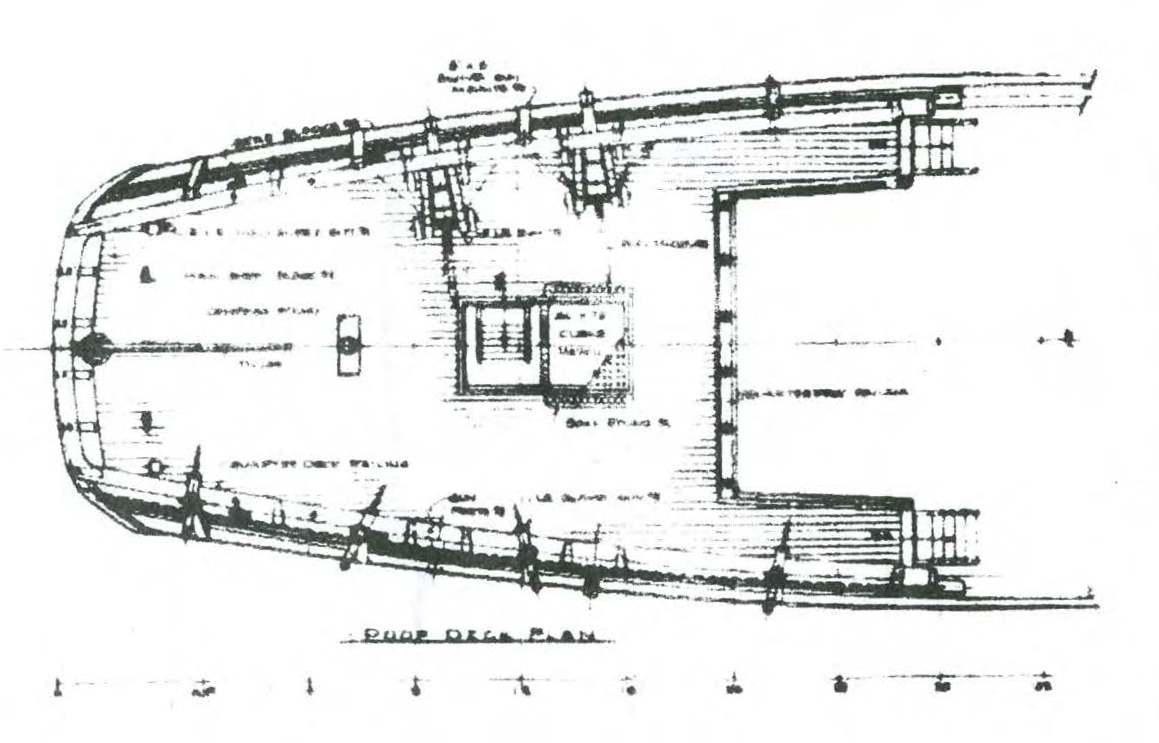
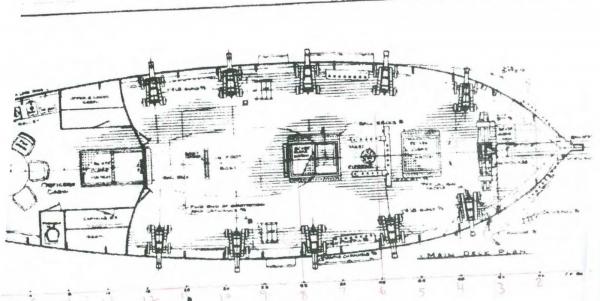
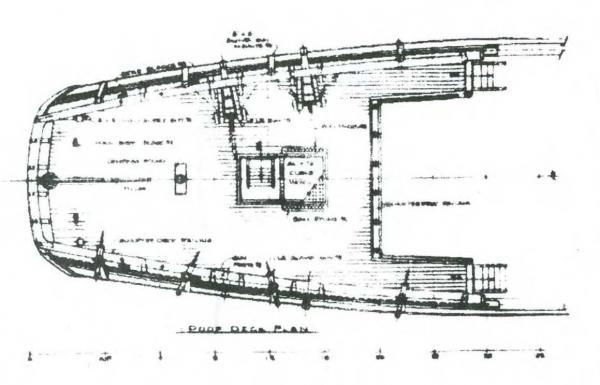
The difference in deck plans interests me. Looking at the two sets of basic plans, they are the same. Not surprising; my set is from a book which talks about the replica build and yours are from the captain of the replica. I would assume the plans are the same plans. Why, then, are the deck plans diffferent? Maybe one is "as planned" and one is "as built". The four guns on the poop deck/quarterdeck seems to be a bit crowded, but believable. The plans I have and the paintings I have seen shows only 5 gunports, while it is documented as to having 14 4# guns. They gotta go somewhere. I believe I have seen at least 1 painting with them there. I'm not too concerned with the internal arrangements except where they concern hatches and gratings. Keep in mind, the great cabin goes further back than in my plan. I couldn't scan the whole page and I really didn't care much what it looked like inside.
-
SOS, Here is what I have for the basic deck plans (from the book).
-
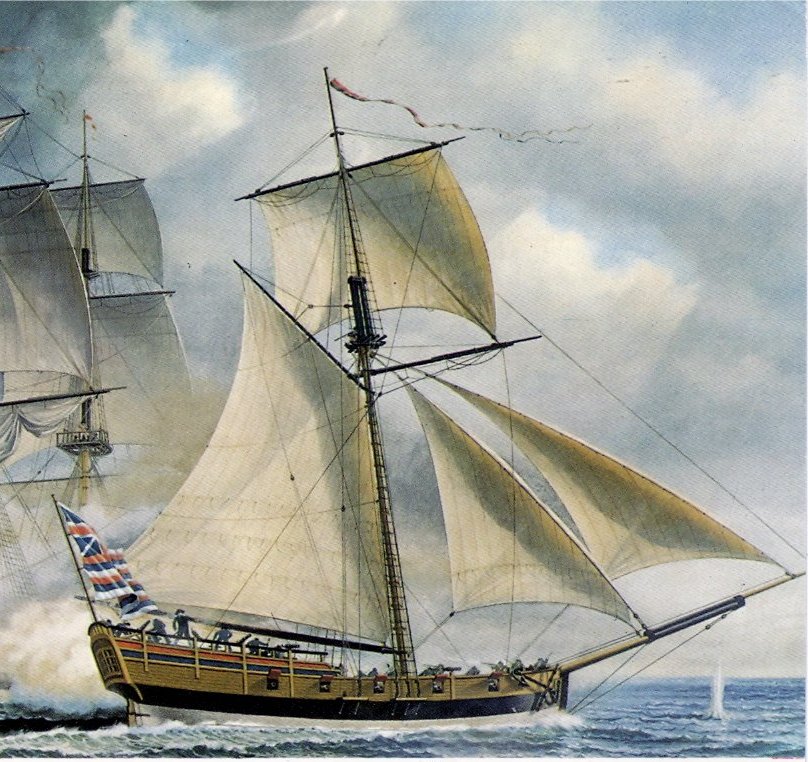
HISTORY The sloop PROVIDENCE was built as the KATY, for John Brown of Providence. It may have been built as early as the end of the French and Indian Wars (1763), being used as a privateer. It is chronicled as making a trip to Suriname in 1769. It went on a whaling expedition in 1770 and again in 1772. Heavily timbered, it was built for speed and strength. By 1775 Rhode Island was heavily engaged in maritime warfare with the British Navy, and nobody more so than John Brown. When Rhode Island put together a navy to combat the British Navy's usurpations, the KATY was a prime candidate. Under the command of Abraham Whipple, the Katy was the first American vessel ship to capture a Royal Navy vessel, the armed sloop Diana in June of 1775. The Diana was tender to HMS Rose which was cruising near Narragansett Bay. Abraham Whipple was known for his role in the burning of HMS Gaspee in 1772. When he learned of the capture of the Diana by Captain Whipple, Captain Sir James Wallace of HMS Rose sent Whipple an angry message: "You, Abraham Whipple, on the 10th of June, 1772, burned His Majesty’s vessel, the Gaspee, and I will hang you at the yard-arm." –James Wallace To which, Whipple replied: To Sir James Wallace, "Sir: Always catch a man before you hang him." –Abraham Whipple. Whipple was never caught by Wallace and died on the Ohio frontier at the age of 86. The KATY was taken into the fledgling Colonial Navy and renamed Providence. She was later commanded by John Paul Jones on several successful voyages. In August 1779, Providence was burned, along with other American vessels, to prevent her falling into the hands of the British towards the end of the disastrous Penobscot Expedition. Google or Bing "COLONIAL SLOOP PROVIDENCE" to find out more about this fascinating ship. Better yet, read the book "Valour Fore and Aft-Being the Adventures of America's First Naval Vessel".

-
SOS, I finally started my PROVIDENCE build log. It will take a few days to get settled in and get the juicy parts posted.
-
Ahoy all. I have begun my build log for Continental Sloop PROVIDENCE. I just started it. I will later include some info on why I shifted from PHILLY to PROV.
- 259 replies
-
- 2
-
-
- Gunboat
- Philadelphia
- (and 1 more)
-
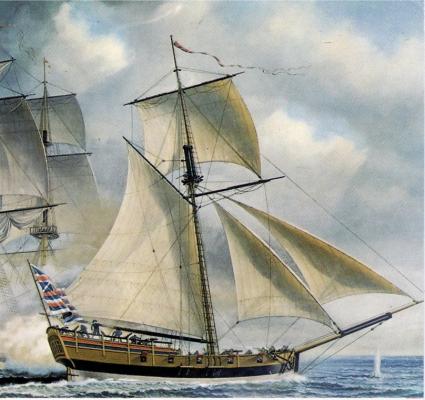
FINALLY...my build logs begins. I welcome those that followed my PHILADELPHIA builds as well as any new comers. Welcome to my build log for the Continental Sloop PROVIDENCE. This ship is famous for being the first naval command of John Paul Jones and the distinction for ALMOST being the first ship in the Continental Navy. GENESIS OF THE PROJECT The idea for this model began with, as most things of value, discussions about pirate ships. Our ship model club annually mans an information booth at the local County Fair. One of the questions that always arises is “Is that a Pirate Ship?” That leads to a discussion about what exactly IS a pirate ship? Does a Pirate go to “Pirate Ship Depot” and pick one out? “Nay” sez we. A buccaneer bateau is normally one they have captured and has attributes that would make it valuable to them; normally speed and agility. Ships that make good pirate ships also make good merchant ships, privateers and naval vessels. I used the example of the classic Bermuda/Jamaica/Virginia sloop. Ships with exactly the same lines serving different purposes; Blackbeard’s ADVENTURE, Armed Virginia Sloop merchant and John Paul Jones’ PROVIDENCE. Sometime afterwards, I was doing some research and found this was not EXACTLY true. While many sloops have almost exactly the same lines and the Model Expo AVS, PROVIDENCE was not one of them. Close, but not exact. Using paintings and plans from the replica PROVIDENCE, I saw that for one, the PROV was slightly beamier than the typical AVS. Also, whereas the aft section of AVS is covered, the PROVIDENCE has an actual poopdeck. My interest in the Continental Navy lead me to get more info and eventually build this ship.
-
Most of my models are pretty moss-ridden as well. I hope to launch my PROVIDENCE build log this weekend.
- 196 replies
-
- 2
-
-
- higaki kaisen
- woody joe
- (and 1 more)
-
I'm only ahead because I started 6 months before you did. Your progress is impressive.
-
Bob, What is that green stuff? Moss? Now we know which side is north. HK is looking great. Will you be showing it at Mystic? CHuck
- 196 replies
-
- 3
-
-
- higaki kaisen
- woody joe
- (and 1 more)
-
SOS, Looking good! Looking familiar. I say take the scribed deck and use it as a fly swatter. Get some good holly from Crown Timberyard (or vender of your choice) and individually plank the deck. I use the pencil caulking method myself. I have used MINWAX Sanding Sealer to do what you are planning. I can speak to that, but not with the items you are using. Using the MINWAX SS I was able to glue to the sealed wood, but I always like to peg the item in using a small bamboo treenail, for strength. I like bamboo because I can get it down to 1MM and still have strength. Other wood I have used falls apart by then. CHuck PS. I plan to launch my PROV build log this weekend. ...then there will be 2.
-
One possibility. They knew they might end up fighting as they did-anchored with one side facing the enemy. That way they could bring more of the heavier guns to bear. They would have to shift ballast to do so, but it may be worth the effort.
- 175 replies
-
- 3
-
-
- washington
- galley
- (and 1 more)
-
Check out the grating kits offered by Chuck P's SYREN Ship Modeling Company. I have made my own in the past, but just finished up one of these. Very nice!
- 44 replies
-
- 2
-
-
- Sultana
- Model Shipways
- (and 2 more)
-
I believe it is "AFT PERPENDICULAR". I you look on the other side of the body plan,the forward most frame is marked FP. I believe that to be "FORWARD PERPENDICULAR". I like your idea of building the lower portion of the hull bread and butter while building the upper part in such a manner as to allow for hatches and ladders. I did something similar on my SULTANA.
-
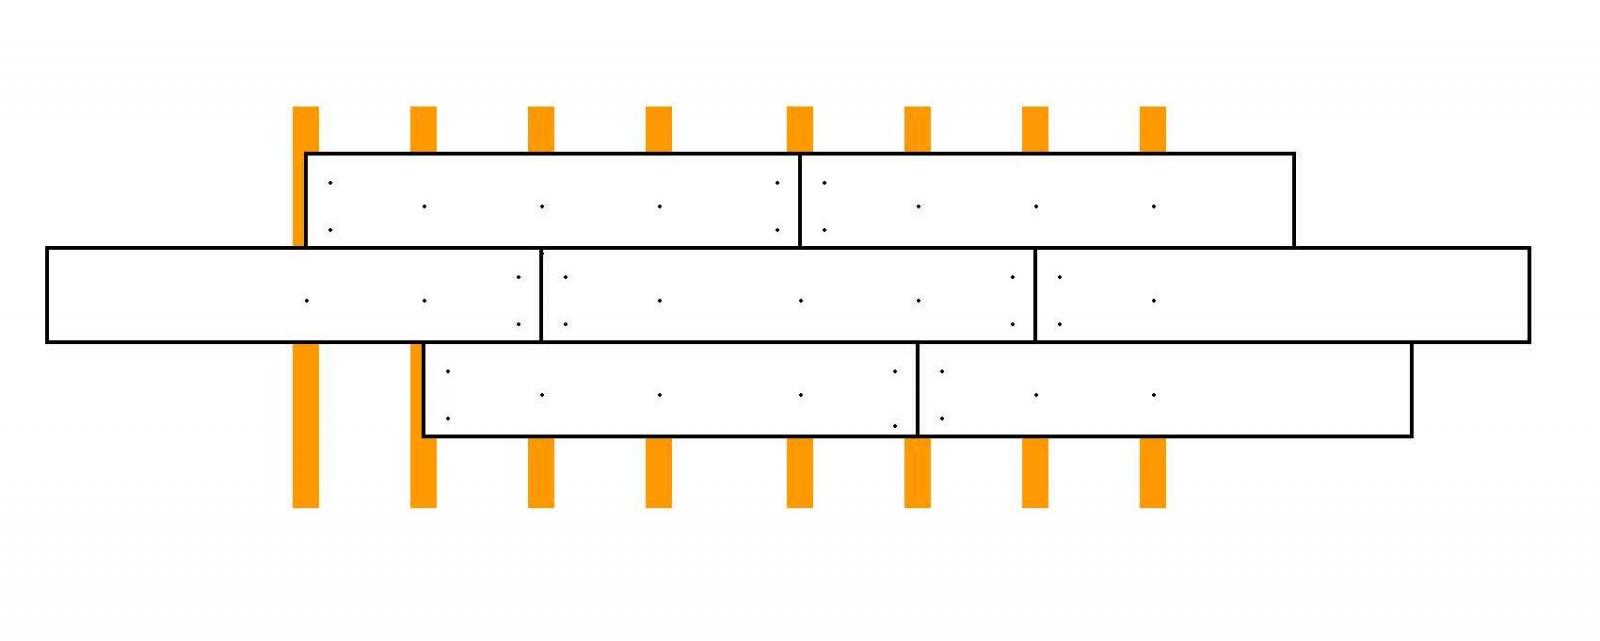
Bob, Looks pretty good. One flaw I see is that you don't have the butt ends trunneled. Since they necessarily fall on a frame, they should be trunneled. I prefer using 2 nails on the ends and one everywhere else (see attached). This protocol would vary from time period to time period and nation. People smarter than I can tell you more on nailing patterns.

- 44 replies
-
- 5
-
-
- Sultana
- Model Shipways
- (and 2 more)
-
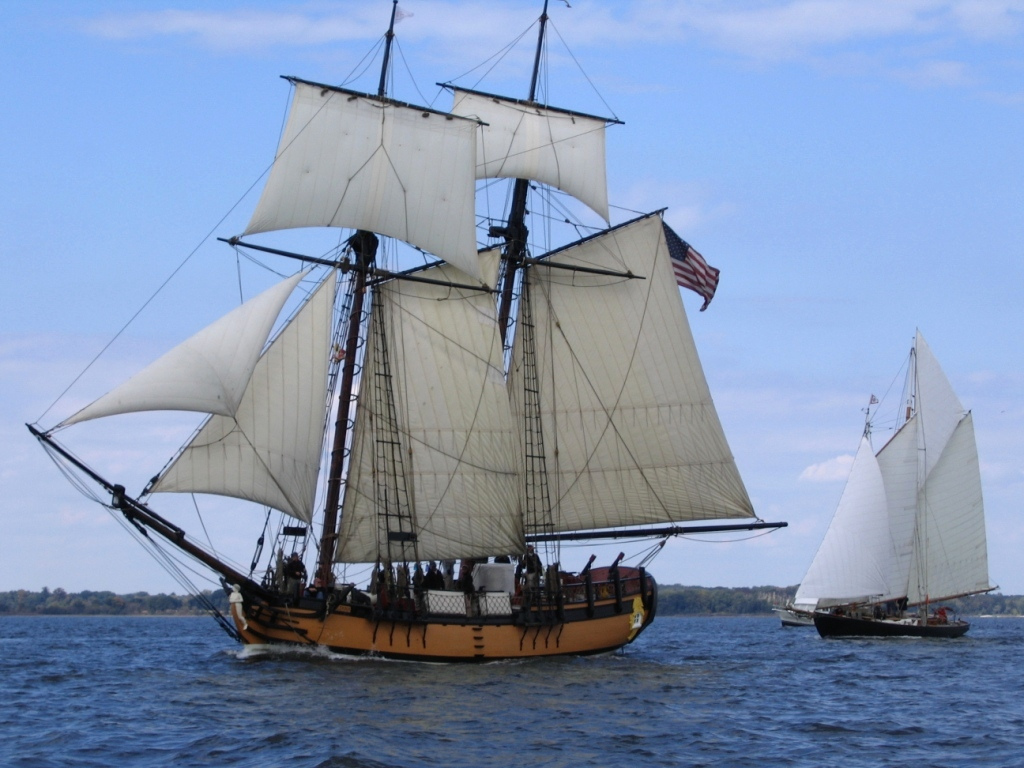
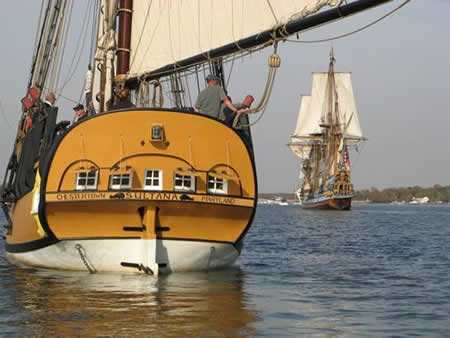
It gets more interesting when you have a real live ship to look at.

- 44 replies
-
- 6
-
-
- Sultana
- Model Shipways
- (and 2 more)