


jack.aubrey
-
Posts
1,268 -
Joined
-
Last visited
Content Type
Profiles
Forums
Gallery
Events
Posts posted by jack.aubrey
-
-
Thursday, January 16, 2014 - Small but important progresses. .
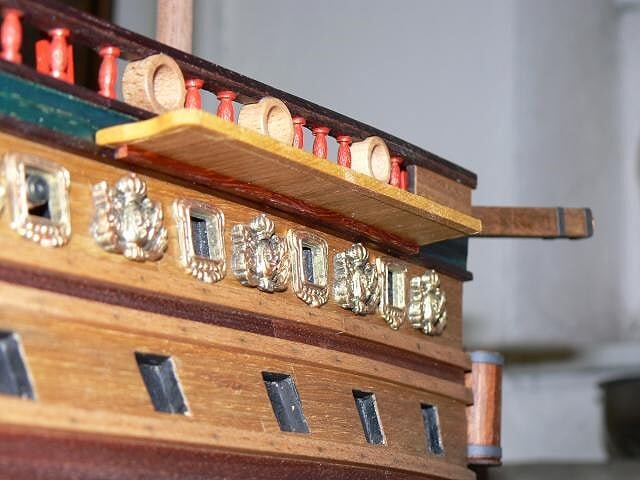
Yesterday, Wednesday, I spent a couple of hours to find, plan and fix on the sides of the hull, with the usual two-component epoxy glue, new decorations, elements that should be applied before fixing the chain plates.
Then, while waiting for the glue to take its course, I have finished the preparation of the individual pieces that make up the chain plates that I had in mind to build for my Soleil.
01 P1090723.jpg
02 P1090724.jpg
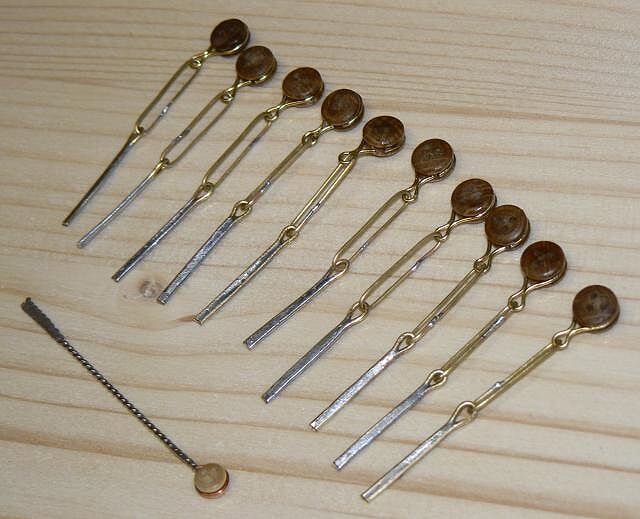
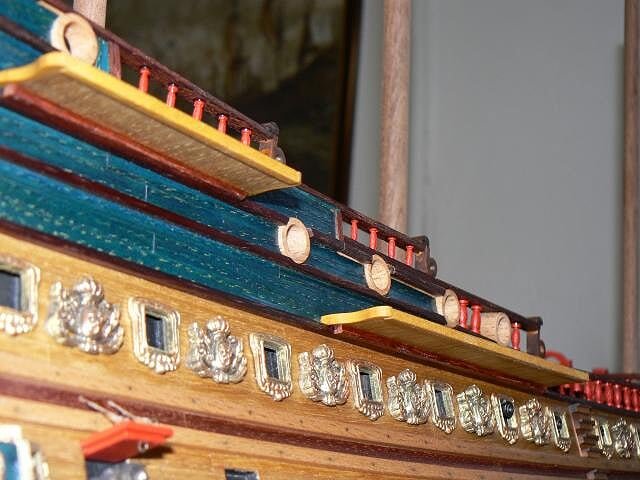
Today, however, I was able to proceed with the assemply of the chain plates . . my bigger problems was the need to weld some pieces, task which for me had always been rather problematic. But this time I put new right efforts and, with the proper tools and the correct method I finally managed the job . .
Below two pictures show you ten "prototype" chain plates . . but I'm so satisfied of the result that I will pass to mass production soon: I need to build about sixty of them.
03 P1090721.jpg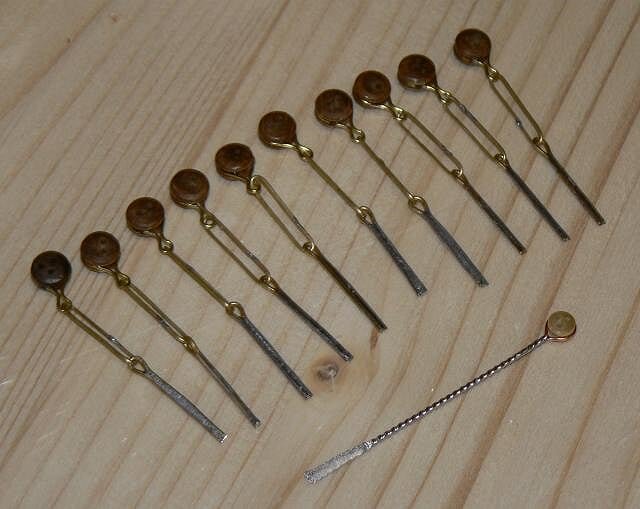
04 P1090722.jpg
-
Monday, January 13, 2014 - Channels and chain plates
Yesterday I spent the afternoon of Sunday working on Soleil.
I delayed for a while the preparation of the chain plates, waiting to feel confident with "soldering" methodology. But I had to find new size of deadeyes, 7mm. rather than 5mm. (the latter are provided by De Agostini but I feel them out of scale), so I worked to finish the wooden part of the channels.
In practice, as you can see from the pictures so far proposed, they lack all the reinforcements of the upper side, similar to reversed bracket. These pieces are distributed by De Agostini pre-cut but, once again, I decided to redo them from scratch, starting from a strip of solid dark wood.
In practice I had to do from scratch these fairly small pieces with the aggravating factor that I had to correct them to get the joints to fit (one by one) to their individual locations.
This activity, laughing and joking, took me a whole afternoon . .
PS: the pencil marks on the channels and the wale below indicate the position for each chain plate. This positioning takes care of the locations of the gunports.
01 P1090710.jpg
02 P1090711.jpg
03 P1090712.jpg
04 P1090709.jpg
-
Thursday, January 9, 2014 - Chain PlatesToday I started to do some tests to determine how to build the chain plates with the lower deadeyes . .I have in mind several ideads but all of them have as a prerequisite some kind of "soldering" . .Unfortunately, I discovered that soldering is a real headache for me and this doesn't make things easier. I'm following training courses via YouTube where everything seems quite easy, but then I can mess with. I also asked for recommendations to friends.I know that sooner or later it will be successful but it will cost me tears and blood before I'll get satisfactory results.That's all for today, Jack.
-
continuation of the previous message. .
The channels photographed from a lower perspective.
It's possible to note that I have added a further reinforcement with the same wood of the wale below.
I felt this measure necessary because, having decided to set up the model with no full masts, there will be no standing rigging to firmly hold together these elemens.
In my case, in fact there will be in place only the lower deadeyes . .
01 P1090701.jpg
02 P1090702.jpg
03 P1090705.jpg
These days I'd the possibility to use the grinding machine illustrated here below. It 'a great tool for many processes.
To use at its best it has to be fixed to the worktop, in my case on an old desk.
I preferred an alternative solution (although not to spoil the desk) that works in practice in the same way and can be removed easily . .
04 P1090706.jpg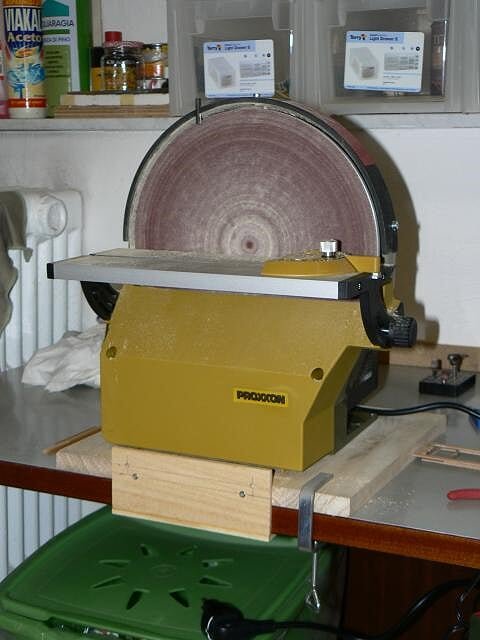
-
Thursday January 8, 2014 - Channels
Today I did'nt work because I had other commitments but yesterdaty I carried out some useful work with the channels: today I only limited myself in taking photos.
Preparing the channels may feel a simple task but it is not. To bring MY channels to the point that you can see in the following photos, I spent three afternoons . . . and there are still to prepare other elements.
To build MY channels I used the material from De Agostini (a pre- cut plywood rather poor) only as internal support that I covered with strips of chestnut veneer on both sides of the element.
The outer frame is made with boxwood to match the original shape.
Then I inserted some metal pins with the objective of strengthening the bonding on the sides of the hull.
But let the pictures speak for me: work in progress, you can see more clamps than anything else. They keep in place a reinforcement below the channel.
01 P1090704.jpg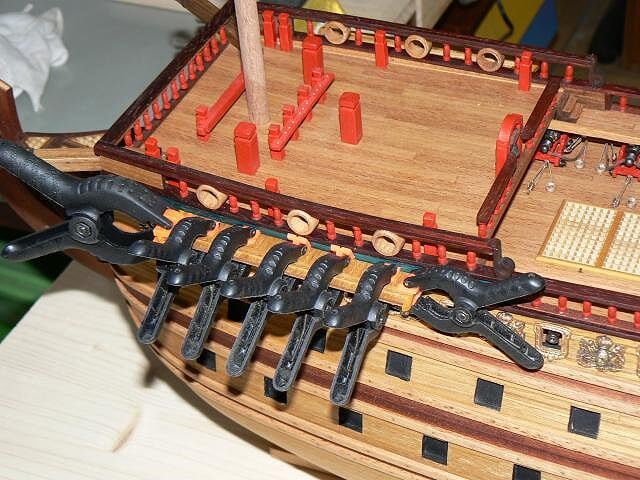
The channels installed but without the outer frame complete. .
02 P1090703.jpg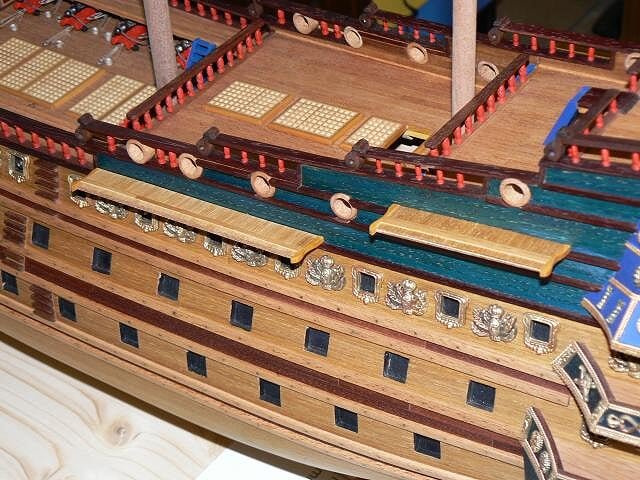
The channels with the outer frame (here only positioned, not fixed)
03 P1090699.jpg
04 P1090700.jpg
-
Friday, January 3, 2014As promised yesterday I went back at work. . starting with the channels. I'm using my new glasses (I had to change them after the last cataract operation) and they sound OK.I used the material provided by De Agostini just as a support to be coated above, below and to the sides with veneer strips of 0.5x5mm. This to provide greater realism to these details that were not built with a single piece of wood.Obviously I still have to finish them and later I'll need to fix on the sides of the hull , so no photos.On the other hand I wrote down a rough plan of the activities that I will carry forward in the future in order to get finished this model . It's a rough plan that needs to be further refined, but it is enough to understand that there is still much work to do, even if the solution I have in mind doesn't foresee the complete masts and consequently all the rigging and the sails.The plan is roughly as follows; the list is not in order of priority, but only a simple list of macro activities.
- Masts: mainmast, foremastes, mizzen mast and bowstrit (only stumps)
- Lower and intermediate deck guns: fix gunports as prototype made some months ago
- Lower and middle deck guns fixing
- Upper deck guns fixing
- Quarterdeck and forecastle guns: complete installation with rigging
- Channels
- Chain plates and deadeyes
- Poop decorations to be completed
- Figurehead and headrails, bowsprit
- Missing riding bitts, belaying pins
- Poop lanterns
- Stern guns and gunports
- Boats to fix onboard
- Boat to be fixed on the display case
- Finishing the display case (plexyglass)
-
Thursday, January 2, 2014I spent the Christmas period to reorganize my lab. . it was really needed, partly because of the long period of activity and inactivity that characterized the last months.I have now a full and renewed knowledge of what I have in charge and where it is . . before I felt the lab of another person.I had to think for a long time during these days on which model to work: the Soleil Royal or the Twelve Apostles, and at the end I decided to resume my work on the Soleil Royal.The reason of this decision is quite simple: the next activity on the Twelve Apostles is to do works that generate a lot of sawdust and in this particular moment I prefer, at least for a couple of months, to avoid jobs that produce dust. This to minimize the impact on my eyes, just recoverted from two surgical operations.So, as a logical consequence, the choice fell on the Soleil.There are quite a lot of works to do. Today I spent the afternoon preparing a working plan that I will refine further tomorrow.Anyway I decided that I will start with the preparation and installation of the channels.Obviously I think to improve the material provided by De Agostini . .Then I'll work on the broken pieces of the masts (you should already know they will not be full masts but only a mokup interrupted below the tops .Now I just have to start real work and I'm going to do this tomorrow.We'll hear soon. Jack.
-
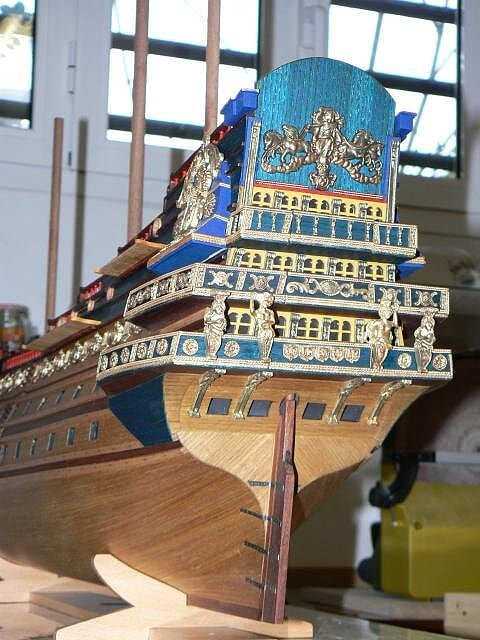
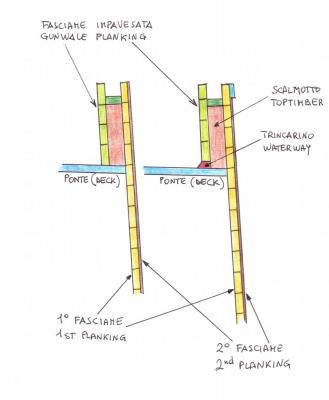
Sunday, November 3, 2013Looking forward to tomorrow I'm planning the work for when I'll be back in business. According to the instructions the next important step is to open the gunports but I'm pretty focused on the bulwarks and handrails and I would like to finish them before proceeding further . These are activities that should be planned around issue 50. I say this not because I read in a crystal ball. . but because I have the specifications (in Spanish language) of the future issues and I can say this advisedly .I enclose a sketch that explains how the bulwarks & handrails will be finally assembled, once finished .On the left side is visible to the scheme proposed in the Spanish instructions on the right side the variant that I would like to implement, more realistic because it provides an important element called "waterways" . It was used to convey water to collection points along the deck where there were scuppers that discharged water overboard.I think it's a very important small element of detail that should provide an added value to the model.That's all for today, best regards, Jack.
-
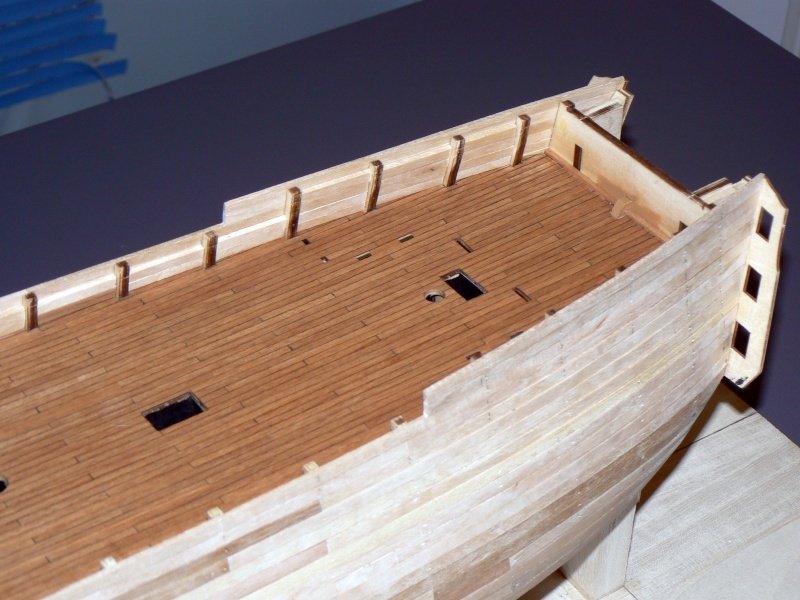
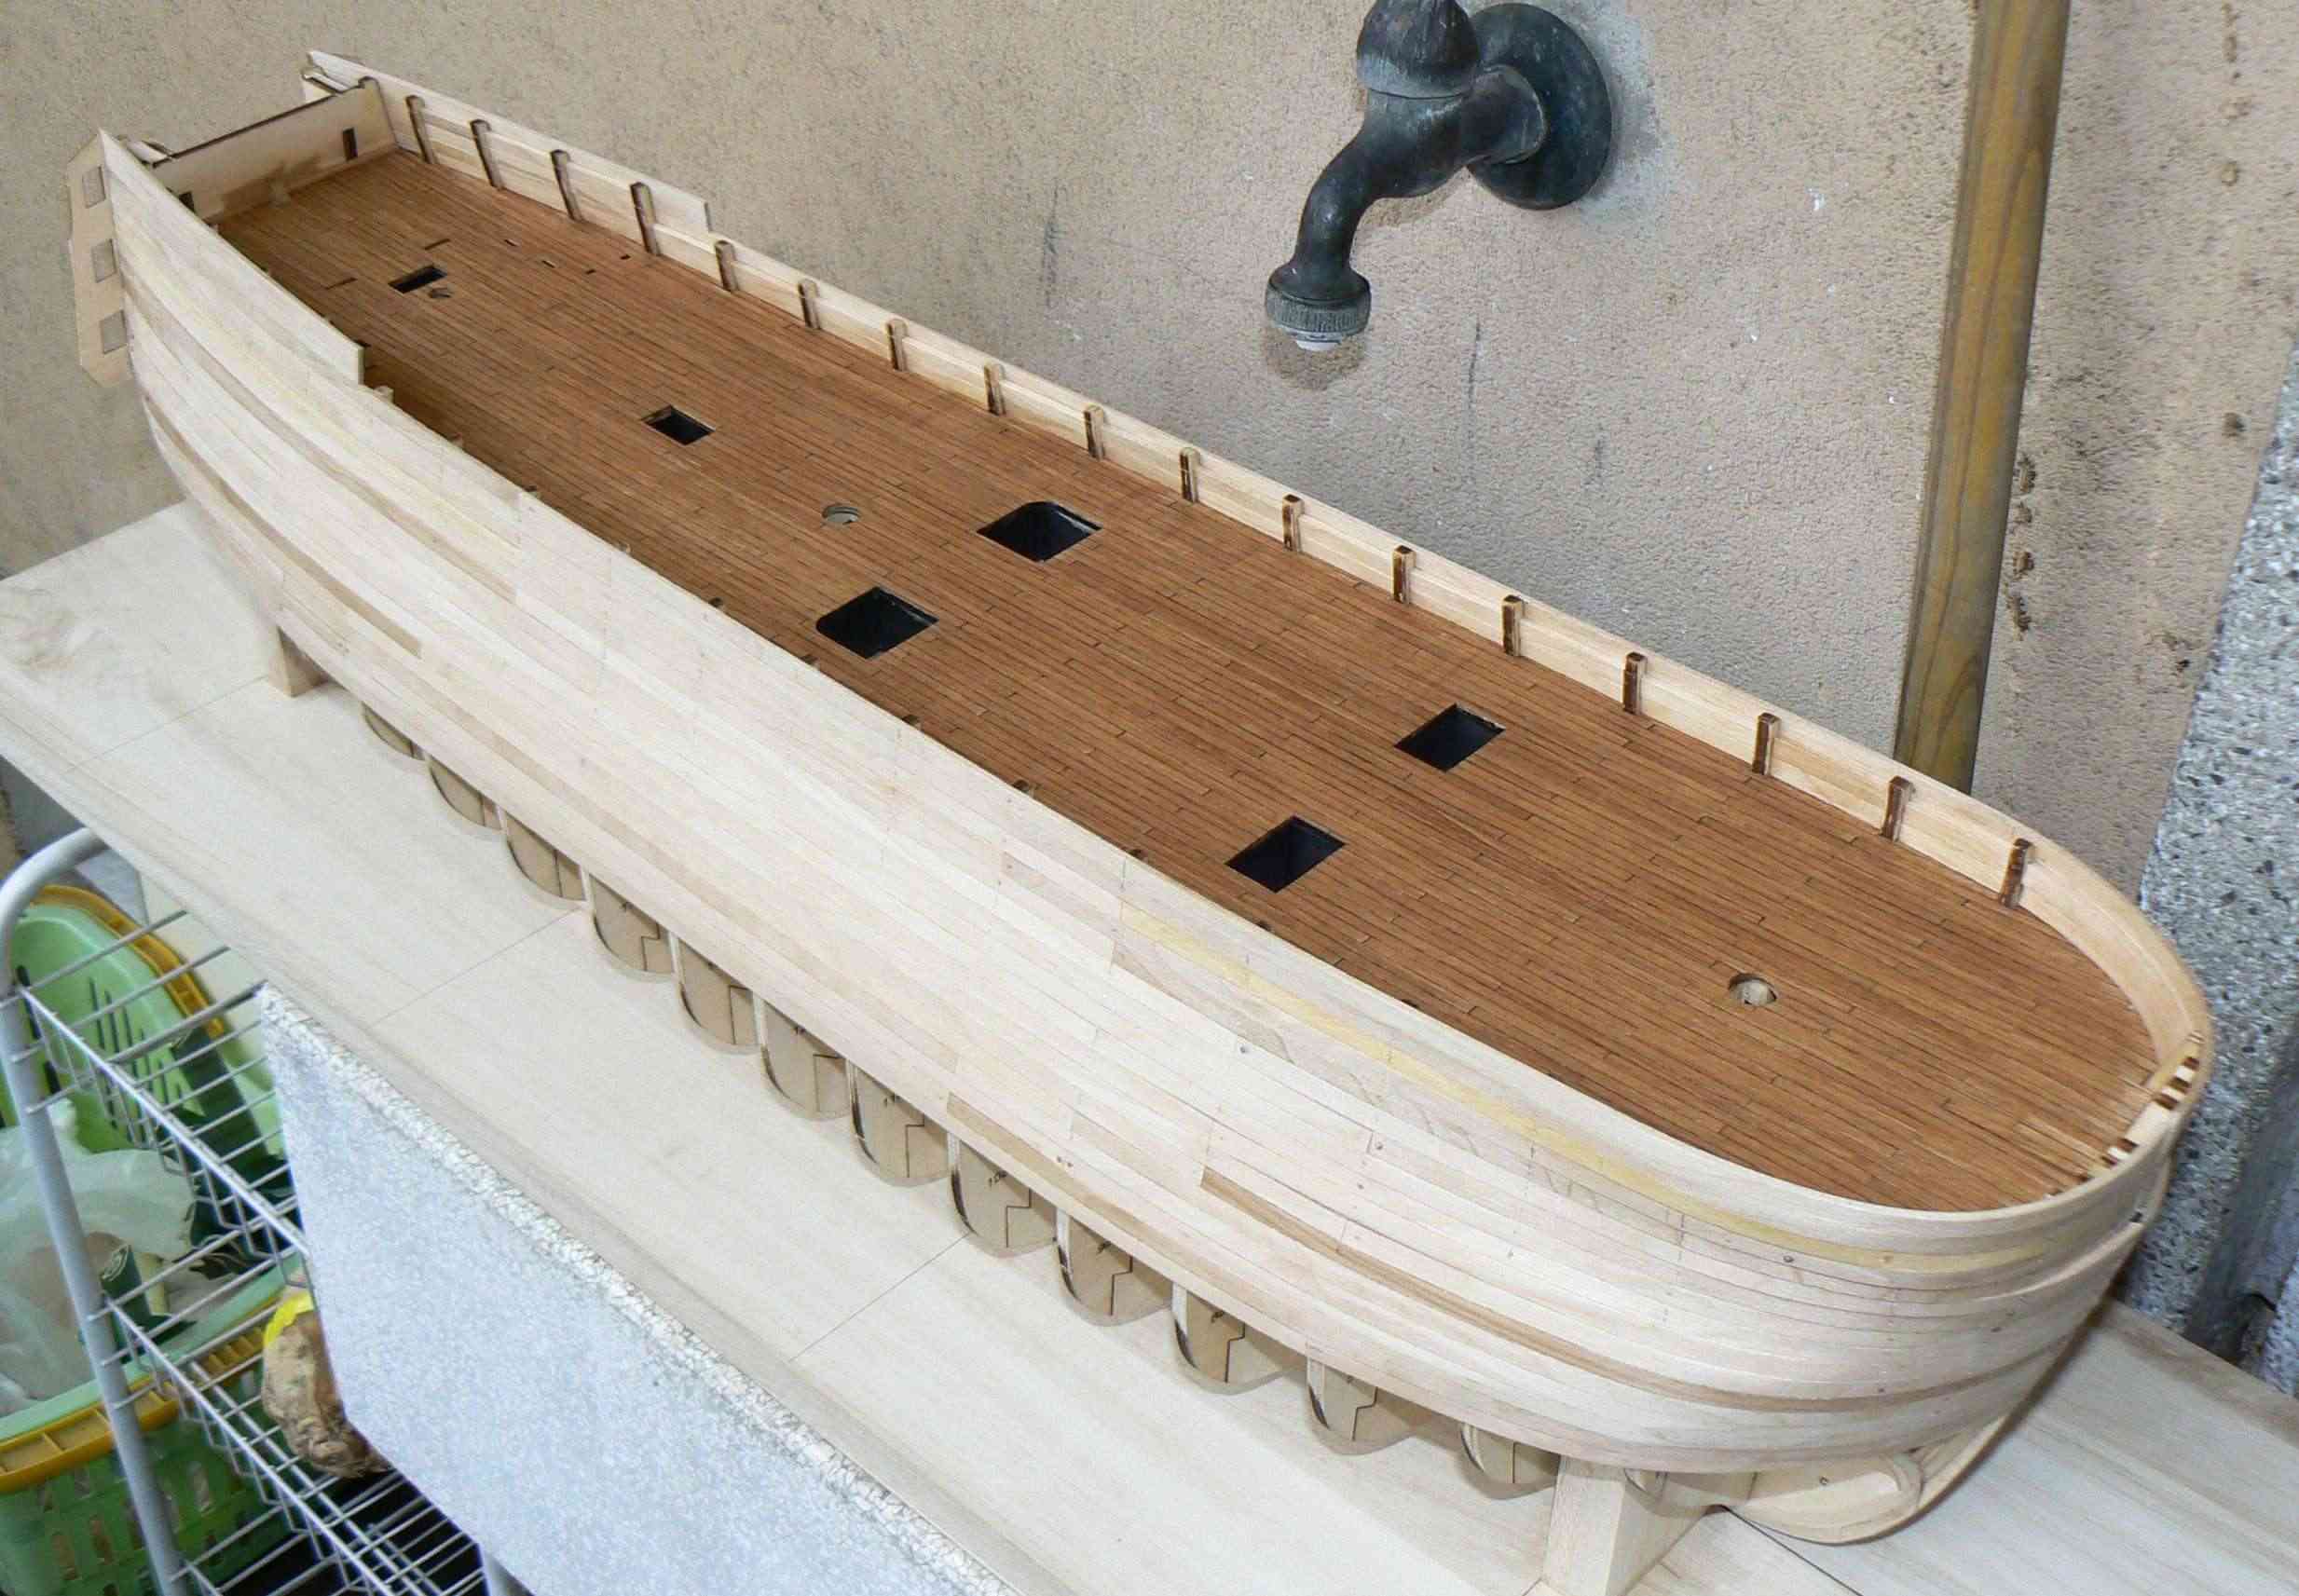
Saturday, November 2, 2013Probably I will not publish new progresses in next fortnight, so I add now a bit of new images, shot this time with the traditional photo camera instead of the smartphone.There are small changes from the last published: I reinforced all over the gunwale which now looks very strong (one of my fixations ..) and I covered with planks the small area of the deck just over the well-known element 46b I added later..01
 02
02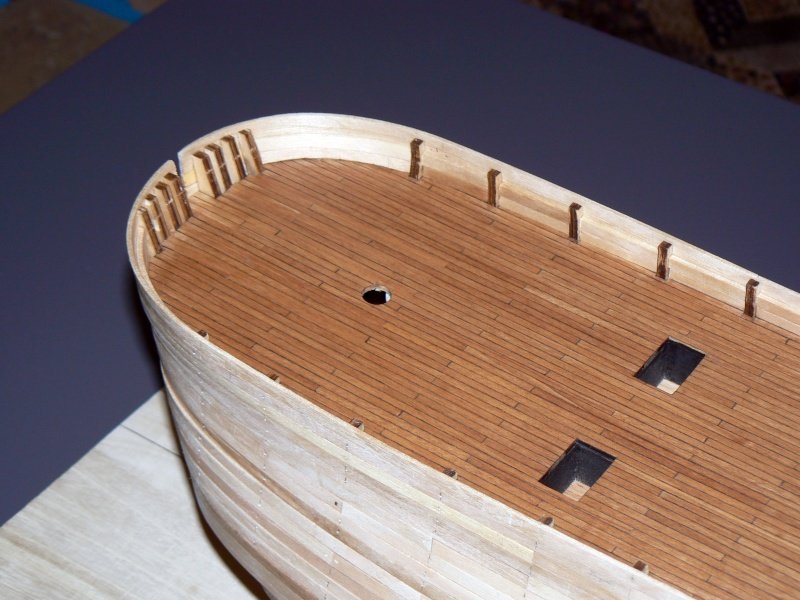 03
03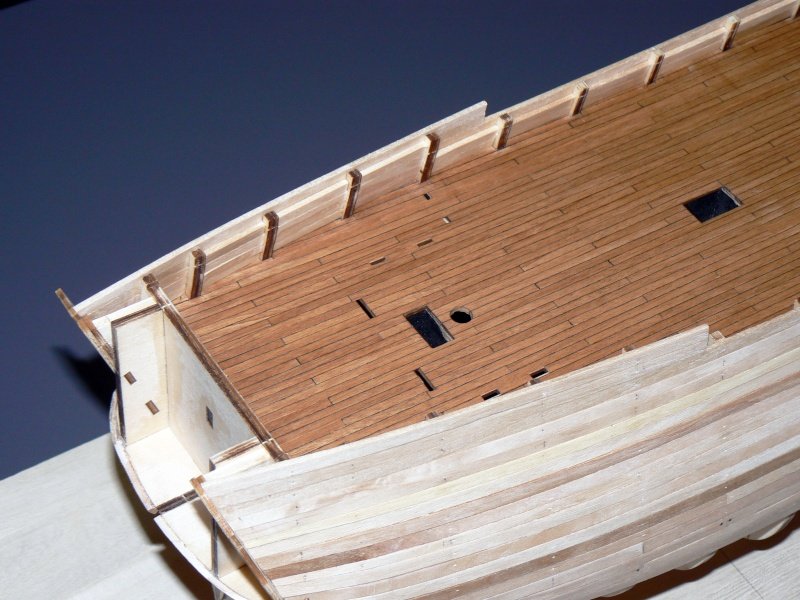 04
04 05
05 06
06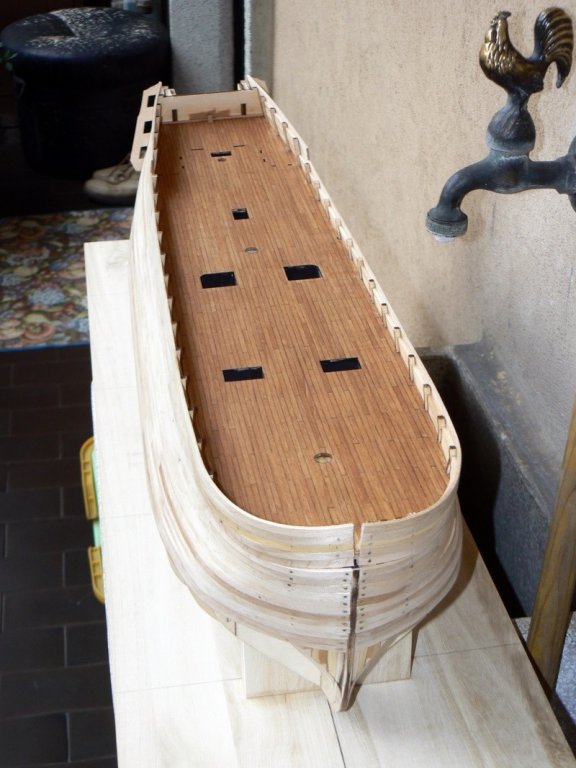 07
07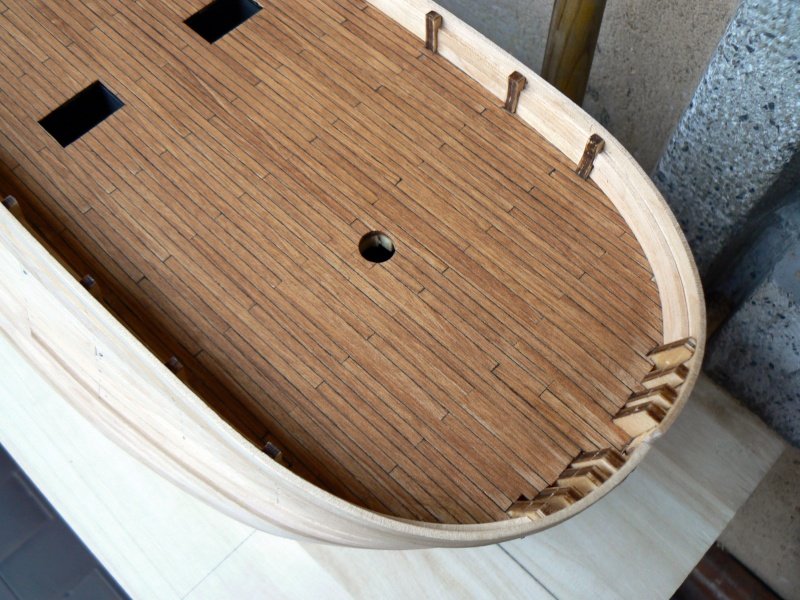 High Resolution Images:
- Dimitris71, Sjors, yvesvidal and 5 others
-
 8
8
-
-
I am attaching some pictures of the finished planking after removing the clamps. It seems to me that the curve at the bow is coming really well. . power of the new tech jig: candle and can . .
Thanks Joe and Randy for your encouraging comments.
- realworkingsailor, ronkh, yvesvidal and 1 other
-
4
-
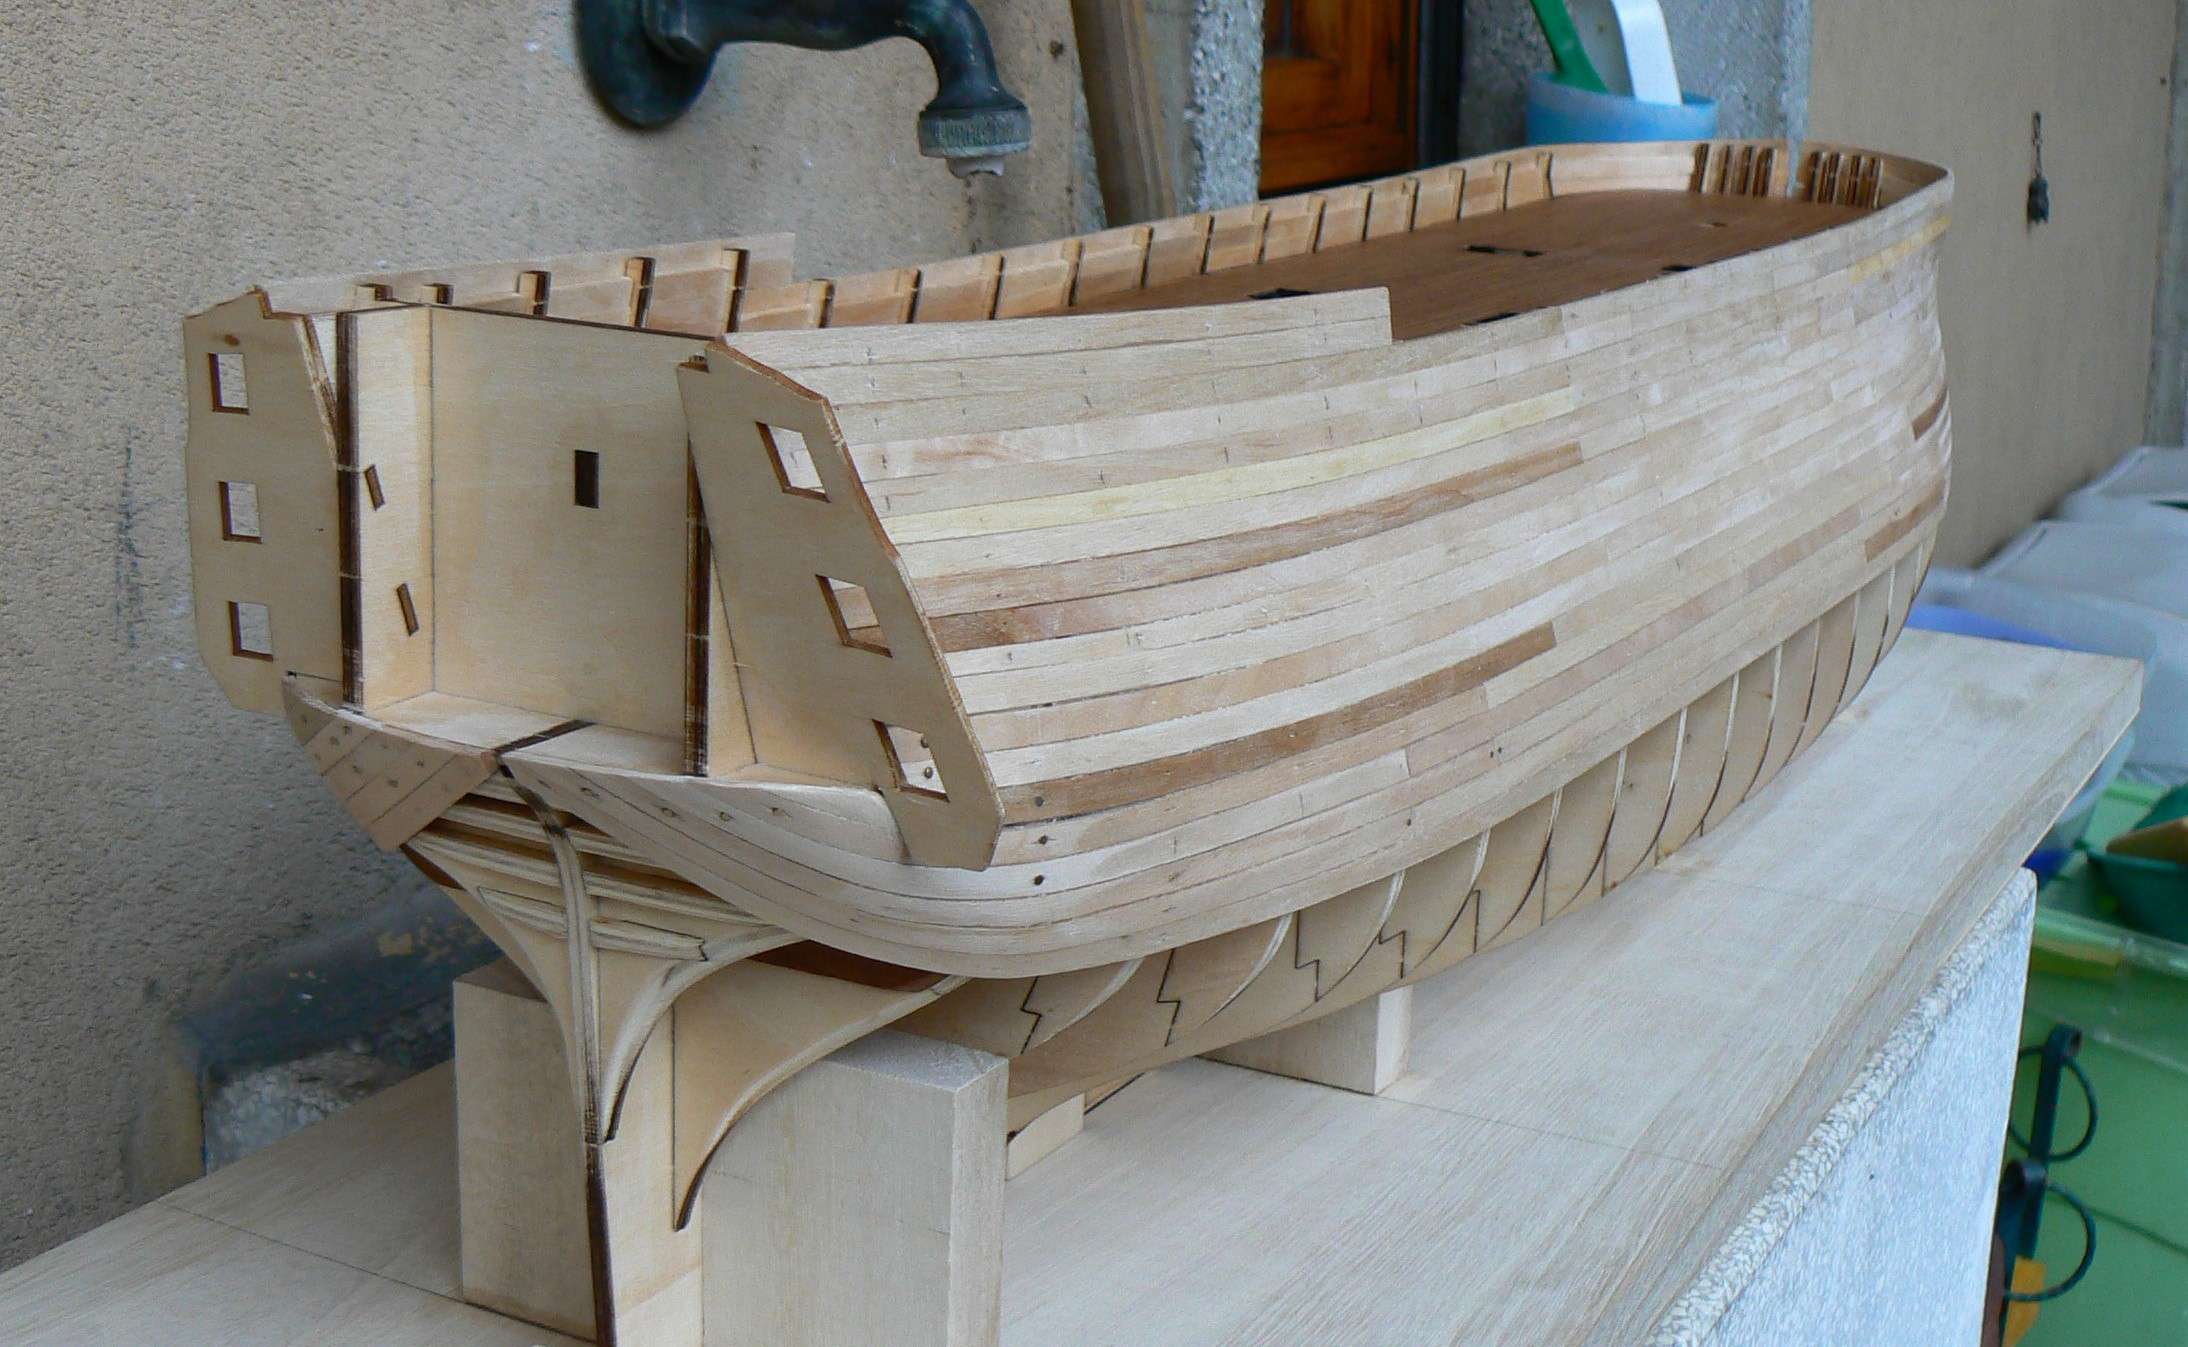
Tuesday, October 29, 2013Today I finished to plank the top of the hull of the 12 Apostles.At the moment I do not have pictures because I just finished and the hull is full of clamps to hold the strips in place.Next planned operation according to instructions is to equalize all the bulwarks at the same height: 15 millimeters. A task for the next few days.Then sandpapering and "elbow grease" to smooth the hull in order to draw out the locations of the gunports and proceed with their opening. But the task inside this last paragraph are postponed after the end of the cataract operation and after the convalescence is finished . .It will mean that from tomorrow to Monday, I'll try to set up some mini activities to enhance the work already done. In this case I will give you proper information.Regards, Jack.
-
Sunday 27 and Monday 28 October 2013Again four new strips on both sides at the bow . . I'm almost at the end, three strips on each side and I got to the roof. I have already prepared the next two strips to install Tuesday.while waiting for the four strips be properly soaked in water for bending I thought to a reinforcement of the gunwale that is shown in the third photo. The complete reinforcement will consist of three rows but I have to wait to finish another task . . to long to explaint, it will be clear at the proper time.Regards, Jack.
-
Excellent planking work Jack!!
Thanks for you positive comment, Adam.
-
Beautiful work Jack. It is going to be a lot of fun, drilling all the gun openings..... Yves
Hello Yves. . what you wrote is right, in a near future I'll have to work a lot to drill out more / less 130 gunports, even high demanding work effort.Regards, Jack.Some lines to report an experience that I'm living from the first time with the 12 Apostles: bending in advance the planks for the hull areas where this is needed, for example in the bow area; here virtually for all planks but also in the area stern for the first three planks.
In the attached picture you can see four strips for the bow, two for each side, ready to be used. They are the first two of the last five missing planks, those that will interact with the area of the bowsprit and which will follow a slightly final curvature.It shows the components needed to perform this bending operation. After a bit of practice it is simple to be successful and I'm wondering why I never tryed it before . . really effective.In this way, the application of the planks becomes a game . . the photo is not technically the best but enough to make people understand that beautiful curves, narrow hips and anyway harmonious, you can achieve with this system.Regards, Jack .
-
Saturday, October 26, 2013Even a small step in the planking of the 12 Apostles. At this time I finished the planking in the central and aft areas.Virtually no problem.It now remains to finish only the forward part of the hull, that I leave for tomorrow and maybe even later.To speak with the Camilleri's Inspector Montalbano I'm "scialando" (means feeling a lot of pleasure) to do this work . Now the 12 Apostles is the sixth hull I planked, since 2006, and I can see the benefits thanks to the drowing experience: no problems at all. .New photos below show the work done. It should be emphasized that in the areas with the hull finished I proceeded to remove the reinforcement strip that I glued on the internal side of the toptimbers as temporary reinforcement.I used the cyan acrylate glue. To detach these strips, it was enough to point the blade of a cutter in the right place and "tock" , the strip was immediately detached.This comment is to remember what are the merits but also, in many cases, the defects of cyan acrylate glue. Just a flick and you're cheated . .And now here are the pictures . Regards, Jack .
-
Saturday, October 26, 2013Yesterday also continued to work on hull planking (at the top of the hull).Now both sides are perfectly symmetrical in terms of number and position of the planks .Now planking is missing from the end of the bow and the last strip on the gunwale . Today I have in mind a light working session: only two strips at prow on both sides . Then I have to stop to think about the last three strips always located at prow area: there are a couple of adjustments that must be carried out before proceeding. For example, I decided to set the famous piece 46b contained in issue 20 , even though I know I'll have to work with a drill and drills to get room for the bowsprit.In one picture here presented I show this particular element only positioned, then it will be necessary to put the strips on the bridge, before applying the gunwale planking .An interesting detail: it will be a case or a slap on the *** (is it the right term ?), but by applying the latest gunwale plank in the midship and aft area, it is perfectly aligned and properly located on both sides, apparently without even a visible and measurable difference: doing it on purpose I'm sure I could not achieve it . .Regards, Jack.
-
Friday, October 25, 2013Even yesterday I continued to install planks on the 12 Apostles. . a small work every day, with calm and, above all, without any hurry.These days seem to play a positive role in my, say, waiting condition for November 4th, a psicological attitude that, in my case, does not encourge any hasty attitudes, indeed. .So I'm enjoying these activities with carefreeness reaching points and levels of incredible pleasure . .In such a mental state of grace I gradually came to adopt a method of applying the planks that, without any boasting, is practically perfect, made up of many small tasks but if well coordinated . .
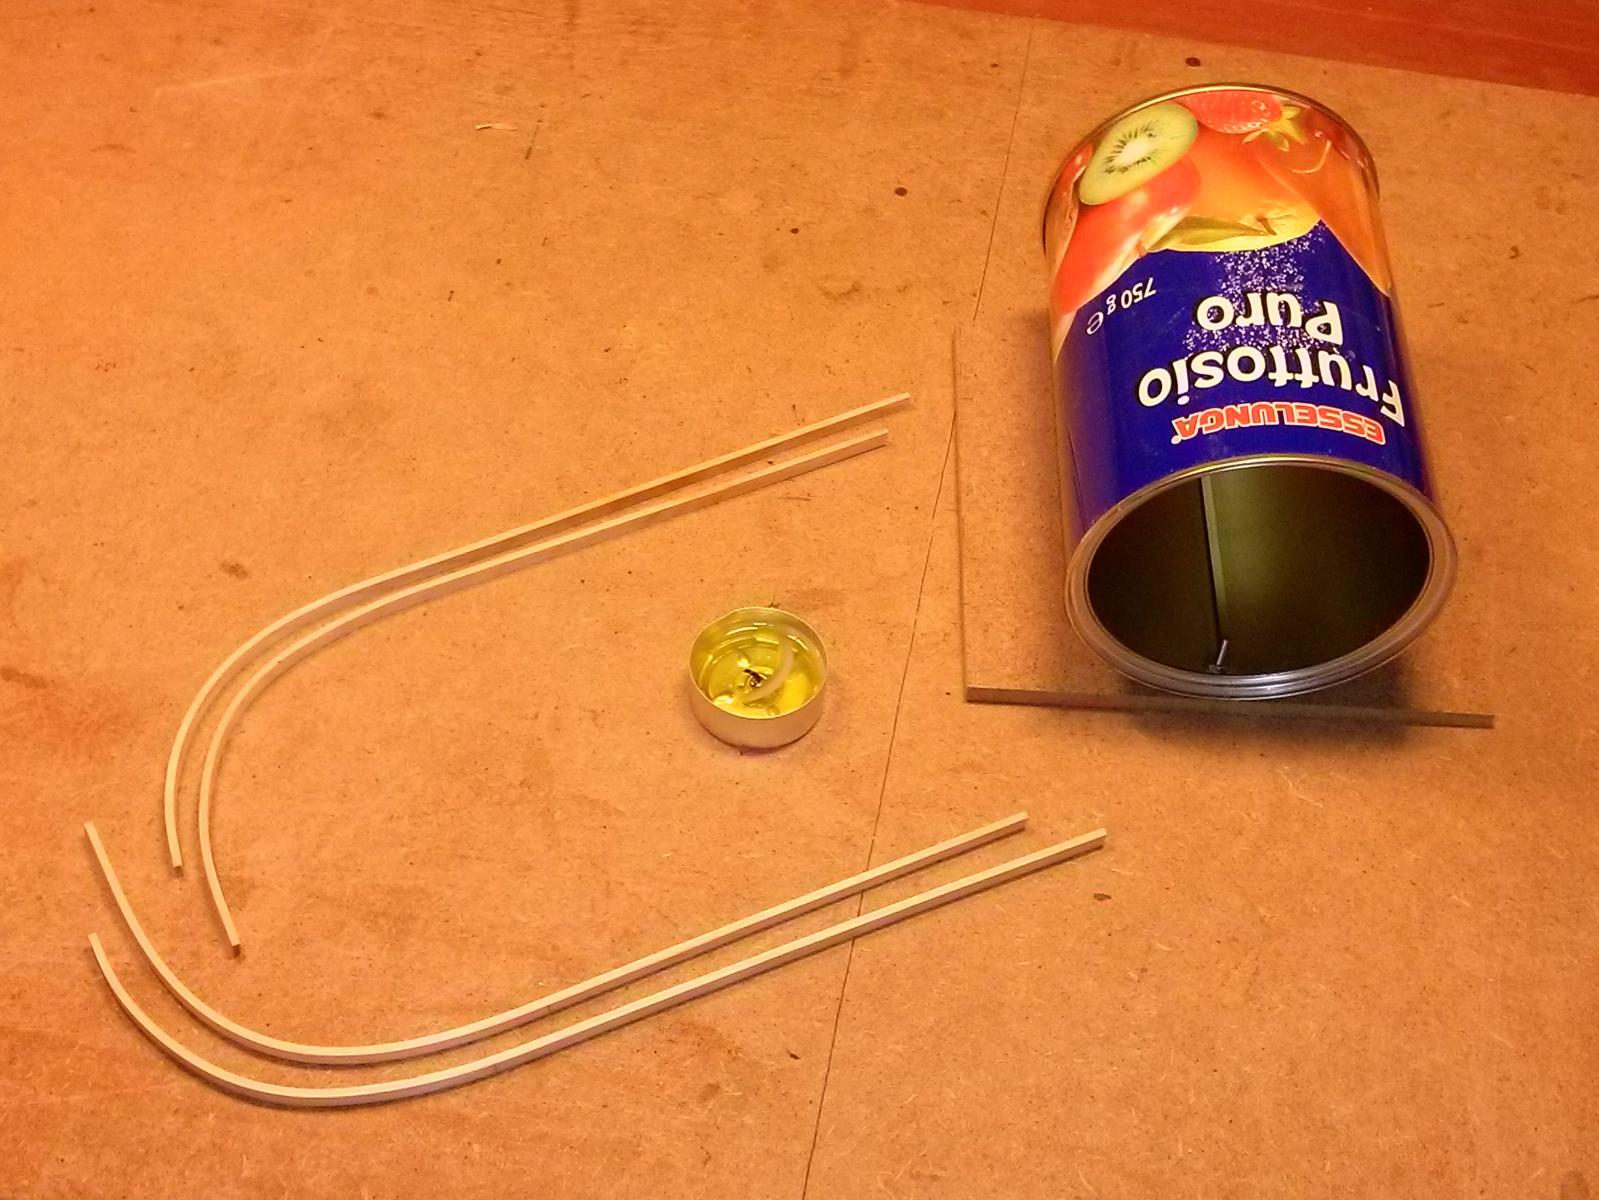
- I start with preparing the strips folded (where necessary) with my strip bender done with a can, after having soaked the wood in water for +/- half an hour. Once bent to the right shape I let them dry until the next day . . installing them wet you can run the risk that they retire . .
- Then I try positioning the strips, I cut them at the right length and I draw with a light pencil marks in the position where I have to plant the nails . .
- So with the mini drill, using a bit of a tenth of millimeter smaller than the diameter of the nails, I trim the hole in the places previously marked with pencil . .
- Then I apply the glue on the bulkheads and on the narrow side of strip . .
- Finally, I fix the new plank in the proper location having care to make it adhere perfectly to the bulkhead and to the adjacent plank. To keep hold I put the tip of a nail in the small hole and I partially hammer the nail slightly, so it can be removed later without big efforts . .
- When the glue dried, but almost always the next day, I remove the nails and I give a light sandering to smooth a little bit . .
In short, a quiet and precise method of working that gratifies me very much. I enclose a couple of pictures of the (small ) daily progress . . Jack.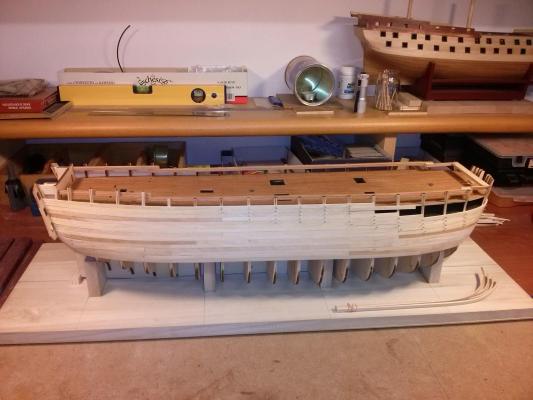
- I start with preparing the strips folded (where necessary) with my strip bender done with a can, after having soaked the wood in water for +/- half an hour. Once bent to the right shape I let them dry until the next day . . installing them wet you can run the risk that they retire . .
-
Adding of the last hour: this afternoon I found myself coming back to my lab and, since I had with me my new smartphone (bought about a month ago to replace the old traditional cell which was practically undone), I took three photos of the 12 Apostles.The photos are of very bad quality (improving as a photographer from mobile will be a future task) but they give an idea of where I'm now.Regards, Jack.
-
Wednesday 23 October 2013Another day of work yesterday afternoon. . .Of course, I continued to apply planks , focusing in particular from midship to the stern area, where I'm now close to the handrail.I found a problem with the birchwood strips which should all be 5 x 2 : 5 is accurate but the 2 is quite variable. Obviously, the problem lies in the fact that these strips are shipped in different packages and small differences in thickness are quite common in these situations.I'll have to work hardly during the sanding phase to level these unintentional thinkness differences but they will struggle greatly, especially with this birch wood rather difficult to sandpaper.Today, in practice I only partially removed the nails used yesterday to hold in place the planks, but tomorrow afternoon I'll resume the remaining work: this time I'll be working on the bow, where it is necessary to first bend the strips .Now I became a master in bending the planks with the can and the candle . . I can also do some warping that was very useful at the stern.Regards , Jack.
-
Tuesday October 22, 2013There are still a couple of weeks until November 4th, the day when I will be operated for cataract and during this time I feel a bit like hanged in a "limbo". I don't want to embark myself on serious things. So yesterday I started to install some new planks on the 12 Apostles.Nothing special, I got quiet to make sure to properly bend the strips over the bulkheads and, above all, between them.These birchwood strips work well , they especially folds beautifully thanks to my jig I've shown long ago.But I want to highlight that anyway I prefer the strips that were provided with the Soleil Royal: this birchwood is much harder than the so-called "ramin" of Soleil (I never discovered what real kind of wood they are) and its sanding requires a lot of efforts.I usually proceed to a first quick sanding after putting four / five rows of planks, just to proceed by steps, separate the work and leave the final sanding easyer and lighter. Working in this way I realized this additional difficulty and I begin to think, in contrast to my consolidated beliefs, that may be a useful an electric sander for this job . . I'll see.This afternoon I decided that I will continue with the same program yesterday . .Regards, Jack .
-
Thursday October 17, 2013Just few lines to update all of you regarding my health . .During the last control medical examination, the eye doctor (who operated me for retinal detachment on the right eye in September) persuaded me to perform a cataract operation in the left eye. . he assured me that I should virtually regain all of the sight of this eye.In the meantime the right eye is recovering and progressing very well.On November 4, I will be operated.That means you'll have to be patient about news on my 12 Apostles and my Soleil Royal.I hope that everything will go well . . . I'll keep you informed.Regarding ship modelling we will meet again at beginning of December, when I reasonnably should be able to resume all my modeling activities.Kind regards, Jack.Aubrey.
-
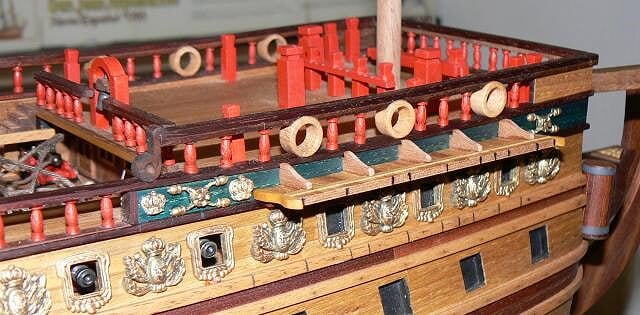
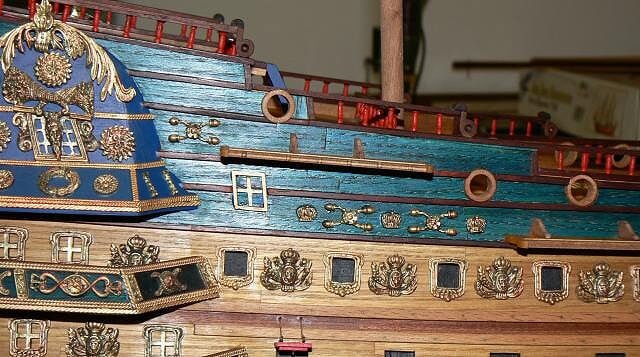
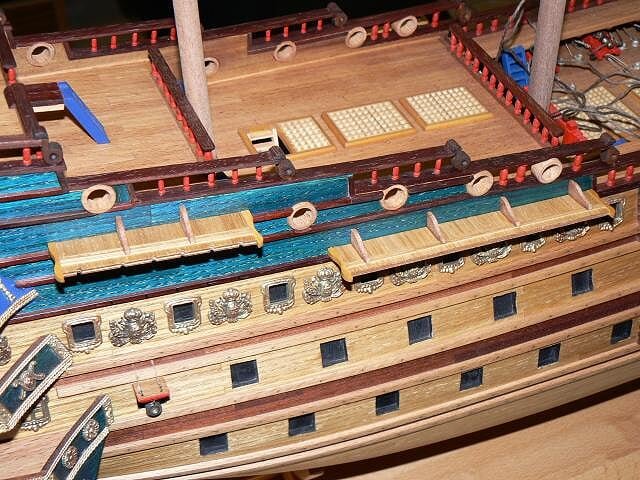
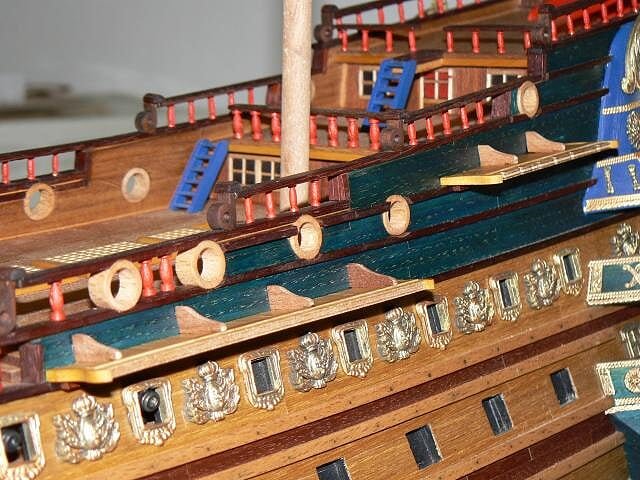
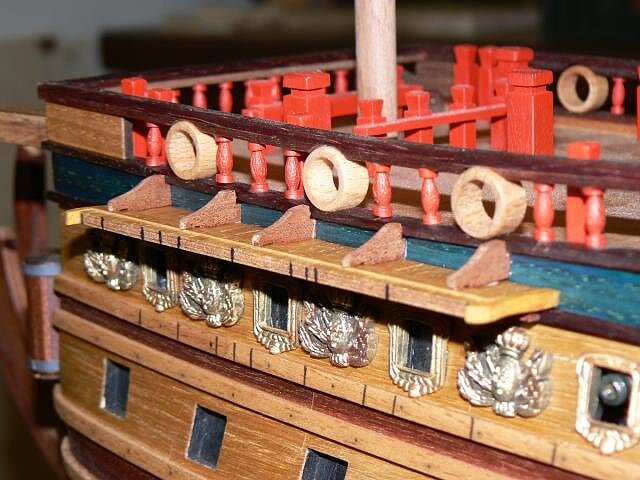
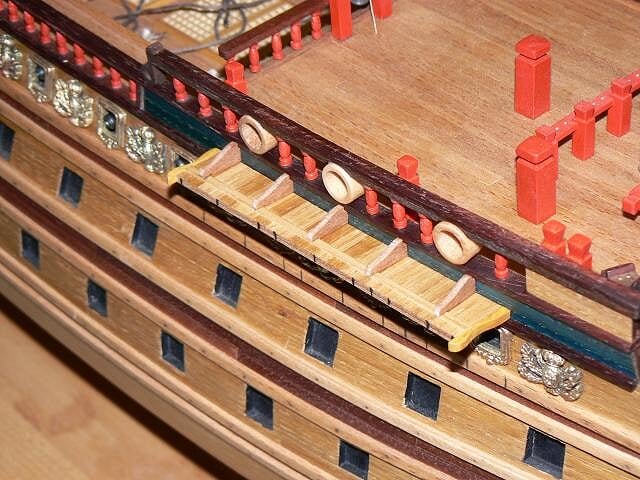
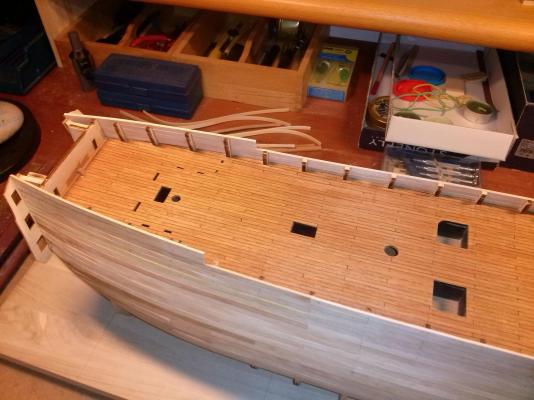
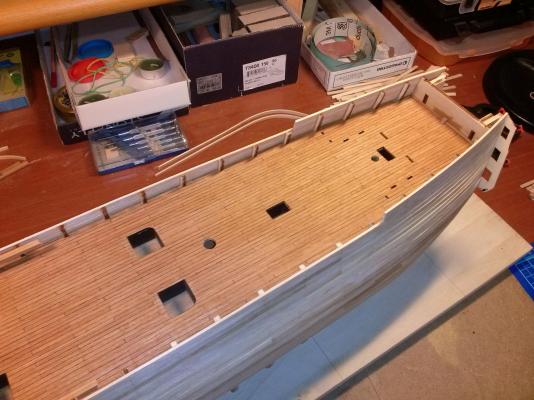
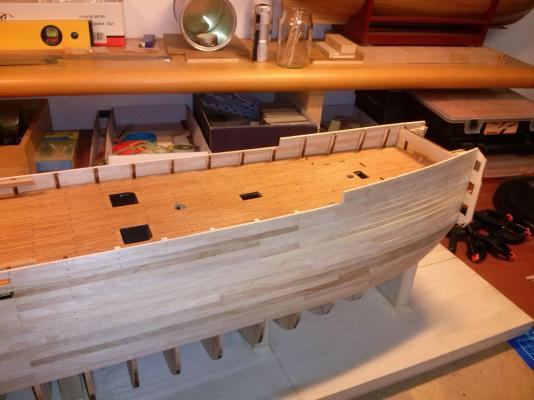
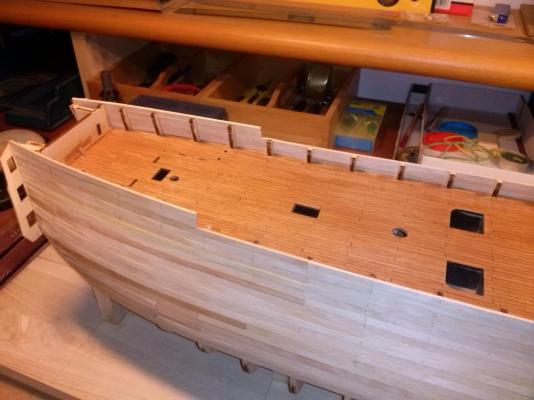
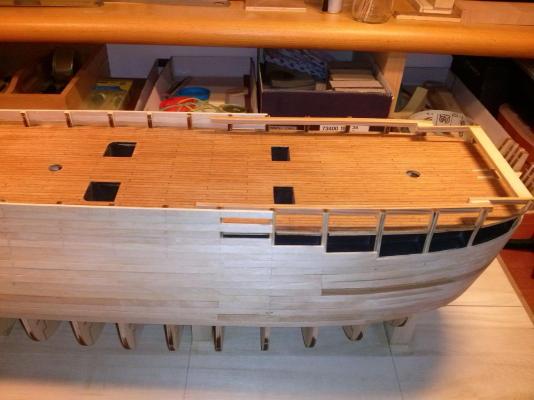
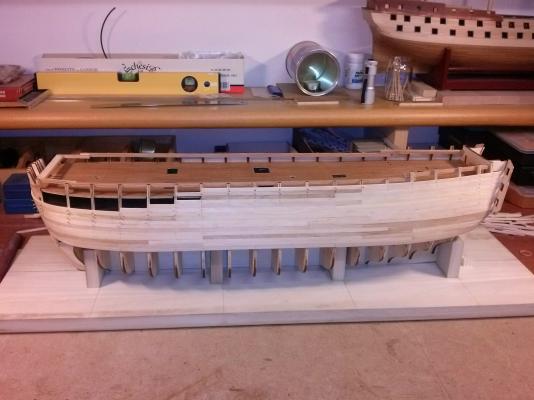
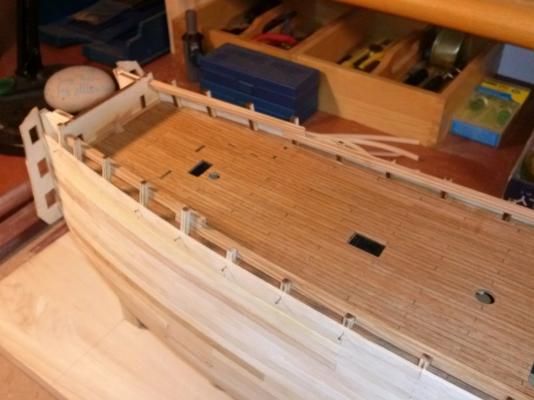
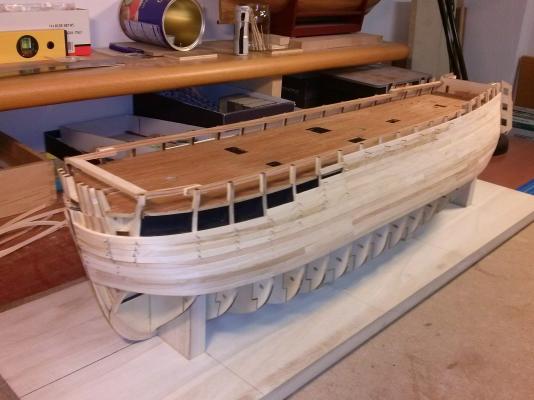
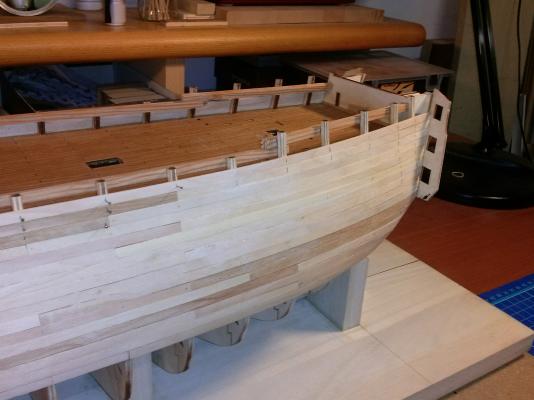
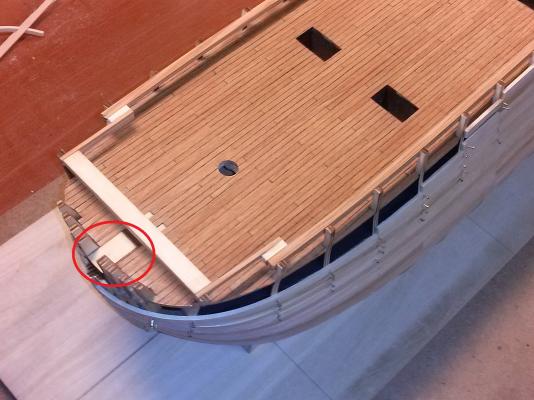
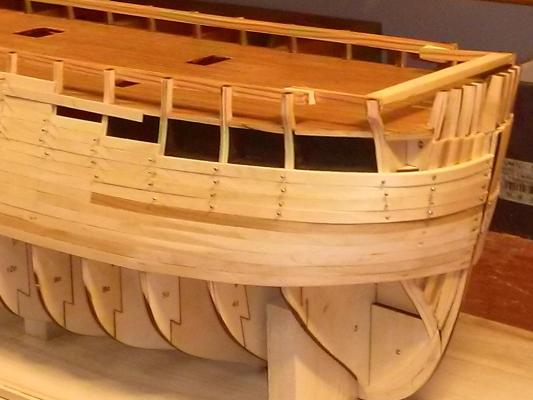
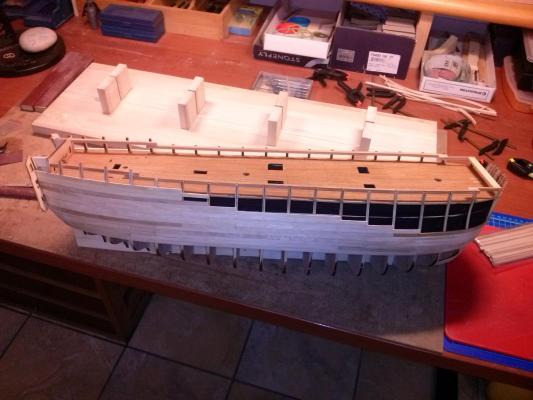
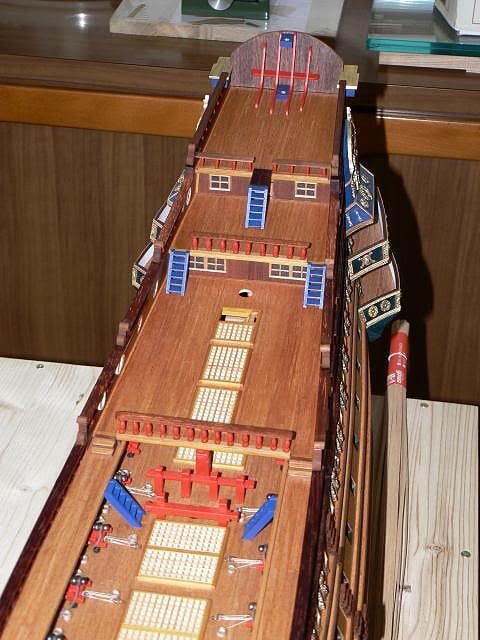
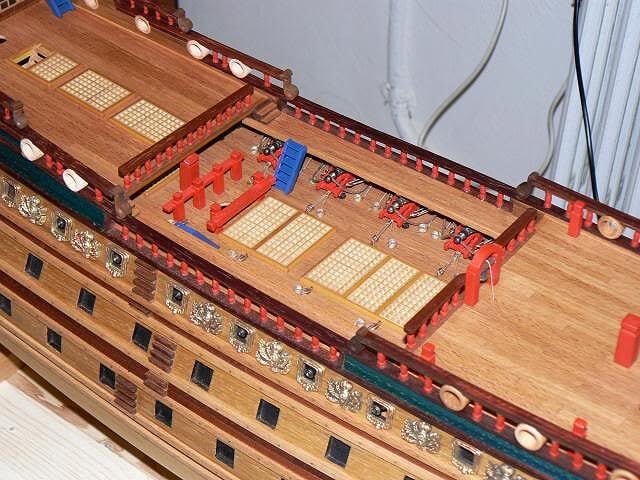
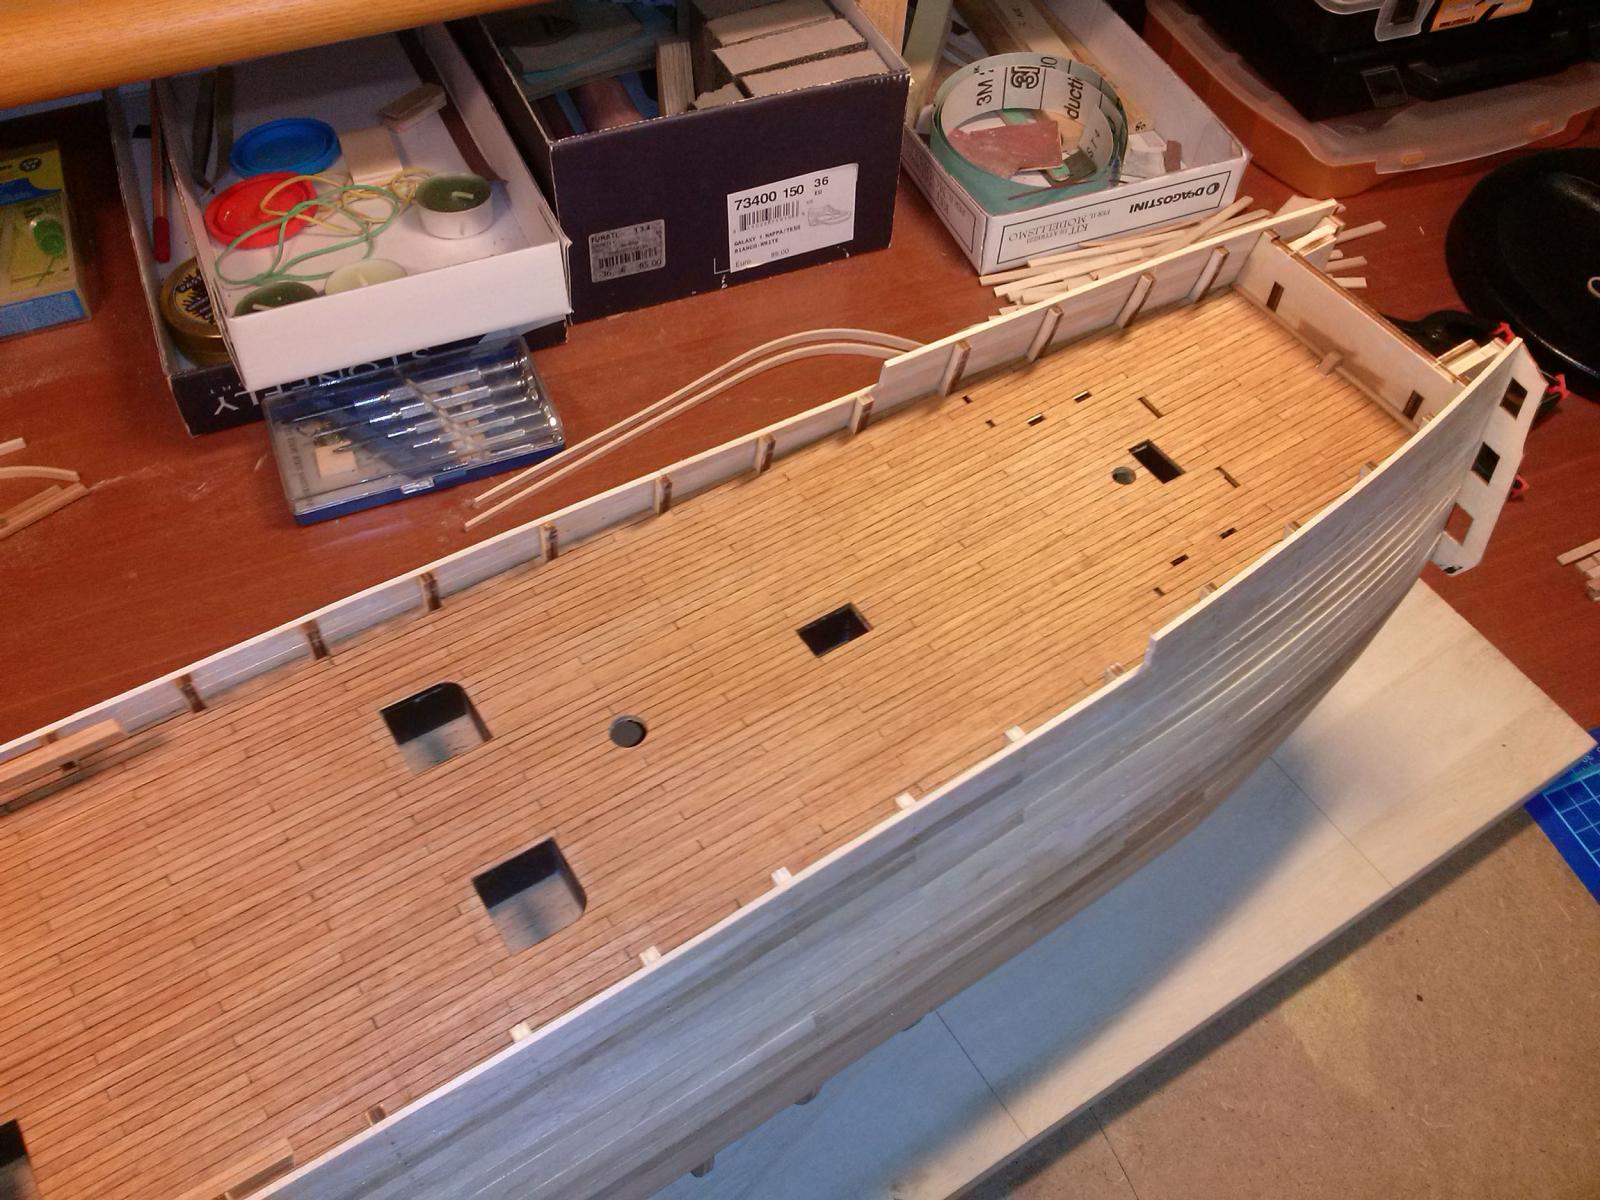
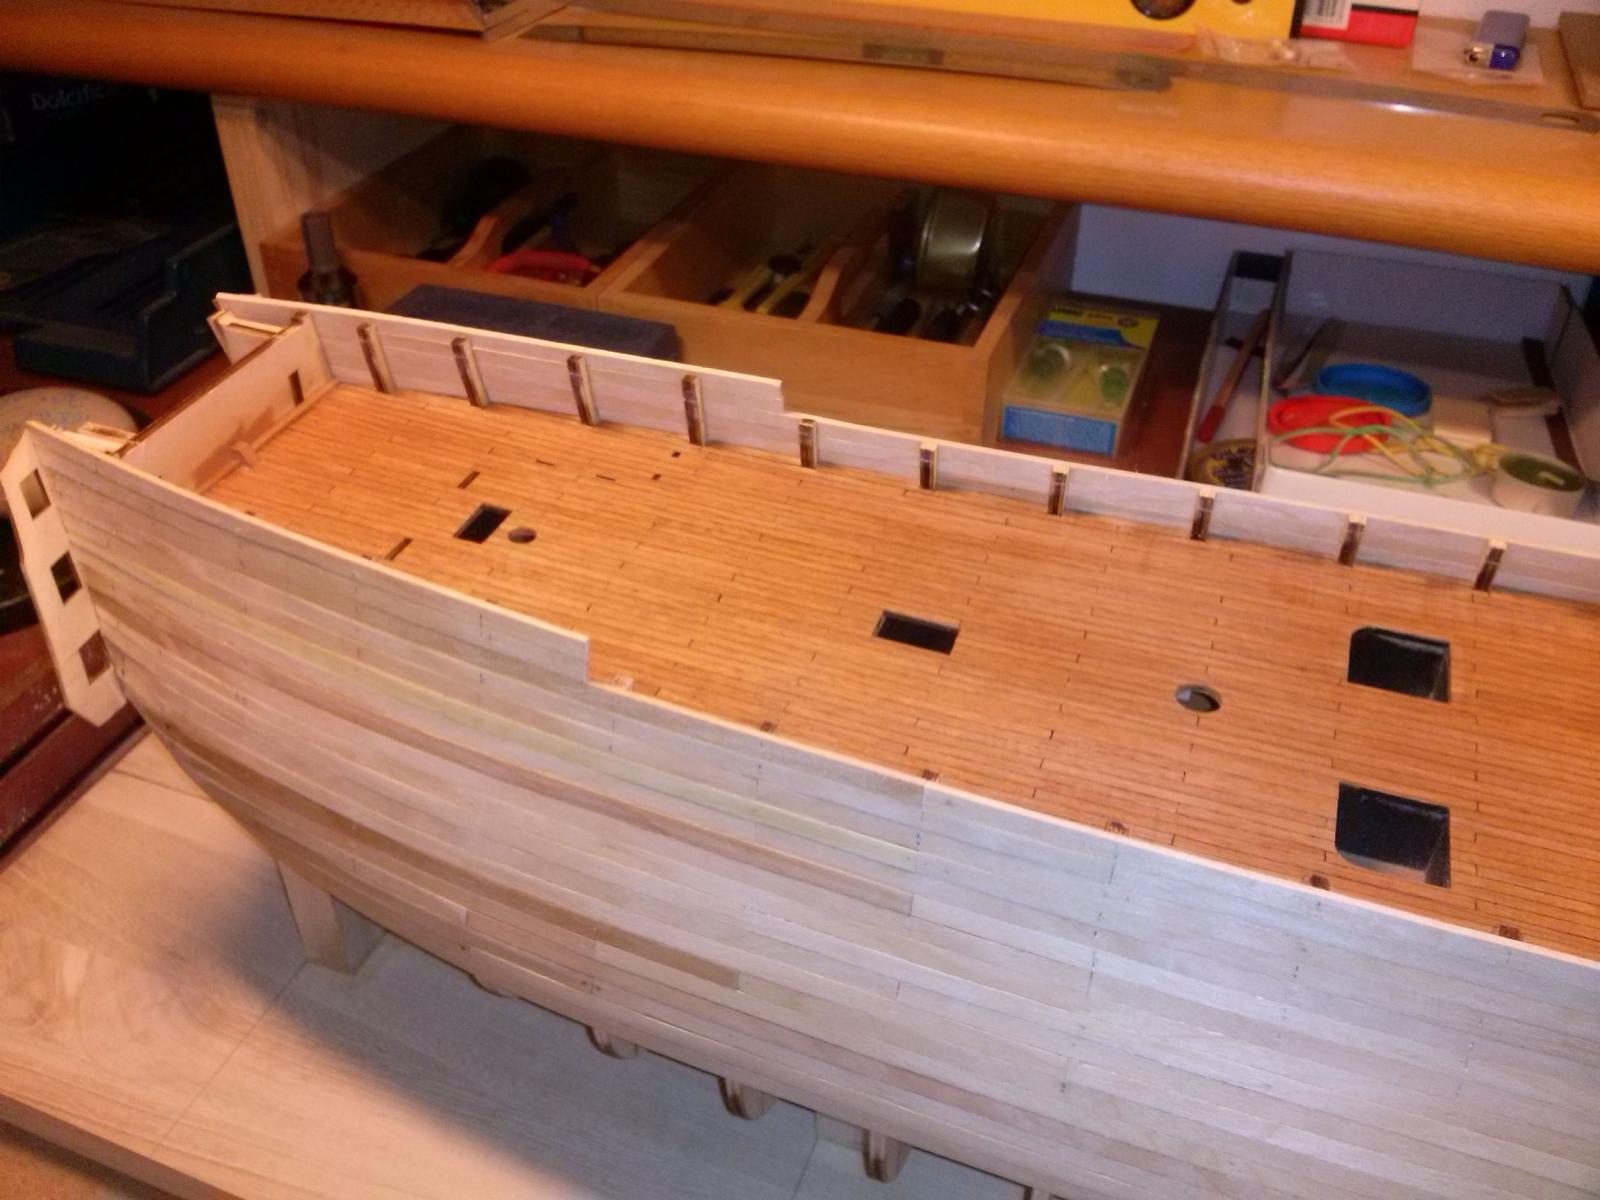
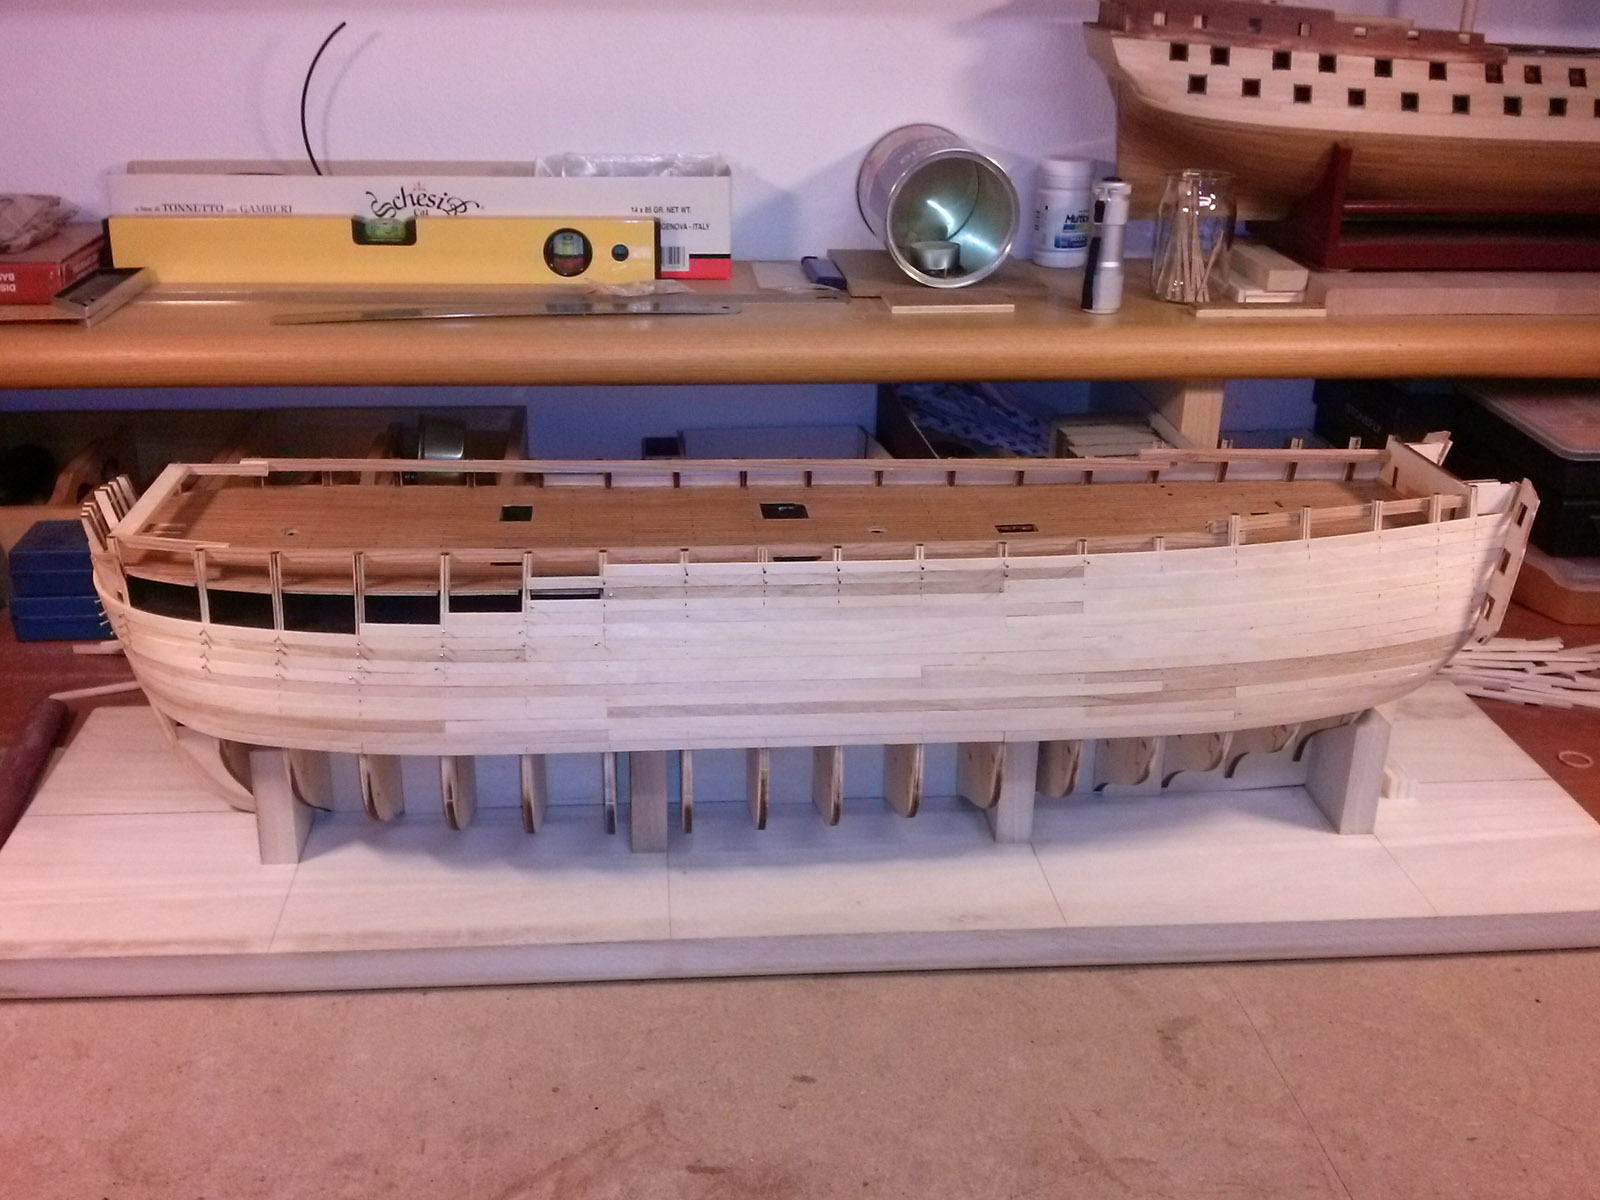
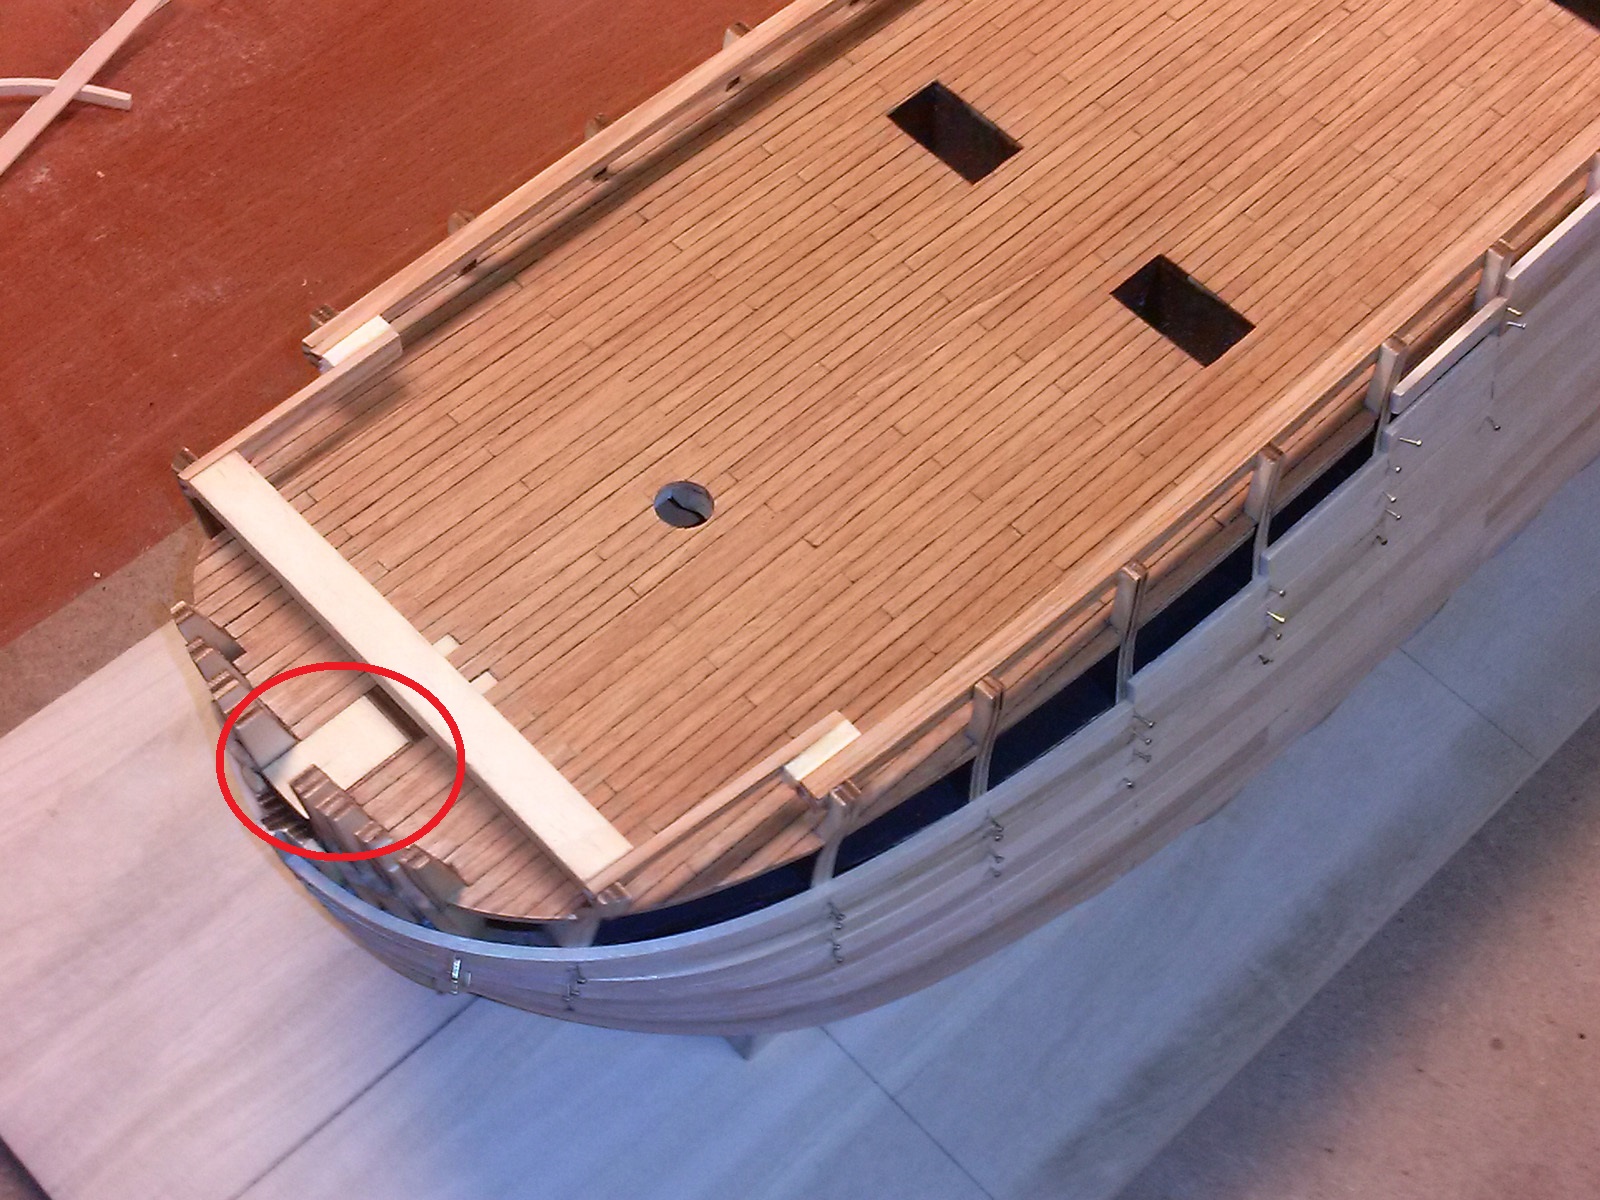
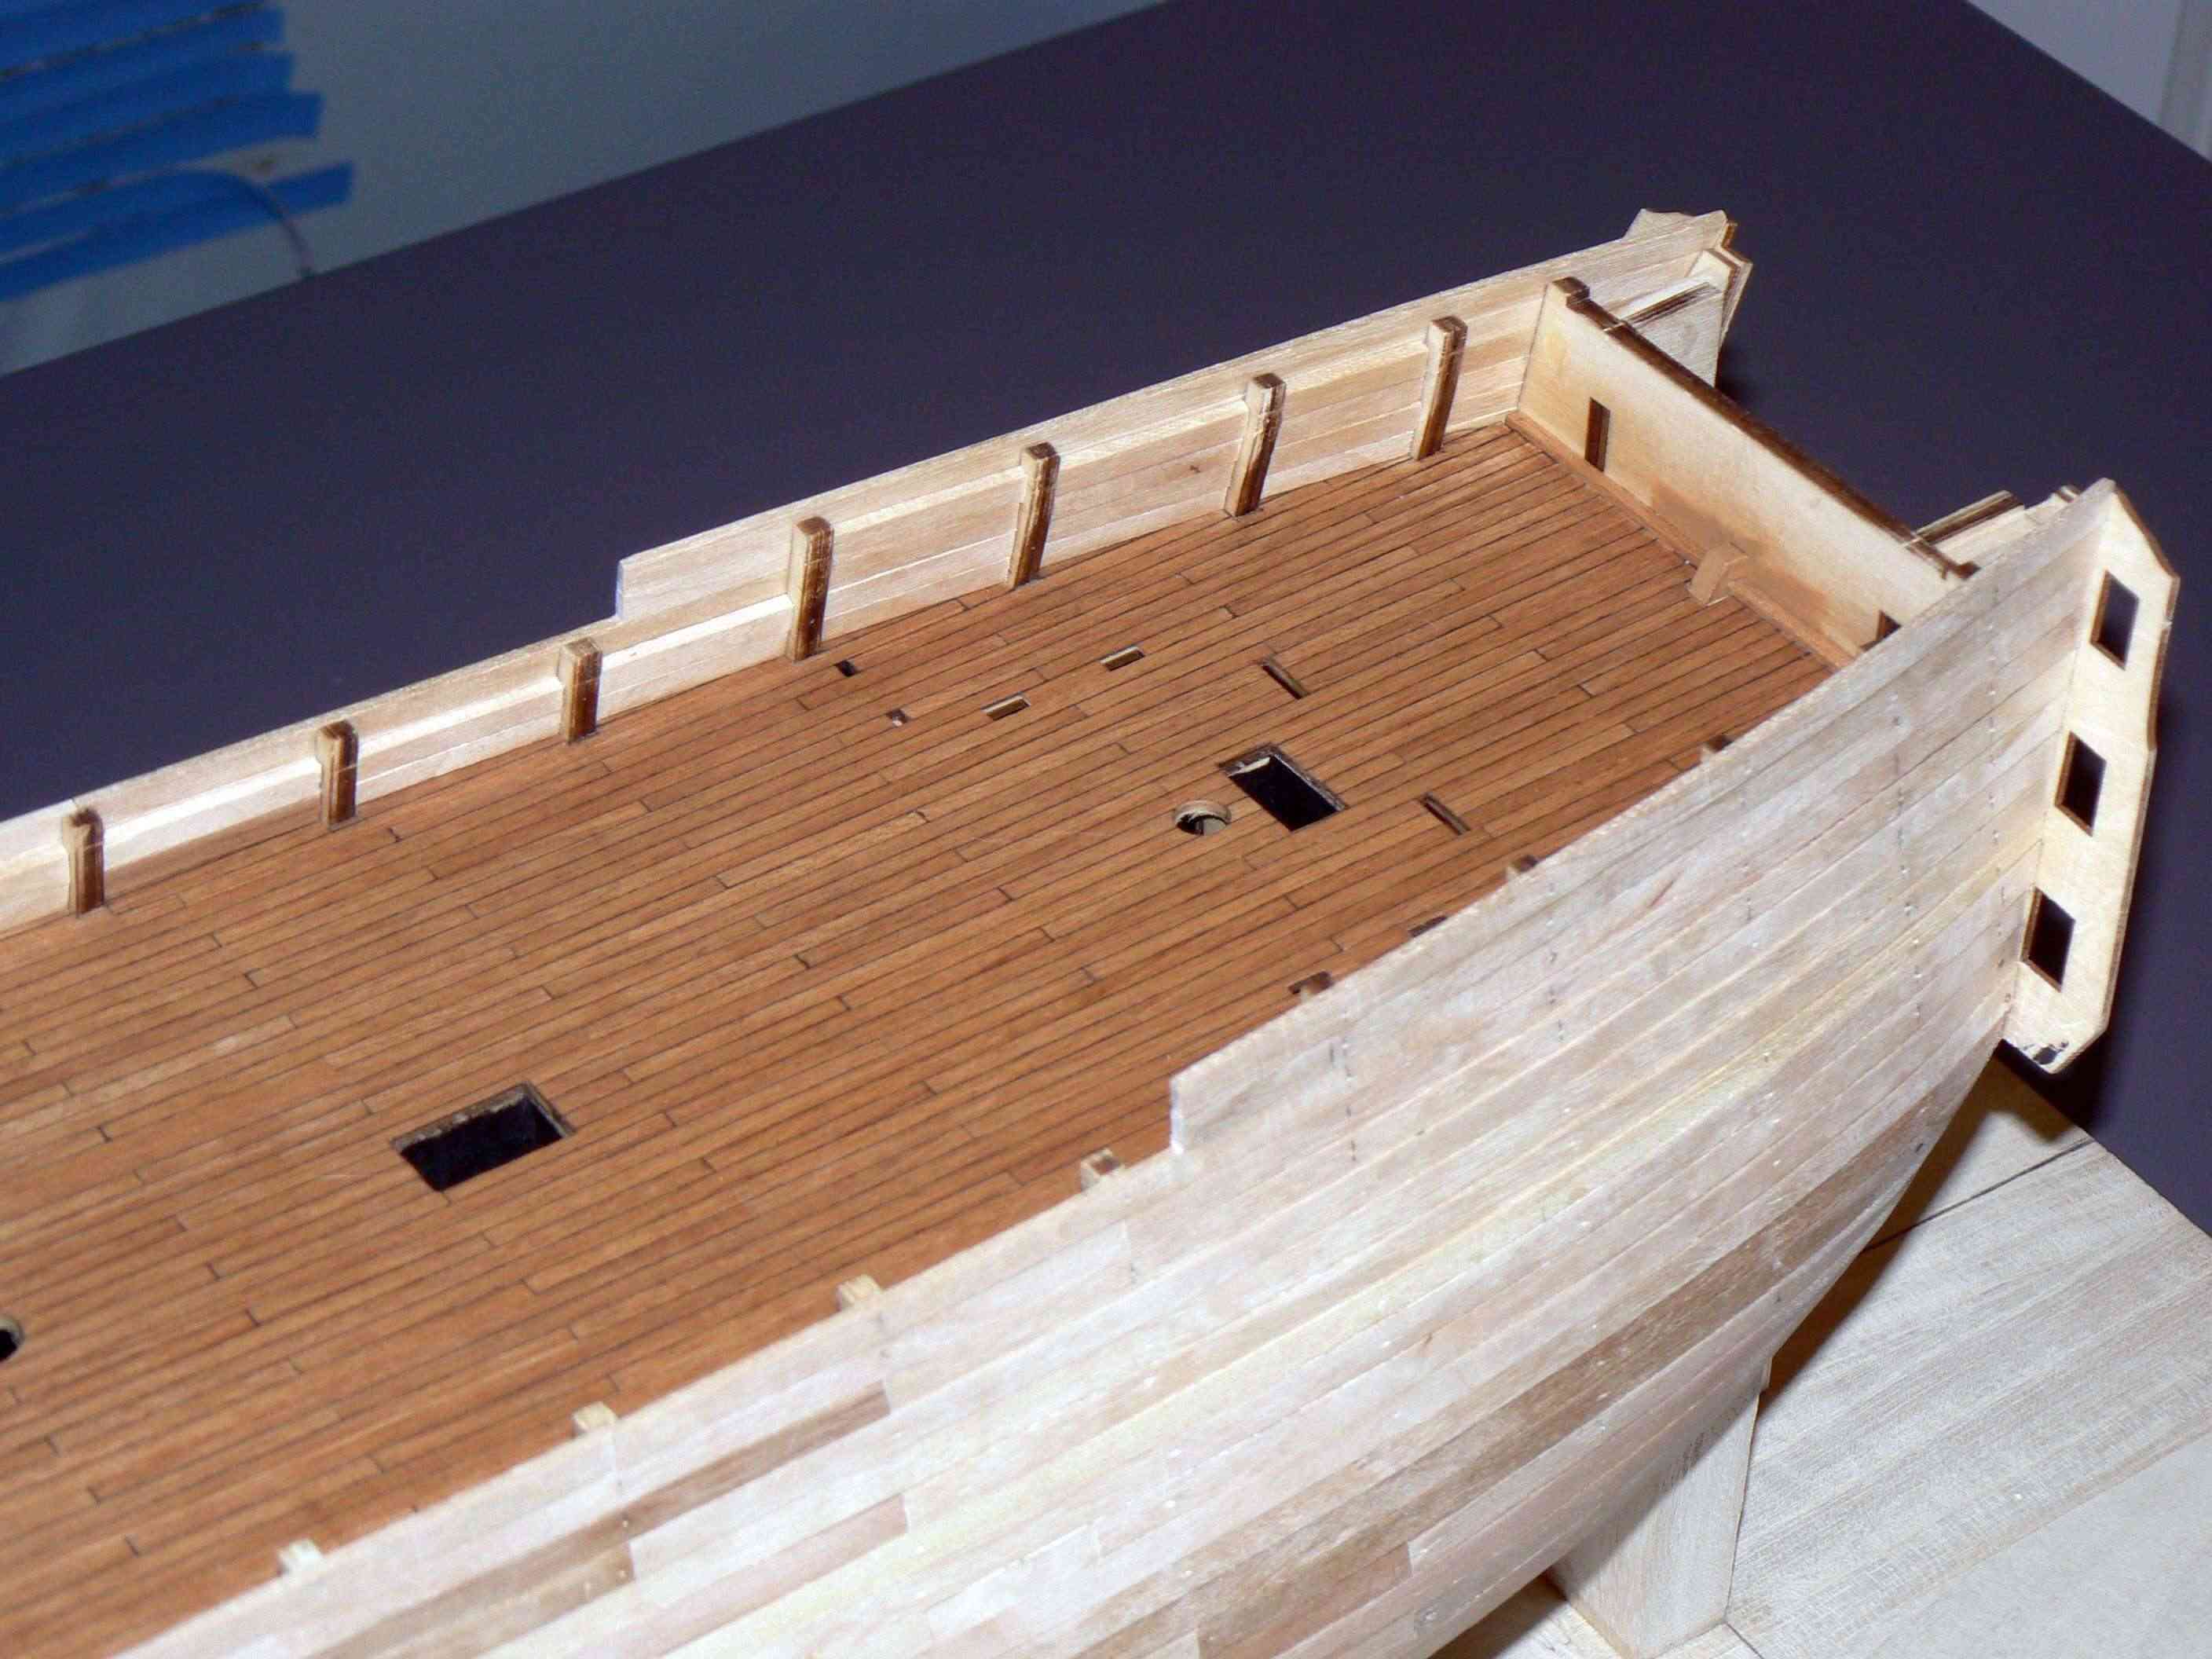
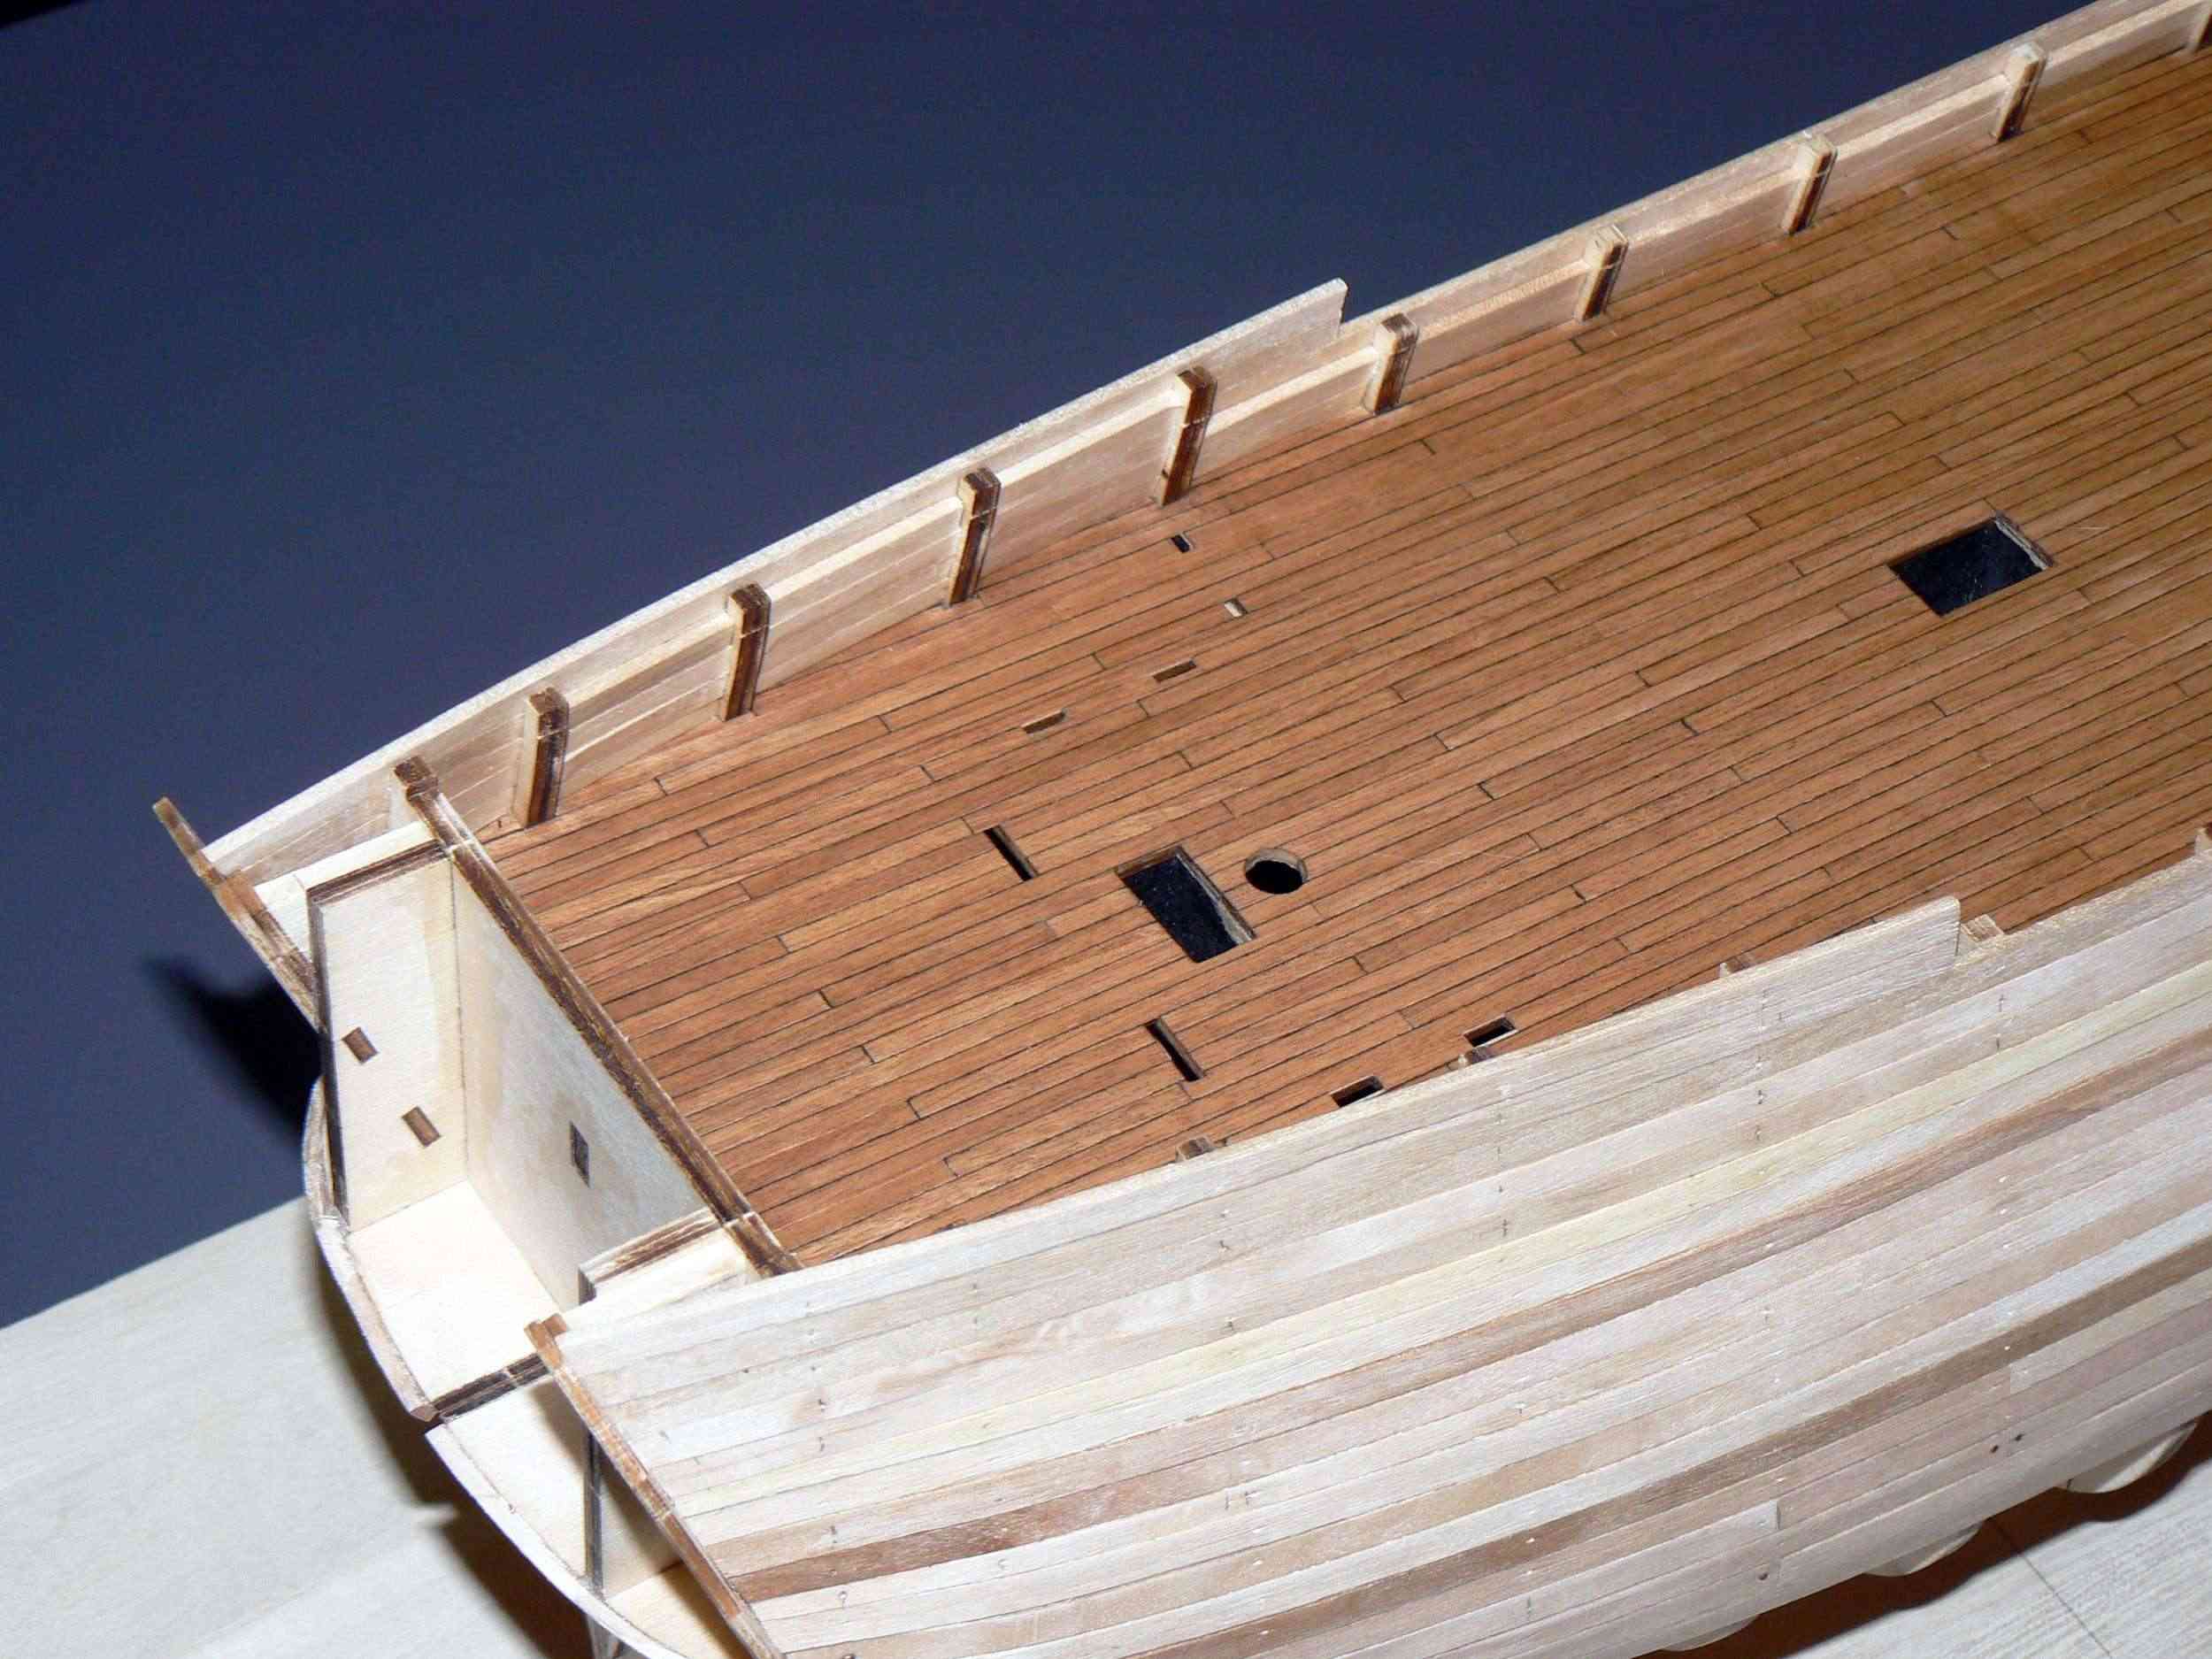
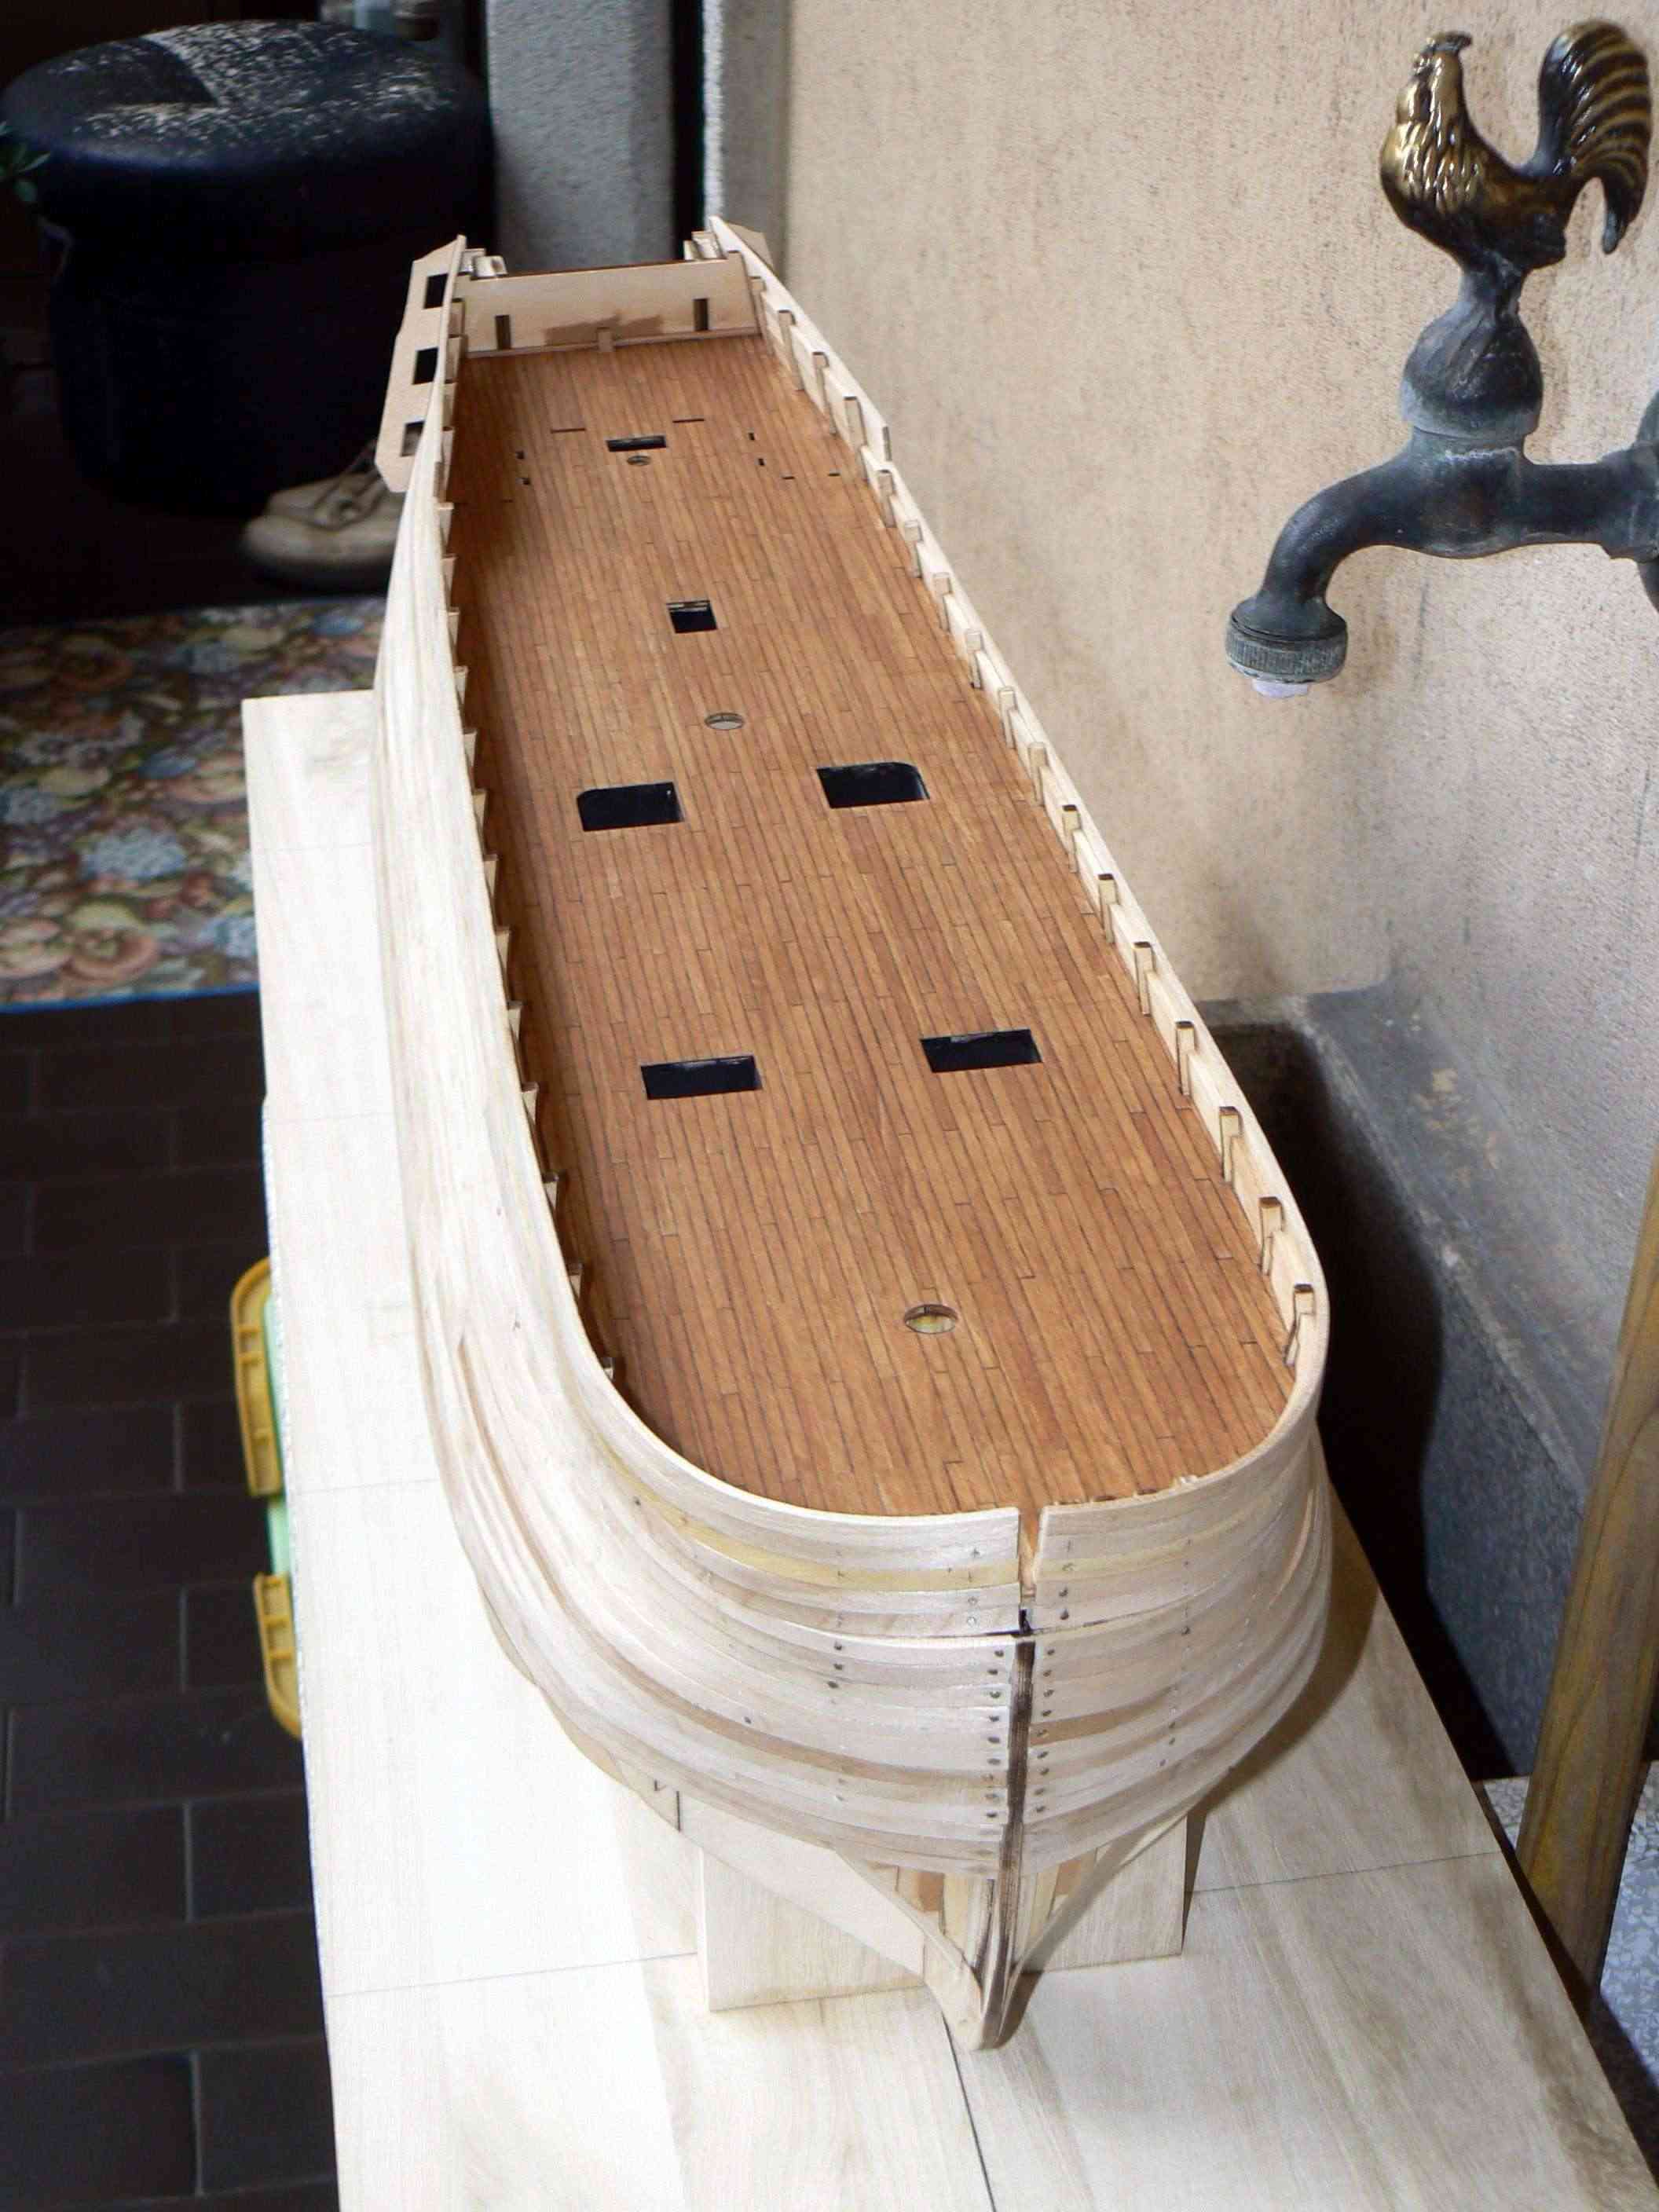
Tuesday, July 16, 2013
I have painted my "doodles" closing the tops of the gunwales with stain and I have installed five stairs/steps which connect various decks together . .
Now I have to find new things to do. There are still many and I cannot decide where to start, maybe I'll start with the installation of the channels . .
01 P1090622.jpg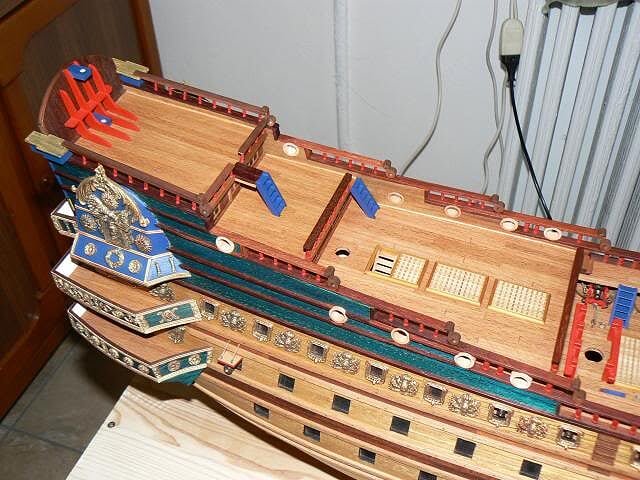
02 P1090623.jpg

03 P1090625.jpg
04 P1090624.jpg


Le Soleil Royal by jack.aubrey - FINISHED - De Agostini - Scale 1:70
in - Kit build logs for subjects built from 1501 - 1750
Posted · Edited by jack.aubrey
01 Ropewalk Machine\CAM00115.jpg
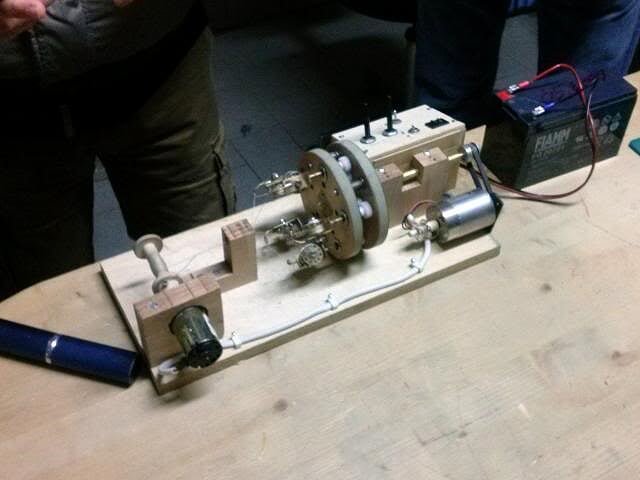
02 Ropewalk Machine\CAM00116.jpg
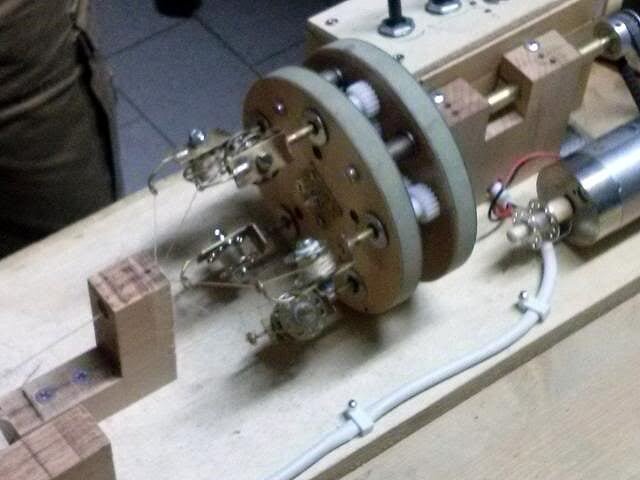
03 Ropewalk Machine\CAM00120.jpg
