-
Posts
1,268 -
Joined
-
Last visited
Content Type
Profiles
Forums
Gallery
Events
Posts posted by jack.aubrey
-
-
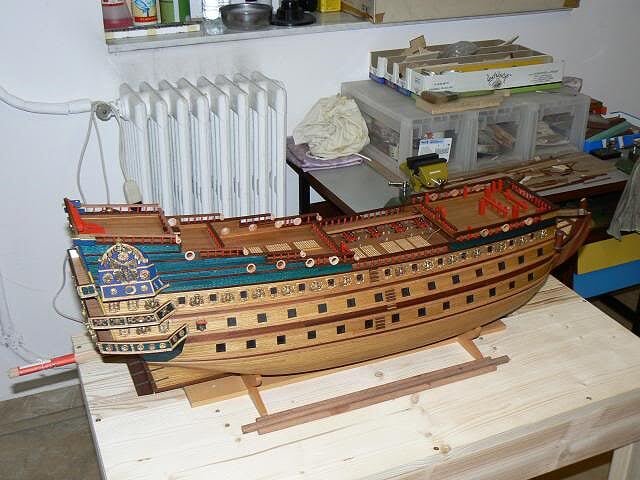
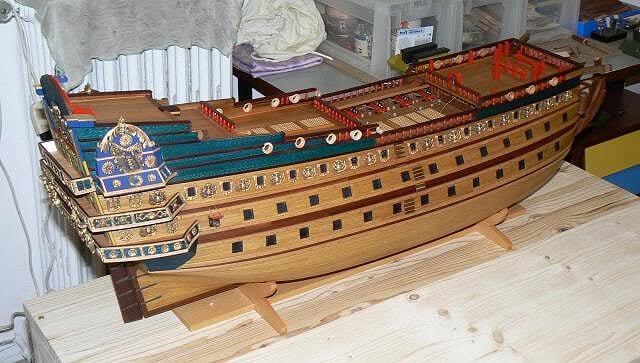
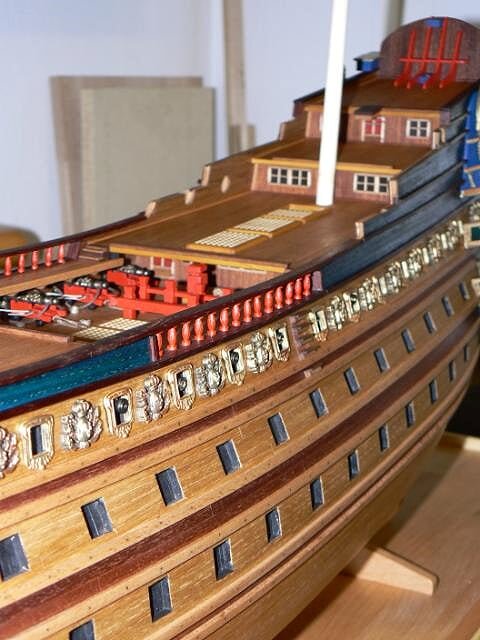
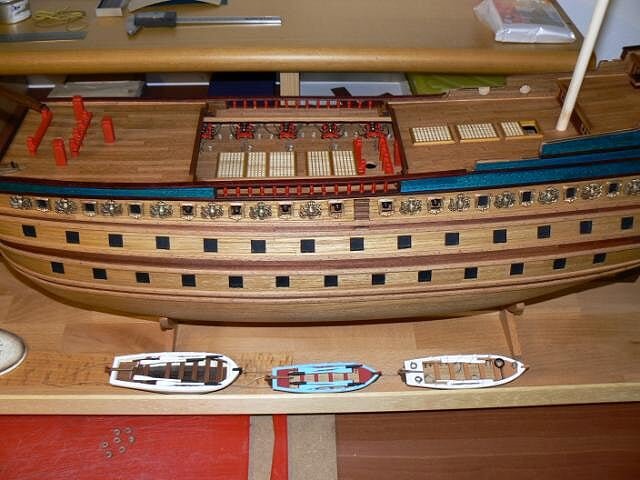
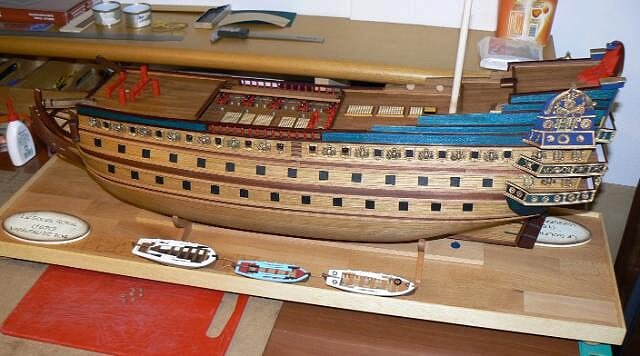
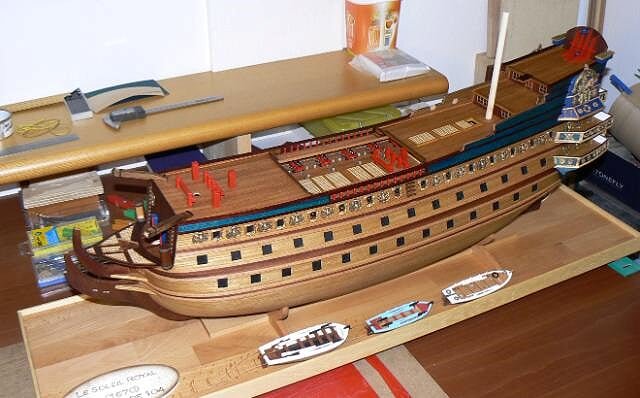
I'm publishing other five pictures of my Soleil, always dated back to Saturday, July 13, showing further details and / or views of the complete model.
On Sunday I still worked on the model for a couple of hours working on further trim the ends of the rails to embellish a bit. I also glued five stairs/steps on the decks . . then I left the Soleil and I started to apply seven / eight strakes on the deck of the 12 Apostles.
Now I have to think a little bit about the upcoming activities. Of big stuff there would still be a two/three things:
- End to apply decorations (boring part but that sooner or later I have to finish);
- Install the channels and related chain plates and deadeyes;
- Install all the gunports.
Then there would be other jobs that could be interesting (the stumps of the trees, the guns on the forecastle and quarterdeck, etc.). We'll see though probably (and rationally) follow my plan just stated above.
A cordial greeting, Jack.
01 P1090617.jpg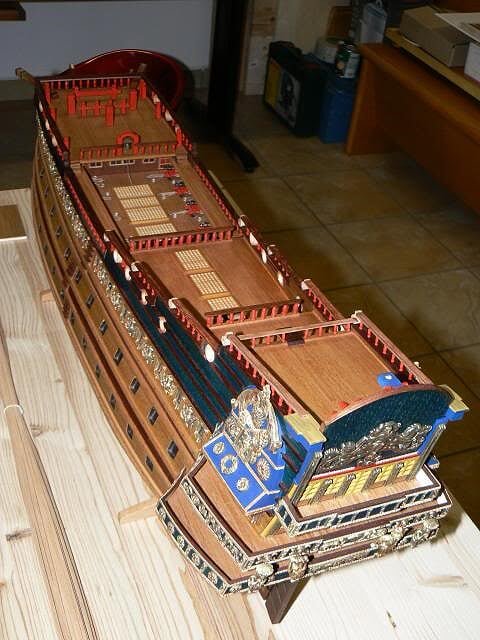
02 P1090616.jpg
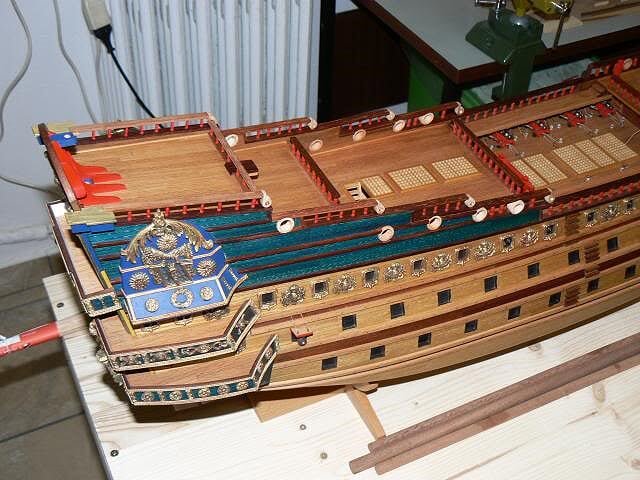
03 P1090615.jpg
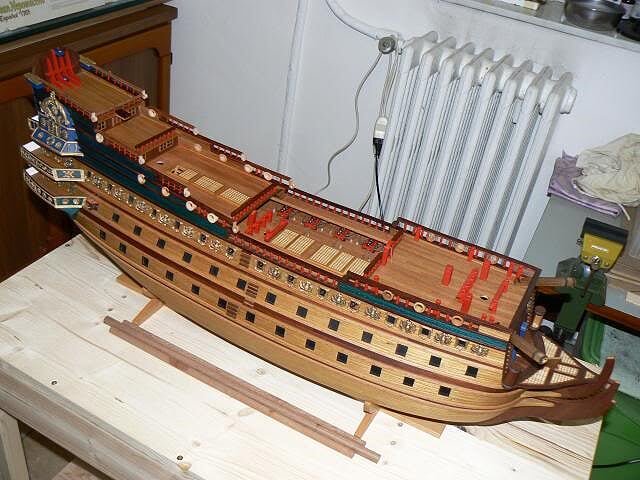
04 P1090613.jpg
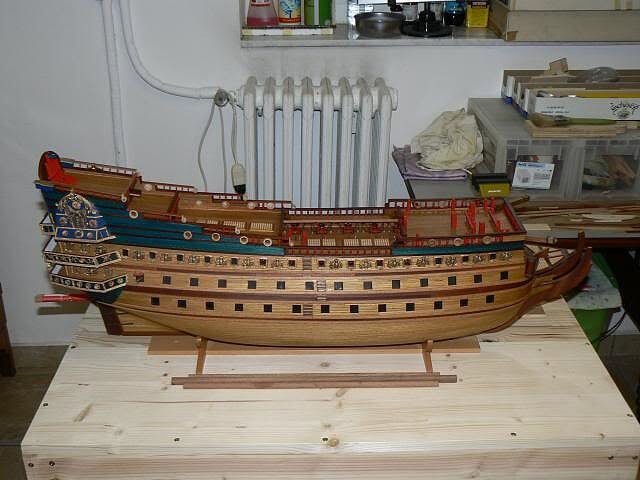
05 P1090612.jpg
-
Hello Brian C, your comment is surely right. . in fact both the red color of the columns (and of other elements) than the blue color of some details of the stern are overly bright.In fact, looking in normal light the model with my eyes, these two colors are not so bright but much darker.The fact that you see this effect in practically all the photos I've posted in this topic is correlated to the flash of the camera I had always used to shot images.I think I explained, many posts ago, this aspect just to explain why the red color looks too strange, with no shadows at all.However, I welcome comments like your, they are always welcome as there is always something to learn from the exchange of views and opinions.Regards, Jack.Aubrey
-
Saturday, July 13, 2013
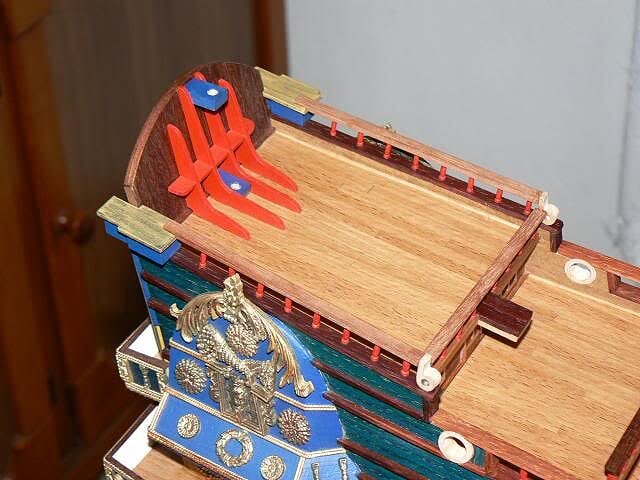
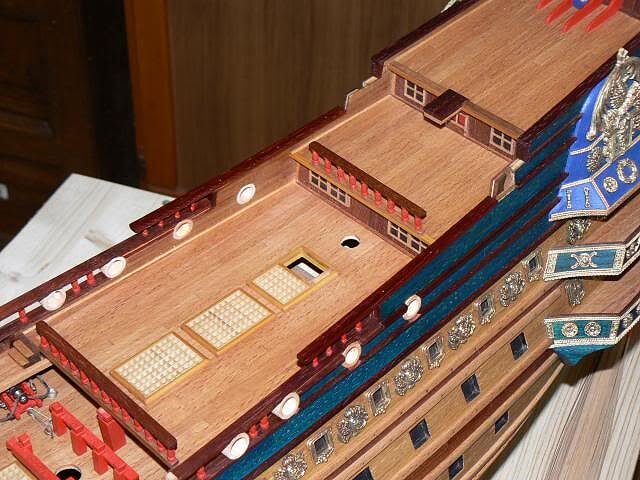
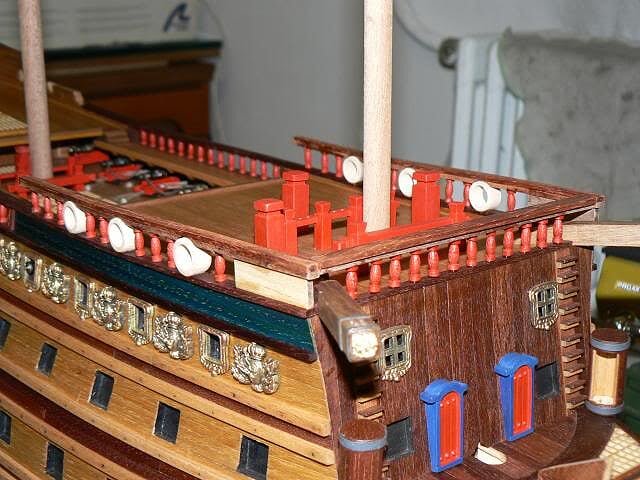
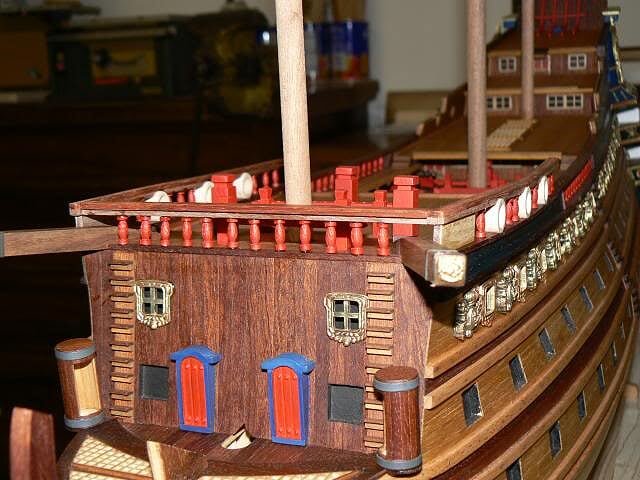
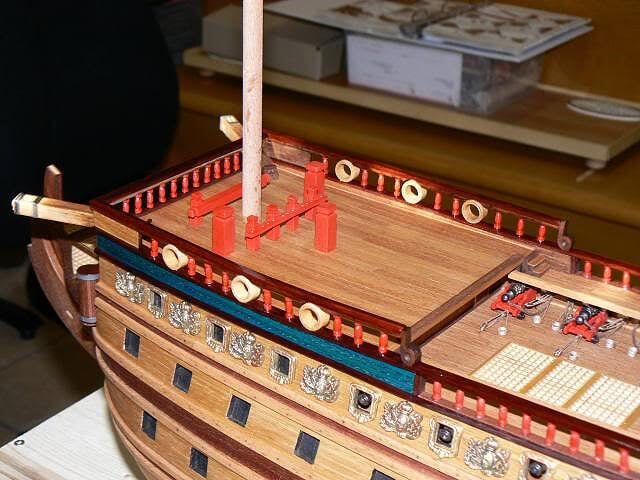
Some pictures of the aft gunwales practically finished. Now all the pieces are perfectly glued. There are now only a couple of things to be done to finally complete this phase:
- Cut the railing (visible in the photo n° 05) to open the gap in the middle. This element was glued in one piece to ensure a perfectly straight line;
- Decide how to color the gunwales top extremities: I scratch made these elements instead of the quarter-circle golden elements proposed by De Agostini;
- Remove all the dust, now practically covering the whole hull, with the air compressor;
- One coat of oil on the rails and maybe even on the decks.
Until next time with new images. . Jack.
01 P1090606.jpg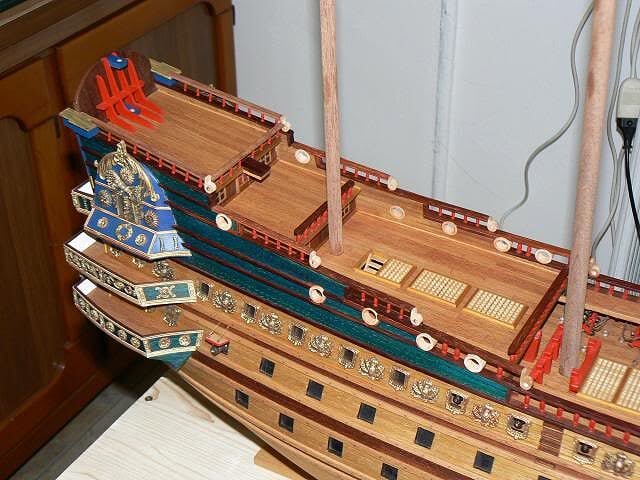
02 P1090608.jpg
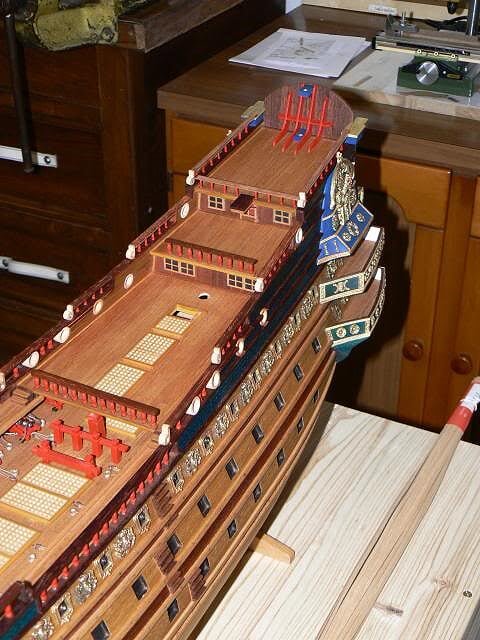
03 P1090611.jpg
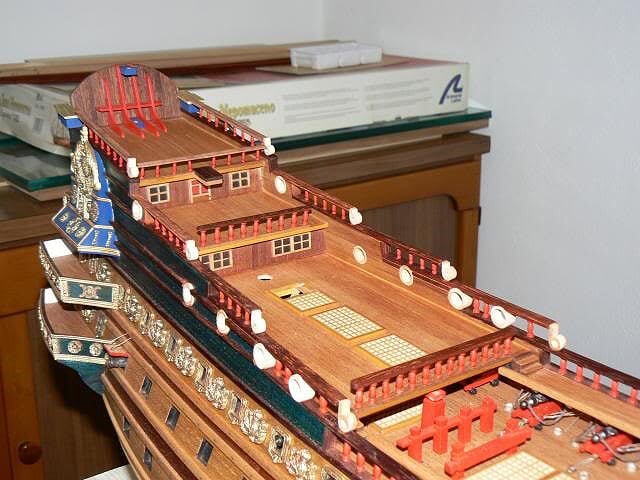
04 P1090610.jpg
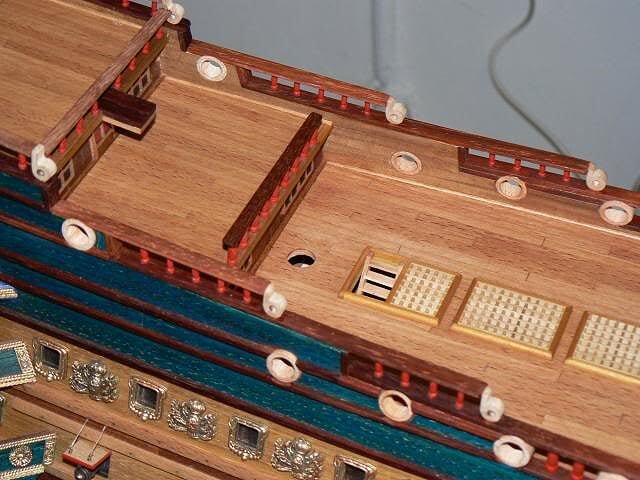
05 P1090609.jpg
-
Tuesday, July 9, 2013
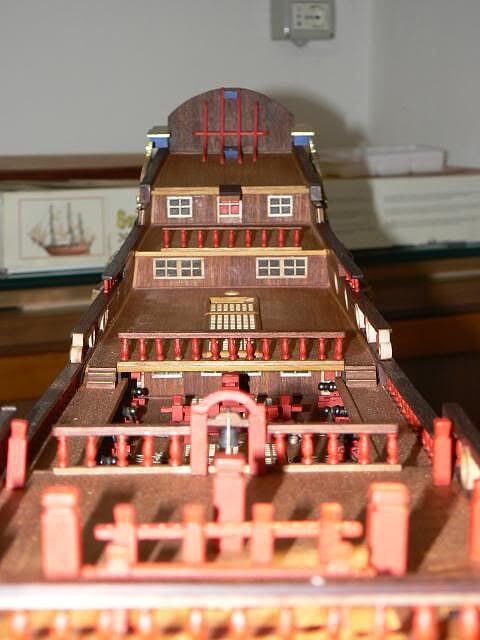
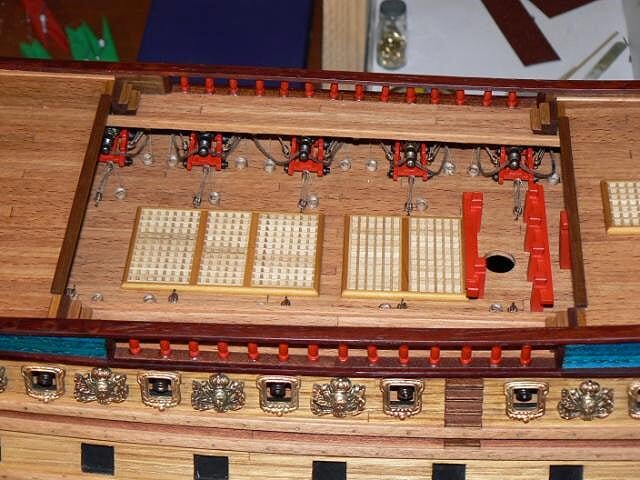
Even a small step forward in the installation of the gunwale with columns. Now only a piece is missing. It's a piece a bit complex because I need to insert a round gunport, but after it what remains is very simple. Let's say three working sessions, one per day, then three days.
01 P1090597.jpg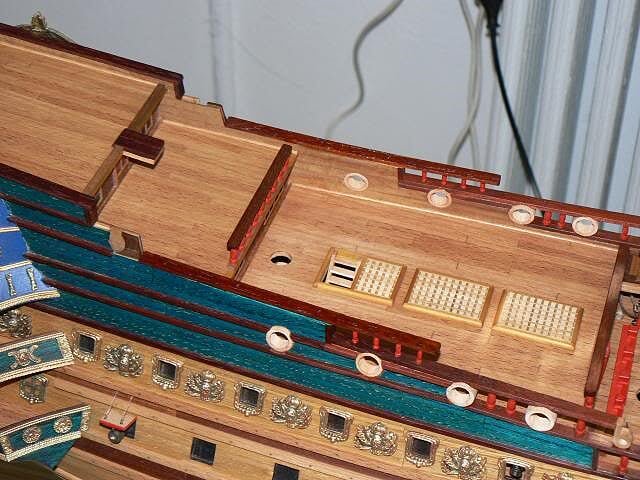
02 P1090598.jpg
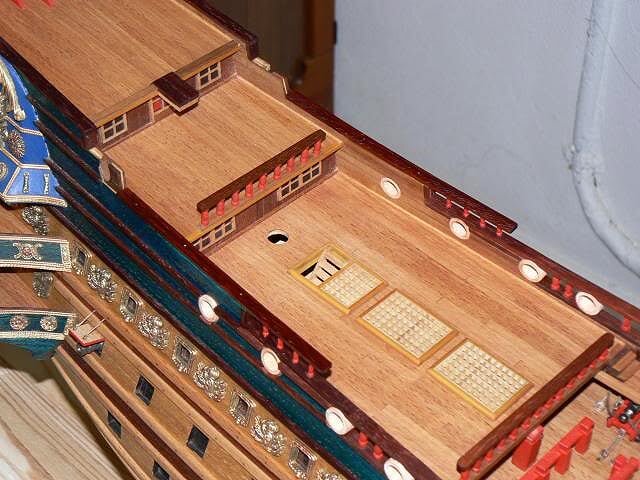
03 P1090599.jpg
04 P1090600.jpg
Kind regards, Jack. -
-
Saturday, July 6, 2013
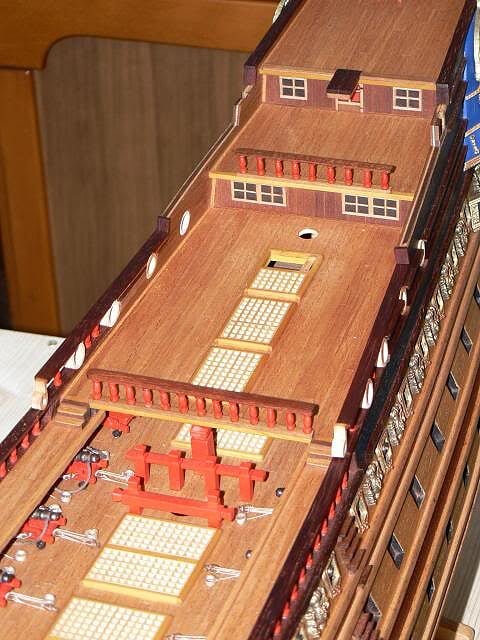
It's several days I don't show any progress . . I have done quite a lot of work in spite of the heat that is back now, but I didn't have till now anything interesting to show.
The work done, incidentally, is still about the well known "columns": the forecastle is almost finished, so i started to work on the other decks located in the stern area.
I had no big problems to deal with them, but the work has evolved rather slowly for several reasons, among which the main course is always the bi-component epoxy glue that takes a life to take hold and dry.
I have discovered a kind of epoxy glue that in theory works in 5 minutes instead of hours but for this type of work it is not suitable: once mixed you have only three minutes to paste the piece and for this reason is not suitable to be used on many pieces concurrently (like our columns). Ii's more suitable for one or two pieces, otherwise you do not have enough time to use it. So its usage is delayed to the next first available opportunity.
I am attaching four photos of details of the work done on the rear decks . .
Kind regards. Jack.Aubrey
01 P1090585.jpg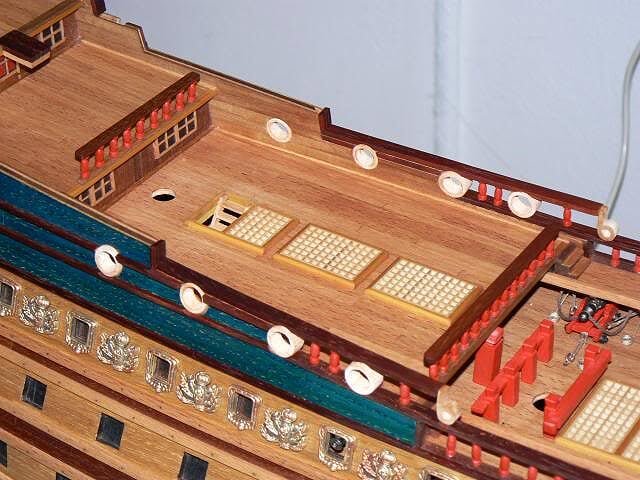
02 P1090586.jpg
03 P1090587.jpg
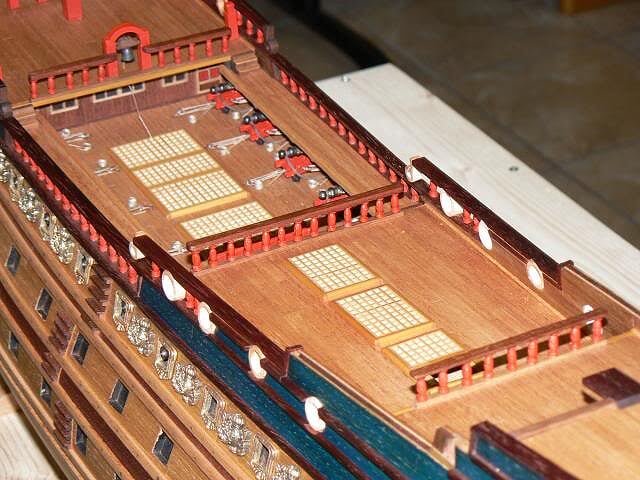
04 P1090588.jpg
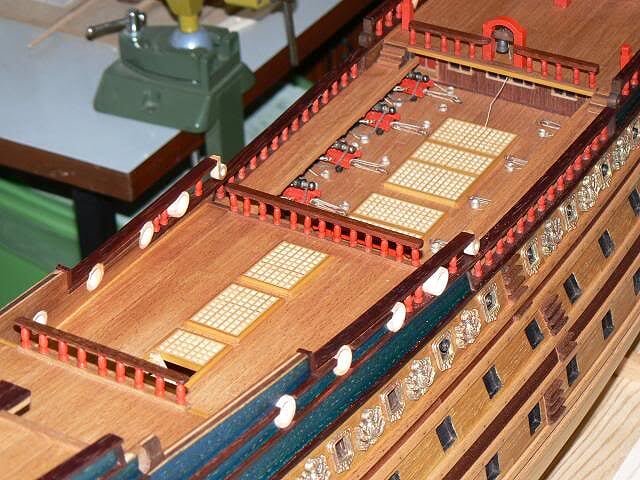
-
Sunday, June 30, 2013 - Forecastle
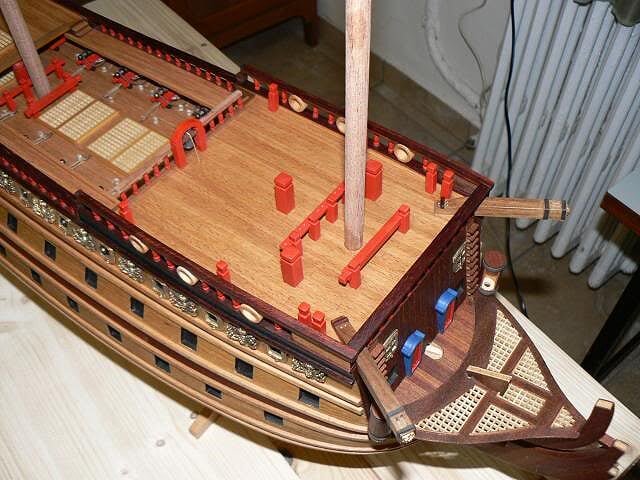
Today I finished some details on the forecastle . . I lost quite a bit of time to prepare the missing pieces, painting and installing them, but at the end, this part of the ship should be complete. Of course the guns and something else are surely missing,but for now it's okay.
Now I'll work on the rear decks of the ship, although first of all I need to study in deep how they should be arranged.
On the forecastle all the pieces where a metal piece is involved are bonded with bi-component glue: are attached in a truly "strong" way . .
Greetings, Jack.Aubrey.
01 P1090576.jpg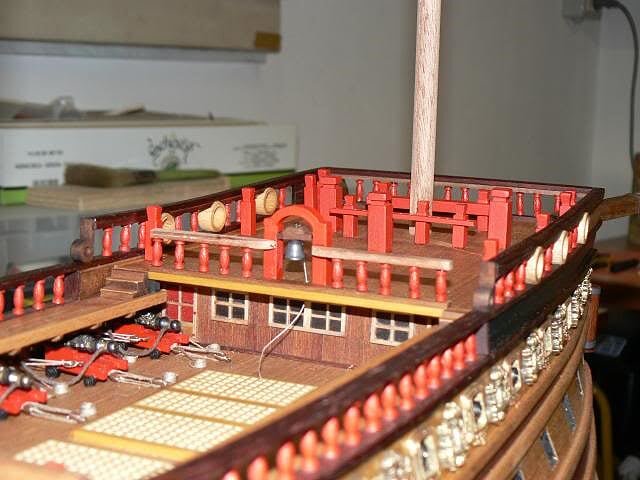
02 P1090575.jpg
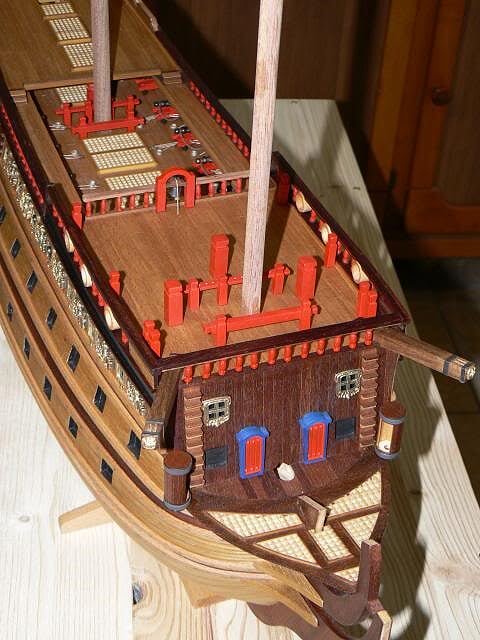
03 P1090574.jpg
-
Friday, September 20, 2013Good morning to everyone. .In these last few weeks I have been totally absent from this wonderful forum because I had a quite serious health problem.In practice, about two weeks ago I discovered a serious problem in my right eye. Medical diagnosis: detached retina resulting in immediate planning for an intervention in the hospital.Everything went well, now I'm at home recovering and I'm very happy with how the things are evolving, but I'll have to stop for a while all physical activities, including shipmodeling, as long as the doctors will not let me restart.However, with respect to the 12 Apostles, I would still be stopped, as, inexplicably, today I have not received any new material from the De Agostini. In the newsstands there is issue number 36 available, I'm (but not only myself) stuck at issue 25 since end July!Regards, Jack.
-
Wednesday, September 4, 2013As promised yesterday afternoon I applied the first three planks on the right side of the hull. Now both sides are simmetric and today I have installed three other planks on both sides, coming to a total of six.But now I really finished the birchwood strips, only three of them are remained, it would take to complete another row and then I have to necessarily stay idle, waiting for other new material.Below a few pictures at the bow and at the stern.01
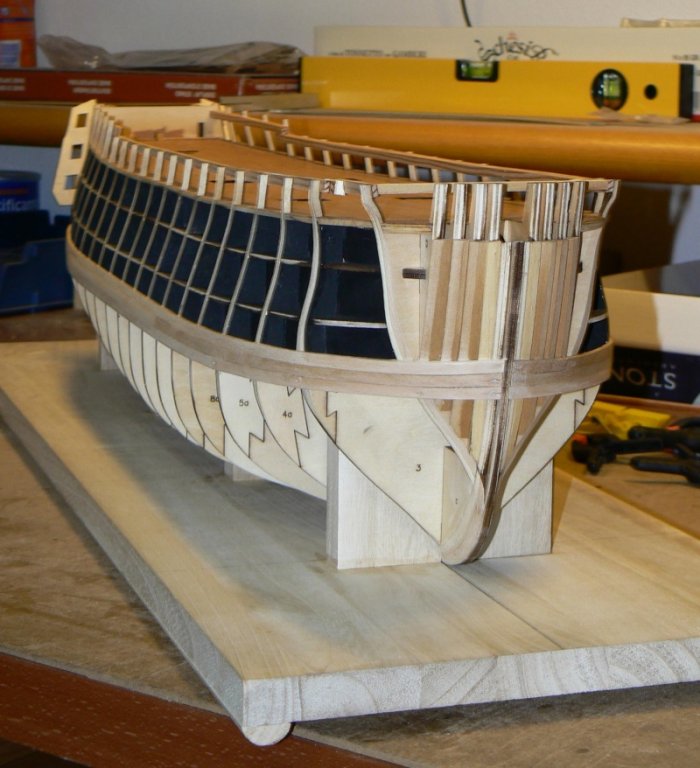 02
02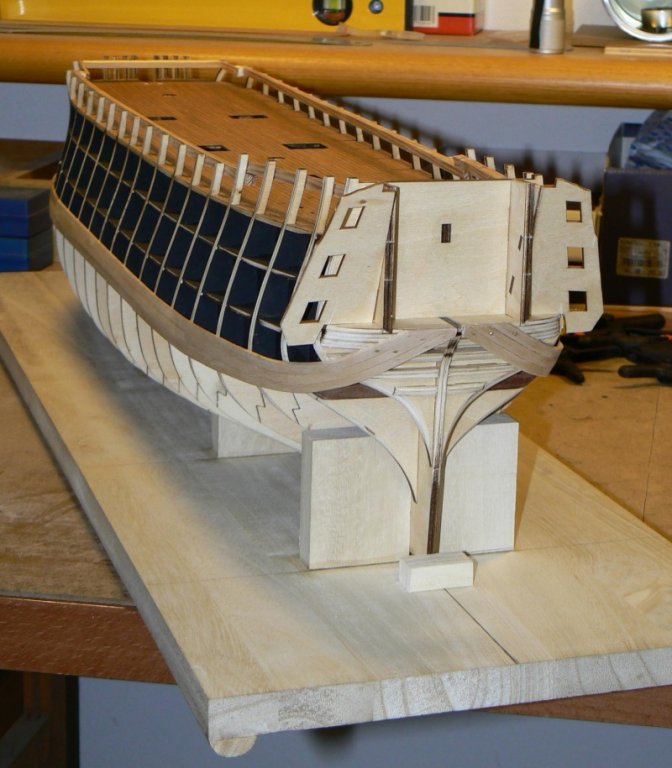 The photo below shows a further reinforcement that I have applied to the first top timber for further protection because, after having beveled it, this piece is really very fragile. I think, with this solution, to stabilize the risk.03
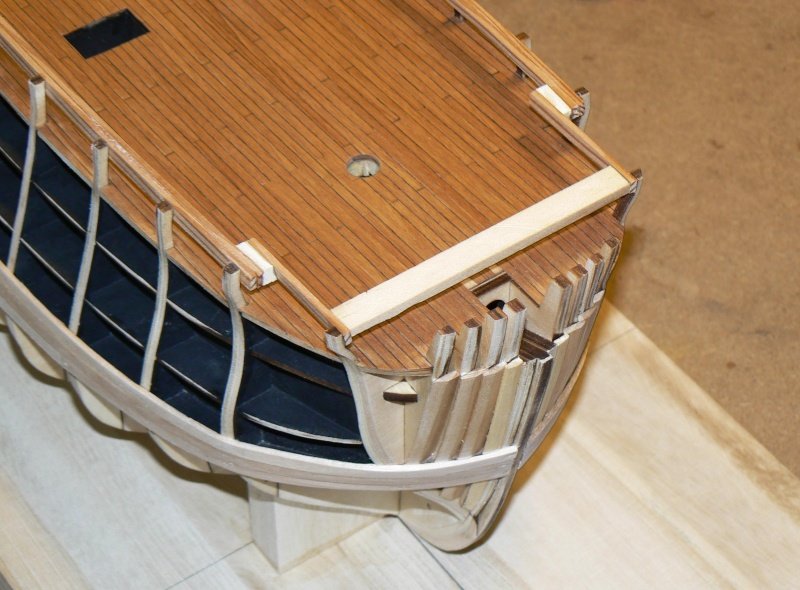 Kind regards, Jack.Aubrey.High Defintion Images:
 -
Tuesday, September 3, 2013It's almost from August 25th I'm doing nothing, neither for the 12 Apostles nor for the Soleil Royal. I've been busy on other matters and I had not time left for anything else.Yesterday, I decided that I had to stop this kind of "fasting" and, equipped with a change for dresses, I set a good pace to bevel the bulkheads on the right side of the model, in the same way as I did in August for the left side.After a couple of hours and a good dose of sneezing I finally unlocked the situation. This afternoon I want to apply at least three rows of planks as I did for the left side and, if there is enough time left, I'll continue in parallel on both sides upwards until I finish all the strips provided by De Agostini with the current received parcels.I remember that I am still waiting for the parcel with the numbers 26-29 . . . I could go to buy the not yet received strips of the same size in a model store but honestly I'd prefer to save this money . . .That's all for today, more news to follow tomorrow, maybe with some pictures.Regards, Jack.Aubrey.
-
Tuesday, June 25, 2013
Yesterday afternoon was dedicated to the Soleil Royal.
Specifically, I completed the handrails of the forecastle area.
After two or three minutes of thoughts, I decided not to use the metal garnishments of the handrail estremities provided with the kit: too simple and not accurate. I spent a couple of hours to test prototypes of different shapes using a small tablet of pear wood (I was going to try some kind of engraving).
At the end I opted for a simple shape, easier to achieve, given that my first engraving attempts with various tools could not properly be called a success.
Here are some pictures, the first three before making some finishing, especially the "home made" garnishments. The other two are finished and after a coat of oil to enphasize the wooden color.
01 P1090560.jpg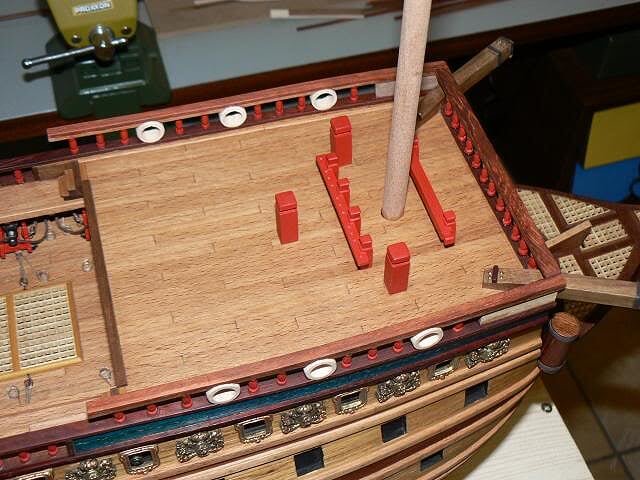
02 P1090561.jpg
03 P1090562.jpg
04 P1090563.jpg
05 P1090564.jpg
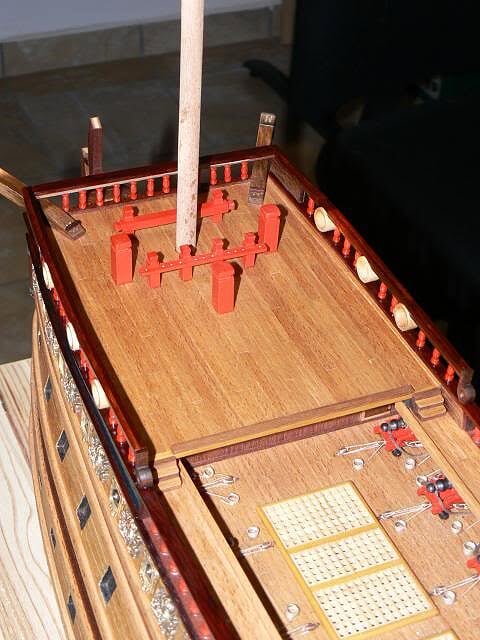
I also worked on the preparation of other details located on the forecastle, when they will be completed and installed I'll show them. This afternoon relax. Sincerely, Jack. -
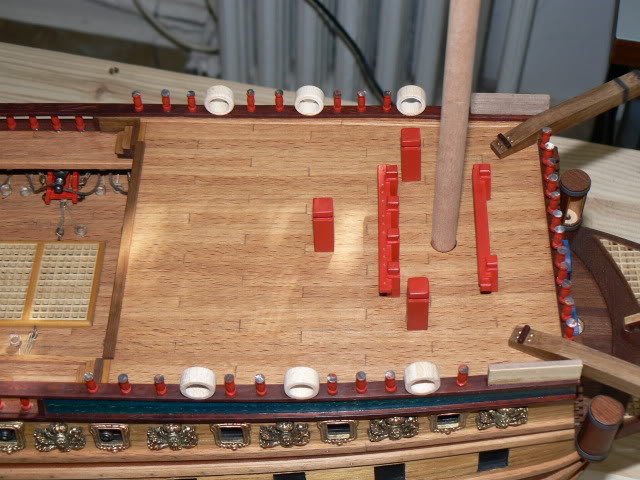
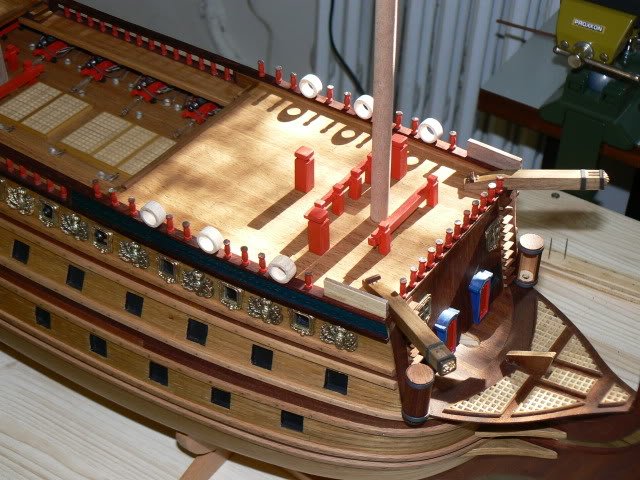
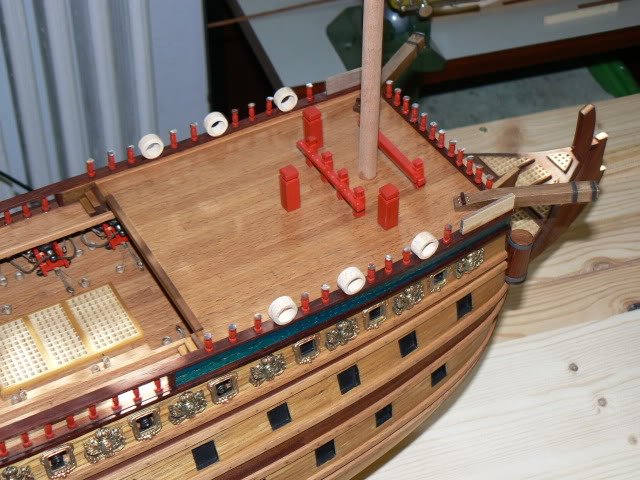
Sunday, June 23, 2013And now let's discuss the famous red columns on the forecastle. The first image shows the composite handrail, prepared in advance and already shaped on the lines of the hull. Bending is permanent and non-deformable.
The various elements, including columns, applied in place and ready for the next step, namely the fixing of the "handrail". The wooden parts are fixed with vinyl, the columns with the two-components epoxy. By the way, I decided not to color of gold the circular gunports: I prefer the natural wood color . .
In the next session I'll install the handrails and then I should close the works in the bow and forecatle area. Regards, Jack.High Resolution Images: to view in high resolution the images of this message, please left click on the image. You will be prompted with a new page containing the same image. Left click over the magnifying glass located near the right bottom of the image. You will get another image and you need again to left click on the magnifying glass . . and finally you win !! I beg you pardon for the idiot programmer that changed the behavior of the web site where I store my images in a similar way . . Jack.
-
Sunday, June 23, 2013
Friday I missed the usual appointment with my Soleil Royal because I had another appointment, not with a beautiful woman but with the dentist and I also missed Saturday morning because I cut the grass in the garden of my mother-in-law and in the afternoon I was too tired.
But on Sunday I resumed the activities and the day turned into a fruitful event: after spending last Thursday preparing all the necessary pieces, yesterday I started to reap the benefits.
Let's discuss a detail that I worked on between the downtime on the main work: the preparation and installation of the "stairs to climb on board" (whatever they call?) On the two sides, amidships, of the model.
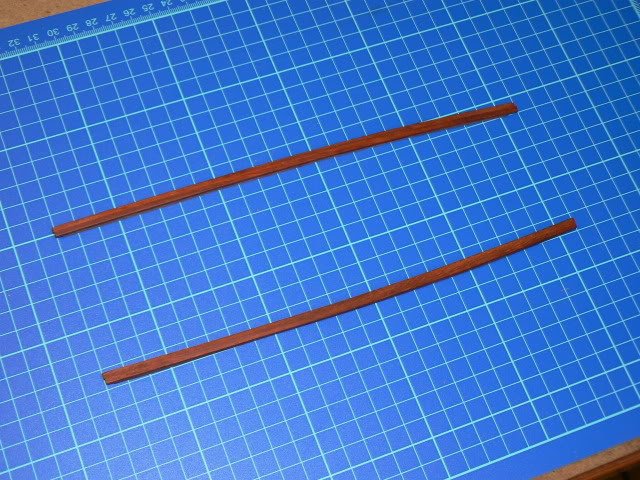
Here I repeated the same method of construction adopted at the time I prepared the ladders at the bow: 1) apply a sheet of veneer on a plywood tablet, taking care to paste only the two ends; 2) then paste the steps (the composite strip element built Thursday) in a parallel manner to the right distance and, 3) cut the pieces with the table saw. An example is in Figure 01, where you can see from left to right, the initial piece, a piece cut out ready for use and two pieces already in use, where there are no elements of the ladder.
01 P1090548.jpg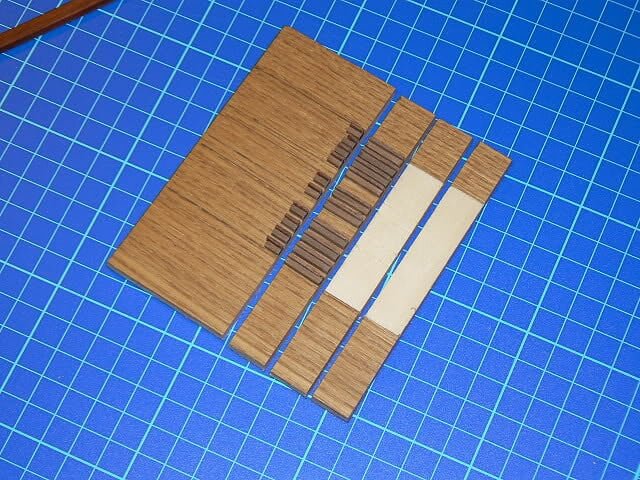
Below you can see these ladders applied on both sides of the ship.
02 P1090559.jpg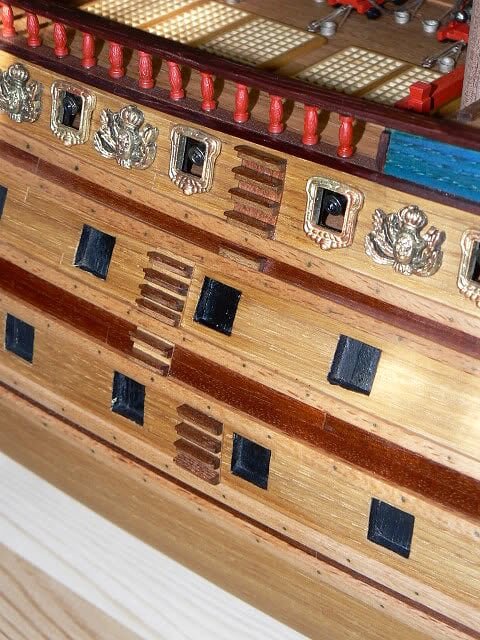
03 P1090558.jpg
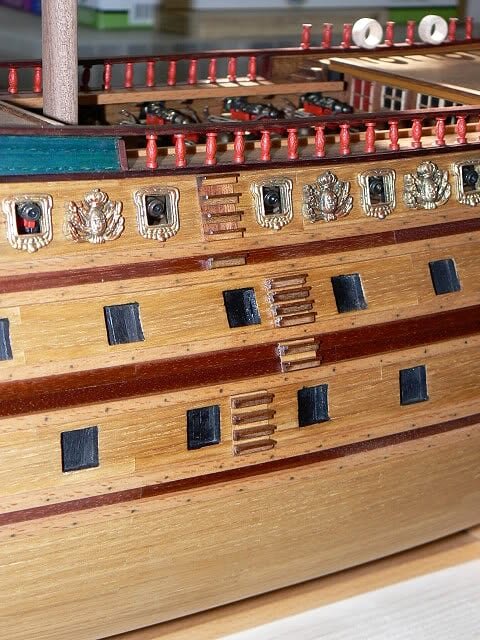
Then I continued to work with the metal columns on the forecastle. I will cover this topic with a separate message.
Sincerely, Jack.Aubrey -
Thursday, June 20, 2013 - back to workToday, after a few days when the hot weather was the absolute master, I finally started to work around my Soleil Royal. .Date absolutely to remember: it was since November of last year that the show was over. I'll manage this shipyard concurrently with that of the Twelve Apostles where I'll probably have frequent downtime because of the monthly shipments.The aim of this first activities is to install on the forecastle the red columns that long time ago I prepared. There are also some hardwood rings, that will serve as "open gunports" for the forecastle guns.First I prepared the two (curved) handrails for the castle, which will then be applied over the red columns and the rings. I took the exact shape of the curve on both sides, in order to prepare the curved pieces. I glued together two strips 2.5 x 2mm and retained them over the previously obtained template. When the glue made its mission the two pieces were permanently curved and ready for use.Then I started the preparation of the straight rack at prow: twelve columns spaced from each other by 91 mm. When drilled the holes to receive the columns I bonded the latter in place with epoxy glue. Now they are drying waiting for tomorrow, when they will be mounted in an "extra strong way".I then started to prepare the material for the ladders that are located on the two sides of the hull: by the time I prepared only the basic element consisting of a compound strip 4 x 1 plus another 2 x 2.Of course I have no images to show, virtually there is nothing interesting to show in the work done today.That'a all for today, see you next time, Jack.Aubrey.
-
Saturday, June 8, 2013After much searching and cursing I found yesterday the "bloody boats" . . they were where I left them time ago, watching me without hiding . .In conclusion now there is nothing missing. So when I'll finish with the new issues of the 12 Apostles, I will resume this model immediately.I have to admit that I don't know my emotional reactions if I didn't find them . . the idea to invest another two/three months of work to rebuild them was something like a nightmare . . friendliness, Jack.
-
Thursday, June 6, 2013 - surprise. .I spoke too soon. . . As I wrote in the previous post, I put away all the material of the 12 Apostles and I resumed the one of the Soleil Royal.Then I started to study a working plan and, since it was more o less six months I didn't think about this model, I started reviewing all the material, just to collect ideas and become familiar again with the secrets of this model.You have no idea how many memories people can forget in six months, especially "my past six months" I spent in Tuscany this winter. .Well, I started looking for the famous columns to build the railings and balusters, which I painted red and I had applied for an initial test just before closing the shipyard in November . . and I do not find them! Anyway, after a couple of hours of frantic searching, finally I successfully found them.Then I said to myself, maybe it's better that I control all the materials very well. . and I discover I cannot find the three ship boats I had spent almost three months to build. The fact is that I'm looking everywhere for three days and today I have not yet found them.I'm very angry with myself and at the same time I'm a little desperate. .Yesterday I got the sixth pack of 12 Apostles and at this point I decided to switch to the latter: I think that in three / four days I will use all the material available and after I can enjoy almost a month of calm before receiving the seventh package . . In the meantime I'll continue looking for the "bloody boats".Greetings (although angry), Jack.Aubrey
-
Completing the series of images relating to the previous post . .These images are mostly details of the bow and the stern, hull areas where it needs to pay more attention to that in the central hull, practically straight. The strips here have been previously bent with the tool discussed above and cut to right length before applying.01
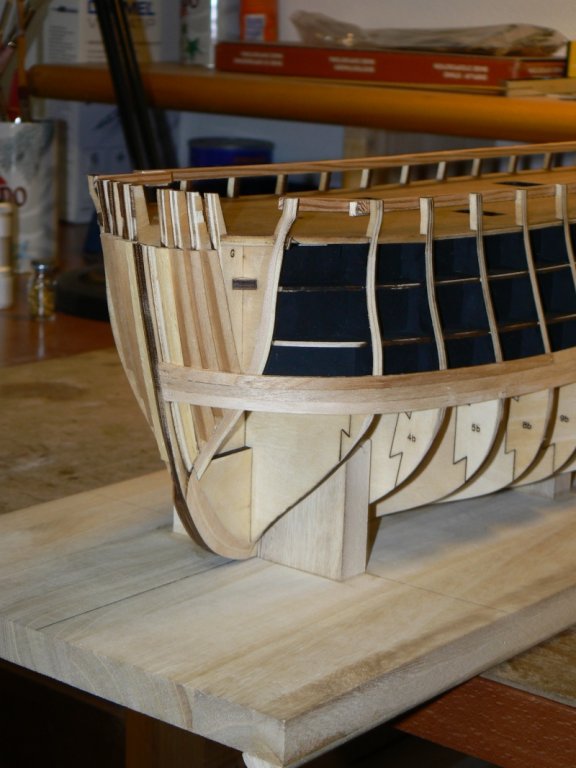 02
02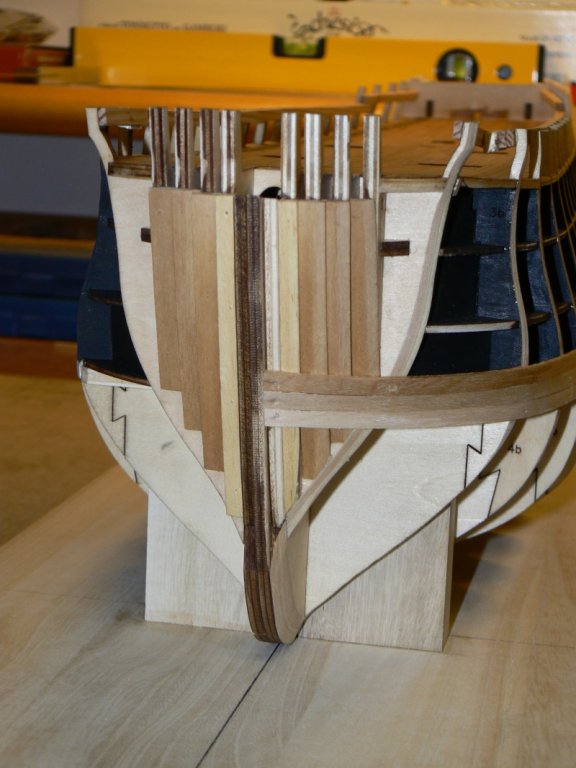 03
03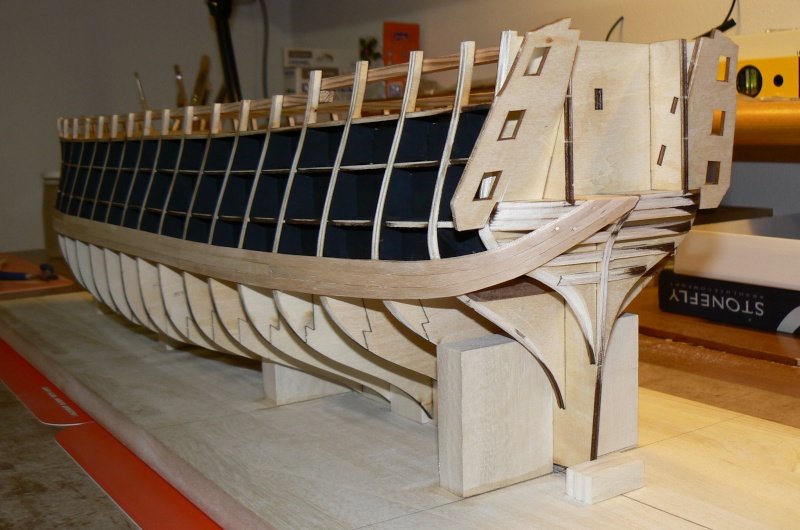 04
04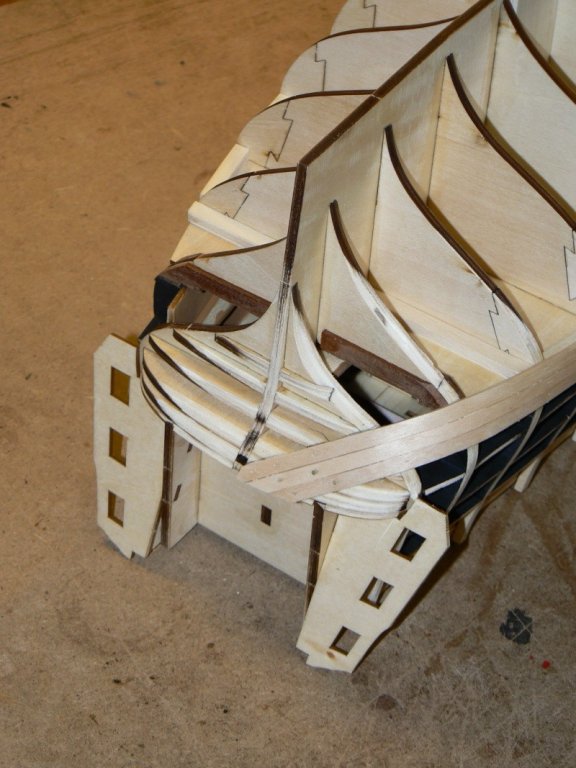 This last image, with the hull capsized, shows that the beveling of the bulkhead was performed only in the upper part of the hull. I have deliberately not worked on this lower part because I need to overthrow the hull to work and I am afraid to kick some top timbers (I finally found the english term for "scalmotto"), in spite of the reinforcement applied. When the top is over, this danger will disappear, and you can work without worries.05
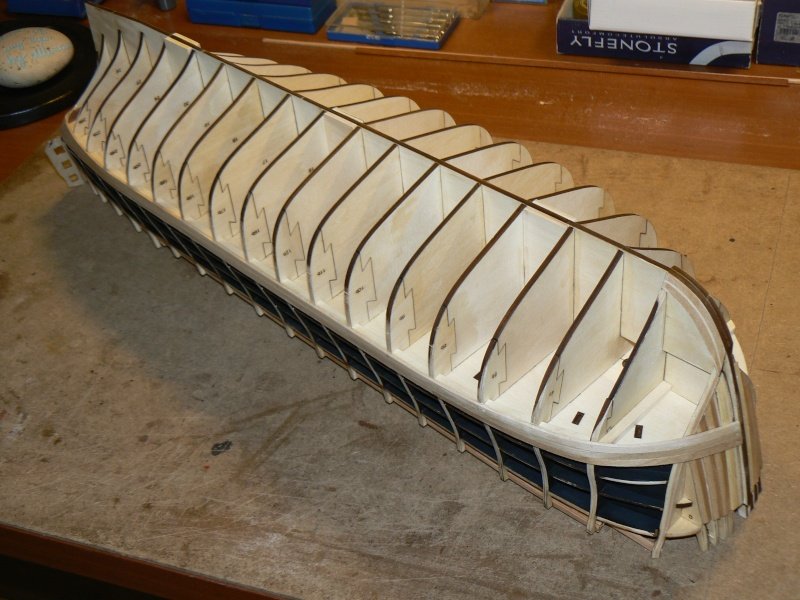 Now I'll have to treat in the same way followed for the left, the right side of the hull and then begin to apply planks on this side too.Sincerely, Jack.Aubrey.High Resolution Images:
-
Friday, August 23, 2013: planking testAs mentioned a few days ago, I completed the beveling of the stern area on the left side of the 12 Apostles . . . the stern also is quite difficult but here there was no need to intervene to correct anything, just "elbow grease".I then decided to continue with the installation of a couple of planks on this side to see if:- the beveling I performed in the way I interpreted it is correct;- become familiar with the provided strips that they are of a wood (birchwood, this is written in the instruction) that I never used and it is important to understand how it behaves.Regarding the birch strips I immediately experienced on my skin that are not like those of lime or beech: where you can bend them without many problems and often without even having to get them wet. With these birch strips this doesn't not work, so I built a "homemade" bender which is in fact a classic of its genre and works 100 times better than the power tools sold in the hobby shops.Components of the tool:- A table of MDF of adequate size,- A metal can, you may build many of then to get various types of curves,- Two bolts 3mm diameter, with a flared head, so that can sink in the MDF and do not protrude.Below you see the finished tool. .01
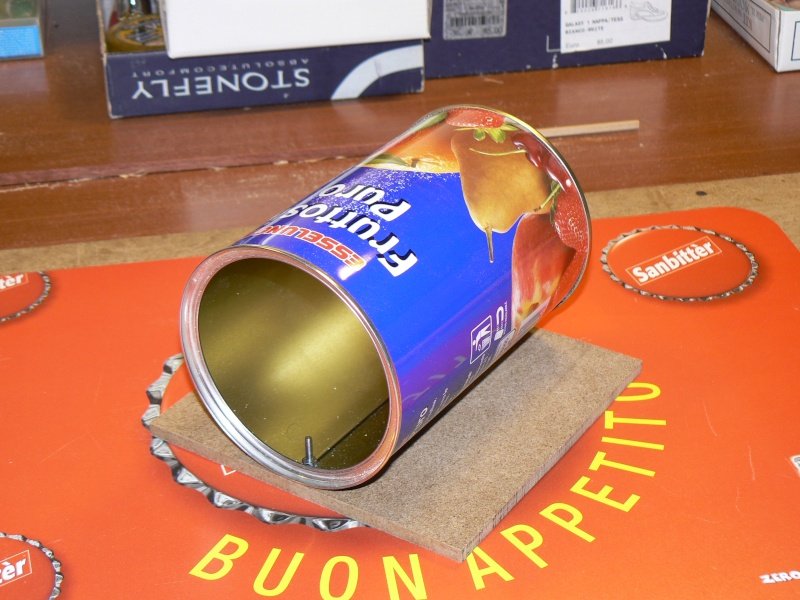 However, two vital elements for a proper use are missing:- A gas lighter,- some candles like the ones shown below.02
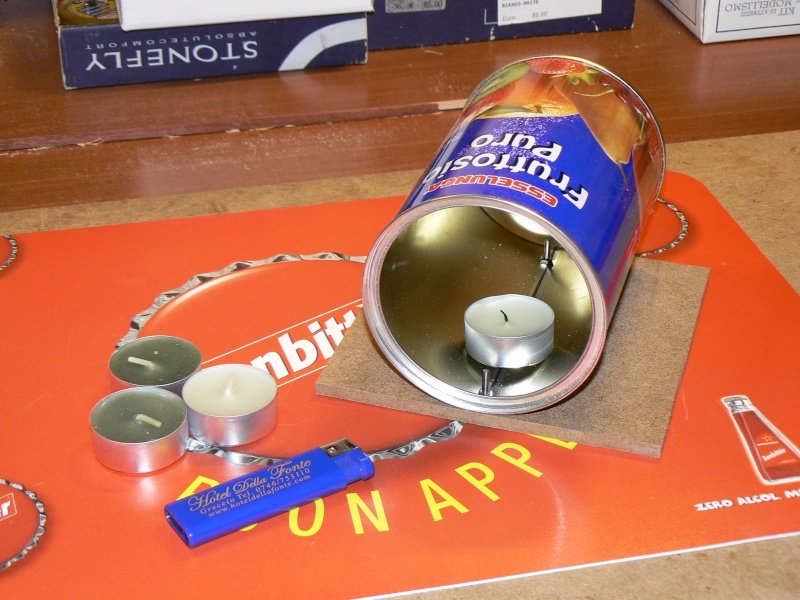 To use it, light the candle and place it inside the can, then take the strips to fold, previously put to soak in water for about fifteen minutes, put them above the hot can, bend at will, waiting for the wood to dry (a matter of seconds), and you're done.And now let's to the planking. .I applied three planks on the left and my interpretation demonstrated to be right. As you can see from the pictures, the entire bow area now collaborates in supporting the strips carefully and the keel, the famous element "A" of my previous photo, is completely free.The strips were glued with vinyl-glue and I held them in place until drying with small brass nails that I had the foresight not to hammer completely into the bulkheads. In this way, subsequently, I was able to remove the nails without problems. A slight sandpapering to make sure that the wood-dust fills the small holes of the nails and the grooves between planks and I immediately applied a thin coat of diluted glue, without dusting. In this way, the grooves and the nail holes are permanently filled. Simple trick but it works well . . ..03
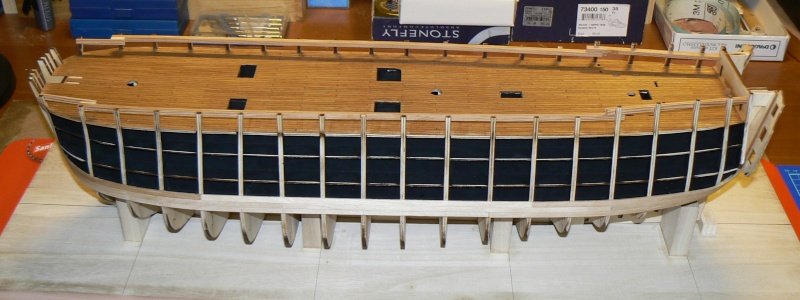 04
04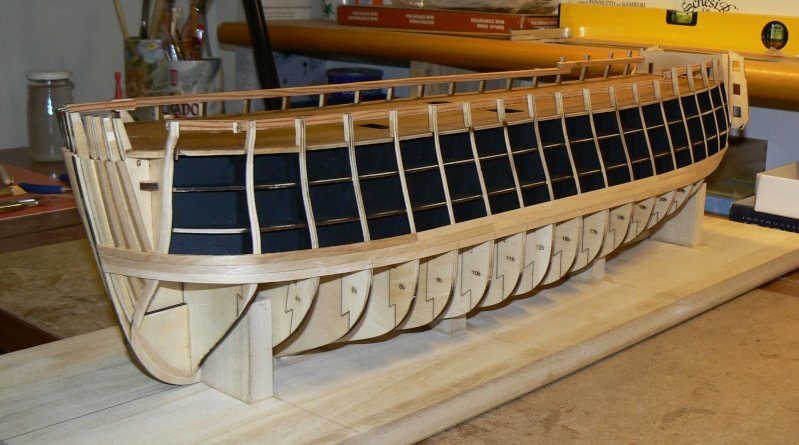 05
05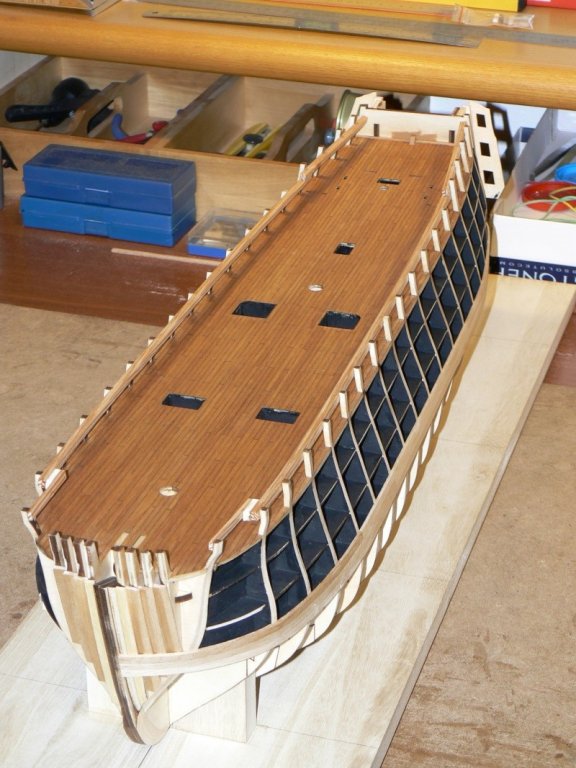 Next I'll post more detailed images of the bow and the stern, where we see even better as all the planking runs smoothly on the bulkhead.High Resolution Images:
-
Wednesday August 21st, 2013Today I did basically two things:
- I prepared and successfully tested the "homemade" tool to bend the strips;
- I started to sand the bulkheads, to model the bevel, but only on the left side of the hull. A preliminary activity for planking.
In practice, I made a bit of sawdust, impalpable but still sawdust. Now I need to finish this side aft, which I will do as soon as possible. Then I shall apply a couple of planks on this side just to see how they fit.If this will satisfy me, I will start sanding also the right side in the same way of the left side and then proceed to the application of the planks on both sides.Unfortunately if I do not receive from DeAgostini the parcel with issues #26-#29 so I cannot go far because I will finish soon the strips available . .Friendliness, Jack.Aubrey
- I prepared and successfully tested the "homemade" tool to bend the strips;
-
Saturday, June 1, 2013 - Next reopening of the shipyardGood morning, in the coming days, probably tomorrow, after six months of total lack of news due to my absence from home, I'll reopen the yard of the Soleil Royal. The yard will be managed in parallel with the shipyard of Twelve Apostles that for at least five/six months from now will be fluctuating.I want to work hardly on this model in order to finish it, health permitting, by the end of the year 2013. Let's hope so. Tomorrow afternoon I'll start a planning session to take up the model in the right direction. I have to admit that in these six months I have forgotten many things regarding its construction.Sincerely, Jack.Aubrey
-
Saturday, December 1, 2012 (please look at the date, its important to understand this message) . .I spent this last week to choose, collect, prepare and load into the car all what I'll need to "winter" in Tuscany, centre of Italy.I just finished loading on my car almost everything; the remaining bargage for next morning, at the last useful moment.Tomorrow, at around 10:00, with the tide, sailed the anchors, I put the bow to south / south-east in "deep downwind close-hauled" to Parma, then south-west with "starboard tack" until La Spezia and then south to Pisa with "the wind in the sails". Go back upstream on Arno river with the favourable tide and I will arrive . .The ship yard is now closed and will be reopened in 2013, most probably in May.Cheers, Jack.Aubrey.
-
Jack,
I would try to fill up entirely around the C parts on your picture.
Yves
Hi Yves, as you can read in my previous message, I have done what you suggested . . Regards, Jack.
-
Tuesday, August 20, 2013I'm almost two weeks that I don't post messages on the forum. The reason is simple: these days I have not done anything, mainly due to the hot weather but also to take a break to devote to other interests.However, if I have not produced anything of practical in modeling I worked in a theoretical way: I further deepened my doubts that I had previously expressed on August 9.At the end, I arranged a meeting with a friend ship modeller who cooperates with those who are responsible for the publication of this partwork and receives far ahead to subscribers the building instructions of the 12 Apostles to take care of its adaptation and translation from spanish language.Personally I'm still waiting for the package with the issues 26-29 and looking forward to being able to see until the issues 55-60 was very informative. Discussing with my friend we reached a conclusion quite out of the ordinary: the designer of the kit had in mind, with regard to the bow, a way of building that the modeller that is building the model (in order to prepare the instructions) didn't understand and probably did on his own . Which of the two will be right? We will see, in the meantime, let's see what awaits us looking forward.Here below the same image that I used Aug. 9th to give precise references. Moreover, the remaining images were taken with the smartphone and they are not of the highest quality.01
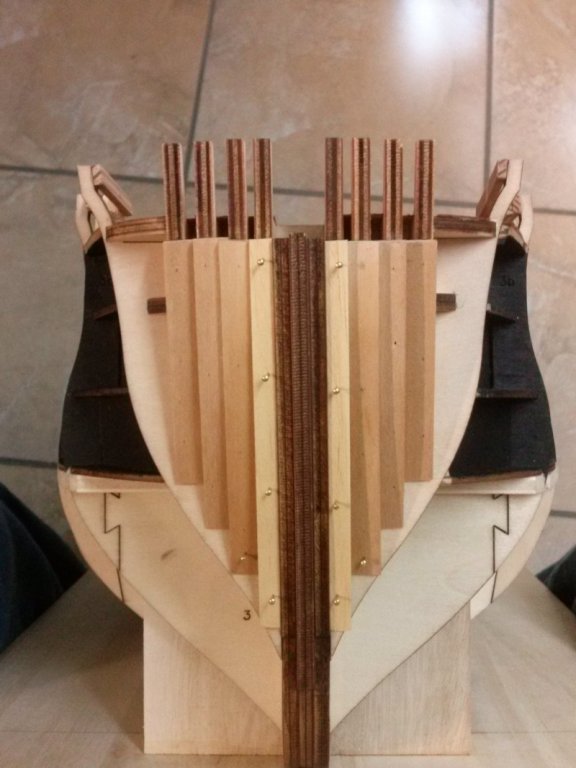
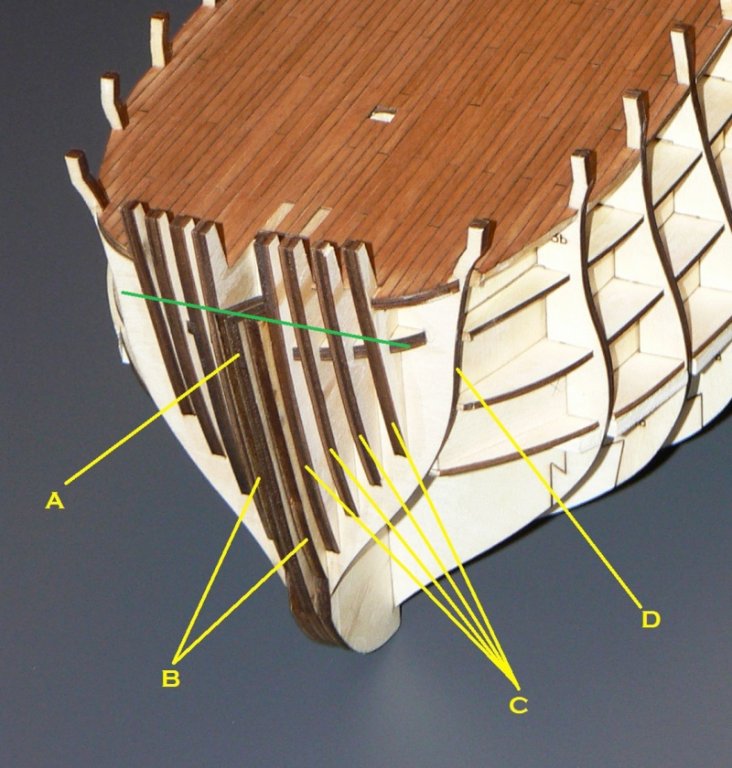 As we have seen from the instructions, the planking is fastened to the keel "A", and the function of the particular "B" and "C" is pretty much useless because they are too far back to serve as a support for planks on the bow. Once applied the first planking you have then to apply the second planking and, when this task is completed, we will be asked to draw on the bow two lines showing the position of the piece "A" and we will be asked to practice a groove of 4mm width to include the piece of pre-cut plywood which constitutes the stem. . an easy job, especially for those who have not a power tool suitable for making this groove.Having now seen the next future, I decided to follow my own way: the piece "A" will not be interested in the planking, which will rest on the two pieces "B". Since the pieces "C" have no effect under the green line, I decided to make sure they become useful by increasing their exposure. What I did today is visible in the three images below, where I applied the strips in front to pieces "C" to increase the size of these pieces allowing a right support for the planking. Obviously everything must be properly beveled, but the concept is to have planks resting even on the pieces "C".I do not know if what I explained is clear . . if someone did not understand is free to intervene with questions.Now I just have to work . . . Sincerely, Jack.02
 03
03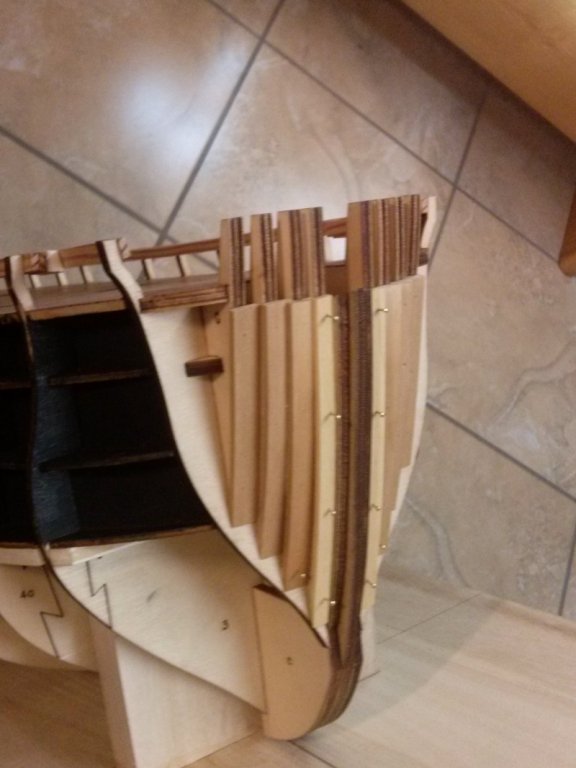 04
04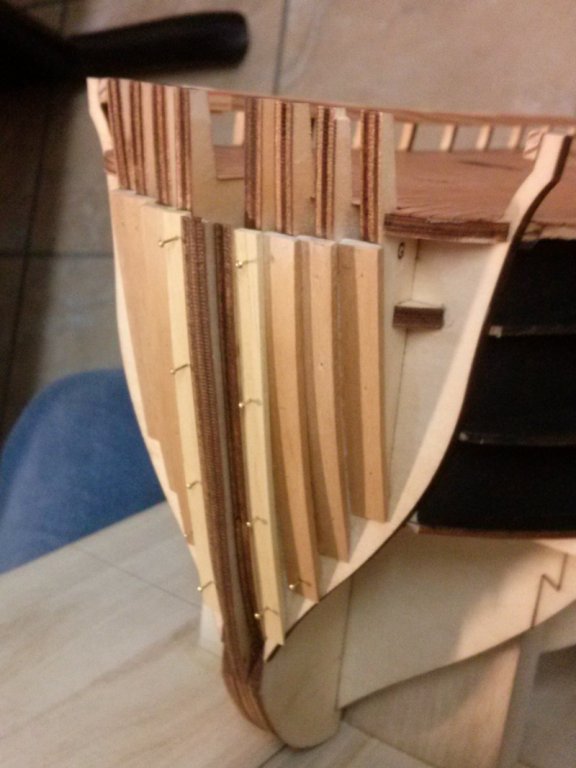
-


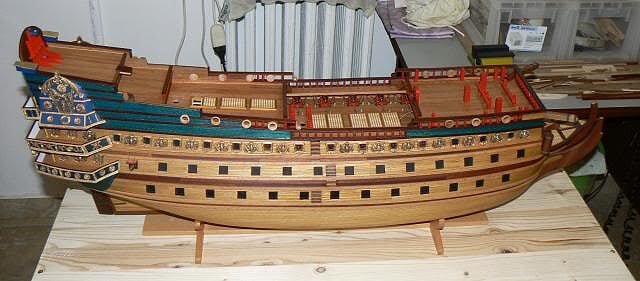
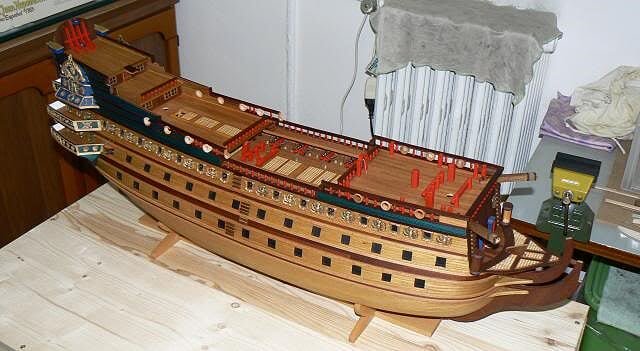
Le Soleil Royal by jack.aubrey - FINISHED - De Agostini - Scale 1:70
in - Kit build logs for subjects built from 1501 - 1750
Posted
Thank you Yves . .Jack.