HOLIDAY DONATION DRIVE - SUPPORT MSW - DO YOUR PART TO KEEP THIS GREAT FORUM GOING! (78 donations so far out of 49,000 members - C'mon guys!)
×


SawdustDave
-
Posts
1,770 -
Joined
-
Last visited
Content Type
Profiles
Forums
Gallery
Events
Everything posted by SawdustDave
-
 The little bit of snow they're calling for is no big deal George.... It's the ice accumulating on our pine trees that causes most of our problems. Once in a while, I need a little reminder of why I never want to move back to Cincinnati. Dave
- 962 replies
-
- 6
-

-
- sovereign of the seas
- ship of the line
- (and 1 more)
-
Just removed the little frame mold. We'll wait until tomorrow to do a first casting. It's best to allow a good overnight curing before going at it with the casting plastic. Thanks for the BD wishes (73rd tomorrow).... The forecast is for rain all day tomorrow, mixed with freezing rain and possible ice accumulation, which means likely power outage. Calling for snow on Saturday. Sounds like a couple of really good ship yard days for sure.
- 962 replies
-
- 12
-
-
- sovereign of the seas
- ship of the line
- (and 1 more)
-
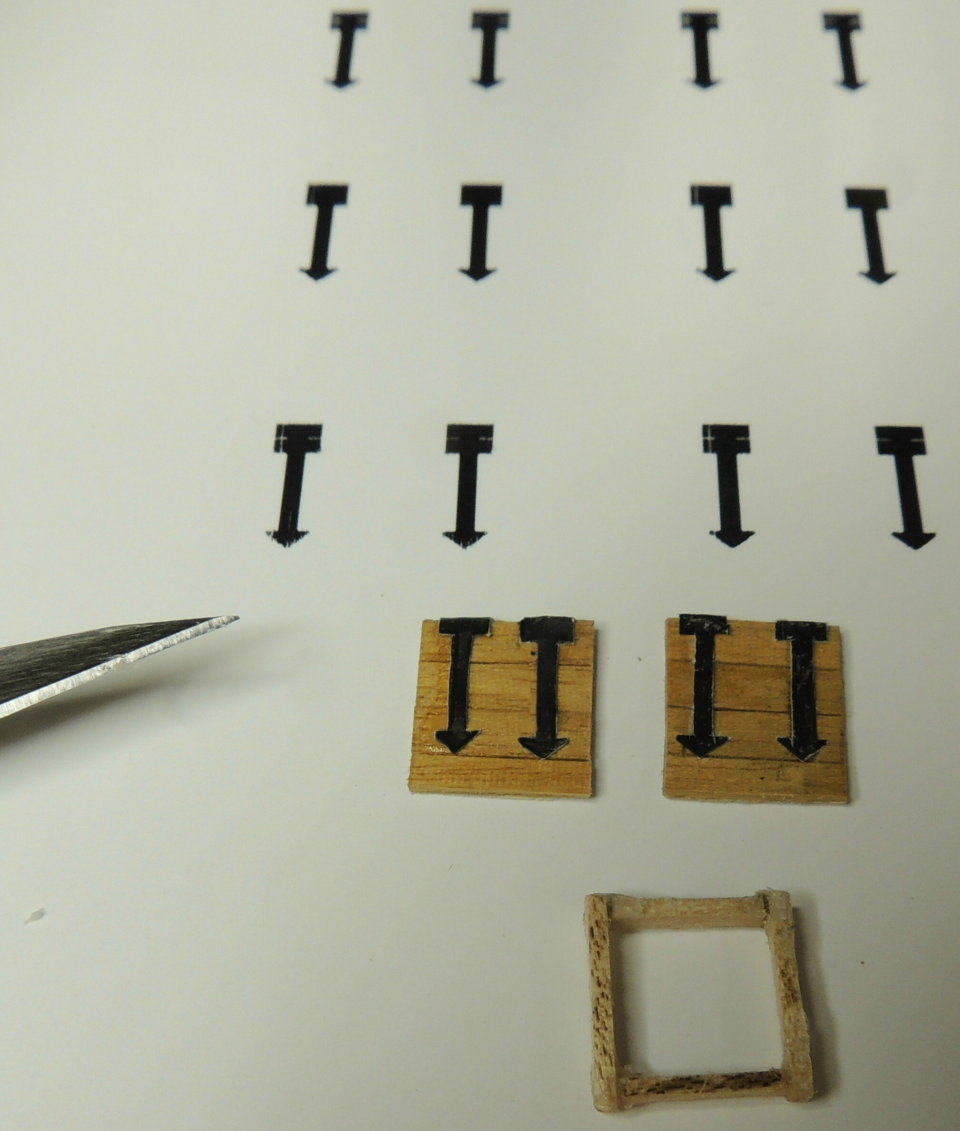
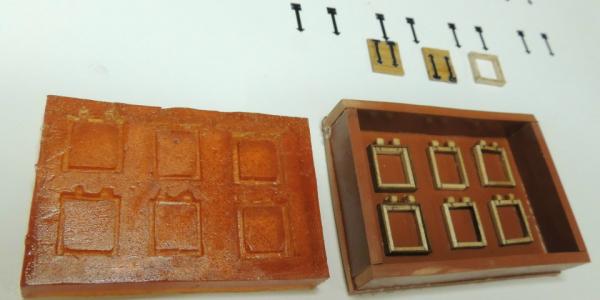
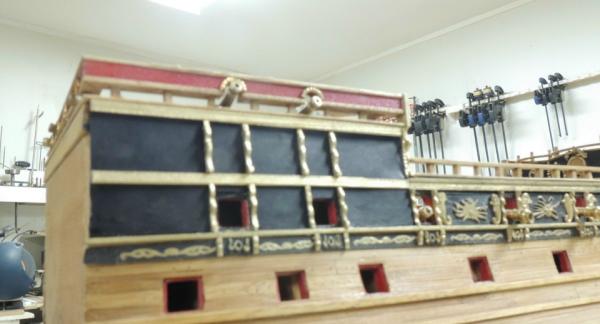
Finally managed to get the port side panels reconfigured and trimmed very similar to the starboard side panels. Everything went pretty well, and I'm satisfied with the results.... even made made a couple of minor improvements. I had not intended to re-do the panels below the forcastle deck, but found a few issues I decided to go ahead and address while at it.... Also.... Decided to do some development work on the gun port lids. Like the cannons, there are so many of them to do, I don't want to have to tackle them all at one time. The broadside gun ports will require 60 lids. Twenty two will be open, and 26 (bottom deck) will be closed. The 5 ports on each side of the waist deck will not have lids. So here's the lids I have come up with....Note, the hinges are created with AutoCad. I plan to create molds of the perfectly sized frames and cast them in red plastic, rather than attempt cutting out and assembling 60 of them.

- 962 replies
-
- 11
-
-
- sovereign of the seas
- ship of the line
- (and 1 more)
-
Thanks guys.... Patrick.... The carvings..... although some are salvageable, most of them I just did not really like that much. They will be replaced with the mold castings from the carvings I did for the starboard side. This too shall pass, right?
- 962 replies
-
- 7
-
-
- sovereign of the seas
- ship of the line
- (and 1 more)
-
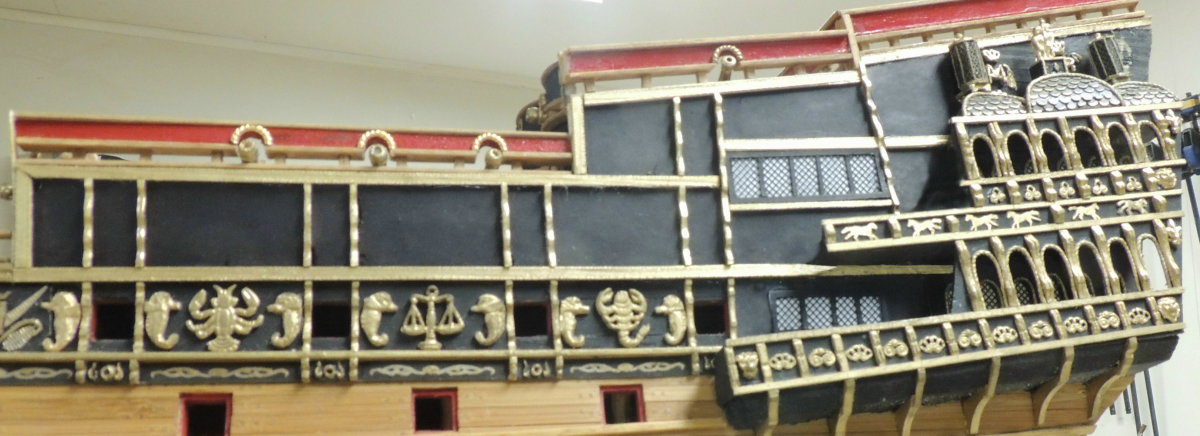
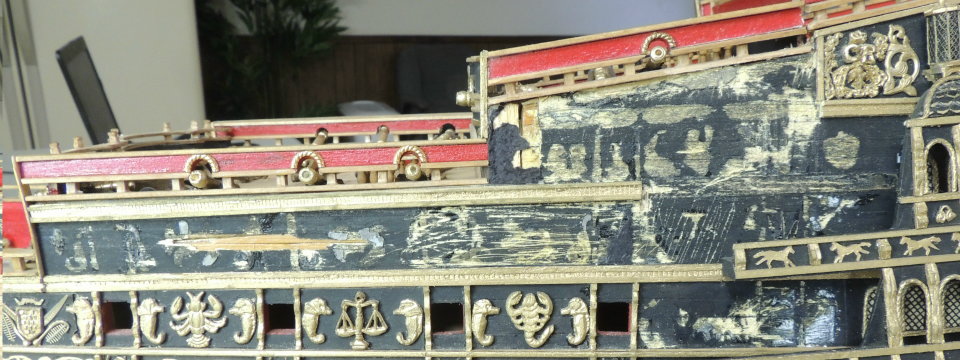
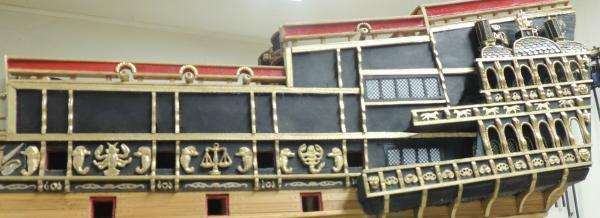
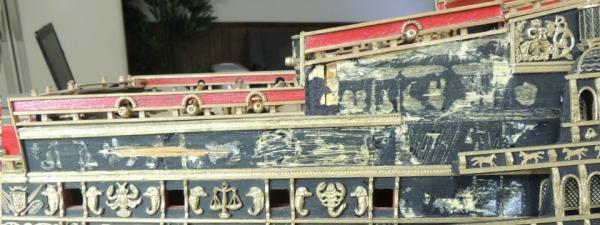
More backwards progress.... The more I kept looking back at the early mistakes made following the poor plan sheets, the more it was bothering me. The difference in the design of the port side layout, using the plan sheets.... and the layout of the starboard side, using photos of some of the very fine build logs from some of the best modelers I could find.... became more than I could accept. My early rationale was, "No problem, since it will be displayed in it's case with the starboard side showing".... Changed my mind. It does matter. So I spent last night ripping out the panels and carvings from the port side. What a train wreck, huh? I will, of course, rebuild that area to look more similar to this view of the starboard side....

- 962 replies
-
- 13
-
-
- sovereign of the seas
- ship of the line
- (and 1 more)
-
Oh there's plenty of options CapSteve.... didn't mention adding the top rails with 2.5mm stanchions, all the gun port lids, rudder, etc..... Thankfully, this is one ship I have not set any kind of deadline for finishing....if I ever actually do finish her.
- 962 replies
-
- 6
-
-
- sovereign of the seas
- ship of the line
- (and 1 more)
-
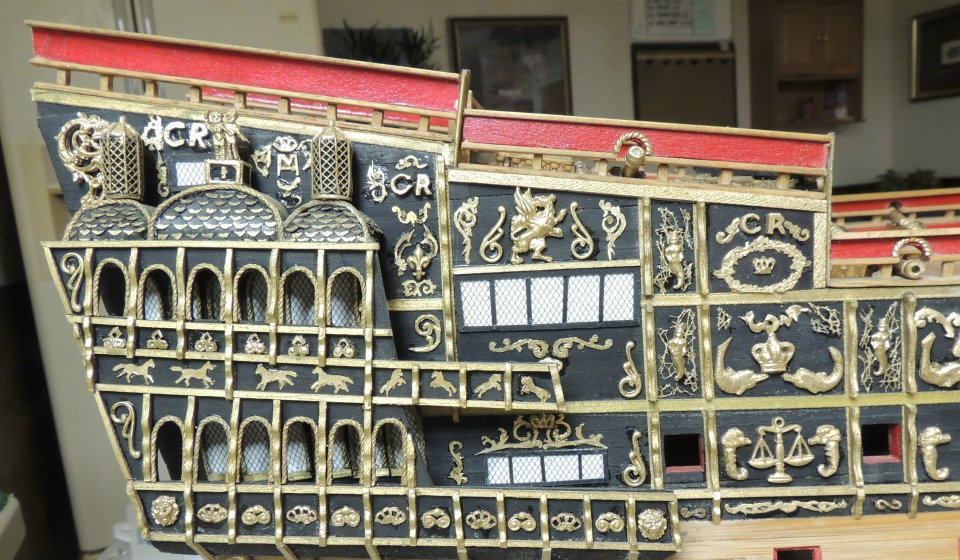
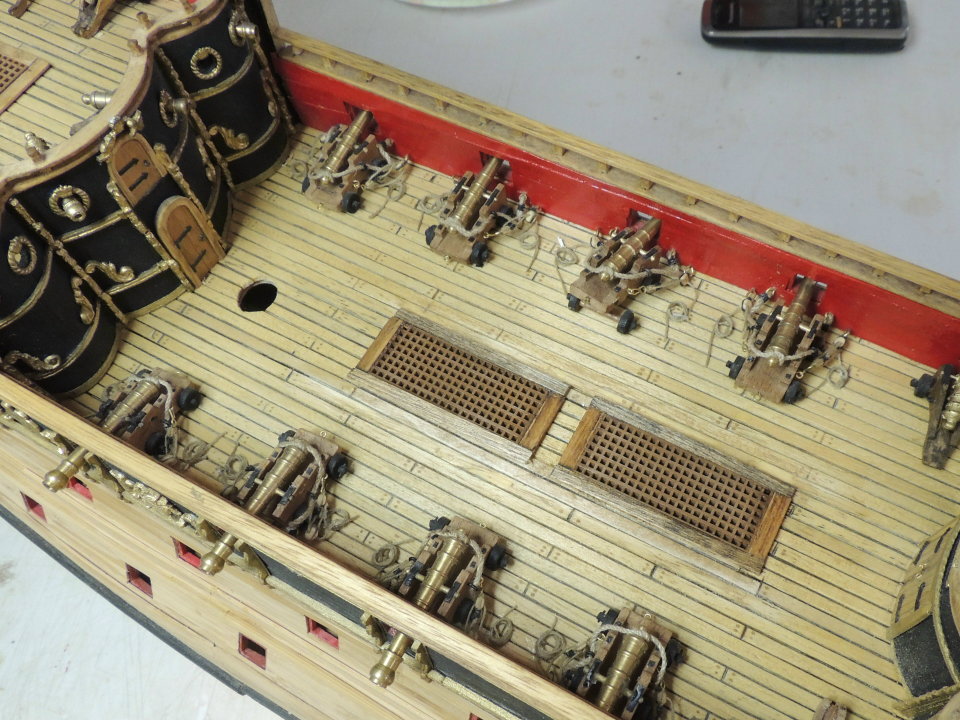
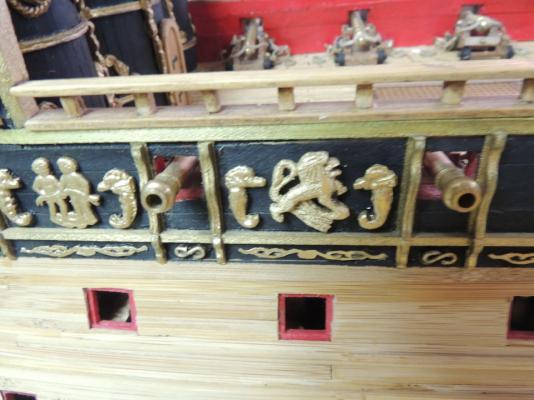
The too-wide grating issue now resolved.... went pretty smooth....no big deal there. And here's the new carvings fitted to the open panels on the starboard side.... I've not decided whether to begin another carving, go back to finish up rigging the big cannons, begin tree nailing the hull, or begin working on the beak area. Plenty to choose from.


- 962 replies
-
- 16
-
-
- sovereign of the seas
- ship of the line
- (and 1 more)
-
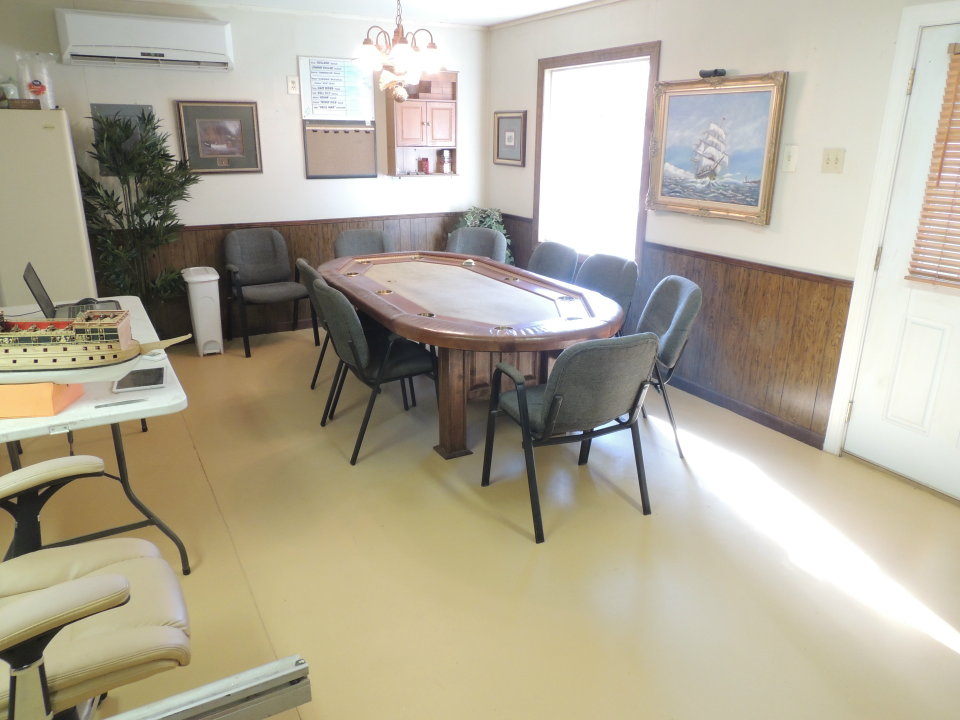
UPDATE.... First, after cleaning the ship yard to thoroughly, the little half bathroom stood out like a sore thumb. Some of my poker club pals have actually been threatening to start going outside to get rid of their beer. So I took another two days to build a new cabinet and paint and trim out our "pee room".... Didn't take a "before" photo, but, trust me, it was pretty bad. Note the framed print of the Frigate Confederacy now hanging on the wall. And here's what the "Poker Room" part of my little mancave now looks like.... Finally, back to work on the SOS.


- 962 replies
-
- 12
-
-
- sovereign of the seas
- ship of the line
- (and 1 more)
-
Hi Erik.... You're going to really enjoy the Cheerful build. As usual, Mr P did a wonderful job in developing the plan sheets and instruction. Pulling up a chair. Dave
-
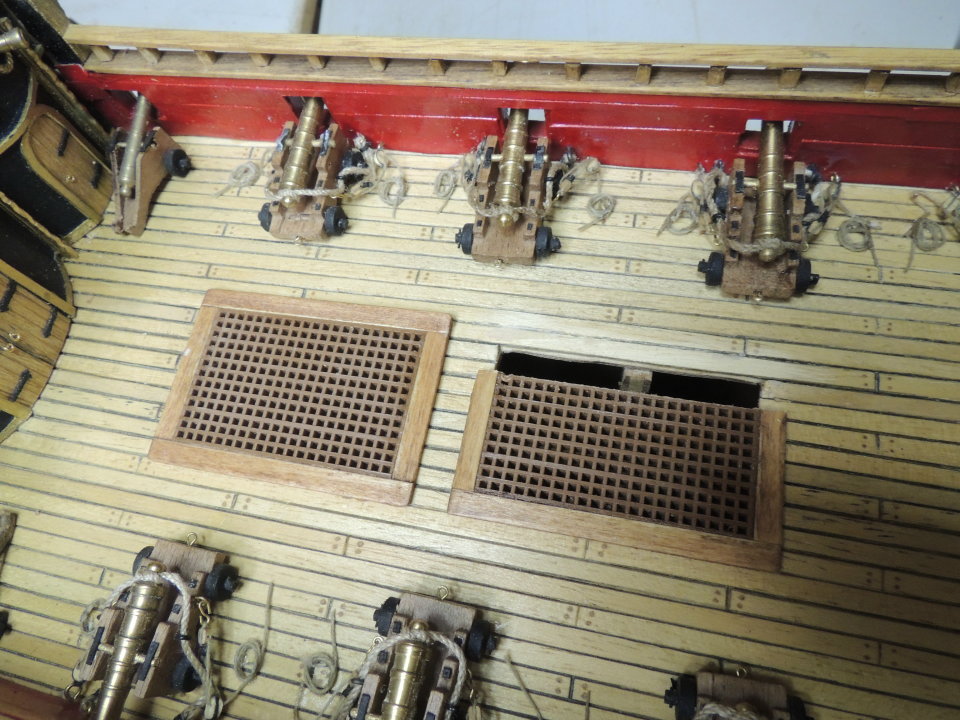
Always good to hear from you dear Piet.... I did consider changing the length of the gun carriages, but it would have meant completely de-riggin them ... and then I don't think I could take enough off the carriages to resolve the space issue. Also double-checked the scale of the cannons.... they convert to 9 ft long which is correct for a 32 pounder. So the only remaining option was widen the deck (RIGHT!).... or narrow the gratings. Guess which one of those two choices I went with. Finished the re-do last night and will take a pic this morning after I get the color of the new planks right. Janos.... First, let me say your carvings are simply incredible. I am so glad to have you share many of your cleaning and smoothing techniques. As much as I would like to try some of the carving materials you suggested, they are kinda' tough for me to get around these parts. I do have a bristled rotary brush.... don't believe it's goat hair.... but that really sounds like a super tip and I shall certainly be giving it a go very soon. Thank you again for your visit and valuable coaching. Cheers Dave
- 962 replies
-
- 8
-
-
- sovereign of the seas
- ship of the line
- (and 1 more)
-
Look at it this way Jesse and Nenad.... I would love to be able to carve figures like Bill Short and Janos.... just do a search on their SOS models.... WOW! Though I'll never achieve that amazing level, I still get a lot of pleasure out of taking a piece of wood and making it kinda' look like something unique. And if it works into my love for ship modeling, all the more better.... right? Cheers
- 962 replies
-
- 9
-
-
- sovereign of the seas
- ship of the line
- (and 1 more)
-
Have you tried carving Jesse? Might be surprised how easily you can develop a nack for shaping wood with a sharp tool. It's really much easier than it seems. Cheers Dave
- 962 replies
-
- 4
-
-
- sovereign of the seas
- ship of the line
- (and 1 more)
-
Off to a roaring start.... IN REVERSE Issue.... The gratings are too wide to allow the block and tackle rigging off the tail of the gun carriages. I knew I had this issue as soon as I began fitting the big cannons on the waist deck. I just hope and pray that this will be the last of those plan sheet errors I will have to deal with.

- 962 replies
-
- 9
-
-
- sovereign of the seas
- ship of the line
- (and 1 more)
-
Beautifully done Nigel. The color contrasts are really striking. Your carvings turned out great. Loving it. Cheers Dave
- 270 replies
-
- 3
-
-
- red dragon
- artesania latina
- (and 1 more)
-
Thanks Nigel.... I find hard rock maple a little harder, tighter grain than boxwood. It does not like spinning tools because it tends to surface burn quite easily. Excellent for fine detail, but I must confess, I have not worked with many of the exotic pear woods, tupalo, teak, etc recommended by many if the more professional wood carvers. I happened to have a few scraps of hard maple left over from my former business. BTW....Don't even think about driving a nail through it mate. Cheers Dave
- 962 replies
-
- 6
-
-
- sovereign of the seas
- ship of the line
- (and 1 more)
-
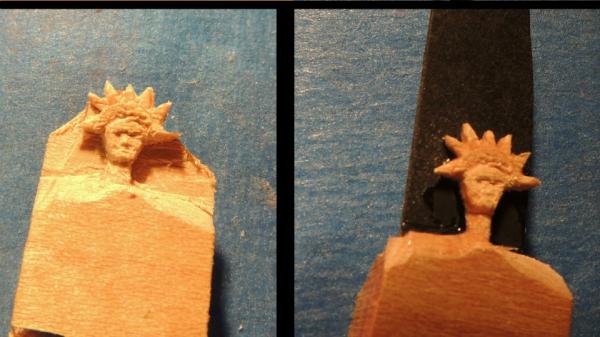
And here's the roughly completed head and crown carving....used a piece of hard rock maple. Left pic is ready for removal and clean up.... Right pic - Note, I have glued in a piece of black card stock to reinforce the very thin points while I cleaned them up. Then with the head attached to the body.... Still see a few touching up places. Also need to build up the nose slightly....then ready to create a couple of molds..... Note, I'll glue another piece card stock to the back side of the whole carving before pouring the mold to help with removal without breaking off any of the delicate parts.
- 962 replies
-
- 13
-
-
- sovereign of the seas
- ship of the line
- (and 1 more)
-
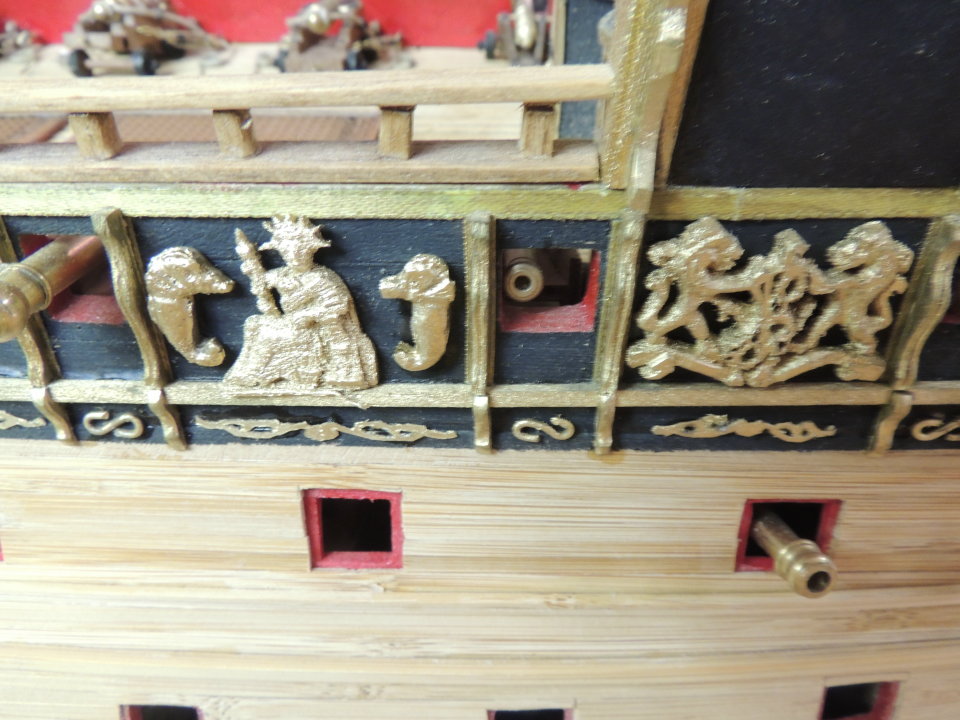
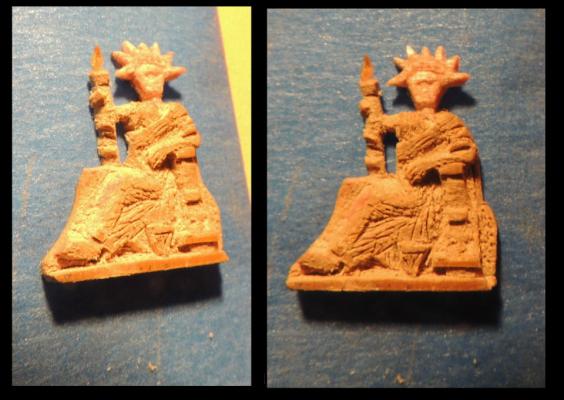
Back to work.... This is an experiment in getting a closer shot of a couple of carvings before painting them with the metallic gold.... Top photo is the clip art I used for these two pieces..... Note, I decided the head of the carving on the left will need to be done with a much harder median (plastic or hard wood) because the vinyl will not allow for the fine detail of the facial features. As usual, I'll be making silicone rubber molds of both carvings in order to cast duplicate pieces to go on the port side.

- 962 replies
-
- 14
-
-
- sovereign of the seas
- ship of the line
- (and 1 more)
-
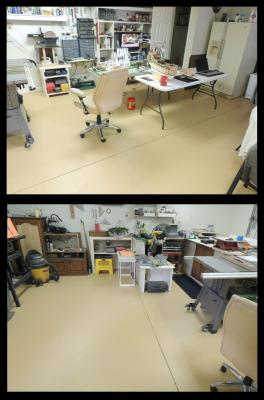
Began the new year with major cleaning of the shipyard (after seven years of sawdust accumulation on shelves and in corners etc.) This turned into a yard sale this past Saturday.... getting rid of boxes and boxes of heavy commercial grade woodworking tools packed away in cargo boxes since I sold my custom furniture business several years ago. Then re-arranged the shop, installed some additional lighting, and painted the floor.... still must caulk the expansion joint and paint over it sometime today. The difference is astounding, to the point that my poker crew walked into the shop last night and thought they had come to the wrong place.
- 962 replies
-
- 14
-
-
- sovereign of the seas
- ship of the line
- (and 1 more)
-
Seeds bad in general Dave. Sunflower seeds worst of all....very fatty.... Causes fatty liver....and that's what he went for like a little drug addict. Pellets are what the vet recommended, but too late for Smokey. Good luck Dave
- 962 replies
-
- 5
-
-
- sovereign of the seas
- ship of the line
- (and 1 more)
-
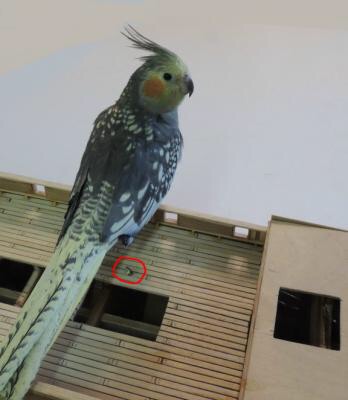
Thanks all for your condolences. Yes, my pal was a really special little creature. But the last few weeks was really tough as the avian vet tried to save him. Here's a note for the bird owners out there..... Make sure your birds are getting plenty of pellets and carrots in their diet. Turns out, Smokey was a "seed addict" and refused to eat the fruit pellets in his commercial "Cockatiel Food" which I fed him for over two years. What happens, is, they can develop a liver disease that becomes, as in his case, fatal. Who knows, I might change my mind after a while.... seems kinda lonely and quiet here in the shop without him fussing at me for attention. Cheers Dave
- 962 replies
-
- 7
-
-
- sovereign of the seas
- ship of the line
- (and 1 more)
-
RIP Smokey.... My little shop pal passed on Christmas morning after several weeks of progressive illness. Every evening, after I turn off the lights and lock the shop.... as I close the door, I still say "Goodnight stupid....see you in the morning." After losing four of these funny little creatures over the years, no more birds for me.
- 962 replies
-
- 6
-
-
- sovereign of the seas
- ship of the line
- (and 1 more)
-
Cutty Sark by NenadM
SawdustDave replied to NenadM's topic in - Build logs for subjects built 1851 - 1900
Sounds like a good solid plan, and I'm sure you will do a great job Nenad. Wishes for a much happier New Year my friend. Dave- 4,152 replies
-
- 8
-
-
- cutty sark
- tehnodidakta
- (and 1 more)
-
Remco... I hope I manage to be around long enough to, one day, find the courage to build a POF model. If that time does come, I am confident that this Kingfisher log, along with EdT's beautiful "Young America Extreme Clipper", will be my primary references.... You guys are true masters, demonstrating skills for every modeler in the world to strive to emulate. For most of us, however, you guys make us feel like a high school runner setting out to run a four minute mile. Even for those blessed with a bit of God given talent, achieving that level still requires an inner effort I can only admire and appreciate even greater than the end product itself. I solute you sir. Dave
- 1,215 replies
-
- 6
-
-
- sloop
- kingfisher
- (and 1 more)
-
That's just crazy cool Jeff. Love it. Dave
-
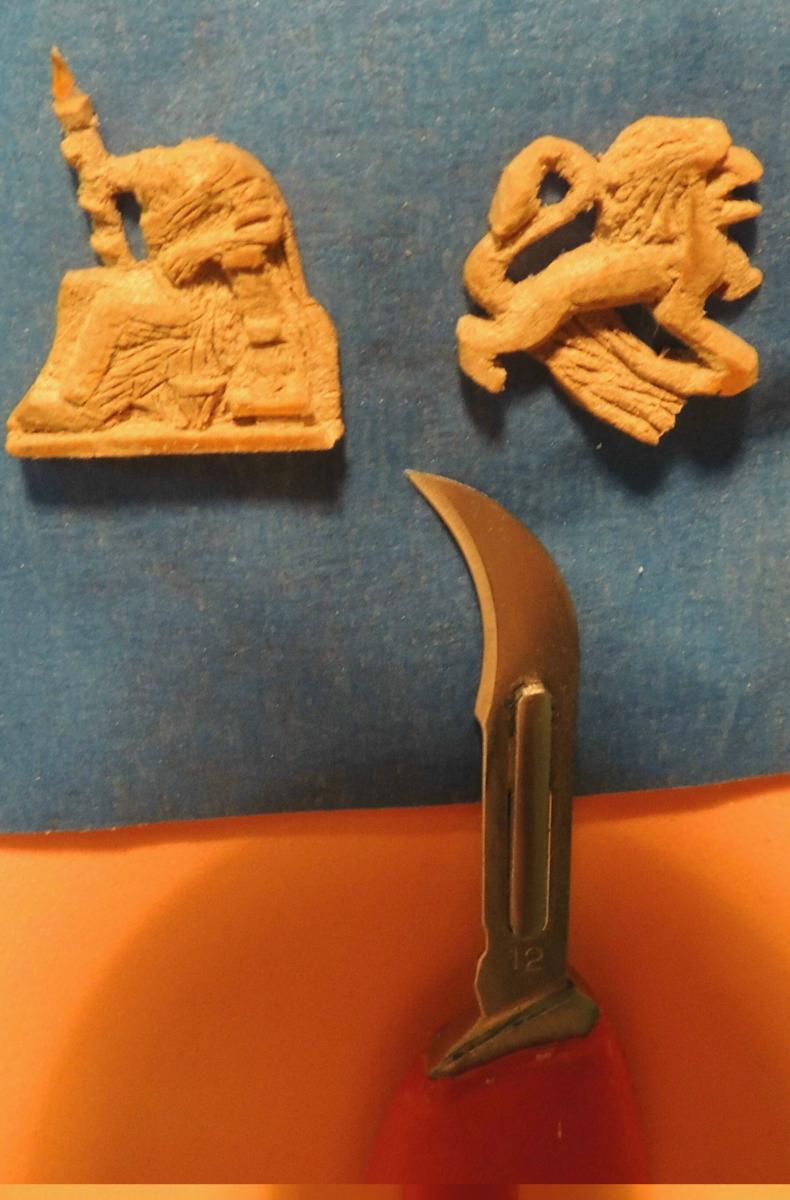
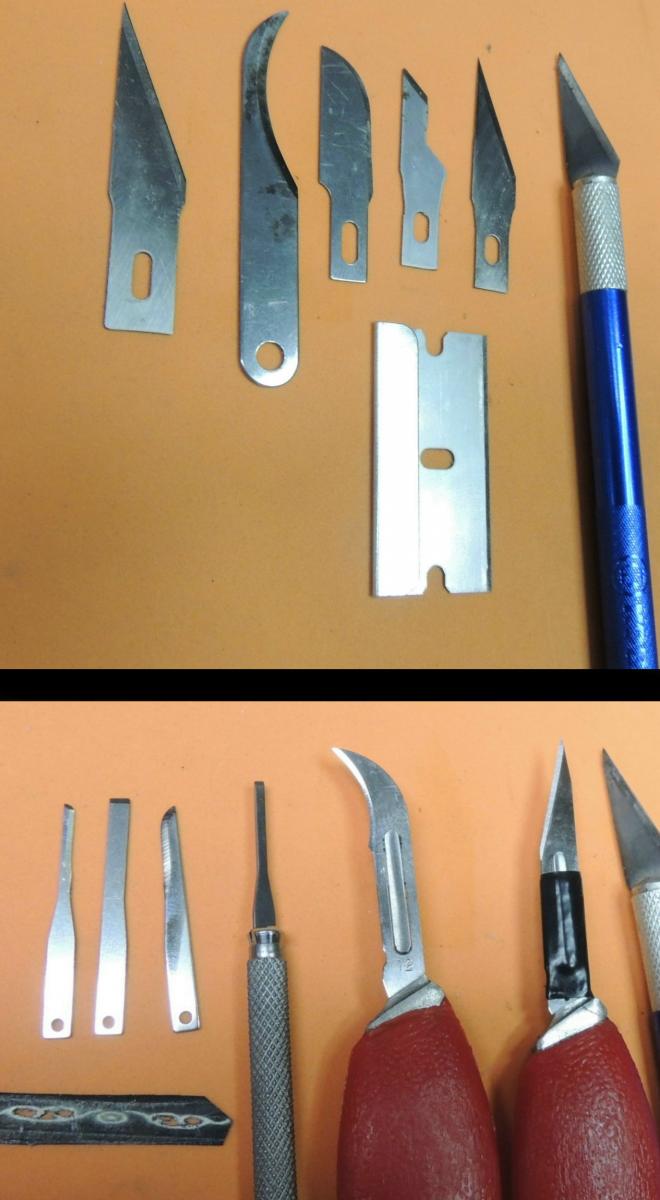
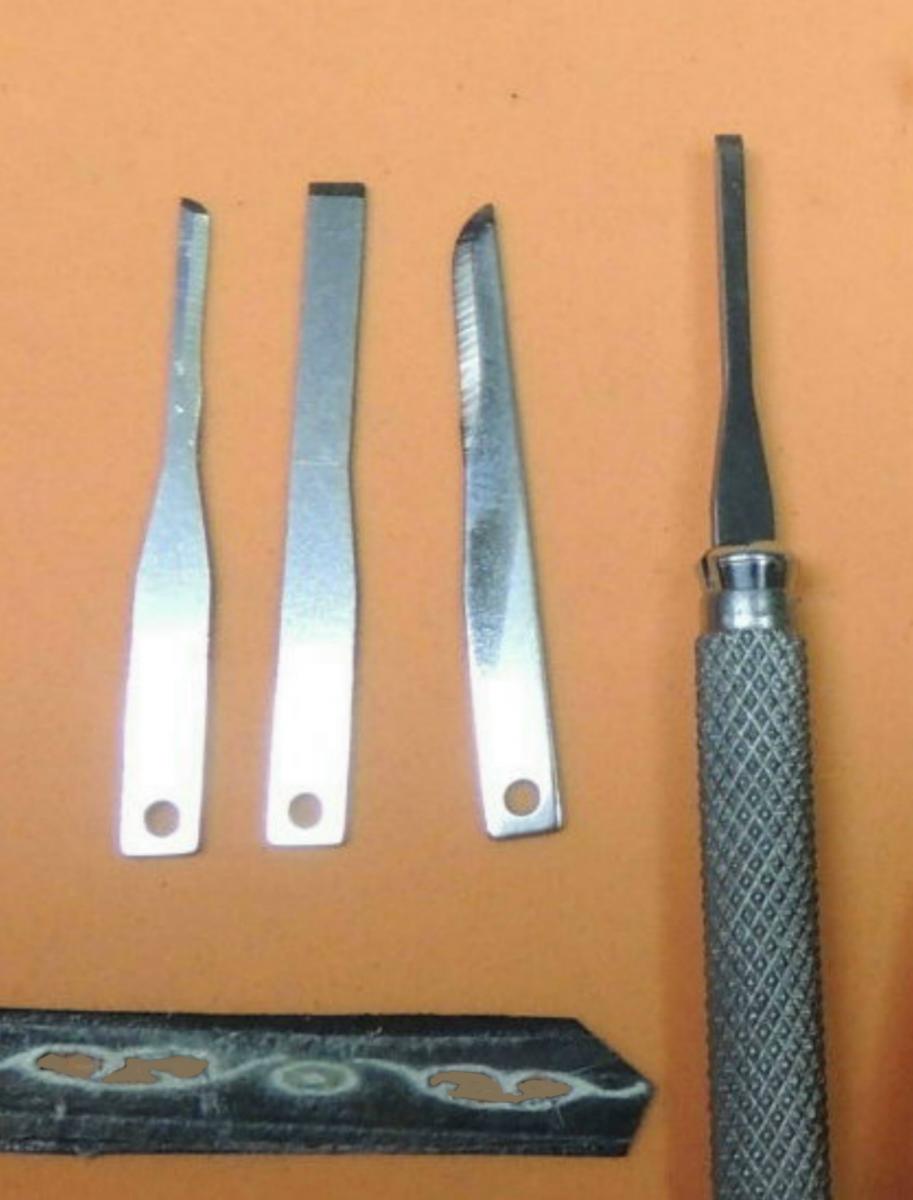
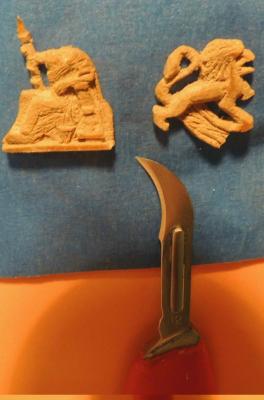
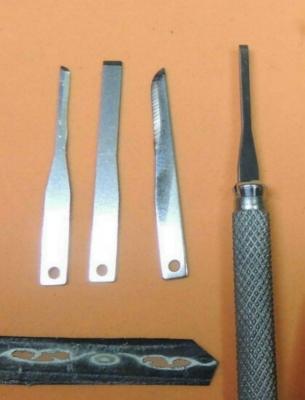
New cutting blade discovery (for me).... How many of these great X-ACTO blades do we go through in a year? For several years, I have re-sharpened and re-shaped dozens of these blades we all so rely on every day.... (top photo) With all the fine detail carving I'm trying to do now, I decided to give the Micro-Mark "scalpel" blades a go.... (second photo) As seen, the mini-scalpel set offers a great assortment of shapes, and the difference in sharpness is truly remarkable. The "clean out" of the material in the tiny scroll clip art seen here turned out much cleaner than any I have previously done with the standard X-ACTO blades I've been using. Just thought I would share this (for me) great new discovery. Well worth the small investment.

- 962 replies
-
- 8
-
-
- sovereign of the seas
- ship of the line
- (and 1 more)