HOLIDAY DONATION DRIVE - SUPPORT MSW - DO YOUR PART TO KEEP THIS GREAT FORUM GOING! (Only 13 donations so far - C'mon guys!)
×


SawdustDave
-
Posts
1,770 -
Joined
-
Last visited
Content Type
Profiles
Forums
Gallery
Events
Everything posted by SawdustDave
-
 Every ship modeler knows and appreciates these little moments of celebration..... last plank of a hull or deck, last clove hitch finishing up ratlines, last cannon rigged of a major war ship..... Here's the last carving to fill in all the broadside hull carvings of my SOS....
- 962 replies
-
- 15
-

-
- sovereign of the seas
- ship of the line
- (and 1 more)
-
Good question Greg.... The Sculpy clay doesn't begin hardening until placed in the oven..... a thin piece like this only requires 15 min at 275 degrees.
- 962 replies
-
- 3
-
-
- sovereign of the seas
- ship of the line
- (and 1 more)
-
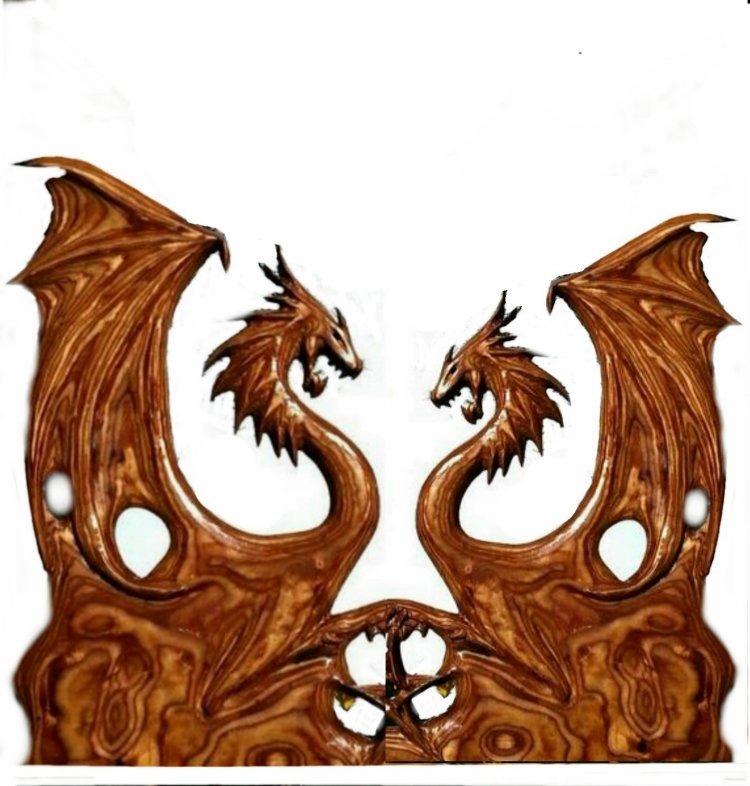
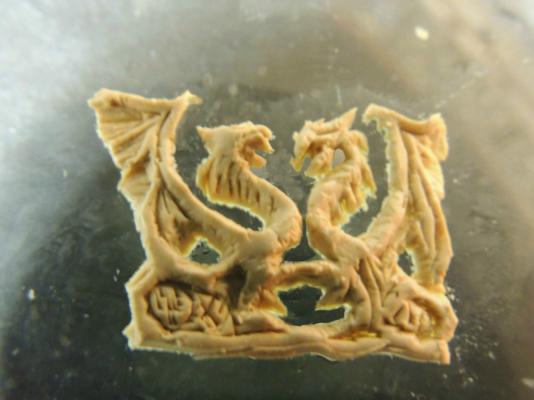
Dragons roughed out in Sculpy.... Think I will try something new with this one because of the delicate nature around the necks and heads of the dragons. Taking this to the oven on the glass used to sculpt it. After baking it to a cure, I'll build a mold box onto the glass around the figure and pour the rubber mold compound. I'm afraid to try to transfer this particular piece from the glass to another mold box.
- 962 replies
-
- 11
-
-
- sovereign of the seas
- ship of the line
- (and 1 more)
-
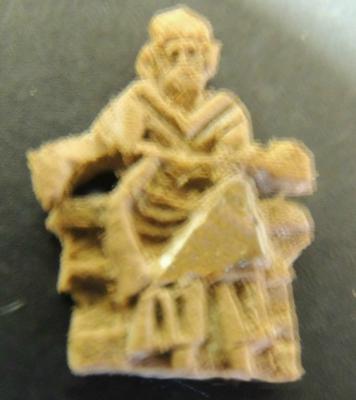
New carvings finished and placed..... The clean-up of the two new carvings went pretty well.... actually a little more detail than I expected, considering the scale. And here's the image of the carving I'm choosing to fit into that last panel. Unfortunately, I expect to lose a lot of these amazing details once I scale it down to fit in the 1/2" x 1-1/4" panel. I may have to go back to Sculpy for this one.... we shall see.

- 962 replies
-
- 13
-
-
- sovereign of the seas
- ship of the line
- (and 1 more)
-
Royal Orb....Knew I could count on you Nigel. Thanks
- 962 replies
-
- 8
-
-
- sovereign of the seas
- ship of the line
- (and 1 more)
-
Yep.... Just finished pouring the mold.....it will cure out overnight. Note that the finished plastic casting will have considerably sharper and cleaner detail. I just came in from detailing the first casting from the "birdman" mold, and it really cleaned up nicely. Should be able to post pics from both pieces tomorrow. Thanks Frank, and Greg.....always great to hear from you guys.
- 962 replies
-
- 8
-
-
- sovereign of the seas
- ship of the line
- (and 1 more)
-
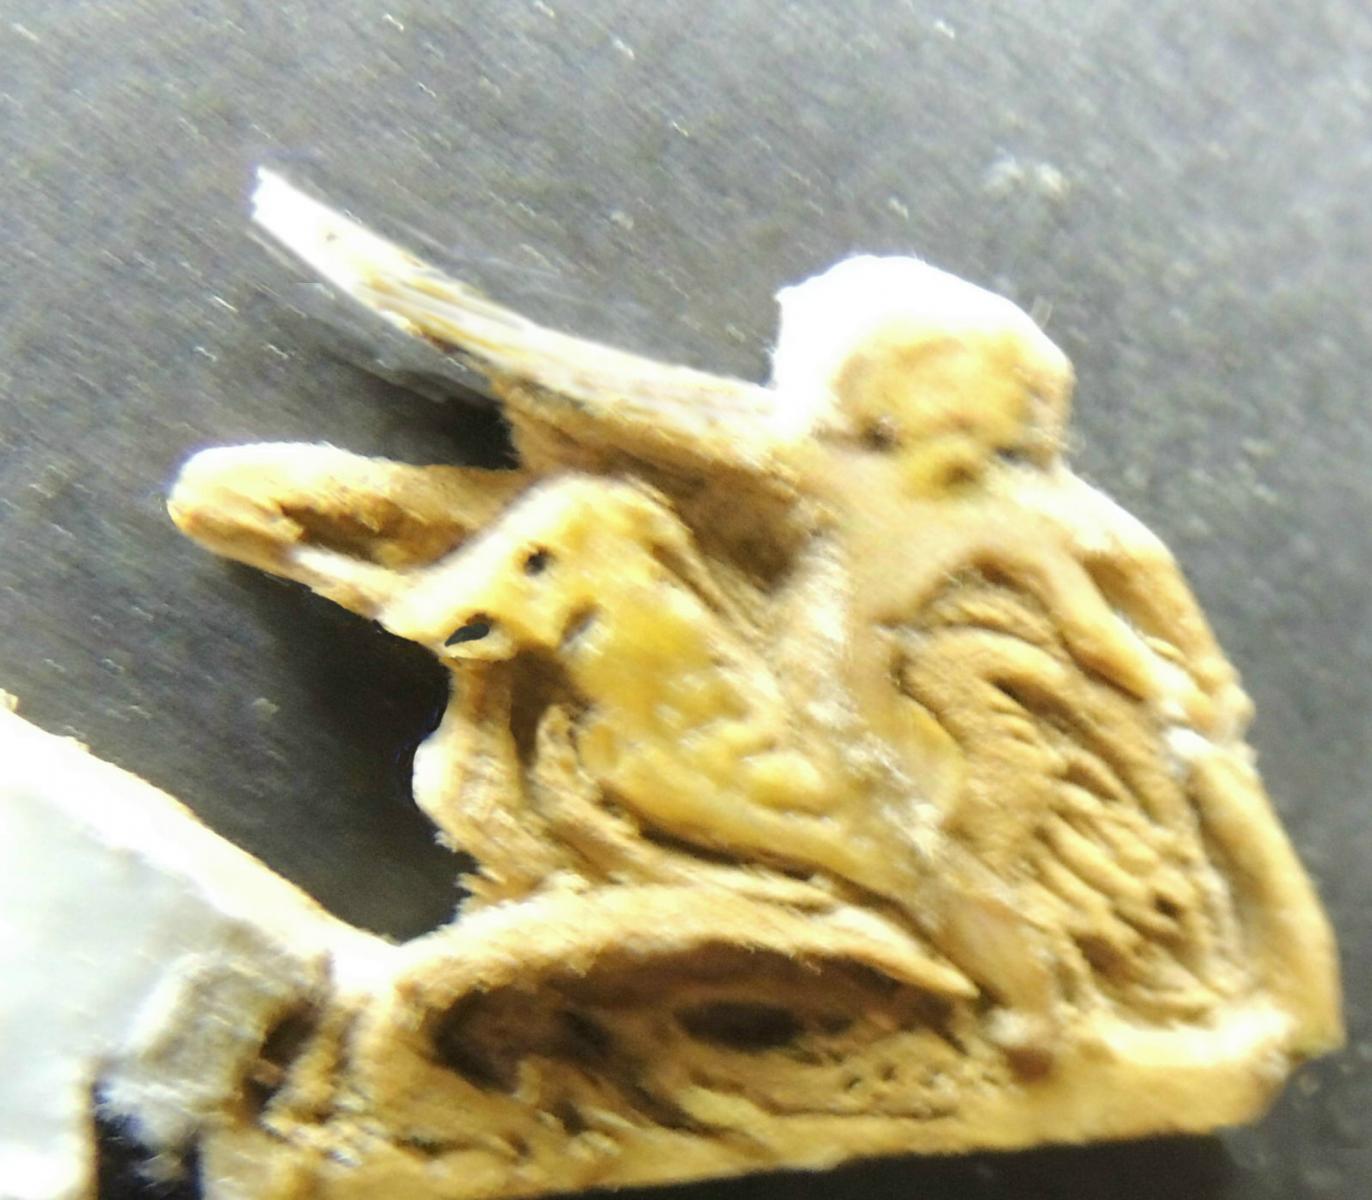
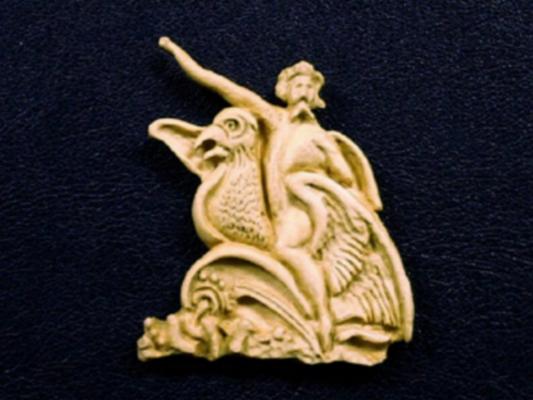
Two carvings in a day.... Note: The sword (right hand) and the ??? in his left hand will be added separately. Nasty cold weather kept me hunkered down in my warm shop all day. Forecasting more cold for the next three or four days. Heck, at this rate, I might just finish the whole build by next week.........
- 962 replies
-
- 10
-
-
- sovereign of the seas
- ship of the line
- (and 1 more)
-
Beautiful job Ulises. Man! That's a lot of gun ports! I agree with having both sides look the same. As for open vs closed lids, I personally like to close the bottom ports and open all the others, but that's just my preference. Nice organized work space mate. So many others would kill for a space like that. Keep up the good work. Dave
- 786 replies
-
- 4
-
-
- Royal Louis
- Finished
- (and 1 more)
-
While waiting for the new rubber mold to cure.... about 8 hours.... I've selected this next clip art image to begin working on for the next carving. Could that be King Chuck himself?

- 962 replies
-
- 11
-
-
- sovereign of the seas
- ship of the line
- (and 1 more)
-
Note that the height of the image was a little too tall for the panel I will be sticking it in, so I had to distort the image slightly before gluing it to the vinyl board. Also, I'll be trying something a little different with this new carving. I discovered that much finer detail can be achieved by etching and carving into the plastic casting. I think this rough shaping in vinyl will give me a sharp enough mold casting to make a decent piece. .

- 962 replies
-
- 13
-
-
- sovereign of the seas
- ship of the line
- (and 1 more)
-
Found a new rich source for carving ideas...... Pinterest.com Here's the next carving I will begin working on....
- 962 replies
-
- 11
-
-
- sovereign of the seas
- ship of the line
- (and 1 more)
-
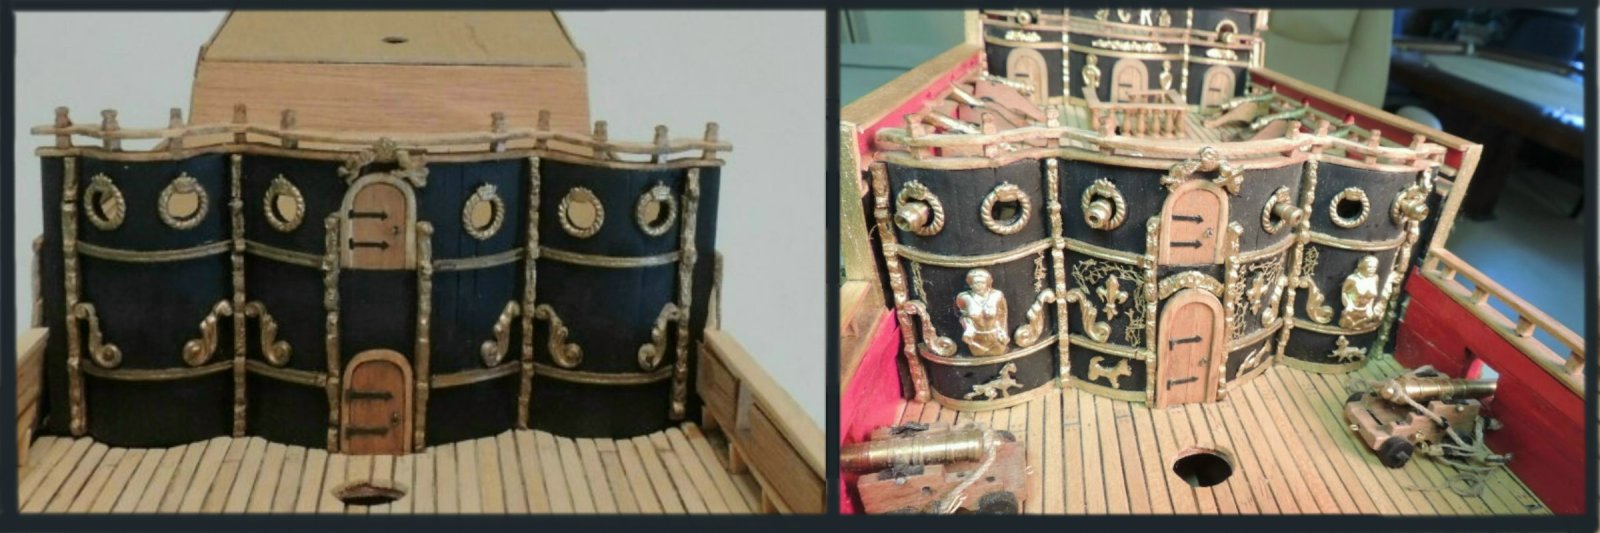
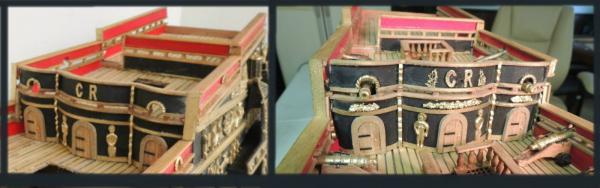
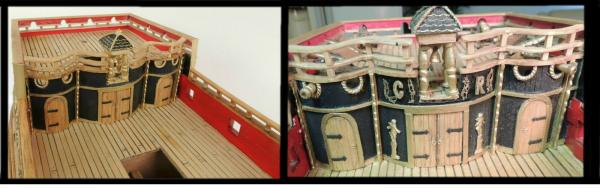
Update....Bulkheads Before returning to the few hull carvings remaining to be done, I spent a few hours re-visiting the ornamentation of the three main bulkheads on the weather decks. I have recognized all along that they still needed a little more ornamentation, but never could decide what I wanted to put on them. Here's what I came up with.... (before and after pics) May still need to tweek the area on each side of the half deck initials "CR" seen in the middle pic....

- 962 replies
-
- 16
-
-
- sovereign of the seas
- ship of the line
- (and 1 more)
-
Thought about the other hardware on the doors Piet, and concluded these doors would have always been secured internally with a heavy bar, and would have only been opened by a crew member from inside. What think ye? Not too late to add the typical rings. Also considered adding King Chuck's "CR" to the doors, but decided against it.
- 962 replies
-
- 7
-
-
- sovereign of the seas
- ship of the line
- (and 1 more)
-
Good question Vic.... I refer you to page 19.....posting #370 I think it really is a beautiful little trim that makes those panels pop in a unique way. The SOS is all about "bling", and that mesh trim allows me to bling away. Glad you like it.
- 962 replies
-
- 5
-
-
- sovereign of the seas
- ship of the line
- (and 1 more)
-
Thank you Bug for what you are doing. I gladly offer my services, as a Confederacy builder, any way I can help.
- 2,191 replies
-
- 7
-
-
- confederacy
- Model Shipways
- (and 1 more)
-
I knew Augie was having health issues, but shocked and extremely saddened to hear of his passing. His love for modeling.... And his excellent craftsmanship is a great loss to the MSW community. My sincere condolences to Diane and all friends and loved ones.
- 2,191 replies
-
- 7
-
-
- confederacy
- Model Shipways
- (and 1 more)
-
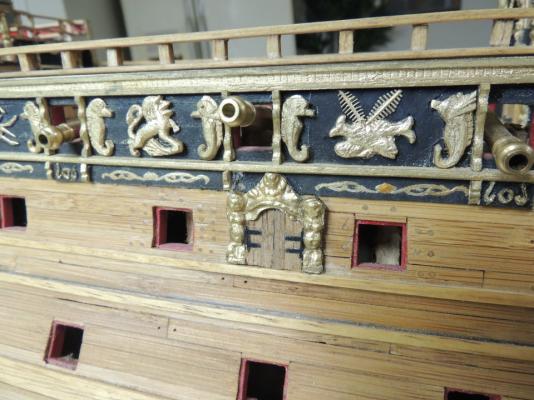
Thanks again mates. The carving and sculpting is, indeed, a major part of the SOS.... main reason for my attempting to build her. However, I am also enjoying the difficulty of all the other aspects of creating the structural parts. This morning began with another re-do.... no surprise there, huh? The main port entry, created months ago, (originally created with a sculpy piece).... was installed as an open port, with no door. Faced with adding the same entry to the starboard side, I decided it should have doors, rather than an open port shown by the old plan sheets. So I carefully removed the delicate entry....managed to get it off in two pieces with no damage. Created the doors and stuck it back in place. Using the original mold, I'll do the same for the starboard side. .

- 962 replies
-
- 15
-
-
- sovereign of the seas
- ship of the line
- (and 1 more)
-
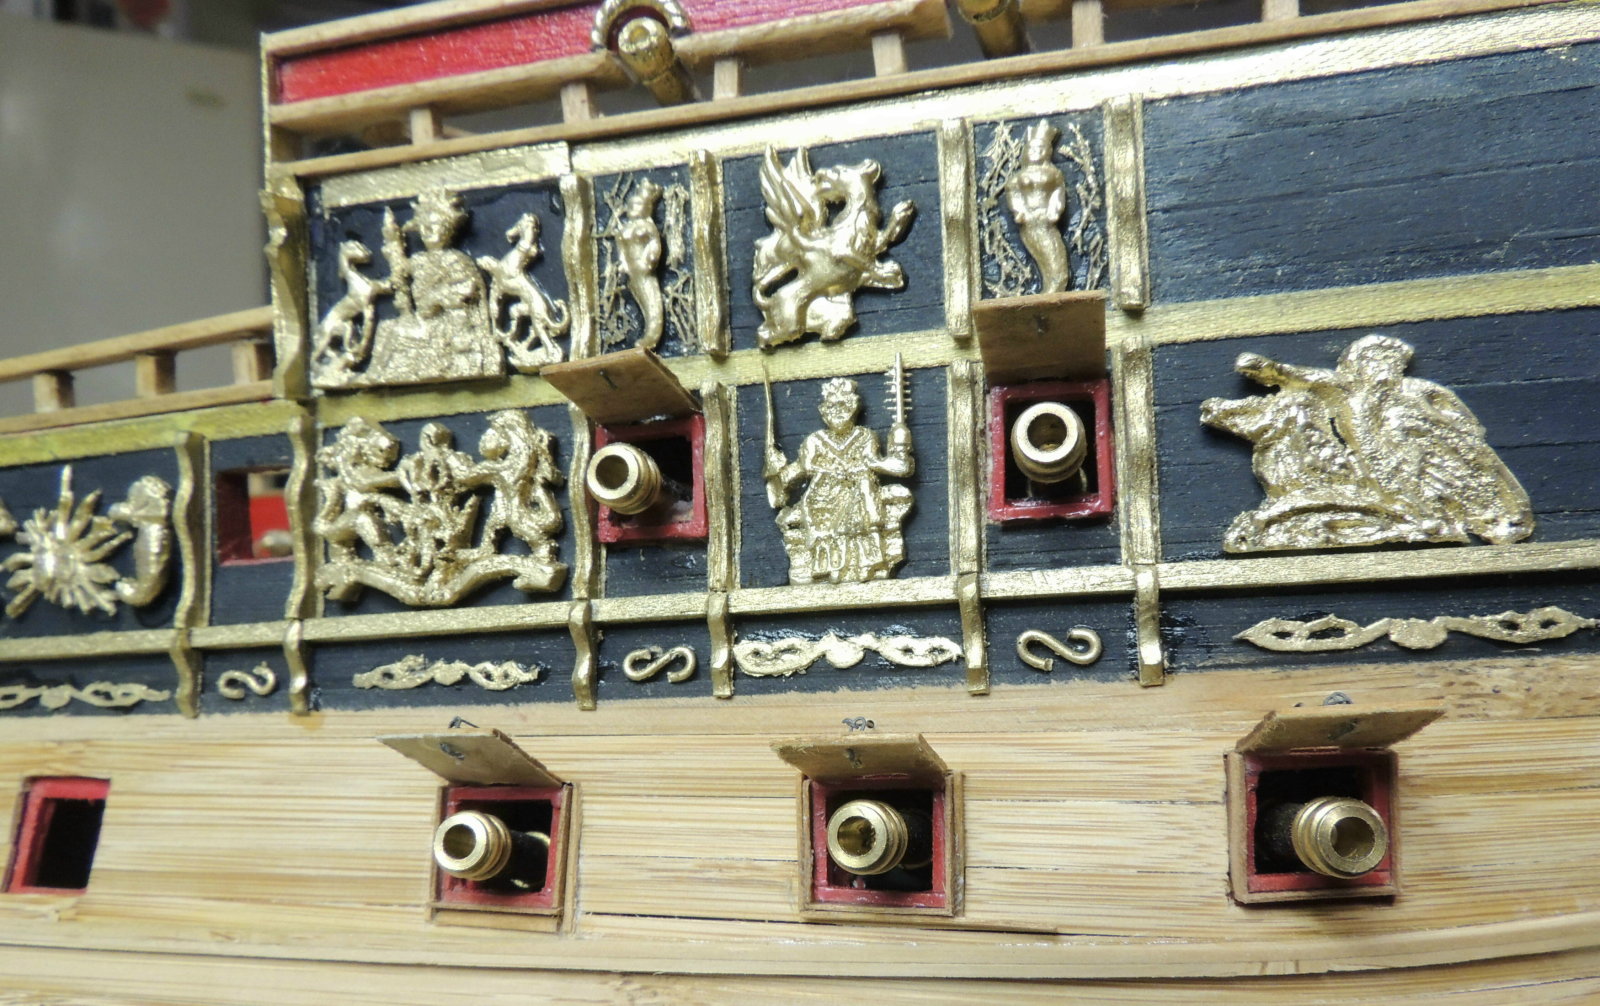
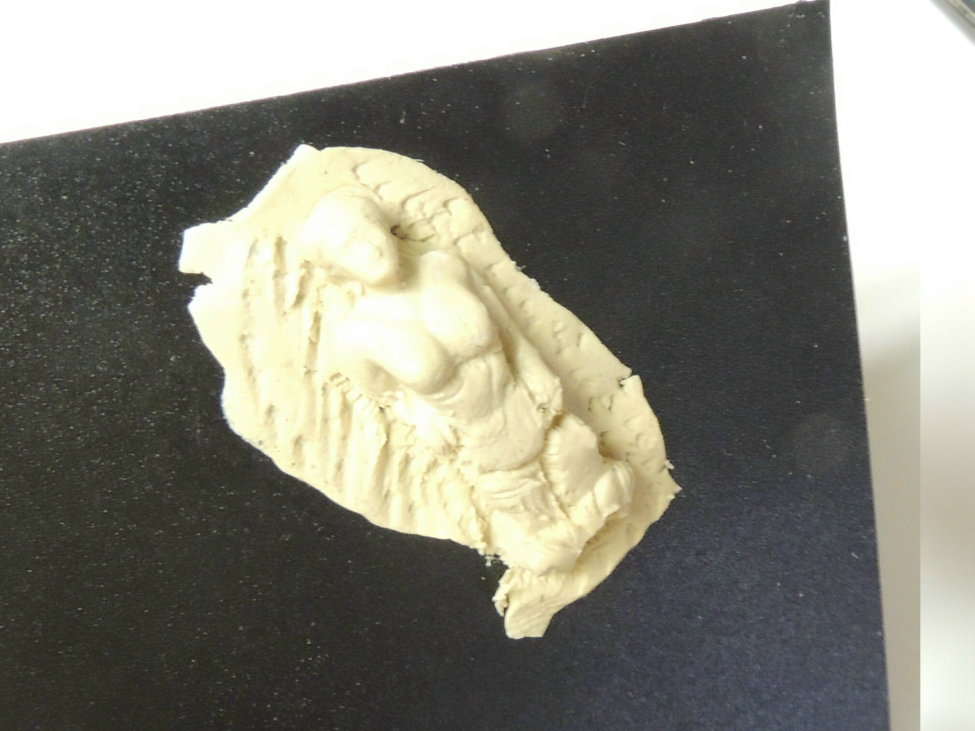
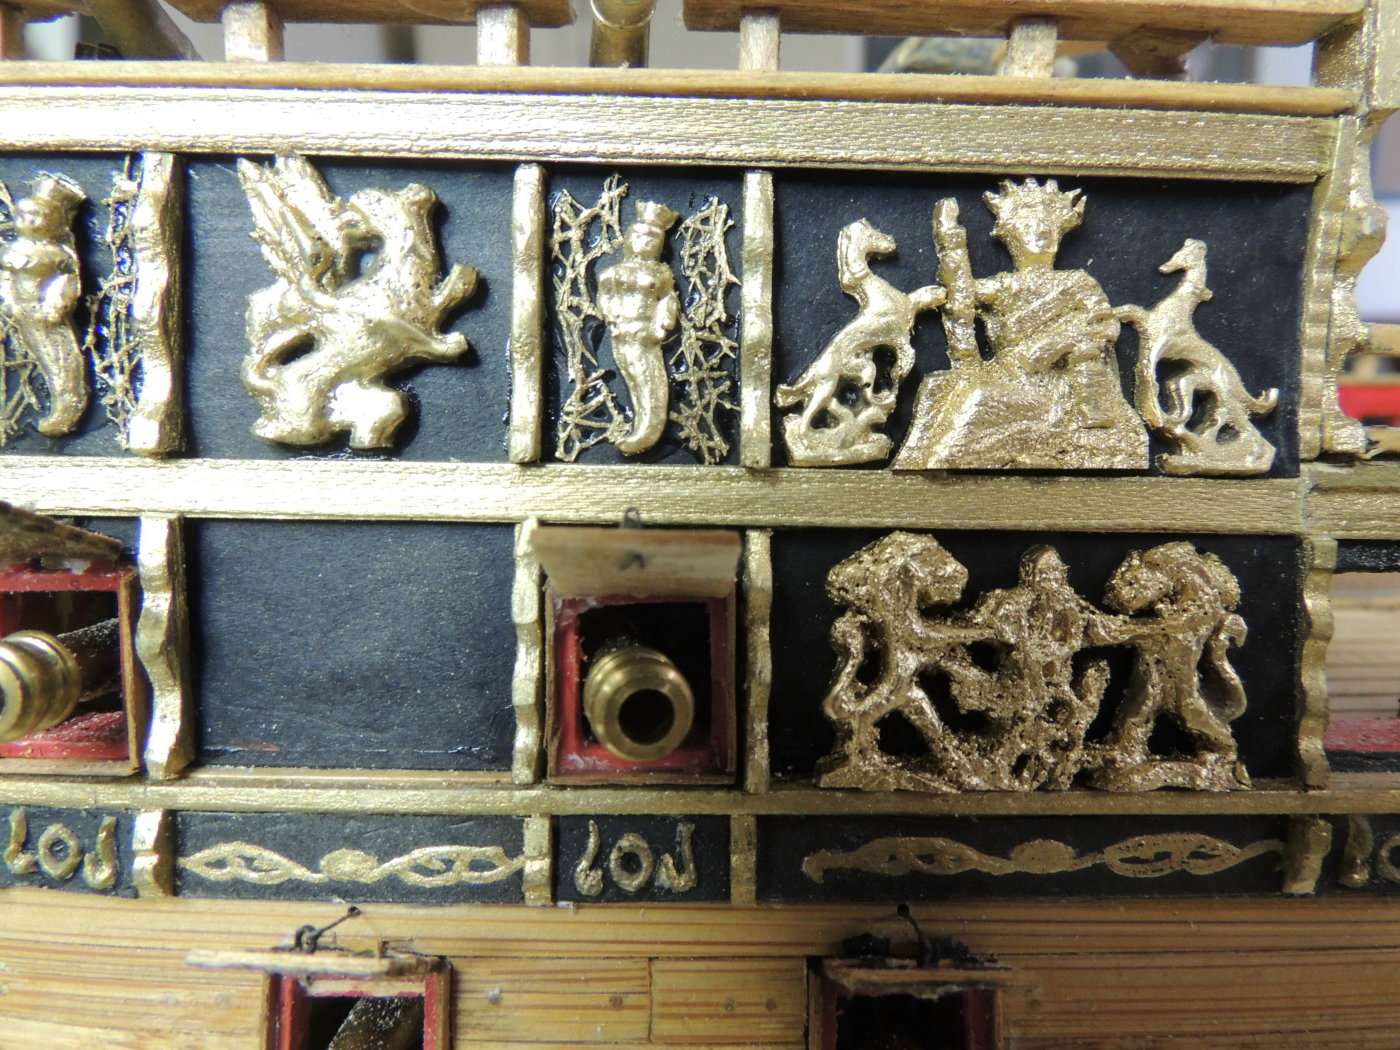
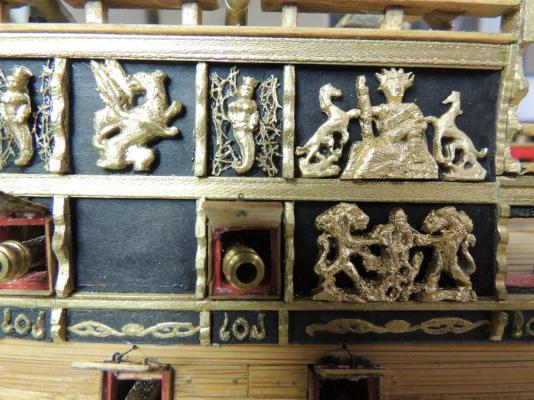
Update.... New Sculpy figure. Mostly worked on adding new cannon ports and lids the last few days. As a break from that tedious task, I took a couple of hours out to play with this new little bust figure, very much the same as the one shown in earlier posting used on the gallery panels....slightly improved. These will be added to the aft main bulkhead. Again, using sculpy.... my favorite medium for such figures. Another improvement to one of the newer panels.... the "Queen on the Throne" carving seemed to have too much blank space on each side of the carving, so I added these two very simple little horses. Works much better for my eye. I think this has turned out to be my favorite panel at this point.

- 962 replies
-
- 18
-
-
- sovereign of the seas
- ship of the line
- (and 1 more)
-
Such a truly masterful work of precision and extreme detail Alexandru. Thanks for sharing your work. Cheers Dave
-
Cutty Sark by NenadM
SawdustDave replied to NenadM's topic in - Build logs for subjects built 1851 - 1900
You will get it my friend. Cheers.- 4,152 replies
-
- 5
-
-
- cutty sark
- tehnodidakta
- (and 1 more)
-
Thanks for dropping in again Pete, Greg, Mark,and Patrick.... and all the "likes". There's still area's to come that intimidate the heck out of me. I think the real challenge is going to come when I get to the beak and stern. Most of those figures will be created using Sculpy....one reason why I just took a shot at the little "busted" lady figure. All this hull decorating stuff is just practice for those more prominent areas that really define the SOS in my mind. Hope I'm able to pull those areas off within reason. Getting closer.
- 962 replies
-
- 9
-
-
- sovereign of the seas
- ship of the line
- (and 1 more)
-
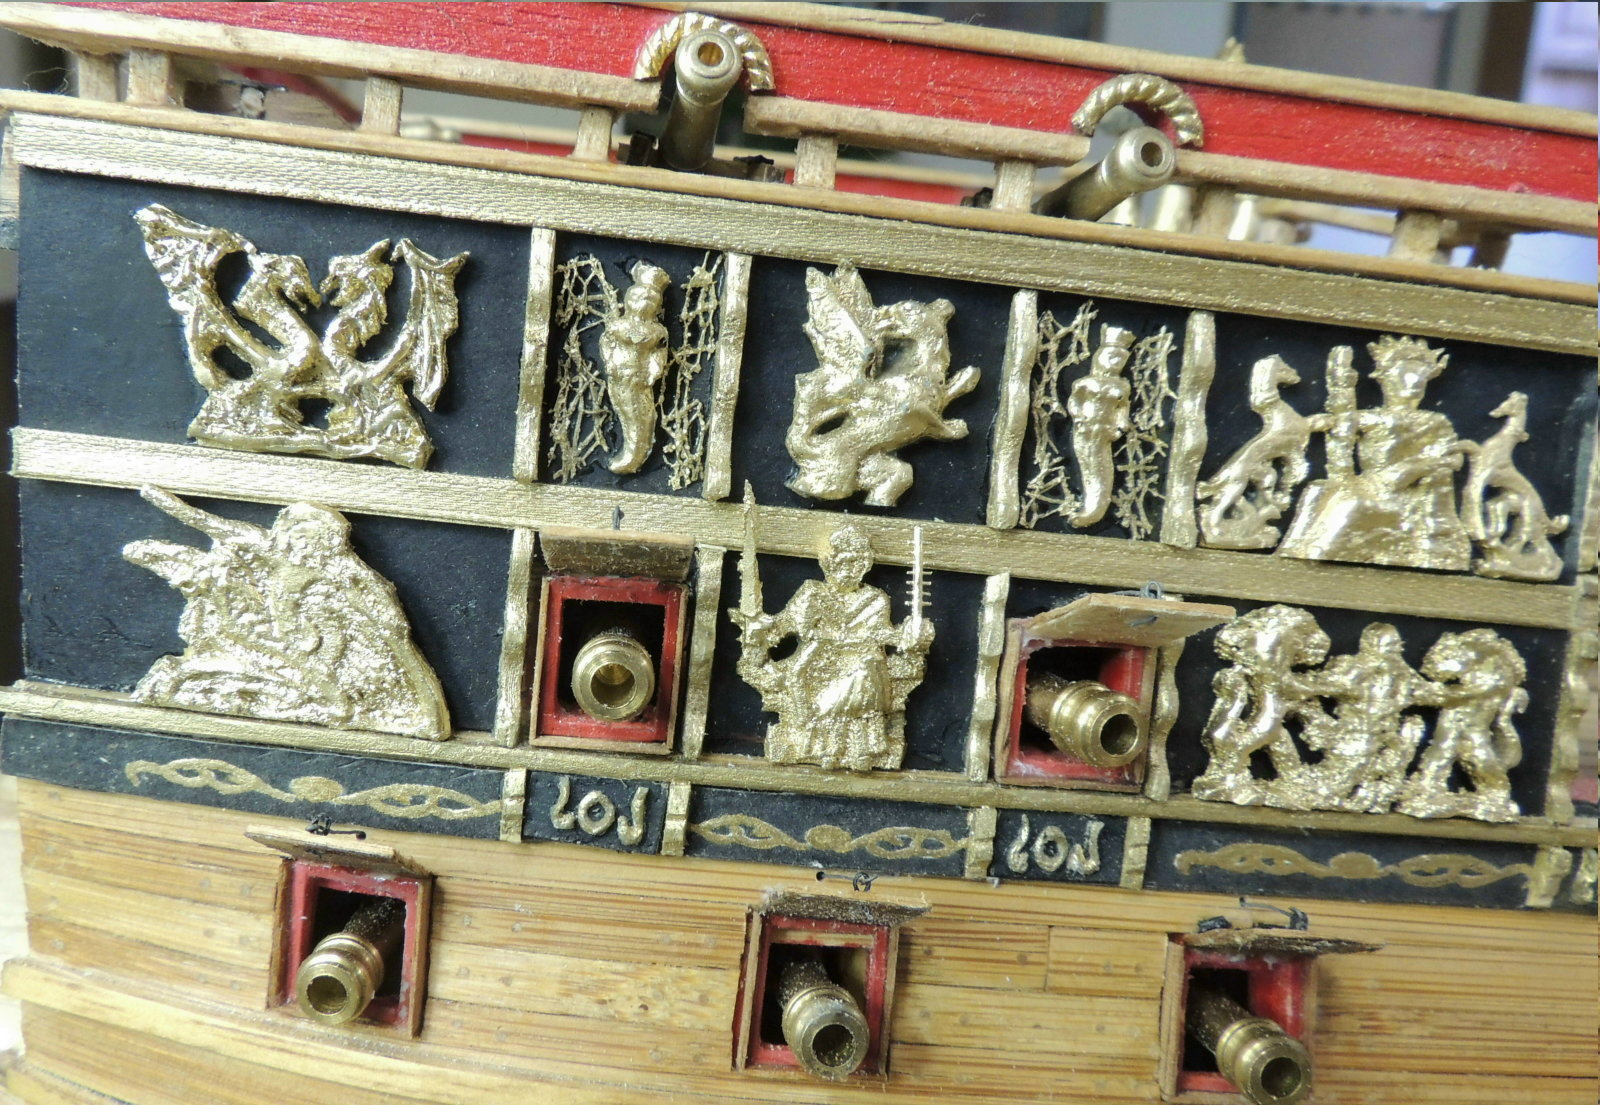
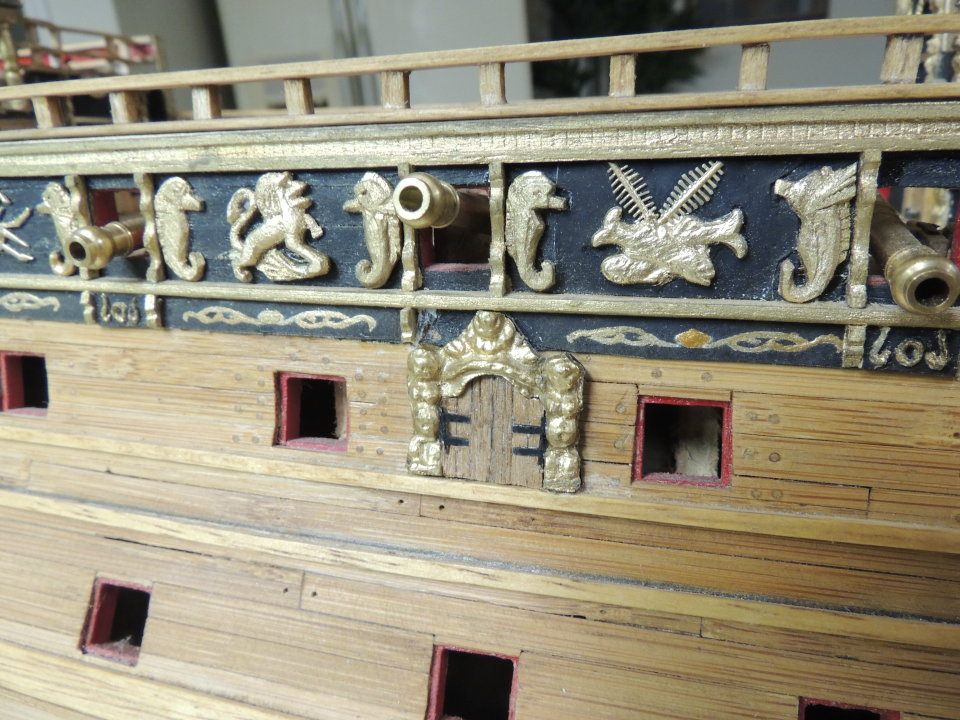
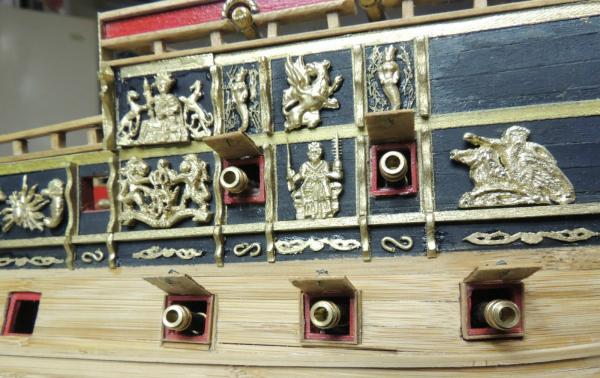
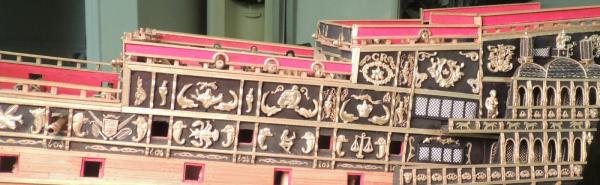
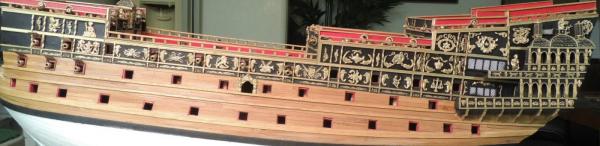
Finally managed to stick all the new stuff in place. As you can see, very few of the original panel pieces made the cut. Same goes for the starboard side, which is now very close to being exactly the same as the port side seen here. Only the three blank panels below the forecastle left to complete the broadside hull carvings. Haven't decided what will go there, but, we shall come up with something eventually. For now, I think I will work on a few more gun port lids and possibly rig another cannon or two.
- 962 replies
-
- 16
-
-
- sovereign of the seas
- ship of the line
- (and 1 more)
-
Information overload Ed.... My head just exploded! However....my son is a serious amateur camera jockey, and might be able to help me decipher your friendly guidance.
- 3,618 replies
-
- 6
-
-
- young america
- clipper
- (and 1 more)
-
As beautiful as your work is Ed, I continue to be almost as impressed with your photography. Every pic is perfectly lighted to clearly show the colors, and fine detail. Very few, including self, are capable of doing the quality of work where we would even dare let the camera capture all of our little freckles and pimples..... Adding to that, you even have fingernails! Cheers Dave
- 3,618 replies
-
- 5
-
-
- young america
- clipper
- (and 1 more)