HOLIDAY DONATION DRIVE - SUPPORT MSW - DO YOUR PART TO KEEP THIS GREAT FORUM GOING! (89 donations so far out of 49,000 members - C'mon guys!)
×


SawdustDave
-
Posts
1,770 -
Joined
-
Last visited
Content Type
Profiles
Forums
Gallery
Events
Everything posted by SawdustDave
-
 Your craftsmanship continues to amaze me Remco. Also.... I am so close to ordering me a milling machine (once I accumulate enough points from the Admiral).
- 1,215 replies
-
- 4
-

-
- sloop
- kingfisher
- (and 1 more)
-
Nicely done on the re-do Toni. We've all "been-there-done-that". Believe me, I've done some real doozies. Great looking paneled bulkheads and doors. Dave
-
Stunning! Just stunning! What a fine shipwright you are sir.
-
Beautiful build Nigel. You have made this highly unusual model really come to life. Love the colors.
- 270 replies
-
- 4
-
-
- red dragon
- artesania latina
- (and 1 more)
-
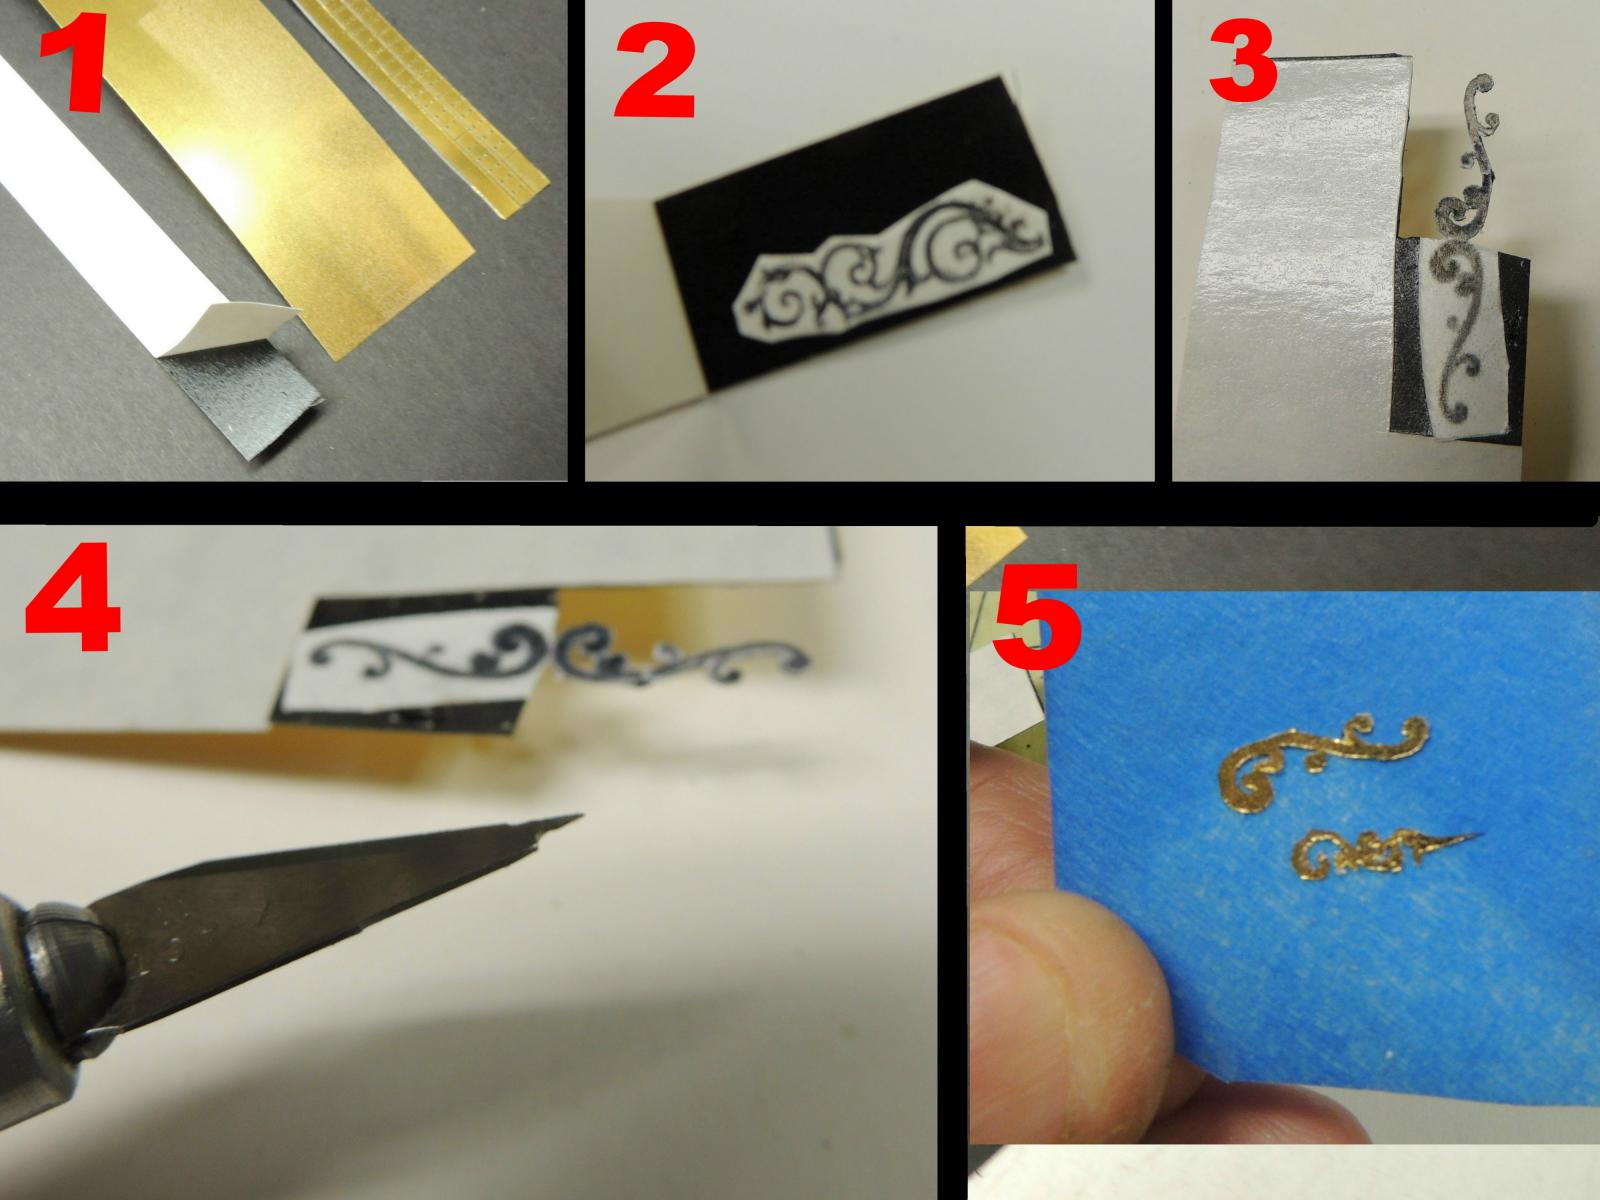
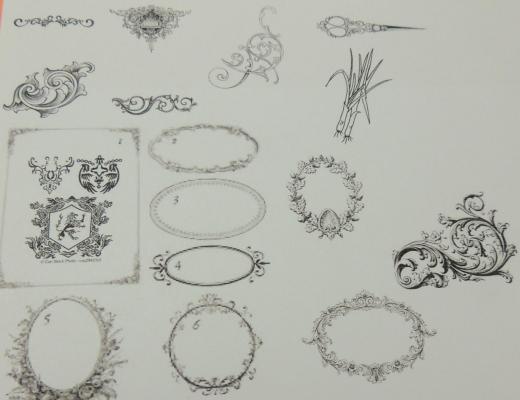
Technique..... Using clip art to create ornamental scroll sculptures. Long searching and trying several different methods of creating scroll sculptures for the SOS.... I found that I had an excellent solution in my boneyard all along. I had used, but forgot about, the metallic "peel and stick" sheets a few years ago to create the copper plating of the Syren. I searched and found that these can still be purchased online. The 5 pic collage below illustrates my simple technique for anyone interested.... Pic 1.... The peel and stick sheet. Pic 2... Sticking the clip art to the sticky side. Pic 3... Shows a half completed cutout of a clip I am working on. Pic 4... Dressing the tip of my X-Acto blade for very fine detail trimming. Pic 5... Mounting the cutout onto blue painters tape for spray painting. Note: After spray painting, the edges smooth out very nicely. Also, you can add thickness to the painted piece by applying additional coats of metallic paint using careful dabbing with a tooth pick application.

- 962 replies
-
- 12
-
-
- sovereign of the seas
- ship of the line
- (and 1 more)
-
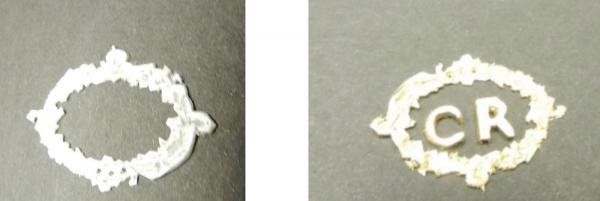
Interesting factoid..... The initials "CR", repeated so many times on the SOS.... the "C" I figured was for "Charles". So what is the "R" for" So I browse around and found this little known factoid.... "CR" is the initials for "Carolus Rex".... (‘King Charles’). This foolish man was a virtual 17th century Donald Trump on steroids!

- 962 replies
-
- 8
-
-
- sovereign of the seas
- ship of the line
- (and 1 more)
-
First new carvings.... The fancy scroll wreath around the "CR" is my first carving in over three months. Used one of the clip art pics posted above for the wreath. Photo's show before and after painting.... (my photography skills still pretty poor).
- 962 replies
-
- 11
-
-
- sovereign of the seas
- ship of the line
- (and 1 more)
-
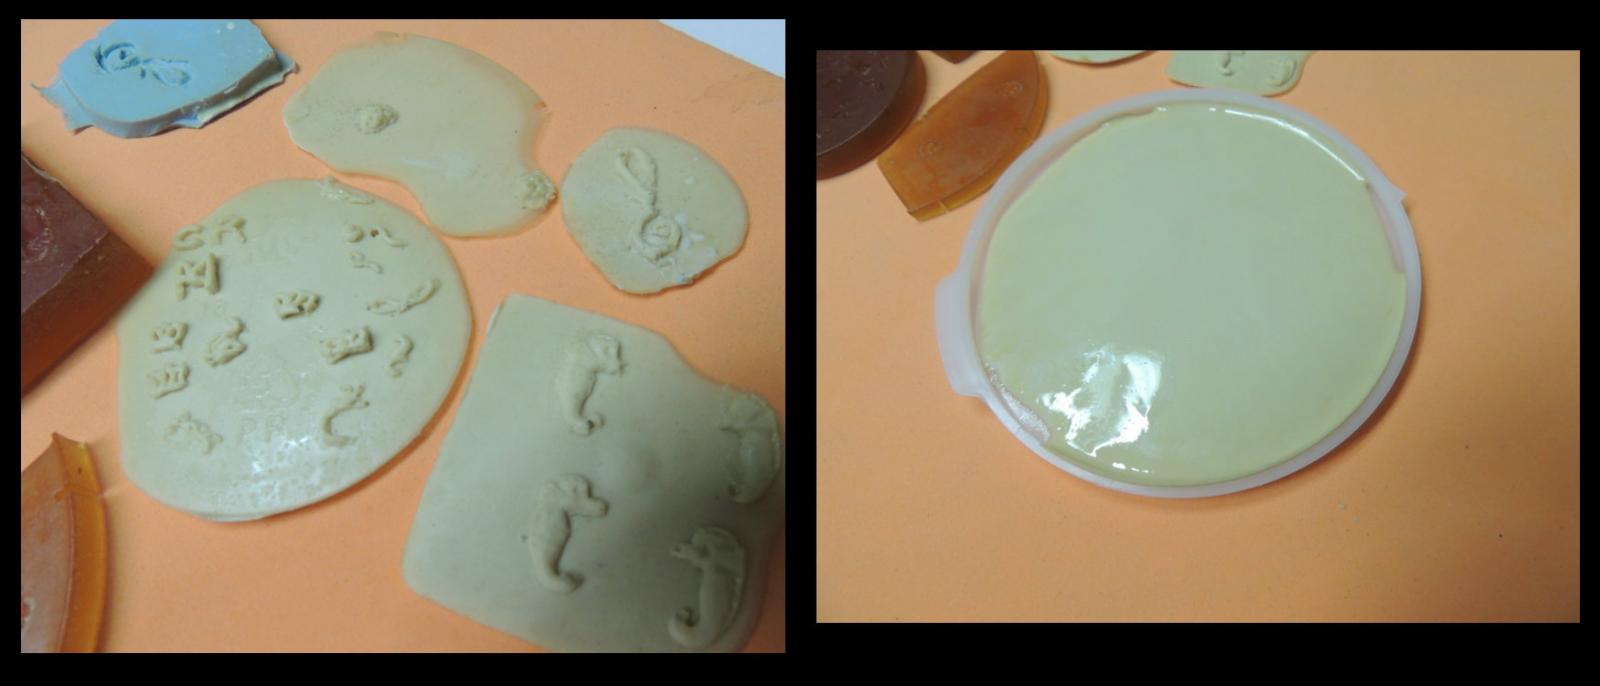
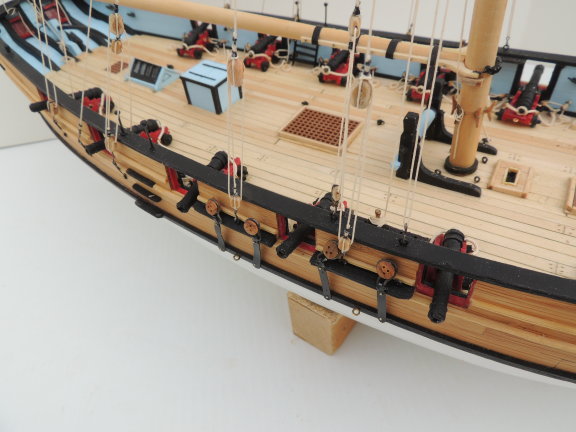
SLOW START..... After cleariing up the shop and bringing the SOS back to the table, I am beginning with dusting off some of the casting molds I created for some of the carvings used on the port side. The big round one on the right was poured to create a thin sheet of plastic I will be using to create many of the fancy scrull work carvings. Realizing I will be needing quite a few new fancy scroll carvings, I went to the internet and found a virtual gold mine of clip art. Why try to freehand the scroll carvings with this material available.... right? There are many more.... amazing!

- 962 replies
-
- 11
-
-
- sovereign of the seas
- ship of the line
- (and 1 more)
-
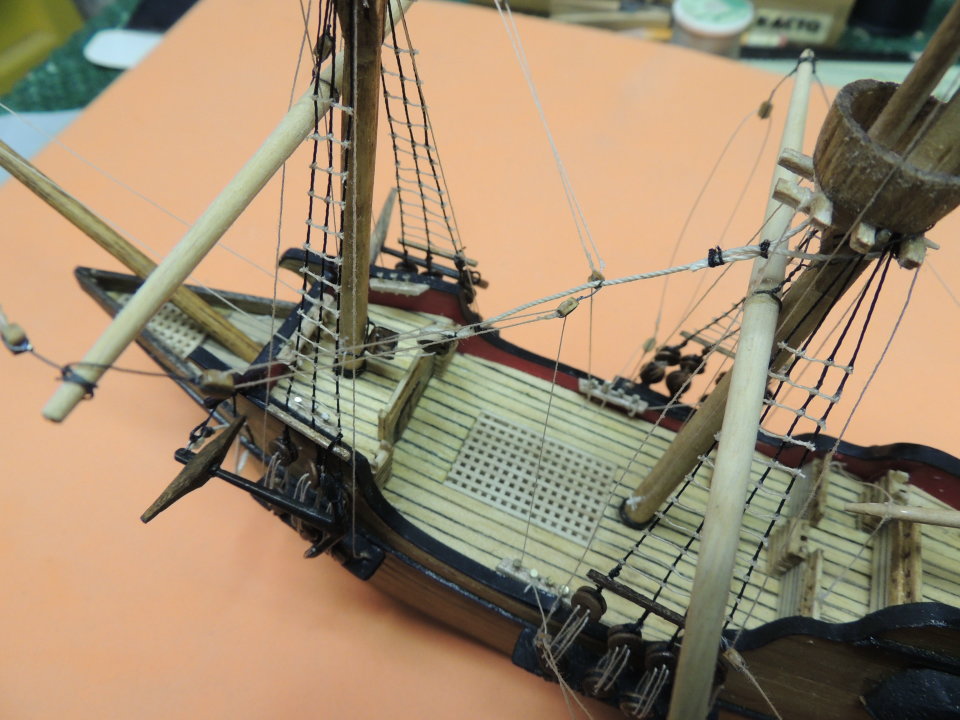
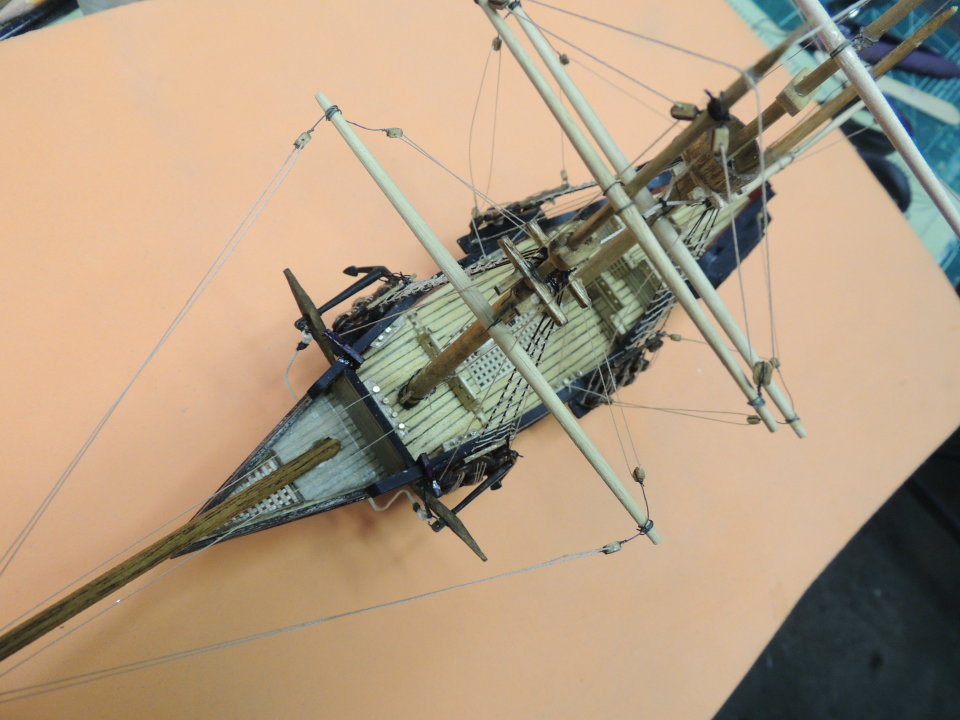
Back to work after three months of complete focus on the Cutter "Pillsbury", along with the little decoy ship. Spent the morning putting away all the rigging tools material (rope, blocks, dead eyes, etc.).... clearing my work area and bringing the SOS back to the table. First impression..... "Man, this is a big model!" Second impression.... "Where do I begin?" At this point, I'm a little intimidated by the realization that there is so much more to do with this build yet. Slowwwwwww down boy. Lonnnnnnng way to go.
- 962 replies
-
- 8
-
-
- sovereign of the seas
- ship of the line
- (and 1 more)
-
Thanks guys. I agree with the "Wowed" comment Ken. The first couple of minutes of the video was edited out in order to create a fairly small file for viewing. The introduction of the little decoy ship was funny as it could be, and he bought into the mis-direction plan "hook line and sinker"! The look on his face, when told he could choose either, "ship A or ship B", was priceless. I'm so glad you folks dropped in to share the moment and witness the infectious personallity of this wonderful physician. Obviously, this has been a rewarding project....well worth the effort. Thanks all for your visits and community support. Now.....back to the SOS. Hope we will see ya' there.
- 209 replies
-
- 17
-
-
- cheerful
- Syren Ship Model Company
- (and 1 more)
-
Ship presentation to Dr. Pillsbury.... Yesterday went extremely well. Dr. Pillsbury was completely surprised. I'll let the video speak for itself. Enjoy https://www.youtube.com/watch?v=sSFWm6nc-ag
- 209 replies
-
- 21
-
-
- cheerful
- Syren Ship Model Company
- (and 1 more)
-
Thanks again guys. It felt strange to sleep in this morning with no pressing reason to open the shop at 5:00 am as usual. Admiral is nervous about her duties of shooting the presentation video with my Ipad camera. Spent 30 minutes going over both models and cannot find anything to tweek at this point....all good to go. Ken.... at this point, I am planning to bring the decoy back with me as a personal reminder of the whole project. Guess I have become rather fond of the cute little thing. Now we're looking forward to dusting off the SOS build.
- 209 replies
-
- 15
-
-
- cheerful
- Syren Ship Model Company
- (and 1 more)
-
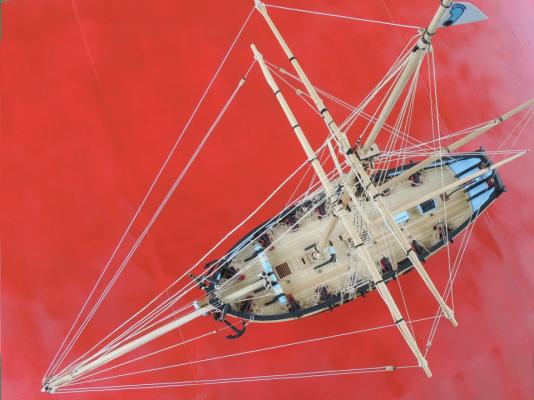
FINISHED.... Update Tomorrow is the big presentation day! So, today, I finished up the little decoy ship and took a few quick pics, seen below. Tomorrow should be a lot of fun for the entire staff of Dr. Pillsbury. Here's the finished decoy ship....


- 209 replies
-
- 16
-
-
- cheerful
- Syren Ship Model Company
- (and 1 more)
-
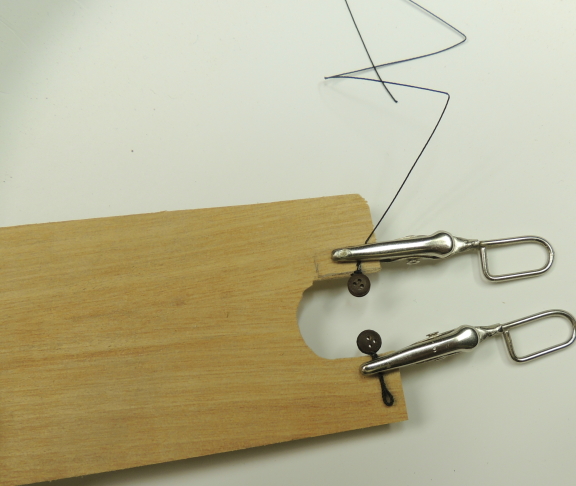
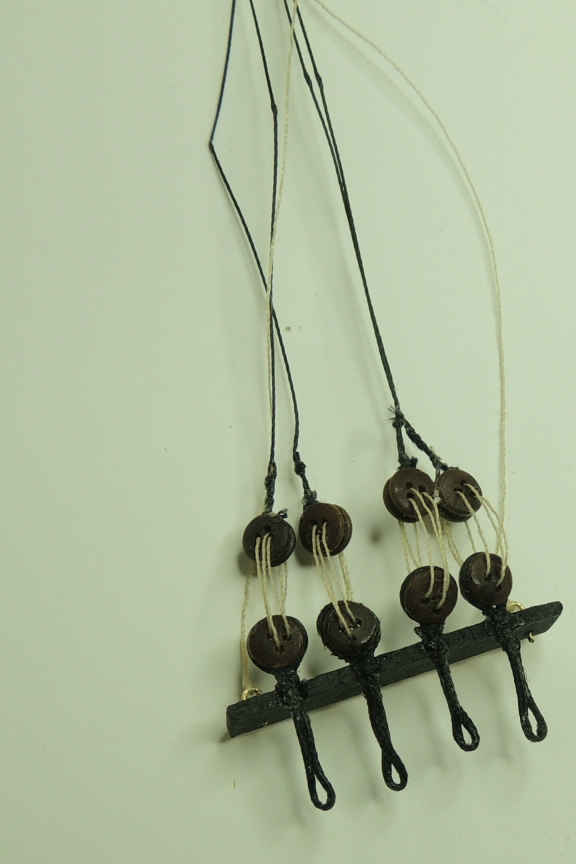
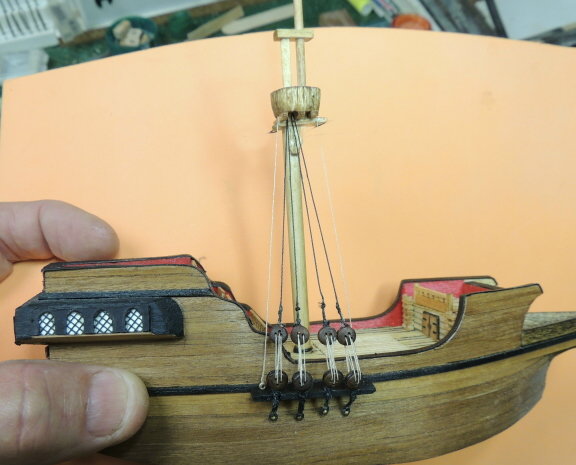
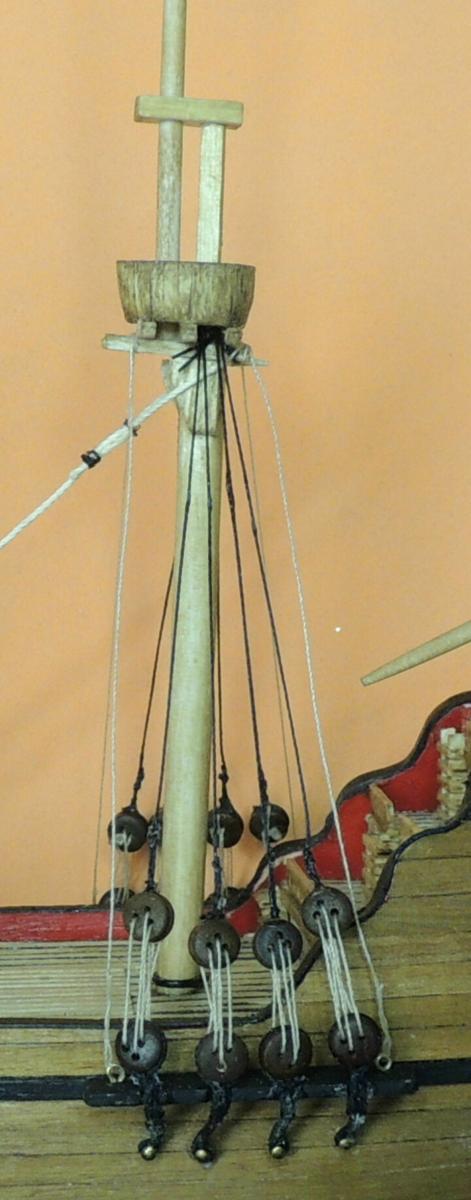
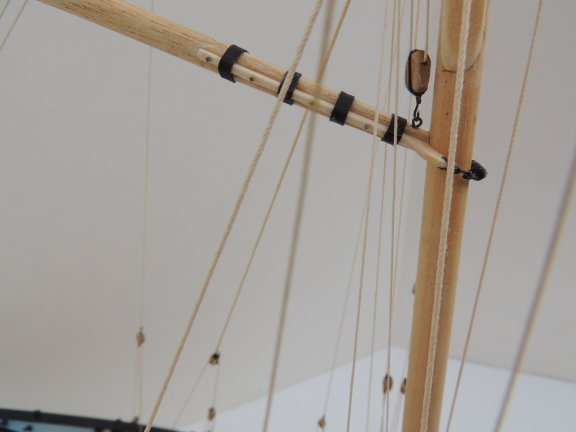
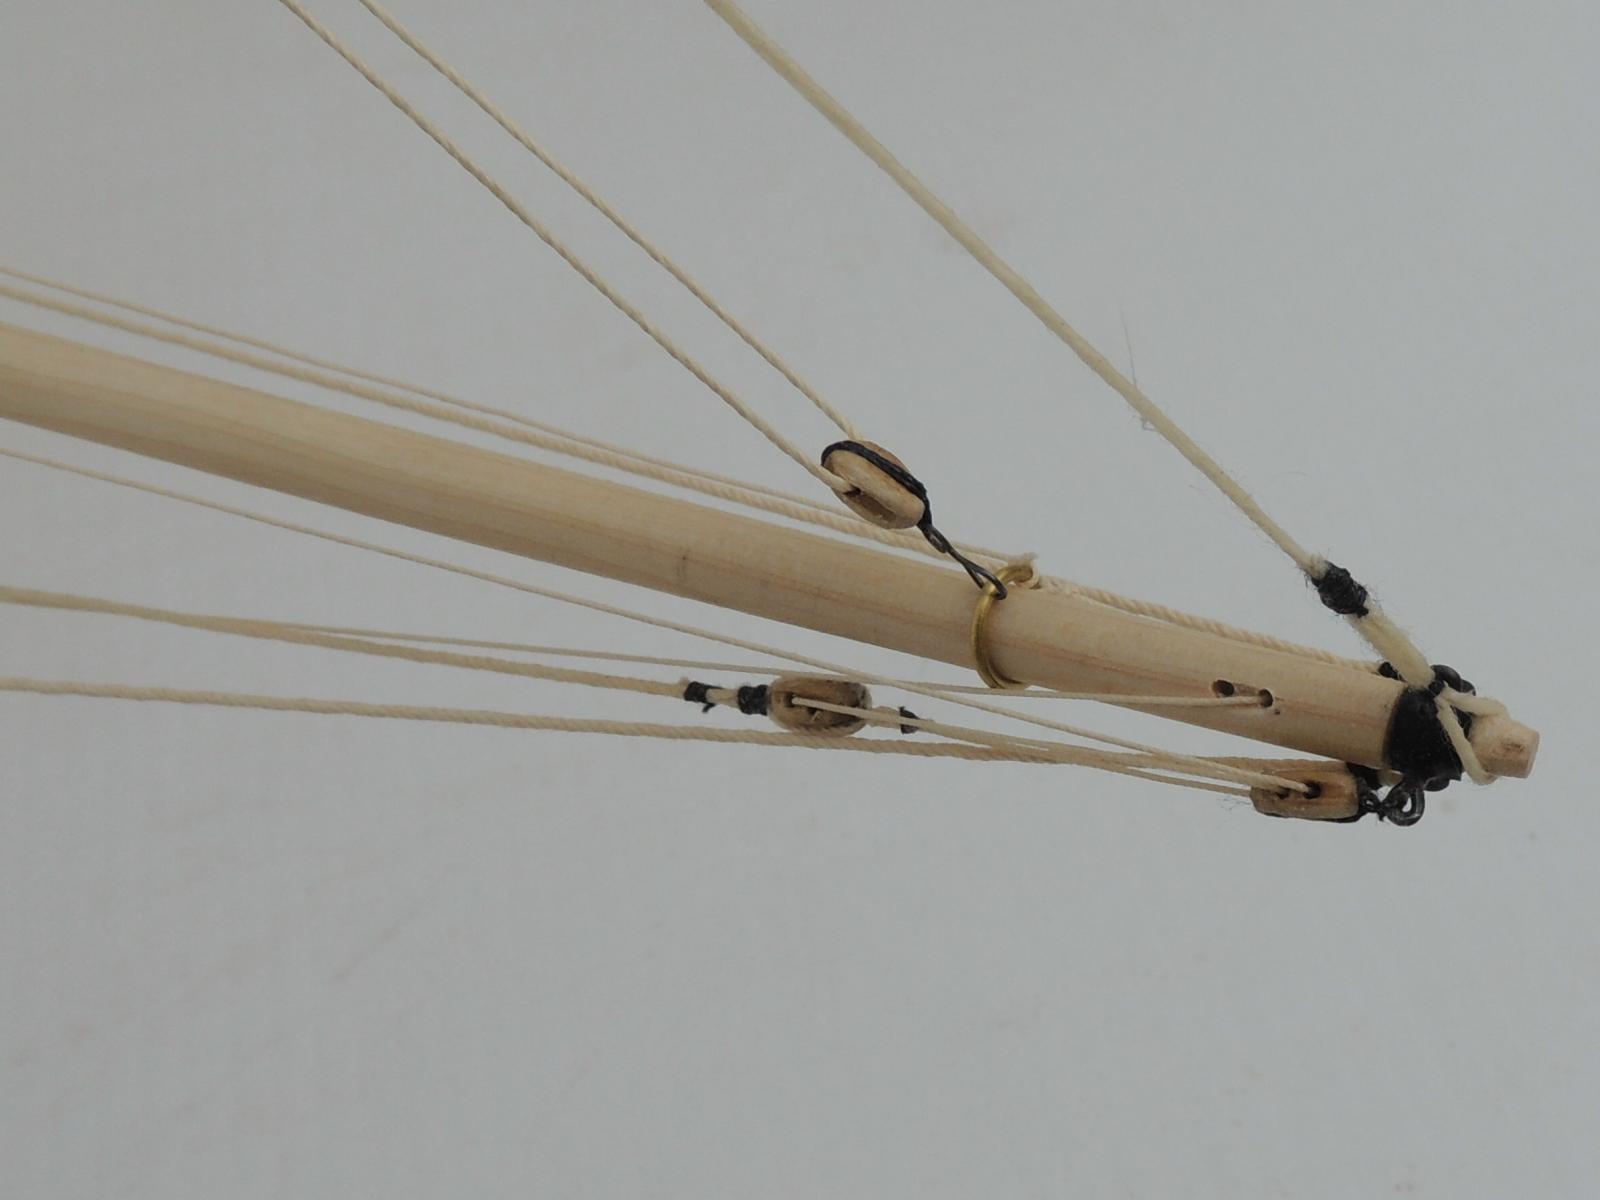
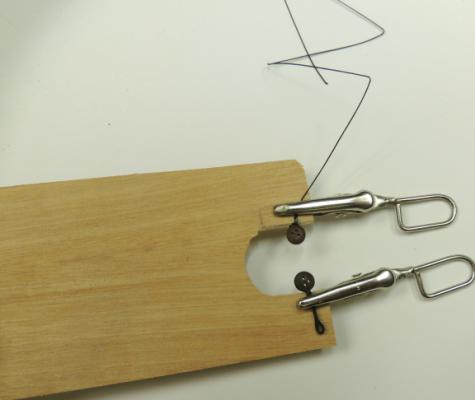
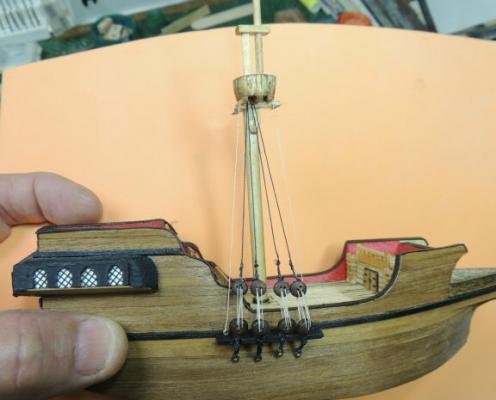
Back to the shop....update After finishing up the Doc's ship, we took a couple of days for some holiday visitation, enjoyed friends and family, and ate way too much good food. Gave a lot of thought to just how crazy I want to get with the little decoy ship, and decided it will most likely be a matter of just wait and see how it goes from here. Scale is right much of an issue, although I found that I still have quite a few very small scale blocks and dead eyes left over from my mini-vic project three years ago. Built the masts before the holiday break, then, worked most of the day on getting some channels and shrouds rigged....pretty tricky due to the scale. Managed to pre-assemble the pendants, shrouds, and chainlink to the channels and then glue the assembly to the wales and nail them in prior to pulling the rigging through the cross trees. Here's a couple of process pics.... And here's where I am as I turn off the lights for the evening....


- 209 replies
-
- 17
-
-
- cheerful
- Syren Ship Model Company
- (and 1 more)
-
Speaking of Cub Scouts, and Pine Wood Durby racing.... Went through that with my son, and then two grandsons. Learned after the first year, the kids are only competitive if the dad becomes heavily involved. Much more so than simply "coaching". That was the last year my boy's Pine Wood Durby racer did not win "Best in Show" and fastest. Fond memories for sure. Anyone interested, I will gladly share my secret to "fastest". You can PM me on that subject.
- 209 replies
-
- 9
-
-
- cheerful
- Syren Ship Model Company
- (and 1 more)
-
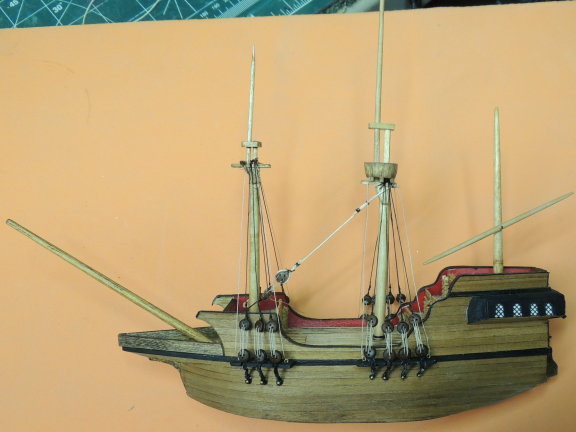
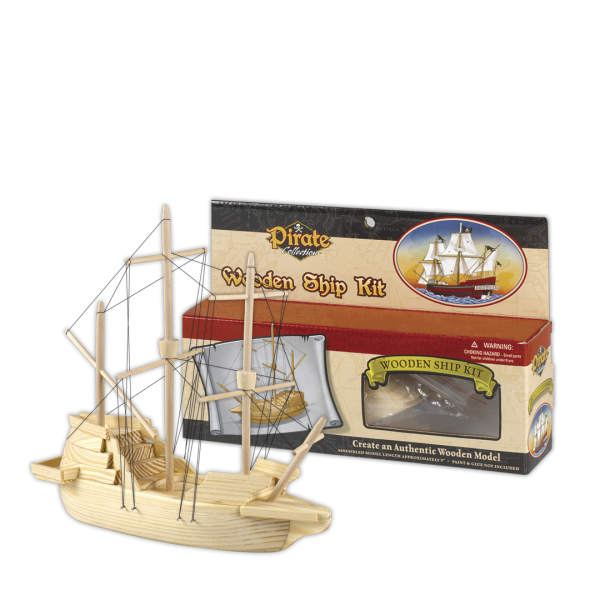
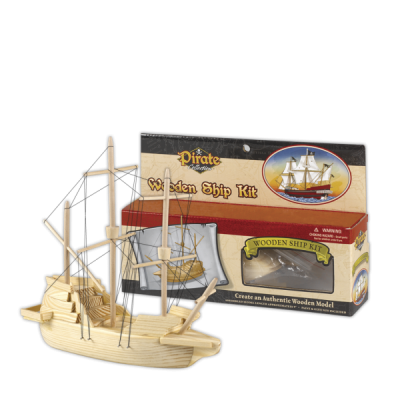
As a reminder, (found it online) here is the little $14.99 kit I started with.... Like I said earlier, it was given to me as a joke, and, as you can see, it's about as sophisticated as a cub scout pine wood derby racer kit.
- 209 replies
-
- 13
-
-
- cheerful
- Syren Ship Model Company
- (and 1 more)
-
Finally got a little browse and learning time today Toni, and headed straight for your amazing log. Now, I'm sitting here plotting how I will pull off the purchase of a new toy and keep it OFF THE BOOKS.. The Admiral thinks I have way too many toys in the Ship Yard already....imagine that. I'm thinking I can sell a DeWalt thickness plainer, and my large shop lathe....both pretty much gathering dust since I took up modeling. Thanks for the tutorial. Love your work. Dave
-
WOW! I'm blown away with all the wonderful comments.....even from mates I have not had the pleasure of previous exchanges. To those of you who have followed this special build from the beginning (seems like yesterday), I cannot thank you enough. So many to name, but especially George, Jesse, Piet, Augie, Mark, Frank, Ken, Rusty, Nigel, Patrick, Jack, David, John, Toni, Druxey, Brian, CaptSteve, Pete, Yves,....I know I must be leaving some out.....apologies to those. Just know I love you all, and thoroughly enjoy your excellent modeling skills, and try to learn from each and every one of you every day. God bless the Model Ship World community. All the pressure now relieved, I had fun in the shop today, picking up on the little decoy ship. It seems so tiny, after working on the larger ship for the last month. All I can say is, I promise it will be cute as a puppy when I finish with it. Just think, I will be jumping from that little thing back to the SOS!
- 209 replies
-
- 11
-
-
- cheerful
- Syren Ship Model Company
- (and 1 more)
-
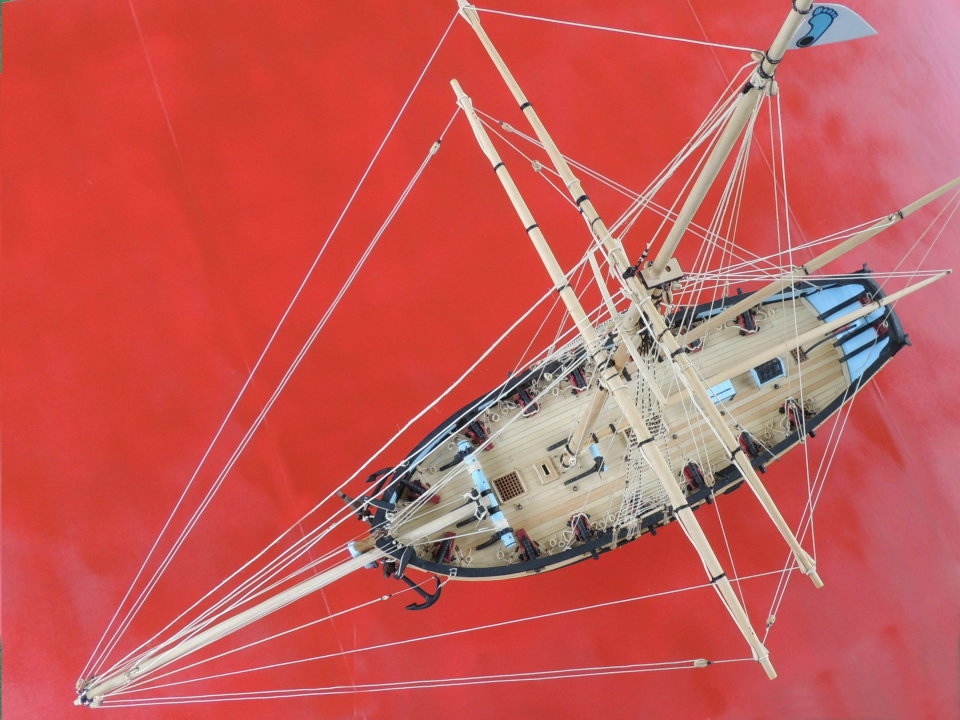
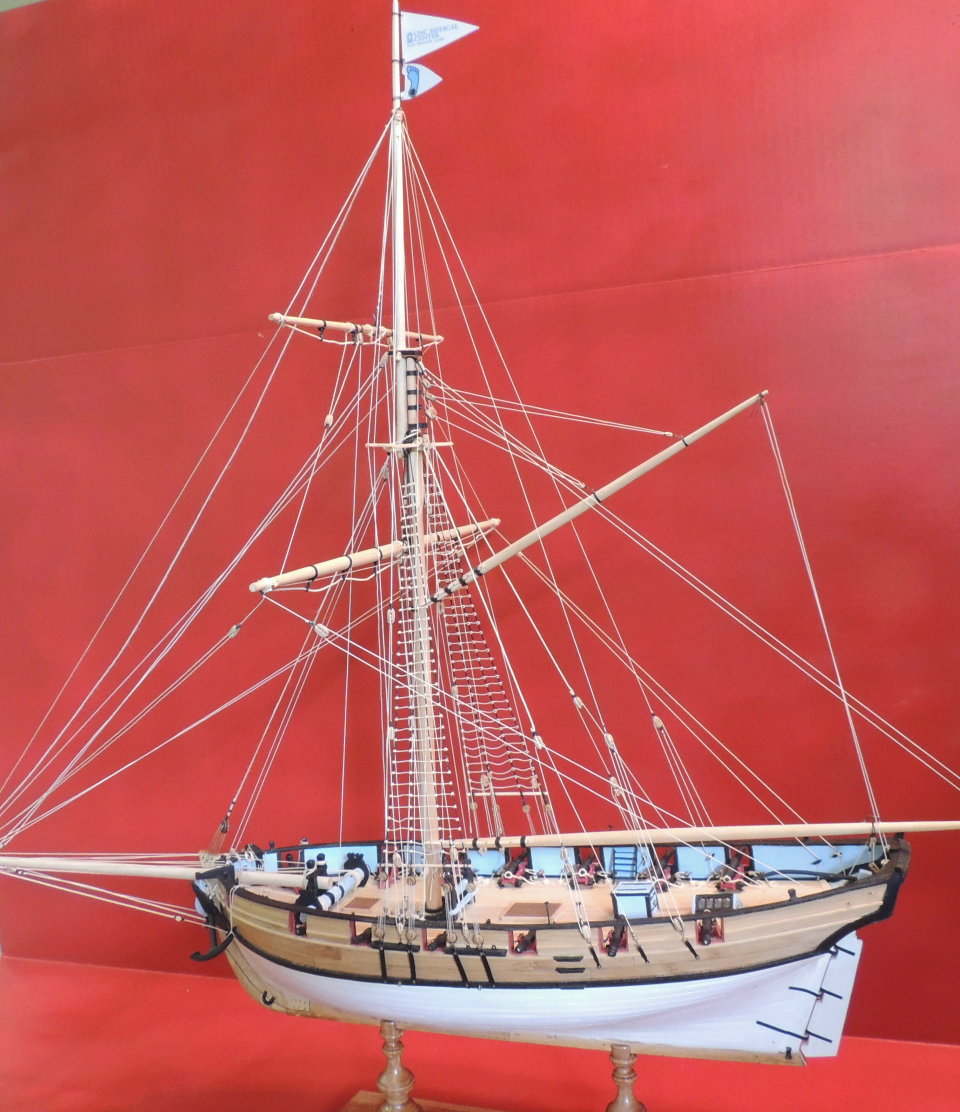
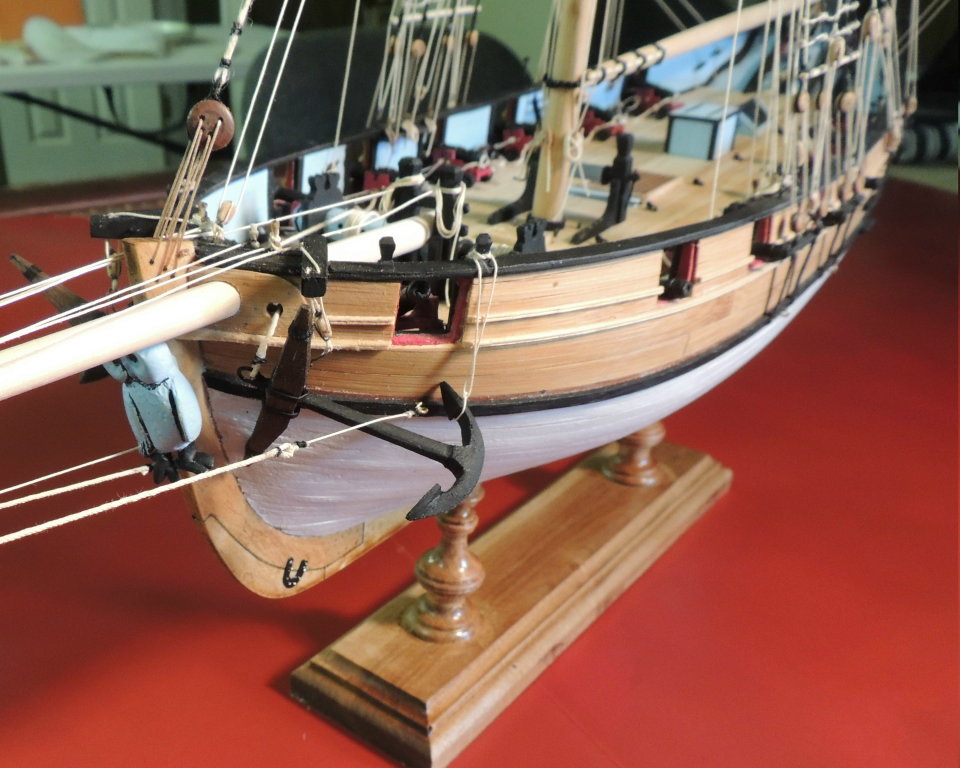
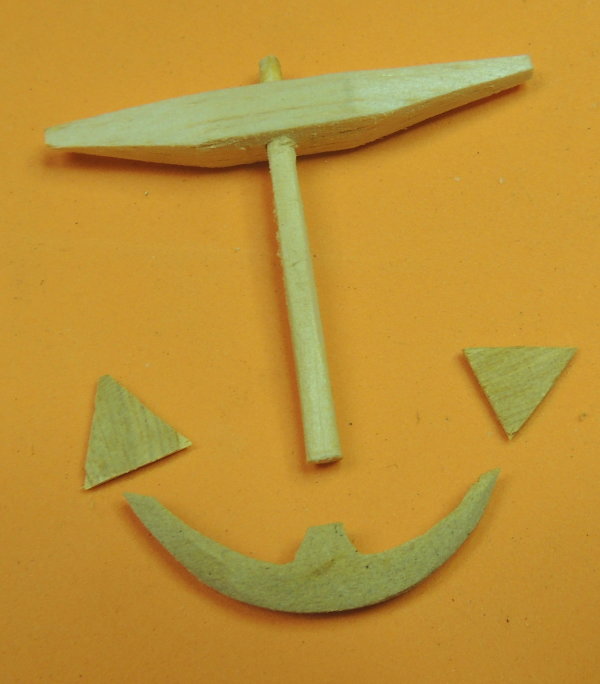
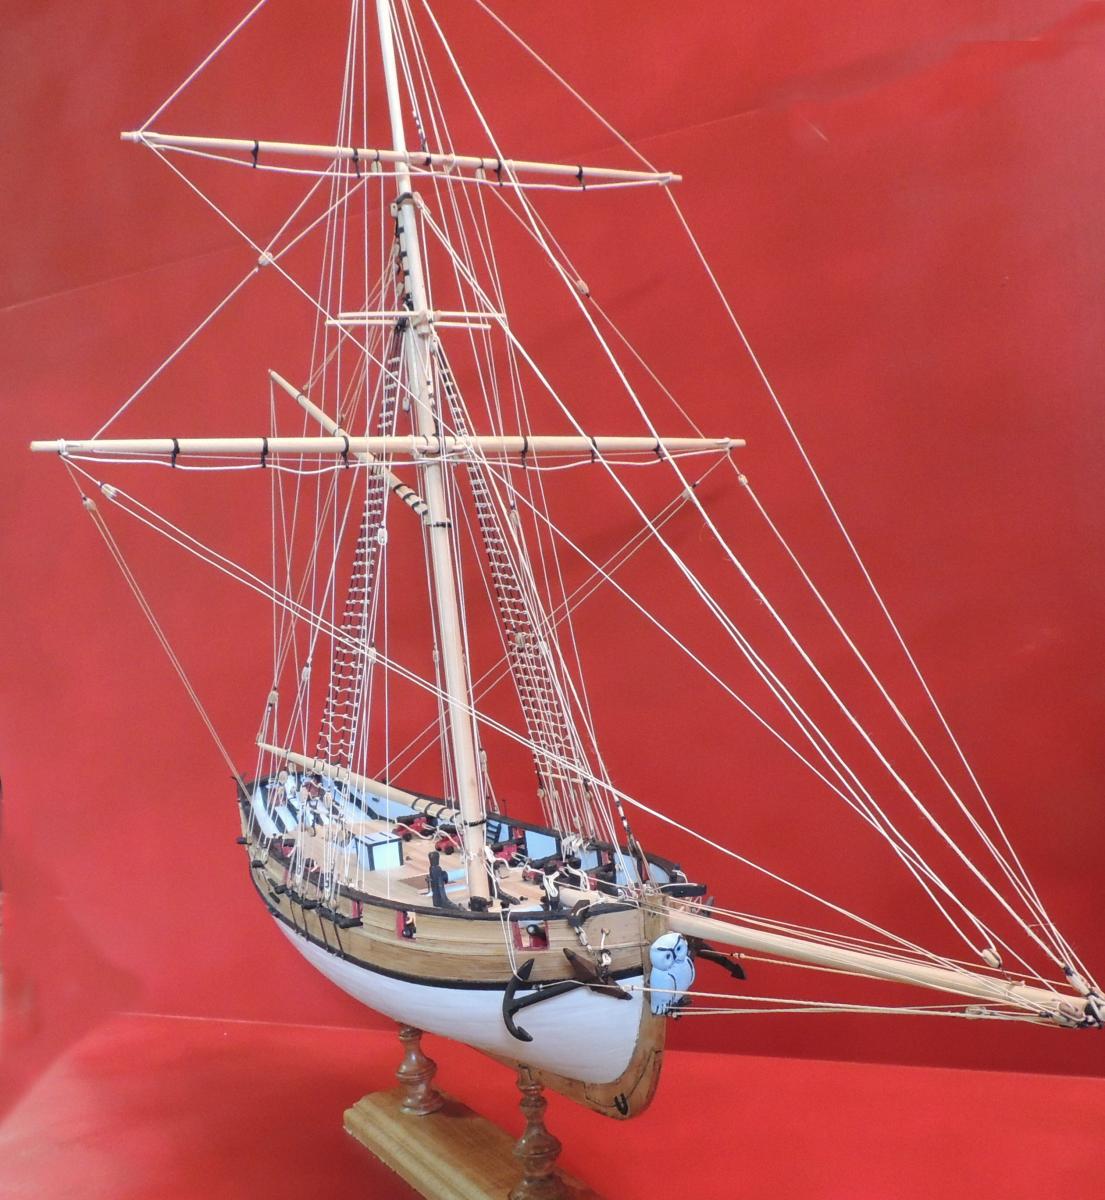
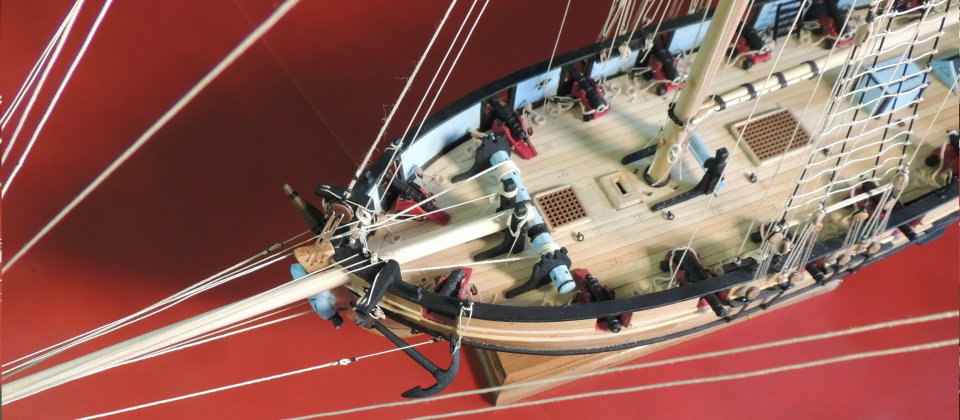
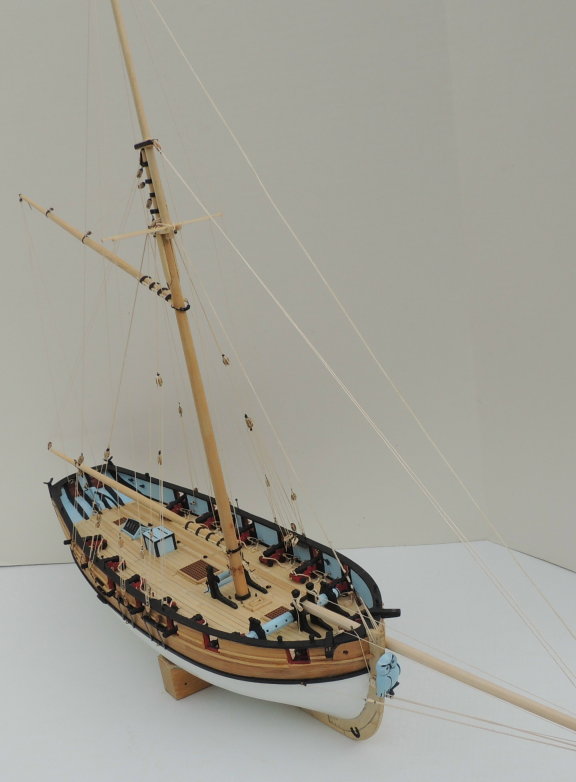
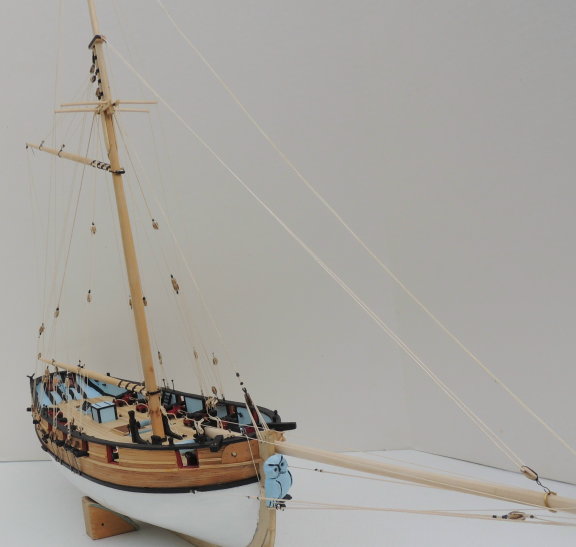
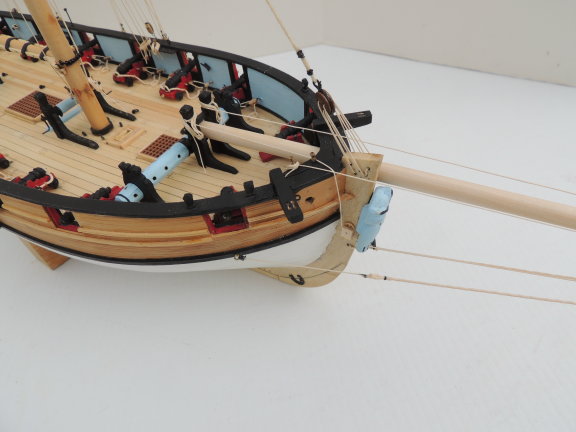
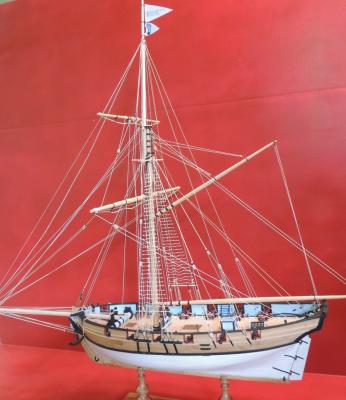
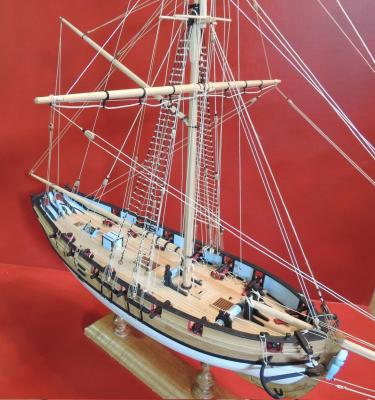
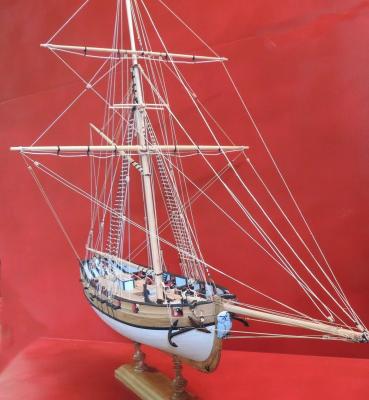
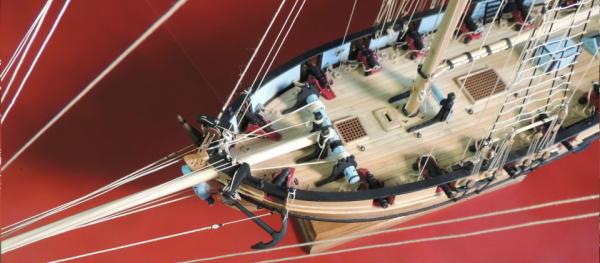
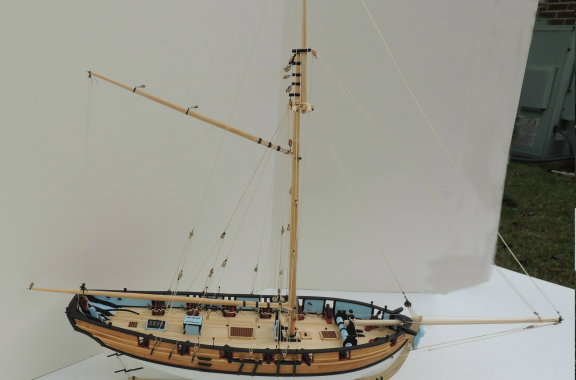
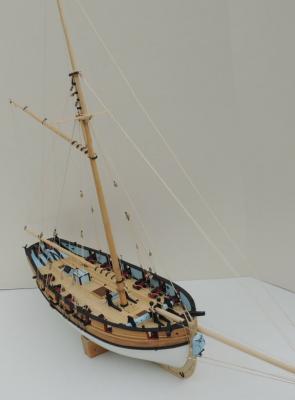
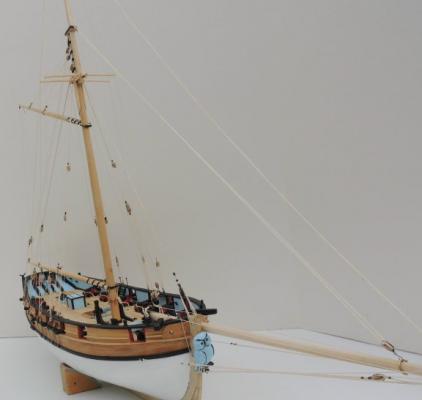
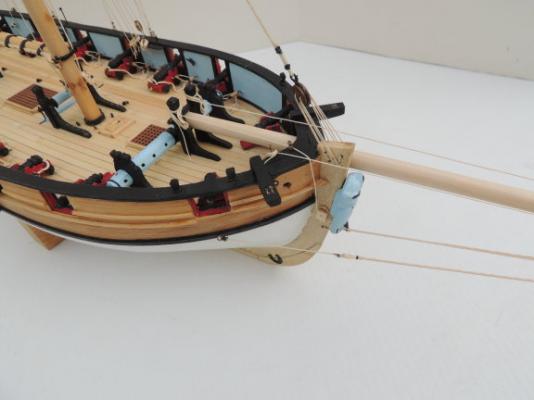
COMPLETED CHEERFUL BUILD.... After taking a day away from the shop following the ratline tying ordeal, I came back yesterday for a full day and made excellent progress. Early start this morning, and, after lashing the anchors down, I'm happy to report that she's done! Starting with the overhead view.... Port side view.... Closer view of the shrouds.... Forward deck view.... Close up of the anchors.... BTW - Here's the way I cut out the anchor parts... Always my favorite shot is the low bow view.... Note the new hard rock maple display base I created this morning. Also, note that I managed to darken the bow stem and keel with golden oak stain. Much happier with the new look. The stain really made the tree nails pop. So now I can turn my attention to the little "ugly duckling" decoy ship.... Actually, I'm beginning to be rather fond of that little dude. With two weeks to go, there's no telling what I might wind up with there.


- 209 replies
-
- 23
-
-
- cheerful
- Syren Ship Model Company
- (and 1 more)
-
Rat lines will be done by noon tomorrow George. Then I can move on to the yards. This only leaves the anchors and display base. Oh, still need to darken the bow stem and keel.... :)
- 209 replies
-
- 7
-
-
- cheerful
- Syren Ship Model Company
- (and 1 more)
-
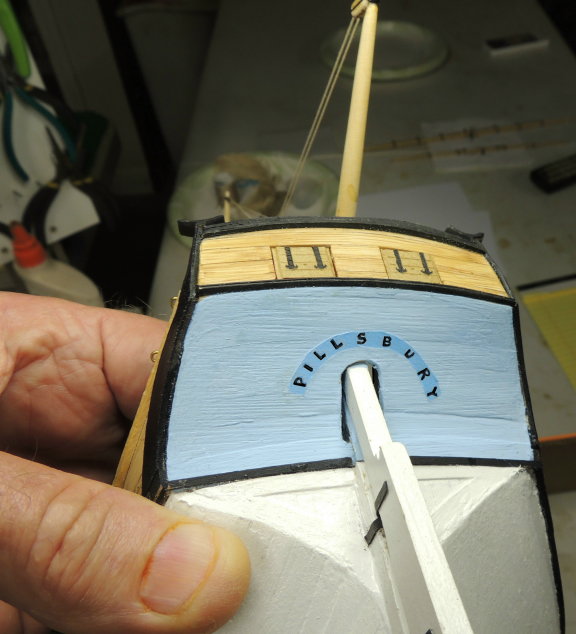
Taking a much needed break from tying clove hitches (about 50% completed), I decided to have a little fun with the special "colors" this ship will fly. Played around with giving them a more realistic look, but completely lost the ability to see and read the UNC Medical Center logo. So, as a trade-off, I chose to let them stand proud like a starched dress shirt. I also created the name plate for the transom, which can hardly be seen without lifting the stern up high enough to see below the gun ports. Unfortunately, the stern design of these cutters just didn't lend themselves to prominent stern lettering.


- 209 replies
-
- 16
-
-
- cheerful
- Syren Ship Model Company
- (and 1 more)
-
OK, I have finally arrived at the dreaded point I knew would eventually come. Wishing I had a little "Clove hitch Elf" that would rig the ratlines tonight whilst I sleep. Just thankful, there is only one mast with only four shrouds on each side.....and no top mast shrouds. Actually should be a piece of cake.
- 209 replies
-
- 8
-
-
- cheerful
- Syren Ship Model Company
- (and 1 more)
-
Guess I did get the rigging knocked out a little quicker than even I expected guys. Everything just came together so nicely. Rainy weather, wife out of town.... Or it could be the meds they've got me on. Wonder if I double up on them, could I fly like a bird?
- 209 replies
-
- 12
-
-
- cheerful
- Syren Ship Model Company
- (and 1 more)
-
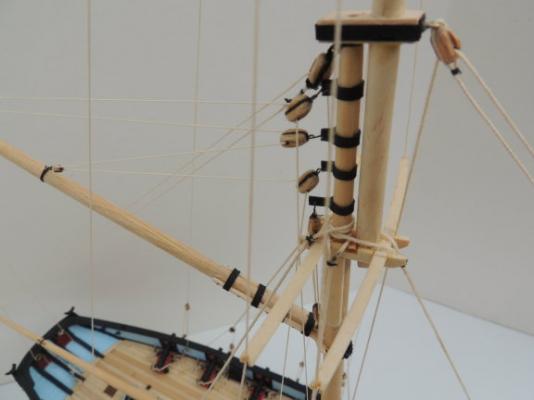
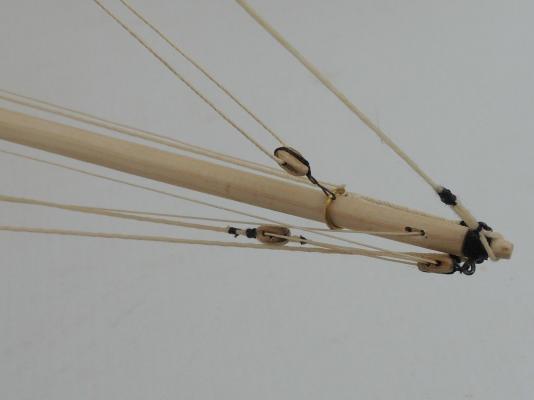
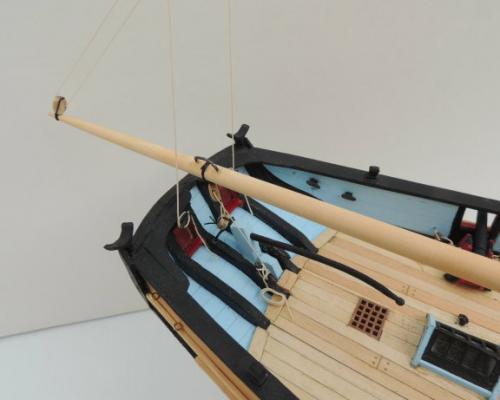
Rigging progress update.... No attempt to describe the rigging sequence here, as Chuck P will be doing a much better job in that area in his continued development of his Cheerful build log. Following his plan sheets and calling on him for a few clarifications along the way, I have managed to arrive at this point of being approximately 80% rigged. > .. > > > > > > Next, I will rig the shrouds and begin the hateful task of tying rat lines. Then, the yards.... already built. Then, anchors, and flags, and name plate.... Then, display base. Then I have to finish up the little decoy ship. Much to do yet, but I think I will make it before my December 4th deadline.


- 209 replies
-
- 23
-
-
- cheerful
- Syren Ship Model Company
- (and 1 more)