HOLIDAY DONATION DRIVE - SUPPORT MSW - DO YOUR PART TO KEEP THIS GREAT FORUM GOING! (Only 51 donations so far out of 49,000 members - C'mon guys!)
×


SawdustDave
-
Posts
1,770 -
Joined
-
Last visited
Content Type
Profiles
Forums
Gallery
Events
Everything posted by SawdustDave
-
 Don't thinkIwould want to be on board during rough weather Nils.
- 2,625 replies
-
- 5
-

-
- kaiser wilhelm der grosse
- passenger steamer
- (and 1 more)
-
Cutty Sark by NenadM
SawdustDave replied to NenadM's topic in - Build logs for subjects built 1851 - 1900
Nenad, I have built entire ships out of those basswood tongue depressors. Excellent material if you can't get boxwood. Not a lot of difference. You can easily cut them into very narrow strips to build your panels, moldings, etc. if you use wood glue and keep it clean, it also takes staining very well. Just jeep on having fun. You're doing a great job.- 4,152 replies
-
- 6
-
-
- cutty sark
- tehnodidakta
- (and 1 more)
-
Here's a photo taken of my chest at 4:00 pm today. And here's a photo of my chest about 20 minutes later. After seven weeks of IV's through that tube, what a wonderful relief. I feel like a free man. Golf tomorrow morning for sure.


- 209 replies
-
- 11
-
-
- cheerful
- Syren Ship Model Company
- (and 1 more)
-
Nils.... Sorry, I m just now discovering your KWdG log. Wonderful craftsmanship! The metal clad plates are amazing. Been through your log once.... Going to go through again more slowly. Dave
- 2,625 replies
-
- 4
-
-
- kaiser wilhelm der grosse
- passenger steamer
- (and 1 more)
-
Patrick.... Hull looking great. Beautiful lines. Save the kidney stones.... They could be useful somewhere in this build. Cheers
-
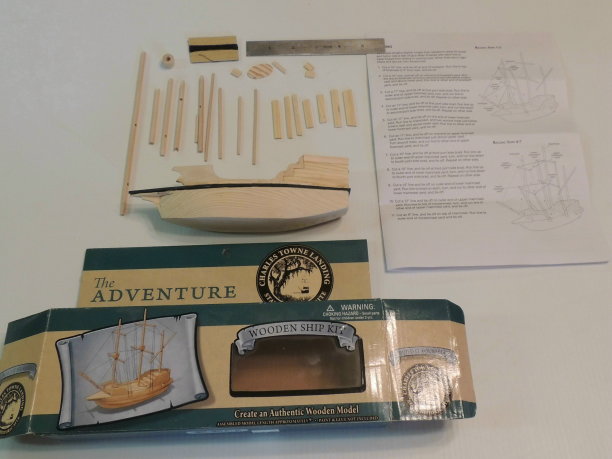
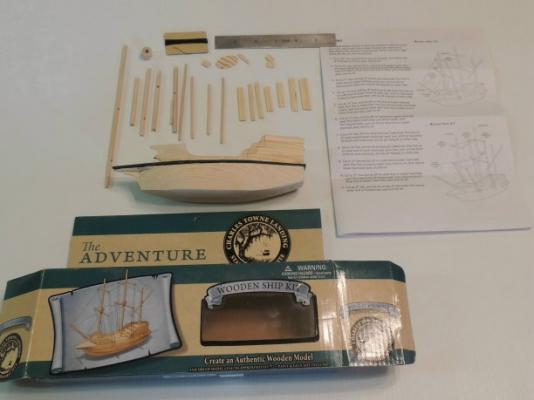
Just learned that the word got out to Dr. Pillsbury. He overheard a phone conversation about "the ship Dave is building for him". No problem....I've got it covered. Here's the ship he will first see sitting off to one side when we do the presentation....24 parts....about as complex as a Pinewood Derby racer. I've already assembled the several blocks that form the ships hull and decks. The black wale is my idea. Goes something like this.... "Dr. P, in appreciation for you saving my life, I've built you a special ship...." He sees this little ugly duckling sitting off to one side and, obviously, thinks it to be his "special ship"....right? The real "Cheerful" is in another room and will be brought in by a staff member at the right time. First time I've ever had three ship projects going at one time. Should I start a separate build log for this one? Hahahaha
- 209 replies
-
- 14
-
-
- cheerful
- Syren Ship Model Company
- (and 1 more)
-
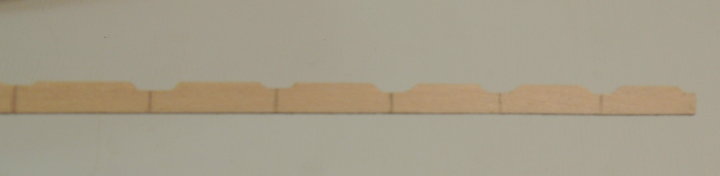
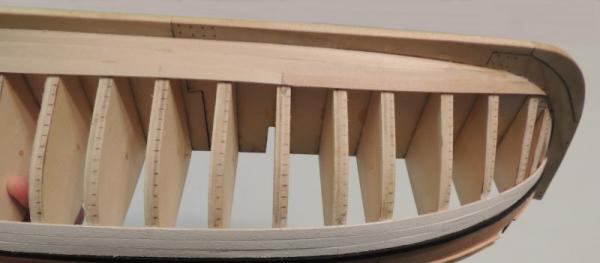
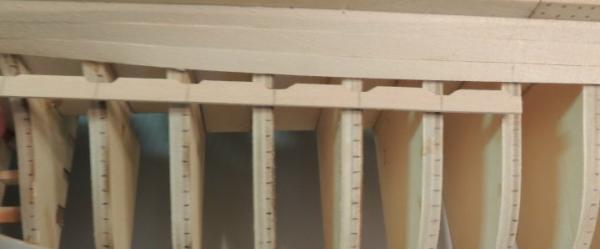
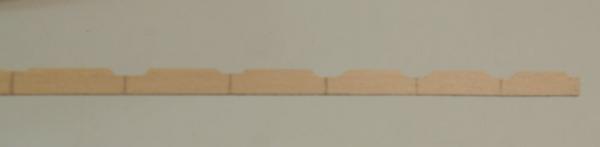
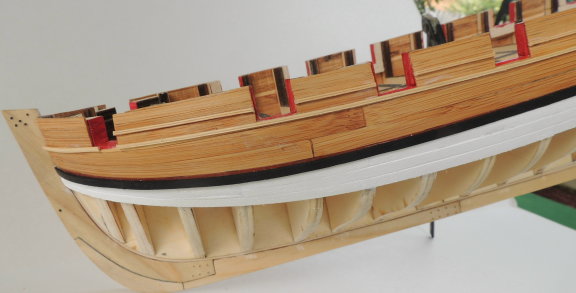
Spent the morning laying out the planking marks for the port side. For those friends who have not tried Chuck's planking technique, here are a few pic's that will give you an idea how it works. First, noting that there are 20 strakes below the wale. I have installed three strakes immediately below the wale, and three strakes from the keel. This leaves the simple task of dividing the gap AT EACH BULKHEAD between those strakes into 14 equal parts. Custom cutting a cardstock strip to the exact length of each gap, this first pic shows, using the "fan divider template" provided by Chuck, to divide that strip into 14 equal markings.... I use knife cuts to make the marks as precise as possible. Seen next is after transferring all of the markings from the custom cut card stock strips to the bulkheads. Note the width of each plank at mid-hull is 3/16th" and gradually tapers beginning at the last several forward bulkheads. Seen next, is my personal technique for getting really exact widths of each plank to match the markings. First, I have marked the plank where it lands on each bulkhead. Then, using carefully marked card stock strips again, I have notched out the exact widths on the plank. Now, all I have to do is remove the high surfaces between the notches. I really love this technique. Thanks Chuck.

- 209 replies
-
- 17
-
-
- cheerful
- Syren Ship Model Company
- (and 1 more)
-
Cutty Sark by NenadM
SawdustDave replied to NenadM's topic in - Build logs for subjects built 1851 - 1900
Nenad, my friend, your work on the panels being great by any standard.... Your unflappable spirit clearly exceeds all reasonable standards. Way to go Nenad!- 4,152 replies
-
- 7
-
-
- cutty sark
- tehnodidakta
- (and 1 more)
-
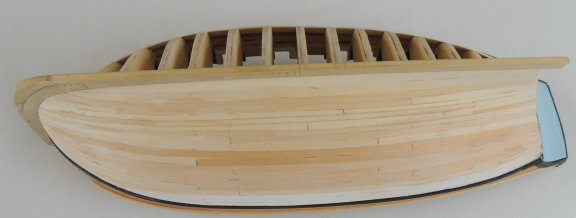
Before applying primer and white acrylic, thought I would post this shot of the completed planking of the starboard hull. This is mainly for the purpose of commenting on the technique taught by Chuck P in great detail with the instructions provided with this scratch builders kit. I have always struggled with single planking. Even after building several fairly challenging models, using my self developed method of planking was always somewhat of a struggle. I must say, this has to be the best shaped single planked hull I personally have ever built. Chuck's methodical approach to marking the bulkheads and shaping the planks has been a huge learning process for this old dog. In this photo, after moderate sanding, you can see there will be very little need for fillers before painting. Now, on to the port side.
- 209 replies
-
- 13
-
-
- cheerful
- Syren Ship Model Company
- (and 1 more)
-
Beautiful work Ken. The Rattlesnake is one of those really beautiful ships I have always wanted to build. I'm sure your deck will turn out great.
-
Beautiful work Brian. I thoroughly enjoyed your build log. She looks amazing, especially your rigging detail. Cheers
- 831 replies
-
- 3
-
-
- Armed Virginia Sloop
- Model Shipways
- (and 1 more)
-
Just wondering....It appears as though the thickness could be removed with a horizontal belt sander as well, using a simple "depth jig" to prevent over sanding.
-
Alexandru.... Your work is simply incredible.
-
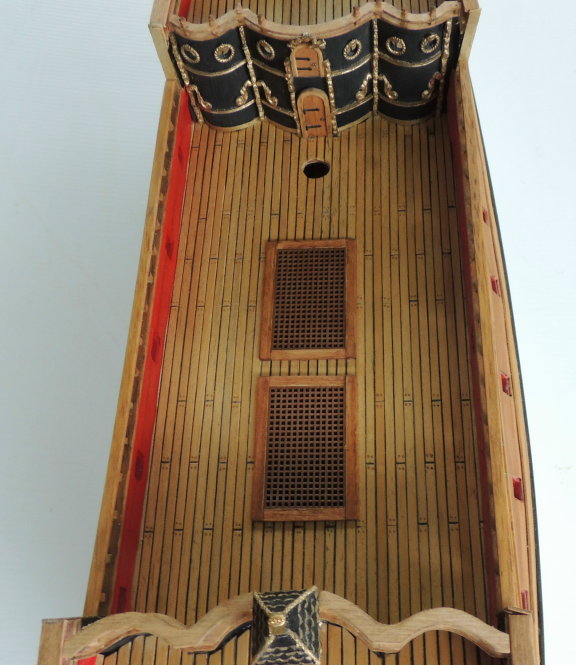
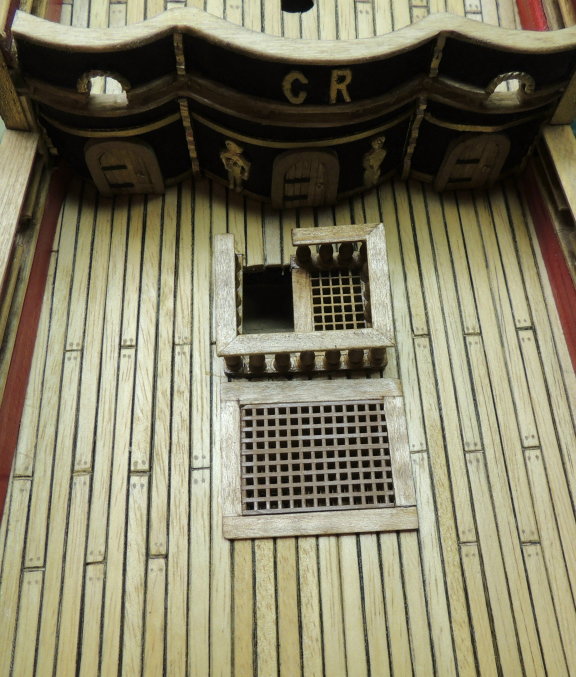
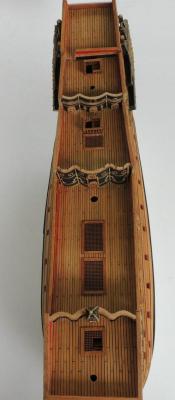
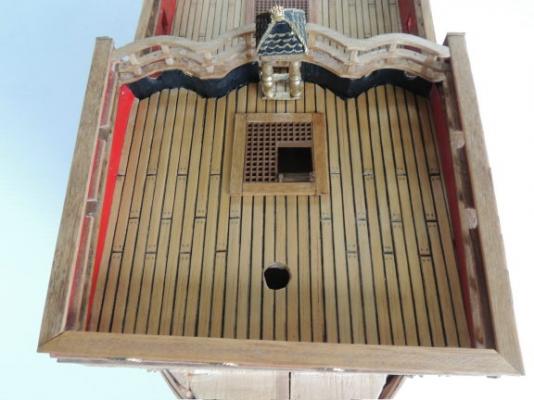
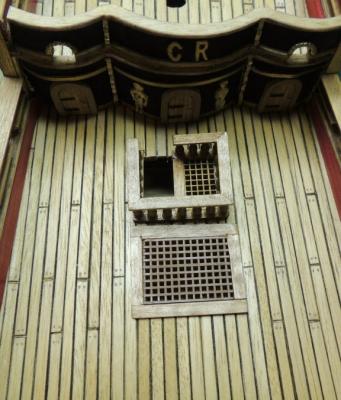
Putting the Cutter Cheerful aside yesterday, turned to the SOS to work on finishing the deck gratings and companion ways. First, after handling the Cheerful for the last month, I was immediately struck by the sheer difference in size and weight. By comparison, this thing is beginning to be quite heavy. So I managed to build out the gratings, replacing the oversized 3cm gratings with 2cm gratings. These beautiful one/piece plastic gratings come in 1-1/2" x 4" panels and very easy to cut to size. Quarter deck companion way.... Half deck companion way.... Main deck gratings installed.... Forecastle companion way.... Note, the color of the deck planks in the previous photos appear more of an orange tent due to the early morning light on my patio. This shot of the forecastle is much closer to the true color of all decks. Note that I have also finished tree nailing all deck plankings.


- 962 replies
-
- 9
-
-
- sovereign of the seas
- ship of the line
- (and 1 more)
-
And THAT, my friends, is how the MASTERS do it.
- 1,051 replies
-
- 12
-
-
- cheerful
- Syren Ship Model Company
- (and 1 more)
-
Good one Greg.... Never trust an iPad's spell checker.
- 1,051 replies
-
- 4
-
-
- cheerful
- Syren Ship Model Company
- (and 1 more)
-
If the "Standard" you refer to is the likes of our friends Remco, or Danny, or Chuck P..... These masters are our teachers. All we can do is try to learn from them and emulate them as much as possible. So, to answer your question honestly.... Indeed, I would choose to spend my time building two pretty darned good ships that will make my grandkids go "WOW PAPA! That is so beautiful!", rather than to take the same time to create one ship that would make fellow modelers go "WOW Dave! What a clean model!....(but still not as perfect as the ones built by the masters I just named - therefore still sub-standard) Heck fire guys, I'm just an old woodworker that fell in love with building little wooden ships. I'll leave all the handwringing stuff to those of you that take this stuff more seriously than I.
- 1,051 replies
-
- 9
-
-
- cheerful
- Syren Ship Model Company
- (and 1 more)
-
Working really hard on slowing down my pace. At my age, it's really tough. I remember reading a comment from one of our friends.... "So many ships to build, yet so little time."
- 1,051 replies
-
- 6
-
-
- cheerful
- Syren Ship Model Company
- (and 1 more)
-
Cutty Sark by NenadM
SawdustDave replied to NenadM's topic in - Build logs for subjects built 1851 - 1900
As you well know, I'll "rip out and re-do" when I just cannot live with my mistakes. Having said that, Nenad, there are plenty of times I choose to accept relatively insignificant issues that literally no one on earth will ever notice. I think the English word is " pragmatist".... There's your new word for the day my friend. Use it three times and it's yours.....hahaha Your drawings are very professional.- 4,152 replies
-
- 7
-
-
- cutty sark
- tehnodidakta
- (and 1 more)
-
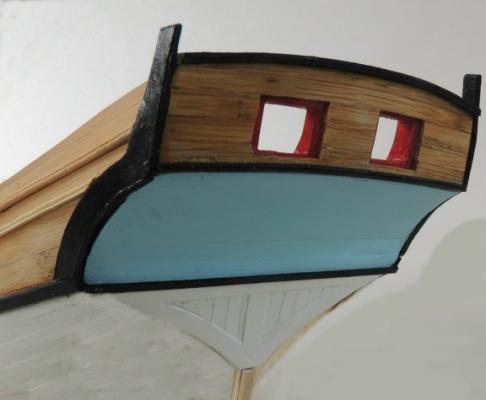
Jack, the hull planks are white. The "square tuck" seen below the transom is also white (needs a couple more coats). My next color delima will be the color of her bulwarks. With red being the school colors for NC State (only 12 miles away), I will have to do something different there. We shall cross that bridge when we get there.
- 209 replies
-
- 4
-
-
- cheerful
- Syren Ship Model Company
- (and 1 more)
-
Painting has been a tough issue to say the least. Trying to come up with a UNC look that will not cause all of my modeling friends to heave chunks when you see it. It didn't take long to conclude that painting the entire hull below the wales "Carolina Blue" would do just that. So I came to a more subtle solution, seen here.... The hull will be painted white below the wales, and the transom will carry the UNC colors. Also completed the two trim moldings above the wales.... The profile of these molds were simply created with a scraper I fashioned from a razor blade. Just noticed in the pic above, the last piece of lower molding had not been trimmed back flush with the gun port. Already been taken care of.

- 209 replies
-
- 13
-
-
- cheerful
- Syren Ship Model Company
- (and 1 more)
-
Can't wait to get to this stage. Beautiful, as always Chuck.
- 1,051 replies
-
- 3
-
-
- cheerful
- Syren Ship Model Company
- (and 1 more)
-
Remco, the improvements are obvious to the eye, and I salute your relentless pursuit of total perfection. I also like the lighter tone of the wood on the new version. Your work continues to inspire all of us my friend. Cheers Dave
- 1,215 replies
-
- 7
-
-
- sloop
- kingfisher
- (and 1 more)
-
Very nice work Brian. She looks great! Congratulations on completing the rat lines.... Always a time for celebration with a cold beverage.
- 831 replies
-
- 4
-
-
- Armed Virginia Sloop
- Model Shipways
- (and 1 more)
-
George....I can't say enough about Chuck's influence on my love for building model ships. Go's back to the Syren project and then the Confederacy, which I have taken to four shows around the state and been honored with "Best in Show" each time. Last show in Fayetteville, there were two other really fine Confederacy's entered, but I think my fully rigged version must have a little more "WOW" going for it in the public eye. The man is a master teacher in the way he writes his instructions.... As if he is sitting beside you with every cut. BTW.... I hope to eventually manage to take the SOS to a level of "HOLY SH##!" hahahaha
- 209 replies
-
- 12
-
-
- cheerful
- Syren Ship Model Company
- (and 1 more)