


Snowmans
-
Posts
99 -
Joined
-
Last visited
Content Type
Profiles
Forums
Gallery
Events
Posts posted by Snowmans
-
-
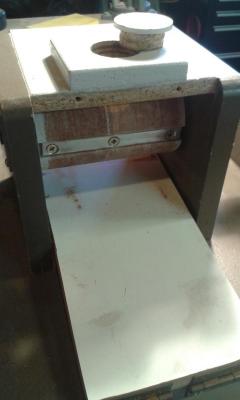
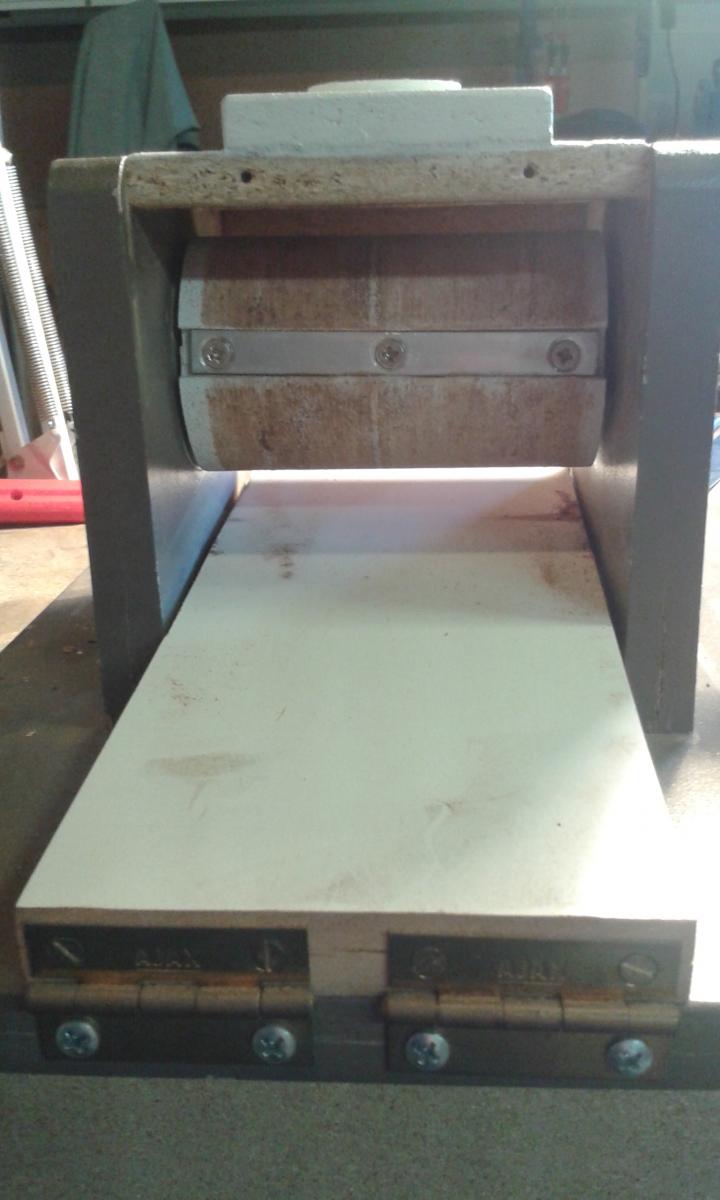
The table that goes under the drum that the timber slides on is hinged at the front. There is a bolt through a bracket at the rear to adjust the height. I have sanded down to 2mm strips on this but probably coundnt get any thinner. The drill is variable speed so this can be changed for different sanfpaper grits.
-
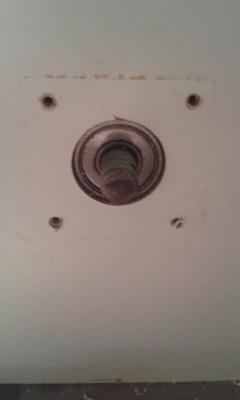
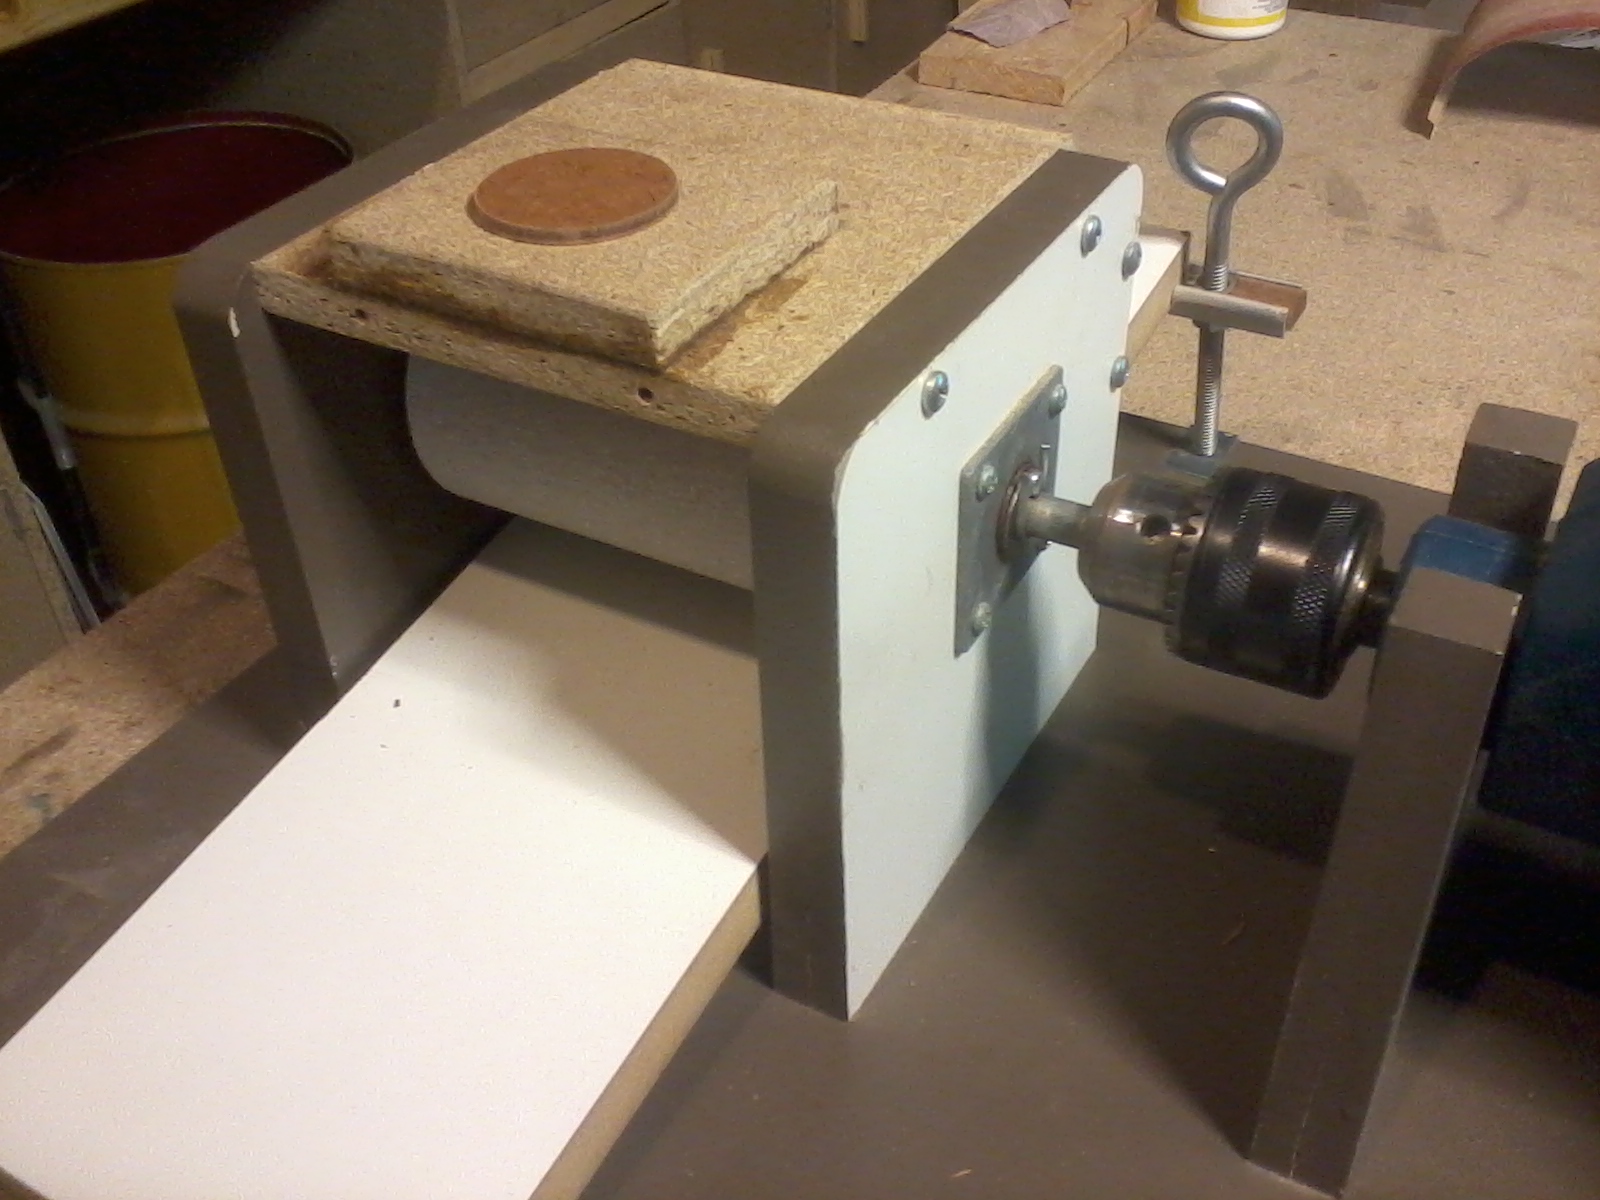
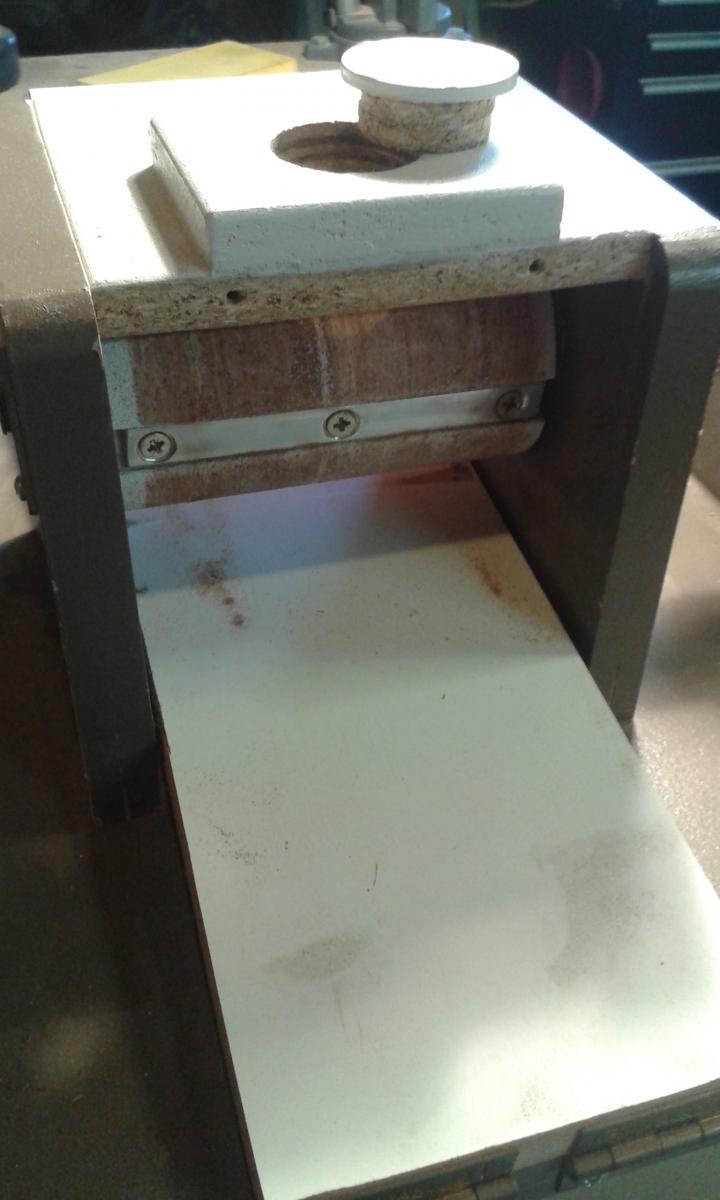
The block on top was added after a month or so of using the sander as by then I was sick of the dust that it blew out. The hole is just the right size to fit the vac hose. With the vacuum attached all the dust is taken away, I don't even need to wear a dust mask while it is operating. The round cap is used to block the hole and also to check the condition of the sandpaper during use without removing the front cover. Here are a couple of extra pictures showing some of the details.


-
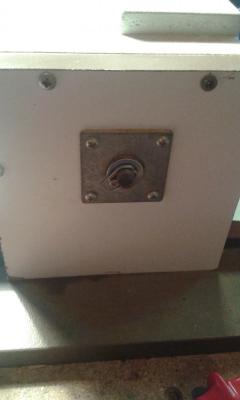
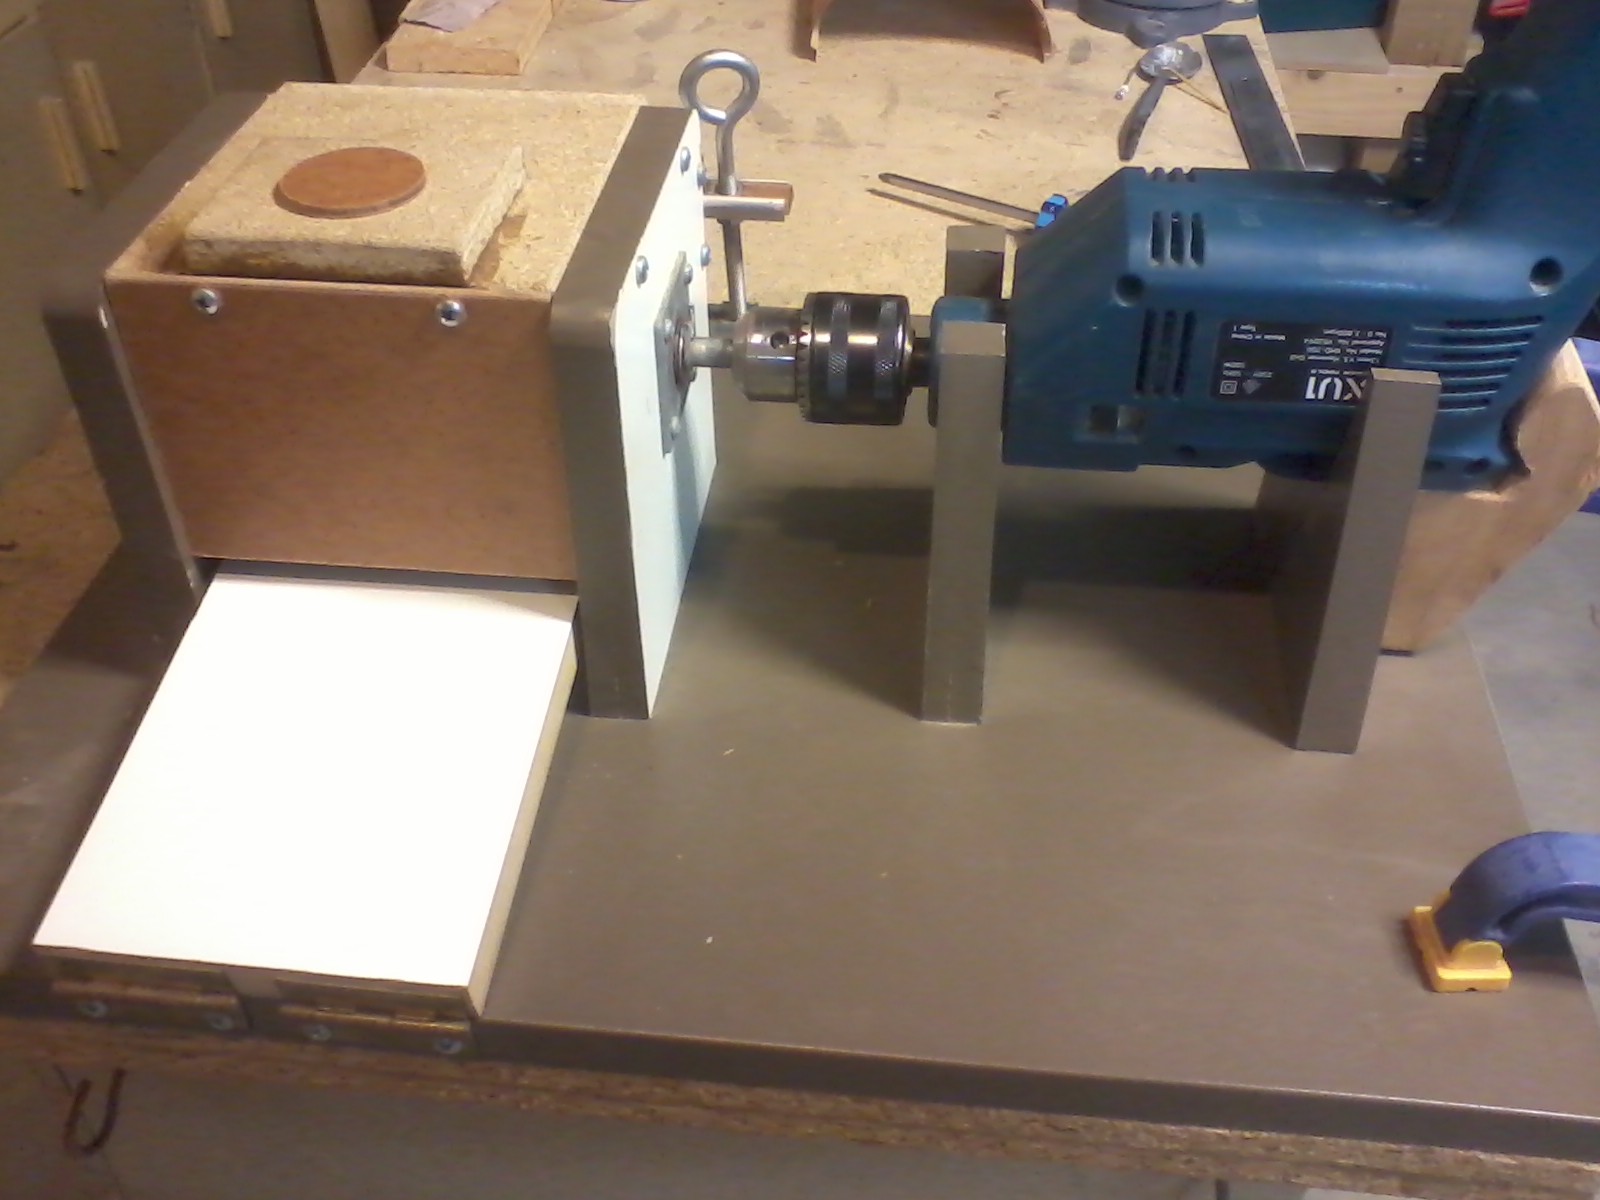
The box was then built to enclose the sanding drum from melamine and particle board. I made this with about 5mm wider than the length on the drum, the sides are 150mm square. 10mm holes were drilled through both sides to fit the shaft.Then I widened the outside holes to 18mm wide to a depth of 8mm so the bearings were held in place without any movement. I made the holes so they would need a light tap with a hammer to get them in place, and there is asolutley no wobble in the shaft. A square washer was fixed over the bearing both to keep it in place and to keep dust out. There is less than 0.5mm gap around the shaft.
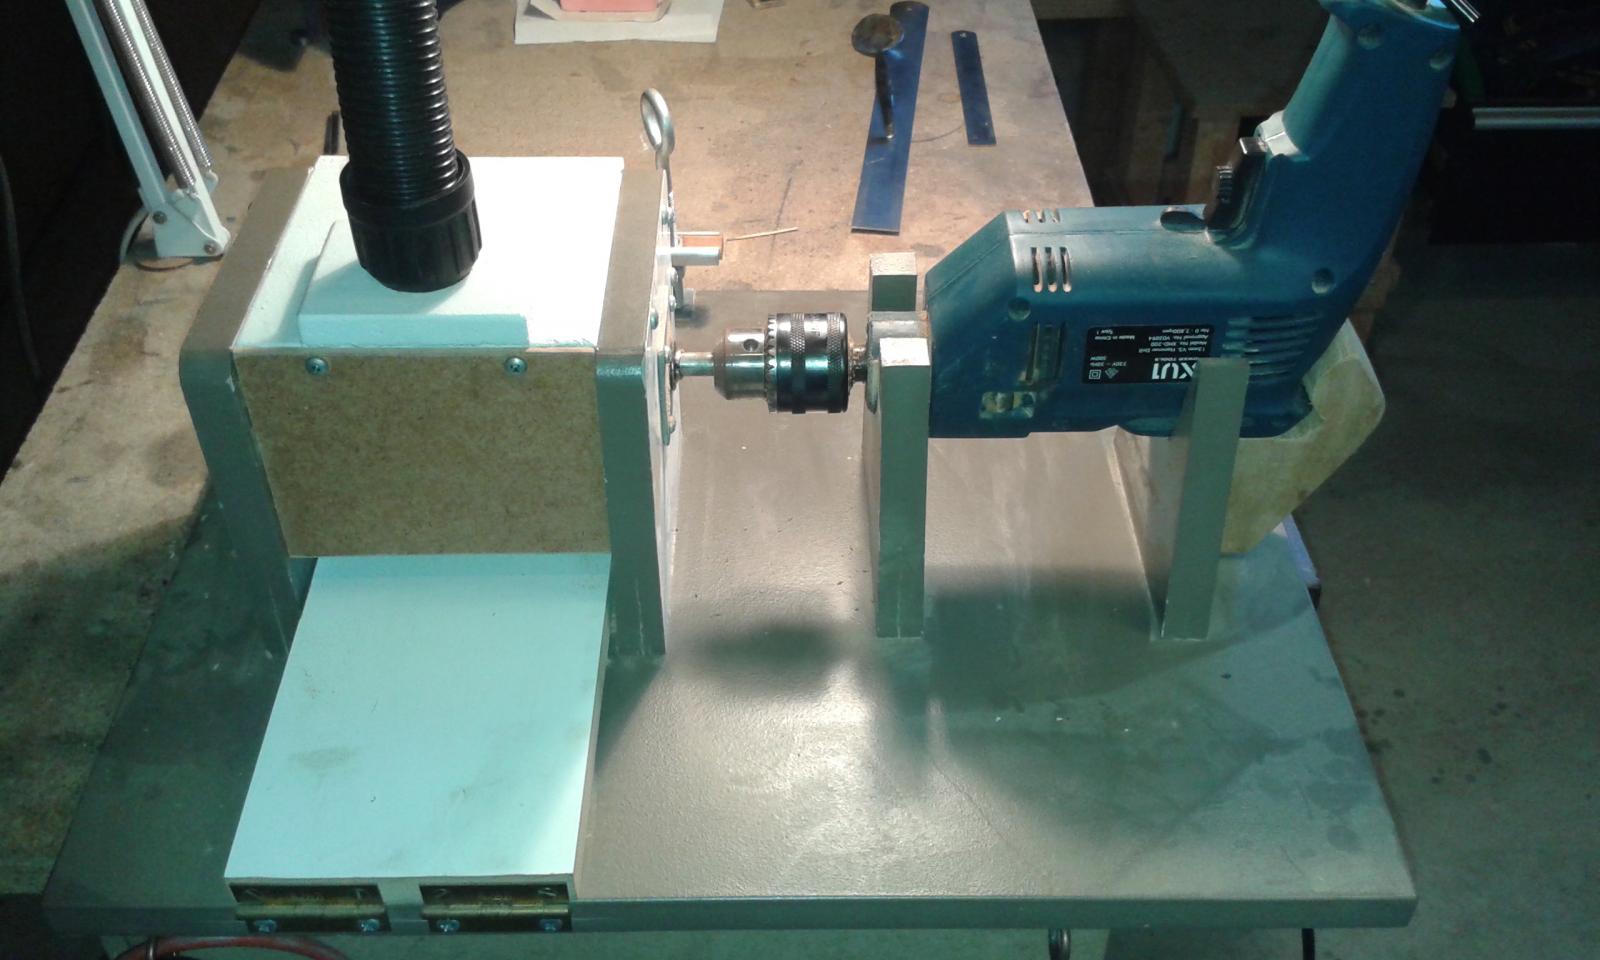
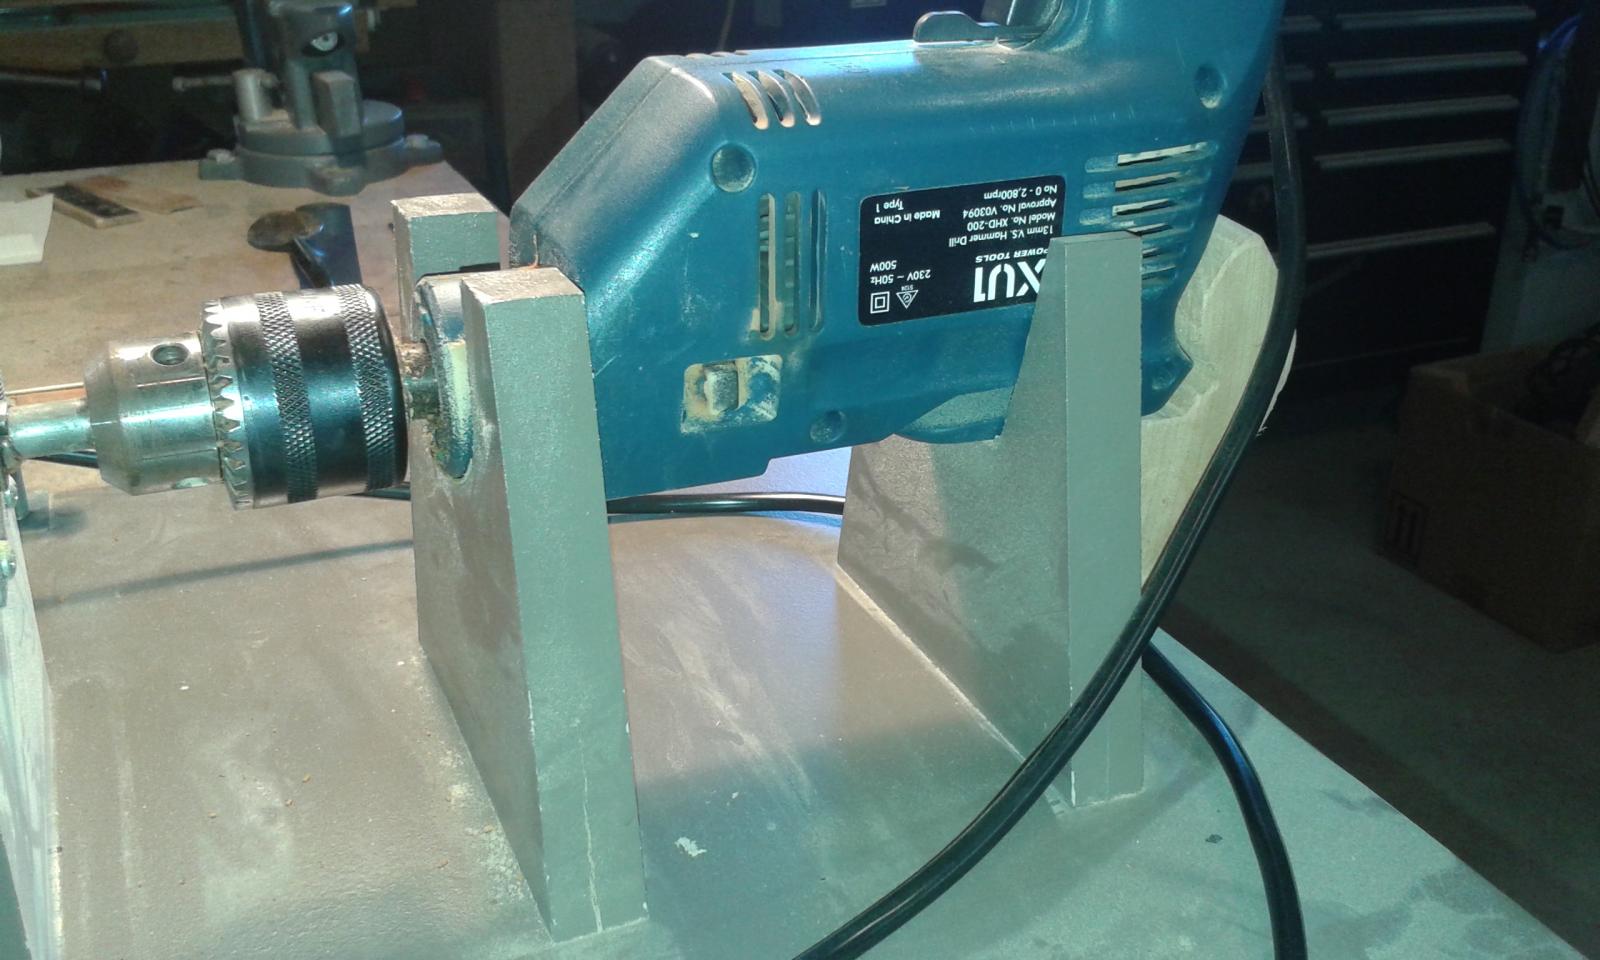
At this stage I then had a height to work with so I could make the stand for the drill to fit in place. The two vee shaped uprights had been cut to fit the drill into were fixed in place so the drill chuck fits perfectly over the shaft. The smaller piece at the back of the drill is screwed in place to stop the drill slipping backwards, but can be removed to get the drill out if needed.
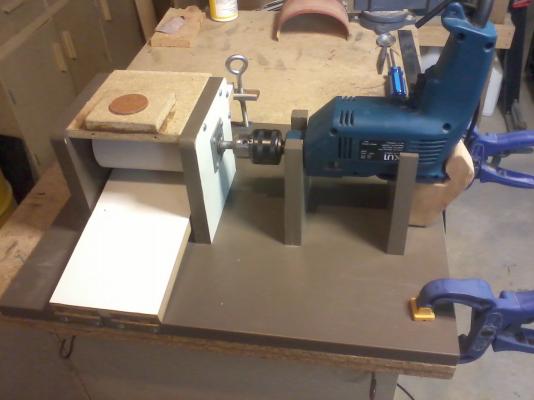
Melamine was used as the table as it is flat and slides easily. The size was as wide as I could get in and as long as the base board. From memory it is 450mm long. Two hinges fix this in place to the front of the base. A length of timer is fixed under the back with a nut epoxied in place and an eye bolt is used to set the height. 1 full turn on the bolt gives 1mm of adjustment. I do sometimes use a couple of lock nuts to keep it all in place when I am sanding a lot of timber to the same thickness so nothing moves.

Now the drill is in plase and there is a flat area to work from the drum is trued to round. I fixed a fairly coarse length of sandpaper to a flat board and turned on the sander. The table was raised while the sandpaper kept mooving side to side made short work of any lumps and bumps. The photo shows the drum with sandpaper already on it, but this is just to show how it was done. As you can probably tell a lot of these photos have been taken recently.
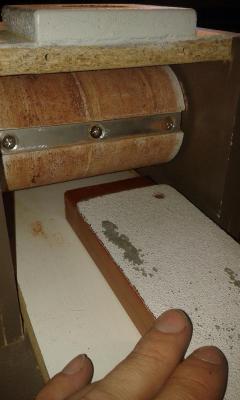
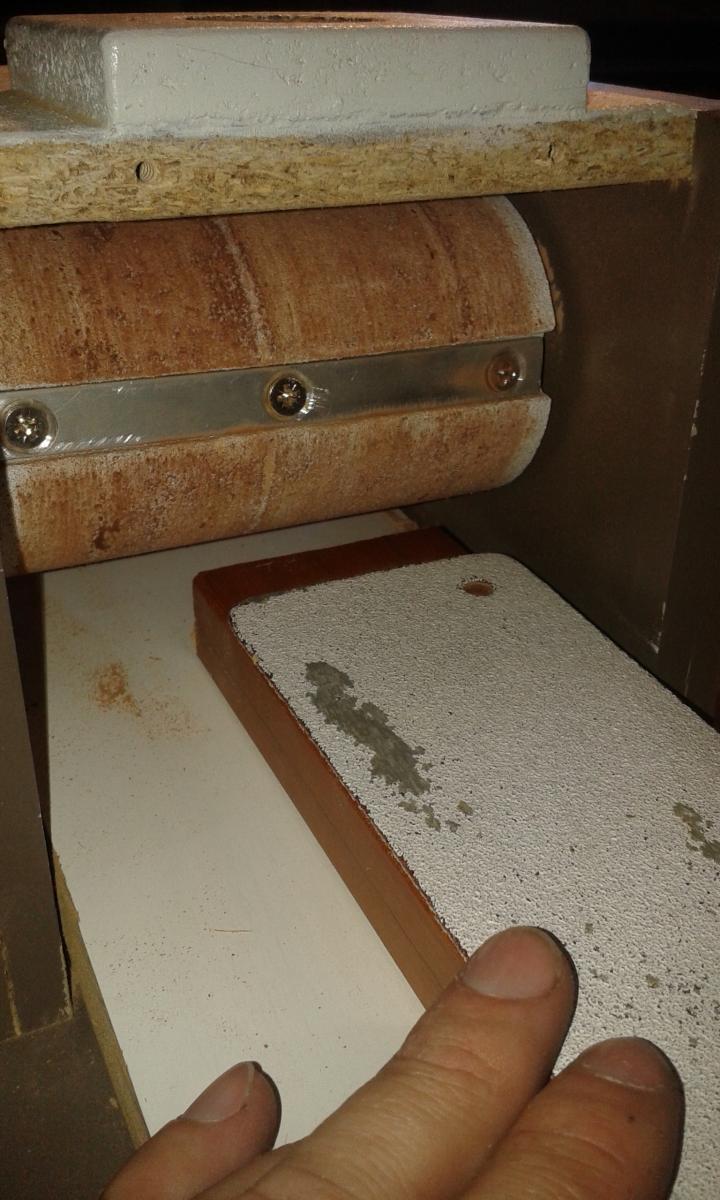
The drum then had a groove cut along the length to fit the aluminium strip that holds the sandpaper in place. When this is pushed into the slot it pulls the sandpaper tight. Three screws hold it in place and this is recessed about 2mm below the surface of the drum.
- flying_dutchman2, janos, PeteB and 9 others
-
 12
12
-
I have had a few people asking about the thickness sander I made a couple of years ago, so I thought I would put up a few photos and details to help others if they want to make their own. I spent quite a bit of time searching the net and looking at different sizes and types and this is what i came up with. It has had a couple of changes since it was first built.
The idea was to fit half a standard sheet of sandpaper around the drum and to take up to 100mm wide board by 50mm thick. I haven't used anything that size through it, mostly the timber for my Triton build.

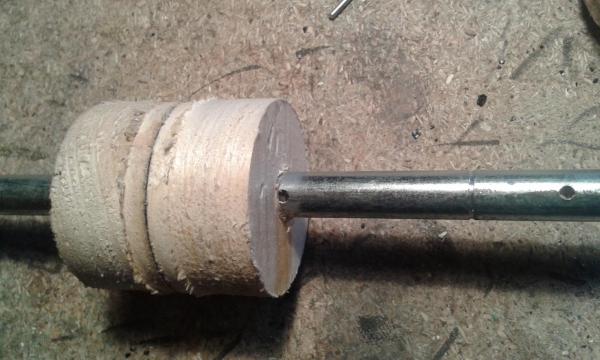
The shaft that goes through the centre is 10mm, only because I had a short length that size handy and it had a couple of bearings that fitted on nicely.
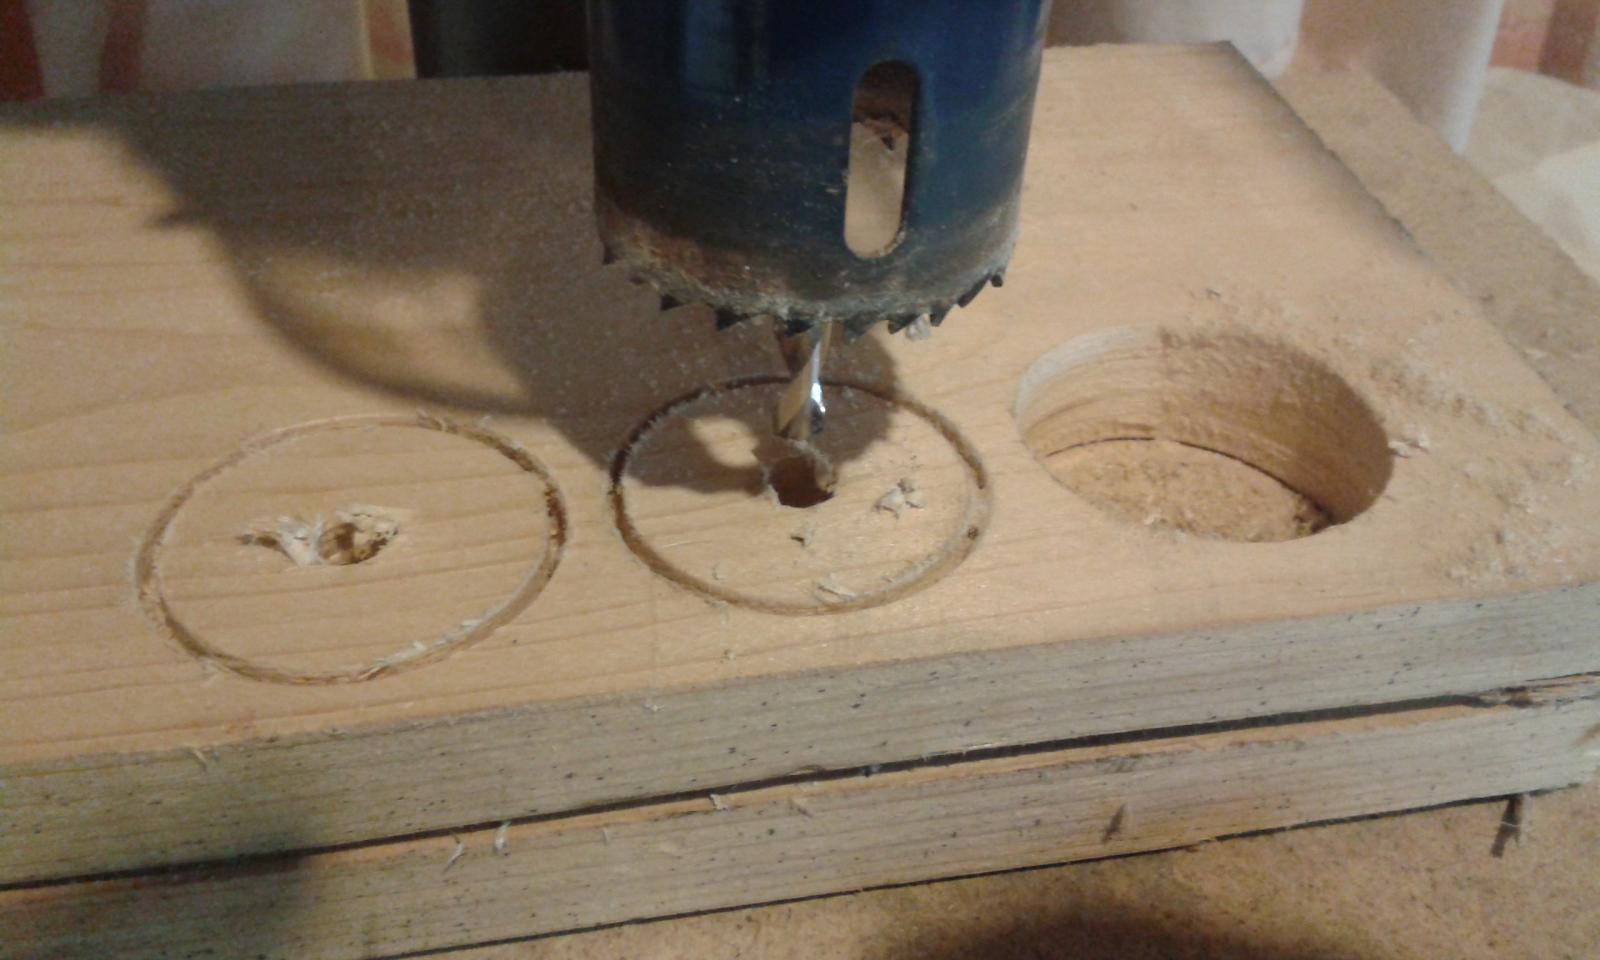
The wood used for the drum was 20mm thick and the circles were cut with a hole saw. I drilled about 1/3 of the way through, turned the board over and drilled the same from the other side. Changed drill bits and enlarged centre hole to 10mm to fit onto the shaft, then finished cutting through with the hole saw bit. By doing this it was easier to hold the block than trying to drill the centre once the circles had been cut out.

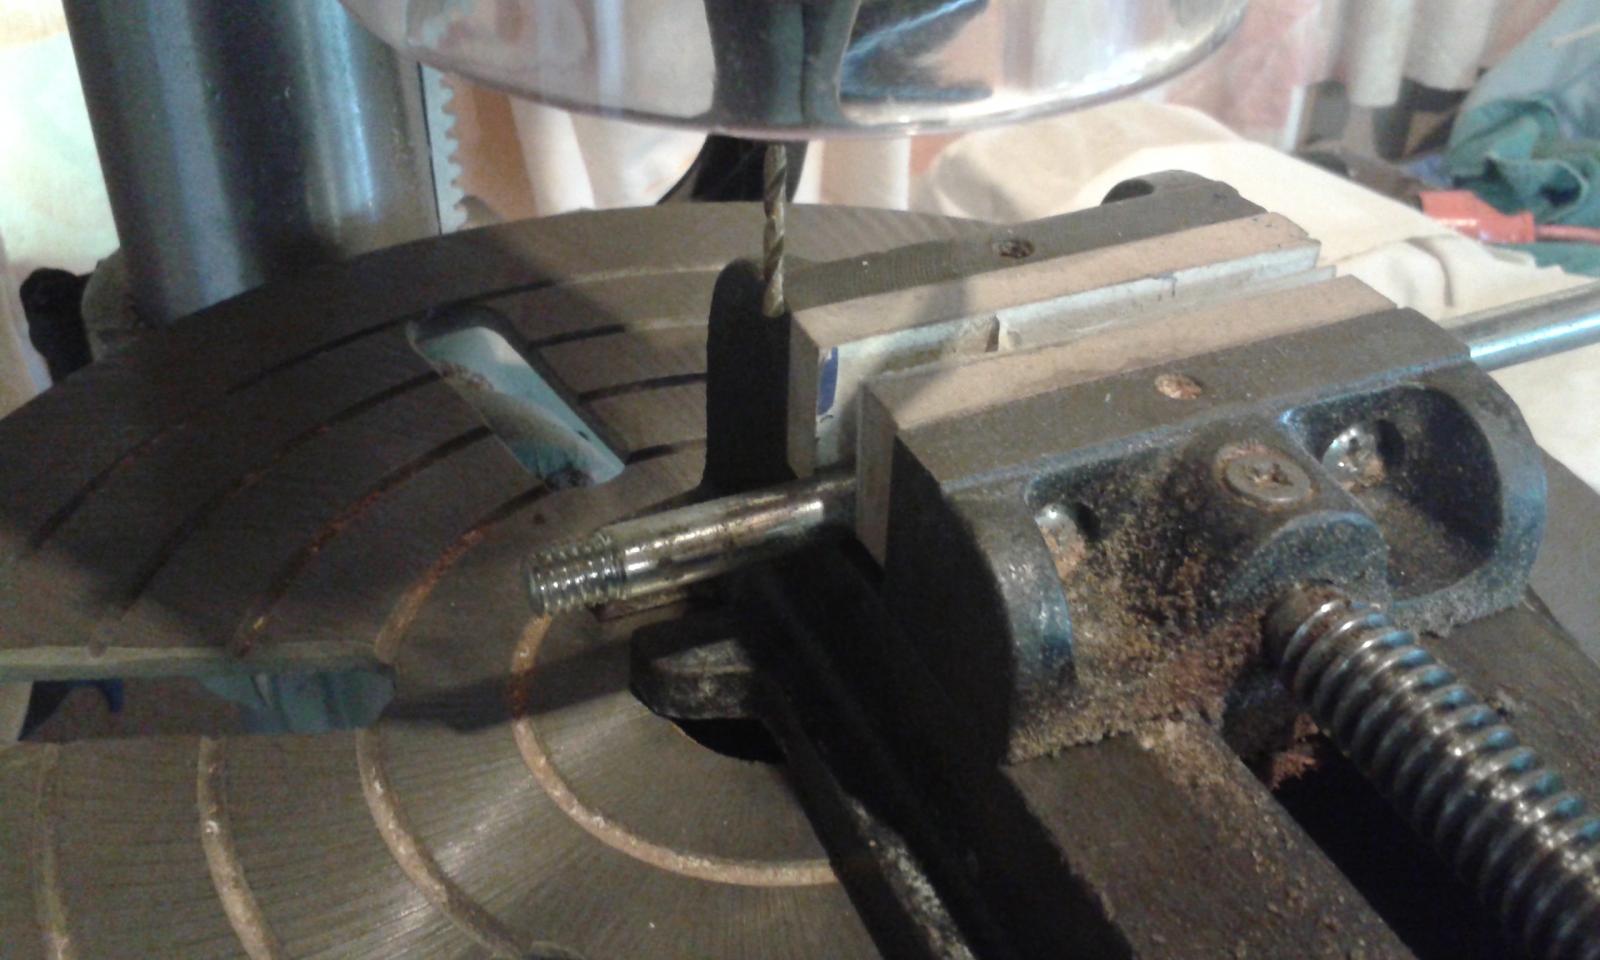
The shaft then had four holes drilled through. These were measured and marked when I had the circles cut so they were the right distance from each other. One hole at each end for the split pin to hold the shaft in place and a hole at where the last join between the blocks would be. The short threaded end in the photo was cut off before the sander was put together.


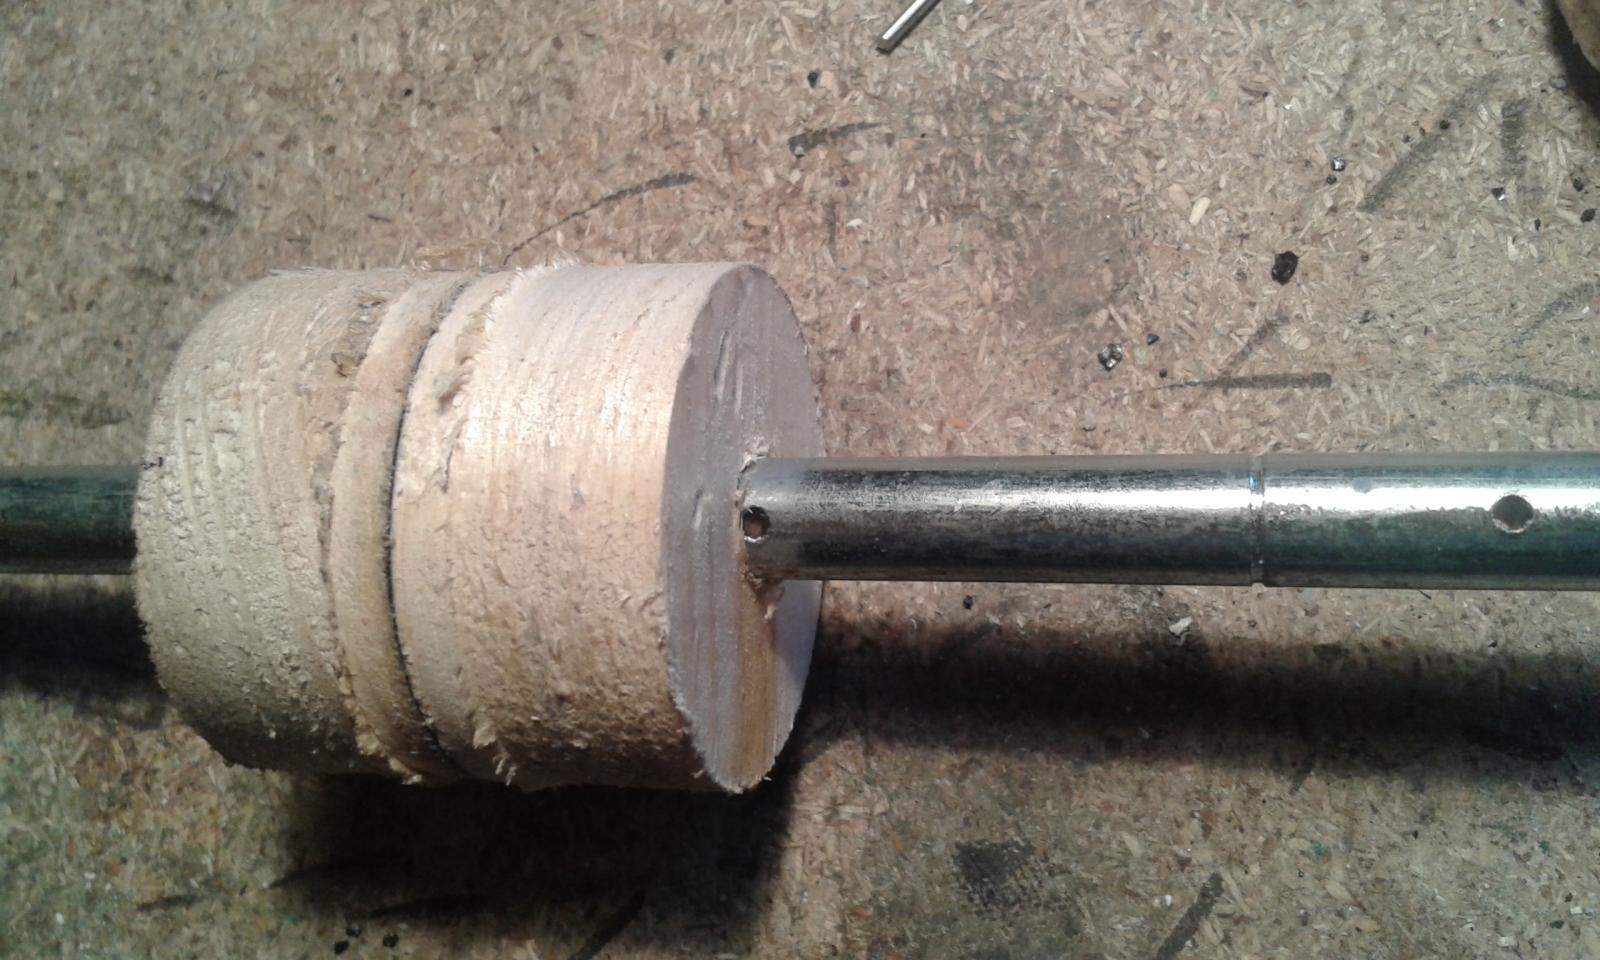
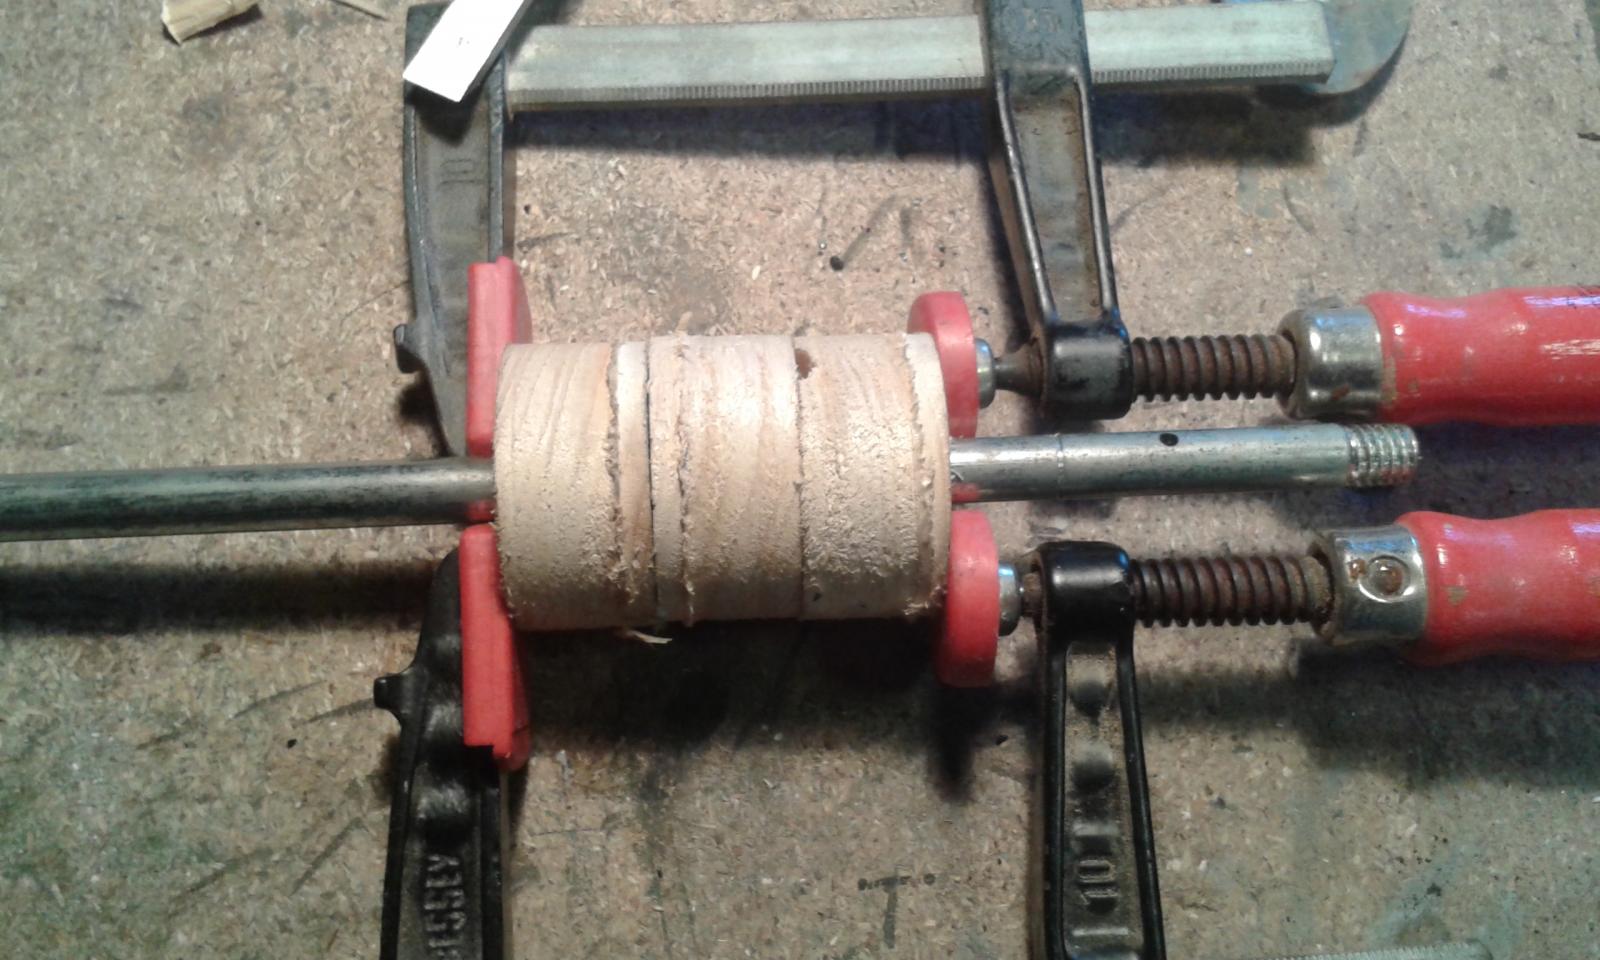
Blocks were then glued in place. Each of the end blocks have a small notch cut into them to fit a pin or in this case a nail with its head cut off through the shaft. This is put in to prevent the wood breaking of the shaft and spinning freely. Epoxy glue was used to fix everything in place then clamped and left to dry overnight.


- flying_dutchman2, nobotch, AON and 8 others
-
11
-
-
-
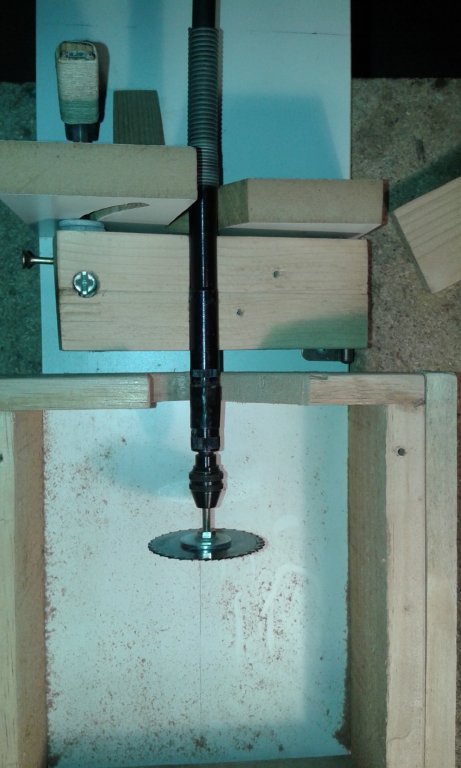
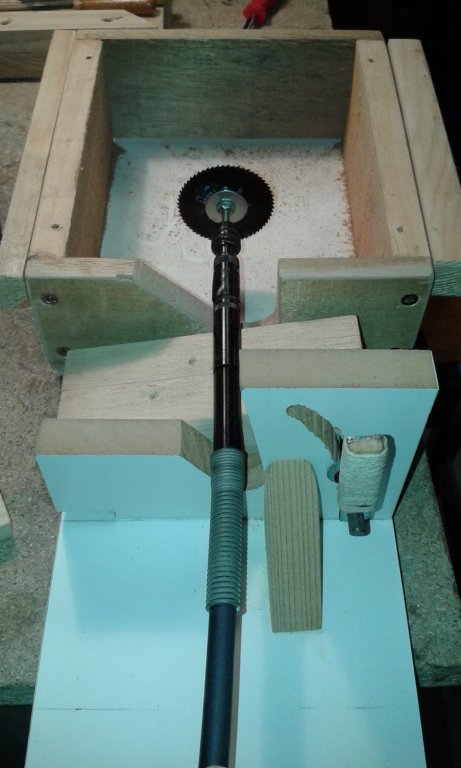
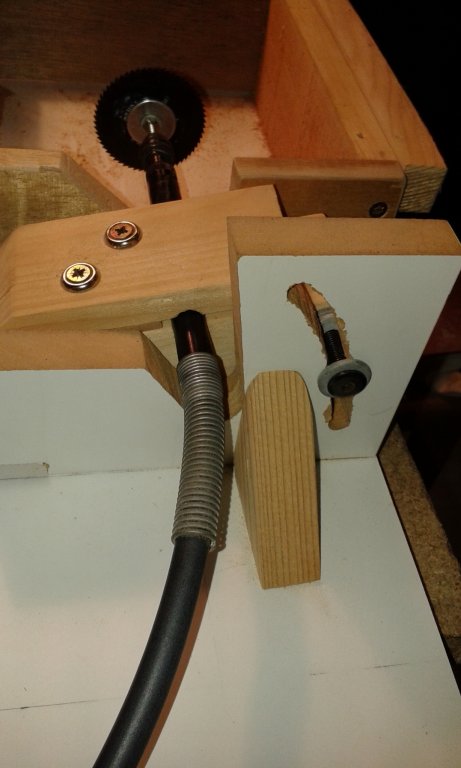
This shows my multi tool table saw, made from scrap I had around the shed. The flexible shaft sits in a groove on a hinged block to set the depth and has a locking block screwed on top to hold it in place. I have put a mark on the block to line this up each time I set up. The mandrel is from a small drum sander has a small washer each side of the blade to keep it a bit more rigid. The top was screwed on then I turned on the power and raised the blade to cut through the top.
- WackoWolf, harvey1847, Aussie048 and 4 others
-
7
-
Timmo
The saw blade is mounted in a flex shaft which is mounted on the side. This is able to be adjusted up and down so I can set the depth of cut. I will put a couple of pictures up to show the setup.
-
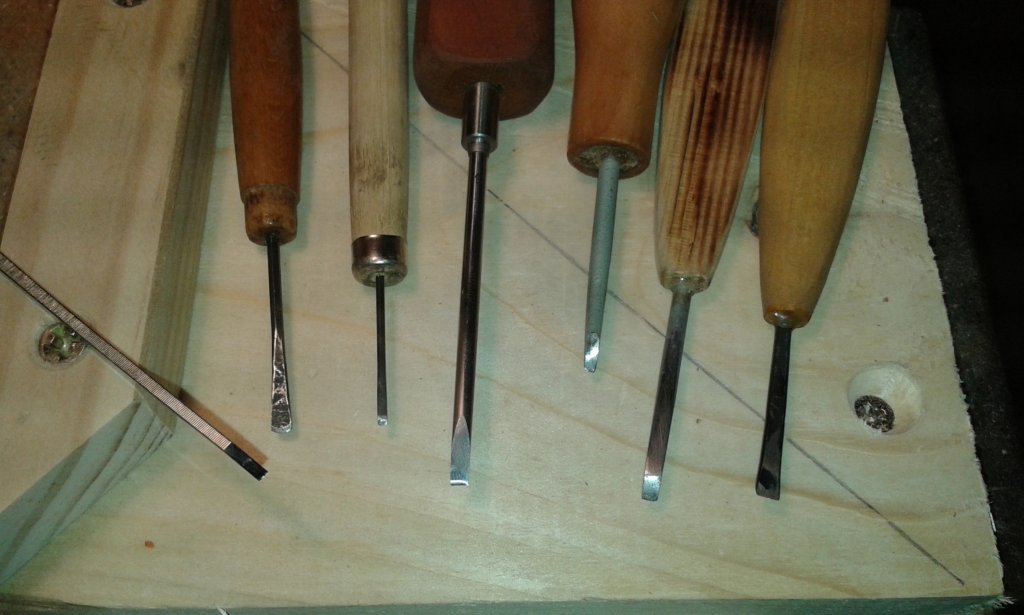
The one on the left is the only store bought one. The next two are made from allen keys. One is from a spraygun needle, this doesnt hold an edge as well as the others. Last two are concrete nails ground down to size. All were ground or hammered to shape then heat treated before the final sharpening. The handles range from old file handles to hardwood blocks shaped on the lathe. Some are just a flat stick with the blade epoxied in a hole in the end.
-
Thanks guys, I hadn't realised it had been so long since I posted here. I stopped on the Triton for a couple of months while I worked on a few tools and sorted out the shed to make it more user friendly. I did make a couple if small chisels - only because I dont want to spend lots of money on a range of sizes. Only the 3mm one on the left is store bought. they look a bit rough bit cut nicely. The smallest one (not in pic) is 1.5mm.
-
Have been making a bit of progress again. Have a few more pieces in place.
- harvey1847, dewalt57, Pete38 and 4 others
-
7
-
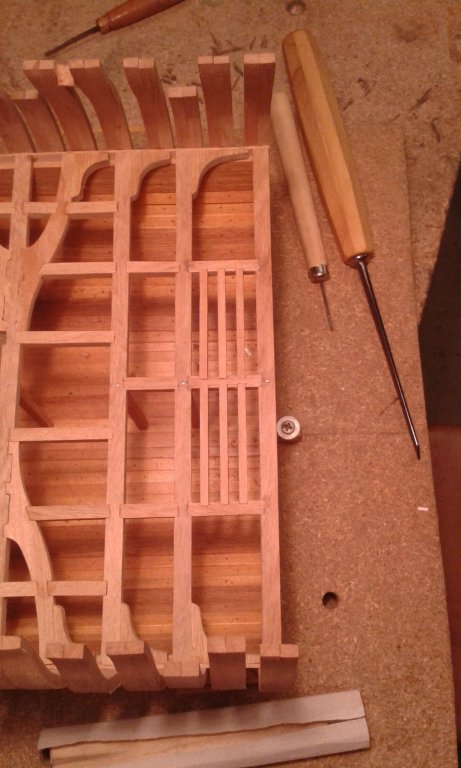
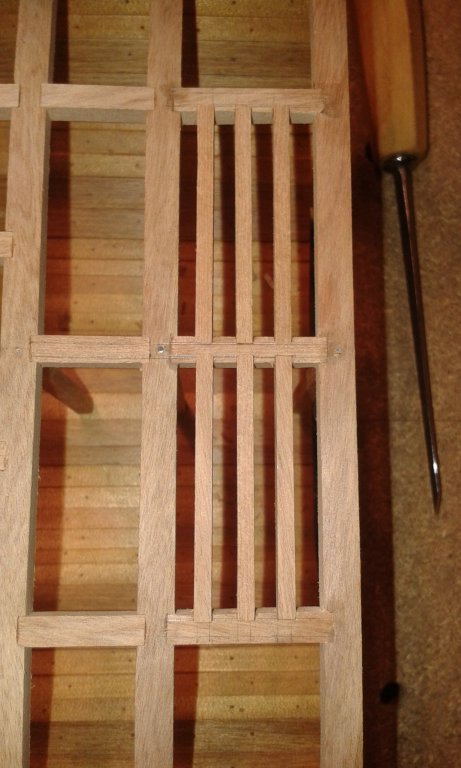
I have some of the hanging knees fixed in place, hopefully have all finished tomorrow. It will take a bit longer to get them glued in place. Only glueing one or two at a time otherwise they get knocked around when I try to glue the next piece. Will start the smallest of the deck beams when the knees are all in place.
-
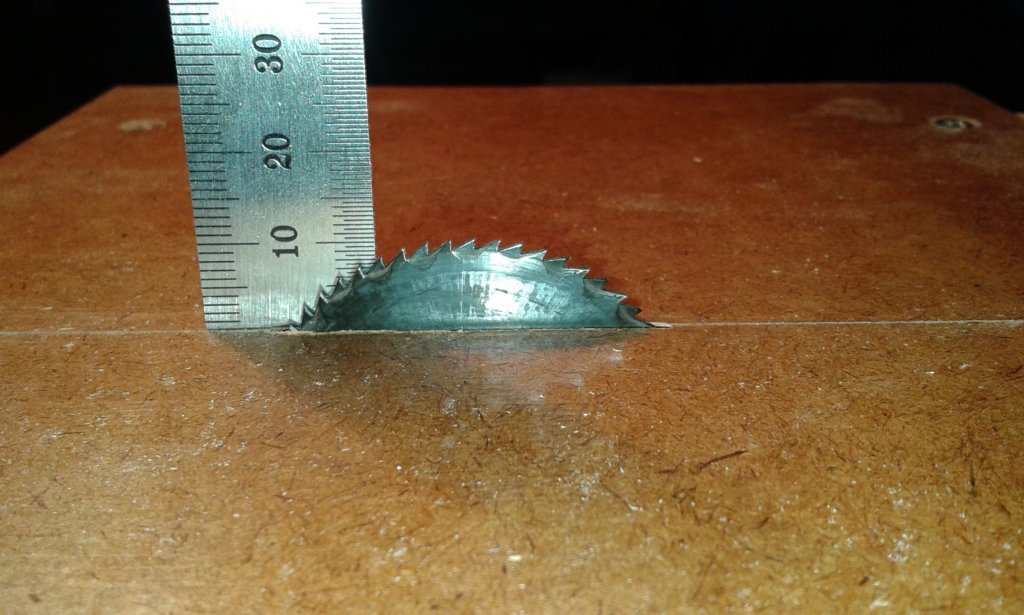
The square is 50mm x 30 mm, with a Rimu handle. I cut and L shaped piece then filed and sanded until it was square. The timber was glued into place with epoxy and then sanded. Finished with oil and wax. Here it is against its larger version.

- harvey1847, mtaylor and Mcdood
-
3
-
Its been a couple of weeks since the last post. All the family has recovered and I managed to catch up on few jobs around home . Nothing more on the build. I did manage to get a couple of new tools made in the few minutes in the shed. Decided I didnt need to pay a heap of money for a small square and my others (all 5) are too big to be of any use on the Triton. So a small piece of Steel, spot of epoxy glue, and scrap of timber later I have a minature square.

-
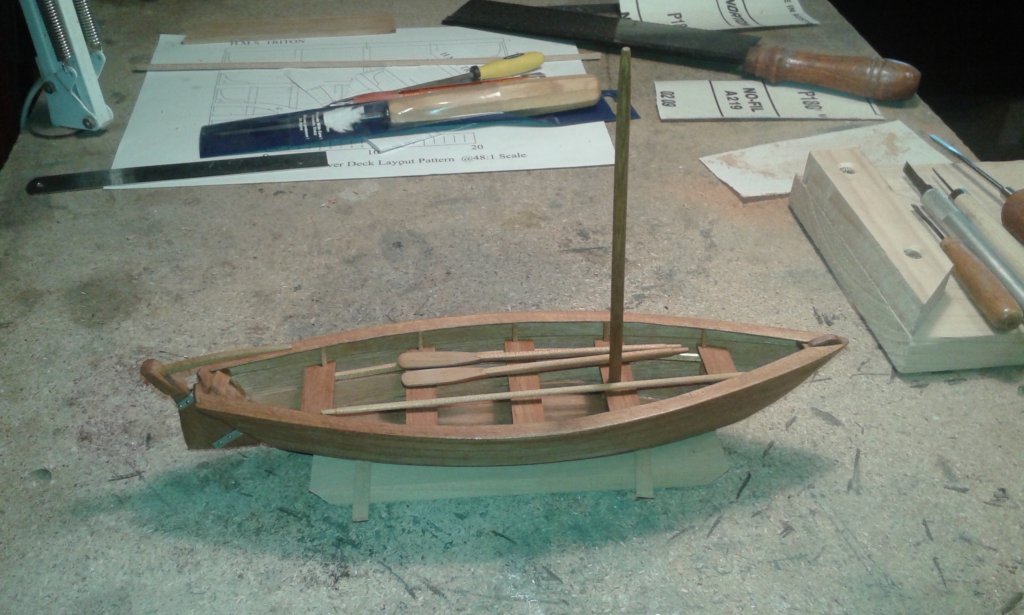
That is a nice looking dory Bob, great colors and detail. I have the same plans and will be building one once I finish the Triton cross section. There are a few tips I will use when I do mine - the buckets look easy the way you have made them.
-
Slow building this week, kids are under the weather so not a lot of time to spend in the shed. This weekend is out too as have been given a list of things to do. I think I will have to sneak down in the evening once everyone is in bed to get a few minutes of building in. Only problem with that is winter has arrived and it is freezing cold sitting in a tin shed late at night. Fingers have trouble mooving after a while.
-
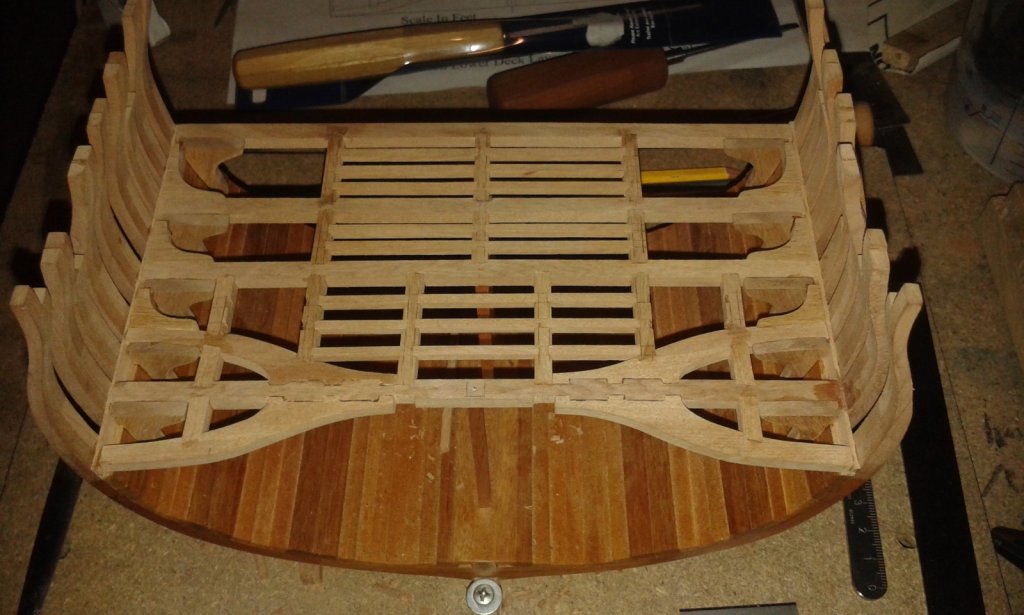
Got a few more beams in place over the weekend, they need to get a bit of a sand to tidy them up but they turned out ok. I dont have gaps that are too big, so I am happy about that. Still shaping the knees to fit so that will be next weekends job, hopefully.
Latest pictures


-
That is a good selection of timber. Should be a good looking build when done.
-
The clamp on the rear beam on the left is where I ripped a chunk out where I wasn't supposed to - should be invisible when glue has dried and other pieces glued into place.
I can tell the forst mortice from the last but I am pleased I only had to make one of each of the beam arms. I have spare lengths of timber set aside so I would be able to redo when needed.
-
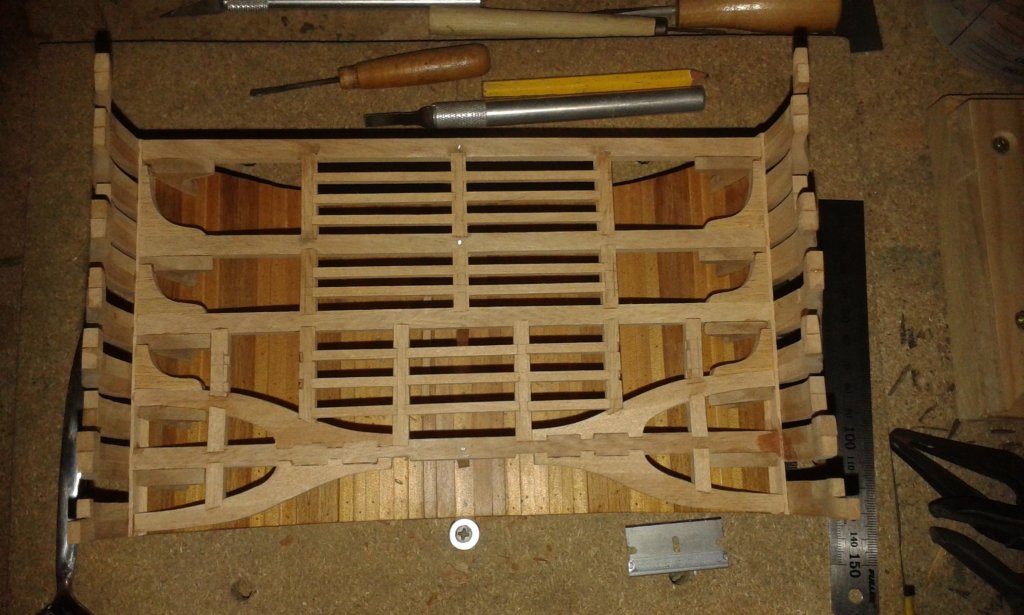
I have fixed the beams in place and started cutting the notches out. Just a dry fit here to see how it looks. Still a bit of tidying up to do yet.

-
Looking good Rusty, That red heart is a beautiful looking timber. As others have said the joints are an excellent fit.
-
Always get a answer fast here. I have contemplated for a couple of days and decided to try doing the smaller size and see if I can make these without them breaking. Otherwise will do what Rusty has done and go half way. The more I look at the two pics side by side the larger looks too large, but that could be my eyes and staring for too long.
-
Ok, I need a bit of help. I have to plans that look the same except for part 13 - the hanging knees.
These are on drawings labelled Midship Cross Section 1 and Midship Cross Section 12.
I have pictures of the difference below and cant decide which is the shape to use. I guess the larger piece has more strength and would be easier to make but which is more accurate?


-
Couple of photos of the sanding table used for the knees and other small parts. Built from scrap mdf and timber them a coat of paint to dity it up. Not bad for an hours work. Overhangs the workbench so the flexishaft fits next to the edge. No wobble in the sanding drum that I have noticed, but have only used lightly so far.

and in use

Here are the larger sanding drums I use in the drill press. Largest is 75mm middle is 38 mm and the dremel type.


Triton Cross Section by Snowmans
in Cross Section Build Logs for HMS TRITON
Posted
I have all of the deck beams fixed in place. Need to give them a light sand then the deck will belaid on top andit will be all hidden. This has been a good practice for the top deck, I may leave this open to show some exposed beams. Will have to decide when I get to that stage, and see how good the joints are.