


cobra1951
-
Posts
947 -
Joined
-
Last visited
Content Type
Profiles
Forums
Gallery
Events
Posts posted by cobra1951
-
-
-
Thanks Boyd
you can find the sacks and lots of other stuff here http://www.ogauge.co.uk/accessories_c5721.aspx
The postage is a bit dear though around $15 for you
-
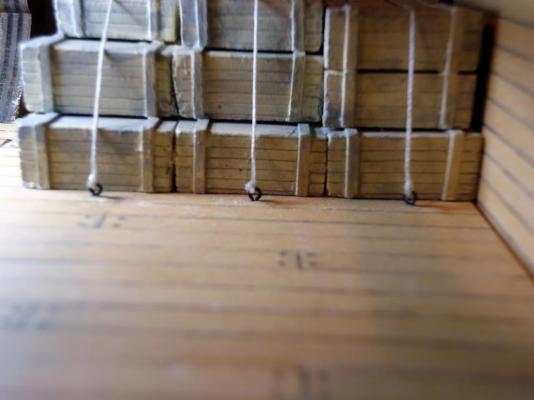
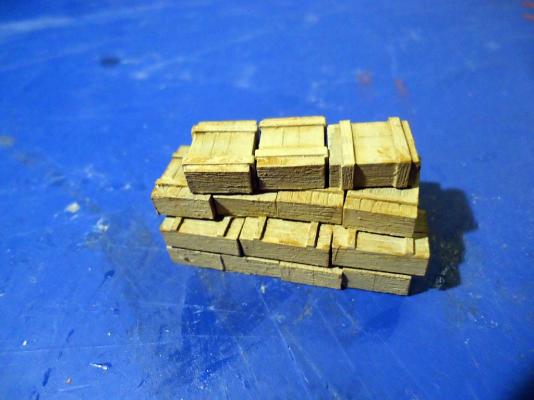
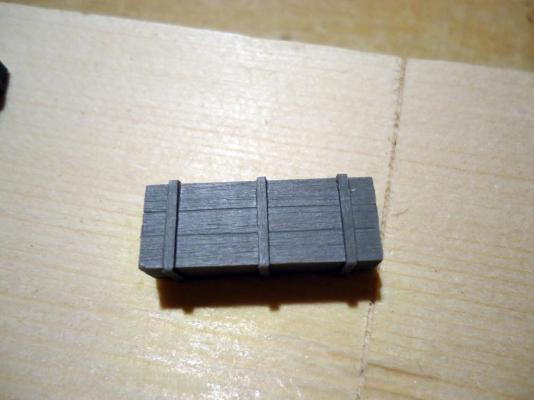
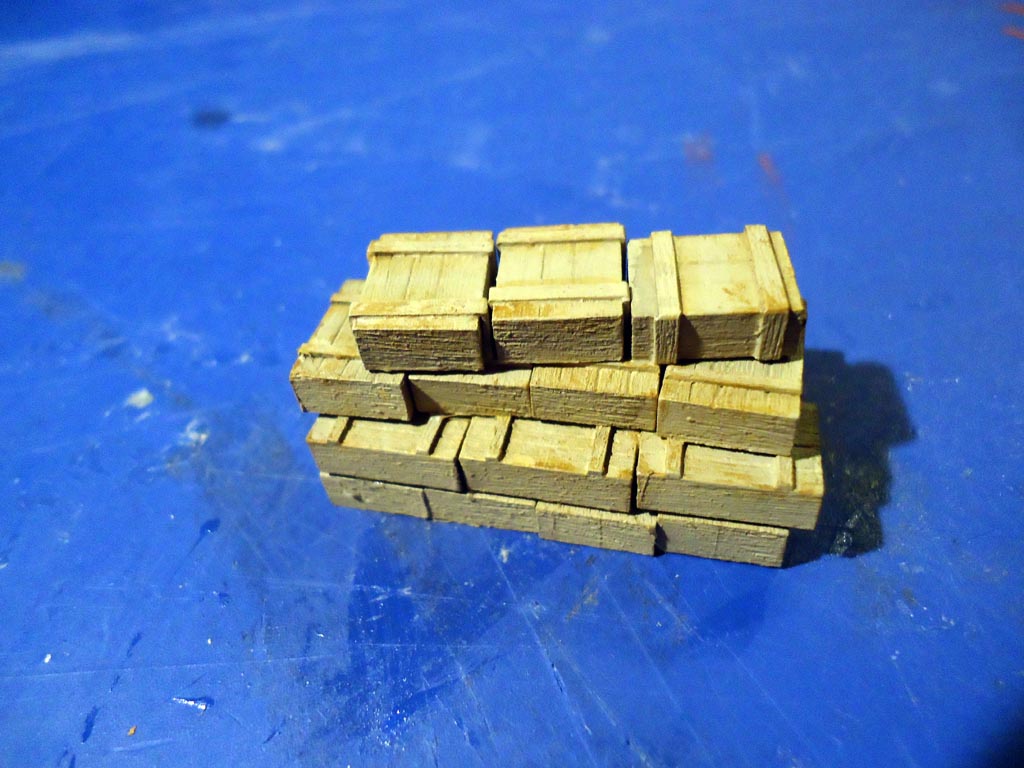
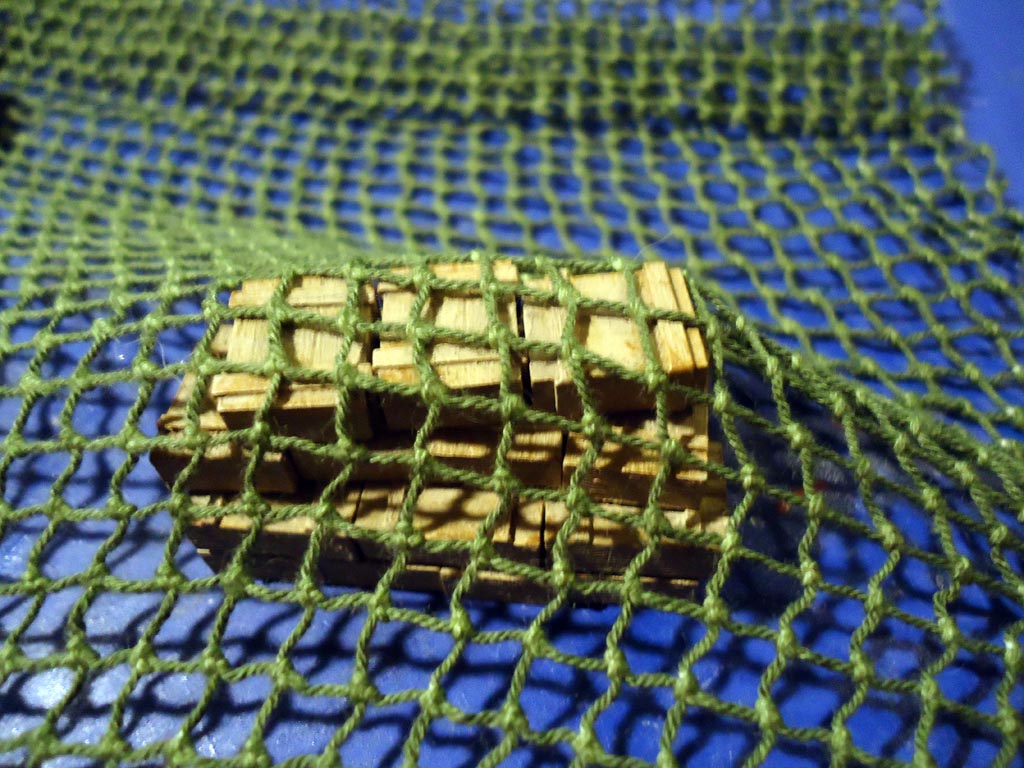
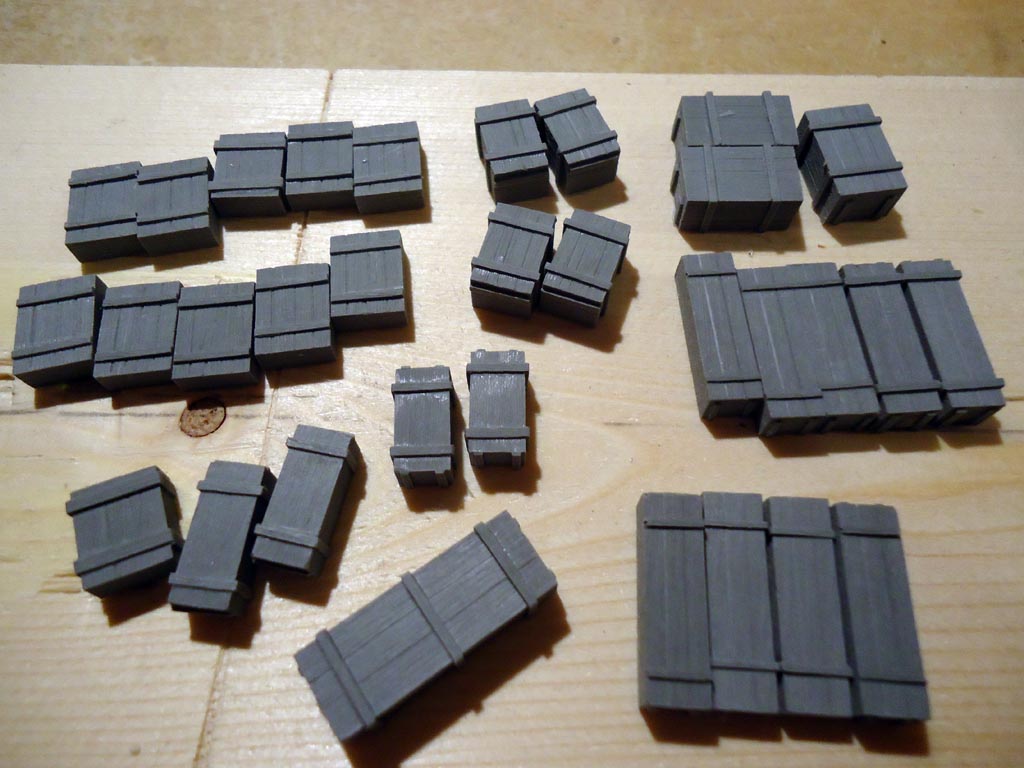
Painted up some crates and weathered them with a mid grey wash and hacked a few bits here and there to make them look old, then glued them to the rear cargo hold deck.
Then i blackened some more eye bolts and fitted them around the crates.
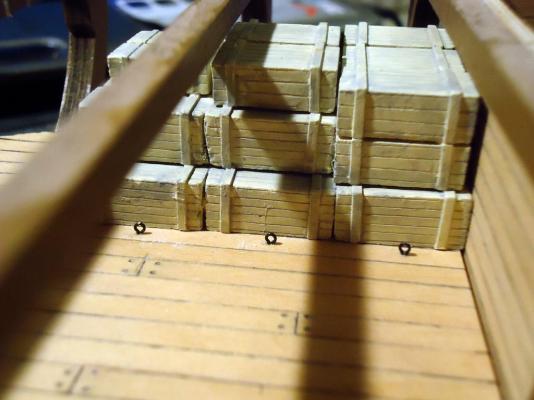
Next i took some rigging cord and lashed the crates down. I may not use the cargo nets because they hide a lot of detail and once the middle deck is on it will be dark in there, so i may just use them over some of the near side cargo.
- foxy, michael mott, CaptainSteve and 4 others
-
 7
7
-
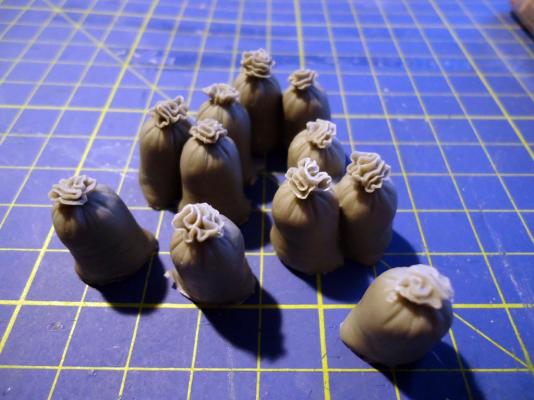
Still getting my cargo items together
I was going to make some sacks from modelling clay as i could not find any decent ones in 1/48 scale. Then i struck on the idea of searching for O gauge sacks and suddenly i found lots of them. Although O gauge is not 1/48 scale it is 1/43 scale and that is near enough for me.
These will be use to represent potato sacks etc
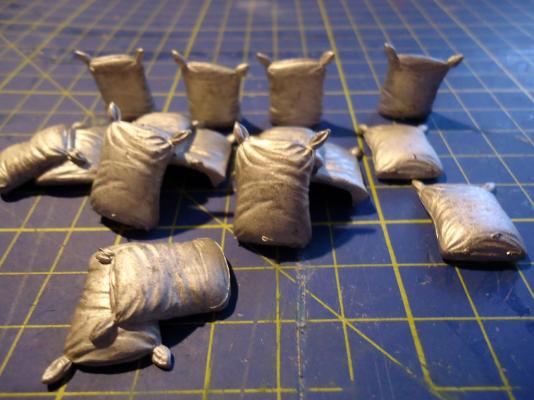
These were for mail sacks but they will do fine for my flour sacks
And as the crew have to eat at some point i got them some baskets of fruit and vegetables


Waiting on some more wooden barrels and buckets now
-
Painting or varnishing the blocks is all a matter of choice, you do what you feel looks best. The blocks in the instructions are fitted with brass wire but again you can use some thin rigging cord if you want
-
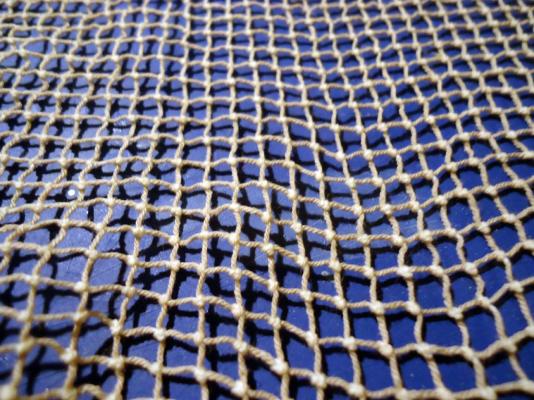
Sorted out the cargo netting
Changed it from this green colour

To this more natural looking hemp colour. As the netting is 100% natural cotton and not nylon i just dropped it in a 50-50 solution of water and bleach for 3 to 4 minutes then rinsed all the bleach out of it
-
Thanks I'll take a look on there
-
-
Hi Frank
I could almost swear that is a Wooden model if i didn't know better, looks great mate
- dgbot, riverboat, Old Collingwood and 4 others
-
7
-
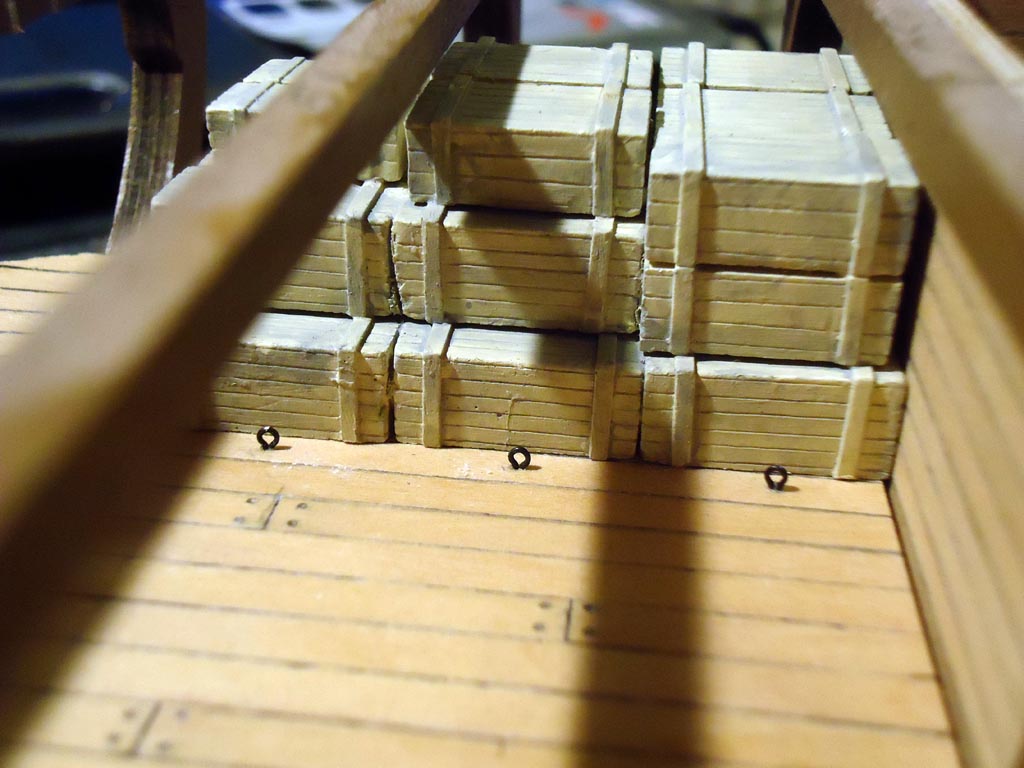
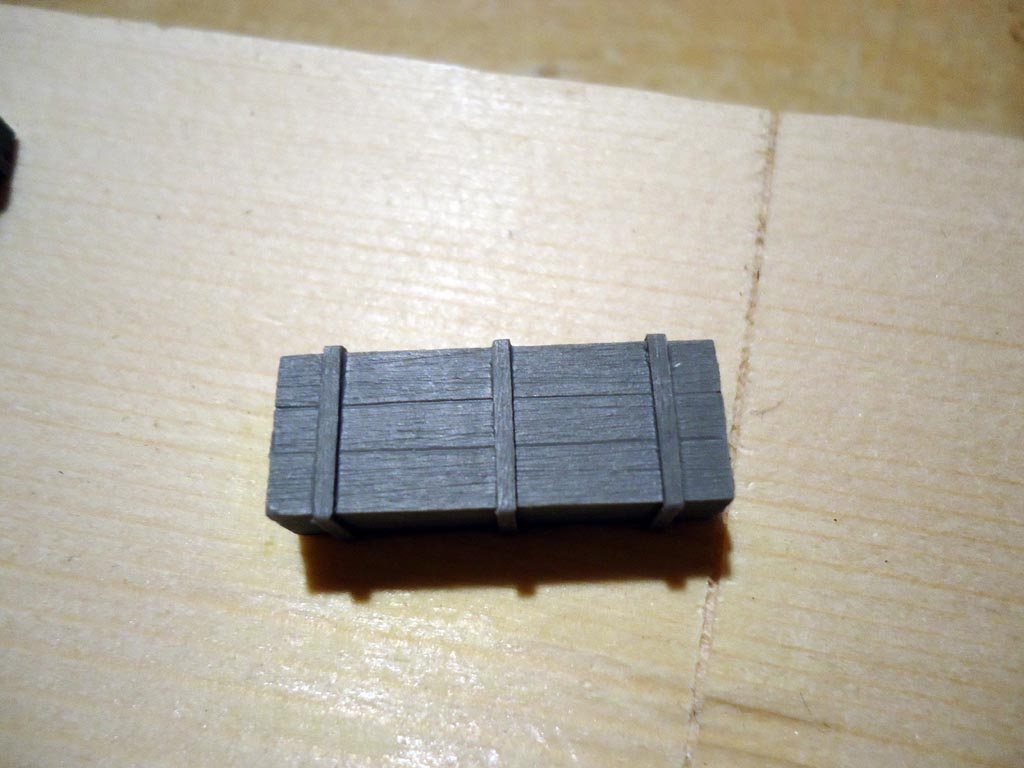
I decided to order some different crates but these will be a while as they are coming from Canada. Not wanting to be bored, i painted up a few of the crates i already have just as a test and then made them into a stack as if they where in the hold and then made them look aged (bit like me lol). When i do the actual crates i wish to use i will fit eye bolts into the deck in the holds and then using some rigging cord i will lash the stack to the deck.
Once i am satisfied with the placement of all the finished crates i end up with i will them place some cargo netting over the crate stack. In the next picture i have just placed the netting over the stack just for demo purposes, the final fitting will be a piece of netting cut to size then tied down to the same eye bolts that the crates are lashed down with. I am also going to try and see if bleaching the netting will get rid of the green colour and if it does i will then dye the netting to a more natural hemp colour. If not i will just have to put up with the green. Also once stretche the netting will have a thinner appearance than it does in the photo.

Next project is an attempt to make some flour sacks and some potato sacks
-
Well back in the swing of it.
Tidied up the StarB side and turned to do the port.
Checked my intray of parts made up and found I had not added the Binnacle, 'Durrrrrr'.
With the shrouds in place it was a struggle to get this fitted, 'so next time,' Bin before Shrouds'.
The tie downs were the problem, but all went well.
Now to the Port, 'No not the drink port, 'but maybe a good Idea lol'.
Happy New Year folks.
Frank.

Nice recovery Frank

And Happy New Year to you and everyone else on this fine forum
-
Hi LA
I got mine from the eBay UK site but you can get them from the US eBay site i had a look on there and they have exactly the same ones. Go on eBay and use search term 1/48 scale crates and you will get loads of them. Be careful though some are crates plus tents. There are some better ones on there than the ones i got but they are not available here.
-
Those are great crates as for cargo.
Why not wrap them with a thin wool HD ( high dense) material...... oh, yes that's the way I would go....
I have purchased some cargo netting as well so the plan is once painted up most of the crates will be stacked in piles in the holds then lashed to the decks then covered by the cargo nets
-
-
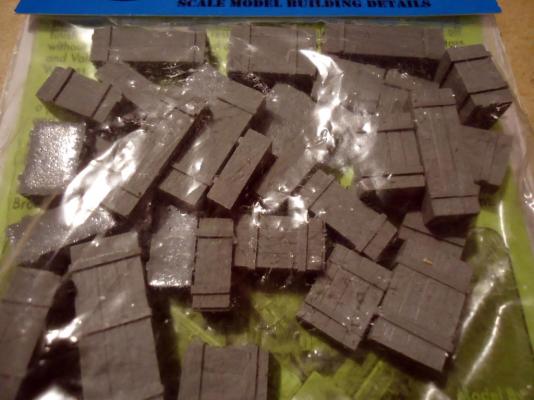
Got myself some 1/48 scale mixed sized crates to use for extra cargo. They seem okay for the job and have a good degree of detail, so i have ordered some more. Just need to give them a good degreasing and paint them up to look the part now
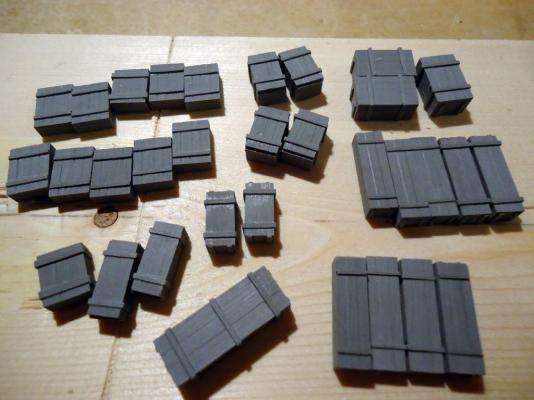
- Altduck, foxy, zoly99sask and 3 others
-
6
-
Absolutely Superb!!! planking
-
Hi Captain
I agree that the bales would have been tightly packed, so maybe the words "soft and lumpy" was the wrong term for me to use. The plan is to use the wadding but pack it as tightly as i can so that when it is roped up there will be a bit of give where the rope presses into the bale and not be solid like using the supplied wood would make them. Talking of the supplied wood i have now found it buried in among some of the other wood, but there are no plans to use it. I have dug out an old white t-shirt that has faded and i will be using that for the covering. They probably where not on the Bounty anyway unless they were to be used for trading, but they look good so i will use them.
-
Good idea to use the wadding (I think I may do the same)
I also prefer a fully rigged model without sails (just my personal opinion). The rigging and mast structures are one of the most beautiful aspects of these ships and I think the sails conceal too much of them.
However, I do like sails on schooners and tall ships
You're thinking is exactly on the same lines as mine, why hide all that beautiful intricate work that goes into the rigging
-
Very nice looking build Bob,
now`s your chance (accesswise) to place nice Little inovative kit bashing details into the below deck Areas....
lovely work..
Nils
Hi Nils
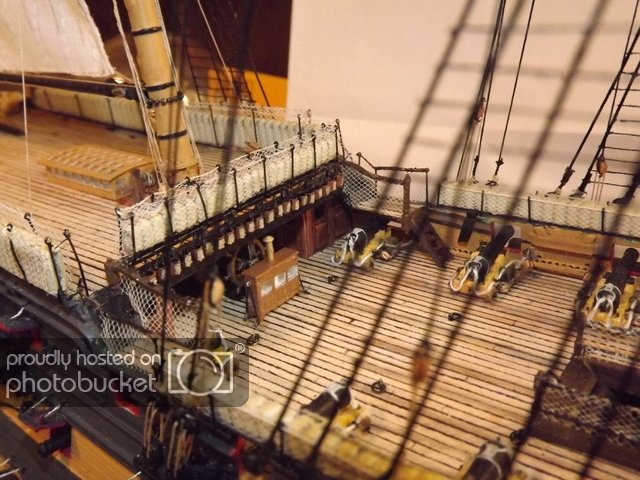
Thanks for your kind words. The only thing i am planning on adding to the hold areas is a lot more cargo than is supplied with the kit. As you say while there is good access is the time to do it. I just have to keep the area where the ladders will be clear
-
Hi Boyd, thanks for the reply. The wood is not too much of problem as i have loads of wood batons lying about that i use to make things like plank cutting jigs etc. It was the cloth that i was more interested in. Like you say the bails could have been cotton so my plan is to get some wadding that they use to stuff pillows etc or even cotton wool and wrap that in cloth, this would leave the bales soft and lumpy like real ones, I am thinking about using an old off white t-shirt to do it with, because the sail cloth has stitching in it. As for the sails themselves i am still in two minds whether to use some of them in the holds or to use them on the masts, the reason for this is i think a sailing ship model looks better just fully rigged without sails on. I must emphasize this is just my own opinion and no way takes away from the look others decide to go with.
-
A quick question for other builders of this kit. with reference to picture 103 in the manual it shows parts and part numbers (472 and 473) to make up bales for the cargo, none of these parts are in my kit except for the rope, has anyone else got these parts IE. the basswood and the cloth in theirs or are you supposed to get your own.

-
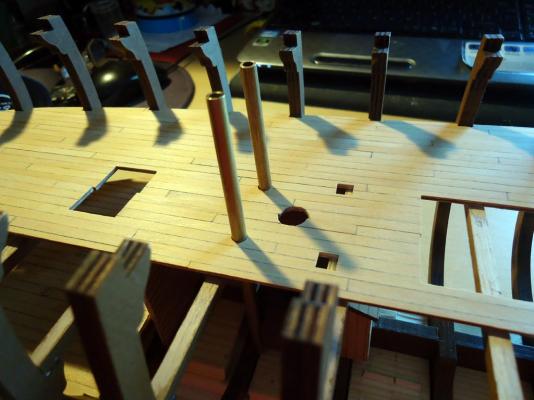
Thanks to the information supplied by others doing logs of the same model i knew i would have to file away some of crossbeam 49 to allow the bilge pump tubes to pass through the deck.
Dry fitted the deck and marked out were the crossbeam needed trimming then removed deck and made the adjustment needed in the crossbeam
Then dry fitted the deck again and test fitted the bilge pump tubes.

- thomaslambo, canoe21, zoly99sask and 1 other
-
4
-
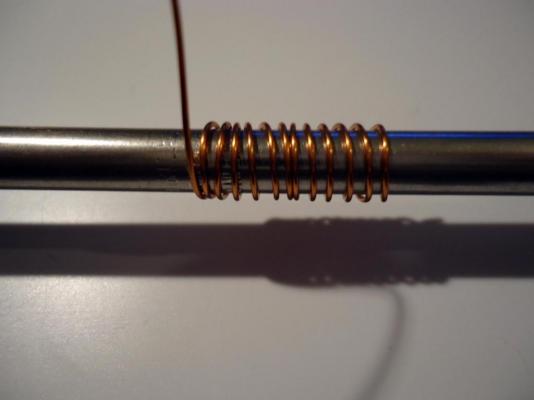
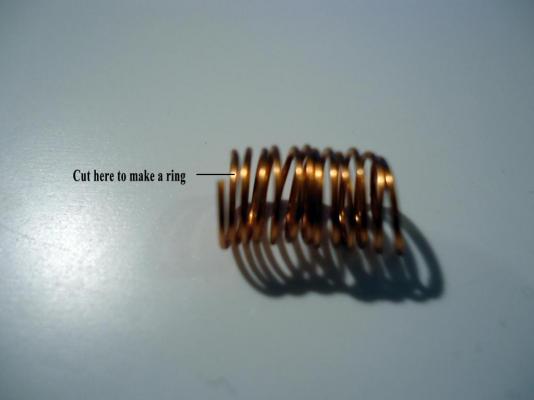
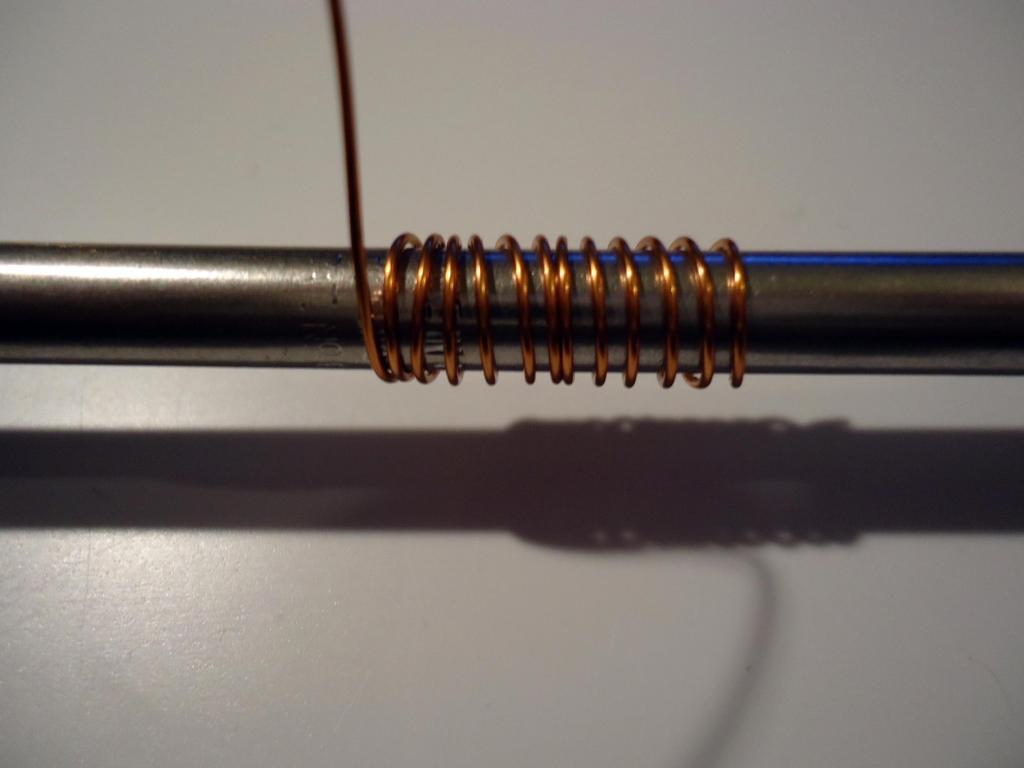
There is a way you can make good rings with brass wire.
First take something round which is the same diameter as the ring you want to make, a screwdriver for instance. Then wrap the wire around it in a spiral keeping it as tight as possible. Once done, slide the spiral off the object you chose to wrap the wire round and cut it in the place i have highlighted in the second picture, you can cut off as many as you need all the same size and perfectly round. Note in the pictures the spiral was not tight as it was only to be used for reference purposes.
- Nirvana, CaptainSteve, Canute and 5 others
-
8
-


HMAV Bounty By cobra1951 - Artesania Latina - 1:48
in - Kit build logs for subjects built from 1751 - 1800
Posted · Edited by Cobr@
Thanks Lawrence, your remarks are much appreciated.