


jcoby
-
Posts
88 -
Joined
-
Last visited
Content Type
Profiles
Forums
Gallery
Events
Posts posted by jcoby
-
-
I suppose I could just approach this build in metric from the very beginning!
Fractional divisions is where Imperial really shines. Need 1/3 of 12"? 4" Need 1/3 of 100mm? 33.333333...mm. Need 1/2 of 7/16? Just multiply the denominator by two (7/32). Need 1/6 of 12"? That's 2". Need 1/6 of 100mm? Good luck doing that in your head.
I work with both measuring systems and metric has its advantages but Imperial also has its advantages. There is good reason the construction industry hasn't moved to metric and other countries just adopted metric versions of the Imperial system for construction.
-
-
-
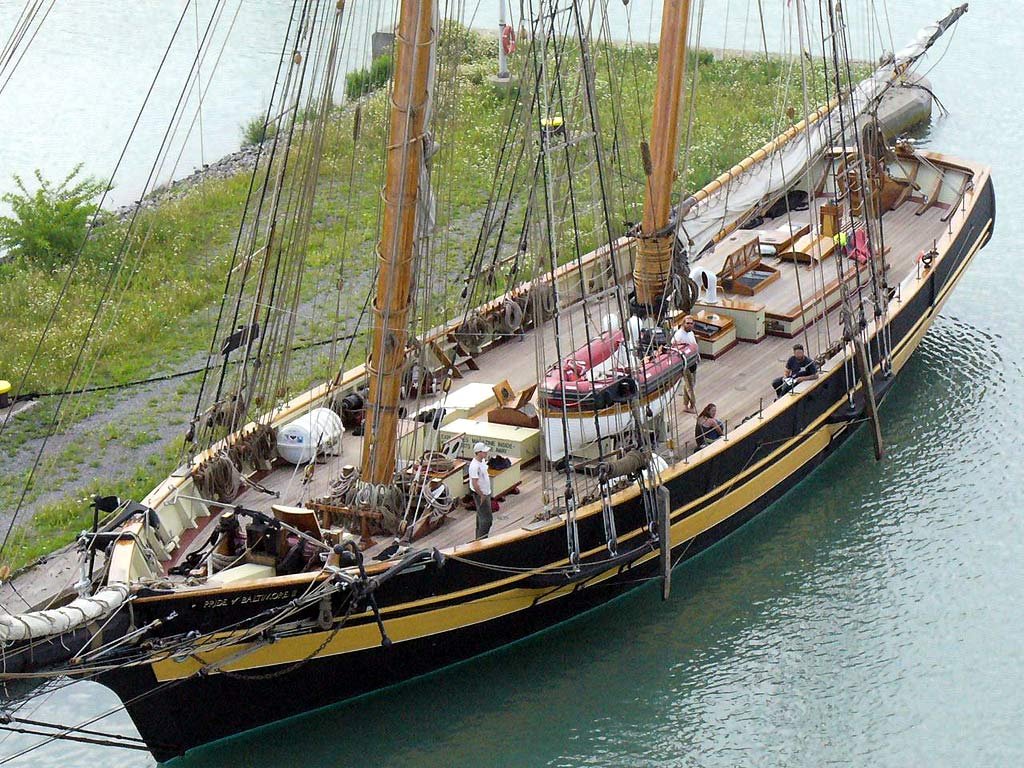
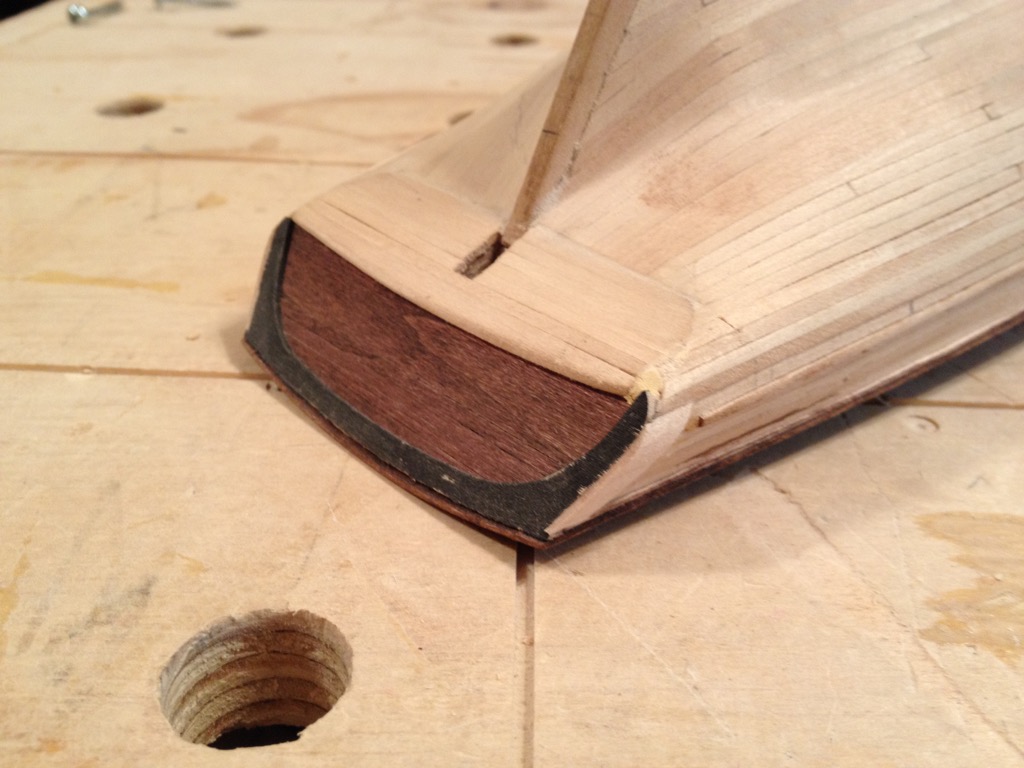
I'm also having a hard time trying to figure out what's happening with your transom. It looks like you didn't sand down the counter enough perhaps?
Maybe these pics will help some? I'm happy to take other pics if they'll help.
-
I like the simplified crest. The plans call out the full design but I couldn't figure out how in the world to even begin to apply that to a 1/4" high piece of basswood.
What are your plans for the transom lettering? The "PRIDE OF BALTIMORE II" lettering is carved into the transom where the "BALTIMORE MARYLAND" lettering appears to be painted on.
I ran into the same problems with the side fancy pieces not meeting up with the planksheer. I think I just added a bit of filler to the planksheer to make them meet up. The transom on the Pride is one of the more fiddly and difficult parts IMO. Mostly because the plans don't really call out exactly how it's supposed to assemble.
She's coming along nicely.
-
I may have ripped a few strips out of the 1/32 sheet to make the trim. I know I've had to rip several pieces from the laser cut stock to make up stock that wasn't supplied with the kit.
That was about three (!!) years ago at this point so the details are a bit hazy.
Where does it show the 1/32 square stock being used to trim out the gun ports? The gun ports are by far the least enjoyable part of this build, especially since the cannons don't fit (they're far too tall) and it's all fiddly little pieces that have to be assembled in a jig with tweezers.
-
I just looked at mine and it looks like I used the 1/32x1/16 for the planking then I ran the piece of 1/32x1/32 square stock along the top under the rail to simulate the top plank turned sideways. Five of them fit perfectly. All I had to do was plane the bottom strip down a bit when I got to the continuous scuppers.
I haven't found a need for that 1/32x1/32 strip anywhere else. I might have been able to use it as detail on the compass box. Honestly if you left out that 1/32 square detail I'm not sure it would be noticeable.
-
I used scrap from the sheet the keel timbers were cut from to create the hawse timbers. You can glue them up of multiple pieces as well since they get painted the cream color.
-
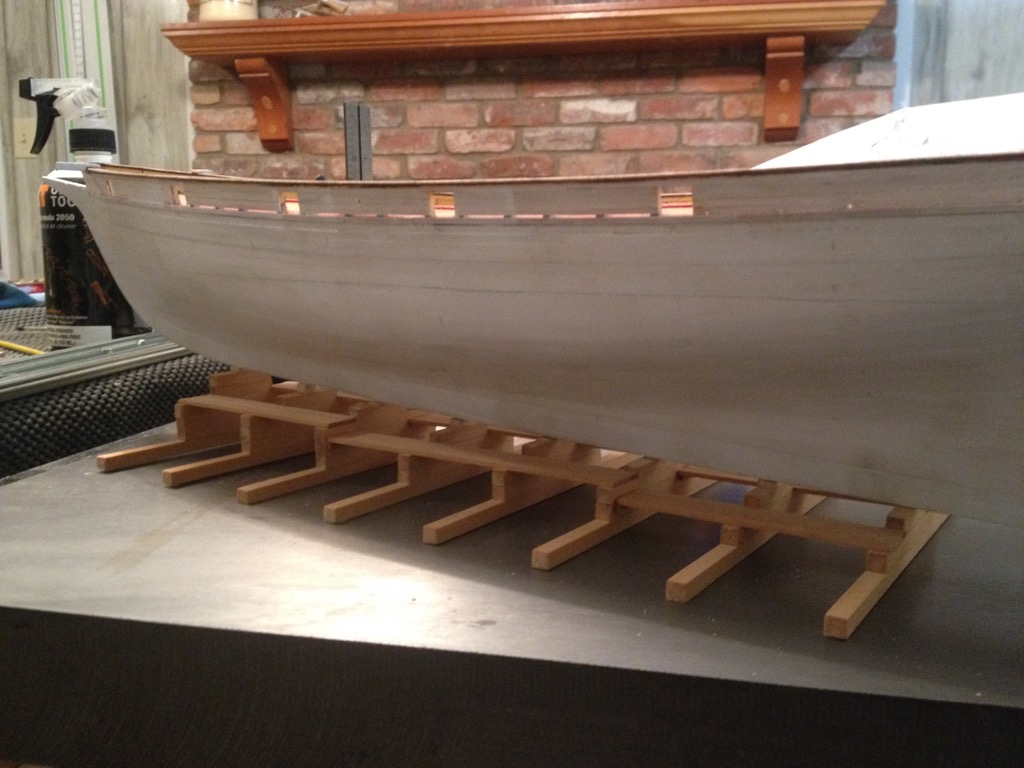
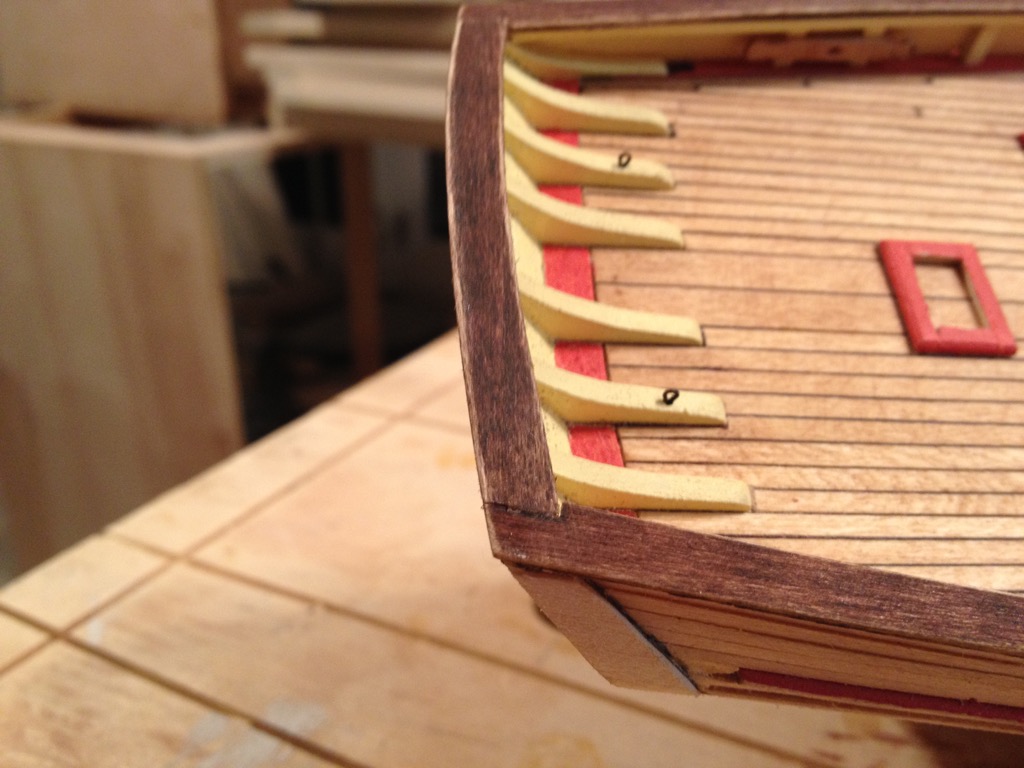
Do you have the stanchions leaning forward or is that lens fisheye? They should be vertical.
Check out this picture:
-
I used a peice of the 1/4" wide strip and cut a notch to clear the planksheer to align the stanchions to the hull profile. This seems to be mostly correct except for the aftmost 4-5 where it needs a bit of tumblehome to align with the transom and transom knees.
I have no clue if this is correct or not but my rail seems to match closely to the plans and it looks like the pictures I can find online looking at the bow and stern. Mine came out a bit pointier at the bow comparing to the plans but I honestly don't know if that's due to a drafting error or an error on my part.
-
Sheet 5, detail 5-I (bottom, left side) shows the boom storage eyes and hooks in the outer knees.
I wouldn't worry too much about the Ipswich Pine stain. It's really light and you won't see it over the red. You can just wipe it off. I think I used the tip of a paper towel to get into tight spots. I also ended up painting the planksheer a few times due to handling. You want to apply wipe-on poly after, yes. I try to do it as soon as a part is done to help prevent it from getting dirt or other stains. I used satin. The deck on the Pride is unfinished so you won't want to use anything shiny. The mahogany and other trim is gloss though. I just used the satin for everything. Gloss just doesn't look right at small scales IMO.
As for gluing, you can always sand or scrape the area to accept either wood glue (PVA) or CA.
-
I used MS paints on my AVS, and they are pretty bad. I'll never use them again, as it takes a lot of work, and a LOT of thinning to make them be decent to use. They are terribly inconsistent from bottle to bottle, even in the same color.
As for spraying, it depends on your airbrush and how fine the tip/needle is. The MS paint can be thinned with distilled water until it is about the consistency of skim milk, and it will go through your airbrush unless your tip is fine. The paint doesn't have super fine (small) pigments like a good airbrush paint will, which is why it won't work with finer tips/needles.
Use some scrap wood (like the stuff you took the laser cut parts out of) and do some test sprays and see how it works for you. You can also add in some retarder if it's drying too quickly while spraying.
I'm glad it's not just me then. They're going in the trash as soon as I'm done with them. Maybe sooner.
The black is OK I guess. The other colors barely work. I've noticed the same inconsistency in consistency. One of the blacks was so stiff it would hold a paintbrush vertical. The other was more like elmer's glue.
I'll try some other things to try and get them to flow. And I'll try spraying some. If that fails I'm buying some other paints. I've got too many hours in the PoB II to ruin it with cheap paints. I'm really considering scraping off all this paint and starting over.
What paint brands are worth buying? I'll probably buy some black and yellow. And maybe the proper blue-green.
-
Jcoby,
very nice ship, beautiful made hull planking, deckplanking and bulwarks
Nils
Thank you! I'm learning as I go and I really owe a lot to this forum.
-
Painting continues. I'm really regretting painting the hull at this point. I'm not at all happy with it.
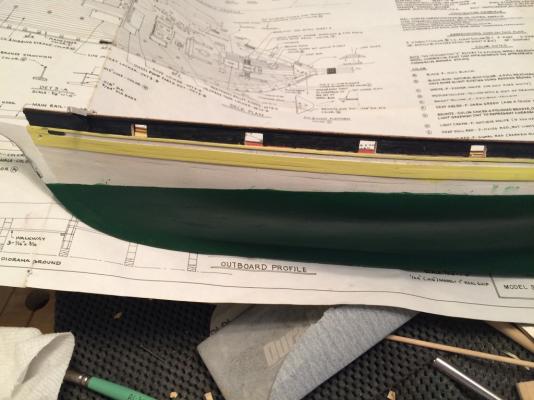
The sloppiness around the LWL will go away when I paint the black along the LWL. The yellow and black will need at least two more coats and the green will take at least one more to make six or seven (I've lost count at this point).
-
Speaking of the MS paints, they have this to say on their site (emphasis mine):
These historically accurate colors have been specially formulated for model ships!
High quality acrylic based paints can be thinned with water, thinner or alcohol. They clean up easily with water, making them ideal for airbrush use. Brushed or sprayed, paints dry flat with good grain structure and a smooth finish.
1 oz. bottles.
Note: color swatch you see will vary due to computer monitor/calibration differences and the fact that the computer screen is RGB. Color description at top will give you the best idea of the exact color. Model Shipways paints are not compatible with airbrushes.
So which is it? Can I spray them or not? I'm leaning towards not.
I do wonder if I can thin them with thinner. Adding some VOCs would help the paint flow and level quite a bit and it would slow down the flash rate.
-
Four coats of green later and it's looking like it'll need at least four more coats with some pretty healthy sanding in between. For some reason the MS paint flashes extremely fast even though it's fairly slow drying so I end up with some buildup where brush strokes overlap unless I'm extremely careful. Washing over the tacky paint with water helps some.
The green that comes with the kit really needs to be cut with some light blue (per the plans) to match the blue-green that was used on the real ship. Unfortunately I don't have any light blue paint.
-
I'm still slowly making progress. I spent about an hour and installed the cathead supports (knees?). After that I added the first coat of green to the hull. I didn't stress too much about the waterline. The black will define it.

Tomorrow it'll get a light sanding and another coat or two of green. It's going to take a lot of green to get an even color.
-
Hi jcoby, thanks for that advice - I will need to look on the plans for those 2 eyes. After deck planking, I was planning on working on the stanchions, bulwarks and railing above the deck. So, putting these eyes in prior to that makes sense as the deck is wide open right now.
I can't imagine doing the deck planking - especially the nibbing work, after the bulwarks are installed - it's hard enough to get a knife at the nibbing plank as it is now, much less if the bulwarks are in the way.
Andy.
I approached it the same as you. Hull, coamings, decking, stanchions, bulwarks. I wouldn't do it in any other way. I washed the inside of the hull planking with a 50% solution of white glue and water to shore things up a bit as well.
Oh and check the windlass against the plans. Mine was cast quite a bit smaller and the larger deck planks that go under it don't line up perfectly when built to the plans. I put in the larger support planks after decking was completed and I wish I had put them during deck planking.
-
Glad to see someone else working on the PoB II. She's not a very popular model here for whatever reason. Your build is looking good.
One thing you may want to do before finishing the transom is to mount the two eyes that go inboard of the pt/stbd knee for the lines that secure the boom at port. There is absolutely no room to drill them once you get the wales and transom installed. I sure wish I had!
-
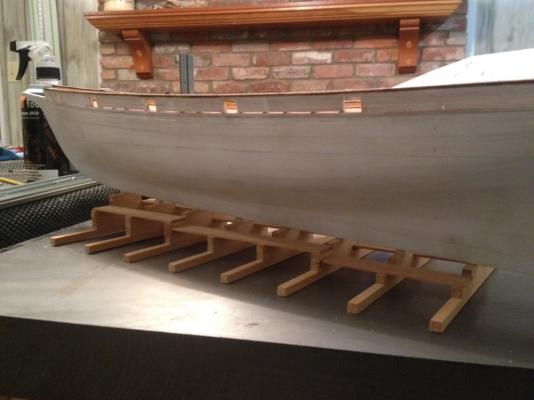
Progress continues, slowly. I primed the hull, sanded, filled low spots, sanded, and primed it again. I then mounted it to the stand and drew the water line.
I only have on photo of the result. The holes for the mount aren't perfect and it draws up a bit. It takes almost no force to push back down so when I mount the blocks to the final display stand I will glue or screw them down flush.
Next up is the green up to the waterline and the black above. Once painted I'll have to permanently mount it to the stand since the MS paint is pretty fragile stuff and tends to lift if handled too much.
Most likely I will leave the screws and outboard drive off the side of the hull. I realize the real ship has them but the castings that come with the kit are quite ugly and I feel they ruin the lines of the hull. I also don't really want fragile little things hanging off the side of the hull. They'll almost certainly get knocked off at some point.
-
Those are called catheads.

Thanks. I've been away from this model too long and can't remember half of these terms.
Also not pictured is me giving up on trying to install an eye on the side of the outermost aft knees. They're supposed to be used for securing the boom at port but I cannot figure out how to get them in there. I guess I could just jam in a piece of metal bent to a 90° with some hemostats or something. My drill will absolutely not fit in there.
-
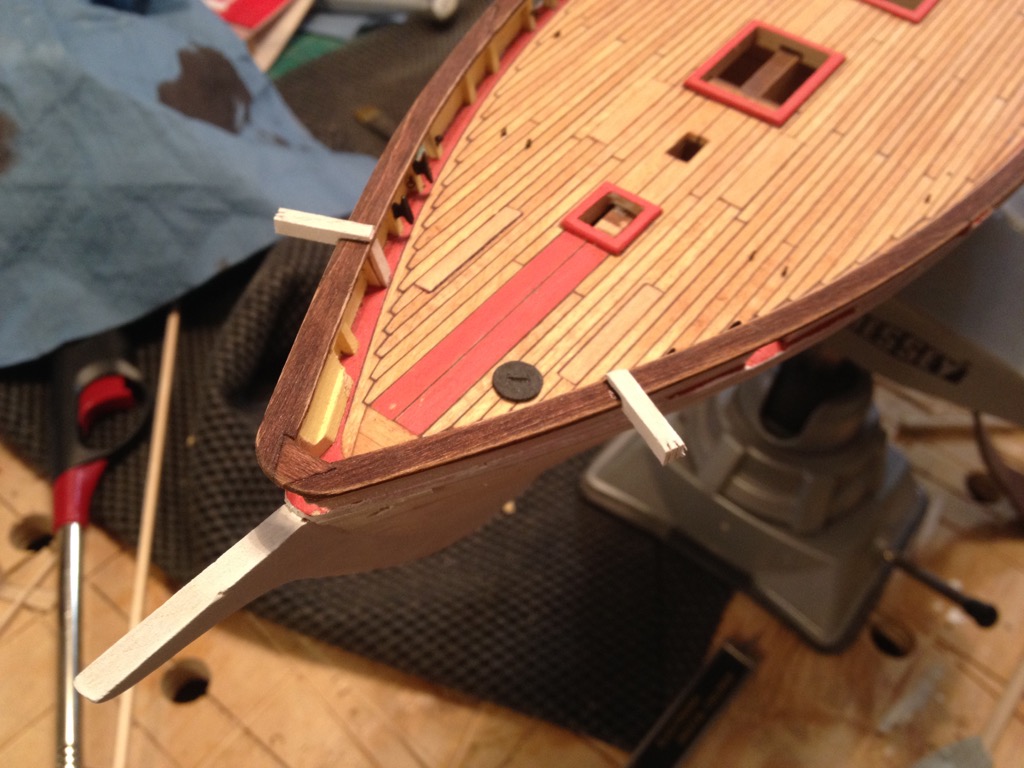
I started working on the PoB II again last weekend.
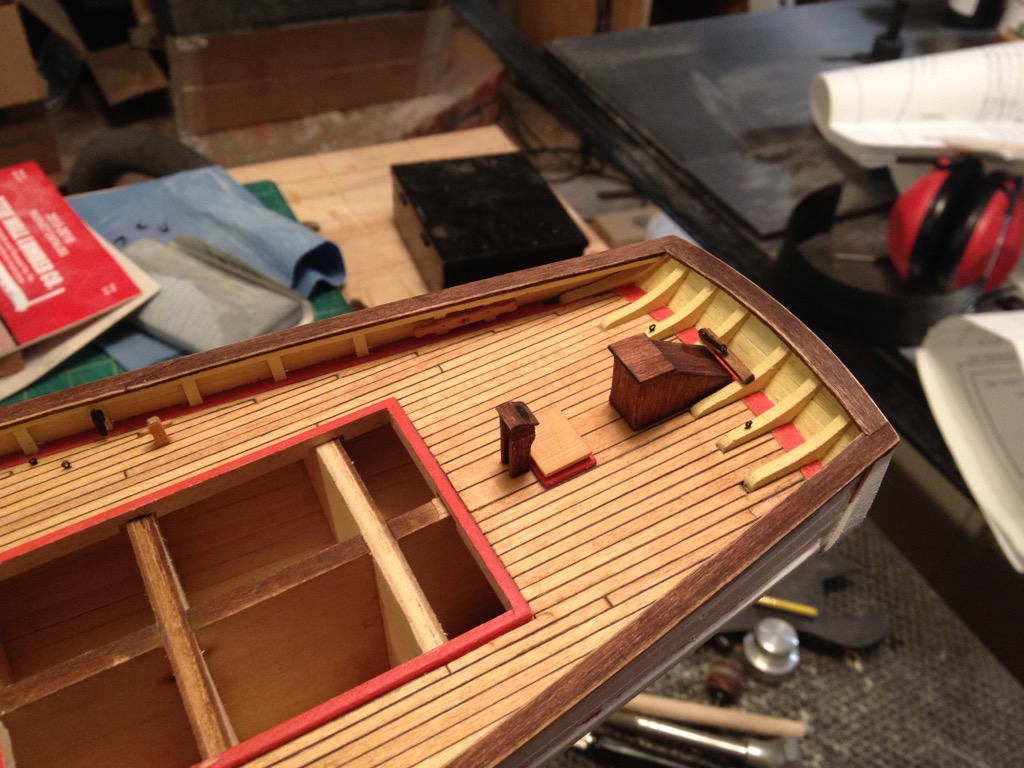
I started by installing these pieces at the bow. I can't remember what they're called right now but they hold the anchors.

After that I decided to start finishing the deck from aft to fore. I built the binnacle and installed it, the wheel house, a rear hatch, and a block for the boom. This is the second binnacle I made. The first came out awful because I tried to replicate the molding. at 1:64 scale that molding at 3/4" or so only sits proud of the binnacle about 0.011". It's not worth the effort to reproduce.

Then I remembered that I needed to finish the hull first and get it attached to the base. So I applied a primer wash (thinned about 30%). There are several cracks from the planking that I'm not happy with so I'll be filling those with a bit of filler, sanding the whole hull, applying another layer of primer and then the final layers of hull paint.
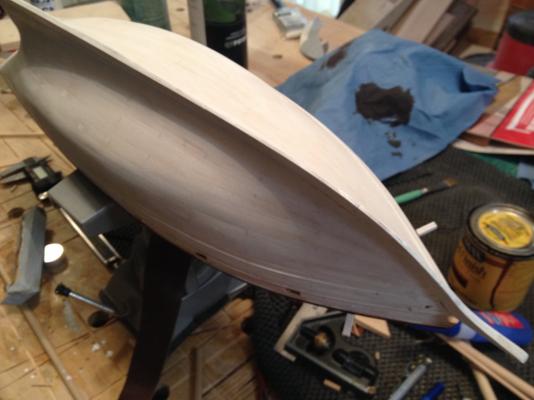
While I was waiting on the primer to try I started working on the yards. Unfortunately I've completely forgotten how to make yards so I'll have to figure that out again.
-
-
Jcoby, Just checking in, hope all is well
Warm Regards,
Bill
I've had nearly zero time to work on the PoB II. About all I've been able to do is spend a bit of time working on the transom trim since my last post. It's not true to the plans and the plans are not true to the real ship. I'll probably adjust them a bit to make them a bit smaller and true to the real ship.
I'm looking forward to getting back to working on it. I'd like to finish up the last few bits of deck furniture and get the hull painted and mounted to the cribbing/stand so I can start on the masting and rigging.


Pride of Baltimore II by jcoby - Model Shipways - Scale 1:64
in - Kit build logs for subjects built from 1801 - 1850
Posted · Edited by jcoby
Slow, but steady progress still happening.
Worked on a bit more deck furniture. I also have some of the other deck boxes built but not fully painted yet. I think have three or four more to install.
The fuzzies you see were cleaned up before installation.
And as she sits today. Still needs a bit of touchup on the black on the hull to cover up the yellow smudges. I will most likely be painting the windows onto the various furniture as I did on the forward most one. I need to make some templates first. I'm still unsure if I'm going to install the cannons since they are so out of scale. I may just close the ports and call it done.
There isn't a huge amount of work left before the deck is fully furnished. Unfortunately I'm only working on her at best a couple hours a week.
A couple of older pics as well. These were taken before I worked on cleaning up the hull paint. I switched the black to a different acrylic and it made a HUGE difference in the quality.