bgarden
-
Posts
74 -
Joined
-
Last visited
Content Type
Profiles
Forums
Gallery
Events
Everything posted by bgarden
-
 I hope all is well Rich, your boat sounds like it is moving along. To reiterate some of Larry's thoughts I look forward to seeing your hull decked out with it's new paint job. I remember struggling with the waterlines as well on my bluenose but found that a tall plastic container or a tall beer can (means that you would have to buy one and drink it first) with two holes punched through for a pencil to snugly fit worked well. How goes the job hunt? It can be difficult process, but I hope it is going well for you. Brian
 -
Buck I cannot believe the beauty and depth in your finishes. Catching your posts from time to time is a pleasure. For me finishes are something that I have yet to gain the skill for but would love to learn. Thank you for posting your how-to's, they are great to file in the back of my mind for future projects. Brian
- 515 replies
-
- 2
-

-
- artesania latina
- whaleboat
- (and 1 more)
-
Larry its great to see the gun ports and sweep ports taking shape. I like you "over sized beam" idea. Thanks for the pic's, they shall help to inspire me to finish my gun ports and sweep ports soon. Brian
-
Thanks guys. Between the craziness of life and my long work days these days things have been a little bit of a blur, and I think that the idea of owning a house will settle in eventually. But right now I am running just to sand still. I am thankful that the move is still a few months away. Brian
-
Patrick- it is funny that despite using a jig to frame the gun ports I am still very slow. And soon enough I hope that some of the planking will start maybe in a few weeks. Building on board the Niagara continues, but I thought that I would post a short comment to share that last night my wife and me have put in a firm offer on a house that has been accepted! This will be for both of us our first house. With this I will be able to set up a wood working shop and to have a little more space in the house for a ship building room. Our closing date is July 5 and will move shortly after that. Other wise I hope everyone is well and I will post more pics probably on Sunday if I can free up a little more time to finish the port side gun ports. Brian

-
I agree about the car. As far as I am concerned the is about 23 little elf's that live in it, moving cogs and wheels when called on. Good find on the chicken wire I am interested to see your pics. Brian
-
David your hull couldn't be any better. Very crisp and clean. If I didn't know any better, you make building a boat look easy, but since I know from experience how tricky putting together a model ship can be, I must conclude that your skills are first rate. Does the bear have a name? Brian
-
Hi Joseph I don't have any carving experience like you but bass wood seems to be easy enough to work with I am sure you may not enjoy it as much as boxwood or beech but I am sure it will come out fantastic once you jump into your build. And just remember these 5 important points 1.) Have Fun no matter what 2.) Wood can readily be fix if something goes wrong. 3.) Mistakes are going to happen no matter what you do 4.) Learn from you mistakes they are the best teachers of life 5.) Have Fun!!! When you start carving out your rabbet stop short from where you wish the rabbit joint to be and slowly sand the rabbet into perfection using a hard sanding block and emery board. Good luck to you sir Brian
-
Hey Larry I think that your boat is coming along nicely. It is great to see the stern take shape and colour. Your joint between the green transom planks and the red looks crisp and clean. Your doing good work with that sprayer of yours! As for sanding, I couldn't agree any more with you about the emery sticks they are invaluable. One trick I think that I tried recently that I found also worked well was to use a prepaid plastic card that was of coarse used up already, mine is iTunes, cut them into emery board like shapes and glue what ever grit sand paper on to it. I used this while fairing the hull, deck, and rails and seems to have worked out really well. Happy modelling Brian
-
Hi Joseph, Sorry I saw your post earlier this week and had made a point that when things slowed down for me that I would reply... So here is my thoughts, for what they are worth. I don't know where you are at at the moment but if you are going to choose to use a jig to hold the keel while you build I might suggest that you do a few things first before mounting the centre keel. First I would suggest that you assemble the 3 laser cut keel pieces (2 keel pc, 1 stem pc) leaving off the sternpost piece for the moment. When you assemble them make sure to sand the burnt edges off and to glue then against a flat surface with a piece of wax paper between the parts and the flat surface. Next I would suggest that you mark your bearding line and cut your rabbet joint. Next I would glue the 3 keel pieces to the centre keel on a flat surface waiting 24 hours for the glue to cure. Next attach the stern post. And it would be at this point that I would suggest to mount the keel to he jig you wish to use. Drawing lines along the keel and the jig sounds like a great idea to help installing the bulkheads. Brian
-
I love all those carronades! I am sure it is times like these that you are glad that you are not building a First rate ship with five or six times the guns. Great work and once again good luck on the job hunt. I've got my fingers crossed as well. Brian
-
Hello Joseph, I (and i am sure soon many more) would like to say a warm welcome to you. I will greatly enjoy looking in on your log. I my self am beginning the Niagara kit and look forward to sharing tips and tricks. As for your concern about the keel, I think that you may find that more then one of the laser cut parts does not match up to the plan 100%. I know already I have had a few of my parts vary from the plan in one way or another. First thing I might advise is to consider that the laser cut parts are cut a fraction of a hair larger then what you need. This is done so that you can sand off all of the burnt edges due to the lasers cut. Also you should sand square the lasers cut. When the part is being cut out of the billet the laser bends through the wood like light refracting when it passes through water. So consider that you want to sand out these blemishes. When it comes to the centre bulkhead, you may want to assemble the three parts to the keel and see how those parts fit in relationship to your plans and to the centre bulkhead piece. And decide where you would like to go from there. As for my build I have tried to keep to the plans but there have been a few instances where my boat has not matched the blue prints perfectly. Brian
-
I can understand that. Hard times will inevitably fall on us all and to have a hobby not to retreat in to but to be refreshed from can be a great benefit. I know that last year I had an employer who stood me up on a few months of pay. It put my wife and I into hard times, but now I have found really meaningful work, and a lot has turned around. Good and bad times will come and go but those who care about will stick around. I know that there are many here that would wish you all the best. And thank goodness for gun-build-a-thon's Brian
-
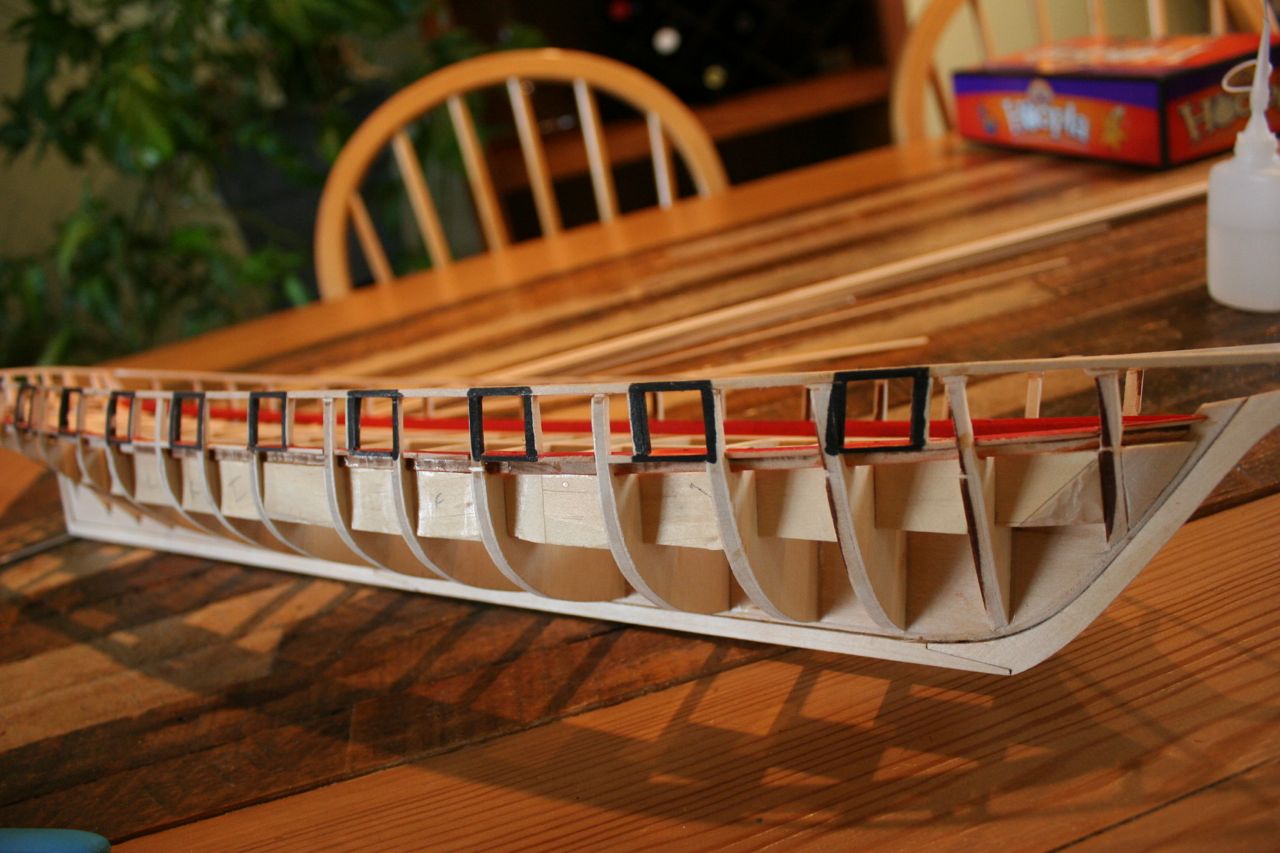
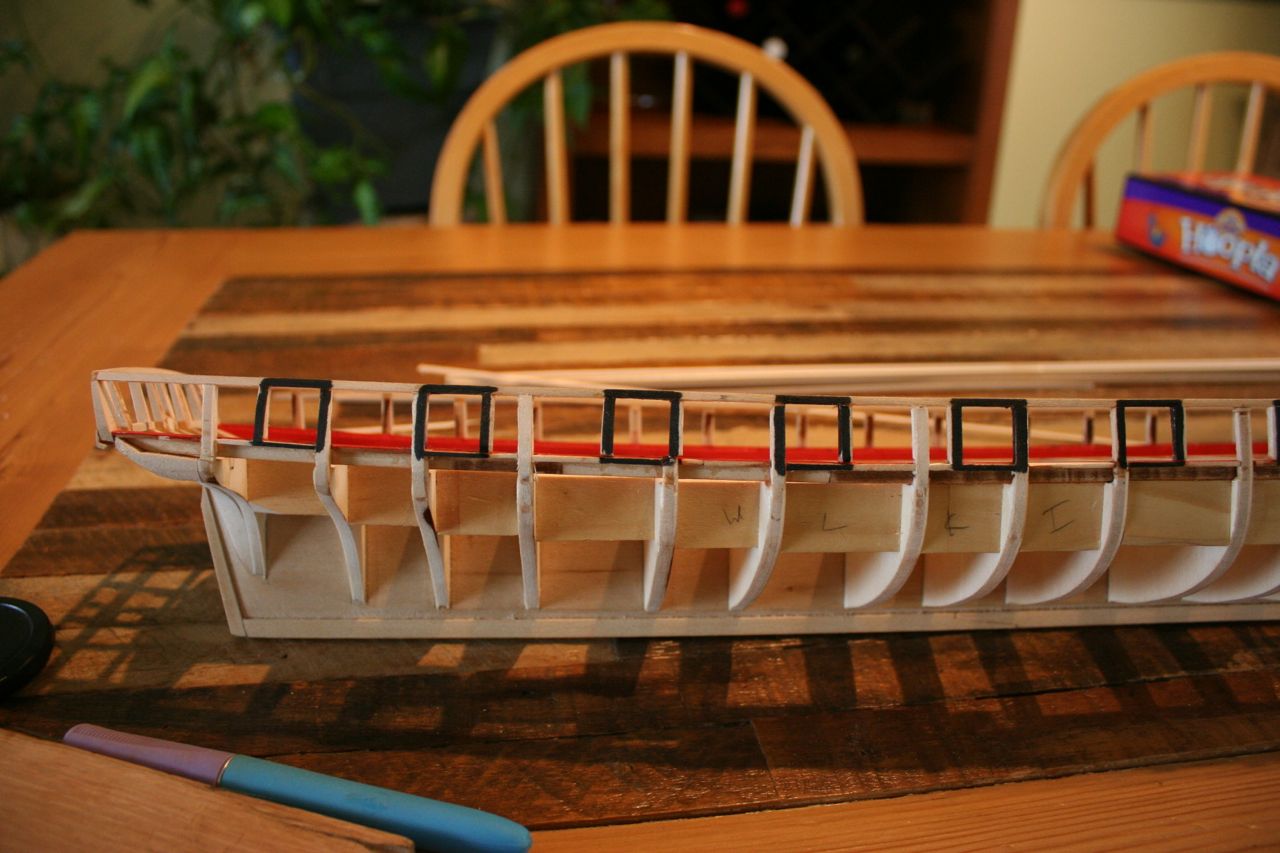
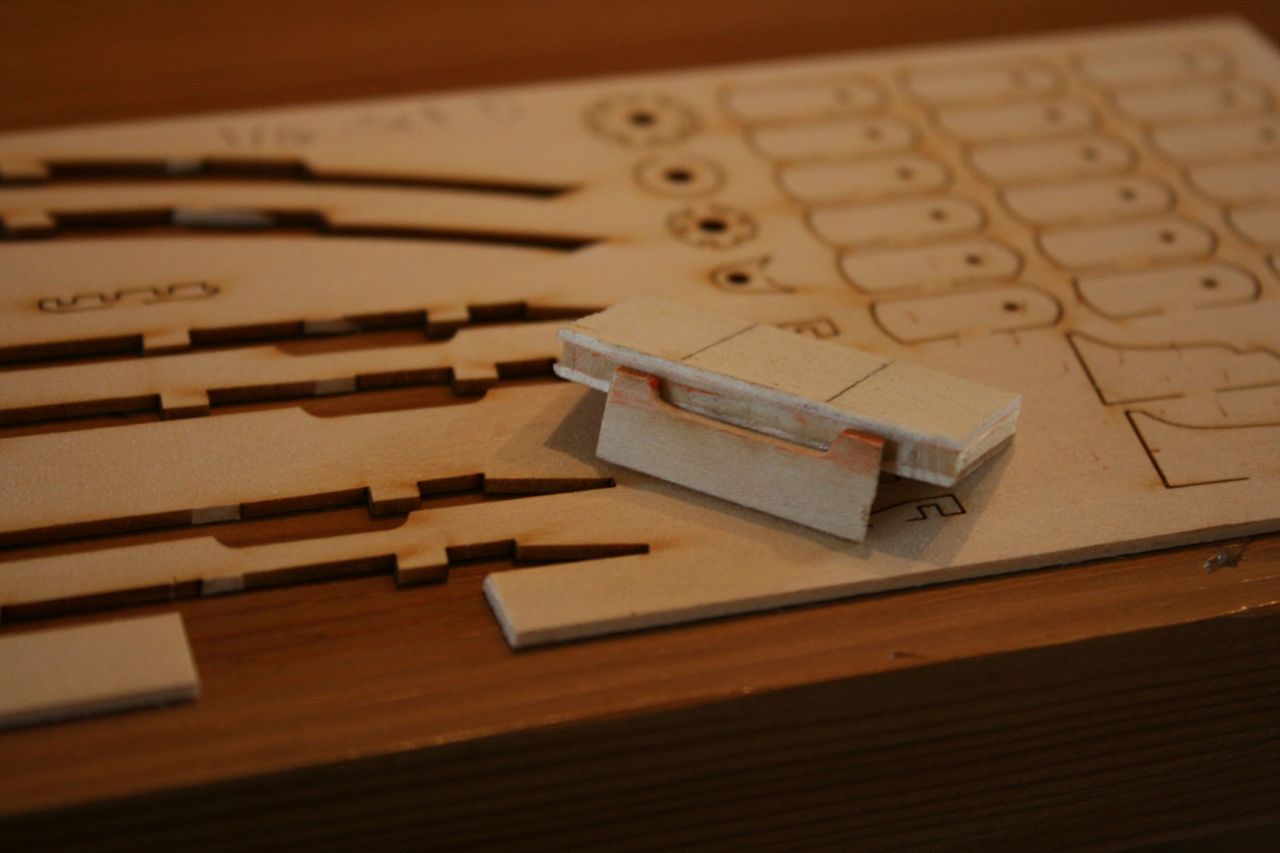
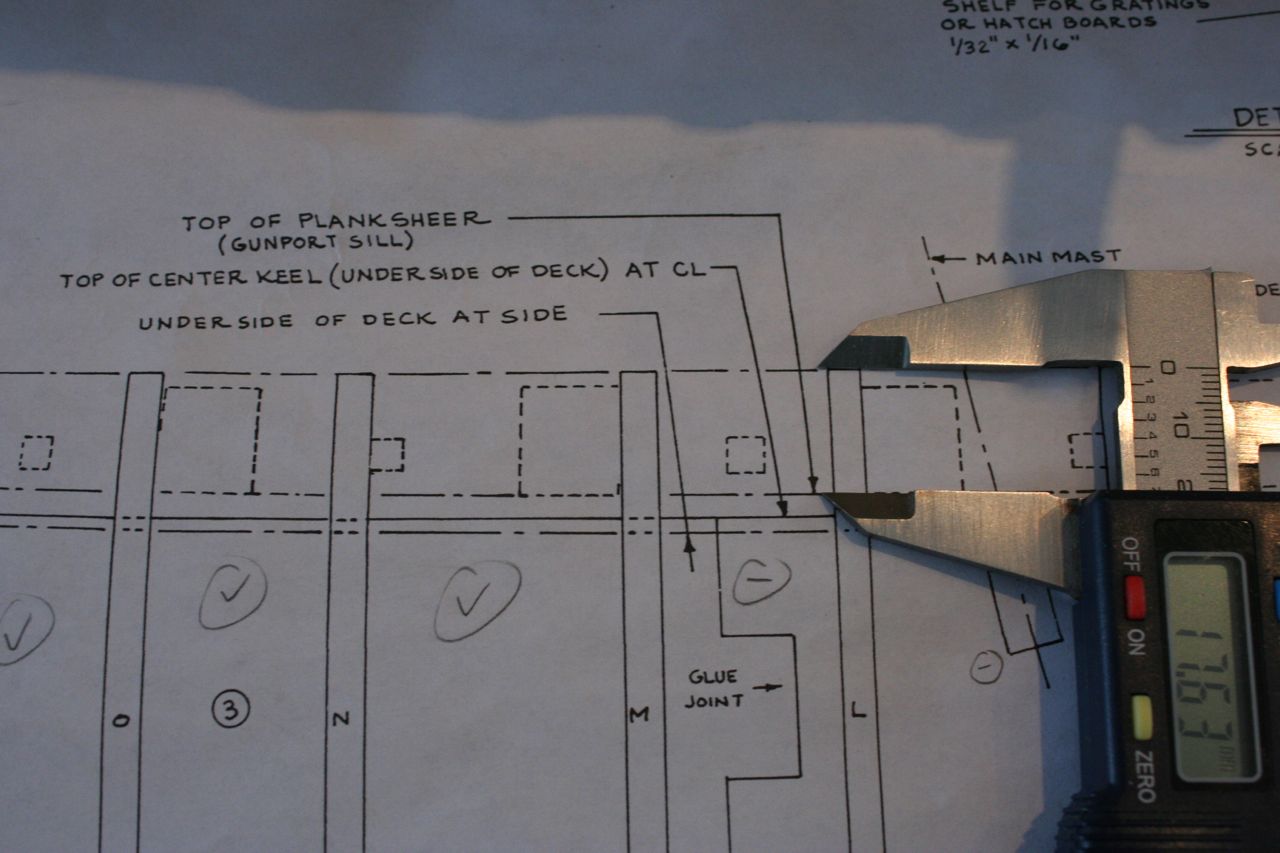
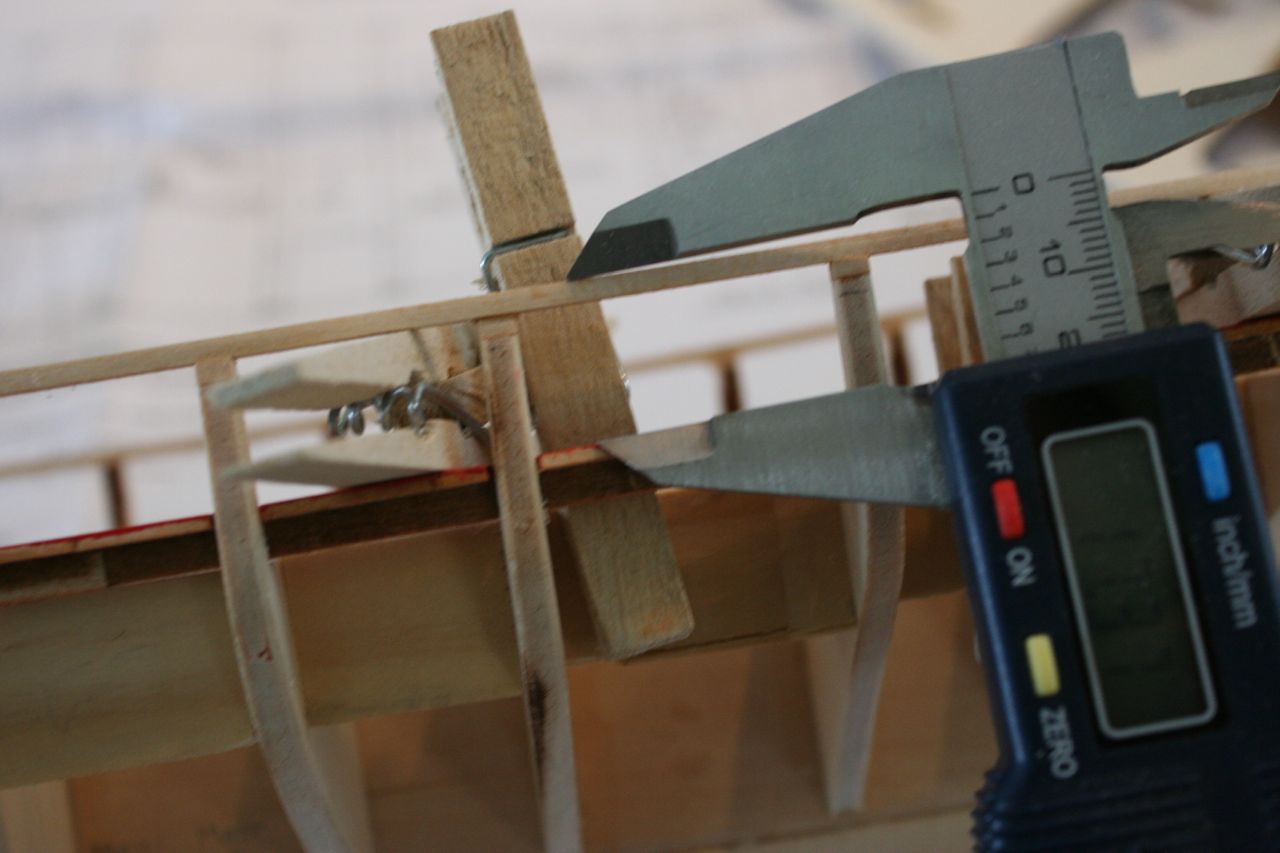
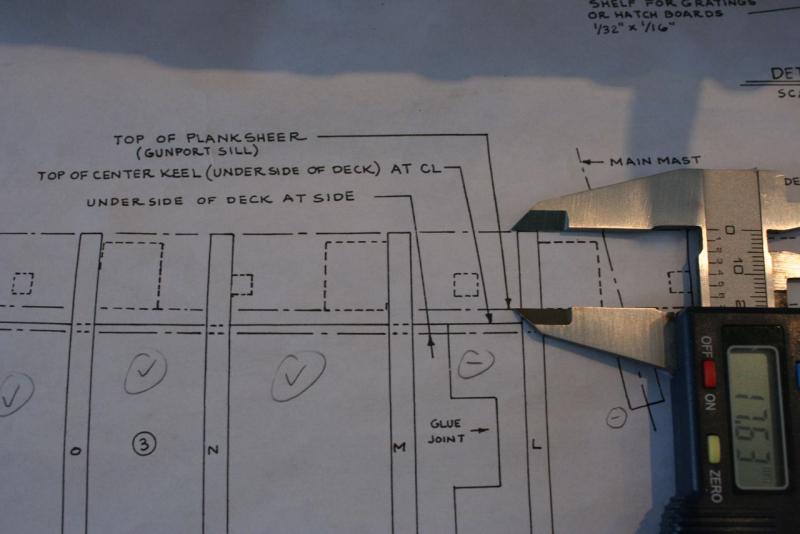
Okay, First I would like to offer a big apology that I have been a bit absent from this form for the past few weeks. My work has required me to give it a whole lot of attention and this has cause my boat building and participation here in this forum to take a back seat. So again please accept my apologies. I hope all is well in everyones builds. As for my build I have recently completed the gun ports on the starboard side. I made a jig, shown in the pictures below, that helped me keep the relative sizes for the gun ports equal and perpendicular to the planksheer. The jig was made from the inverse side the the billet that the planksheer was cut out from. The inverse piece corresponds to the gun port bump out on the planksheer's billet. Having glued this piece to a square scrap piece and drawn perpendicular lines on it I could visualize the placements of the gunport's frame. Once the rough frames of the gun ports were done I check the relative sizes with callipers and sanded true any incorrect openings till I was satisfied. I used black maker around the gunport rough opening just to help visualize the finished product. Brian


-
Bob I love your photo of the collection of booms and gaffs. Your work is coming along well. I can't wait to see your sails. Personally I like the idea of the old pillow case. You can use the old cloth that helped keep you comfortable while you dreamed about sailing around on the Bluenose. Brian
-
Hello Rich, I hope both of the tasks at hand (job hunting and boat building) are moving forward. I also would like to wish you well in your hunt for a job. It is not a task that many people, I am sure, like to have to do. For your own mental health I hope you have a good support network within your family/ friends/ and community to keep putting your best foot forward and your chin up. I can't wait to see your carronades! Brian
-
Hello Patrick, can I join the chorus and tell you just how great your work looks. Truly inspirational. My hat is off to you by seeing this build to it's end (or soon there to be) and giving it your full measure of skill and devotion. When you finish I would like to request that you take copious amounts of photos of her so that we all can find encouragement on those days that we need it. Brian
-
Thanks Larry and Patrick, I will keep that in mind. I tend to use CA glue a lot these days due to the type of dispenser that I have at hand which releases the glue in controllable amounts. My bulkheads and other areas that I do not worry about the control as mush I have used wood glue. On my last ship, Patrick I did the same thing as you, and that was to lather on a coat of wood glue to the inside of the hull planking... Great to get the feed back guys thanks. I will definitely adjust some of my gluing strategies. Brian
-
Indeed nice fix on the gaps! And looking through your log, your deck planking looks terrific. Each deck board seems to line up nicely with the cabin walls and the decks above and below. Are you sure you have enough gun ports there on your ship. After looking at yours I am so glad that mine only has 18. But what a nice boat to build keep up the good work. Brian
-
Ya I think your right maybe while I am installing the ports I will frame those pieces in along with the mast caps on the centre keel. Once I finish installing those backings for the gratings and the companion-ways, and along with the bulkhead blocking, the deck will be a solid surface to plank on... Thanks for the helpful tip both to you Ken and Patrick, please do keep them coming. You both are great!! I have a question though. I get the sense that for some modellers they do not like to use CA glue except on small parts, is there a reason for this? Does CA glue not hold strong enough, or release over time? Is my question crazy? Brian P.S. David thank you very much for the kind words.... and keep being hopeful, we need more people like you in this world
-
Good call Ken, ya I think that putting those types of backing in the framing details would be really good. I will take you advice and make sure that they are installed. I think the next task that I might tackle is to install all the gun port and sweep port details. After that I think that I want to do the planking on the inside of the rails, then finish any remaining framing details and finally plank the hull. This is the game plan from what I can see at this point. But of coarse things often change. I am still debating a few things. Brian
-
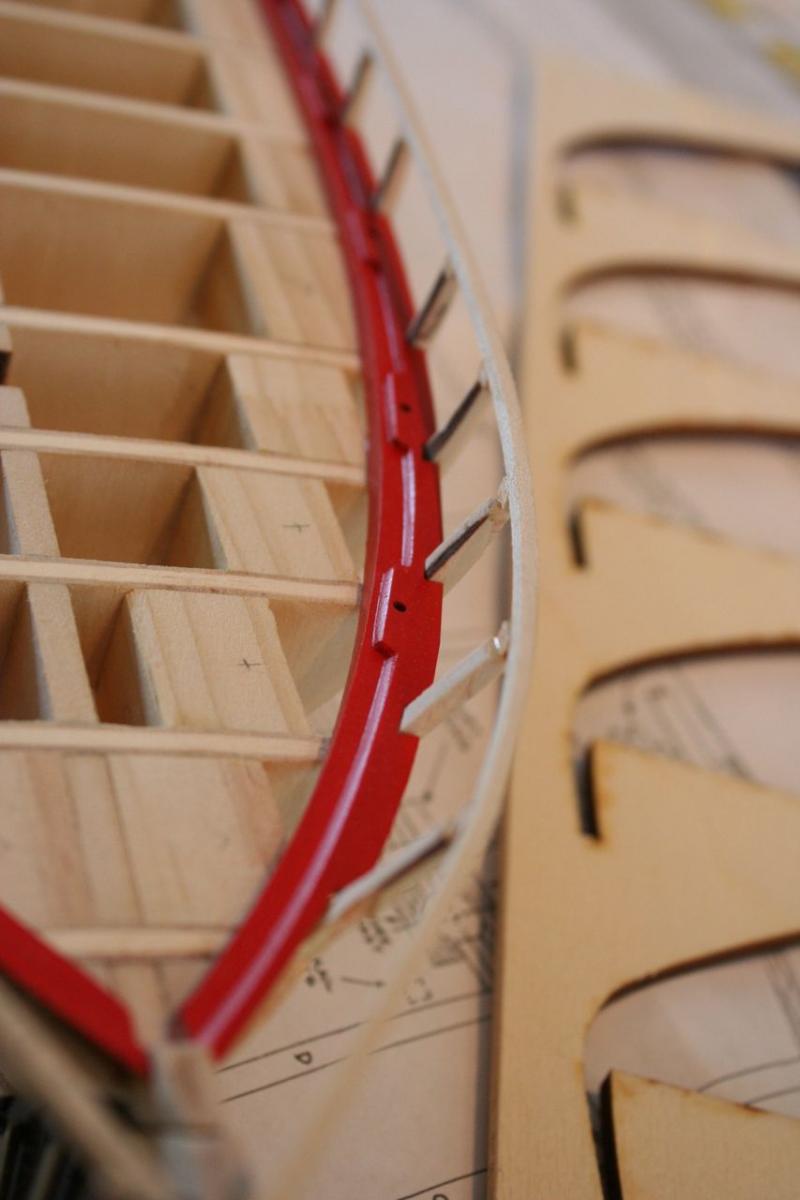
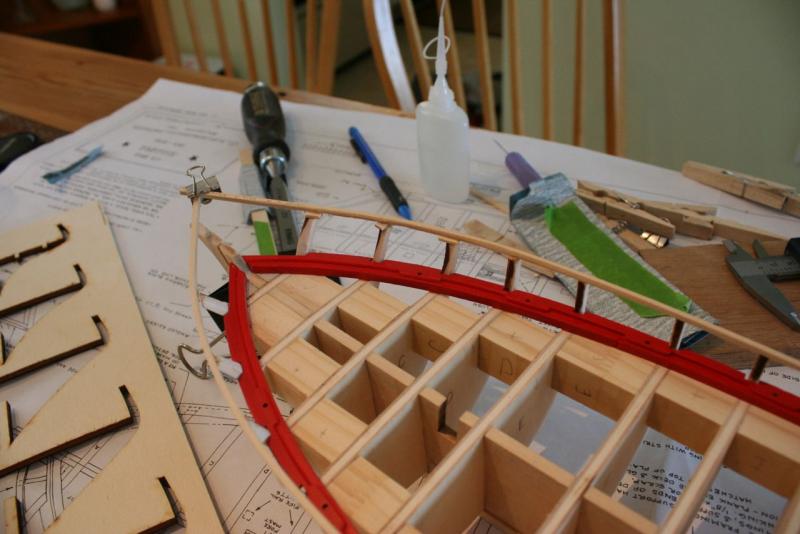
So working on the starboard side was a little bit more of a trick. Over the past two weeks I thought that the curves of the false top rail on the starboard side were not really what I was looking for. They did not match the port side and I felt it was not true to the plans. So I cut free the rail from the bulkheads in the areas that I felt were not up to snuff. This did a little bit of damage here and there to the bulkhead posts, but I am not all that concerned because they will get cover over completely. To me, the bulkhead posts and the false top rail are really just a platform to work from. They help me get a grip as to the shape of the ship as she is being formed. So after dry fitting the starboard side I proceeded to glue in the same manor as the port side by gluing from underneath. Brian


-
Hey Ken, you caught me in mid update but they did not fit perfectly to the bulkhead but to me this was no matter because I had sanded the bulkhead posts to fit the slots of the plank sheer. I felt that if the kit notched the plank sheer to the correct locations for the bulkhead posts then I will make it happen. Latter if I need to re build the overly sanded bulkhead post by shimming then I will. Good question. Brian
-
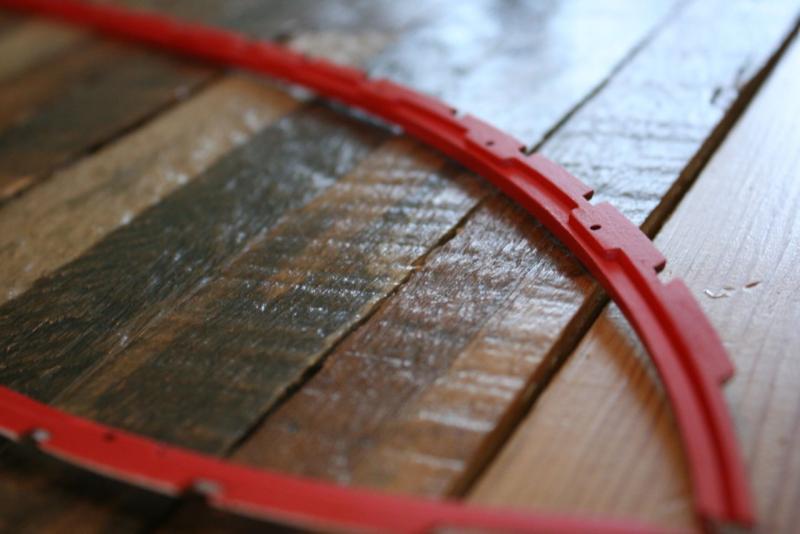
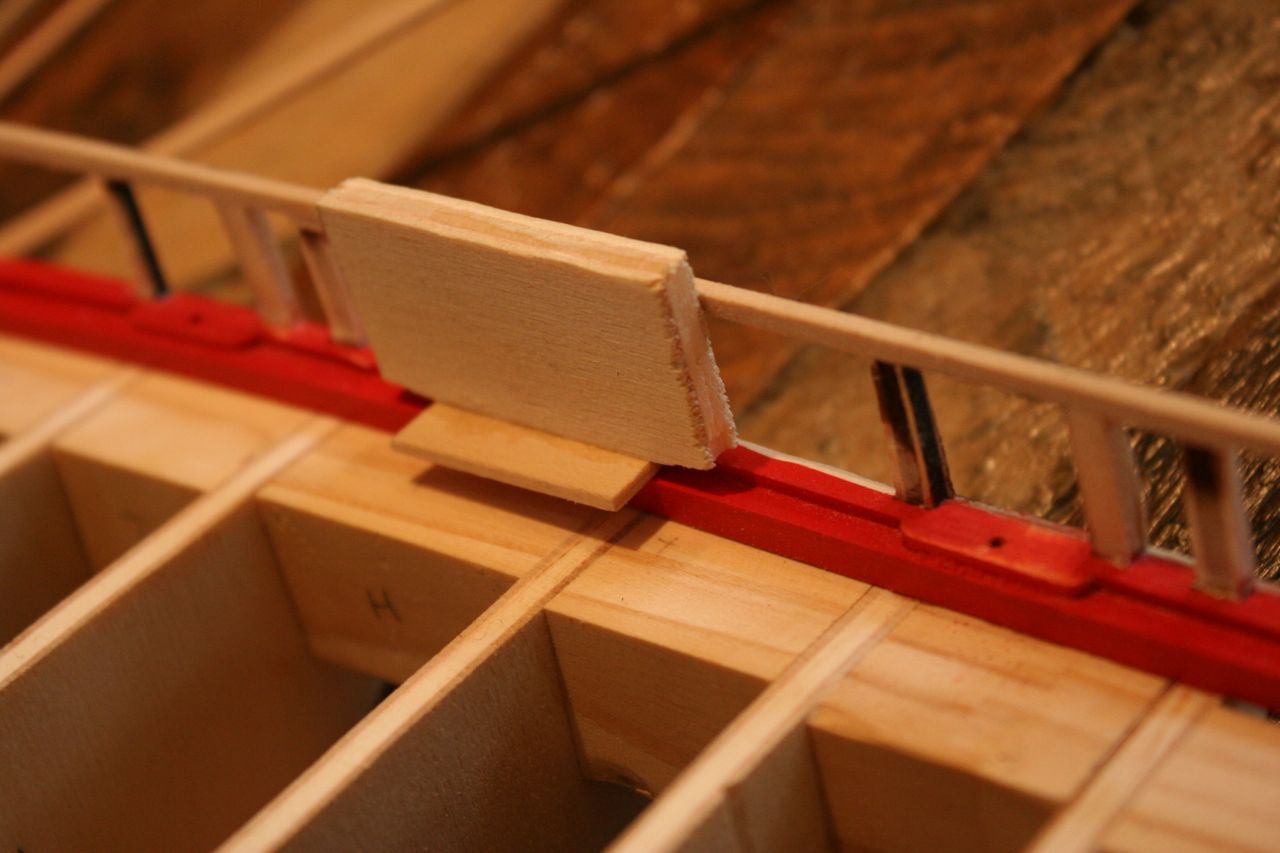
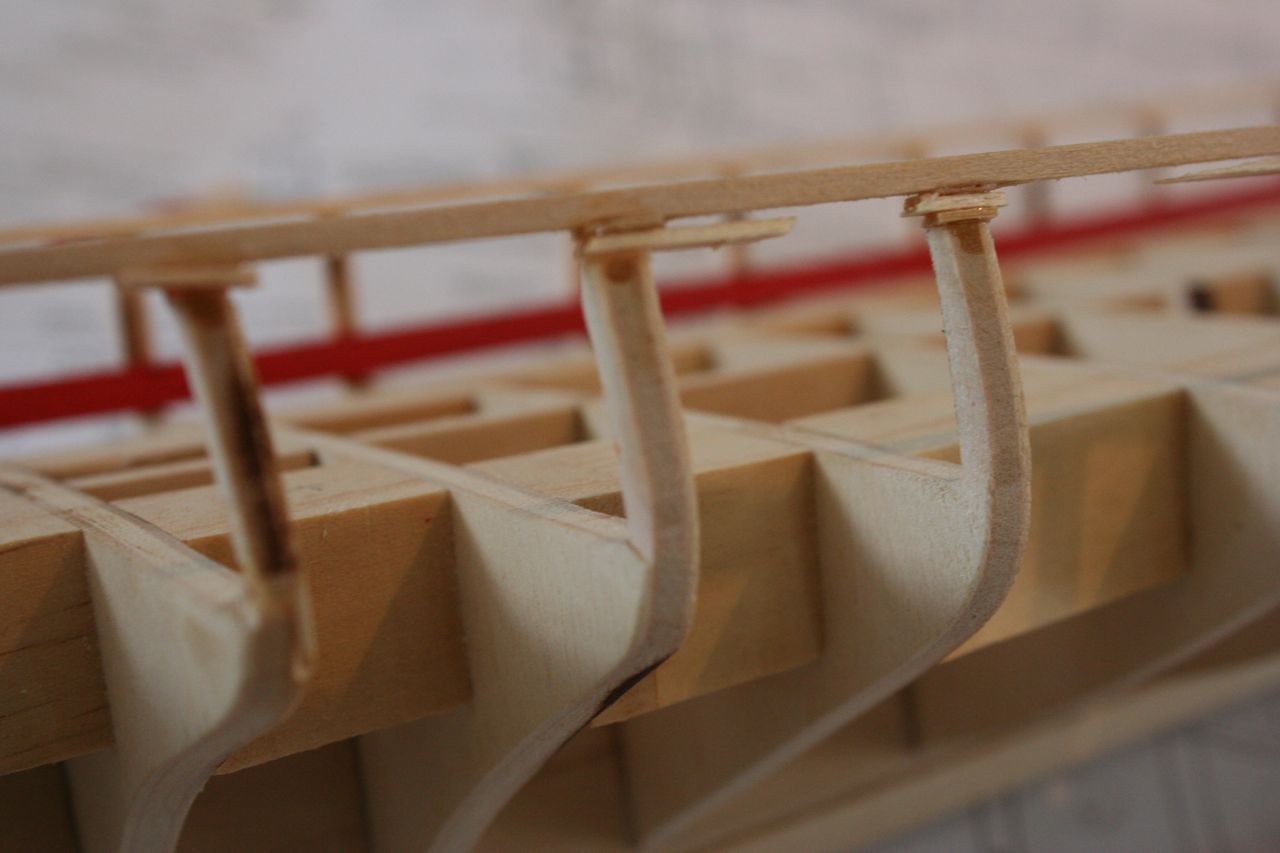
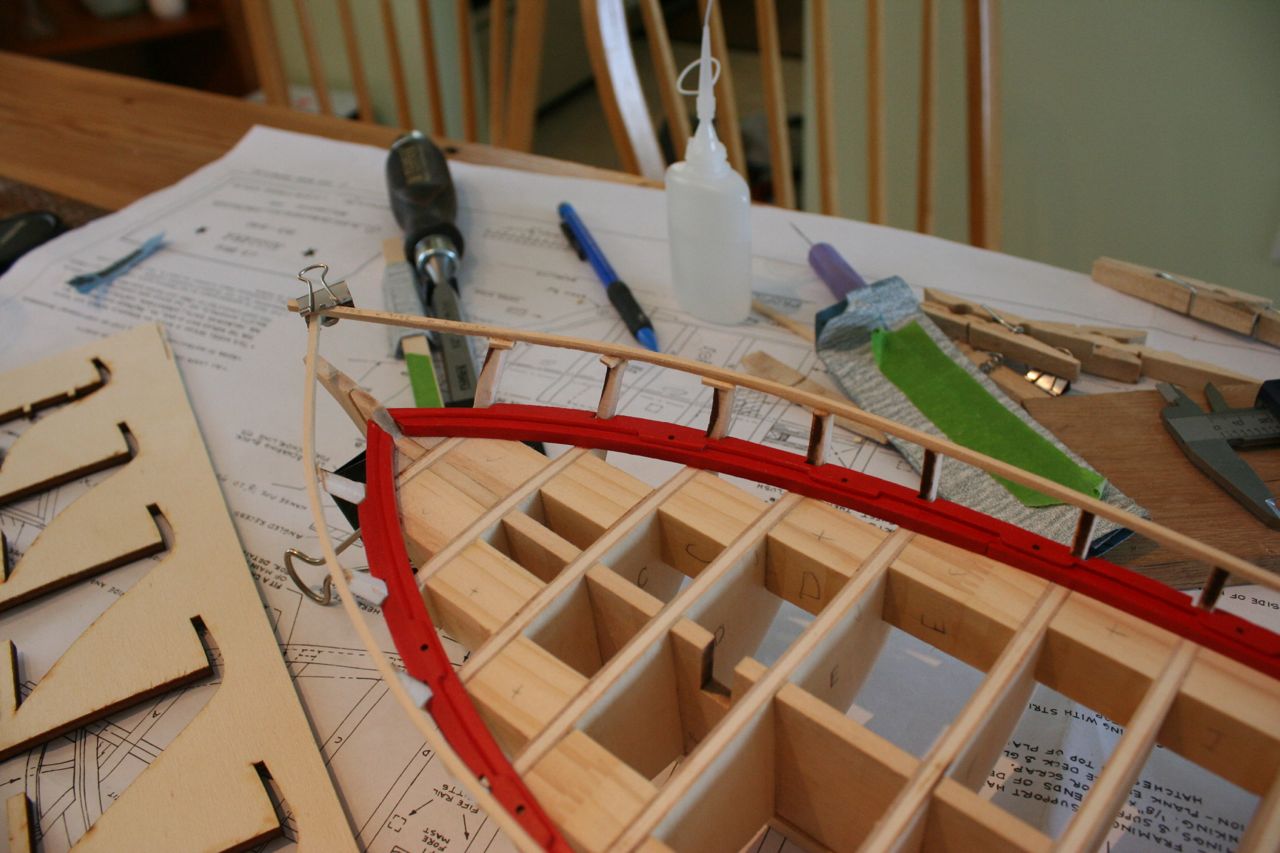
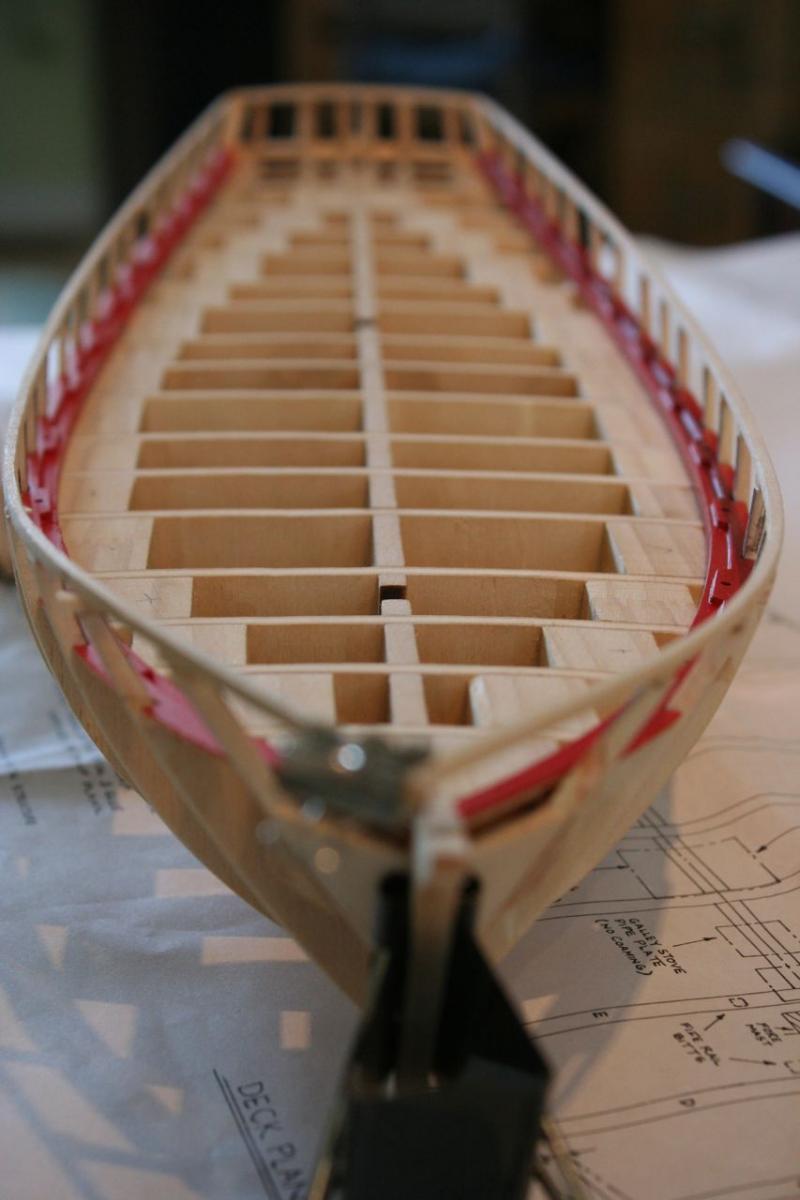
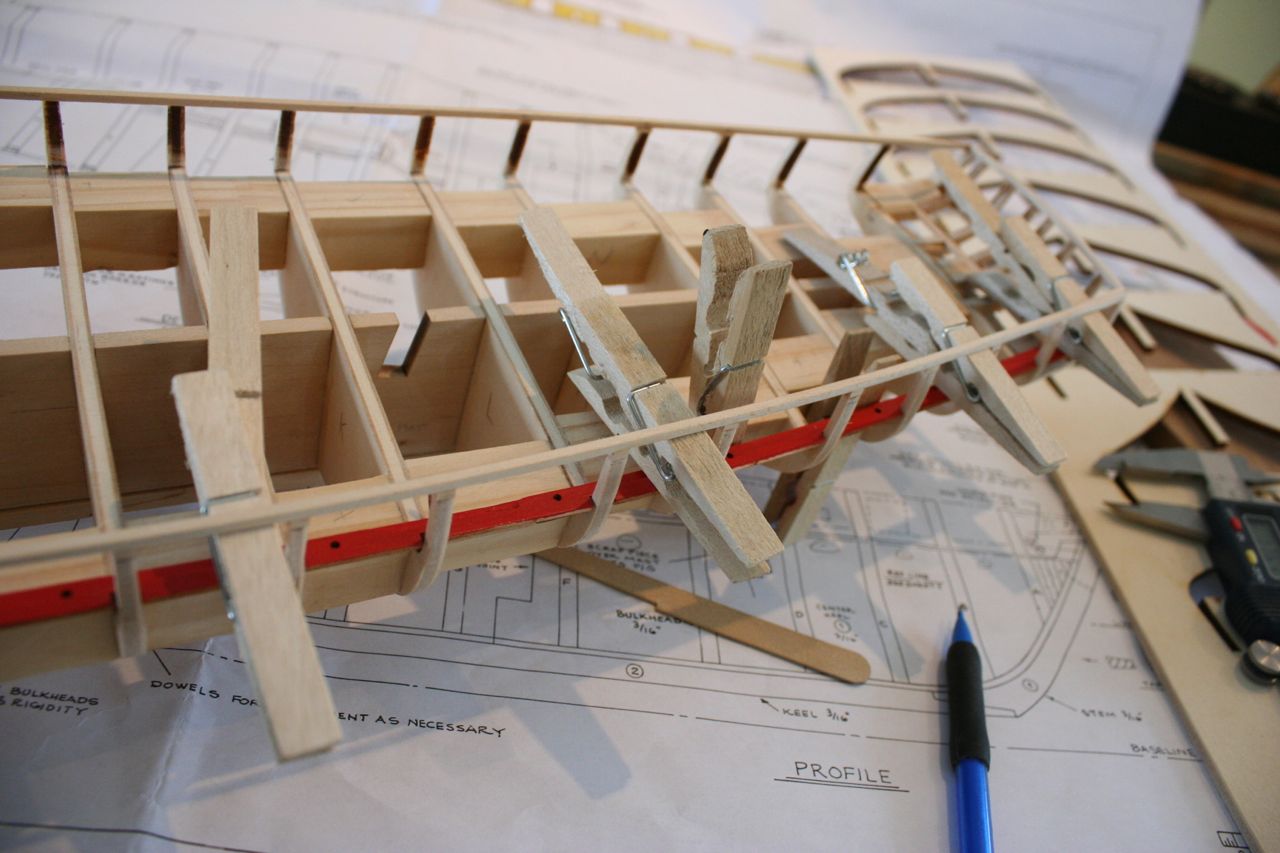
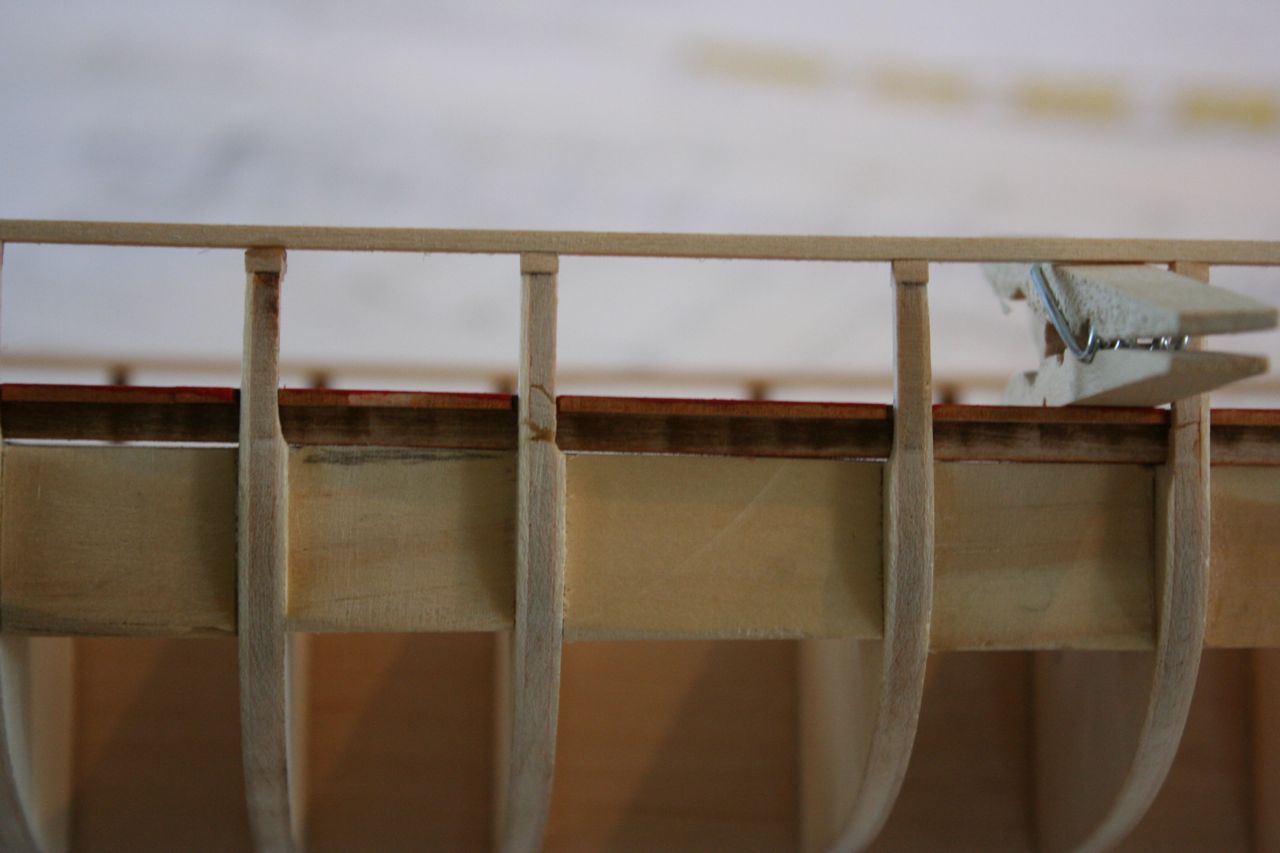
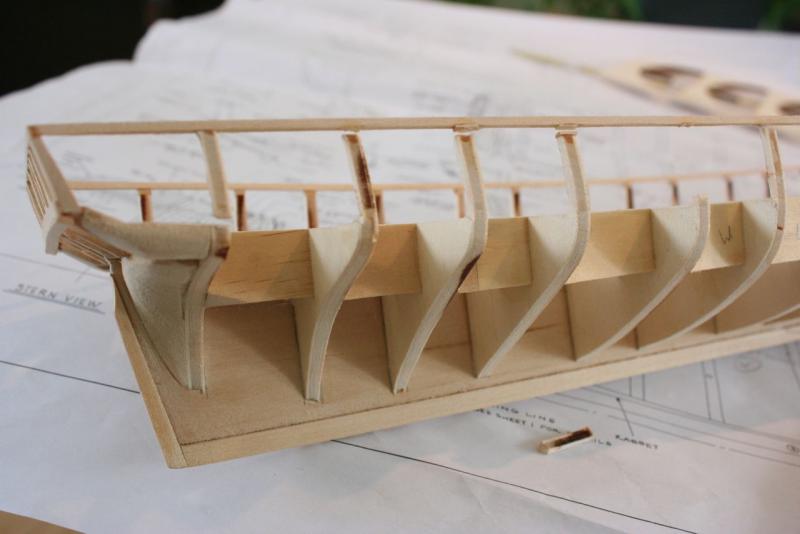
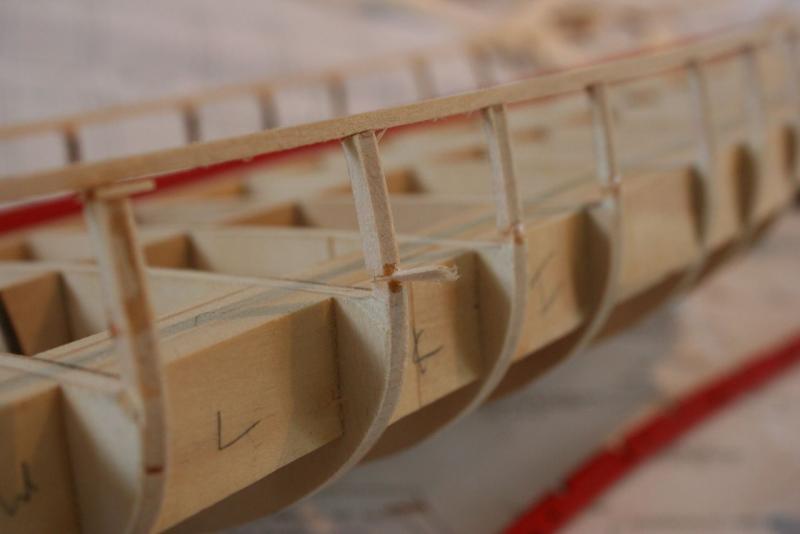
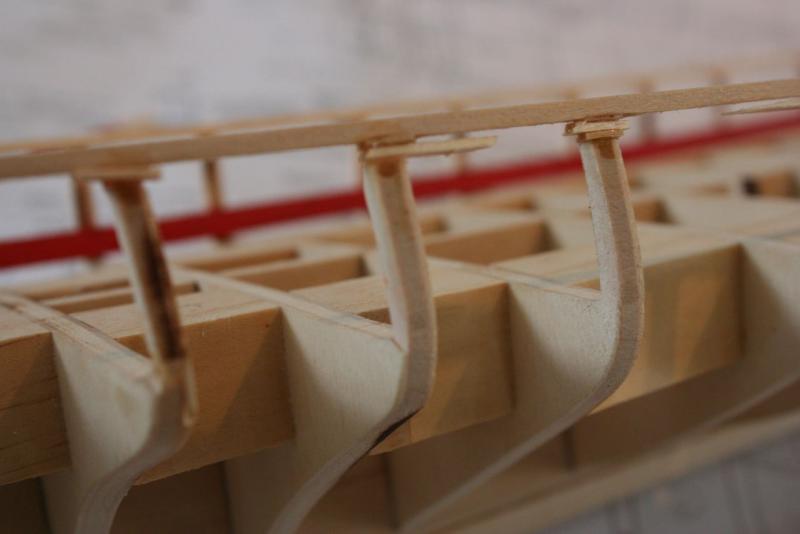
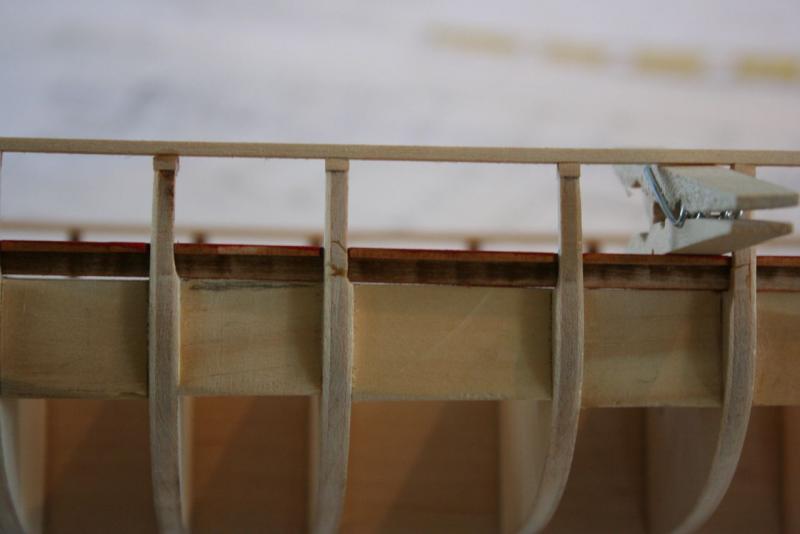
I started the installation of the assembly (waterway + plank sheer) on the port side first because I thought that I had got the curve of the false top rail the best and most true to the plan. So the installation of the port side assembly was done by using the existing blocking and framing in conjunction with wedges (in this case opened cloths pins). This gave me the ability to work with the assembly in relation to the false rail, keeping the two consistently parallel and true to the plans. One area in the middle, the bulkheads were found to be too high and in the stern there were four bulkheads that I found to be slightly to low (must have sanded too much when I faired them). After correcting any problem areas I re set the whole assembly into the perfect spot and then glued from underneath with thick CA glue.


-
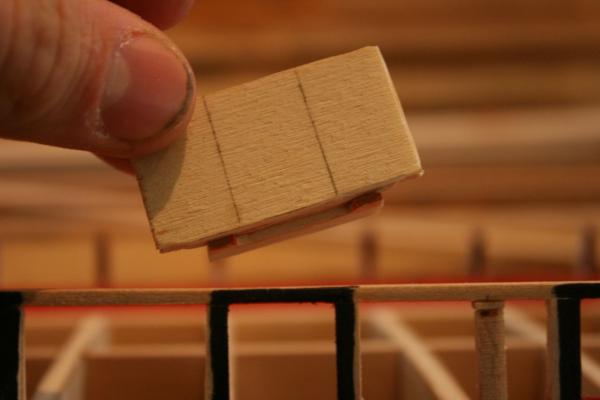
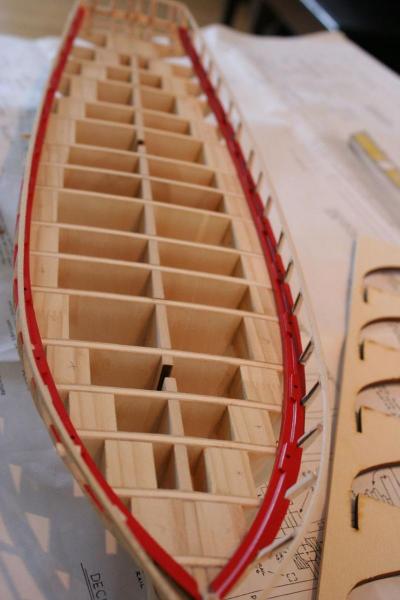
So this week my assembled waterway and plank sheer went into the paint shop (my coffee table) and during the evenings I sanded and gave three coats of paint to assembly. Today I had the time to devote to their installation .