mtdoramike
-
Posts
2,094 -
Joined
-
Last visited
Content Type
Profiles
Forums
Gallery
Events
Everything posted by mtdoramike
-
Thanks guys, I was questioning myself numerous times during the build. But I had to keep plugging along. I'm proud that she turned out as great as she did and I couldn't be happier with the display case choice that I made. I was thinking of doing a separate thread for the Library donation or I could just add the updates here, what do you guys think? mike
- 230 replies
-
- 2
-

-
- victory
- artesania latina
- (and 1 more)
-
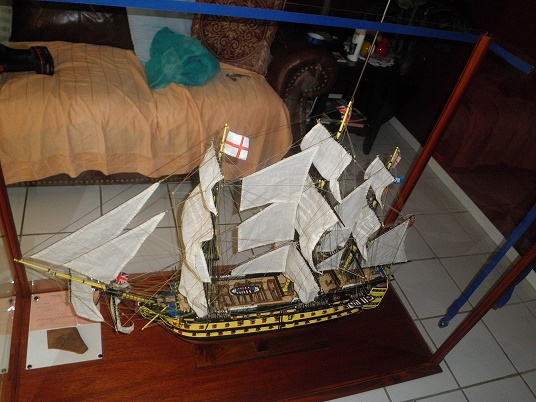
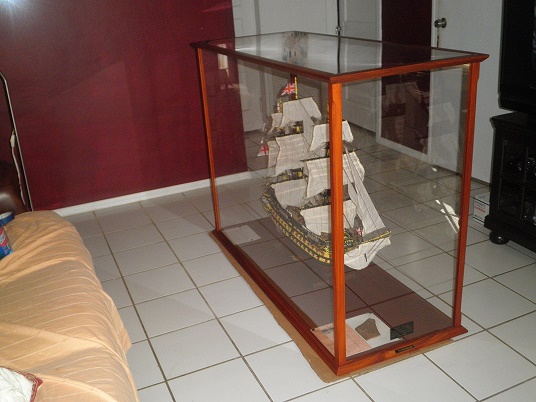
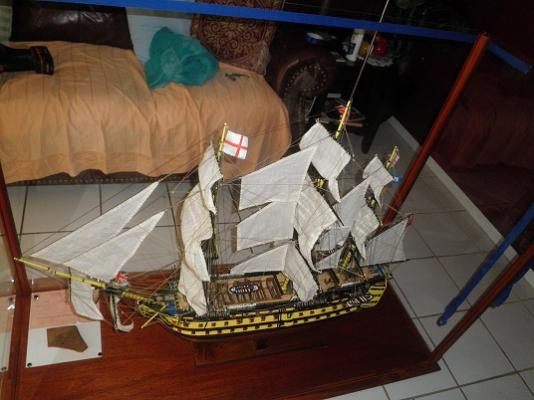
Well, the Victory is finished and safely placed in her display case, ready for her maiden trip to the Library. I'm looking at first or second week of December for delivery especially since I'm coming off a case of the flu. MIke

- 230 replies
-
- 6
-
-
- victory
- artesania latina
- (and 1 more)
-
I too built a couple of models with printed lines rather then laser cut. The kits were from the 50's and 60's. I used a coping saw and though a bit time consuming, once I got pretty good with it, the result was quite good. mike
- 44 replies
-
- 2
-
-
- robert e lee
- constructo
- (and 1 more)
-
Thanks John, Im planning the delivery of the Vic on the first week of December. I would have rather made it a bit sooner like next week. But im going through some medical treatments for the next couple of weeks, which leaves me a might puck afterwards. Mike
- 230 replies
-
- 1
-
-
- victory
- artesania latina
- (and 1 more)
-
The W. T. Bland Library in Mount Dora, Florida. My home town This has been a bucket list item for me for quite some time and since I'm getting a bit long in the tooth with a bad ticker, there was no time like the present, especially since I knew going in that the Victory would take a minimum of two years to complete. Here is a link to there web site: http://mylakelibrary.org/libraries/detail.aspx?id=1 mike
- 230 replies
-
- 1
-
-
- victory
- artesania latina
- (and 1 more)
-
Oooooooo, nice looking kit and contents. Yep, the MDF would have to go, god bless them for trying though. It looks like they have included a lot of rigging line, which is a plus, most kits don't include enough. So before completion of a model, I'm stuck scrounging around trying to find appropriate rigging line to supplement what was sent with the kit. mike
-
Yes I will post some finished pics as well as hopefully get some pictures of the donation ceremony at the Library. mike
- 230 replies
-
- 1
-
-
- victory
- artesania latina
- (and 1 more)
-
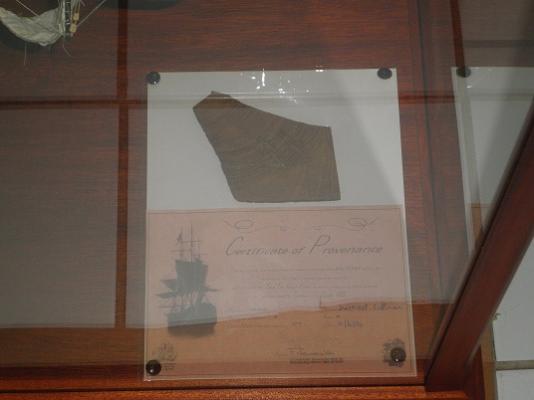
Thank you for the kind words J and G. I'm getting down to just a few more hours left on her. Mainly attaching the lifeboats and the tidying up a few loose ends and then giving it a good dusting and cleaning. I also have to make up a release and waiver form turning over ownership of the model & case to the City Library. I'm also including the book "Anatomy of The Ship 100 Gun Ship Victory", which I used as research for the model, which will give anyone who wished to learn more about this majestic ship the ease and opportunity to do so. mike
- 230 replies
-
- 1
-
-
- victory
- artesania latina
- (and 1 more)
-
Thanks George, now, I hope to get it to the Library in one piece
- 230 replies
-
- 1
-
-
- victory
- artesania latina
- (and 1 more)
-
Well, I'm figuring about 5-6 more hours on the Vic and she'll be ready for her maiden voyage to the local Library. mike
- 230 replies
-
- 5
-
-
- victory
- artesania latina
- (and 1 more)
-
Well, lets get to refreshing and start that building. I'm waiting. It would be nice to see the box and contents mike
-
I'm back from vacation and ready to get back to the Vic! mike
- 230 replies
-
- 1
-
-
- victory
- artesania latina
- (and 1 more)
-
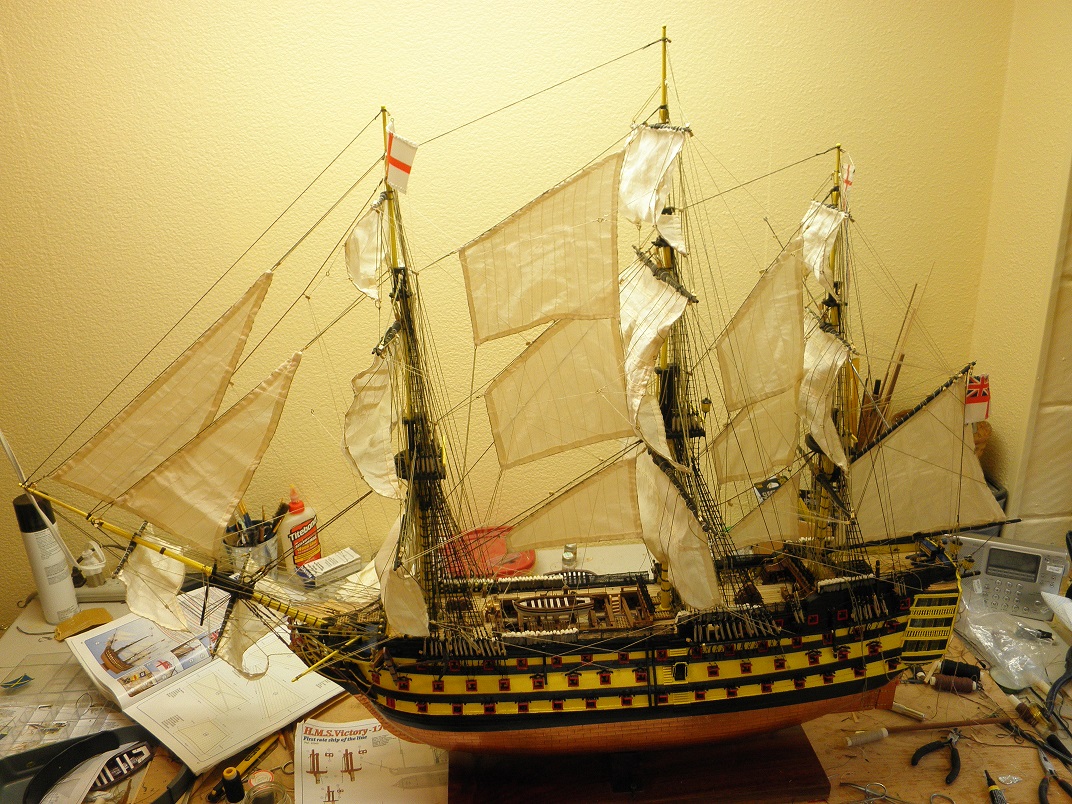
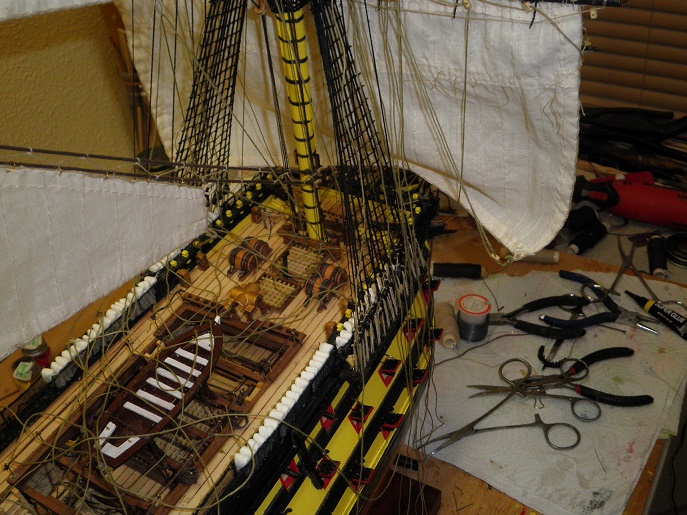
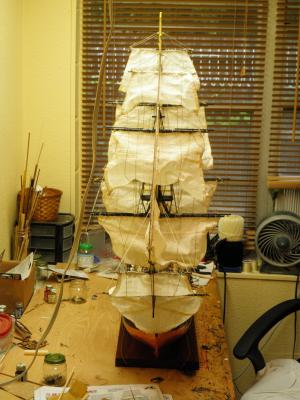
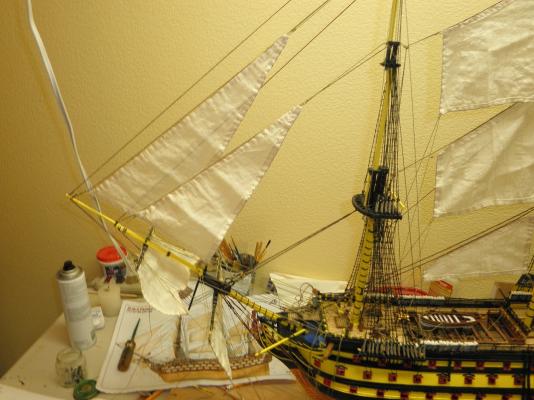
A little tease of a picture from the bow towards the stern. I'm still plugging away at the rigging, taking a break for a day or two in between. Rigging is something that I love and hate to do at the same time and can be a REAL headache. So I need a lot of breaks in between especially when I have days like yesterday when I was rigging only to realize I had a couple of lines twisted and wrapped around some other lines and while redoing them, I popped a couple of other lines. So I spent about 3 out of 4 hours doing and then redoing rigging lines. I was like two steps forward and three steps back. Thank you for the kind words Paul and Jp, that does help with keeping the momentum going. Yes, this could very well be my last build depending on how my health holds out. But if the good lords willing and the creek don't rise, I might, just might mind you build one more model. I have an OcCre Montanes waiting in the wings That I would really like to build and donate to a childrens hospital or some other type of charity for display or to auction off for funds. But, we'll have to wait and see. mike
- 230 replies
-
- 1
-
-
- victory
- artesania latina
- (and 1 more)
-
Absolutely stunning work. She is looking like the prettiest girl at the ball already mike
-
No, no billows to speak of. I have tried in the past to billow sails from using molds to placing in front of large fans and spraying them with hair spray, which gave a hint of a billow, but also turned the sails a brown tinge after a year. I have in the past sewn into the sails a thin wire, which helped to hold the billow once the sail was molded, but that was during the sail making process. These sails came pre-made and a sight better than I could have done with a needle and thread. mike
- 230 replies
-
- 1
-
-
- victory
- artesania latina
- (and 1 more)
-
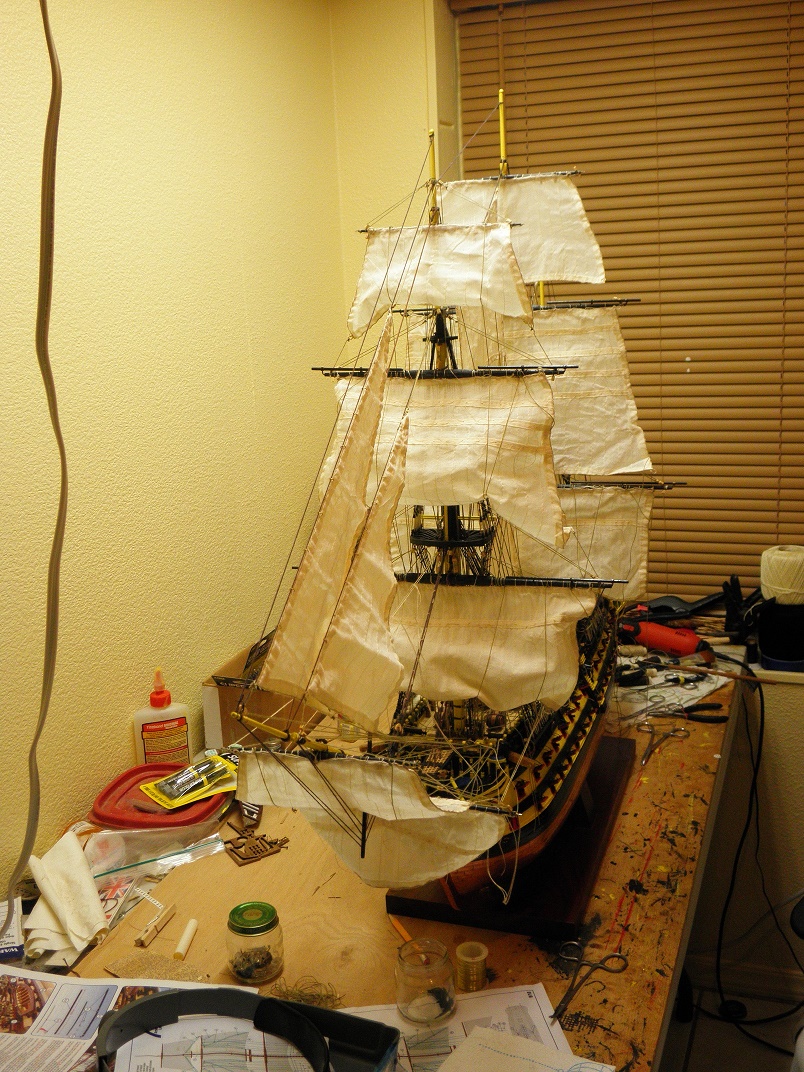
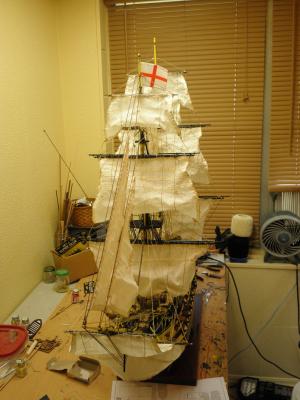
By the by, the sails on the Foremast hav not been tied down to their belaying points yet. I'm in the process of rigging them first before I start belaying them. Yep I know, confusing isn't it? It looks like a pile of spagetti. mike
- 230 replies
-
- 1
-
-
- victory
- artesania latina
- (and 1 more)
-
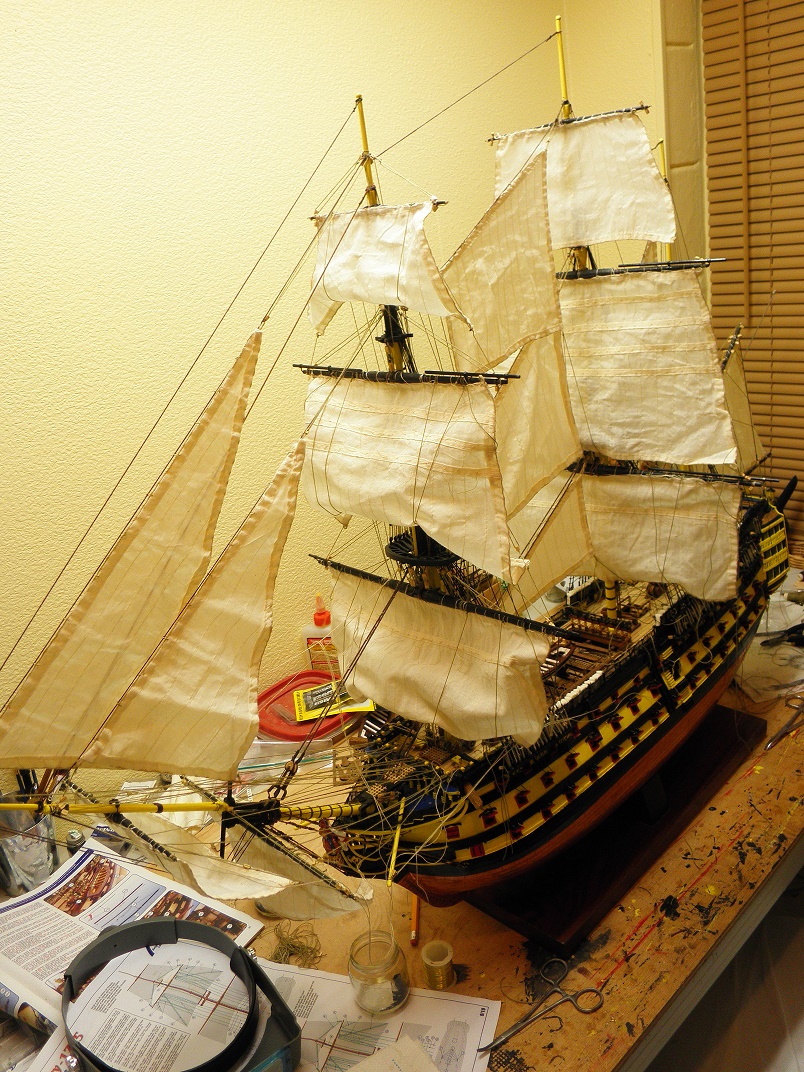
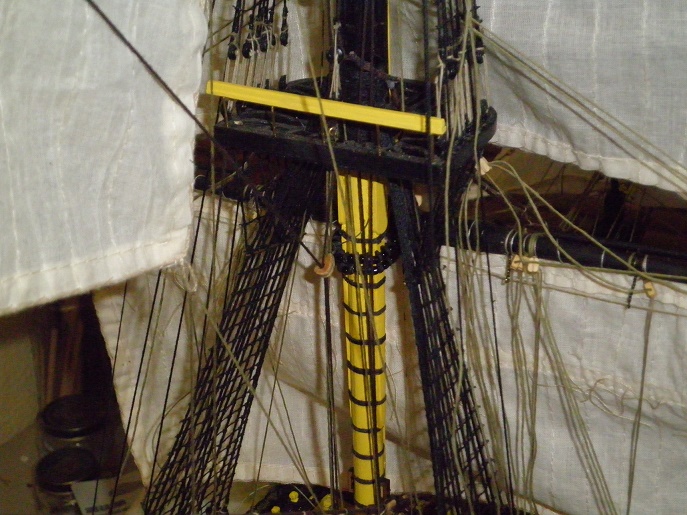
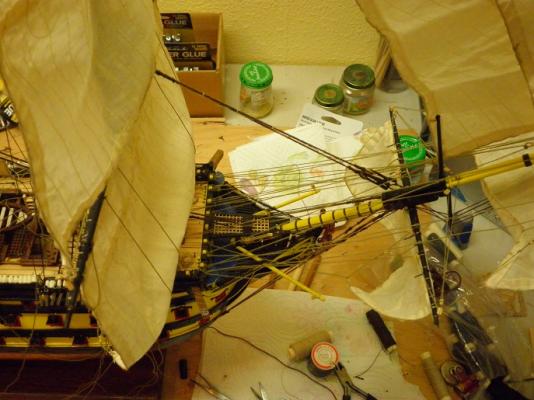
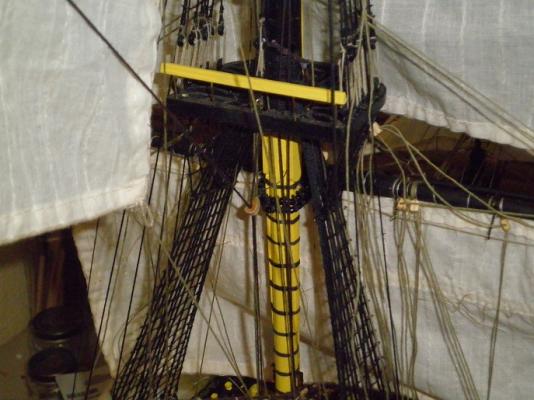
Heres a few pictures of the rigging and where I'm at right now. mike

- 230 replies
-
- 2
-
-
- victory
- artesania latina
- (and 1 more)
-
Hey Paul, your right, but that is one BIG piece of plexi to try and manuver into place. The way to probably avoid it would have been to place the plexi into the grooves of the top and then place the wood framed top onto the cabinet and then screw it down. But, the only way that will work, is you would have to use some type of strap and wrap it completely around the entire cabinet length ways in order to keep the corners from spreading out towards the top of the cabinet and the side plexi from coming out of the grooves. It's one of those where the more hands the better when assembling it. mike
- 230 replies
-
- 1
-
-
- victory
- artesania latina
- (and 1 more)
-
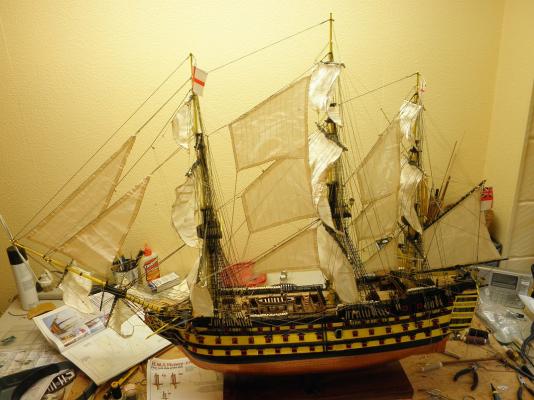
Thanks George, I usually hang all the sails in one section like on the Foremast, I will hang all three sails and run the rigging, before tying anything off. It can get a bit confusing, but it seems to keep me from belaying lines, only to have to go back and rebelay them because they are criscrossed or binding on another line. I hate the looks of binded lines.
- 230 replies
-
- 2
-
-
- victory
- artesania latina
- (and 1 more)
-
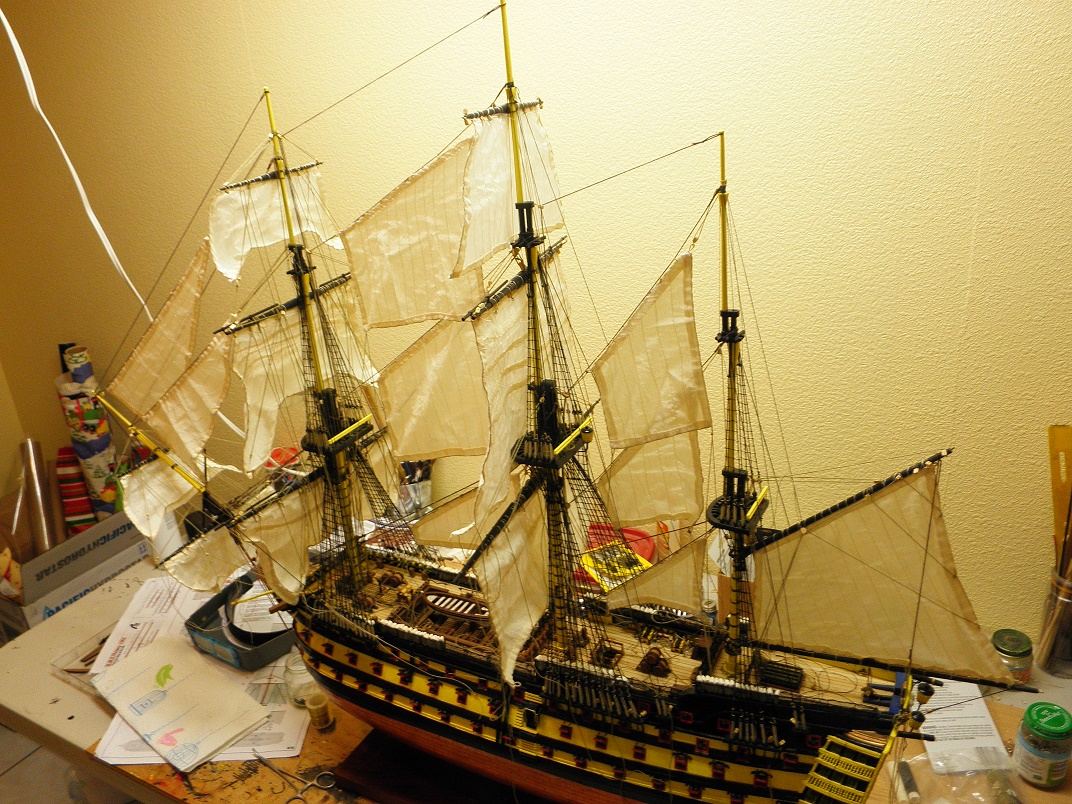
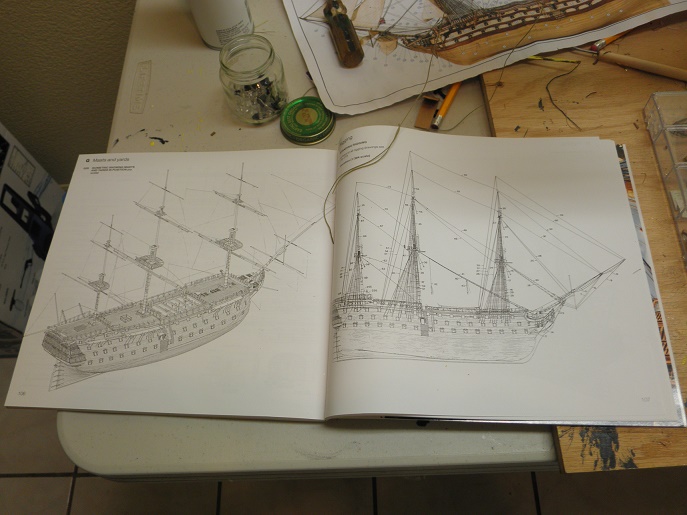
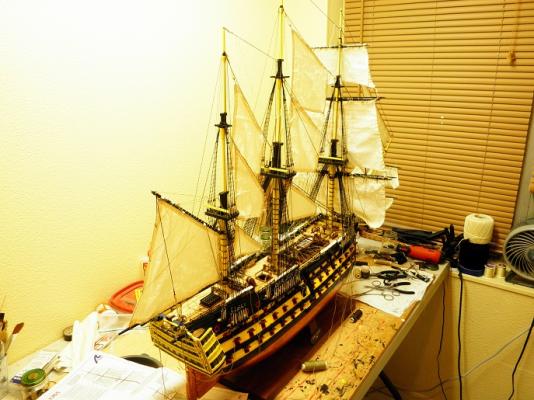
Bit more work on the Vic the last two days. The Sprits are just about mounted and tied down, then off to the fore's. Have my reference material laid out just in case

- 230 replies
-
- 4
-
-
- victory
- artesania latina
- (and 1 more)
-
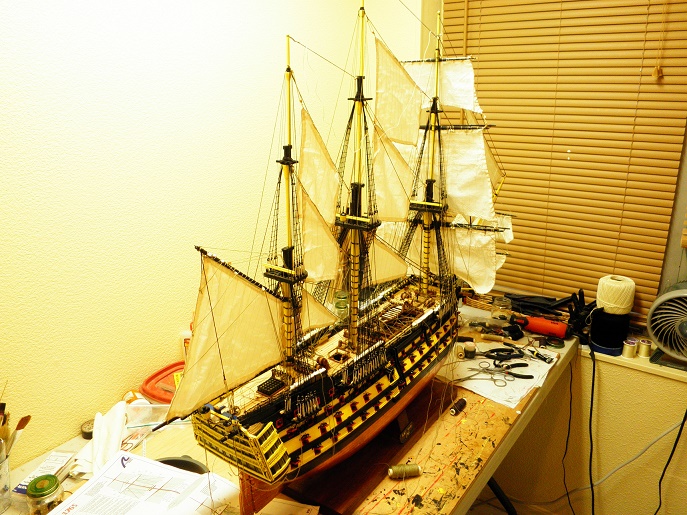
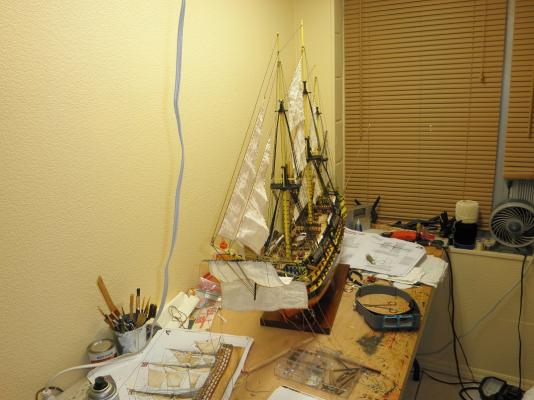
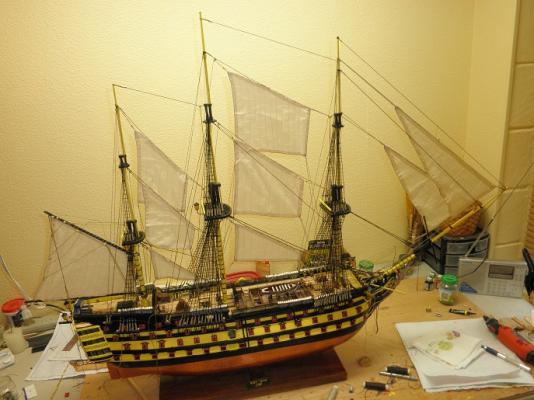
Spent a little time on the Vic over the weekend and yep, I cleaned off my work table.
- 230 replies
-
- 3
-
-
- victory
- artesania latina
- (and 1 more)
-
Absolutely beautiful work. mike