HOLIDAY DONATION DRIVE - SUPPORT MSW - DO YOUR PART TO KEEP THIS GREAT FORUM GOING! (Only 13 donations so far - C'mon guys!)
×


mtdoramike
-
Posts
2,094 -
Joined
-
Last visited
Content Type
Profiles
Forums
Gallery
Events
Everything posted by mtdoramike
-
I know what you mean, you can even find some orphaned projects at these venues looking for a new home.
-
I hope you win. I usually build a display/transport base for my models, which allows me to strap them down to the base when need be. As far as durability, I use Tamiya glue for the plastic parts, which causes the plastic to literally fuse together. On the metal parts or parts that I want to bond instantly so I don't have to hold them for 30 minutes and the PE brass parts, I use CA glue with a kicker, which causes the bond to be instant and strong. But, you better be right the first time because getting the parts apart is a bear.
-
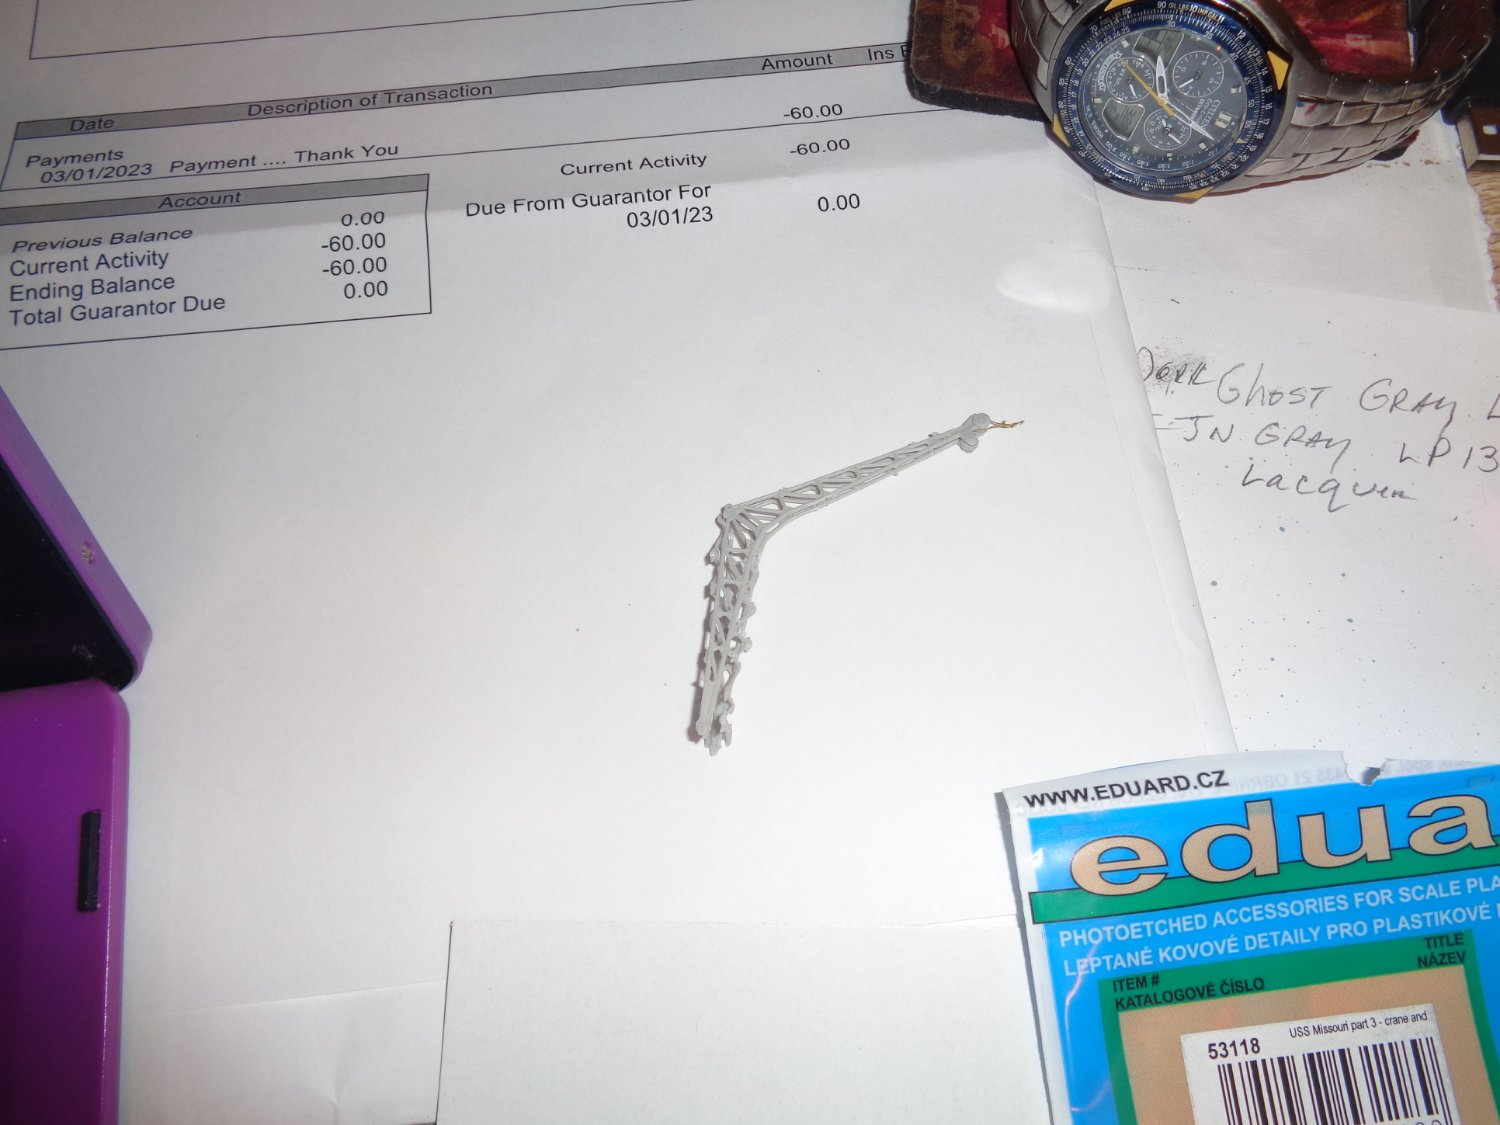
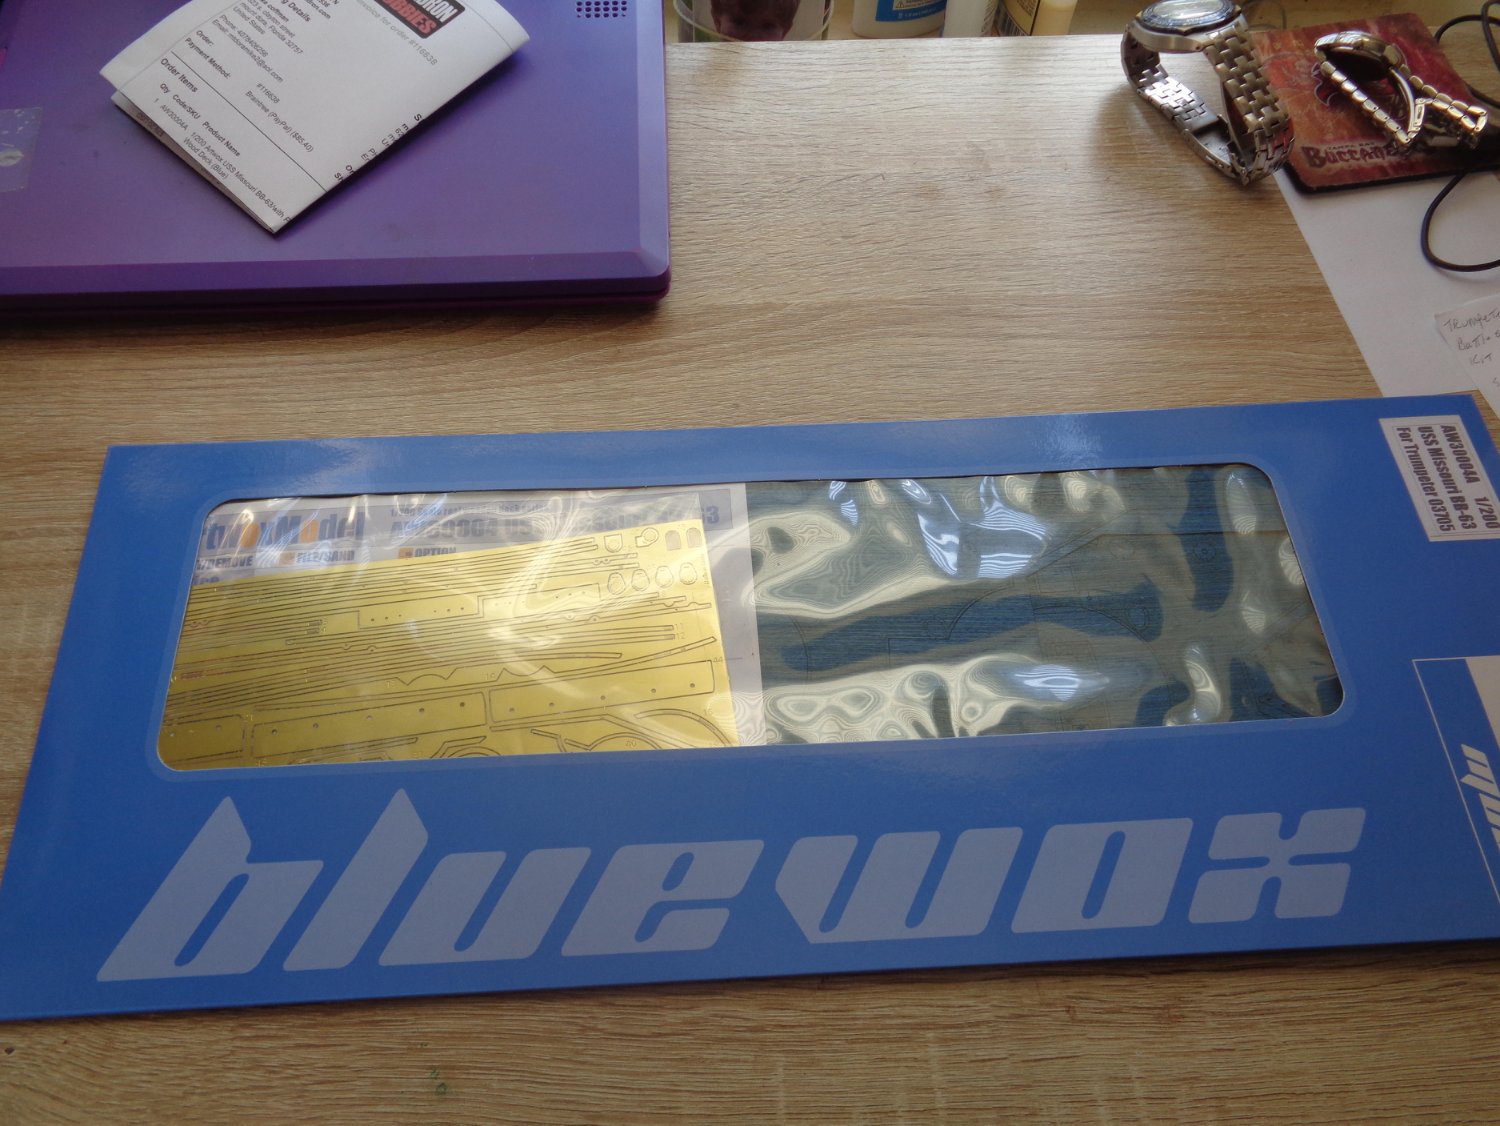
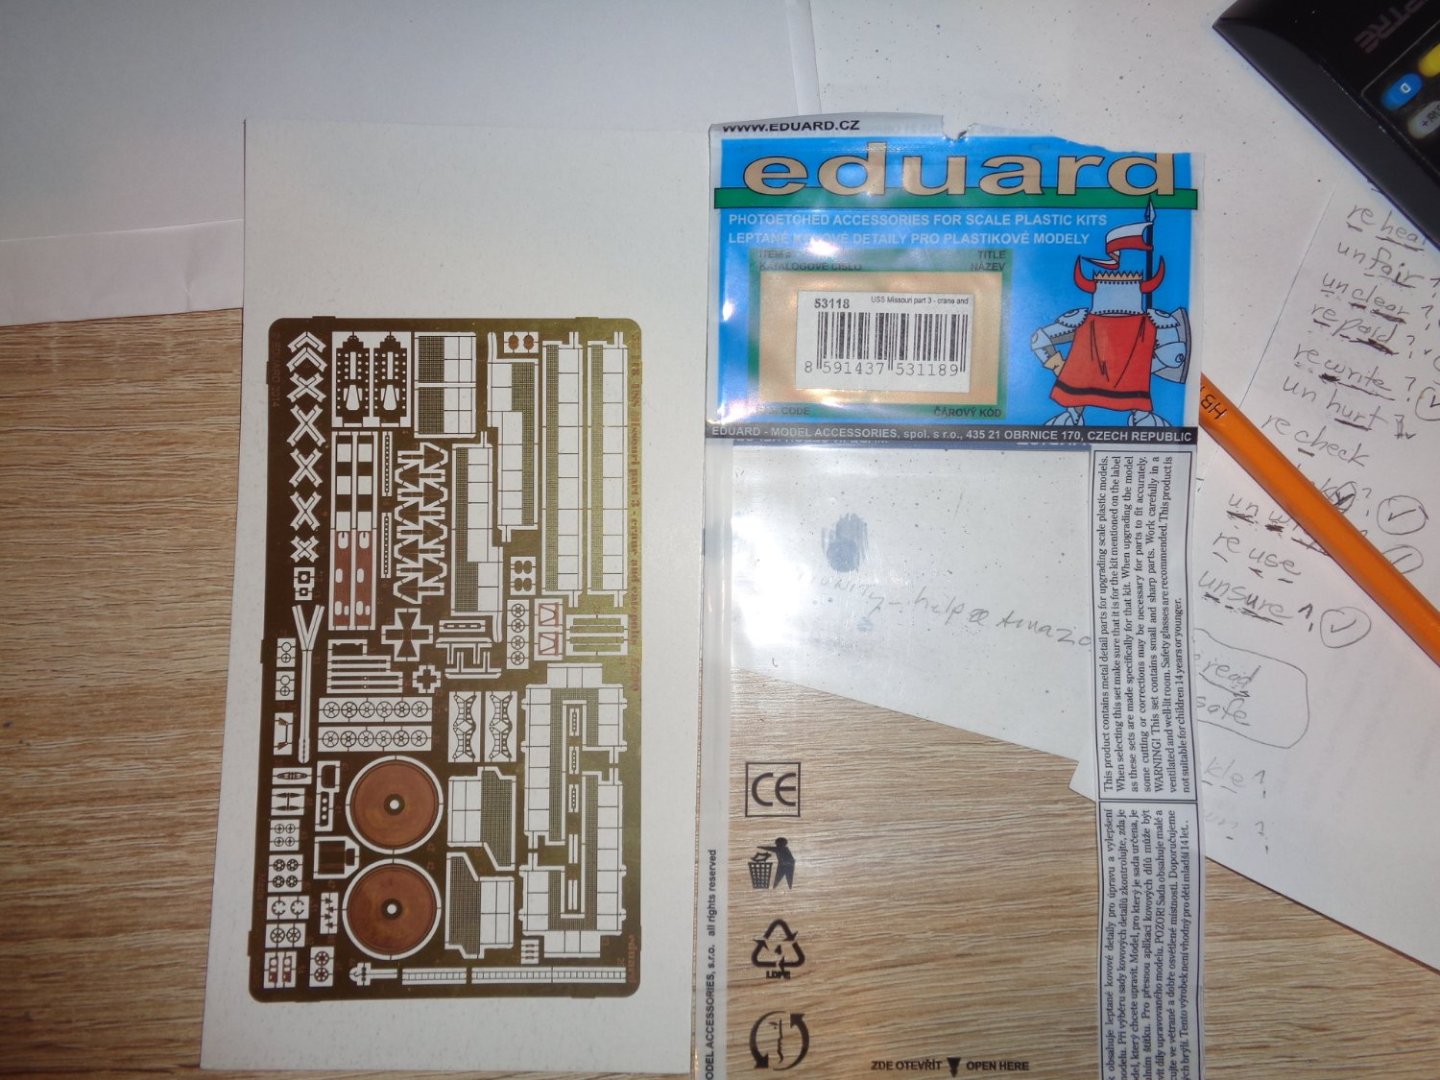
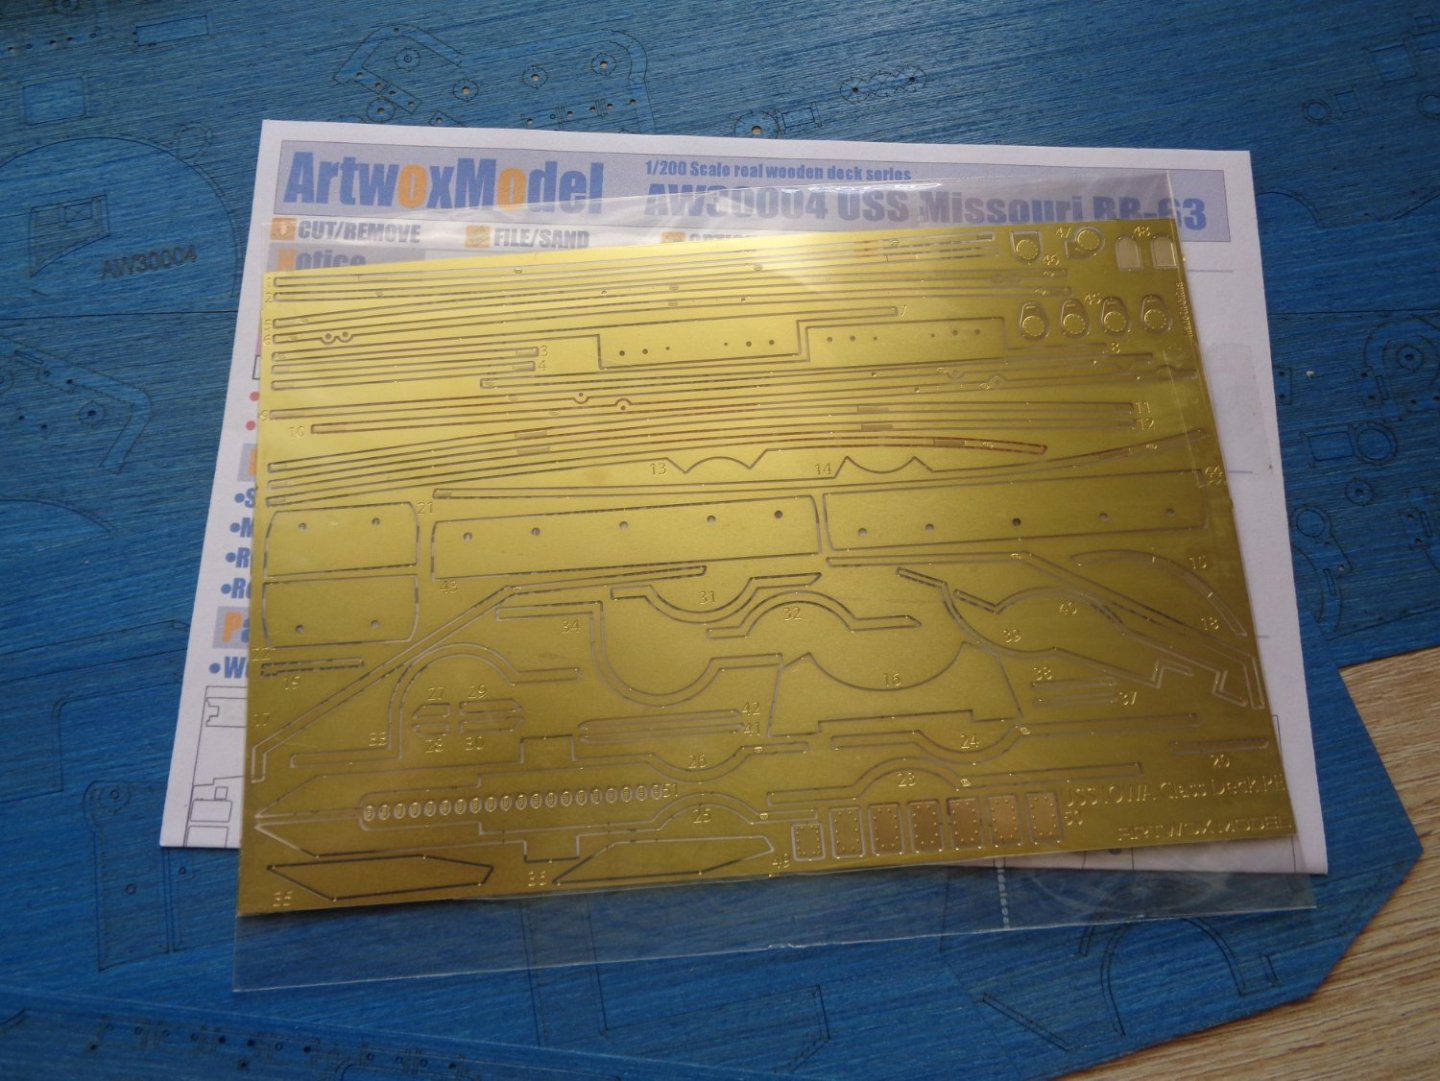
Well against my best judgement, I ordered a PE (photo etched) brass crane and catapult sheet from from Sprue Brothers for a sum of $34.00 shipped. I put together the plastic crane and catapult systems and although they were adaquate although a might rough they would be acceptable, but I thought maybe a photo etched crane out of brass would look more detailed. So I ordered the PE sheet and it arrived today. To my surprise, there were no crane unlike the what the description said. You have to use the plastic crane from the kit while using brass inner supports from the PE sheet. That blows!! So that was a total waste of $34.00 on a very misleading description.

-
Yep the old Ebay ship model kit purchase, I think we have all been there and done that, hoping everything is in the box when it arrives only to realize there are parts missing from parts of the model to plans and instructions. After your first or second model, you will toss the instructions, which at best are confusing and at worst down right misleading and build mainly by the plans or drawings. You will also learn that basically all ship models are built the same with only a few differences.
-
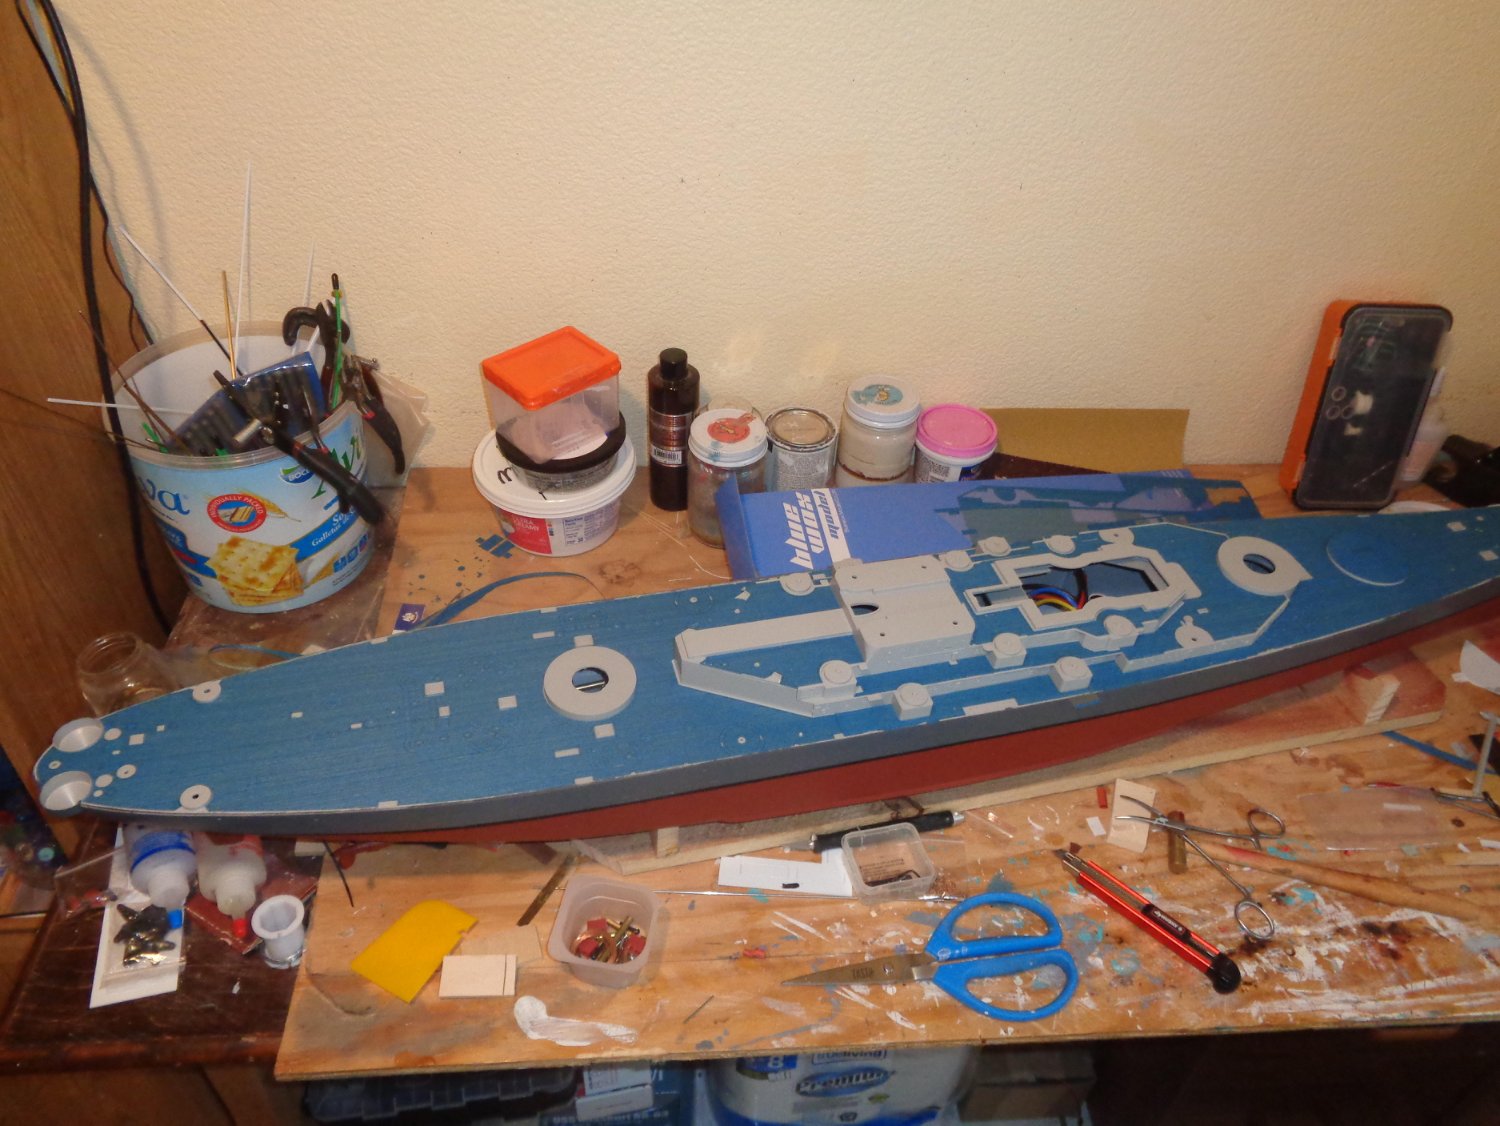
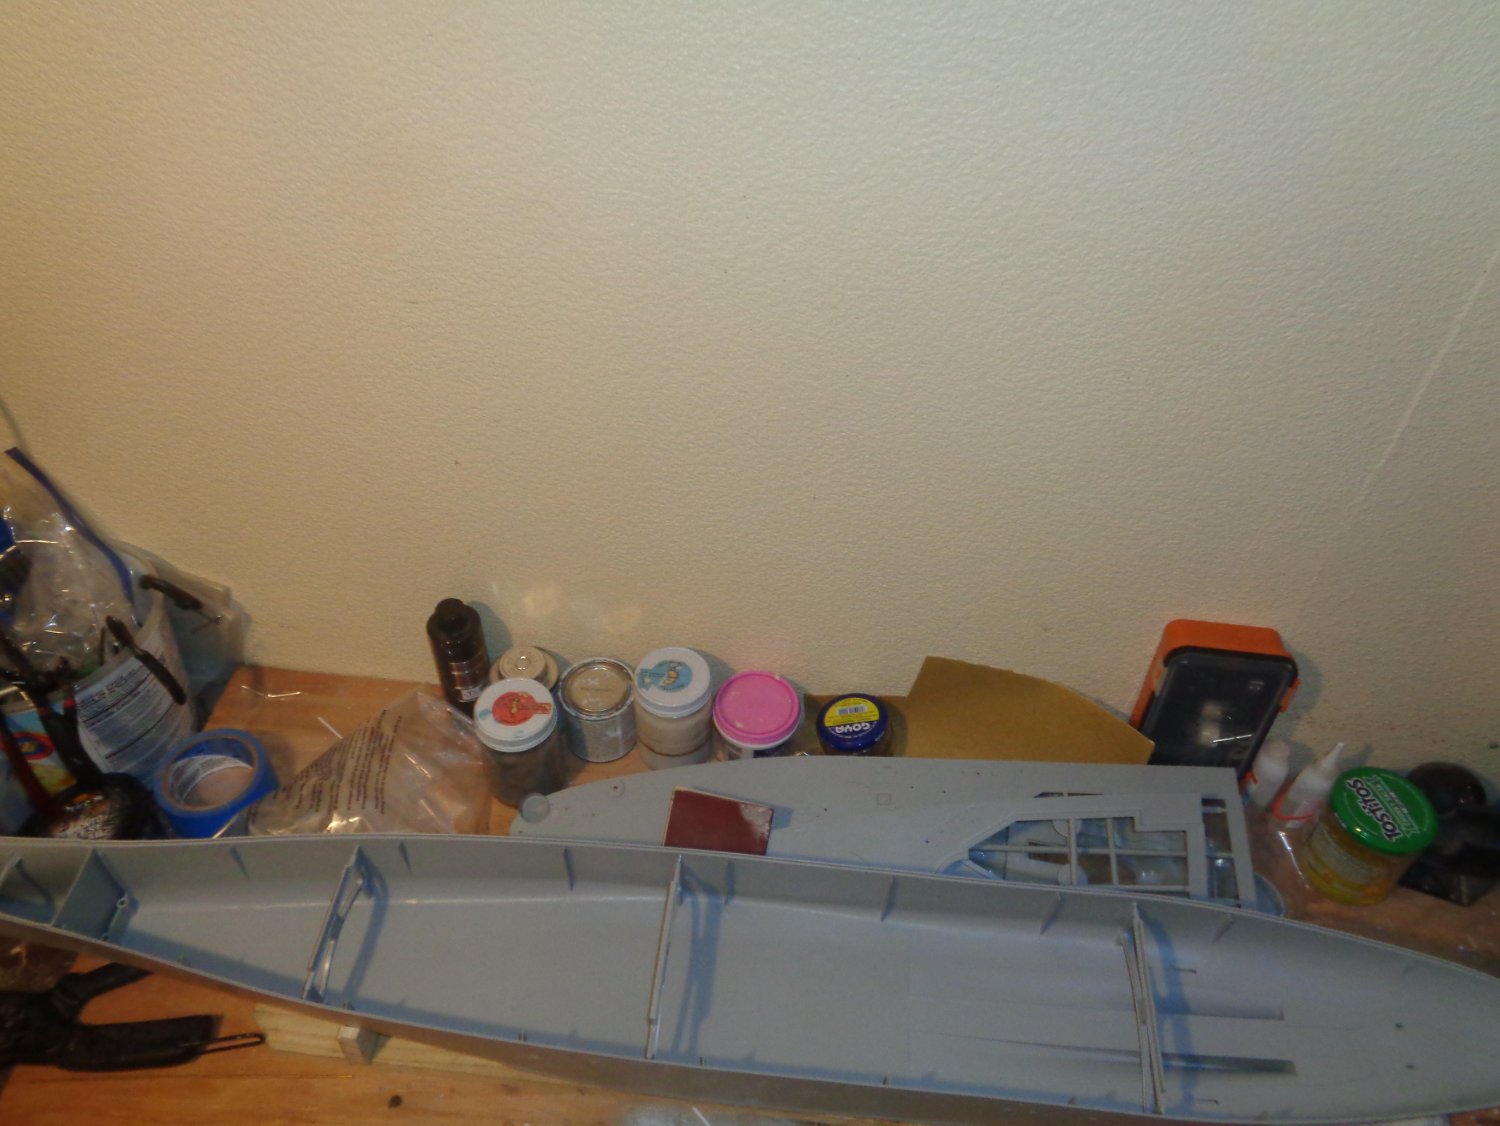
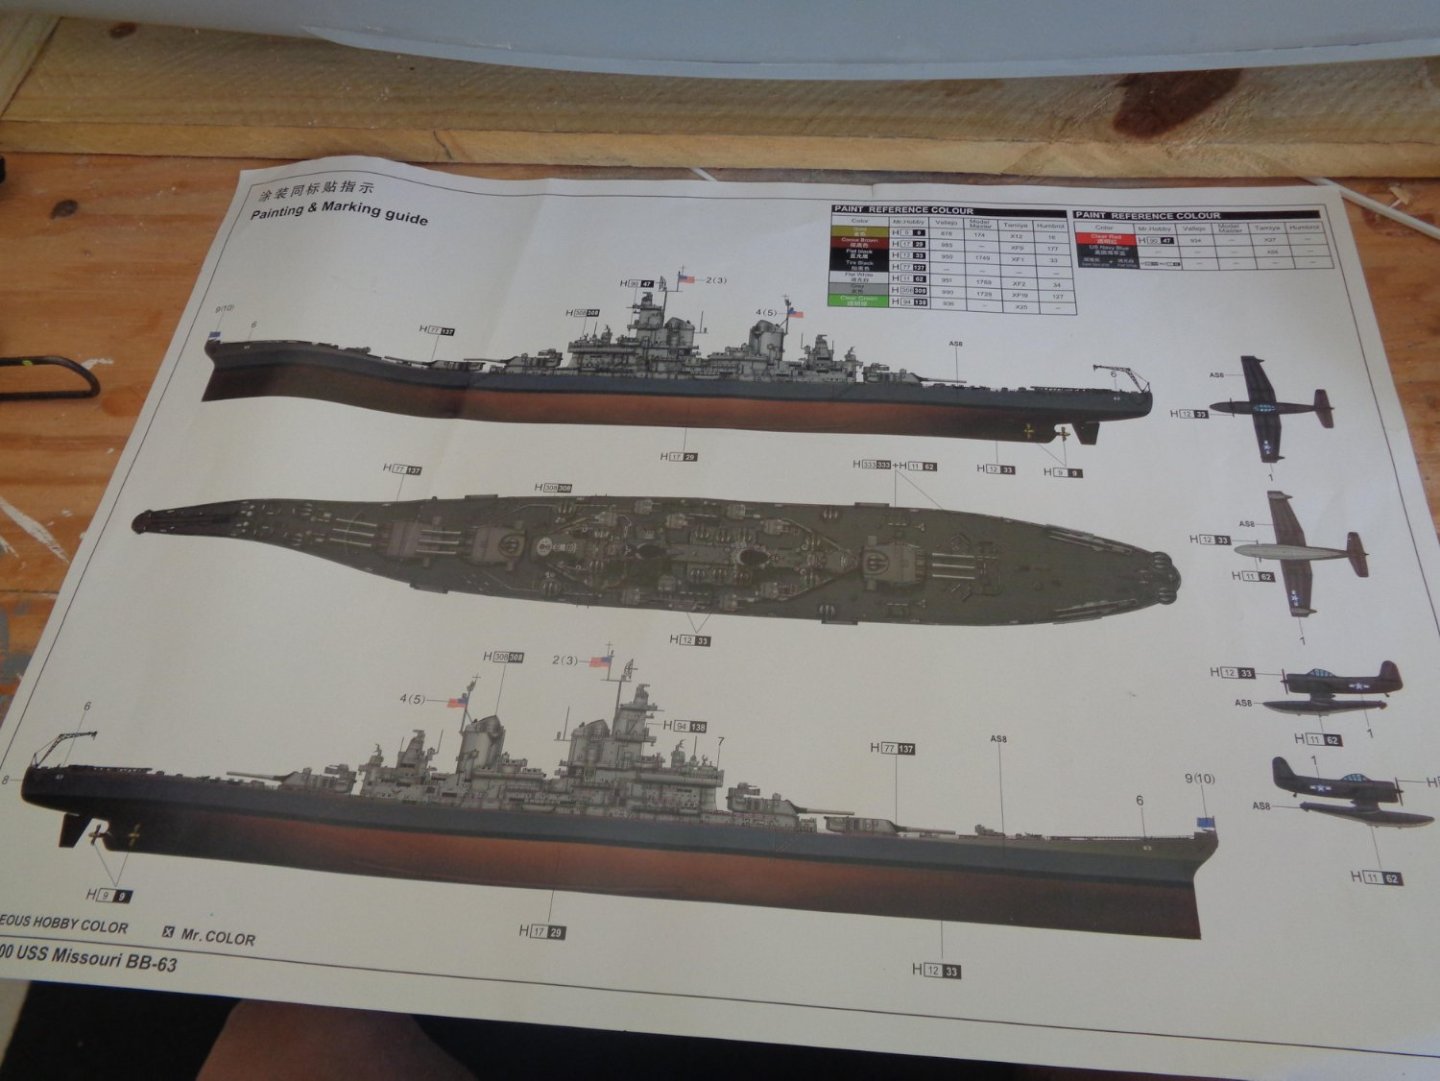
I'm using Tamiya IJN Gray LP13 flat lacquer paint for the upper portion of the hull and Dark Ghost gray LP36 flat lacquer paint for the super structure and deck fittings, which actually looks more like a light blue than gray, but I liked then name Dark Ghost gray.
-
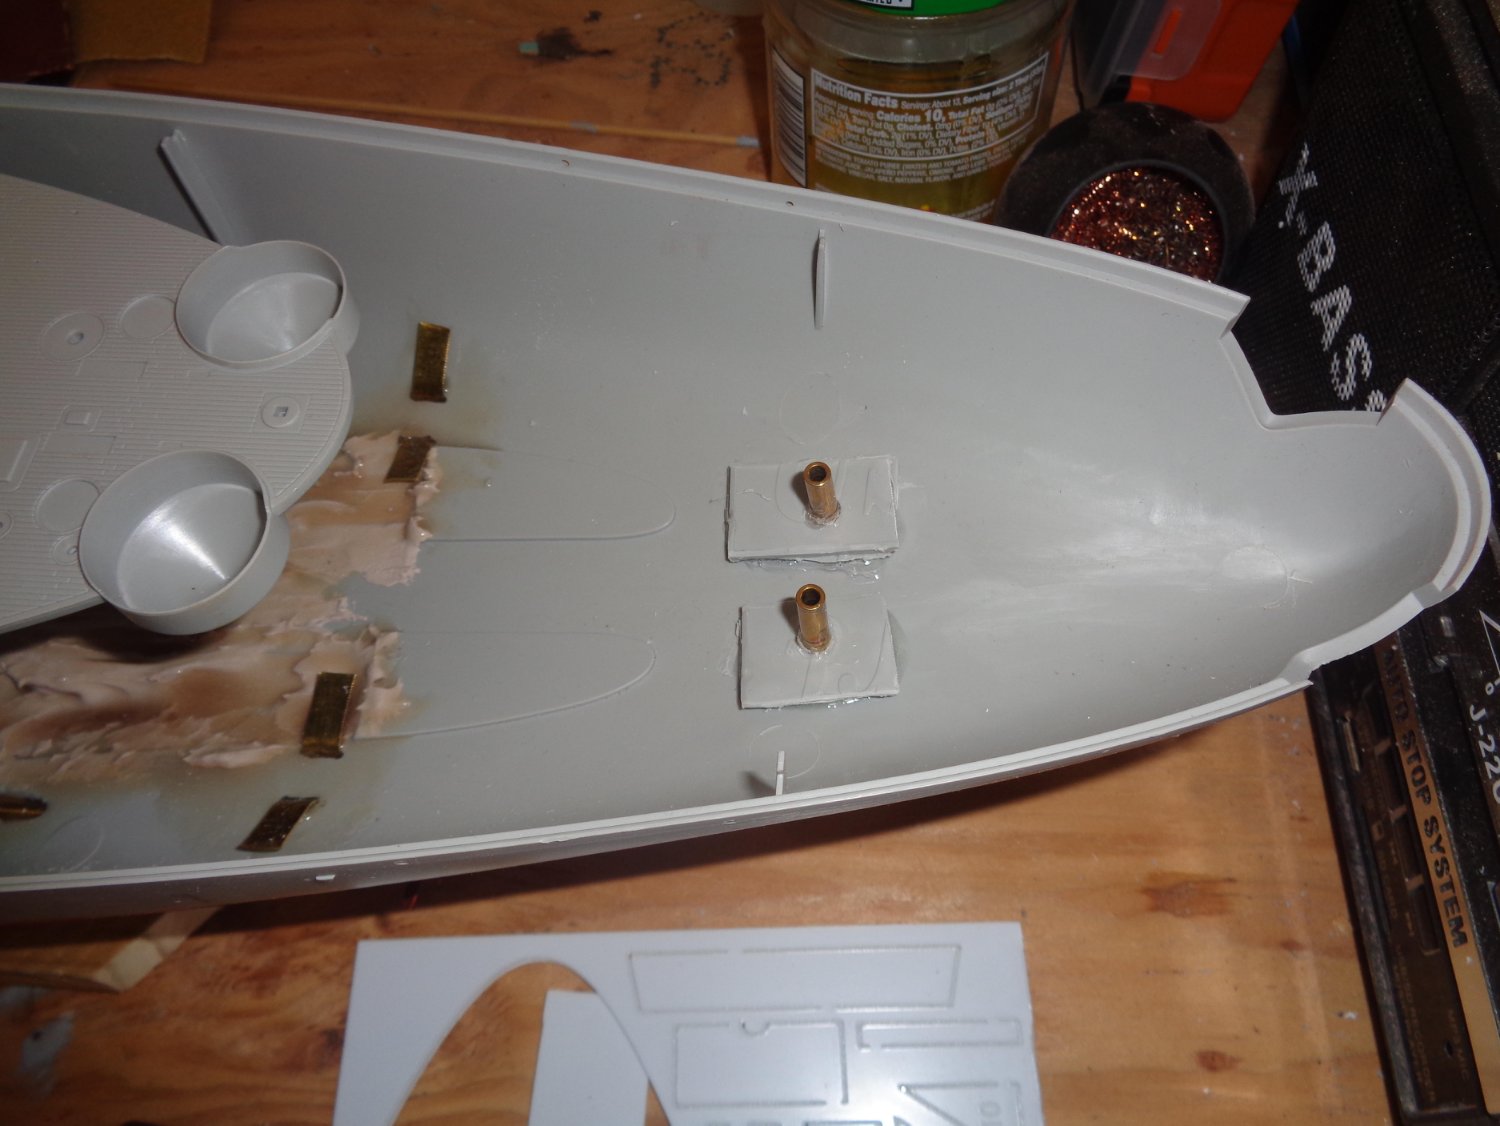
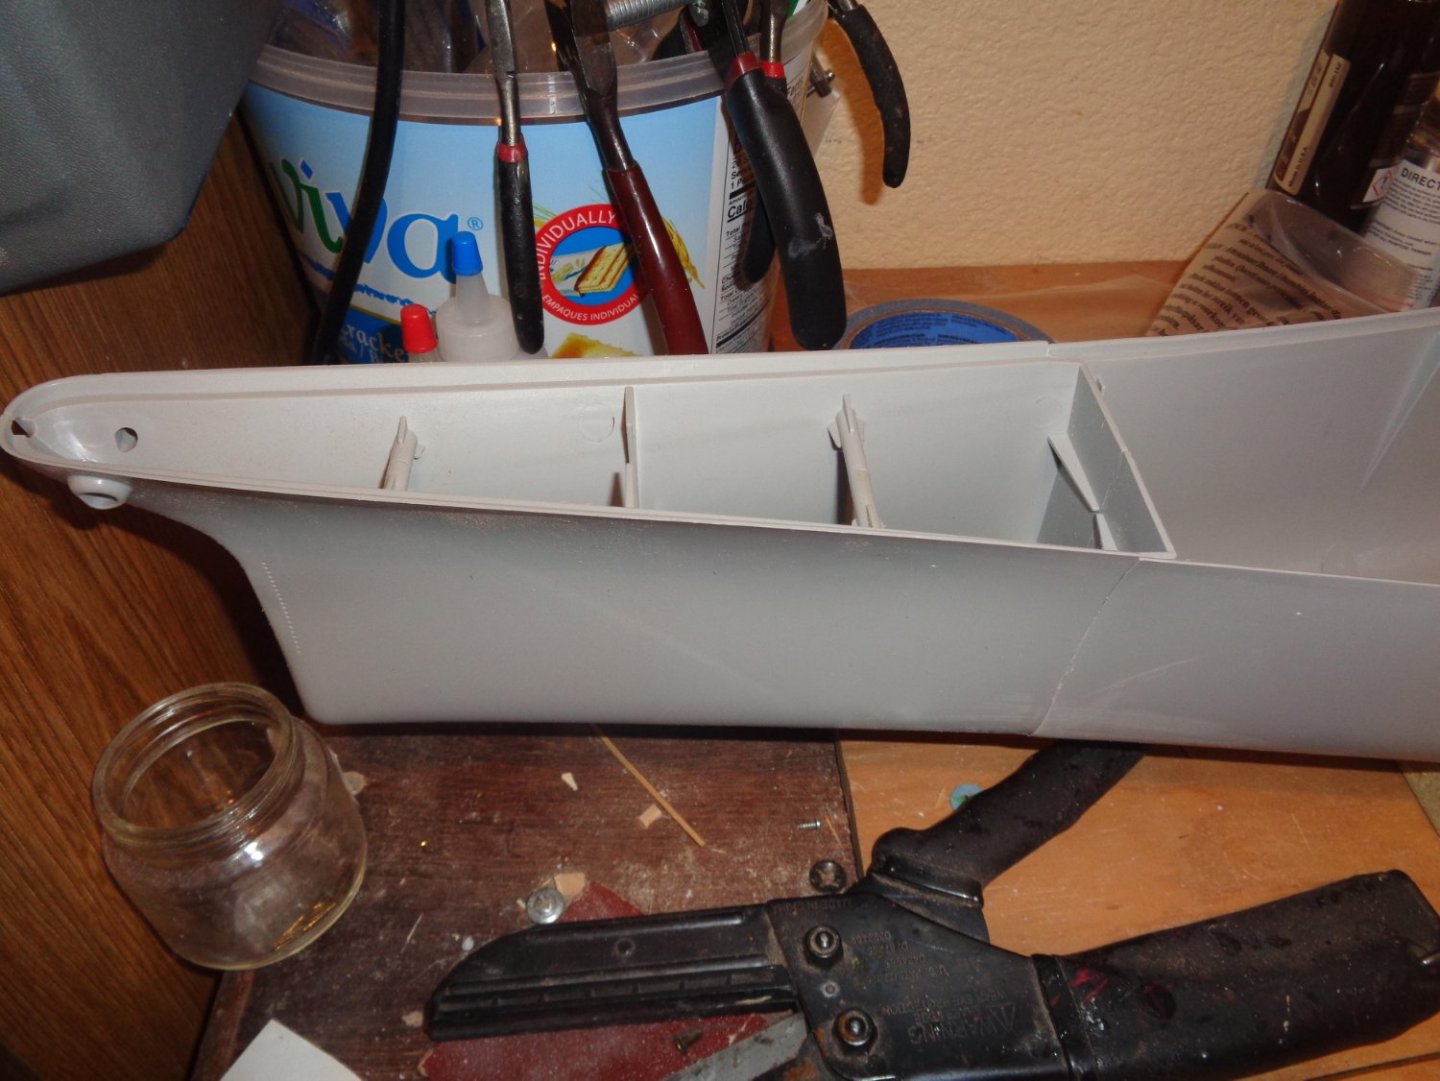
I was having a battle with myself on how to allow access to the stern portion of the ship once the deck was attached to allow access to the rudder posts and rudder arms, which do require adjustments at times. I finally desided to glue blockes to the insides of the hull from midship back to the stern which allowed me to screw the rear half of the deck down. So now if access is required, you just have to unscrew the deck rather than glueing the rear deck to the hull like was done on the front half of the deck.
-
Thanks CD, a fellow modeller built the Trumpeter 1/200 scale of the Bismarck and met with me at Lake Dora and floated it around the boat ramp area and it was magnificent.
-
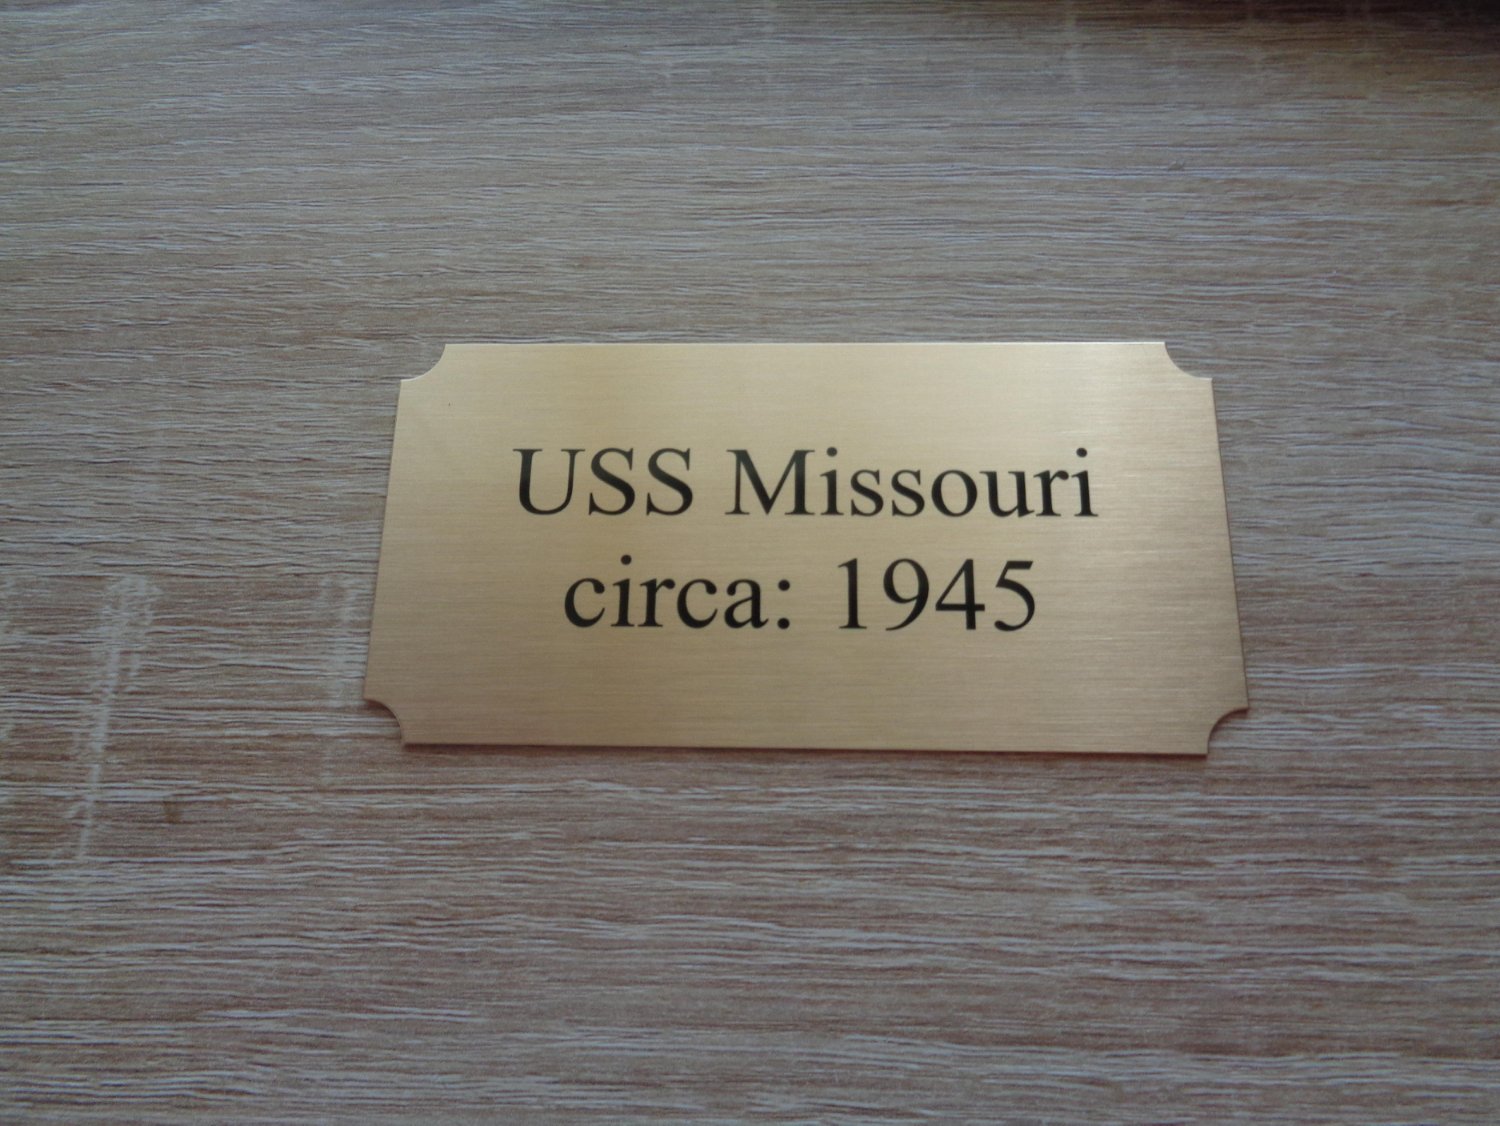
The Big Mo came with a decent plastic name plate, but I can't roll like that, so I ordered a nice brass name plate for such a grand ol gal.


- 47 replies
-
- 10
-

-

-
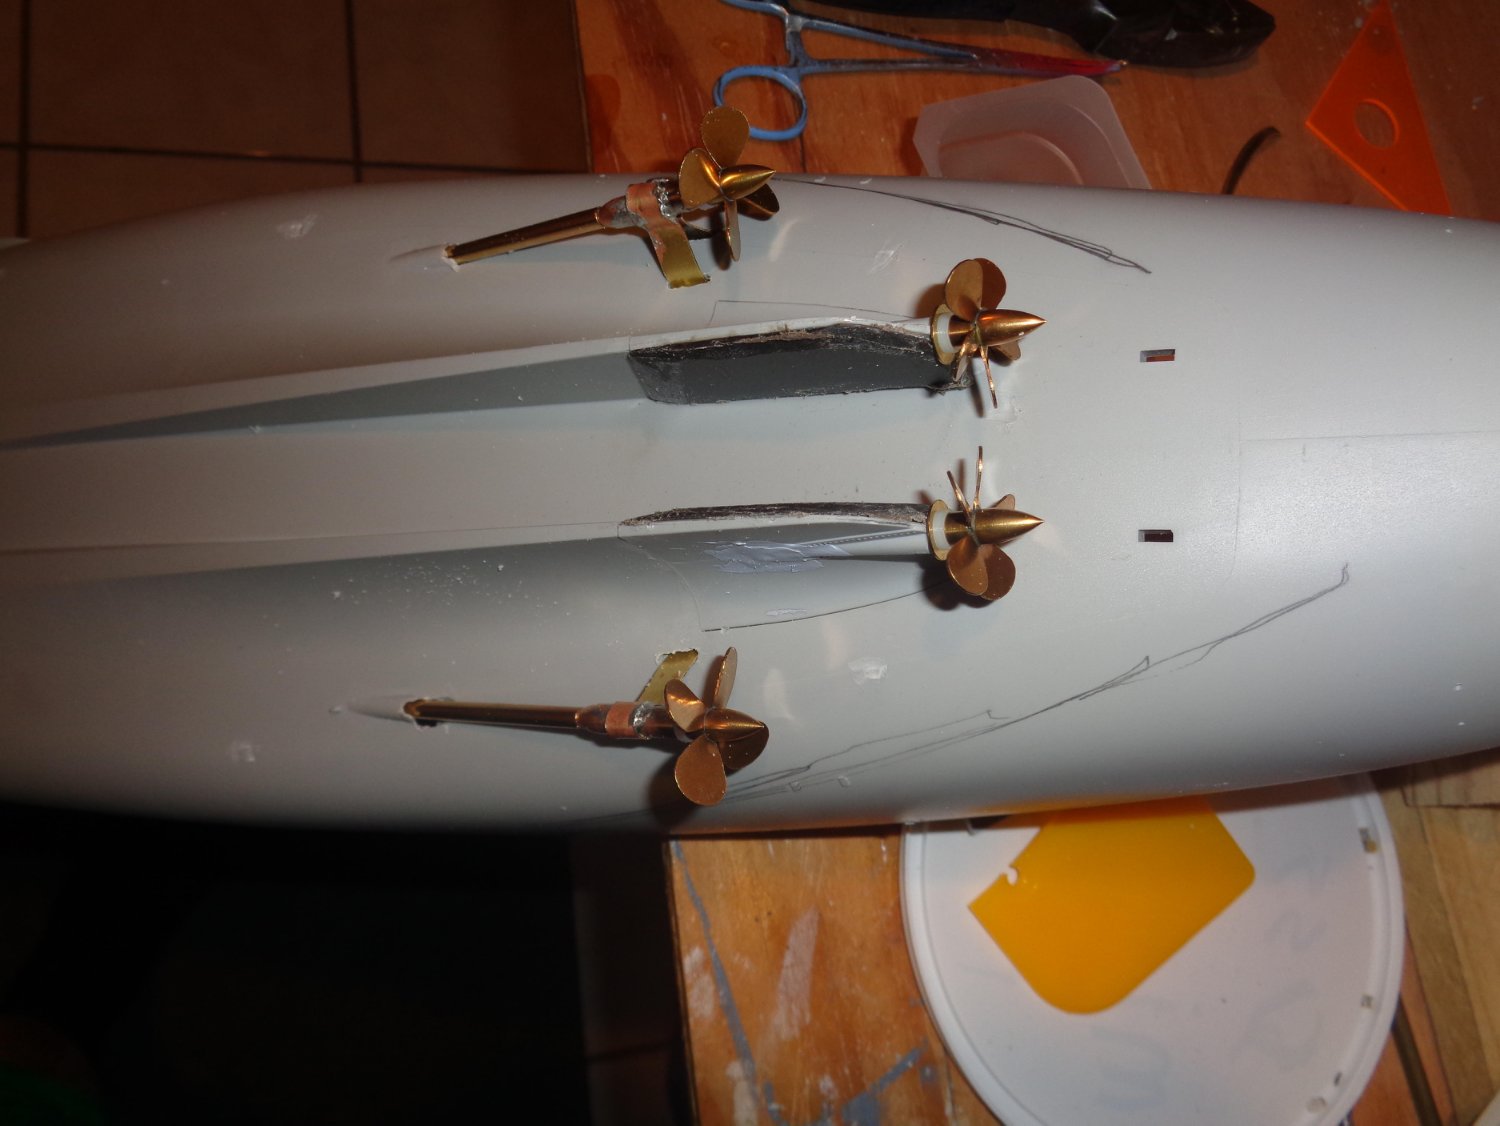
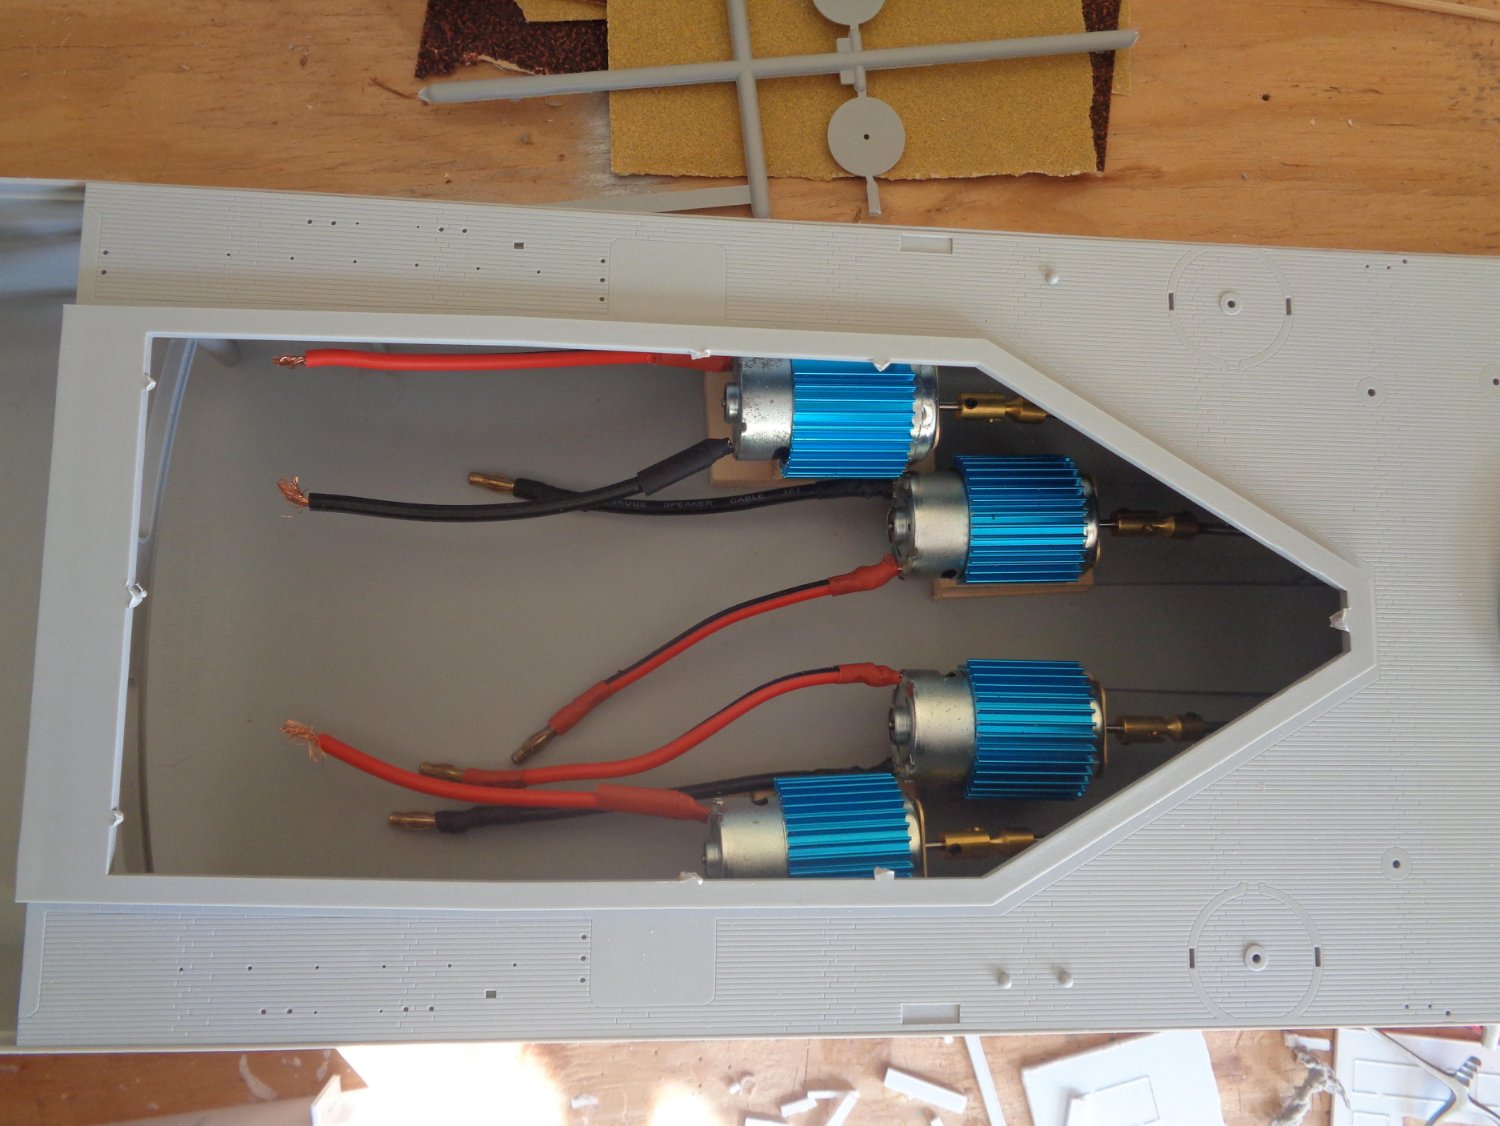
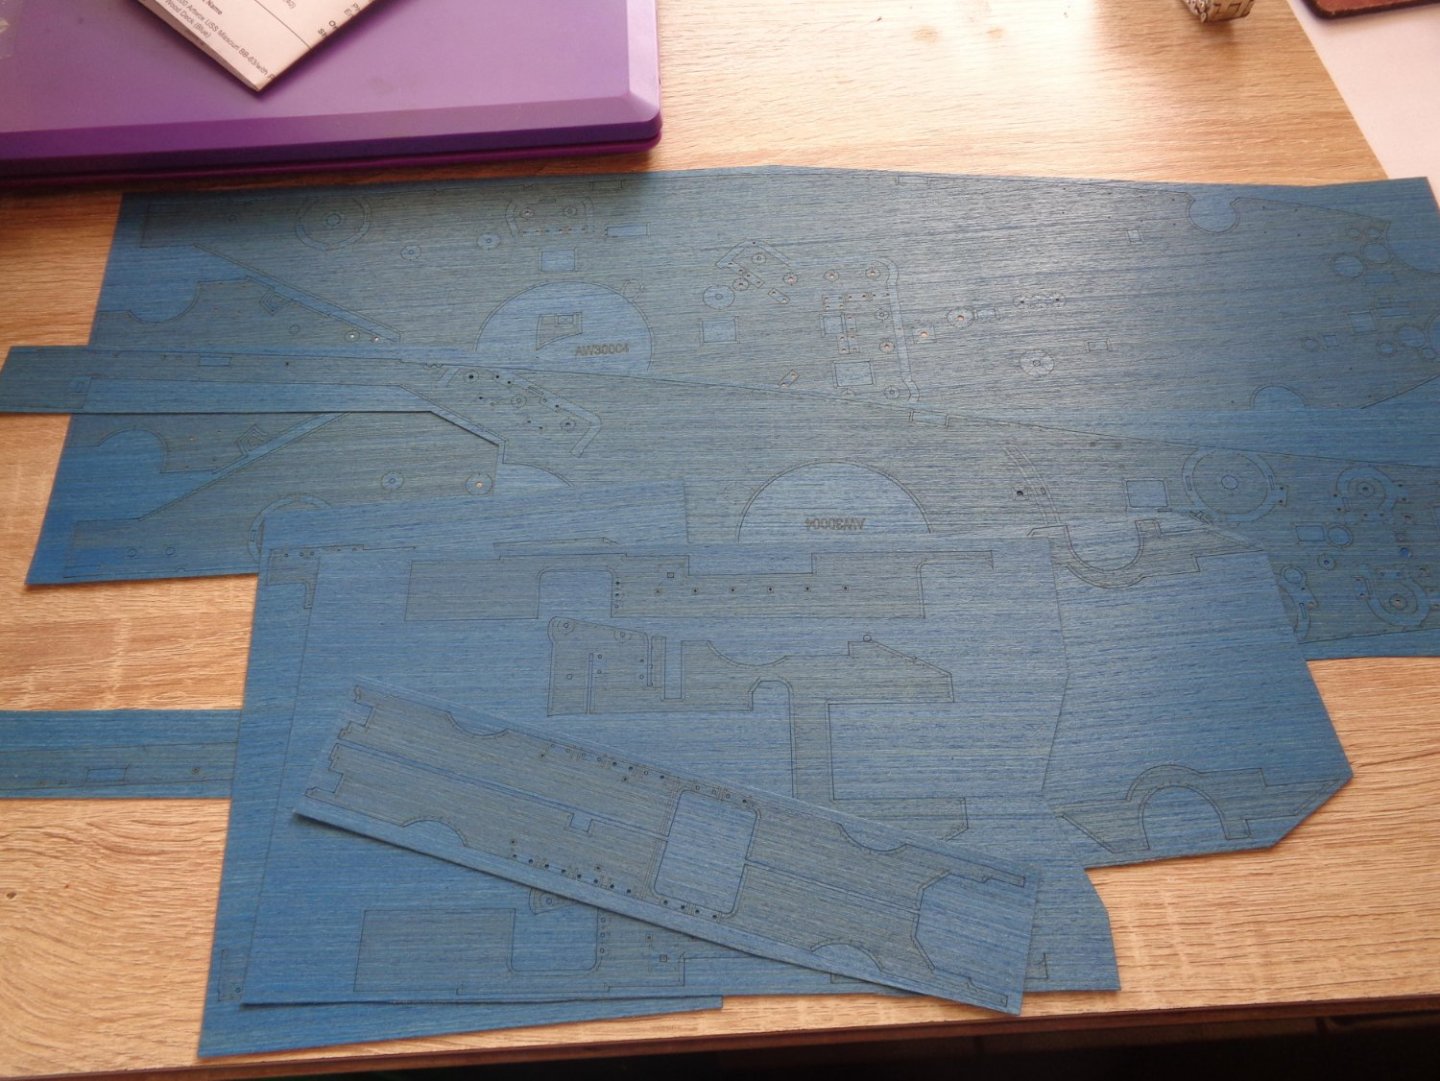
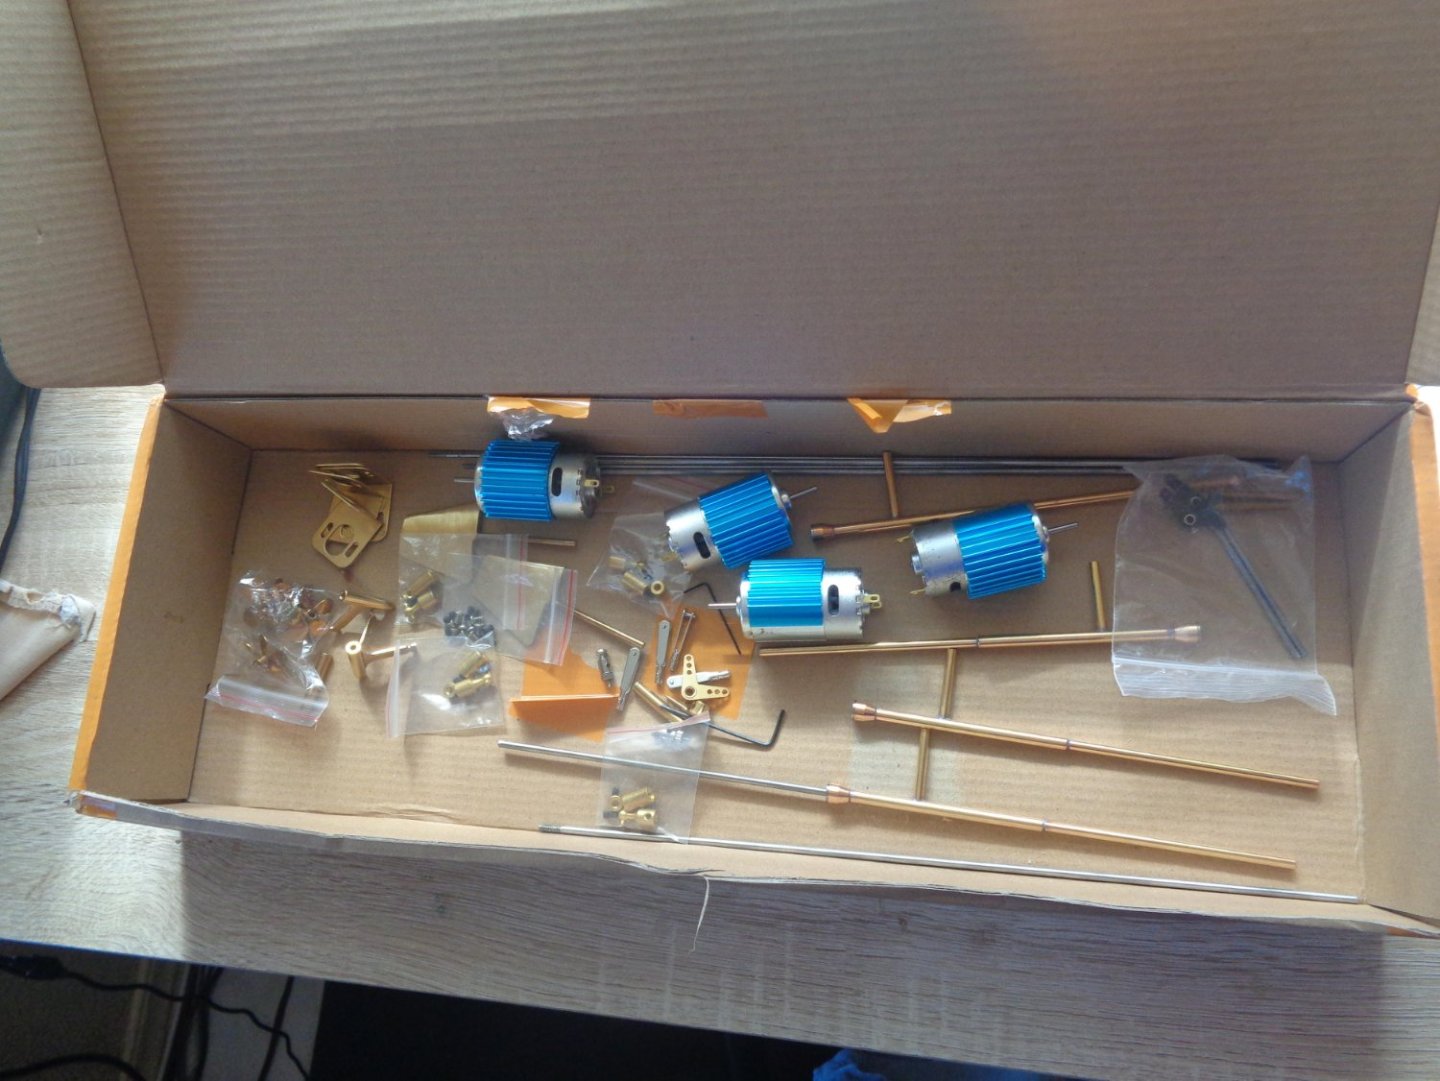
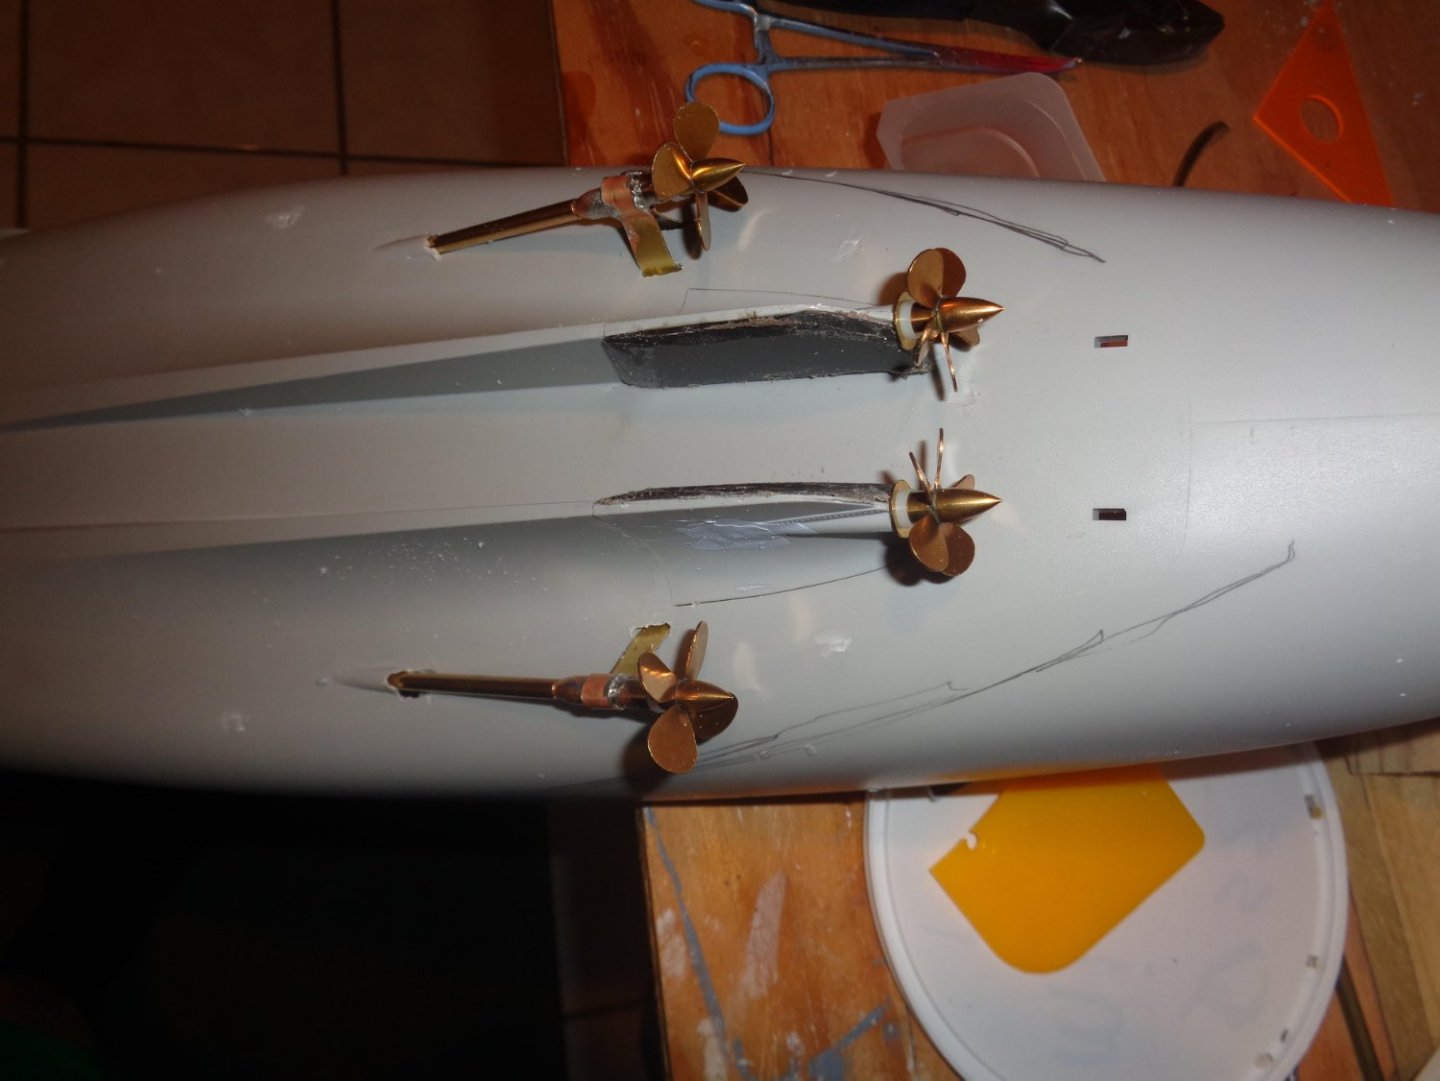
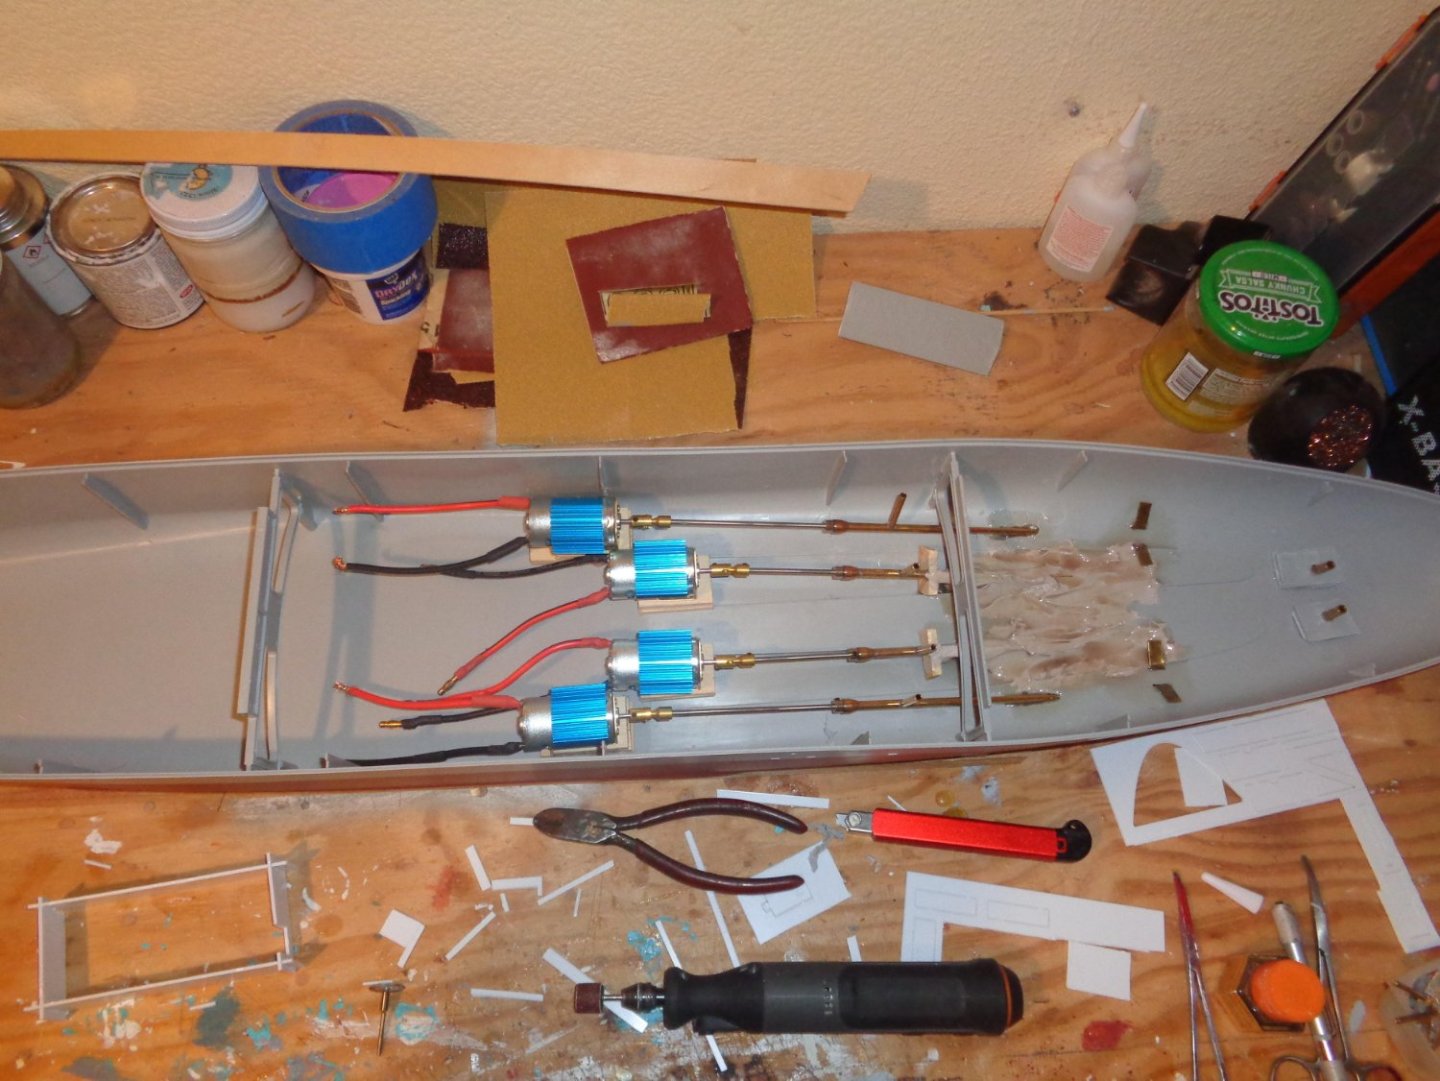
I know you can buy a ton of Photo Etched brass upgrades for this kit, but I don't plan on buying very much upgrade or detail; up sets for this kit. You can buy brass turned canon and such, but the guns to me from the kit look quite detailed and fine. I did however purchase a wooden deck for the Big Mo and chose the blue deck, which is like a peel and stick. I also decided not to use the twin screw setup from the previous owner and opted to go for the realistic look of the actual ship and use a 4 screw setup and ordered it from China, which set me back $199.00 shipped. Now let me point out here, if I were going to keep this model for myself, I would have used the twin prop or screw setup rather than the four screw because I saw a video of the Big Mo with both twin and four screw in operation and then performance of the twin screw was way better than the four screw, which required a lot more room to turn and slower to react than the twin screw.


-
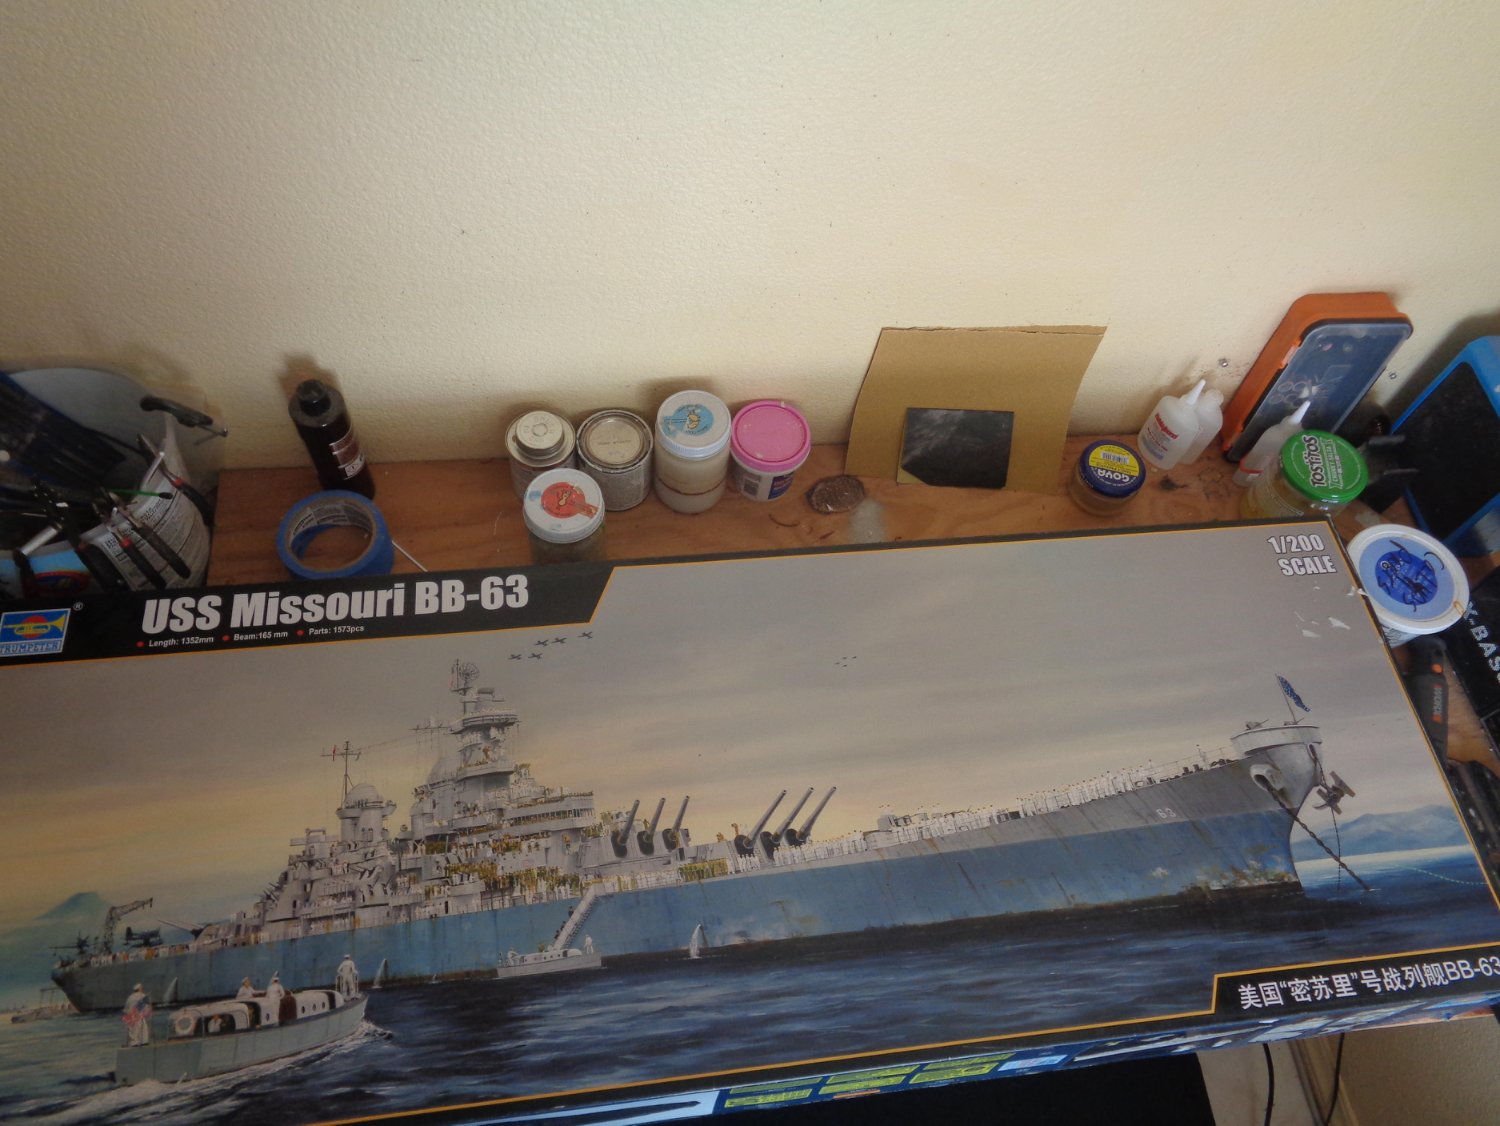
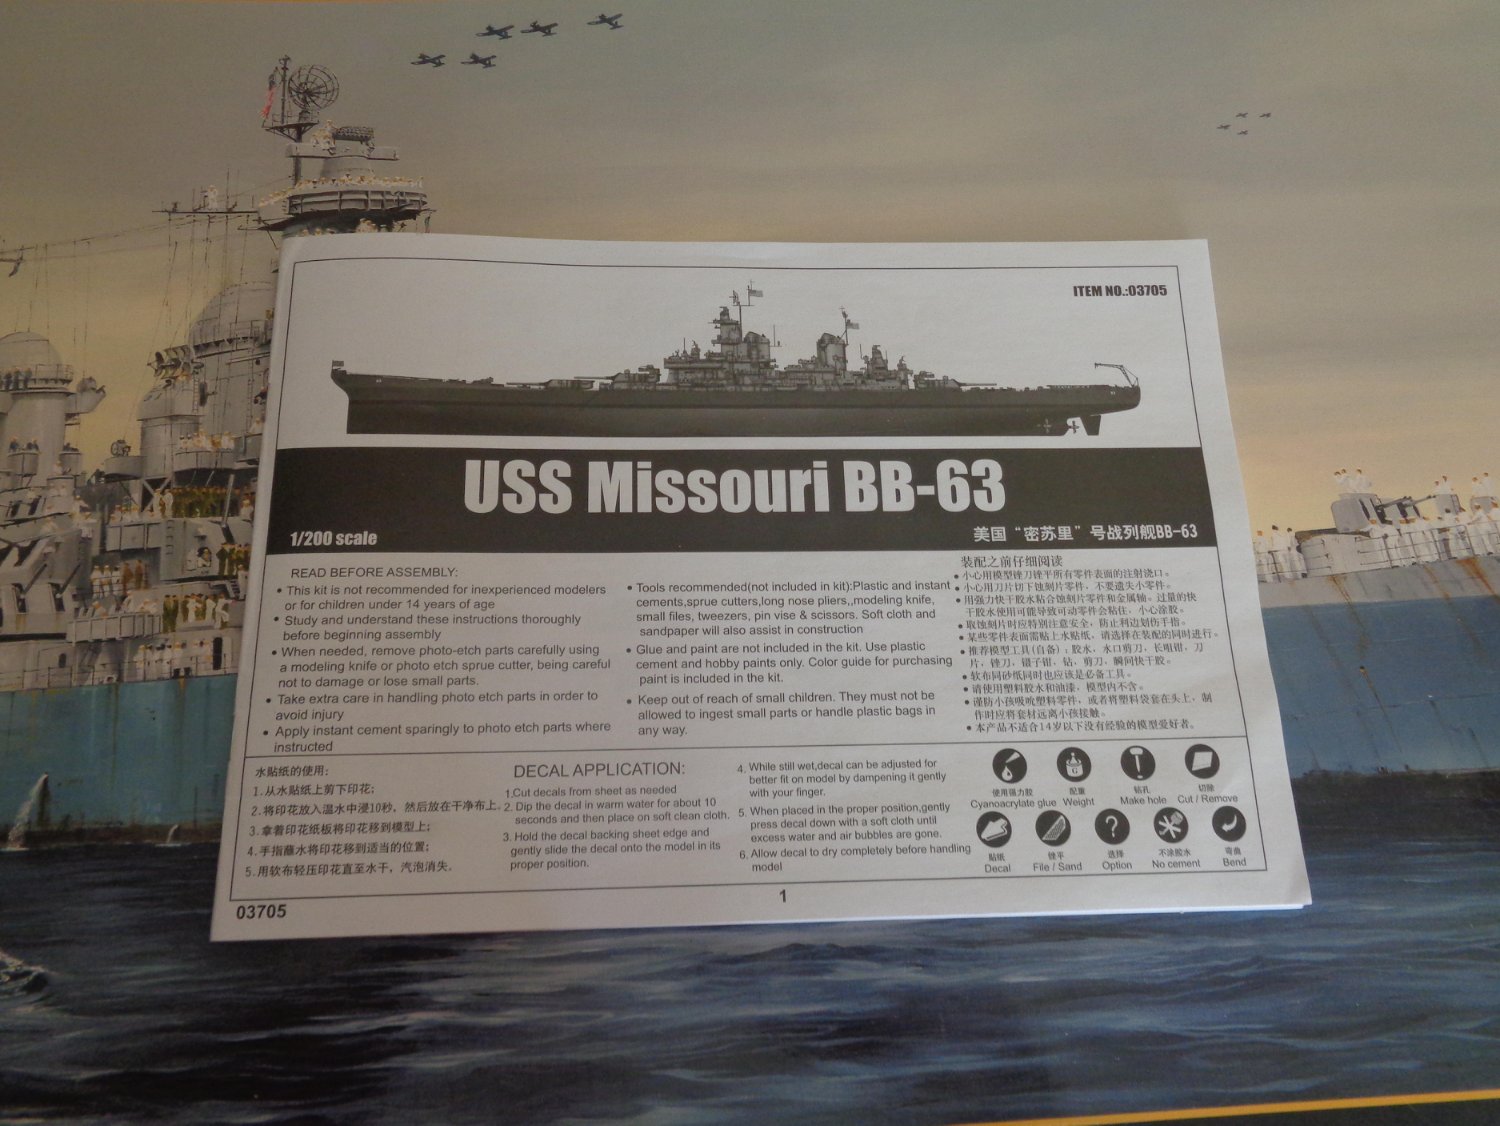
I adopted an orphaned kit of a battleship by Trumpeter 1/200 scale of the USS Missouri aka:Big Mo a while back and has been awaiting it's turn on the building bench. It had never been started, however one of the previous owners (not sure how many? purchased a twin screw drive system from England for it. First impression, this kit is huge, and not for the faint of heart. upon completion of the Big Mo, I will either offer it for sale or possibly see if a local VFW would be interested in it to raffle off as a donation.


-
It measures out to about 32" in length, which is a manageable size. Absolutely beautiful kit for sure.
-
The first model ship that I tried to build was a Bluenose Canadian fishing boat. I got so aggravated with it that I placed it on the driveway and ran over it with my truck, backed up and ran over it again, then gathered up the pieces and threw them in the trash can. It didn't fix anything on the model, but it did wonders for my frustration. My wife asked me in a sarcastic manner "did that make you feel better"? I simply replied "yes it did".
-
May I ask why you are on to the next project when you have these to finish?
-
Say WHAT? I was just informing the group of an outstanding deal if there were someone dreaming of building a magnificent model in the near future. But a schooling in business practices and how to screw over the IRS is always appreciated. Model Expo also has the Wappen Von Hamburg regular $1500.99 sale $999.00 Amerigo Vespucci regular $1499.99 sale $949.00
-
The SOS is on sale until 12/31 regular price $1499.00 sale price if $849.00 a savings of $650.00 plus free shipping. I am soooo tempted. But I got way to many projects.
-
Just to give you a heads up, I can buy the Model Shipways Syren from Amazon for $299.00 with free shipping. Usually second hand kits sell for 50% of retail unless the kit is out of stock or production and someone just has to have it. This kit matches neither of those.
-
I'm glad to she you make great progress on this beauty. It is turning out purdyful.
- 84 replies
-
- 1
-
-
- Corsaro II
- Corel
- (and 1 more)
-
I have a few orphans awaiting their turn on the bench. Trumpeter USS Missouri 1/200 scale, Dumas Super Sport or the Dumas Jenny Lee. I will choose one in the next few weeks, I'm going to take a few weeks off from modeling to do some stuff around the house that I have been putting off for that (Tomorrow). It's finally cooling off here in central Florida so it's not as bad being outside.
-
Well, I have some good news and some bad news depending on who you are, I just sold the 3/4 finished Miss Chloe to a friend who wants to finish it, but wanhts to make it into a fishing/Lobster boat and intends on distressing it or weathering it. But the good news is, I have the plans as well as the templates to build another one as well as the materials. But that will be a future project.
-
thats the one
-
No, I ordered from an ebay graphics company that I have been buying from for years.
-
Thank you for the kind words, yes, I have done this more than a few times. But it seems on every project there tends to be changes or modifications maybe not so much needed as preferred. Yes, Pat does a wonderful job on drafting plans of his creations, which makes building them a breeze.
-
Thanks Bob, wait till I get the canopy on her.