HOLIDAY DONATION DRIVE - SUPPORT MSW - DO YOUR PART TO KEEP THIS GREAT FORUM GOING! (Only 24 donations so far out of 49,000 members - C'mon guys!)
×

nikbud
-
Posts
203 -
Joined
-
Last visited
Content Type
Profiles
Forums
Gallery
Events
Everything posted by nikbud
-
 I think that is a very good idea Matt. Have you checked out the planking tutorials in the articles database (at the top of the page)? I remember that I tried to do the first layer of planking as if it were the final layer. You will have to taper etc the final layer so you may as well get in some practise with the first layer! I got myself into the mindset of taking my time and working on each plank until I was satisfied with each one, there were days when I only managed one plank one each side per day. I know what it's like to pull apart something you have already made, but it will be worth it! Good luck n happy planking!😁
- 68 replies
-
- 2
-

-
- virginia 1819
- artesania latina
- (and 1 more)
-
Thank you for the compliments, Mark, I am pleased with how the stem has turned out. I have kept putting off making it out of fear that it wouldn't look right - I'm glad it's finally done. I just have to attach it to the hull strongly enough to withstand any force from the hull planking...……. Took me all afternoon to think that up 😎
-
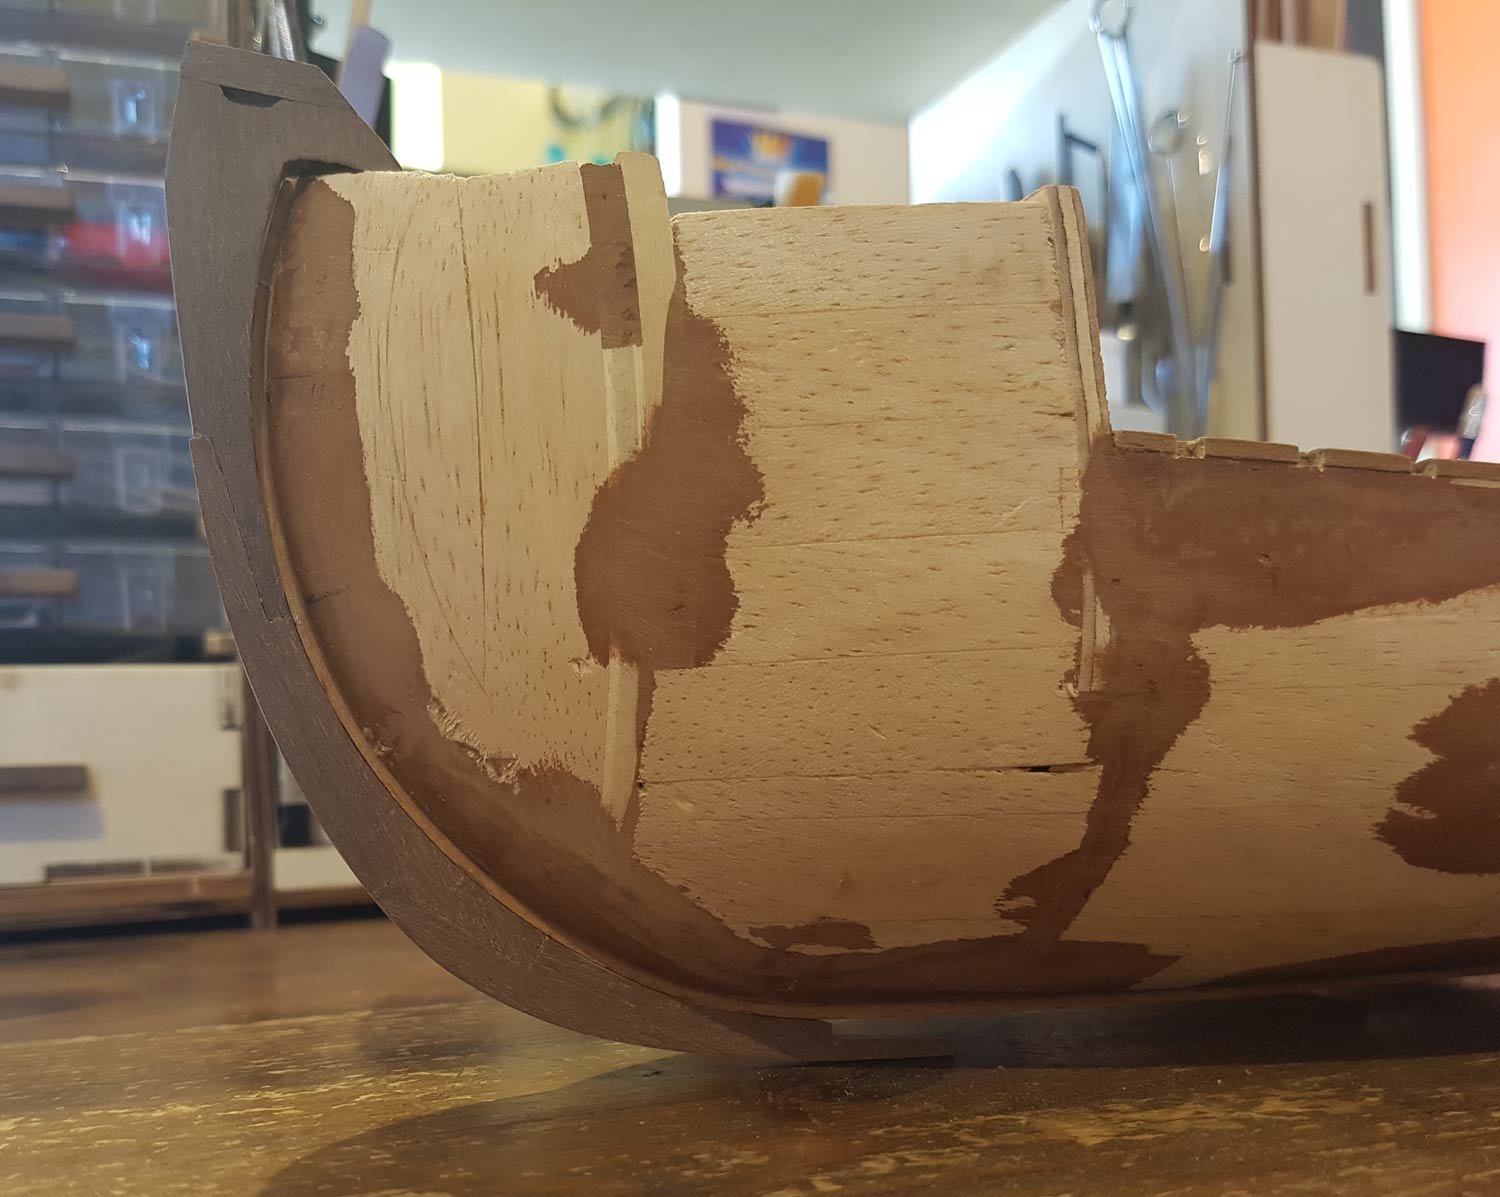
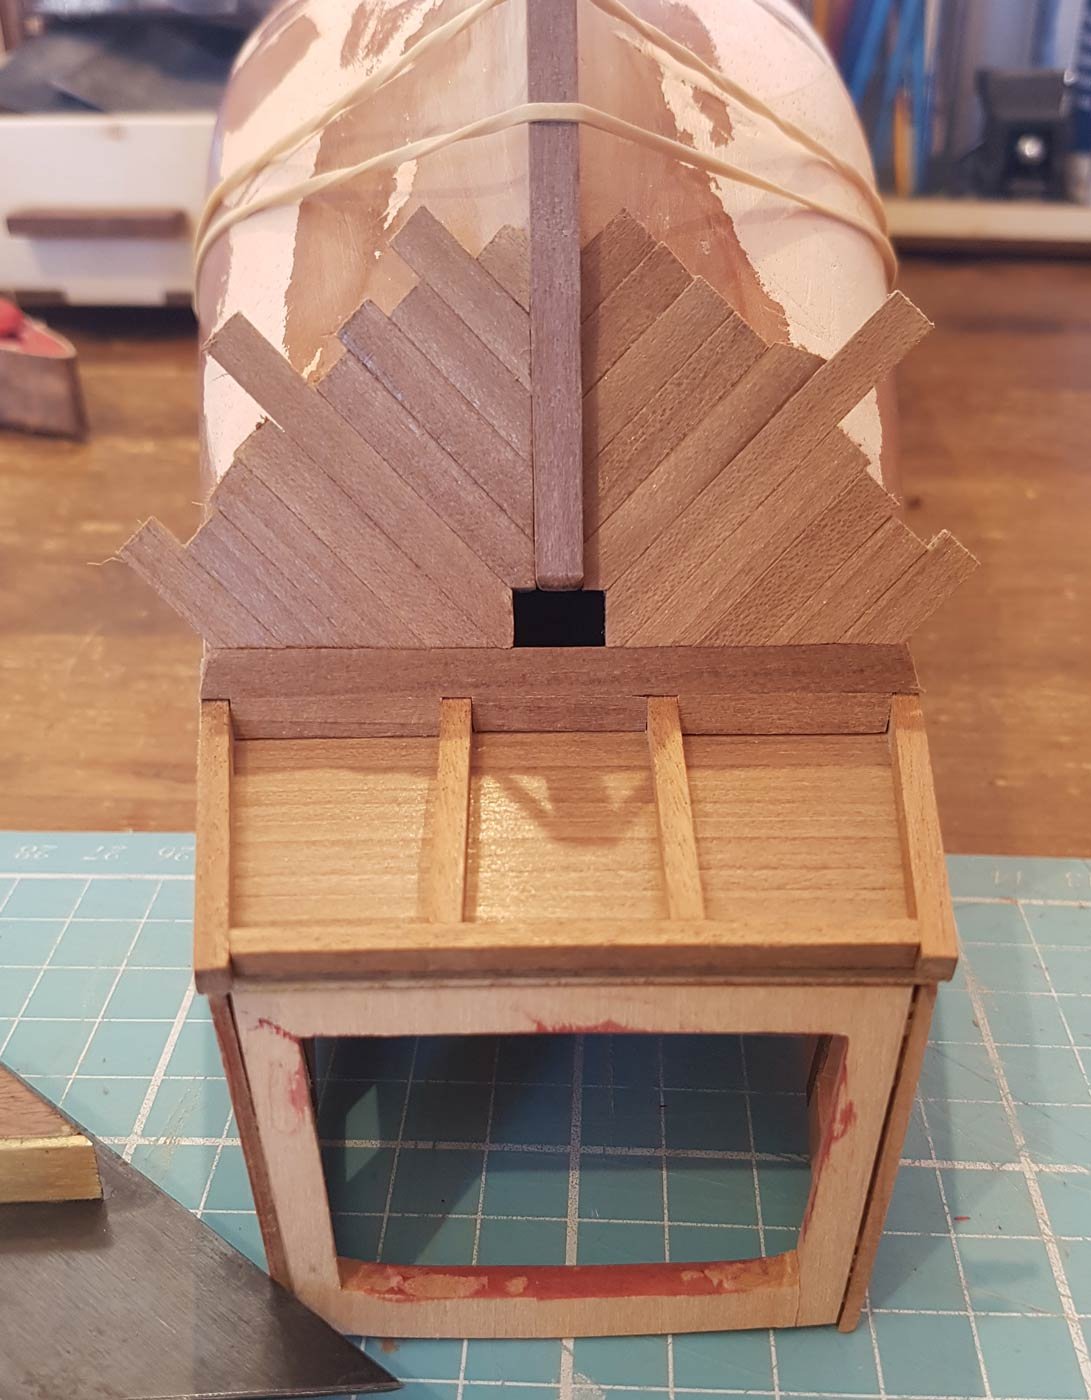
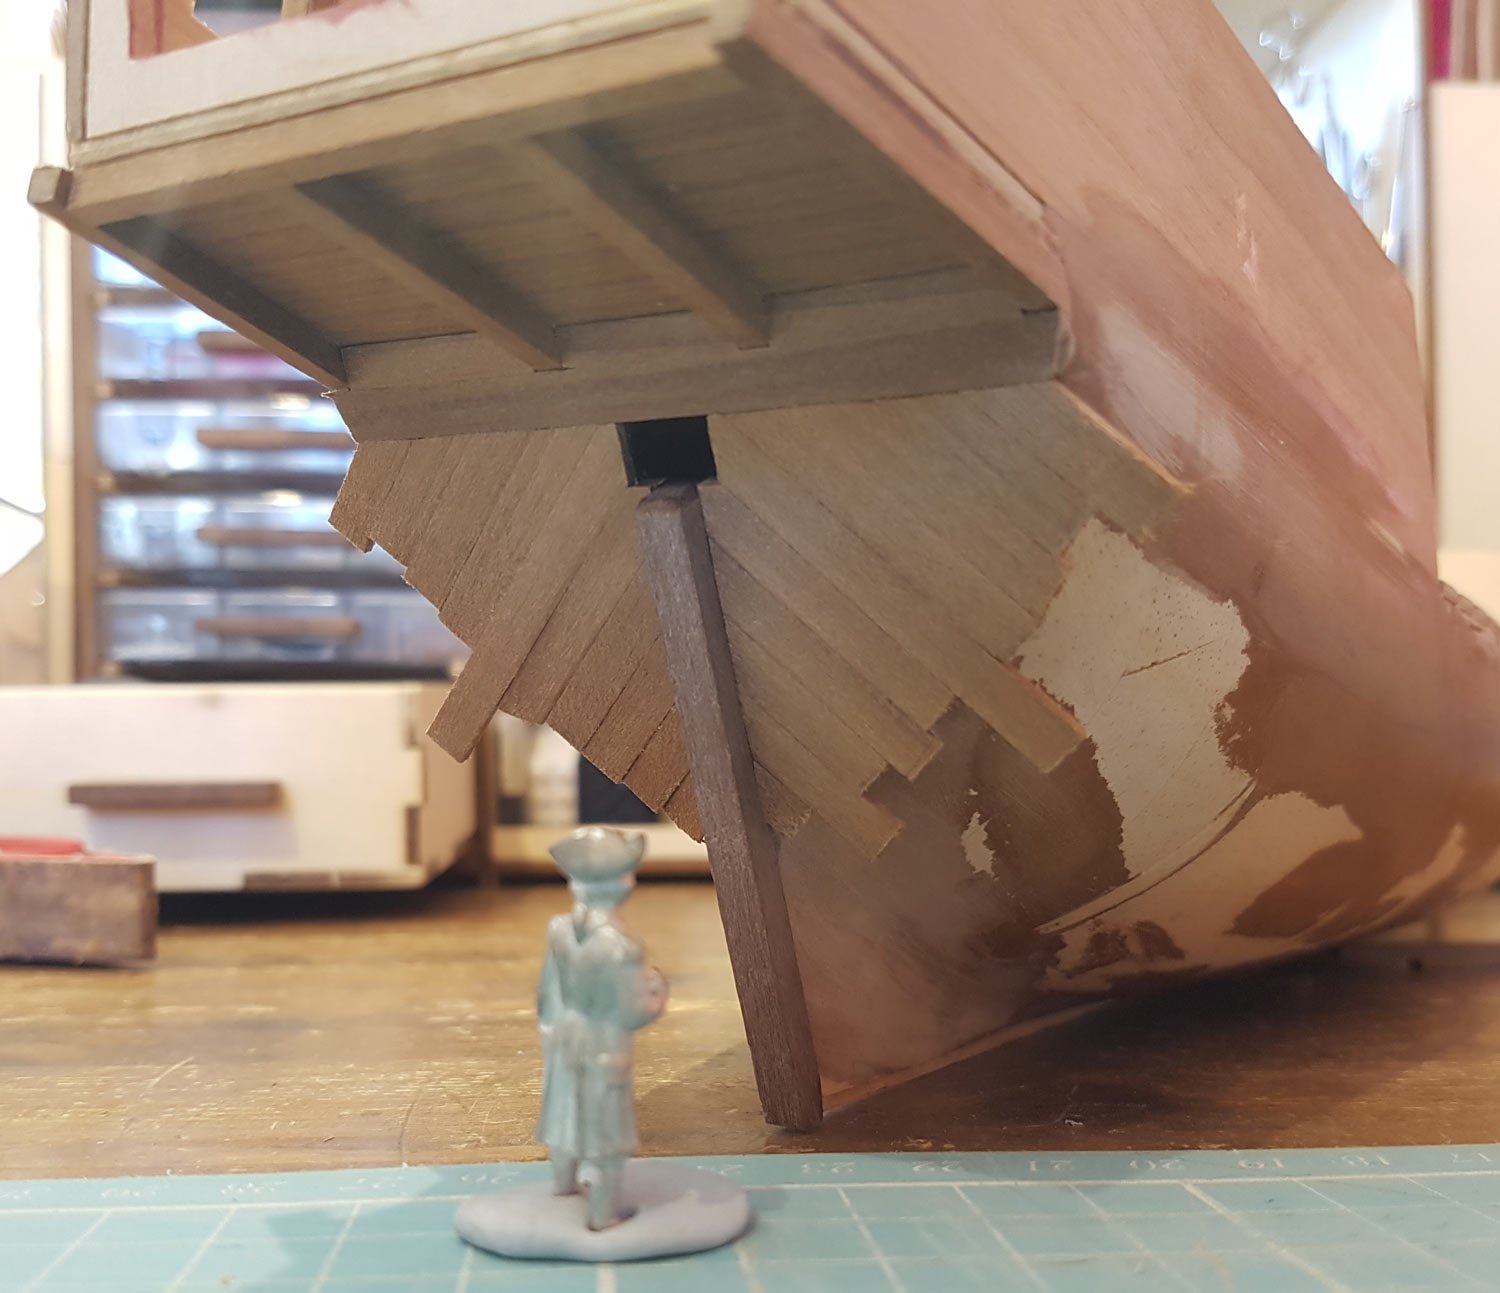
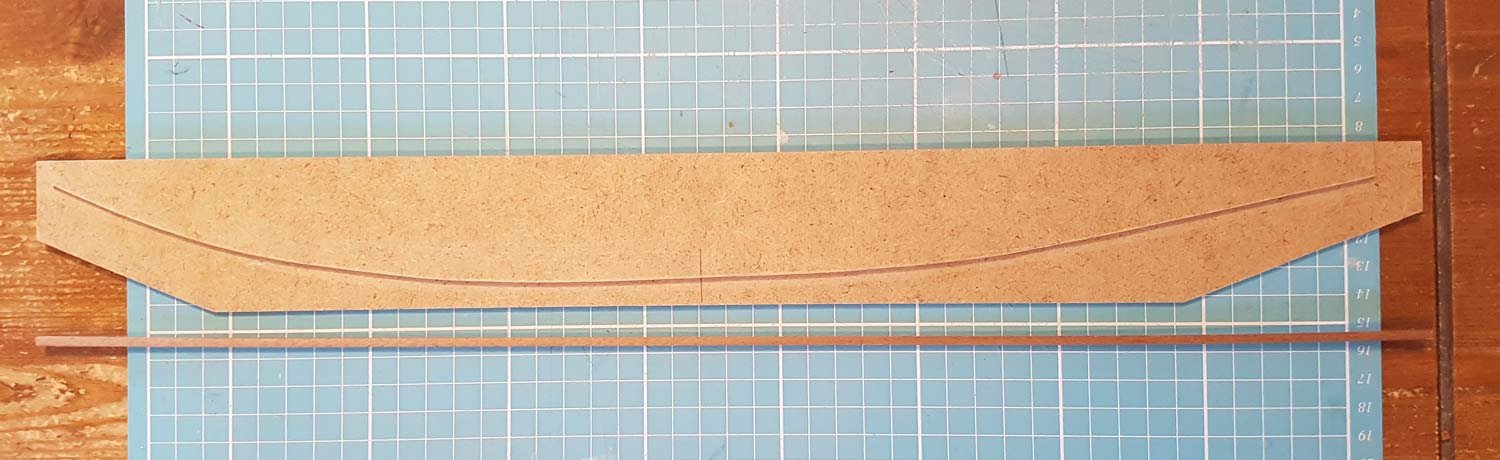
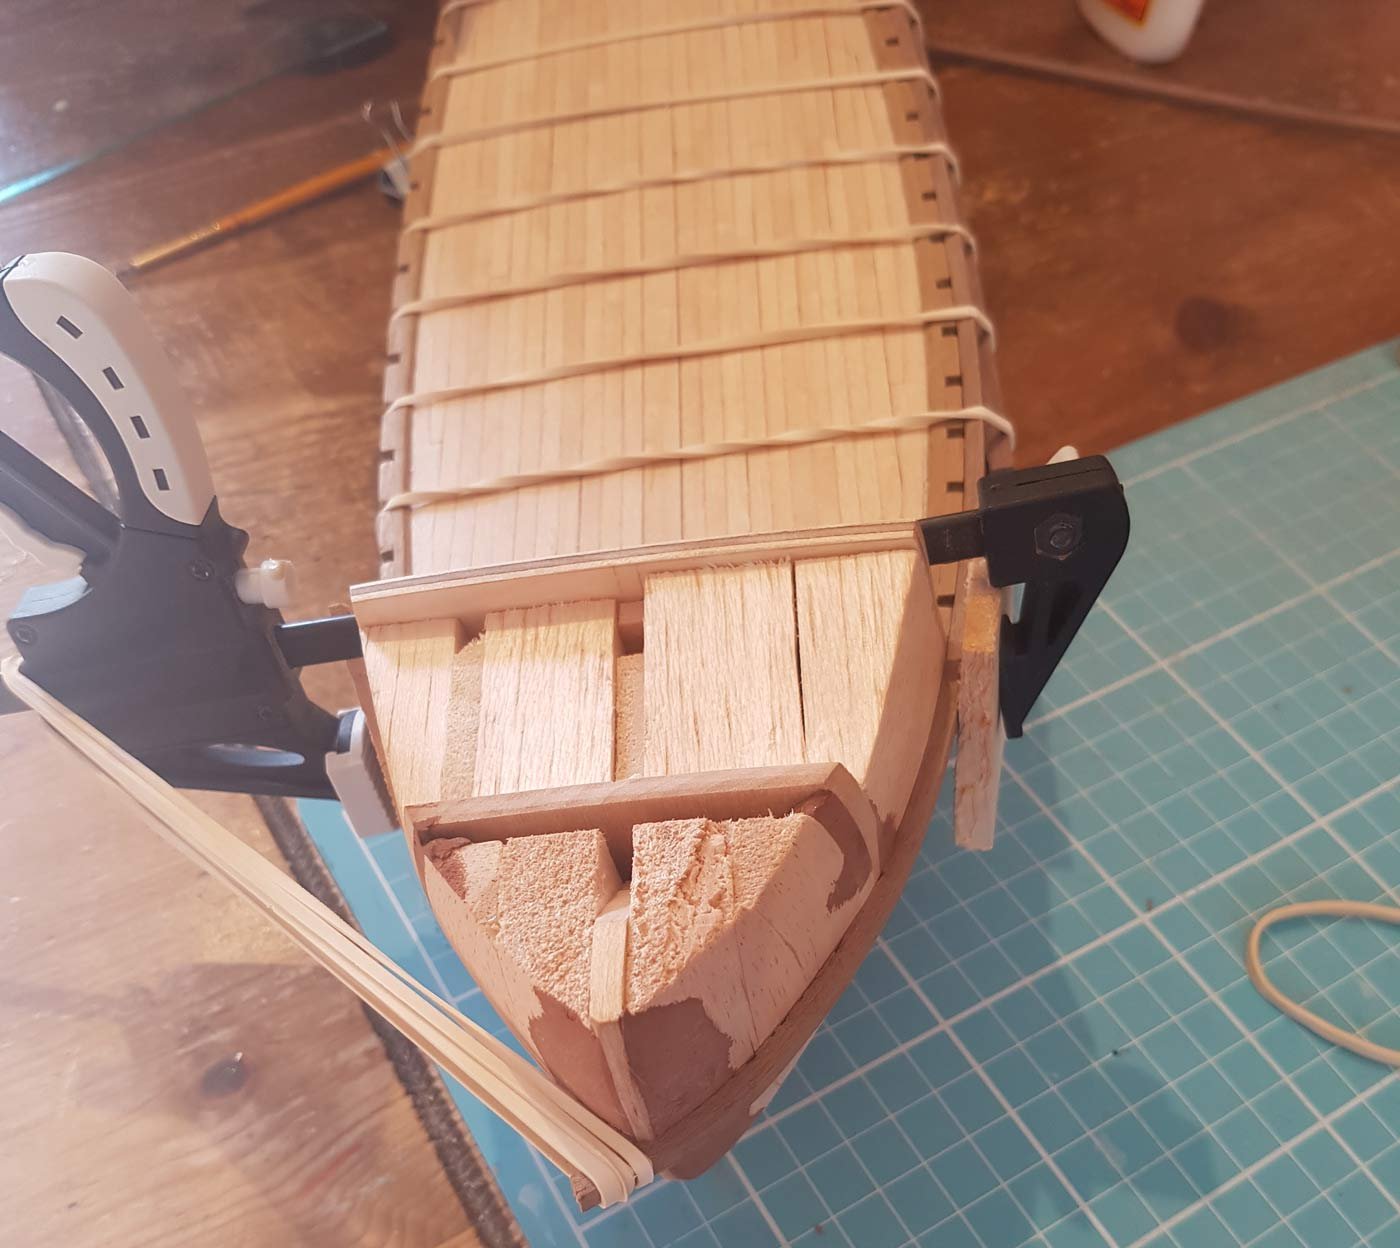
So I managed to illicit permission from the Admiral to open the shipyard for a few hours before I return to work tomorrow…………… I continued with the stem, and made the third/lower piece and cut the scarf joint on the keel; Once I was happy with the fit to the hull I glued the stem pieces together, I didn’t use any colour in the glue this time - I think it works better without. When the glue had dried I gave the stem a preliminary scrape. I also made an end cap for the top of the sternpost; I used the flat sanding disk that I had made previously for the dremel and shaped the front of the stem. I kept in mind that the Vivacia not only sails on the ocean but was also designed to travel upriver, so I made the stem bulge slightly at the bottom - strength and protection against rocks and the riverbed. There will also be a false keel added later. The stem will be covered in sealer and sanded - I am going to dilute the sealer to see if I can get it to penetrate the wood better. Gratuitous “dry fit on the hull” shot; In between gluing the stem I carried on with the transom planking; As you can see I wanted the lower transom planking to be at an angle. I wasn’t sure what the angle should be, so I used this, I attached the sternpost (with rubber bands - no glue - so that it can be removed to allow the transom planking to be scraped/sealed/sanded) and finished the planking; Captain Kennet, King of the blah blah etc, came out to inspect the transom; It struck me that this pic shows very well the “relative size” of this ship. I did mention to the Captain he had a noticeable list to starboard, apparently it’s to compensate for the excess of port imbibed the night before…… Till next time, Have Fun! Cheers.


-
Nice work on the companionway - did you bend the kit piece for the roof? good job ifn you did - I found it practically impossible!
-
Thank you for the kind words, Peter. The rabbet strip is 2mm wide, and the stem is 5mm wide. It should be enough of a difference to fit the planking in. I was going to notch the wales so they would fit in the rabbet too, but I think it would be a weak spot and likely to split the wood so the wales will just butt up to the stempost.
-
Thanks Mark I do appreciate that. Well as long as you don't include the two attempts to make a 5x5mm walnut strip to bend along the bow curve...…………..😢
-
Nice start to your build there Matt. There are several build logs on this forum of the Virginia 1819 that may prove useful ( Wallace, SardonicMeow and mine to name just three), especially when it comes to the rudder...…. Good luck and keep at it, its a fun build!
- 68 replies
-
- 4
-
-
- virginia 1819
- artesania latina
- (and 1 more)
-
Excellent work on the sails Peter, She looks fantastic, a real masterpiece. You, Sir, have set a standard I can only wish I could emulate. Best of luck with the rest of the rigging. 👍👍🧙♂️
- 236 replies
-
- 1
-
-
- artesania latina
- kitbashing
- (and 2 more)
-
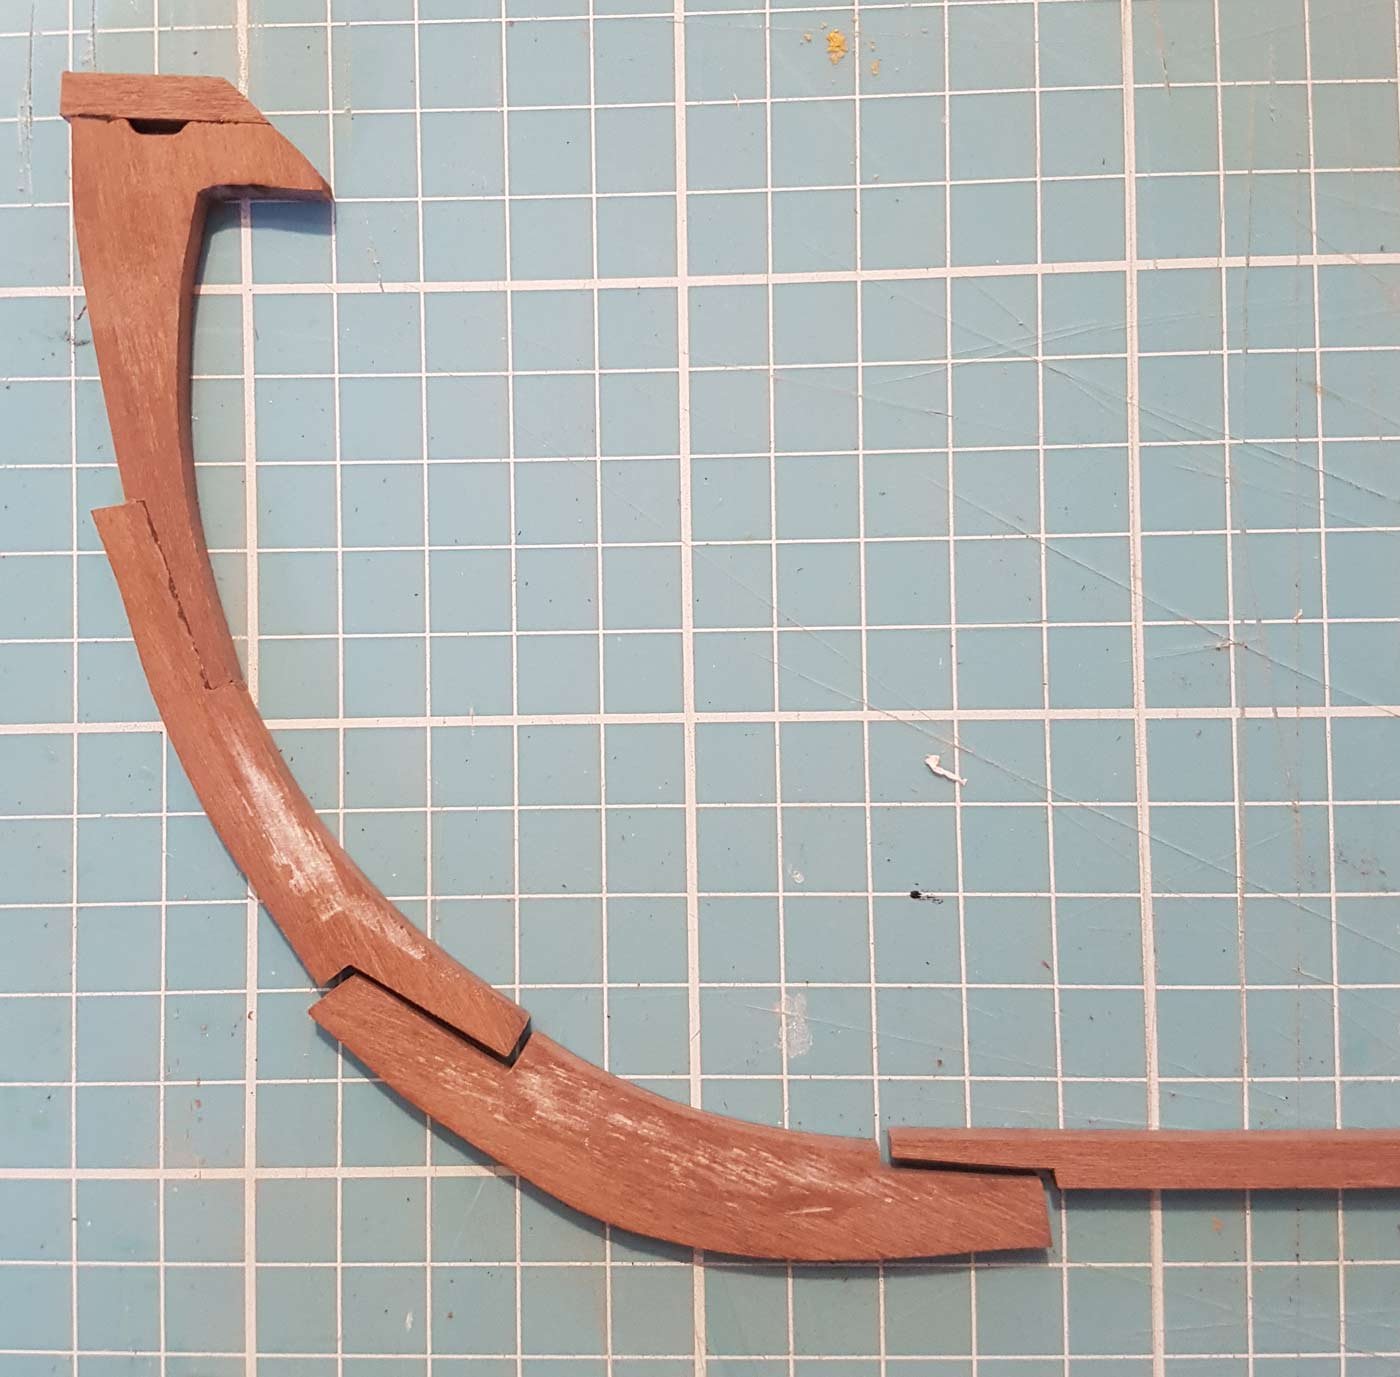
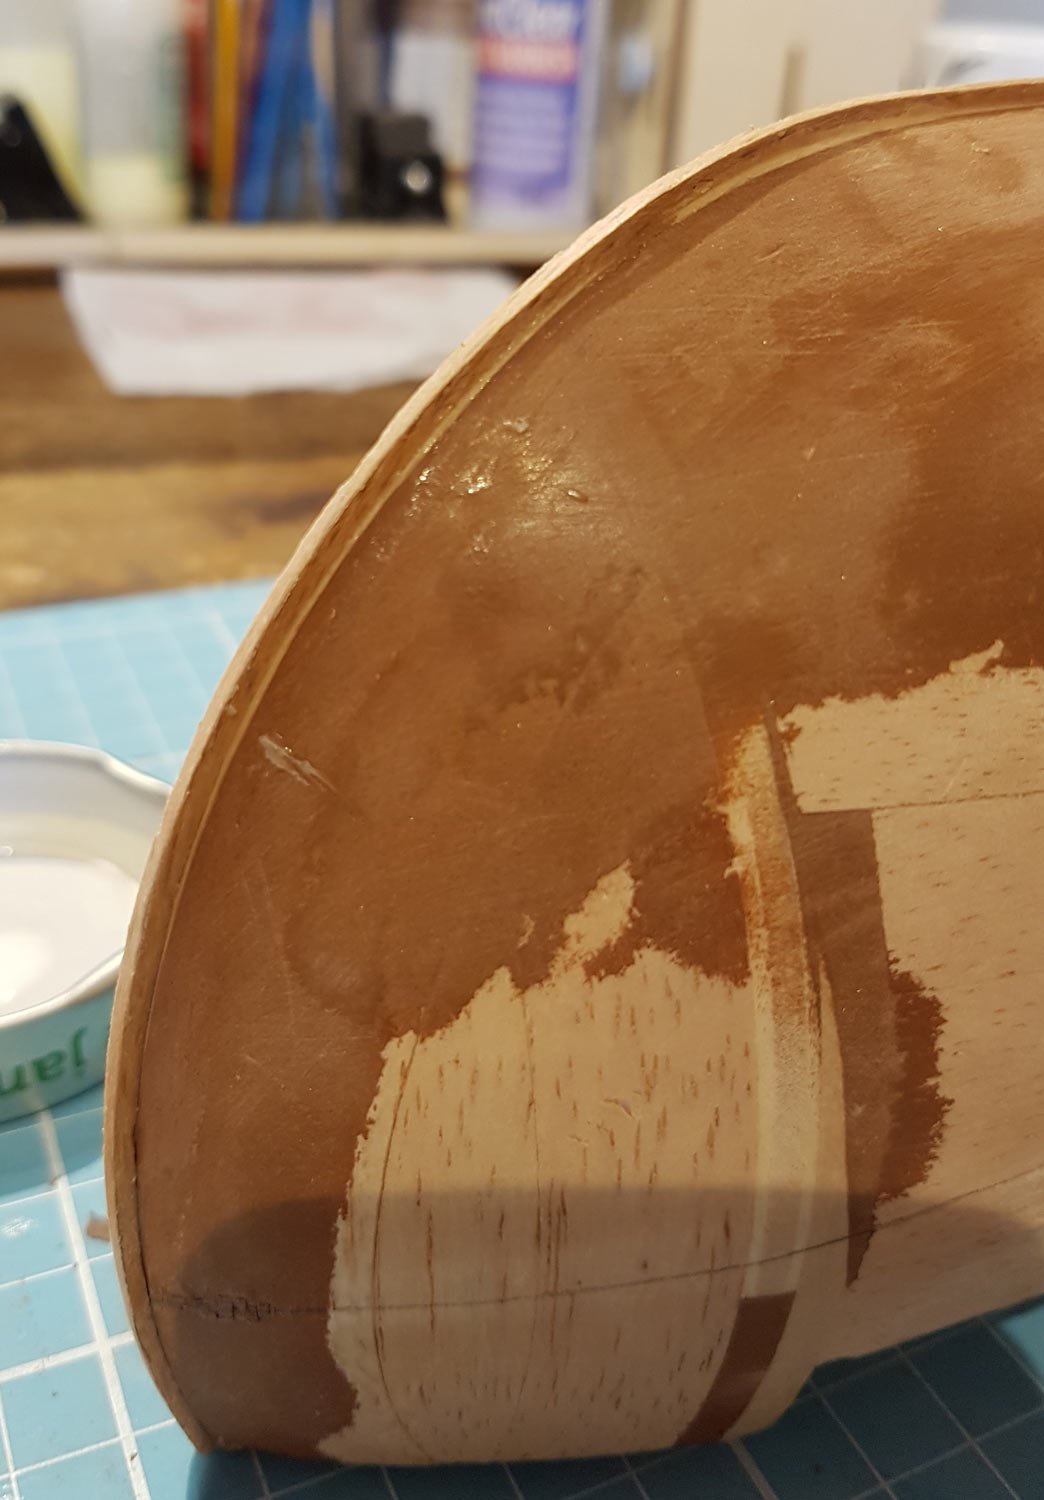
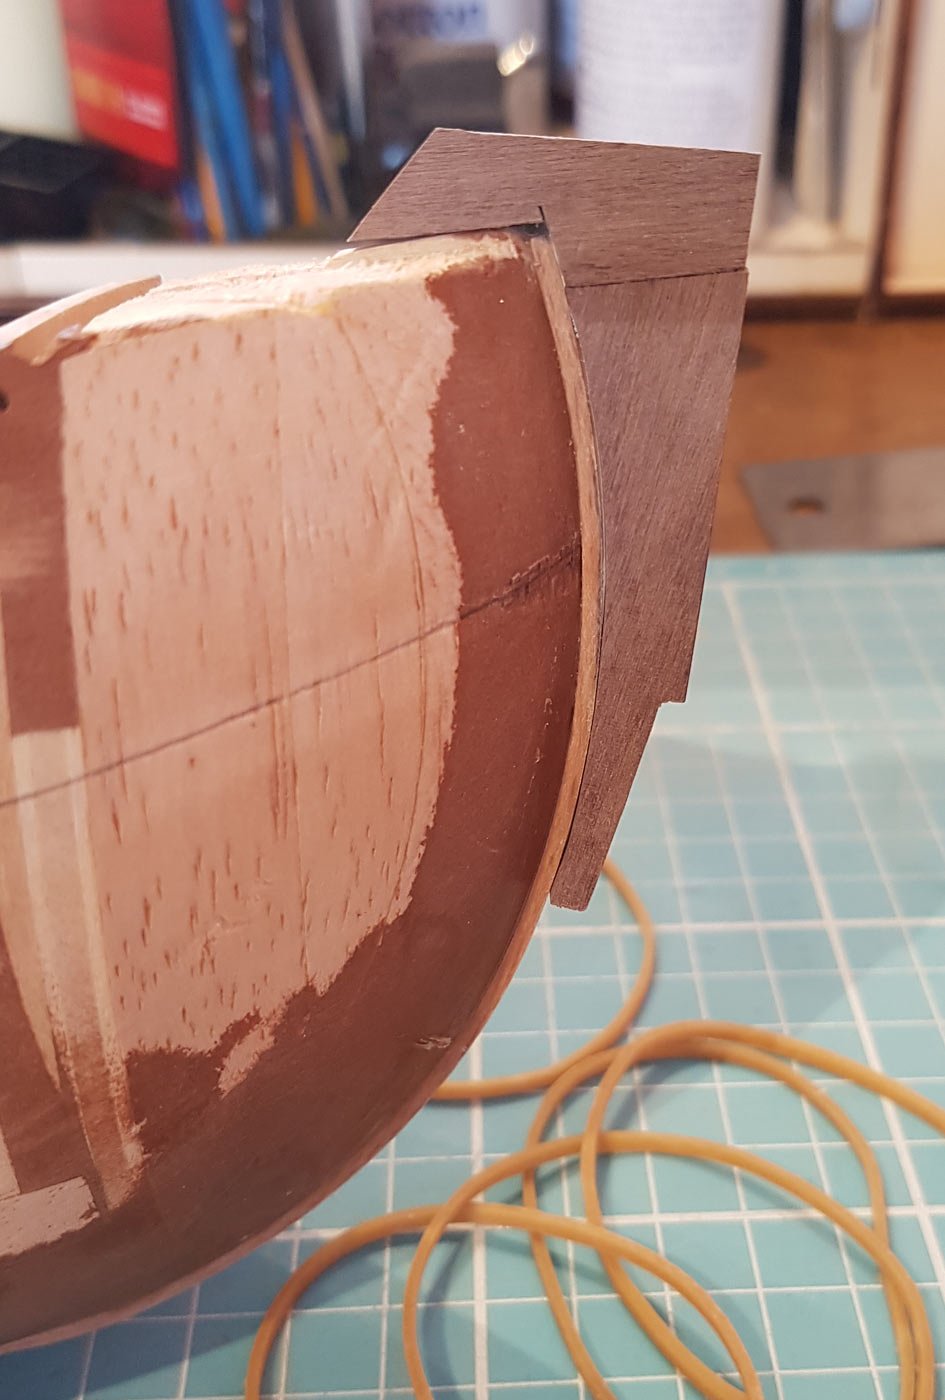
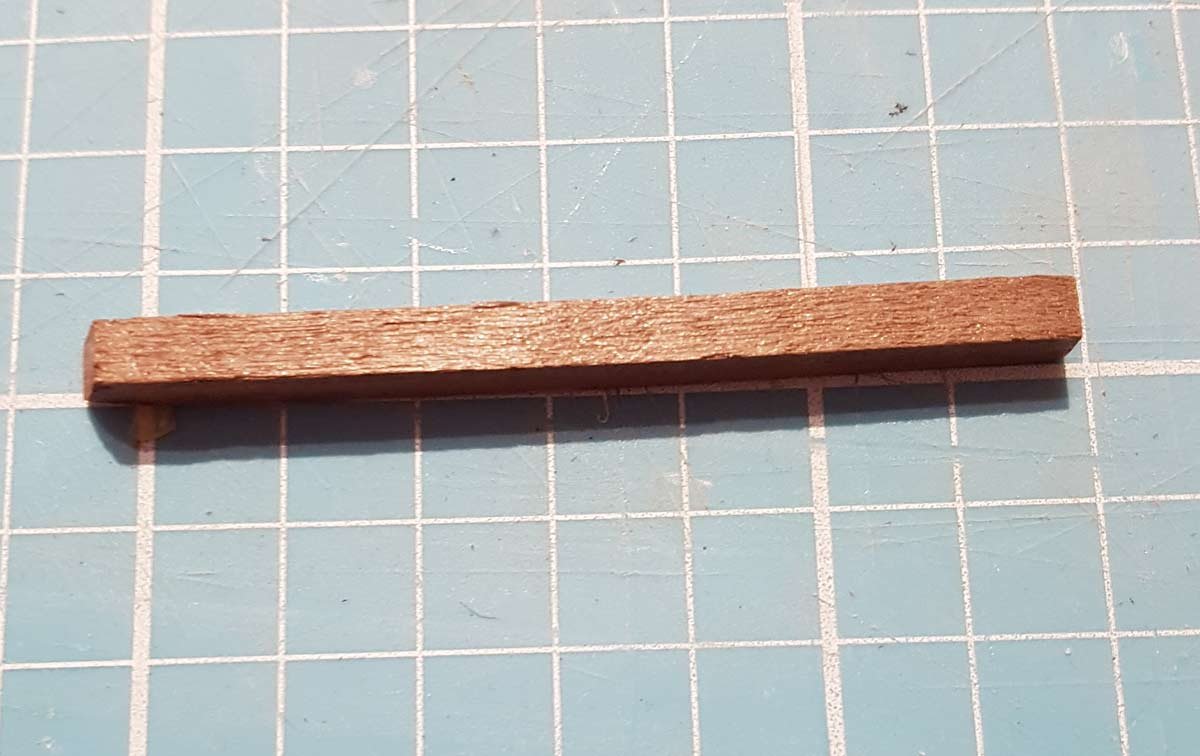
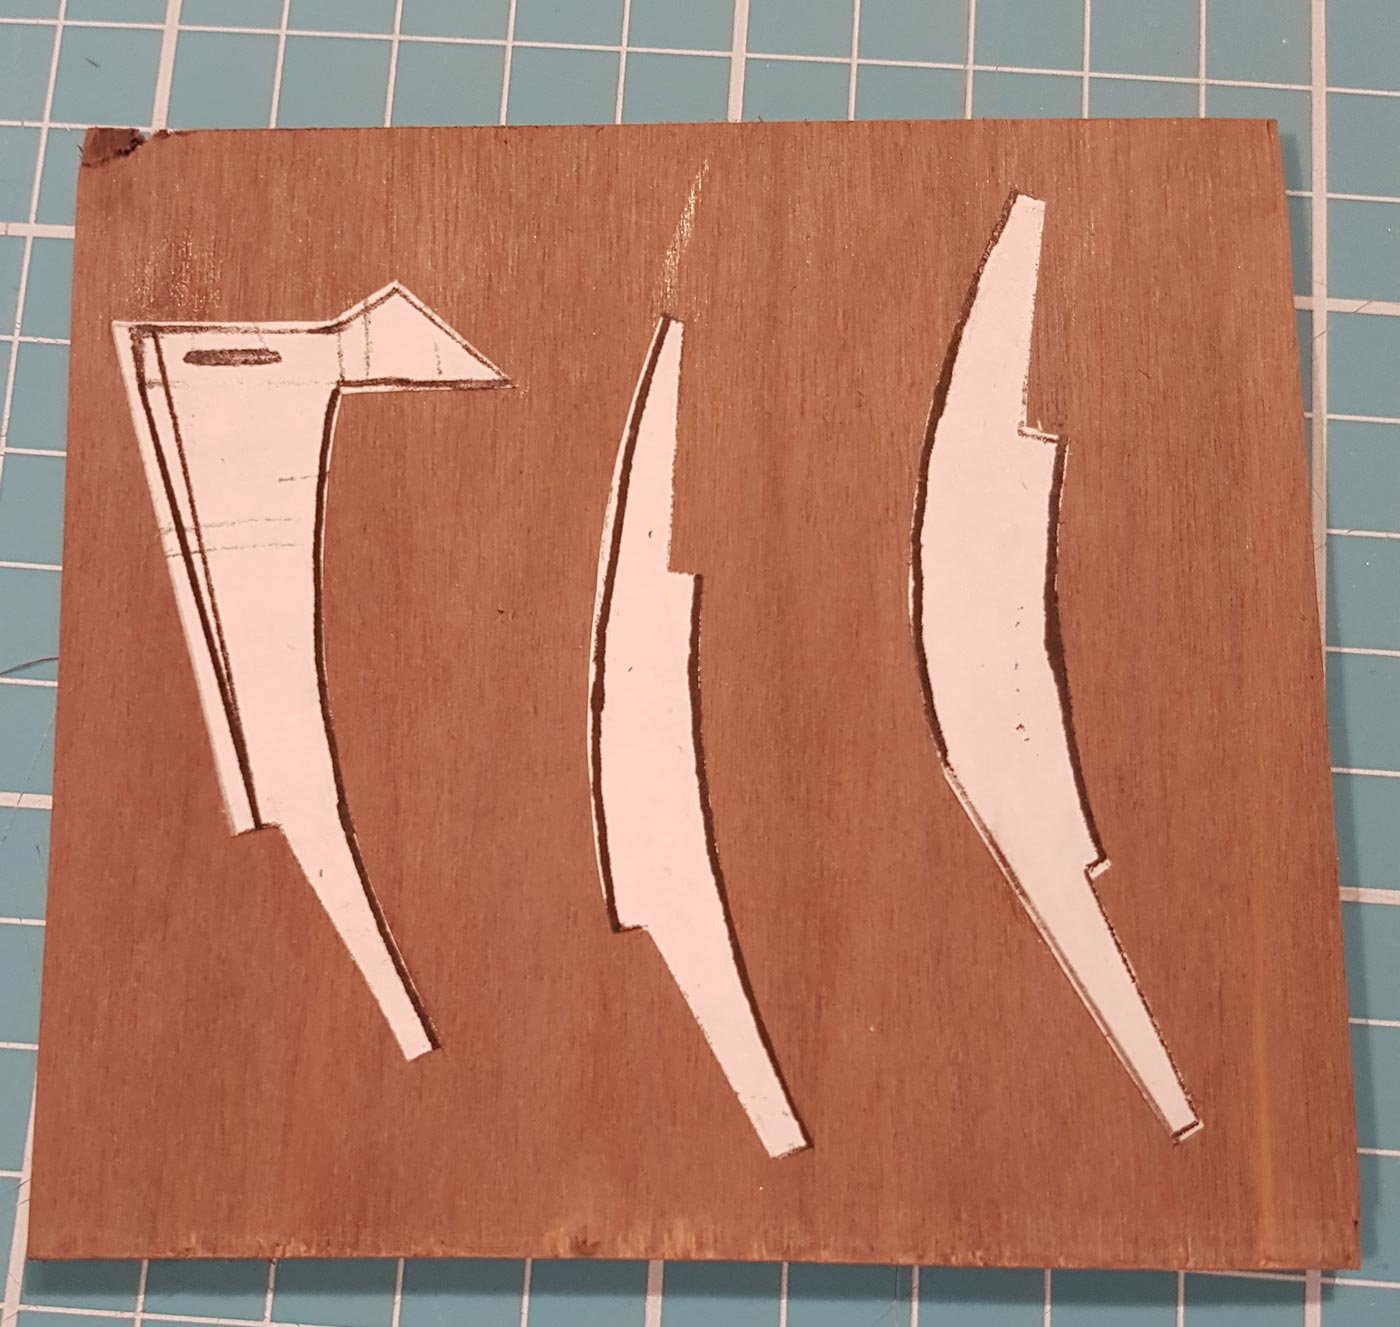
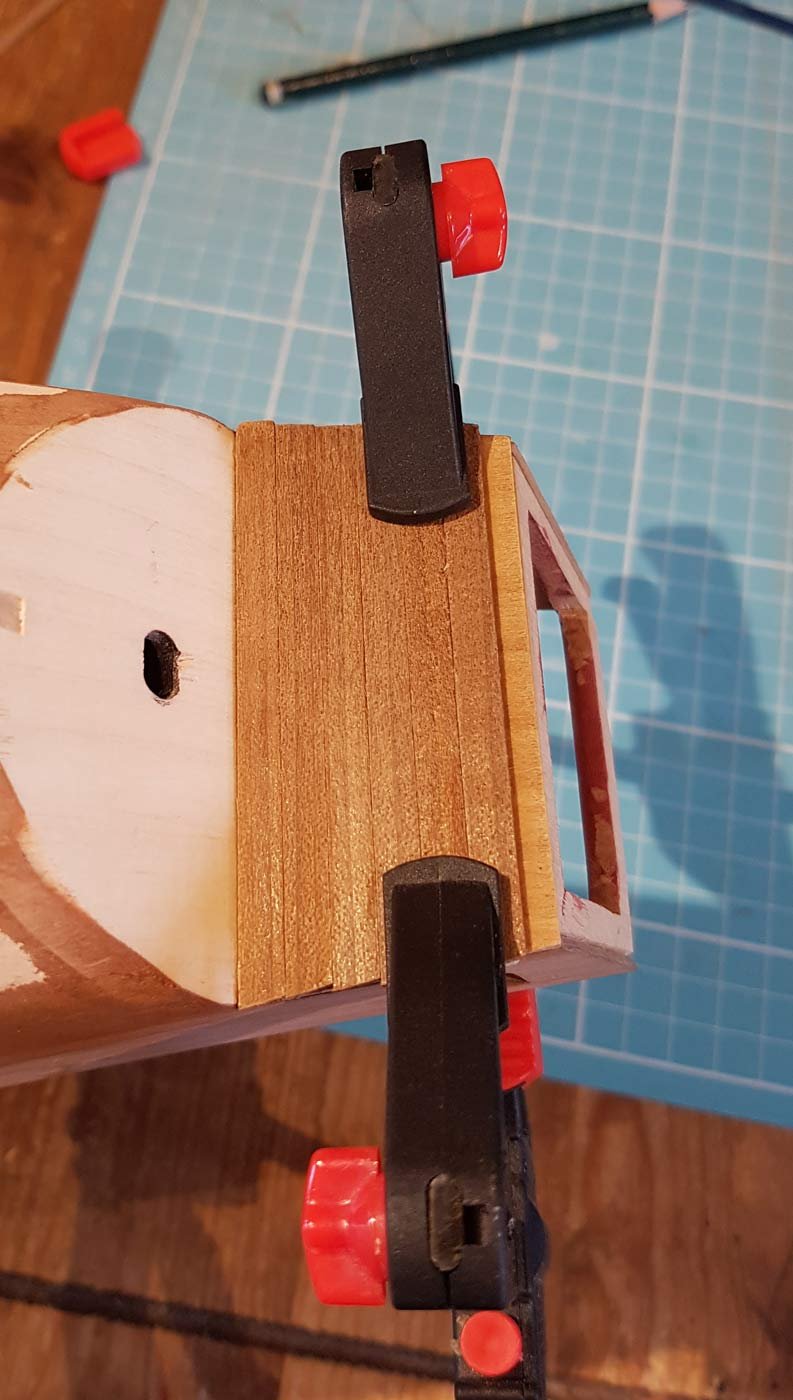
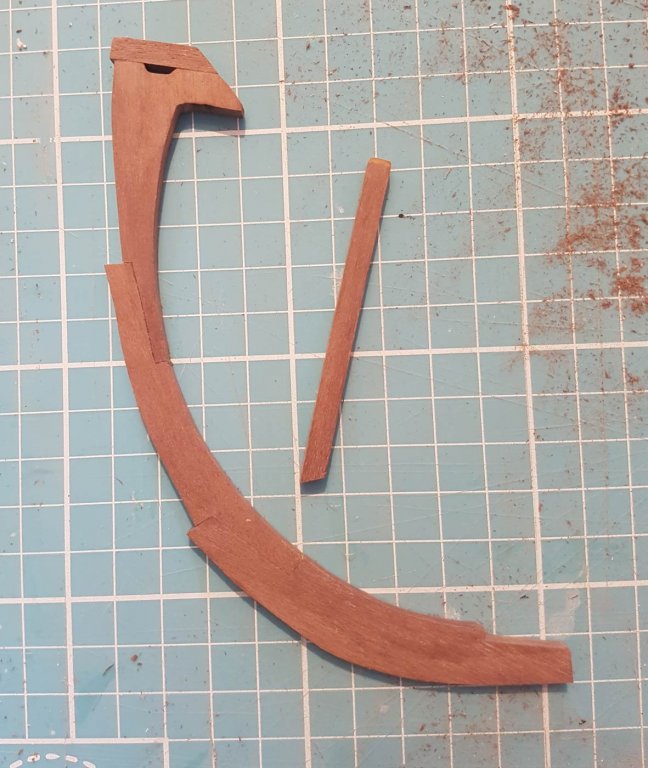
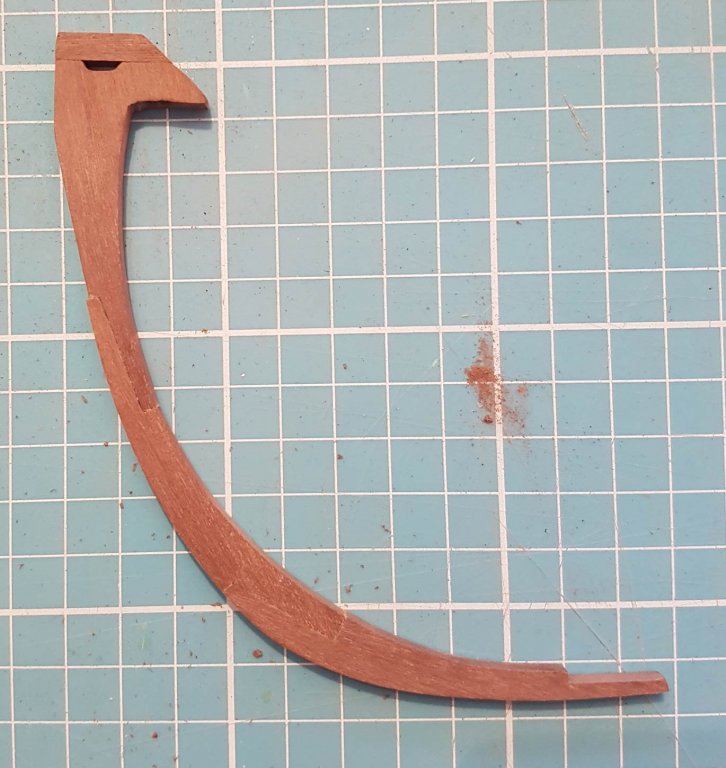
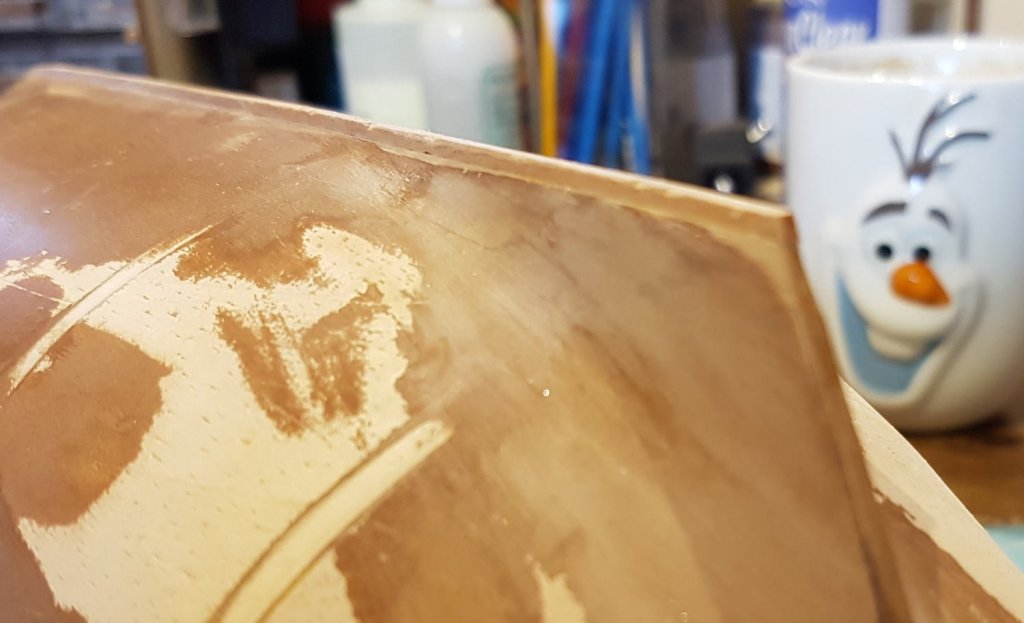
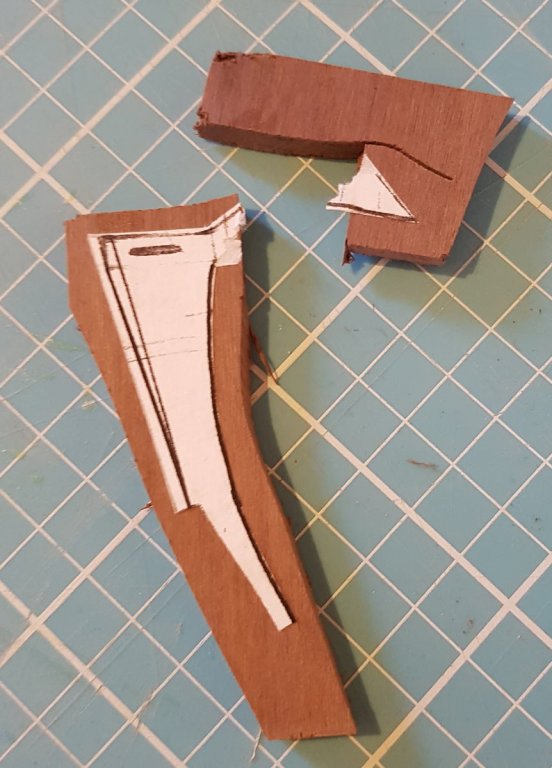
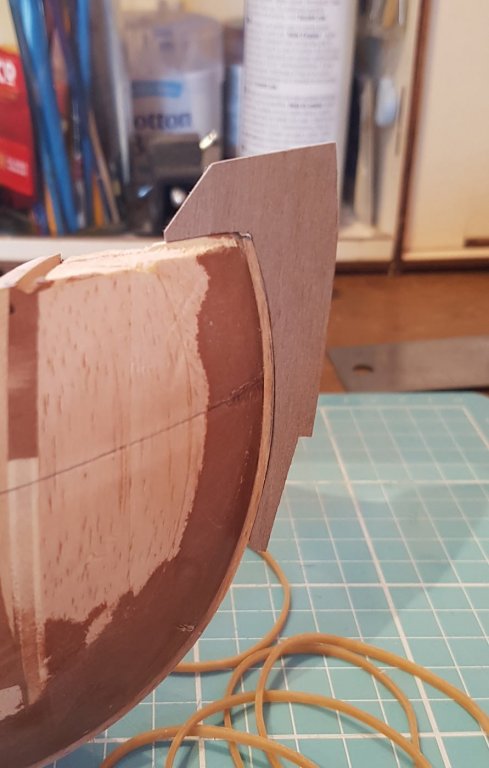
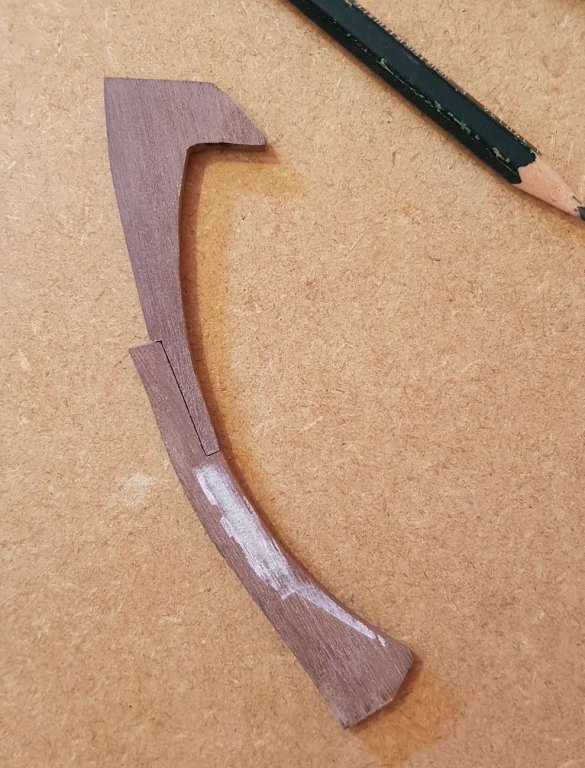
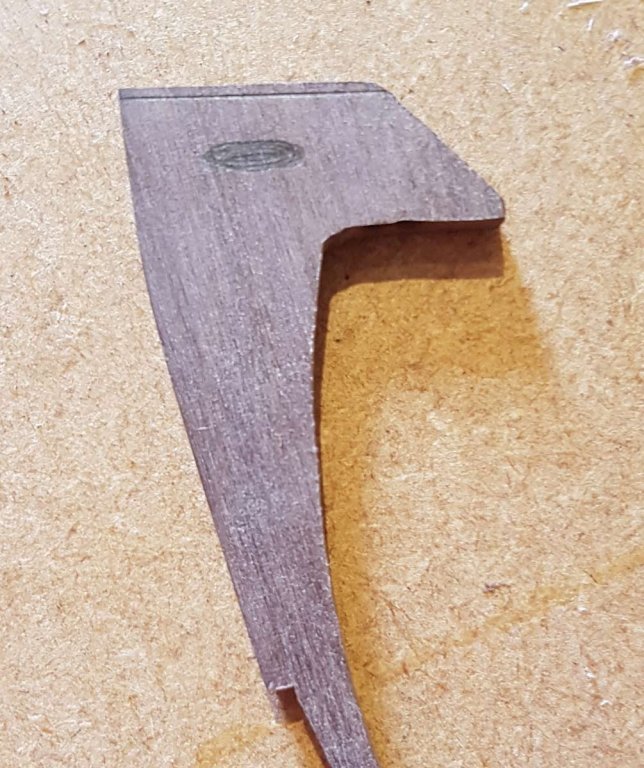
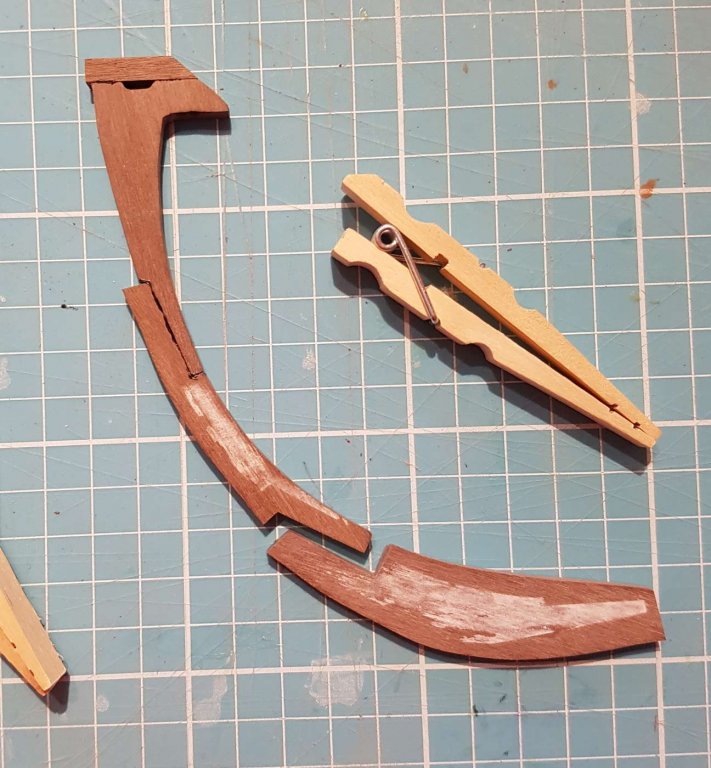
A little update on the Vivacia progress, where I at last start on the Keel……. First up was to glue the 2x2mm rabbet strip ( that I had previously bent way back in October on page 1…) to the false keel. I used a thick bead of Gorilla wood glue to make sure I had a strong join. Bow; Stern; I left this to dry/cure for a day or two and started on the stem. Remember this from page 2? I knew that the hull/rabbet shape would probably not match the plan I had drawn so I cut the three pieces out with room to spare. All was going well until Mr Hamfistedness showed up for a cuppa; I remade the stem from two separate pieces, hopefully to avoid any weak spots. I shaped it using different sanding bits in the dremel; Now, if you have been paying attention to this log you will know that I have an aversion to using the first (or second) piece I make, so true to type, I decided that I didn’t like the height and shape of the top part. So I spent another afternoon making another one. The second part of the stem was roughly cut out and with much testing and dry fitting was made to fit both the first piece and the hull. The “outside” edge of the stem will be formed later when all three pieces are glued up. I found the best way to work was to complete the join between the first and second piece and only then form the inner/rabbet edge of the second piece. The lip at the front will be where Vivacia’s torso will start; At this point I started looking at the “gammon hole”; I decided that once the hole was made there may be a weak point along the wood grain above the hole. So I cut the top off the stem piece, and made a horizontal strip over the gammon hole. The front of this horizontal piece will have an end cap over it, the rear will be curved to allow the bowsprit to lay on it and the top will have a couple of pin heads to represent reinforcement bolts. I started to make the third stem piece. To make it easier to fashion this part I glued the upper stem pieces together. I wanted to make the joins stand out so I mixed a little Tamiya black in with the Gorilla glue, time will tell if this works or not…………. While the glue was drying I made the sternpost. I have covered it in the sealer used previously. It will be sanded, sealed and sanded again before fixing to the stern. At this point the Admiral needed the table for dinner so I had to pack the shipyard away. She also informed me of various duties I am required for over the next few days, I have no idea when I’ll get permission to play again! Cheers, n have fun!


-
That is exactly why I will almost probably definitely leave out the trenails…..😁 Knowing my family that will just be me then.....😢 Thanks Peter, I almost probably definitely will go unstained 😁
-
Great work on the sails Peter, you have turned the usual poor AL offerings into sails worthy of your ship. I also like the way you have attached them to the yards; simple, effective and realistic looking. I don't know if you have tried this but to get pin/needle/thread holes out of fabric dab on a droplet of water, "massage" the area between your fingers then gently use a steam iron. Be very careful with the iron though; I tried this with the sails that came with my Virginia (before I made my own) and managed to burn the bolt rope and stitching. I know what you mean about AL rigging "instructions", I had the same problem with the Virginia. The only way I found was to learn what rope each sail or yard needed and how they worked and where they went, and then tried to match my new knowledge with the pictures.
- 236 replies
-
- 3
-
-
- artesania latina
- kitbashing
- (and 2 more)
-
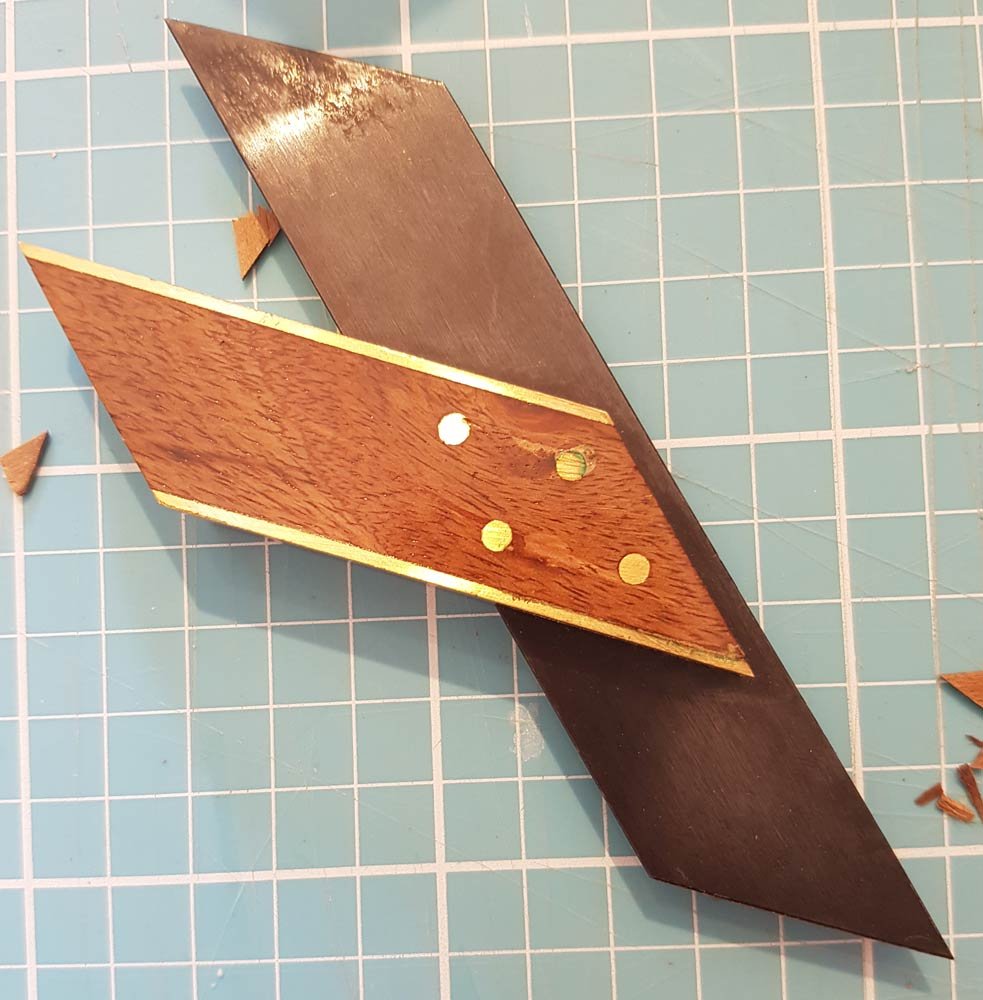
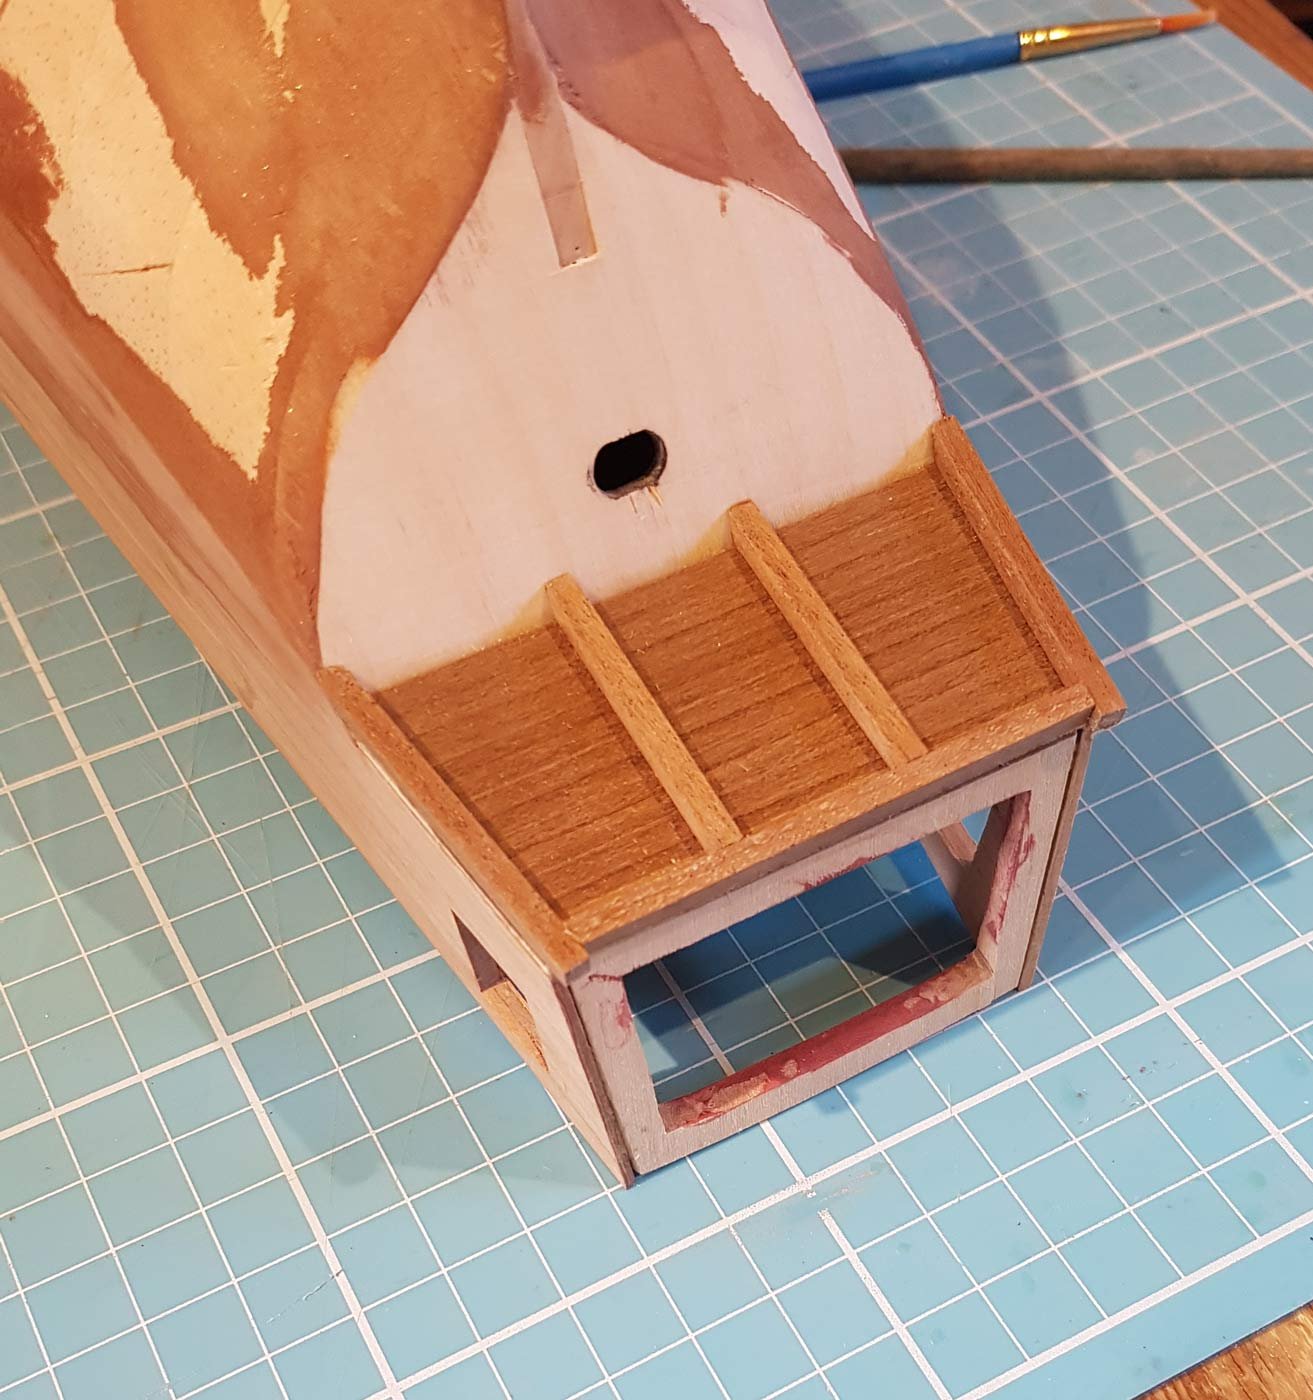
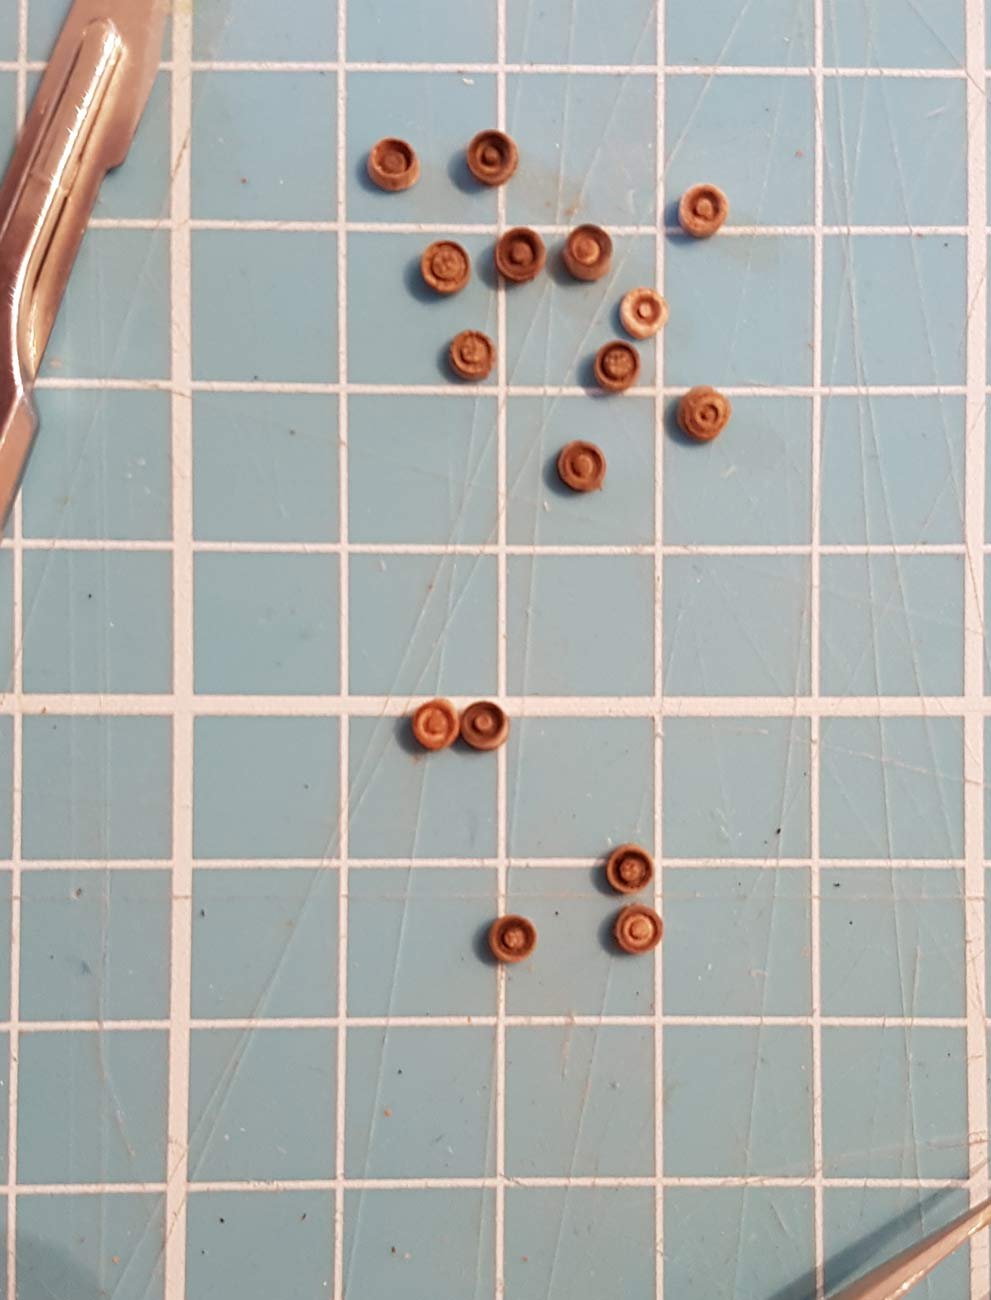
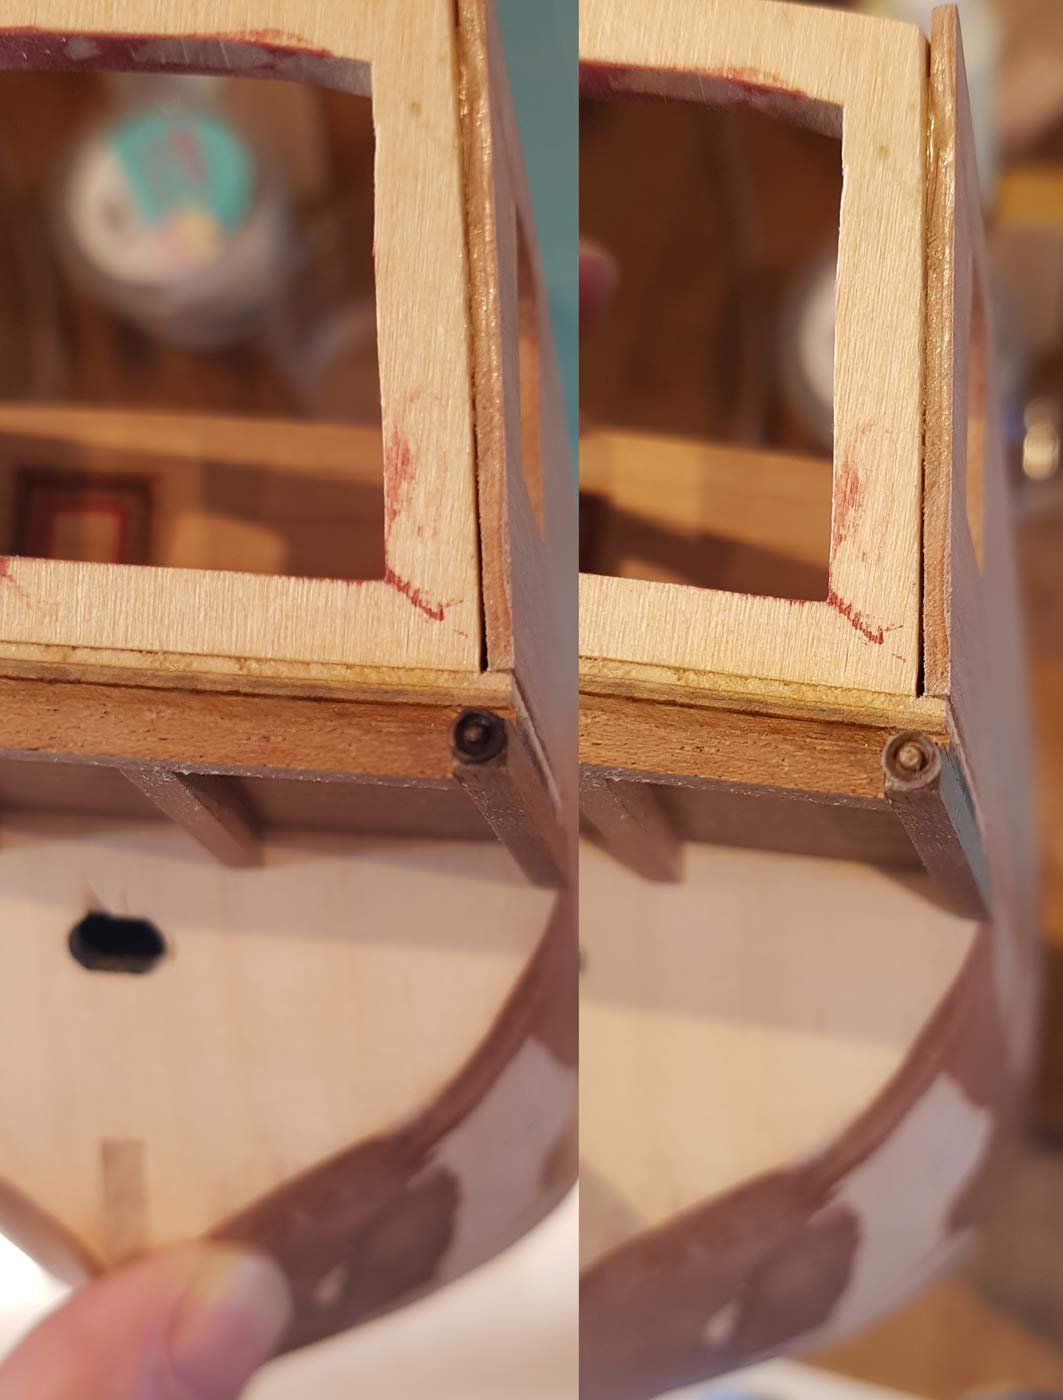
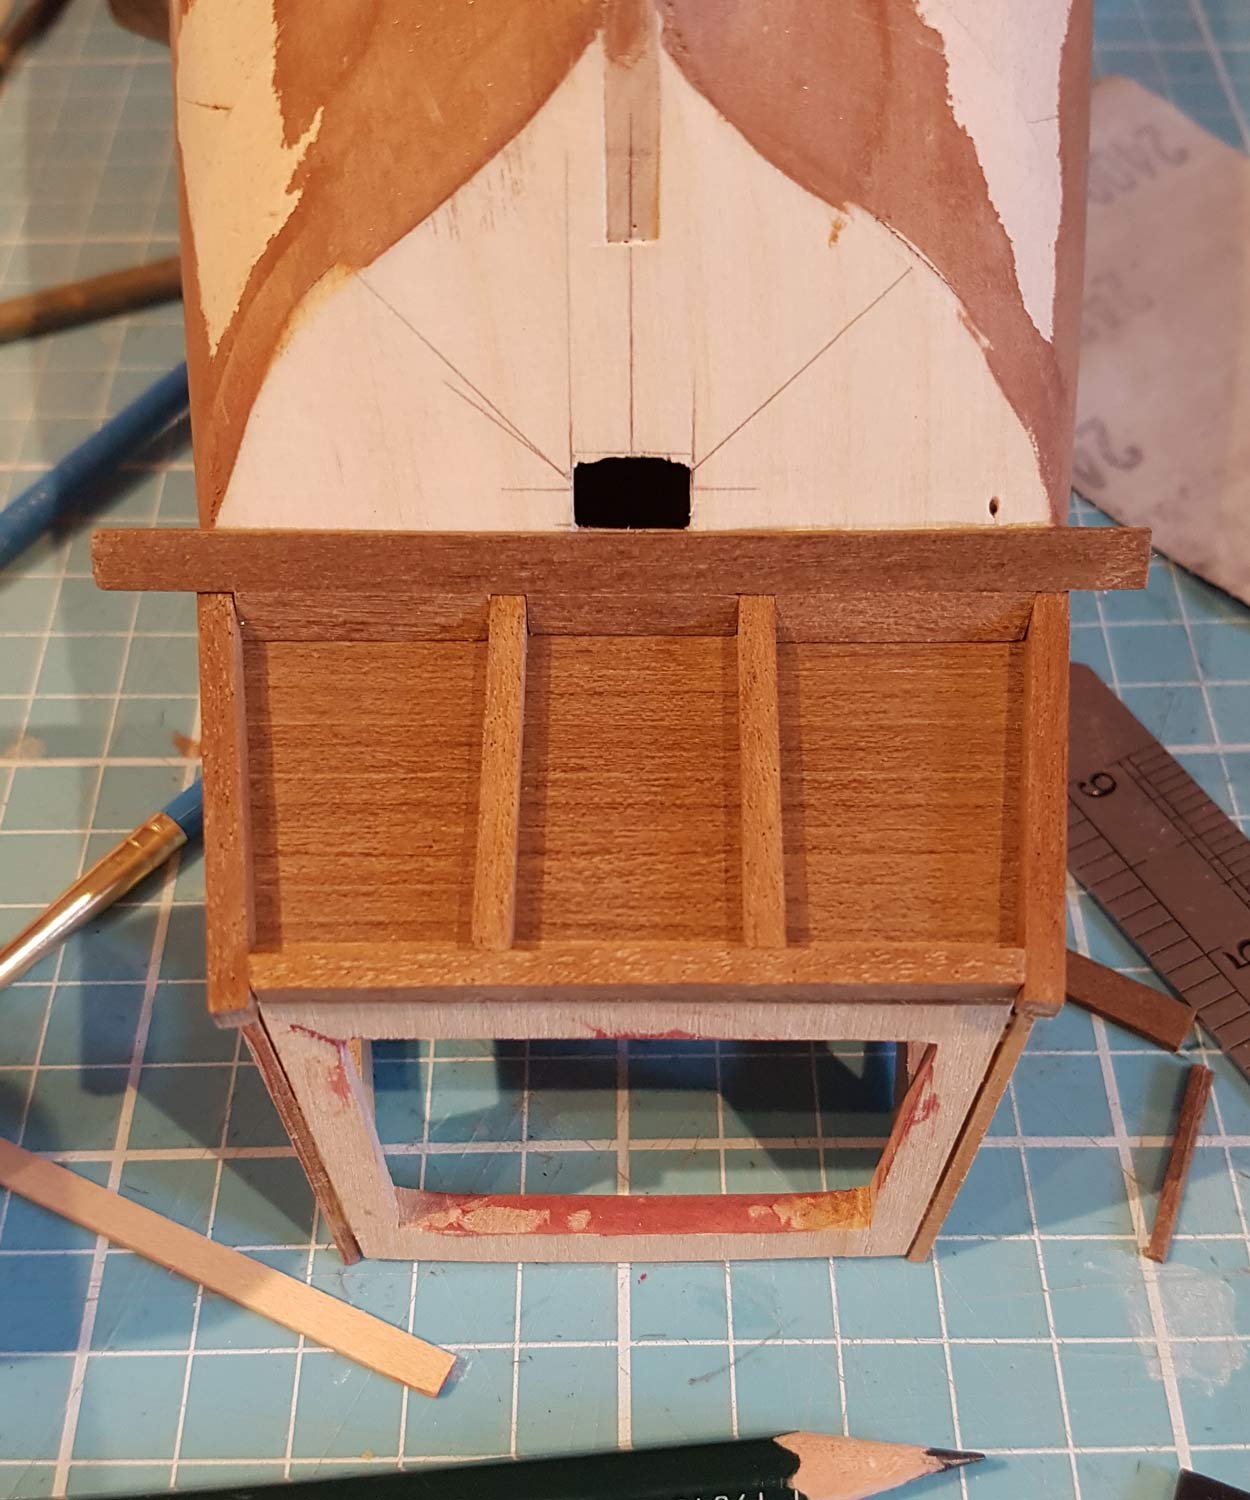
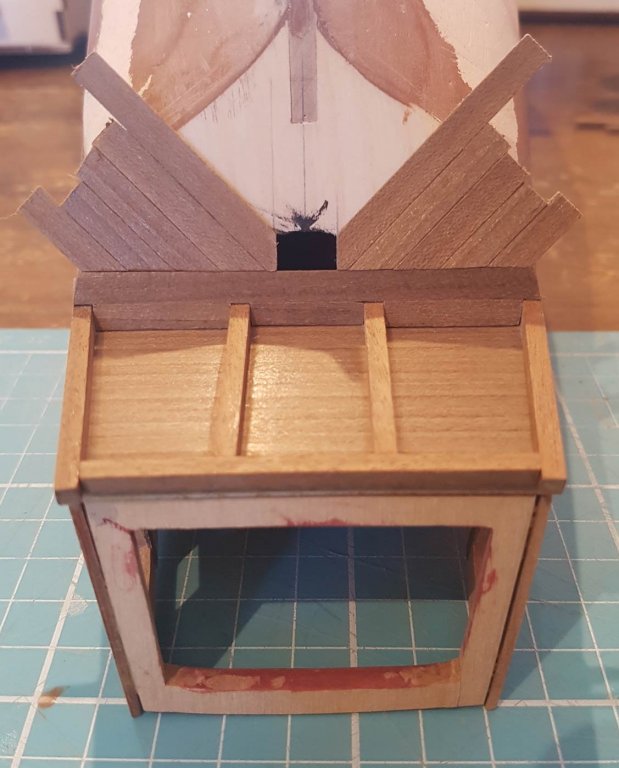
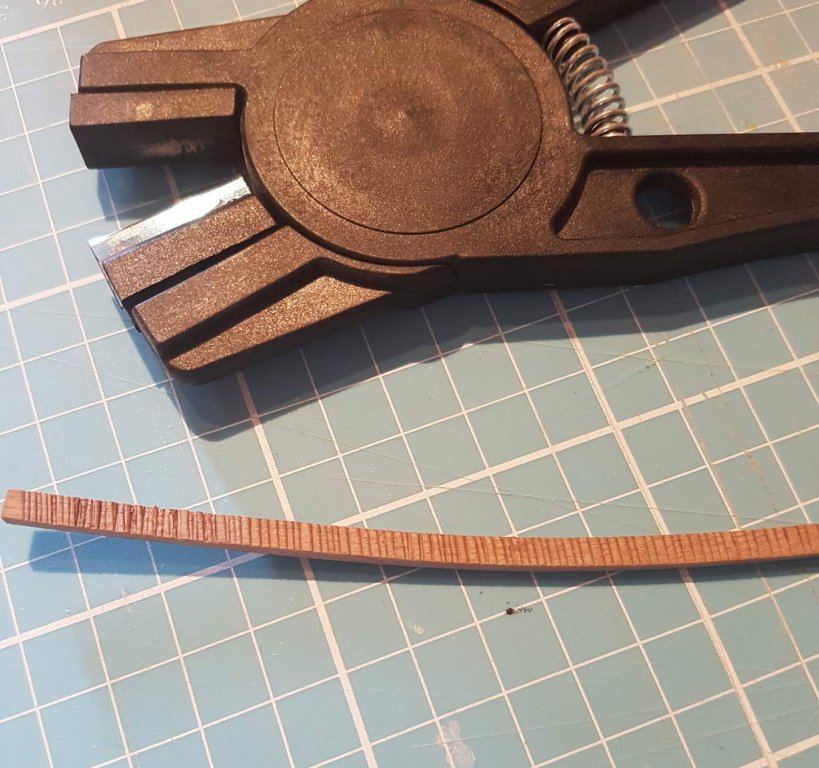
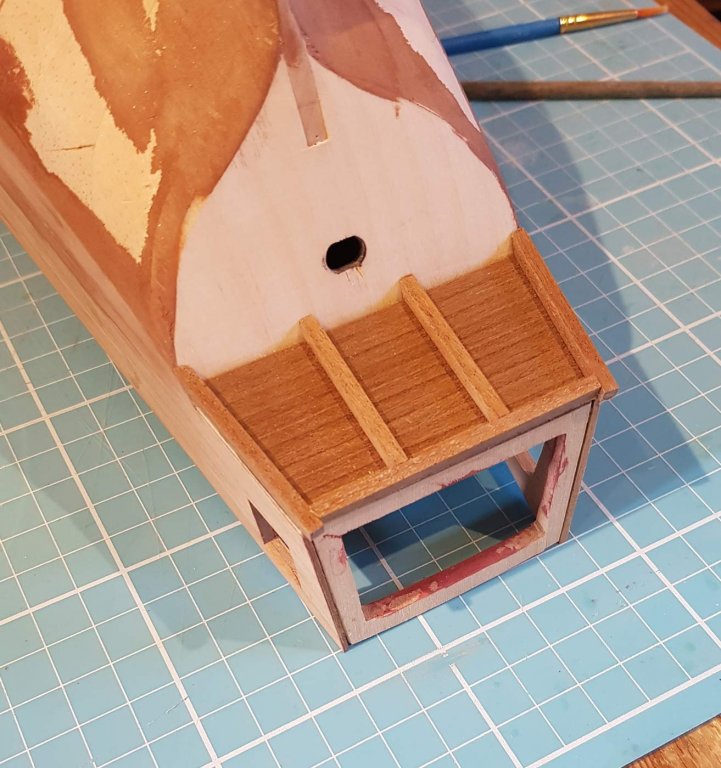
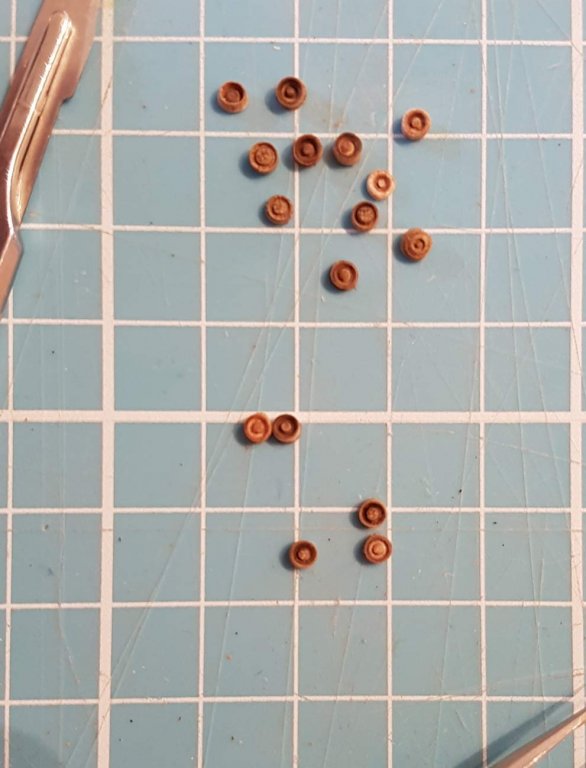
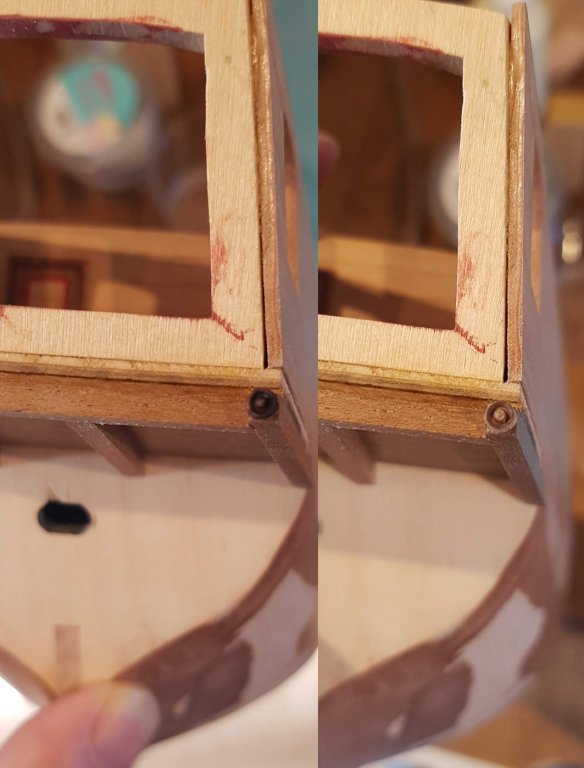
I have managed to get the odd hour here and there in the shipyard over the last week or so, interspersed, as is usual, with hours of thinking and mind changing…… The deck is staying as it is. I am in two minds whether to represent trenails or not. I used a sharp pencil on the Virginia build - it looked effective but not neat enough. I don’t want the deck to look too busy. I think I am going to go with the premise that the holes for trenails would have been plugged and pretty much invisible at this scale, but we’ll see…….. As I think I have said before I have made a jig to pre-bend the wales and strakes to account for the fore and aft upswing; The 4x3mm wales were soaked, clamped in the jig and then heated and left overnight. The athwarts curve is quite tight at the bow so I tried my plank bending tool on the inner edge of the wales and then soaked the wales in boiling water and clamped to the hull. The plank bender worked well in helping the wale to bend but the walnut can be a bit brittle so I lost the odd chunk where the bender had cut into the wood… …luckily the strakes are 1.5mm thick so these will cover the gaps. The rest of the wales are 3x3mm so they will hopefully be a little easier to bend. I want to get all the wales prebent in all axis before I make the keel. I also needed to plank under the aftercastle before I added the keel. The planking is under the aftercastle framing, which is under the wales, which need to be prebent before the keel is made. The planking was done with the hull planking wood -Walnut 1.5x5mm - that came with the Mantua kit. Once the glue had dried I covered it in the gloss poly and then sanded. The framing was made with 3x3mm walnut - the same that I will be using for the smaller wales. The two outside longitudinal pieces will have the end grain showing so I wanted to make some end caps to cover this. I spent the best part of an afternoon chucking various pieces of wood into the dremel, trying my best to get two pieces to look the same…. I the end I had four that were as identical as I could get them, so I stained two of them with black ink to see which would look better; I am wary of ending up with a “boy-racer-brake-cluster” look so I think I will stick with the unstained wood. I planked the top of the transom, and also enlarged the hole for the tiller. The lower part of the transom will be planked at an angle with a small frame around the tiller hole. But that is for next time…. Till next time, Have Fun!! Cheers.


-
Is that code for "replacing something you should leave well alone"?😁
-
Oooh, don't know ifn I can do that.....🤔 Seriously, thanks for the kind words. This morning I'm thinking the deck will stay, I'm going to do a bit if research and see what other "stuff" would be on a busy deck. I know rope coils are a must - early on in the books the captain's son trips over rope coils and has to re-lay them.
-
An interesting picture, Backer, what book is this from?
-
Thank you, My Master.... I appreciate your input Peter. I just have to get past this nagging feeling that I have let myself down. I know I got overly keen and rushed the planking - lesson learnt the hard way I suppose.
-
I don't understand the new fangled computer wizardry,😆 but will you be able to put a bulkhead near the pointy bit and have a hole in the bulkhead to hold the bowsprit instead of the pointy bit?
- 222 replies
-
- 1
-
-
- sultana
- model shipways
- (and 1 more)
-
I suppose it all depends on whether the shroud meet your vision and narrative of the ship. However, I like the look of the futtock shrouds, I would keep them. Are you going to put some on the other side? Oh and as usual; superlative, exemplary and meritorious work as we have come to expect!👍
- 236 replies
-
- 3
-
-
- artesania latina
- kitbashing
- (and 2 more)
-
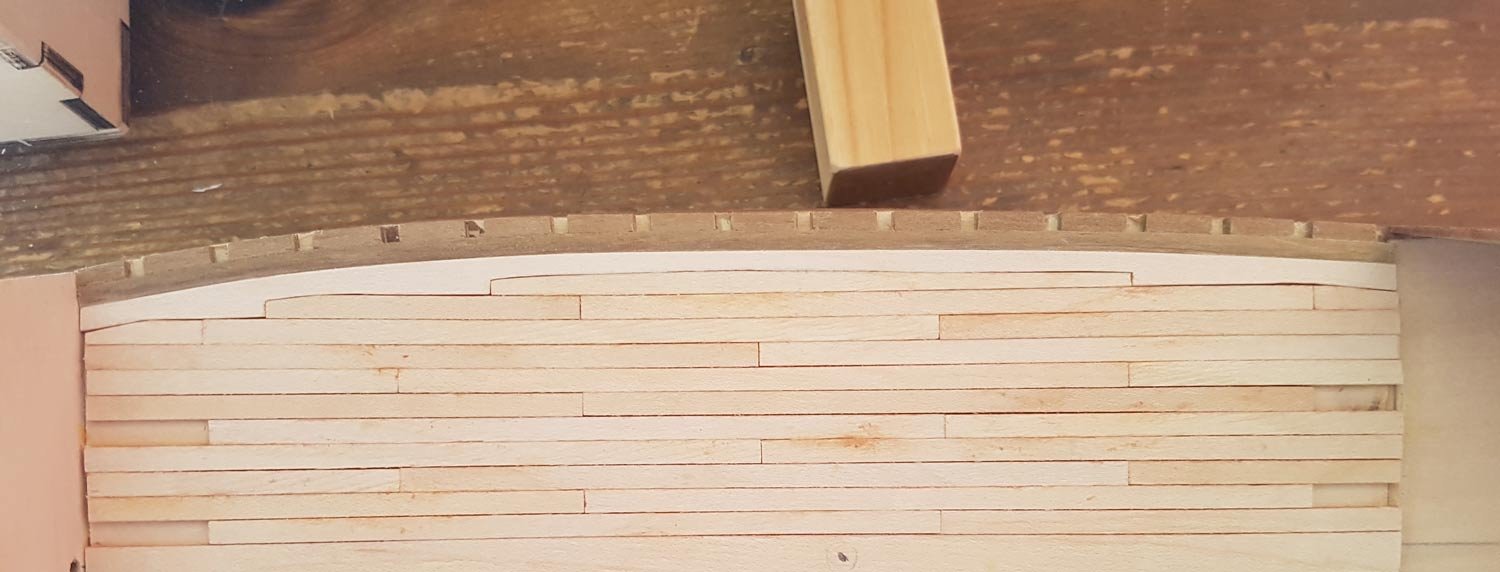
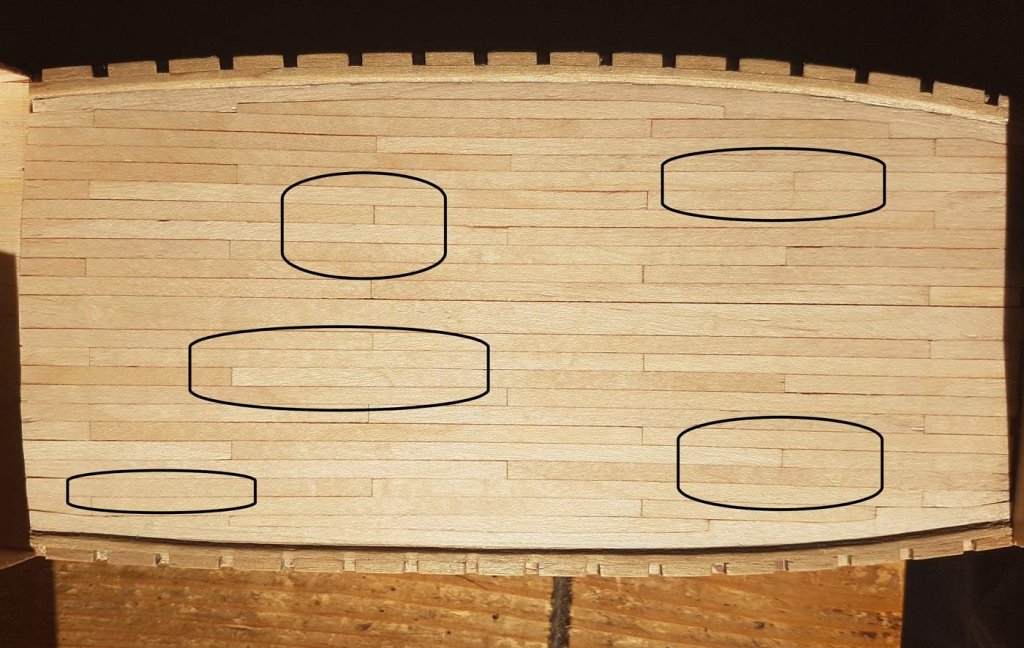
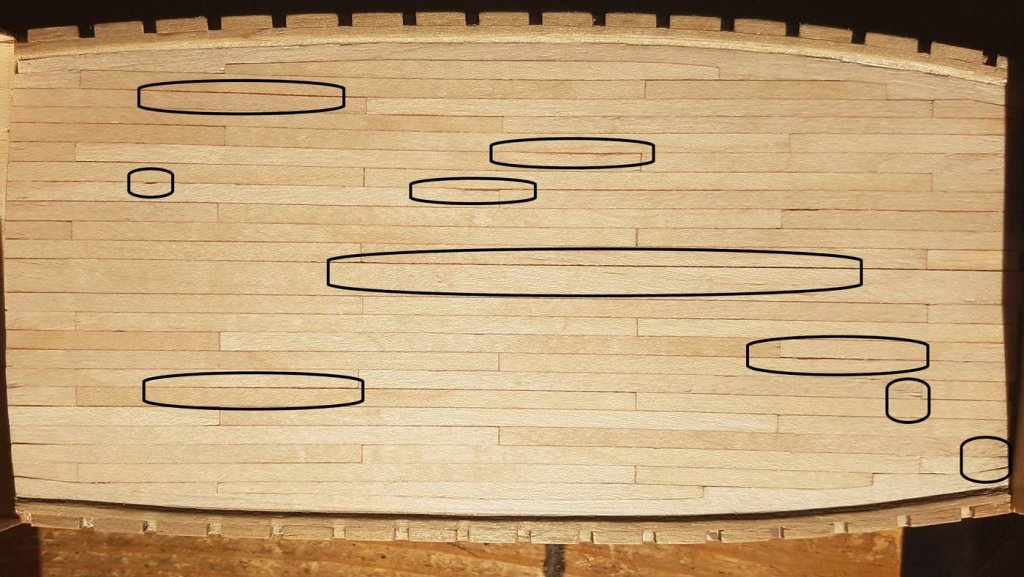
Yesterday I said; Well I looked at the deck in the cold light of day and I must confess to feeling a little disappointed in myself. There are parts of the deck that turned out how I wanted it to look, like here, here, or here, and here; But there are parts of the deck that I know I should have done much better, here and here etc; I can’t see a way to fix the individual mistakes without pulling up the whole deck and starting again. However there is no guarantee that any re-laid deck will be better, or even as good as what is already there. I also don’t know what damage will be done, especially to the waterways should I pull up the present deck. On the other hand I do strive for realism. (I do appreciate the irony in striving for realism in a ship that only exists in fantasy novels!). At the time the model represents the Vivacia is about 70 years old, and while she was well made by craftsmen and well looked after; planks shift, maintenance is done by the crew, planks are lifted and replaced by lesser skilled craftsmen and caulking is removed and replaced. Much of the deck will also be covered by; a capstan, two large hold hatches, mast, fife rail, two boats, barrels, rope coils lockers etc. At the moment I can’t see the wood for the trees. I think I’m going to shut the shipyard for a day or two and come back to the deck with fresh eyes. Help me Obi-Wan, you’re my only hope!
-
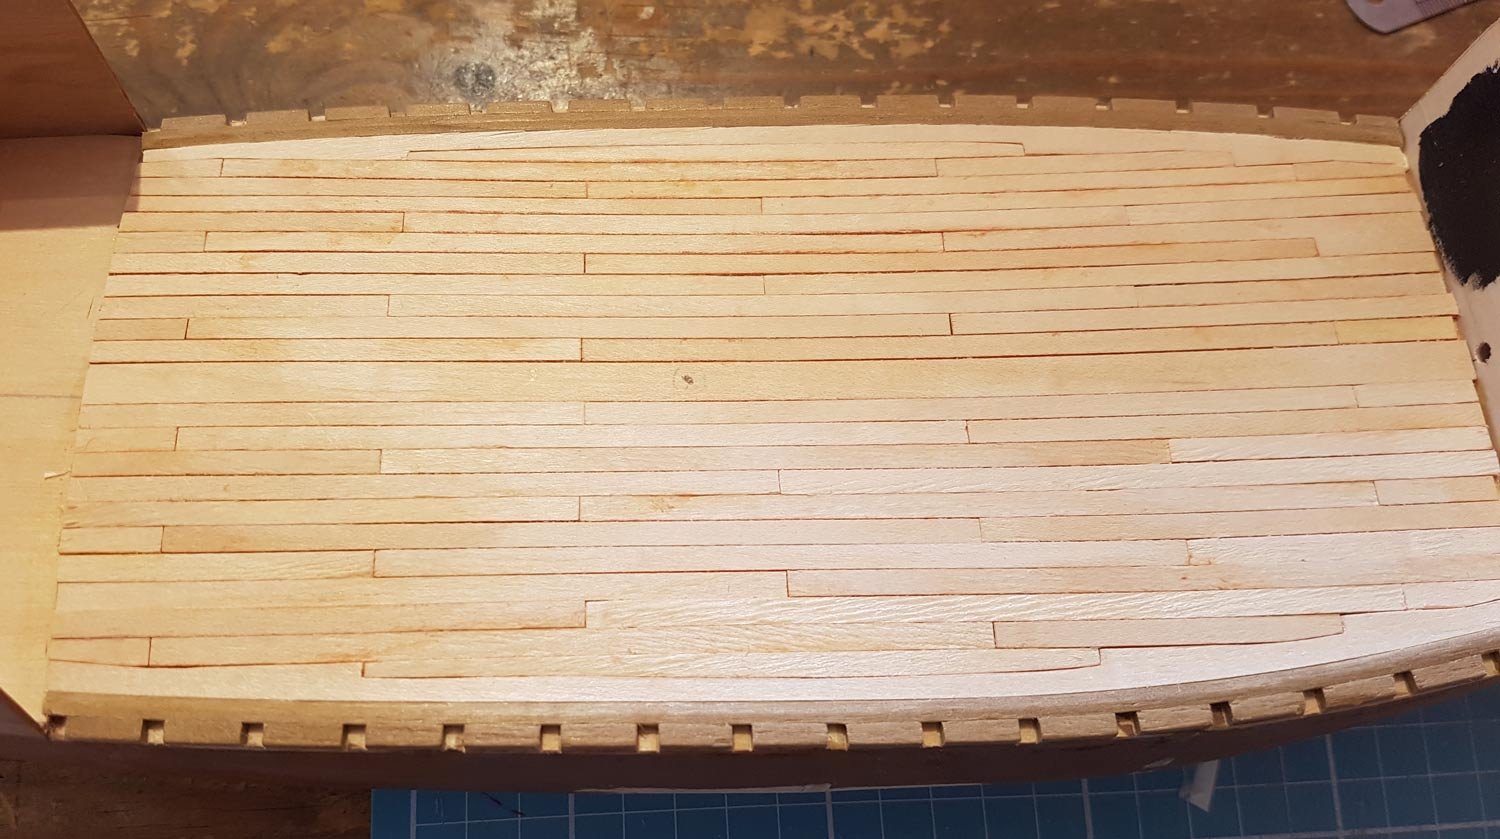
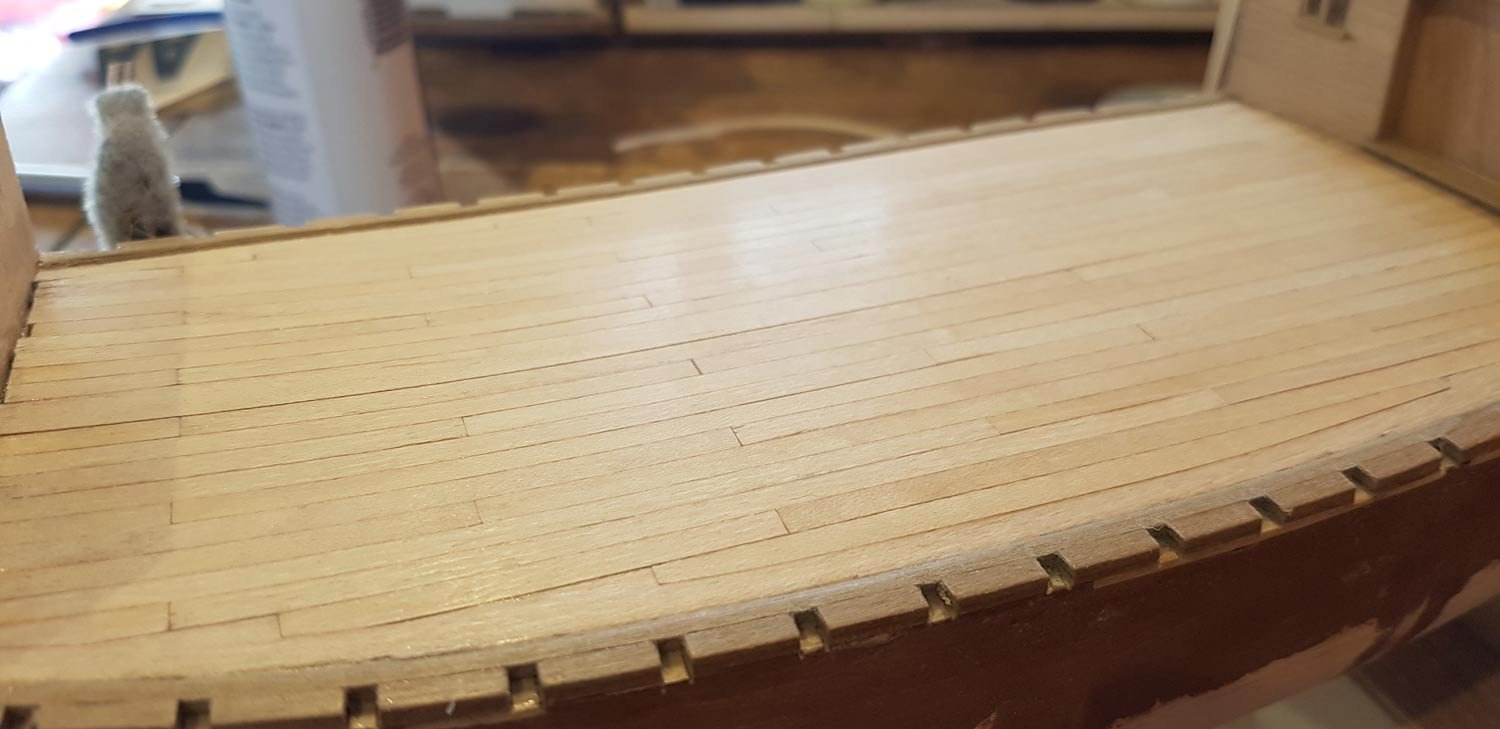
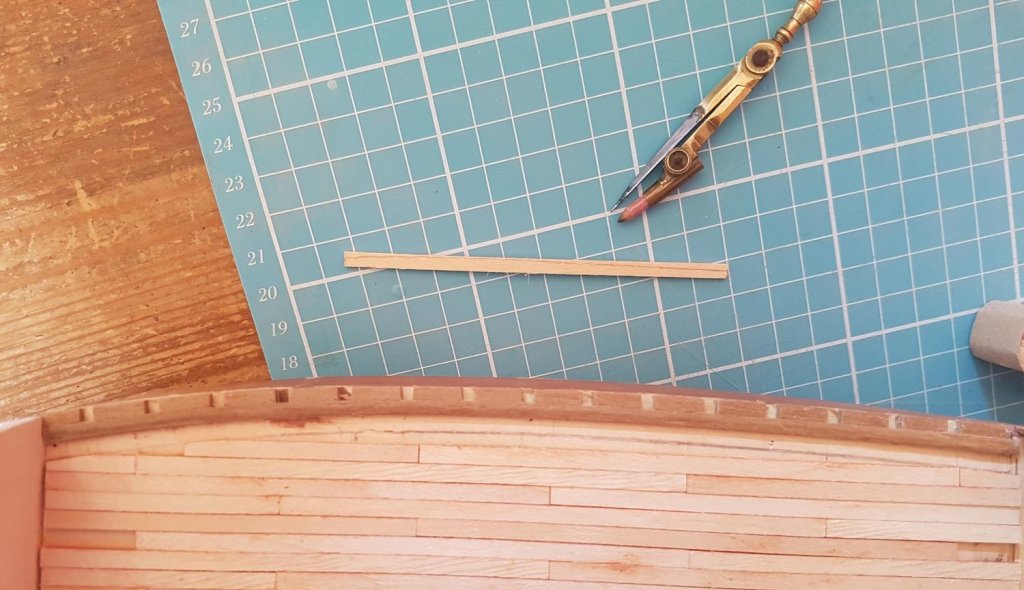
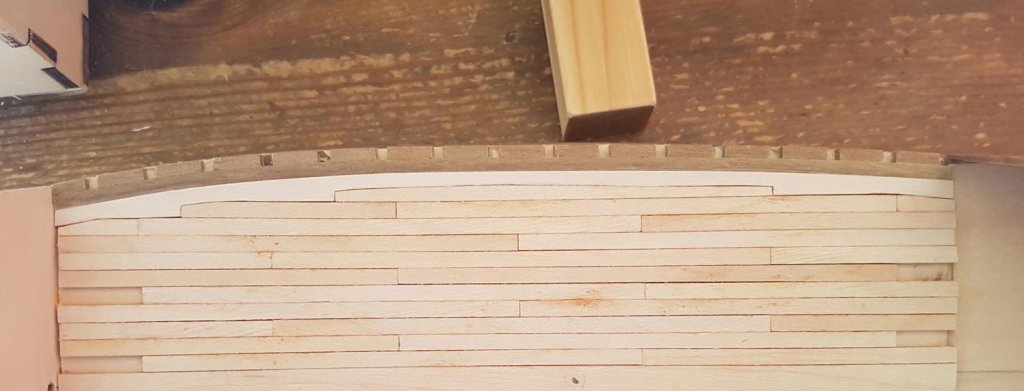
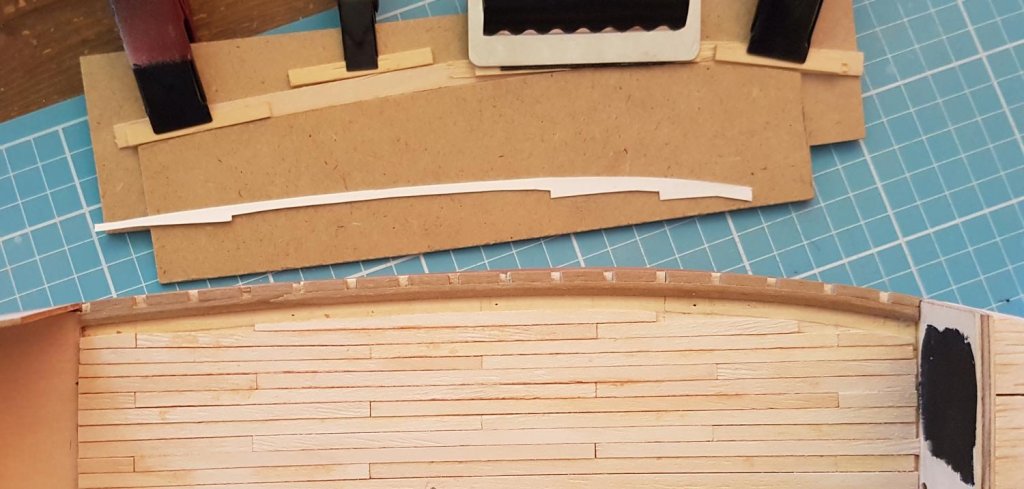
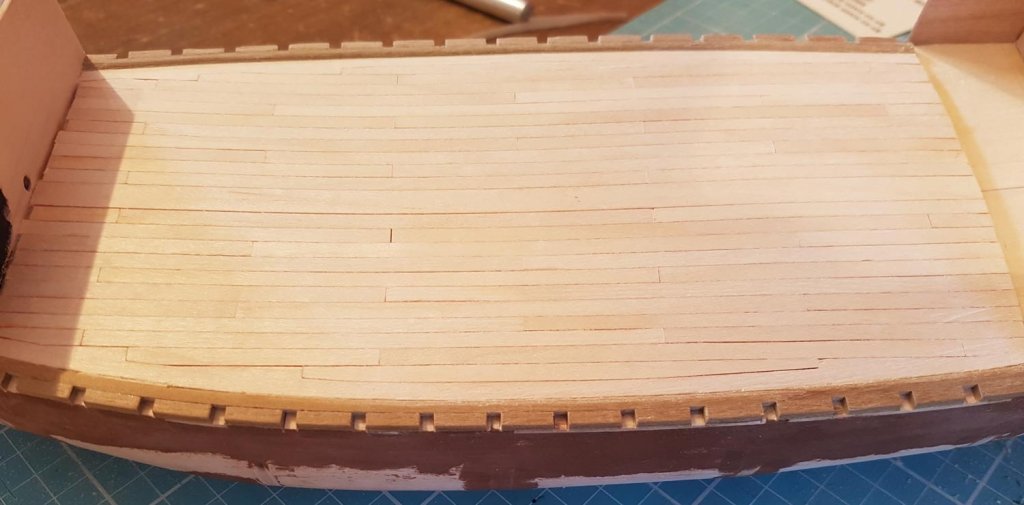
The Deck continued……. As I mentioned above, I had to remove the outermost plank. It corresponded to the #2 shift whereas it should have been on the #3 shift. The plank came off with little problem, which left me wondering whether I should be happy that it came off without a hitch, appalled at my gluing skills or worried about the glue! A new piece was made for each side, using the compass to mark the shape followed by some sanding and test fitting. Next to make were the outside nibbled planks. For the first one I used sticky tape taped on to the deck and cut out to give me the required shape. Unfortunately this method wasn’t accurate enough, and this and the fact that I generally cut oversize anyway meant that I spent an afternoon sanding, test fitting and more sanding. Eventually I had a completed nibbled plank…. For the other side I used a thin strip of card and cut to shape; This method was a lot quicker and with a little sanding to shape I had both nibbled planks ready to be glued in; As you can see the deck looked a bit rough so I am glad that I chose to go down the scraping route. This is the first time that I had used a scraper so I took it slow and easy. I think the scraper that I used was too large really for the job hence there are a couple of faint gouge marks, but they can only be seen if you know where to look………. I put a coat of gloss poly on and when dry rubbed it down with wire wool. I repeated the process once more, and then made the mistake of rubbing down with 3600 grit micropad. The micropad gave it too much of a gloss shine so I brought it back to a matt finish with more wire wool. The downside I have found with wire wool is that it can impart a grey tinge to the wood in places - where the scraping wasn’t as good as it should have been and tiny wire fibres get caught under the surface. On the whole I am pleased with the deck. The caulking shows up just enough for this scale. There are some gaps that are too large - a result of my wonky sanding of the edges of the planks. I didn’t want to mess up what I had done so haven’t tried to fill the gaps with filler or slivers of Maple - I think that there will be enough placed on the deck that most of the deck won’t be seen anyway. Gratuitous Deck shots;- Progress will be a bit slow from now until the hull planking is finished, there is going to be a lot of soaking, bending and clamping in the near future! Cheers Paul


-
The caulking is represented by the red/Brown pencil - I hope this will show up enough. If it doesn't, well.......🤔
-
Yes, i deliberately havent sanded or worried about the thickness of the planks as i will scrape them. I'm going to have to be very careful not to gouge the wayerways, I'm also wary that the scraping may exacerbate the gaps between the planks. Hopefully I can at least start the scraping tomorrow......
-
I do hope so! Though I've noticed that the outermost plank on the starboard side has to be replaced - it should start one shift aft. We shall see how easy it is to remove today.....