HOLIDAY DONATION DRIVE - SUPPORT MSW - DO YOUR PART TO KEEP THIS GREAT FORUM GOING! (Only 24 donations so far out of 49,000 members - C'mon guys!)
×

nikbud
-
Posts
203 -
Joined
-
Last visited
Content Type
Profiles
Forums
Gallery
Events
Everything posted by nikbud
-
 Thanks Mark. Not gonna be able to open the shipyard for a few days so the new year will start with me wishing the first few days away! Pun intended??😄
 -
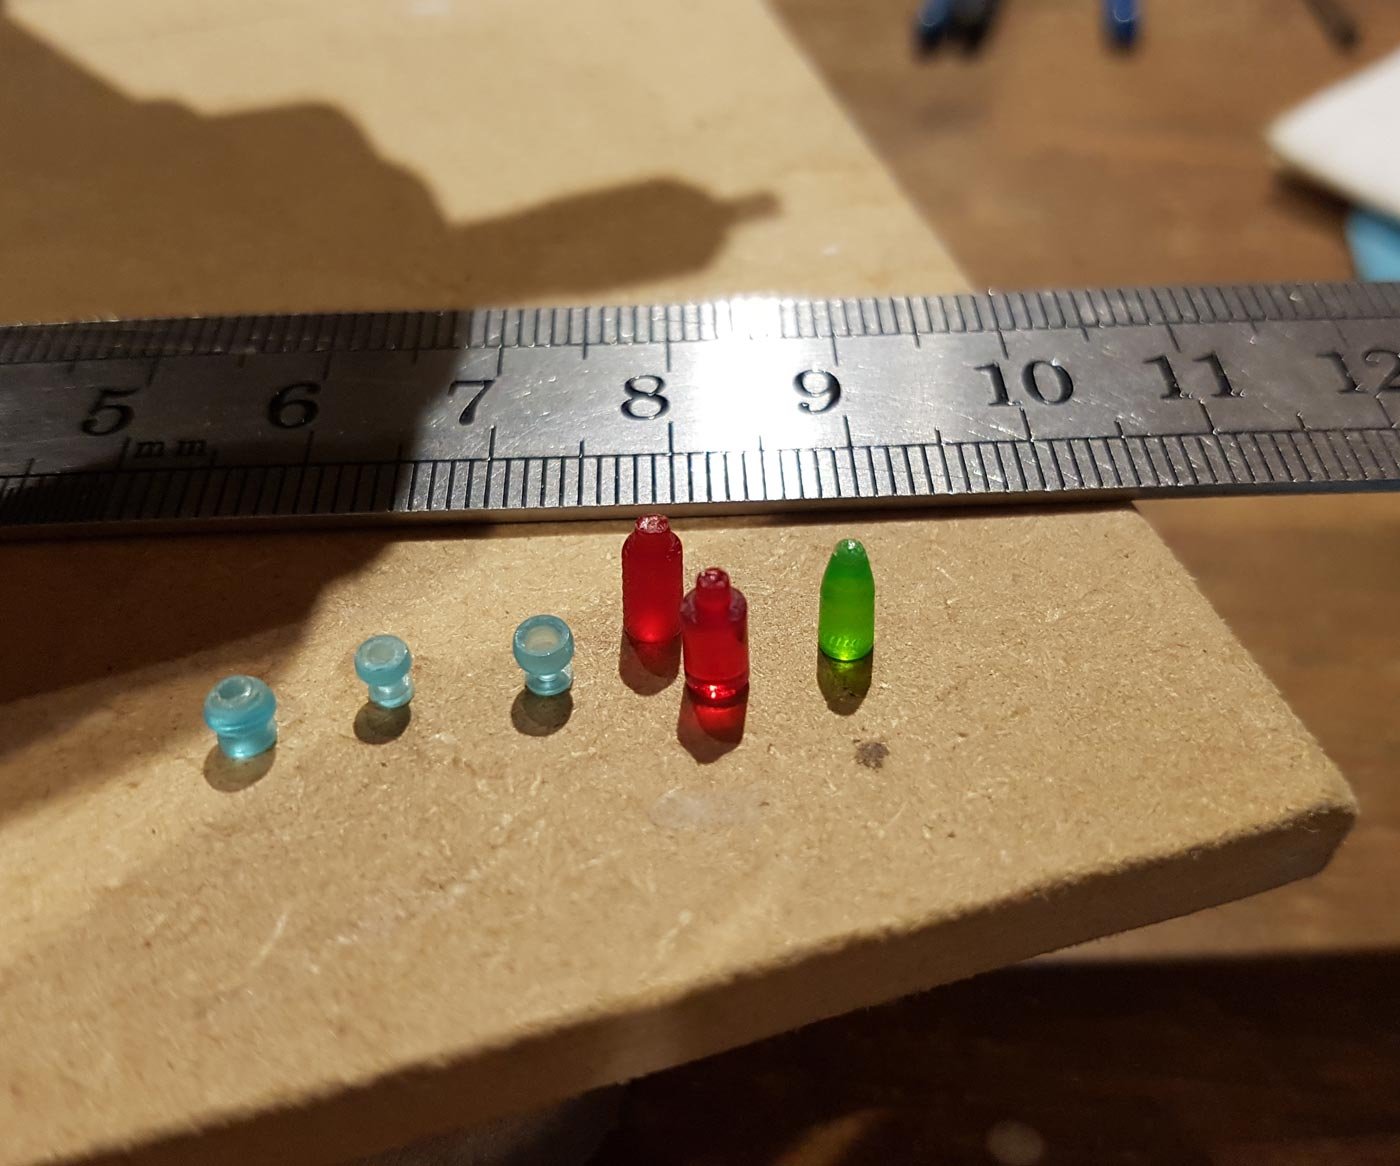
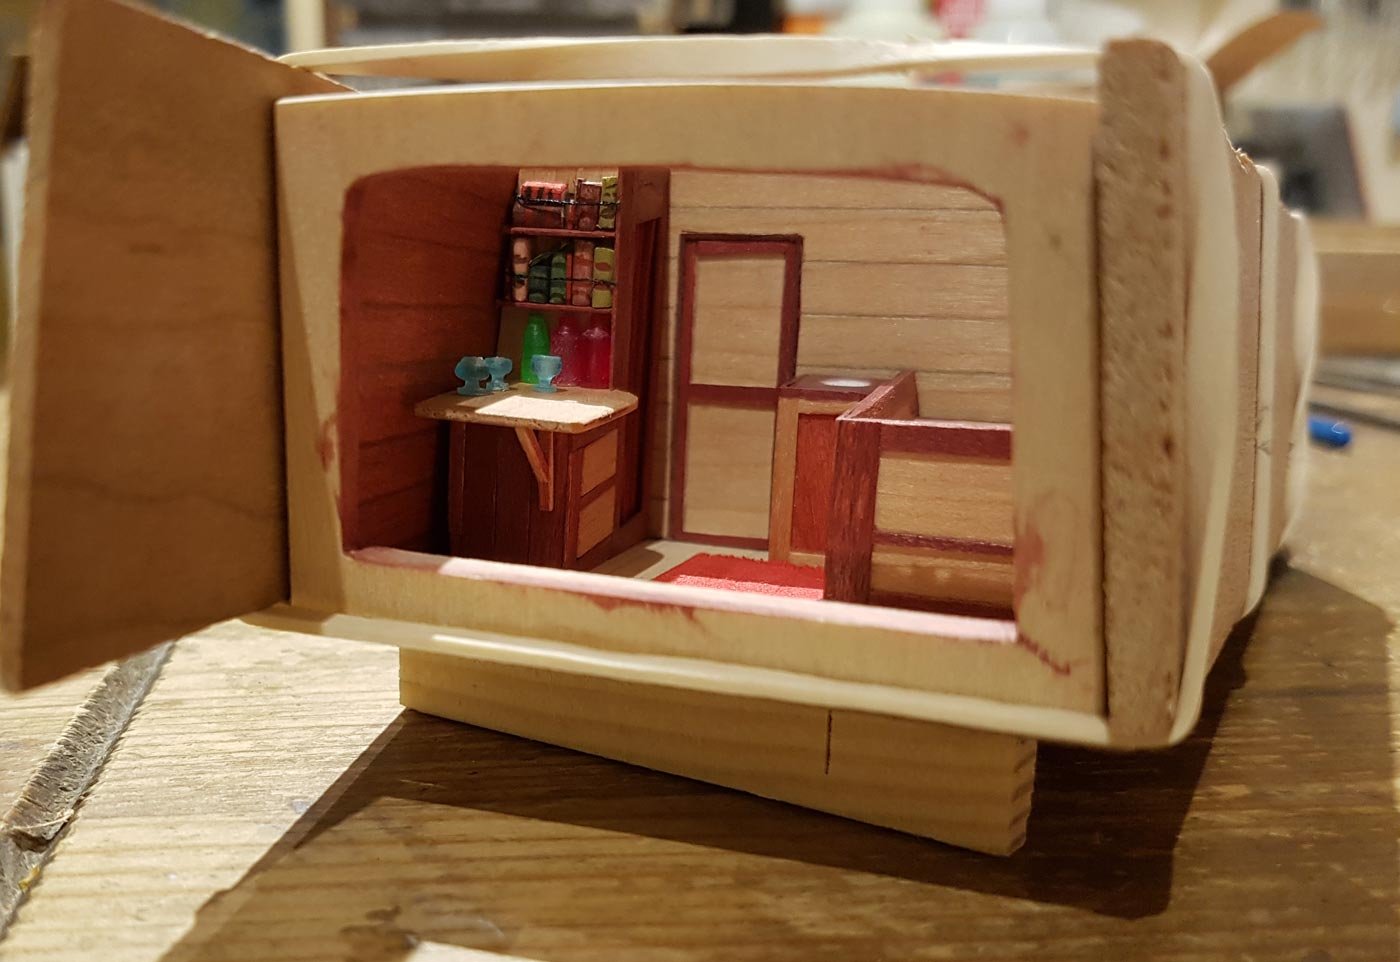
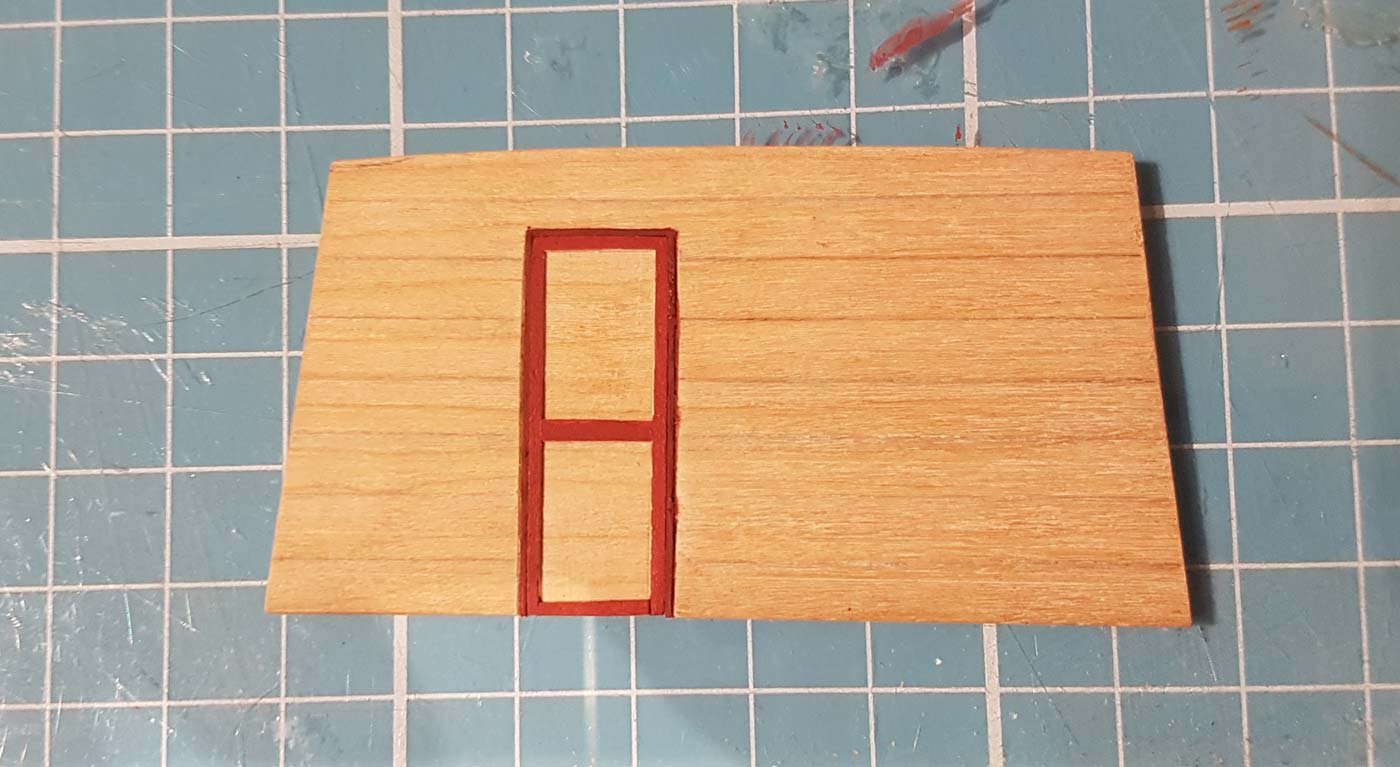
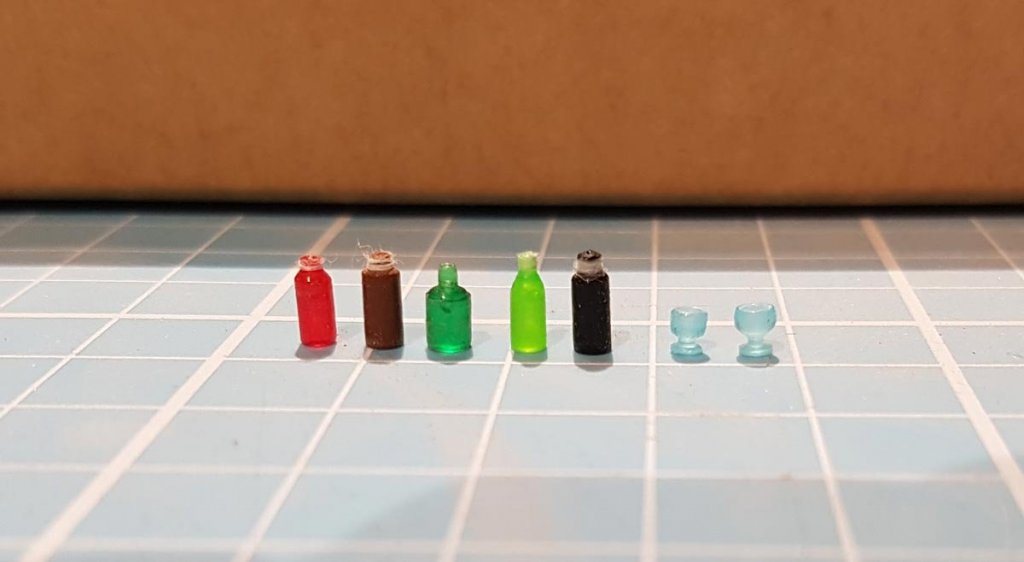
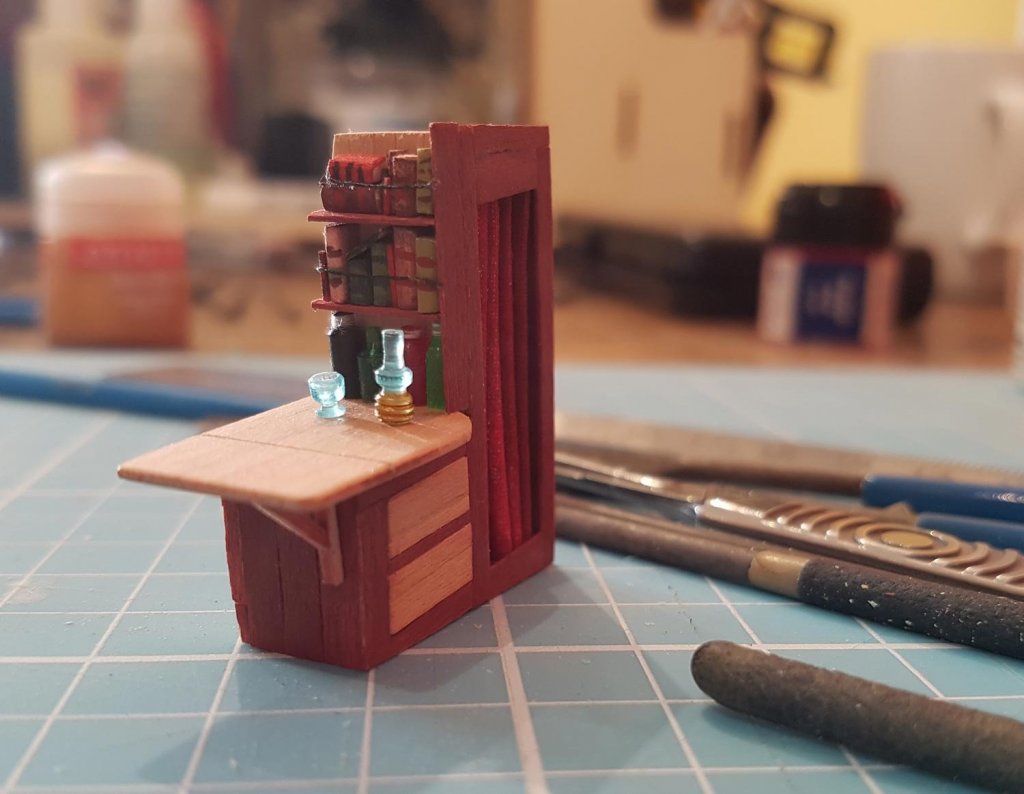
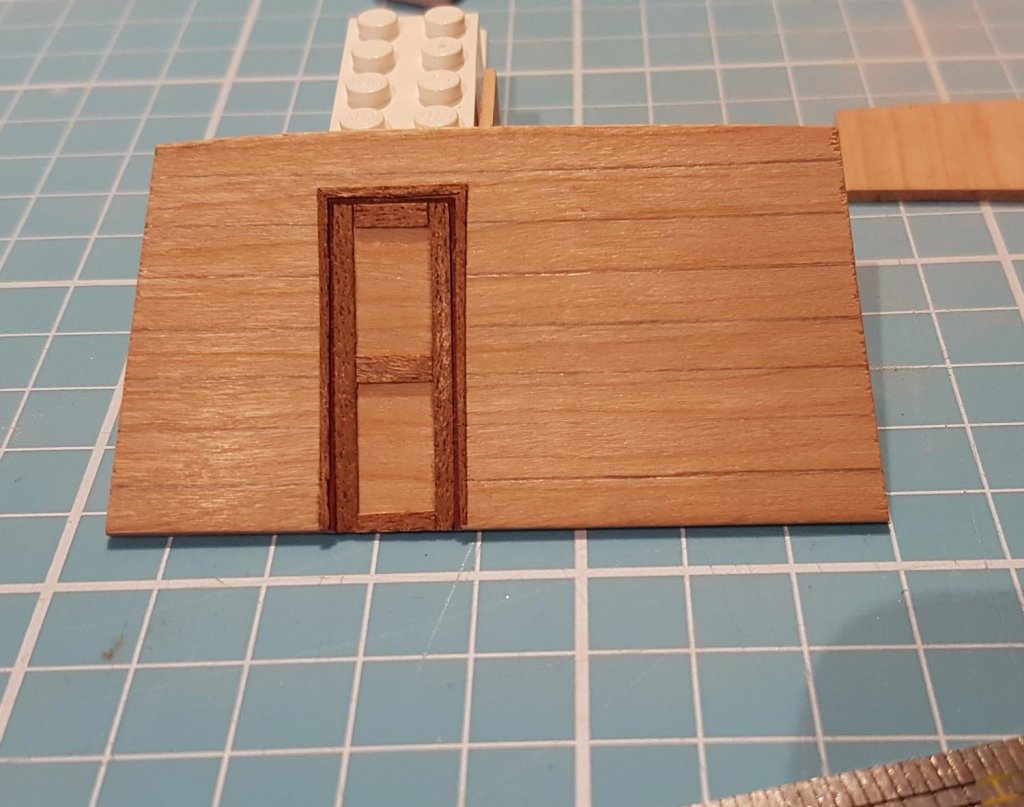
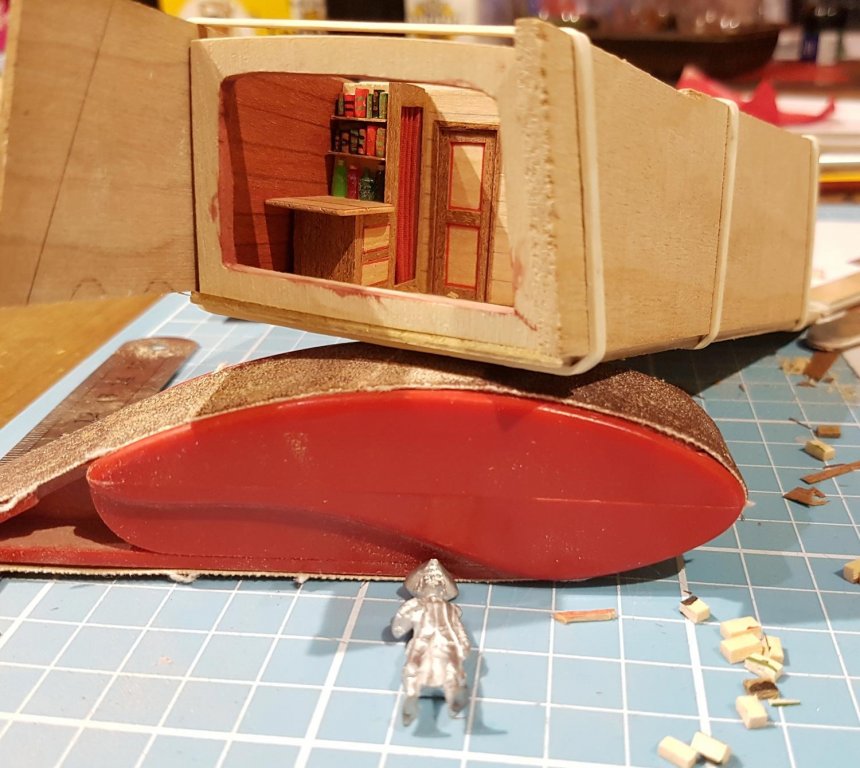
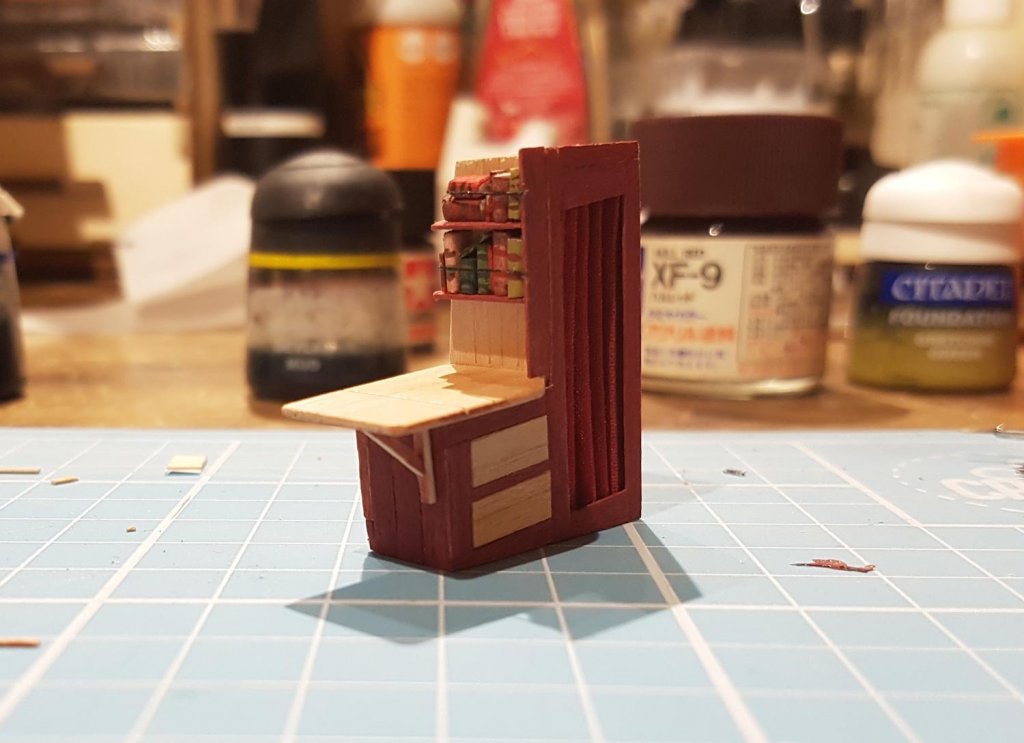
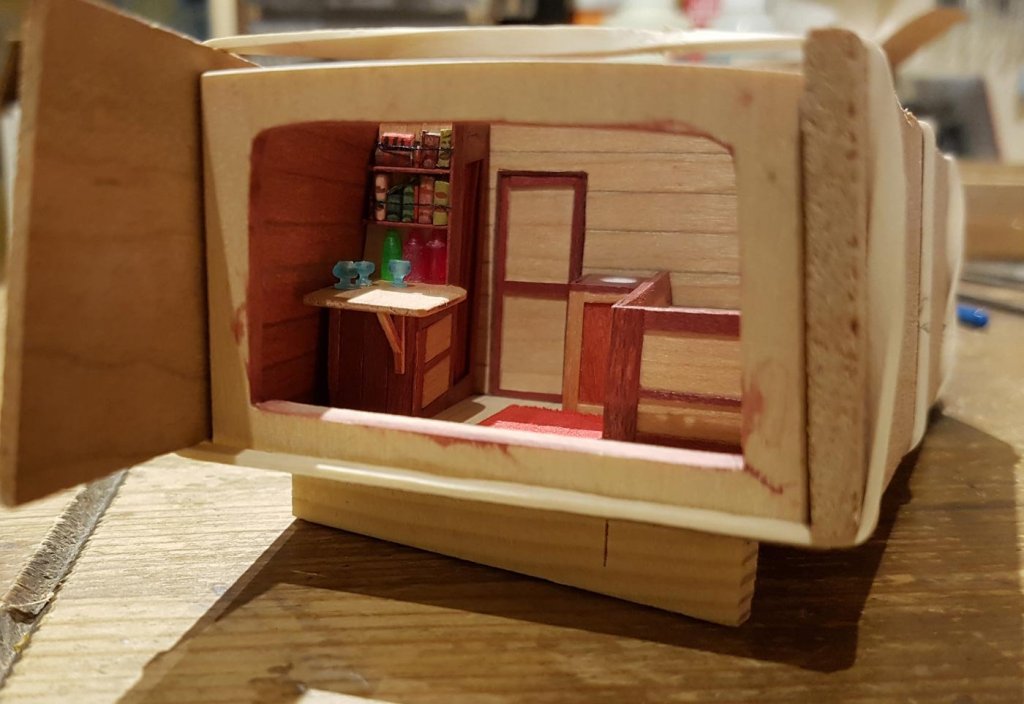
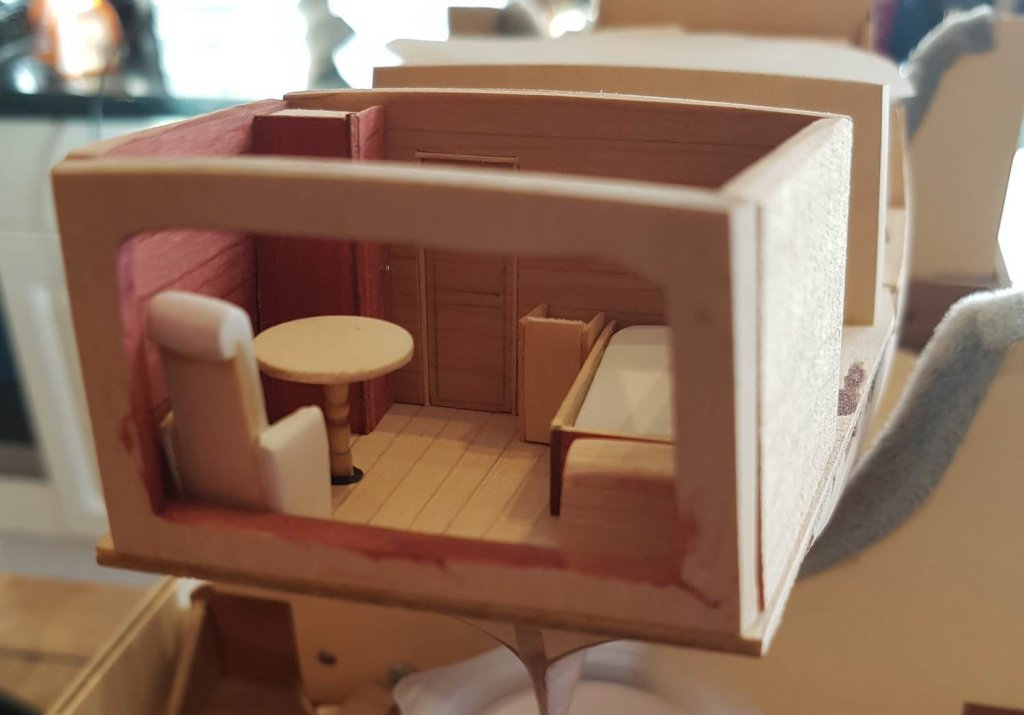
Just thought I’d add a little update so that I start the new year with the log up to date. As I said in my last update I needed to redo the bottles so I could polish them. In the end I made 5 and an extra glass. all were made from lego rods turned in the dremel. When I was polishing them in the dremel some thread from the cloth I was using caught around the bottles - I have left it on as it looks a bit like a bottle top, a bit of 50/50 pva with sort out the fluffiness…. I was having too much fun to stop turning so I made a couple of oil lamps. The left one is made from one piece with the bottom painted, the right one uses a piece of the brass pipe that I used to help shape the curtains. the painted one will sit on the table and the other will be on a little shelf on the bulkhead above the bunk. So this was the state of play, before I started thinking…. The comments made by Mark and Peter have been invaluable, especially with a build like this where there are no plans to follow apart what is in my own head. Two words kept running around my head; detail and paint….. No matter what I did the painted wood looked like paint on wood - and looked a bit bland. So I had an idea. I checked my wood stock and found just enough of the outer hull planking (mahogany I think) from my Virginia build. First step was to take apart all the furniture……… I started with the door. I replaced the painted wood on the door with the mahogany and also added thin strips for the doorframe. The word detail kept coming to me. I had a tool that I haven’t used for years and which I was going to use for the windows so I thought I would give it a try in the door and the drawers, I love using the lining (or bow) pen and I have been thinking hard how to incorporate its use with the painted wood, but like I said painted wood looked like painted wood. Unfortunately the paint was a bit too thin when I did the door so it has spread a little - time will tell if I keep it or redo the door, I may not have too as there will be a large mirror on the door. As I had taken everything apart I had to redo the books, which I had wanted to do as the first ones looked a bit messy. I think these look neater and newer, Having changed the wood I will now have to plank the walls in the same wood, which means I will first have to thin out the walls I have or make new ones. The mahogany looks a bit rough in close up photos but looks good from normal viewing distance. Ideally I would have used walnut instead of the mahogany, but the hull will be planked in walnut and that represents the “wizardwood” and only the frames planking and sometimes the decking used wizardwood, furniture would not have been made from this. So this is a dry fit of the wardrobe/drawers/table with the new wood. I’m hoping that this is the final incarnation! Thanks again to everyone who has read, liked or commented, and I wish you all a very Merry New 2019. May your saws never blunt and your glue always stick! Cheers Paul


-
A huge thanks to you all for the comments and likes, they are very much appreciated. Mark, I must say a thank you for opening the can! It helped get me to look deeper into what I was doing and what I want to achieve. In that vein I have to agree with you Peter; I too prefer stain rather than paint, and that was the intention when I started, but I got too heavy handed. Something was bugging me about the cabin and I think you have hit the nail on the head...….. ….. I hope to show you all my fix early next year! Cheeeeers !!!
-
I like the idea of the pinstripe. Will it stay straight with all the handling?
-
Amazing work as always. Everytime you post more progress you show me something I want to incorporate into my own build. You are also setting a standard that I can only wish for! Did the chainplates come with the kit? I will need to find some similar, the ones in the Pinta kit are poor in comparison..
-
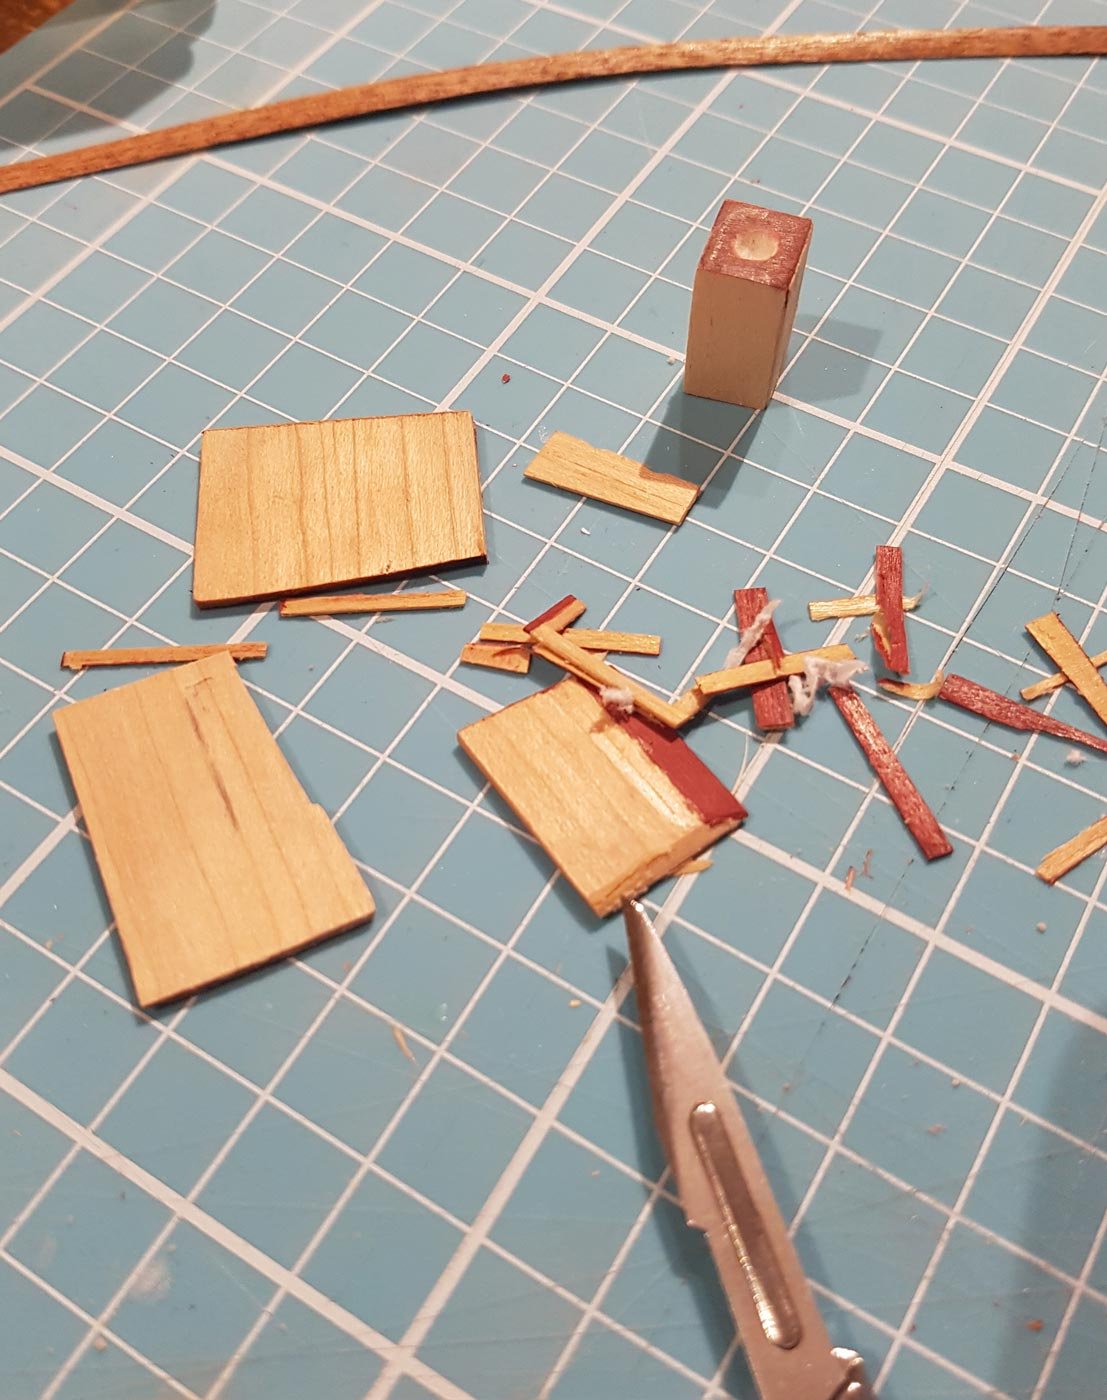
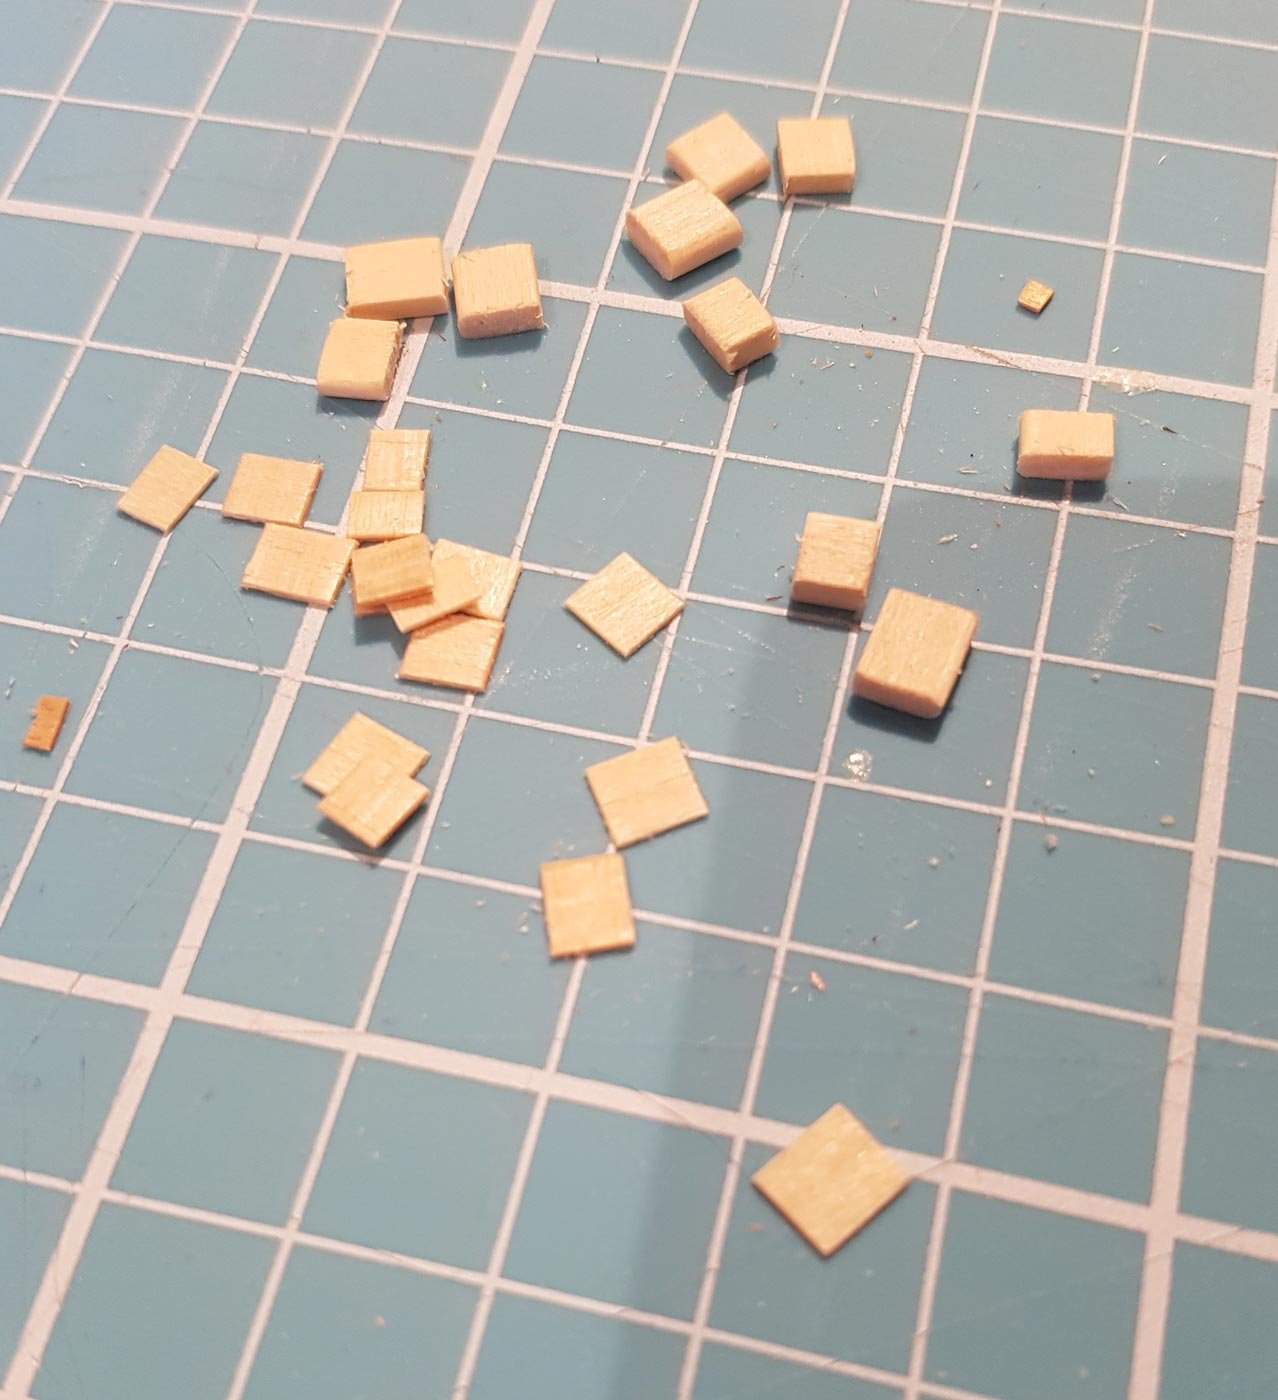
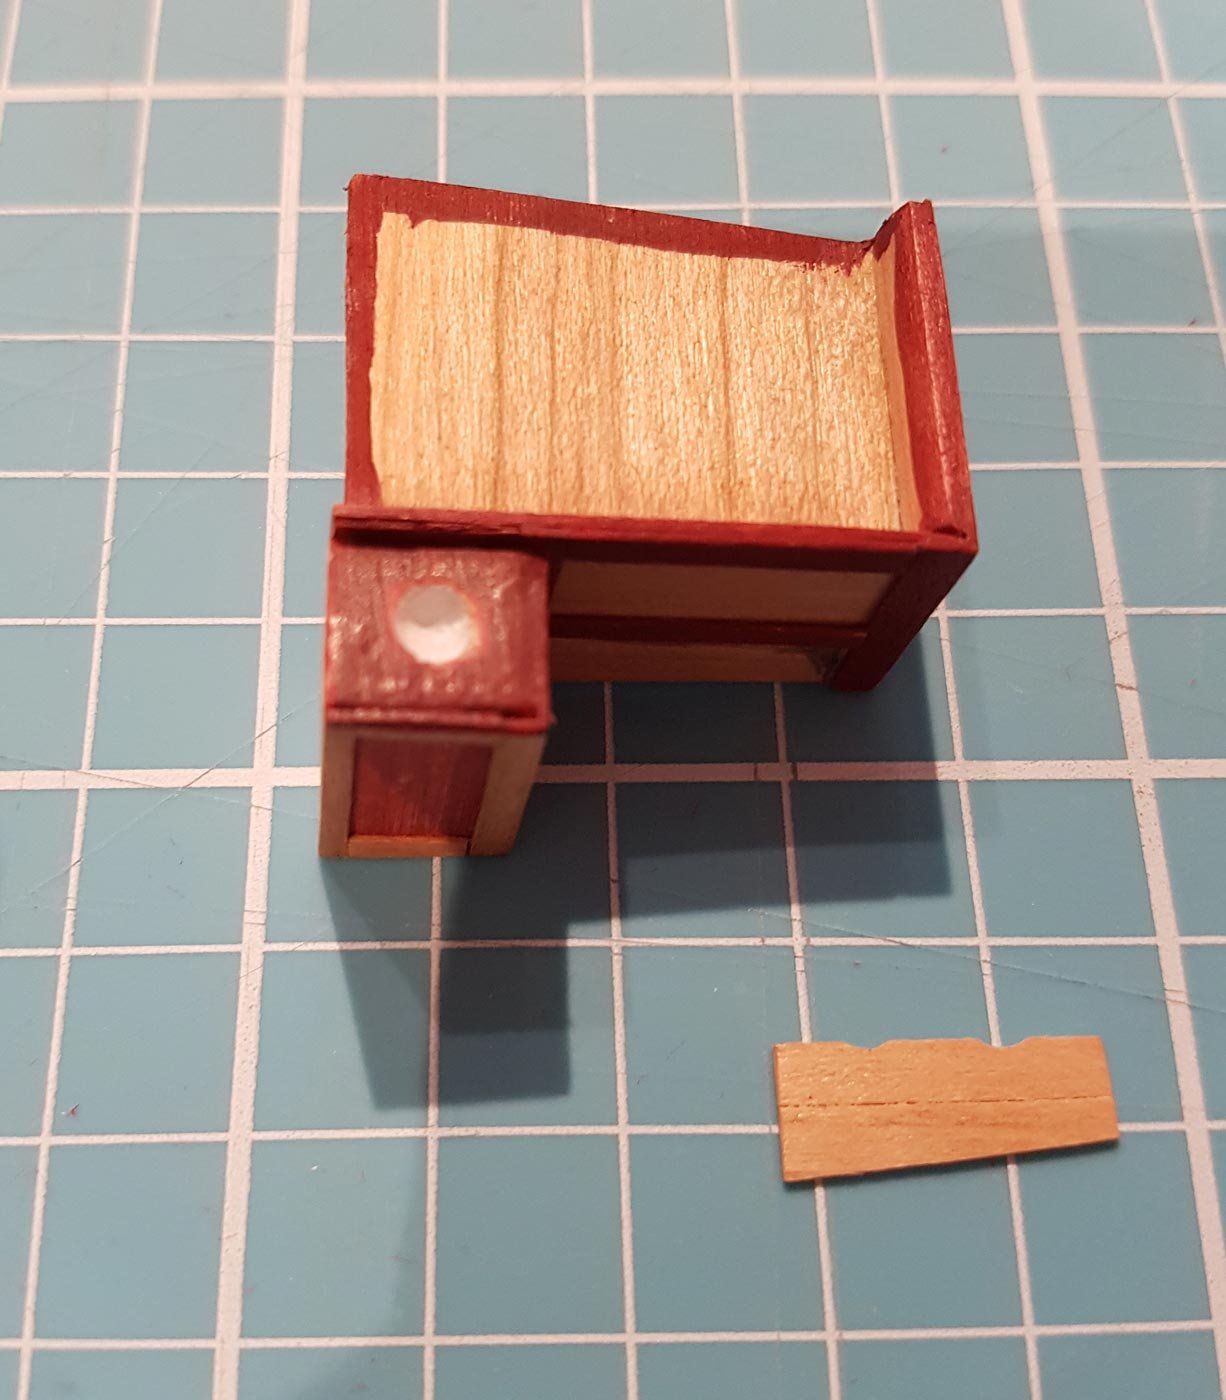
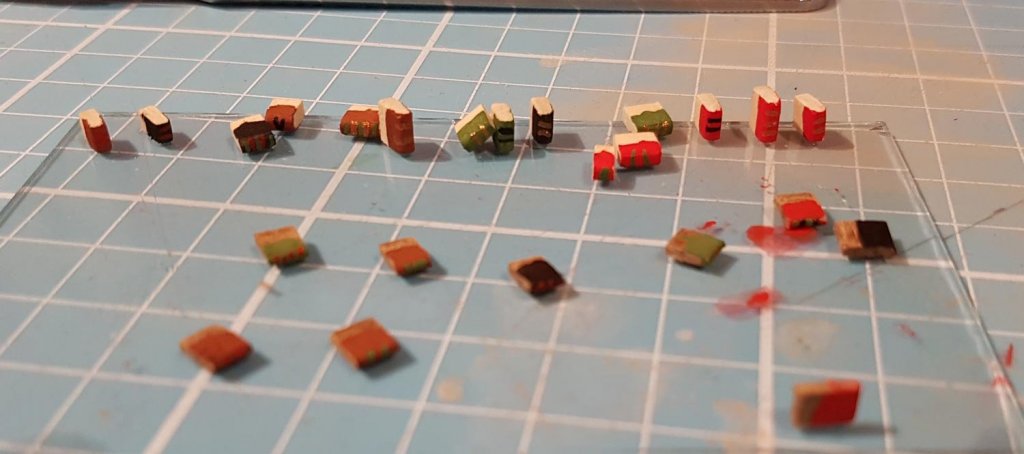
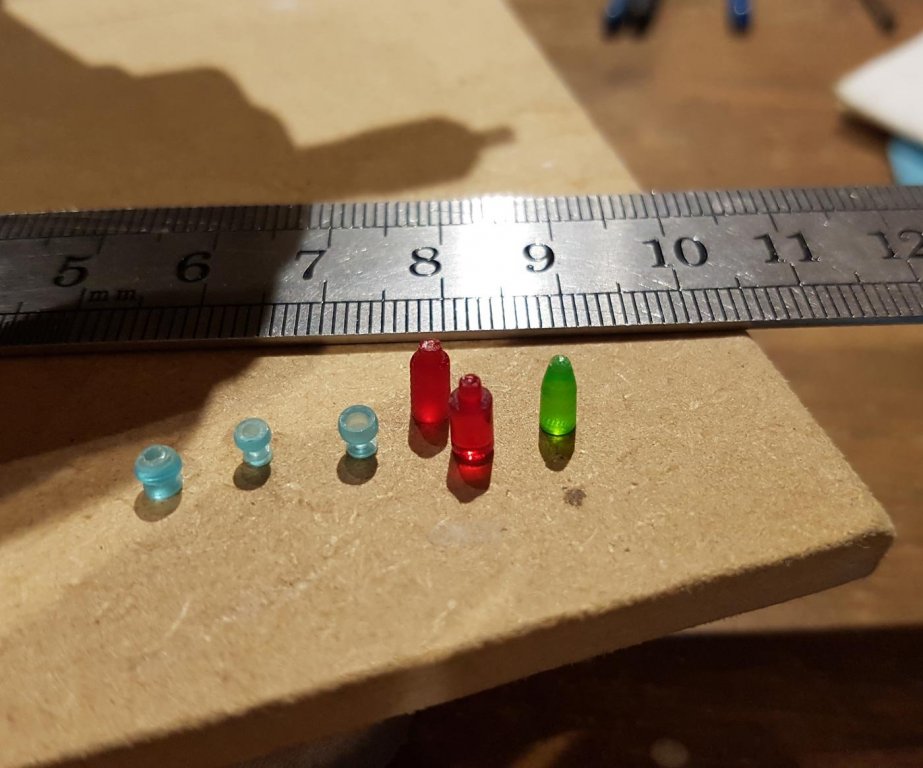
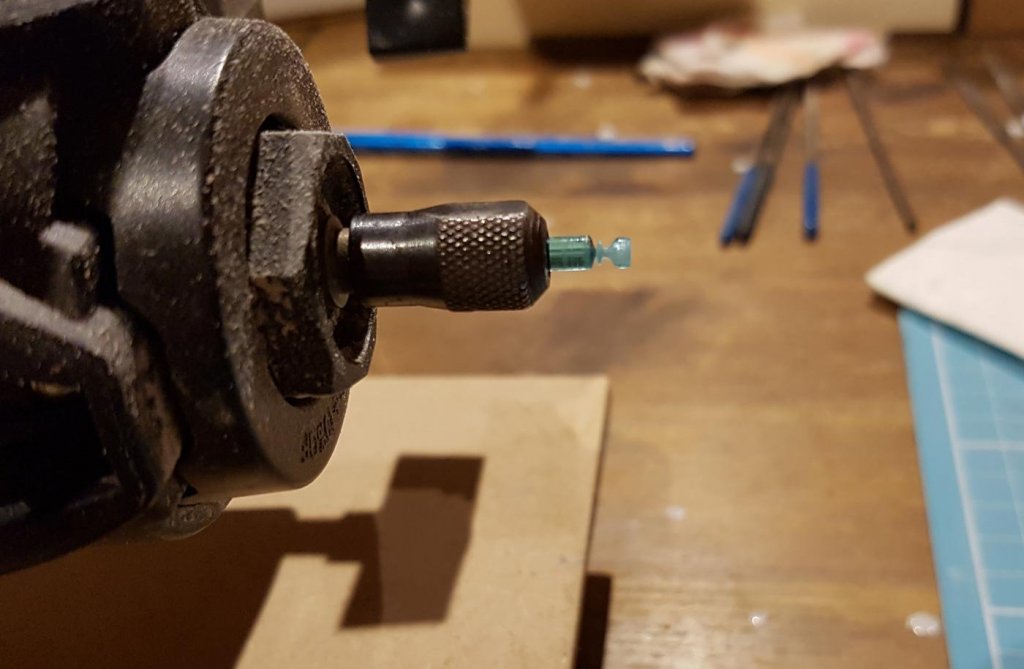
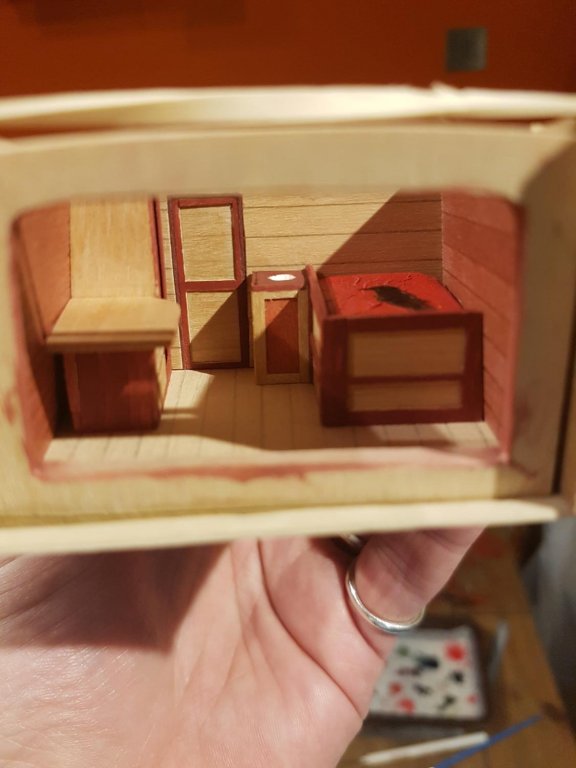
I knew that I had to put something on the side of the wardrobe - it was a large blank space. Initially it was going to be a piece of art but then I remembered that in the novels Kennit demanded that Wintrow (cabin boy/protégé) teach Etta (Kennits “woman”) how to read and allowed them to use his books. So a bookcase it would be - but I needed some books…. Different thicknesses of wood were cut roughly to size and sanded smooth, and then painted to look like old style books, The shelving was painted and the books glued down. Obviously in “real life” the books would not be glued down and would end up trashed in a rough sea so there is some thin rope to hold them in place. Whilst teaching Etta to read, Wintrow sits on the floor on a rug, so a rug was made. A bit of the sail/curtain/handkerchief was painted and when dry cut square to the run of the thread, and then some threads were removed at each end to give a tassel effect. The face of the draw for under the bunk was made. After specific threats from Captain Kennit, King Of The Pirate Isles, along the lines of there was no way he would put up with cracking his ankles on drawer knobs, I made some hand cut outs along the top of the drawer. There was still a blank space under the books. More books? No, Kennit liked the finer things in life so he needed to have a few bottles of the finest wines….. I raided the kids lego spares boxes (with little bloodshed) and found some clear rods of different colours. The Pirate Gods must have been on my side as these rods fitted perfectly into the collet of my dremel. I worried that the plastic would melt spinning so fast in the dremel but I found that by cutting with the needle file every other couple of seconds there was no melting. I made a couple of bottles of red wine and a bottle of white wine. I will need to redo these as I found out a way to polish them after I had finished them. I then chanced my arm and made some glasses. The first was too bulbous - I may turn it into the base for a paraffin lamp, the second was a bit thick, but the third was just right! Well not quite as its about six scale inches wide but probably as good as its going to get. I found some polishing compound that came with the micro mesh sanding kit and it worked well on the glasses, hence the need/ability to redo the bottles; And yes I really did turn them in the dremel; So this is the current state of play, Over the next couple of weeks I plan to make the blanket and pillows for the bunk, finish the chair, make a mirror for the door, make some art and lamps for the walls and make another chest with a cushion on the top. At some point I will have to cut windows into the walls……….. Close up in these pics it all looks a bit rough and ready but life size its not too bad. As always, your comments, criticism and advice are always welcome. Cheers & Happy New Year!


-
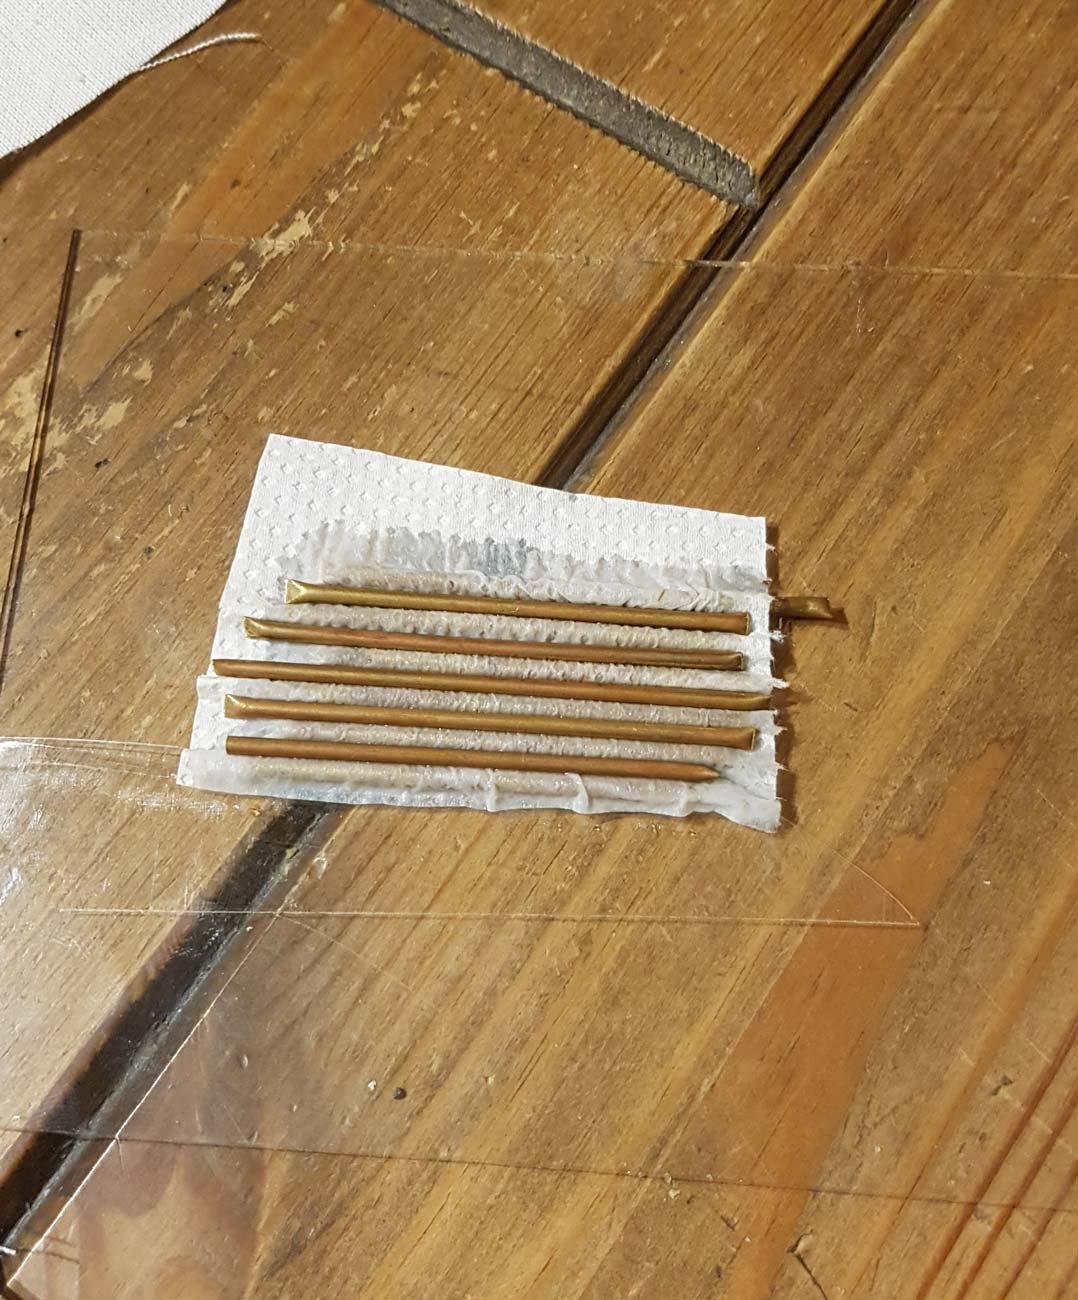
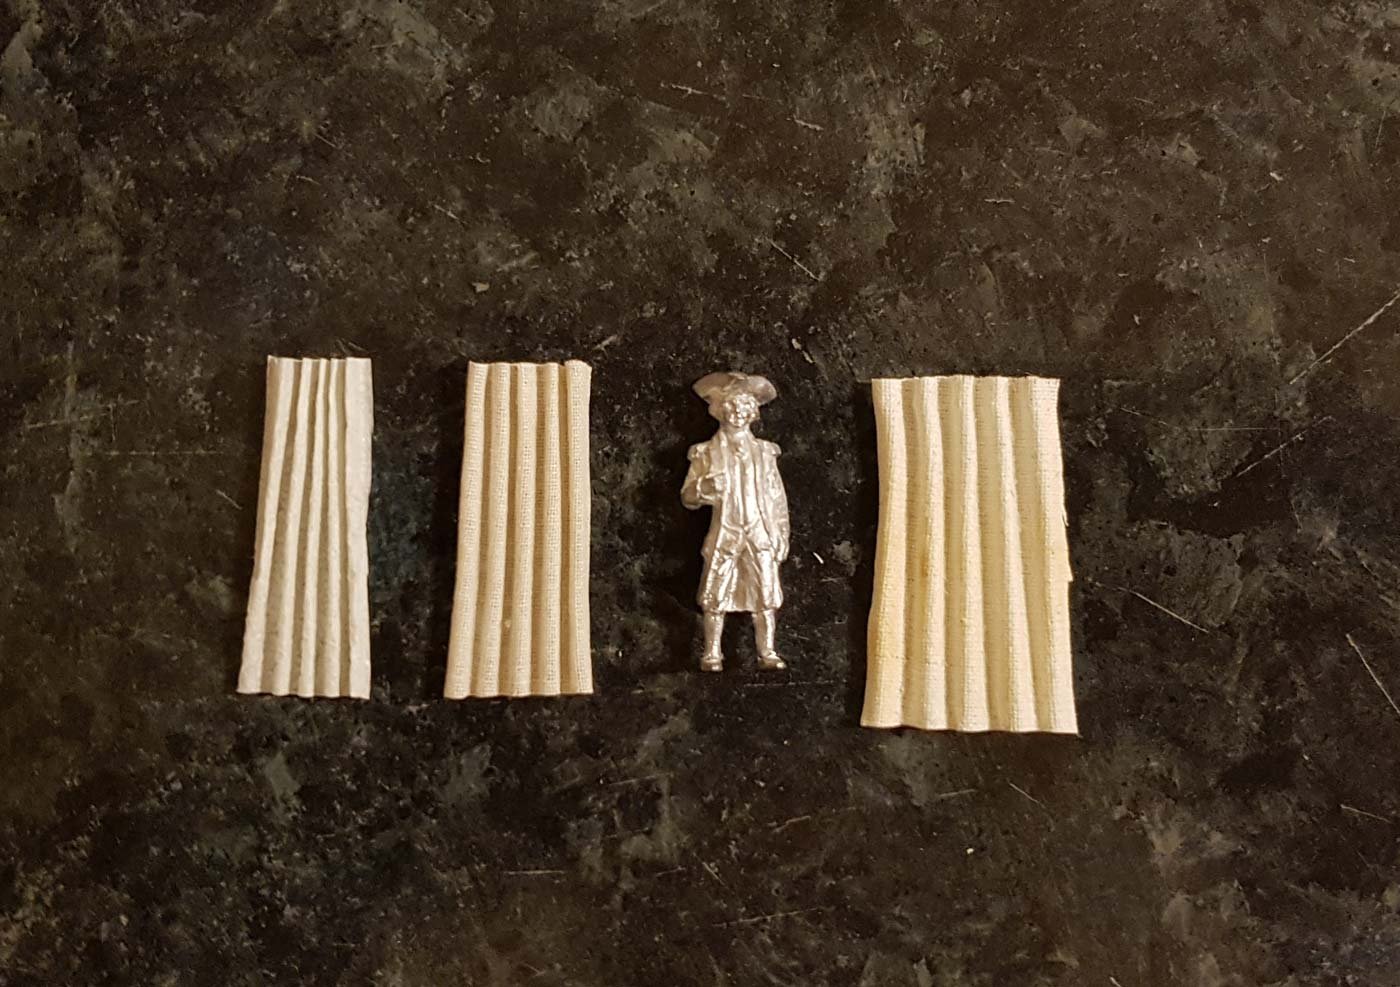
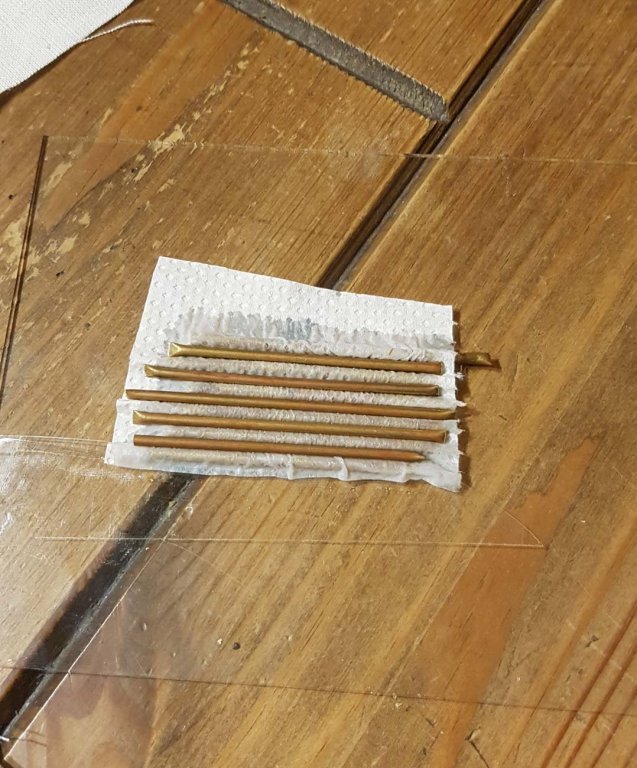
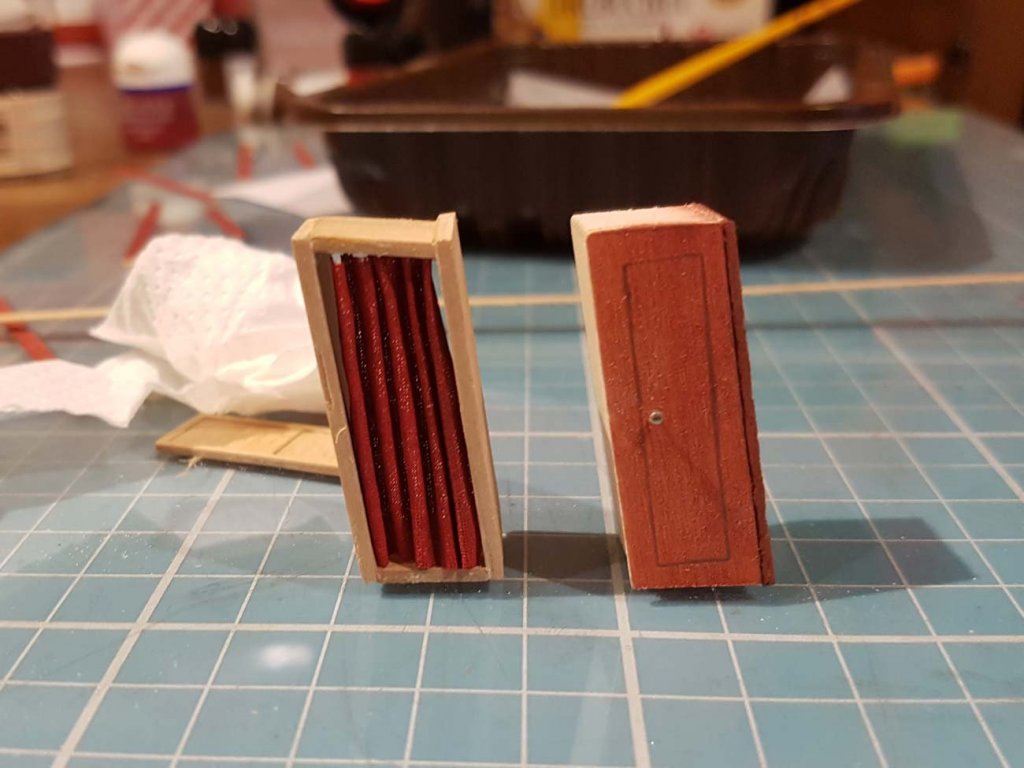
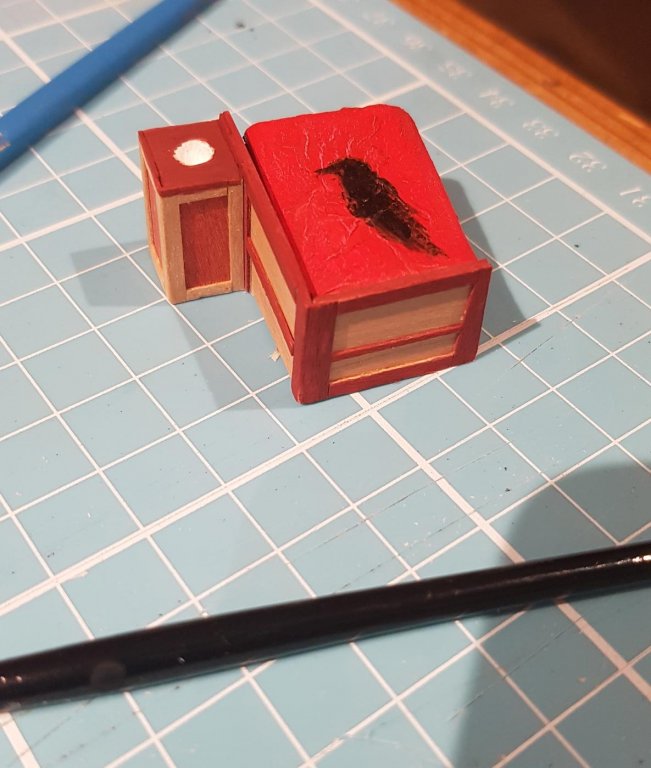
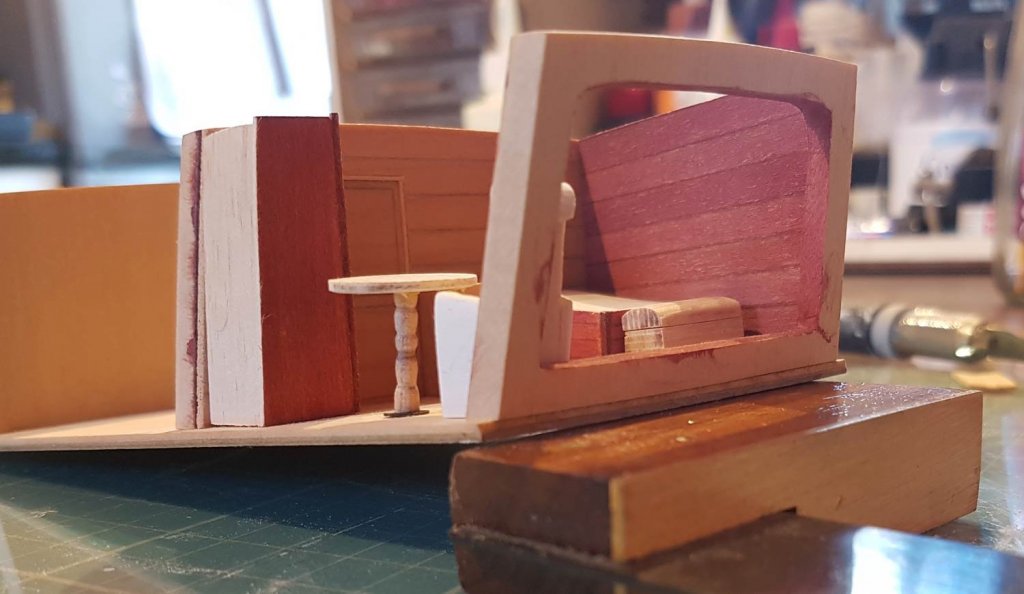
Hello everyone, I hope you all had a good xmas and are set up for a merry New Year! I have managed to get the odd hour here and there in the shipyard so I have made a little progress - enough for this update to be in 2 parts……. Marks’ suggestion of Option 6 got me thinking. The only way I could think of to achieve this was to use framing/panelling. I first tried it on the door, and then painted the frame the same colour as the walls. I liked the effect so I knew that I would have to remake the wardrobe and the bunk. Whilst I was building the carcass of the wardrobe I wondered if I could make a curtain for it instead of a door. I was also thinking about whether to have curtains on the windows, (still not sure about that). So I spent an afternoon trying various ways of making curtains. The solution I came up with was to wet some kitchen roll with 50/50 pva then using some cut up brass pipe (the same pipe that I used for scuppers on the Virginia), I placed the kitchen roll over and under the sections of pipe. I used a hot air gun to speed up the drying time. I also tried using a handkerchief (leftover from making the Virginia sails) and a piece of linen (out of an old sofa). The brass gave a good fold in the material without sharp edges and once dry I could squeeze the folds together using tweezers. The best result was from using the handkerchief. I painted the curtain red (colour coordinated lol) and test fitted into the carcass of the wardrobe. I think it works! The white bits in the curtain are the light shining through the material and are not visible in real life. I needed (well, Kennit demanded) more storage in the cabin so I did away with the round table and decided to replace it with a chest of drawers with a fold-down table on top. I painted up some 0.5mm strip and applied it to the wardrobe/chest and bunk/cupboard. The white circle in the cupboard is Kennits’ porcelain sink. I laminated some thin strip to paper to make the drawers for the chest so they would stand slightly proud of the surface. I will also need to make a drawer for the bottom half of the bunk. I wanted to show Kennits Raven Flag on the blanket for his bed, so I glued some kitchen roll to a thin bit of dried clay, leaving a few wrinkles, painted it red and then painted the raven. Unfortunately it still looks like paint so I’m going to bin it. Its beginning to look a bit more like how I imagined it would be, taking into account of the technology and time period present in the books.


-
I would test first thing in the morning over a week or two, that should give you a good idea of her "rest" state. As long as she doesn't indulge in late-night snacks 🍰…. It took me a couple of months but I eventually worked out that milk was shooting my blood sugar up, won't touch the stuff now. I did have a mouthful in the summer and swore at my admiral - it tasted like she had put 3 spoonfuls of sugar in it! Don't quote me on this, i'm no expert, but I think that high levels cause problems over time rather than instantly - I think the dizziness/unbalance might be more to do with blood sugar shooting up and/or crashing. but like I said I could be wrong on this. From what my nurse said I think the aim is to get a result of around 7 for a diabetic. Again don't take that as gospel. I am allowed to work with levels between 5 and 15 so 18 doesn't sound too bad. The other problem of course is that stress and worry can play havoc with the blood sugar levels. the more I worry about having a (for me) high result the harder it is to get the level down.
-
Not for me, however I have to qualify that answer; My diabetes was diagnosed very early 18 months ago as a result of a medical that I have every year for work. My initial hb1ac result was 6.6, the NHS threshold for having diabetes is 6.4. I control my diabetes with diet and exercise, no medication. I have to keep my blood sugar levels strictly between a certain range for work so I have to be very careful. My mother also had diabetes and although she was never unbalanced she did fell dizzy when she had what she called a "hypo". I saw a nutritionist through my GP and she warned me to be aware of the "crash" effect. Meaning that if you raise your blood sugar level too fast and to high, the resulting fall is also too fast. Im not sure but could this be what your admiral is experiencing? I was told to always eat protein if I am eating carbs; the protein helps to slow down the effect of the carbs on your blood sugar level. Apparently bacon is an excellent Carb slowerer! Hope this helps.
-
I don't know if this will help but I use a Gluco/Rx Nexus, bought from the pharmacy in Tesco's for £25. I find it consistently accurate and very easy to use. The downside is a pot of strips cost £20 for 50. I hope the Admiral is feeling better, my thoughts are with you both
-
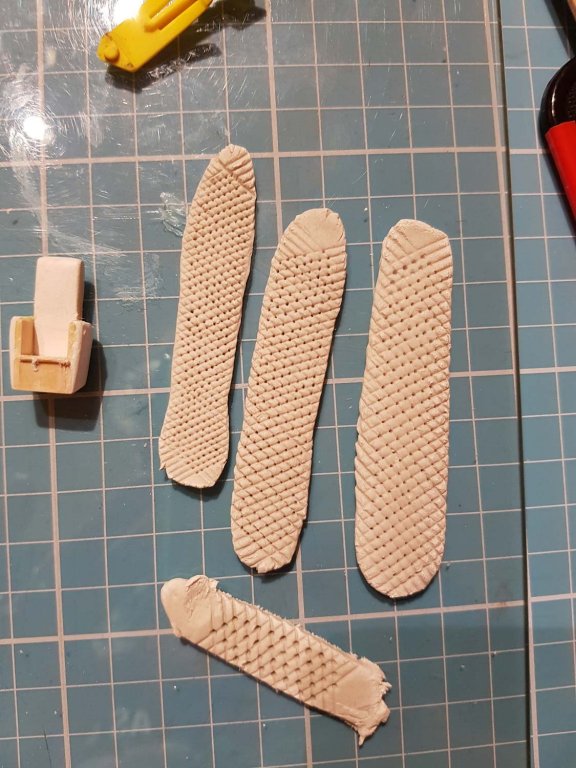
Last night, while flicking through the tv channels, I ended up watching JAWS2, you know "just when you thought is was safe to go back in the water...….". So Mark, you must have known this because just when I thought it was safe to post a pic of a completed but unpainted chair you come up with.... At first I thought "uh huh, no way not in this scale" but before I knew it out came the clay. I flattened a few pieces of clay and set about with a cocktail stick. But no matter what I tried with different points on the stick, it didn't work. I could get the indentation but I just couldn't form the creases. Stick, sharp knife, blunt knife, swearing, nothing worked. I had thought that I could wait for the clay to dry a bit, but knowing that the clay takes at least 24 hours to dry, I had no way of knowing when the skin would be thick enough for me to form the creases when I made the button indent, and at this scale I guessed that the point, however blunt, would pierce the skin. I realised that the only way would be to make the creases at the same time as the indent, so next I tried to hold a piece of thread taught across the clay whilst I pushed the point of the cocktail stick down - unfortunately it was too hit and miss and ended up nearly cutting the clay in half. Eventually I came up with the idea that I think will work. I rolled out and flattened a piece of clay and then, holding a piece of thread between both hands, pushed the thread down onto the clay. By repeatedly doing this, first on one diagonal and then the other I created the creases. By then using the cocktail stick to make the indentations at the intersection of the diagonals, I think I have come up with something that will work. They will require some cleanup when dry but for an initial try they don't look too bad; I will see what they are like when they are dry...………. Thanks again Mark!!😁
-
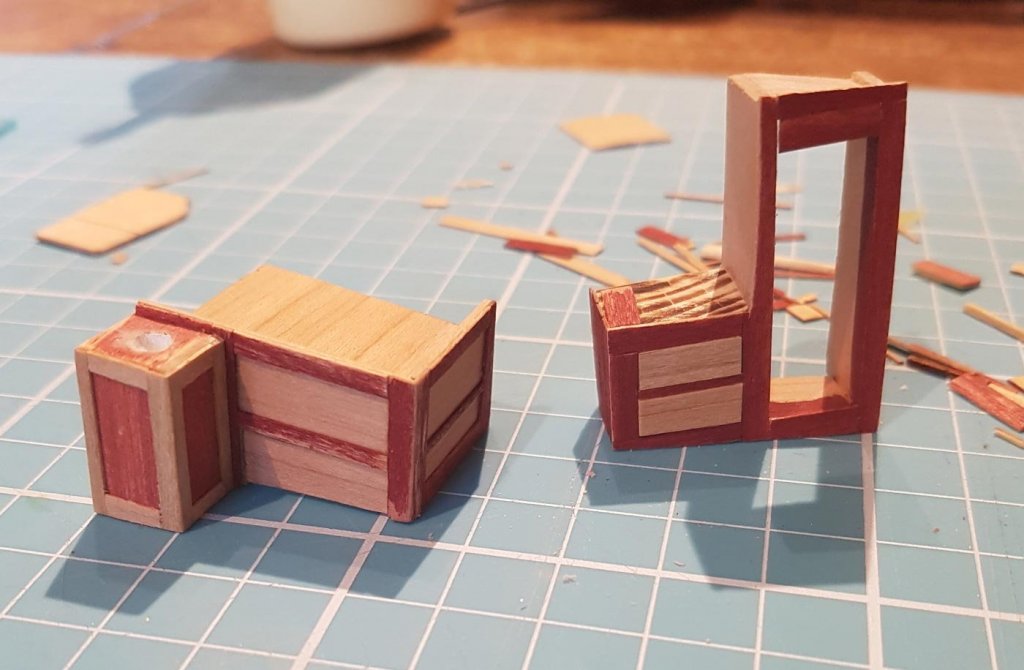
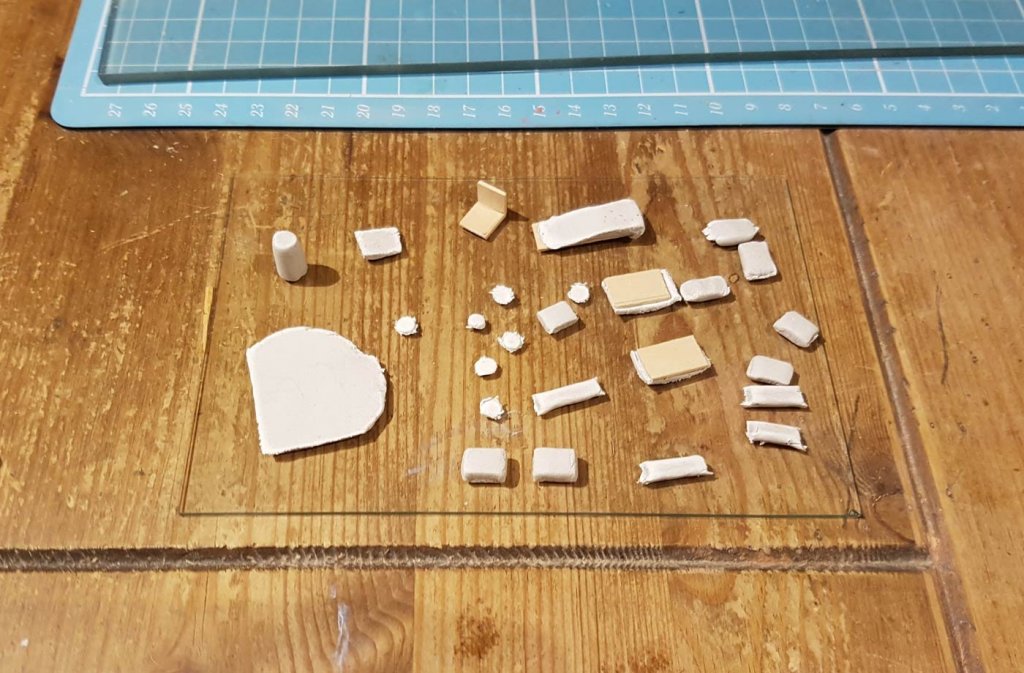
Mark, thank you so much for the kind words, they are very, very much appreciated. Although it might not sound like it, I am very much enjoying this build. This is the first model I have made where I have not had instructions to look through - while I have always deviated from model instructions, they have always been there and given me a mental map. With this build I keep finding things that I hadn’t thought of initially, so I have to re-adjust quite often. With that in mind I have a little update and a dilemma I’d like you guys to help with……. I wanted to make a luxury chair for the cabin, as Captain Kennit pointed out “there is no point being a pirate if you cannot enjoy the spoils now is there”. I thought a green leather, high backed chair, would fit the bill. I got some DAS modelling clay, which I have never used before. It’s a lot softer and more fibrous than I expected. I also doesn’t stick to wood without adhesive - I had hoped it would stick to the wood while drying, but no go. the bonus with DAS is that its air drying and doesn’t need to be baked. I made various components for the chair, a blanket, pillows cushions etc and left the clay to dry. I tried aliphatic glue to stick the clay onto the wooden components. which worked. Once dry I sanded the chair to shape - the clay sands very easily. I also laminated some thin wood strips and after a lot of sanding made a wooden chest, after all every pirate needs a treasure chest. Both need painting/staining …. As always I put the cabin together to see how it all looks…… So now I have a dilemma; I quite like how the bulkhead wall and door look unpainted. I think it gives almost an oak type look. My options are 1 paint the b/h wall and door to match the sides. 2 leave the wall/ door and sides as they are. 3 leave the wall/door as they are but paint the sides a walnut type colour to match the wood that will be on the outside - will also have to paint the wardrobe and bunk to match. 4 remake the sides, bunk and wardrobe to match the oak look of the wall/door. 5 any combination of the above…… At the moment I am leaning towards no.4, but I’m interested in everyones thoughts. No4 will mean that I can’t hide mistakes with paint! Thanks for looking Cheers!


-
Thanks, Jeff!
-
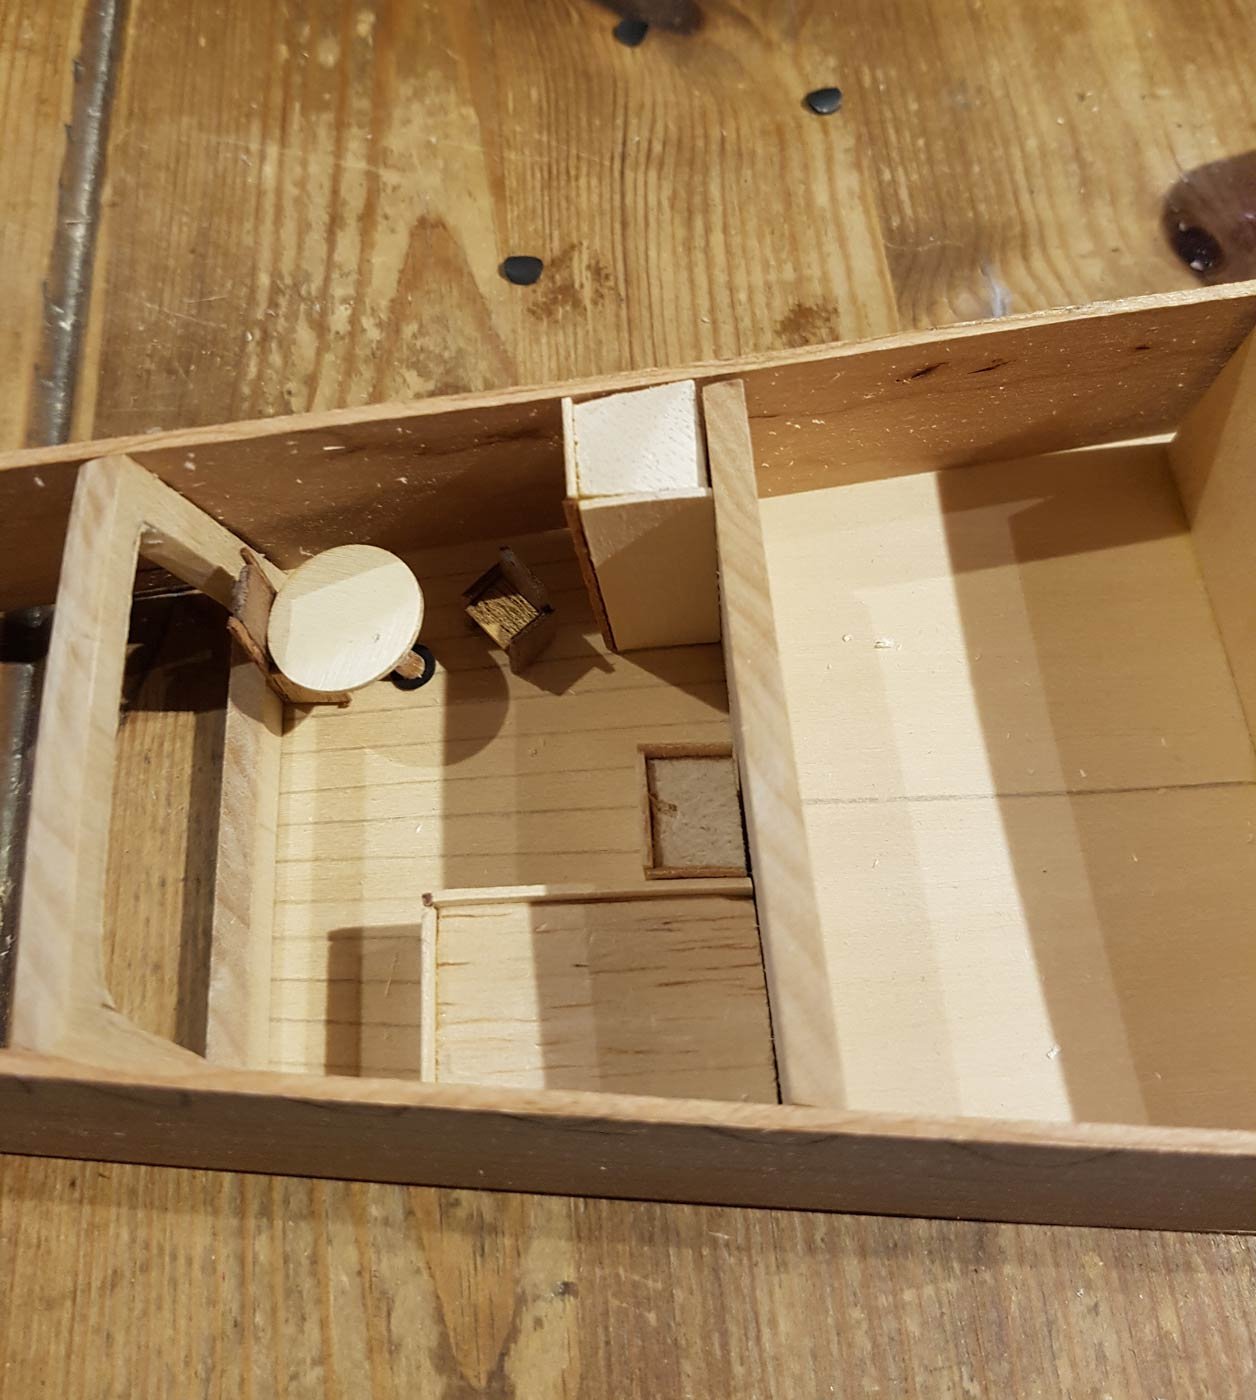
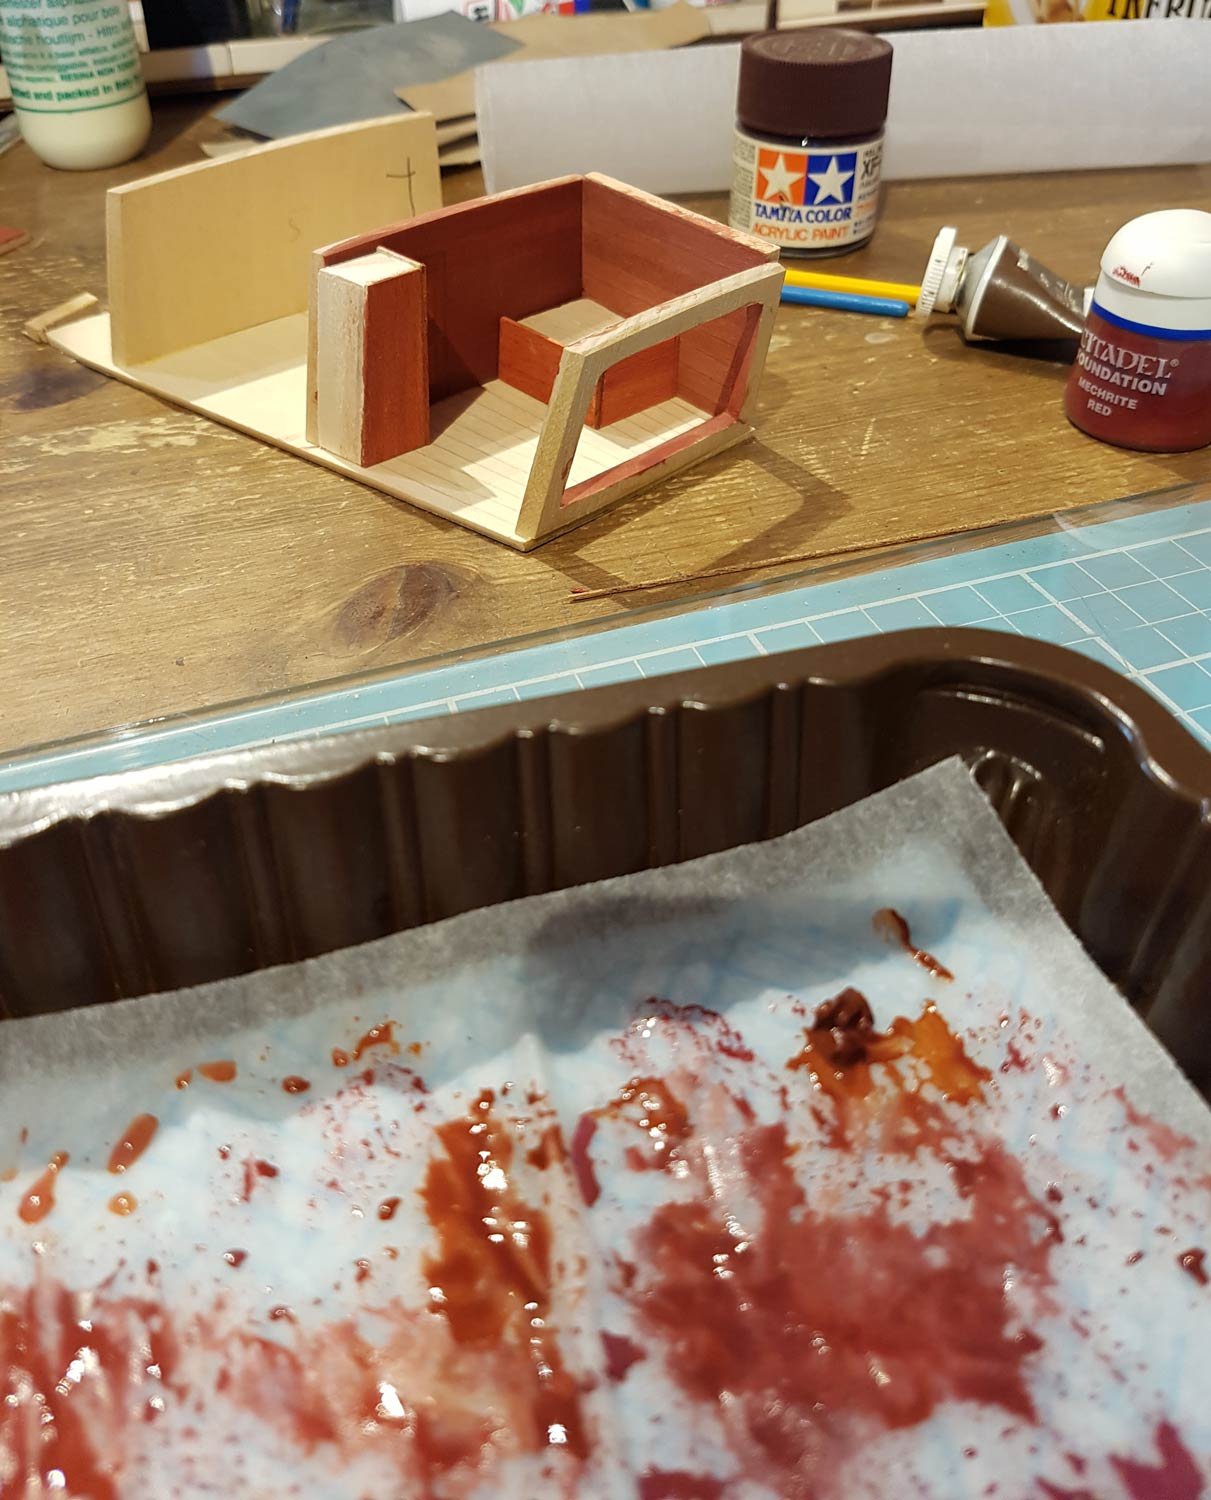
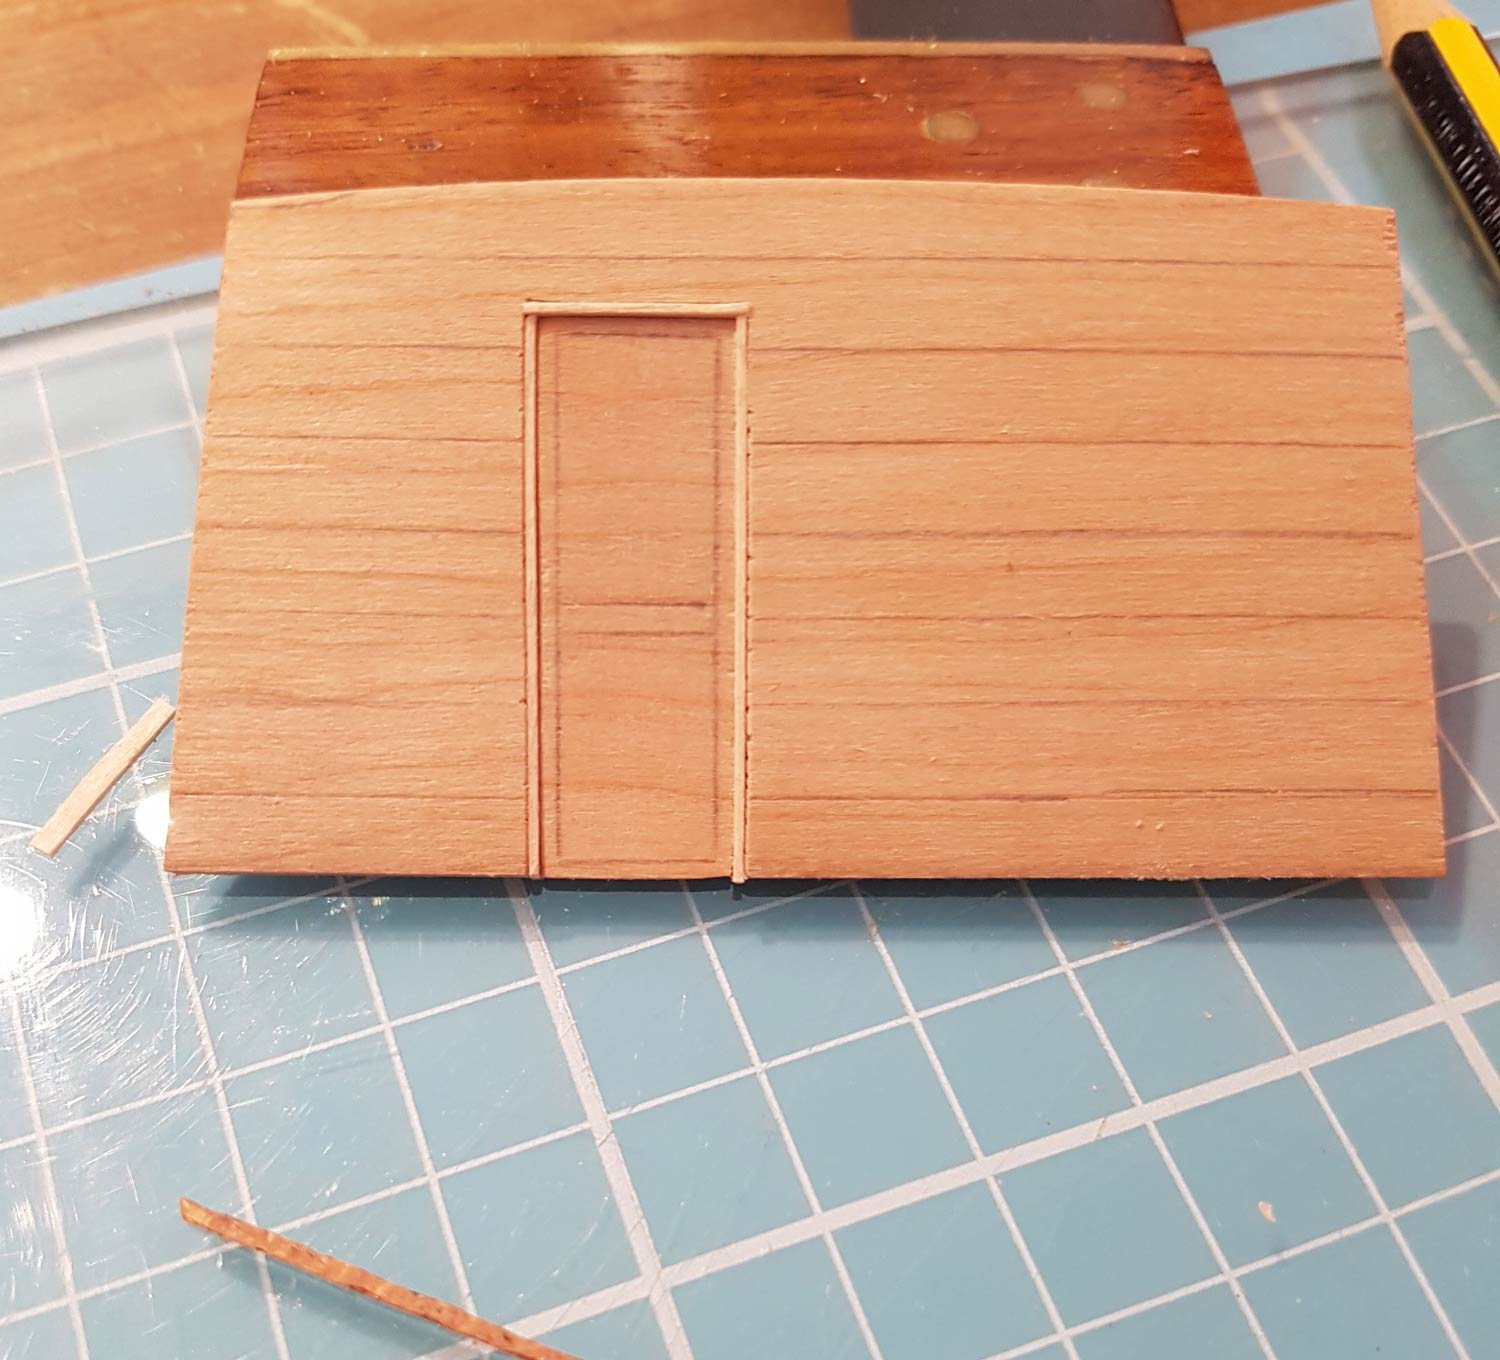
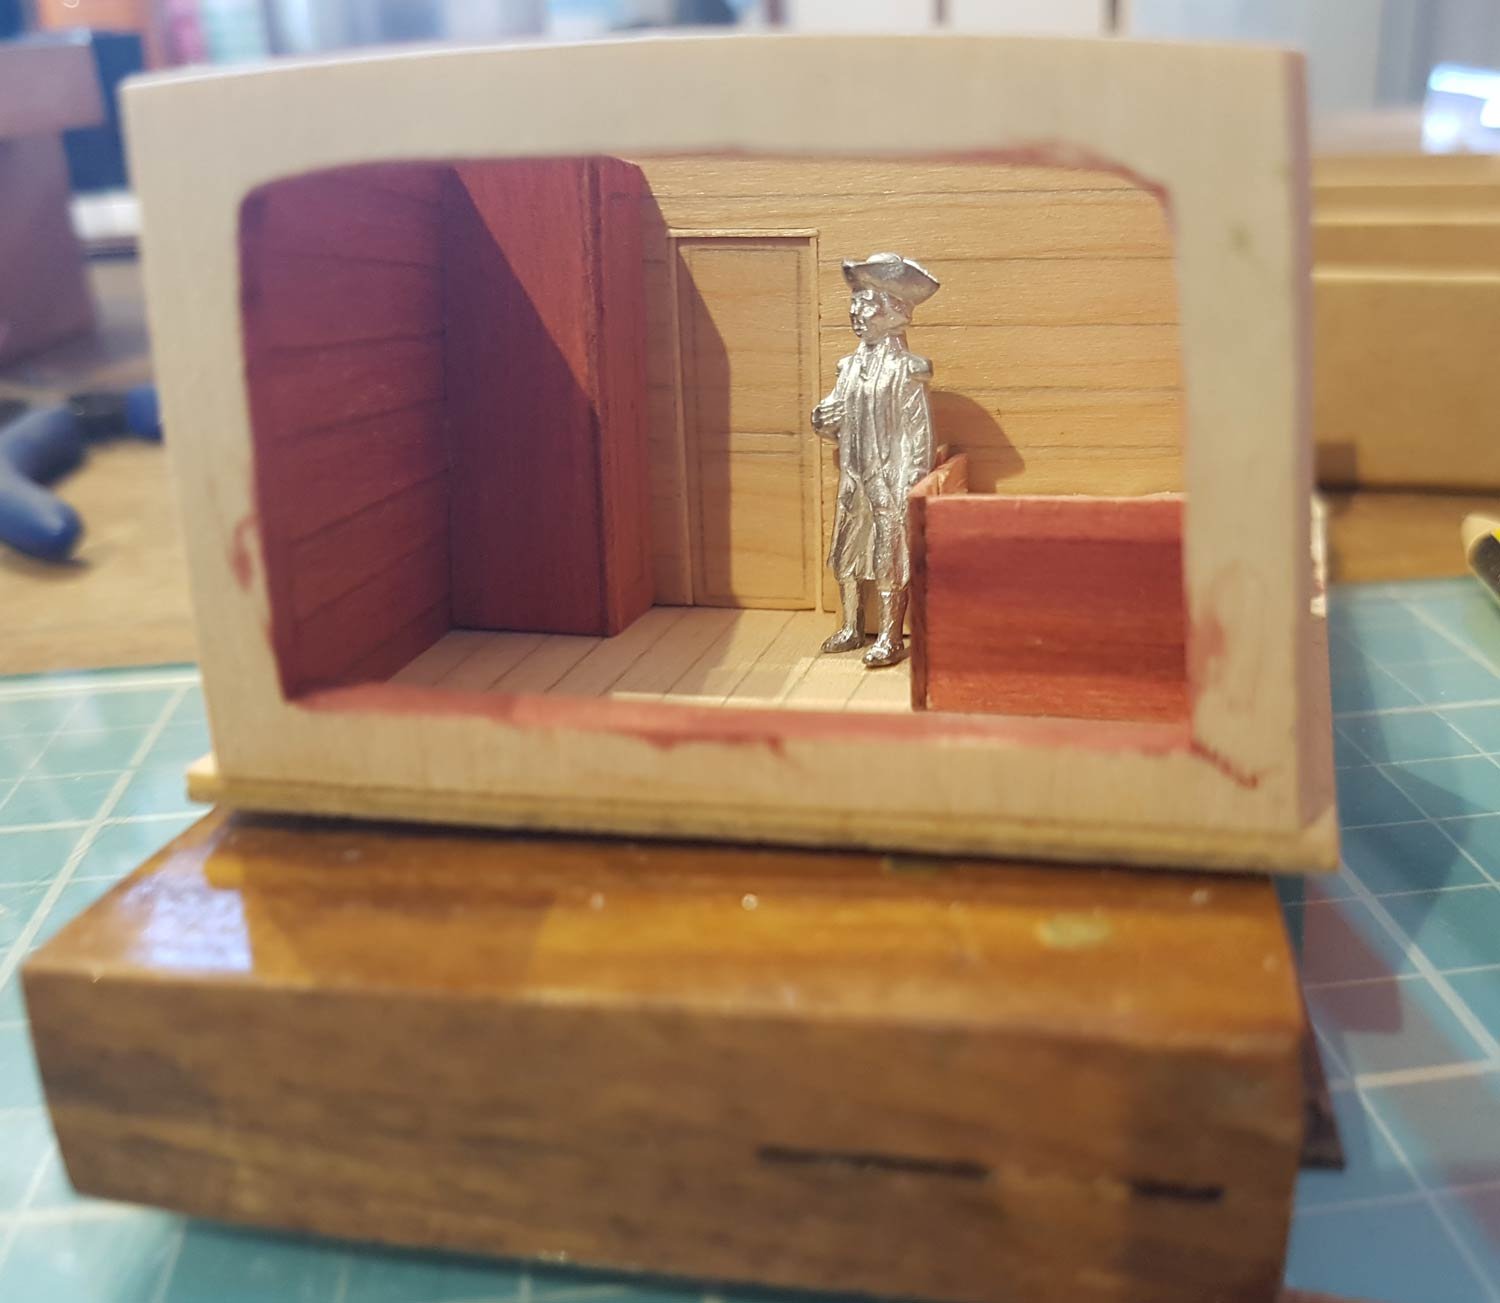
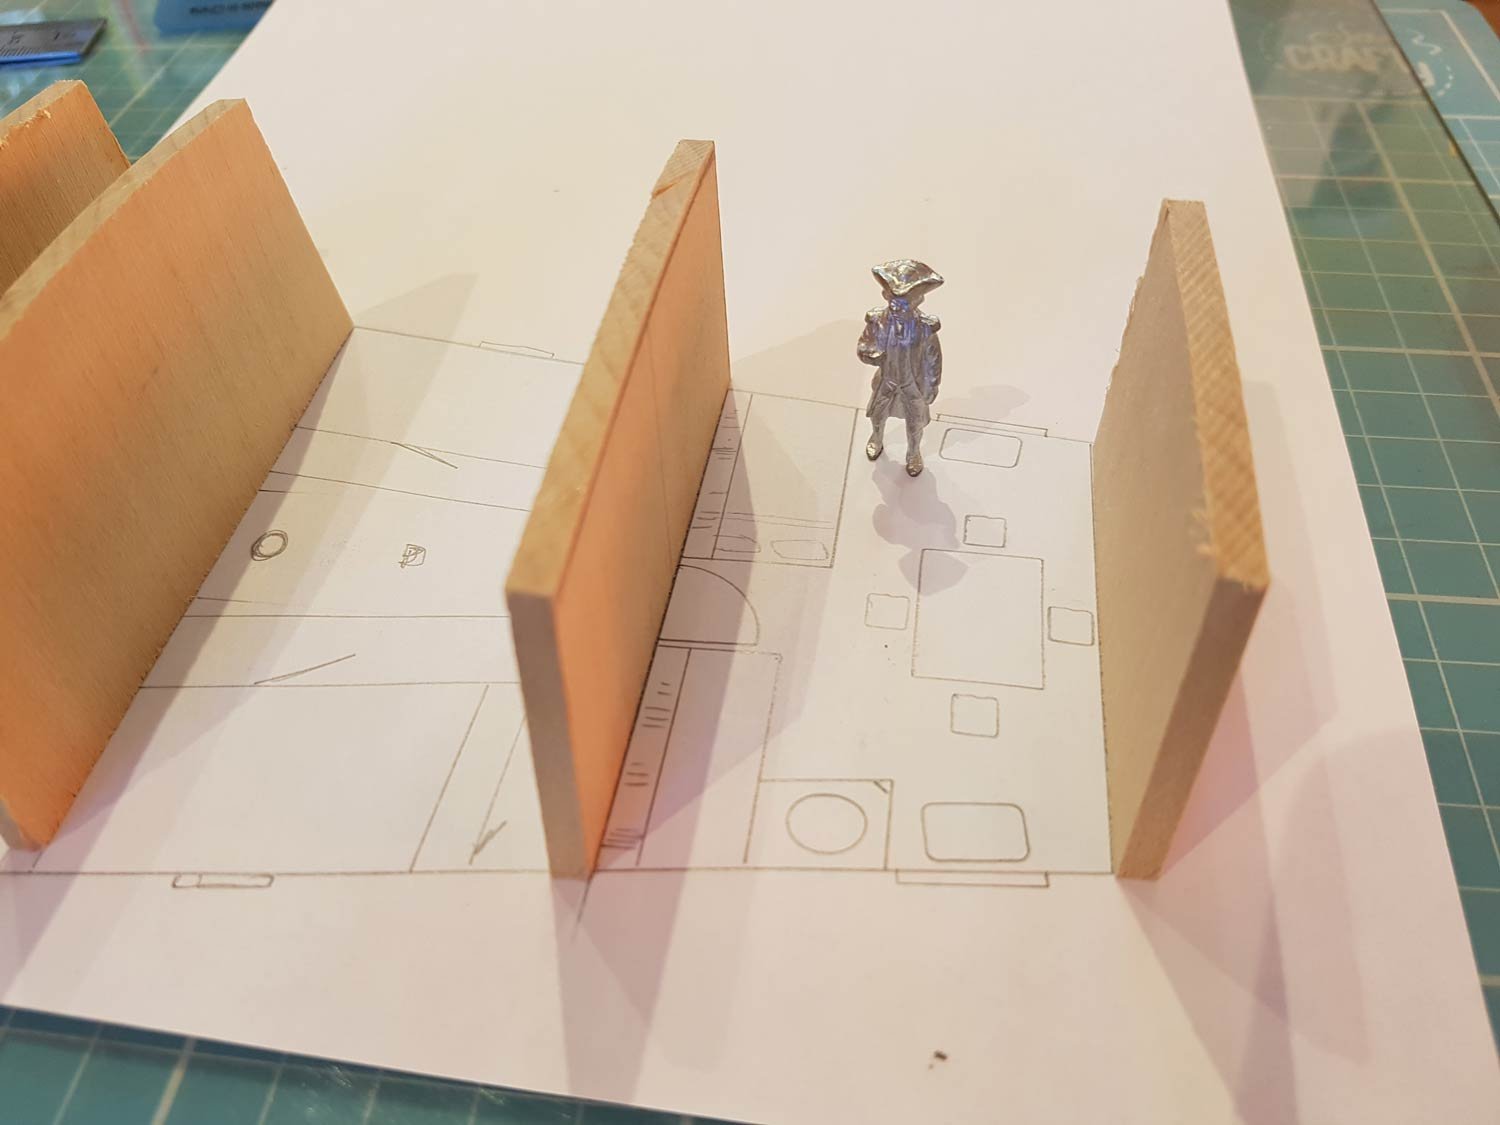
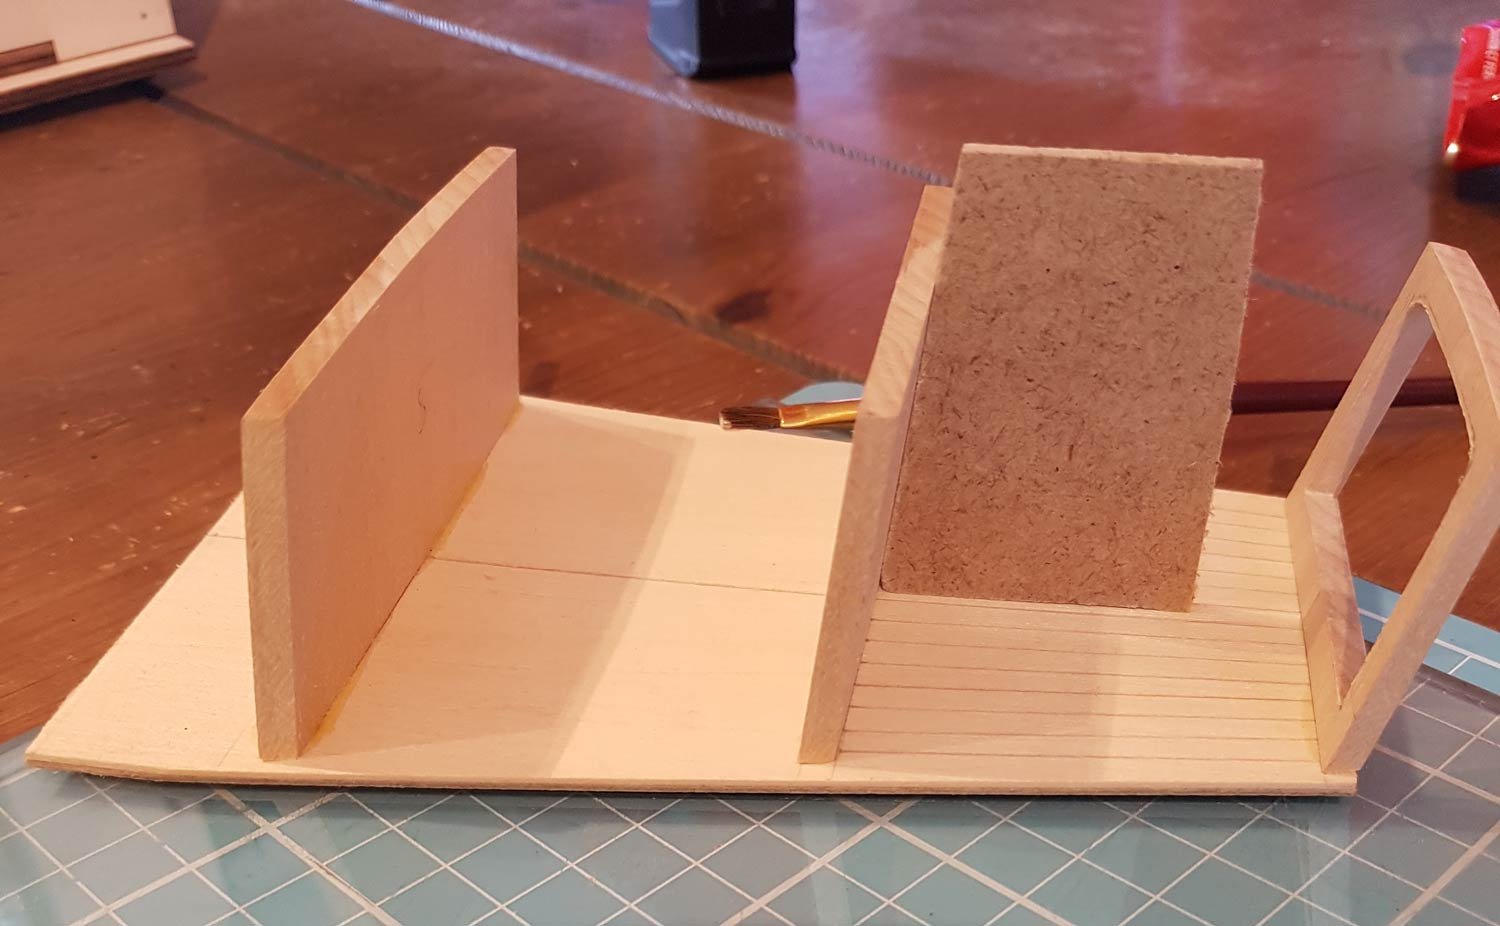
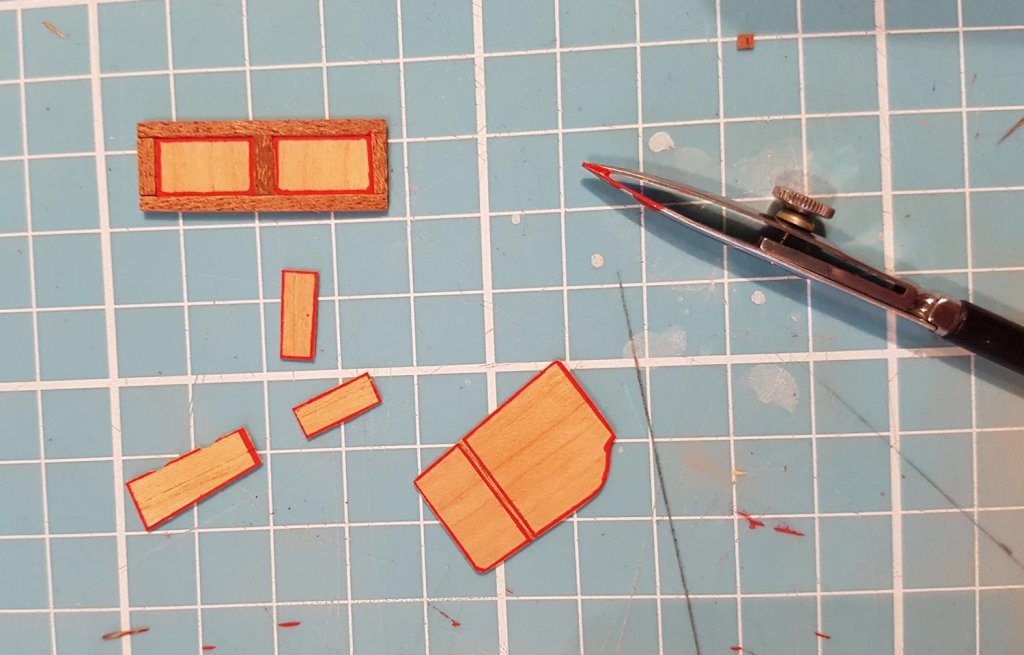
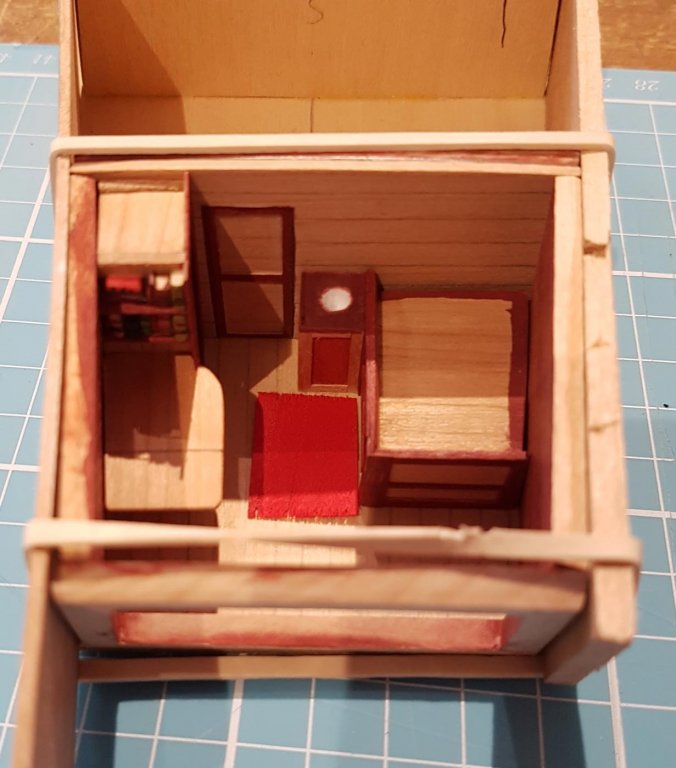
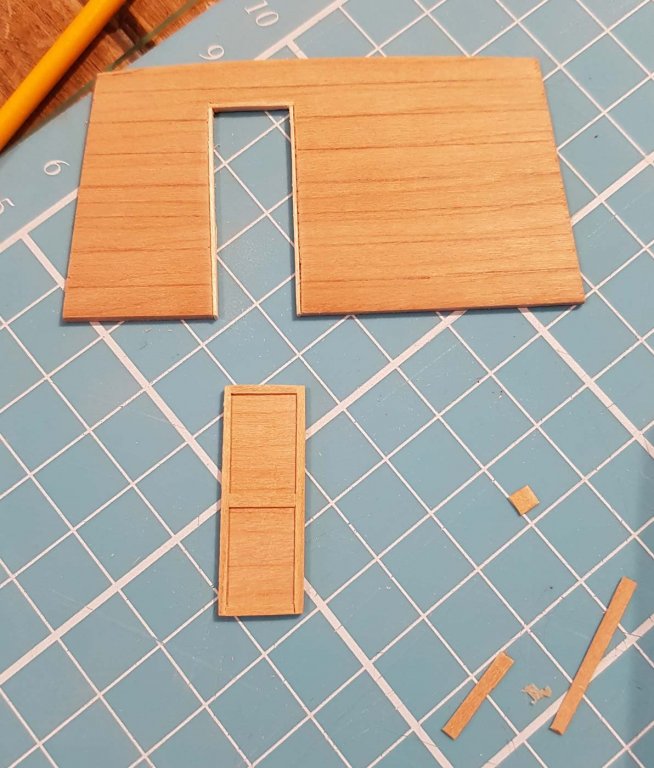
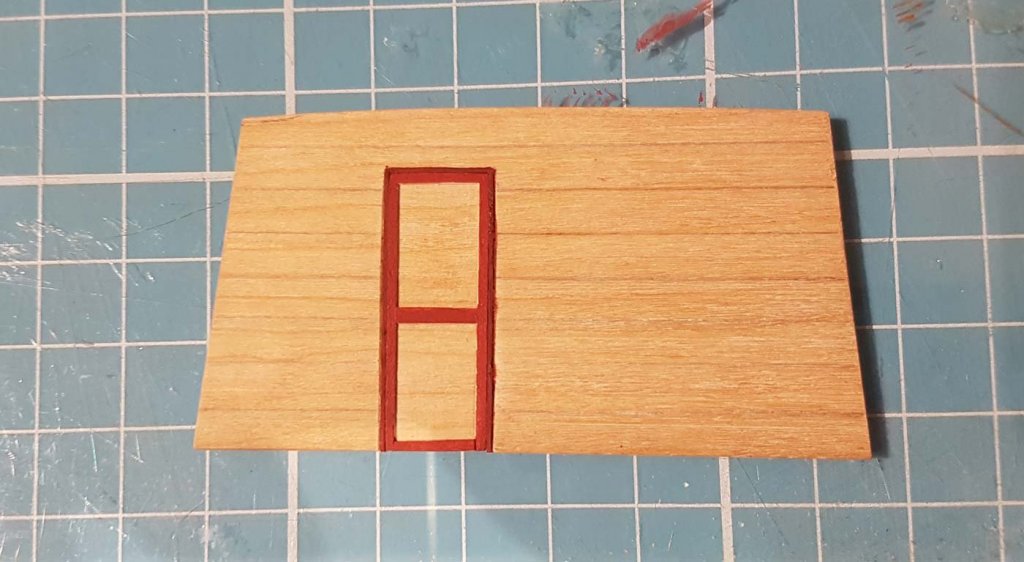
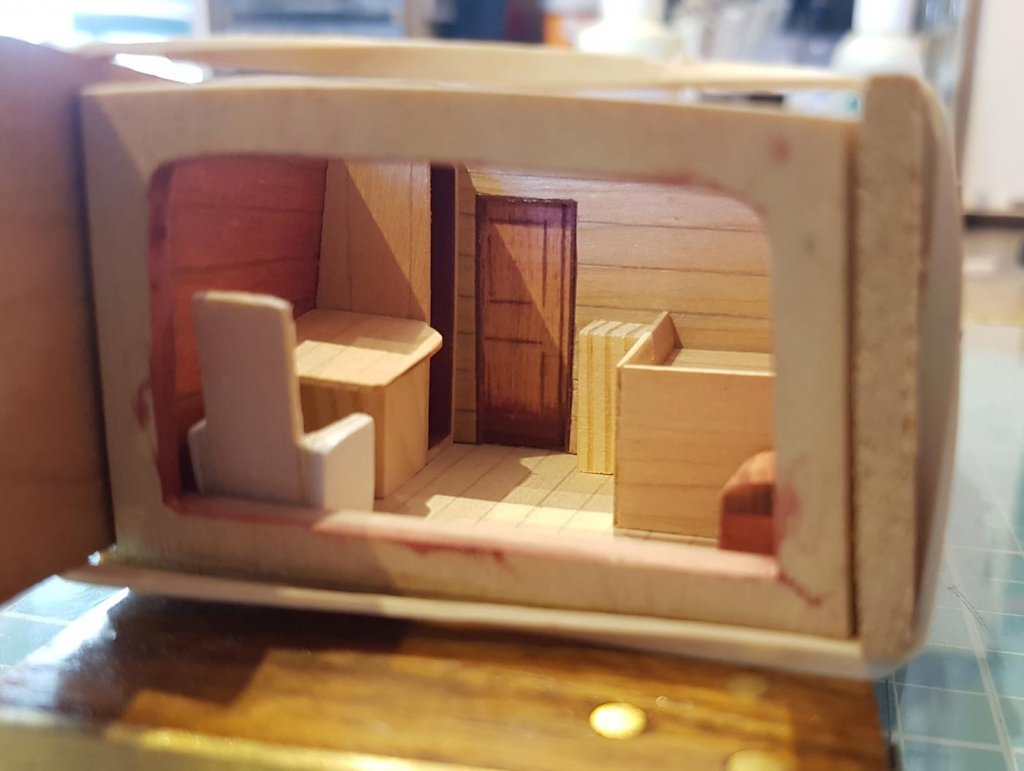
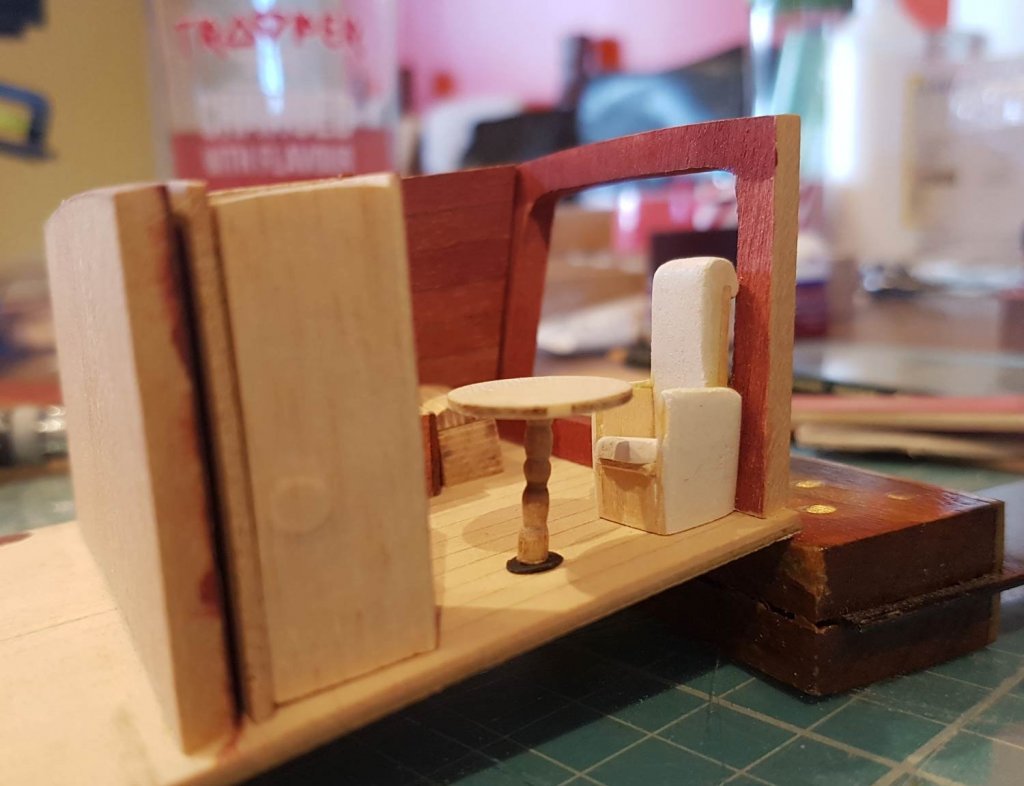
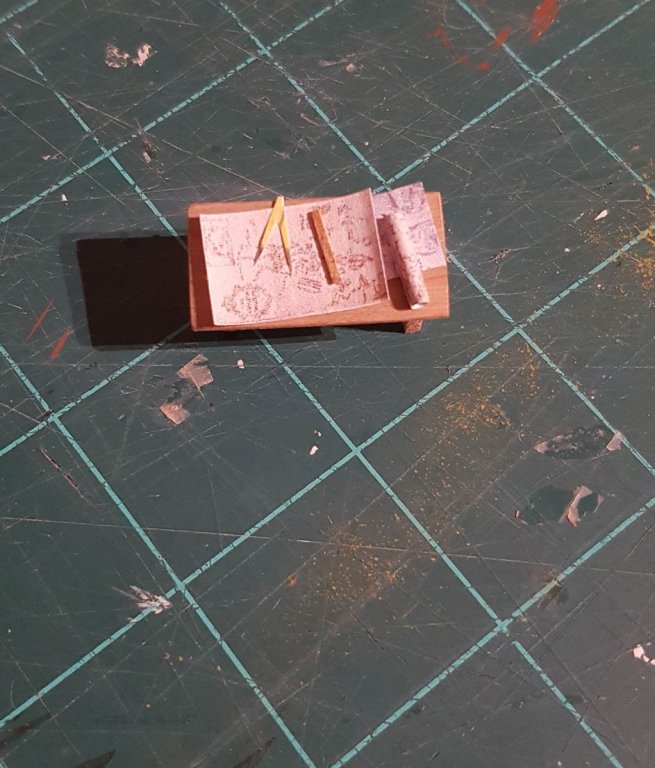
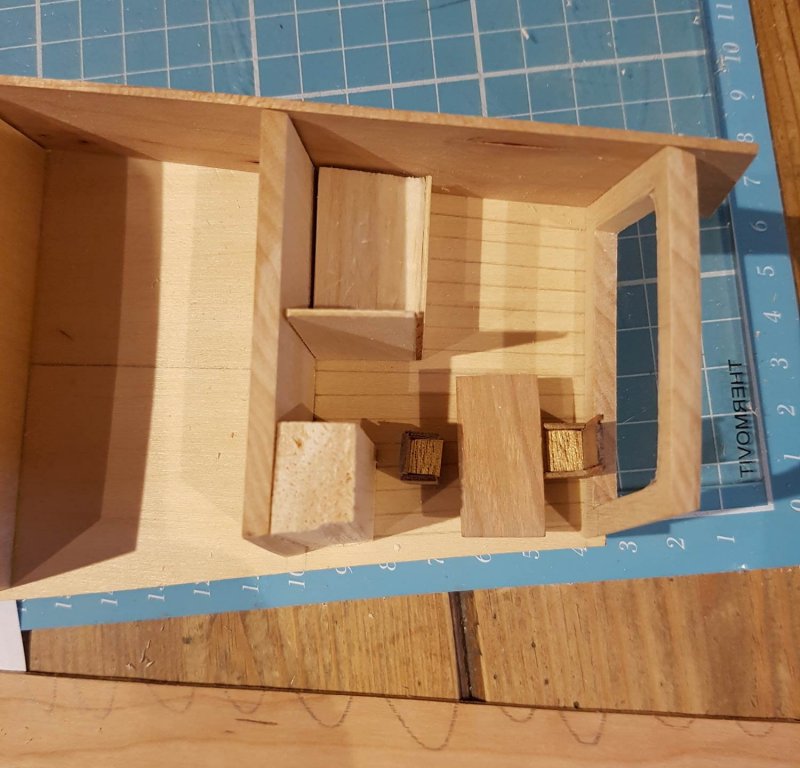
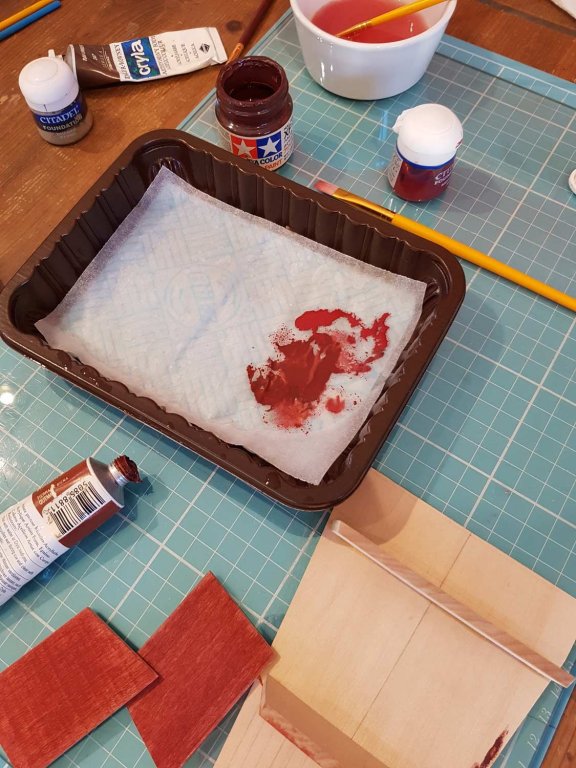
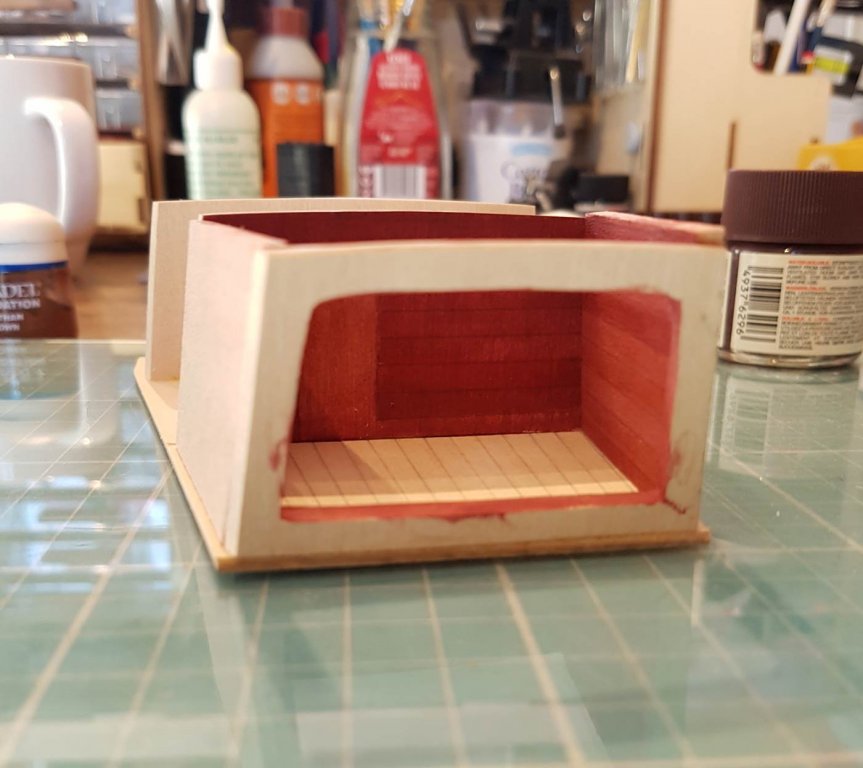
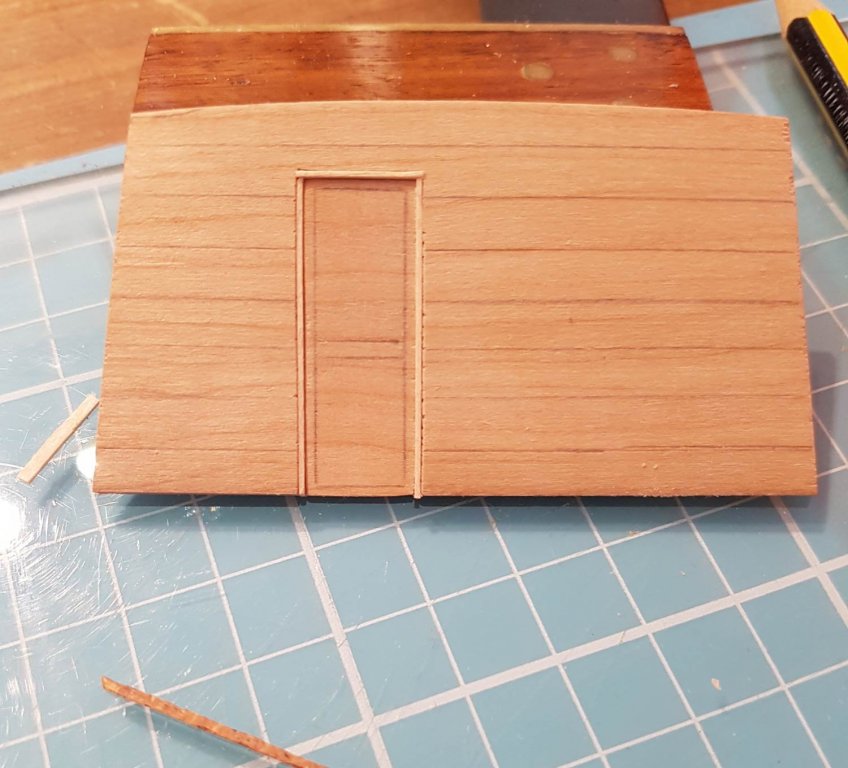
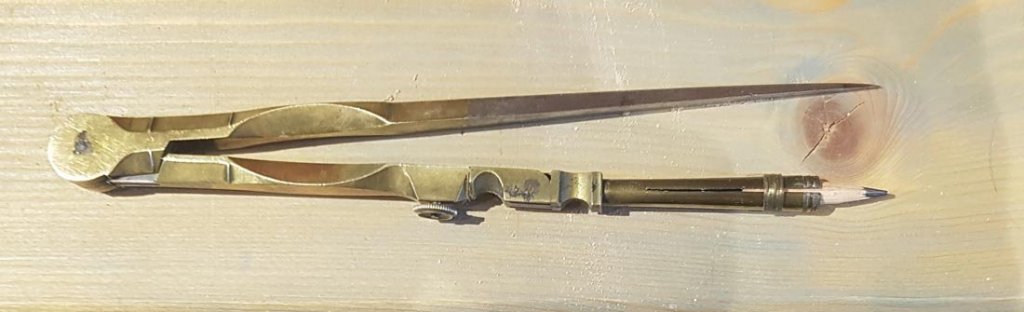
Cabin stuff……. The Captains cabin will have two windows on the stern and also a window on each side, so although here will not be any lighting inside, the inside will be visible to some degree. One thing I have taken from making the interior of other models id that whilst every detail, line or shade may not be exactly discernible to the observer, the fact that it is there gives an impression of realism and authenticity. First off was a table for Capn Kennit to peruse his charts. It was made from some scrap wood and the underside was sanded along the edges to make it appear thinner. I photo’d a map from the books, and suitably old map from the web (of Fowey in Cornwall), printed them out, rolled one up as a scroll, made a ruler out of wood and a pair of dividers out of paper (yes, they are BIG dividers!) I made a couple of chairs, and a mock up of the bunk (double of course, Kennit IS a pirate!) and wardrobe and placed them on the cabin space. Whilst I know that space on ship is at a premium, I thought that this was too cramped for the cabin of a rich Bingtown Trader (whom the ship was originally built for) so I changed the table to a smaller one and moved the orientation of the bunk I realised that the walls were too thin. I would need to either show the frames or make the walls thicker. I decided that, for the money that was being paid for this ship (in the books) that the walls would be planked or panelled. As I think I said at the beginning the ship would be well built but not ostentatious, so planking it is. At this point I decided to paint the interior. I decided that the cabin would be resplendent in mahogany so I set about getting a nice reddish brown. I used Tamiya Hull Red, Cryla artists Burnt Sienna acrylic, and Citadel’s Mechrite Red and Blood Red. I used a wet palette and mixed the colours willy-nilly. The wet palette keeps the acrylics from drying out and allows me to constantly apply different shades and thickness of paint. This eliminates having everything just one colour, and as I said, adds to the realism. I wasn’t happy with how I had painted the door in the cabin so I tried to improve it with some pencil colours. It didn’t work. So I made a new wall and door which will be stuck to the b/h. The door itself was cut out of the wall, and then sanded thin to give the impression of depth. A tiny thin strip (maple?) was placed around the door to give the impression of a frame - because of the rise of the deck the door would open outwards. Captain Kennit at last approves, although I still have to paint the wall/door a mahogany colour. Thanks for looking and if you have any criticism or ideas, please keep ‘em coming. Cheers Paul


-
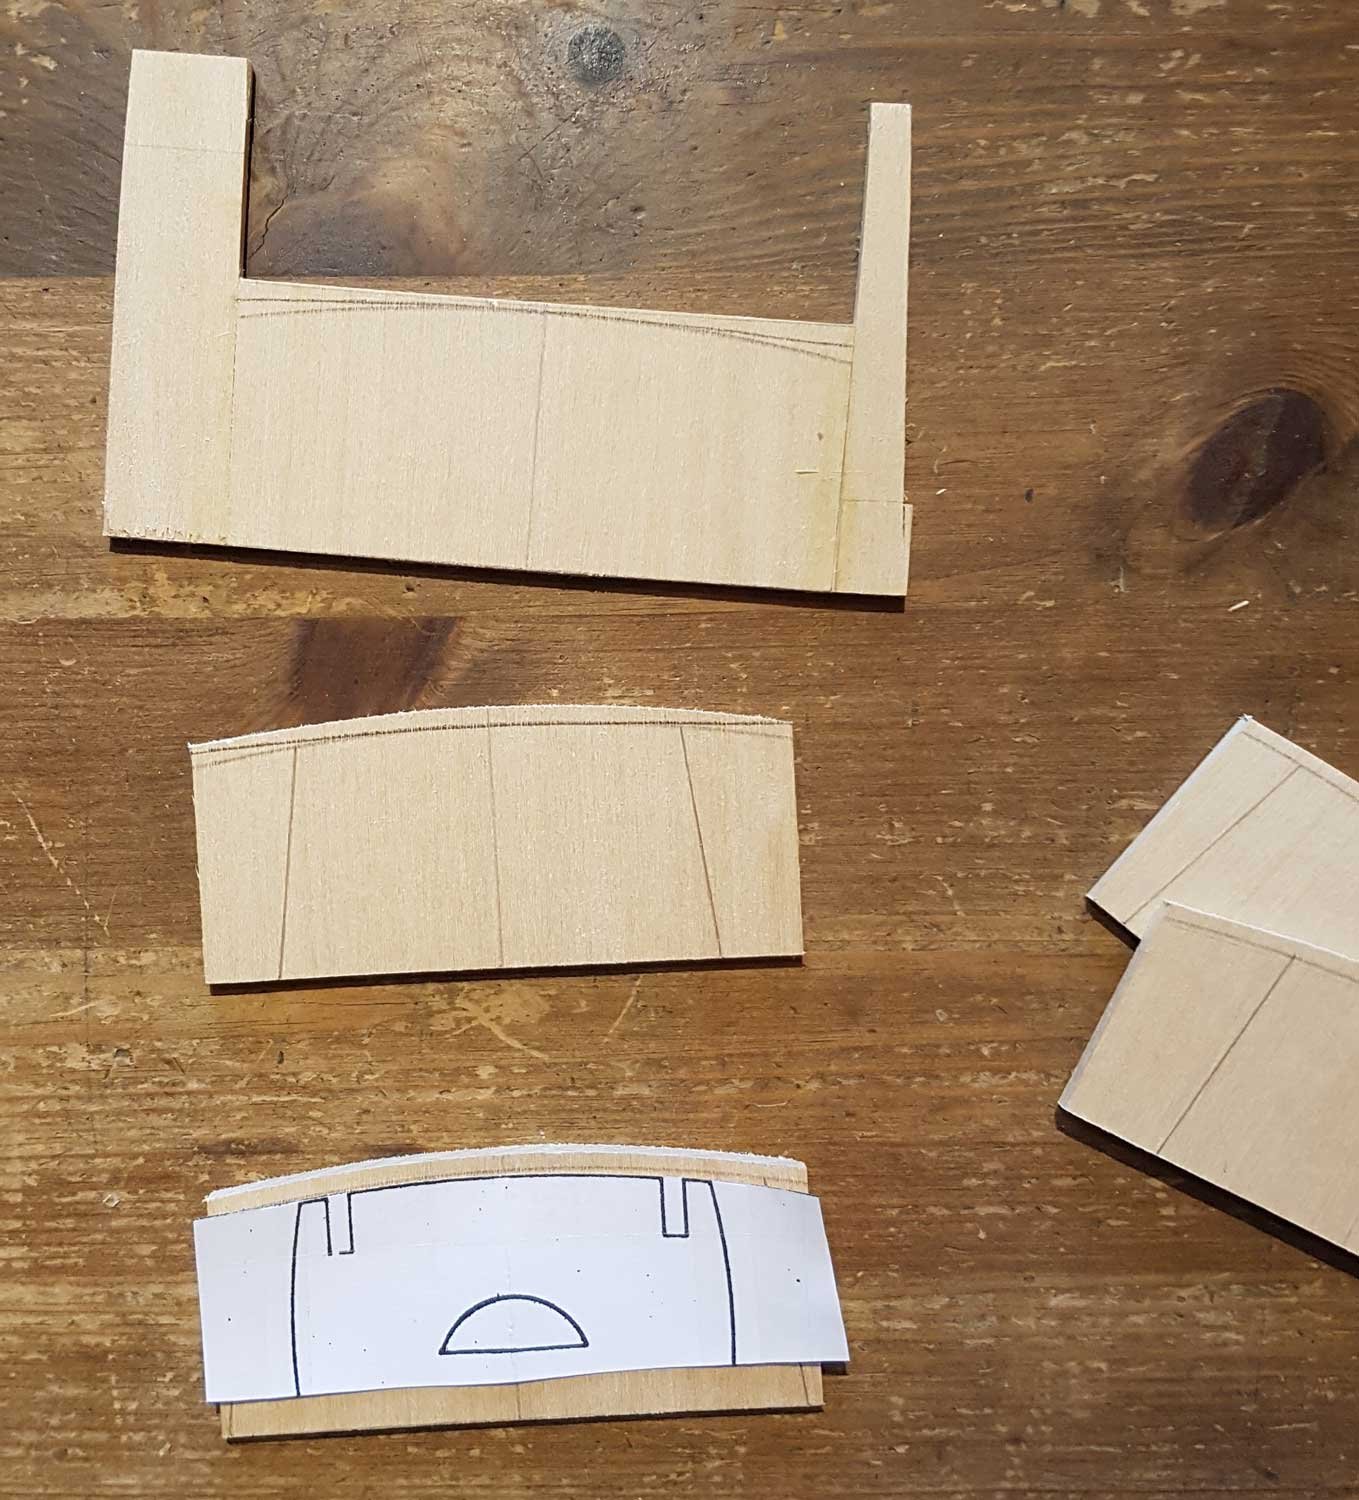
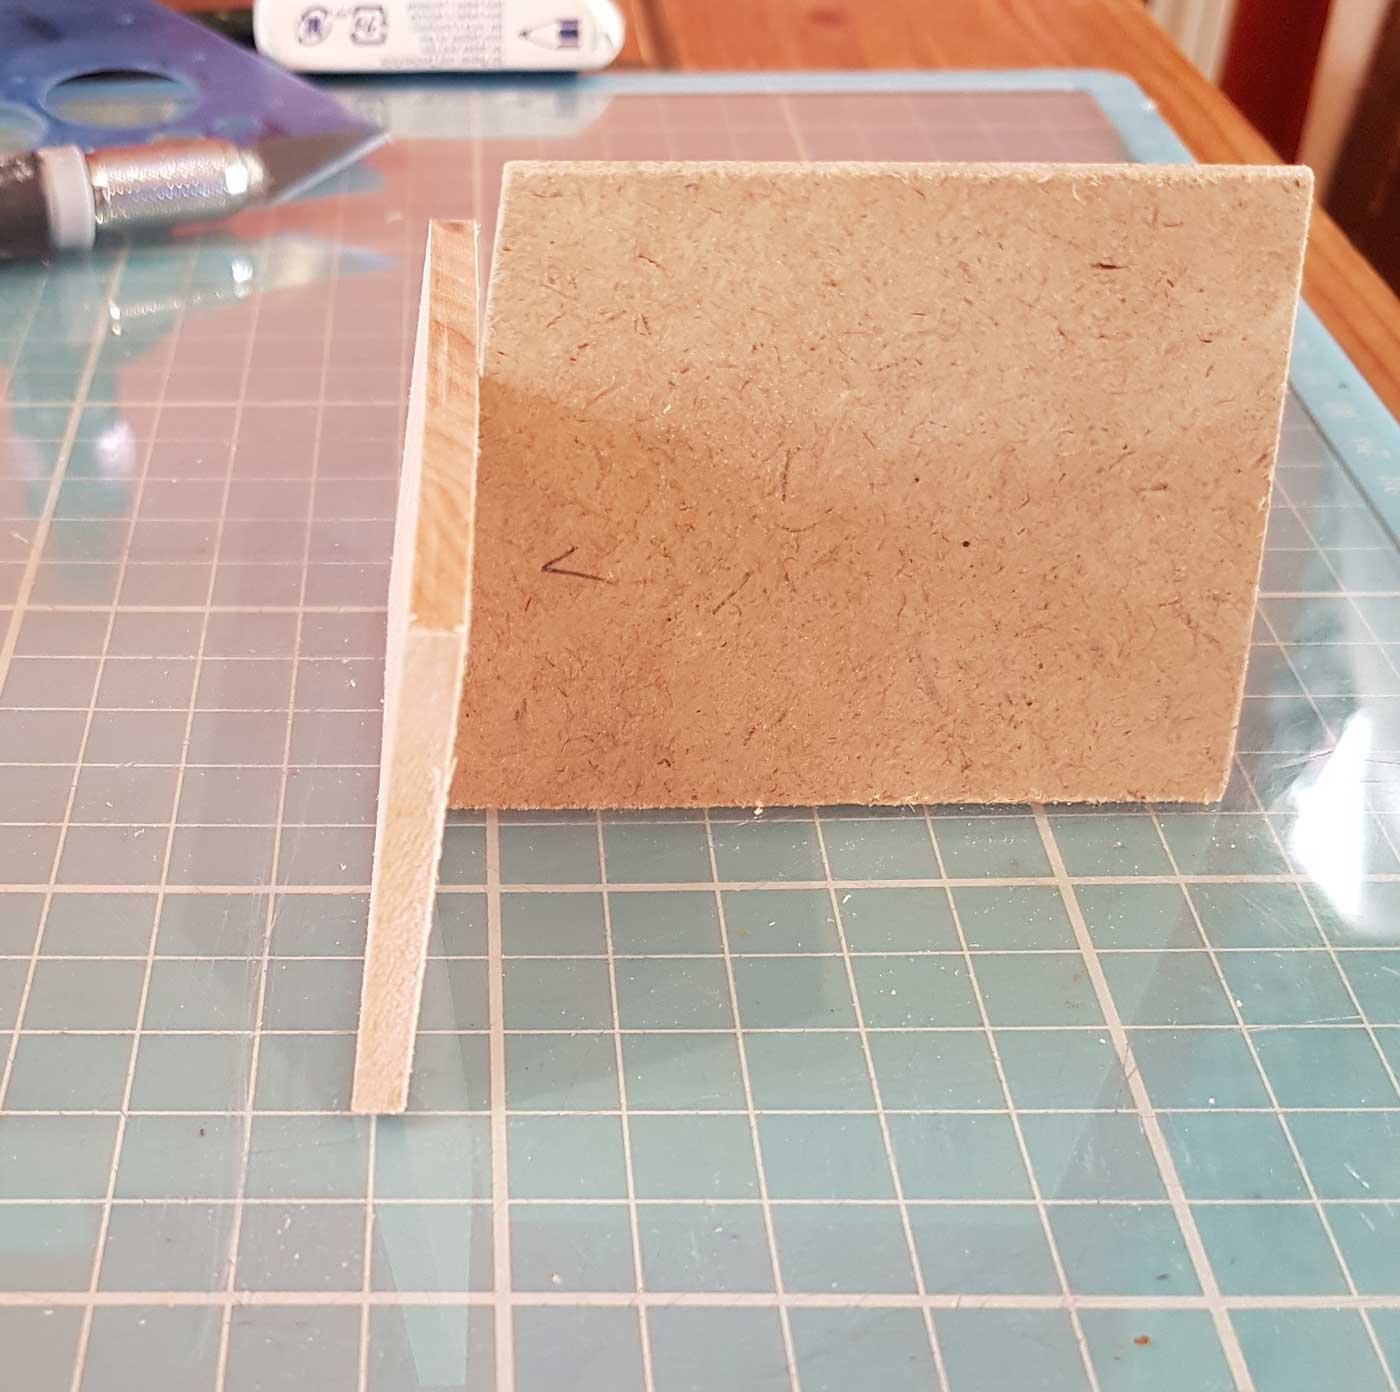
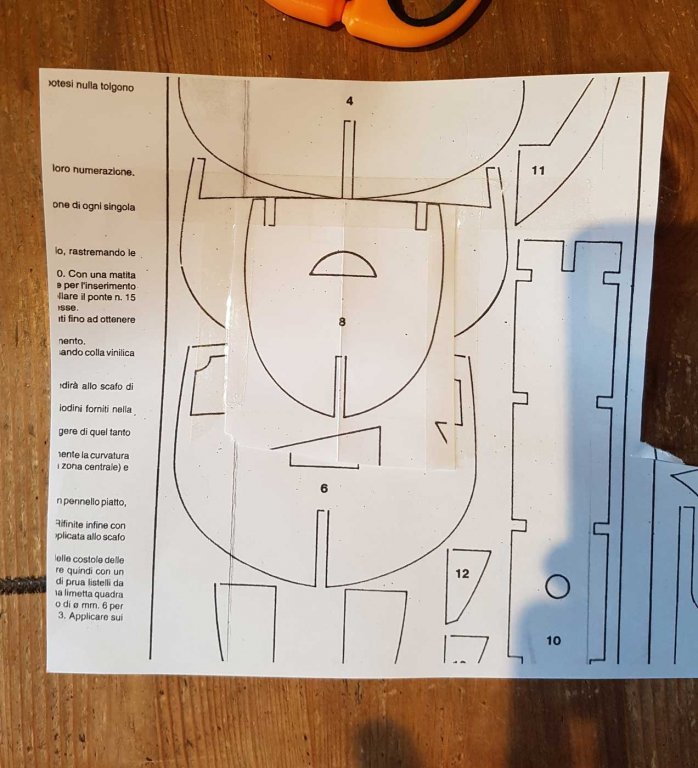
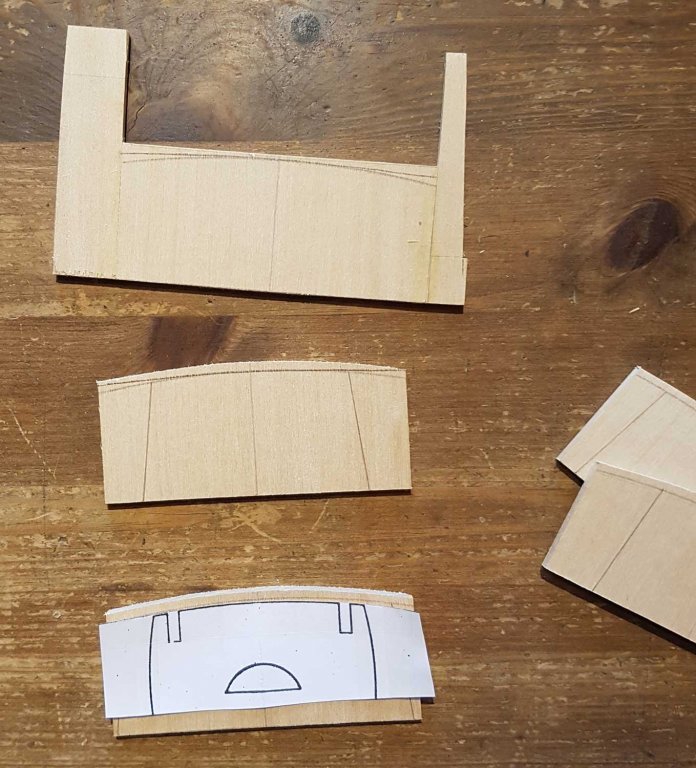
With this build it has been another week of a lot of time in the shipyard but not a lot to show for it. I have redone several things over again this week to achieve the look I am after. I’ll say it again, having the plans only in my head means a lot of stopping and thinking…… So I said previously that I wasn’t happy with the camber of the aftercastle deck and I wracked my limited brains trying to figure out how to achieve the correct camber. I didn’t want to use the jig I had made previously as it just didn’t look symmetrical. Eventually I realised that I had the correct camber on the plans. These were duly photocopied and stuck together because there was no central portion to the bigger bulkheads; And then cut out and the aftercastle b/h’s marked. I then used my dremel sanding machine thingy. Not the most professional set-up but it allowed me to get the correct angle on all the sides. I made a 6 degree jig which came in handy….. It’s important to concentrate and not get carried away…… Test fitting b/h no2, The reason all this took so long is that everything is at angle; The deck rises towards the stern at an angle of 6 degrees. The side walls close from bottom to top at an angle of 6 degrees. The side walls close from fore to aft at an angle of 8 degrees. After I remade the sternmost b/h, I cut out the centre to accommodate the windows. This will be covered with a board which will be planked. The sides of the b/h will represent the frames, the top represents the beam and the bottom will be seating/lockers. All may become clear……. Before I had completed the b/h’s I had drawn a plan of the captains cabin. Captain Kennit is unsure……. The cabins forward of the captains cabin will not be detailed as there will only be one small window in each. For the deck I laminated a 1mm sheet of lime to a 1mm sheet of walnut. Both needed the grain to run fore/aft so I did get a bit of an athwarts curve even after weighting the deck down whilst the glue dried. However this curve disappeared when the bulkheads were glued to the deck. I also drew some deck planking in the cabin with a pencil. Up next, making some cabin stuff…… …… and remaking some cabin stuff……


-
Thanks for the tips guys. Peter, unfortunately ammonia is a no-go; the last time I had the stuff in the house was 10 years ago when I seeded my fish tank - the Admiral swore never again! Mark, I love the jig. I am going to need two jigs for the planking as I will need to edge bend as well as the "hull" bend, so one jig will have to have a vertical element to it to accommodate for the bend from the first jig..... I may have to use blocks of shaped wood rather than pins, thoughts are swimming round...….. Luckily I am weeks away from any planking...….🤔
-
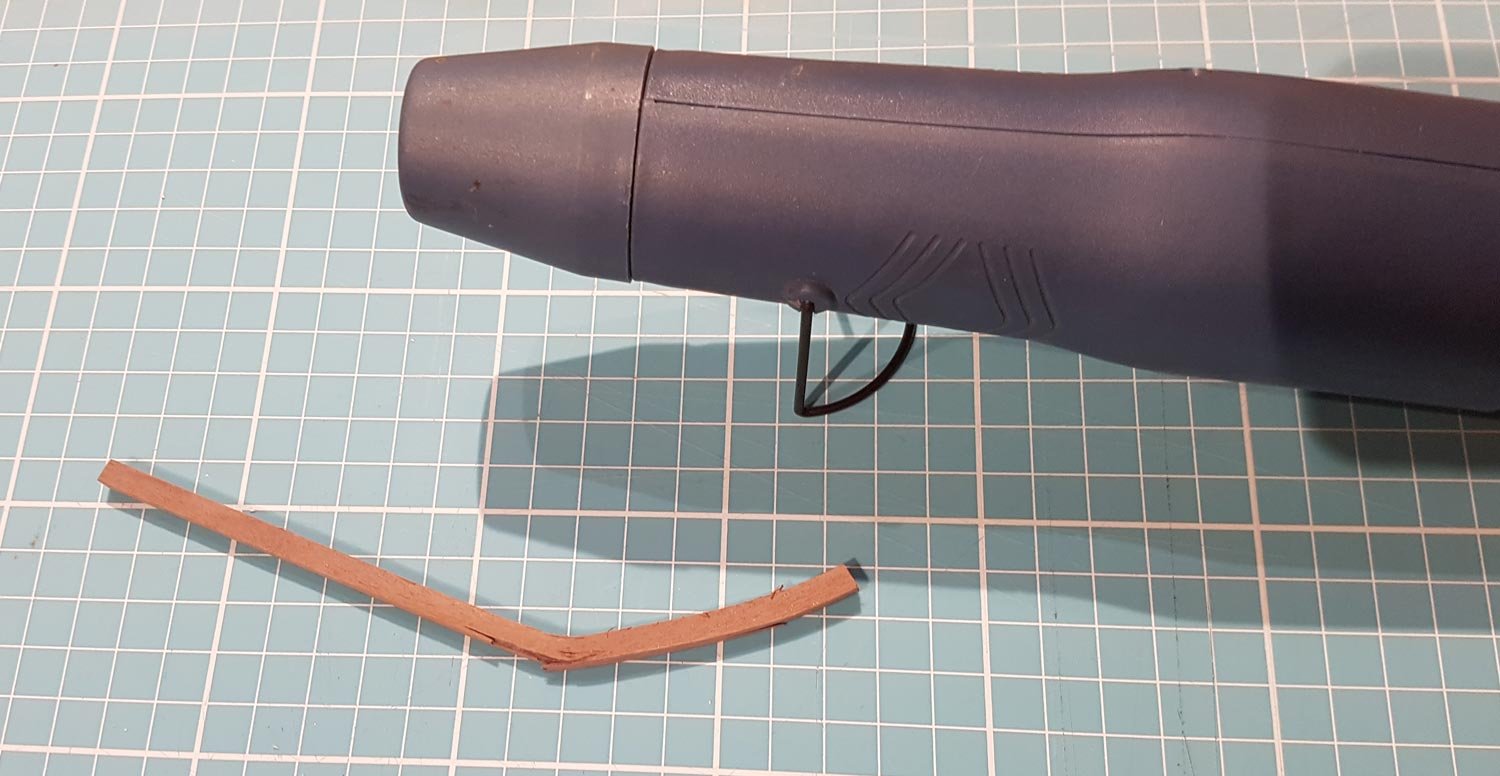
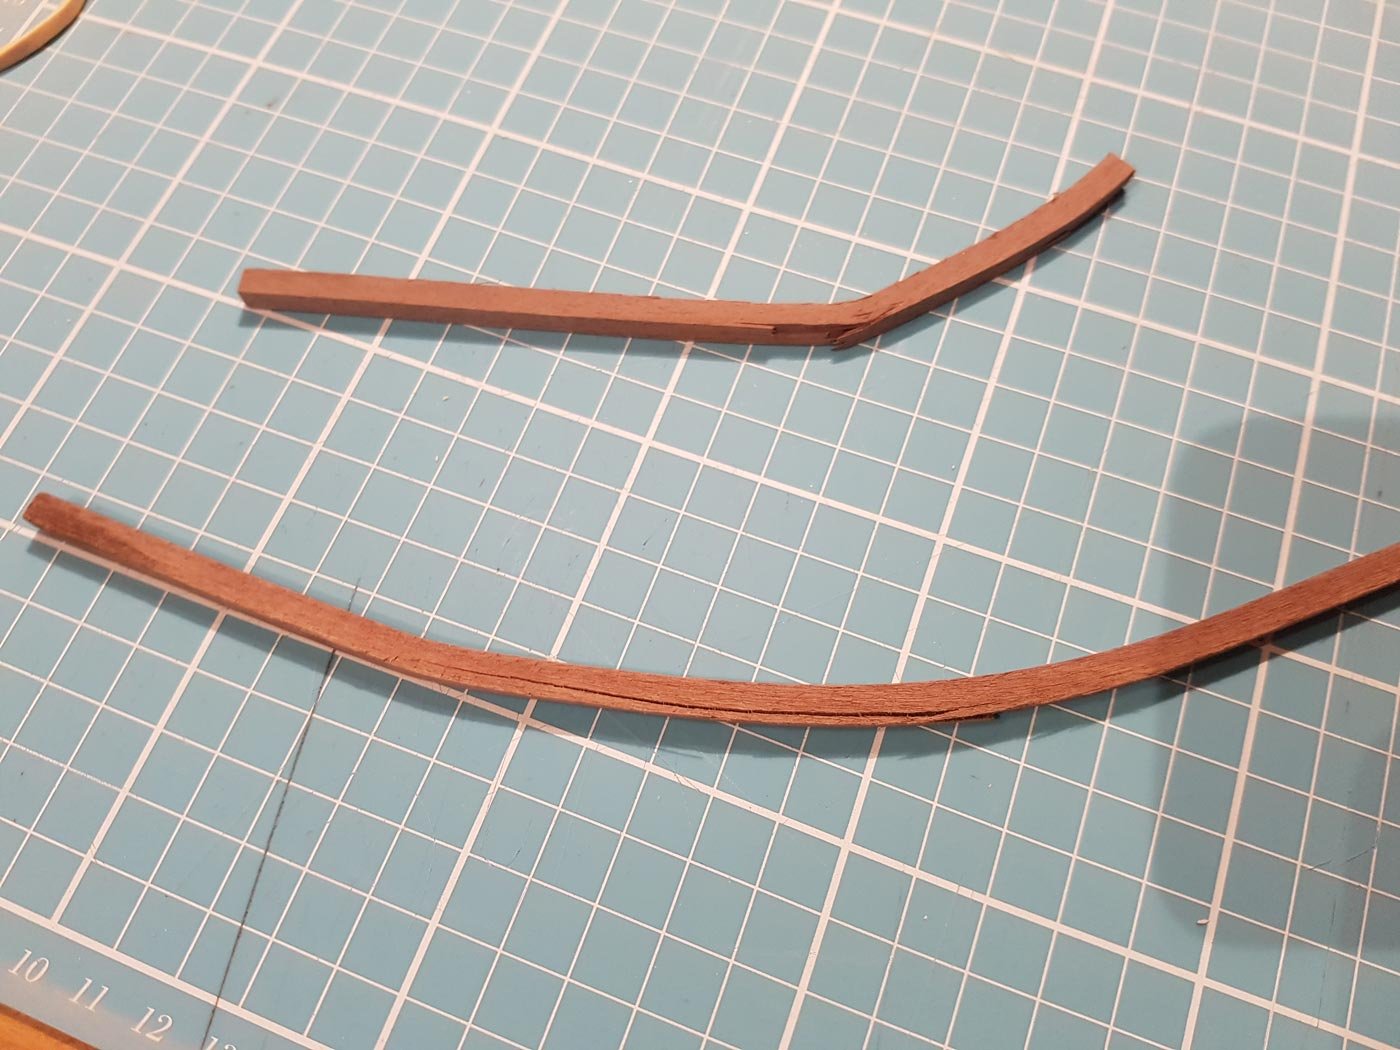
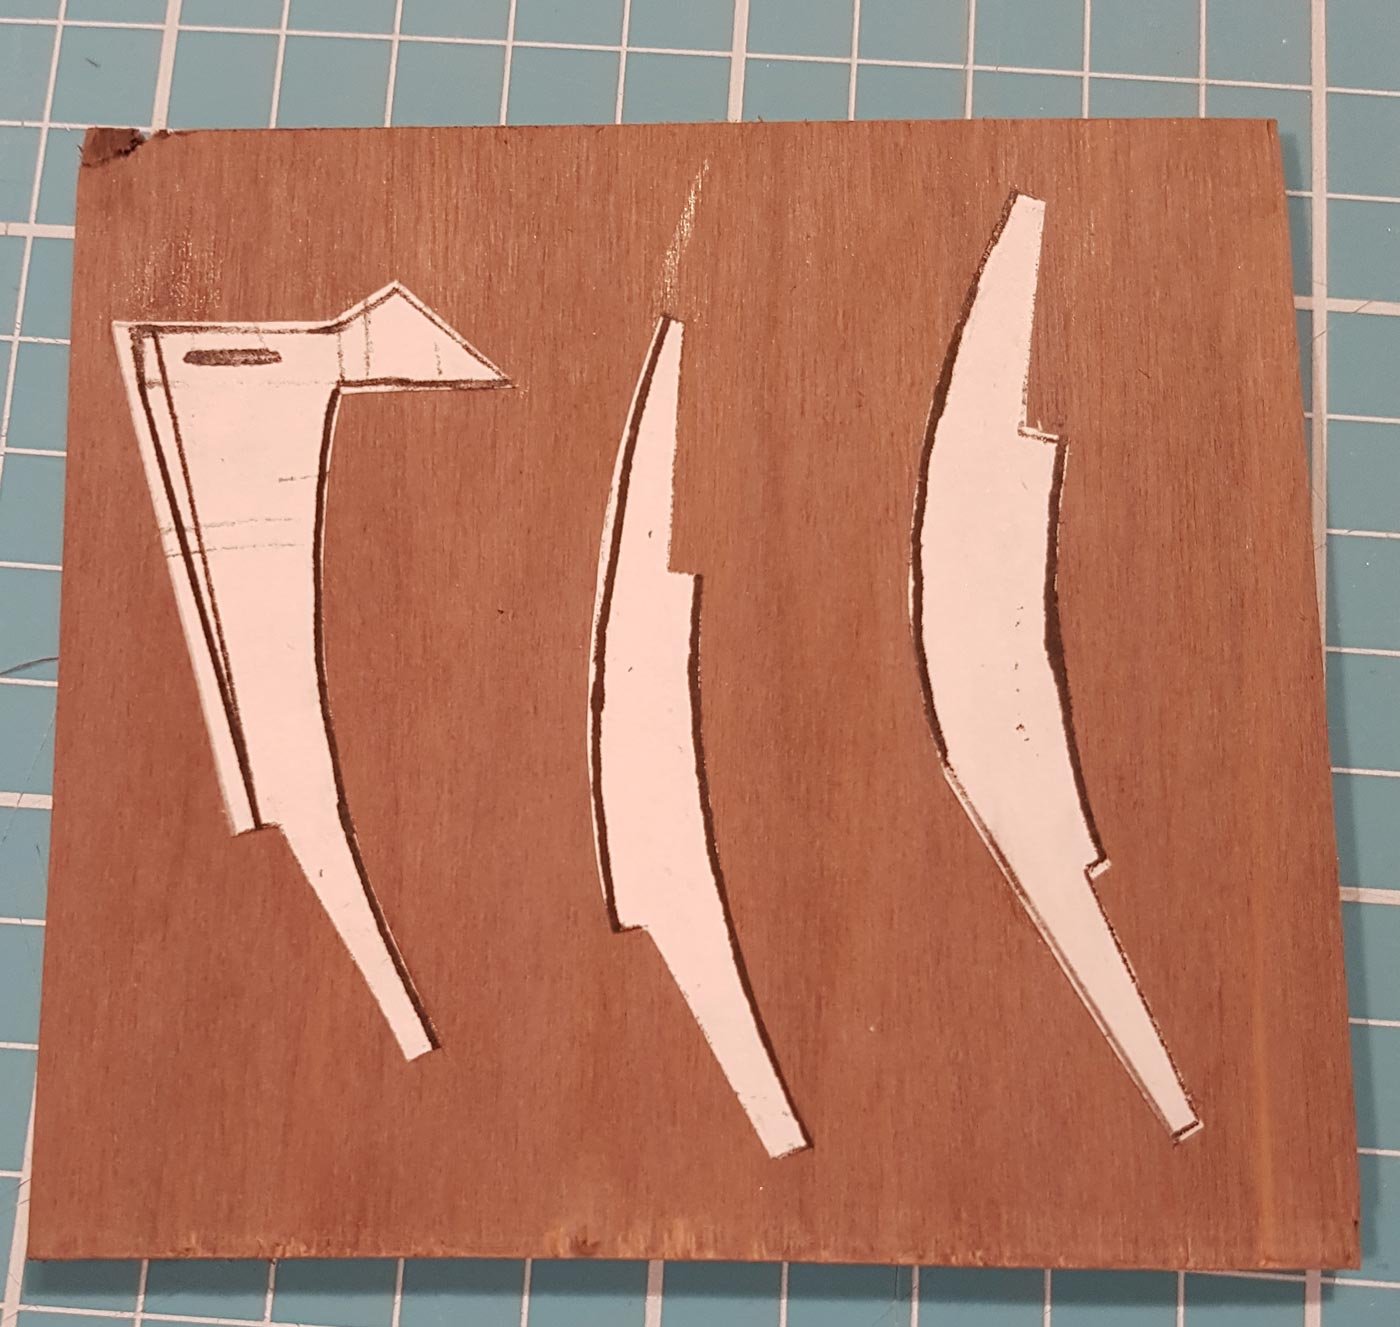
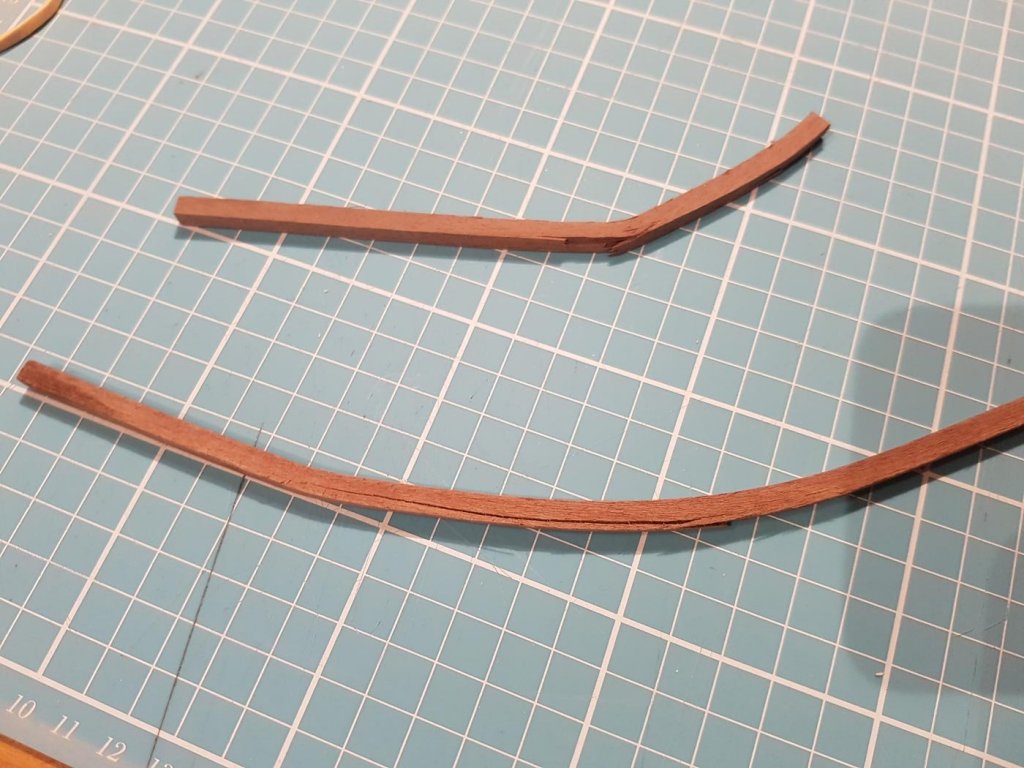
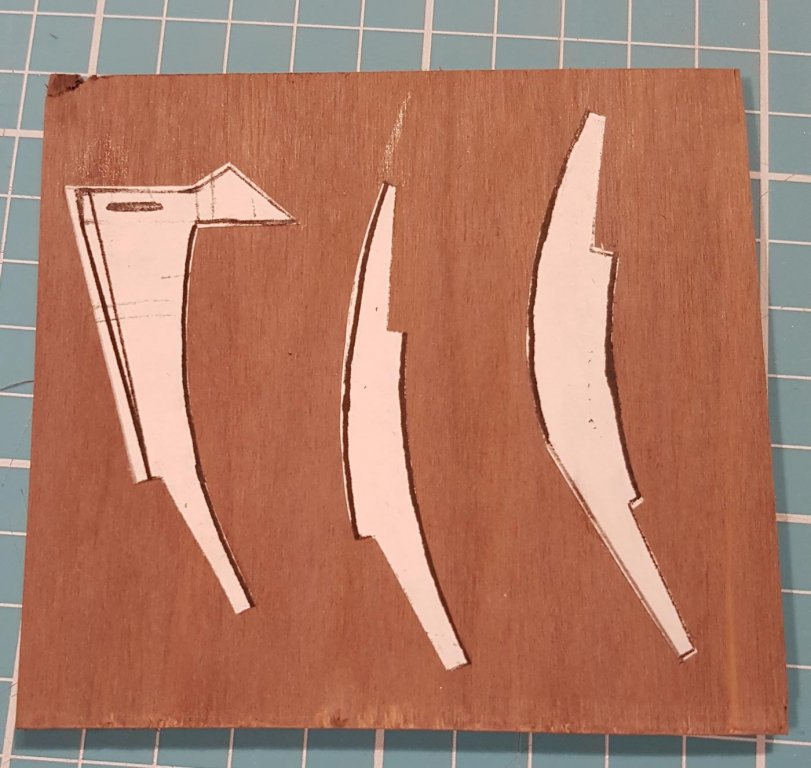
Thanks for the kind comments everyone, they are much appreciated. I have come to realise this build is far more involved and difficult than I first imagined. I really wish that I had some properly drawn plans, bulkheads etc. I keep having to stop building and rethink and replan, I imagined I would be planking by now but realistically its probably months away! Having said that I am having loads of fun and really enjoying this build, even if it is two steps forward, stop, think, two steps back and think again. For example; the keel...... I had a delivery of wood last week mostly walnut with some dibetou (African walnut) - the wood is darker than in the photo. So I decided to try plan B with the keel. I thought that it might be possible to bend the 5mm strip to form the stem. Firstly using a heat gun. It went well to start off, and then..... So I tried soaking it for a while and then wrapped it in kitchen roll and nuked it. Again it started off well, I got further than the first try and then...…. So I returned to plan A. I cut out the stem pieces from the plan I had drawn and stuck them onto a piece of 5mm thick walnut. Hence the need for the sanding thingy! I have roughly drawn the shapes to allow for adjustment to fit on the ship. With this build it is a case of building "to what is in front of you" rather than building to a plan. I am going to work on the aftercastle for now, the size of the windows on the stern and the sides mean that you will probably be able to see into the Captains cabin...….. Till next time, Cheers n have fun!


-
Yes the gamble definitely paid off. It adds that little bit of detail that makes models pop out from the crowd. I am so nicking this idea!
- 236 replies
-
- 1
-

-
- artesania latina
- kitbashing
- (and 2 more)
-
As expected, amazing work Sir! I am going to take a lot of tips from this build to use on my own build. I especially like how you made/attached the channels (Rusten). I have always shied away from having pins showing on the hull, but you are changing my mind, they look great!
- 236 replies
-
- 1
-
-
- artesania latina
- kitbashing
- (and 2 more)
-
Looking good! Is that arrangement going to be stiff enough so that the gun won't "droop"?
-
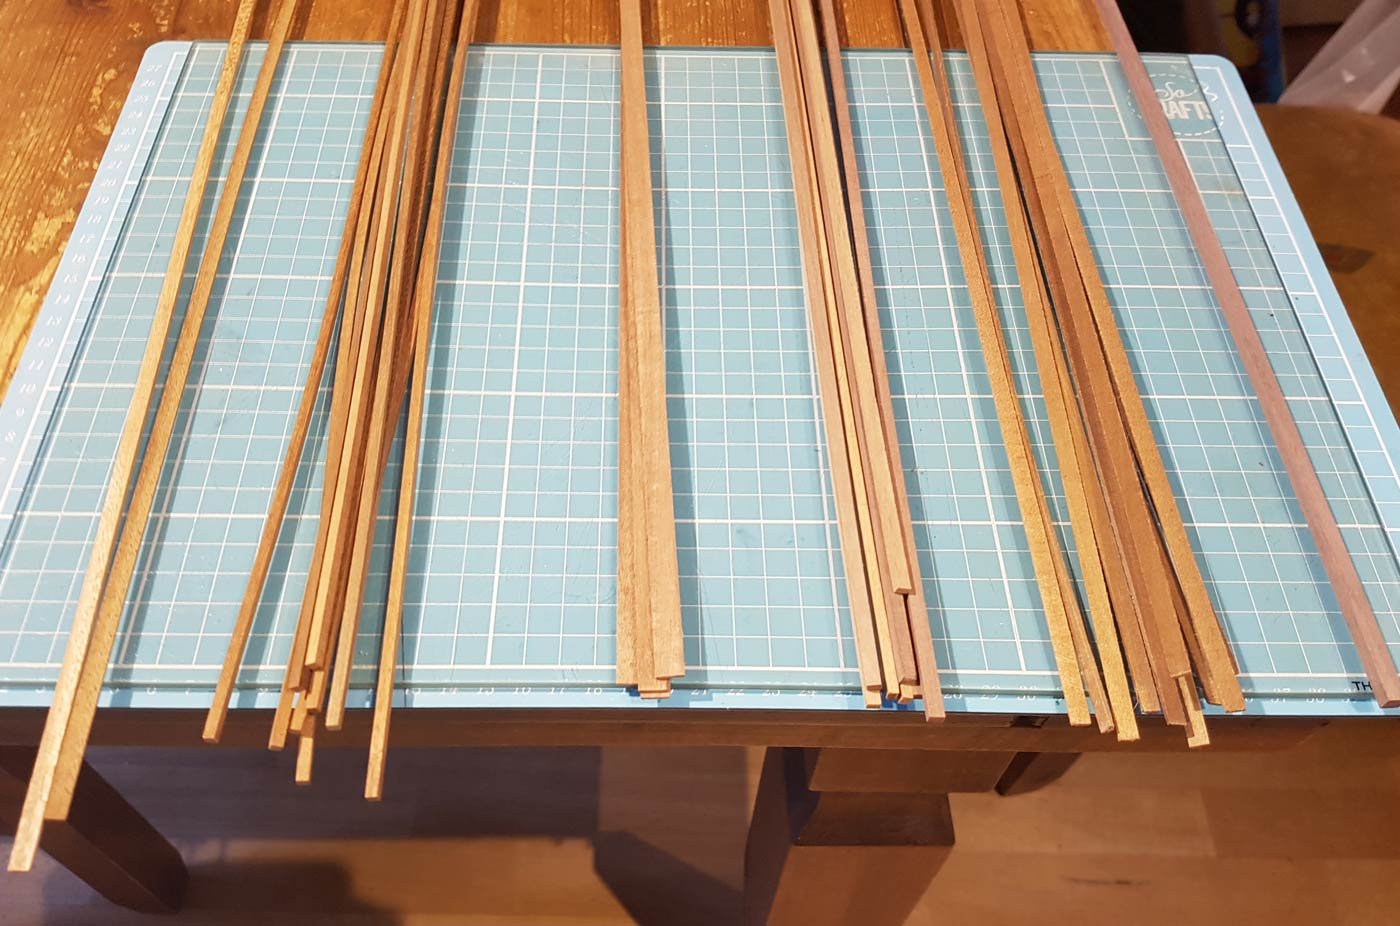
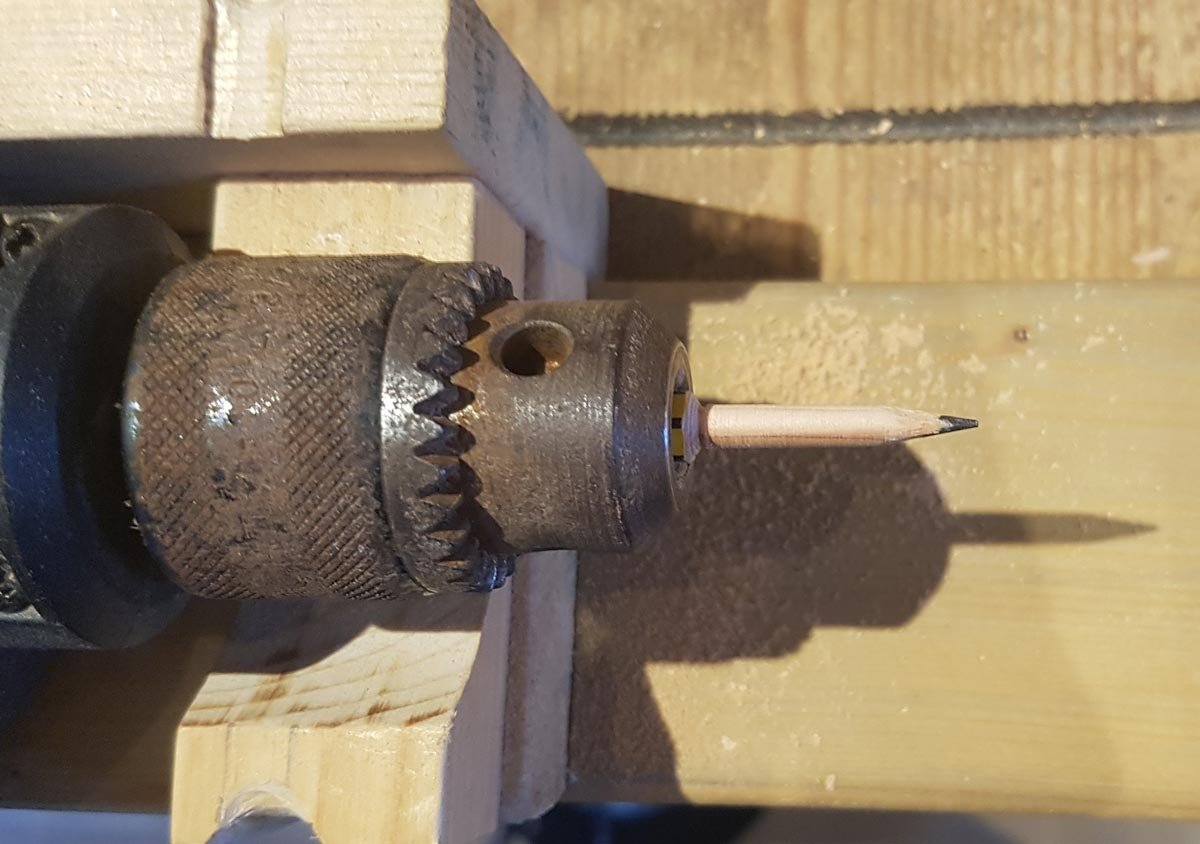
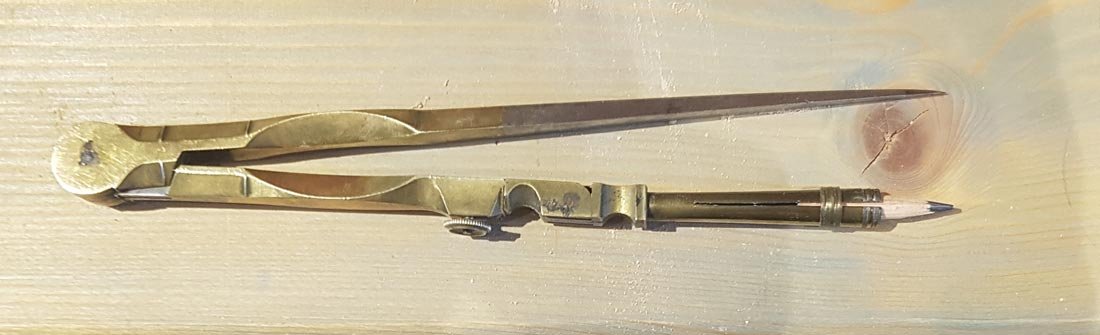
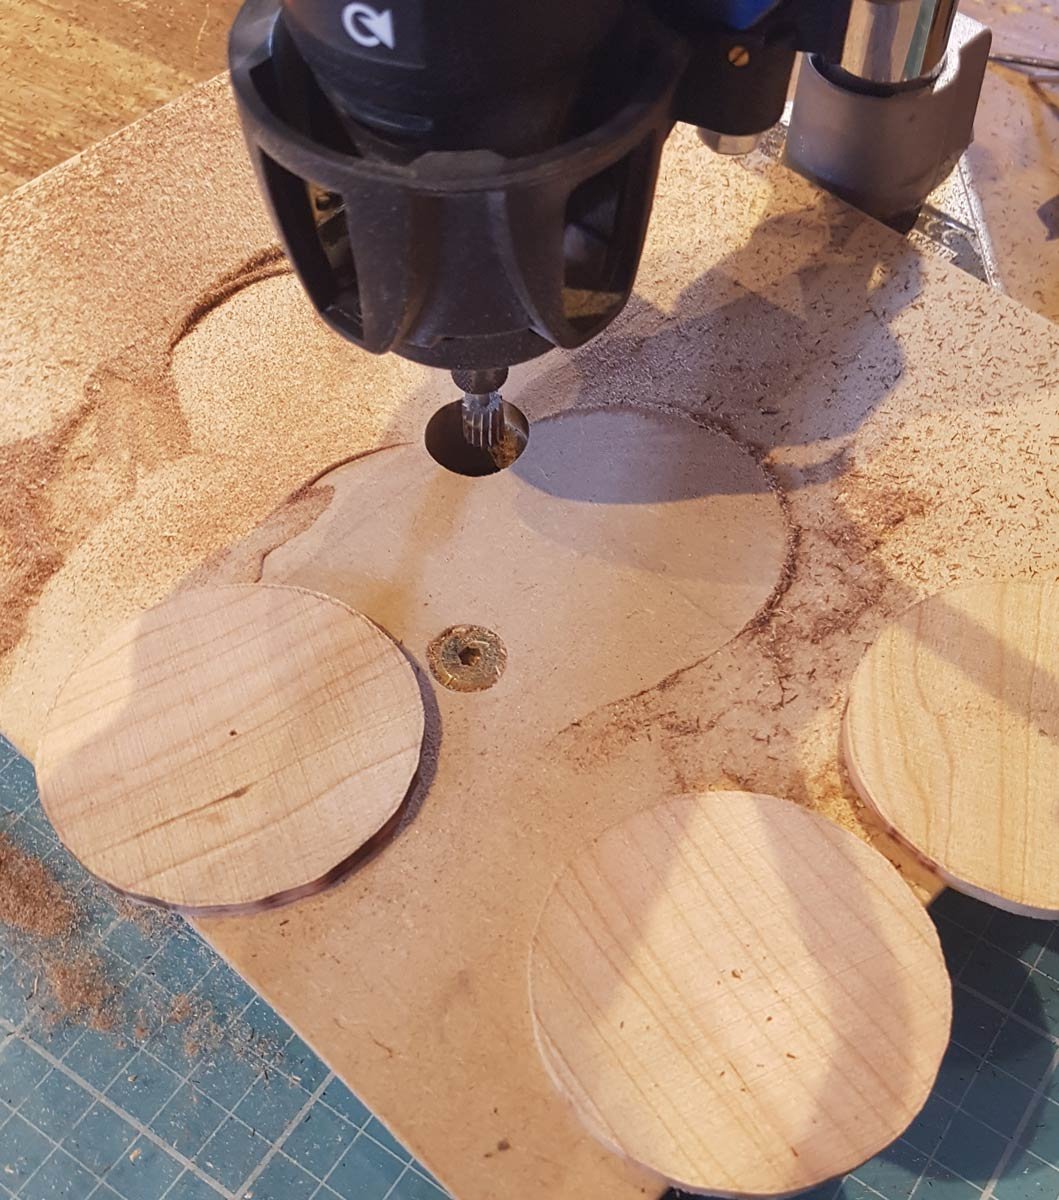
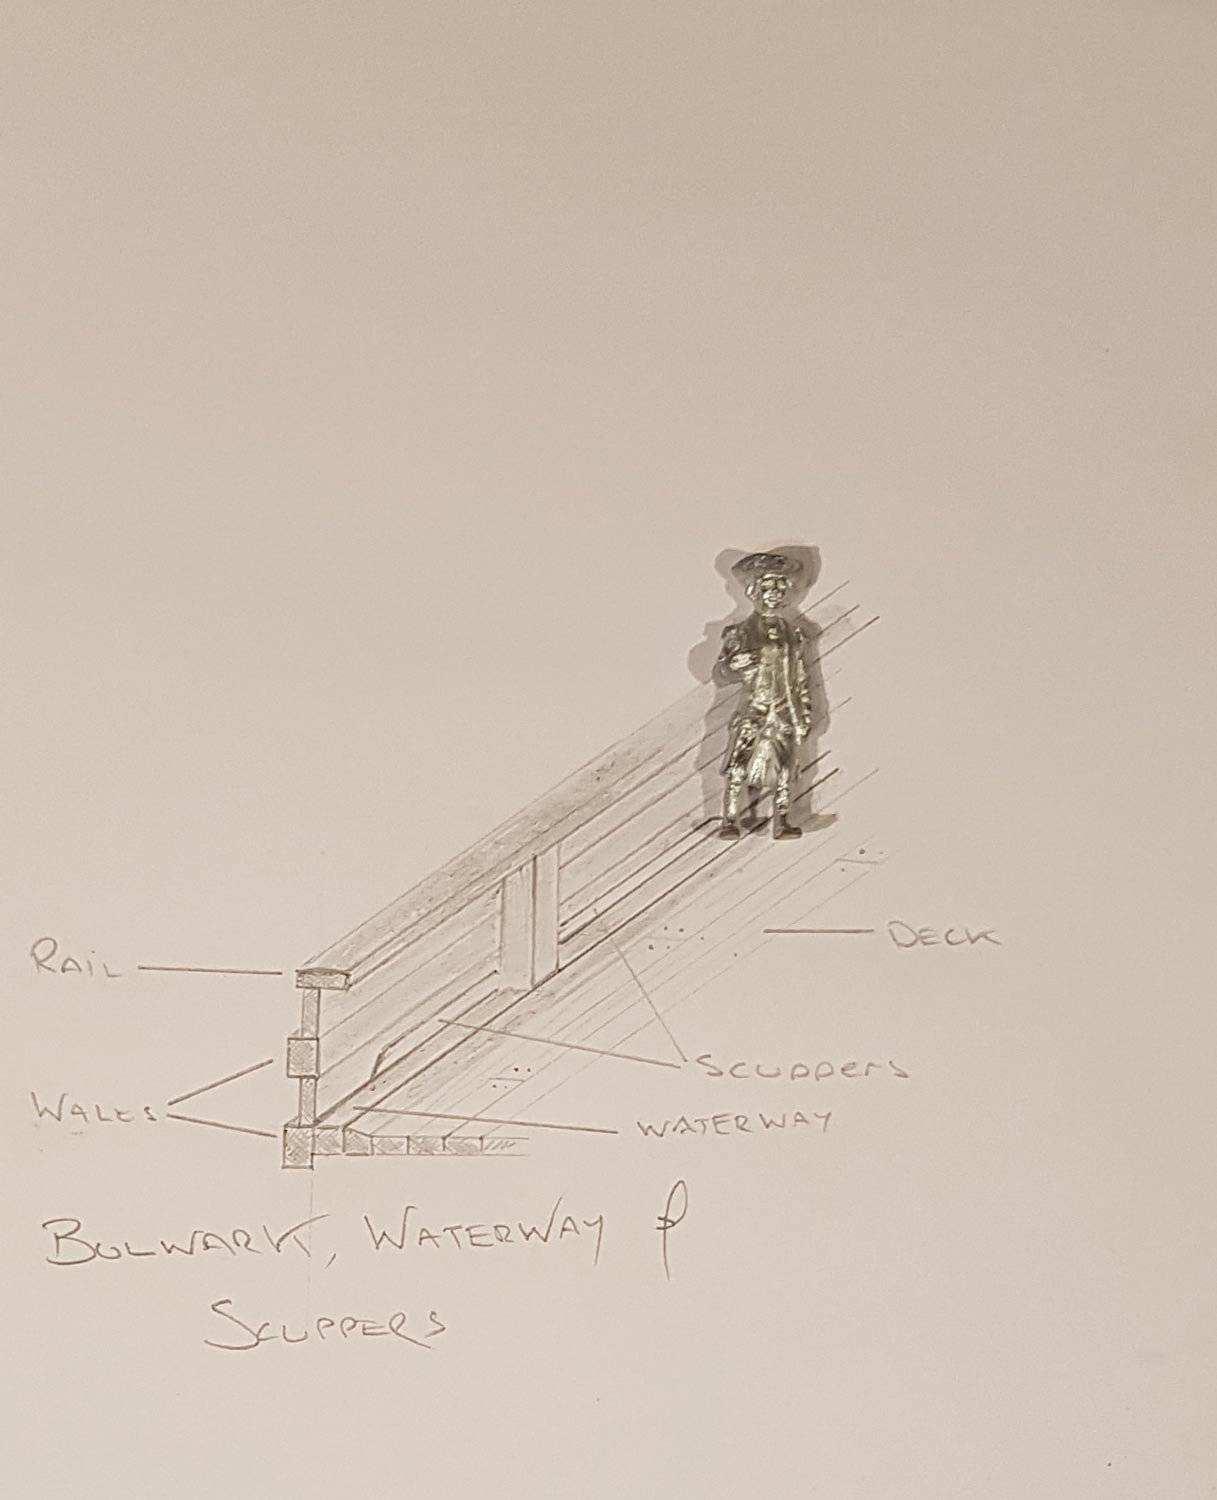
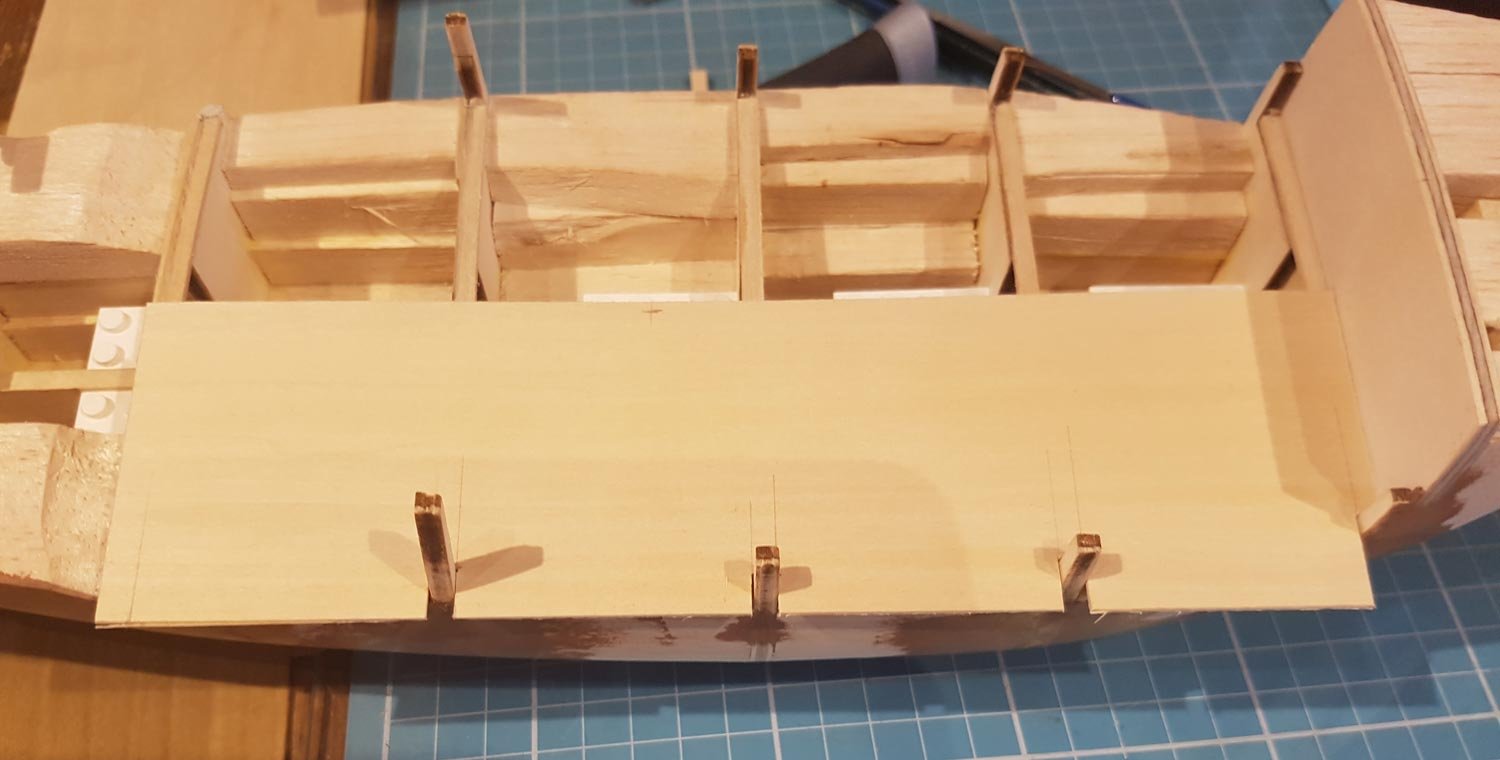
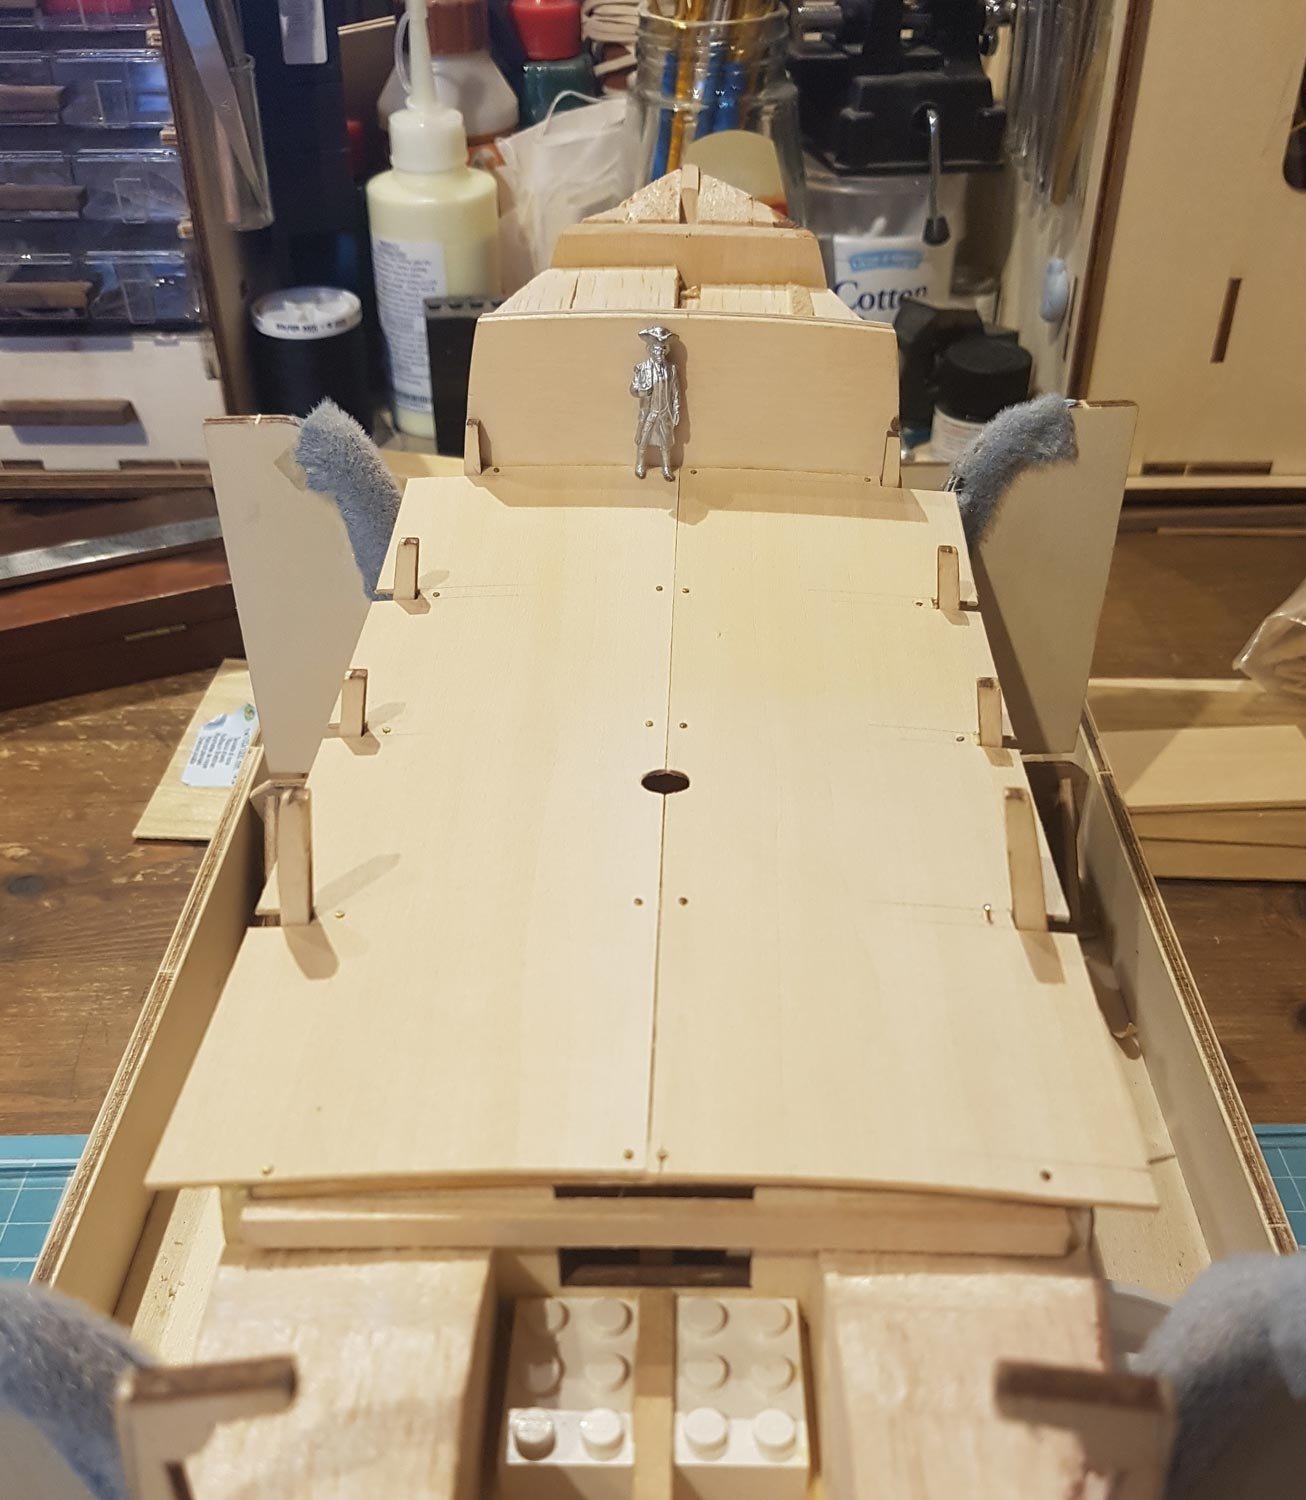
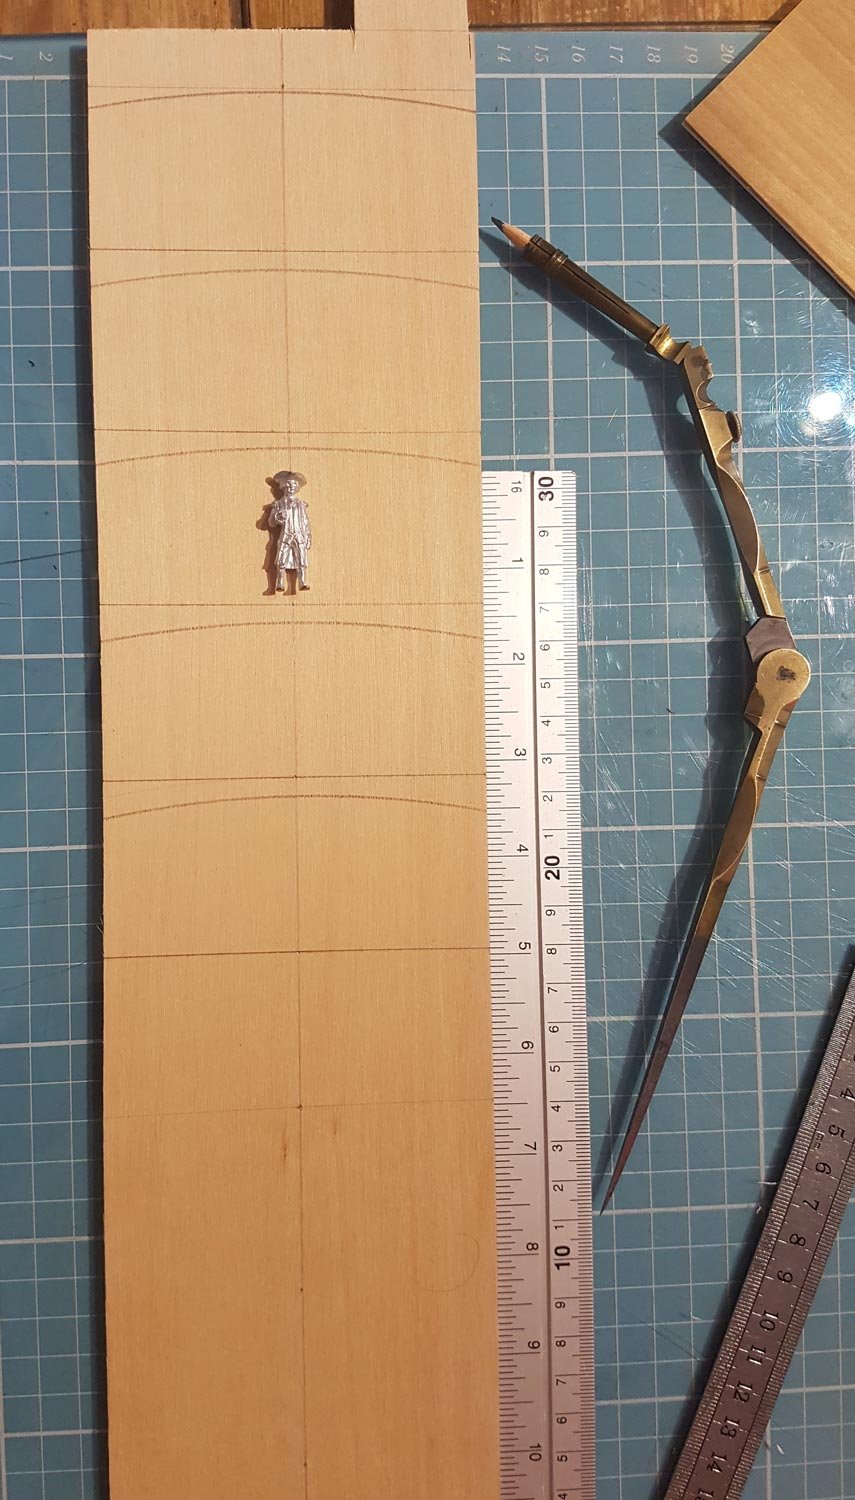
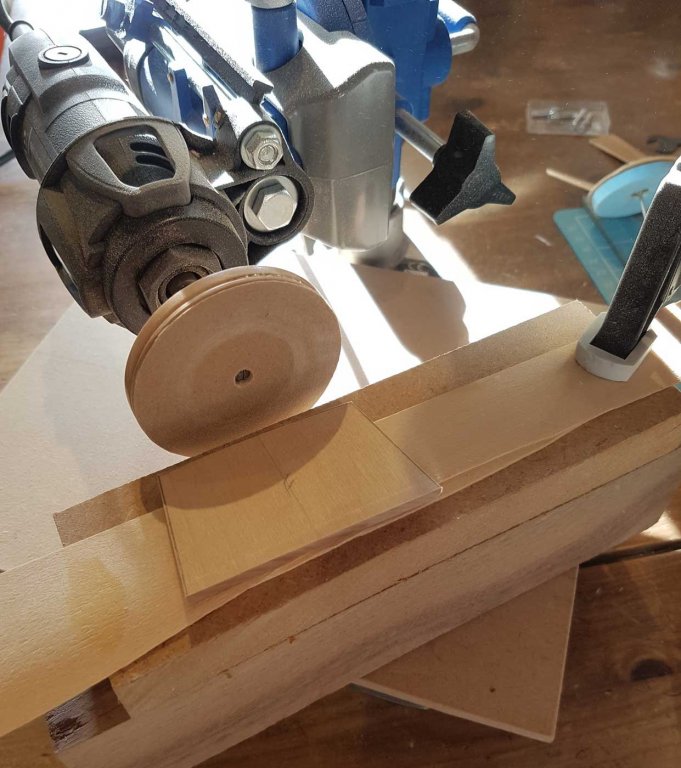
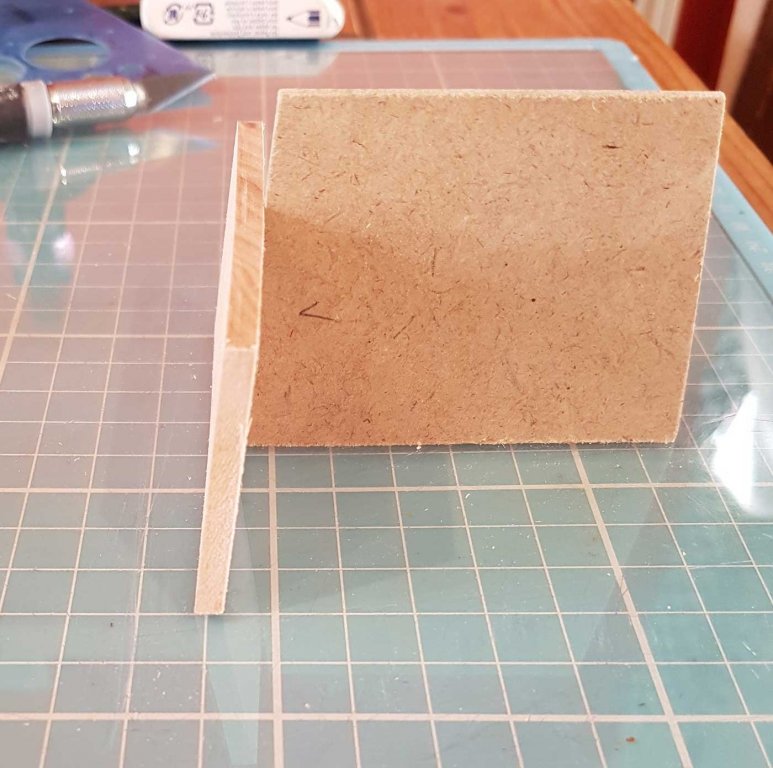
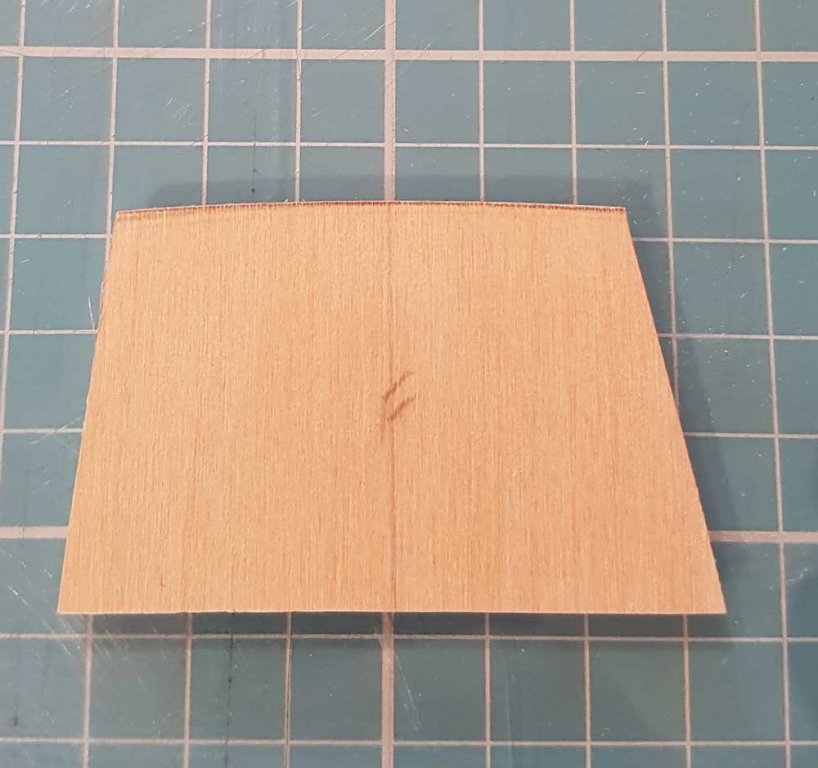
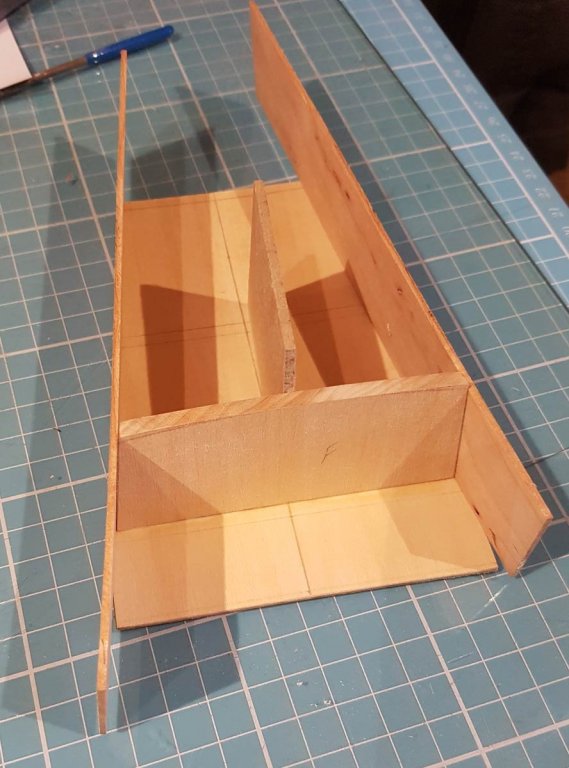
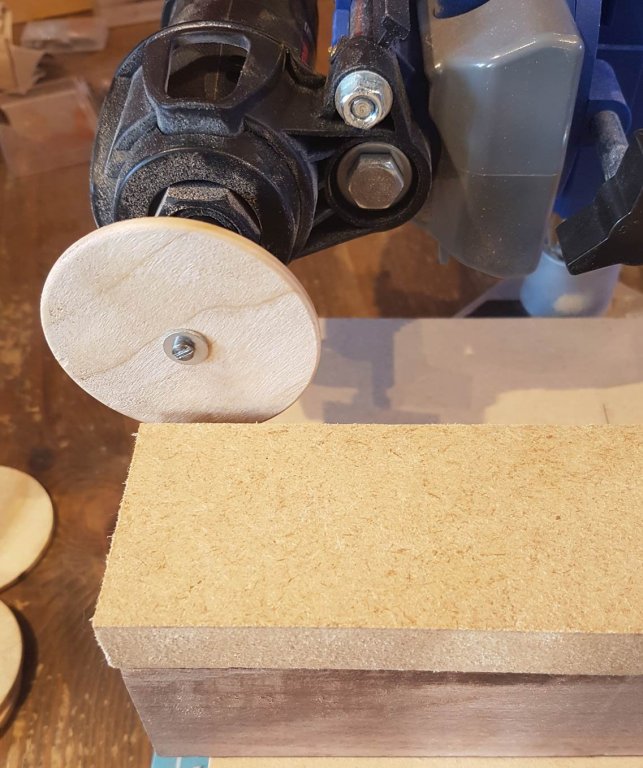
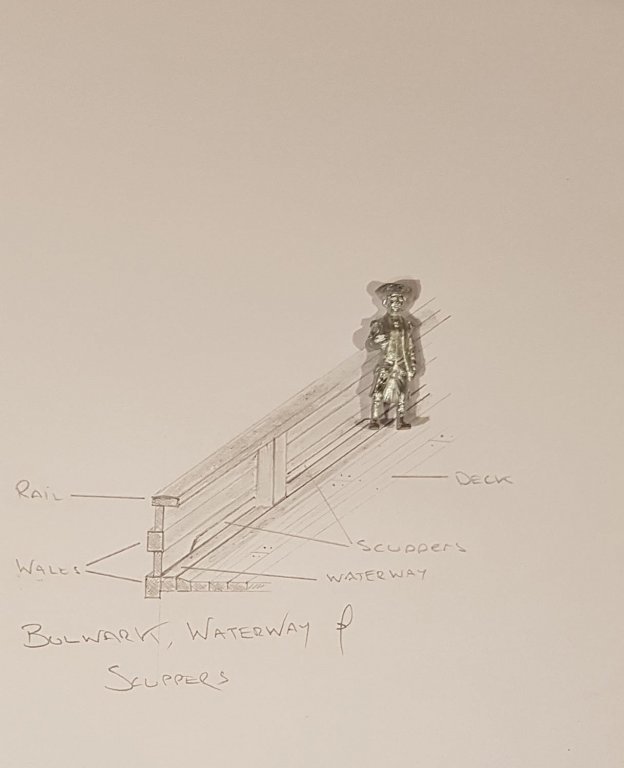
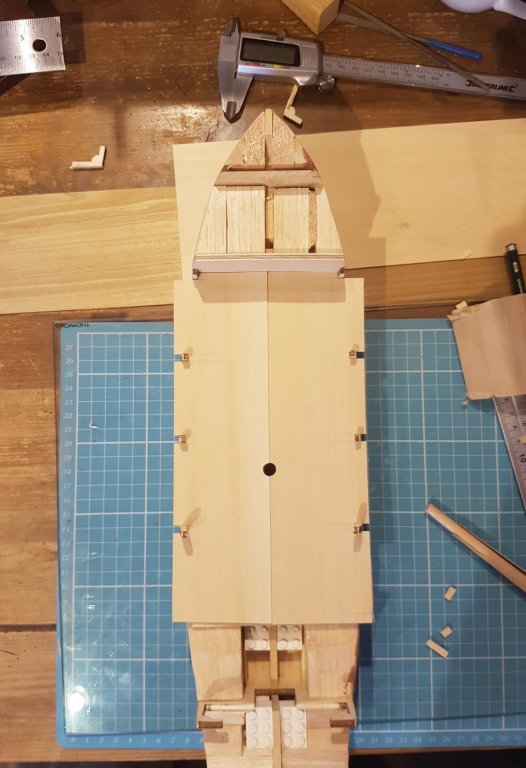
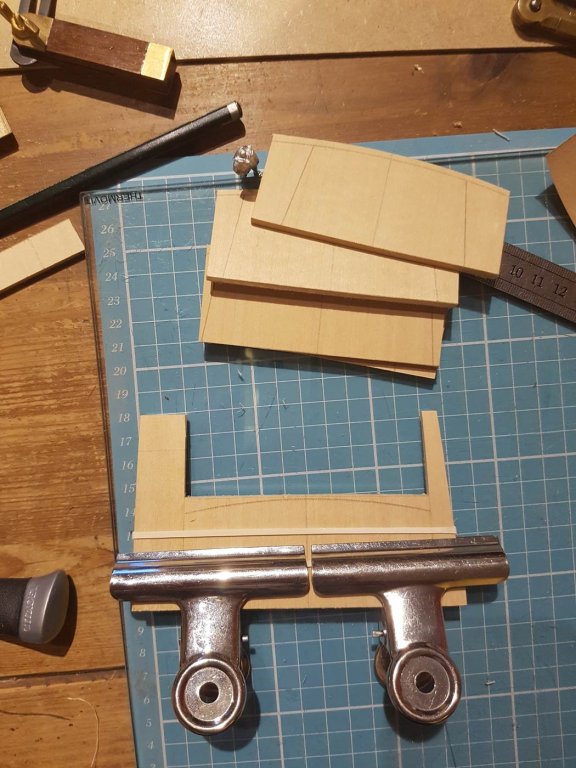
Hello again, I’ve managed to get a few hours in the shipyard over the last few days. Mostly I have been sanding the hull. Because I have changed the shape of the hull from the original kit plans there has been a lot of filling and shaping. It’s been difficult to make sure that both sides of the hull are the same - especially at the stern, but I think I’m almost there. Thinking ahead I have decided I need one of those Vertical Sanding Thingy Incorporating Spinning Disk Machines. So I decided to adapt my Dremel stand. Firstly I needed to make a thin pencil for my old compass. So out came the home-made lathe and I sanded a standard pencil to 4.5mm. It is about 0.05mm too wide but I didn’t want to chance my luck, but it fits. I drew and roughly cut out some disks and then shaped them on the dremel. The disks were then chucked in the dremel and then sanded smooth. This is the set up. Back to the boat. As the hull is nearly finished the planking should come next but there are two areas that need attention first; The Keel - which will form the rabbet, and the Wale, scuppers, waterway and deck arrangement. The main wale will be the point from which the planking starts. I wanted to incorporate scuppers into the build, not holes but scuppers that run the length of the plank like here on the Matthew; To achieve this I need to build the false deck at least so that I can work out the relative positions of the waterway, the wale and therefore the scuppers. A bit like this arrangement, This gives me a rail height that comes up to the midriff of the Captain. I made the false deck in two halves, I wasn’t sure that I would get the correct fore/aft and athwarts cambers with a single piece, and I didn’t have a piece wide enough anyway. I cut off the upper parts of bulkhead 6 (these will be part of the aftercastle) and made one half of the main deck. The second half test fitted And then both halves glued and pinned. As I decided earlier the rear cabin area is going to be made off the ship. Instead of a framework I am going to use bulkheads to create the shape of the deck camber and the sloping sides. The bulkheads were drawn out on a 5mm piece of lime, assisted as ever with the captain lying down on the job. I'm not sure if I am happy with the camber on this. It will be greater than the camber on the main deck. Looking at the pic above it looks too severe, I am going to have to flatten it out. One piece needed extensions on the sides as the lime wasn’t wide enough so it was glued and clamped. That’s it for this update. I have done some testing on the keel - where a decision was made for me but that’s for next time. Cheers!


-
I have never come across this before and have never had a problem with applying enamel, or even oil paints over acrylic. I think the problem lies in applying paint over a coat that hasn't had enough time to "cure". I have always left a coat of paint at least 48 hours to cure before applying anything over the top.
-
Stunning! Incredibly neat work. Your work is a joy to see, Sir! I love the crisp lines.
- 236 replies
-
- 2
-
-
- artesania latina
- kitbashing
- (and 2 more)
-
My best wishes to your Admiral, I understand how hard it is as I was diagnosed type 2 18 months ago. I was told to eat sensibly, little and often and do some exercise every day. Not always easy or straightforward.