HOLIDAY DONATION DRIVE - SUPPORT MSW - DO YOUR PART TO KEEP THIS GREAT FORUM GOING! (Only 24 donations so far out of 49,000 members - C'mon guys!)
×

nikbud
-
Posts
203 -
Joined
-
Last visited
Content Type
Profiles
Forums
Gallery
Events
Everything posted by nikbud
-
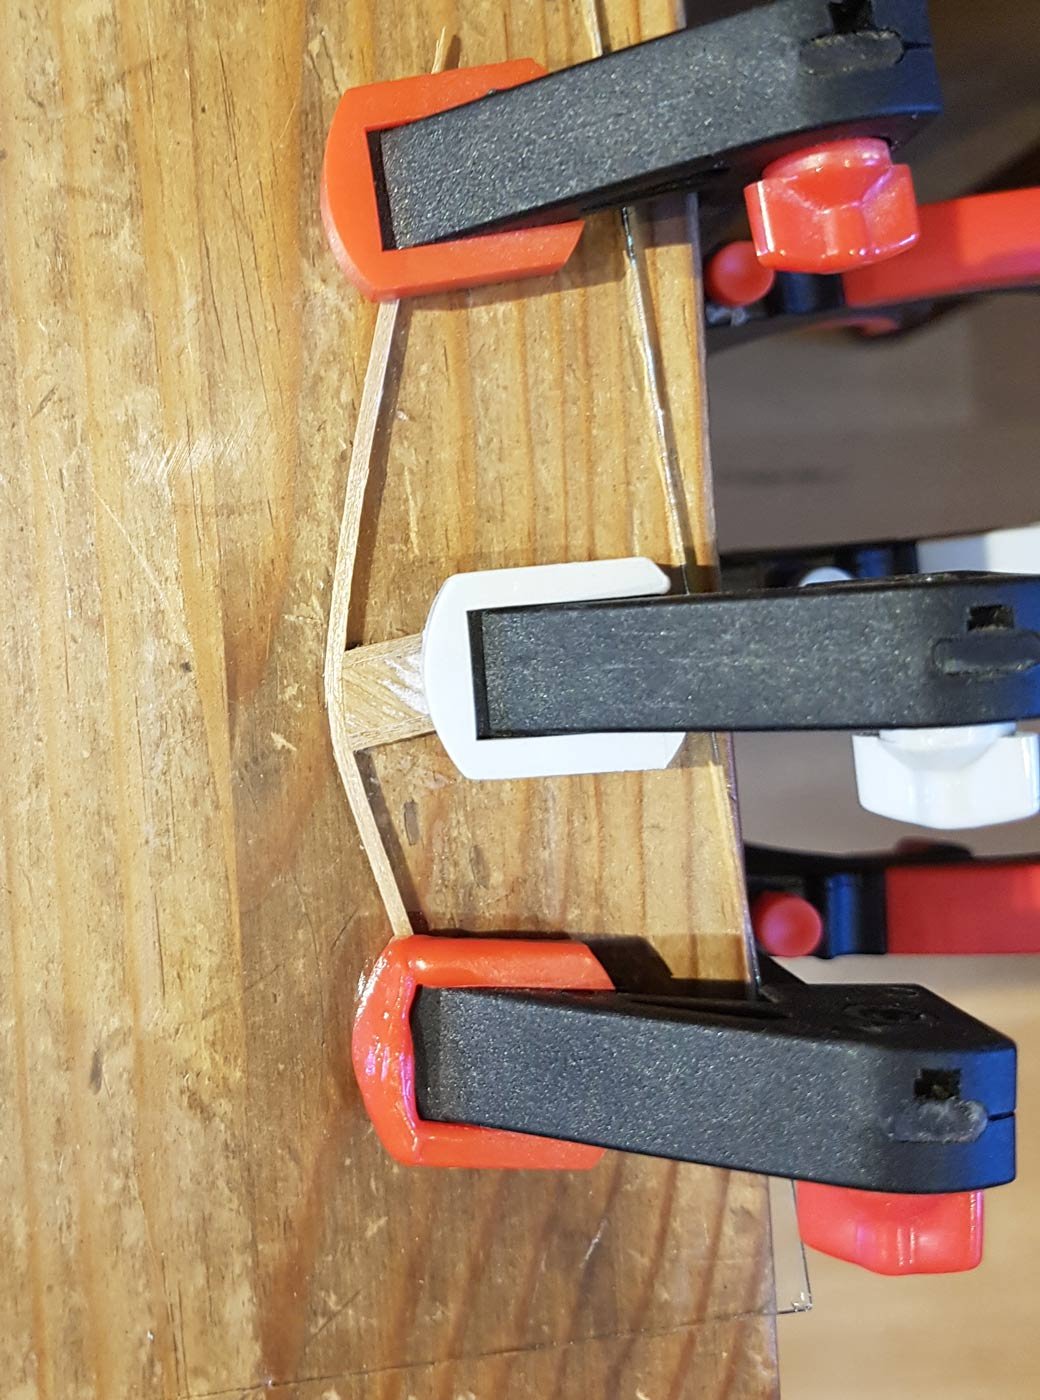
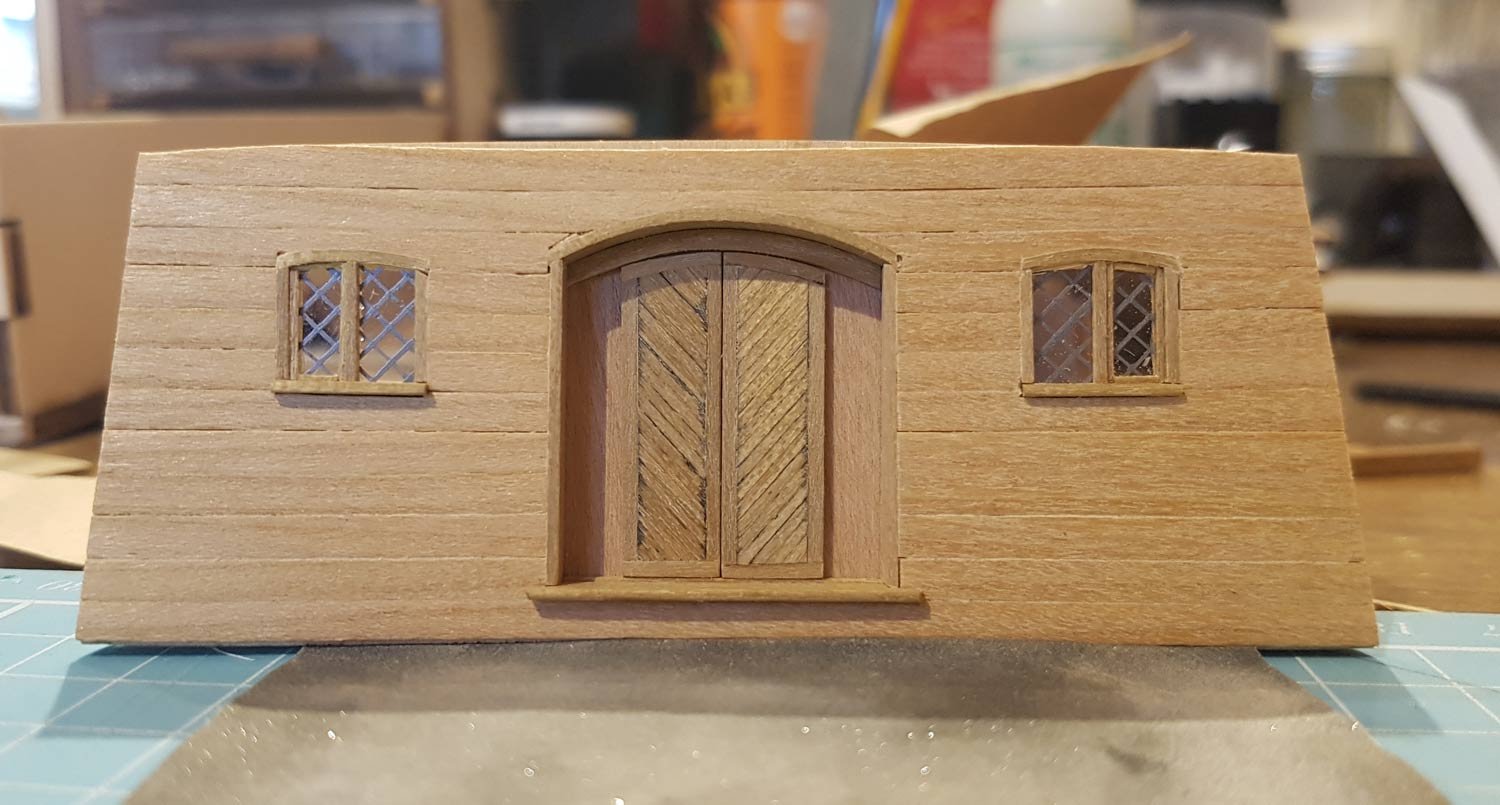
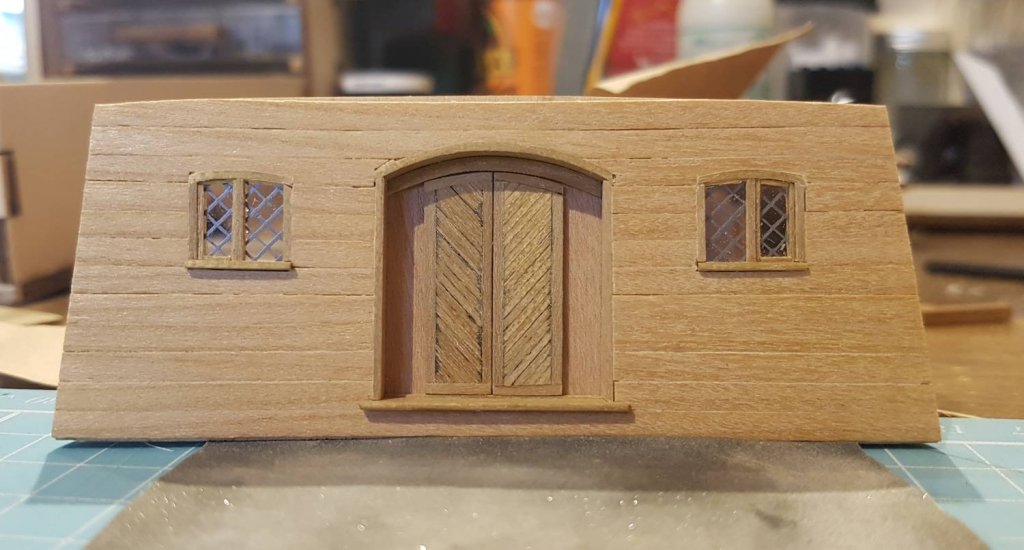
 So today I have imposed a new rule, and to ram home the message I have given myself 100 lines, thusly; I will check the log for invaluable advice, ideas and comments BEFORE I start the days cutting and gluing. I will check…… I’ll do the rest later, you all know I’m good for them - I’m always repeating stuff. Anyways, today started with the doors, well the port door. I sanded the face smooth, applied the ink - thank you Mark! - and cut to width. I sanded again until I was happy with the effect, I glued thin strips to the edges and then the bottom. When dry I applied a thin strip to the top, having to clamp to achieve the curve, I then broke the cardinal rule; “If you want two things to look the same, then make them the same way” With the second door, I applied the ink before I did any sanding, and lo!..... ......different looking door; And yes, there will be 100 lines………… It was whilst pondering the doors, that I popped on here...……………... and read Peters advice. Words were uttered. I really liked the idea but there was no way I was going to be able to cut out a plank or two neatly enough. So I thought about colouring the required planks with stain or ink. Some quick experiments on the back of the doors showed again that I wouldn’t be able to do it neatly enough , even with using the lining pen. Either my edges were not straight, or the ink/stain would bleed into adjoining planks. Also the angle of the planks was too shallow to look like a "V". There is, of course, only one solution; Doors, Part II; So now I’m off to watch Peter Rabbit and eat pizza. Seriously guys, Thank You for the continued help, advice and comments, I really do appreciate them. With your help this Vivacia is turning out far better than I imagined. Cheers!

-
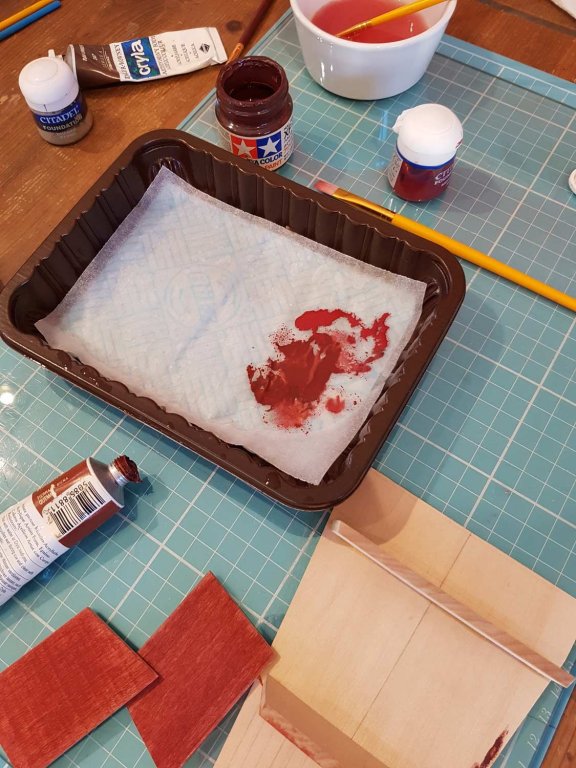
The technique I have found most valuable when brushing with acrylics is the use of a "wet palette". I came across this method when I was painting Warhammer figures, it is great for mixing colours and/or thinning paints. All you need can be found in the kitchen; a waterproof base - a plastic margarine tub lid is ideal, a sheet or two of kitchen roll/paper, a piece of greaseproof/ baking paper and some water. Fold up the kitchen roll so its 4 layers thick, place in the base and flood with water. Pour off the excess water and place the greaseproof paper on top. Put a dollop of the required paint/s on the paper and mix/thin to your hearts content. The paint will stay wet far, far longer than it would on an ordinary palette. It works well with Humbrol, Tamiya, Citadel and Artists type acrylics. I haven't tried it with other manufacturers paints but I can see no reason why it would not work with any acrylics. Another acrylic tip, or rather non-acrylic tip, is that for washes and drybrushing, don't use acrylics. I have had much better results with artists Oil paints thinned with white spirit. As they take longer to dry than acrylics they are much more controllable and subtle, giving little or no "tide mark" when the wash dries. Cheers Paul
-
Hmmm, interesting call on the ink, Mark. I have a few different coloured Citadel washes that I was thinking of using, but I like the idea of trying something new - I've never used ink before. Time for some experiments...... Strange; I'd got it in my head that I was going for a V shape for Vivacia - I never clicked that it would be a fishbone pattern!😲 Thanks for the shout on the windows, I will probably keep them......🤔
-
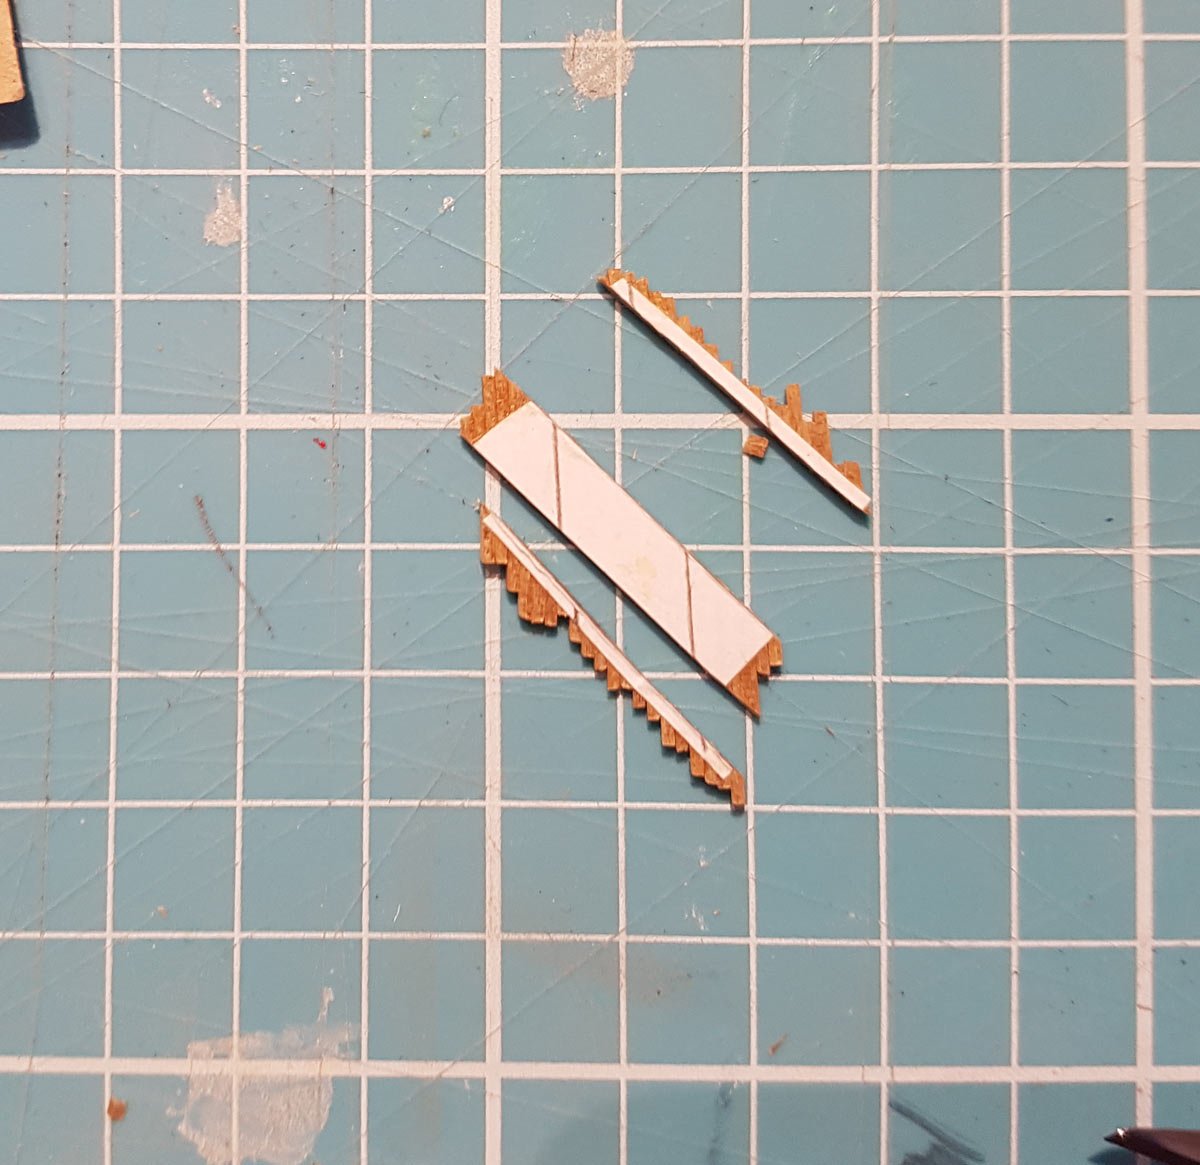
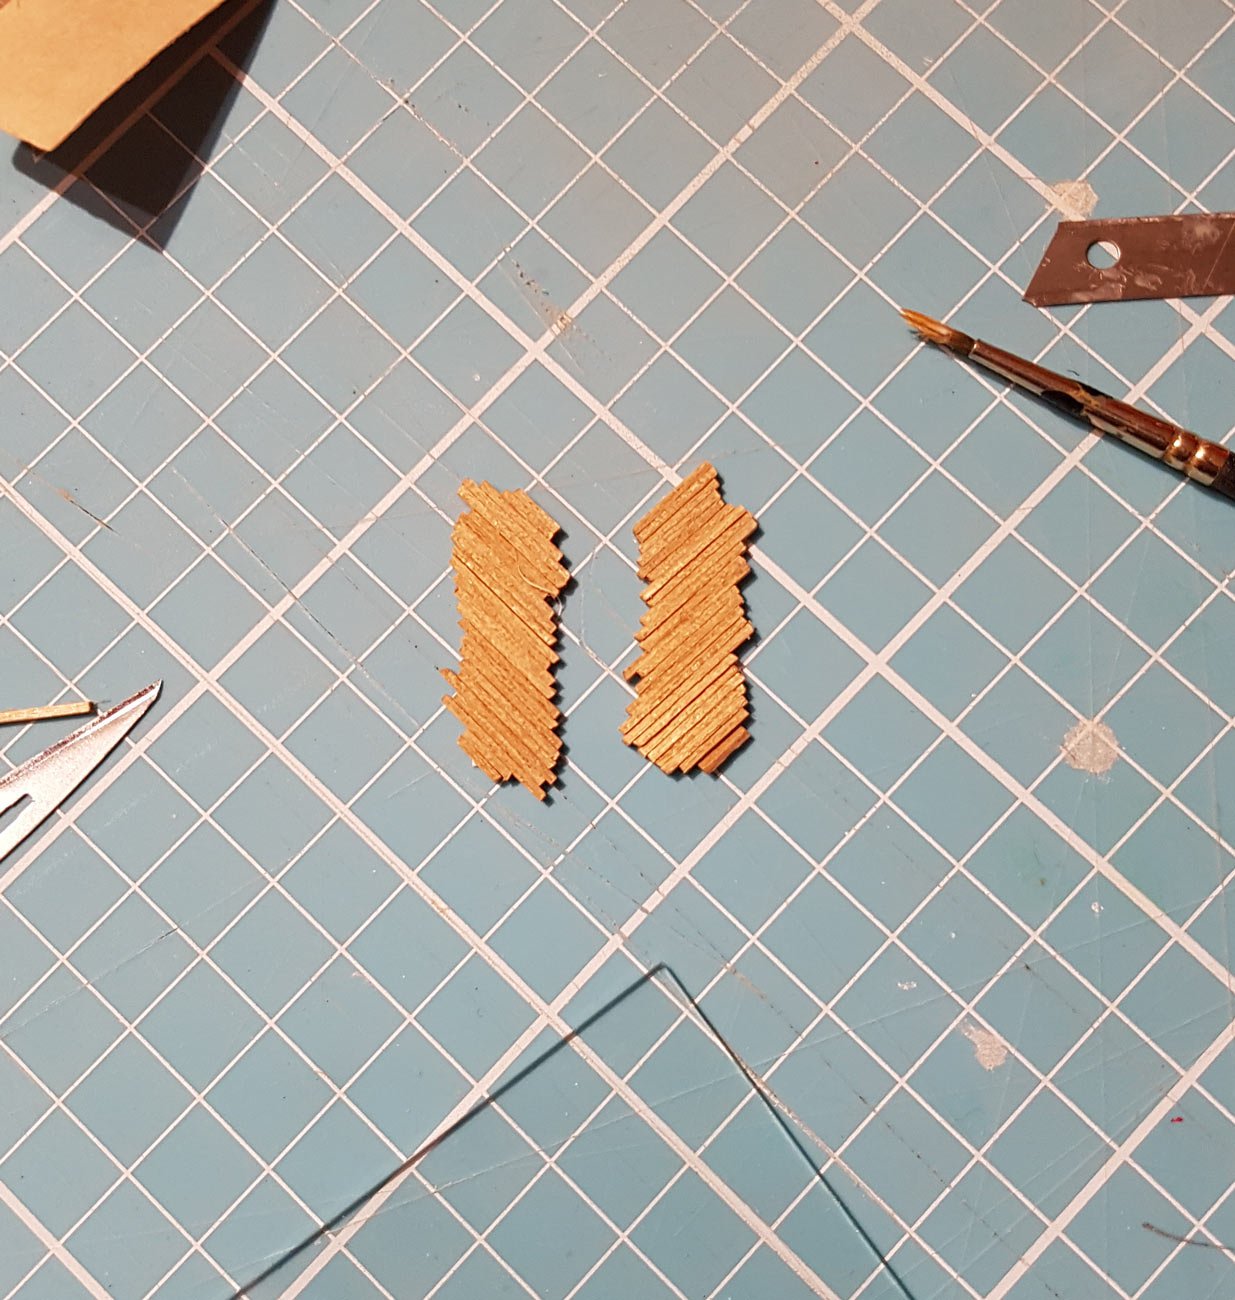
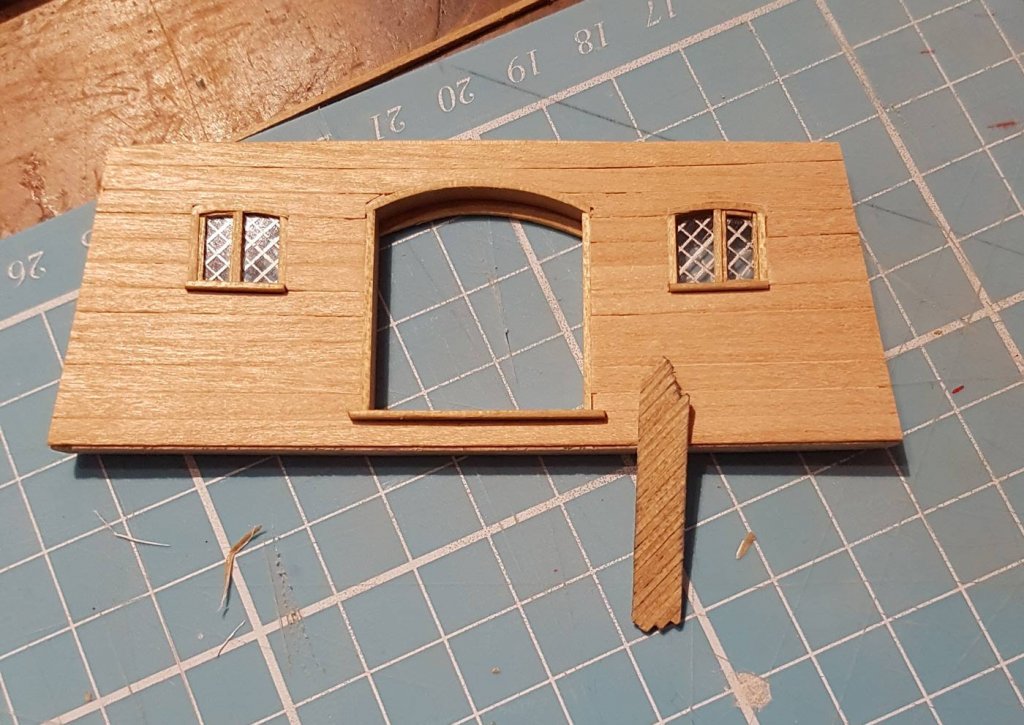
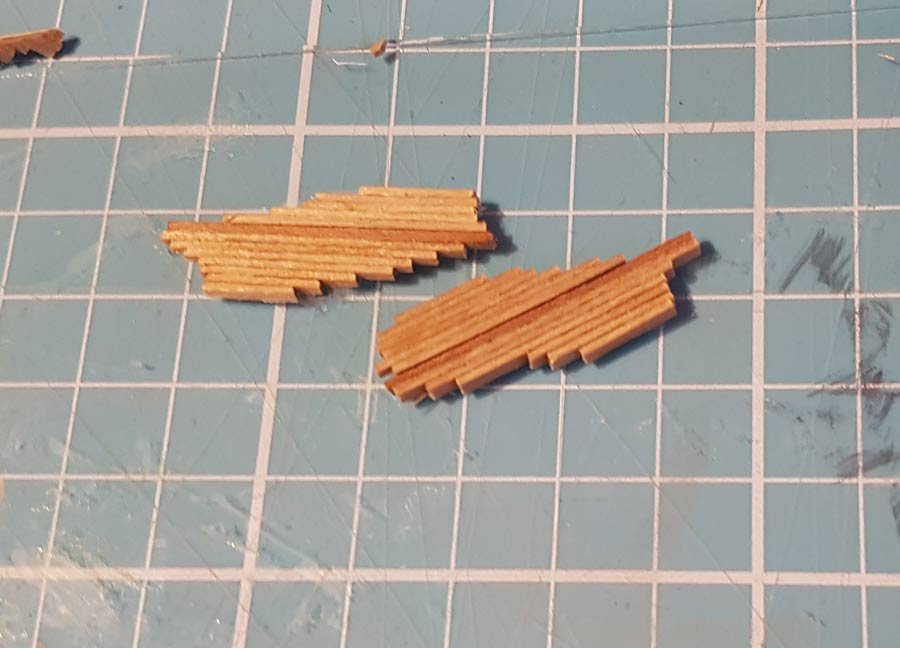
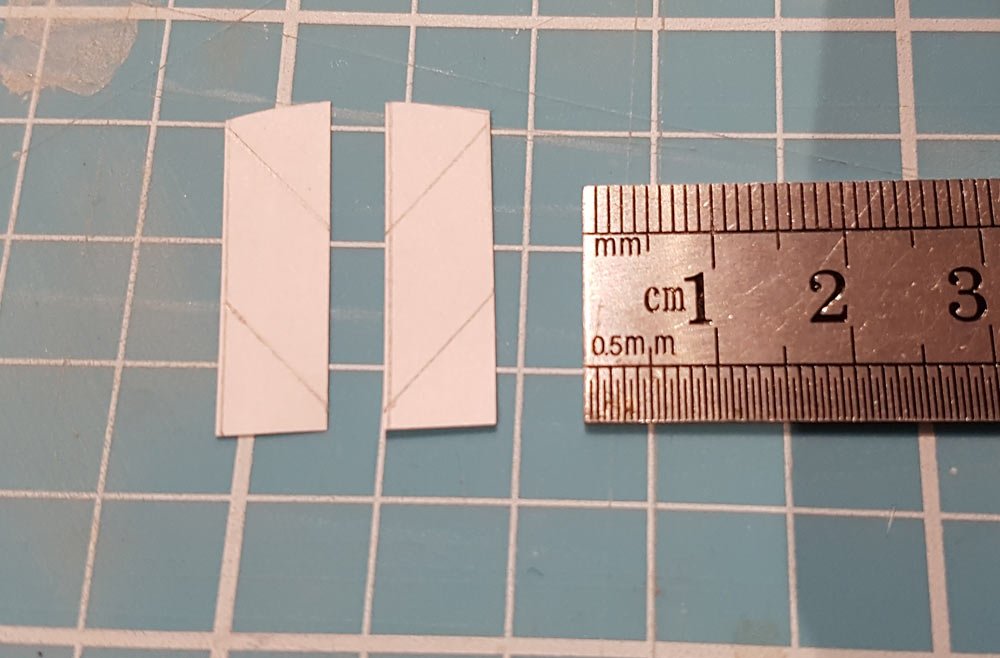
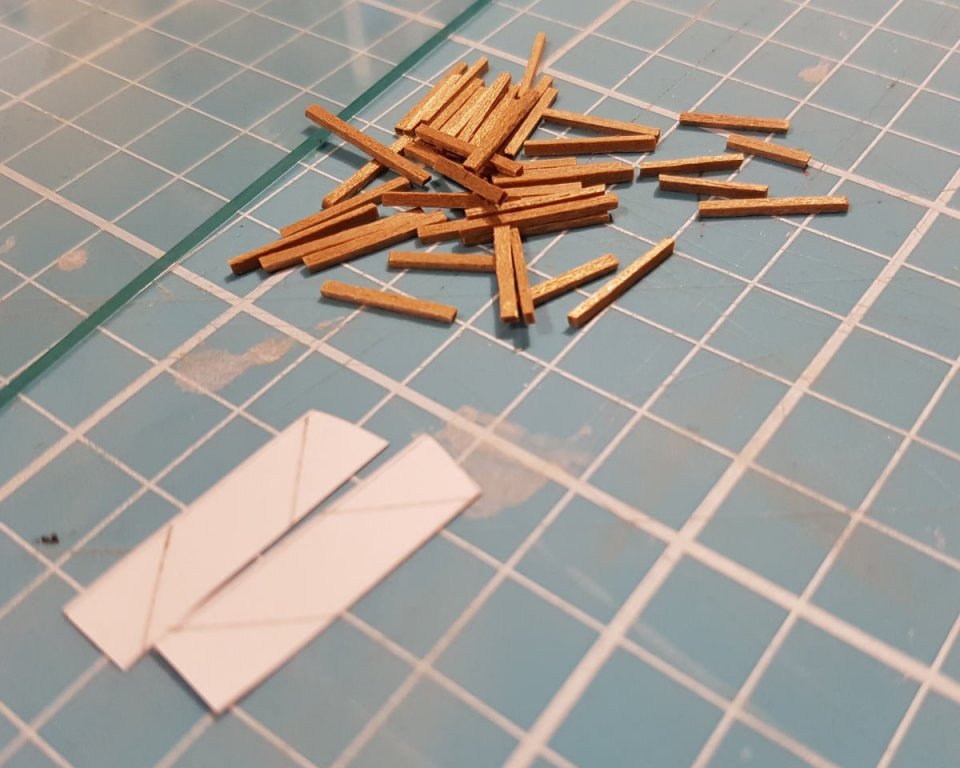
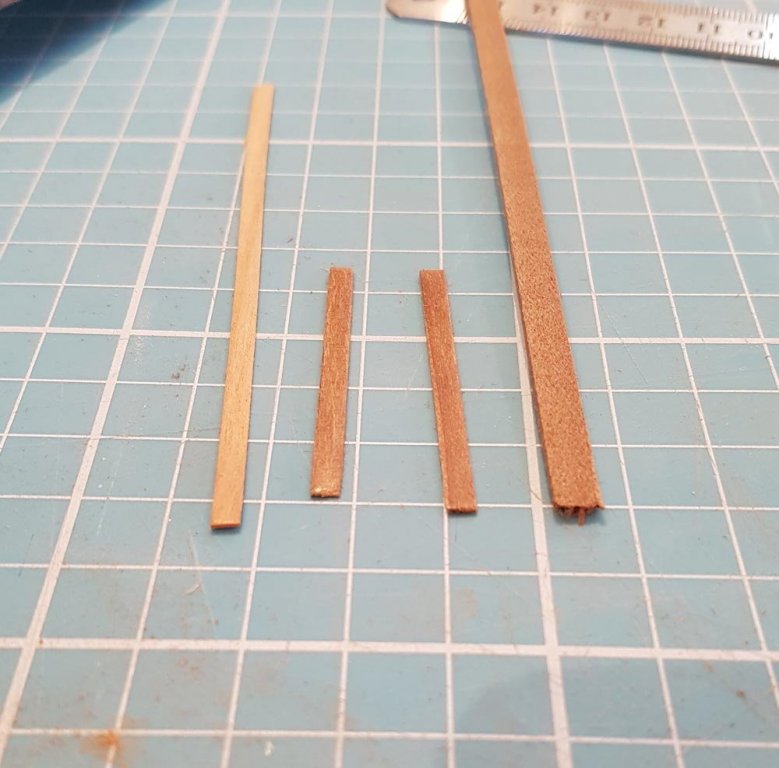
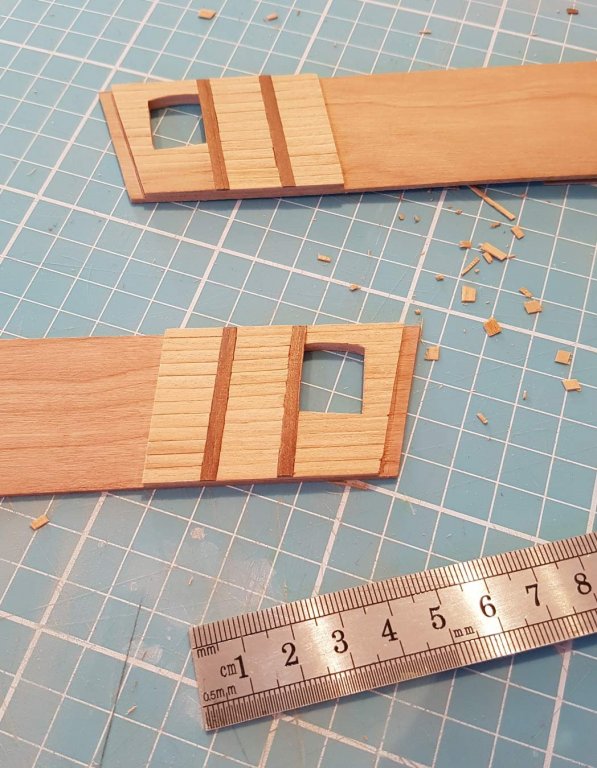
I managed to get a couple of hours in the shipyard today and made a little progress. I started on the doorway. I made a doorstep and used a previously curved piece to form the top of the doorframe. Next up, and the most time consuming was the port window, building was the same as for the starboard window. At normal viewing distance the windows look pretty good, on the pics they look pretty ragged. I’m in two minds with them at the moment; on the one hand I could remake them, they would possibly be a little tidier but I think I’m about at the limit of my skills. On the other hand, like I said before, they will be difficult to see once all the rigging etc is on the boat, and I’m conscious of getting bogged down with detail that will hardly be seen. I’m sticking with them for the moment. I will make a decision when I have sourced the brass and the brass blackener and made the hinges - yes, there will be hinges after all! Back to the doorway. There will be a double door entrance to the aftercastle. Along with the upper frame and doorstep there will be a panel either side of the doors. I didn’t want plain/standard doors like in the captains cabin, so I’m going to try something a little different - I have no idea if it will work or not; First step was to cut out the door shape and draw some diagonals, I then cut a load of thin strips of the light walnut The strips were glued onto the paper I have put them under some weight and shall see how they turn out tomorrow………… Cheers!


-
Its interesting you say that you have a separate container, Mark. One of my problems is that if I keep tools separate I have a tendency to plow on using the tools in front of me rather than finding the correct tool that's in the container that's in the drawer that's in the cupboard. Its part of my tendency to rush things and one of the reasons I get everything out when I open the shipyard. I need to find a jar with patience in it, it would need to be self and fast refilling tho!😁
-
I like the solid and purposeful look of the channels. The decking pattern is very impressive, both the deck and channels give an insight into how these ships were built - with craftsmanship, but using what is available where necessary. Good work, you have given me much to think about!
- 756 replies
-
- 3
-

-
- galleon
- golden hind
- (and 2 more)
-
Oliver, you need to wrap another line around the block that is attached to the mast, just like you have done already. The other end of this new line goes down, through the block attached to the yard, back up, through the block attached to the mast, and then down to the belaying pin. Hope that helped.
-
That's exactly what I was failing miserably at doing Mark!😢 To be fair I was trying to be too clever, too "in scale"; I was using 1mm lengths of 39 gauge wire (0.09mm), I couldn't even see it without my glasses and magnifying glass!! I have some thicker gauge wire but I need to get some metal blackener first, stuff that will work on brass and kanthal/steel. When I have found my patience, (it might wander home tomorrow afternoon) I will try with a thicker wire and paint and next time I will put my magnifyers on!
-
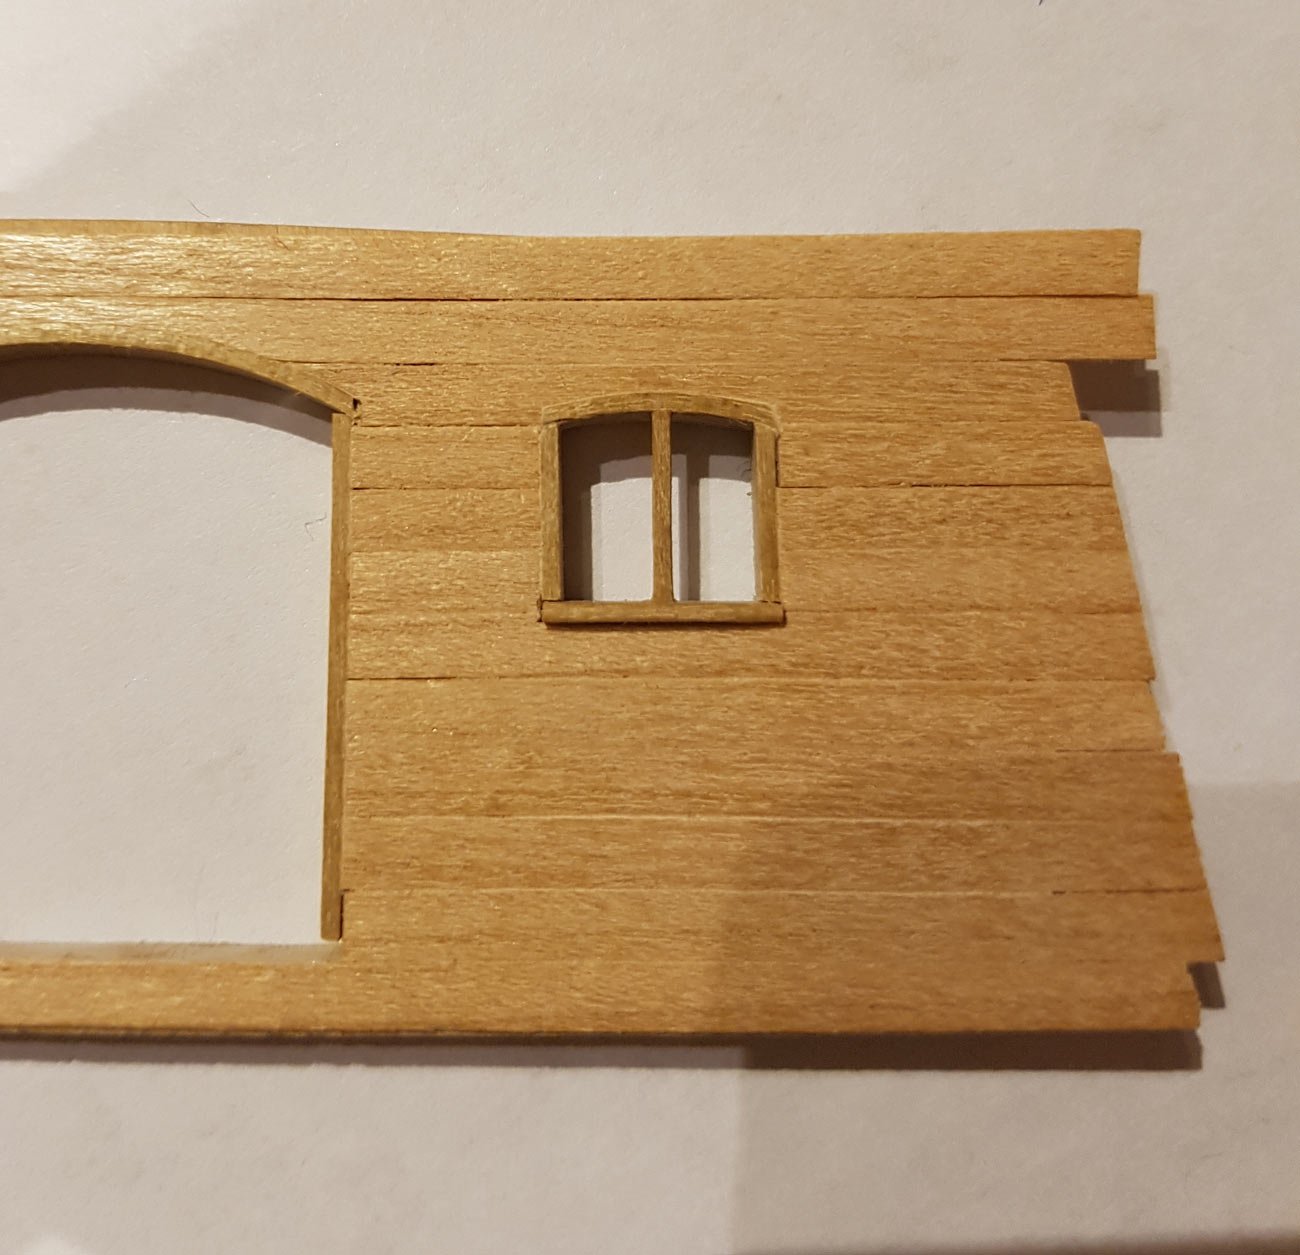
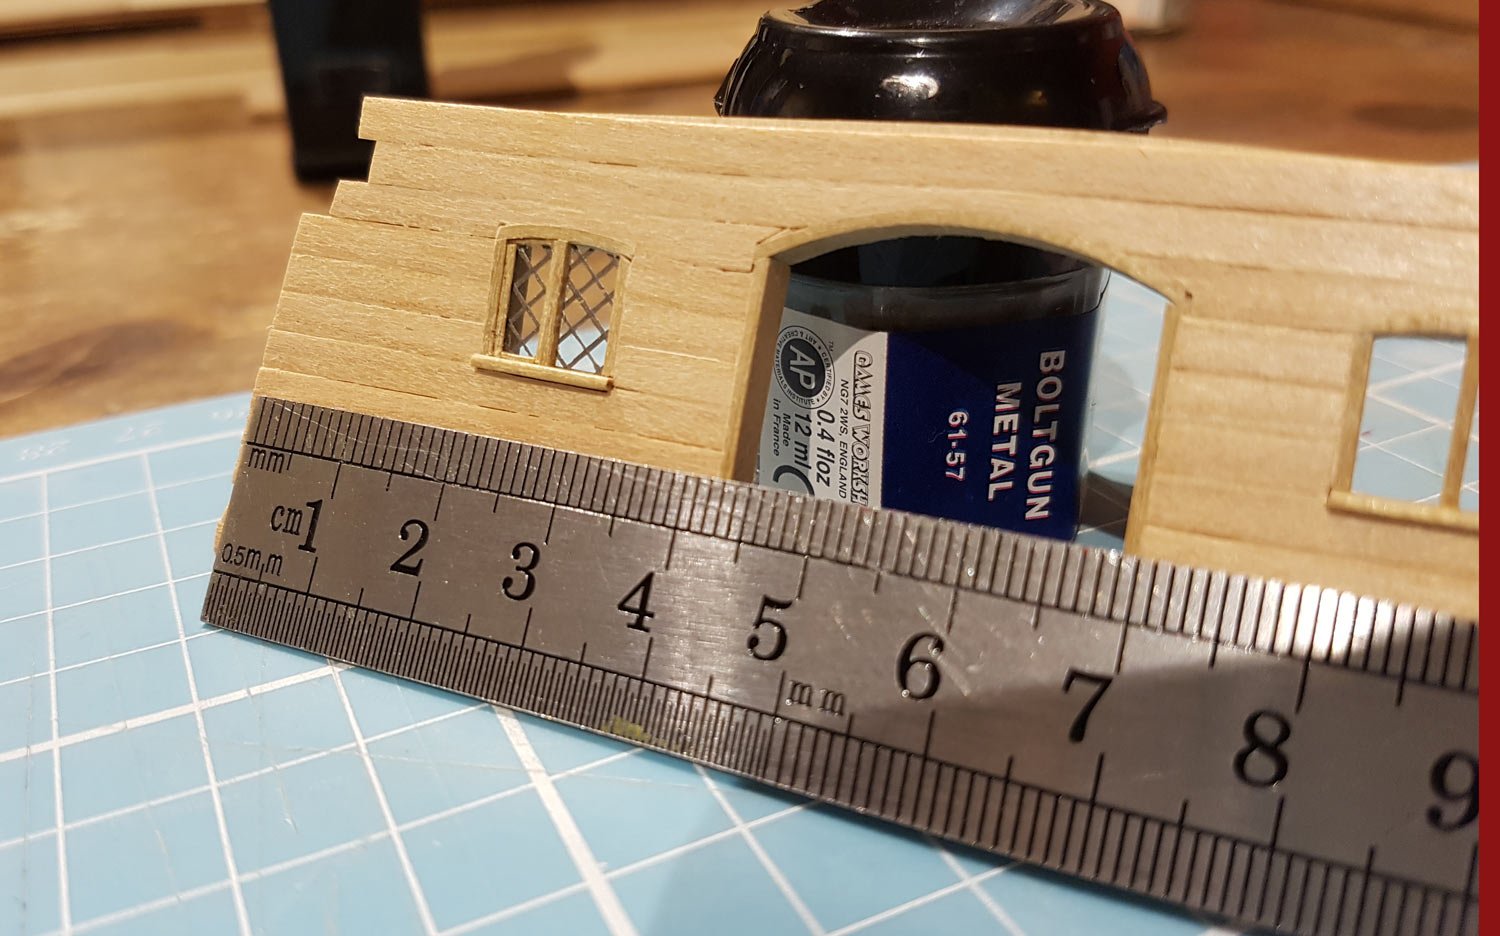
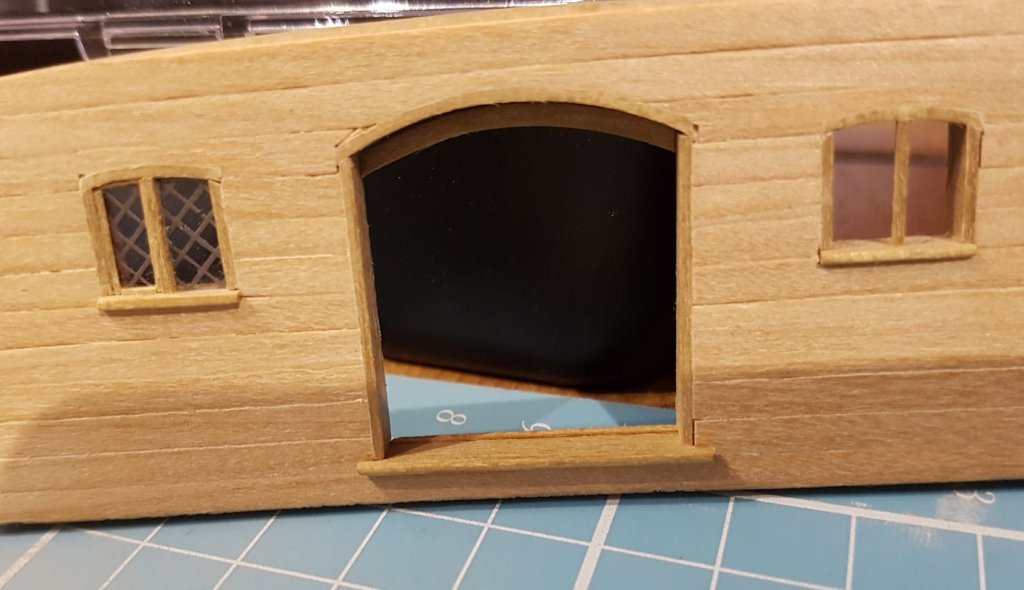
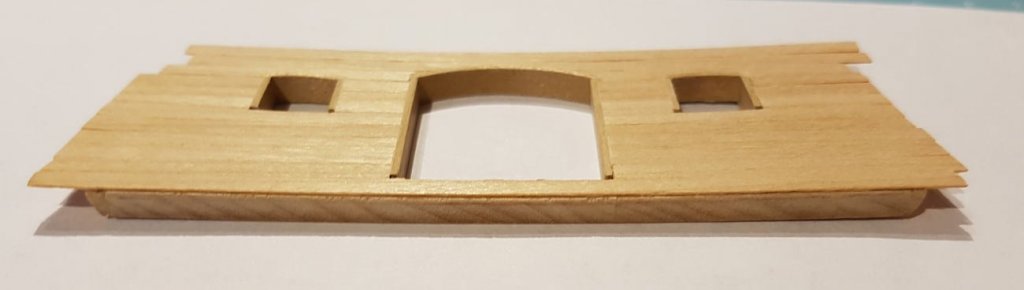
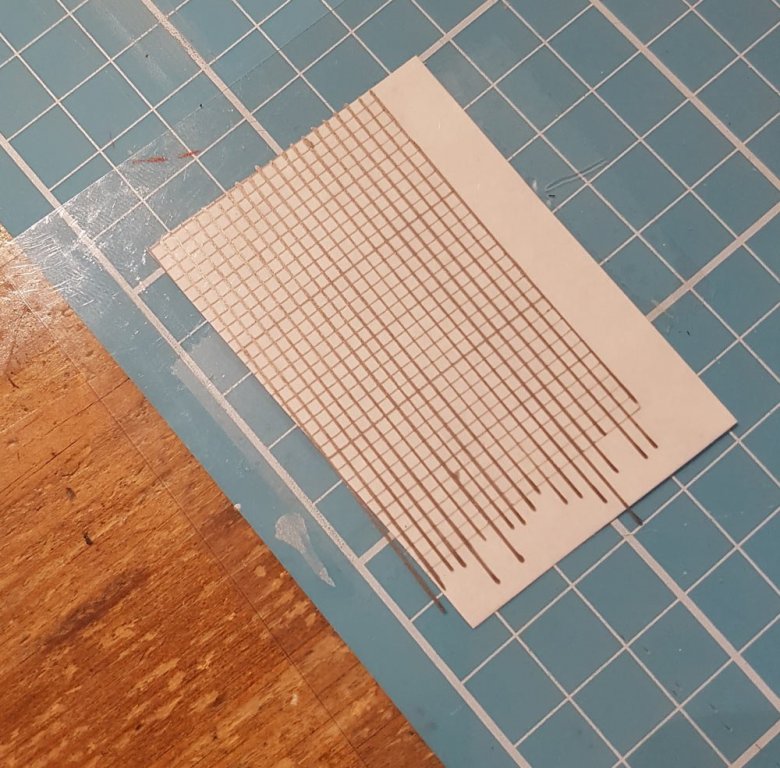
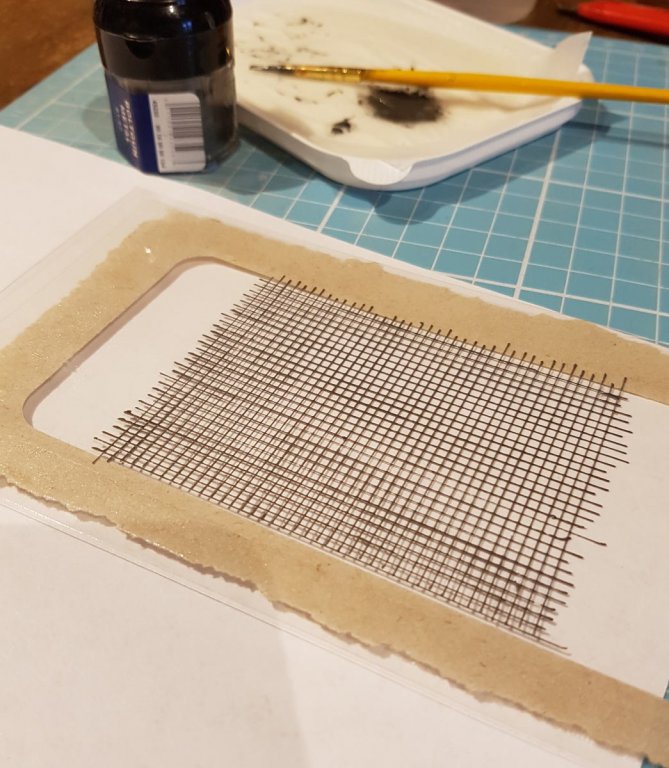
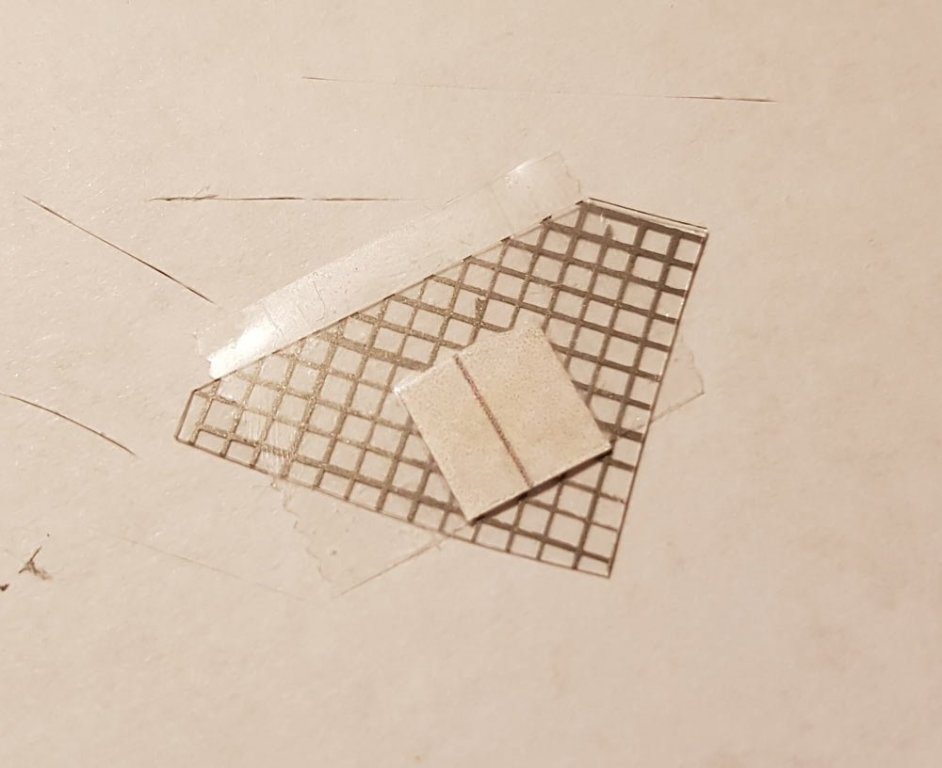
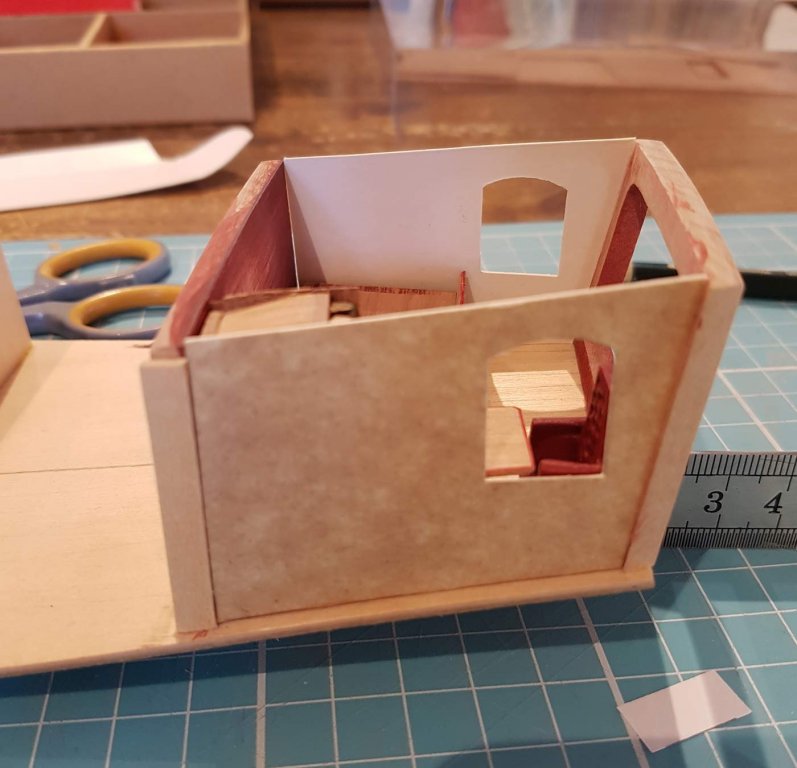
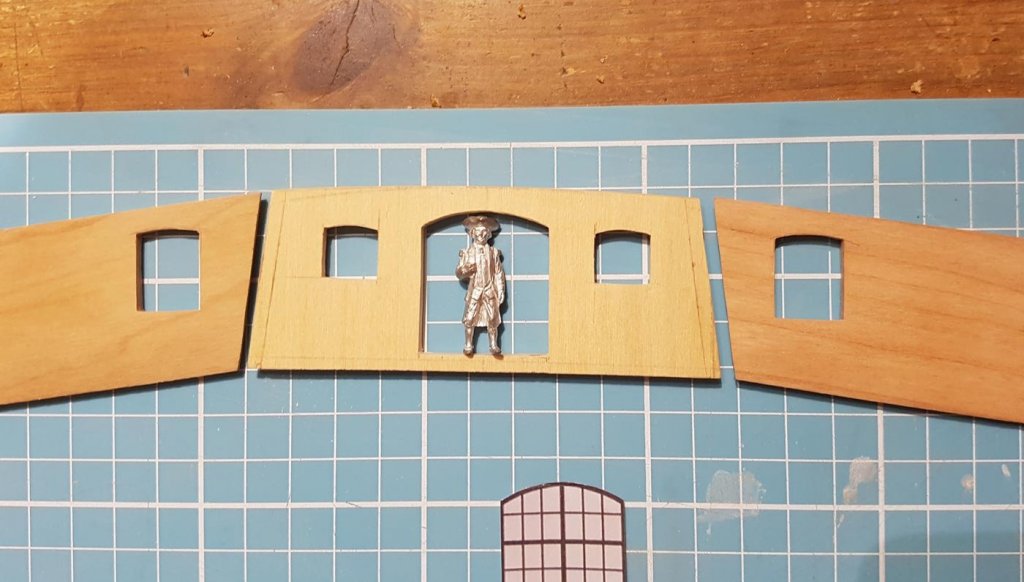
I think I said somewhere on another thread that I was in awe of my late grandfather, a carpenter, who could make a window in a couple of days. “Well, Grandad, whaddaya know? So can I!”……. When I opened up the shipyard this afternoon I found this I have decided to become a fully paid up member of the ‘Bob Ross School Of Theory And Everything’; So this is not a mistake, but a happy accident! I had thought of having the bulkhead curve but I couldn’t work out how to achieve it. I don’t know if this will be visible once the boat is all built up but I’m not going to worry about it. The window….. I taped a piece of squared paper to a piece of clear plastic. I used a piece from a stamp album insert and also tried a thicker piece from some old retail packaging. I loaded up my lining pen with Boltgun Metal from Citadel, I think it gives a good representation of lead. Using a ruler I drew over the lines. Once I got the paint consistency and the pen angle right I managed this on my fourth attempt. While it was drying I glued in the windowsills and the uprights; I made a template of the window opening and cut out the correct shape from the plastic sheet I glued the window to the back of the upright using aliphatic glue.I cut some thin strips of the light walnut and placed them to represent the window frame. I will only do the framing on the port side of the port window and the starboard side of the starboard window, my sanity was stretched to the limit doing one, I can manage to do another one but not another three! The stern windows will be a little bigger so they should be a bit easier……. The window isn’t as neat as those produced by Peter, but as a first attempt I am quite happy with it. The bulkhead windows will be partially obscured by the rigging, staircases, columns and other deck paraphernalia. Hopefully with the stern windows being bigger and that I’ll have had more practice by then, the stern windows should be much neater! Thanks for looking guys and as always all comments, ideas and criticism welcome. Just don’t ask about hinges on the window, I tried hinges, hinges don't like me, I failed at hinges, there will be no hinges.


-
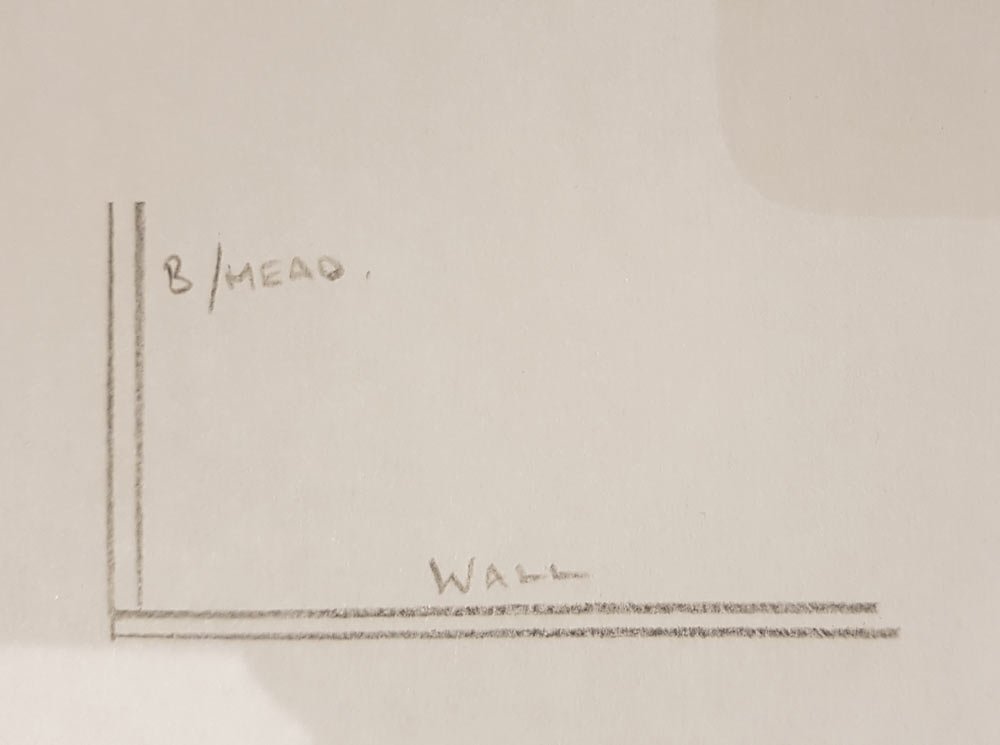
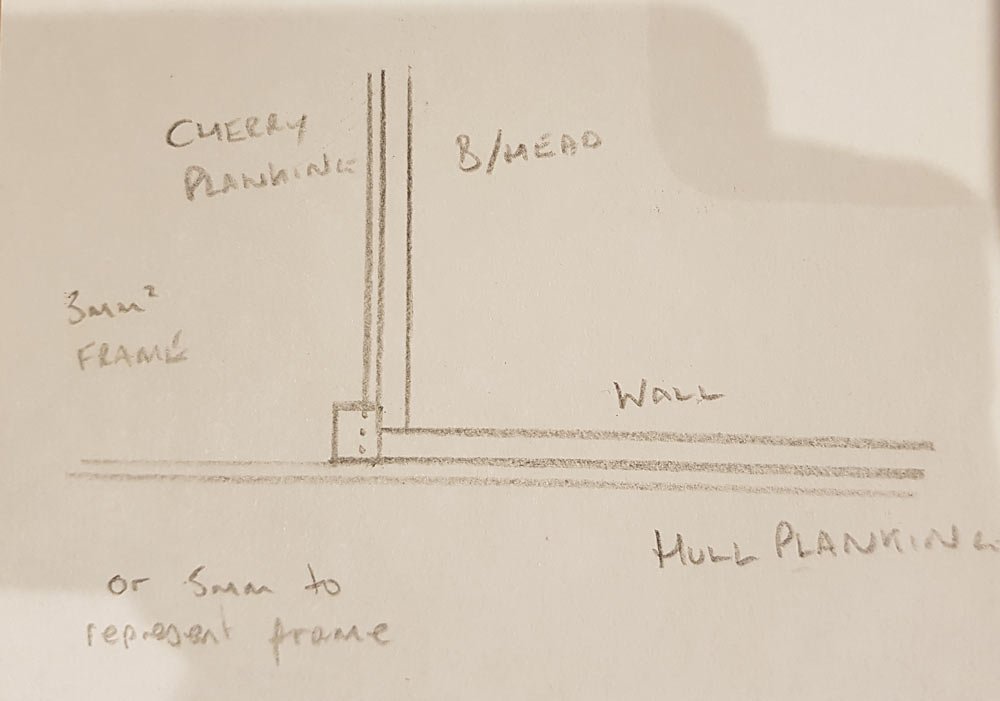
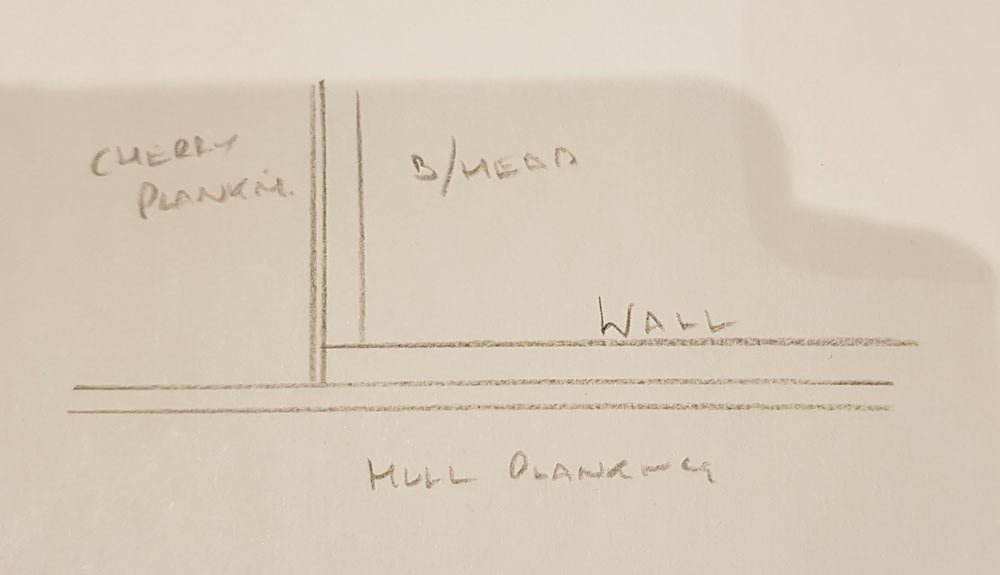
Thanks for your comments, guys. The plan at the moment is to use Danish oil, but I haven't really given it a lot of thought. I used Danish oil on the Virginia and while I liked the effect on the darker wood, it made the lighter wood a bit too yellow. I am going to have to do some testing to see the effect on the maple and cherry. Mark do you mean each end of the bulkhead? I have given this a lot of thought..... The b/h will butt up to the wall like so; (pics looking down in plan view) At the moment I have three options first - cutting about 2mm of the edge of the planking and using a 3mm square frame to cover the join, this I can extend upwards to form a stanchion for the upper deck rail, second - instead of the 3mm frame just use a thin piece to represent the frame, just as I did in the cabin (dotted line). I wont be able to continue this upwards tho. Third option is to use the planking to cover the join between the b/h and the wall; I think option 3 is the more likely one used in "real life", but I REALLY like the idea of option 1...…. Luckily I don't have to decide just yet 😁
-
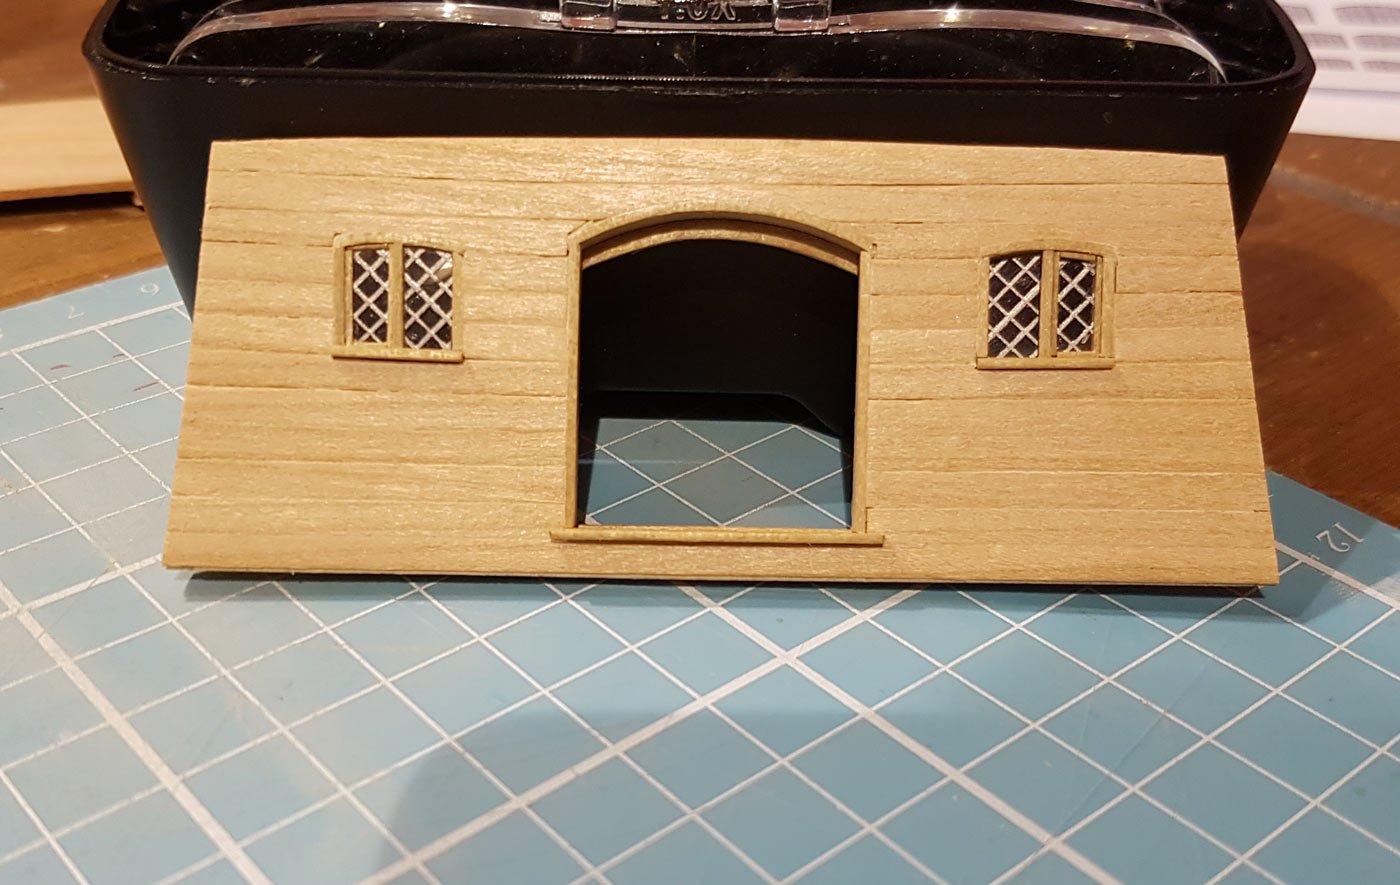
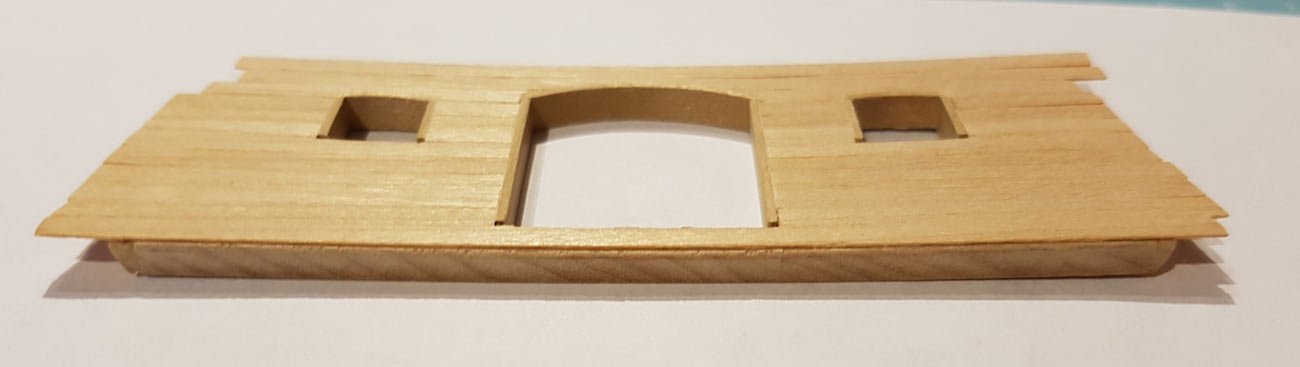
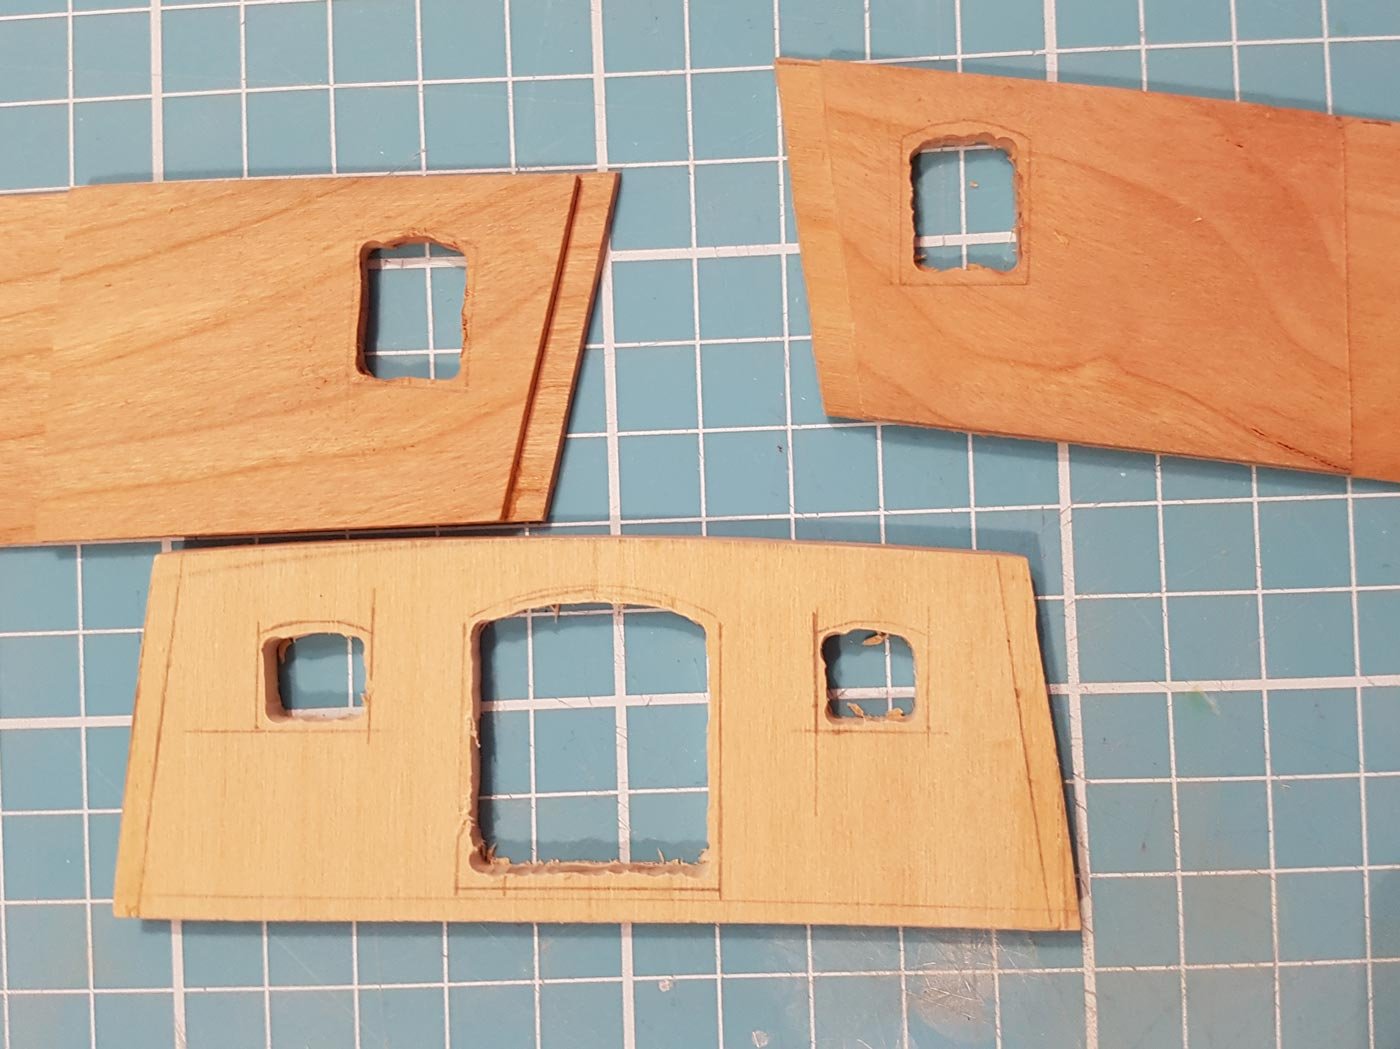
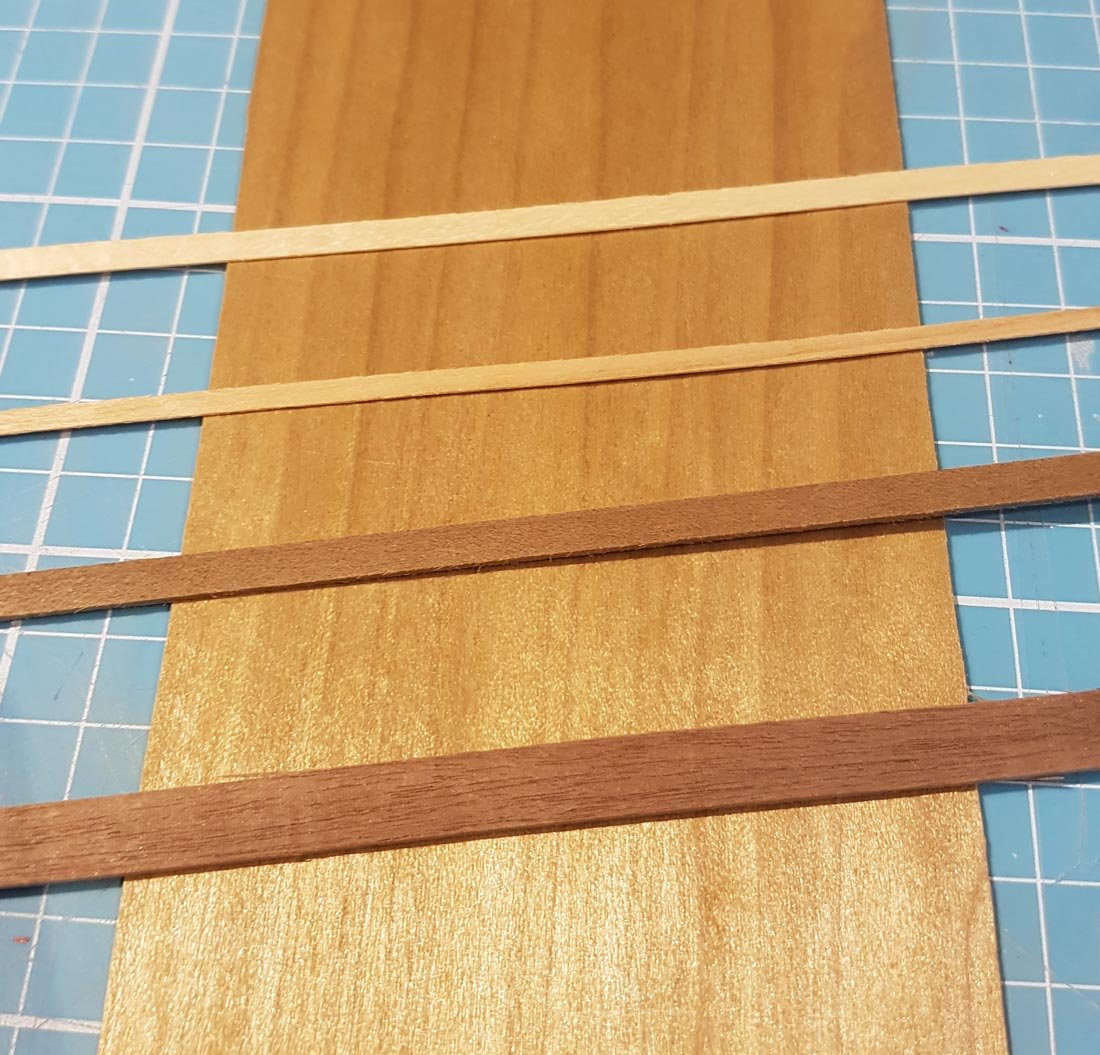
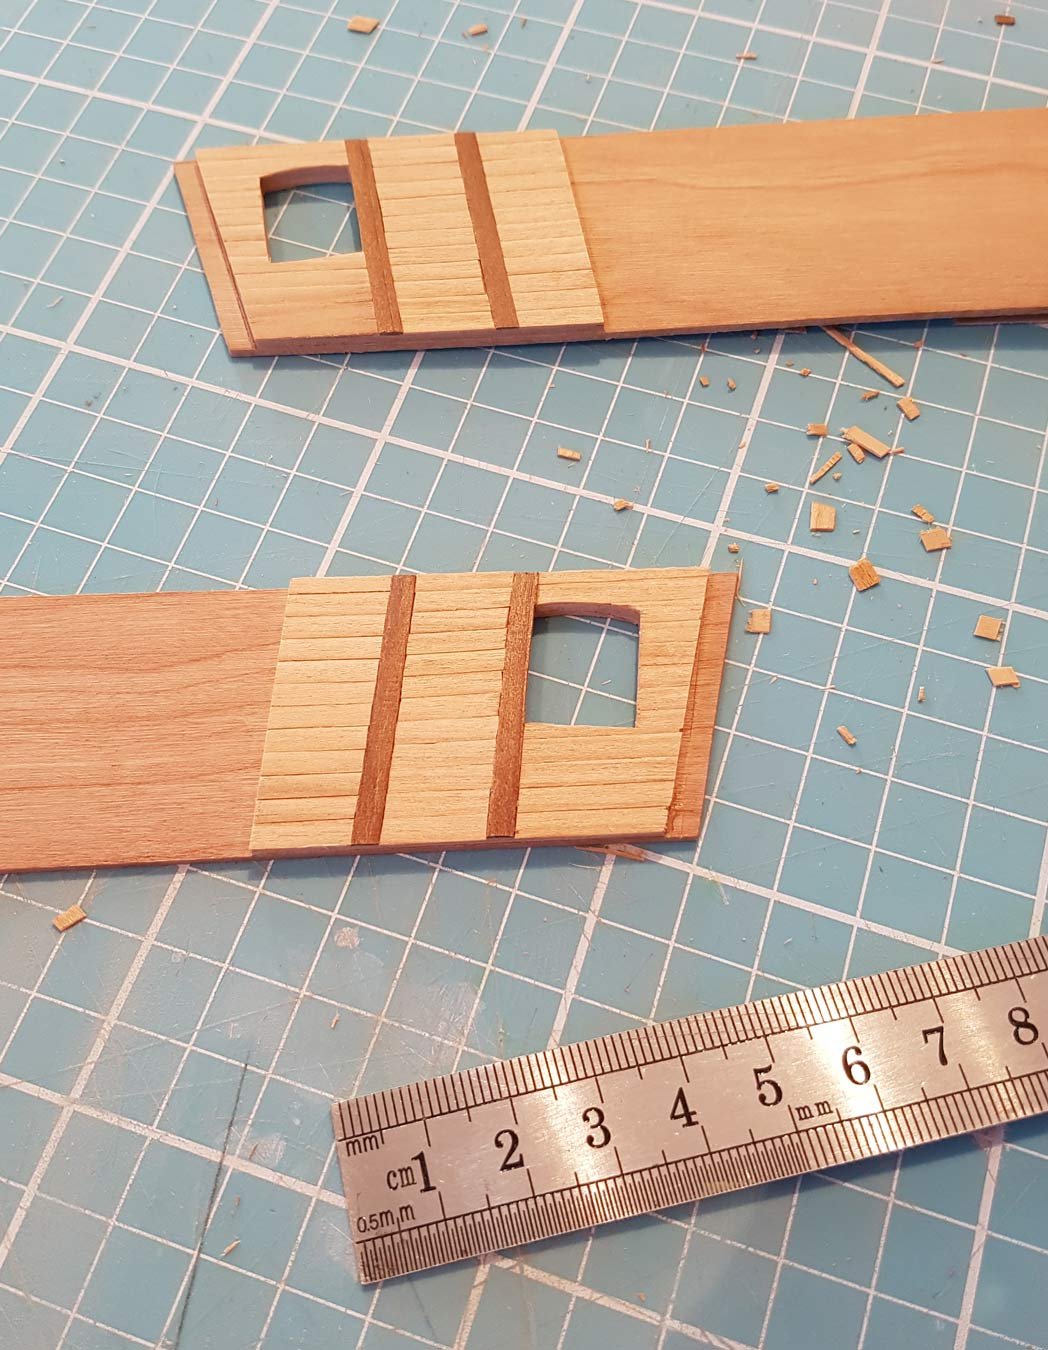
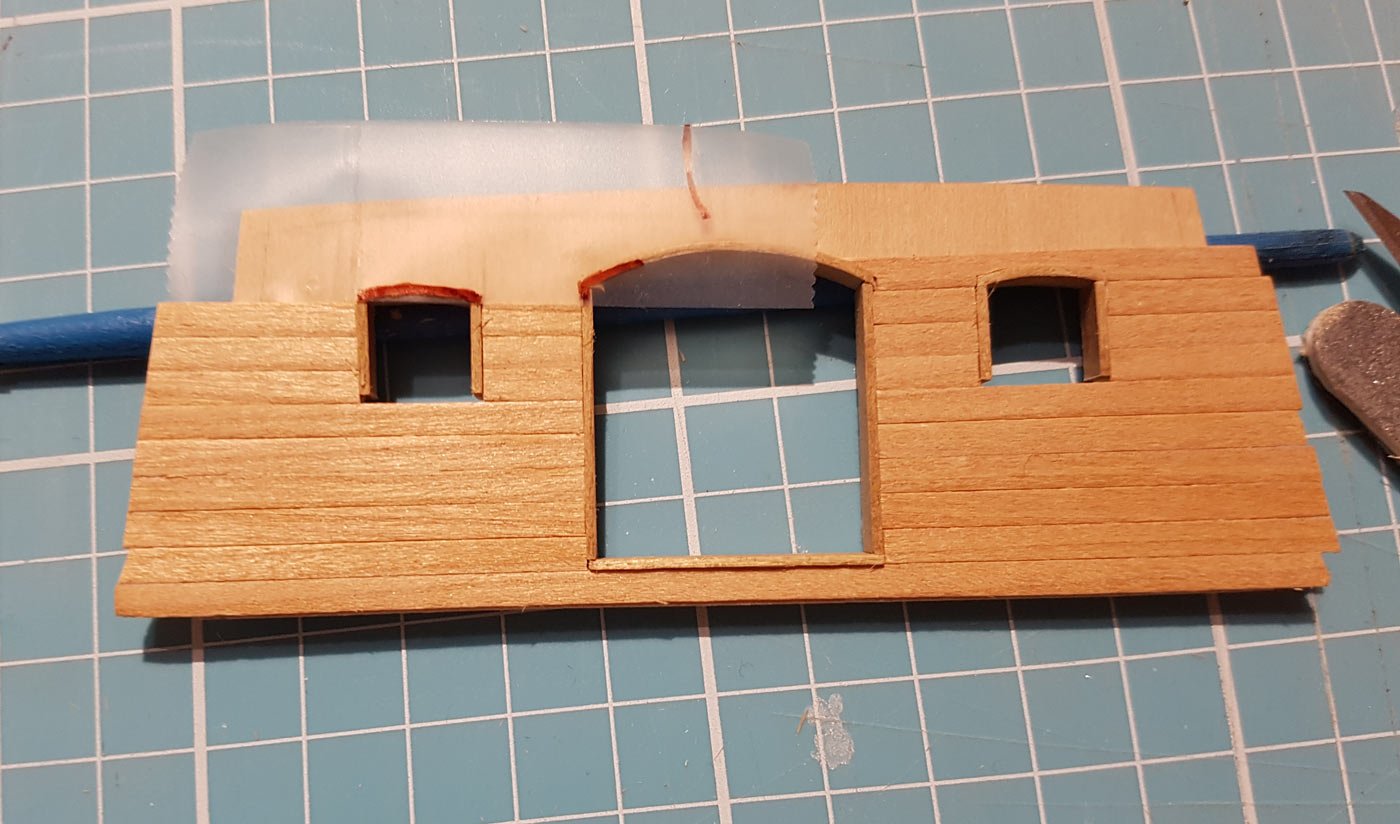
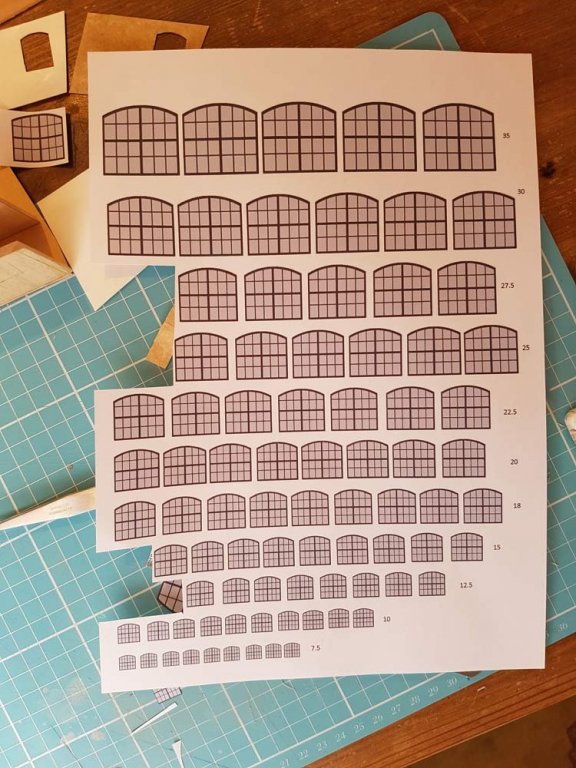
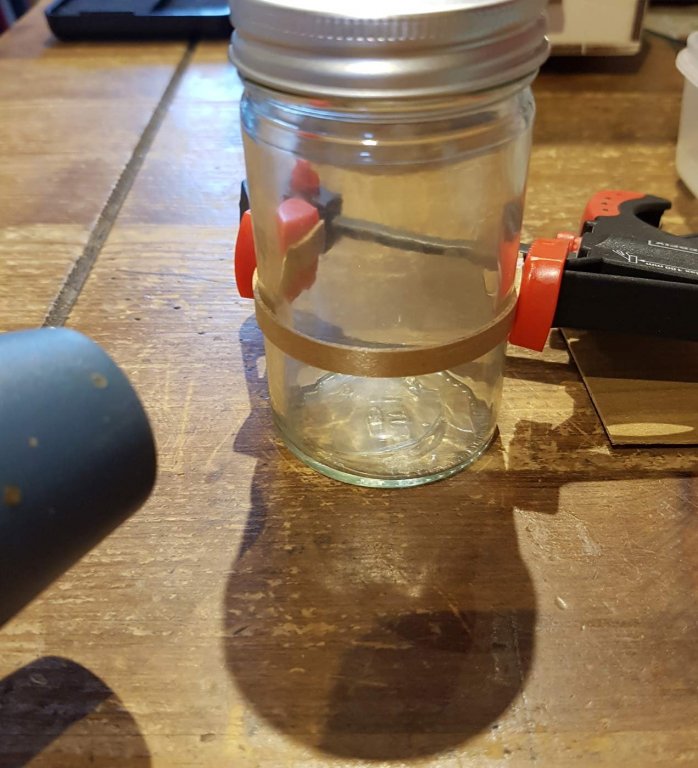
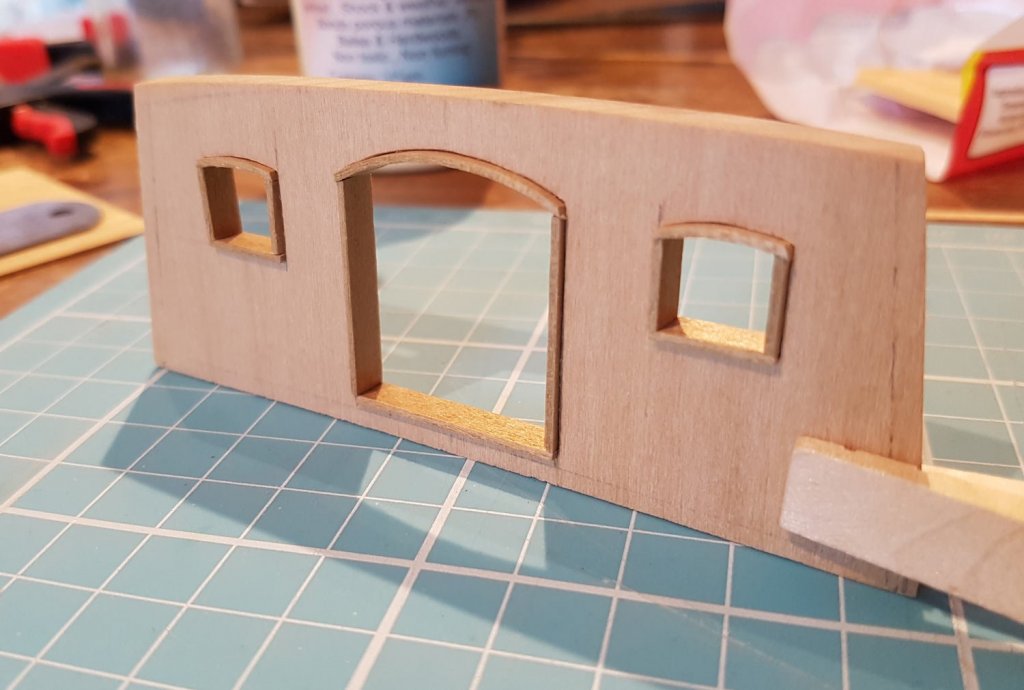
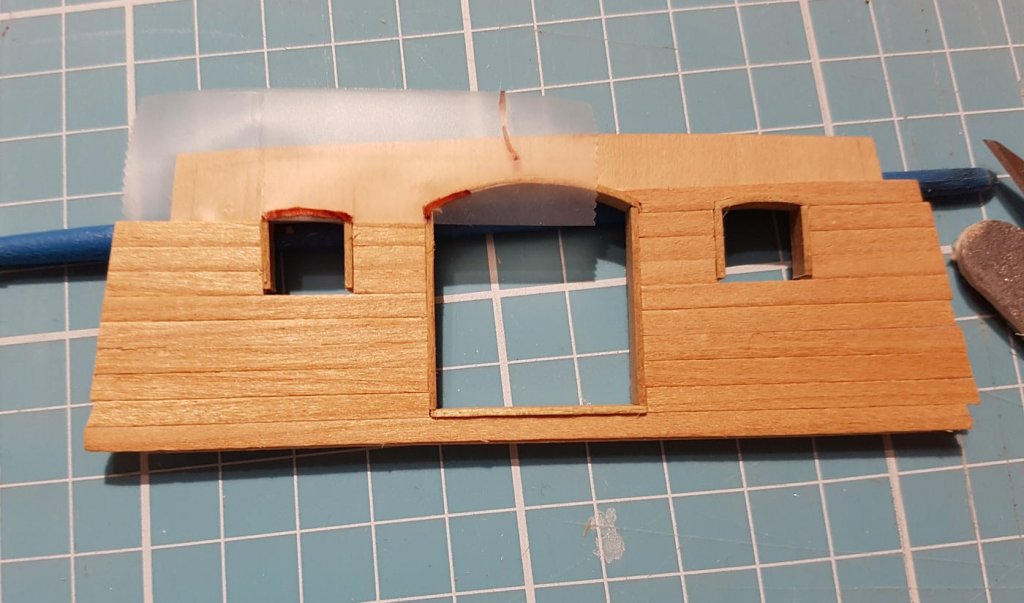
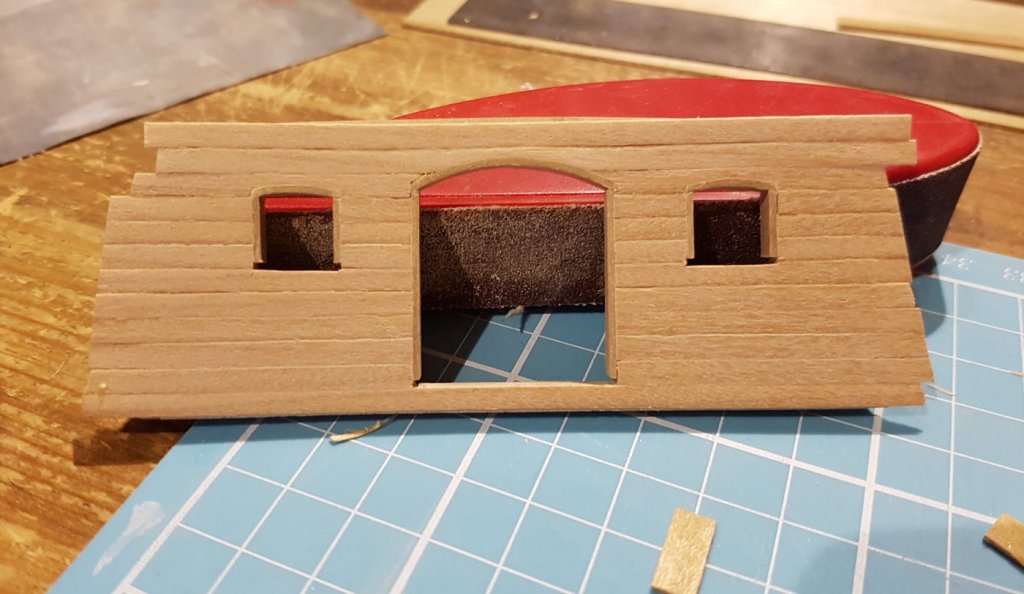
Hi everyone, time for an update; As has become the norm with this build there is a little bit of building preceded by a lot of thinking coupled with a few changes of mind…… So, after I finished the cabin furniture the next job was to plank the inner cabin walls, but I needed to cut out the windows first. I have been inspired by the windows in Peter’s (Katsumoto) Santa Maria 1492 build so I spent some time thinking of what I wanted, and what I could achieve. I eventually decided on a flattened arch window. I found an image on the web, resized it on the computer and printed it out; I made different templates out of card to see which would fit the best, and stuck with my first choice; I used my dremel to roughly cut out the windows in the side walls and the window and door openings in the aftercastle entrance bulkhead and cleaned the openings up with needles files and sanding sticks At this point the intention was plank the inner walls and windows/door frames out of the same mahogany I had used making the furniture, thus giving some continuity from inside to outside. I wasn’t looking forward to using the mahogany as it was brittle and splintery, but whilst chatting to Mark he suggested using something like ebony or teak. Unfortunately I couldn’t source either in the limited size and quantity I needed. It looked like I was stuck with the mahogany. The problem I had was that I wanted a contrast with the planking but couldn’t use walnut as that was representing the “wizardwood” hull planking and the upper planking was going to be dibetou, so I couldn’t use that. It wasn’t until later that day that I remembered a sheet of 1mm walnut that I had that was a lot lighter than the walnut planking that I had. The plan now - and I’m sticking to it! - is Maple - deck Cherry - forecastle and aftercastle bulkhead planking Dibetou - upper hull planking Walnut - lower hull planking, frames, rails light walnut sheet - doors windows I decided that I wanted to show the upper deck beams in the cabin, so I thought I would show at least the face of the frames in the cabin. I will add the shoulders and deck beams when I get to the upper deck (should be about February………2021!) To do this I sanded some 1.5mm planking down to about .5mm To show the frames I decided to plank the interior wall of the cabin in cherry Next job was to bend a strip of the light walnut to make the arch of the window frames. It was soaked for about 5 mins, clamped to a jar and heated with a heat gun After much thought I decided to build the door/window frames on the aftercastle bulkhead before planking, I found that the cherry could chip when I planked the walls first and then cut out the window. It would mean more work when planking but I thought I would get a neater result, and more work means more fun ! The frames were made deeper than the depth of the bulkhead so that after planking I could sand it all level. Here the side and arch frames are glued in but the bottom frame on each is left unglued. This is so that after planking I can remove them, sand the other frames flush with the planking and the replace the bottom frames giving a “windowsill” look Using a sticky tape template for the next plank; And after sanding Hopefully I can get the bulkhead finished in the next week or two. Then it'll be the side windows. At some point I need to finish the decoration for the cabin - mirror, pictures etc. The aftercastle, its sides and the bulkhead need gluing together and then attaching to the hull, and then I need to start on the forcastle bulkhead. All that should see me through to the summer! Thanks for looking!


-
Thanks Gerty!
-
Just noticed your log, hope you don't mind if I pull up a chair and follow, i'll sit quietly at the back.
-
I like the look of this ship, so i'll pull up a chair and follow your progress, good stuff so far
-
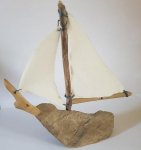
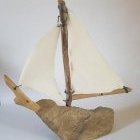
Thanks for your comments Oliver, I really appreciate them. I think AL did pretty well with this kit. It is a basic kit of a generic "schooner type boat" so I can't comment on AL's accuracy. But the wood supplied was varied and of decent quality and you got more than enough to complete the kit. None of the wooden parts were warped. I didn't like the metal parts; carronade, bitts, boom saddles etc, I would have preferred them in brass as shown in the instructions but for the price point its understandable. The instructions were pretty good for a wooden kit, although they mostly follow other manufacturers in that they tell you to do something rather than exactly how. And then when it comes to the rigging they tell you to work it out from the pictures - again I don't think that is unusual with these type of kits! As a basic kit as an introduction to wooden ship building? yeah I'm happy with the kit, not the best but not the worst either. If AL had the ship I was looking, for in the scale I wanted, I would certainly include them in my decision.
- 50 replies
-
- 1
-
-
- virginia
- artesania latina
- (and 2 more)
-
Looking very elegant, Peter. Just a thought though; In "real life" would they have put a flag so close to the lamp? Flappy material touching hot metal containing a hot flame = scorching! 😎
- 236 replies
-
- 1
-
-
- artesania latina
- kitbashing
- (and 2 more)
-
Never thought of doing that. I just use a flame to get rid of the fluffiness, but it comes back after handling. Combining the two methods is something I will try. Cheers!
-
She is looking a beauty, Peter, you should be justifiably proud. I love the look of the Lombard, it looks very purposeful, and the anchors' look great. Good on you for getting the beeswax to work, I just ended up with a waxy mess...….
- 236 replies
-
- 2
-
-
- artesania latina
- kitbashing
- (and 2 more)
-
Hi Oliver, Nice build so far. I am sure others will correct me if I am wrong but I think that you have built up the anchors wrongly. The wooden stock should be perpendicular to the flukes, rather than parallel as you have built them. Hope this helps, good luck!
-
Thanks Mark, Very kind words indeed. I am pleased with how it has all turned out. I do thank you and Peter for giving me a little nudge and advice, gave me the push that I wanted. Definitely! I think I have reached the limit of my capabilities, and my sanity...... When I started the cabin back in November I thought it would only take a couple of days......😂
-
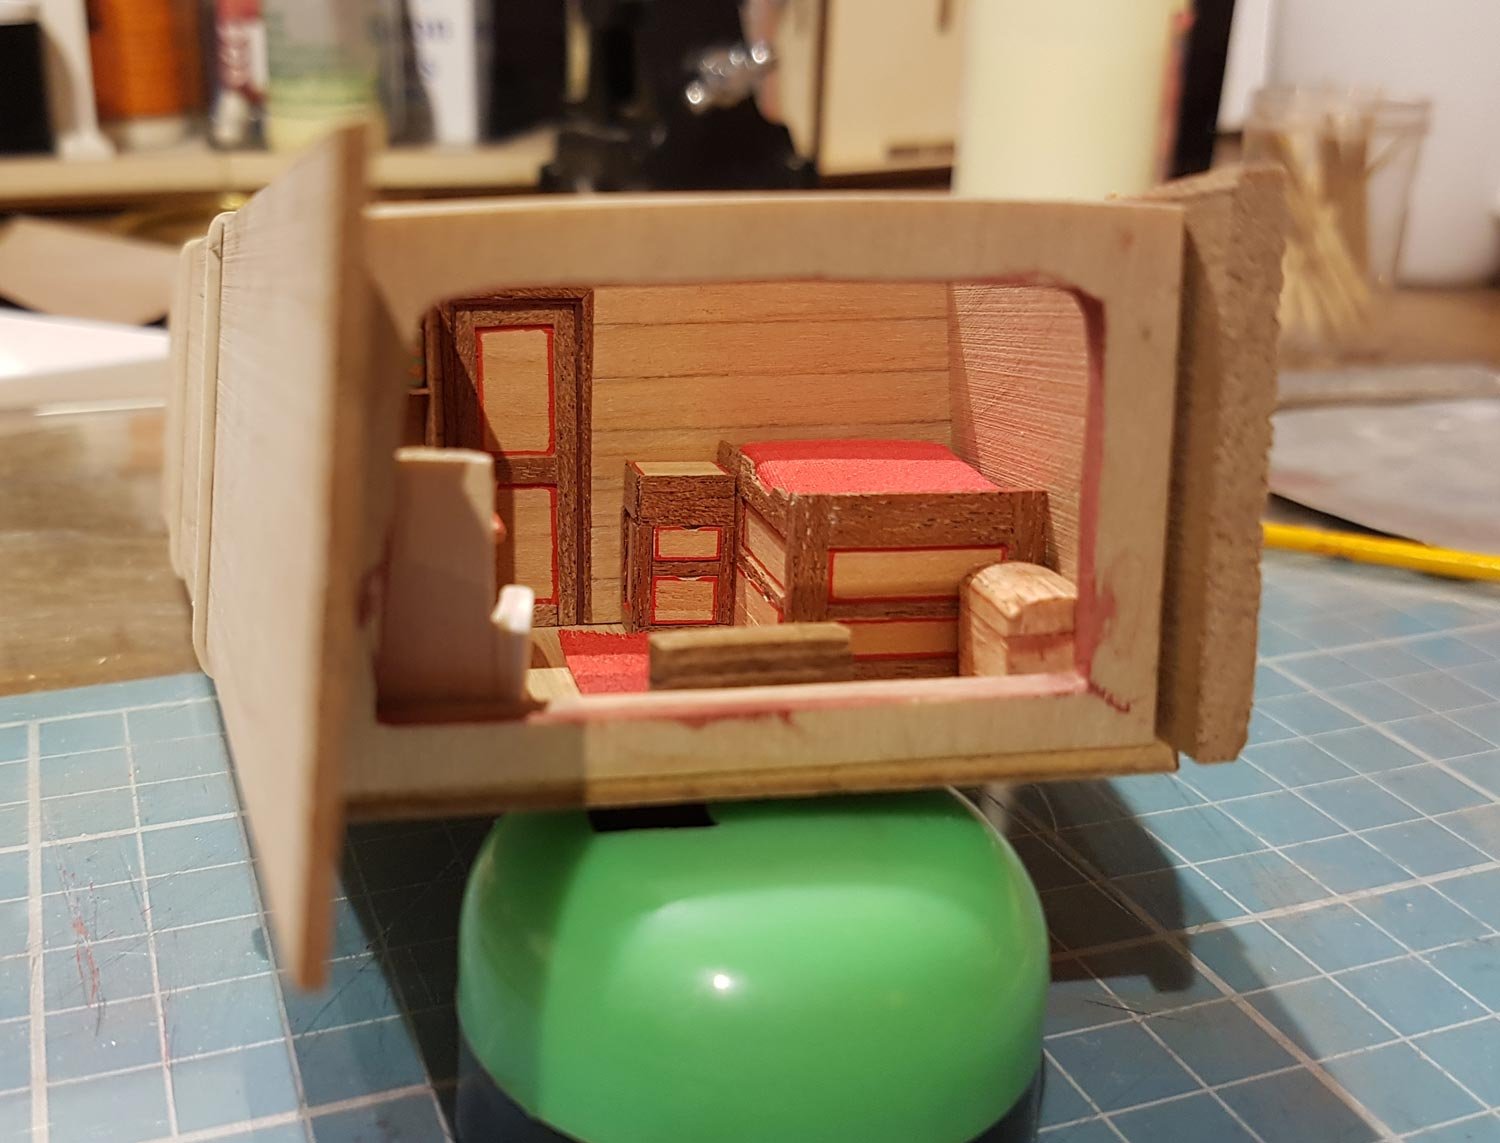
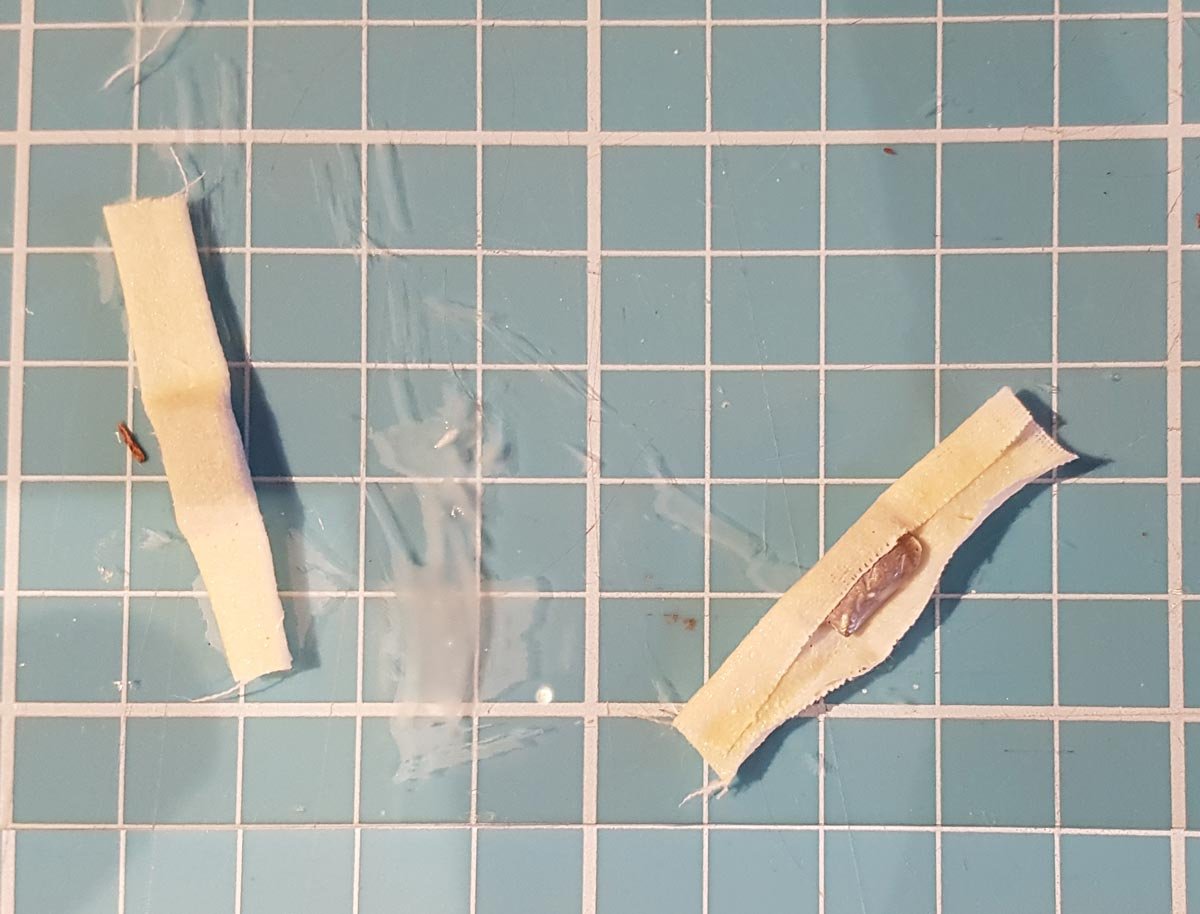
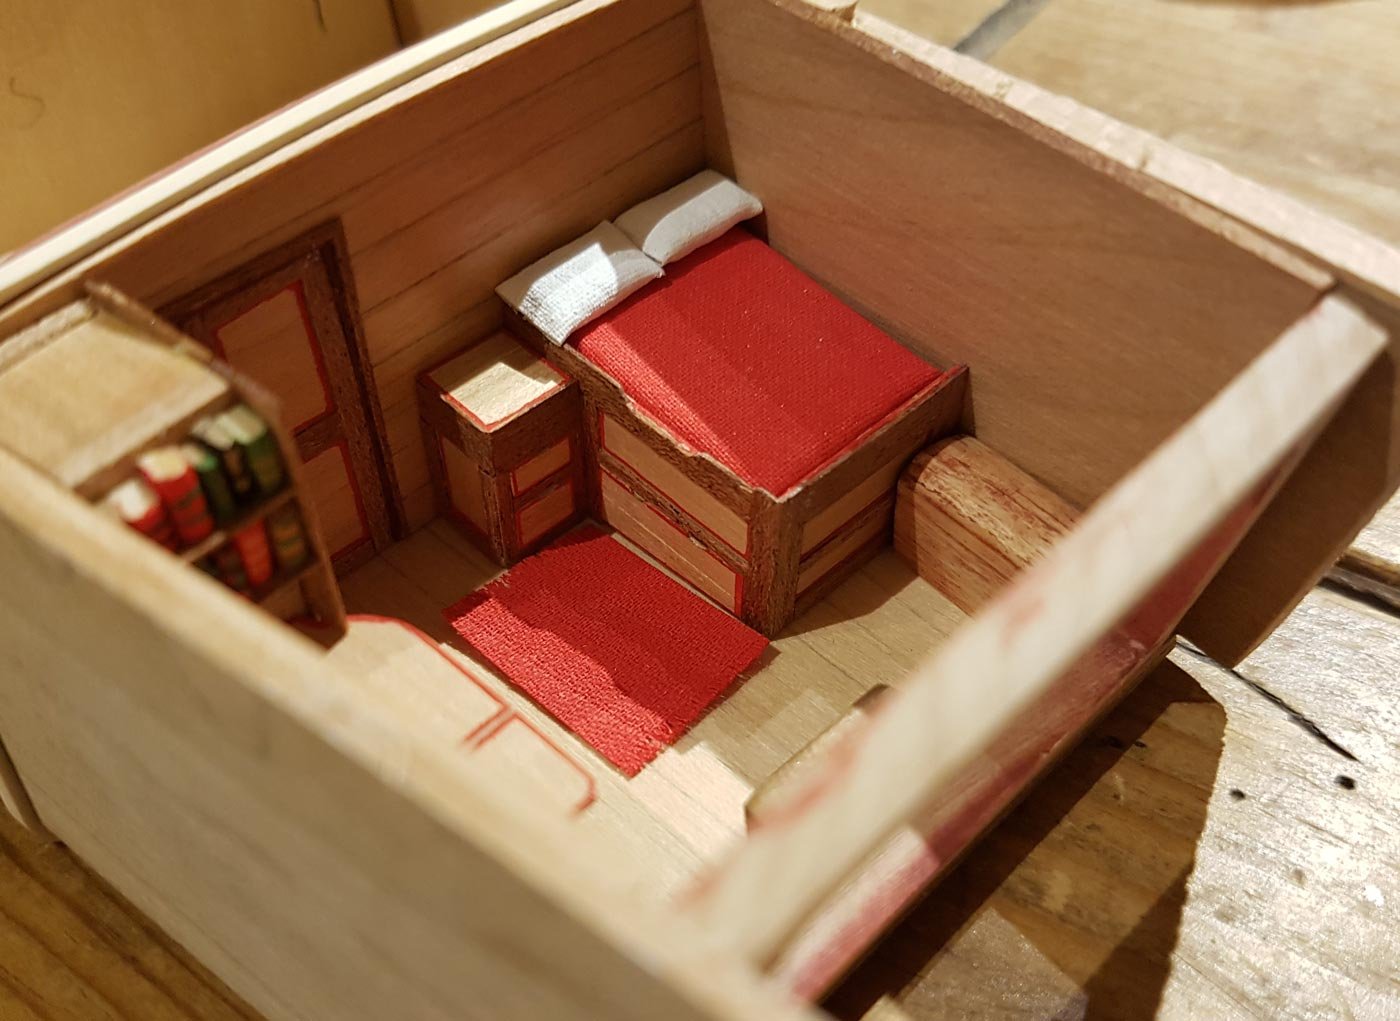
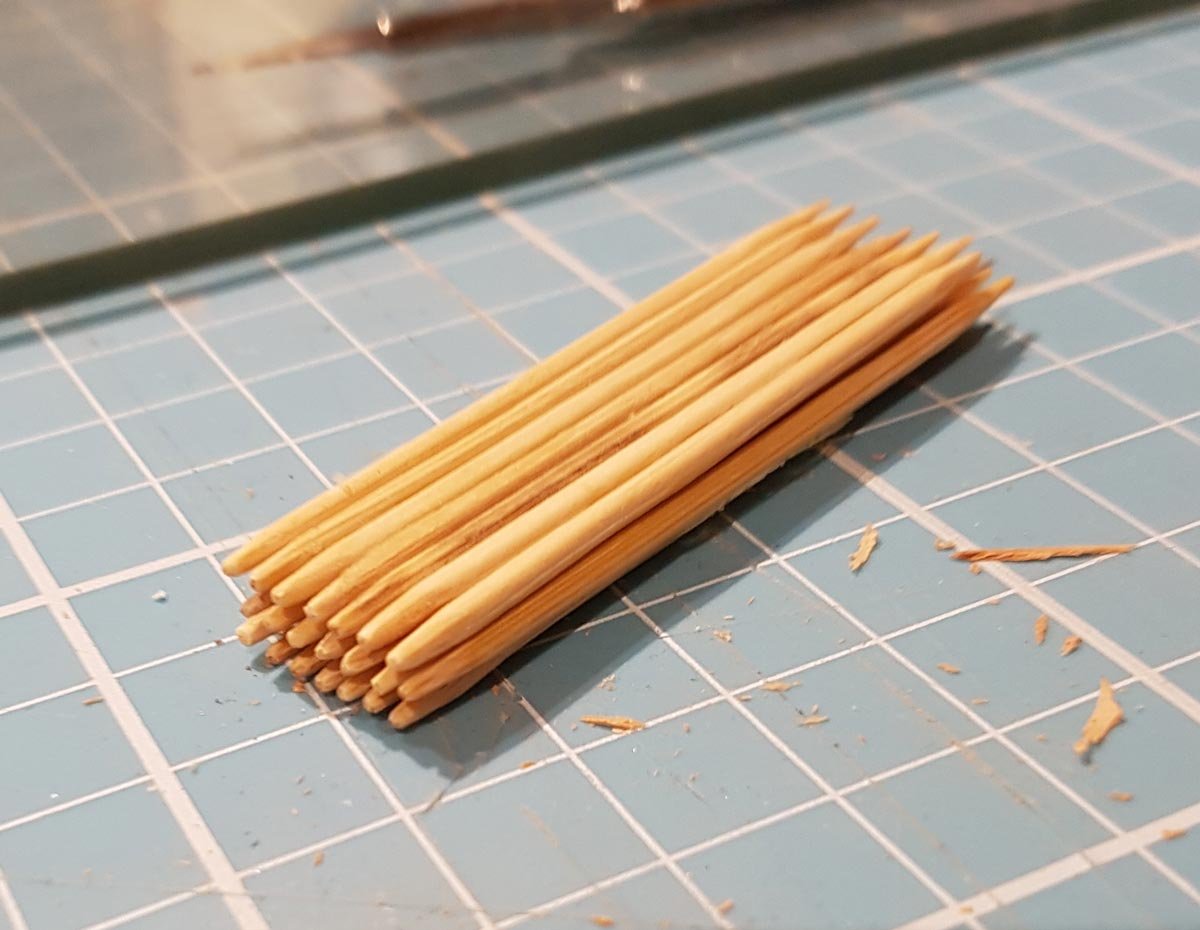
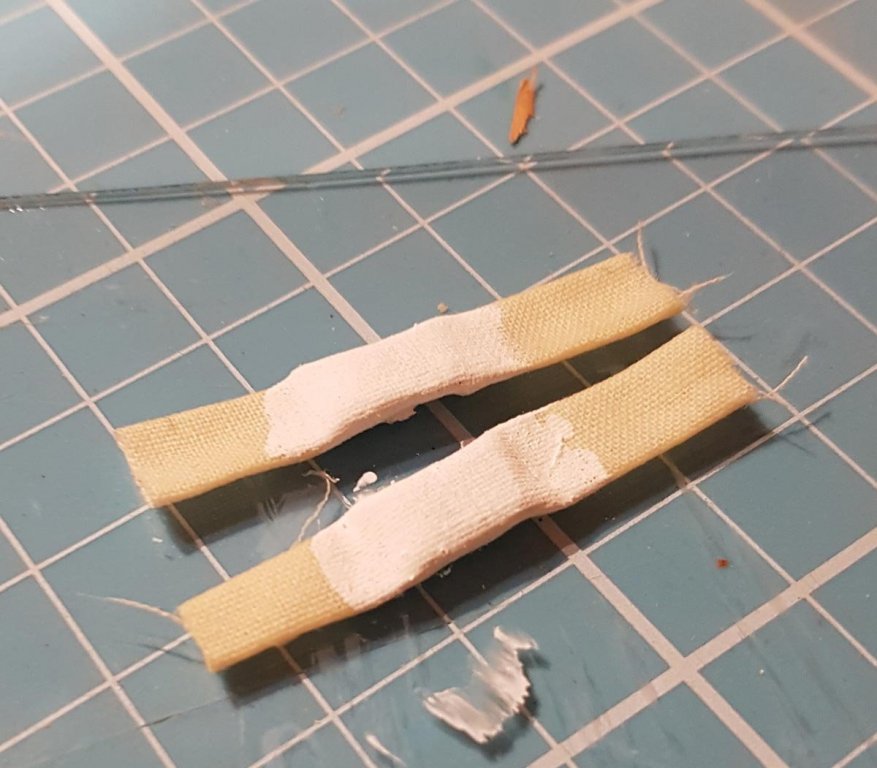
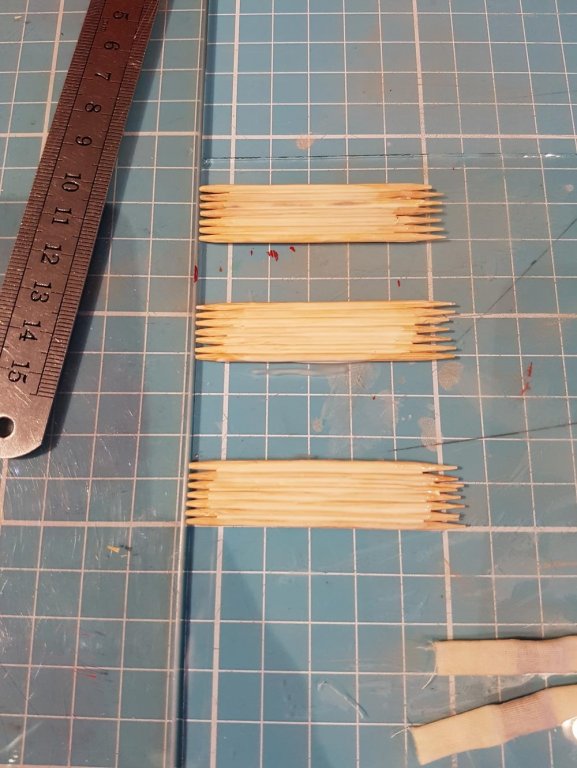
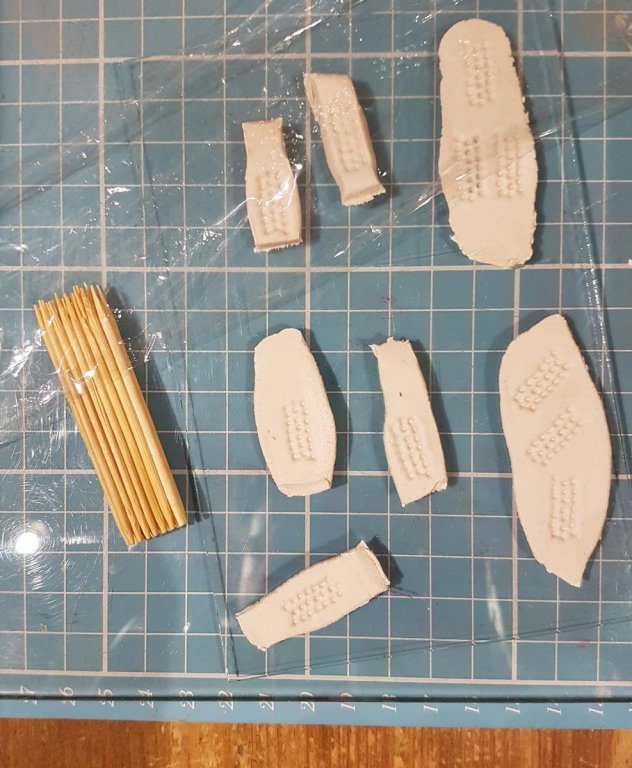
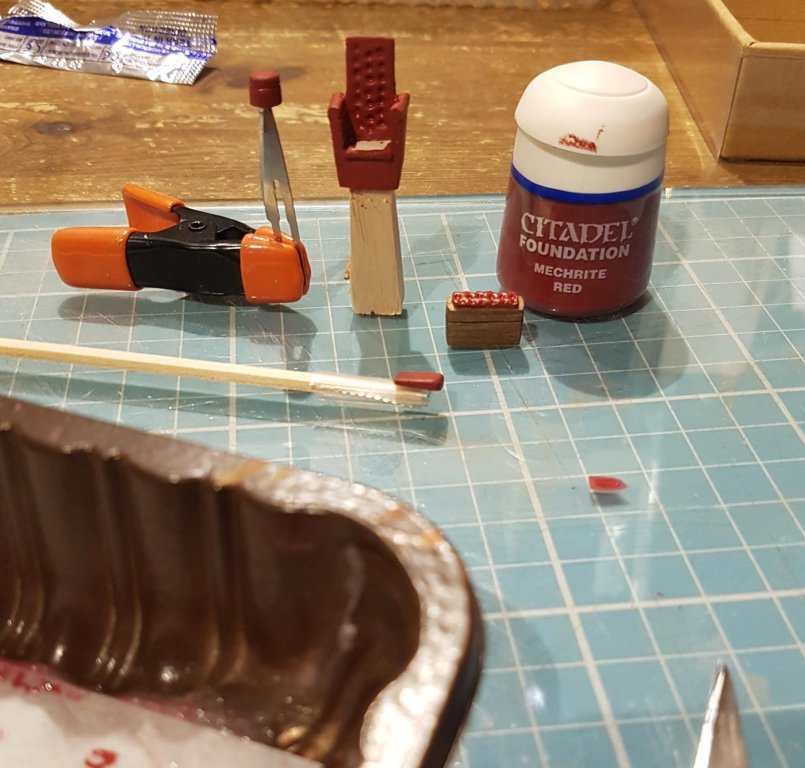
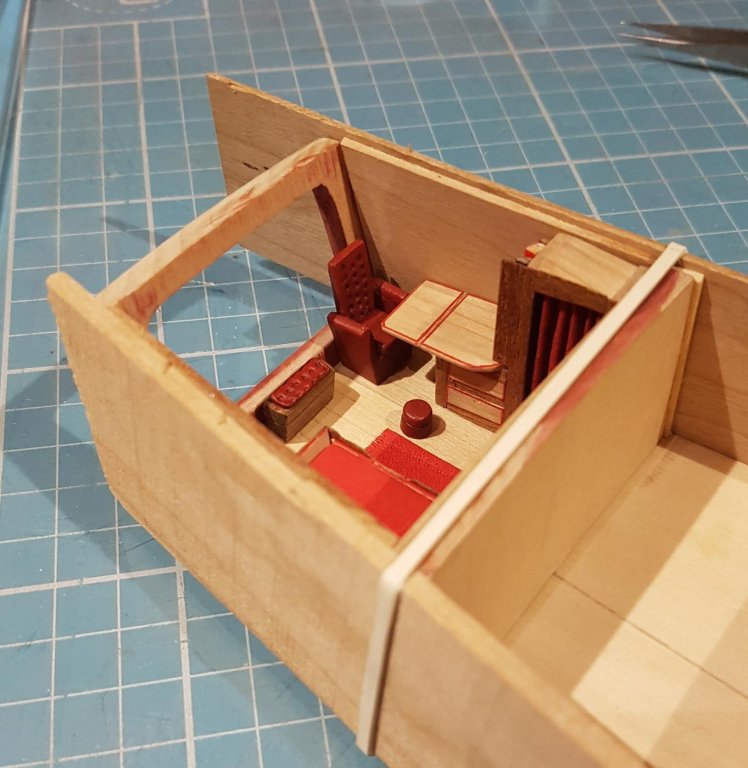
Hi everyone and welcome to the first log update of 2019; After rebuilding the wardrobe /drawer/table I rebuilt the bunk/sidedrawers. I did the same as for the wardrobe, basically replaced the painted wood with the mahogany. I also replaced the drawer unit. It was a bit wonky after the destruction and I didn’t like the look of the porcelain sink - and anyway the sink would have had a cover to allow the unit to be used through the day, so I just modelled to top closed. I lowered the height of the bunk carcase so that I could model a little dip in the side, just to make getting into the bunk a little easier. I laminated a few strips of walnut to make another chest that will sit along the back wall - this chest has a flat top to allow a cushion/seat on top. The other chest still has to be stained; I’m thinking of mixing up a dark oak type colour. Unfortunately I didn’t take any photos during the bunk reconstruction, but here is a finished dry fit shot; Every bunk needs pillows. After trying different methods without success I found a couple of whitemetal flour sacks from my model railway supplies. I covered them with the handkerchief/curtain etc material and covered them in glue; …….then painted them white; ……….and cut to shape. At last I had to turn to the chair that I started a while ago. Mark had given me some input as to the correct scale but I wasn’t happy with what I had made so I have spent a while thinking of different ways to achieve what I wanted. I came to the conclusion that I needed a jig; The first step was to shape and then glue three sets of seven toothpicks; Then when dry the three sets were glued together; I then rolled out different thicknesses of DAS clay, held a piece of cling film taut over the surface of the clay, and used my jig to imprint the clay. After some shaping and fitting I painted the chair, cushion for the chest and a footstool. I used Citadel Foundation Mechrite Red. I like using the Citadel paints for brush painting, they don’t dry as quick as Tamiya paints. I then washed them with a Citadel Gryphonne Sepia wash and then drybrushed them with a bit of Blood Red. the drybrushing left them very rough so I polished them. In fact I polished them, and all the mahogany in the cabin, the bulkhead and the deck, with a natural beeswax cream. I brushed on the cream, brushed any excess off and then with a stiff brush rubbed until the pieces shone. On the bare wood I also used a fine sanding stick from Squadron - the stick is so well used its just a polishing stick now! That’s all for now, Thanks for looking, Cheers


-
Lovely clean work, Sir, as we have come to expect. I like the cannons, am looking forward to how they will be rigged.
- 236 replies
-
- 1
-
-
- artesania latina
- kitbashing
- (and 2 more)
-
Thank you Peter, your opinion means a lot, and Happy new year to you. Captain Kennit requires that you refer to him correctly and reminds everyone that keelhauling helps with memory retention...…. I am advised to inform you that his correct title is; "The daring and Undefeated Pirate Captain Kennit, King of the Pirate Isles by Virtue of His Boldness and Cunning" (He is also an impatient, vain pain in the a@@.........) 🙄