HOLIDAY DONATION DRIVE - SUPPORT MSW - DO YOUR PART TO KEEP THIS GREAT FORUM GOING! (Only 24 donations so far out of 49,000 members - C'mon guys!)
×

nikbud
-
Posts
203 -
Joined
-
Last visited
Content Type
Profiles
Forums
Gallery
Events
Everything posted by nikbud
-
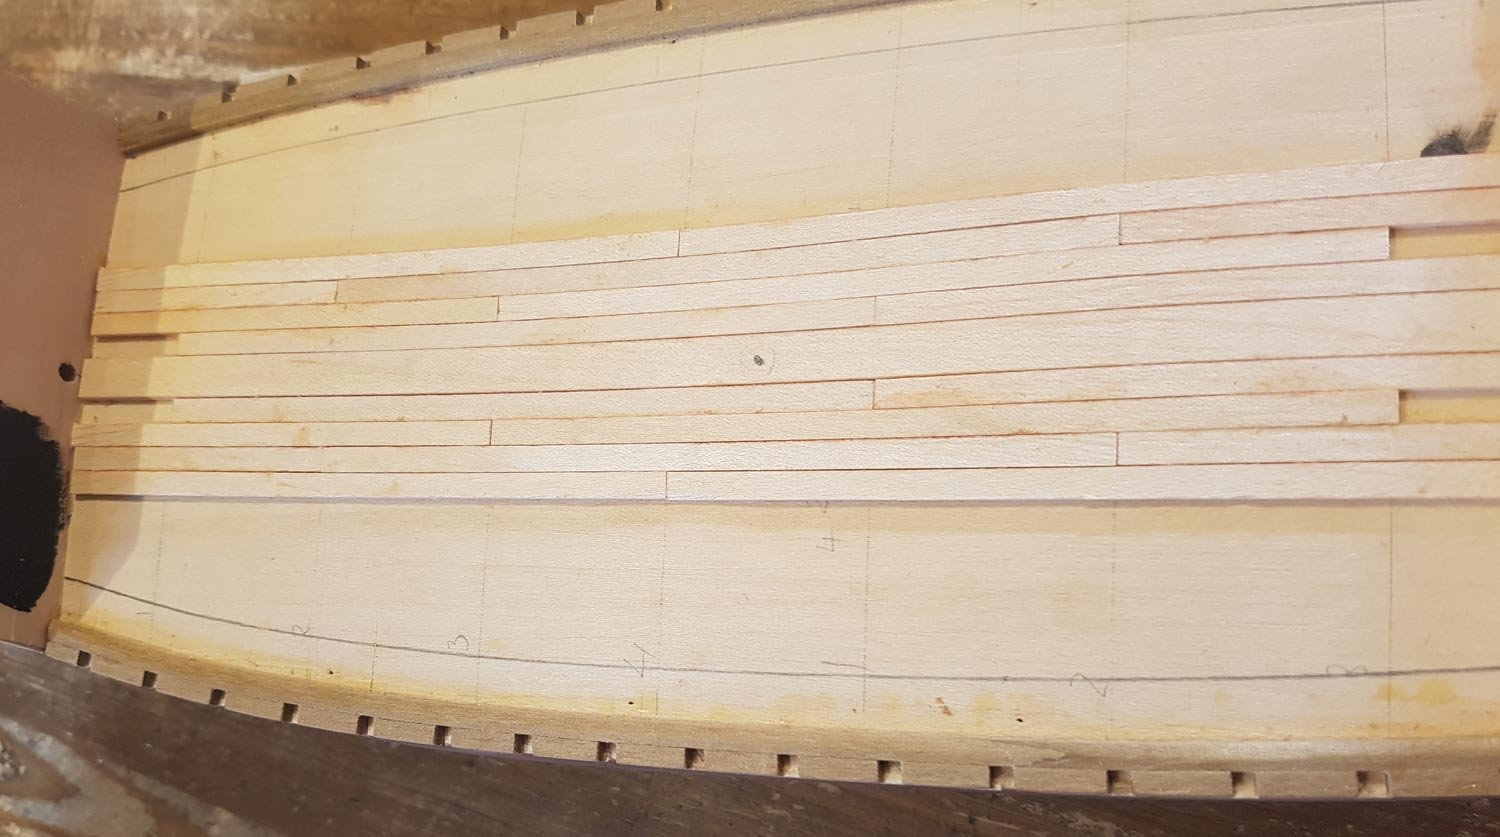
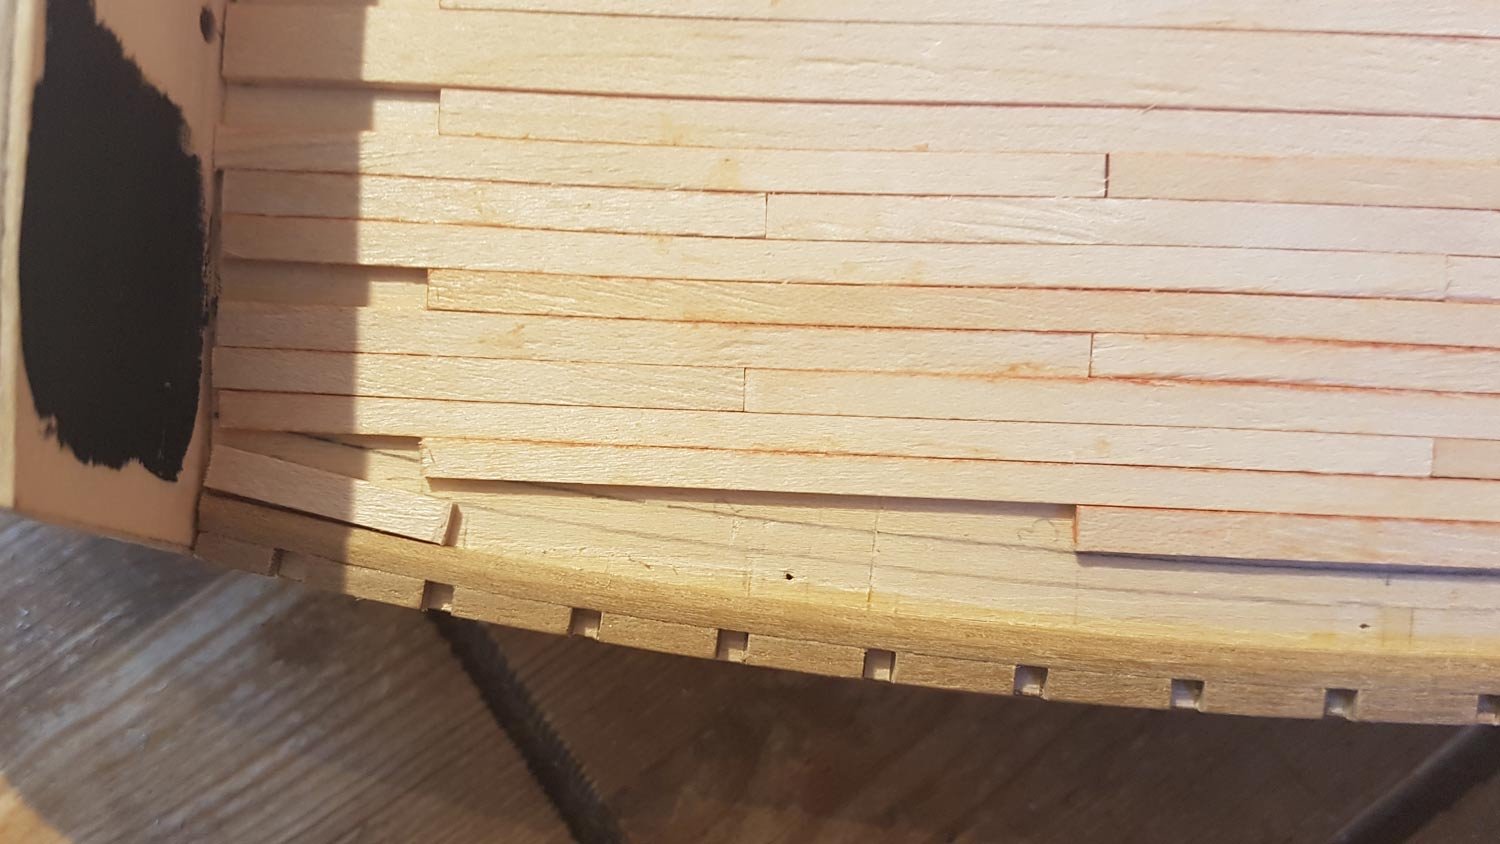
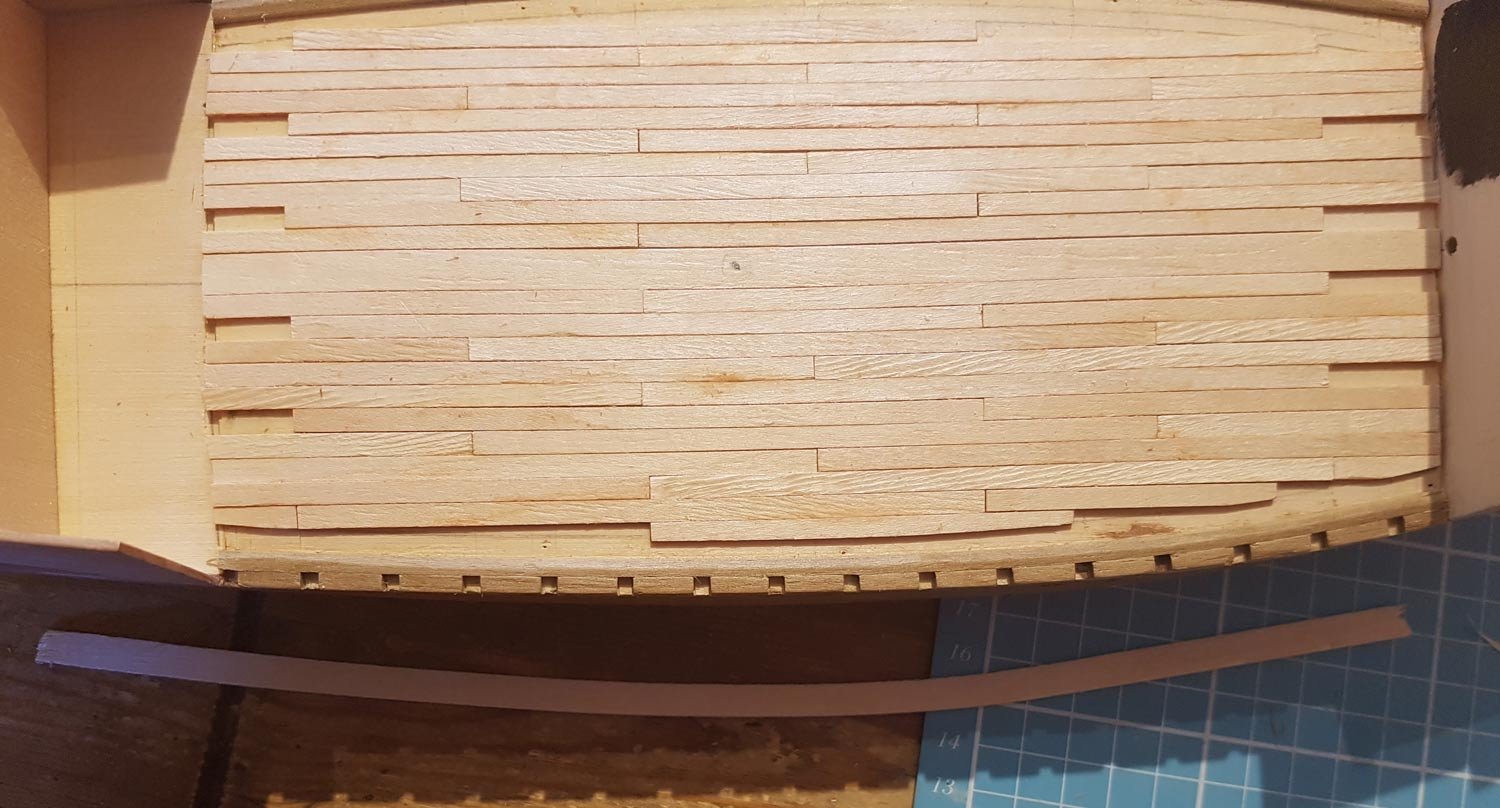
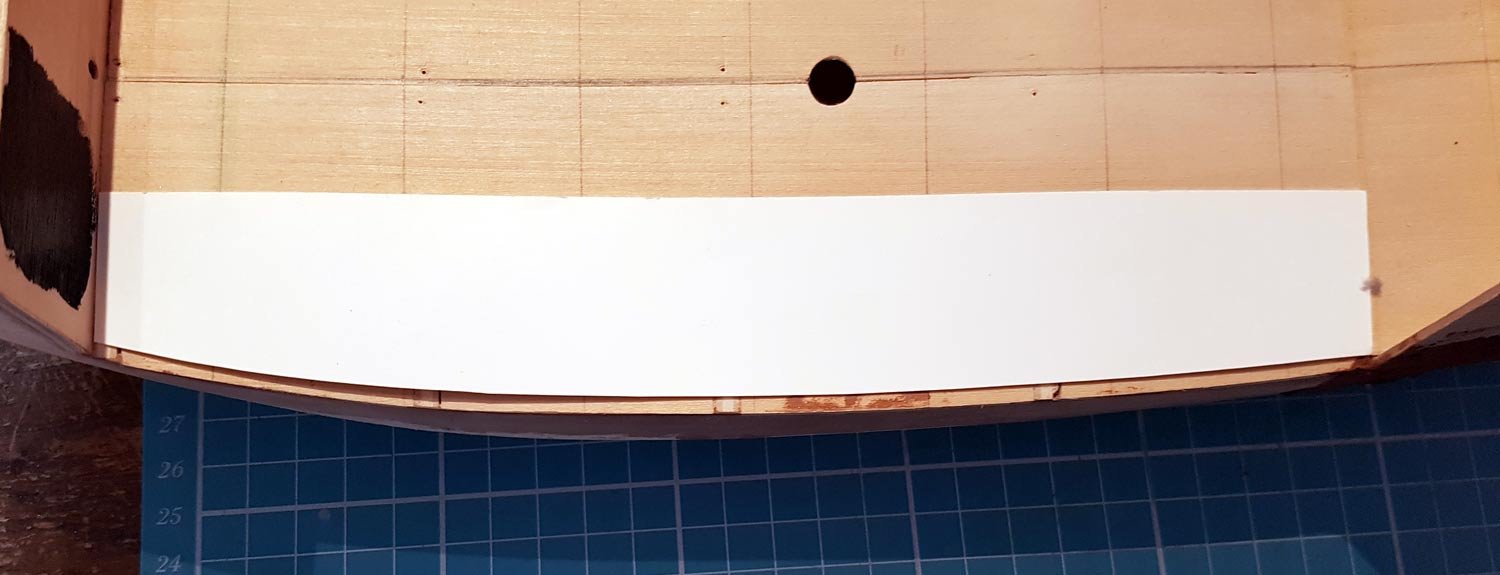
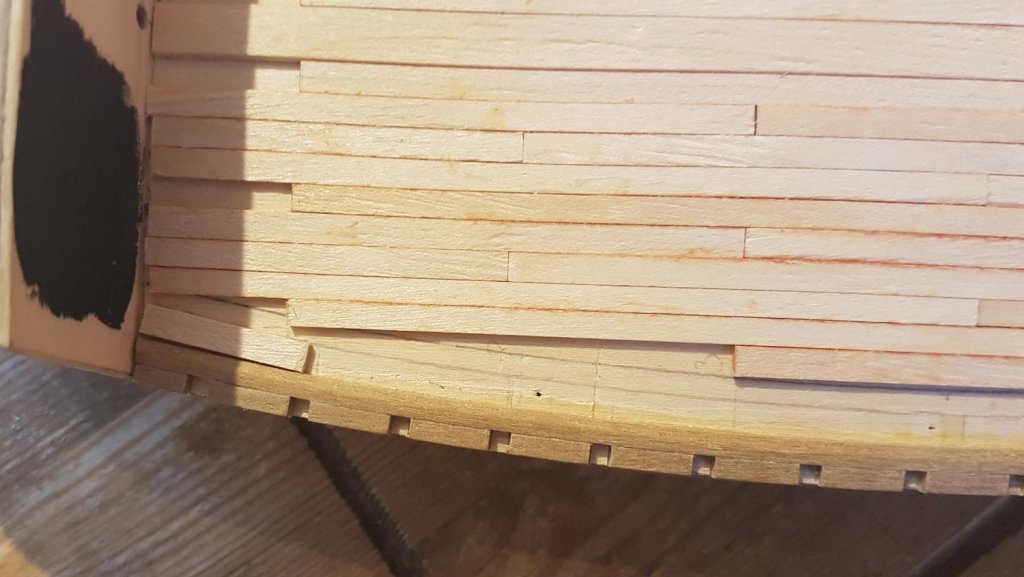
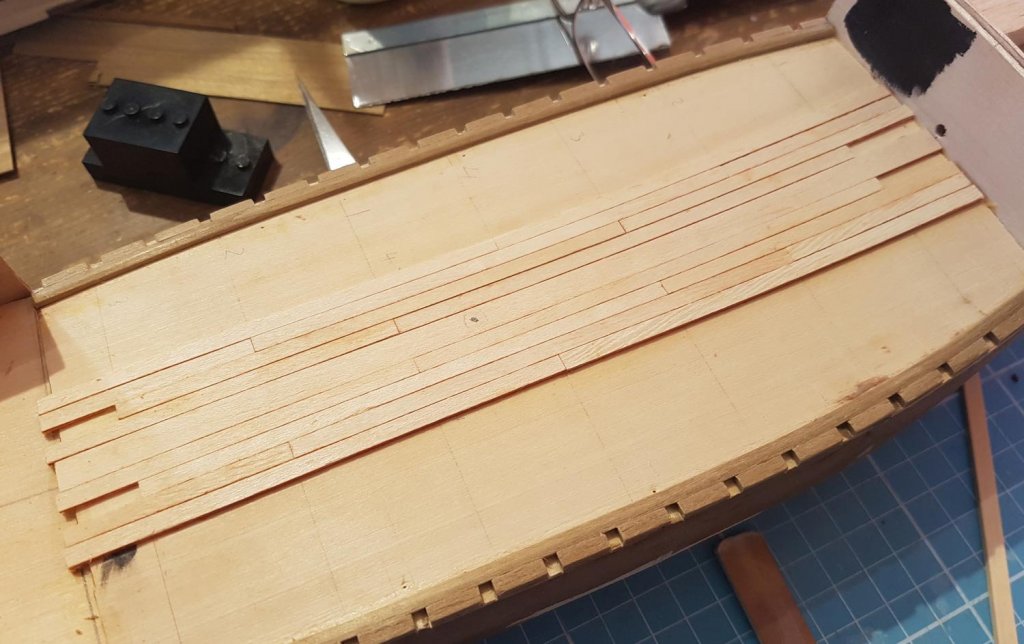
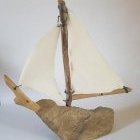 To be honest Mark, I had it in my head that most, if not all, ships had a king plank down the centre of the deck. My initial idea was that the king plank would be shaped to follow the curve of the hull, so the rest of the planks would follow that curve also. Some rough drawings proved that this idea wouldn't look as good as I had imagined. I decided to go with a wider king plank to make a feature of it and then from that the idea to mirror the planking seemed to fit the vision I had of how and why the ship was built. I continued with the planking today. It is slow going - I’m not using any clamping so I am having to hold the planks in place until the glue grabs, about 5 min for each plank. I soaked a 7mm maple plank and then clamped it in the waterway jig, this will be the outside nibbled plank. On the false deck I used a compass to mark the maximum width of this plank. I got carried away with the planking and just in time remembered to mark, again with the compass, the minimum width of the outside plank. The planking completed up to the edge planks; Those of you with eagle eyes may have spotted a possibly major mistake with the planking; The 4 shift pattern doesn’t always end up in line with the ribs/frames. I have pondered my choices…………………… At the moment I am going with the rationale that the ship is made with more hull frames than just those that extend up the bulwark and that some of the deck beams sit on some of those frames that are not shown. If anyone sees a problem with this explanation please let me know, I will have to go with my second choice…………….😬 Cheers!

-
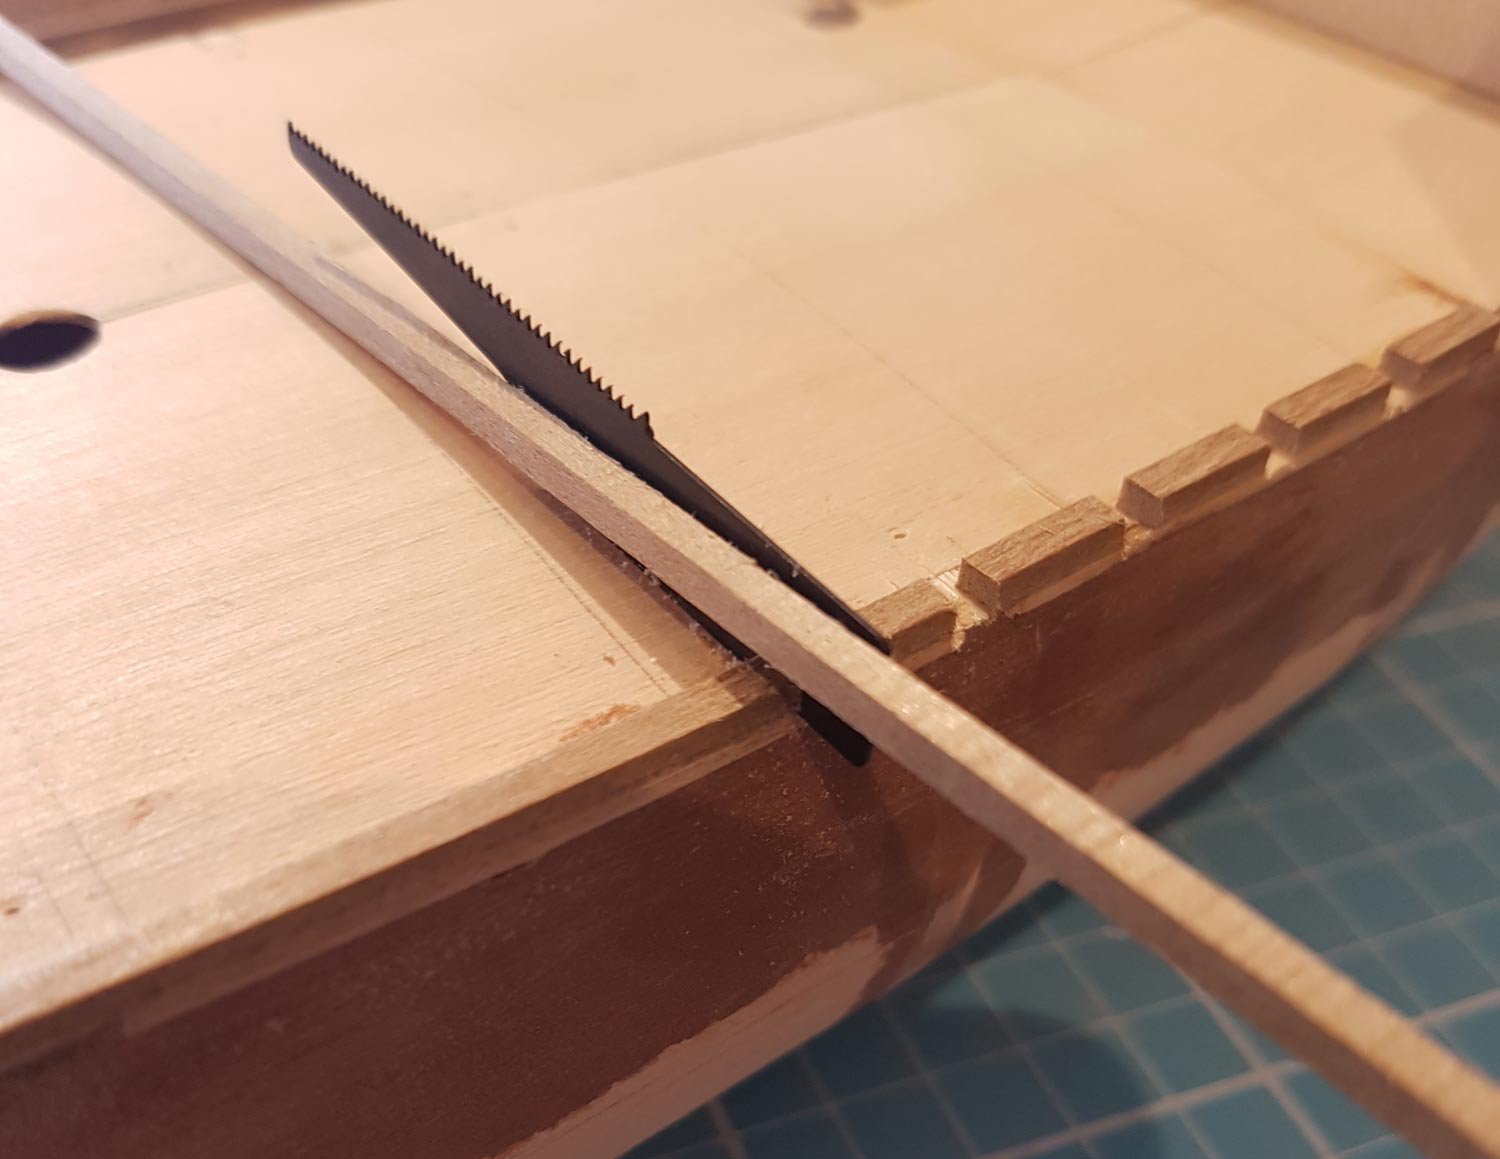
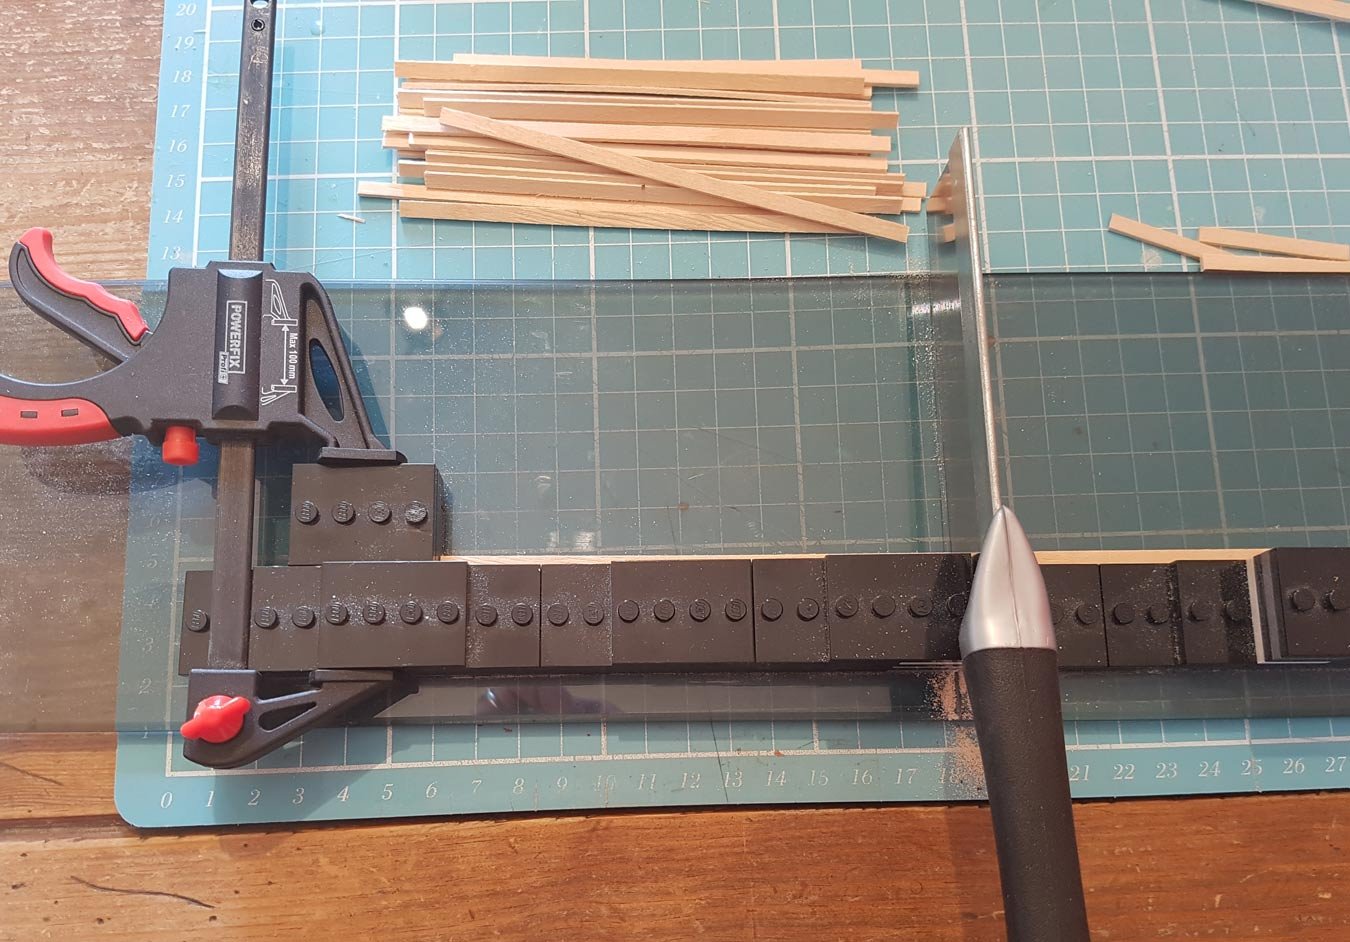
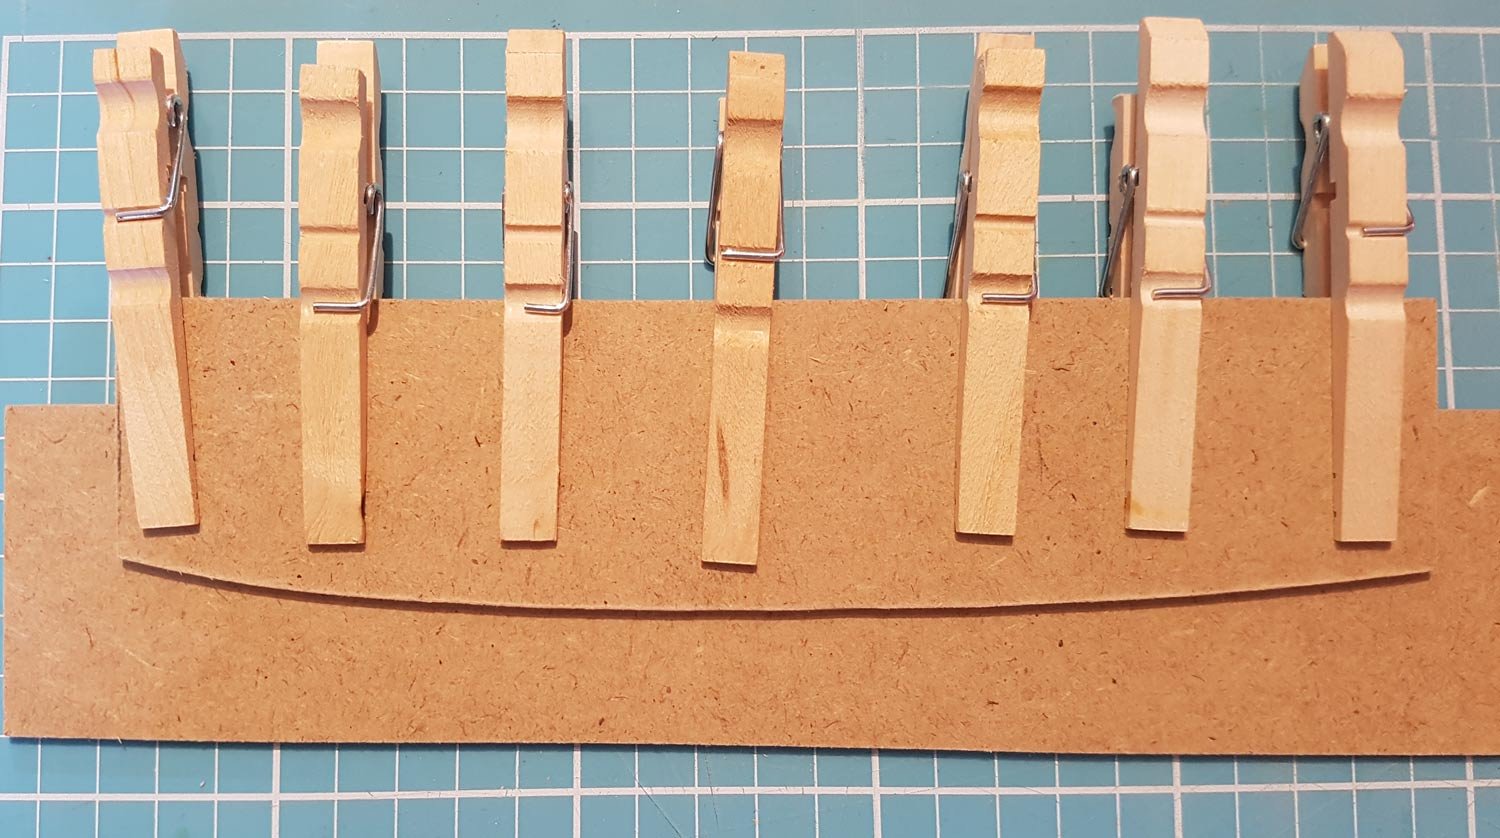
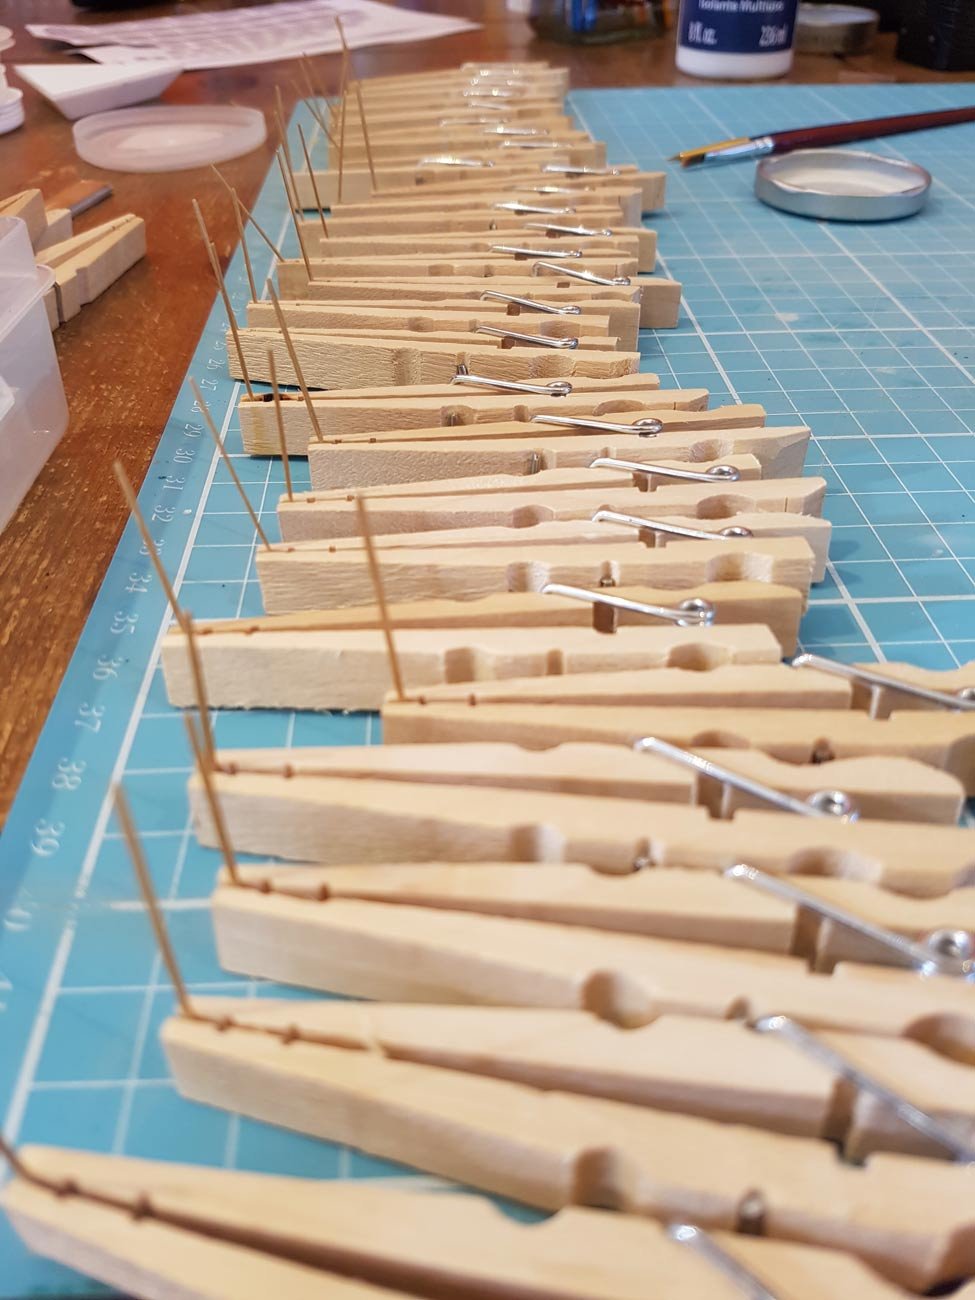
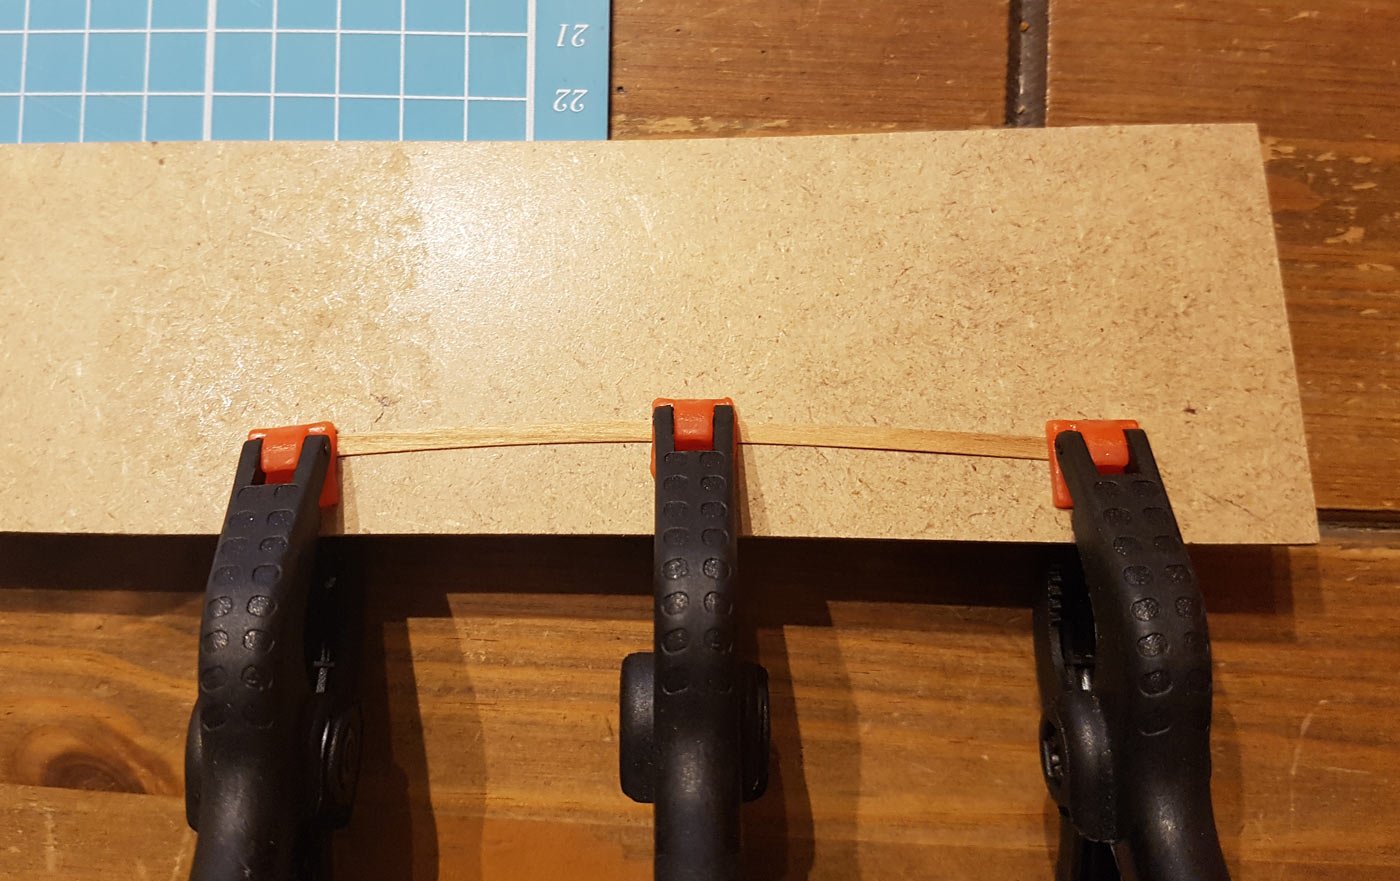
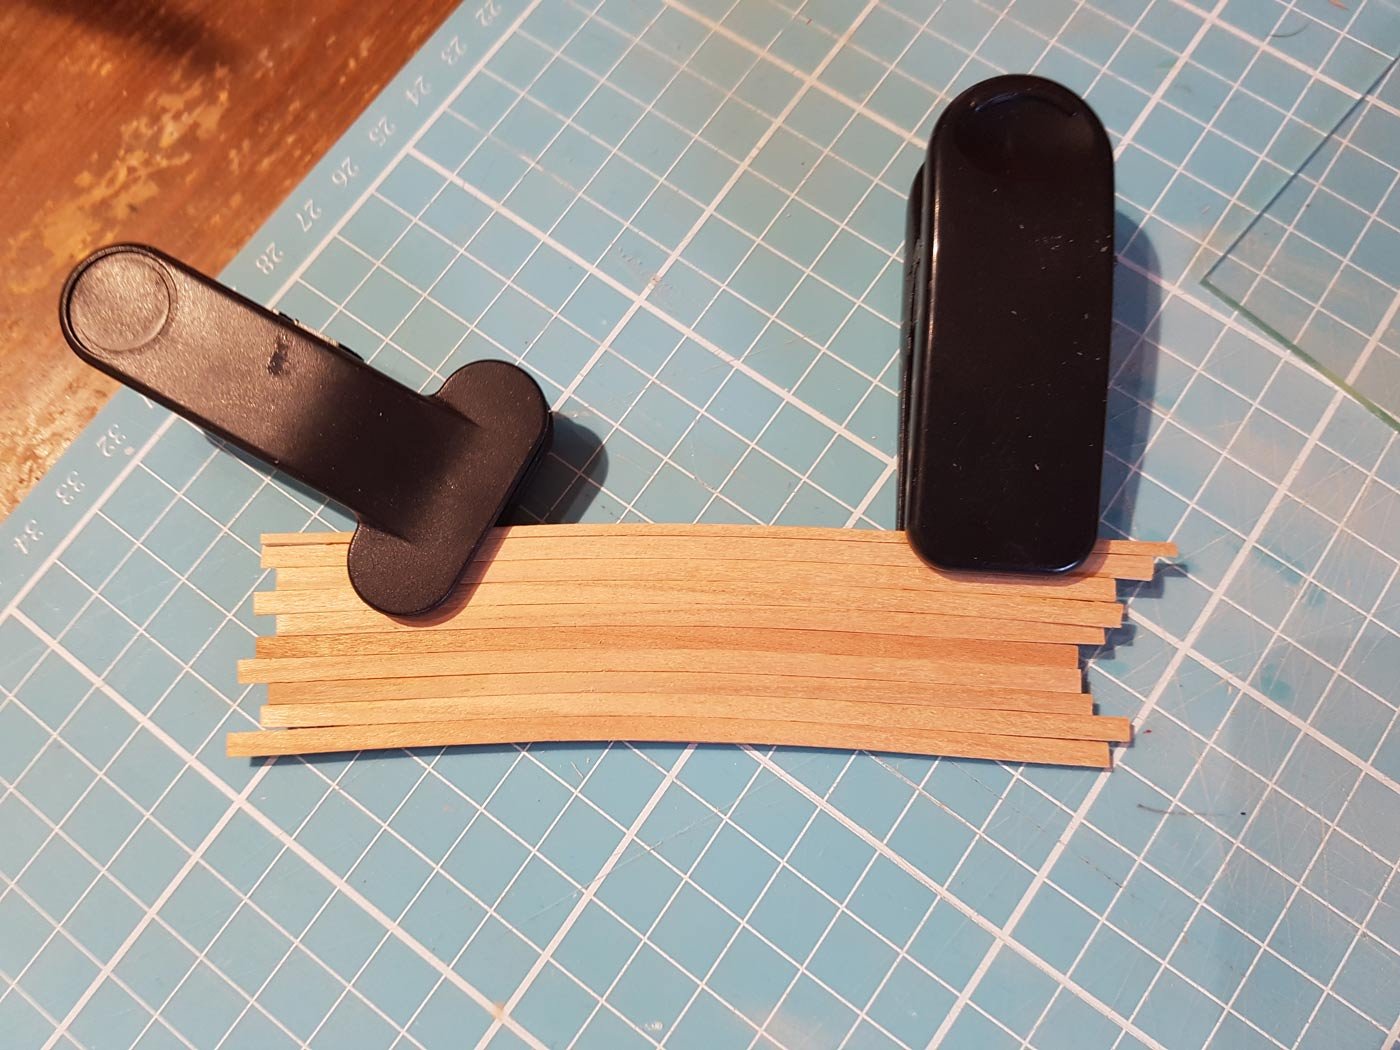
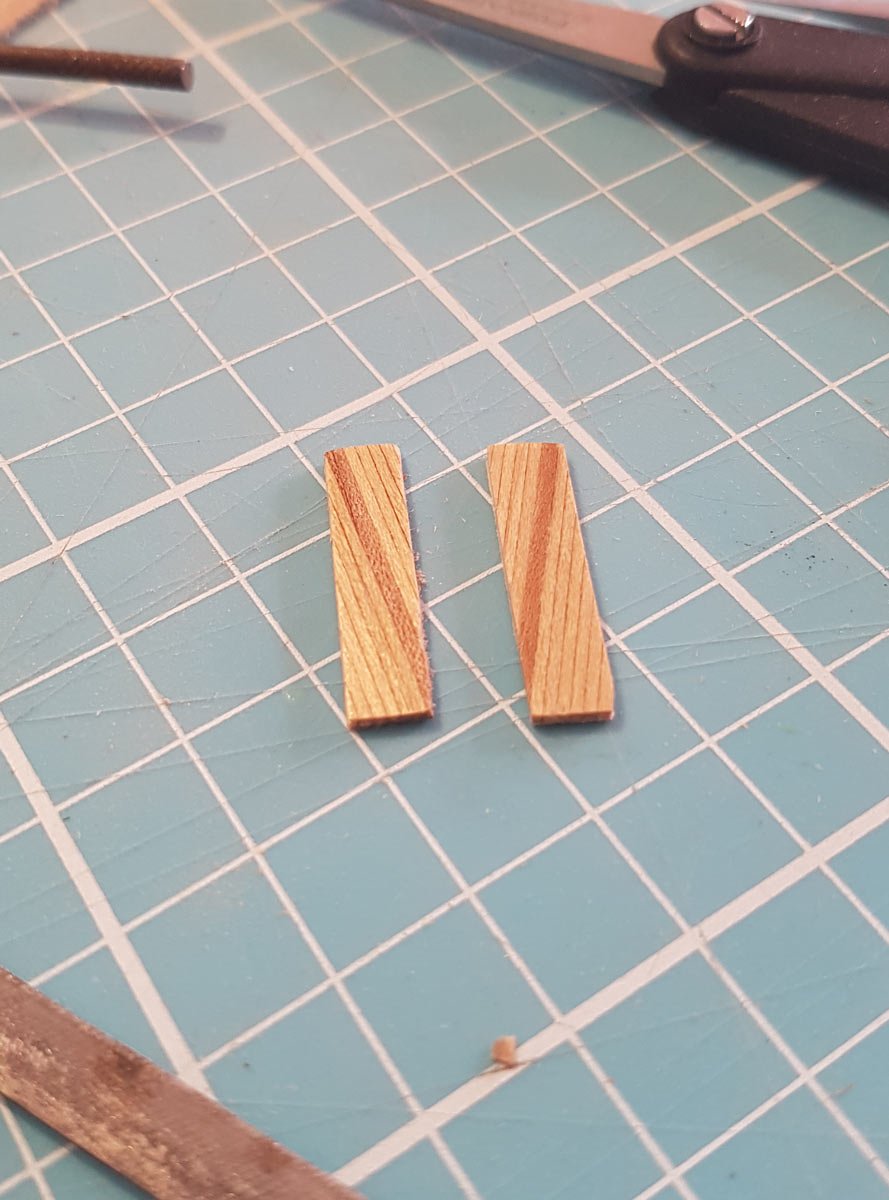
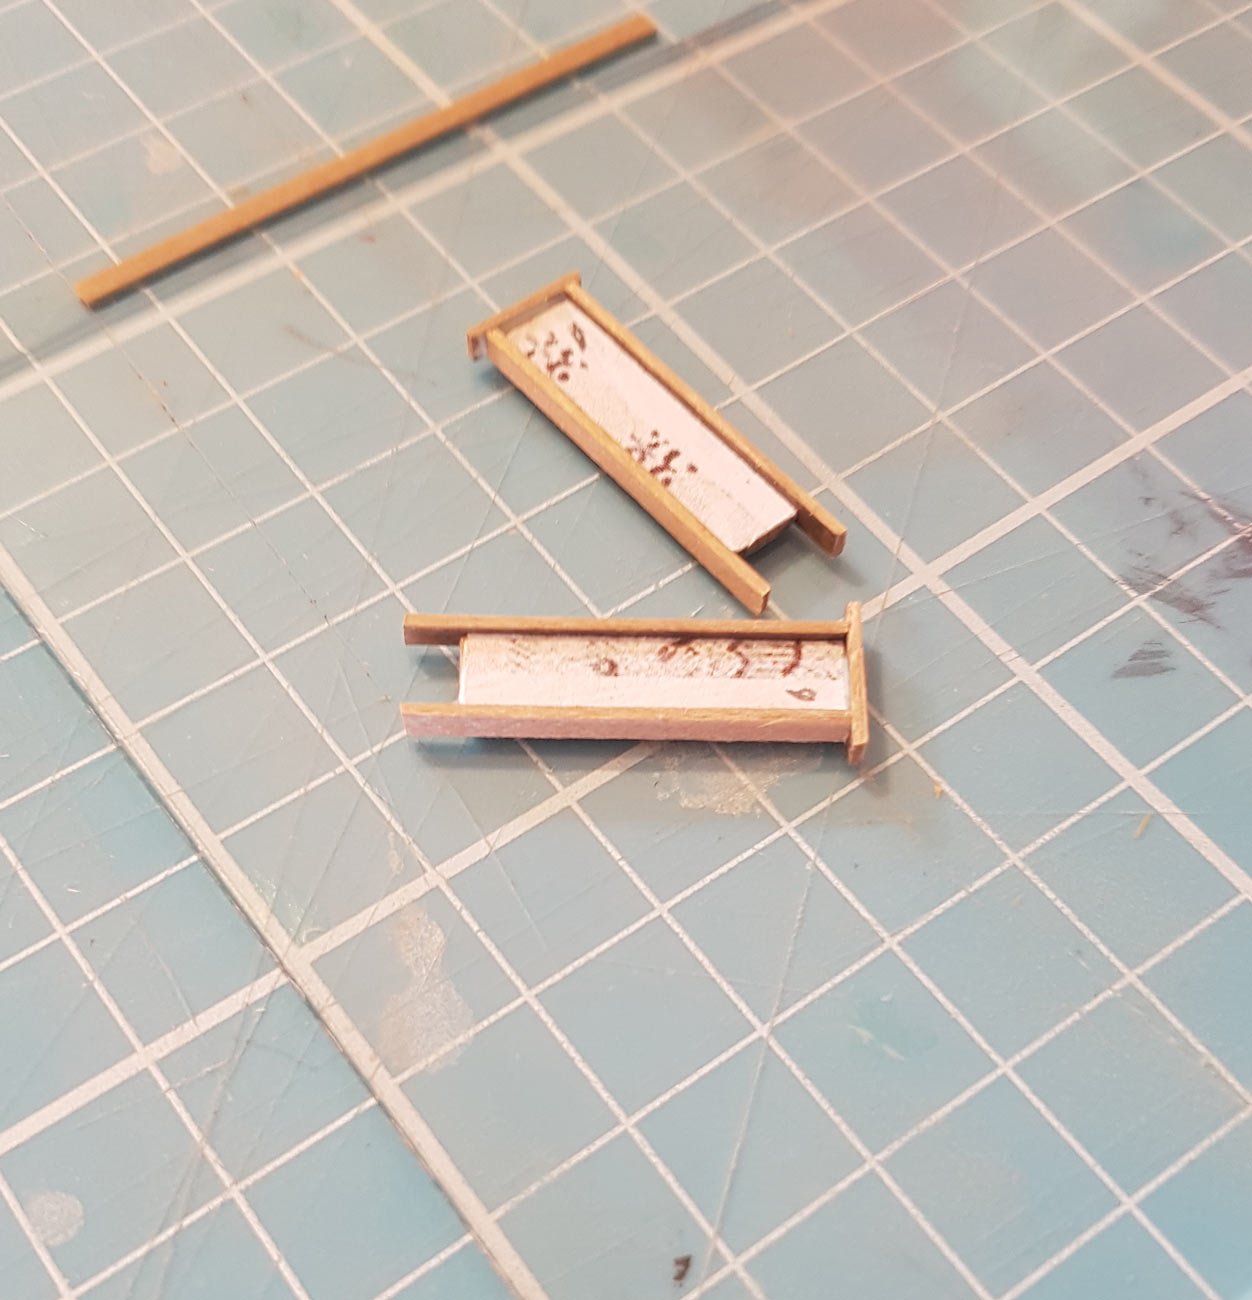
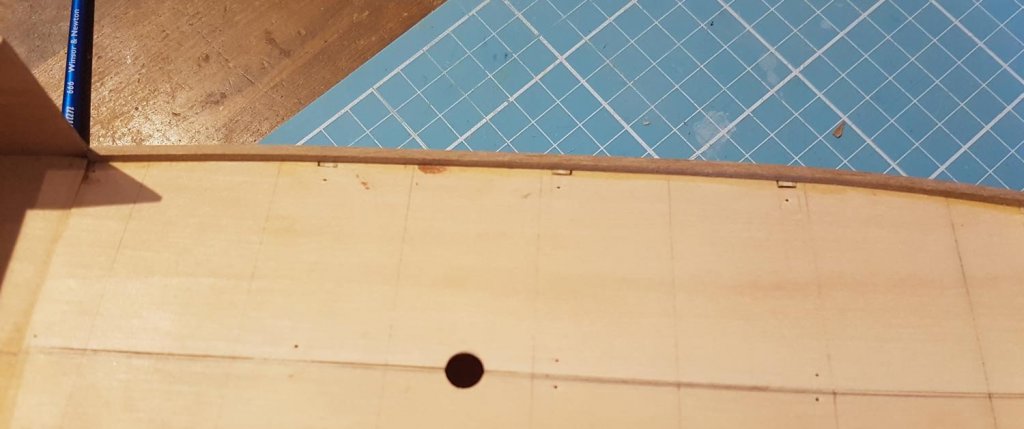
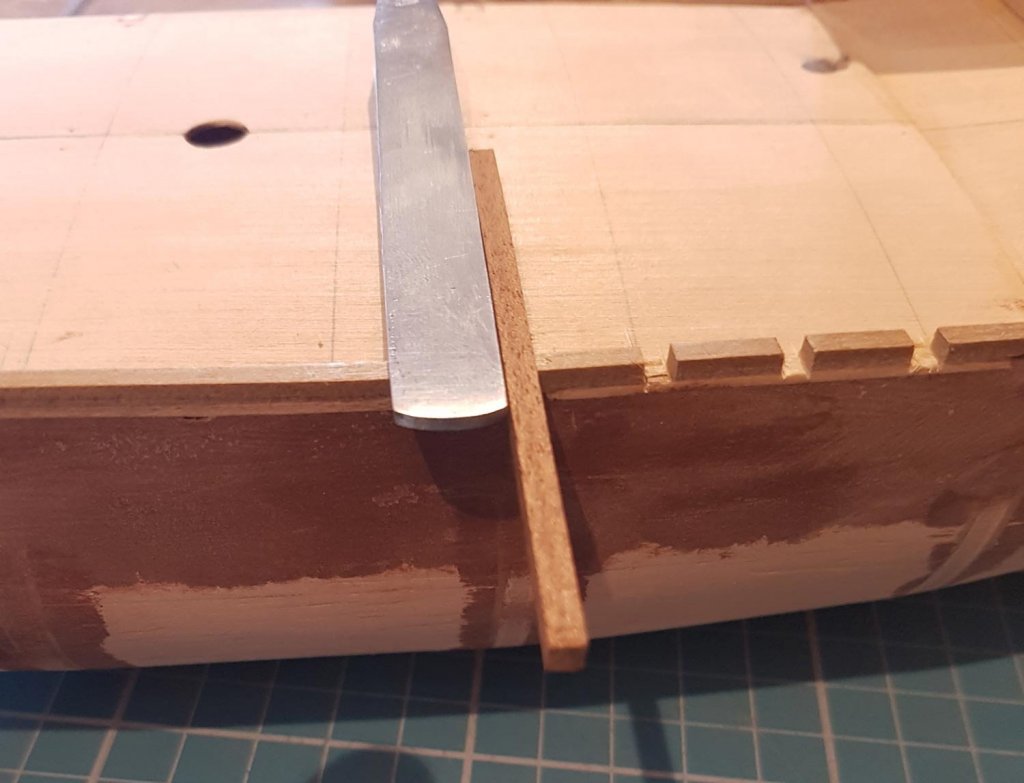
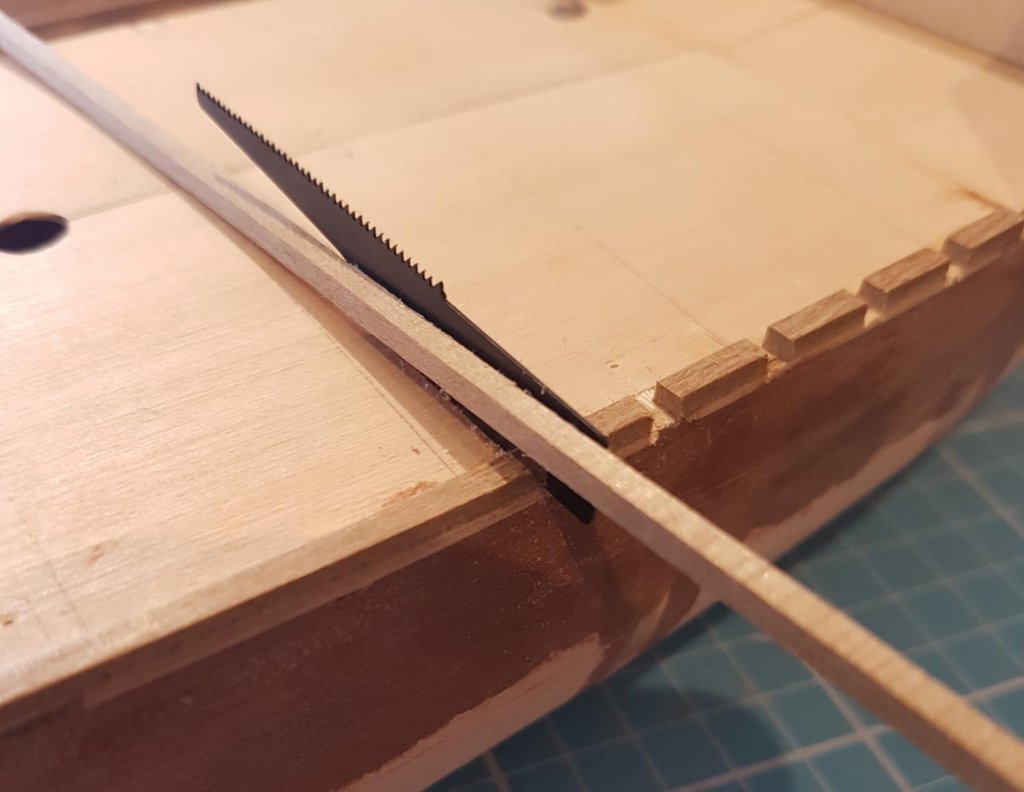
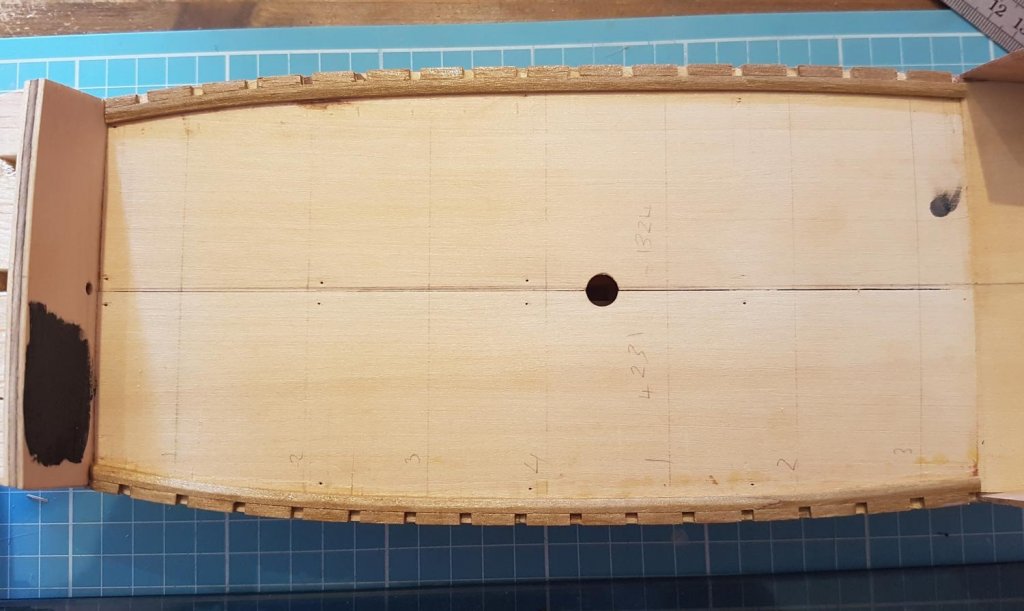
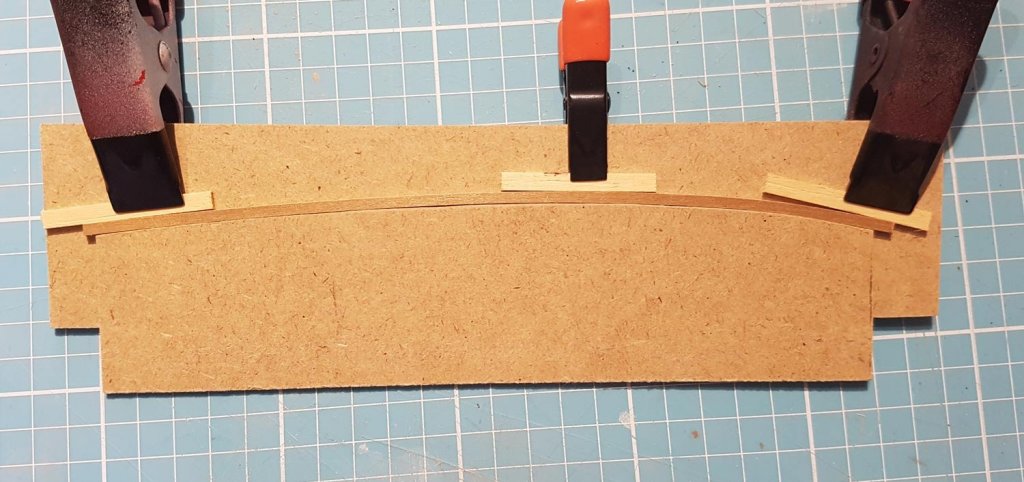
Thanks everyone for the looks and likes, I always appreciate them. Over the last couple of days I completed work on the waterways, made another jig, didn’t make a jig and started the planking. Using the jig I had already made I formed 4 2x3mm strips for the waterways. The outer strips were glued onto the edge of the deck; After the glue had dried I cut slots to fit the uprights/frames/ribs. I ended up not making a jig but, after some experimentation, using the following method; My calculations determined that the gaps between the ribs will be 10mm. From previous measuring I knew that the handle of my tweezers was also 10mm. A3x3mm stock was placed in the previous slot and the tweezers held against the stock. I marked the edge with a scalpel blade; (The first slot was made by holding the 3x3 stock against the aftercastle wall. By doing it this the gap was just slightly wider than the 3mm required) Guided by the scalpel cut I used a micro saw to cut to the required depth. A spare saw blade was put into the cut and a 2mm piece of stock held against it. This time I just used the saw to cut. This method gave me accurate spacing with accurate gaps which will hold the ribs tight. I probably should have made a jig but this method turned out to be surprisingly fast and precise. The inner waterway pieces were sanded- sloping downwards towards the deck, glued to the deck, and given a coat of sanding sealer. They will be sanded later. I turned my attention to the deck, I am using 1.5mm thick maple. I fixed a 7mm wide plank in the centre as the “kingplank” and while this was drying I cut 120mm lengths of 4mm wide maple using my homemade-precise-length-sawing-jig. Each plank was sanded along each edge and coloured on one side and one end with the lighter of the three colours I had tested before. The planks were laid in a 4 shift pattern -1324. I started from the centre and worked outwards, mirroring the port and starboard side. The planks have been left unsanded on their upper faces as I am going to use the scraper on them. I will put a coat or two of sanding sealer on them first. I think I have mentioned making an edge bending jig. I want to accentuate the shape of the hull using the wales. I want the wales to be level with the waterway along the deck, follow the slope of the aftercastle and sweep up towards the bow. I had a strip of 0.5mm maple so I tacked this to the side of the hull following the line I wanted. I then traced this onto paper and made the jig in the same way as the waterway jig. Here is the jig with the first test piece of 4x3mm walnut. The walnut will also have to be bent to follow the lateral curve of the hull, but I will do this on the hull when I am ready to fix the wales. I realise that this is not the accepted way to lay wales/planks, but as I said I wanted to really show the shape of the hull. When I lay a piece of planking along the deckline the shape of the hull forces the plank down at the bow and stern - not a good look. We will have to see how the planks turn out, this may turn out to be a case of me ripping up weeks of work and doing it “properly”, obviously I hope not! More decking tomorrow, I have an idea how to treat/nibble the edges of the planks - I really don’t want the deck planks to end at a point. I’ll also take the wale out of the jig and see how that has worked. Cheers


-
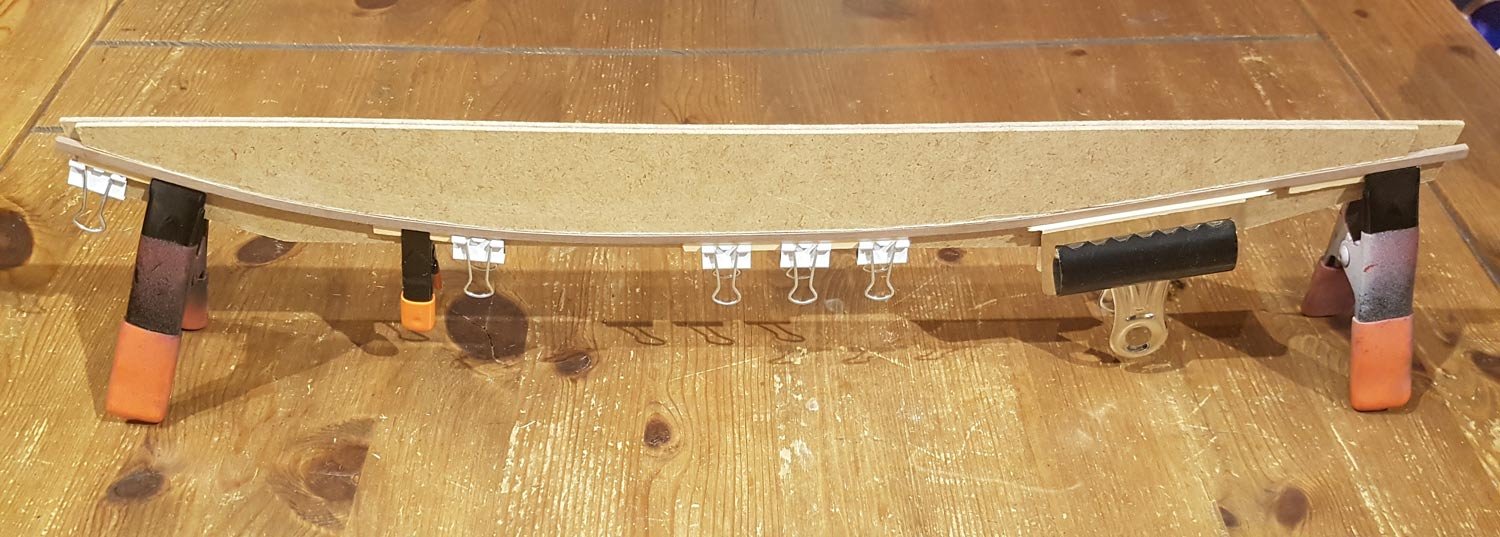
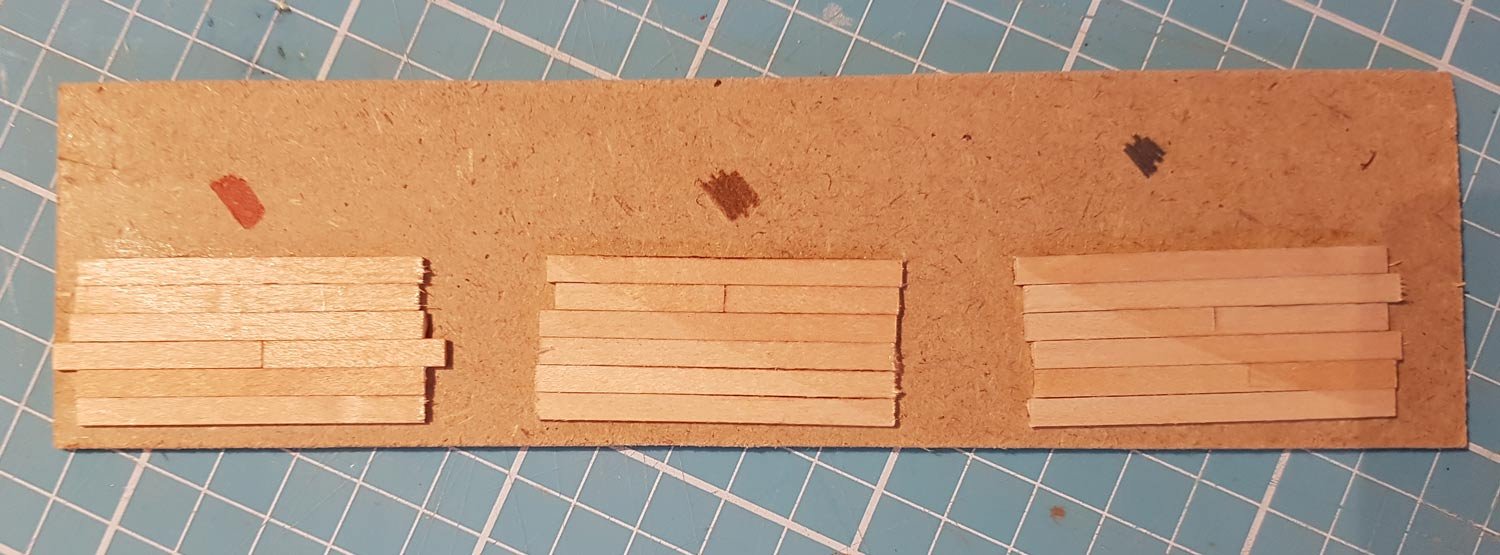
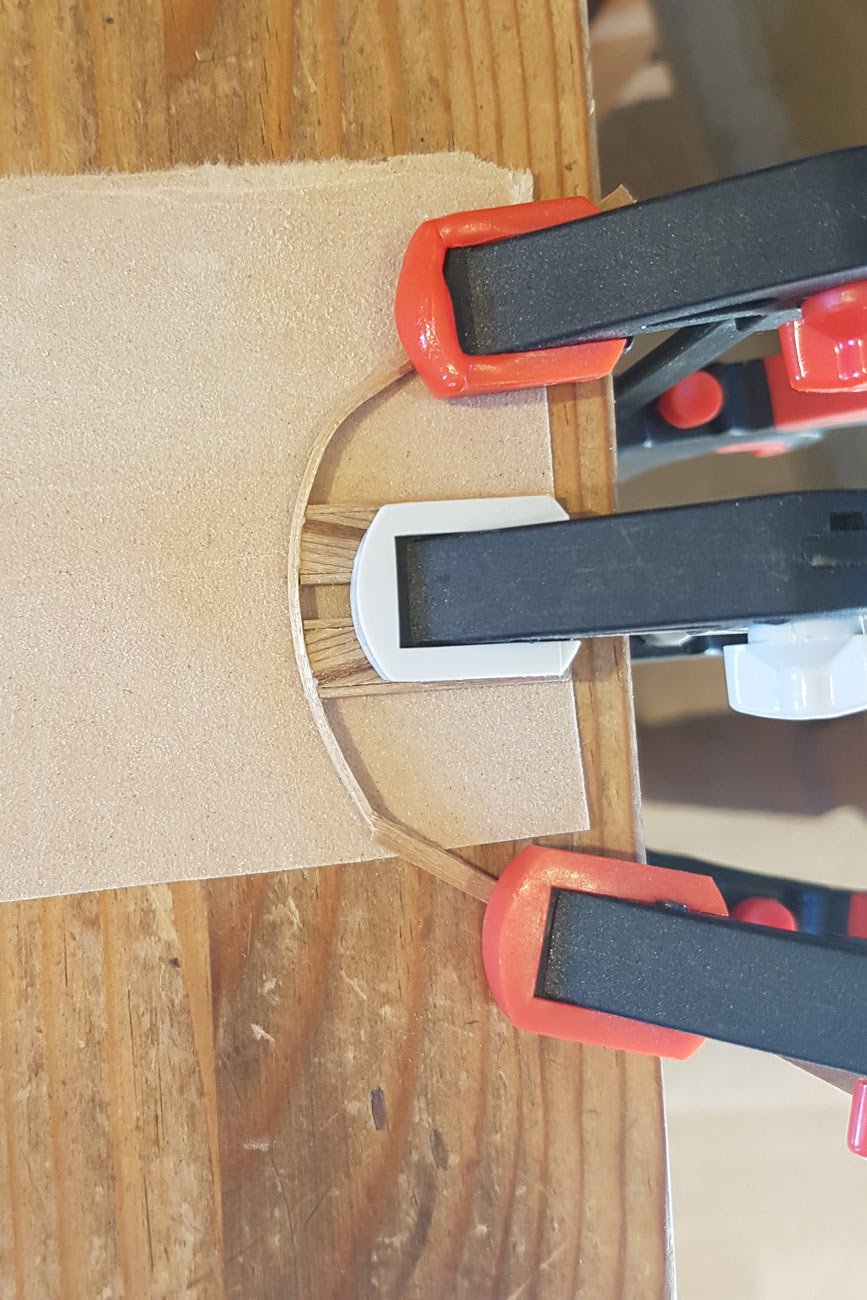
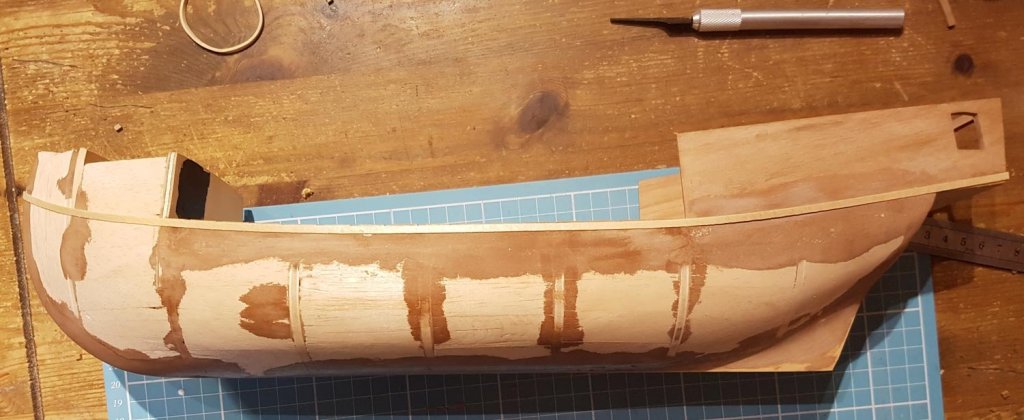
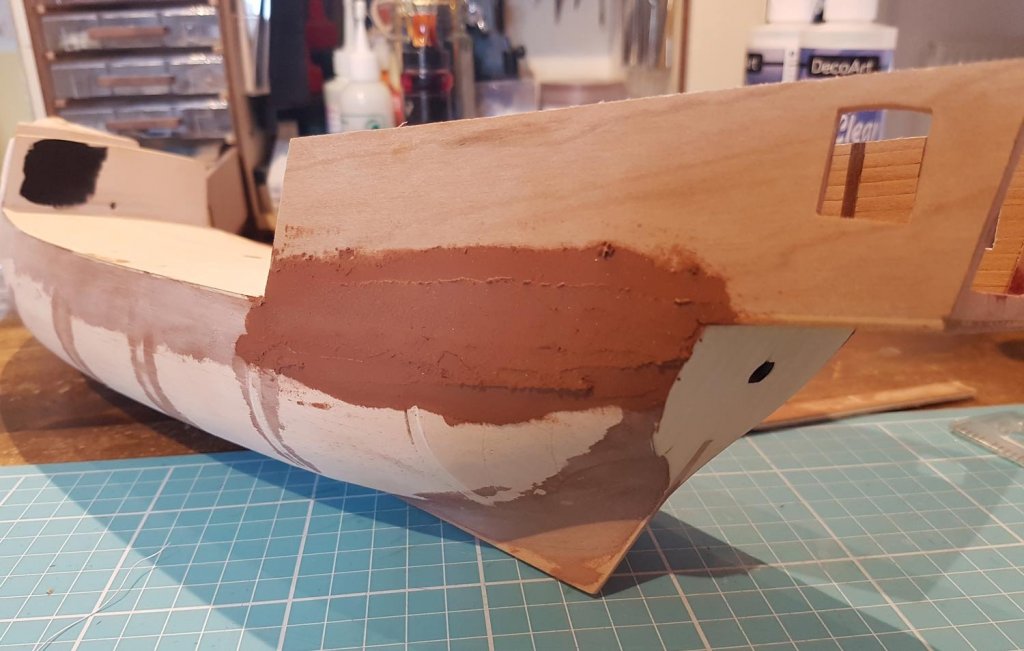
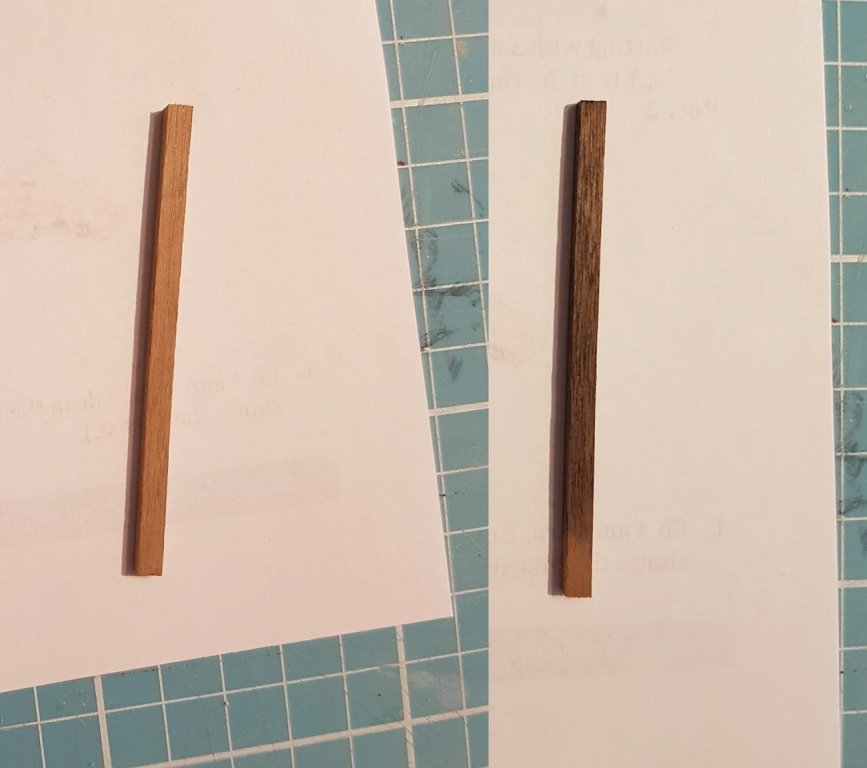
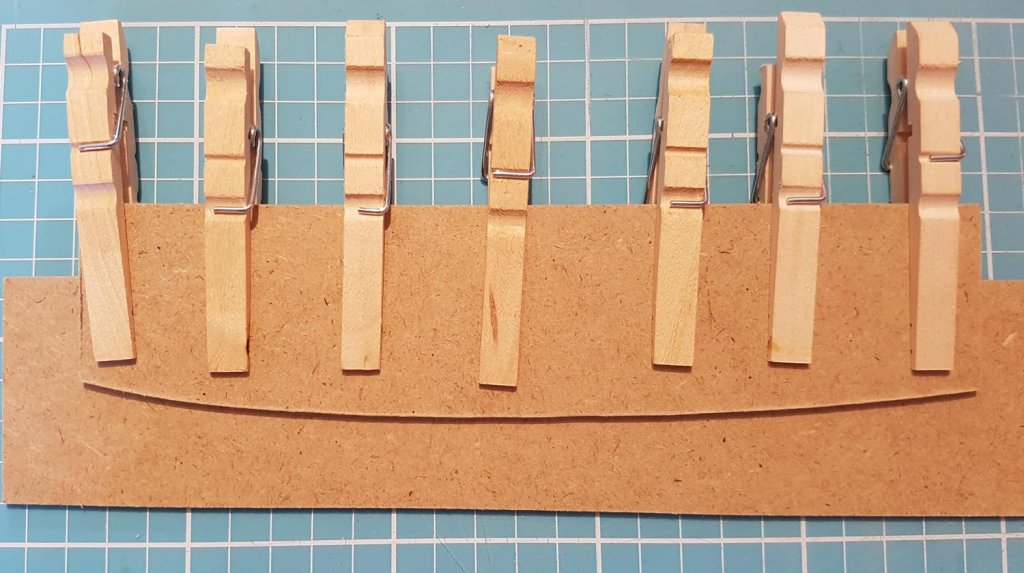
Yep, I did! A Devon cyder with Elderflower 😎 So yesterday I made a major step forward in this build: I have, at last, glued on the aftercastle to the hull! A couple of layers of filler were applied to fill in the gap, And an afternoon spent happily filling the kitchen air with filler dust later; While the filler was drying and in between sanding I set up a couple of experiments: I was toying with the idea of making the wales darker than the hull planking to make them stand out. I covered a short strip with black shoe polish. I covered the strip in sanding sealer, and then used my new scraper (arrived this morning). As you can guess the scraper unsurprisingly removed the stained wood 😆. One bonus of the experiment is that the scraper gave a superior finish on a strip of walnut that had been covered in sealer as against a strip that had not. I may repeat the experiment with ink but I am leaning towards not having any stain at all. The second experiment concerned the deck. I made 3 deck mock-ups to test different colours for the caulking. I prefer to use pencil so chose a couple of browns and the standard HB pencil. I covered half (diagonally) of each deck with 2 coats of sanding sealer to see if this will have much of an effect on the scraping. The scraping will be undertaken tomorrow when the sealer has dried overnight. Before I can start the deck planking I wanted to form the waterways. The waterway will comprise of two strips of 3x2 mm walnut. The outer strip will be stuck on to the false deck and then 3mm sections cut out to fit the bulwark ribs/frames and the inner strip will be chamfered to slope up from the 1.5mm thick deck to the 2mm thick waterway. I hope that’s clear?? The first job was to cut a piece of card that followed the curve of the deck edge. I was a bit nervous when I flipped the cut piece and tested the other side of the deck - It fitted! giving proof to the old adage “more luck than judgement”…. I then stuck it to a piece of board, cut out the curve with a scalpel, and stuck that to another piece of board, After several experiments a strip of the waterway was soaked, and fitted onto the jig using strips of sacrificial wood to avoid any marks on the waterway. It was then heated to within an inch of its life with the trusty hot air gun. The conclusion is that it will take at least 2 soakings and heatings to achieve acceptable limited springback. Tomorrows jobs include, but hopefully not limited to, scraping the mock decks, fitting the outer waterway already bent, bending the other side and maybe making a jig to edge bend the wales and hull planks. Wish me luck! Cheers!


-
I did think about this but I didn't want the end grain showing. That and my ability to drill in the exact centre of a dowel is rather wanting 😢 Indubitably, Sir. Veritably I do postulate that my expanded terminology, or phraseology if you prefer, is a denouement of the unadulterated eternity exhausted yesterday manufacturing an elementary circlet by unquestionably convoluted and perplexing techniques. My aspiration is for less burdensome arrangements to manifest themselves in the not inconsiderable future.😁
-
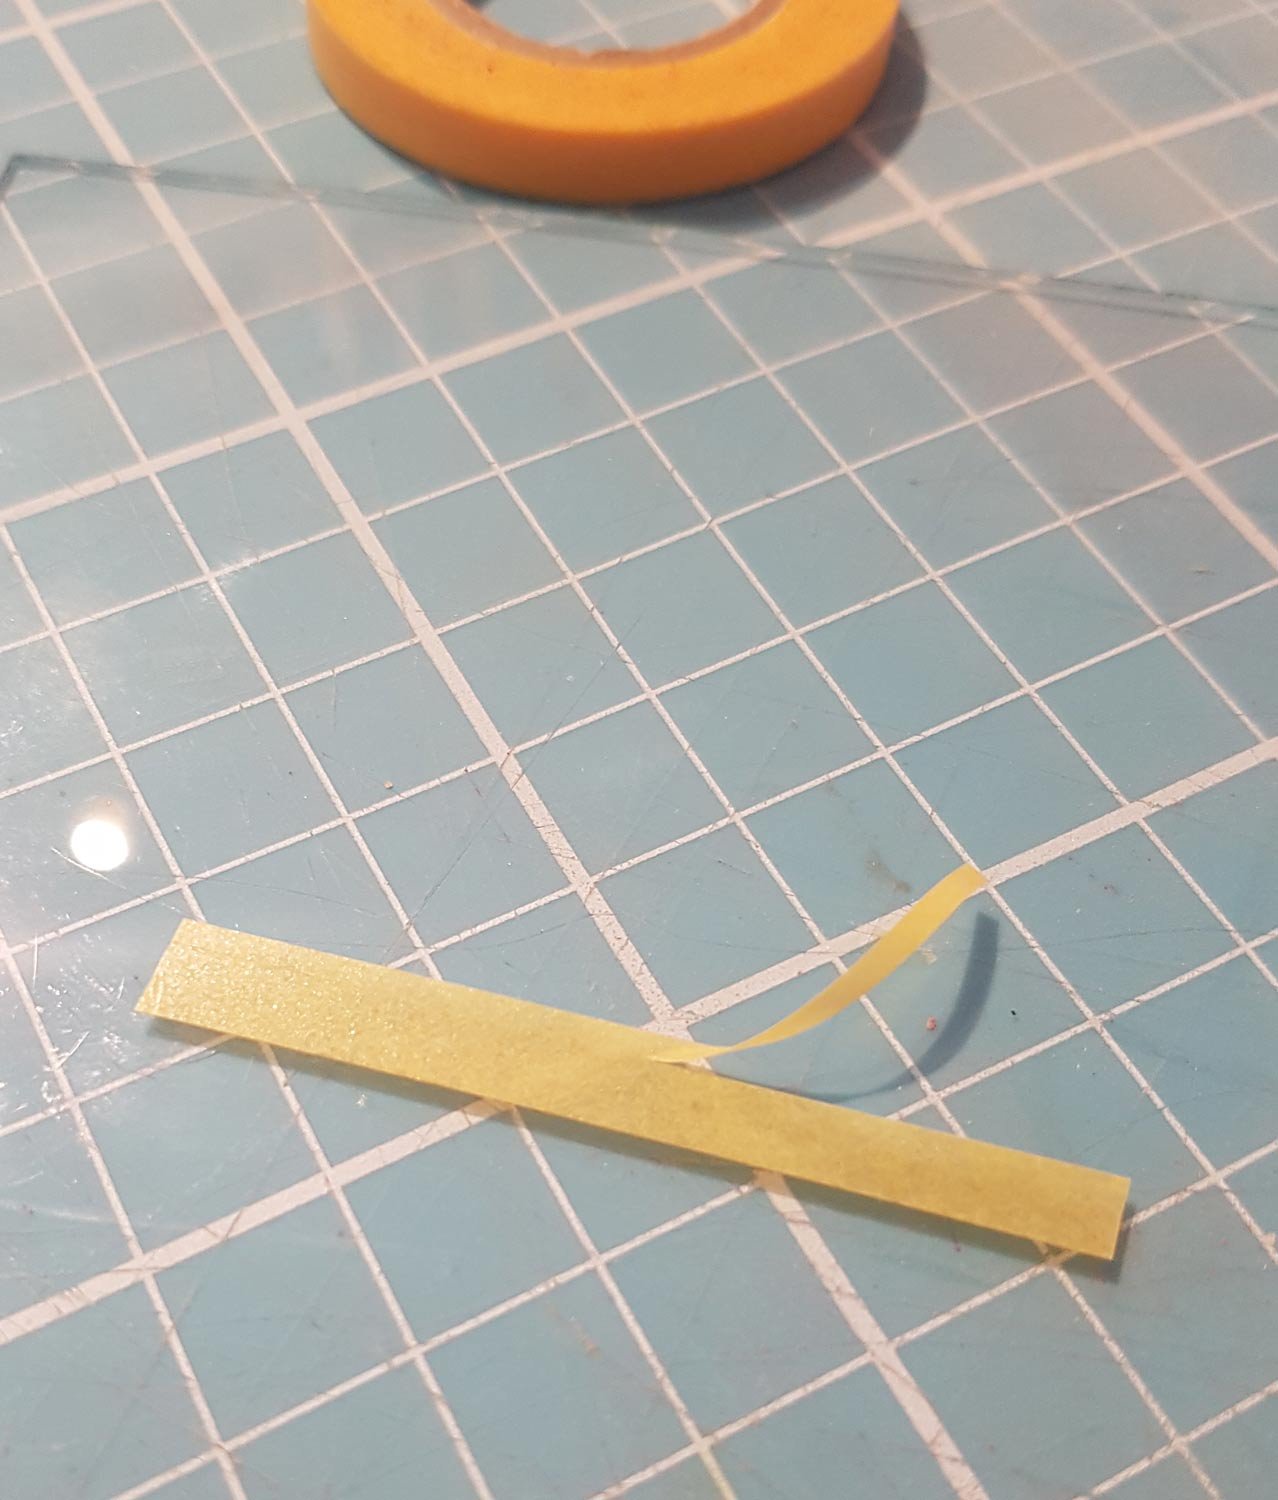
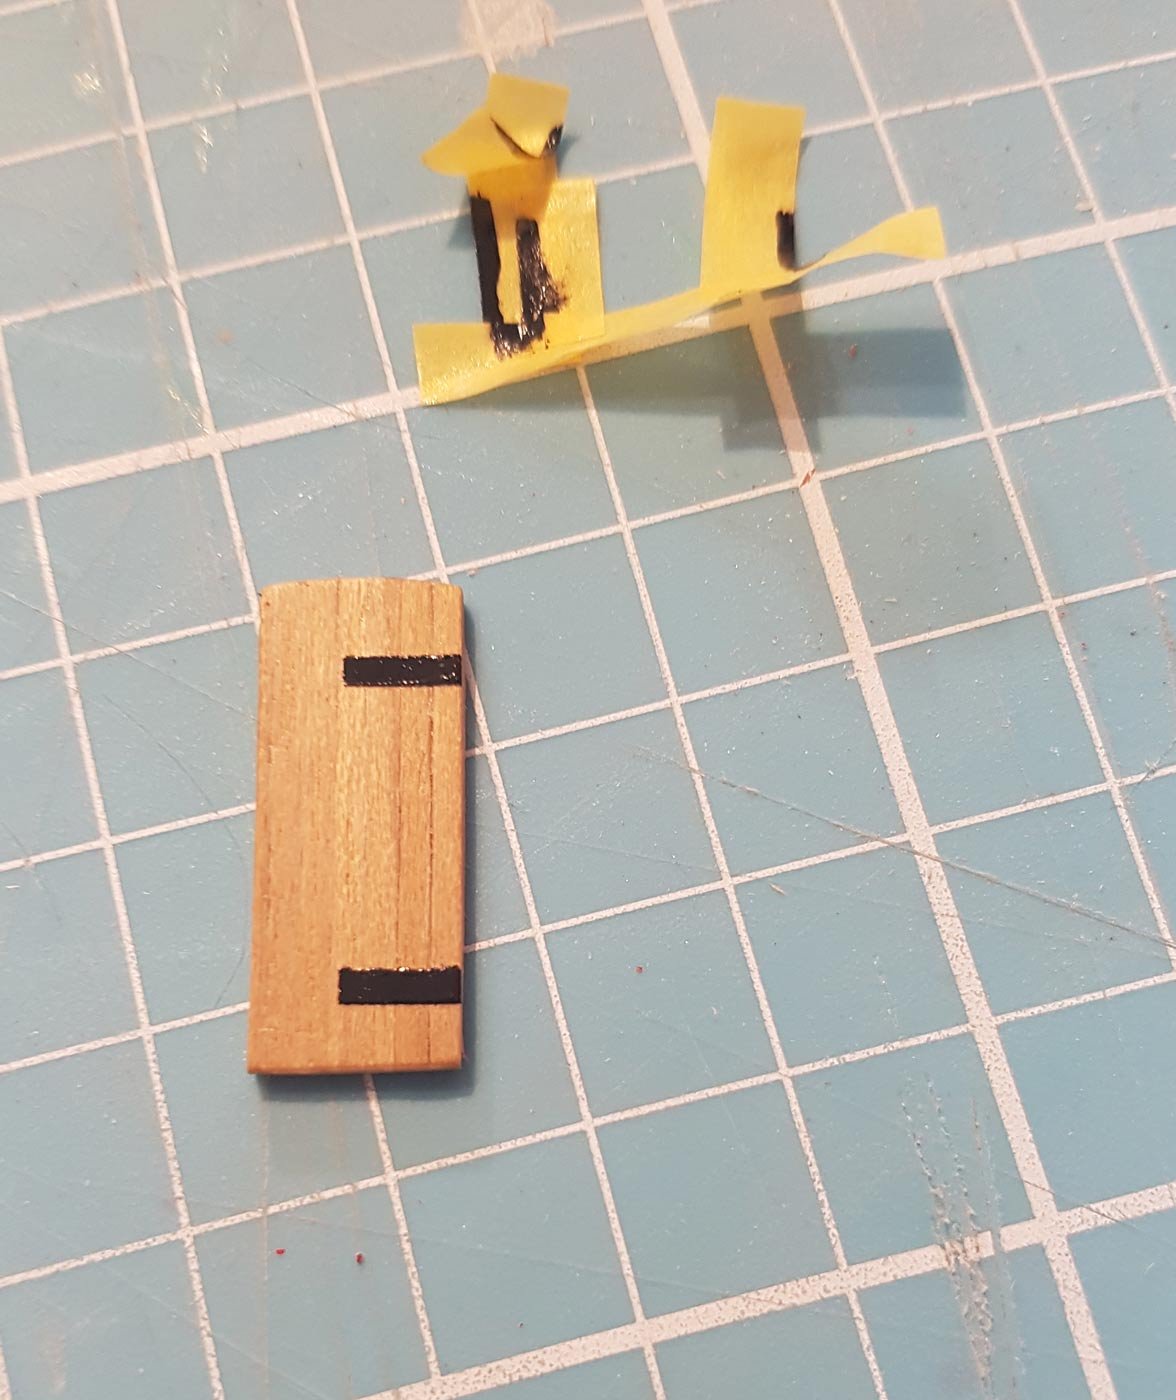
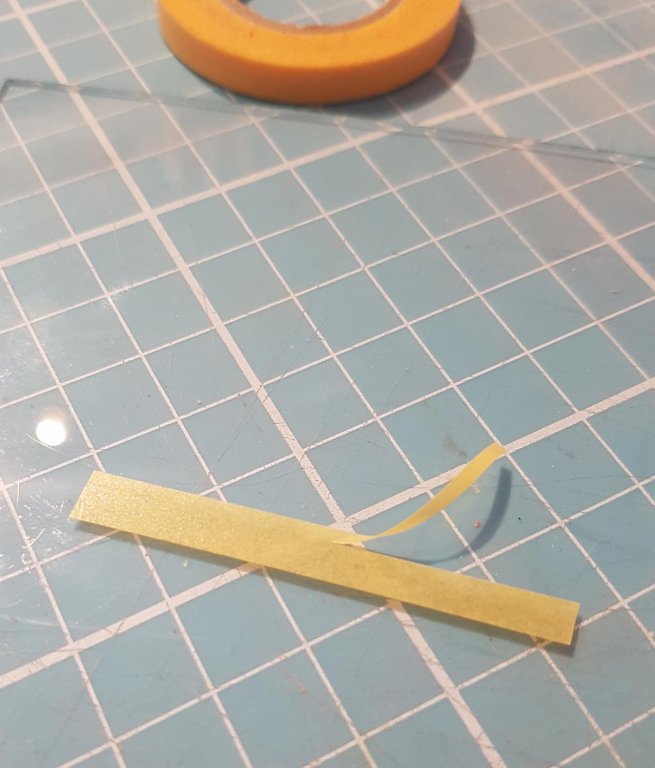
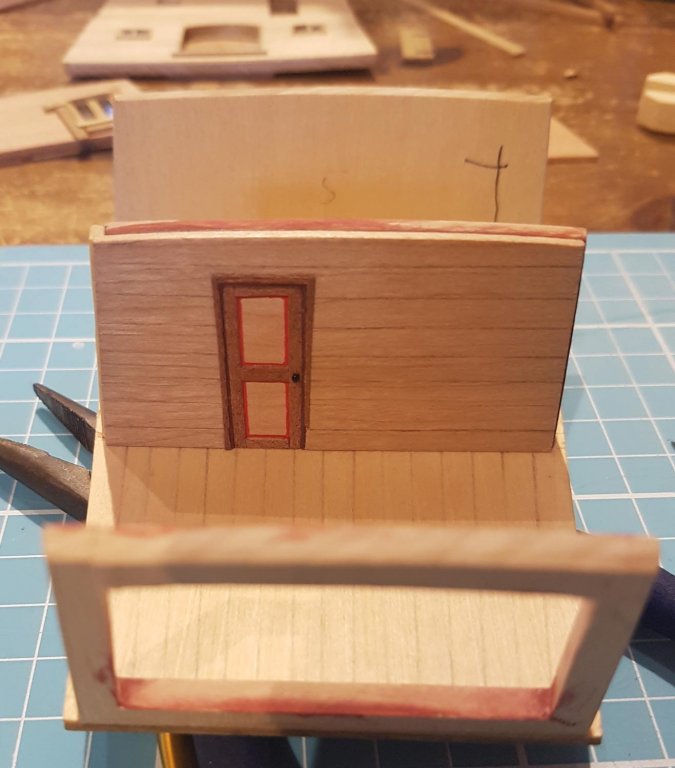
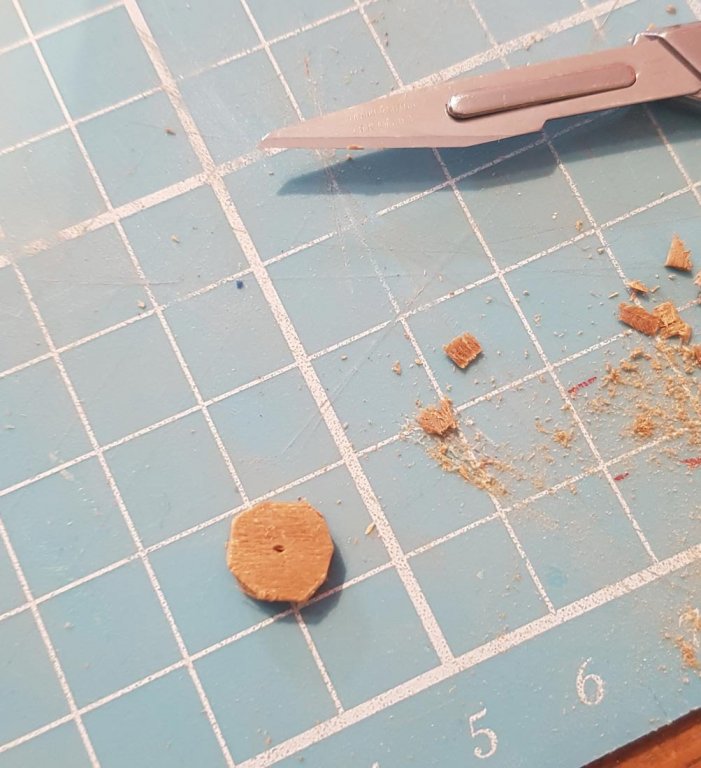
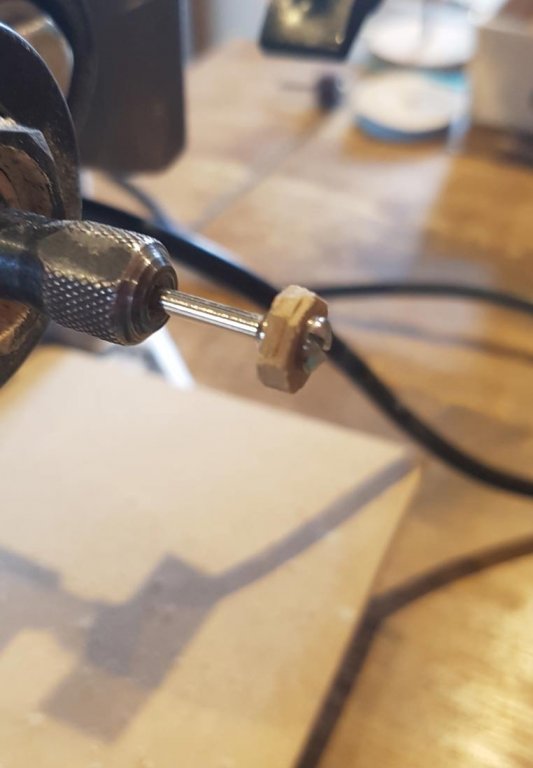
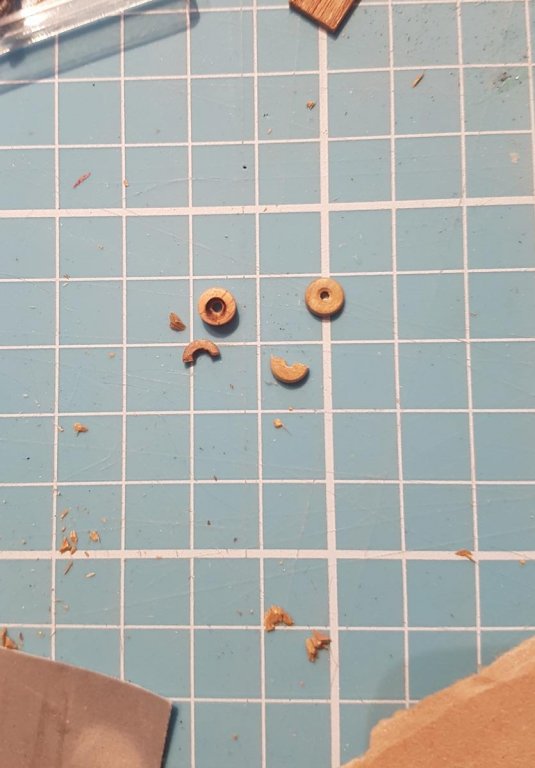
Awwww okay 🤔 …. well, I did give the bulkheads an extra sanding - the sanding sealer dried “sparkly” and using the wire wool didn’t get rid of it completely, so this morning I used a very fine sanding stick which gave me a polished-wood look. (pic at the end) My first job today was the ironwork on the forward door. As I said yesterday I just used paint to represent the arm of the hinge - the hinge itself will be made from blackened brass (a job for later this week). I used Tamiya masking tape to mask the door. One tip when using masking tape, especially tape that has been rattling around the toolkit for a few years, is to lay a strip of the tape on a clean pane of glass and cut a strip off the edge. This will give you a new straight clean edge to mask with; Naturally I got carried away with the process and didn’t take any pictures, so I only have the final result to show you, The top of the lower arm is a bit ragged, possibly (probably) I may have mistakenly used the “wrong” edge of the tape. Life size it doesn’t look too bad. I have always been wary of gluing sub-assemblies together, in case I have forgotten something. But today I decided to stop prevaricating and decided to glue the aftercastle side walls to the base. Before that I had to glue the back wall of the captains cabin to the bulkhead. I also glued the door in place and made a door-handle out of a painted pin head. While the aftercastle walls were drying I turned to the forecastle bulkhead. The books specifically mention the use of a capstan on Vivacia, so I need a hole in the bulkhead for the anchor chain/rope to pass through. I wanted to make a “reinforcement” ring to go around the hole. Easy, I thought: my initial plan was to laminate some strips of the light walnut; ….mark the centre and trim to shape, …..drill out the centre and screw into the dremel and sand to shape, ….aaaand, after a couple of hours and many false starts I ended up with; 😣 😭😭 Undeterred I tried again with some walnut and at last made something I’m happy with; So only a few hours work and a fair amount of swear words (I think I made up some new ones too), to make a circle of wood - and I don’t even know what it is called……….. little wonder the Admiral thinks I’m mad. Cheers Paul


-
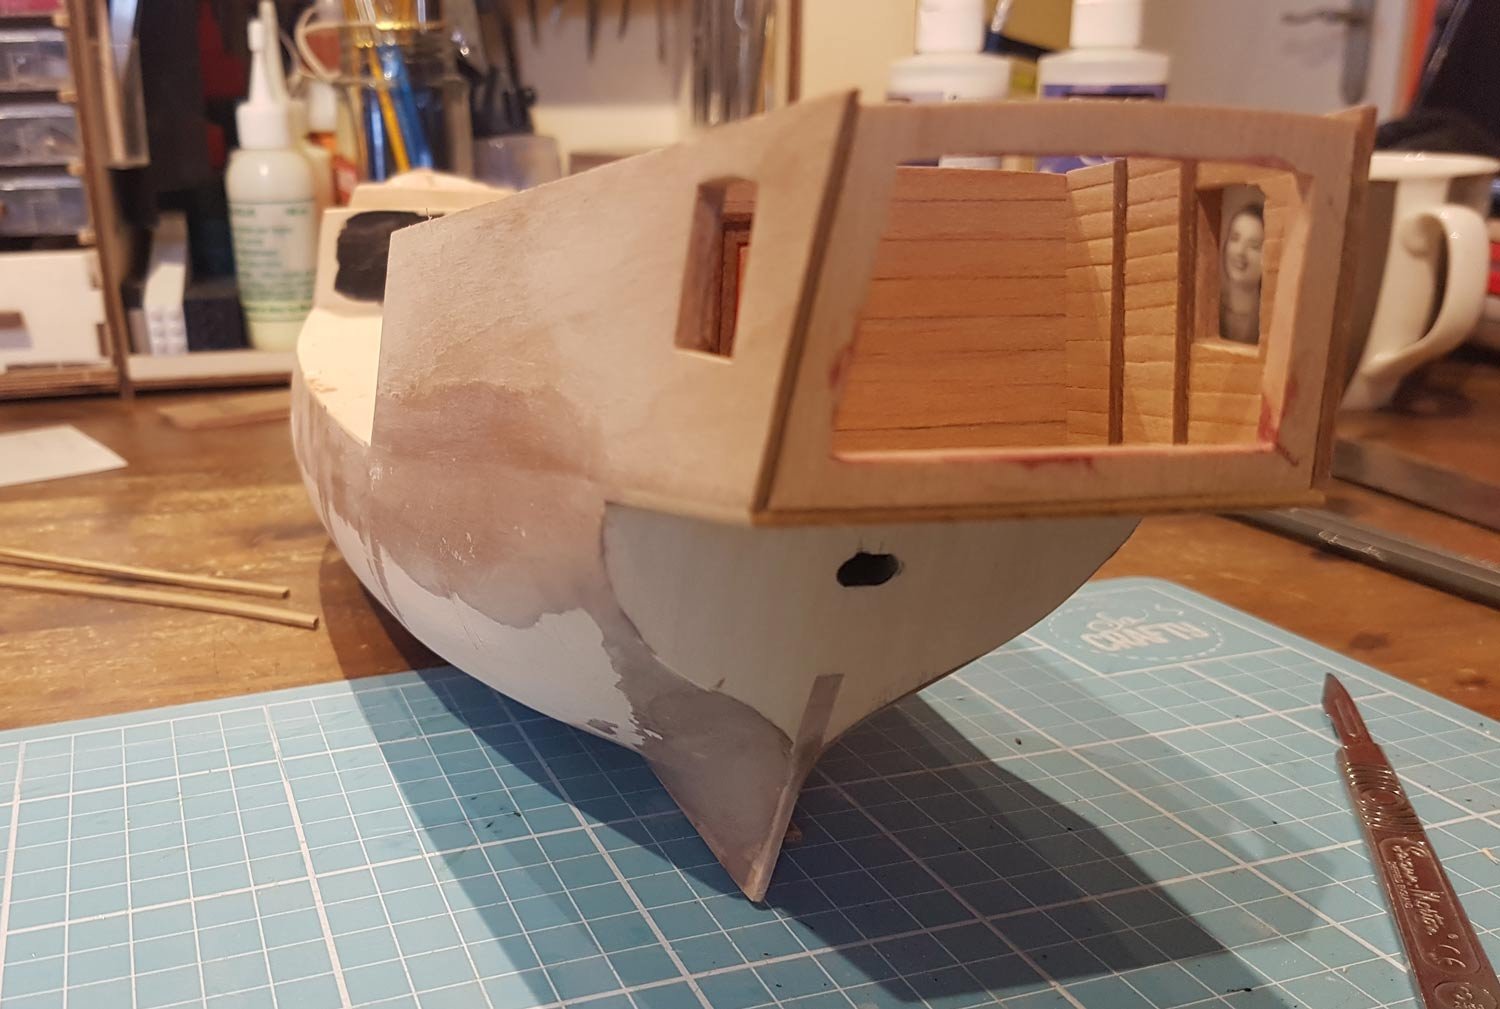
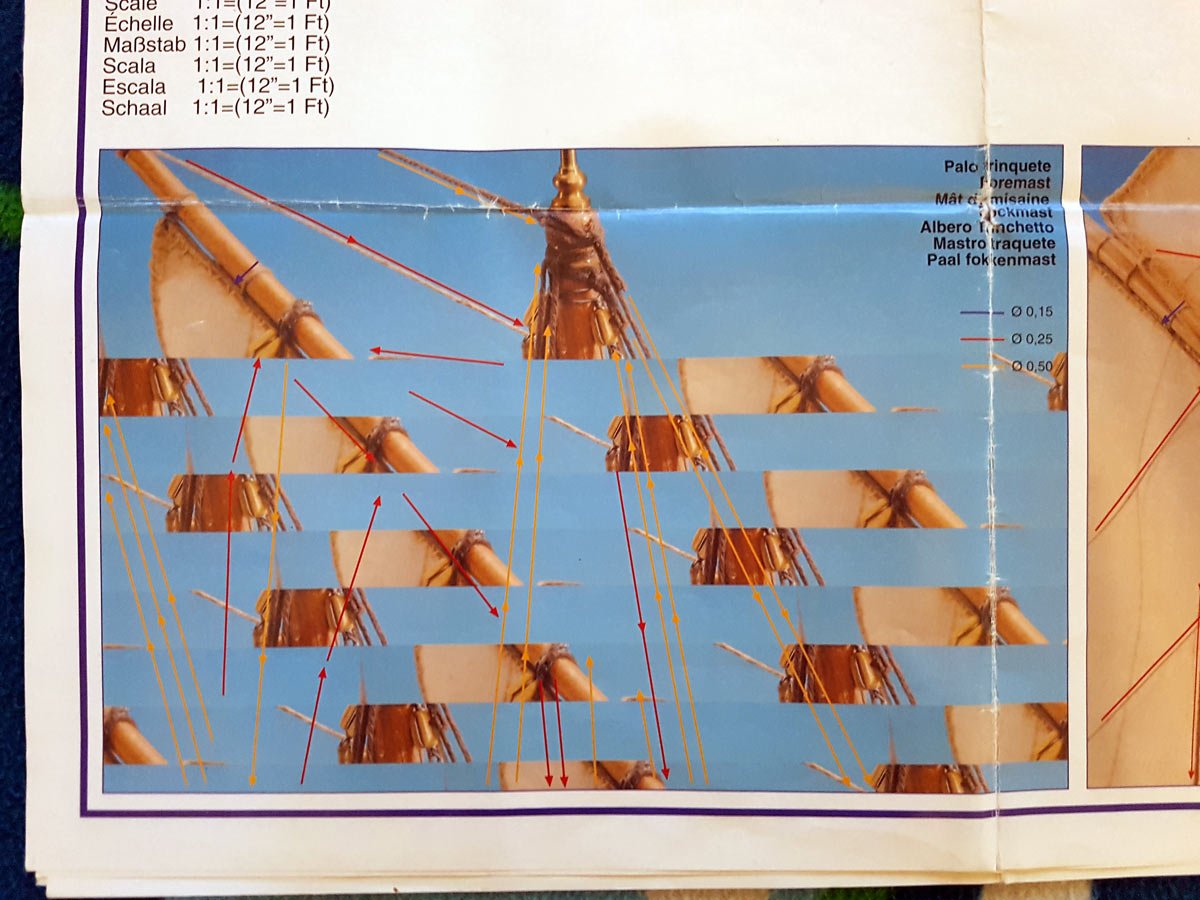
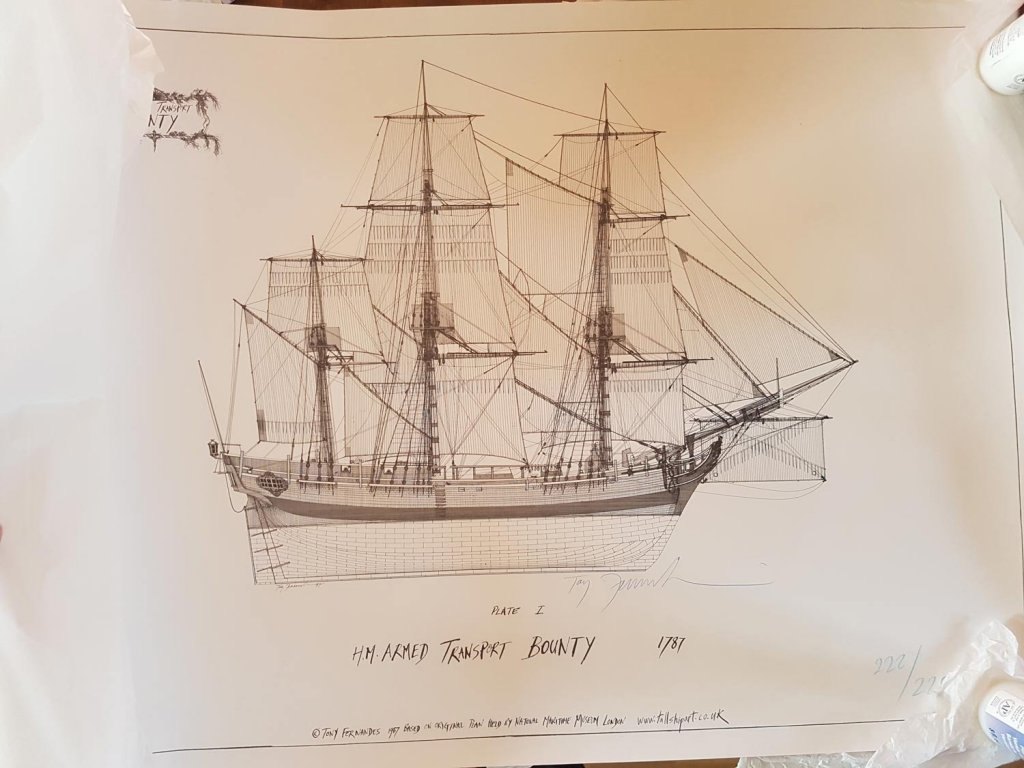
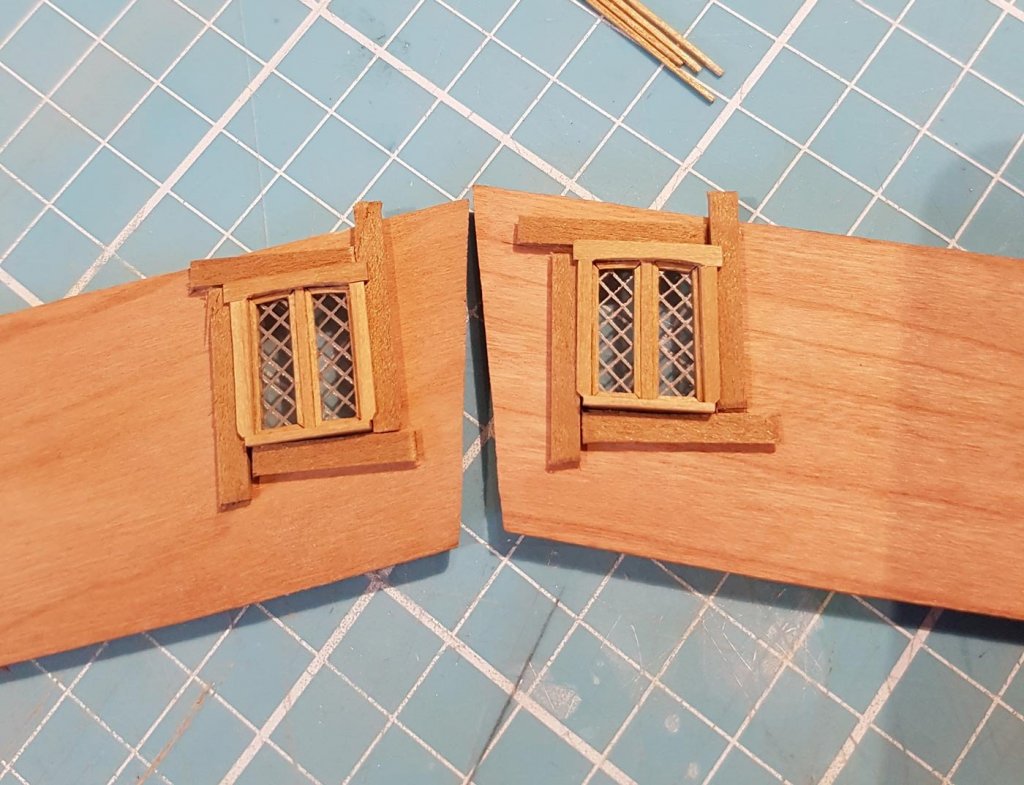
Hi guys, thanks for your comments on the aftercastle bulkhead, I will leave it as it is. Tho I must admit to spending more than a few minutes contemplating the redo………🤔 The Admiral came through with the various bits and pieces required for this build so I can crack on. However, not before I spent quite a while gazing at this fantastic piece of artwork the Admiral found; Nothing to do with this build, but a good incentive to keep on building 😎 So, as I said, I wanted to try an experiment with some sanding sealer and its effect on the fuzziness of the window pane frames. The first job was to brush the sealer onto each of the pre-cut and sanded thin wood strips, I let them dry overnight, then rubbed each one with fine wire wool. I was happy enough with the effect that I brushed sealer onto the fore and after castle bulkheads, I rubbed these with wire wool and recoated them for a second coat. I think I used the wire wool on the second coat a little early so I have left them to cure properly and check on them tomorrow. Back to the windows, I glued the glazing from the inside. To make sure the glazing did not pop out into the cabin in the future I applied a thin strip along the edges and the bottom on the inside of the pane, Once these strips were dry I spent a good half hour making the outer frame on the right hand side; It took so long because each length was cut to a little over length and then minute slivers were cut off until the correct length was achieved. Of course every now and then I would cut too much off and then have to start with a new piece……….😕 After a good couple of hours work I now have two completed (barring the ironwork and internal central strip) side windows. As you can see there are a couple of gaps, luckily at normal viewing distance these are not visible. Like I said before I made a door for the forecastle bulkhead, unfortunately the pencil between the strips didn’t all show. I’m going to try masking and using just the thickness of paint for the ironwork on this door and see how it turns out. If I'm not happy I may just make another door……….. Forecastle bulkhead and “current” door; Hopefully I can get a whole day in the shipyard tomorrow….. after I have perused my latest maritime modelling how-to book; Cheers!!

-
Now that, Peter, is a definitive Masterclass on ratlines. Incredibly neat and consistent work. I have no idea how you work so well so fast, I am sure that it would take the rest of us weeks to achieve anywhere near the same standard. If anyone had seen your work in 1492 I'm convinced you would be accused of witchcraft! 👉🧙♂️👈 Well done Sir! Has anyone got a thesaurus? I'm quickly running out of superlatives for Peter and this build......
- 236 replies
-
- 3
-

-
- artesania latina
- kitbashing
- (and 2 more)
-
Thanks guys! 😁 I am dipping heavily into the patience jar Mark! Thanks Peter, of course, you know that I'm now wondering whether I should have done the same on the aftercastle bulkhead...…….😕
-
21?? I wish....... Wednesday is the day, but I can't get to the shipyard till the weekend........ And it's only monday......
-
She is looking good!
-
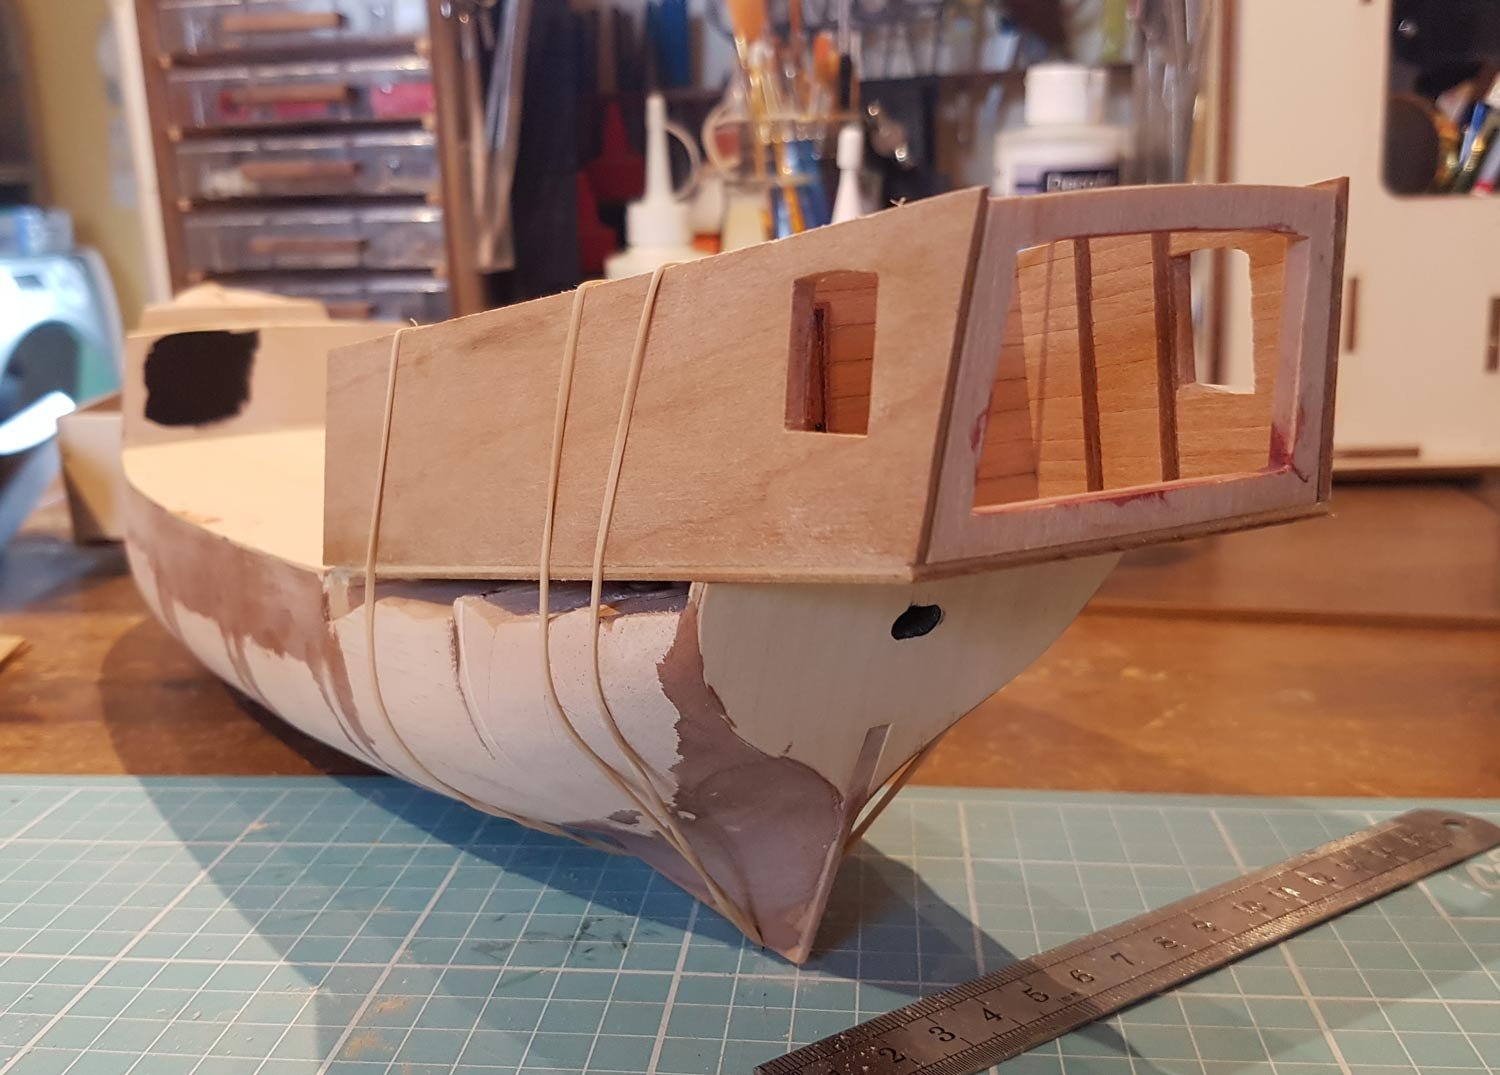
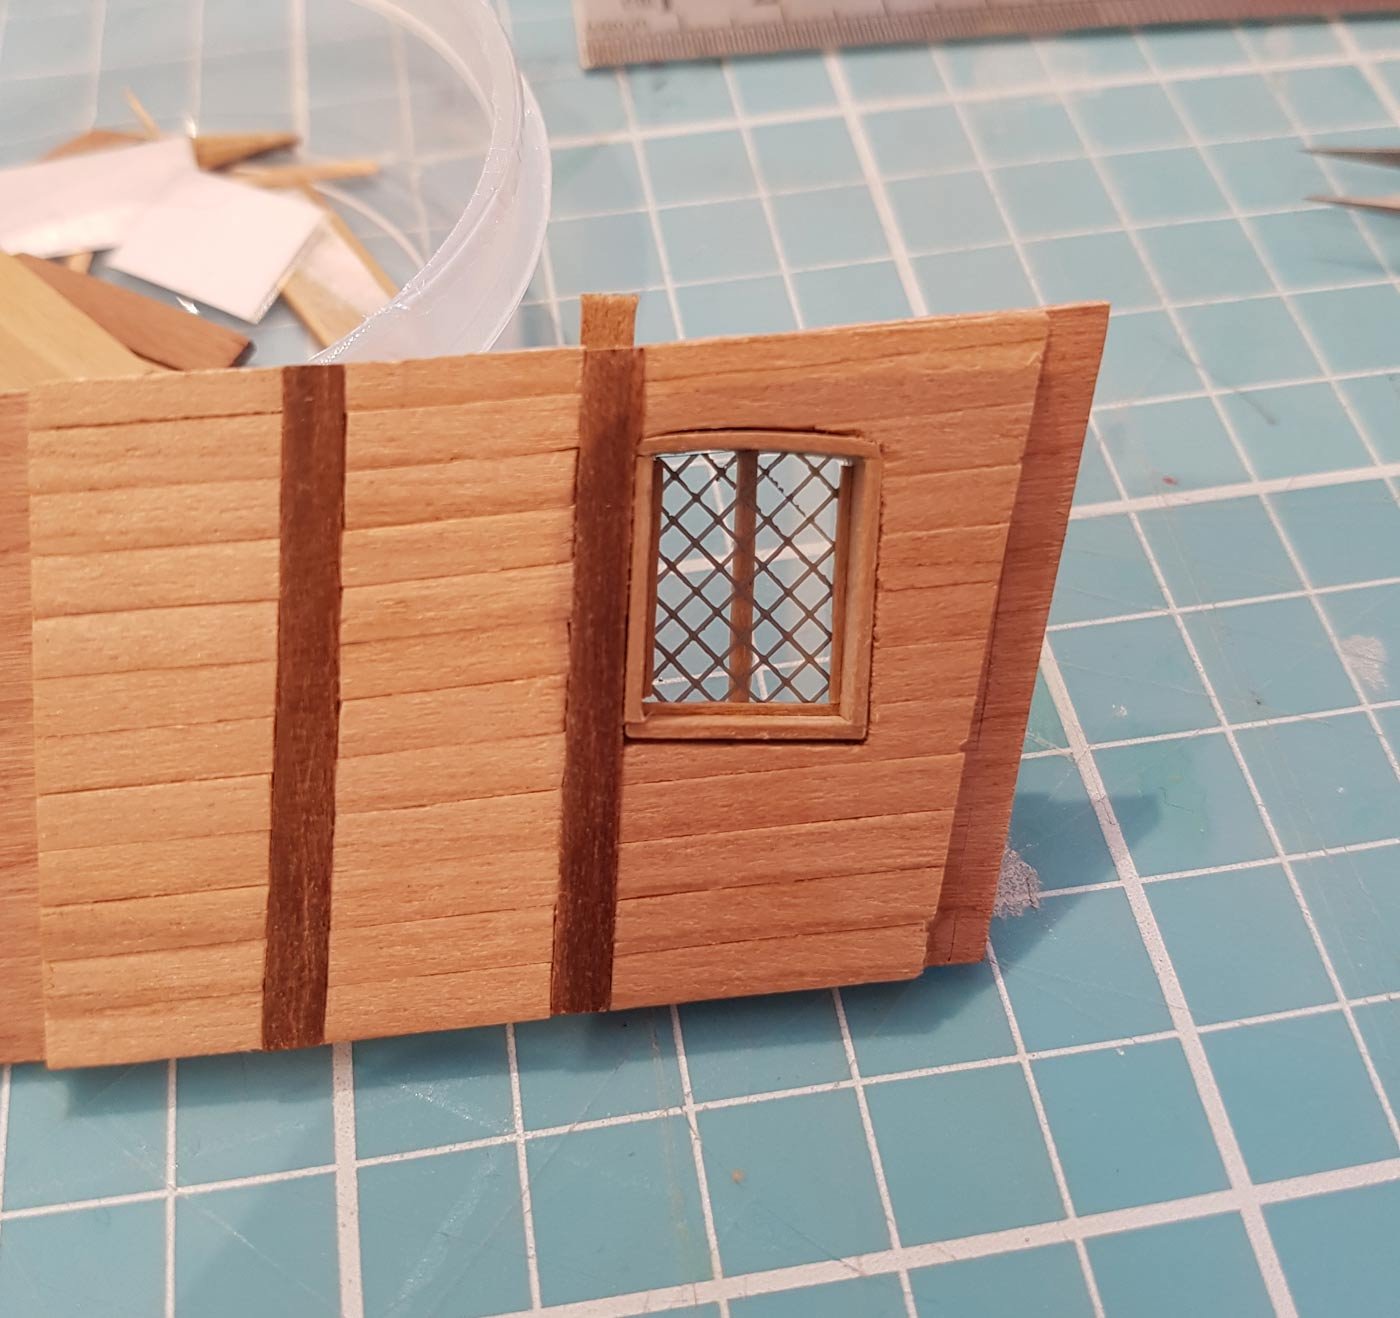
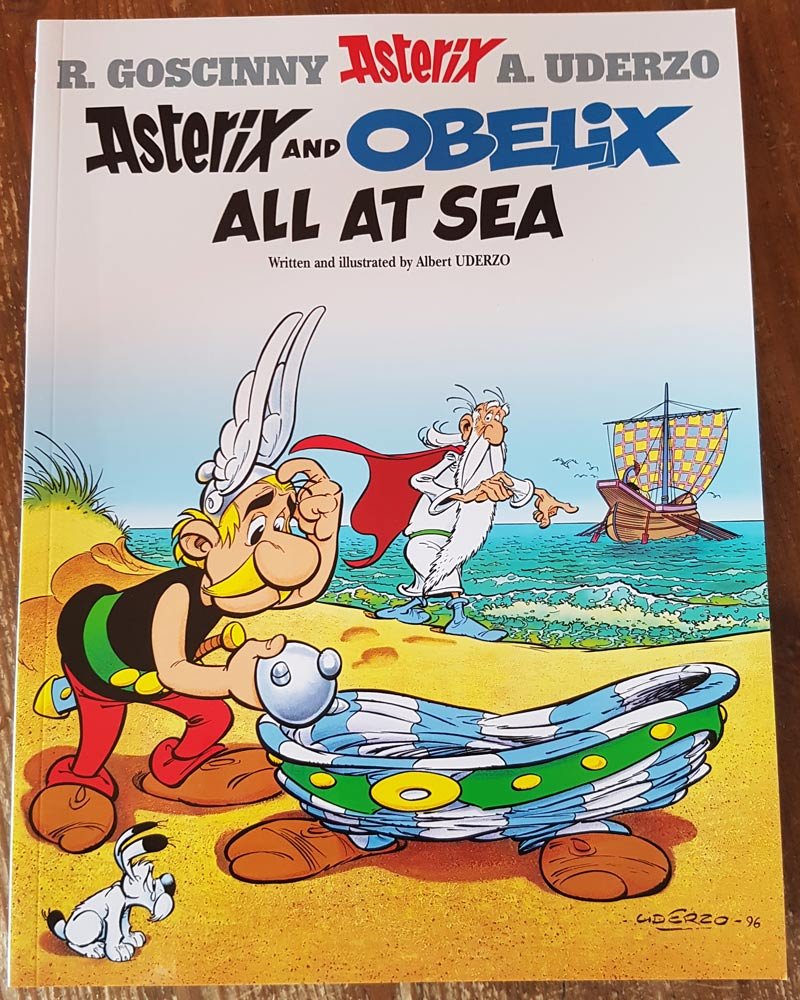
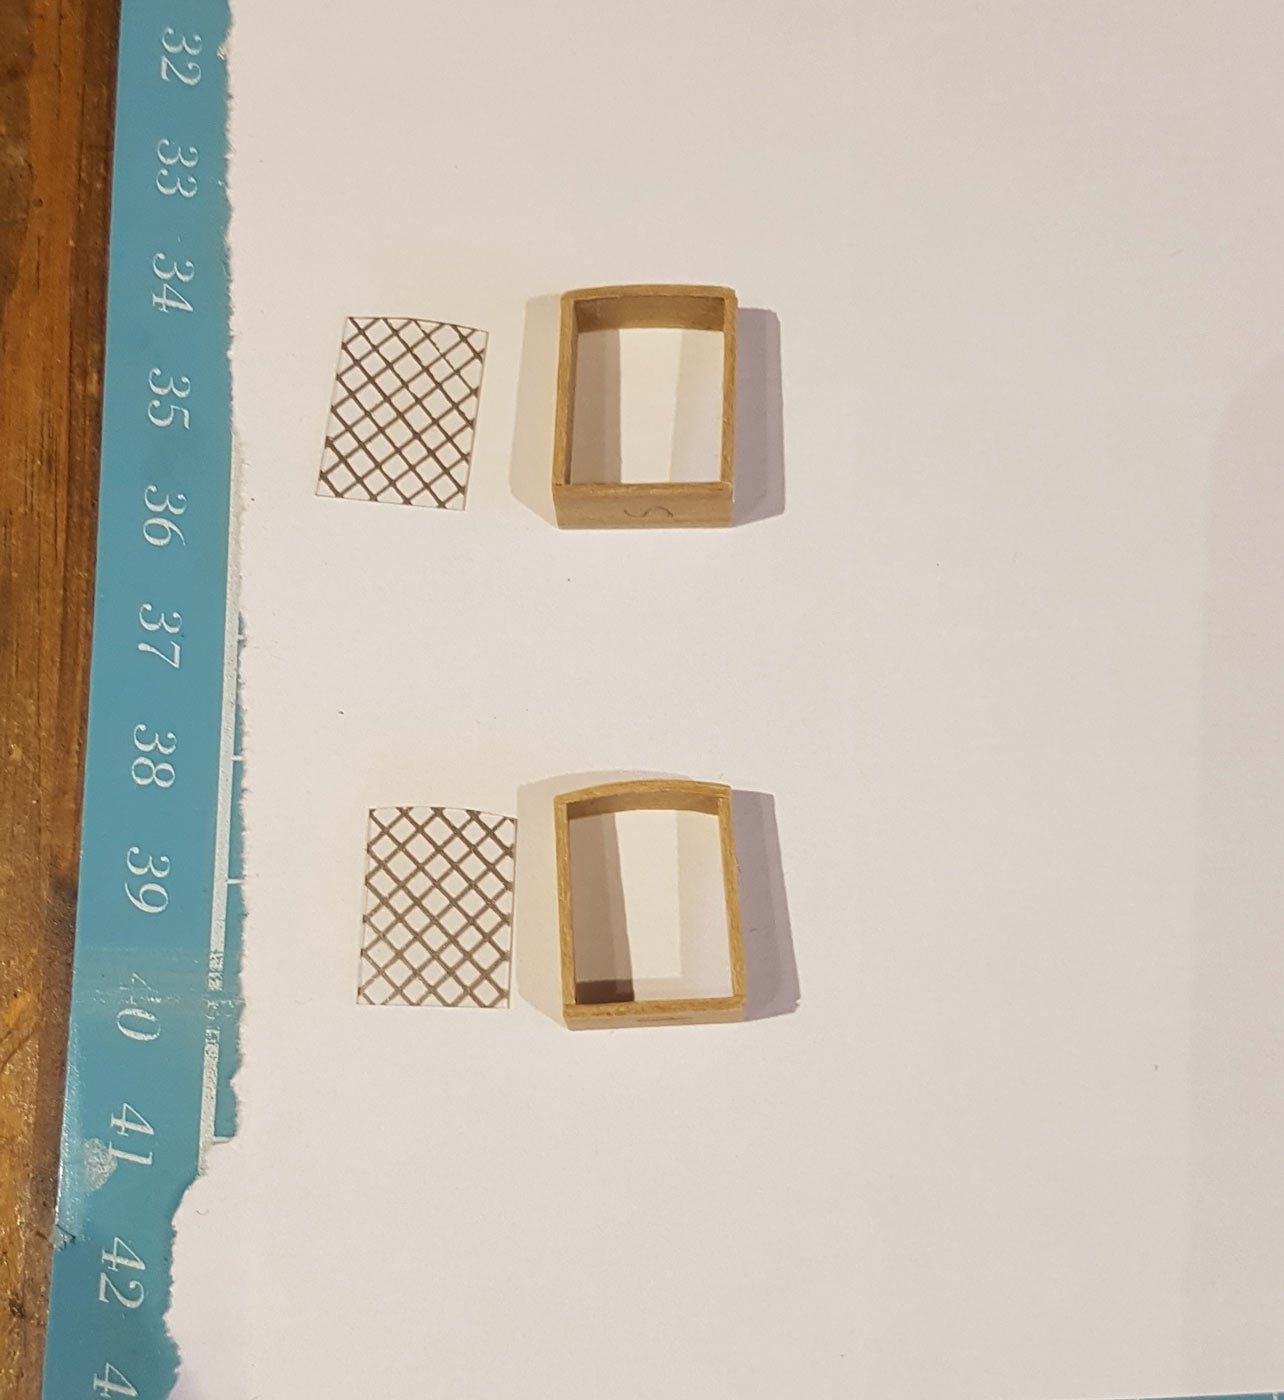
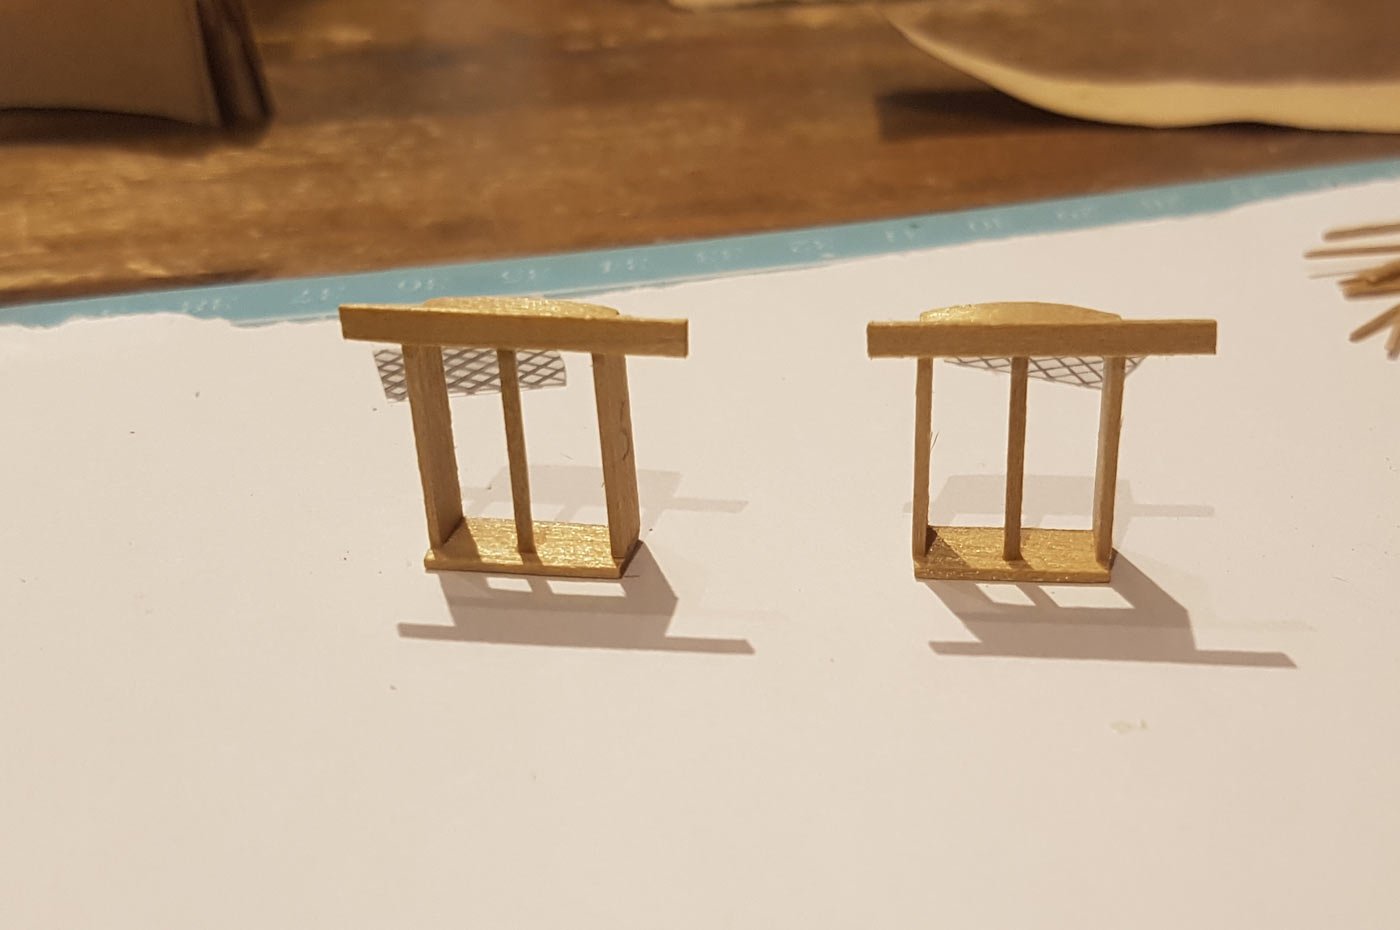
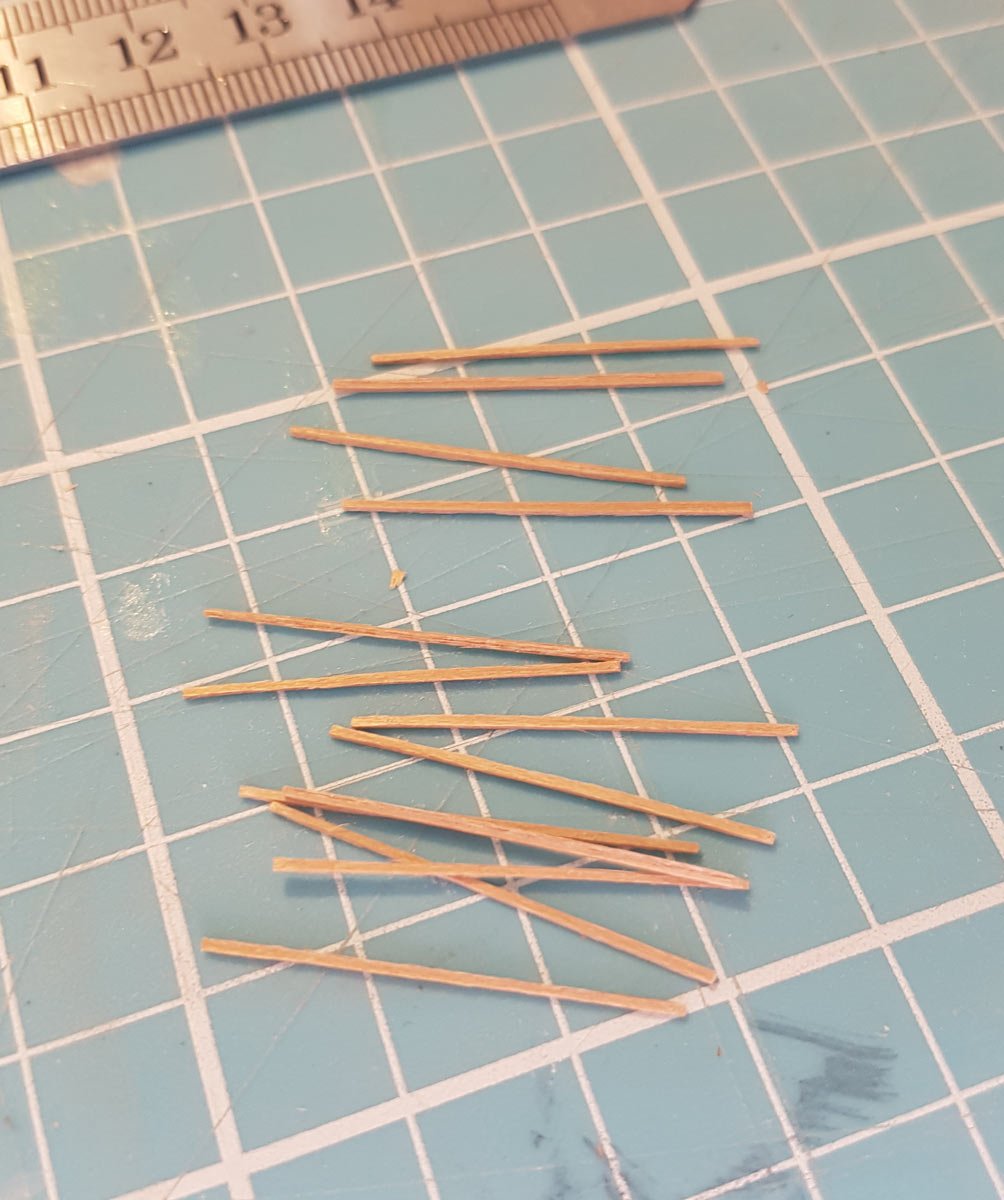
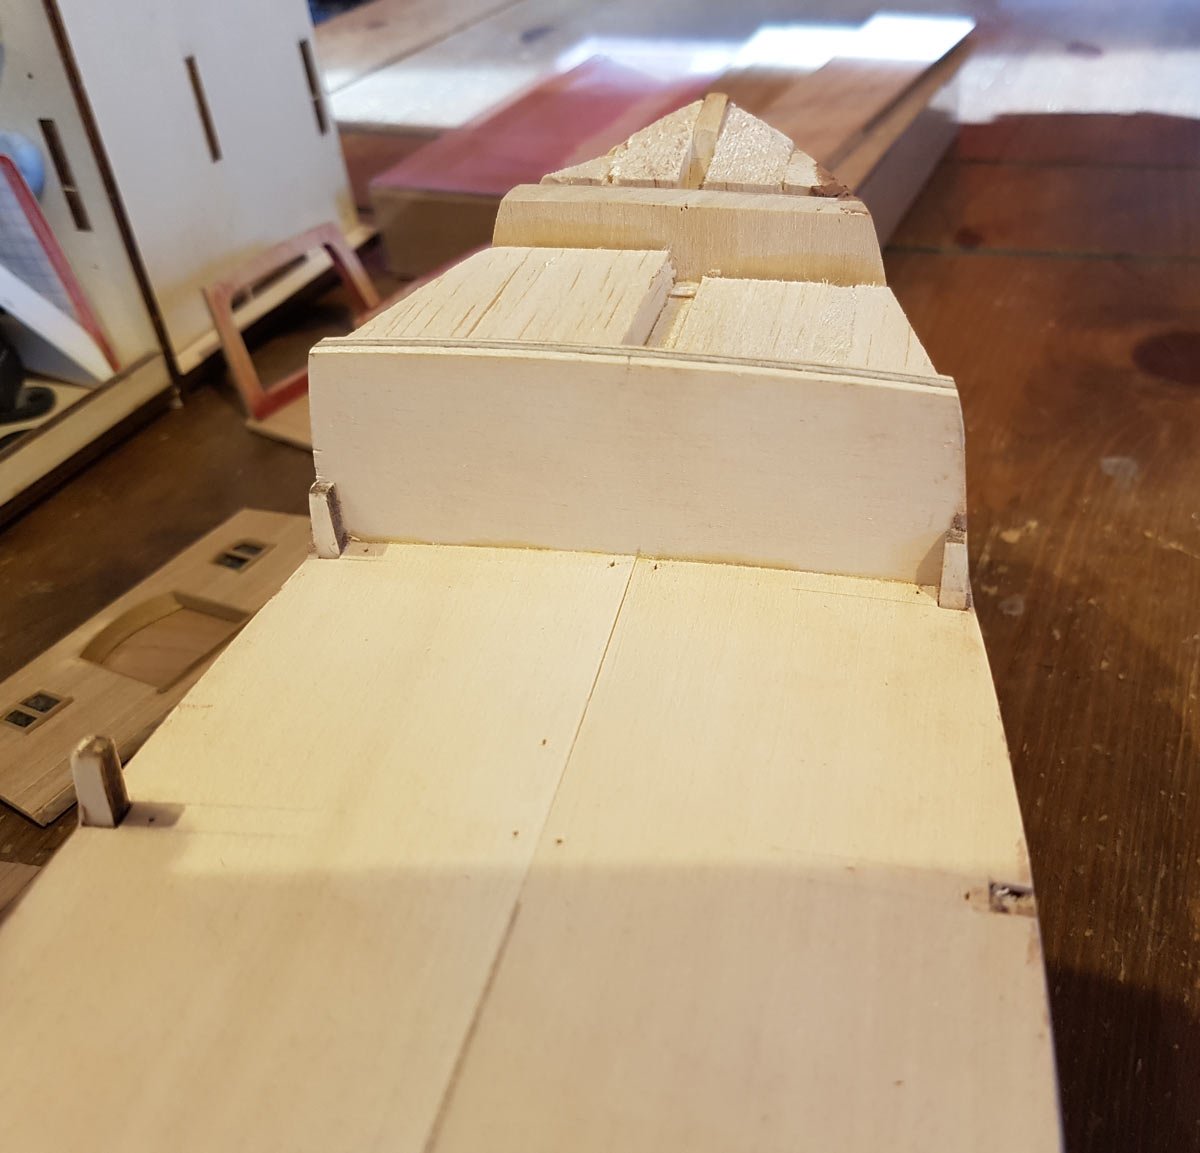
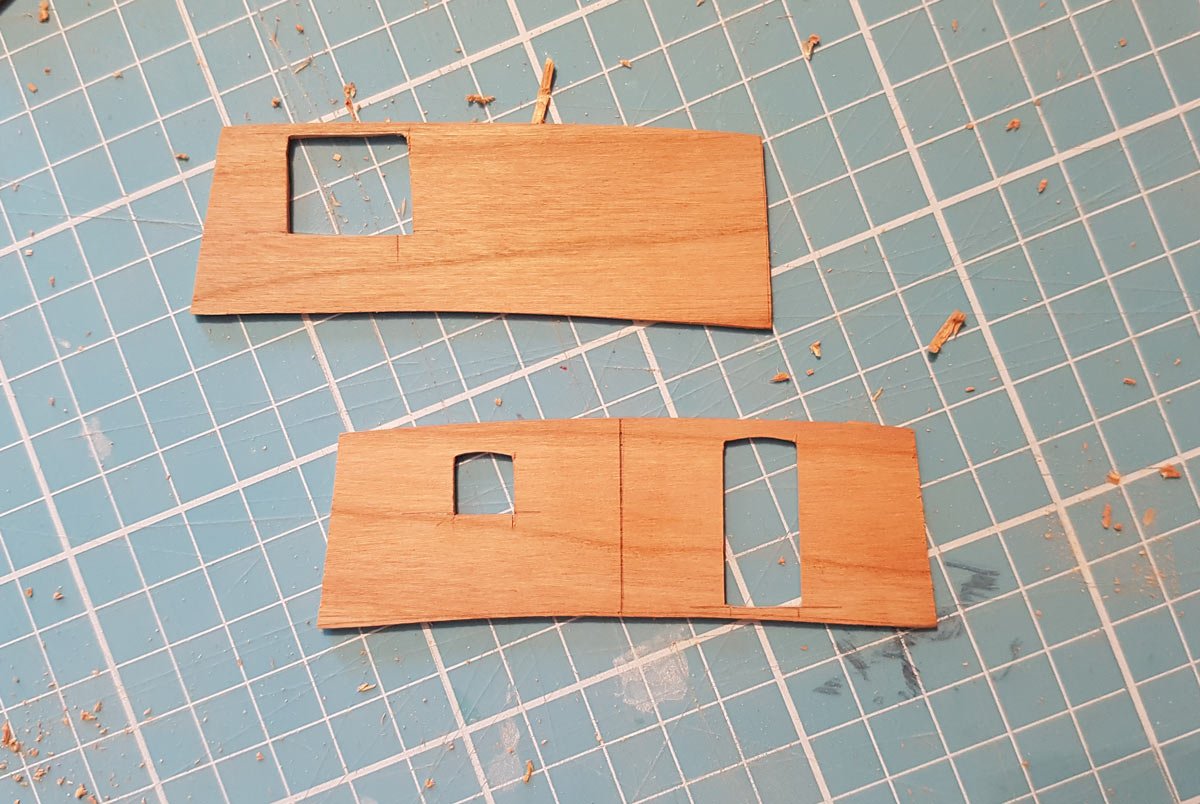
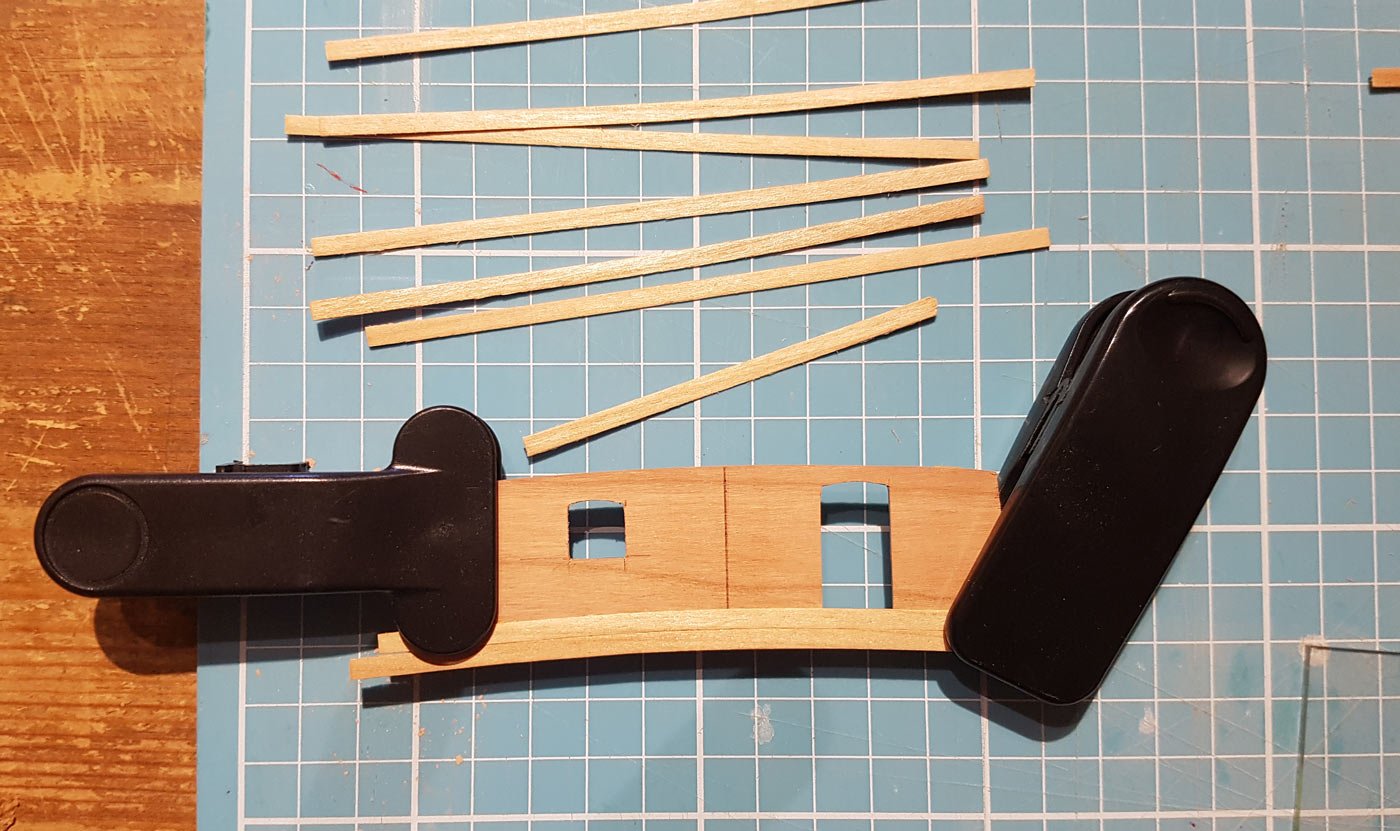
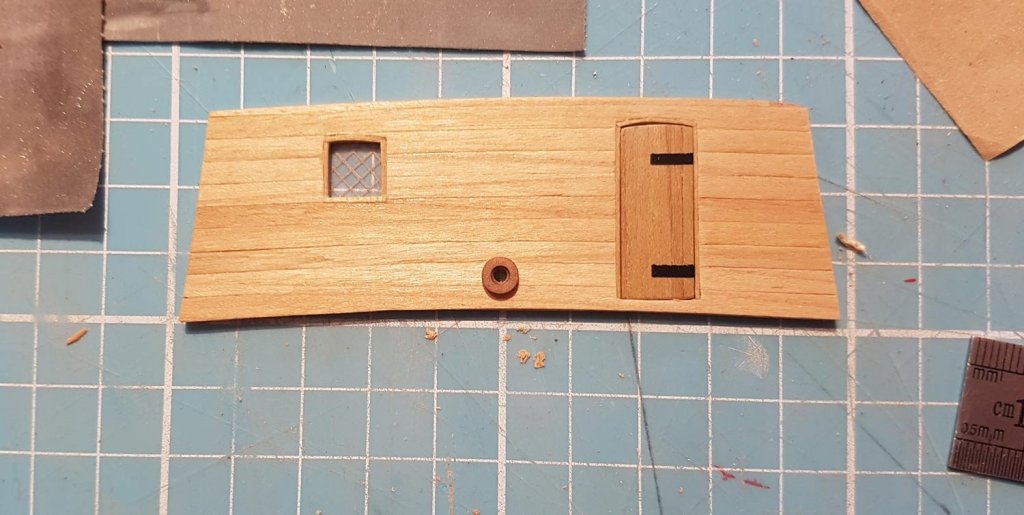
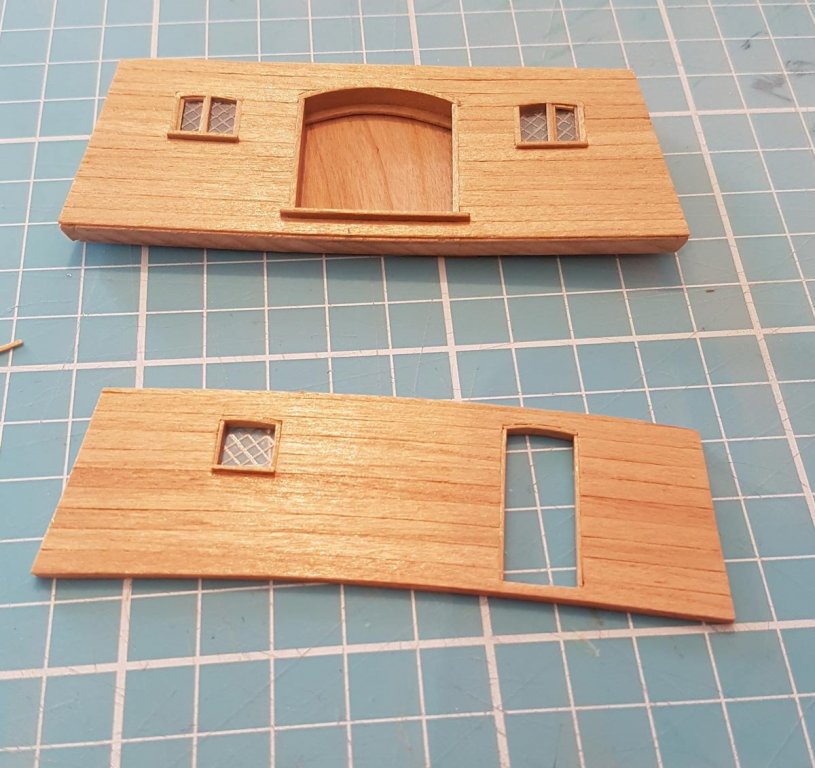
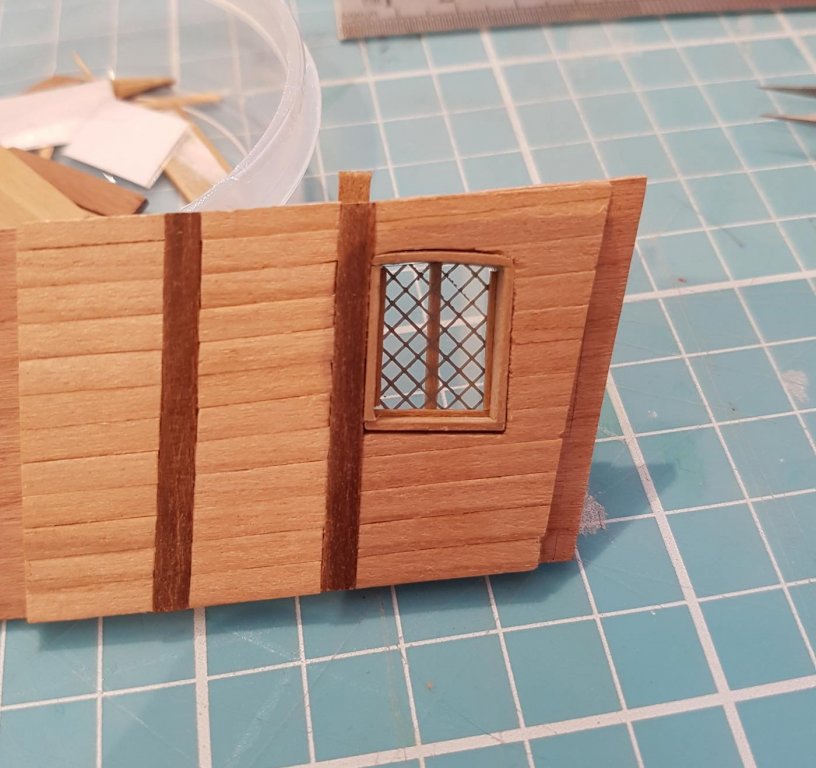
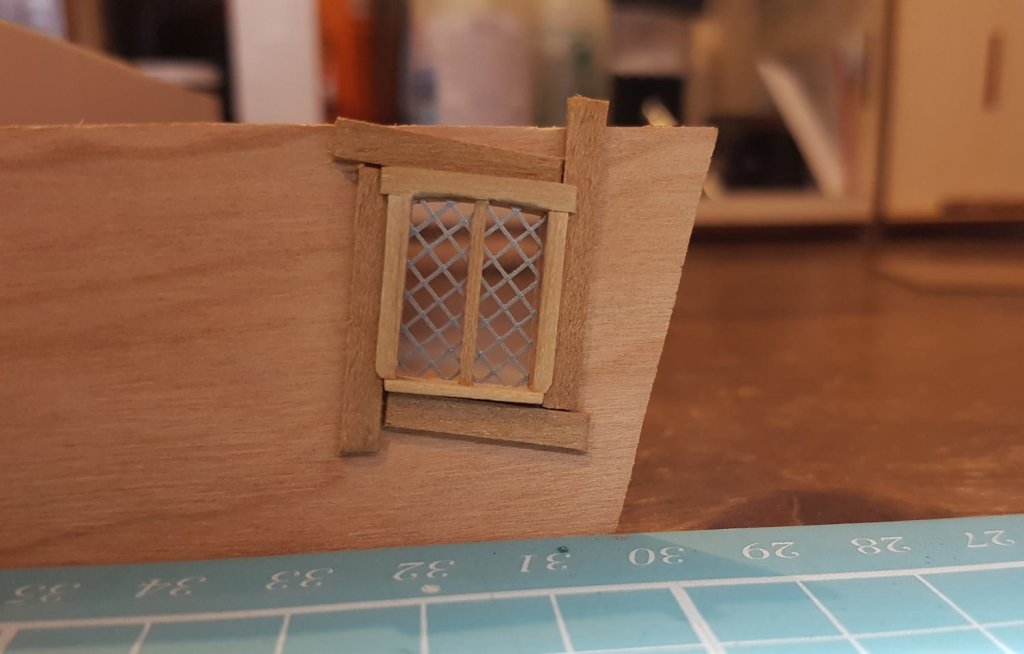
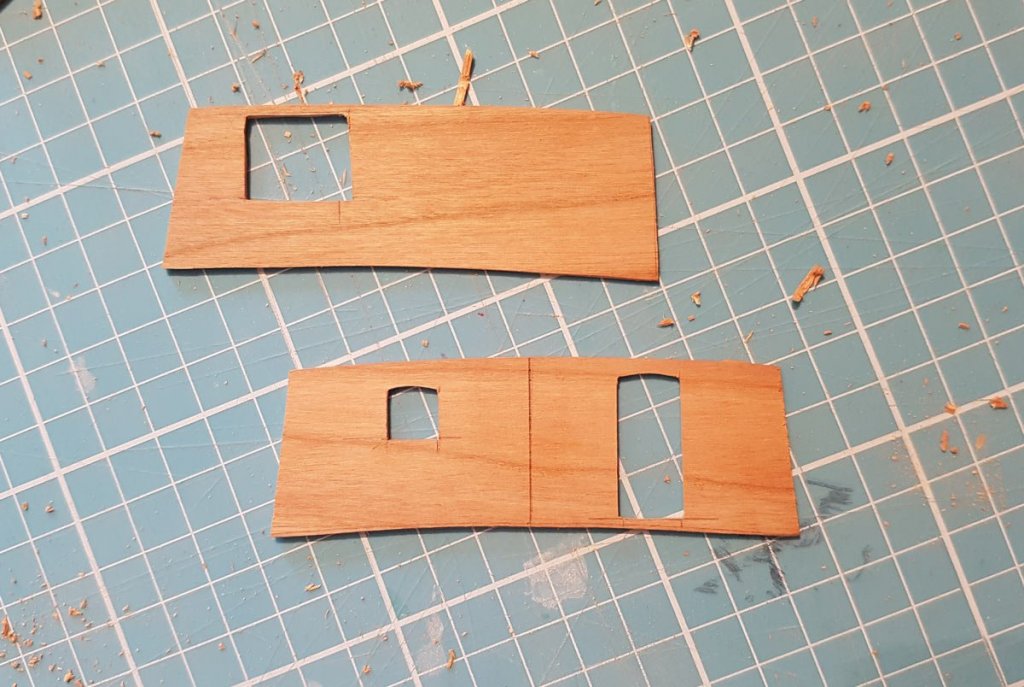
Hello, my apologies to those of you who have taken a seat for this build, I hadn’t realised it has been two weeks since the last update. Due to work interfering I have made only a little progress, although I have two weeks leave after this week and I am looking forward to spending a lot of that time in the shipyard. I will have to make the most of those two weeks as work will interfere again until late June. So, I had thought long and hard about Marks’ suggestion about inlaying the cherry either side of the doors. I tried various methods but, unfortunately, I could not get the neatness I was after. A milling machine would be ideal for this but neither my cutting nor the dremel were able to match up. As the doors etc don’t need to be glued up as yet, I have decided to leave this for the moment. I may try again another time or I may settle with what I have. I continued with the side windows; cutting out the window “glass” as I had done with the previous windows. I then made the centre upright and the thin strips that will surround the window and cover where the planking meets the window “box” The top strips shaped, the side strips shaped and then test fitted on the side walls; Thin strips were cut to make the window-pane-frames. It was at this point I decided that I would try an experiment. The bulkhead windows made previously suffered from a little fuzziness, so I wanted to apply a little sanding sealer or poly to the strips before final sanding and fixing to the windows. But I didn’t have any so they were added to the must have list, which was then “helpfully” commandeered by the Admiral to help constitute my birthday present. A nice gesture, but means I will have to wait until the end of this week before the experiment can start……. I turned my attention to the forecastle bulkhead. Again I felt that this needed to be at least partially completed before planking and decking. In preparation I cut off all of the remaining bulkhead extensions. The forecastle bulkhead will be a much more simple affair than the sterncastle bulkhead. It will have one door and window. The door will be simply made from strips, like others seen on models from this period. The window again will be simple, with no hinges or window pane strips. The premise being that the Trader/owner will not spend good money on a fancy door or window the “ham-fisted crew will use and abuse” The window and door were cut out of a hardwood strip, another strip will be laminated to the back of this to give a bit of depth behind the window. A larger hole was cut out behind the window to allow me to more easily glue the window pane. I wanted to have the bulkhead planking to follow the curve of the deck so each cherry plank was cut to length, sanded and then clamped and heated. I decided to make this bulkhead in the opposite way to the way I made the aftercastle bulkhead, so the whole bulkhead was planked first and the window and door holes will be cut out from behind. Once the planks were trimmed to size and the holes cut out, I used thin light-walnut strips to form the door and window frames. The two strips were glued together and then the window pane glued from the back. The door isn't that wonky in real life, its the camera - honest! The area behind the window will be painted black, which will hopefully give a sense of depth and space. I have started making the door - sorry no pic - and I think I may have to go with a gate type hinge. I’m hoping I have some offcuts of brass etch hidden away somewhere, although my metalwork skill are non-existent. If not I may print out a couple of hinges on the computer and see how they turn out. I have also got a little motif (took me ages to work out how that was spelt!) that I may be able to use on the door so I have a few options. Hopefully the Admirals’ birthday package will have the required bits so I can continue as planned. I have also asked for a couple of books that will help me with the rigging, I’m going to have to start to think about this soon as I need to work out how I am going to fit six sails onto this ship, and the associated channels and pin rails. That’s all for now, by this time next week the side windows and the forecastle bulkhead should be just about finished - fingers crossed! Cheers!


-
Fantastic work Sir, wonderfully neat. Any reason in particular you went for a lighter thread for the ratlines?
-
Ah that makes sense. its obvious now 😎. I know what you mean about rigging instructions, I think most manufacturers are the same. Although they will all have to go a long way to beat these instructions I had with the AL Virginia; 😭

- 236 replies
-
- 1
-
-
- artesania latina
- kitbashing
- (and 2 more)
-
Ah, I understand. Is that what the shrouds are connected to?
- 236 replies
-
- 1
-
-
- artesania latina
- kitbashing
- (and 2 more)
-
She's really coming along nicely now Peter, looking good! What are the four (I think) structures inside the crows nest? I can't make them out.
-
I will Peter, Thank you! So simple but looks fantastic. We shall have to see if I can get as neat as you...……..😎
- 236 replies
-
- 1
-
-
- artesania latina
- kitbashing
- (and 2 more)
-
Peter, how did you start and stop the wraps of thread around the mast and yards, it looks incredibly neat. 🧙♂️ Too neat, must be some wizardry afoot...... 😁
- 236 replies
-
- 1
-
-
- artesania latina
- kitbashing
- (and 2 more)
-
Thanks for the comments and likes guys! Mark, yeah I thought about inlaying the strips, but...……… i'm not confident my skills are up to the job. Having said that I may as well give it a try, I have got enough wood, I have nothing to lose apart from a couple of days work! Peter, I'm not sure what ideas of mine your nicking, but i'm certainly striving to emulate your neatness and expertise.
-
Thank you GrandpaPhil!
-
Well, as we have come to expect, Fantastic! I always look forward to your updates, there is always something for me to aspire to.... I love the look of the mast and yard, great colouring, it all looks so authentic. I hope you don't mind but I am so nicking sooo many of your ideas for my build! Great to see your son getting involved, if it hasn't got wheels my son isn't interested, and if it doesn't go into space or is in Minecraft my daughter isn't interested!
- 236 replies
-
- 2
-
-
- artesania latina
- kitbashing
- (and 2 more)
-
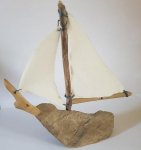
Nice job on the little boat. I initially didn't think the colour of the deck would work, but it looks great. You have a good eye Sir!
-
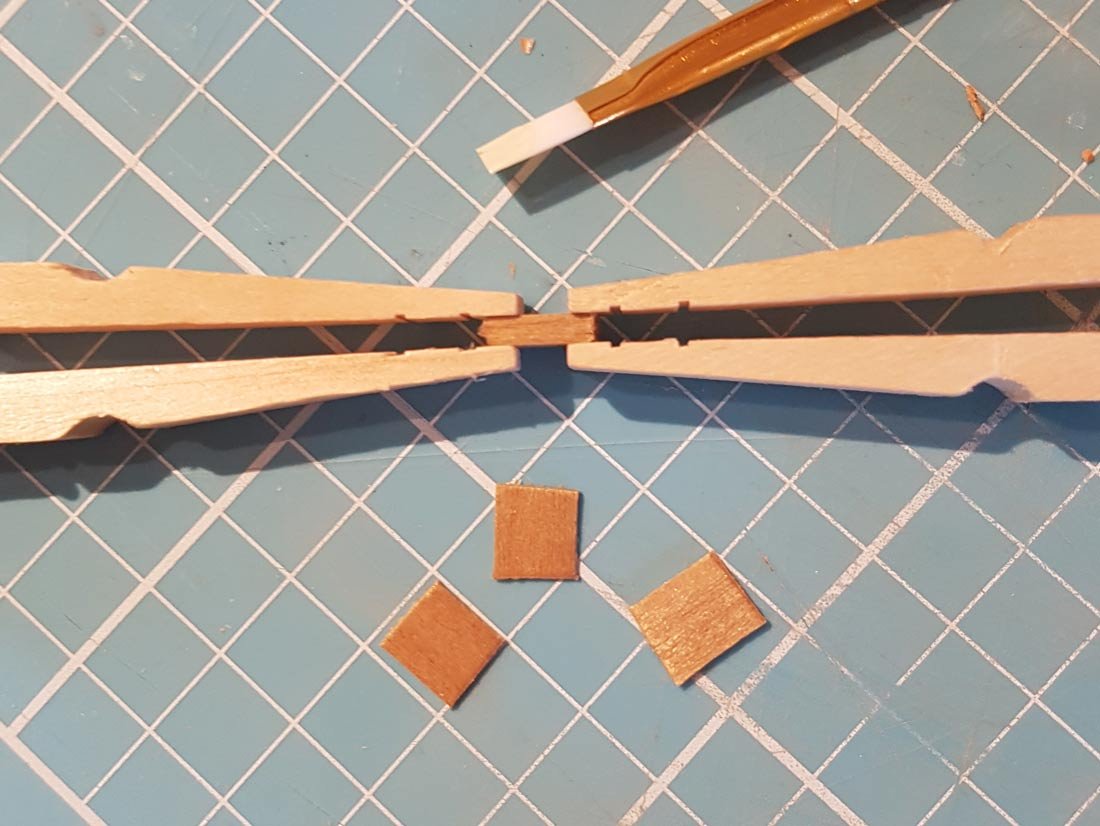
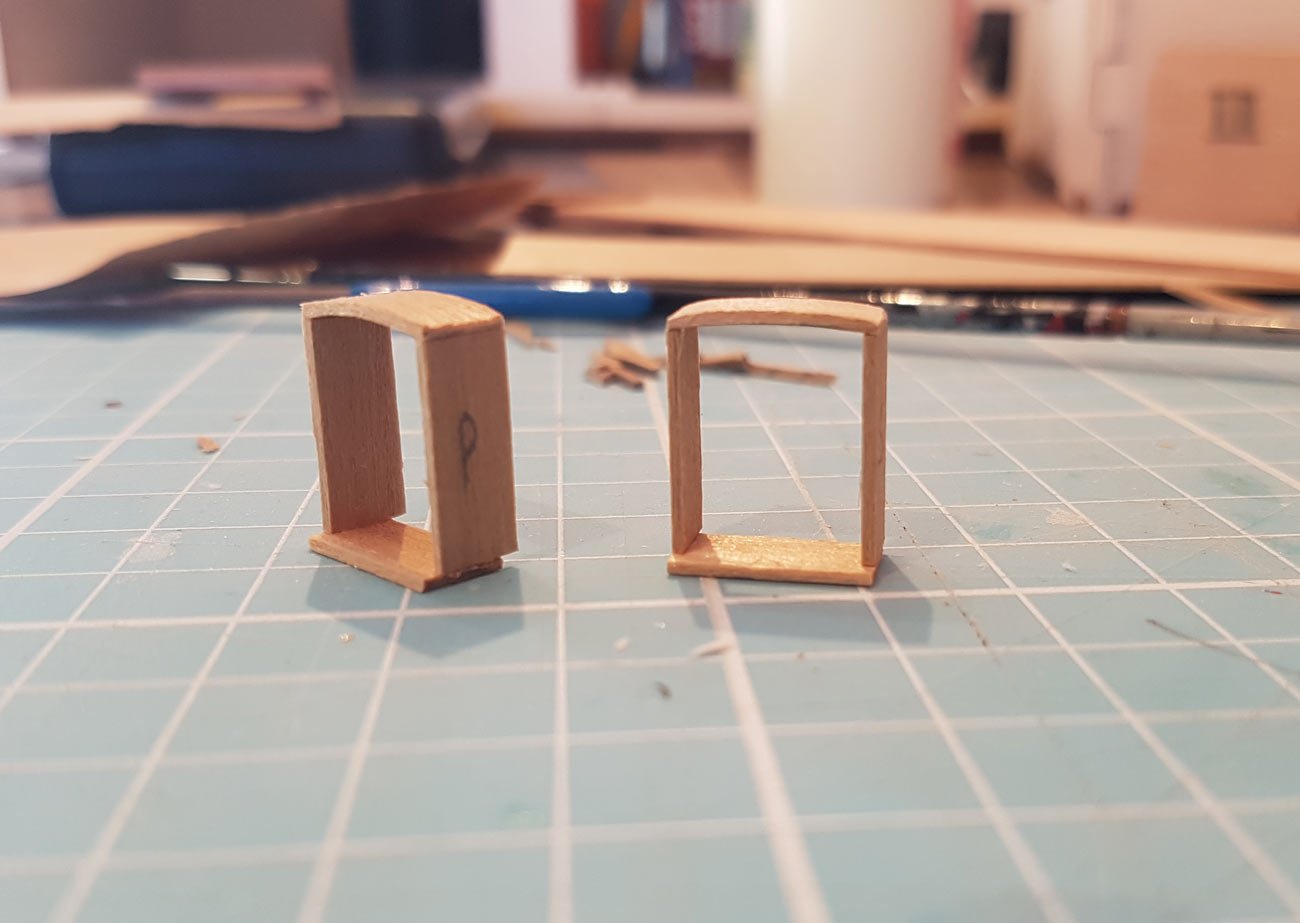
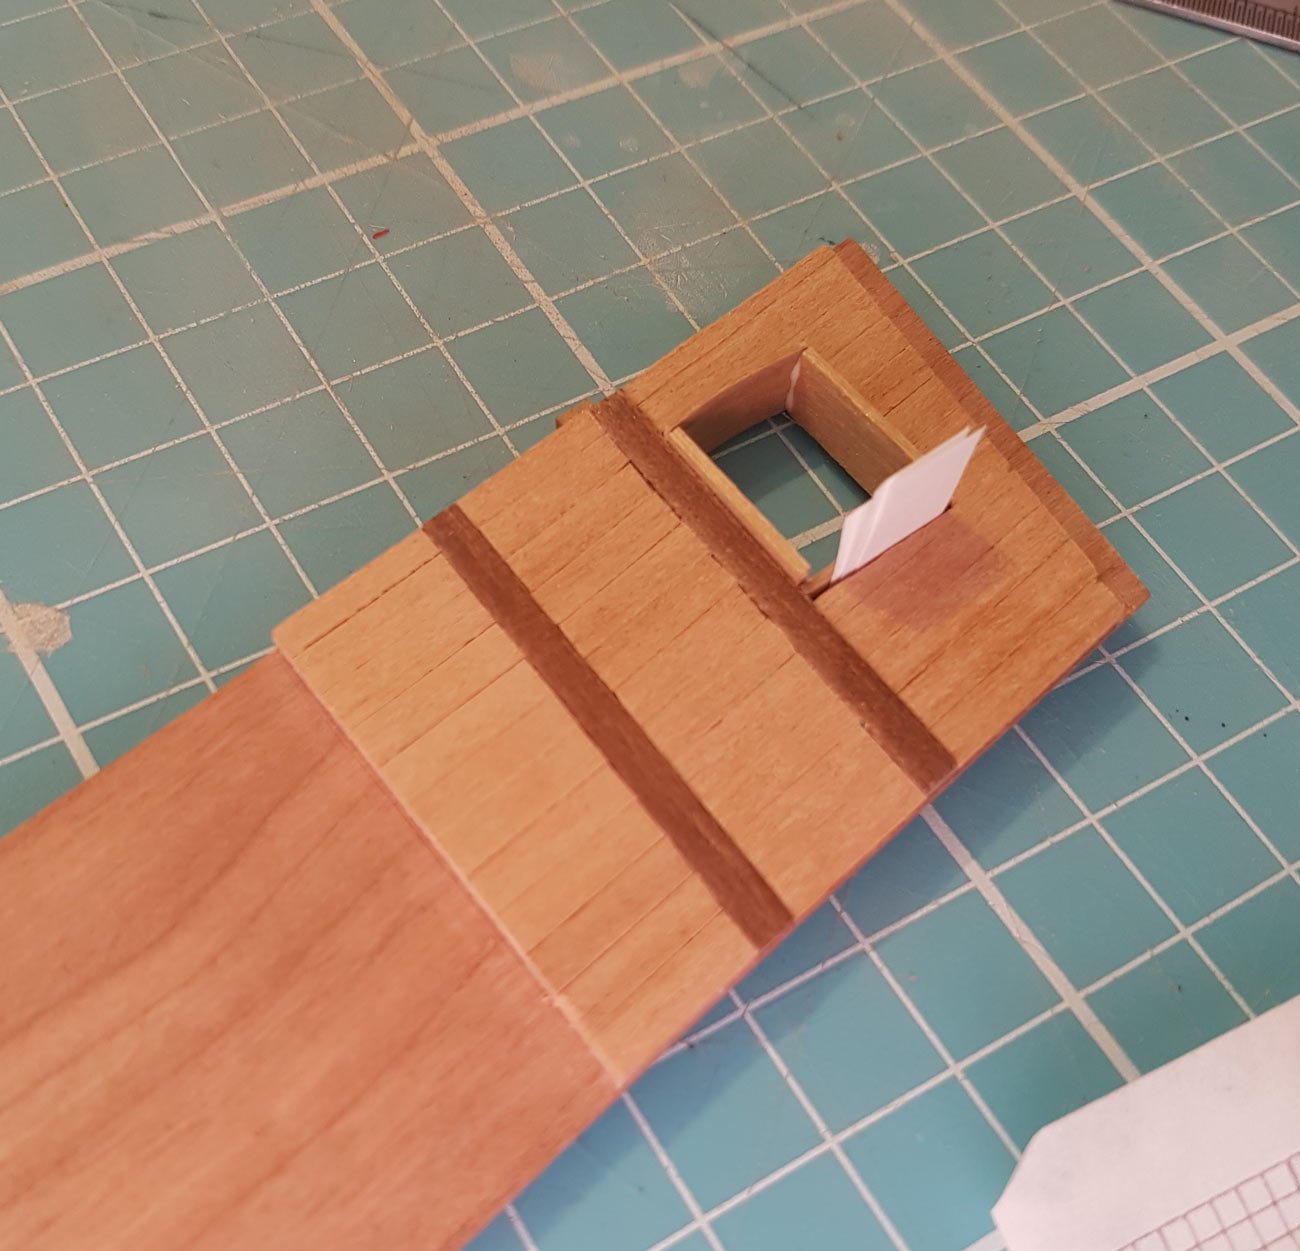
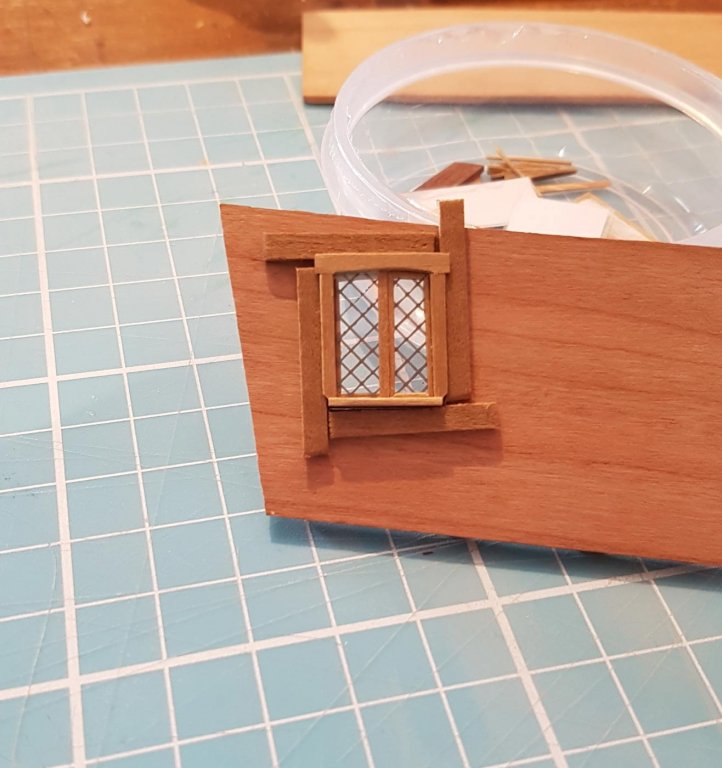
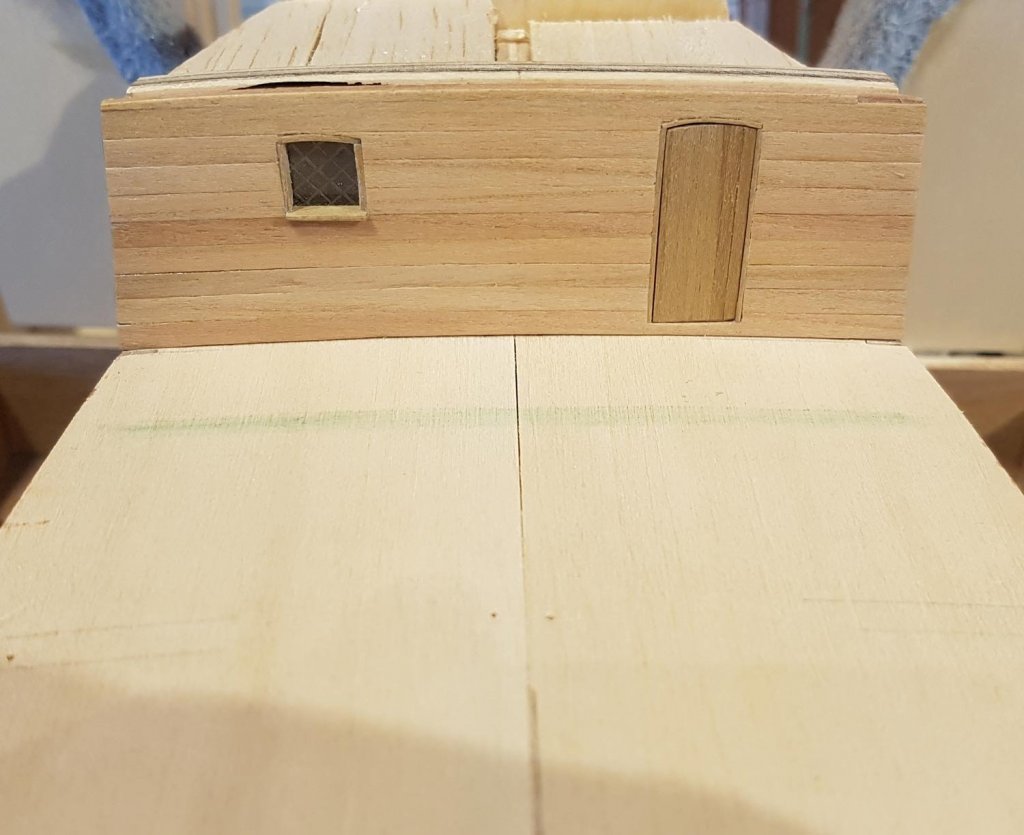
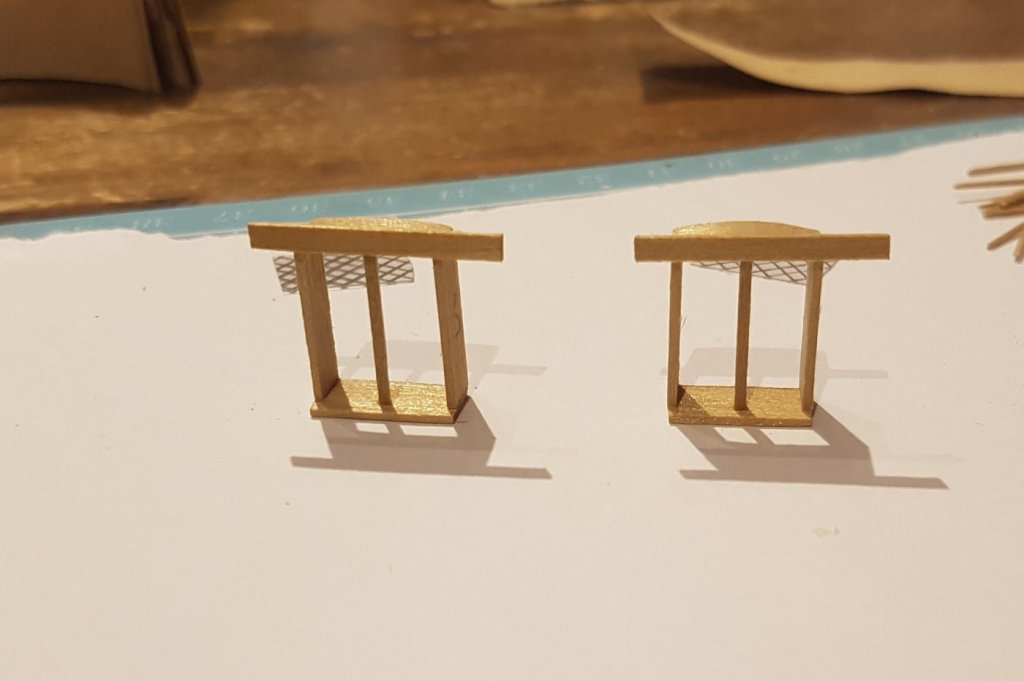
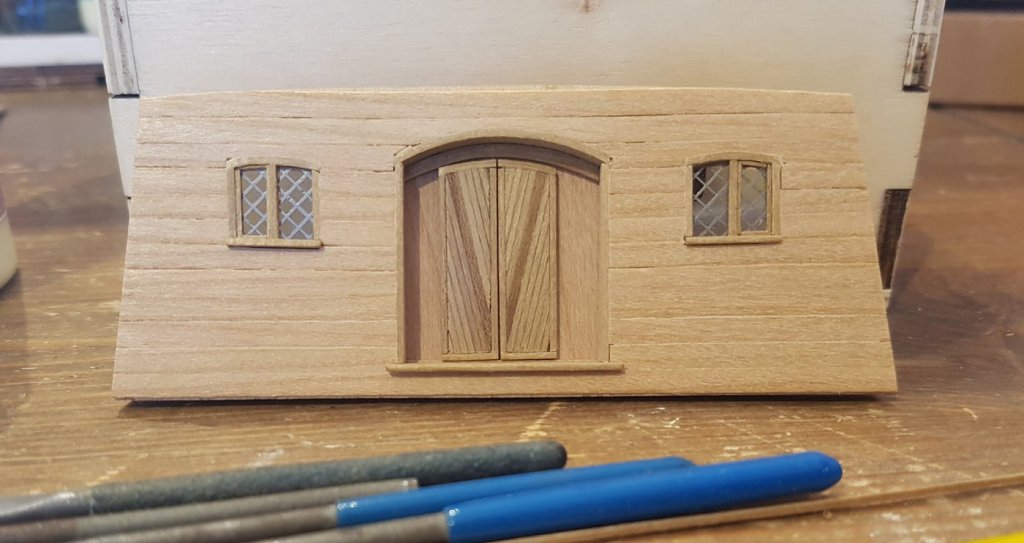
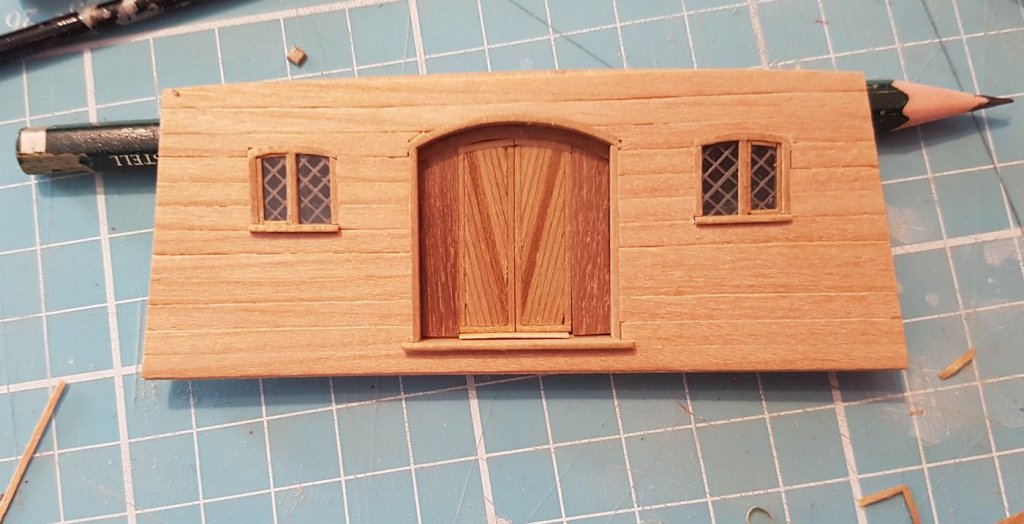
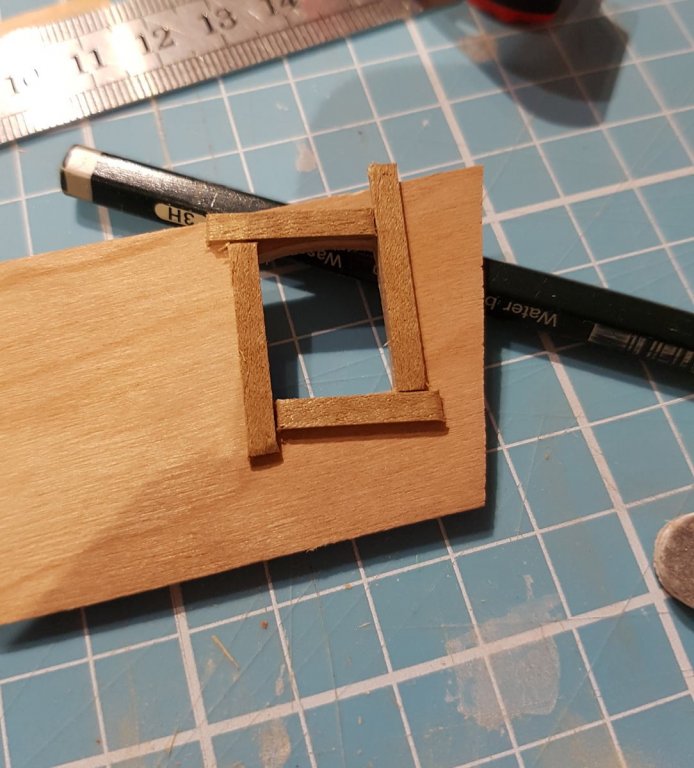
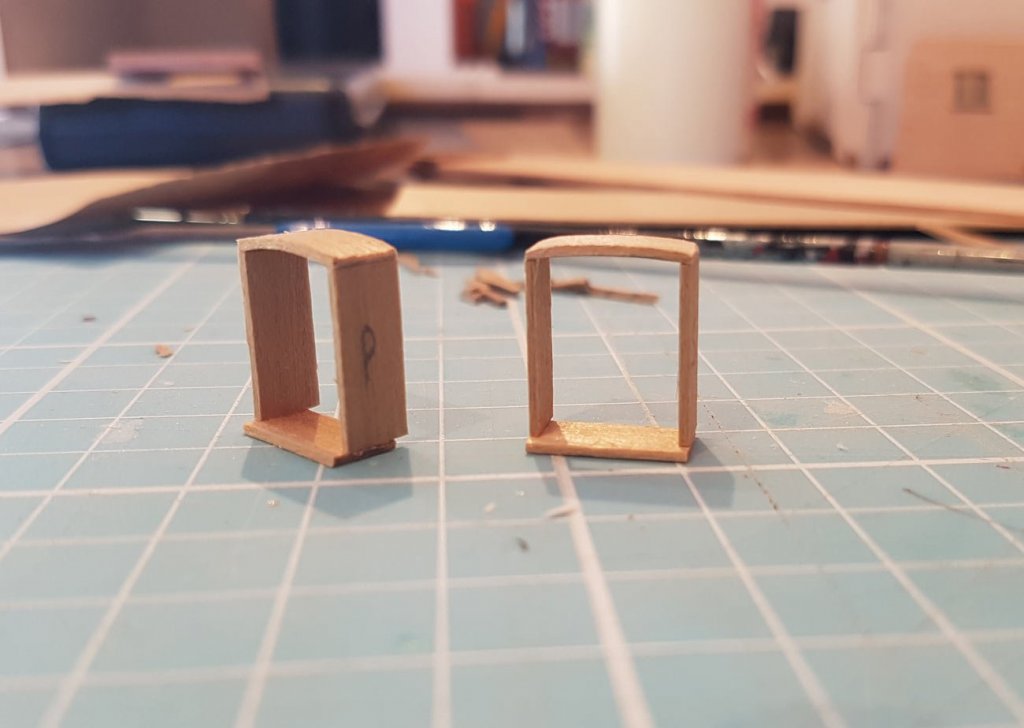
Hi everyone, another few hours achieved in the shipyard today, so I carried on with the replacement doors; giving both doors equal treatment😉 I started off with the initial sanding of the new doors and then cut them to size. I think the pencil between the strips worked well enough that I don’t need to use ink. Try as I might I was just off in the cutting of the second door so the “V” is slightly offset compared to the other door. I decided I could live with it, for now….. The outer edges of the sides and the bottom of the doors were applied, …and then the top of the doors fixed. The strip was pre-bent around a jar and heat applied. After some sanding and a bit of polishing they were test fitted on the bulkhead. The eagled eyed may have spotted that the doors are slightly too short (measure twice, cut once!) so I made a small doorstep. I also made two panels to fit either side of the doors out of the dark walnut that I will use for planking. The panels looked a bit bare so I fashioned a couple of strips out of the cherry, I won’t be sure until I add the ironwork to the doors but I think the assembly looks better with the strips rather than without. The doors and panels are not glued down yet, I’m going to rub a pencil around the edges and maybe a slight bevel to separate the doors more from the panels. While the edges were being glued to the doors I made a start on the side windows of the captains cabin. The idea is to make them off the boat and fit them after the planking so that they sit flush. I’m also thinking of adding a thin strip around the frames so that the planking goes under - hopefully all will become clear……… I tacked some of the planking strips around the window opening so that I can get the correct depth. The inner frames are glued together; the paper allows a slight gap so that I can remove the frames. I managed to glue them so that there is a slight windowsill on the outside Both frames removed. Note the handy P and S so that I remember which window goes on which side…….. If you guys don’t mind I would like your opinions; Is the V too wonky? Is it dark enough? Side panels with or without strips? Hinges; simple rod to represent hinges or a gate/bar style hinge? Cheers!


-
Oh I will, Mark, I will!😁 Don't know if I will need the ink this time, I used a pencil on the strips before I glued them, a la deck planking. Will see ifn it works out...…….