nikbud
-
Posts
203 -
Joined
-
Last visited
Content Type
Profiles
Forums
Gallery
Events
Everything posted by nikbud
-
German WW2 Armor Models by nickbud - PLASTIC
nikbud replied to nikbud's topic in Completed non-ship models
Thanks again for the info, its discussions like these that bring models to life. I think its fair to say that most if not all motorsport has been "affected" by the vast amounts of money flooding around. I follow F1, and as you said the days of the privateer, and to a certain extent, off the wall innovation are long gone, no chance of ever seeing a six wheeler again! -
Stunning Stern Sir! I keep repeating myself, but damn she looks good!
-
Yup, and "tomorrow" the same bits snapped off! I should have left them off till I finished sanding, oh well 🙄 On the plus side probably only a couple days left of sanding..... yay me!
-
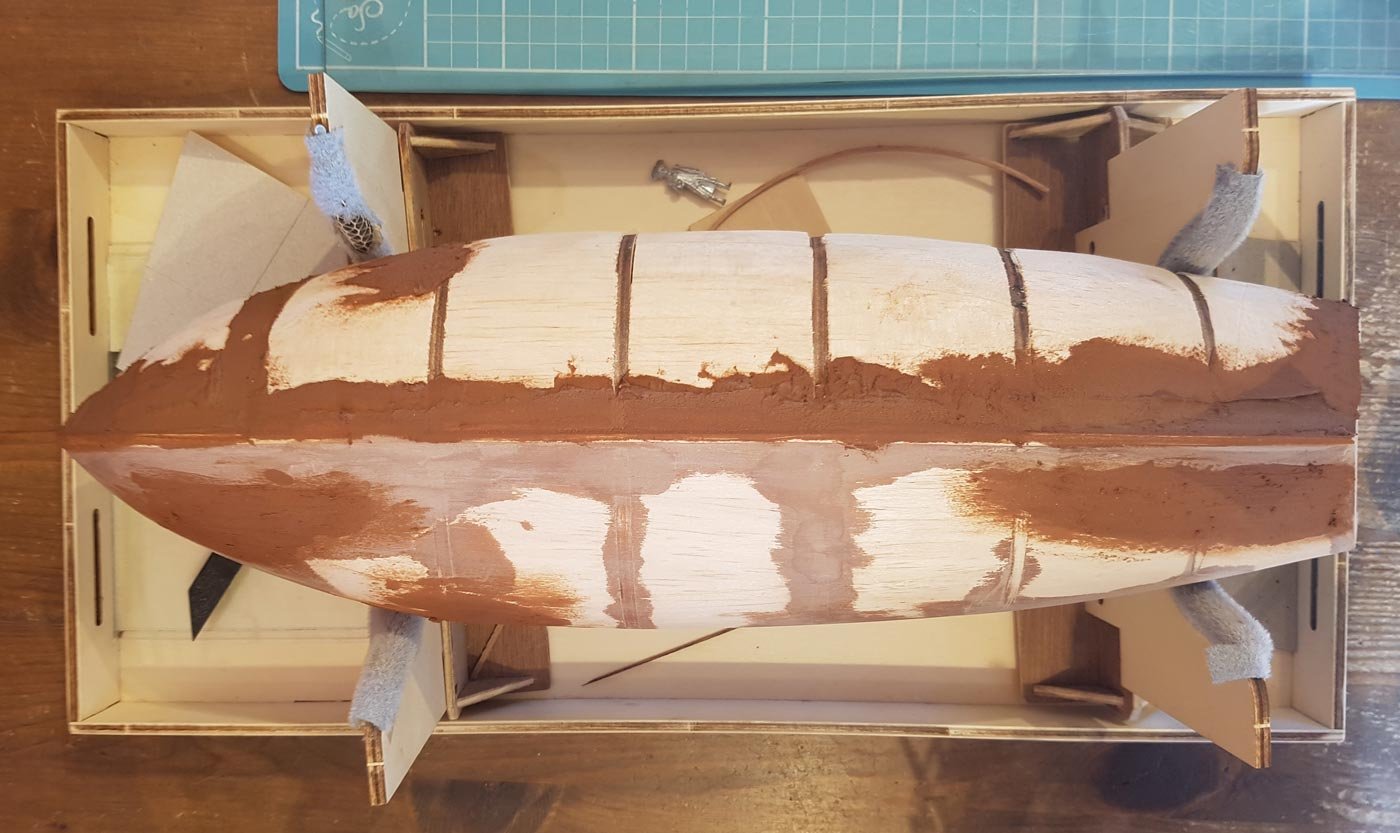
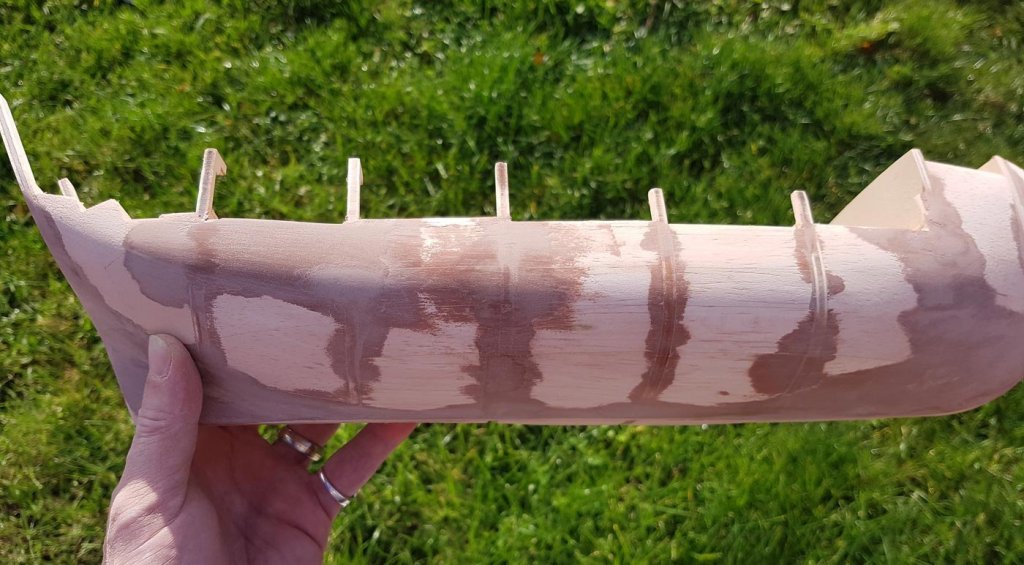
I suppose everyone has had one of those days where you realise that you really really shouldn't have opened the shipyard, well today was my turn.... The afternoon started off ok. Initially I overcame one of the problems of not having a complete set of plans and of changing your mind mid-build. While sanding the starboard side I sanded a tumblehome on the top of the forecastle until I got the look I was after. So to get the same on the port side I found the centre of bulkheads 1 and 2, and using a set of dividers marked where the tumblehome would be. So far so good.... So I started to sand the port side when there was an audible snap. Yup I had snapped off one of the bulkhead sticking-up things. I had managed to sand the whole starboard side and no problems, a couple of minutes on the port side and I break something. Some swearing was had. I continued sanding, and I'm not kidding but less than 30 seconds later there was an even louder snap, followed by a lot of swearing - another sticking-up thingy had broke. From the living room the Admiral said "Are you OK, heard that in here, what snapped?" I mumbled something, looked at the ship and dropped the whole thing onto the table and swore a bit more. Quick as a flash my son chirped up "Sounds like it was dads patience!" The ship was OK but I knew that I should pack it up for the day. Hopefully I am less ham-fisted tomorrow!
-
Thanks Mark, I'm hoping the more sanding and shaping I do now the less I will need to do after planking. And yes a table lamp will be needed, weather has returned to dull grey again, the sun is next due out in April!!
-
German WW2 Armor Models by nickbud - PLASTIC
nikbud replied to nikbud's topic in Completed non-ship models
Lou, Thank you so much for taking the time to write out all that info, I really appreciate it. My autistic son has a self-imposed bedtime of 2130 no matter what, except for the 24hr Le Mans - he can tell me every fact and figure over the last few years but not much about the history. Cheers Paul -
After the frivolity of photographing old models (plastic ones - I can see you smirking at the back there!) it was back into the shipyard today. However there is not much to show, I am at the stage where I’m sanding, checking, sanding, checking, filling, waiting, sanding, checking and so on and so on. I am using more filler than I expected, partly because I was over-enthusiastic with the dremel, especially where the hull meets the keel, partly because of the sharp transition at the stern and also partly because I have increased the distance between the bulkheads. I am being careful to keep the bulbous shape of a carrack and not end up with a “racing” hull. I did find out a neat trick today. As I was sanding this afternoon the low sun came in through the back doors and I noticed the shadow on the hull. By turning the hull in the sunlight I could see high points and low points marked out by the line of the shadow all along the hull. Not very scientific but very helpful nonetheless. One side of the hull is almost complete, the difficulty now will be getting the other side to match. Hopefully I can complete the hull sanding by next weekend, we shall see…..

-
Ooh, I've always loved the look of the stugs! I've never done a vehicle card kit before so I will be following this with interest.
-
I concur with others, the only time I gave used gloss paint on any model is either a model car or to represent glass. Otherwise, to me, a gloss model looks toy like. I prefer to brush paint with enamels or oils, much longer drying time. If you wait until a flat enamel has fully cured, a light rubbing with a lint free cloth will give a nice "sheen".
-
What works for me is to "remember the scale" of the model, and imagining how far away I would have to be from the real thing to have an equivalent view of the model.
-
Hi Frankwil, nice start to a ship I'm also interested in, I will pull up a chair ifn you don't mind. Have you have a look at Chucks Planking Videos found under "Building, Framing, Planking and plating a ships hull and deck" Heres the link https://modelshipworld.com/index.php?/topic/13850-chucks-planking-videos/&do=findComment&comment=428102 Hope this helps
-
German WW2 Armor Models by nickbud - PLASTIC
nikbud replied to nikbud's topic in Completed non-ship models
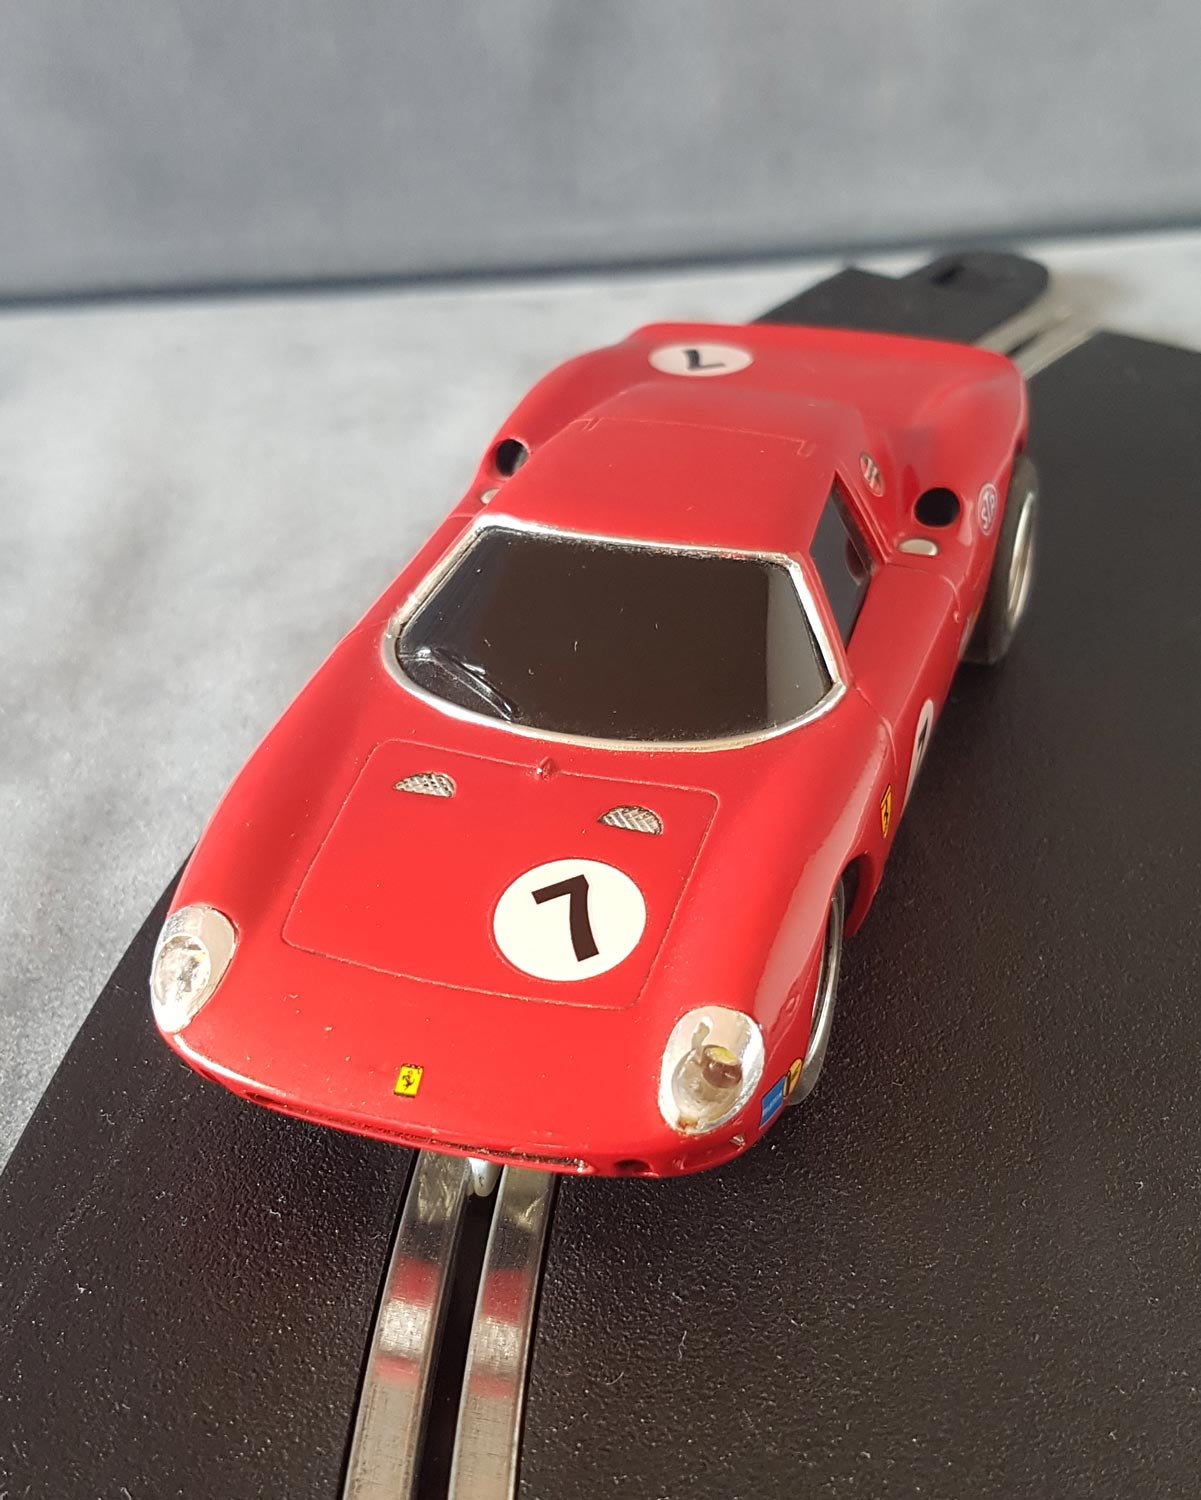
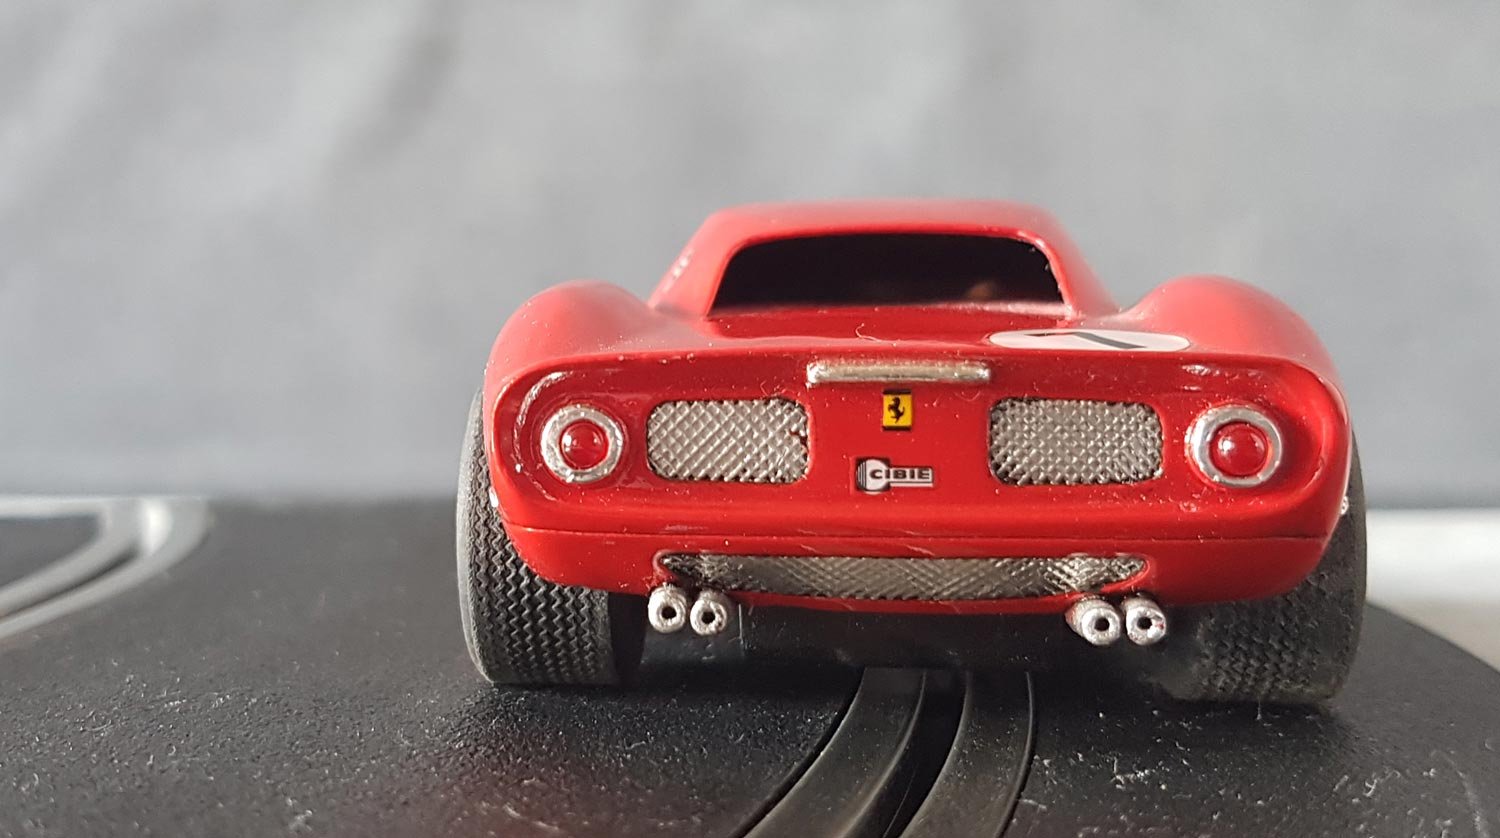
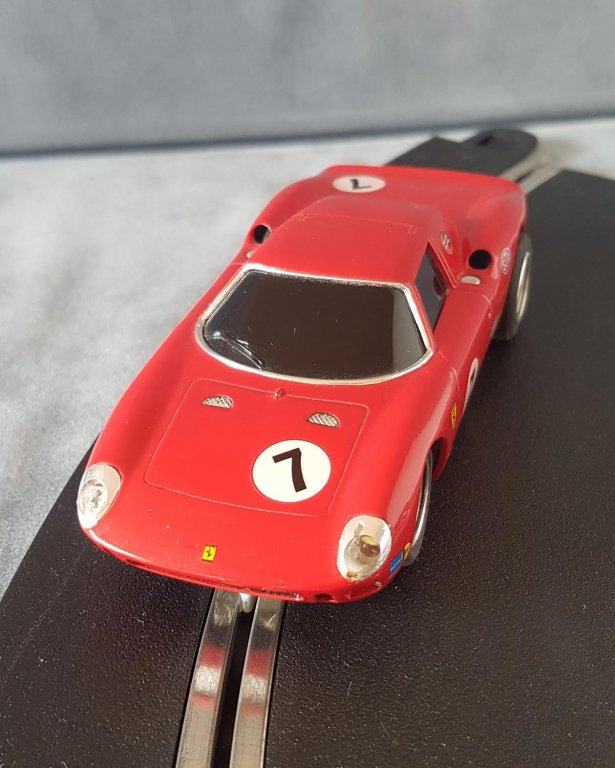
Lou, Thank you for the kind words and the info, I always assumed that the Ferraris were winning up till about the 80's or so. I do have to make a correction, the Car is in fact a 330 P/LM, I have no idea where I got 250 from. From my hazy memory the P in P/LM stood for prototype and I don't think this 330 ever raced in anger, but she certainly can shift on our track! -
German WW2 Armor Models by nickbud - PLASTIC
nikbud replied to nikbud's topic in Completed non-ship models
I never even noticed that!! 🤣🤣 -
German WW2 Armor Models by nickbud - PLASTIC
nikbud replied to nikbud's topic in Completed non-ship models
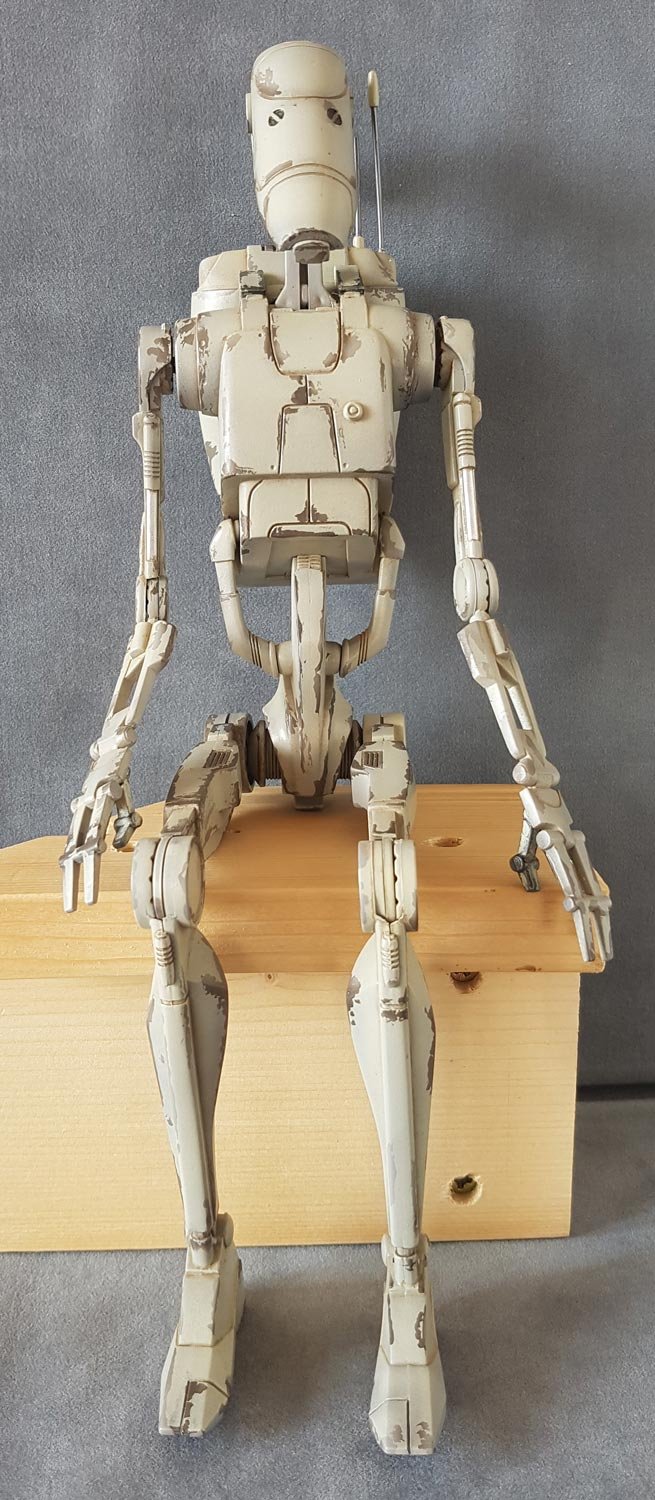
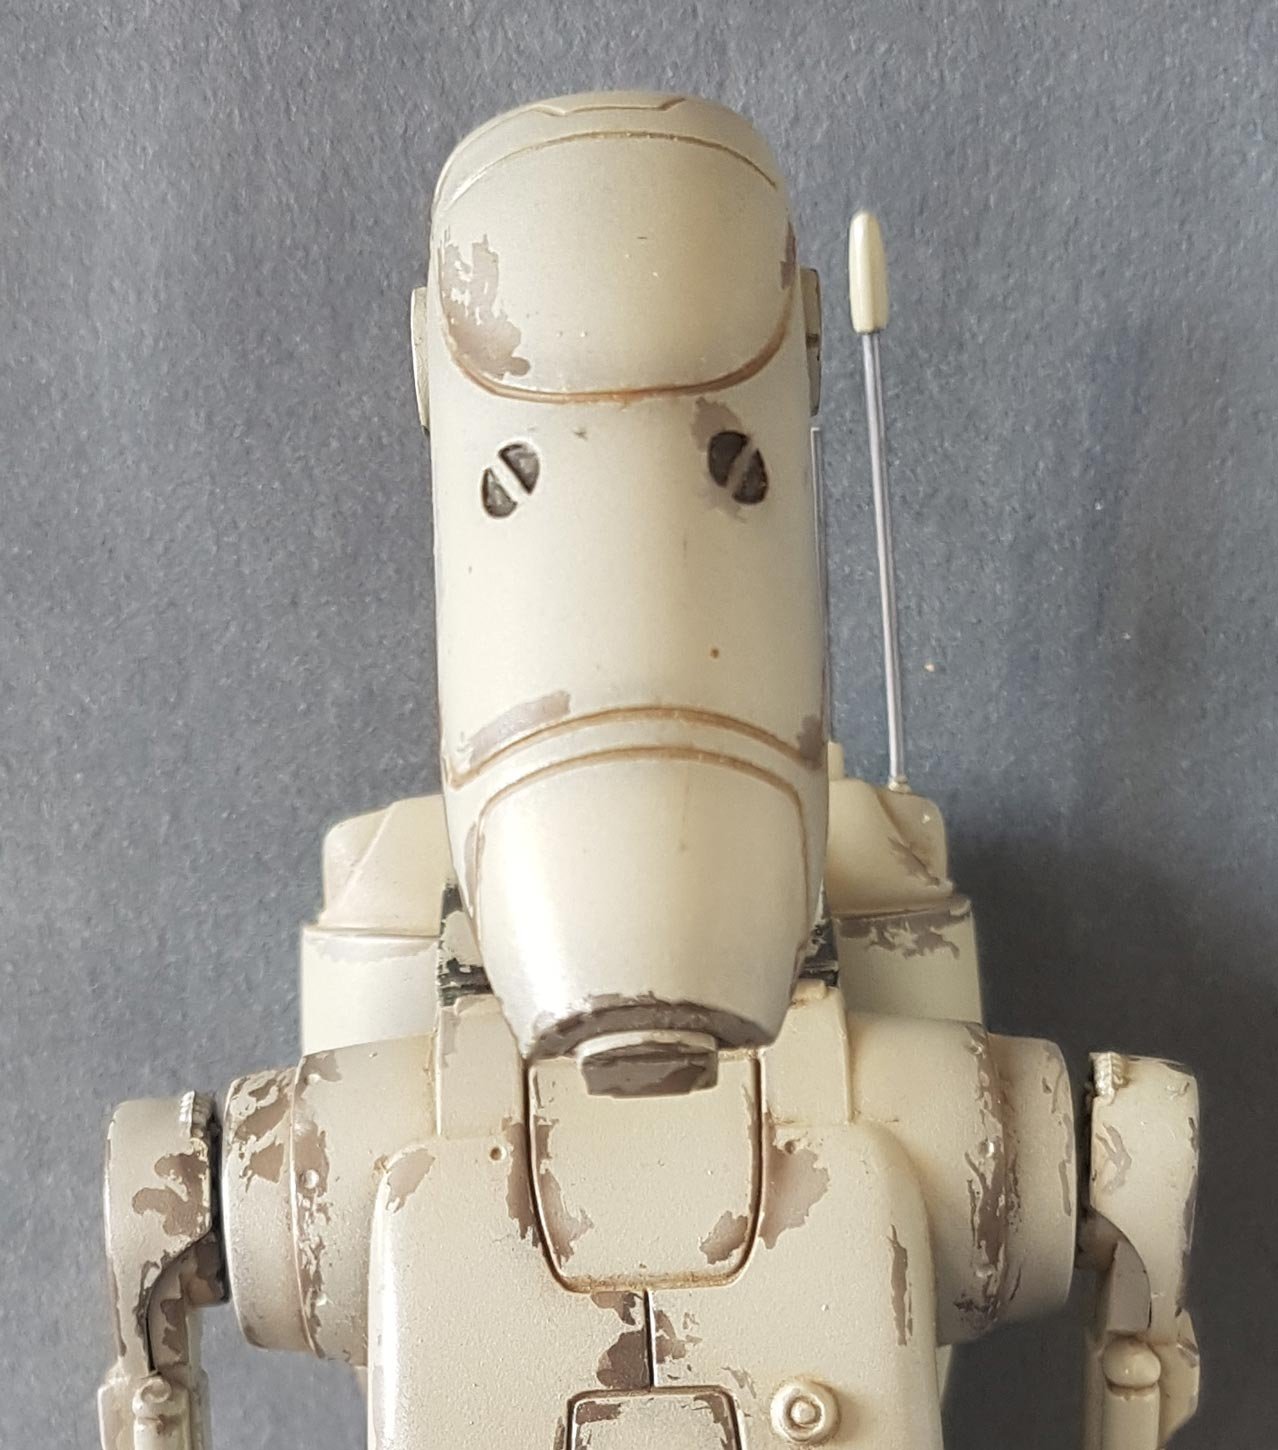
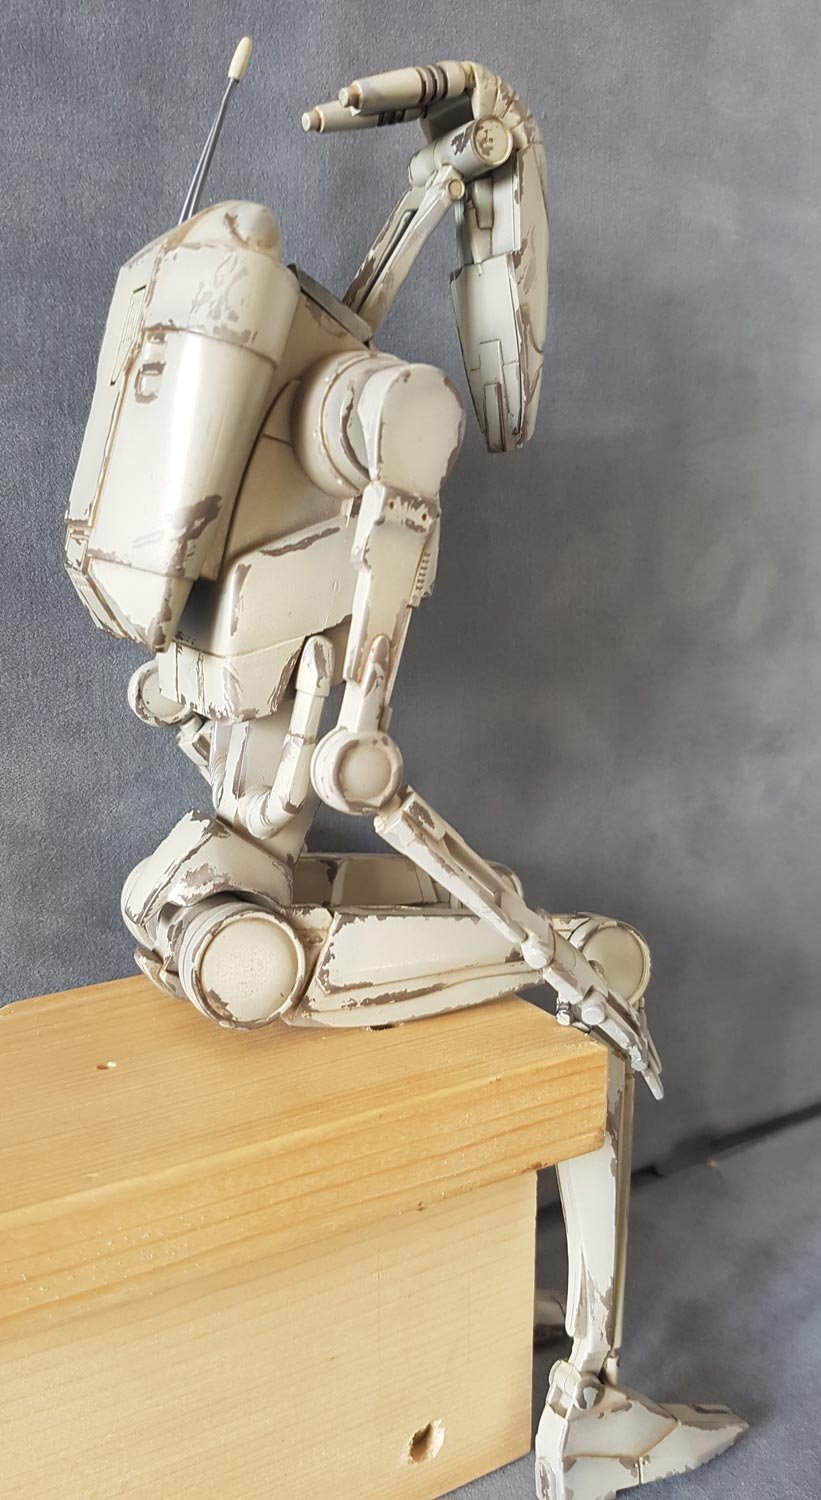
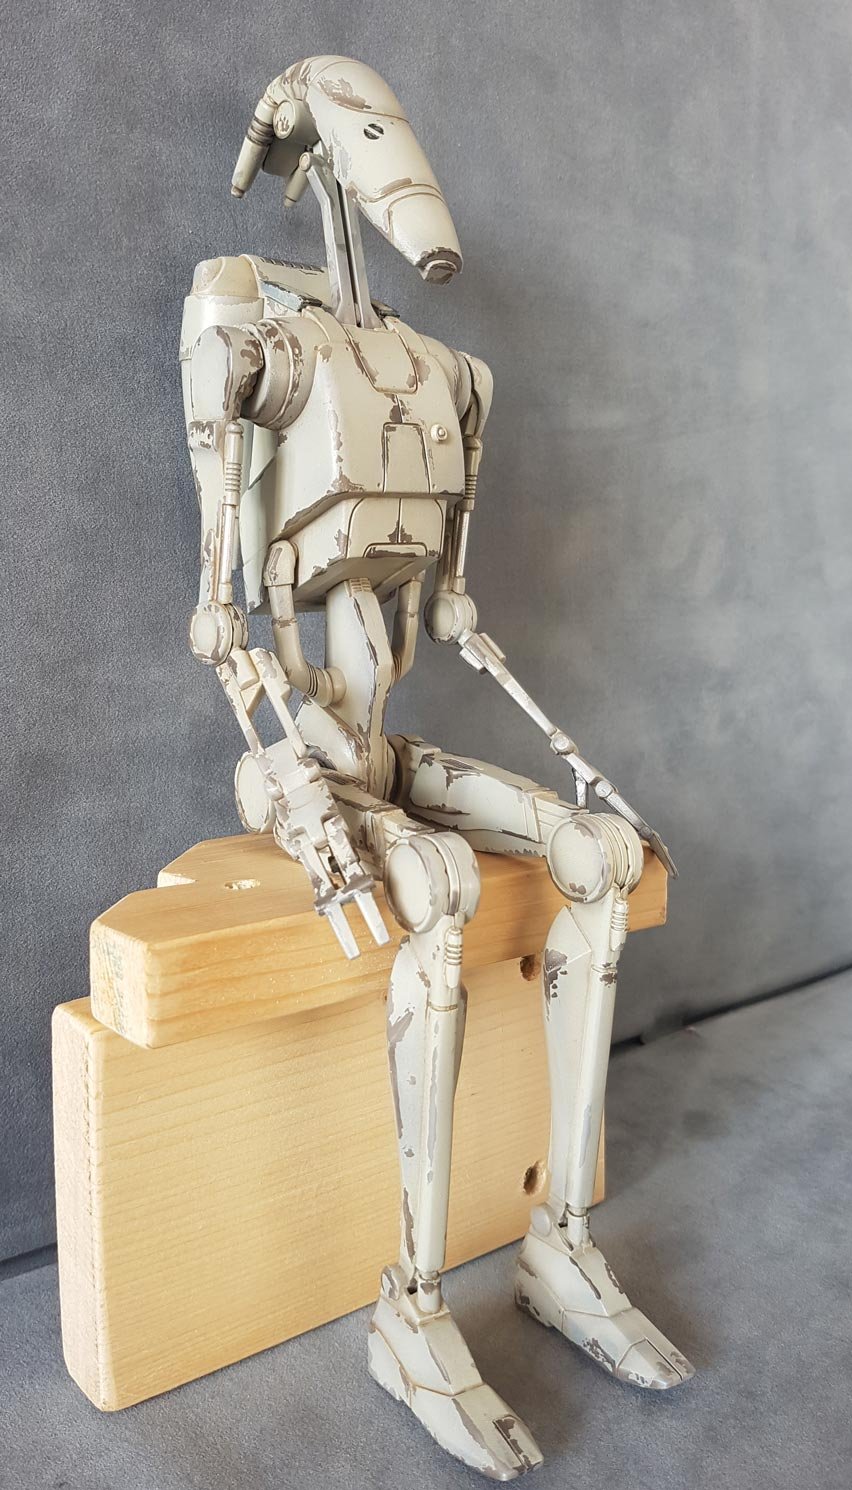
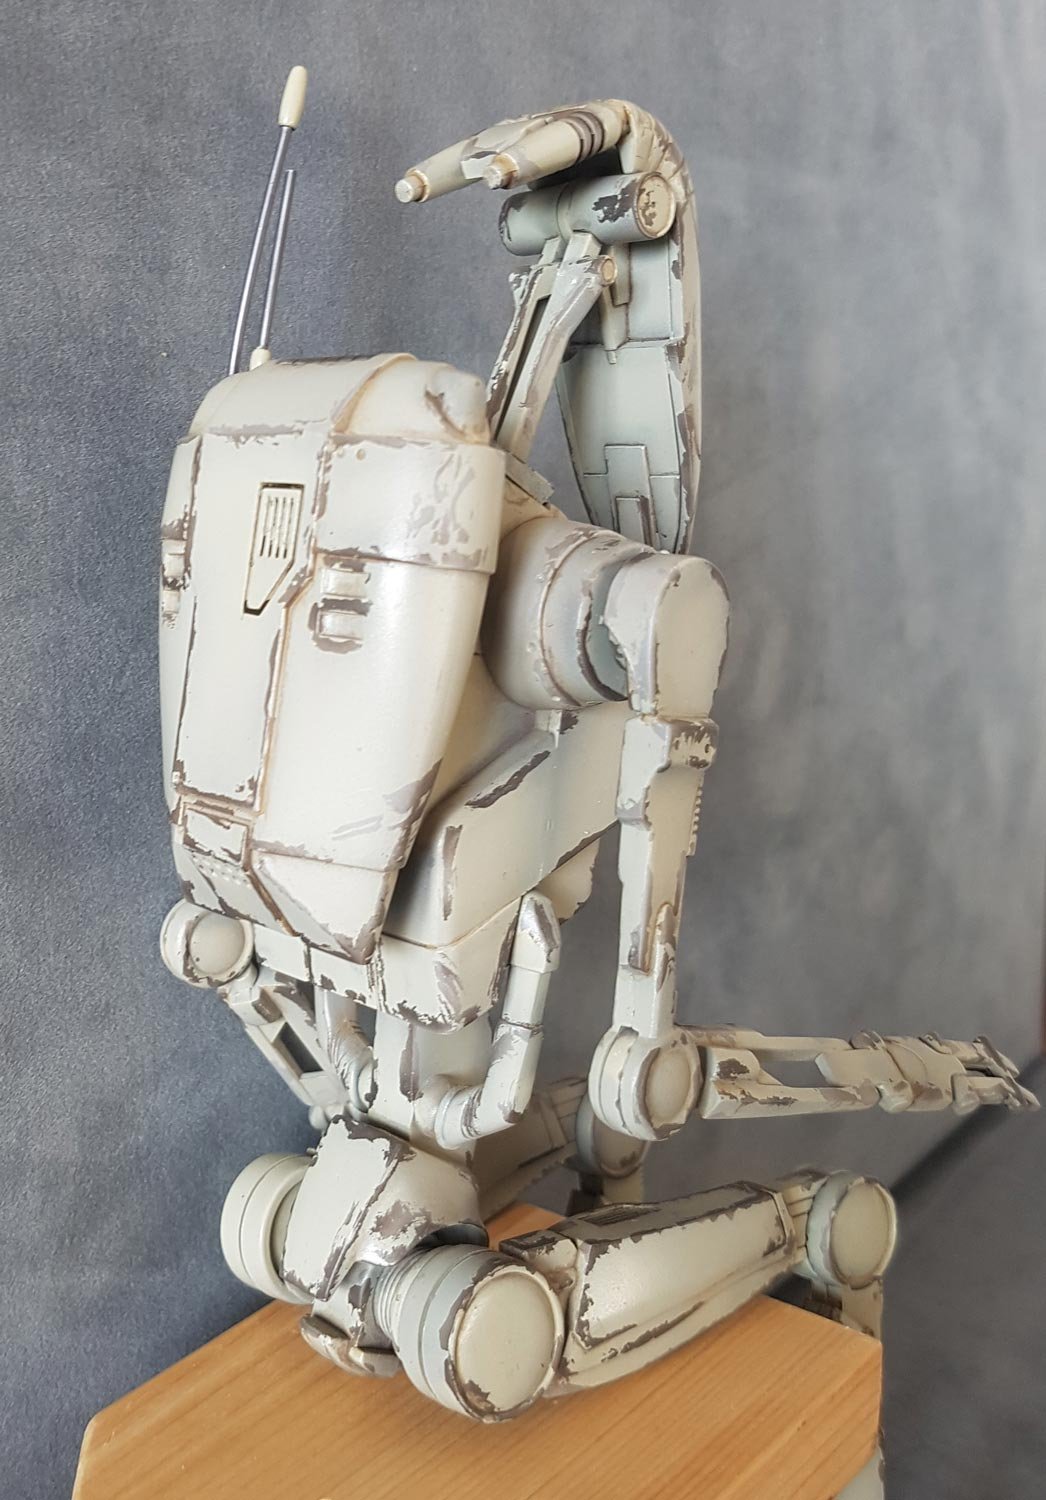
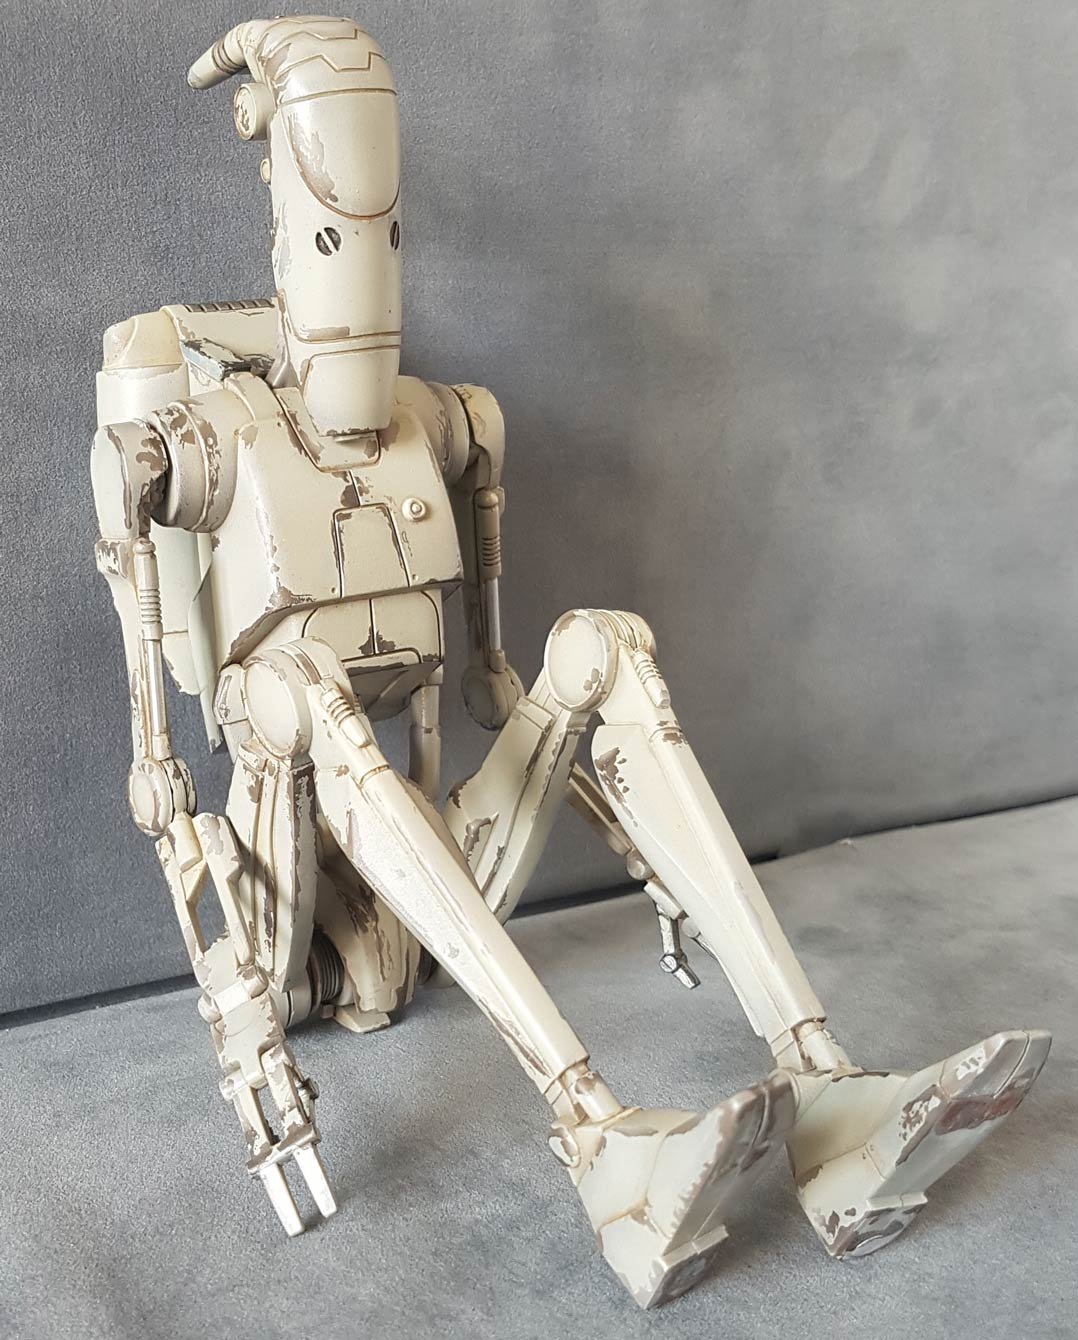
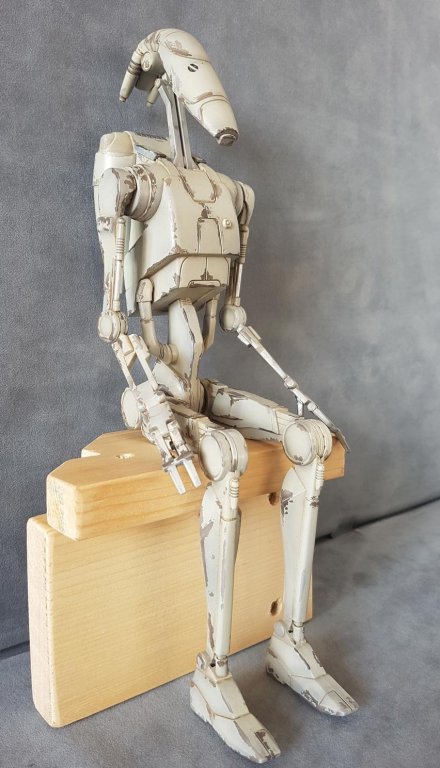
As its not bedtime here yet I thought I'd add one last model that I'm proud of, and indicates a couple of techniques that I hadn't used before. Roger Roger is a Battle Droid, he was built from the AMT kit. He came with a 'Stap' (think flying Segway with guns) but he wouldn't fit right so it was taken away from him. He was airbrushed in enamels using the technique of 'pre-shading'. For those who don't know this comprises of a base coat of light grey auto primer, and then, before the top coat, a dark colour (usually black) is roughly airbrushed along edges, panel lines etc. This combined with a thin top coat creates a colour shift across the panel etc. I used a dark metallic grey for the pre-shading, the effect is very subtle and unfortunately doesn't come across very well in photos, but it is there honest!. The other technique I used was liquid rubber. This was applied with a brush or cocktail stick along edges after the pre-shading, after the liquid rubber had dried the top coat was added. Once the top coat is dry, I rubbed my finger where the liquid rubber was. It peeled of leaving a chipped paint look. I think I overdid it a bit.... please let me know what you think. As I used enamels for the airbrushing I had to use acrylics for the washes which is why the washes appear a bit coarse. I find it much easier to use oils for washes, the take much longer to dry and are easier to blend in. The 'Passport Shot' Roger in his "I'm On The Naughty Step" pose; And, "at the end of a long photoshoot, I'm pooped!" Again thanks for looking and I hope you enjoyed what you saw. If you have any questions/comments/criticisms, please feel free!! Cheers Paul


-
German WW2 Armor Models by nickbud - PLASTIC
nikbud replied to nikbud's topic in Completed non-ship models
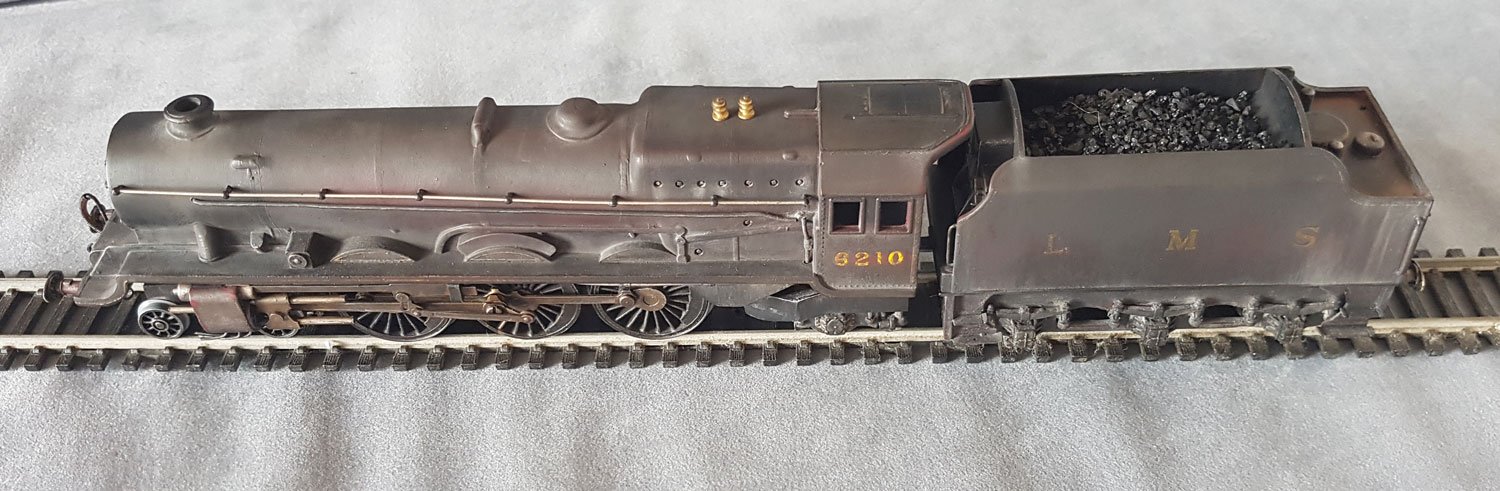
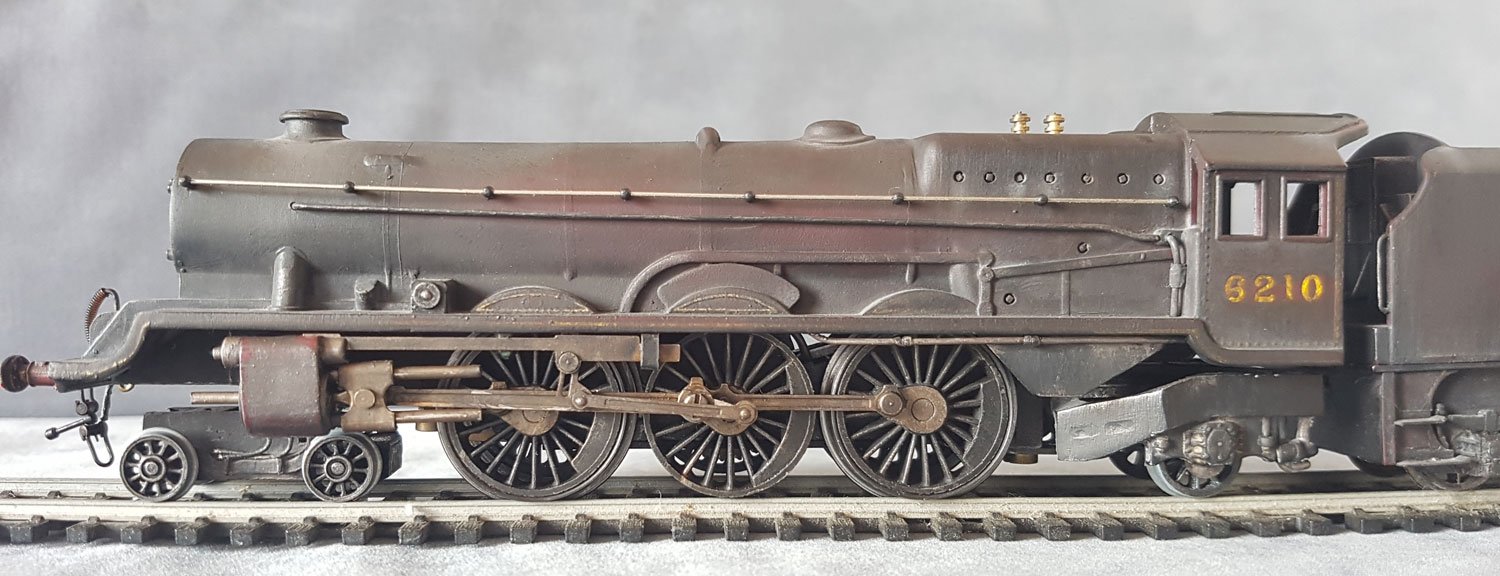
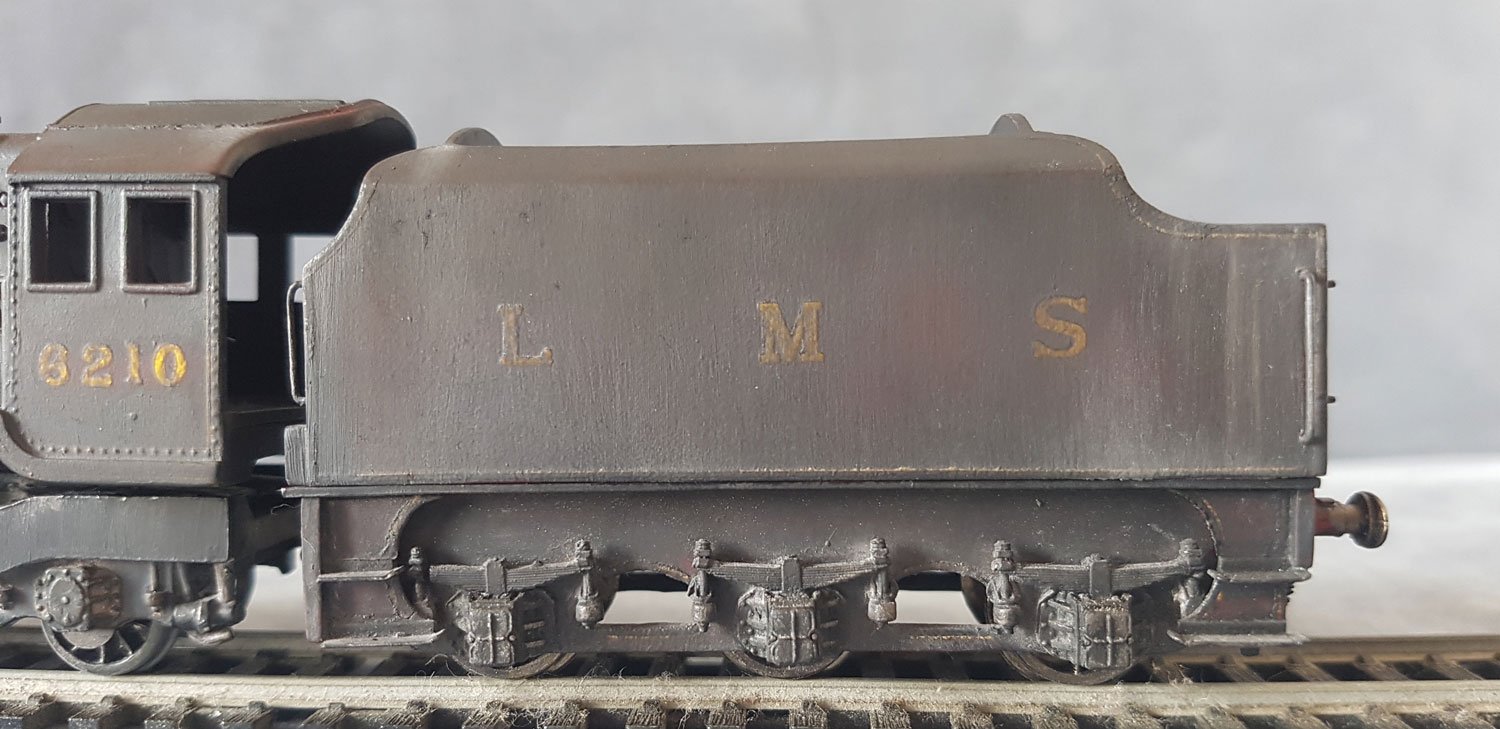
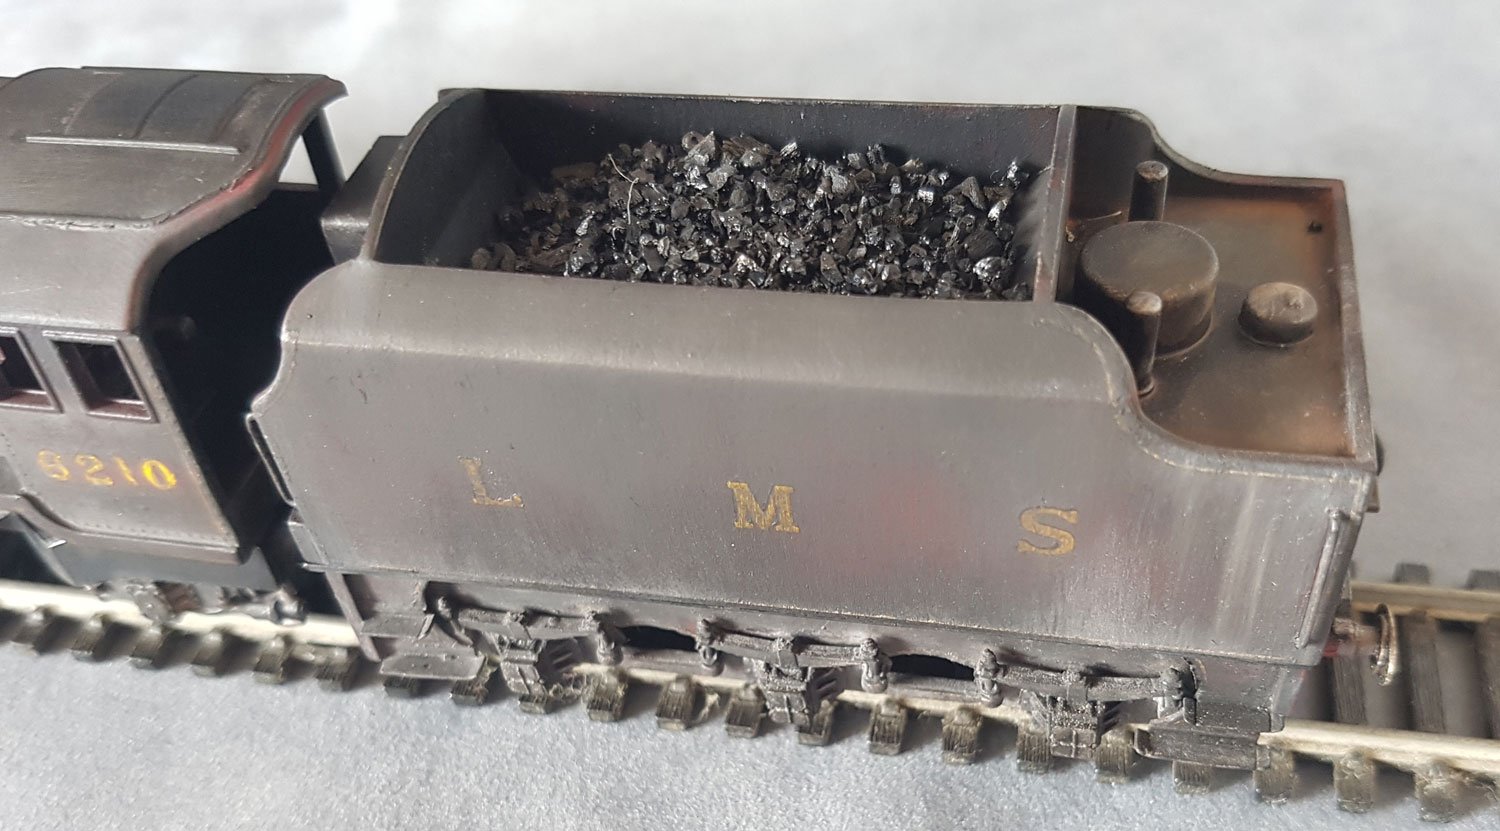
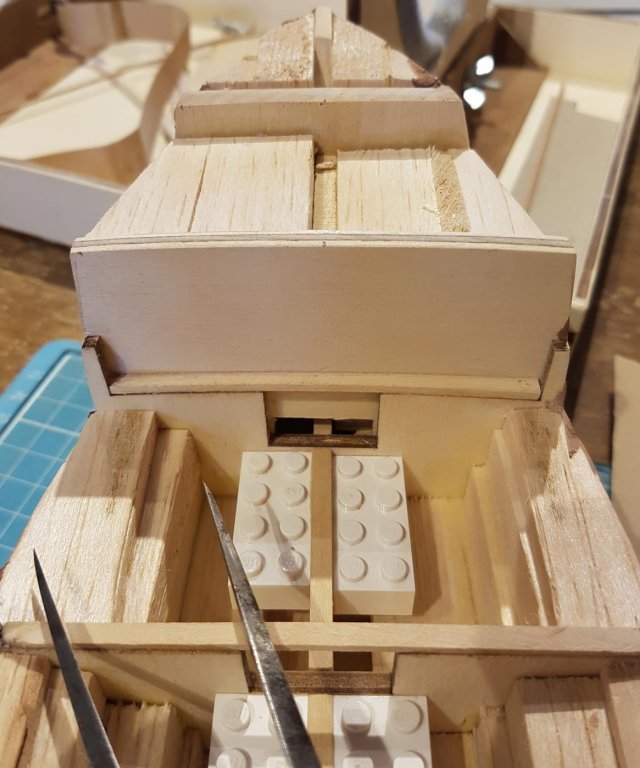
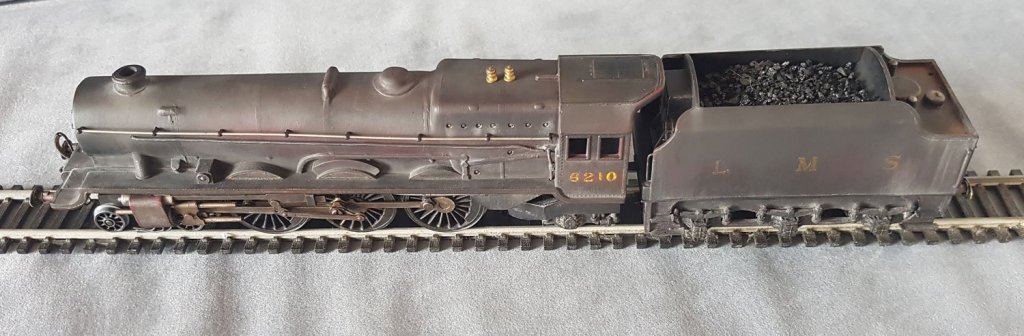
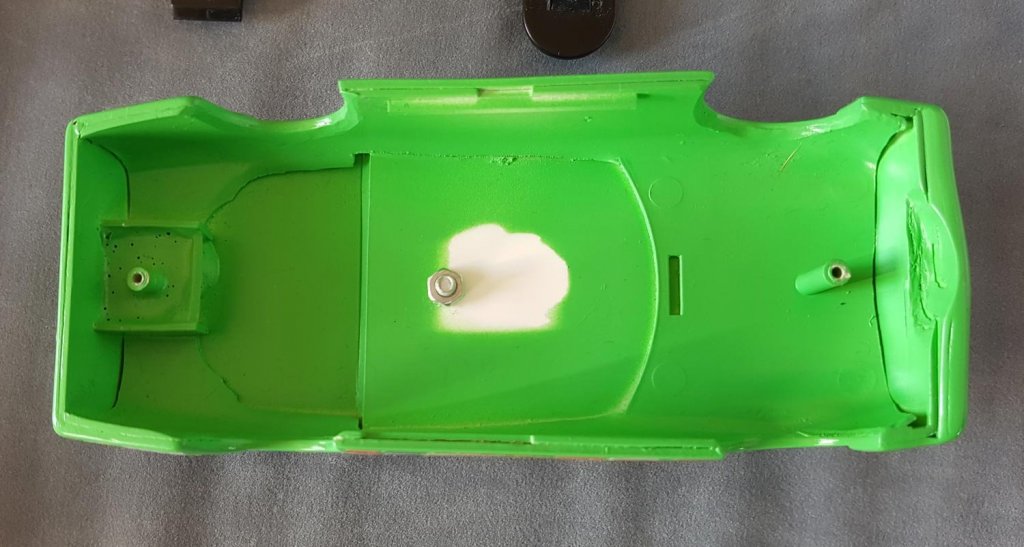
Ok Mark, you twisted my arm...... A few years ago the Admiral (as this is concerning choo-choos, should she be renamed The Fat Controller??) bought me, for the princely sum of 5 British Pounds Sterling, a bashed up, OO gauge, late 19050's Triang LMS Princess Elizabeth Locomotive, and asked "will this go on your layout?". Not in its present state I thought, so I set about fixing it up. The motor needed replacing, the loco body had a screw hole in the front and a cracked cab roof, and the tender chassis was warped beyond use. I managed to find a motor and the loco body, but was unable to get a tender chassis without buying the whole tender and loco, so I made one out of plasticard and aftermarket axleboxes and etched brass. I also used more in-scale wheels for the for and aft trucks on the loco, and added handrails and appropriate pipework. I adjusted the loco/tender connection so they ran closer together. The green body is the replacement and the white plasticard is the basic chassis components; I rebuilt her up and sprayed her in Red, but I didn't like the shade of colour so I decided to weather her. Now technically speaking, AFAIK, the engine under the auspices of the LMS would have been kept reasonably clean, it was only under the days of British Rail that the engines became increasingly grubby, but I wanted an LMS engine so LMS she would stay. I decided to try a 'new to me' method of weathering; This consisted of the use of artists oils only, dabbed on and blended, kind of Bob Ross style. A little artists chalk was used around the chassis area for dust and grime. Oh, and I used real coal! I hope you like the effect; Thanks for taking the time to look! Cheers Paul


- 22 replies
-
- 10
-

-
German WW2 Armor Models by nickbud - PLASTIC
nikbud replied to nikbud's topic in Completed non-ship models
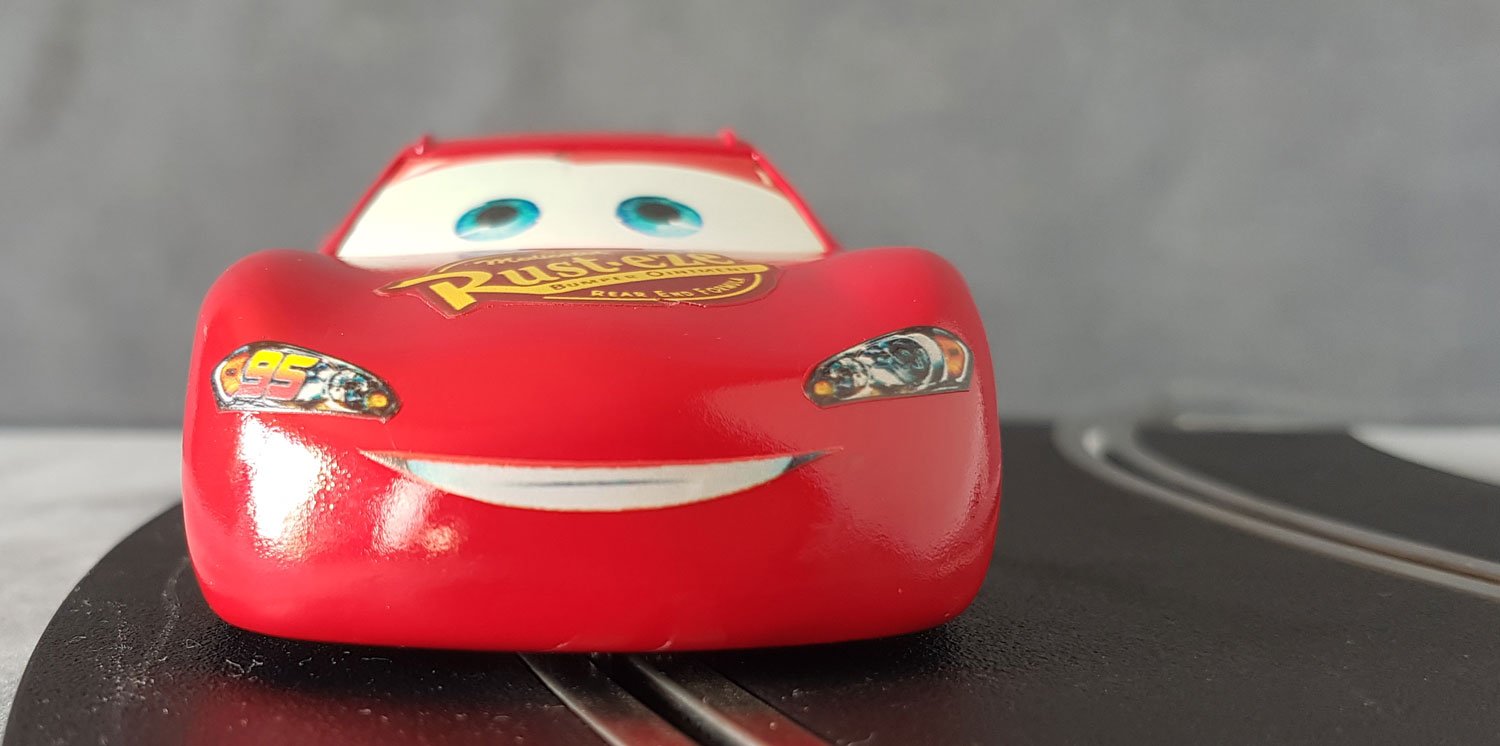
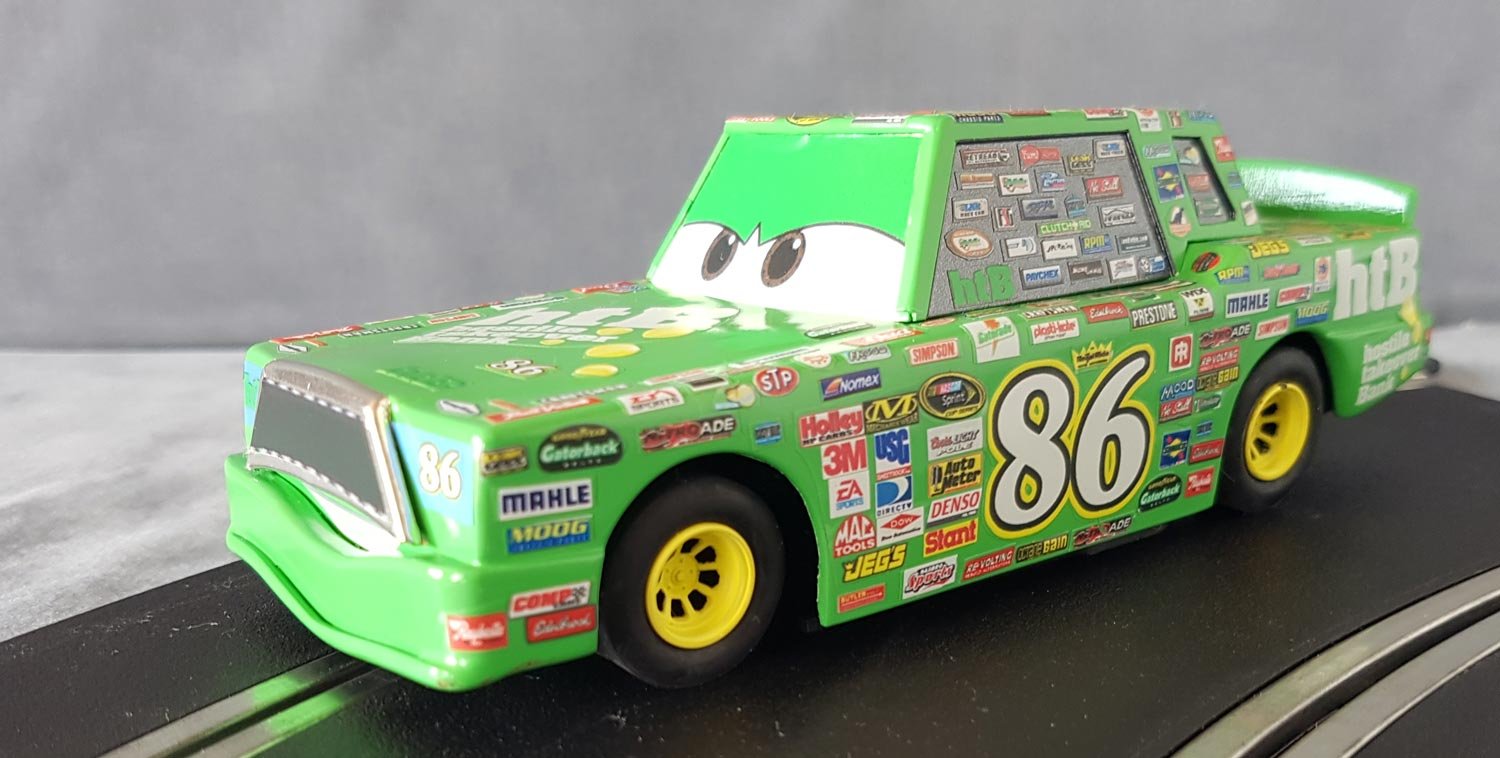
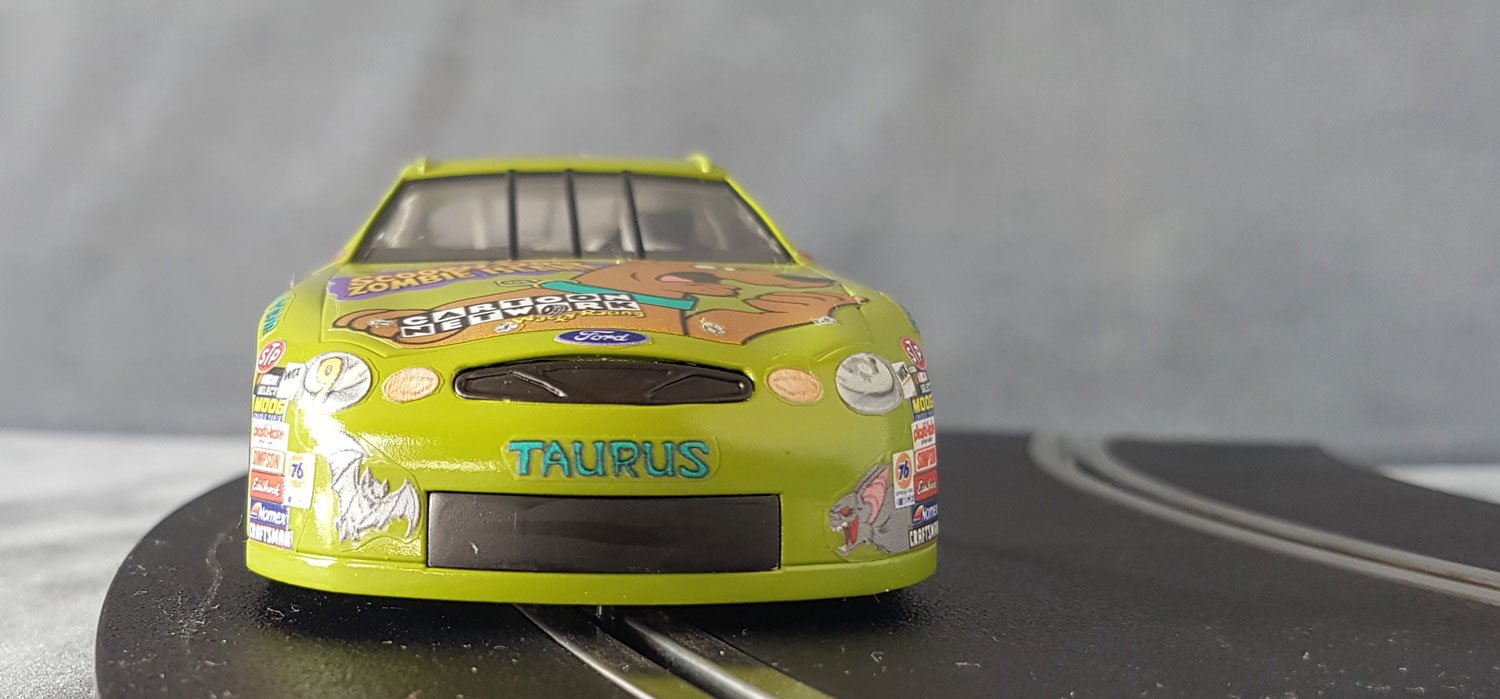
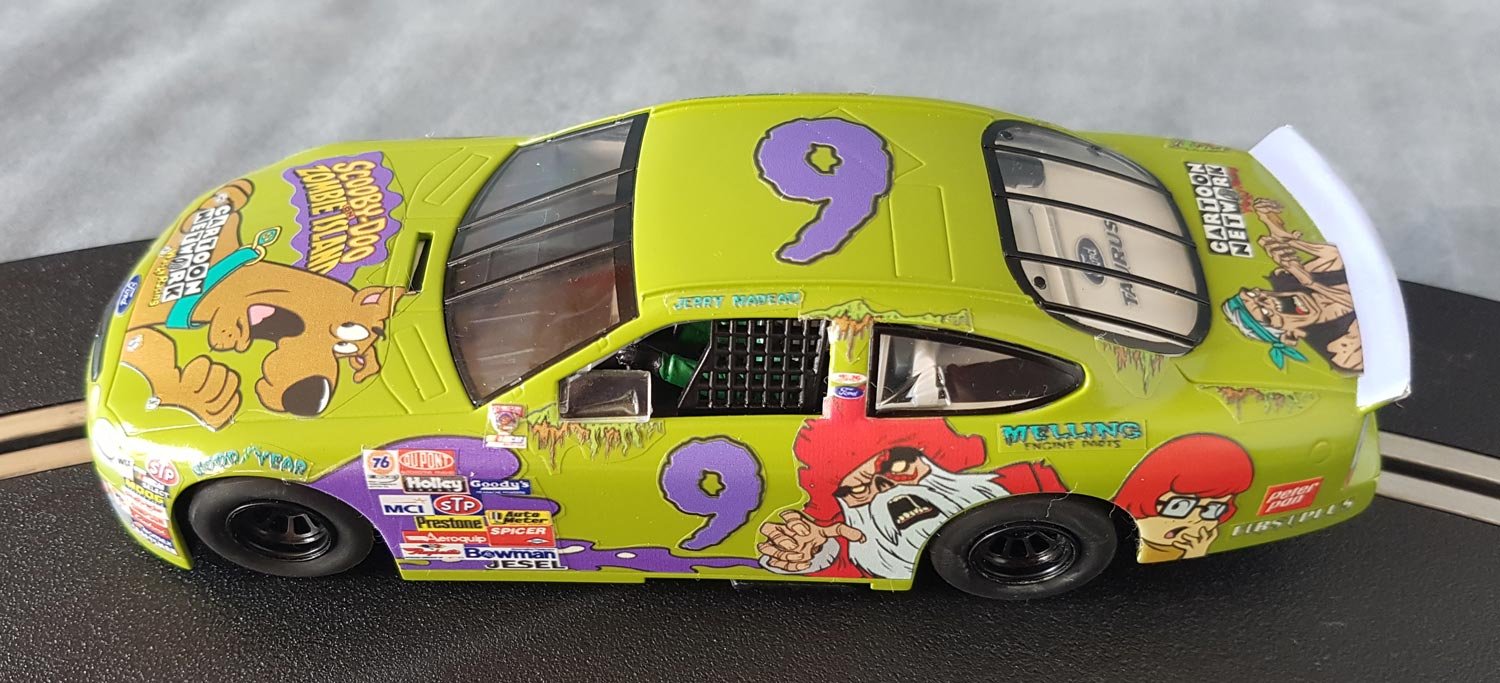
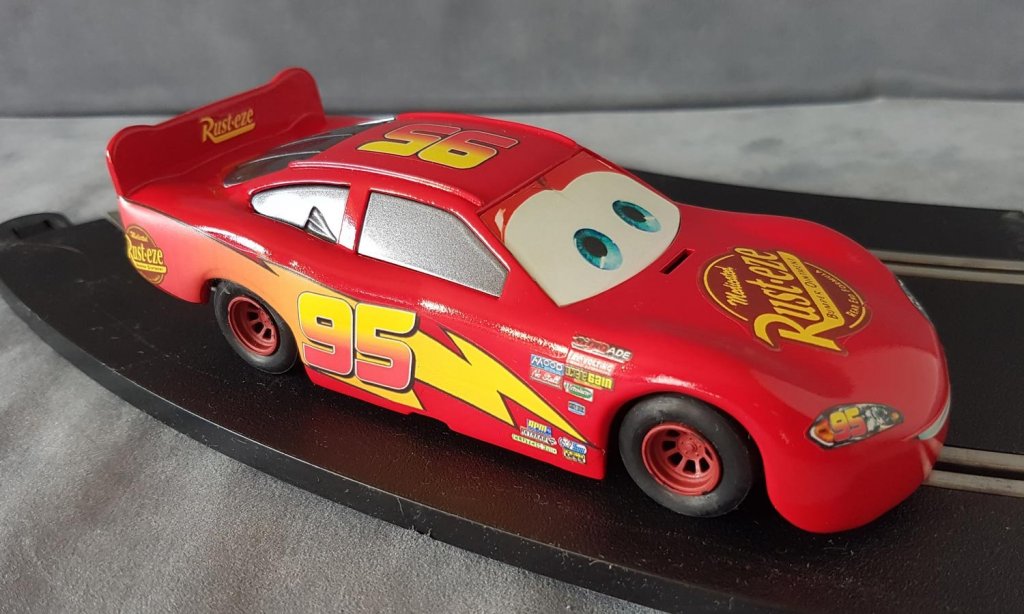
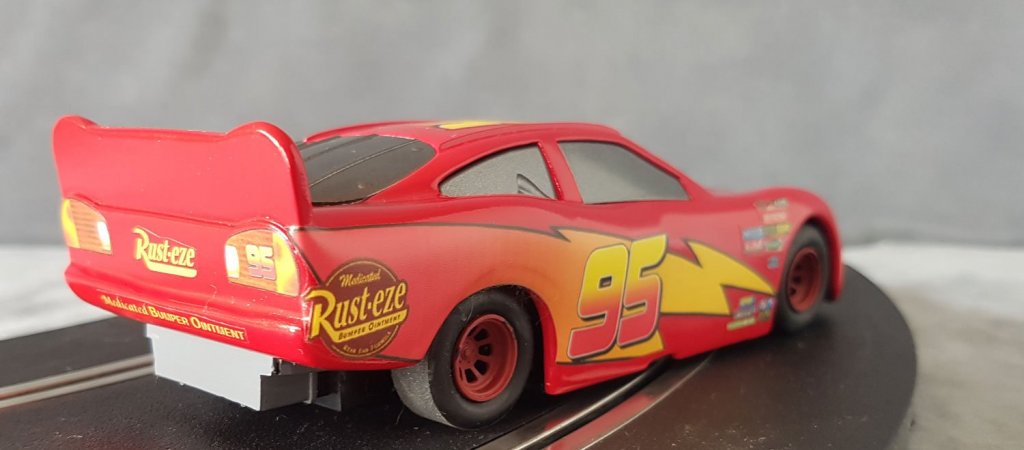
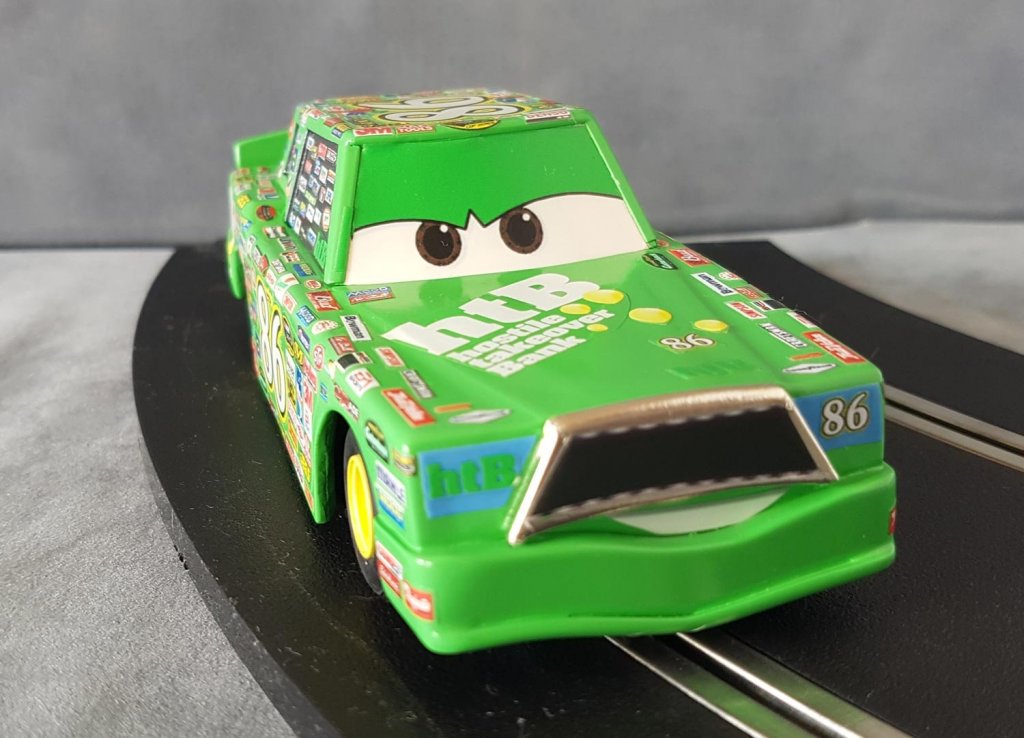
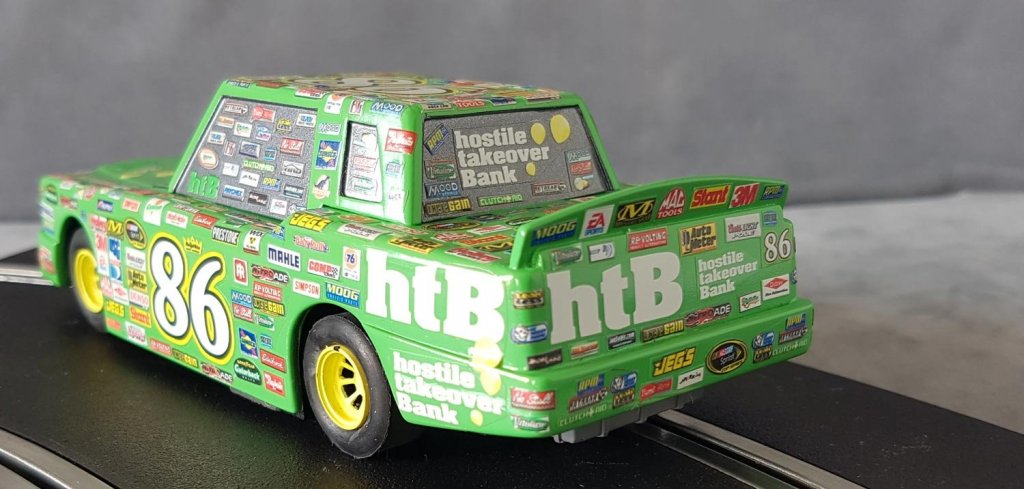
Cars part 2 My son was a big fan of the Pixar movie "Cars", but no-one made any of the characters in Scalextric form. So I used the other 2 Ford Taurus that I had...... Lightning McQueen "Ole Stickers" was made by smoothing out the front end, cutting off the rear end and creating a new spoiler, and making the wheel arch shapes from putty. He is a bit longer than he should be but looks the part whizzing around the living room! Every hero needs a protagonist, so Chick Hicks was made by cutting down the original body to size and then using plasticard to build up the appropriate shape; This shot gives you some idea of how the body was cut and shaped. I have no idea why I completely sprayed the interior...… I hope you liked these cars, they are not "scale accurate" but were fun to build, and yes they are fun to "drive" around the track! Up next, Anyone wanna see a choo-choo?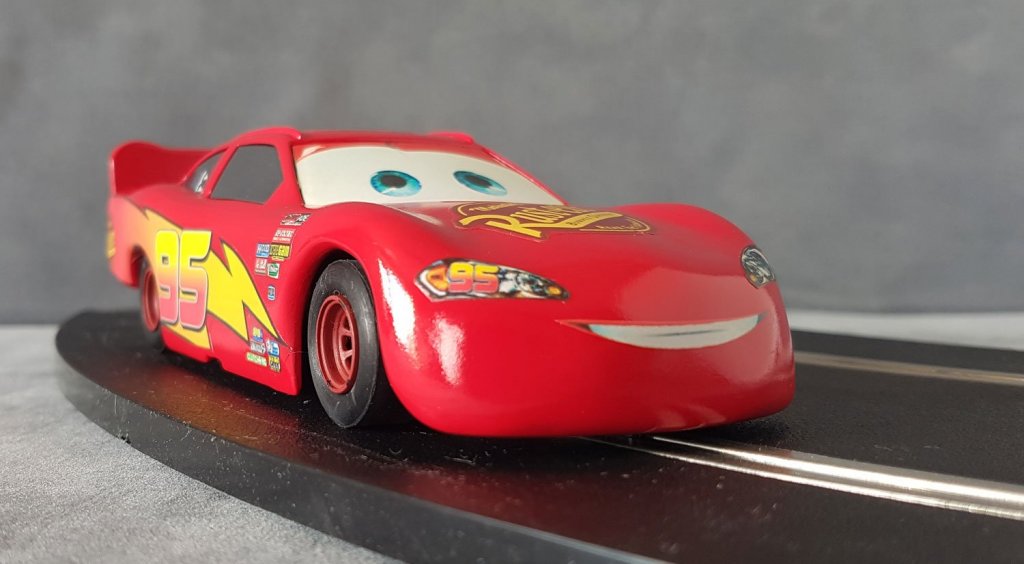


-
German WW2 Armor Models by nickbud - PLASTIC
nikbud replied to nikbud's topic in Completed non-ship models
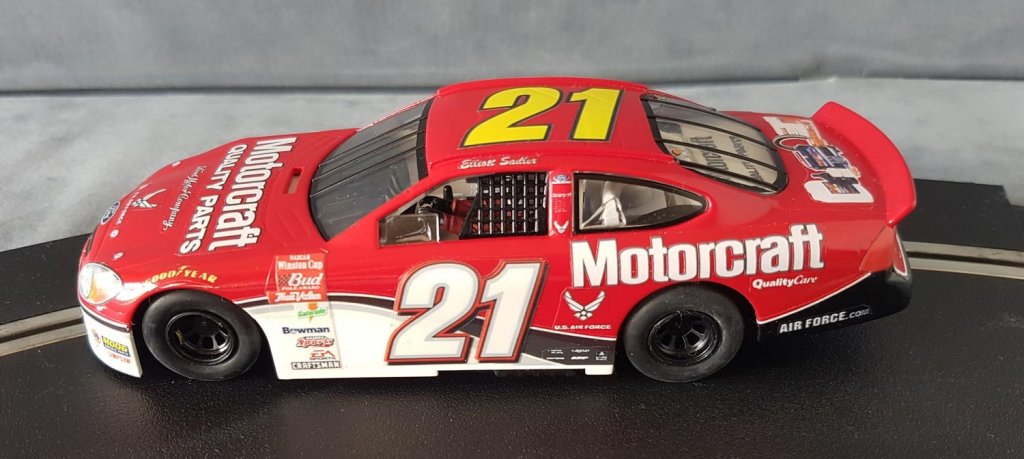
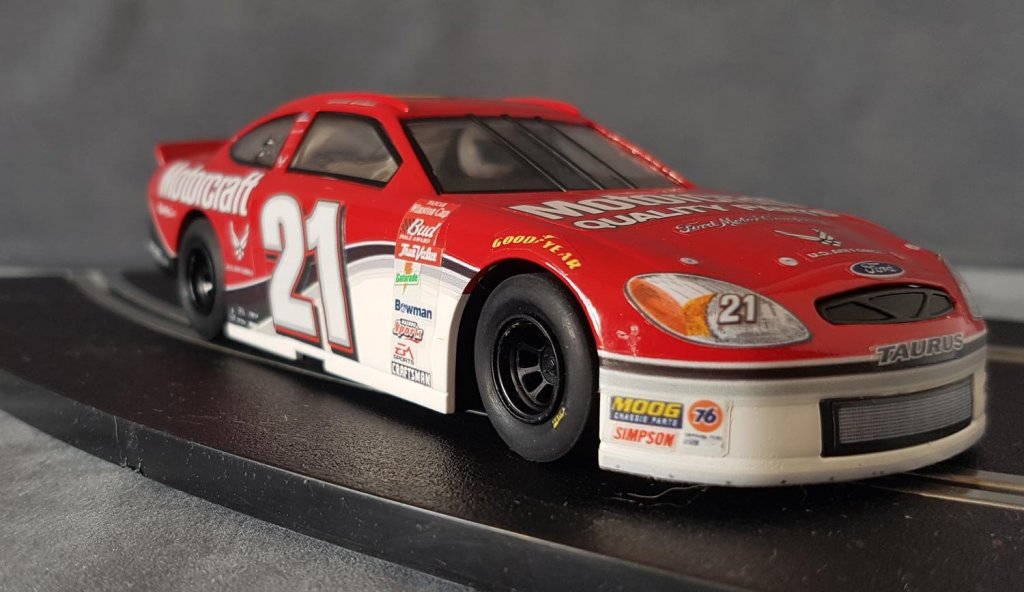
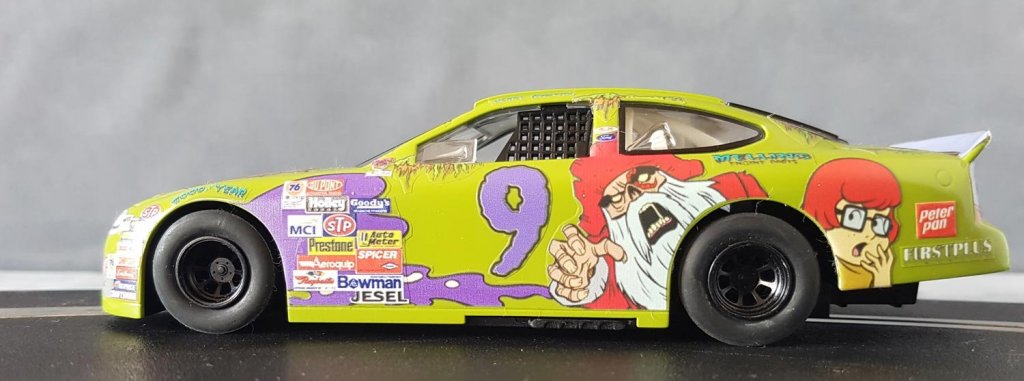
Thank you so much everyone for your comments and likes, they are all very much appreciated. Cars part 1 My son is a racing car fan, so obviously when he was younger we had to have a Scalextric set. He had the usual WRC and F1 cars. I hope you like these Scalextric cars; Ferrari 250 P/LM. Built from a Monogram kit of the 1960's, painted in rattle-can auto paints and trimmed in Bare Metal Foil. The wheels, tyres and motor are all aftermarket parts. My son wanted some Nascars, but couldn't find ones he liked so I purchased 4 beaten up Ford Taurus cars from ebay. The first two were resprayed and decals applied. Again Auto paints were used , the decals were obtained from a company in Australia, unfortunately I can't remember the name. ……….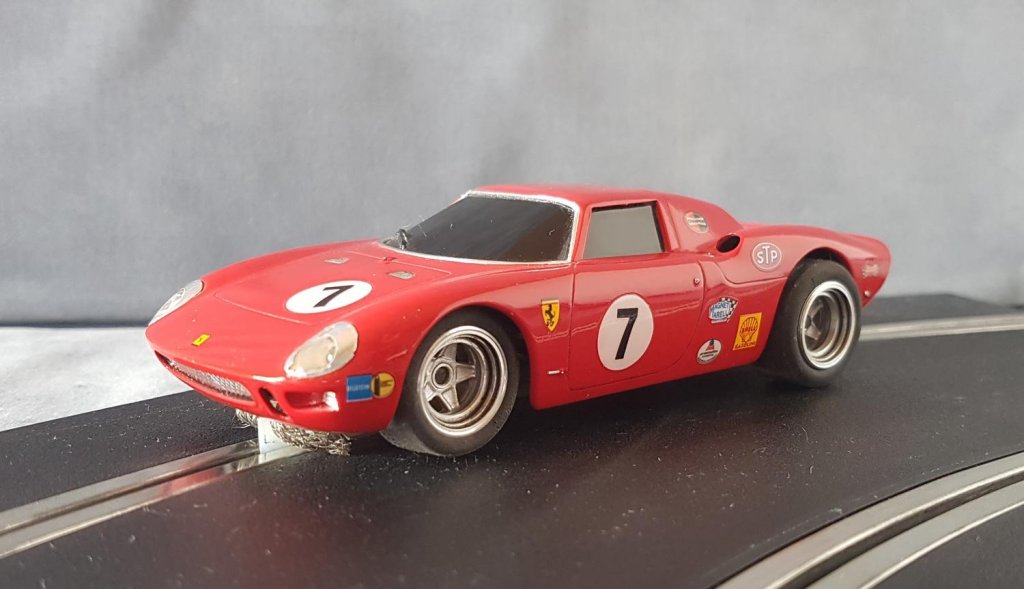


-
Dave's 1951 XK120 Jag Roadster - FINISHED - 1/24th scale
nikbud replied to SawdustDave's topic in Non-ship/categorised builds
Hi Dave Just read up about the Molotow chrome, it looks great, are you going to use the markers or airbrushing it? -
Looks fantastic, you have done an excellent job! Were there any extra difficulties in using pre-cut strips rather than one long plank?
-
Dave's 1951 XK120 Jag Roadster - FINISHED - 1/24th scale
nikbud replied to SawdustDave's topic in Non-ship/categorised builds
If I am seeing the photo right then the molotow stuff seems much brighter. I remembered the chrome foil as being much shinier than in your photo, have you got the brushed version or the bright version? I'll see if I can dig out an old model I used it on. I think I used it on a pink cadillac….. -
Dave's 1951 XK120 Jag Roadster - FINISHED - 1/24th scale
nikbud replied to SawdustDave's topic in Non-ship/categorised builds
To get a chrome effect have you tried "Bare Metal Foil" ? I've used it on a few 1/24 scale cars and it works a teat. IIRC you can get it in bright or dull chrome and aluminium and copper. -
German WW2 Armor Models by nickbud - PLASTIC
nikbud replied to nikbud's topic in Completed non-ship models
Thanks for all the likes and comments guys. I've amended the title so I can add some other stuff over the next few days, I hope you'll like em Cheers paul -
German WW2 Armor Models by nickbud - PLASTIC
nikbud replied to nikbud's topic in Completed non-ship models
Haha Thanks! -
German WW2 Armor Models by nickbud - PLASTIC
nikbud replied to nikbud's topic in Completed non-ship models
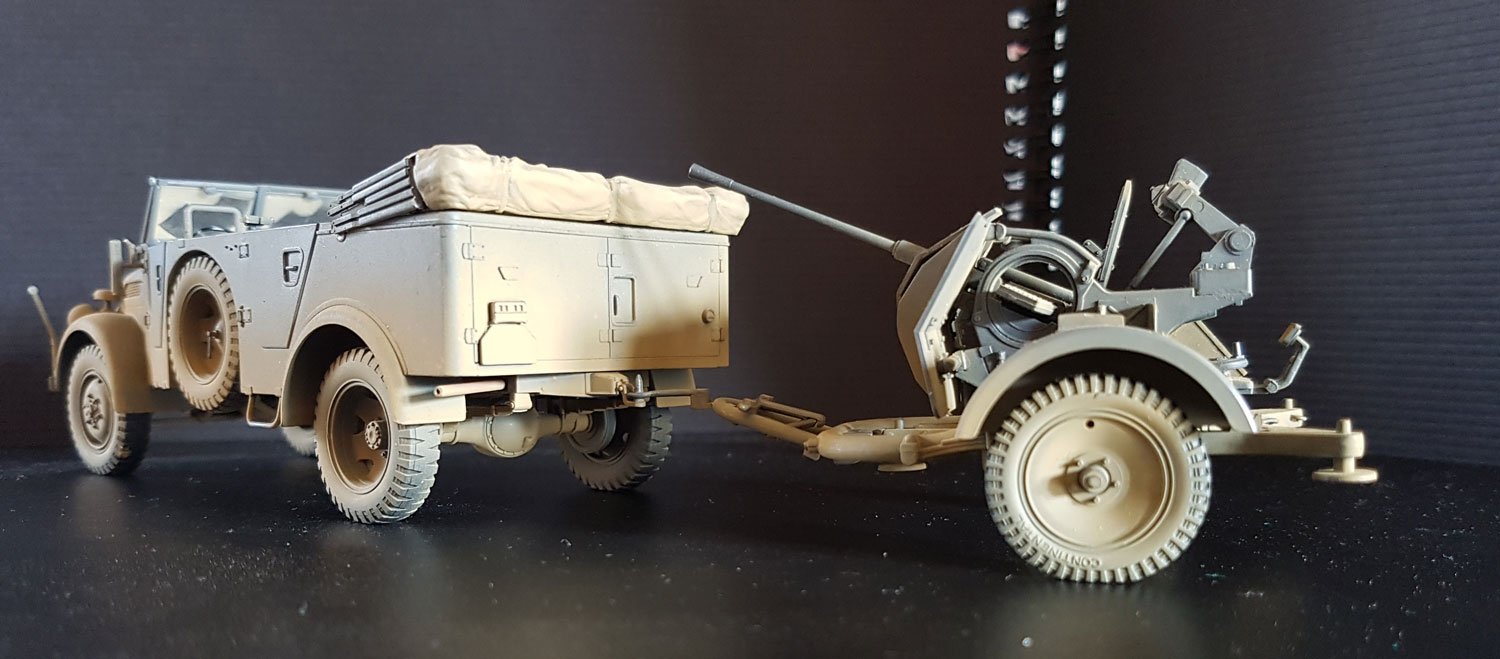
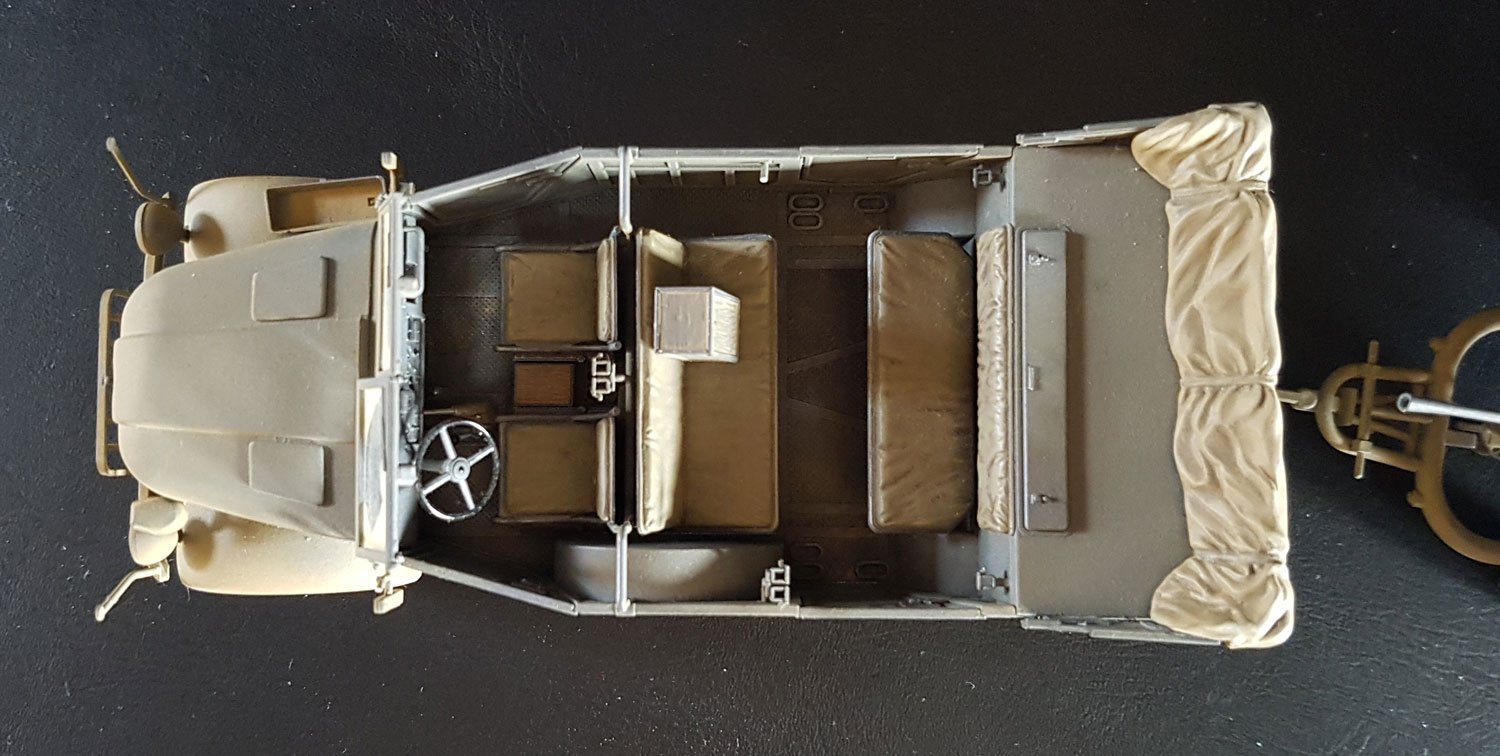
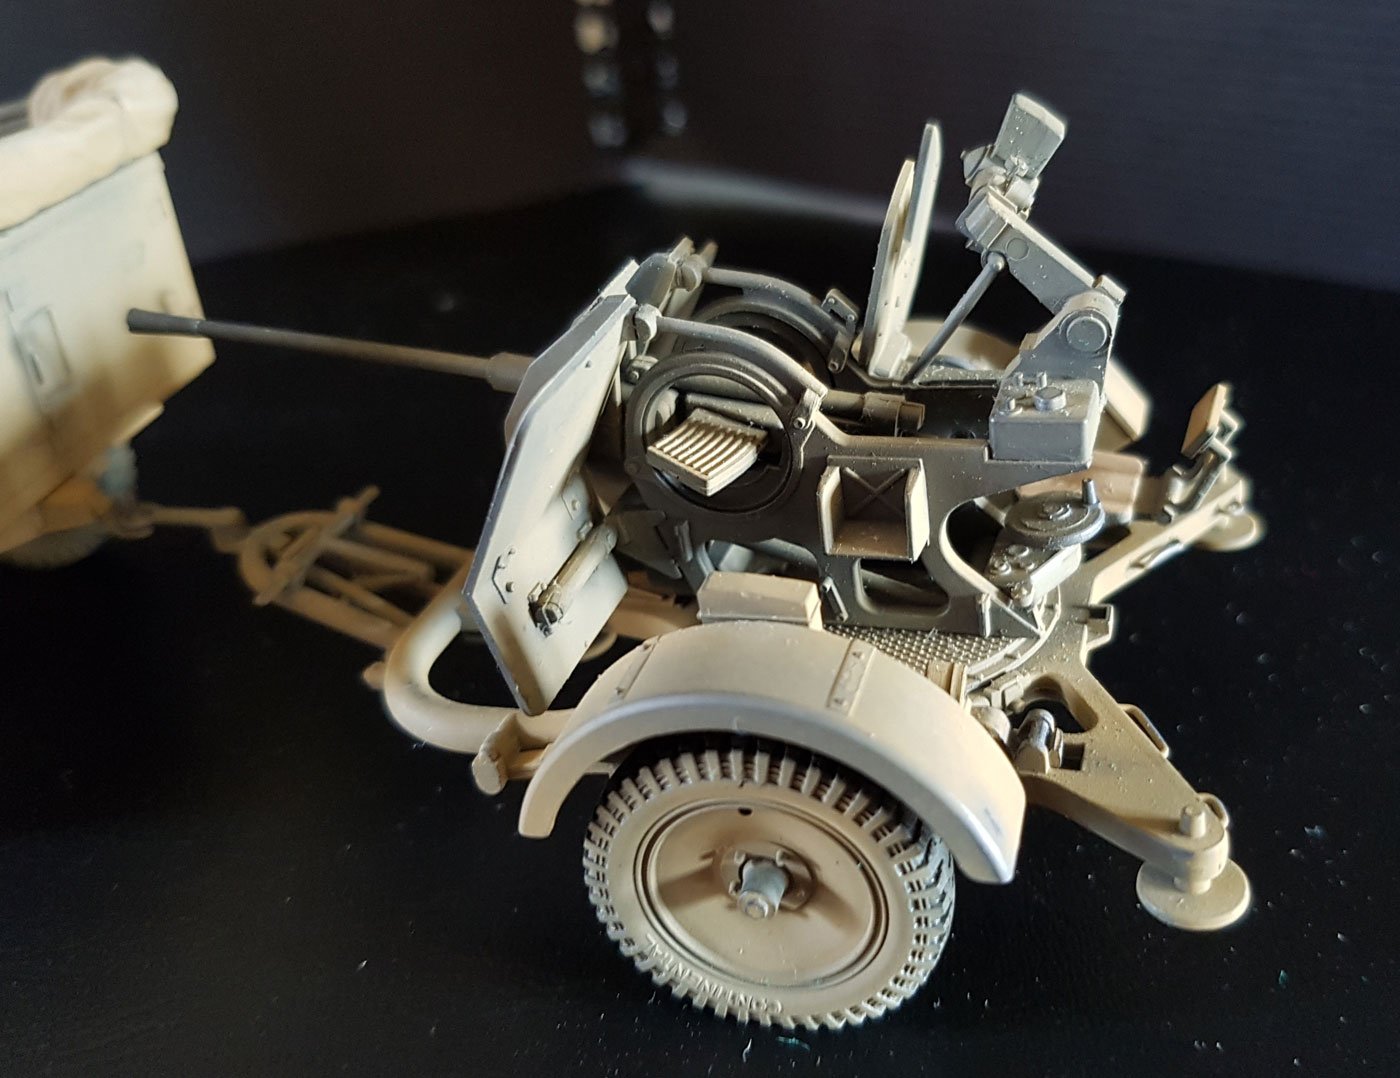
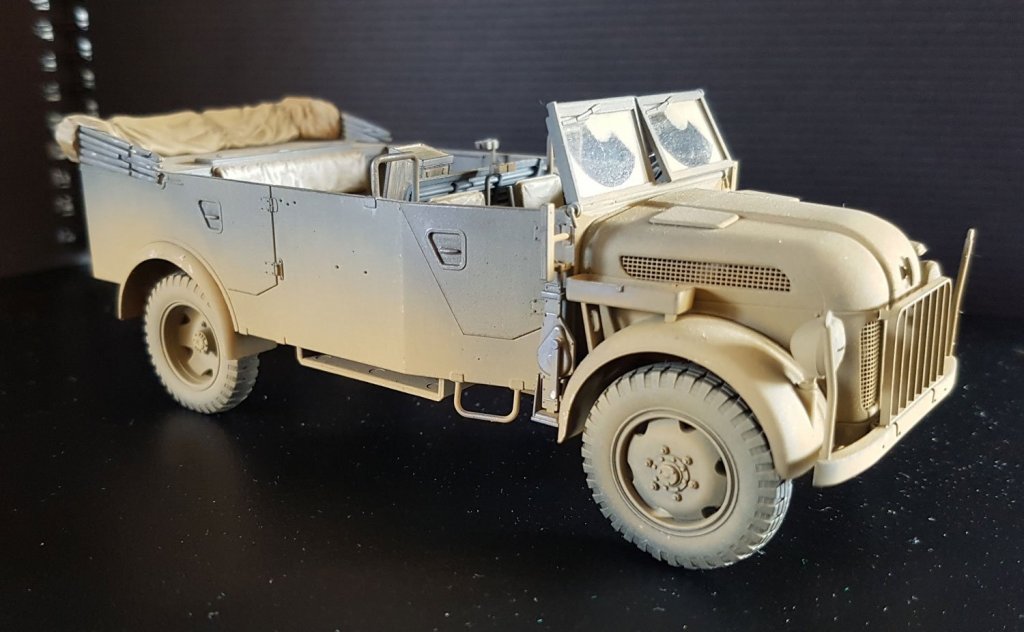
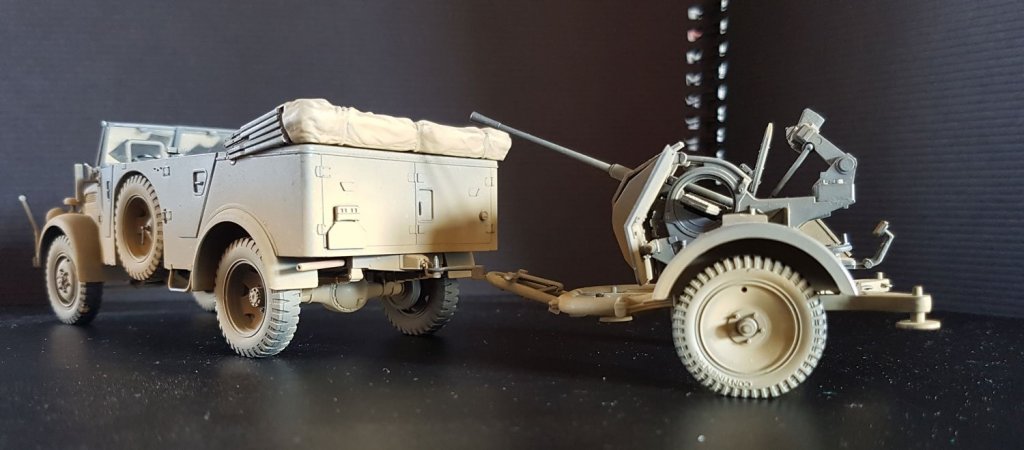
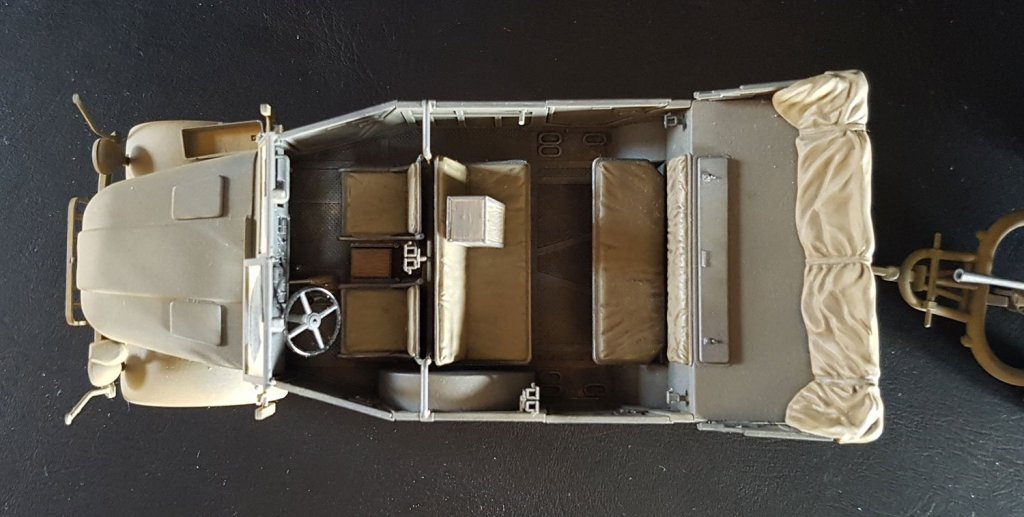
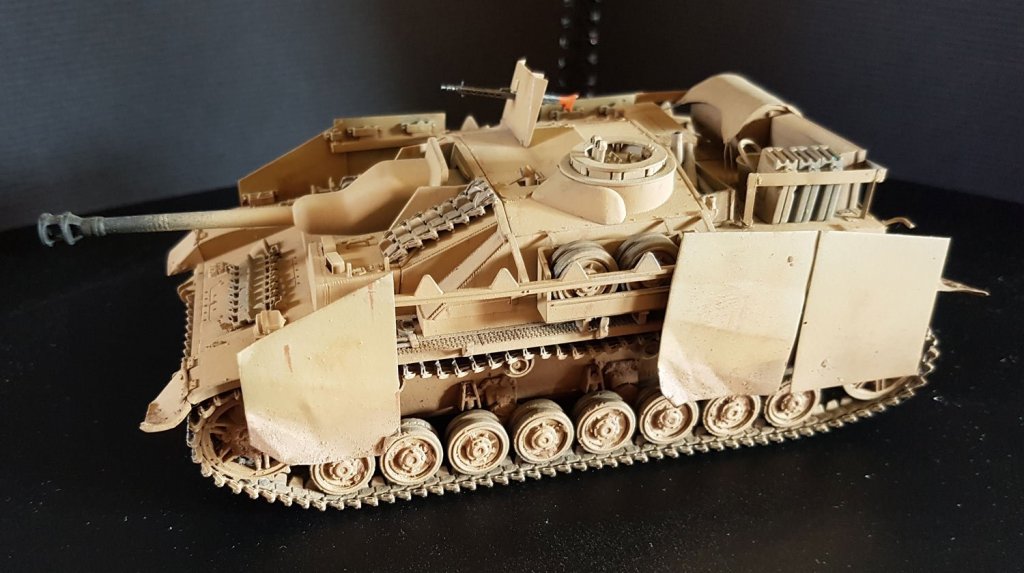
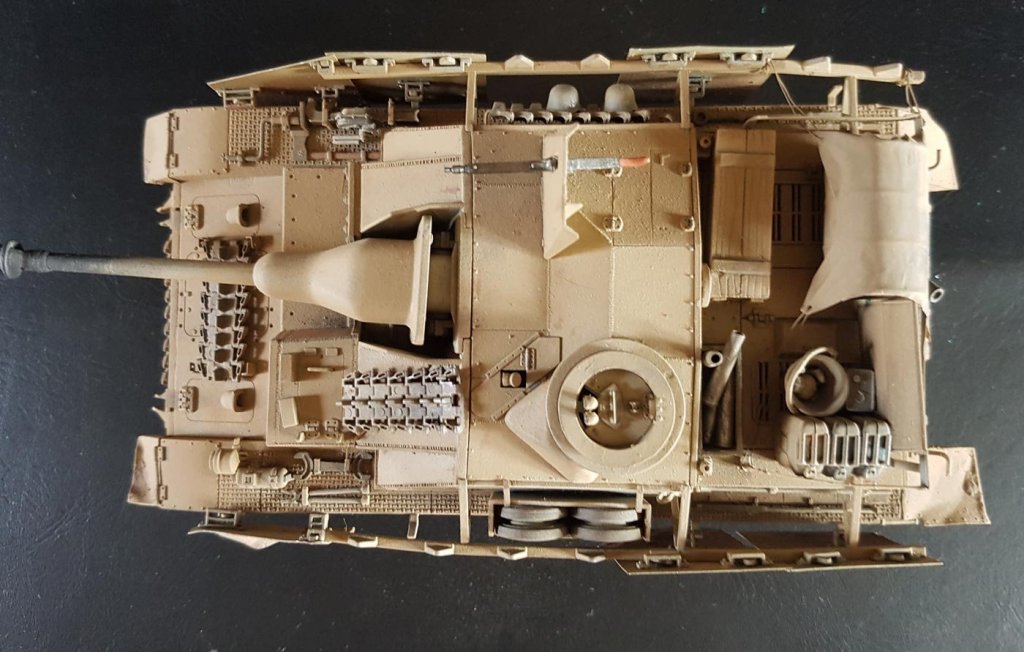
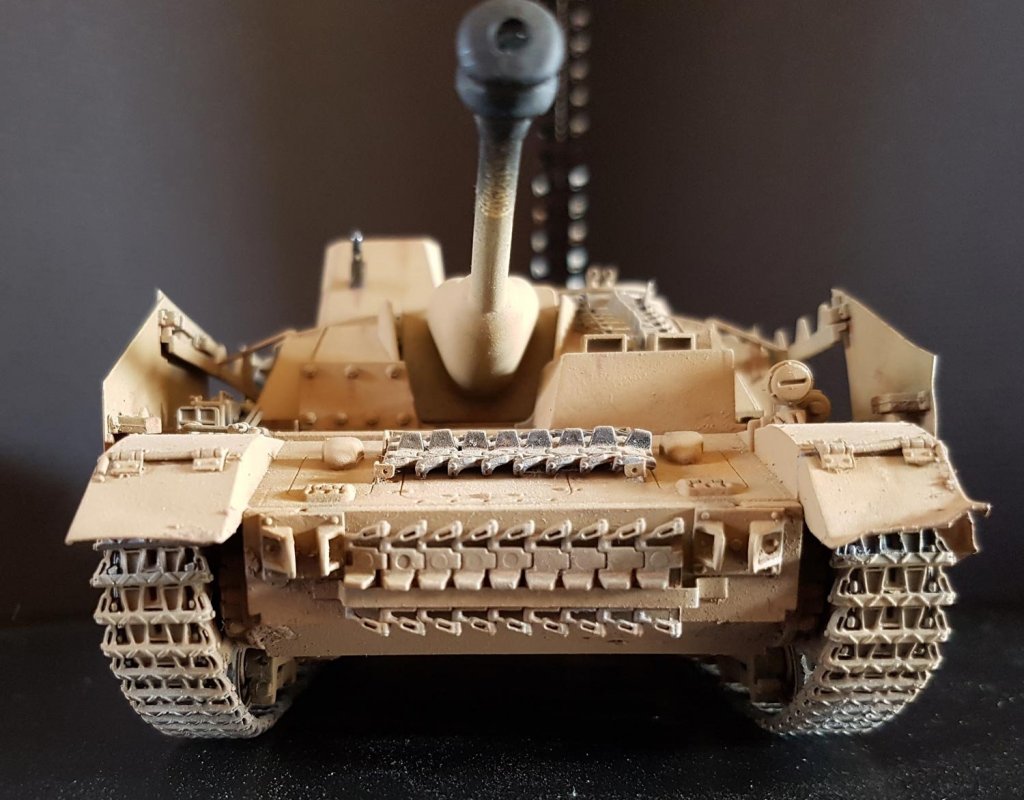
Part 2 Steyr Type 1500a/01 with20mmFlak38. Built stock from the Tamiya (Steyr) and Dragon (Flak) kits, Airbrushed in enamels, drybrushed in enamels with artist chalk weathering. And my favourite; SdKfz 163 Sturmgeschutz IV. Built from the Dragon kit with Eduard Brass accessory kit and scratch built rear deck enclosure. Airbrushed in acrylics, washed and drybrushed in artists oils and artist chalk weathering. They are a bit dusty and not perfect but I hope you enjoyed looking! Cheers, Paul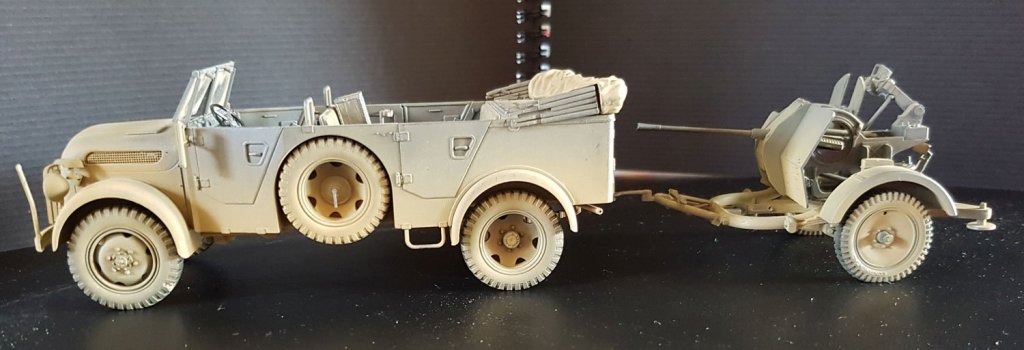


-
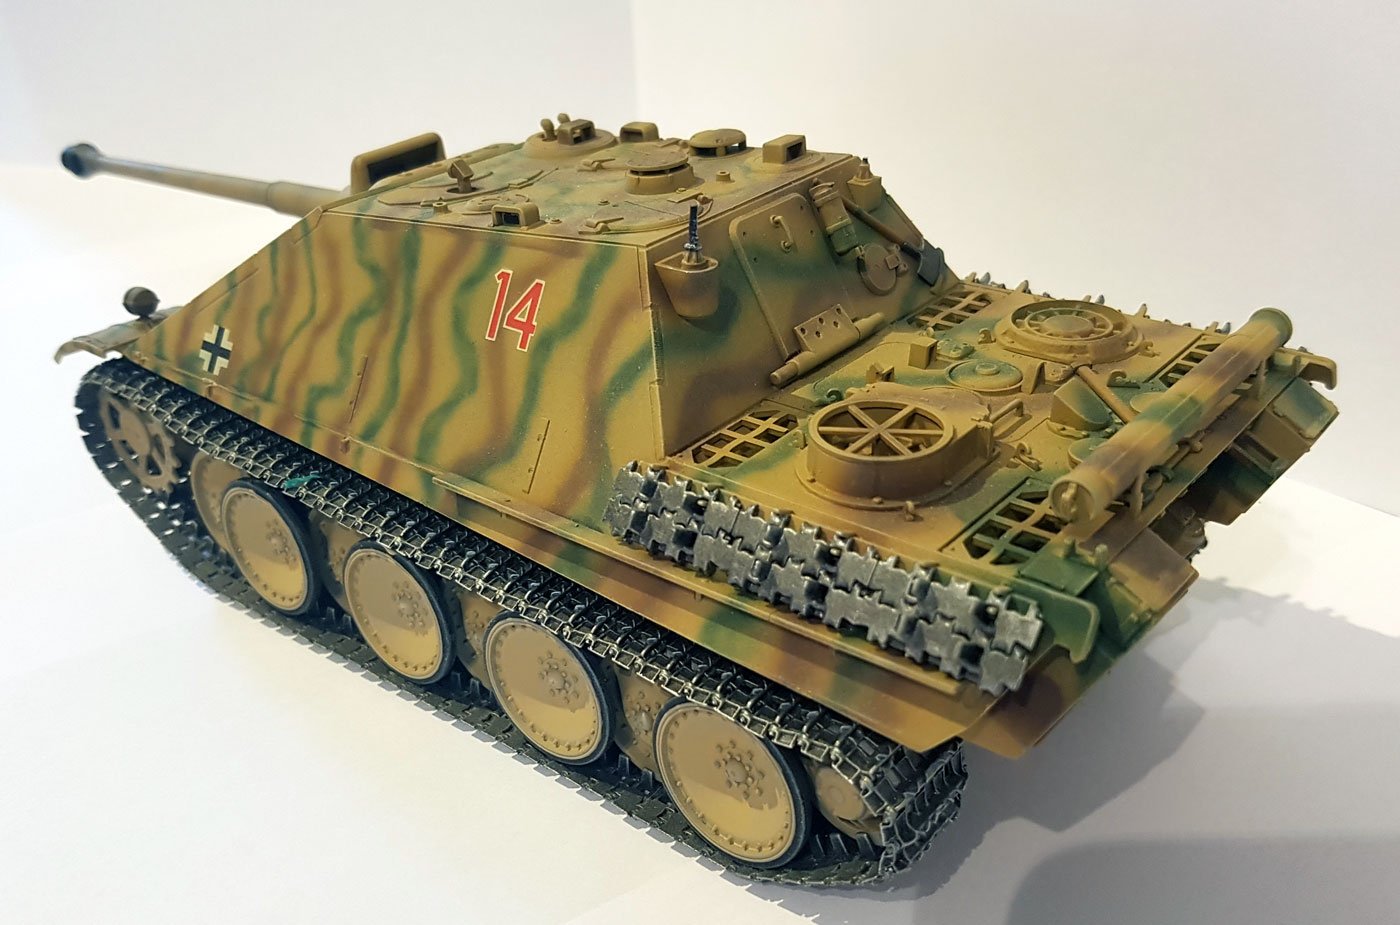
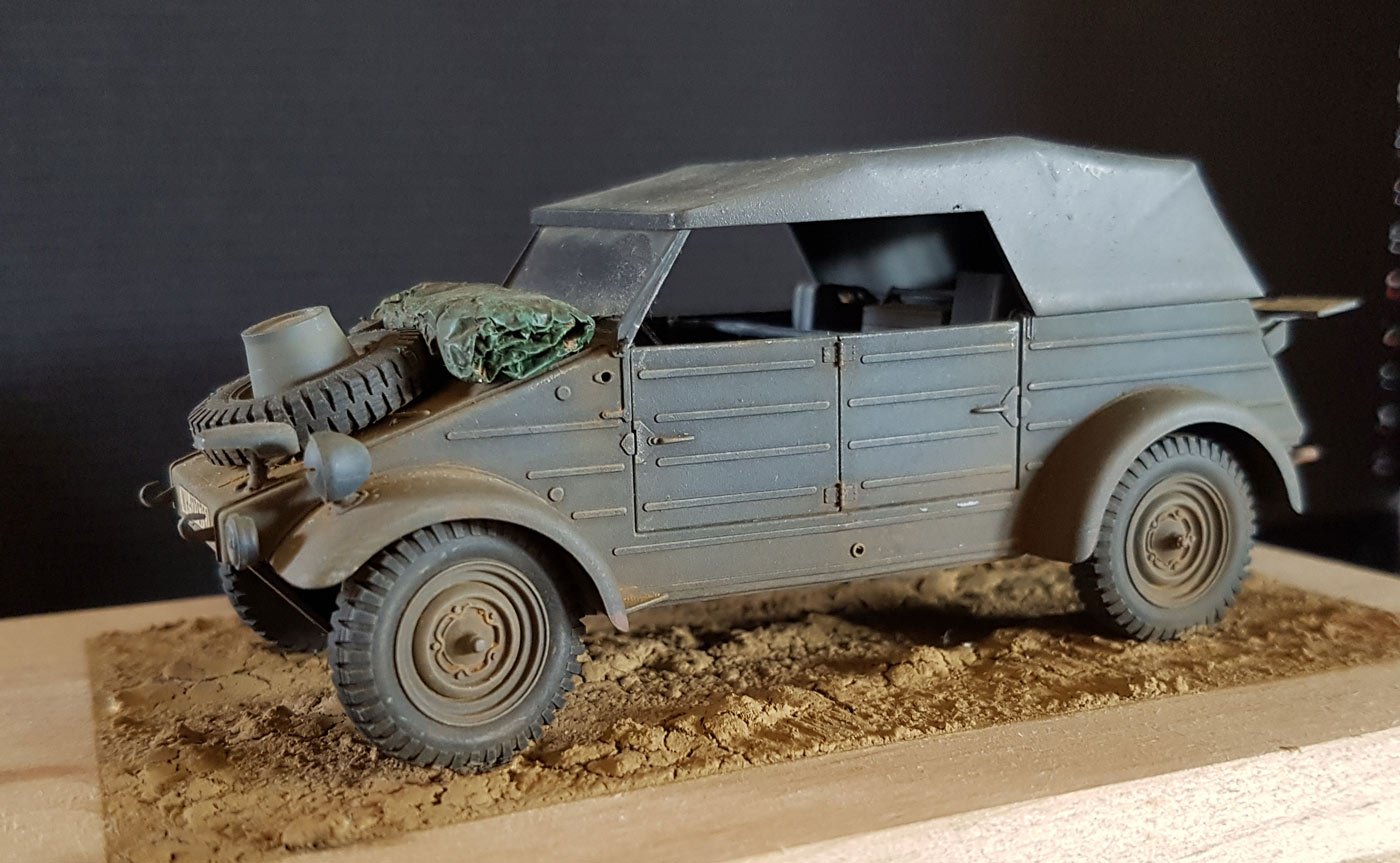
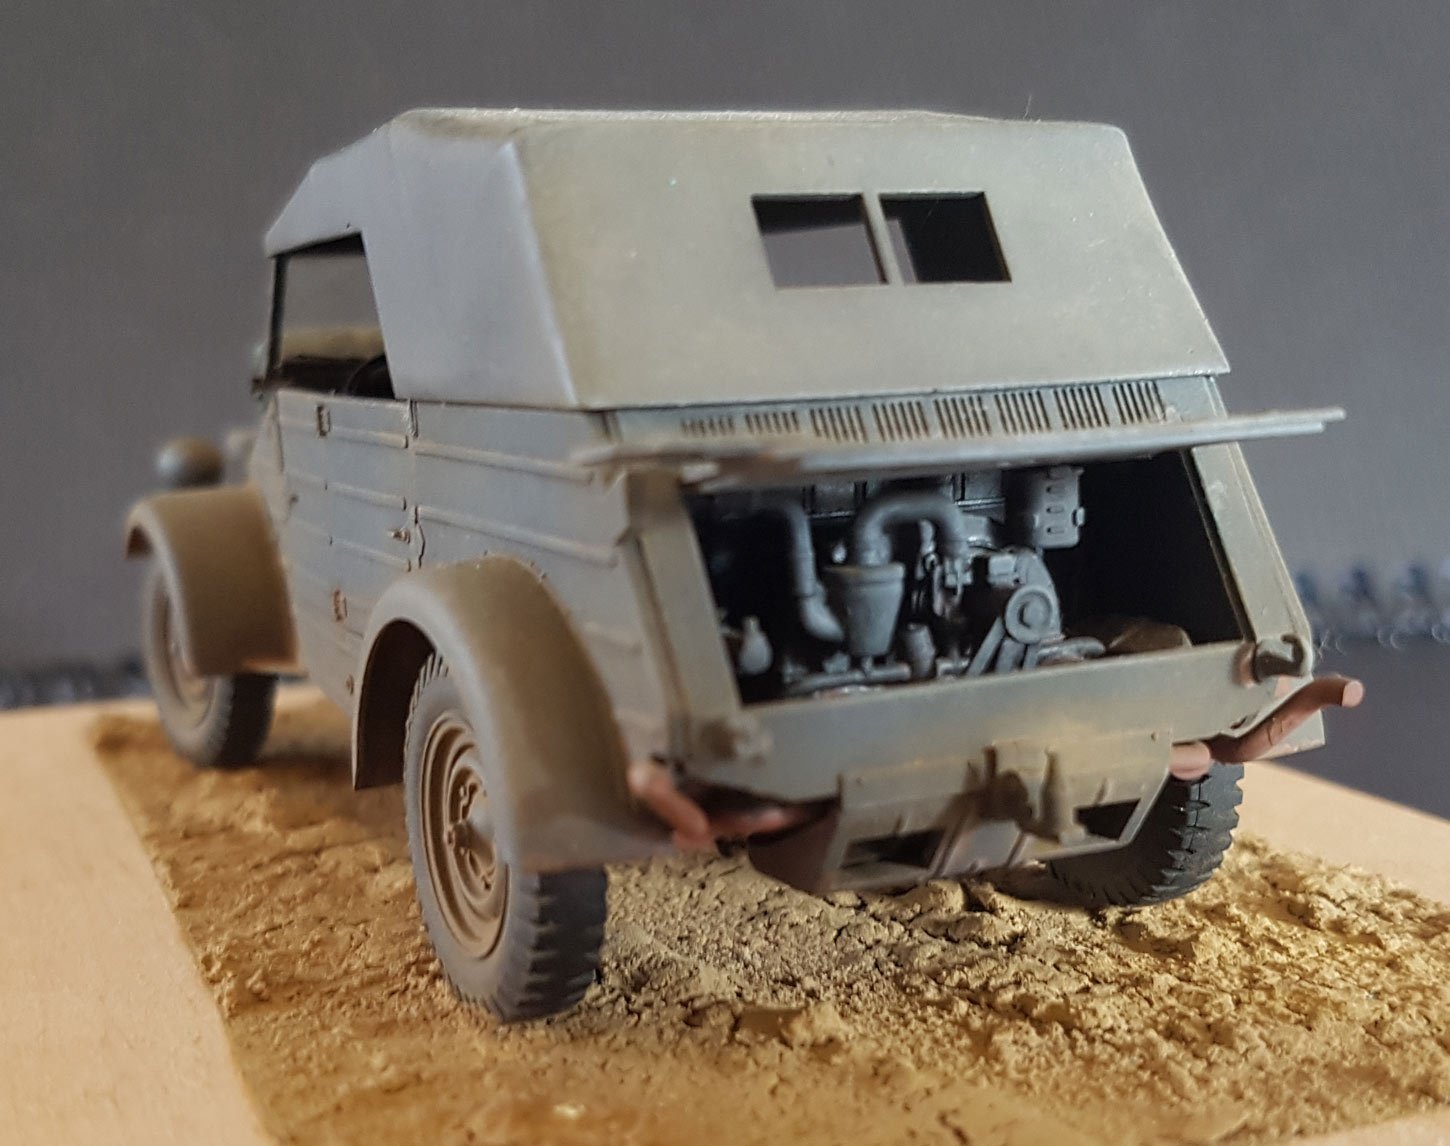
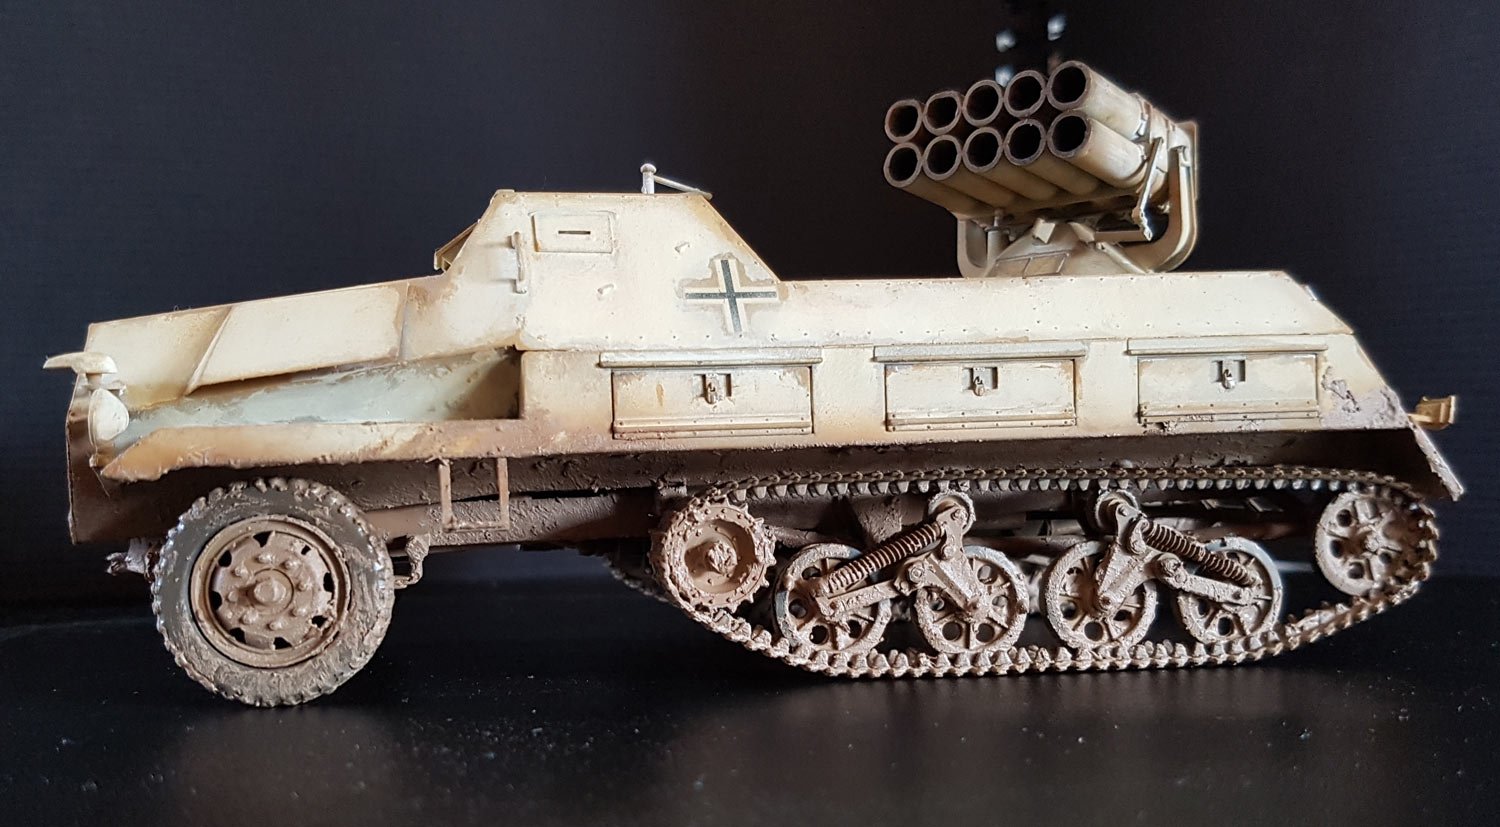
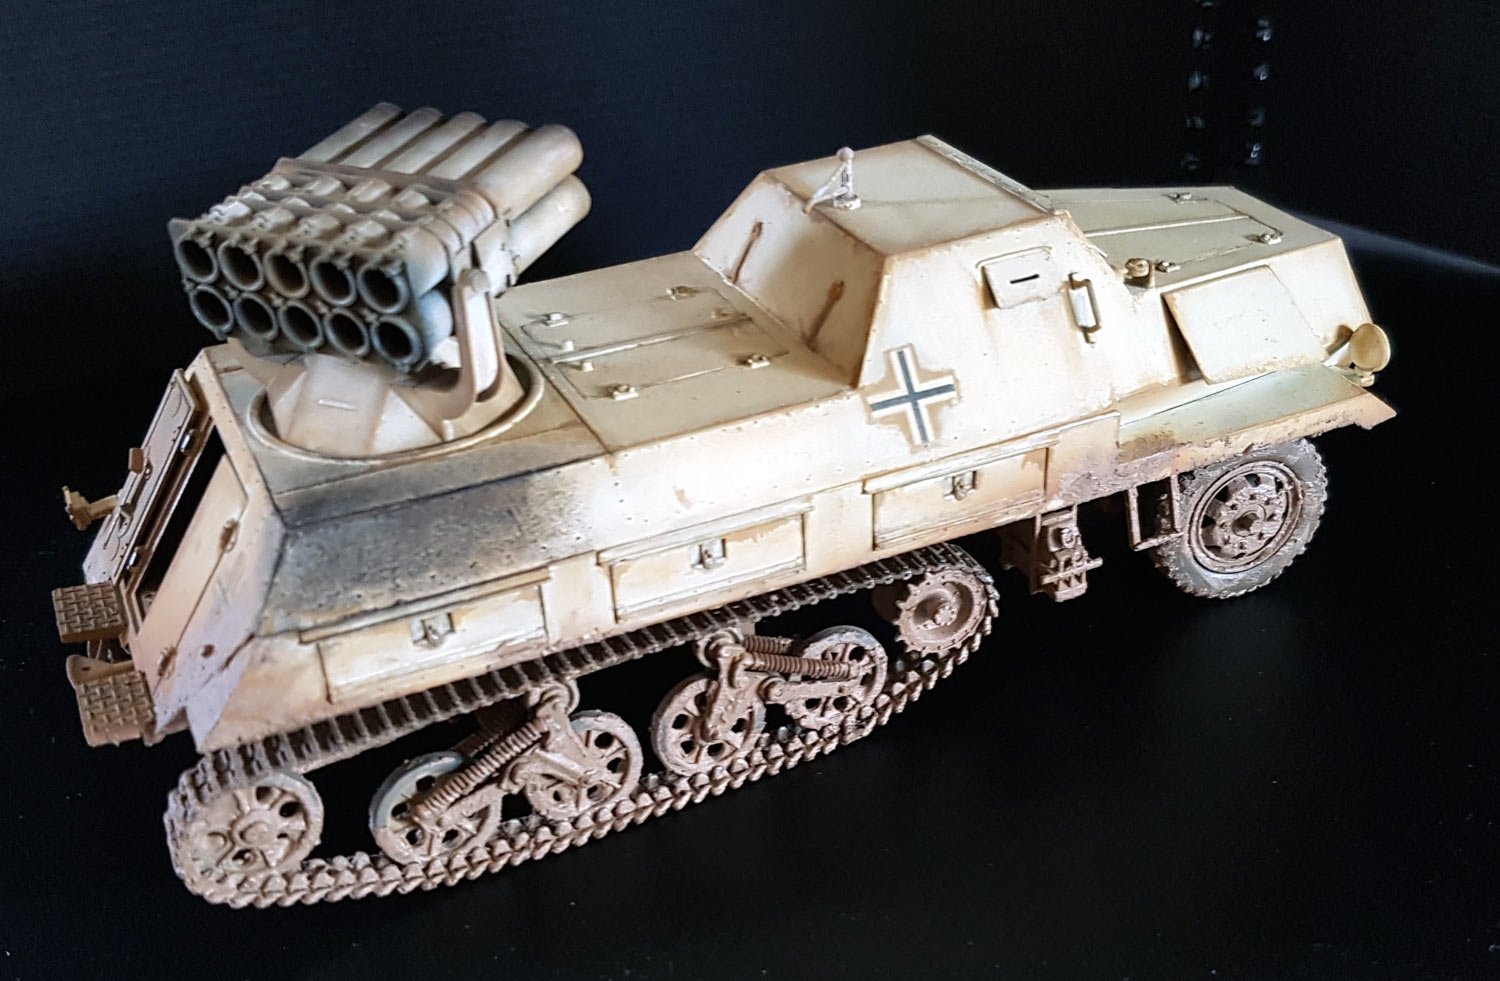
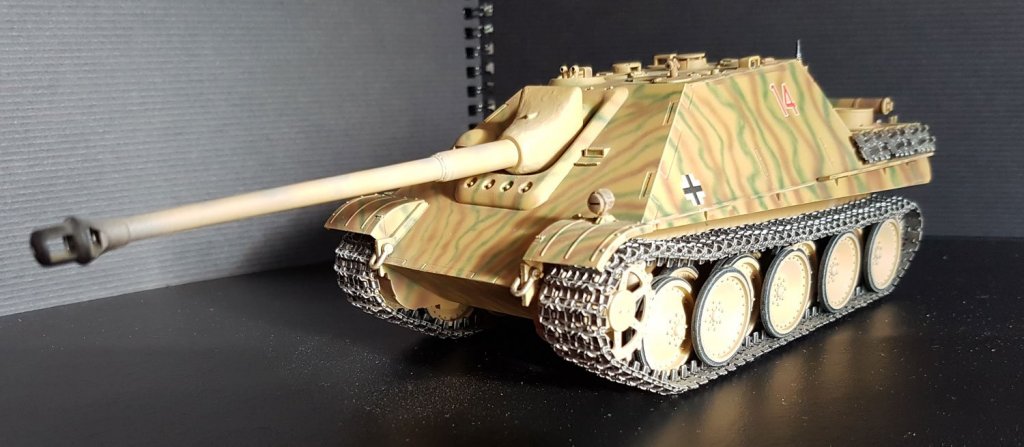
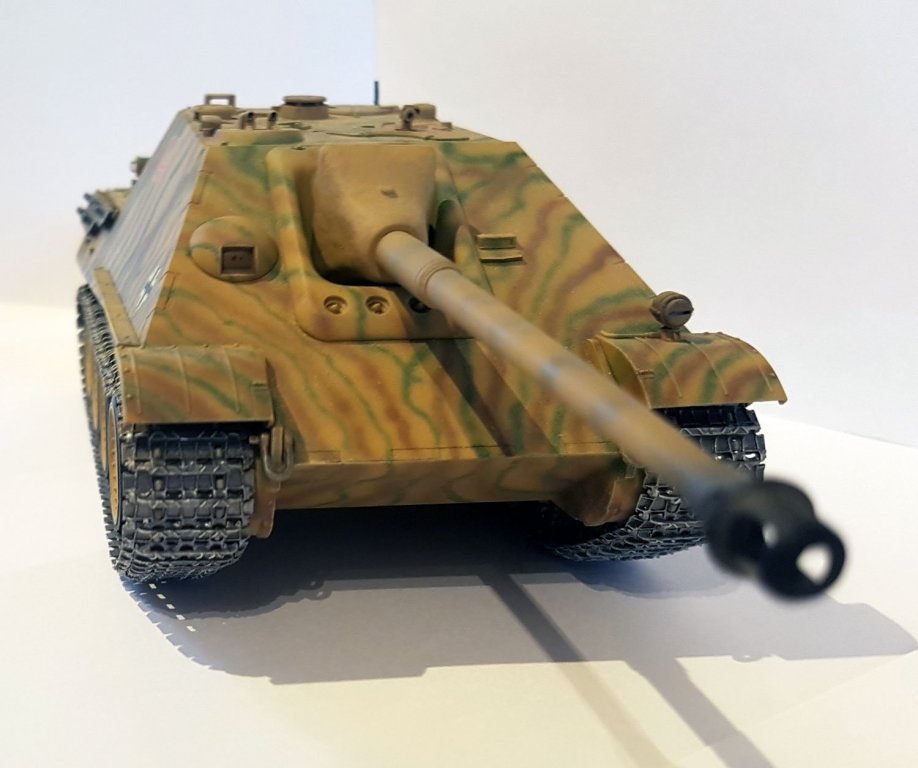
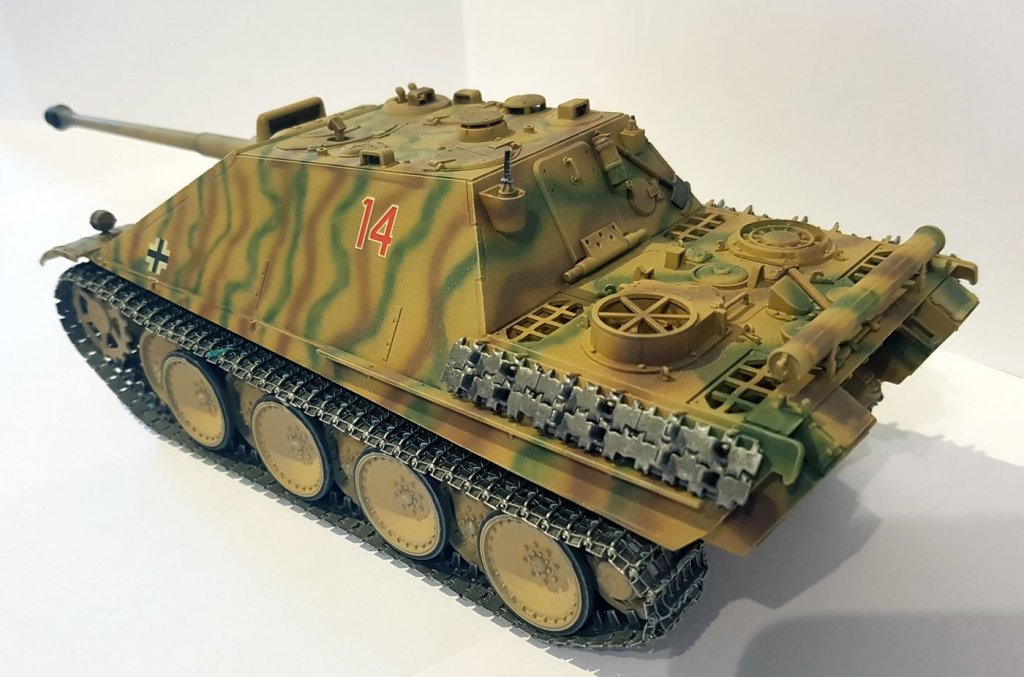
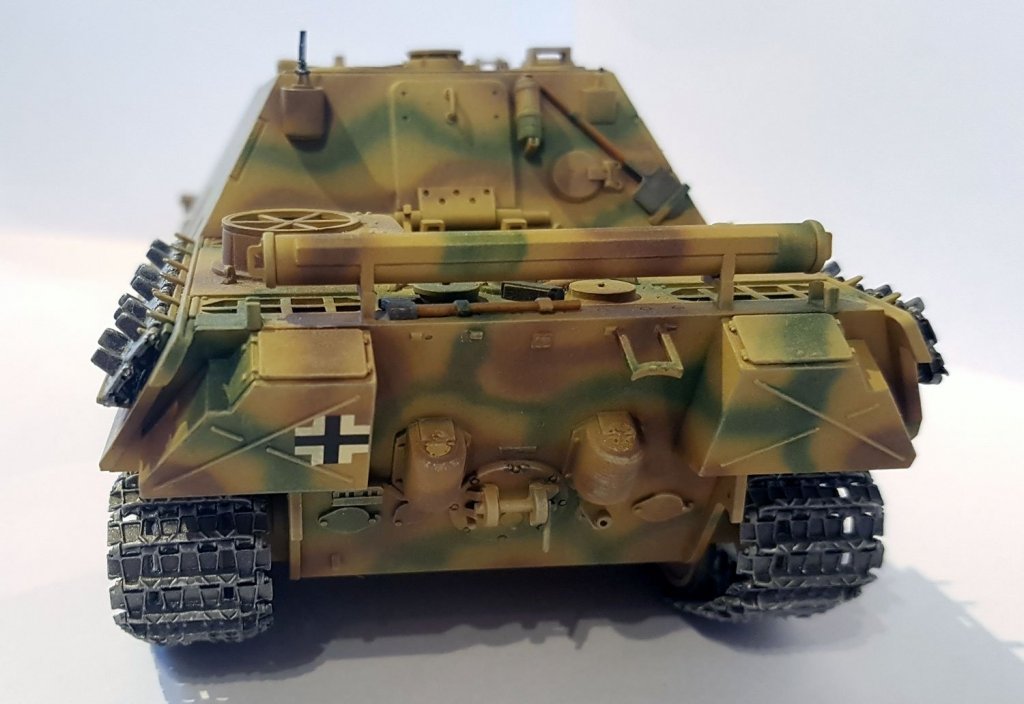
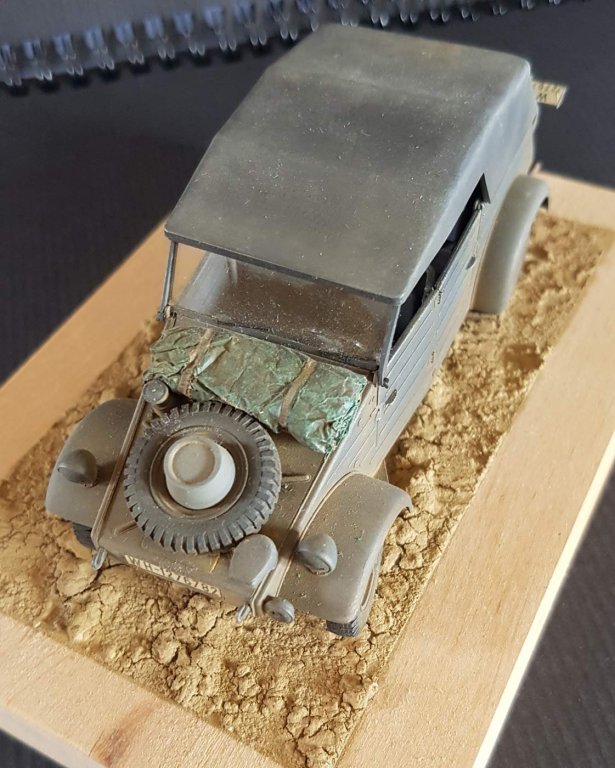
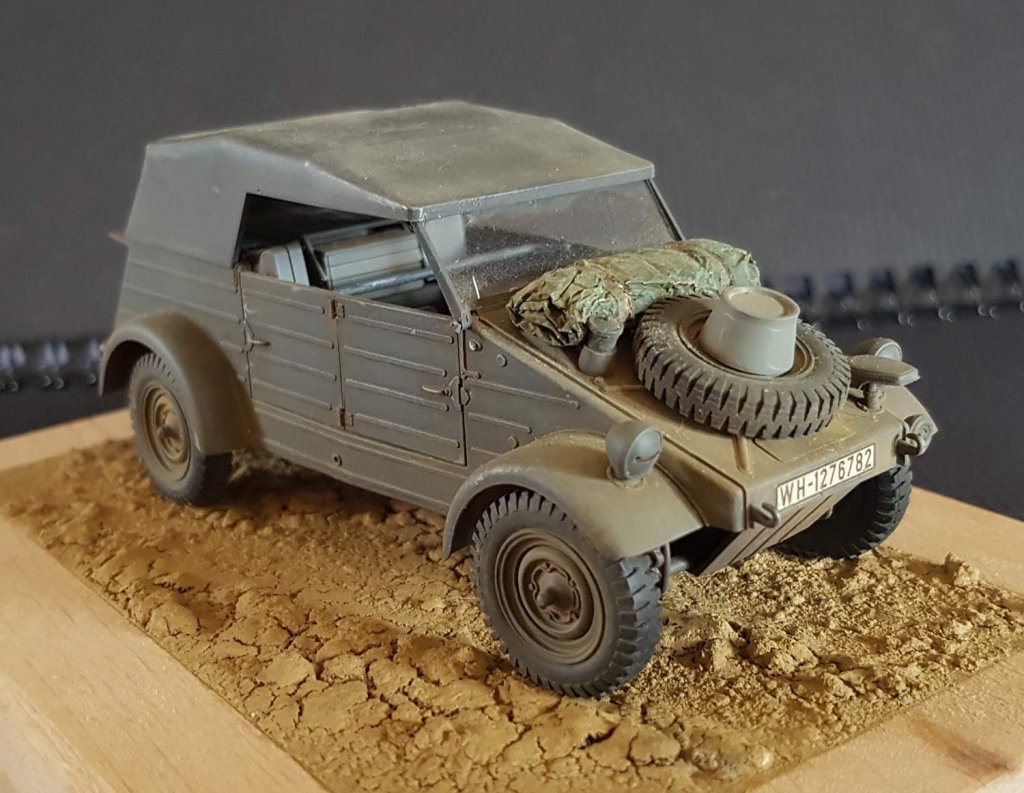
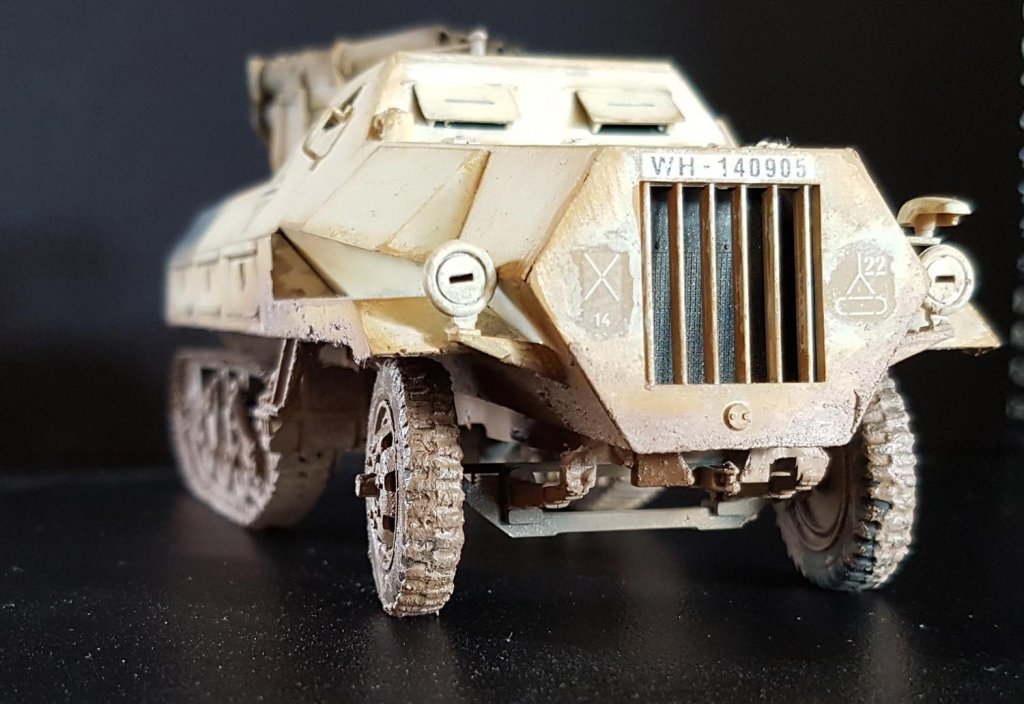
Hi all, just thought I'd post a few pics of some of my plastic models - made before I got the wooden ship bug. Part 1 SdKfz 173 Jagdpanther. Built stock from the Tamiya kit and airbrushed in enamels. Kubelwagen Type82. Stock built from the Dragon kit, airbrushed in acrylics weathered with oil paints and artists chalks. SdKfz 4/1 Panzerwerfer 42 Maultier. Stock built, probably a Tamiya kit, airbrushed with acrylics heavily drybrushed with oils. More in Part 2....


- 22 replies
-
- 10
-