


Jack12477
-
Posts
5,454 -
Joined
-
Last visited
Content Type
Profiles
Forums
Gallery
Events
Posts posted by Jack12477
-
-
15 minutes ago, CDW said:
I eat tomatoes like an apple...only with a little salt.
So does my Admiral or she slices them with a slice of mozzarella cheese and some seasoning
-
18 minutes ago, Canute said:
Do you eat stuffed Bell peppers? Or just for salads?
Both! And as pizza toppings and sausage/peppers/onions. It's a taste, texture thing with tomatoes, ketchup, pizza and spaghetti sauce okay, raw / stewed / fried , no go.
-
8 hours ago, mtaylor said:
You need something stealthy like a cross bow
I picked up a "cat scat mat" from a Garden Supply Company in Vermont. Think of a 12 inch square barb wire mat, except it is all plastic with sharp pointy spikes. Place it on top of the soil, plants grow up thru it, but critters get their feet spiked when they step on it. It comes in 6 ft long x 1 ft wide rolls you can cut to size.
-
I have 2 types of tomatoes, Cherry, or grape, and "Big Boys", both are for the Admiral, I don't like tomatoes. The Cherry mature early and produce a lot of fruit, all the other varieties don't produce much fruit and don't mature until almost September even tho I plant them in May and they get 8 plus hours of full sun . Fried green tomatoes, no way ! Fried green peppers, yea ! I have red and green Bell peppers. Tried some of the other pepper varieties last year but did not get much yield, so went back to Bell variety.
The purple potatoes, yes that is their color - skin and meat, are unusual but have a very strong potatoe flavor/taste. Found some at a local farm stand a few years back and tried them, decided to plant my own.
-
-
I have 3 raised beds for veggies, 1 - 3 ft x 3 ft, 2 - 3 ft x 6 ft. The 3x3 is tomatoes, peppers, bush beans; 1- 3x6 is all potatoes, red skins and purple aka Adirondack potatoes, have a purple skin and purple meat very tasty; other 3x6 is beets, broccoli, egg plant and kolhrabi. I use the "square foot" gardening technique for the veggies.
The flowers are the peripheral gardens, we just augmented them with a variety of phlox, coneflowers, Bee Balm (Manarda), coral bells, coleus. The flower gardens are well established, we just augment them from year to year.
-
Still here! Just waiting for supplies !
 Also got a little sidetrack, planting veggies and flowers; had to build a 2 ft high fence around a raised bed to keep the feral cats from digging it up.
We are sloooooooowly coming out of lockdown, but now I have to remember to put a "face covering" in my pocket along with a handkerchief
")
- lmagna, popeye the sailor, Canute and 4 others
-
 7
7
-
7 hours ago, Nirvana said:
Beautiful done! I am jealous!
Me too ! Great looking space.
- thibaultron and mtaylor
-
2
-
My first car was a '65 Mustang convertible, 6 cylinder, 3 speed on floor, manual top - no motor but not needed because top was so well balanced you could raise/lower with one hand, only drawback was you had to exit the car to do it. Color was Twilight Turquoise, depending on light either sea green or green. Great car.
-
Well, here's the Villa all painted and assembled. The last wall had to be re-epoxied because the 1st attempt did not hold. Now for some weathering, then create the scene. Having some difficulty locating the building materials I want, most are out of stock at the moment, so progress will be a little slow.

- lmagna, CDW, Edwardkenway and 6 others
-
9
-
2 hours ago, mtaylor said:
Will you be adding "smoke damage" to the stucco?
I will be adding some type of damage, just not sure how I wiil present it yet. Still messing with the basic colors right now.
- mtaylor, Canute, Old Collingwood and 4 others
-
7
-
Thanks, Edward, great help.
- Egilman, lmagna, Old Collingwood and 4 others
-
7
-
Thanks, Edward. The box art is a little vague looking at the color photo. I was experimenting with unbleached titanium white, which is kinda like parchment in color. Have to play around still.
-
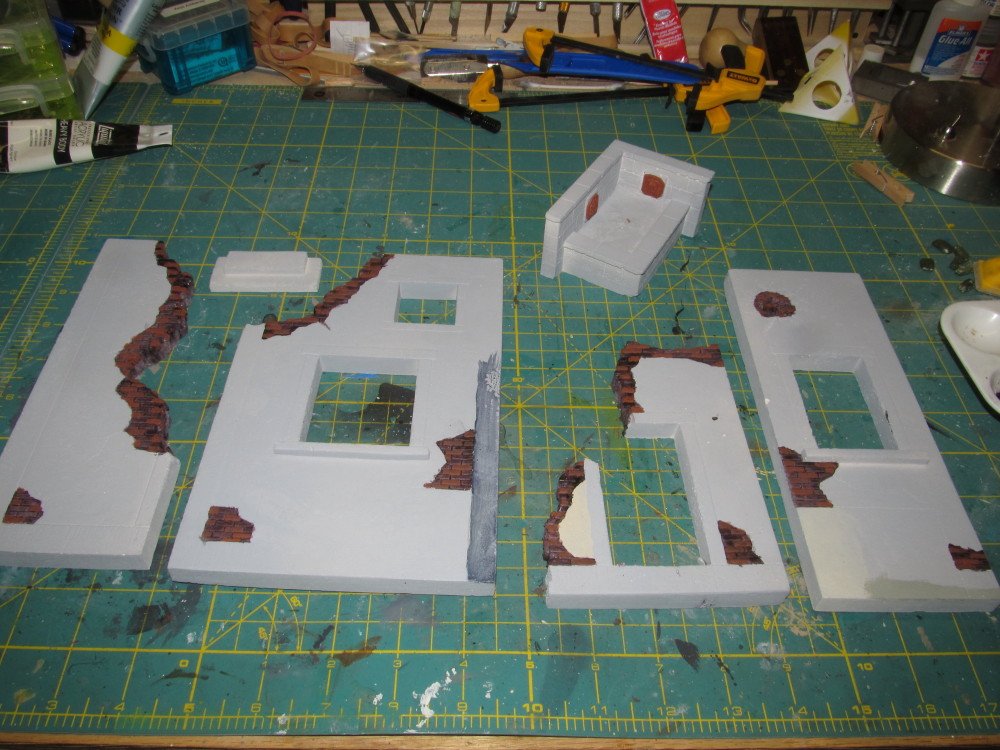
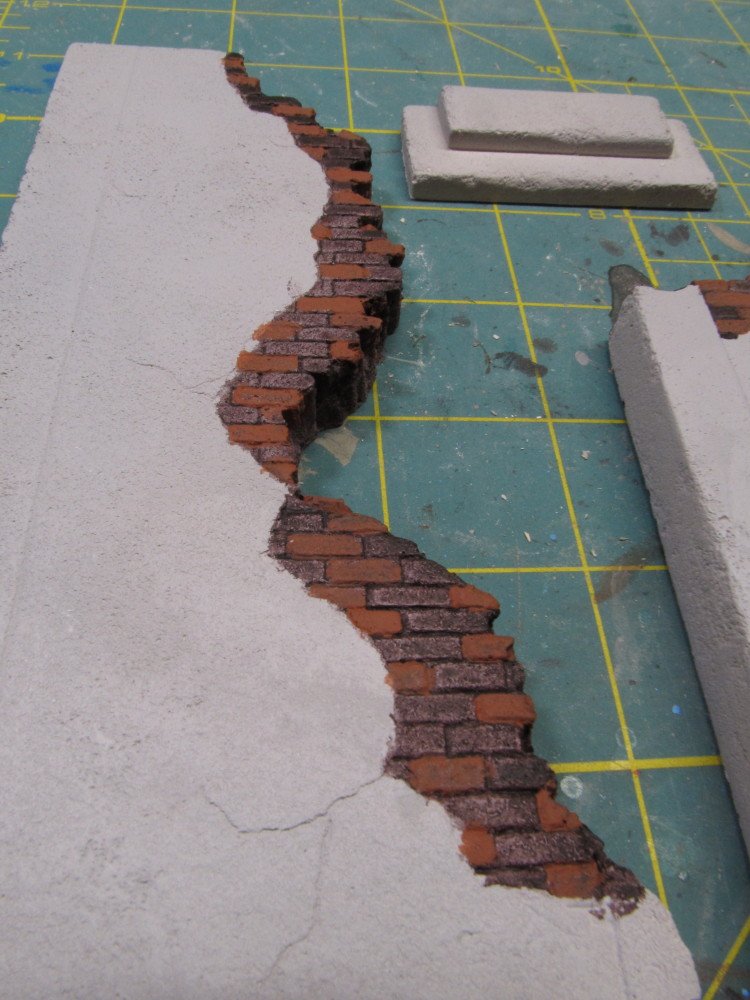
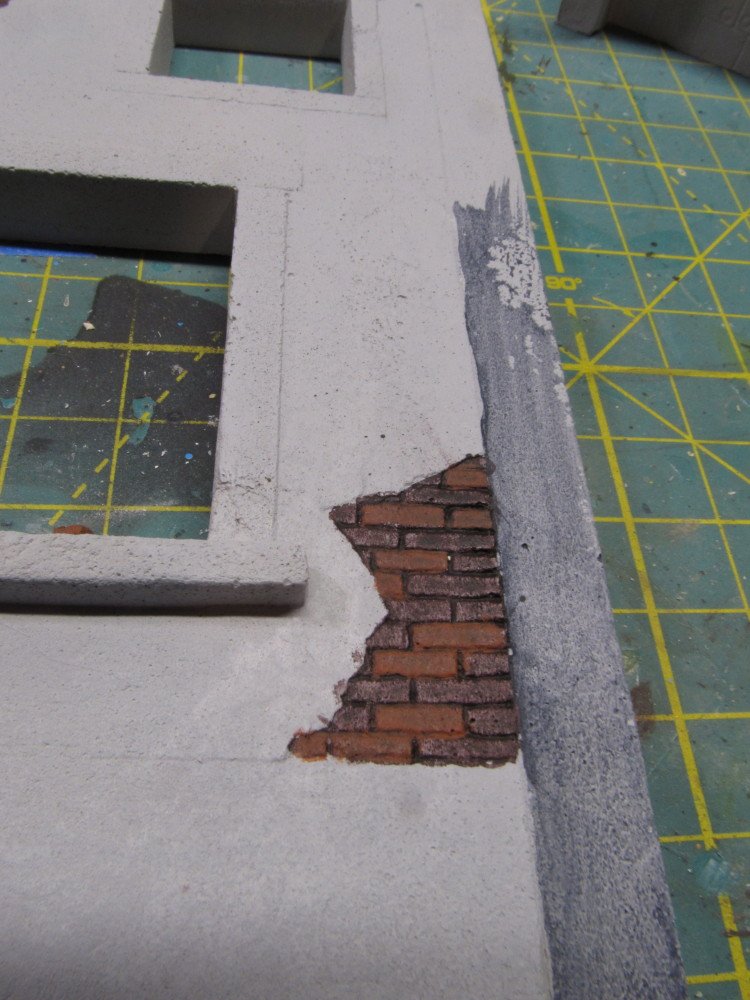
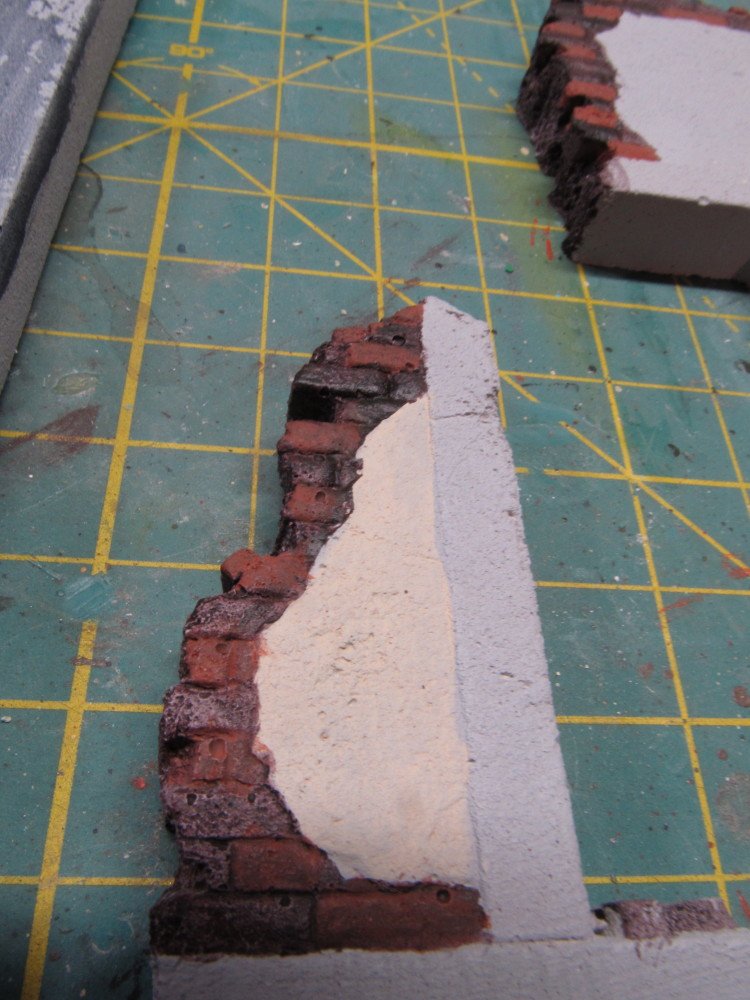
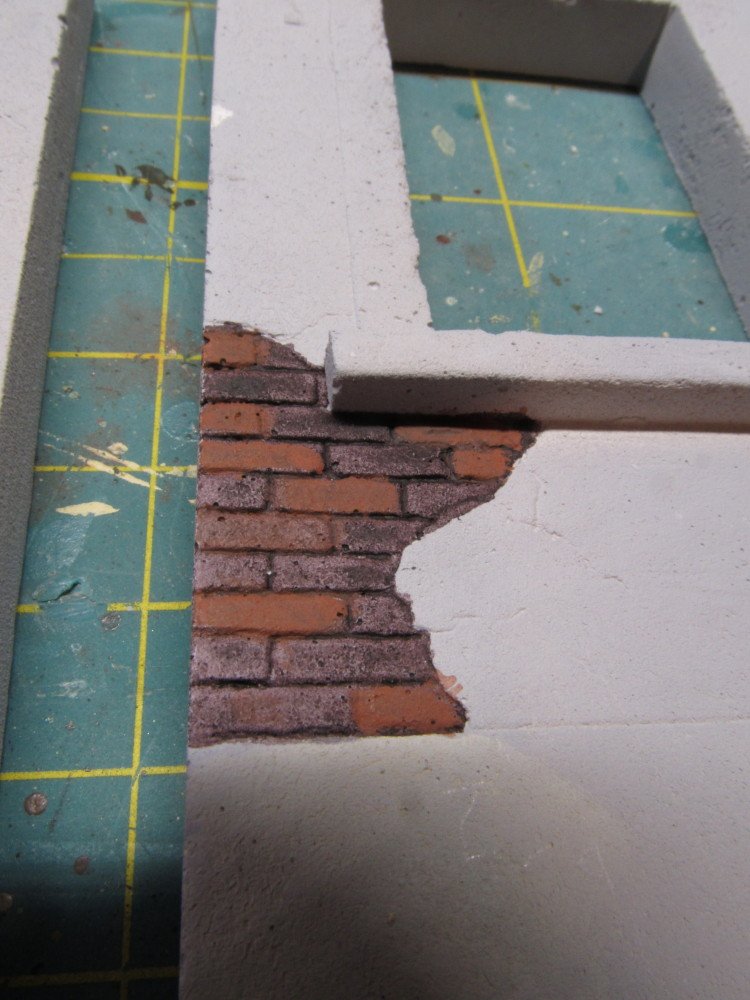
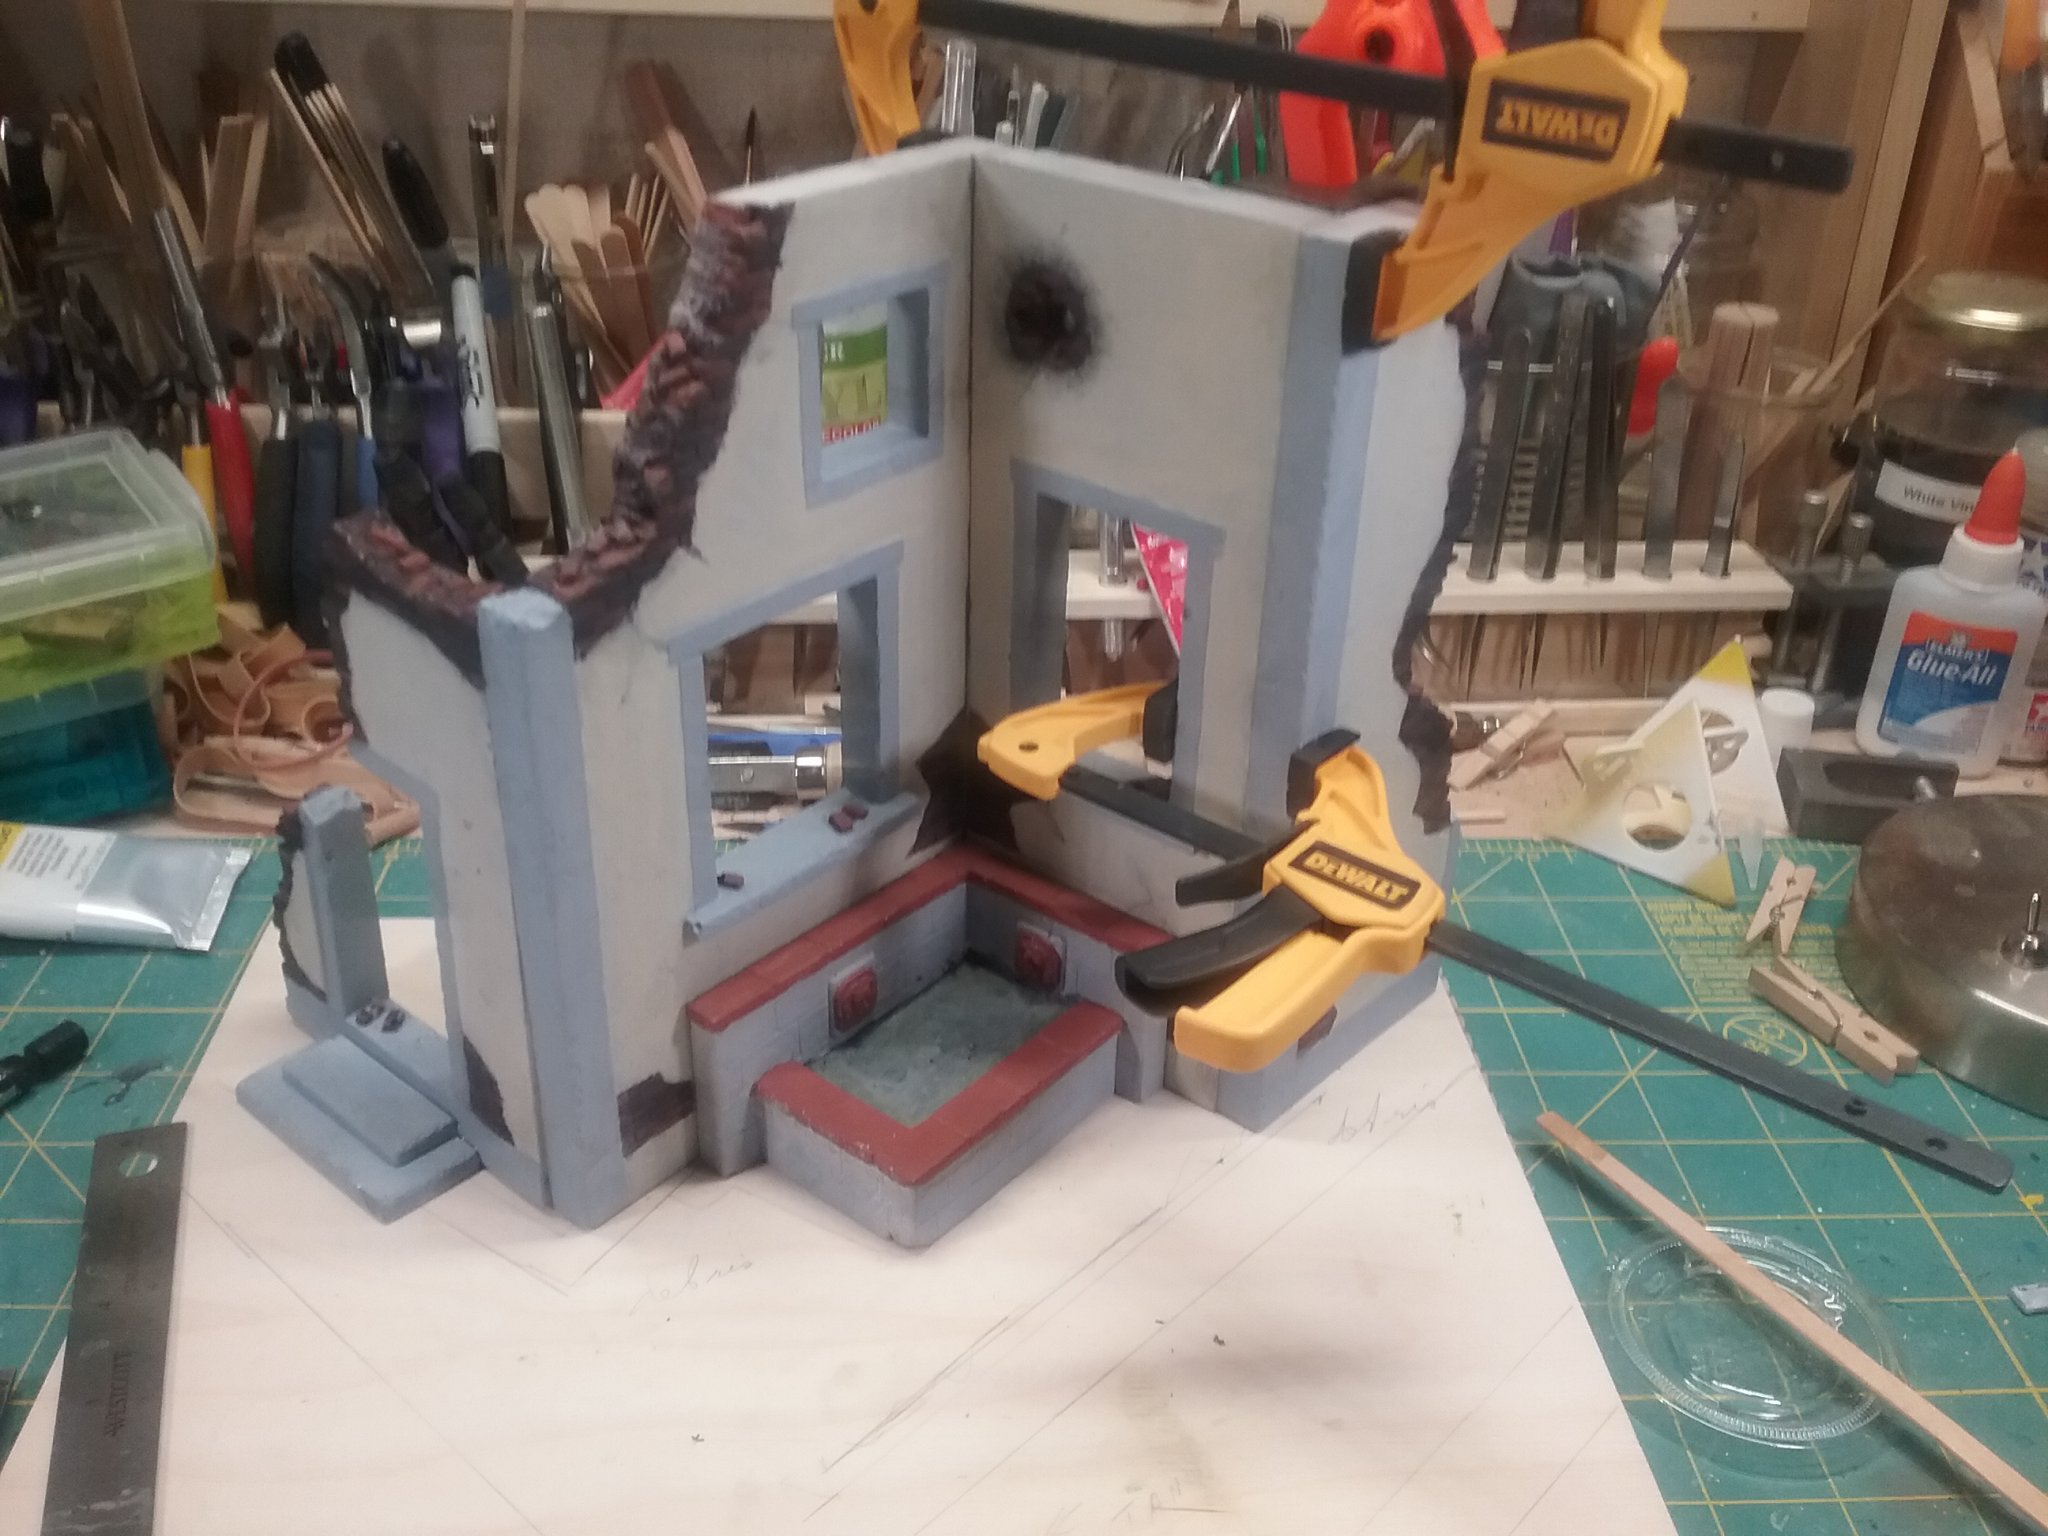
While I am trying to figure out a suitable display for the tank, I decided to at least drag the Verlinden Battle Damage Villa kit out of the stash and at least paint it. Not sure how I want to depict the stucco but I hit the whole thing with a coat of Tamiya Fine Gray Primer first. The started painting in the exposed bricks. The various other colors on the stucco are just test paint strips for now. For the brick I first applied a coat of Liquitex Red Black acrylic then over painted somewhat random bricks with Lifecolor Terracotta. More work to be done and more testing of color schemes. Then the whole thing has to be Epoxied together. It's 3 " x 4" x 3 " x 3' wide per panel.
- cog, lmagna, Old Collingwood and 5 others
-
8
-
-
7 hours ago, mtaylor said:
Very nice work, Jack. Just curious, would the crew's side arms (the Thompson and M1 been kept outside the hull? I think the weather would have damaged them. But then, I know zip about tanks.
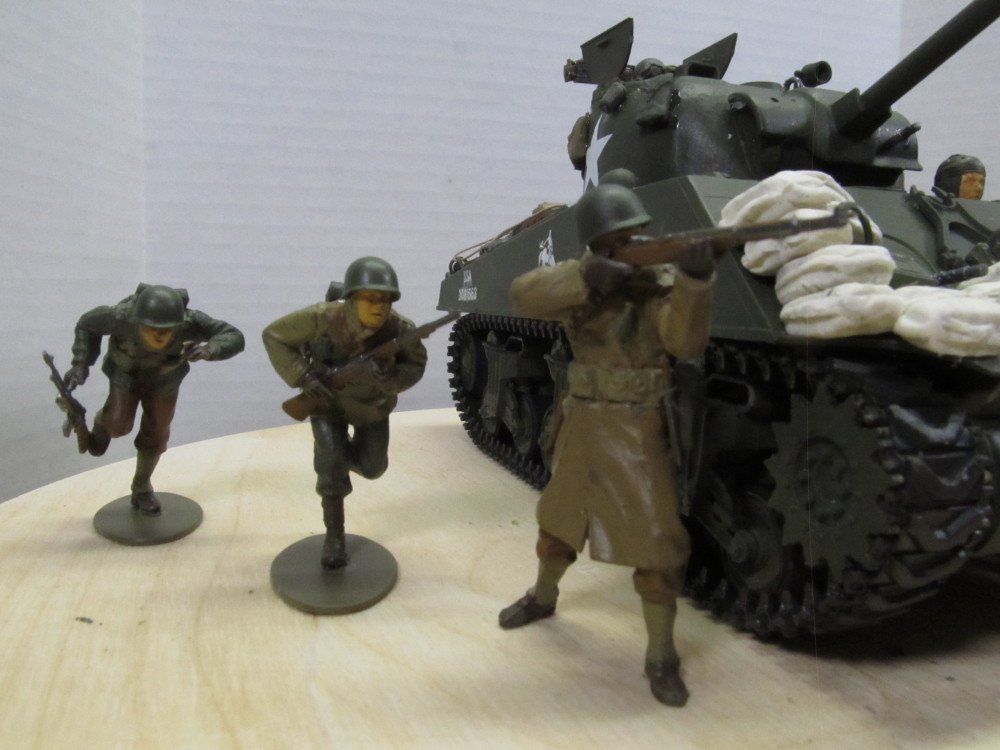
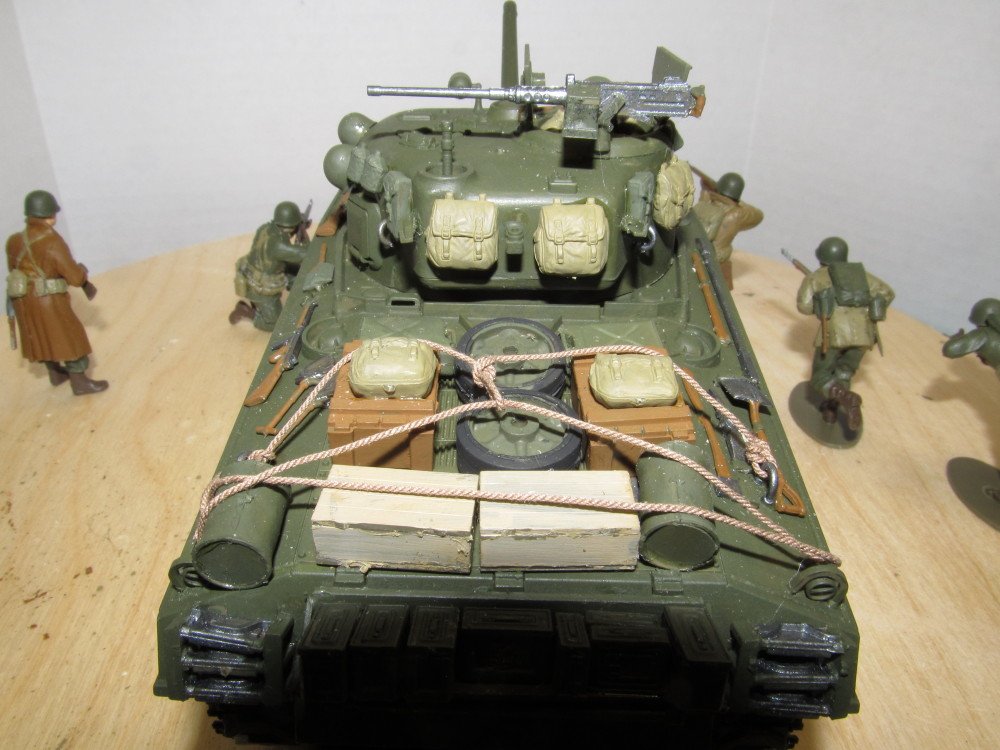
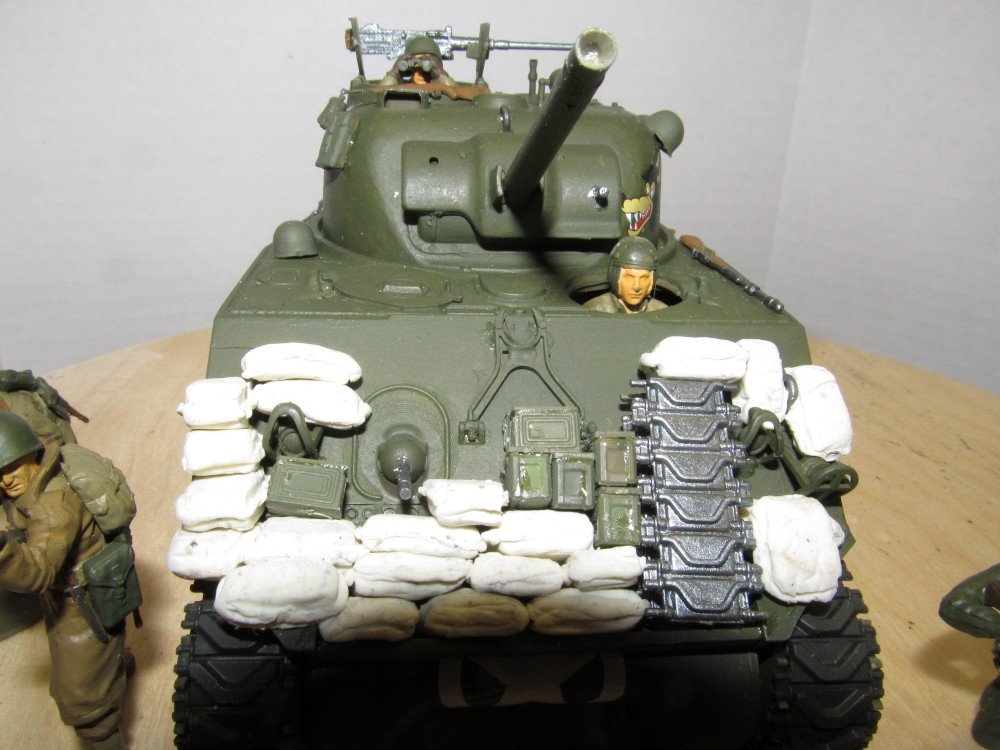
Mark, I am assuming the tanker brought the carbine up with him when he opened the hatch and placed it on the turret to keep it handy and close. The ones on the hull are just there cuz they were shown that way in pictures I had, presumably the infantry could run up and grab a new weapon off the hull deck.
EG, thanks for info on the sandbags. I'm still not satisfied with their look, may redo them. Not glued down yet.
-
On 4/30/2020 at 12:53 PM, CDW said:
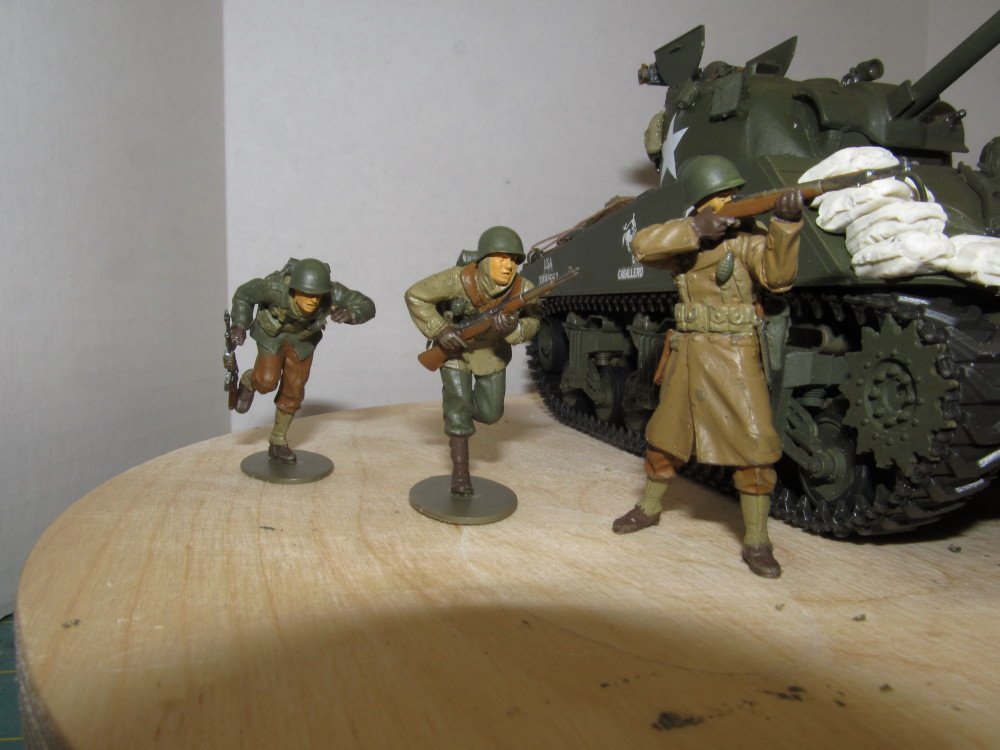
Nowadays, there are some very fine armor models out there, but none of them include the nice infantry figures like Tamiya did with their armor models. Always liked the extras Tamiya kits provided.
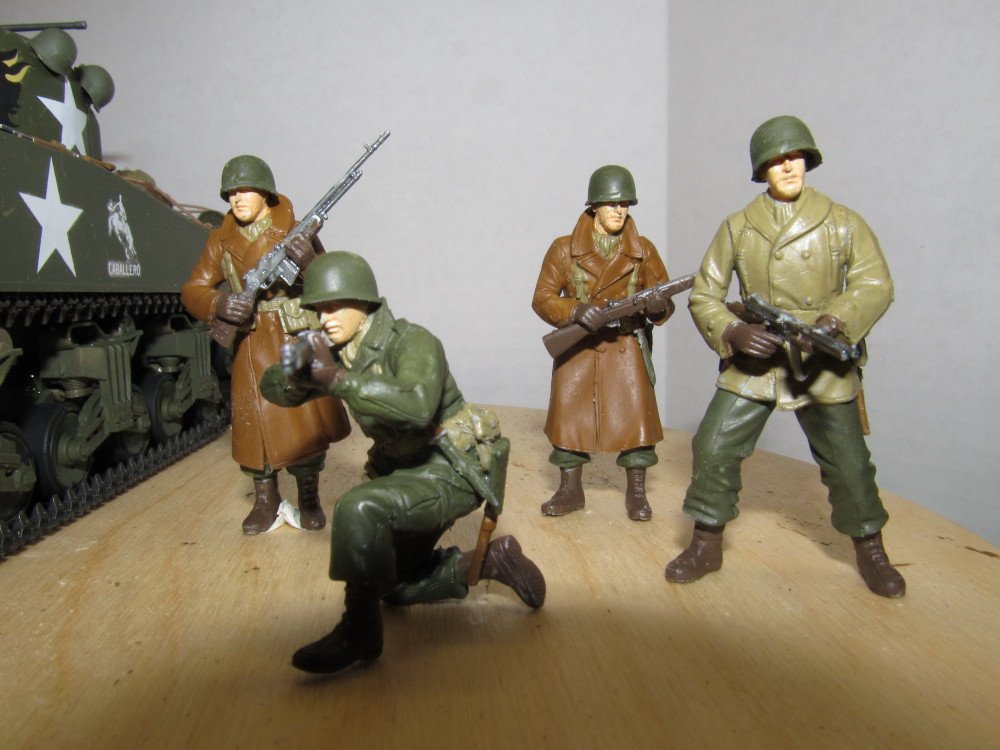
I just put together a kit of four figures from Dragon and I am pretty impressed with their quality, level of detail, and the fit of the individual parts. I would say they are on a par with Tamiya.
- mtaylor, lmagna, Edwardkenway and 6 others
-
9
-
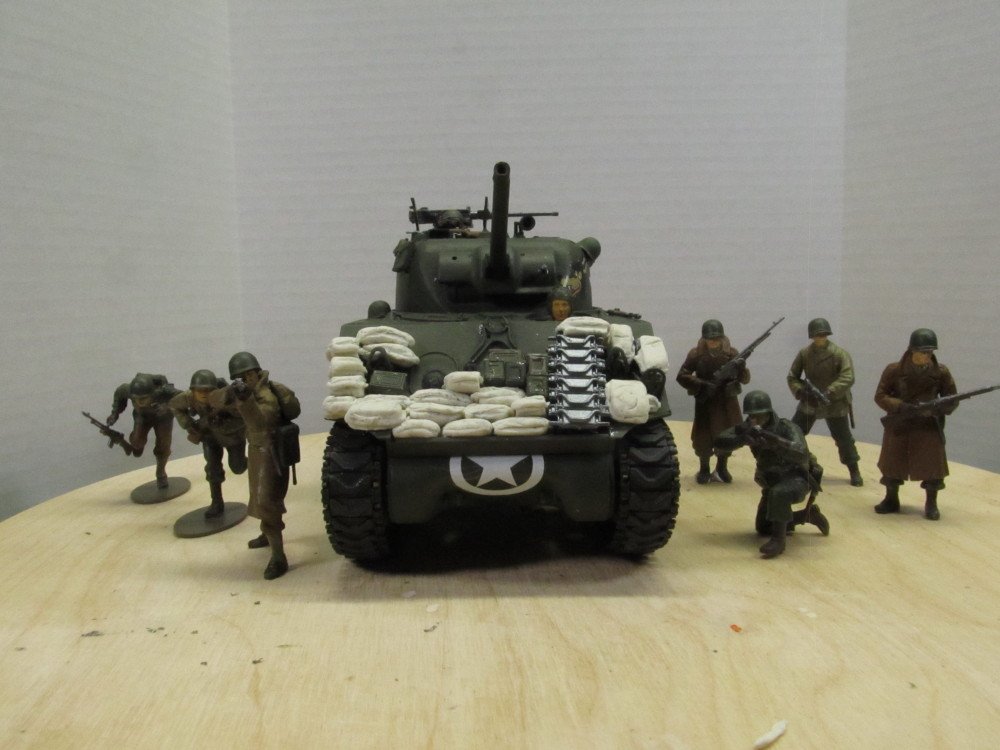
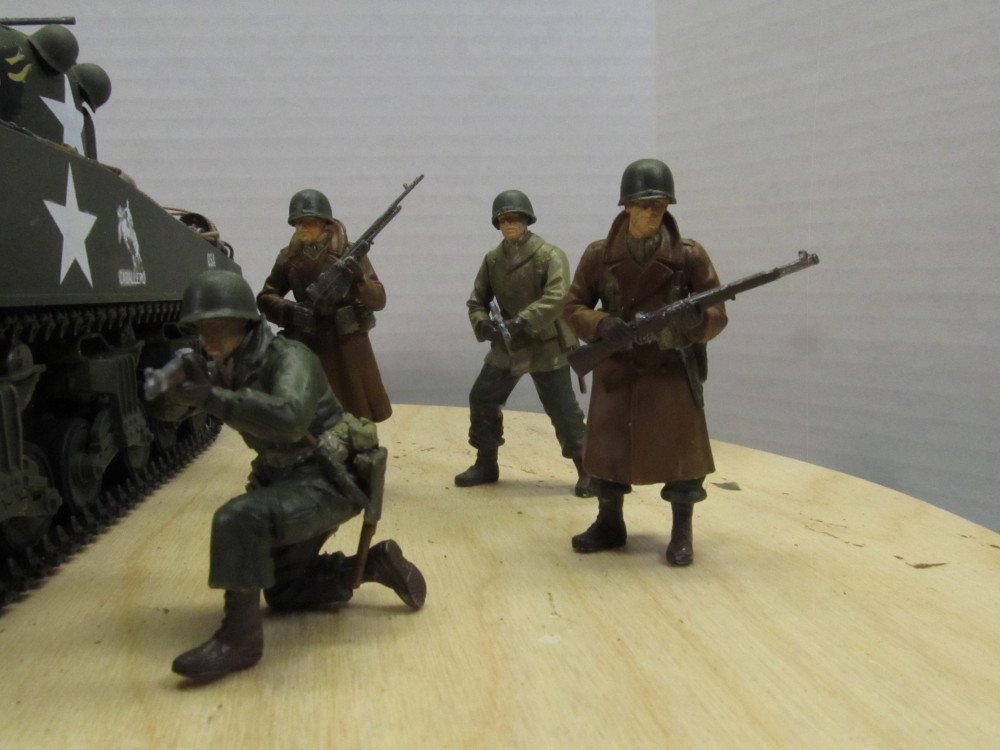
Okay, I think I am now finished with all the figures and added accessories. EG, you wanted sandbags ! I think I captured the look, altho I have not decided on a color for the bags. Btw they are made from a children's modeling clay. The 3 figures to the left of the tank came with the Tamiya tank kit, the 4 on the right are from a Dragon figure kit I purchased as an add-on.
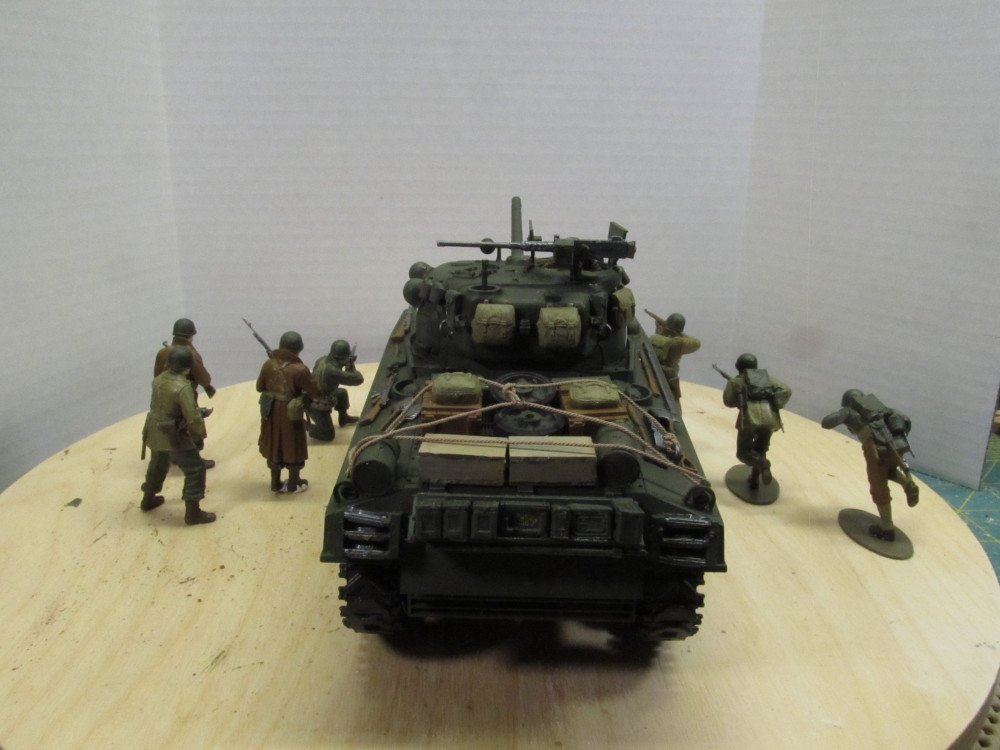
Now to use the tank's cannon and blast my way out of this dungeon and get out in the yard for some yard work.
Last night, May 9th around 5 PM EDT, we had a significant SNOW SQUALL blow thru with some pretty high wind gusts and near blizzard visibility for a couple hours. Thankfully it did not accumulate here but up north and in parts of western Vermont they got 5 to 10 inches accumulation.
- lmagna, Egilman, Edwardkenway and 6 others
-
9
-
-
2 hours ago, Canute said:
On pins and needles
Hope you didn't accidentally sit on your Admiral's pin cushion, Ken !

- Canute, popeye the sailor, mtaylor and 4 others
-
7
-
Thanks Edward, OC, Craig, EG, Lou for compliments!
Stay tuned, Lou, it is not finished yet ! More to come.
- lmagna, popeye the sailor, Canute and 4 others
-
7
-
14 minutes ago, Egilman said:
"Modeler's License" ?
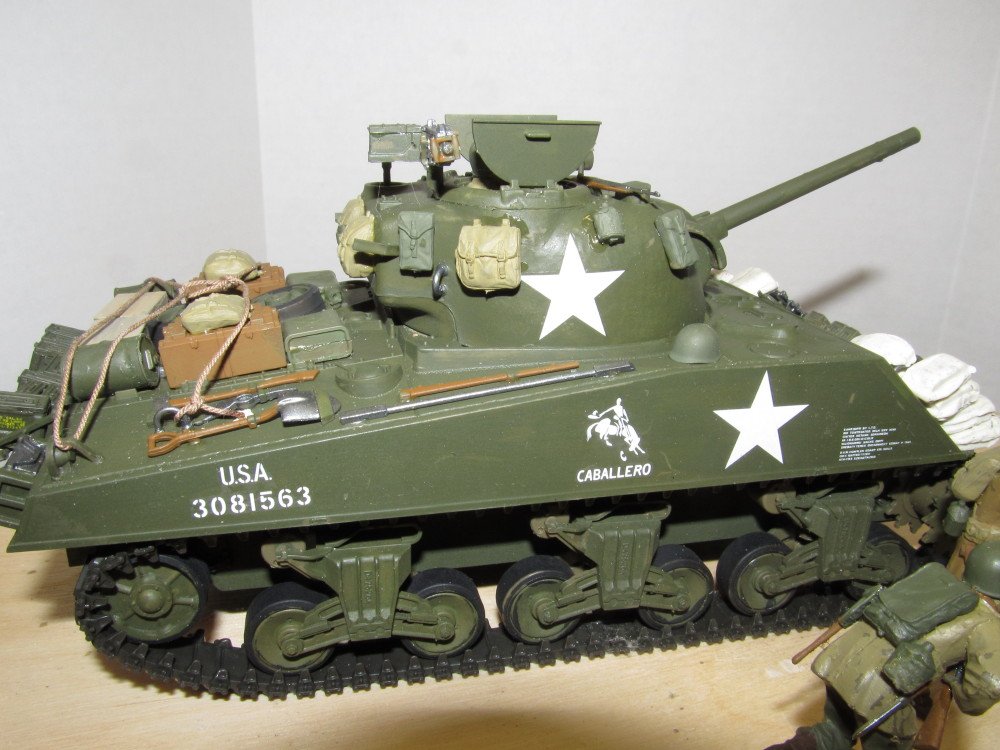
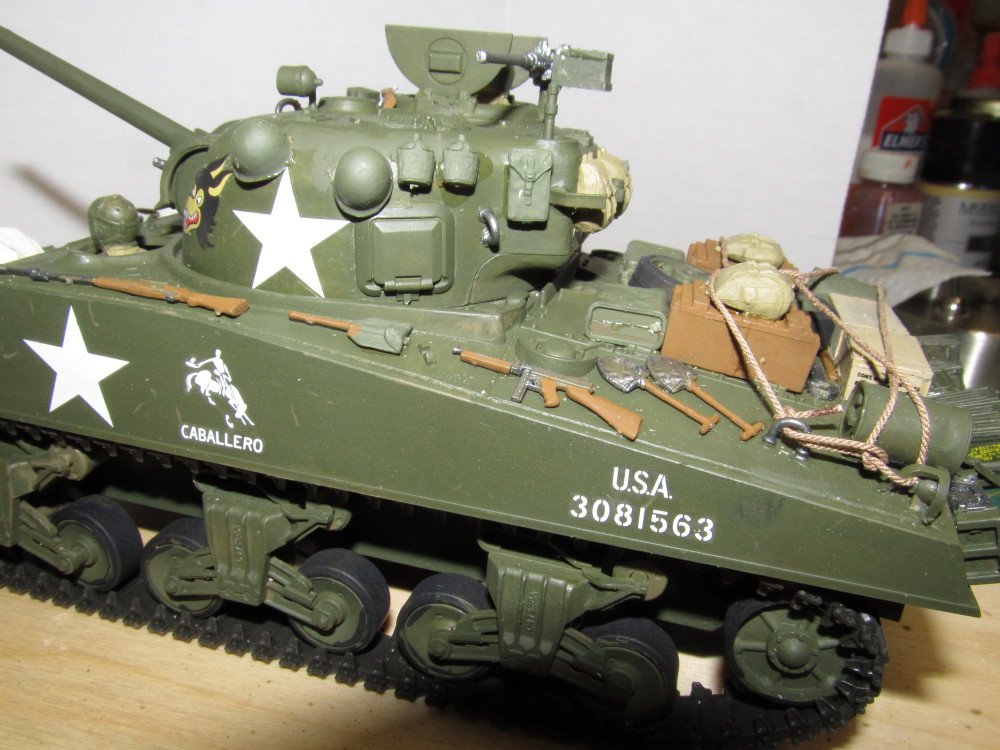
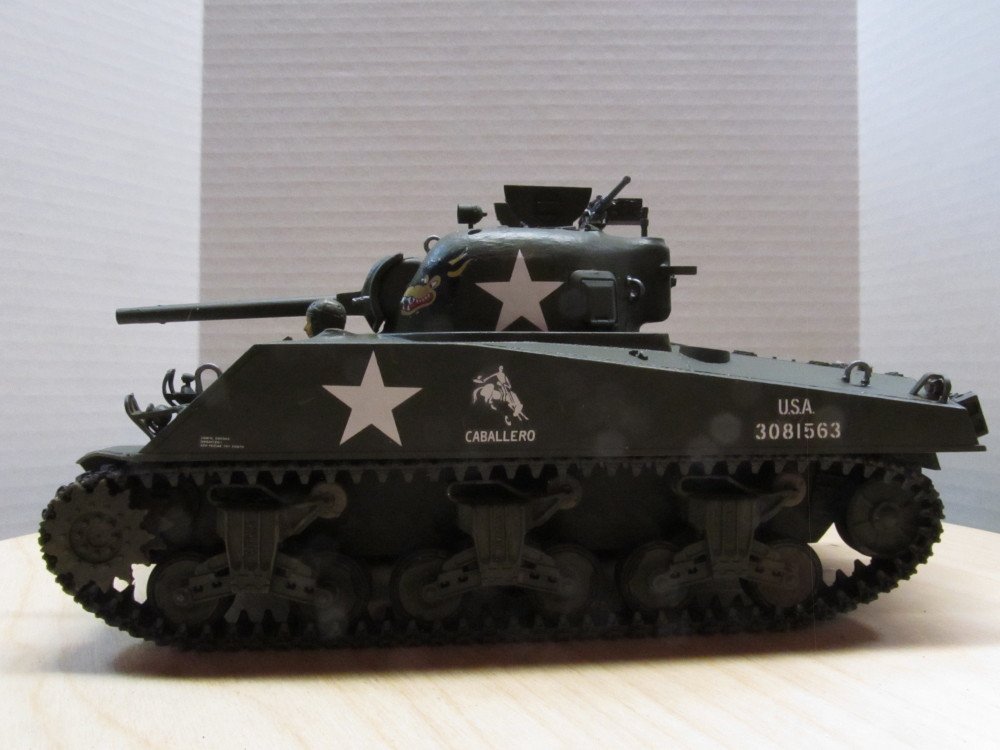
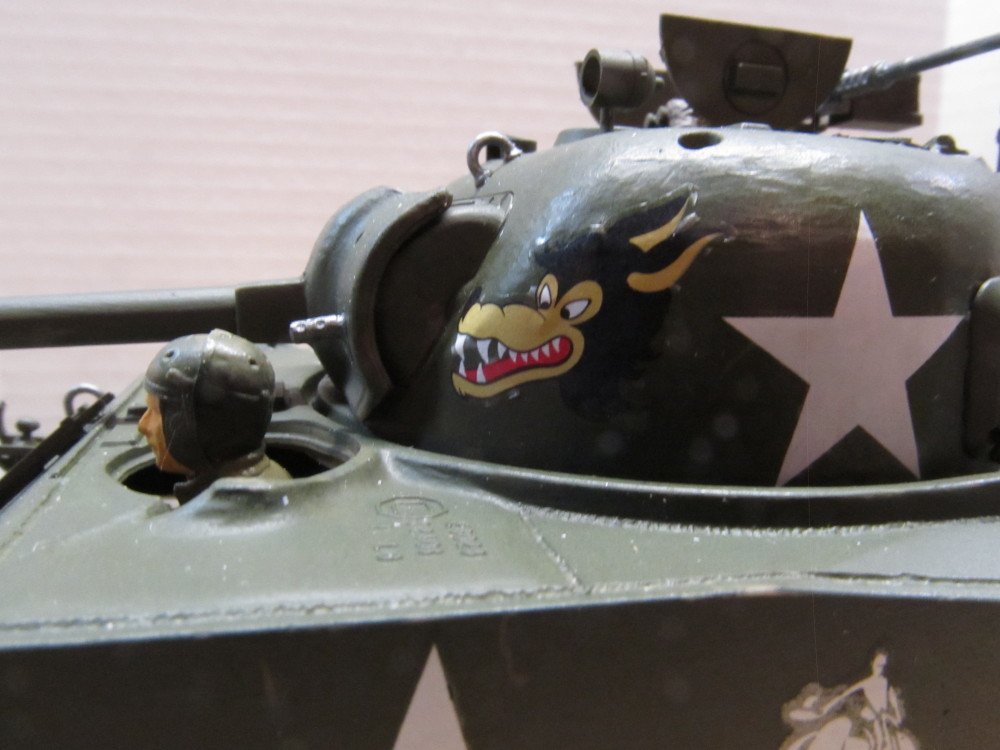
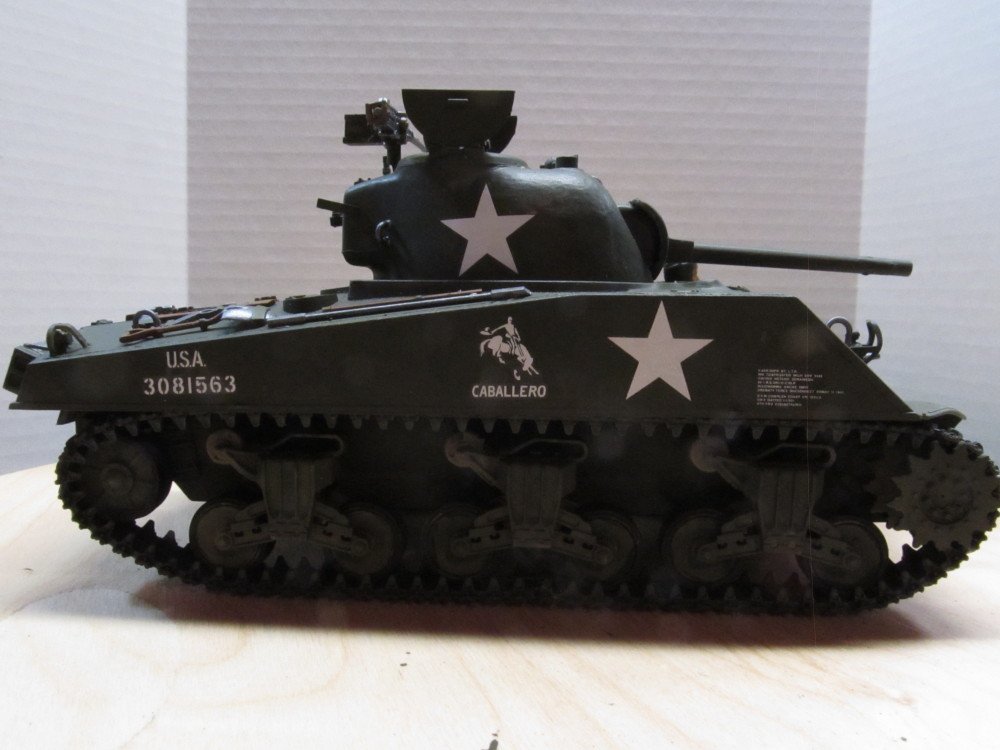
The license is the red wolf decal on the left side of turret. That was for a model in January 1945 Philippines (option C). Didn't want to relegate the decal to the scrap box, so instead of attaching it to the hull, I put it on the turret of option A, 6th Armored Division, January 1945, Ardenne
-
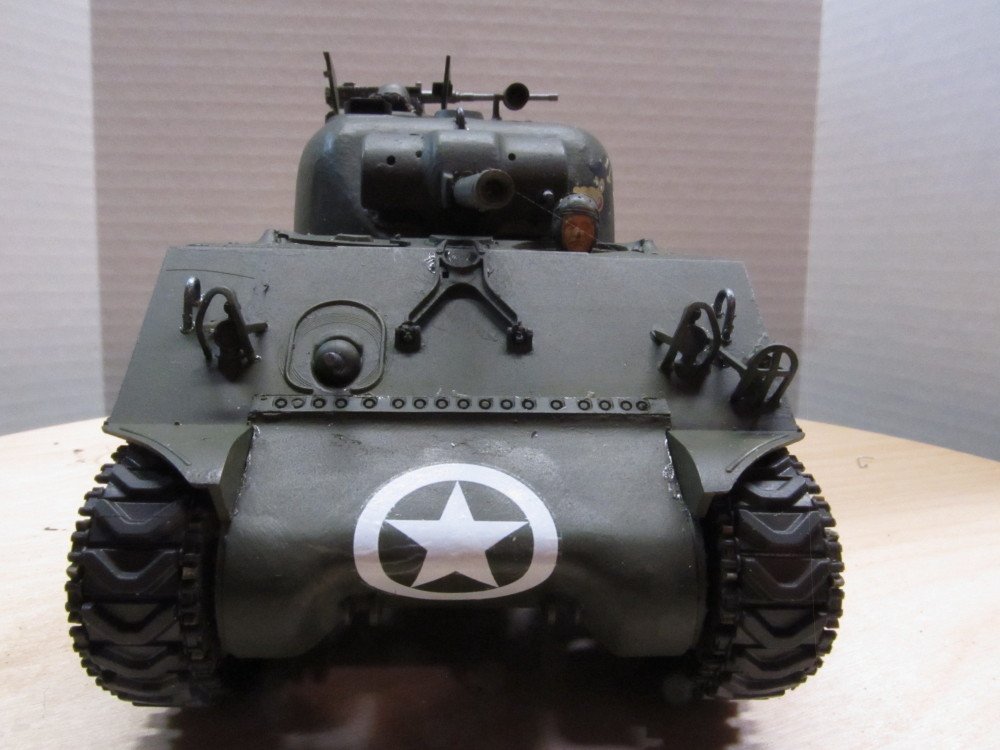
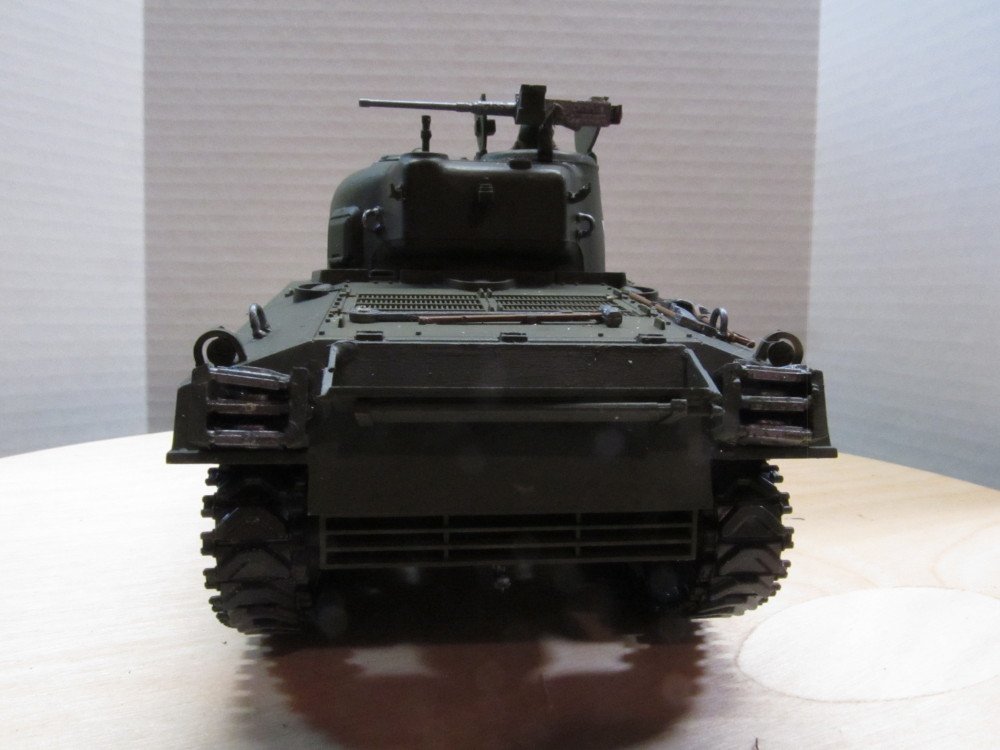
Okay, I know you guys have all been waiting with baited breathe for the next installment of the Sherman tank model <he says laughingly>, so here's the completed model sans, extra figures and accessories, which still have to be assembled, painted and attached to the model. And yes, EG, I did take some model's license here too. The tank commander is 1st LT Elwood "Red" Wolfe and he does like to decorate his tank.
Still haven't decided on how I will display it tho.
- marktiedens, Egilman, Edwardkenway and 9 others
-
12
-
Too beautiful to hide in a cardboard box !
- mtaylor, Edwardkenway, lmagna and 4 others
-
7
FINISHED - M-50 Israeli Sherman - MP Models - 1:35 Scale
in Non-ship/categorised builds
Posted
Nice, Craig. I like that subtle shading effect.