


Jack12477
-
Posts
5,619 -
Joined
-
Last visited
Content Type
Profiles
Forums
Gallery
Events
Posts posted by Jack12477
-
-
Depends on my attention span 😉 usually 20-30 minutes soaking then into the clamps . Clamps can be overnight if I get distracted.
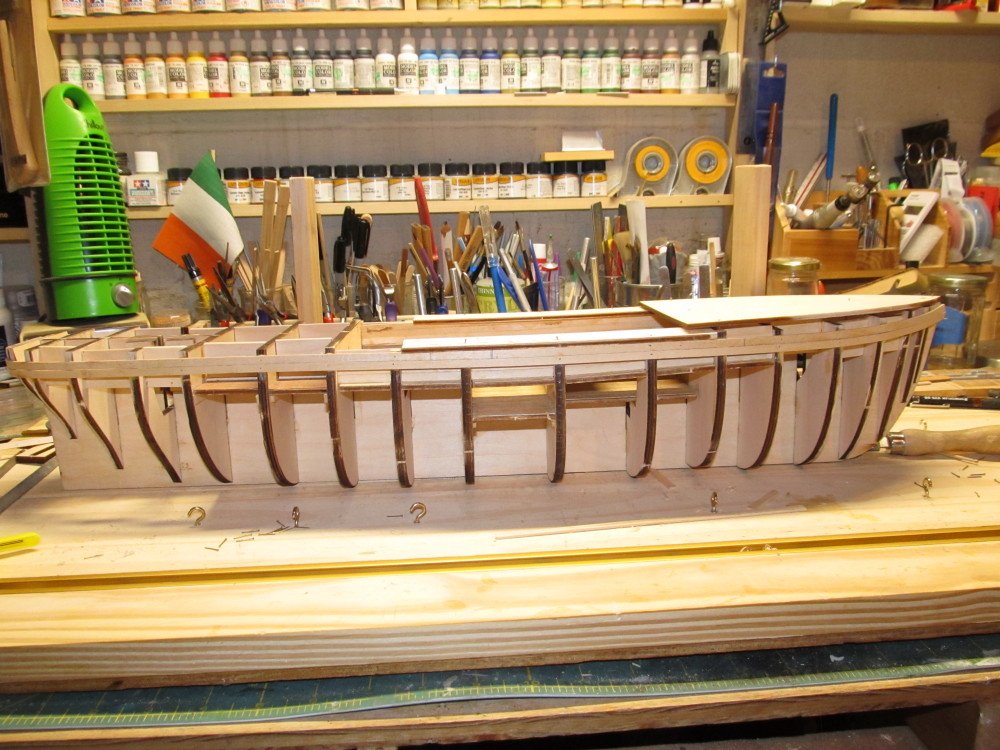
I will say one thing! This rounded stern is a bear to plank and get all the compound curves right without breaking the planks in the process. Even tho I am using water and heat to bend them.
- mtaylor, Canute, Edwardkenway and 1 other
-
 4
4
-
-
Denis can you put the camera in Program Mode (P) and increase the ISO number. An ISO of 400, 800 or higher would compensate for low lighting. I use it all the time, flash sometimes washes out the details at close range. (ancient film photographer still trying to master digital 😉)
- mtaylor, Edwardkenway, Egilman and 4 others
-
7
-
HE's BACK !!!!! Well, sort of back !
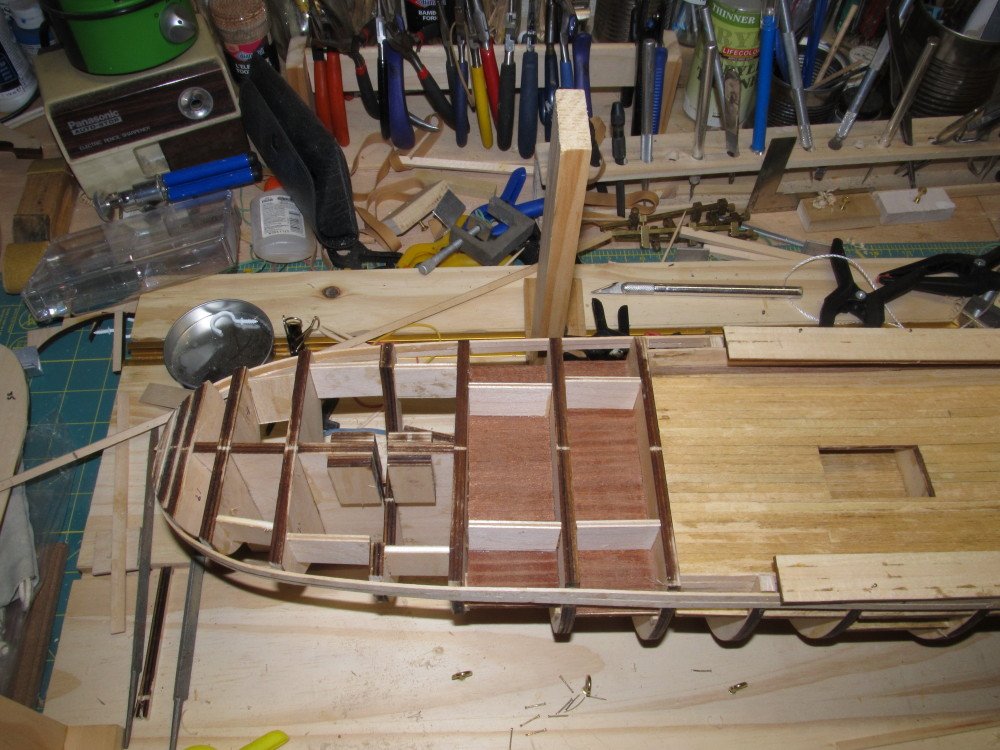
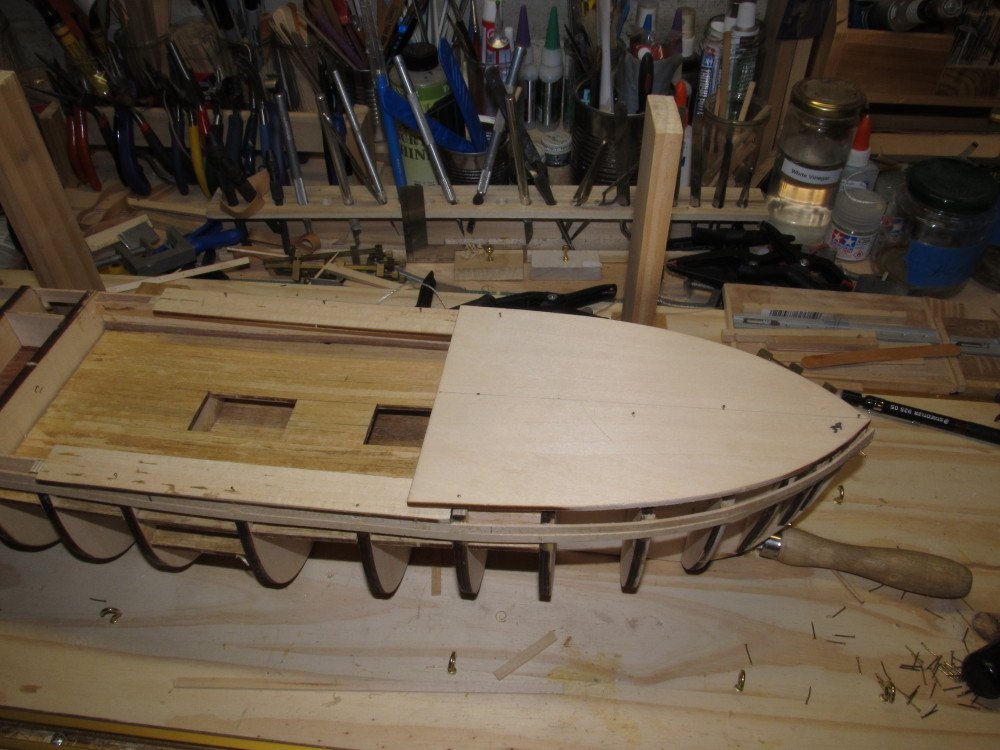
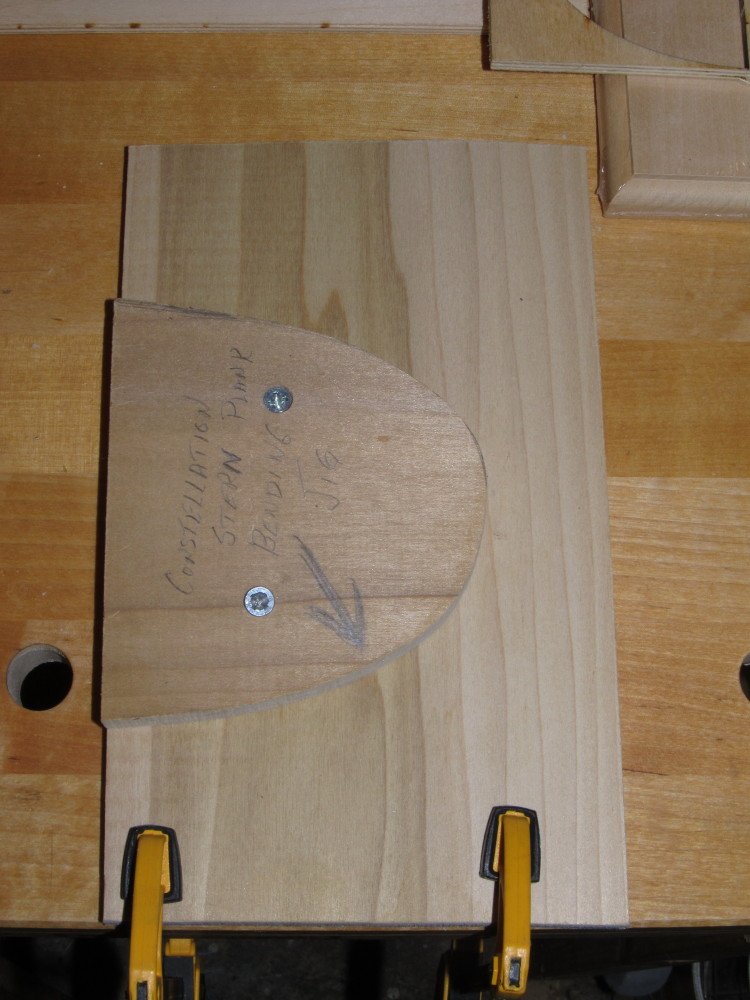
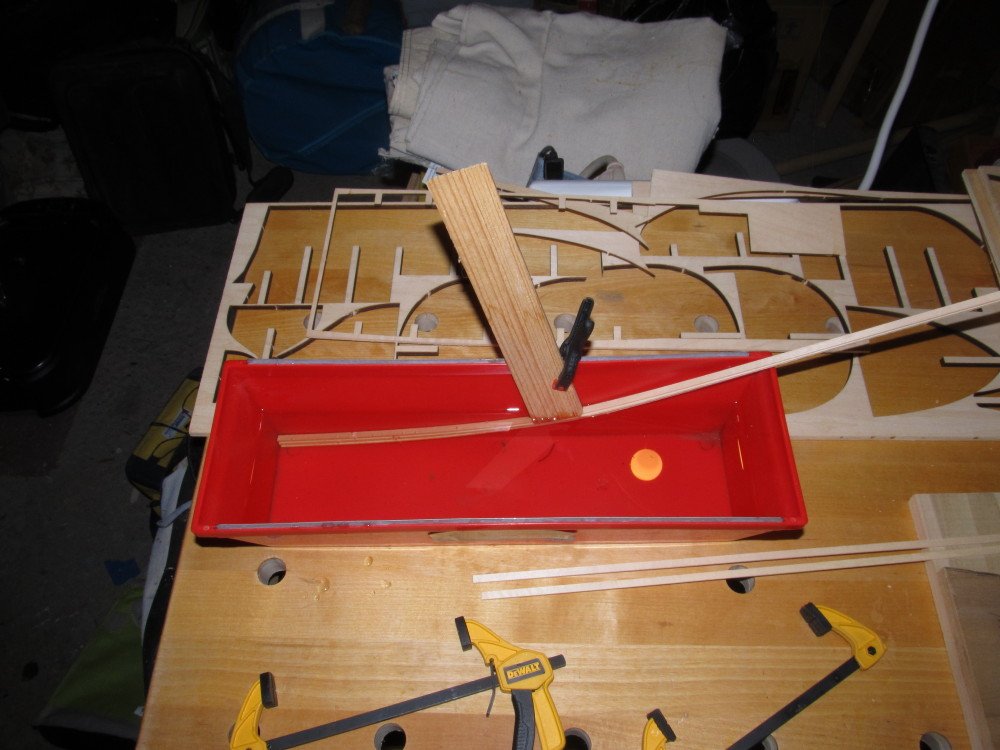
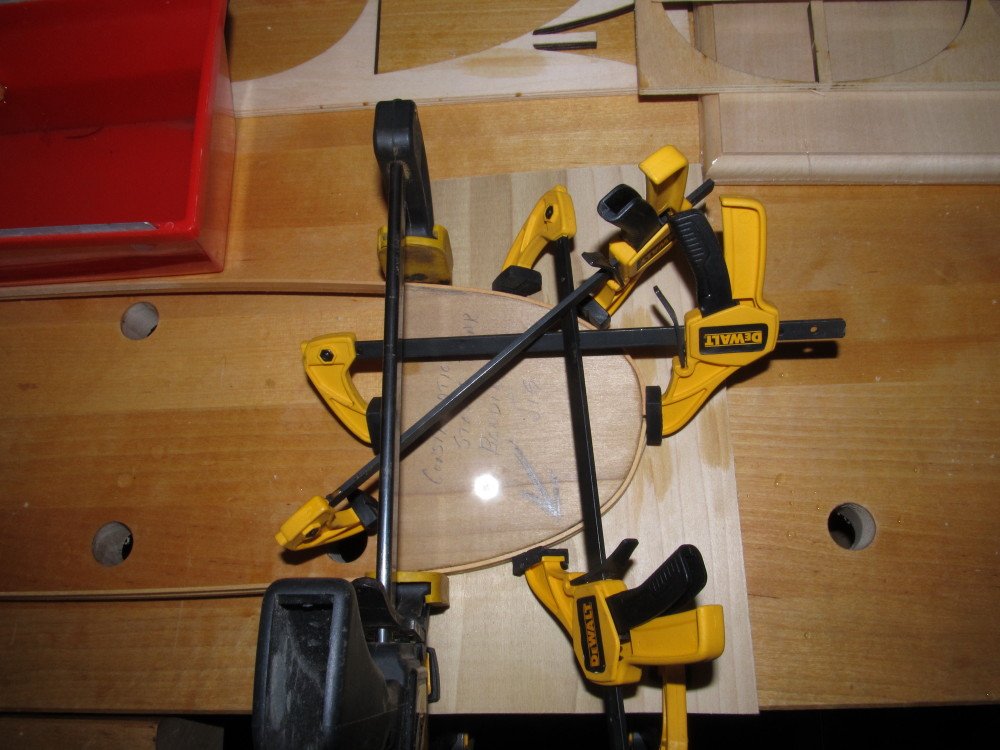
Finally figured out how to make part #36 from the non-existent 25 mm x 500 mm sheet . Fabricated some pieces and glued them in place. Started the first 2 top most planks port and starboard. Build a jig to allow me to bend the planks into the curvature of the stern. Easiest way is to soak, bend around jig, clamp and wait for them to dry, then install on model fastening with small nails until glue dries.
Photos follow:
Plank bending jig and water trough
-
Thanks guys for the support!
BTW woke up this morning to SNOW. Yep ! It is snowing in October here in the valley. 😀😀😀 And the lawn is covered in wet leaves, been raining here all week.
-
I think hip replacement and a pacemaker is tad more serious than a ventral hernia repair. The only thing that complicated mine was I developed an Ileus from the general anesthesia which kept me hospitalized for 5 days instead of overnight.
-
Well, I finally got all the medical drains removed this week. Just one small bandage over the hole where the J-P drain was. That should close on its own by tomorrow. Still on the nothing over 10 lb weight limit for lifting for another week, then nothing over 20 lbs for an additional two weeks, then all activities can resume. Been putzing around the model a bit but still no ambition to dive back in. And this Covid isolation is starting to wear thin, even tho in our area the infection rate is less than 1.5% and holding.
I ordered some sample exotic woods from Woodcraft.com, should be here today, to see how they would look as the backbone and runner plank for another ice yacht model. Woods are all 1/4 × 3/4 × 16 and 1/4 × 1 1/2 × 16 inches and are Purpleheart, Bloodwood, Bubinga, and Paduak.
The two ice yacht models I have in mind are the Manhasset, which we just restored, and Franklin D Roosevelt's, FDR, latteen rigged Hawk. Unfortunately, the Hawk is locked away in a National Park Service climate controlled storage area and is only brought out for display every couple of years. I did get some rough measurements and lots of photos the last time it was on display (our club helped them set up the yacht for display), so I am hoping that will be enough. Manhassett I have all the measurements and photos from the restoration. But first I have to at least get the hull of the Constellation planked before I can start that project.
But first I have to get rid of this post op malaise; been taking a lot of walks around the neighborhood each day, so that helps. Getting old sucks !
-
Or you need more lives than a cat ! 😉
- Canute, Egilman, Old Collingwood and 3 others
-
6
-
-
-
-
-
-
I am still here ...... no progress on build ....... been a crazy month so far ..... went in hospital for same day ventral hernia repair Oct 8th ..... emerged 5 days later after spending 3 of those days NPO, nil per os, with an NG tube, because the alimentary canal went to sleep and would not wake up.
The surgery was a breeze. I was fully awake post op and ambulating, just certain parts of the waste disposal system decided to take a 3-4 day nap. The medical term is ileus.
And Covid Rules - 1 visitor per day per patient between 1100 hours and 1800 hours for 4 hours max; when they leave they can't come back till next day. Nor can a new visitor come in that day. So the Admiral and my oldest daughter took turns visiting on alternate days.
I've been home since late Tuesday Oct 13th. Can't lift anything over 10 pounds for 4 weeks post op. Also no ambition right now to work on boat.
-
8 hours ago, Egilman said:
but there isn't anything on a 1/350 ship that long....
Ship's railings.
8 hours ago, Egilman said:Ice Yachts, Sailing on ice skates.... I'm down for that action when you start building...
See build log in my signature for the 1888 Gaff rigged ice yacht Rocket.
- lmagna, popeye the sailor, Egilman and 4 others
-
7
-
I had considered getting the bug but thought it would be too small, so I got the 5.5 model. Worked fine for me on the plastic ship models with PE. The 5.5 will work even better I think when I get around to scratch building the two ice yachts I have in mind, but that will have to wait for the Constellation build to get further along.
-
You might want to check out The Small Shop out by you and get their bending jig. I have one and it is great for bending that small brass. Used it on my 3 - 1:350 destroyers
-
3 hours ago, Egilman said:
As well as could be expected, she is still the "Admiral"
Good !
- popeye the sailor, Canute, lmagna and 4 others
-
7
-
8 hours ago, lmagna said:
One of my attending doctors would not even fully enter the room until I put my mask on
All the medical staff and visitors wore masks full time, no face shields. I did not have to wear mask while in my room, even if others came in, only had to wear one when I left room to go for a walk or Xrays. NY is less than 1% infection rate so Governor relaxed rules. NYC may be stricter but not up here.
Now back to EG's build .
-
12 minutes ago, Old Collingwood said:
went in for a pre arranged Hiatus Hernia op the
Mine was ventral hernia, aka diastasis recti, right under the navel. Thanks for the well wishes
-
3 minutes ago, Egilman said:
.. I will be praying for your sound recovery... not something to screw around with....
Thanks ! I had a really good surgeon, spent a lot of time talking with me, had a great sense of humor. Even came up to check on me on his day off before going to his granddaughter's soccer game. My "doctor" daughter (PhD Epidemiology, 25 yrs experience), drove down to see me; he spent a good amount of time speaking with her.
I am walking around the neighborhood each day without assistance, so far so good.
Your wife's experience is scary, hope she is fully recovered now.
-
1 hour ago, Egilman said:
No sweat my friend, if you have any more of that, pass it along.... {giggle}
No ! You definitely do not want any of that ...... went in hospital for same day hernia repair 10 days ago ..... emerged 5 days later after spending 3 of those days NPO, nil per os, with an NG tube, because the alimentary canal went to sleep and would not wake up.
The surgery was a breeze. I was fully awake post op and ambulating, just certain parts of the waste disposal system decided to take a 3 day nap. The medical term is ileus.
And Covid Rules - 1 visitor per day per patient between 1100 hours and 1800 hours for 4 hours max; when they leave they can't come back till next day.
I've been home since late Tuesday last. Can't lift anything over 10 pounds for 4 weeks post op.
-
Oh, maybe I am the one confused ! The close similarity in spelling Monssen versus Momsen ! Must be all the General Anesthesia I've had in last 6 months - brain cells are still asleep.
- mtaylor, Canute, popeye the sailor and 4 others
-
7
-
A simple "hi I am following your build" plus clicking the FOLLOW button at the top of the log, is all that's needed also.
- mtaylor, Ryland Craze, bruce d and 7 others
-
10


US Constellation 1798 by Jack12477 - Artesania Latina - 1:85
in - Kit build logs for subjects built from 1751 - 1800
Posted · Edited by Jack12477
My problem is not the curve of the stern, it is the "twist" to make it lay flat in the other plane. That's where it breaks usually. Yes, clamped in the jig is usually 8 hrs after soaking it.
And, yes, I have Chuck's excellent tutorial on planking right on the workbench for reference. 😉😉