hof00
-
Posts
1,656 -
Joined
-
Last visited
Content Type
Profiles
Forums
Gallery
Events
Everything posted by hof00
-
 Thank you Rod!! (And thank you once again Joe....🙂) I finally received my ABER PE Chain Link Rails that will be placed around the perimeter of the Deck, vey nice but fragile.(I expected the fragility.) I also received the "Infini" 110 Denier Lycra Rigging material. This is 0.12mm same as the kit supplied stuff. Two and a bit issues to go.... I get the feeling it's all going to come rather quickly. ("Quickly" is a relative term here....) I have been busy adding heaps of detail bits. It's so nice to be doing something different other than "sub-assemblies!! I'll get some photos up tomorrow hopefully. Cheers and Regards, Harry.
 -
Hi Chap, Looking really good!! (I'm a little way behind you, no prob. 🙂) Cheers and Regards, Harry.
-
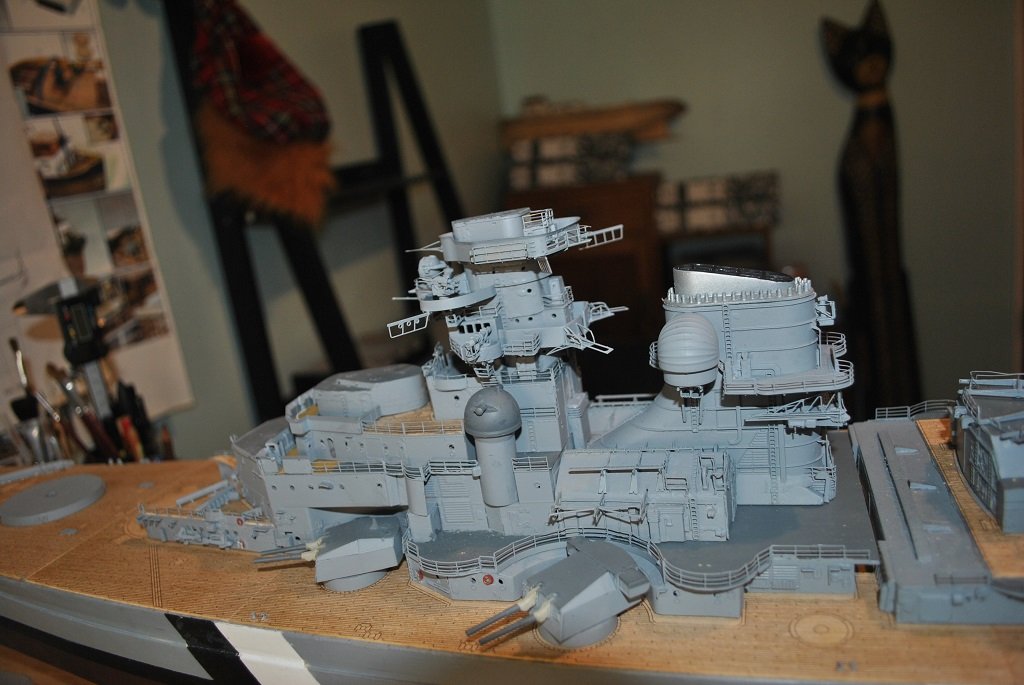
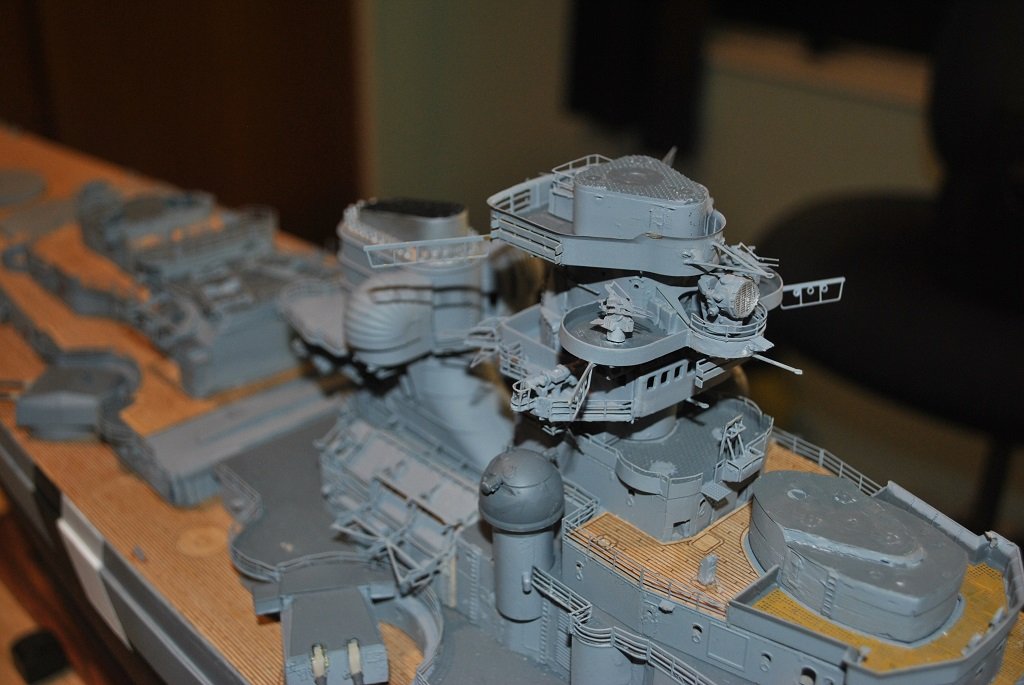
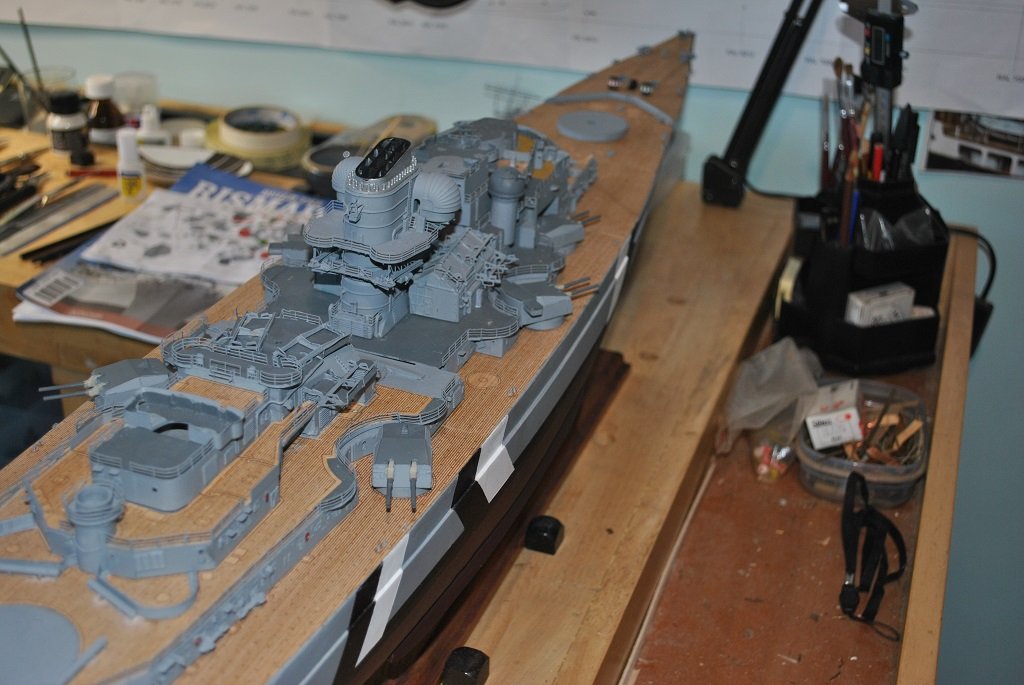
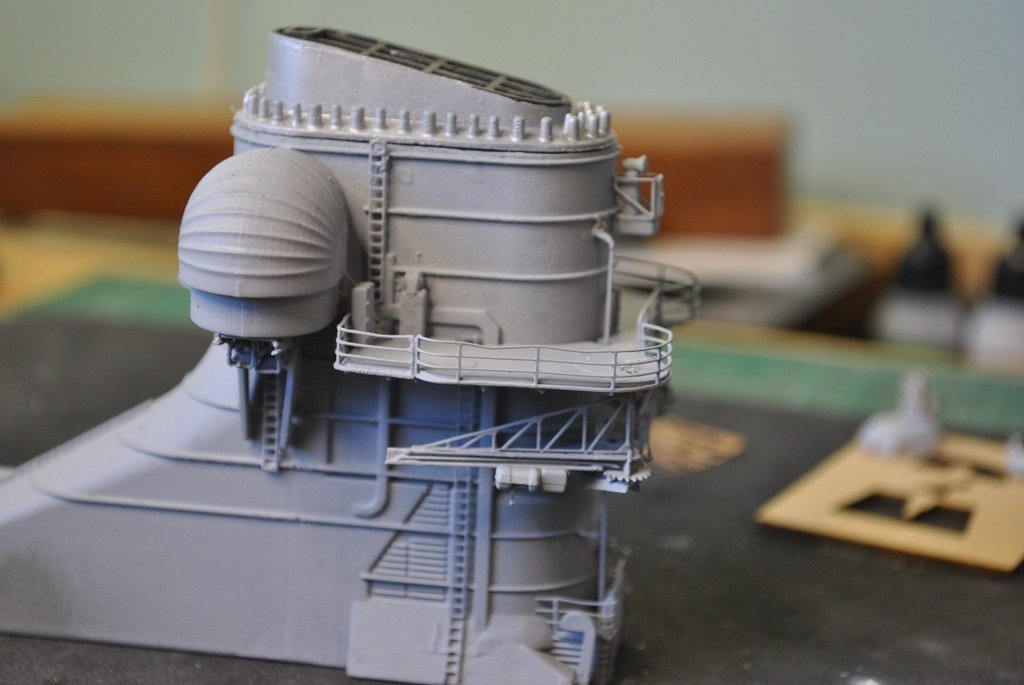
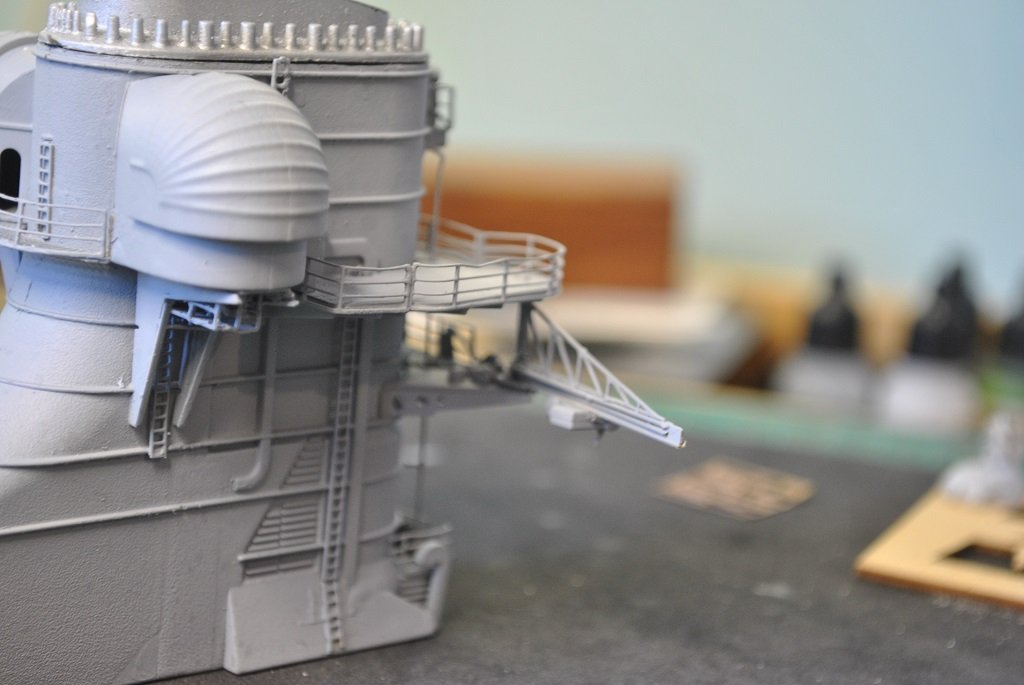
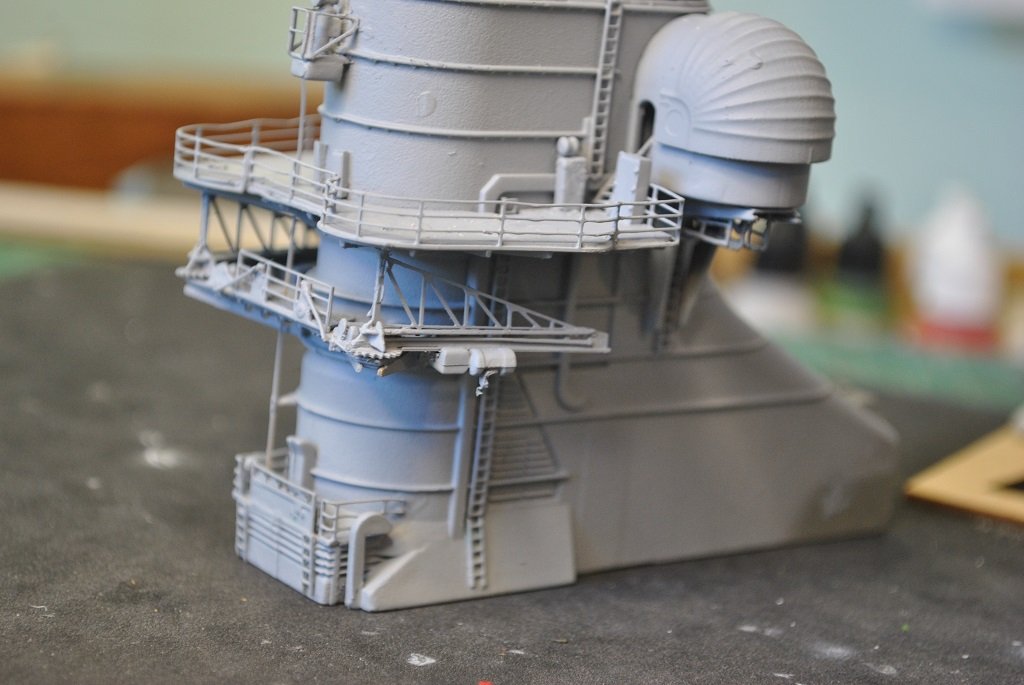
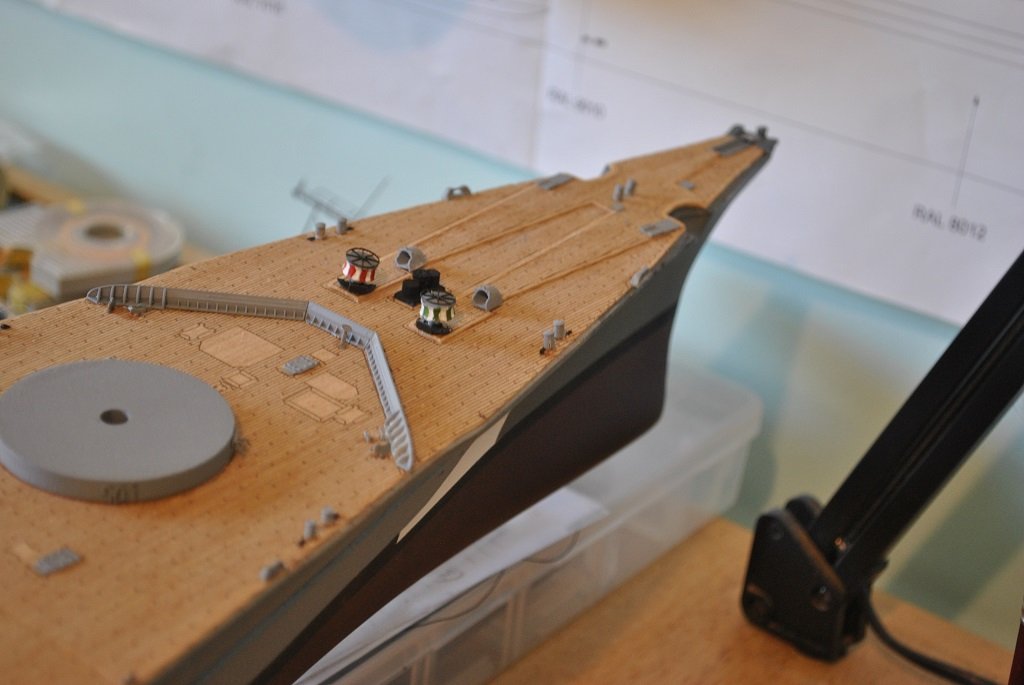
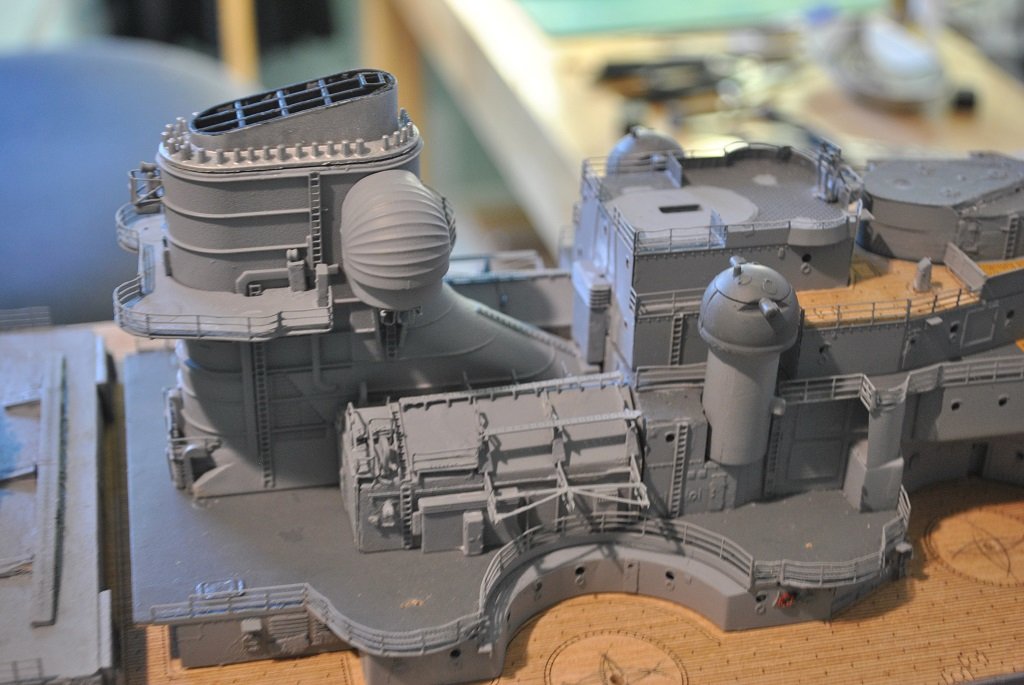
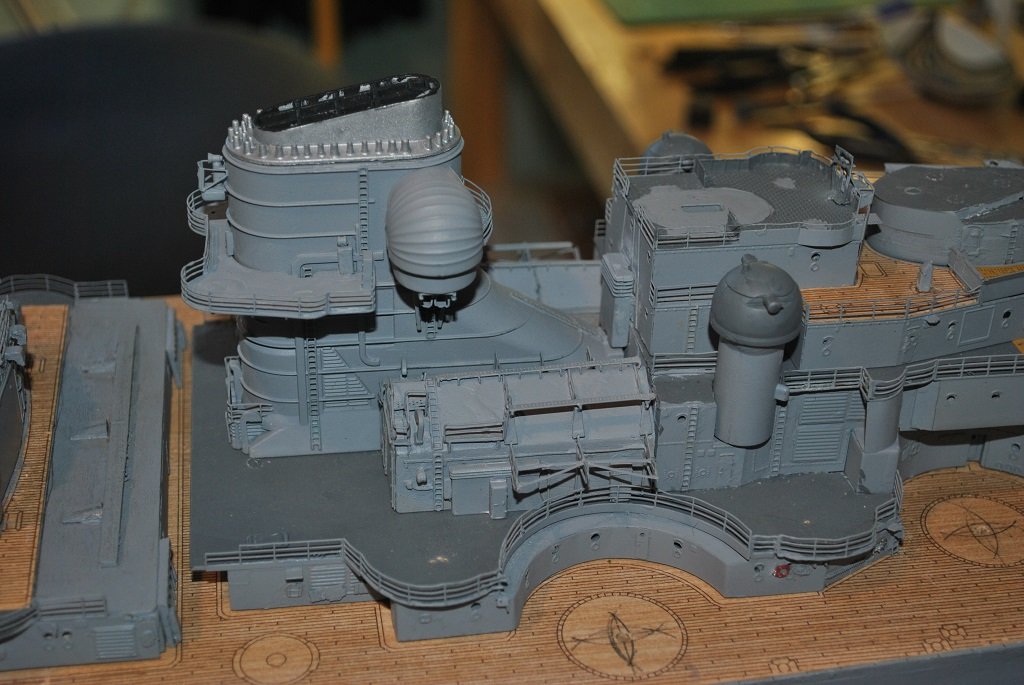
Hi All, Small update: (I think that all my updates are "Small." Maybe I'll just say "Update." Semantics....) Anyway.... I have been having fun over the past couple of days. Of note, Conning Tower attached, Inc. Quad AA Guns and Searchlight.. It was nice to have the Sub-assemblies ready to go and was a case of carefully positioning on the upper Superstructure. One issue that I noticed last night was the Searchlight Platform Spreaders looked wrong on the Port side. (Just noticed in the photos it looks like the Conning Tower is leaning forward, I am pleased to advise that it not!!) Before adjusting anything I performed some diagnostics.... The Spreaders were at the correct angle and distance, referencing the Platform. I discovered the Platform was about 1.5' out of alignment which made the spreader angle out. I slept on it and gave the Spreader a "Tweak", problem solved and its difficult to notice the Platform 1.5" out of alignment. (I was certainly not going to remove and re-attach the Platform!! 🙂) I "Shoehorned" in the Conning Tower Cabinets into place, I thought this might be next to impossible but proved relatively easy. (Small blessings....) The top tier of then Superstructure that the conning Tower is fixed to is not yet fixed to the underlying Superstructure, this will make thing much easier to add Cabinets/Hatches/Etc. For the same reason, Fore and Aft Superstructures are not affixed either. (I think that this procedure will come close to completion. Trying to think ahead. 🙂 Another reason is that movement of my right arm is still restricted, even after a year post Rotator Cuff surgery. (1.5 arms.... 🙂) Tomorrow, (And the next few days), I will be installing Hatches/Cabinets/Skylights, Splinter Shields and a whole host of other details.... Cheers....HOF. Photos:
-
Very nice Chap!! Don't worry too much about a door, no one is going to notice and I can't either.... 🙂 (Call it artistic license.) Cheers....HOF.
-
Looking good!! 🙂
-
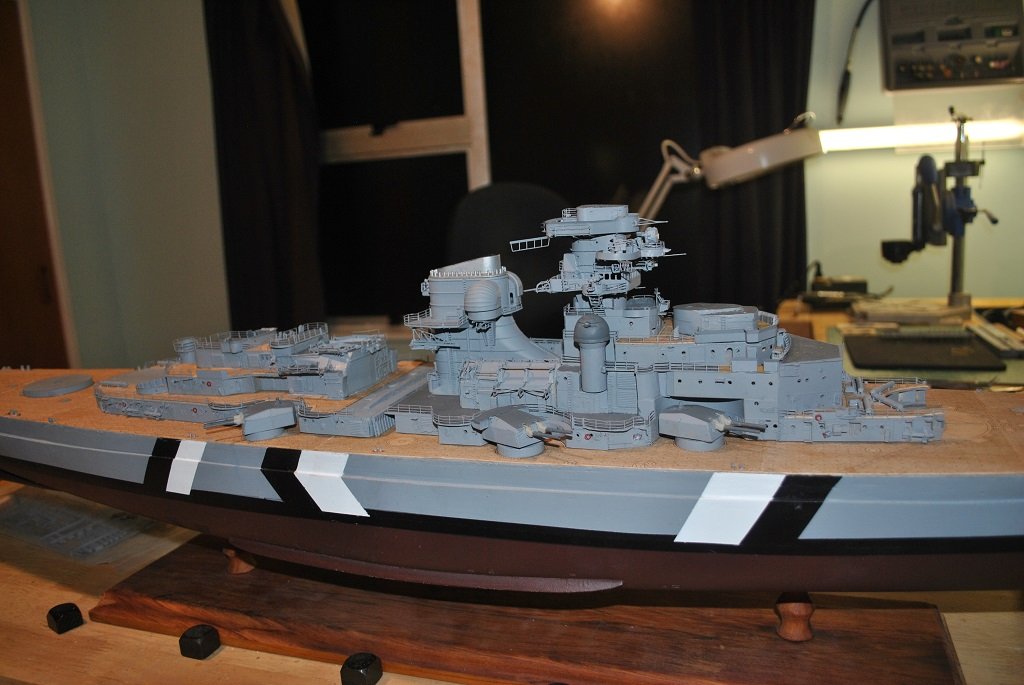
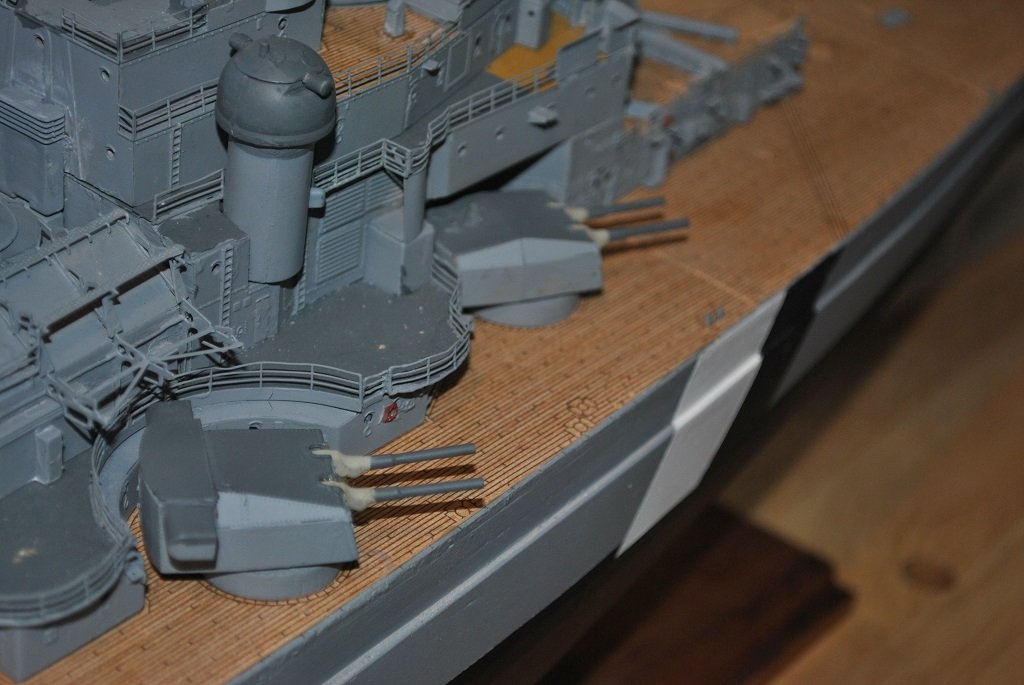
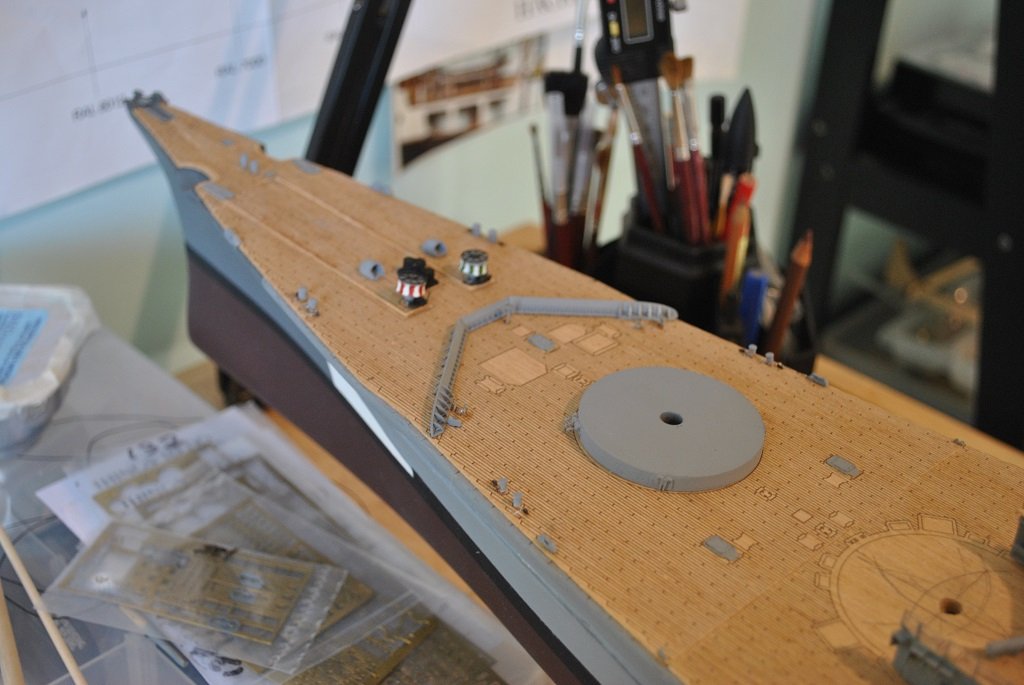
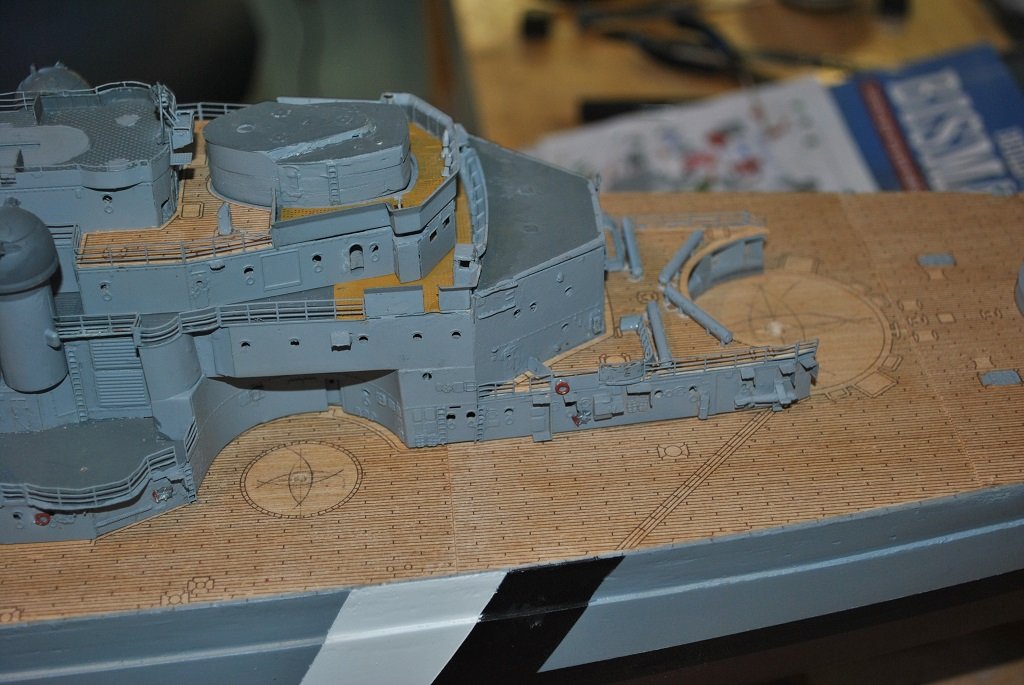
Hi All, Small update: So, carrying on with detail stuff, I feel there are less sub-assemblies to construct now and more to actually install. It's a good feeling.... 🙂 Things of note: Main, Bow and Stern Anchors installed Secondary Barbettes attached and Turrets test fitted (I prepared the Turrets some time ago.... 🙂) (The turrets traverse nicely so I must have done something right....🙂) ((It sort of feels like things are starting to shape-up a little....) Cheers....HOF. Photos:

-
Awesome!! Thank you kindly. The pieces are PR and have a vey delicate mesh, I'll install them.... 🙂 Cheers and Regards, Harry.
-
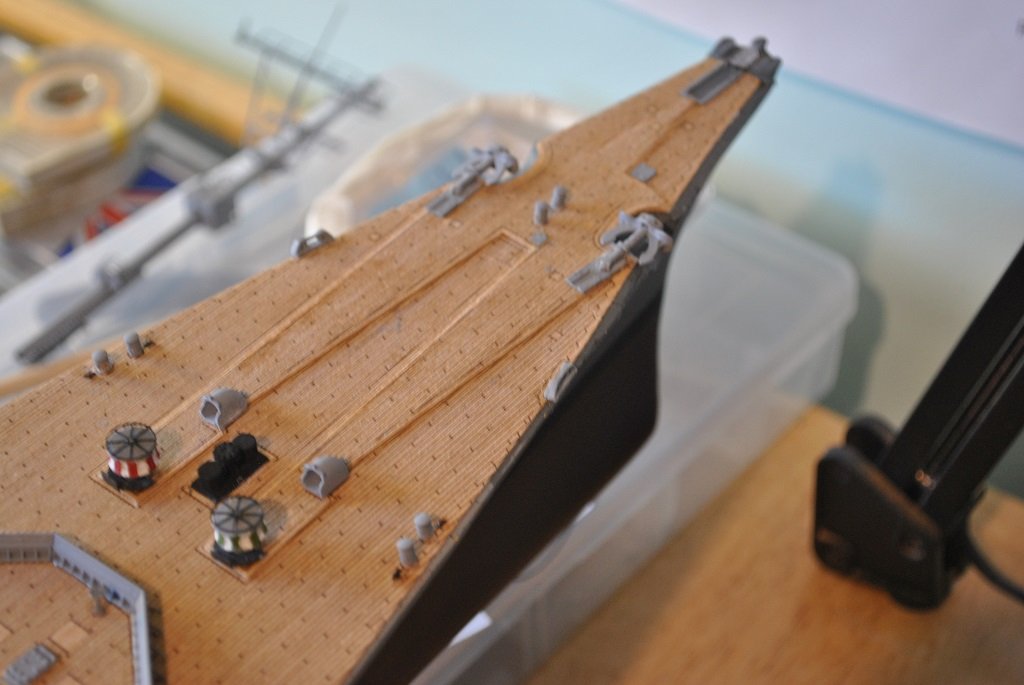
A question for the forum: Would anyone know what the Black rectangles represent? Any insight appreciated. Cheers....HOF.

-
Thanks Kevin. Much appreciated.... 🙂 Quite a bit to go.... Getting there, I think.... Cheers and Regards, Harry.
-
Thank you Sir!! I don't yet know where I'll put the "Beastie" and at 1.5 m long..... It will need a cabinet of some description to prevent the Abyssinian boys breaking stuff.... (There have already been a couple of close calls.... 🙂) It is quite goon to have allot of sub-assemblies, it should progress things a little more smoothly. (Hopefully) Cheers and Regards, Harry.
-
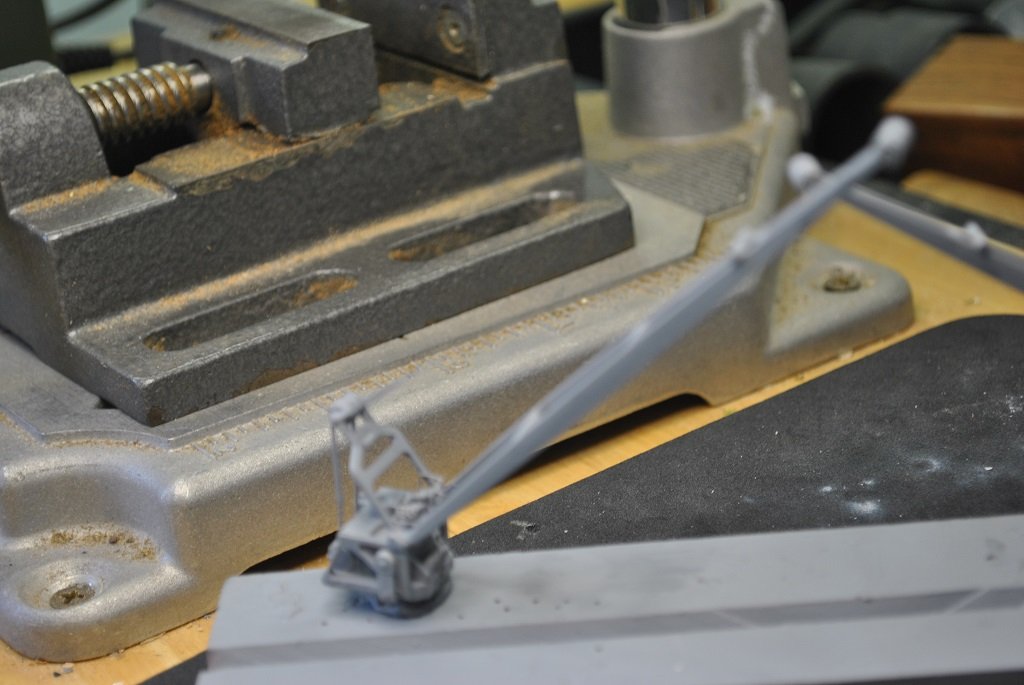
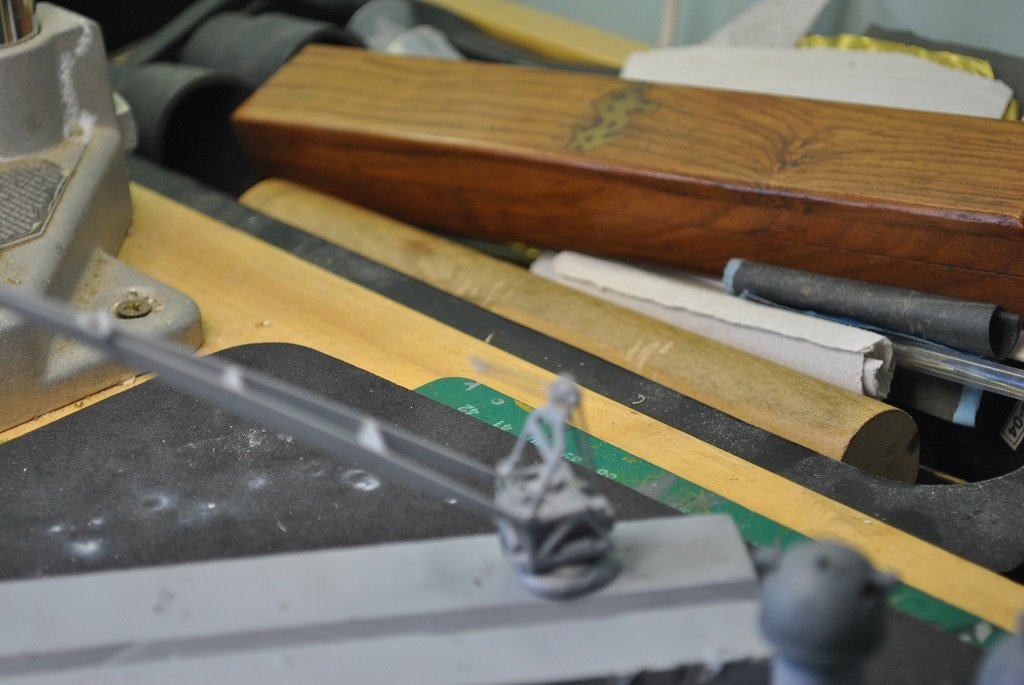
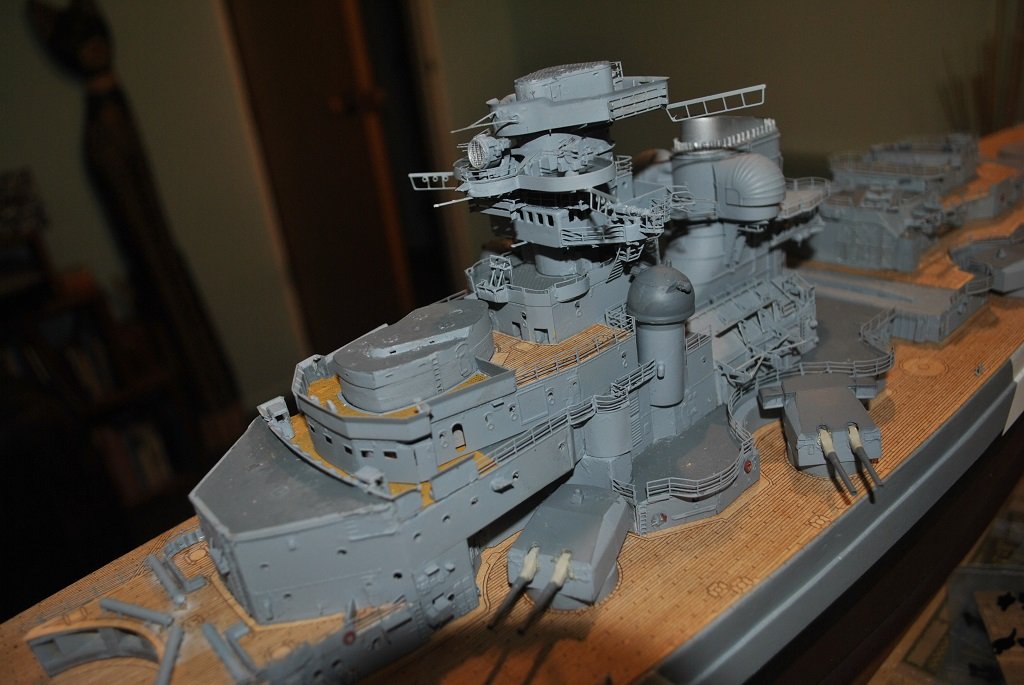
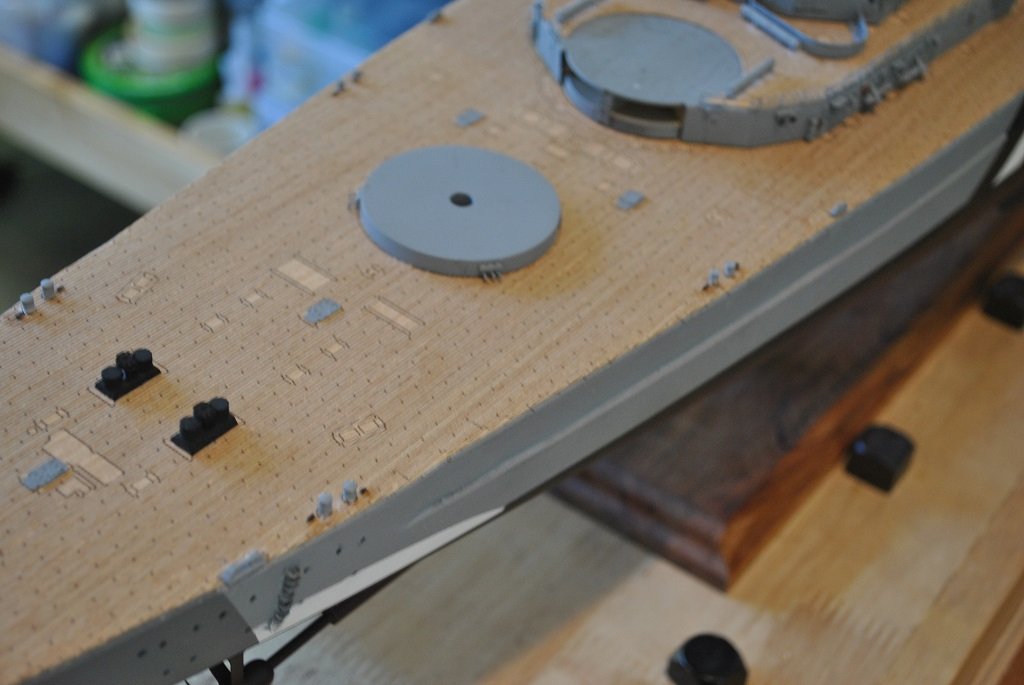
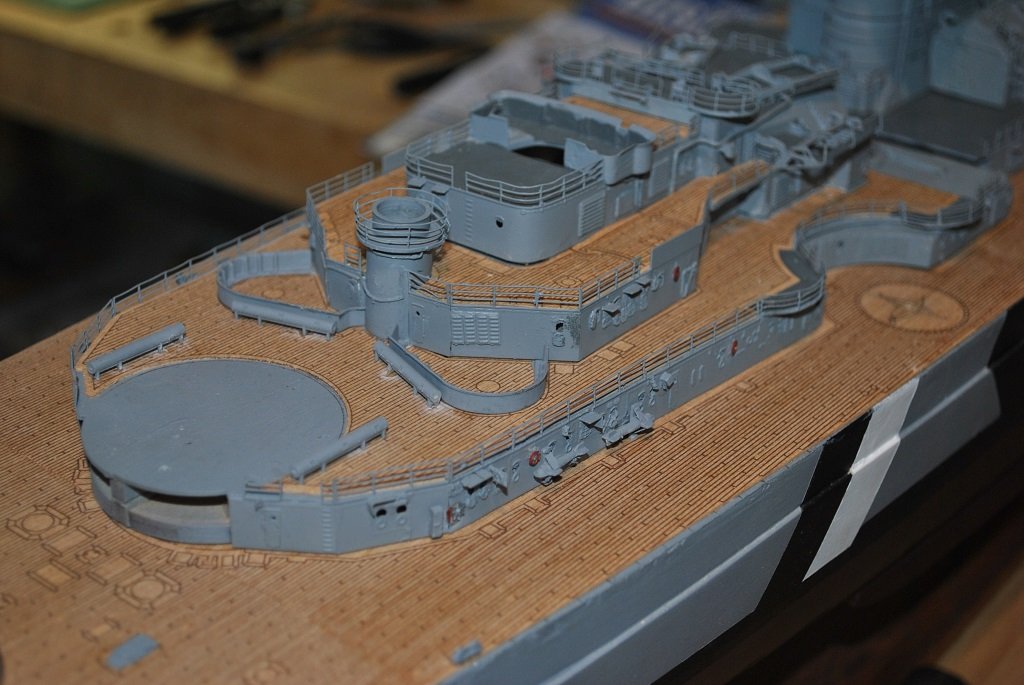
Hi All, Small update: Soldiering on.... Stuff of note: Installed Aircraft Cranes and Crane Deck, (Built some time ago), on the Funnel, added a couple of Ladders form the Searchlight Housings to the Searchlight Deck. (So I don't miss these later and much easier to install now.... 🙂) The Aircraft Cranes "Articulate" but I my fix in position as they will probably only gat in the way.... More Main Deck stuff, "Bitts." 10 Large, 8 Medium and 12 Small.... I was not looking forward to these as they go "Ping" quite easily, in the end, only one small one did this but I was lucky enough to have been given a spare!! Still finishing up some tiny Quad AA guns. The remainder of this installment revolves around further preparing sub-assemblies, Anchors an a few other Detail things. Cheers....HOF. Photos:
- 544 replies
-
- 11
-

-

-
Thank you kindly Sir!! Not very much happening today unfortunatley apart from getting my favorite Air Brush operational again with its new needle and painting the various sizes of "Bitts" and other stuff that's next up for the Deck. That's o.k. though, I need a slow day to have a think about the "Next up" stuff. Cheers and Regards, Harry.
-
Thanks Steve, I'm pleased that you are enjoying the build log. 🙂 Yup, it's reasonably large.... 1.5 meters? (Something like that....) Just as a "Heads-up," rvchima, (Rod) ,has recently completed his awesome build and ted99, (Ted), is getting close to completion, (I think), of his Bismarck. Anyway, just in case you hadn't seen these. 🙂 Cheers and Regards, Harry.
-
Thank you!! After all the sub-assemblies that have been created, the "Beastie" should come together in "Reasonably" short order. However, I am taking my time with the last 3.5 Part work "Issues" and I am sure that there will be things that I will need to consider carefully before "Diving In.... 🙂" Cheers and Regards, Harry.
-
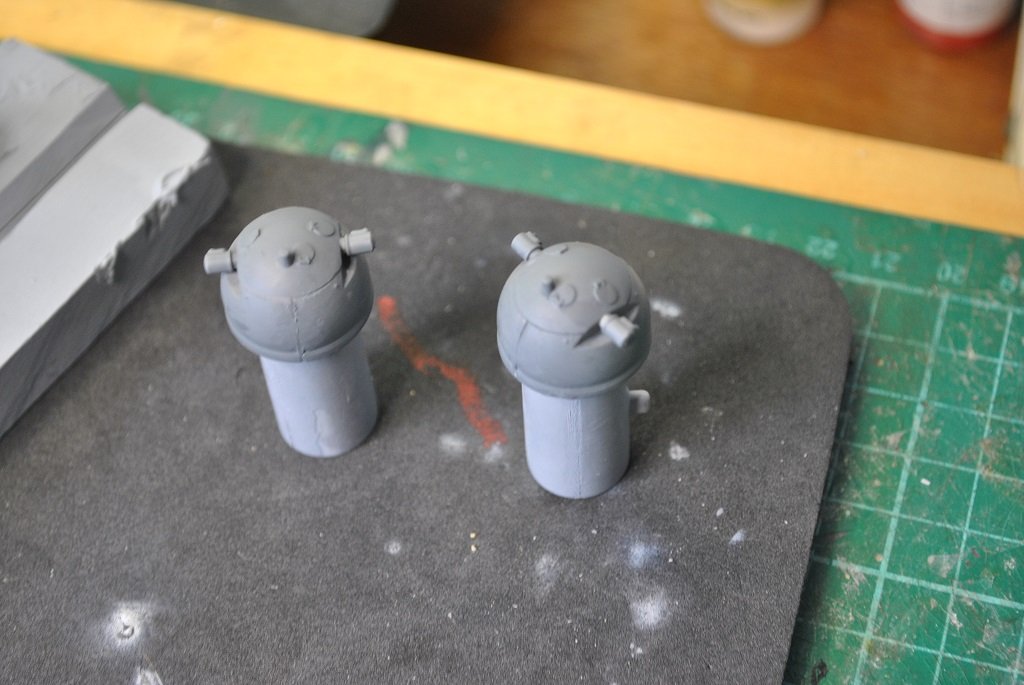
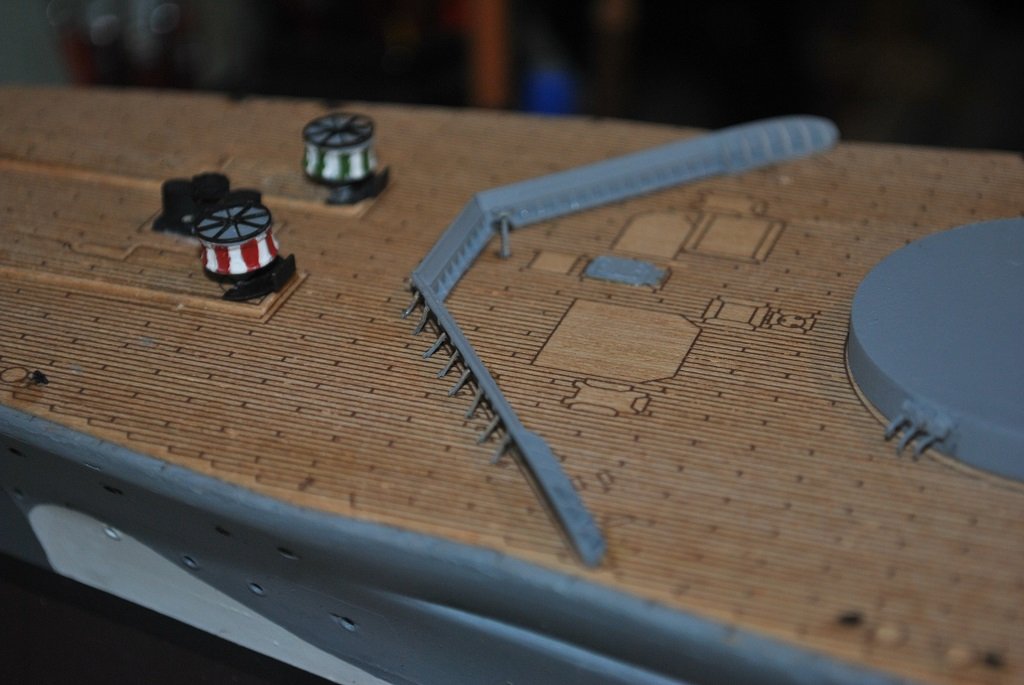
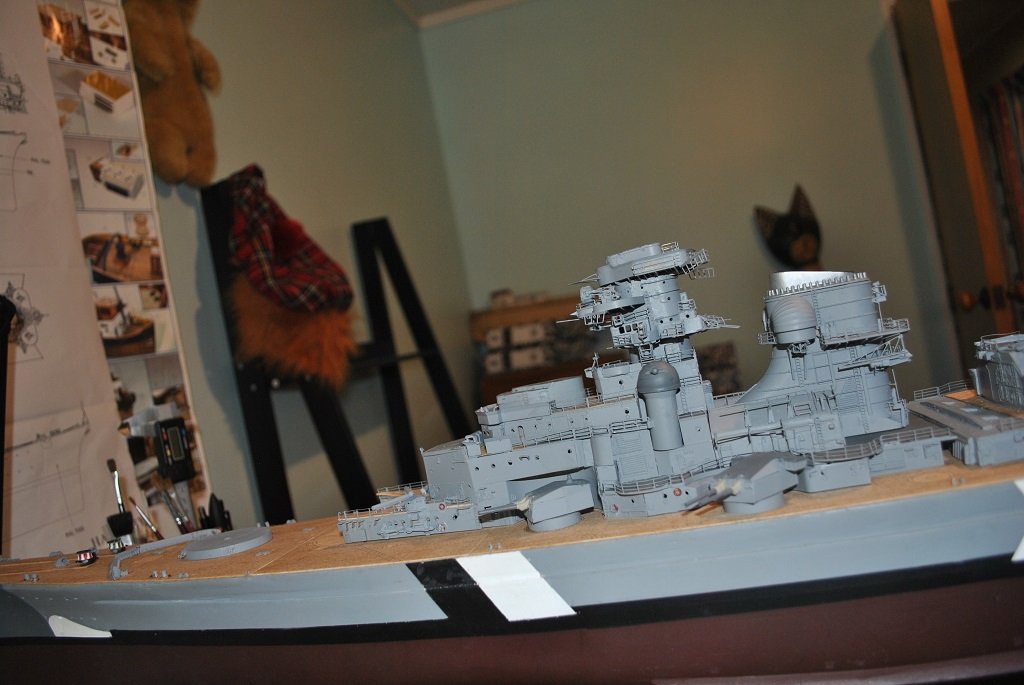
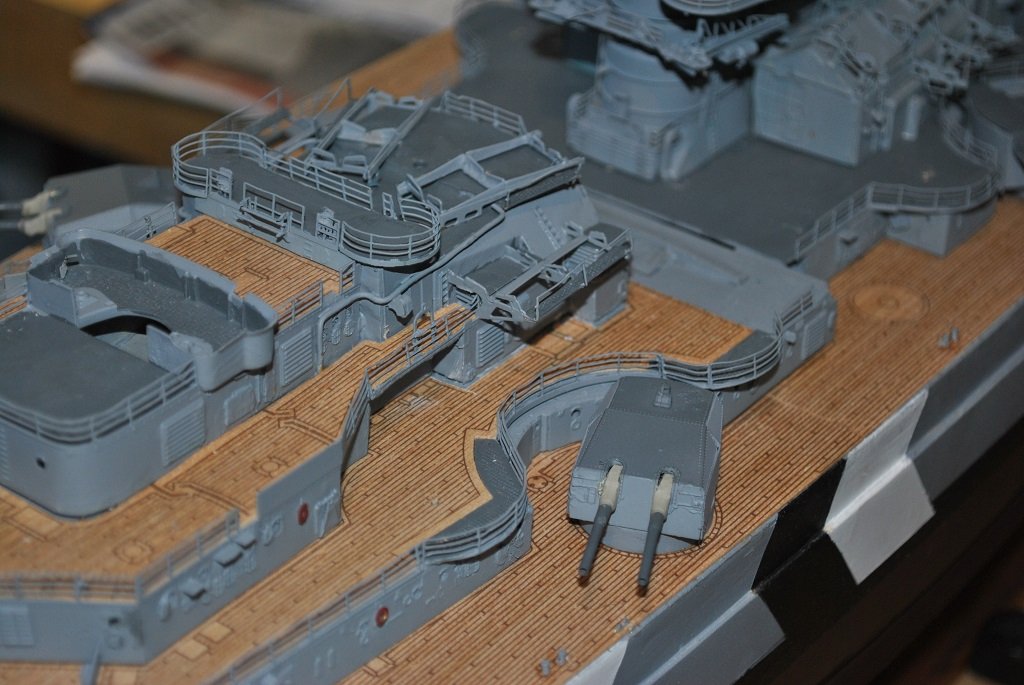
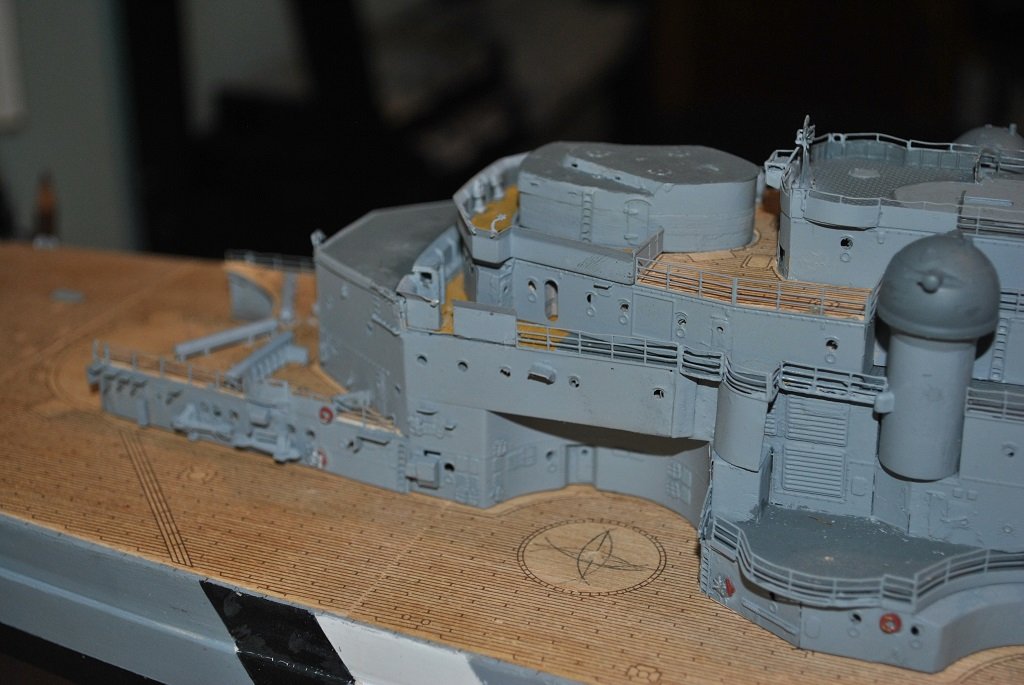
Hi All, Small update: Anton and Dora Barbettes affixed Paravanes fitted Life Rings fitted Sub-Caliber Barrels affixed AA Rangefinder thingy's affixed Deck Fairleads attached Deck Hatches, various, fitted Painting various sub-assemblies Completed the ten 20mm AA guns. My Hangars weren't fitting at the base of the Funnel, they were a tad too long.... Out with the Pen Sander and removed some MDF where the Hanger meets the superstructure, very carefully....🙂 Much improved after this operation. Tomorrow I'll probably get the Main Deck Bollards done, (Painted anyway), and get the Anchors sorted. Cheers....HOF. (You probably can't see too much difference in the photos below from the previous ones but anyway....) Photos:

-
Thanks Rod, I figured that I'd have to paint the entire assembly before fixing it to the Deck. I stuck the Breakwater pats on to a strip of wood with a bit of Double Sided tape, ensuring the PE bits would grab a little on the tape, positioned the PE bits and stuck them to the plastic with thin CA. I let the CA harden, removed the Breakwater pieces and sprayed. There was a madness to the method. Not perfect but o.k. Cheers and Regards, Harry.
-
Hi Chap, That looks very clean and tidy!! (Don't "Hurry Up" though.... Take your time.... 🙂) Cheers and Regards, Harry.
-
Hi Chris, Very nice indeed!! As Grant said, your children will appreciate this for many years.... 🙂 Cheers and Regards, Harry.
-
Hi Richard, That's a very real and tangible piece of history.... I'm looking forward to seeing your ship completed. 🙂 Cheers and Regards, Harry.
- 454 replies
-
- 2
-
-
- Union Steamship Company
- Stepcraft 840
- (and 3 more)
-
Hi Richard, An awesome find indeed!! And, It's something that will live on for a very long time.... 🙂 Cheers and Regards, Harry.
- 454 replies
-
- 2
-
-
- Union Steamship Company
- Stepcraft 840
- (and 3 more)
-
Hi Ted, Thanks for that. I don't notice any issues with your Bismarck from where I'm sitting!! 🙂 The thing is that this model is the first that I have ever had with a serious amount of PE, it has, and continues to be a learning.... Cheers and Regards, Harry.
-
Hi Richard, Very nice indeed!! Your Mast brings back memories of my last trip to Eastbourne, Wellington a couple of years ago. The salvaged Mast stands close to the end of the sealed road heading to Pencarrow Head, a memorial.... Cheers....HOF.
- 454 replies
-
- 2
-
-
- Union Steamship Company
- Stepcraft 840
- (and 3 more)
-
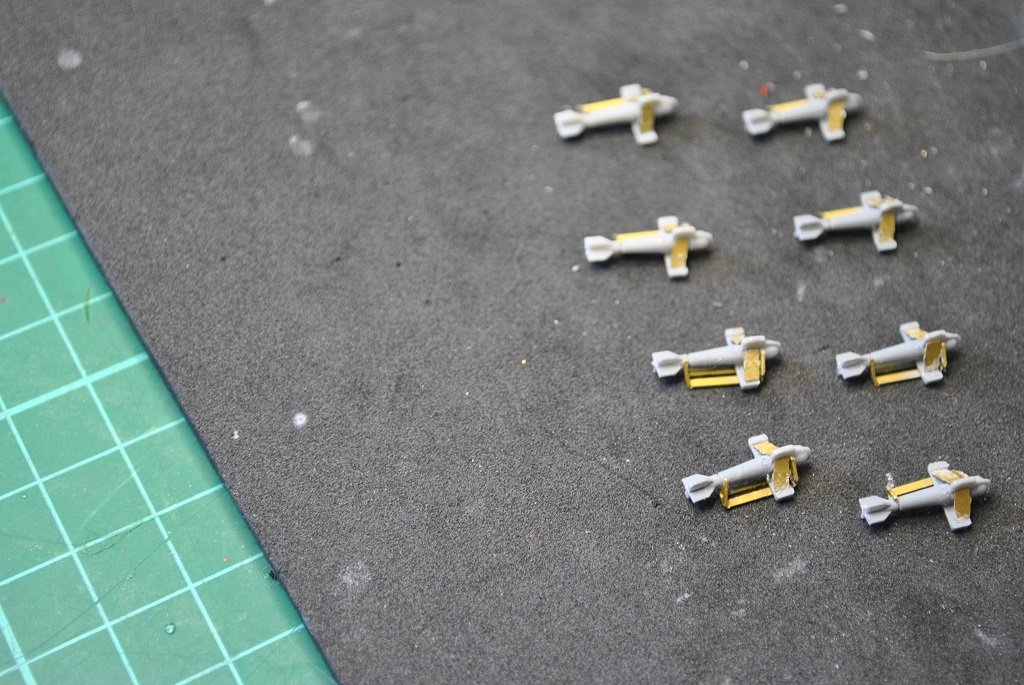
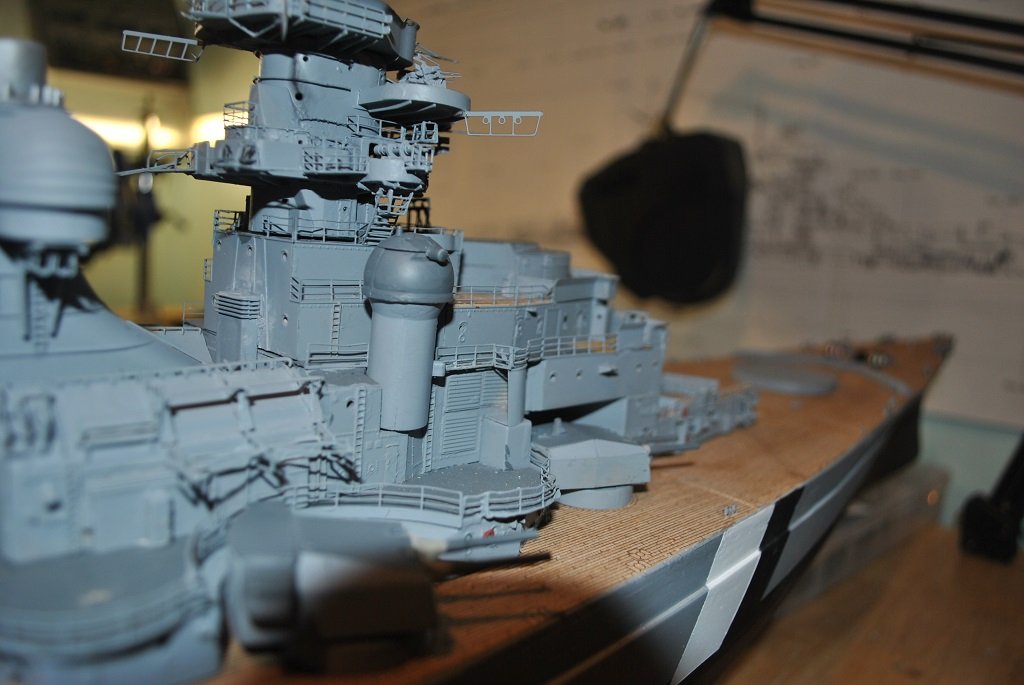
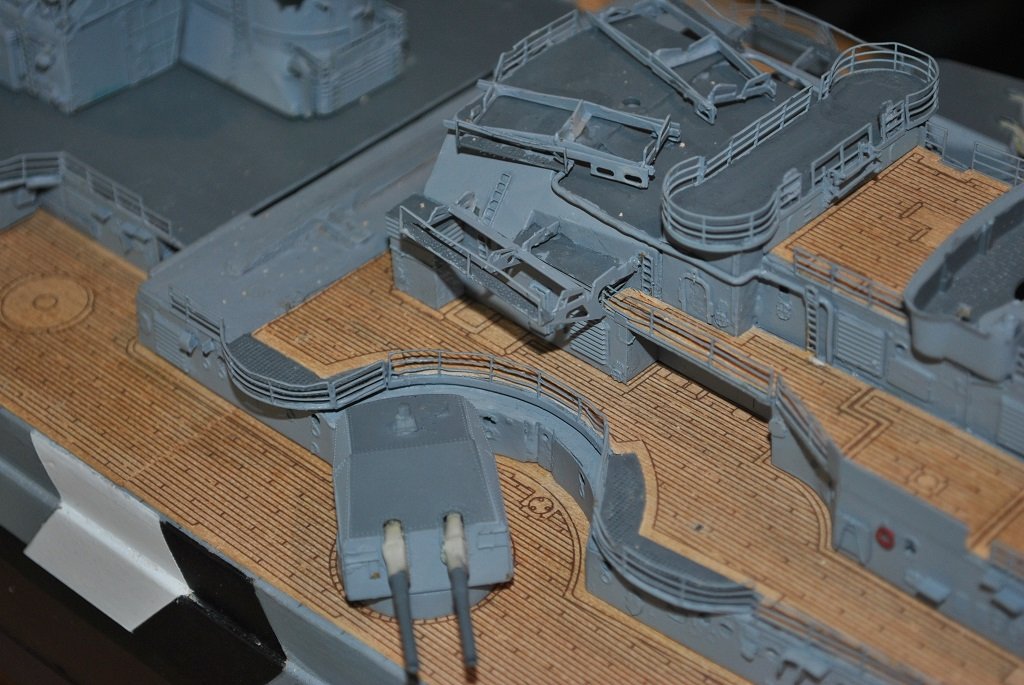
Hi All, Small update: Yet more Sub-Assemblies.... Forward Wave Breaker - Constructed and affixed, lots of tiny PE Struts, not perfect but o.k. I think. Deck Cranes - Yet to be Rigged. Paravanes. Anti Aircraft Range Finders. There are many, many other Sub-Assemblies that I have not photographed recently. (Happy to photograph if required.) I'll add some more detail to the Deck and think about some tiny 20.0mm AA Guns tomorrow. Cheers....HOF. Photos: