HOLIDAY DONATION DRIVE - SUPPORT MSW - DO YOUR PART TO KEEP THIS GREAT FORUM GOING! (89 donations so far out of 49,000 members - C'mon guys!)
×


hof00
-
Posts
1,647 -
Joined
-
Last visited
Content Type
Profiles
Forums
Gallery
Events
Everything posted by hof00
-
 Hi Chap, Some very nice progress there!! Cheers.... HOF.
 -
Hi Chris, Just wondering how you are getting on with your Bismarck.... 🙂 Cheers....HOF.
-
Very nice work there Rod!! The Cabinet looks great and the "Cherry?" is a very nice color. (I reckon that it's good the Cabinet is "In the house" so people can see your work.) Looking forward to your next creation.... 🙂 Cheers and Regards, Harry.
-
Hi Rod, Look's good!! I think that the cost of materials will be well worth it. (I have all my completed Ships in cases, as you say, keeps the dust away.) (Also, in my case, a couple of vary active Abyssinian cats.... 🙂) Cheers and Regards, Harry.
-
Thanks Rod, Mounted the Rear Superstructure and filled the gap on the Port Rear side of the Hanger. Touched up the Grey and looks o.k. except that the Grey doesn't match.... It's a slightly lighter shade.... (Isn't' there a film about this? 🙂) I did my best to "Tone it in with Satin Acrylic, it's not noticeable unless you look for it, I know it's there and it annoys me but I'm going to leave well alone. Also Rod, thanks for the tip regarding the Vallejo Putty, it's pretty nice to use. The Sub-Assemblies continue.... Hawse Reels done although I might take a couple of "Windings" off two or three of these. Started the Anchor Windlass's and larger Bollards. (I'm painting as I go....) Small AA Guns are soon to be assembled also. Very soon, (I hope), some detail on the Main Deck. The "Part-Work" thingy continues to frustrate but I keep reminding myself to "Eat the Elephant one bite at a time. 🙂" I'll get some photos up in the next few days. Cheers and Regards, Harry..
-
Looking good from where I'm sitting!! I have been following your build with much interest. Cheers....HOF.
- 201 replies
-
- 6
-

-
- SD 14
- Marcle Models
- (and 1 more)
-
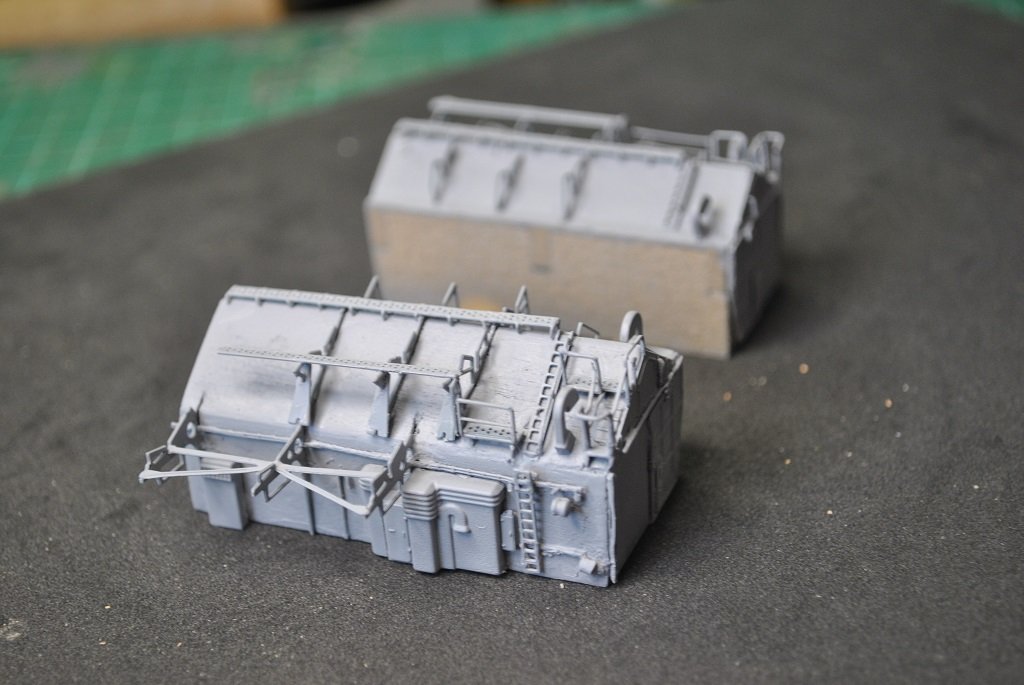
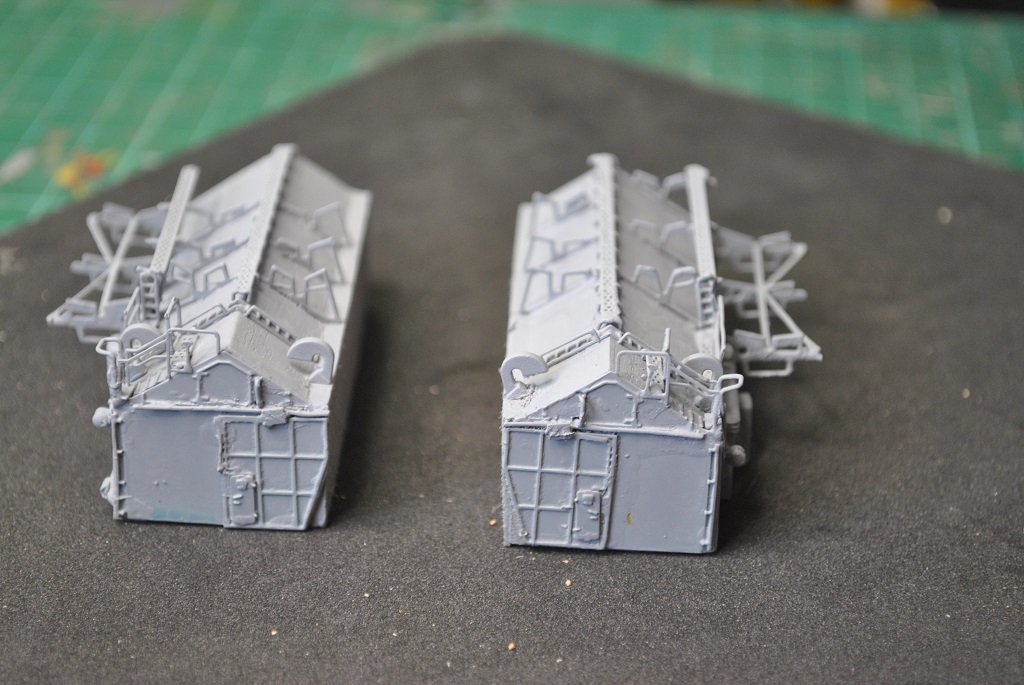
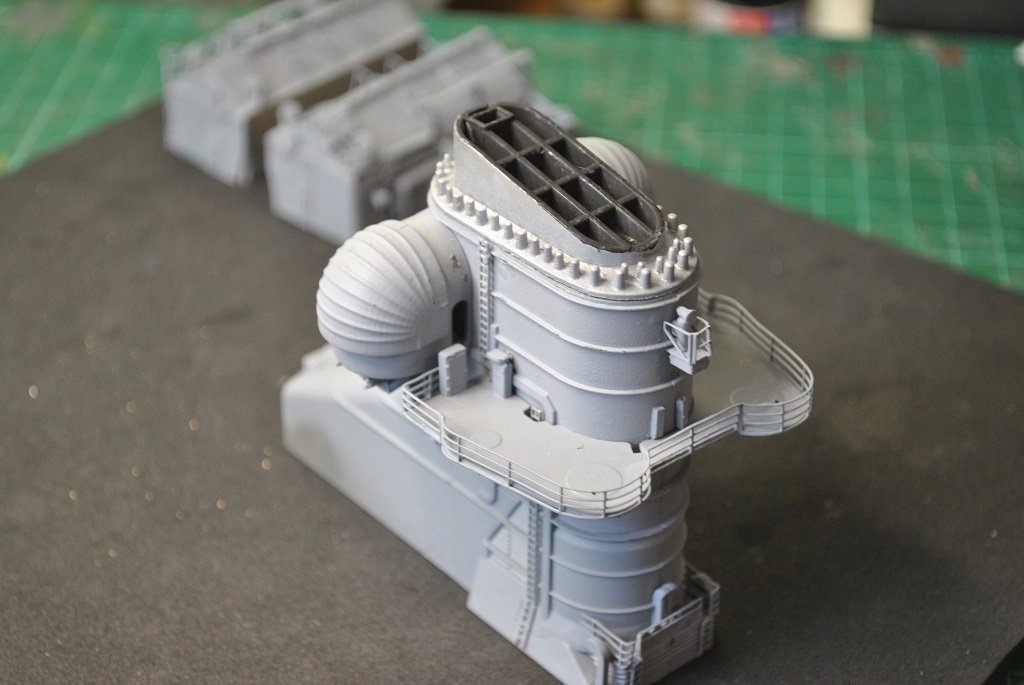
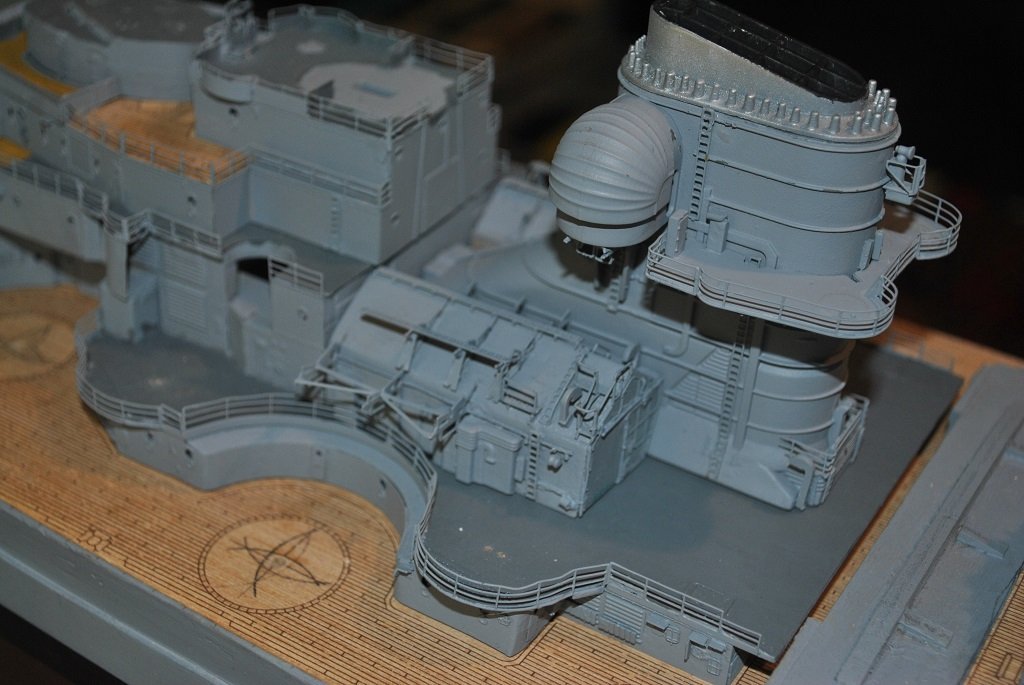
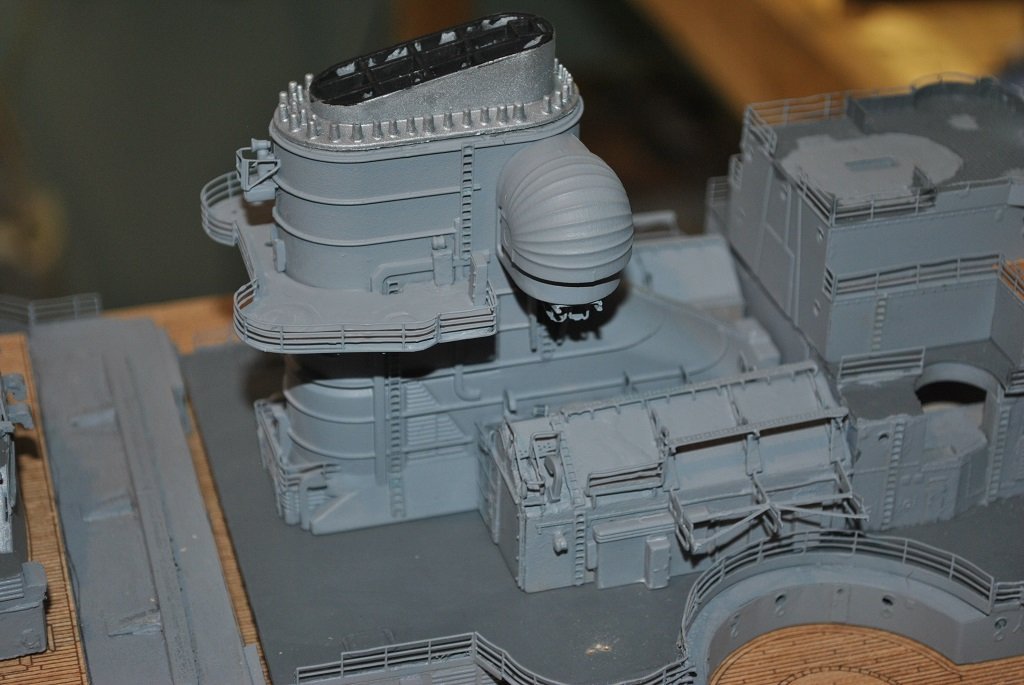
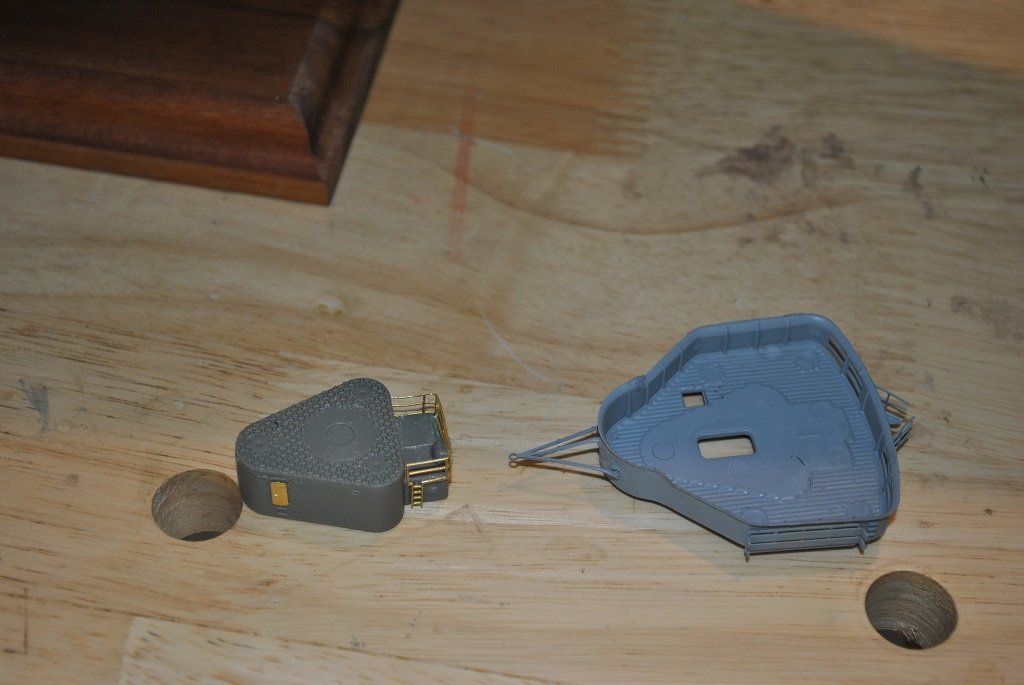
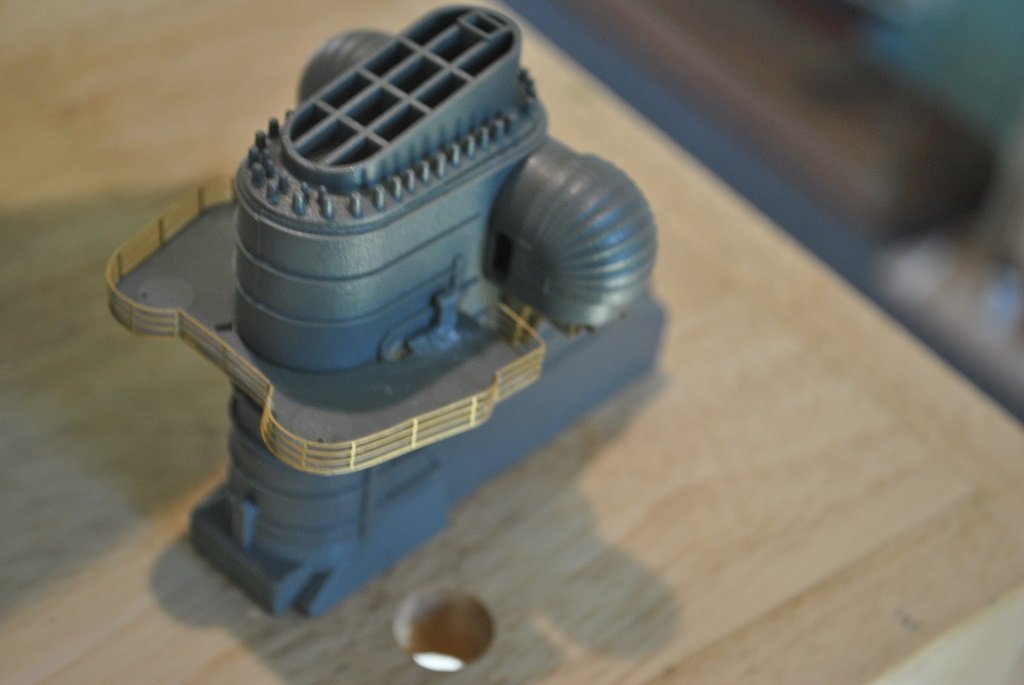
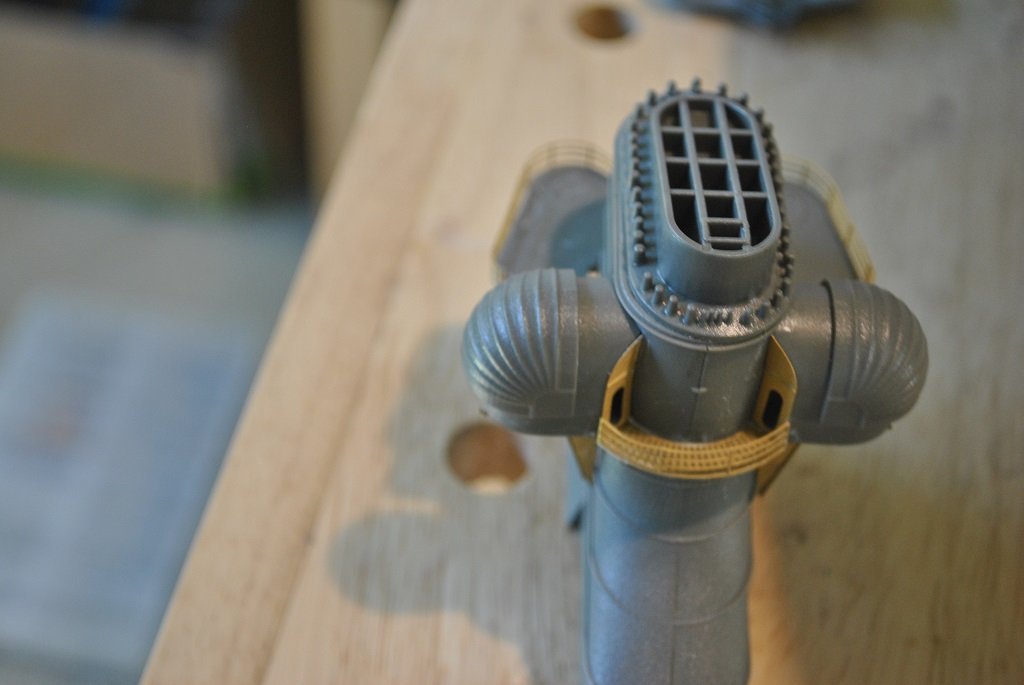
Hi All, Small update: Port and Starboard Hangers complete (One piece of PE to be fitted, Port side) Funnel more or less complete (There's a bit more stuff to be added just prior to installation) The Funnel top needs a bit of a "Touch-Up." Used Alclad Polished Aluminum for top, Exhaust Pipes, etc. (It was easier to carefully remove the Funnel top for painting. While reviewing the instructions for the umpteenth time, I came across the step for mounting the 10.5cm AA gun bases. There were a couple of photos instructing to place bases "As per photos," no measurements given. Rod, (rvchima), very kindly sent me excerpts from his build instructions, with measurements!! 🙂 I marked out and drilled locating holes for the gun bases on the Superstructure Decks. (One problem, my bases do not have locating "Dimples, just flat.... I carefully drilled a 1.0mm hole as close to the center of these as I could, inserted and CA'd small lengths of 1.0mm Brass wire. Trial fitted Bases and AA guns, all good!! 🙂 (Thanks Rod!!) (With the modified bases, I think that I could probably "Articulate" the Guns. I'll fit the Guns and bases further down the track. There are only about 10 "Installments" of the Part-Work thingy left to complete with a couple of "Organizers" full of completed sub-assemblies. At lease the Main Decking is down so that I can place bits on this as necessary. I now need to just take my time also to ensure that my work does not compromise any other component attachment. (It's been a bit of a mission jumping around this build the "Part-Work" way. Cheers....HOF. Photos:

-
Thanks Rod and Chris, Rod, thank you for your advice regarding the kit Stanchions, however, I have now spent the "Coin." It's going to be a little while before I'm ready for the Railing/Stanchions.... 🙂 I am aware that I may need to drill the holes. (I thought I'll "Walk" some dividers down the Deck perimeter first, 8.0mm spacing, this may not be required, I guess time will tell. Chris, Thank you for allaying my concerns, (Slightly), regarding Super Hobby. Cheers and Regards, Harry.
-
Hi All, Small update: After much "Trolling" around on the Net, I found some 1/200 Chain Link Railing.... Chain railing Aber 1-200-02 (super-hobby.com) I ordered four of these, hopefully, more than enough to do the entire perimeter of the Deck. These are on Back-Order and I am hooping to receive by mid July. I ordered from "Super-bobby" (Having never ordered from the EU before, I was a little nervous but hopefully they'll be reputable. So, to stop procrastinating, I'll climb back into it today. Tasks that I will concentrate on: Port and Starboard Hanger completion Deck Reels Locating remaining detail pieces for the Funnel I'll post some photos soonish. Cheers....HOF.
-
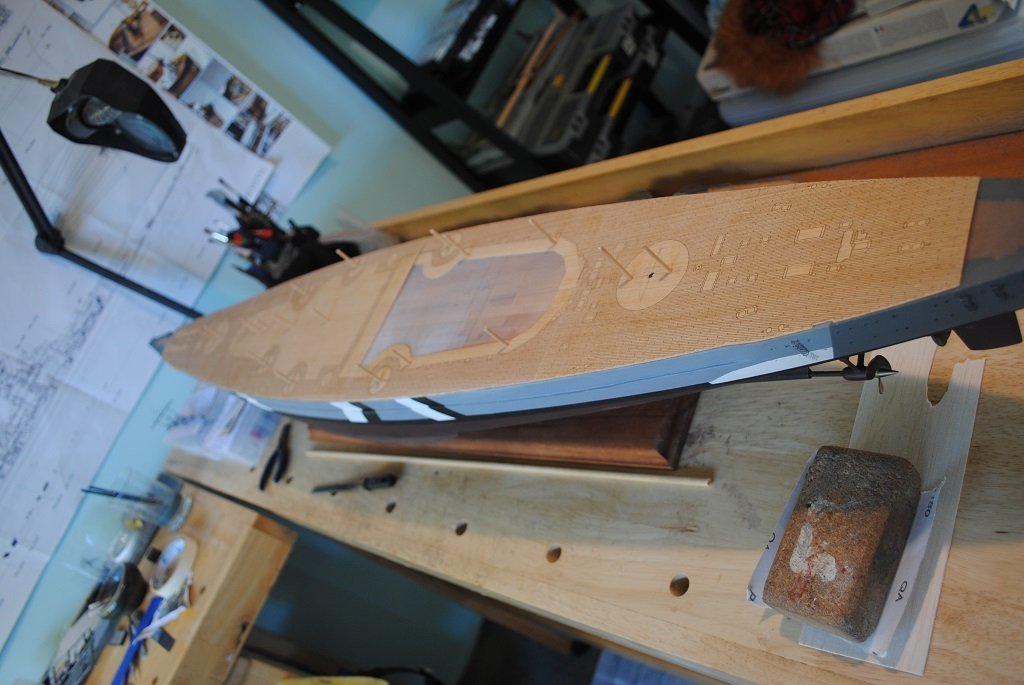
Thanks Rod, The Decking was a bit of a "Mare" so to speak. I had to carefully sand both sides of each section before I could even get a 1.0mm gap.... (The "Gap" was a bit of a trade-off in achieving an all round margin, I just did not want to take off too much Deck detail. As it was, I had to remove the Margin Plank detail, not happy about this, but, never mind, have to move on.) I don't really fancy my chances drilling the Stanchion holes with very little material on the outside of the Drill Bit. (The Jury is still out one....) I have also been looking at aftermarket 1/200 "Chain Link" Rail PE that I do not have to drill holes for and have found some products that might just fit the bill. Anyway, the Decking is down so that's a reasonably big task out of the way!! 🙂 Thank you also regarding the dowelling for Turrets!! Cheers and Regards, Harry.
-
Hi Chap, Some very nice work there!! It will be interesting to see this complete, a different "Take" on this model. Cheers....HOF.
-
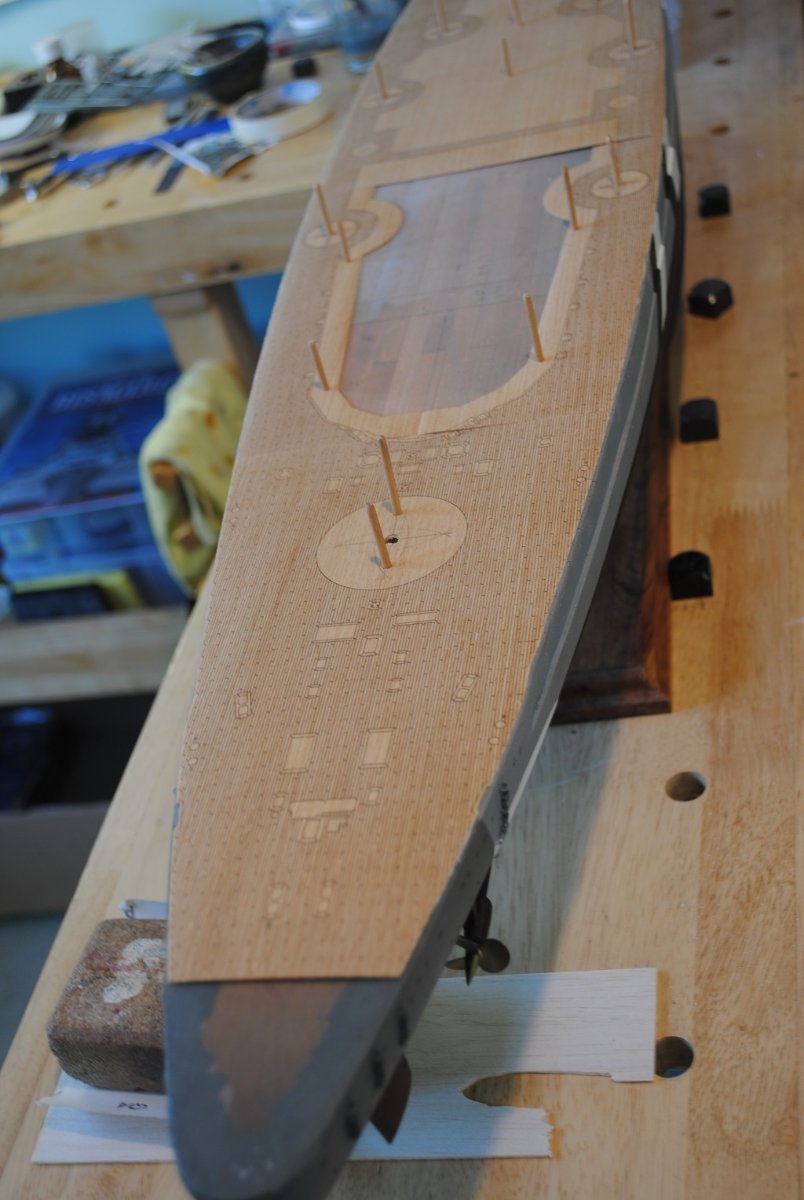
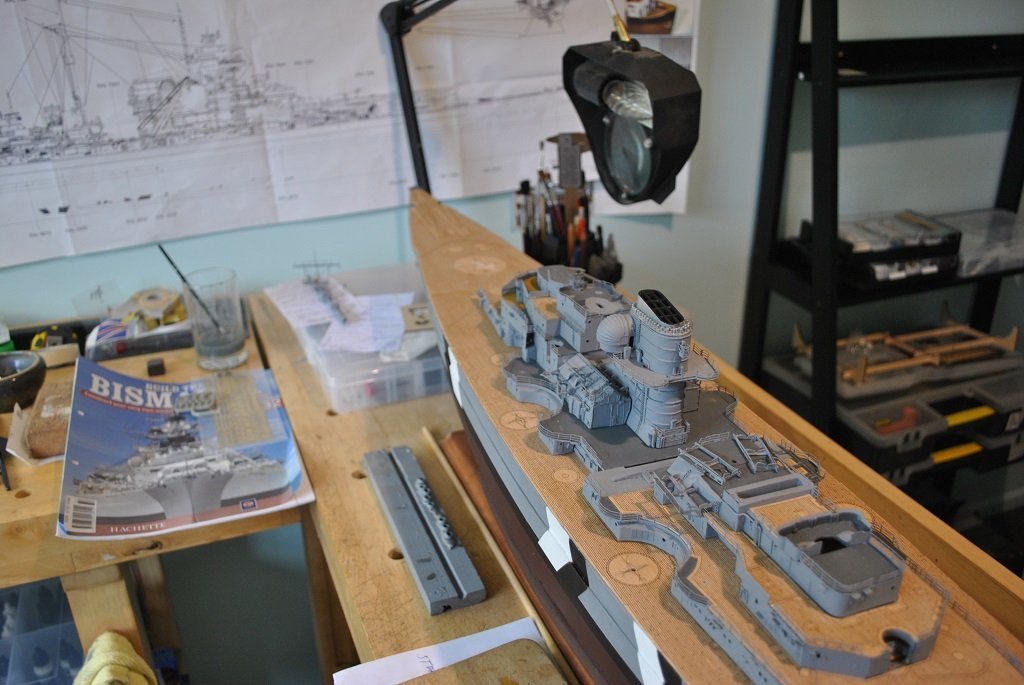
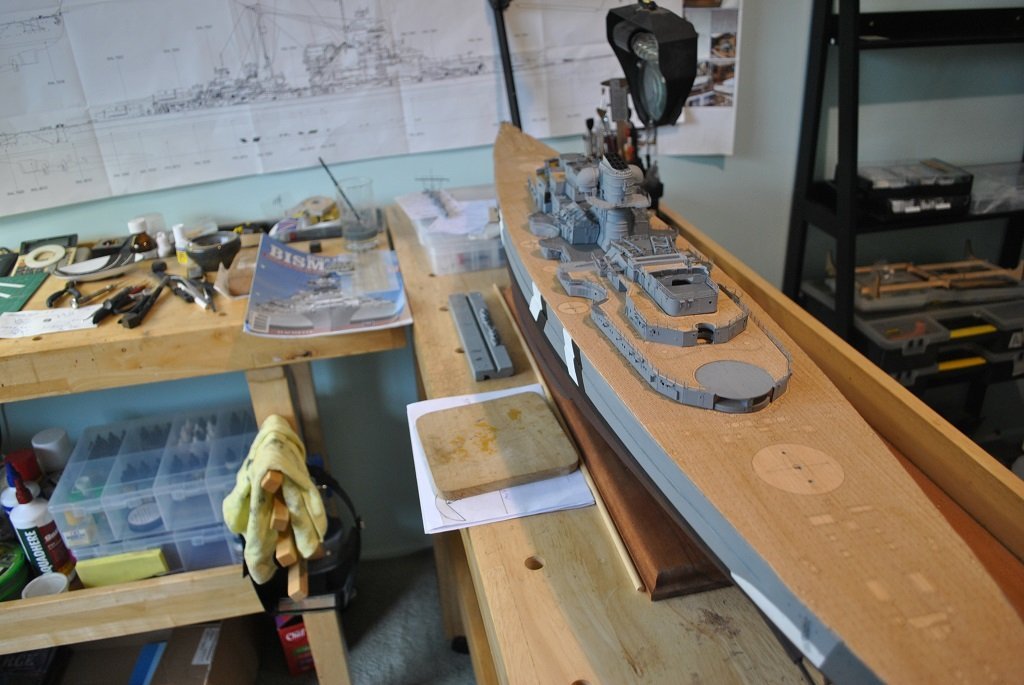
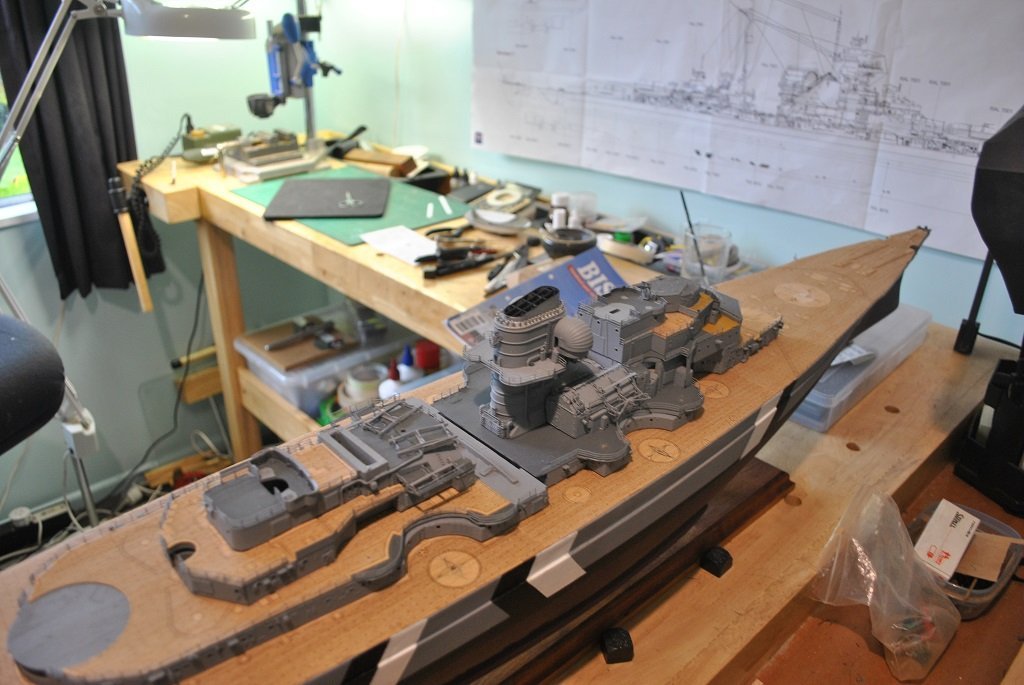
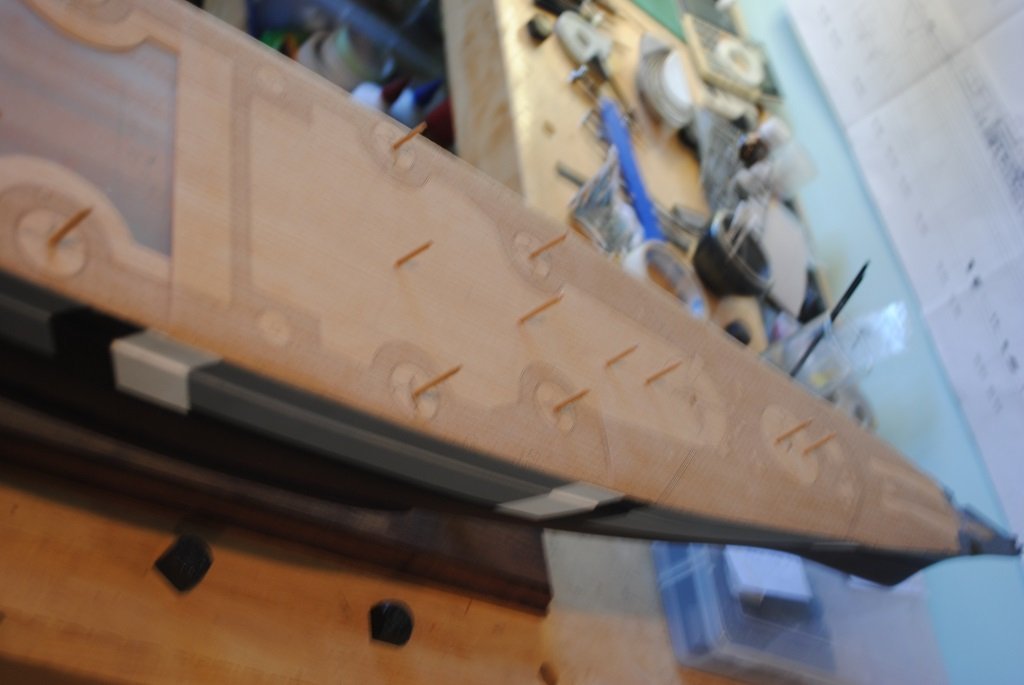
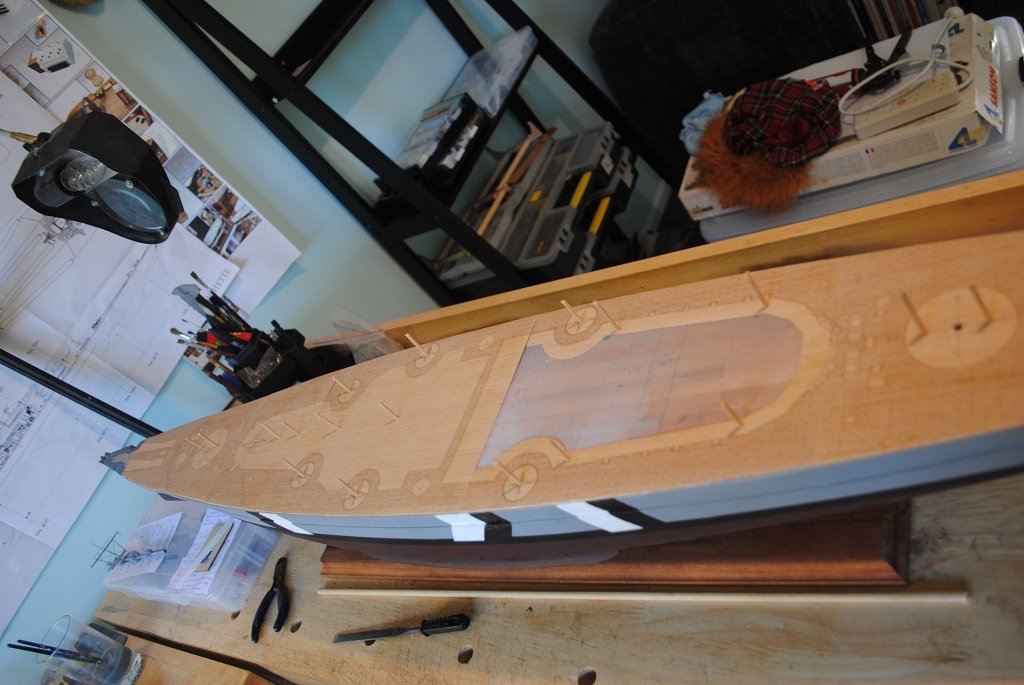
Hi All, Small update: My attention has turned to the Main Deck over the past few days as the Partworks" issues are soon going to be dealing with Deck fixtures in the very near future and it was about time to make a start on this also. My partner was coerced into cutting the Paper Template and marking out the locations of the three hundred Stanchions, Template attached with Paper Gum and St6anchion locations marked. (She did an awesome job!! 🙂) Next up was placing and positioning of the various Decking pieces. (Not a task I was looking forward to.) Anyway, a bit of "Jiggling here and there followed by masking tape to hold in position while 3.0 and 6.0mm holes were drilled for Turret Barbettes. At this stage, I added more 3.0mm holes and Dowel that will be removed after the Decking is attached. (Not in the instructions but I felt a bit more confidence for a good Key enabling a more accurate fitting.) Today, I have been concentrating on that very fitting, there needs to be a 1.0 - 1.5mm gap around the Deck perimeter. I performed an initial sanding today and will hopefully get this complete tomorrow. (The Decking that I was provided with was almost flush with the Hull sides, so, I'm unsure of the impact when it comes to placement of Fairleads, Cleats, Etc. I guess I'll find out....🙂) Anyway, it was time to walk away today, a fresh start tomorrow. Cheers....HOF. Photos:


-
Thanks Ted, Great advice!! I have the Tamiya "Mark Fit" ready to go!! Cheers and Regards, Harry.
-
Thanks Chap, I had a look at several Internet tutorials, I got tired of mucking around with bits of painted tape.... Cheers....HOF.
-
Hi Rod, Really very good!! I am hoping that my effort works out to hopefully a similar build quality!! (Hope you don't get too many seismic events looking at where you have got the ship sitting!!) Cheers and Regards, Harry.
-
Hi Chap, Looking really good!! Decals look great. I am currently in communication with the company as I want to get some 0.5mm Pinstriping decal for the Arado Canopy Frames. Cheers....HOF.
-
Hi Chap, Thanks for that!! I could paint these but I don't want to tempt fate, I'd rather have something that I can just "Place" to achieve the desired result. Just had a look at the site, this might just be the ticket!!🙂 (Australia is not too far away so shipping shouldn't be too costly.) Could you please detail exactly the item you ordered? Good to see you back, I was wondering where you had got to.... 🙂 Cheers and Regards, Harry.
-
Hi Chap, Looking very good indeed!! Awesome detail at this scale.... (I'm having enough of a "Challenge" at 1/200) Cheers....HOF.
-
Hi Chap, Thanks for the advice, Unfortunately no.... 🙂 The Deck is absolutely flat. The Superstructure is in contact with the Deck, but, the Port side of the Hanger is not. (As per the photos.) The only thing that I can think of is that the connection between Hanger and Superstructure is out of plumb somehow.... To try and remove the Hanger part of this Superstructure would be courting certain disaster!! Your advice is very much appreciated and also a trigger to get me thinking about this again. Pretty sure I'm going to use Vallejo Acrylic Putty for the "Gap." Cheers and Regards, Harry.
-
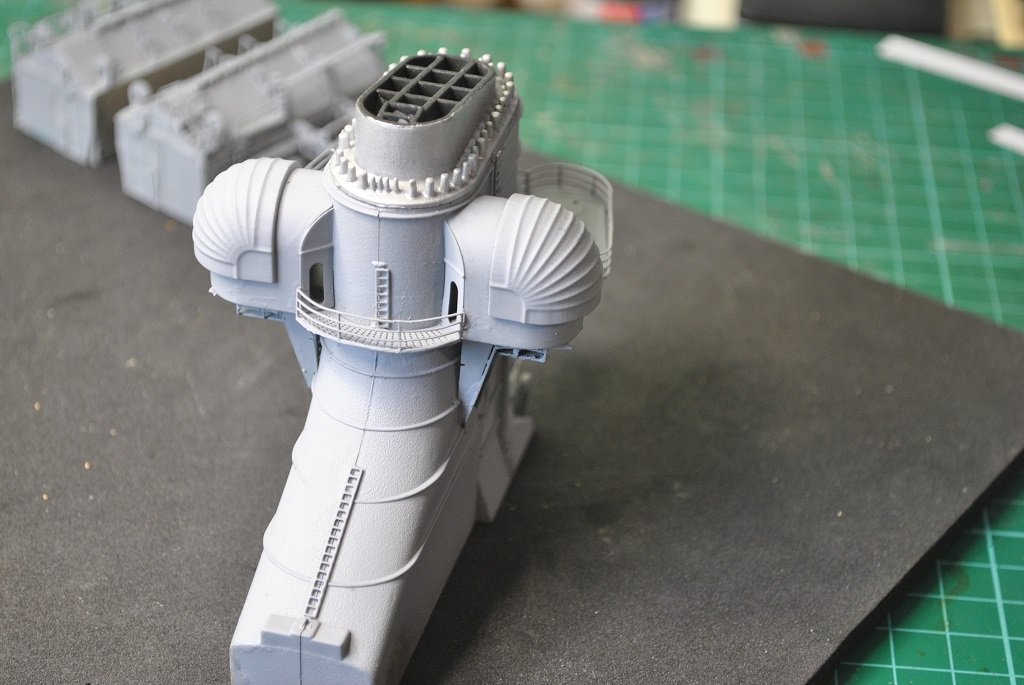
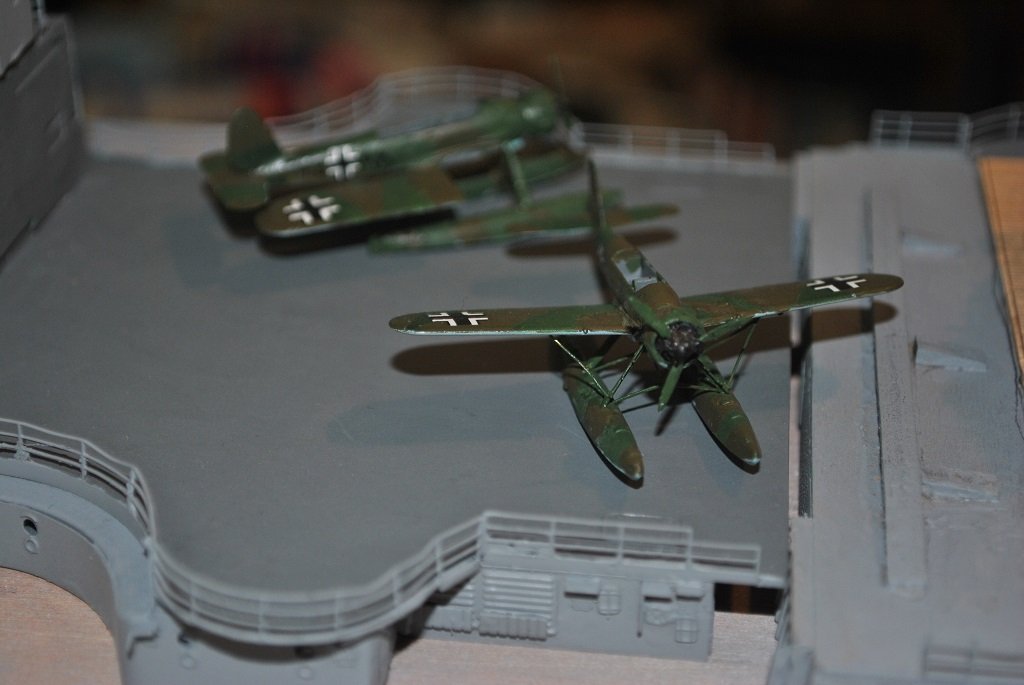
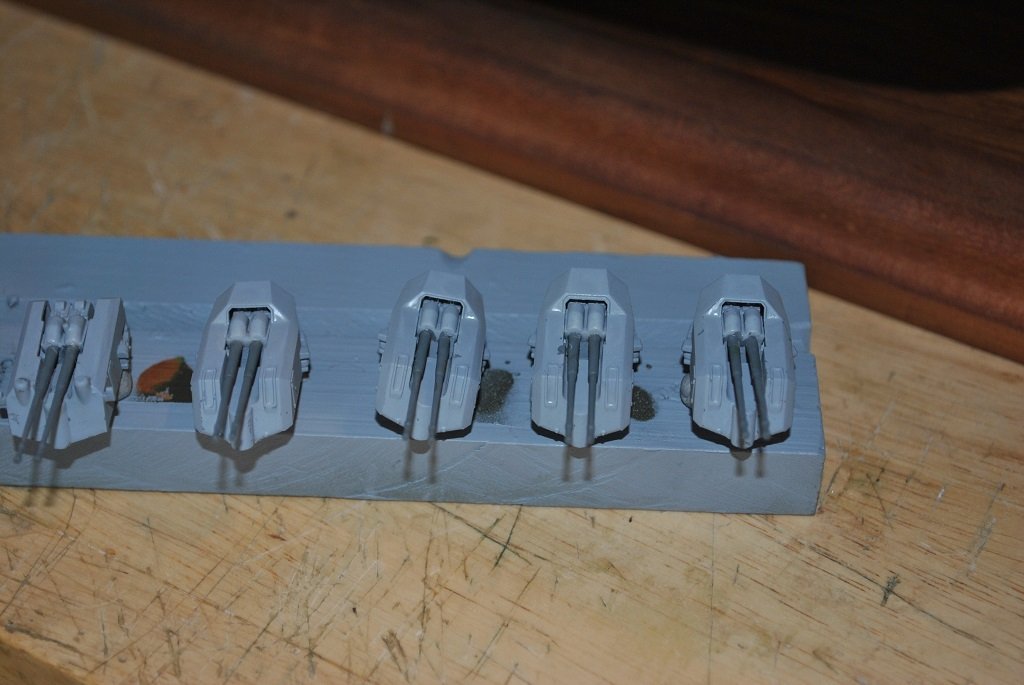
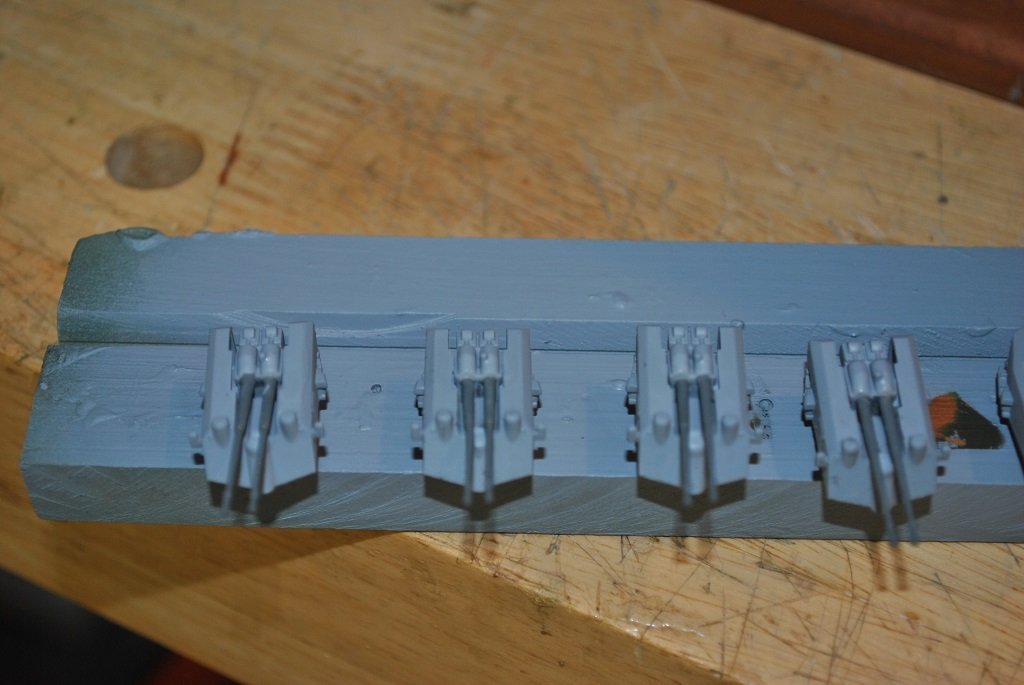
Hi All, It's been a while since I posted so here is a small update: Arados complete apart from Canopies, I'll get to defining the Frames when I find something suitable to highlight them. Conning Tower has had additional PE attached, (Not shown here), and Upper Tower Gallery and Fire Control structures assembled. Funnel PE attached but not yet complete. 10.5cm Anti Aircraft Guns, (X8), complete. Bow Cleat attached. I think that I really need to get the Main Deck Stanchions marked and the Decking sized and affixed as there are many sub-assemblies almost ready to attach. Cheers....HOF. Photos:
-
Hi Rod, Just thought I'd have a look at your "Amati" U-Boat build. An interesting kit but as you pointed out in your log, a little light on detail. (There don't seem to be many U-Boat builds on the forum....) I'm thinking that I might have a go of the Revell 1/72 Type VII "Wolfpack" that I have in storage, I have the Pontos Detail-Up stuff for this as well. Anyway, that's in the near future.... 🙂 Cheers and Regards, Harry.
-
Hi Chap, Looking good!! (The detail is way too fine for the likes of myself.... 🙂) Cheers....HOF.
-
Hi Rod, Your "To Do" list looks a little busy, good to see you will not be idle!! 🙂 Looking forward to your upcoming builds. By Deck Transfers, I am alluding to the Swasticker markings, or, more correctly, Air Recognition" markings. Were these supplied or did you paint these? (I guess I'm looking for a source to order from.) Cheers and Regards, Harry.
-
Hi Rod, That looks really, really Awesome!! I rake my hat off to you, knowing first hand how, in your words, "Insane" this model is.... 🙂 I guess you are almost at the point where you can say "Finished." (Wot's next? 🙂) Anyway, it has been, and is, an absolute privilege to see your Ship come together and also replies to my many questions (I do have another question for you at this time: Where did you procure the Deck Transfers?) Cheers and Regards, Harry.