Supplies of the Ship Modeler's Handbook are running out. Get your copy NOW before they are gone! Click here to order
×
MORE HANDBOOKS ARE ON THEIR WAY! We will let you know when they get here.
×


DaveRow
-
Posts
690 -
Joined
-
Last visited
Content Type
Profiles
Forums
Gallery
Events
Everything posted by DaveRow
-
 Thanks Greg/Pat, I meant that the position where I have set the bumpkins up is where they are fitted. Agree I need to set them up so they can be removed for Anchor work. As always, thanks for your valued comments guys. I am away over in the west, "Fremantle" for a week, plan to look in on the Maritime Museums over there. Dave R
 -
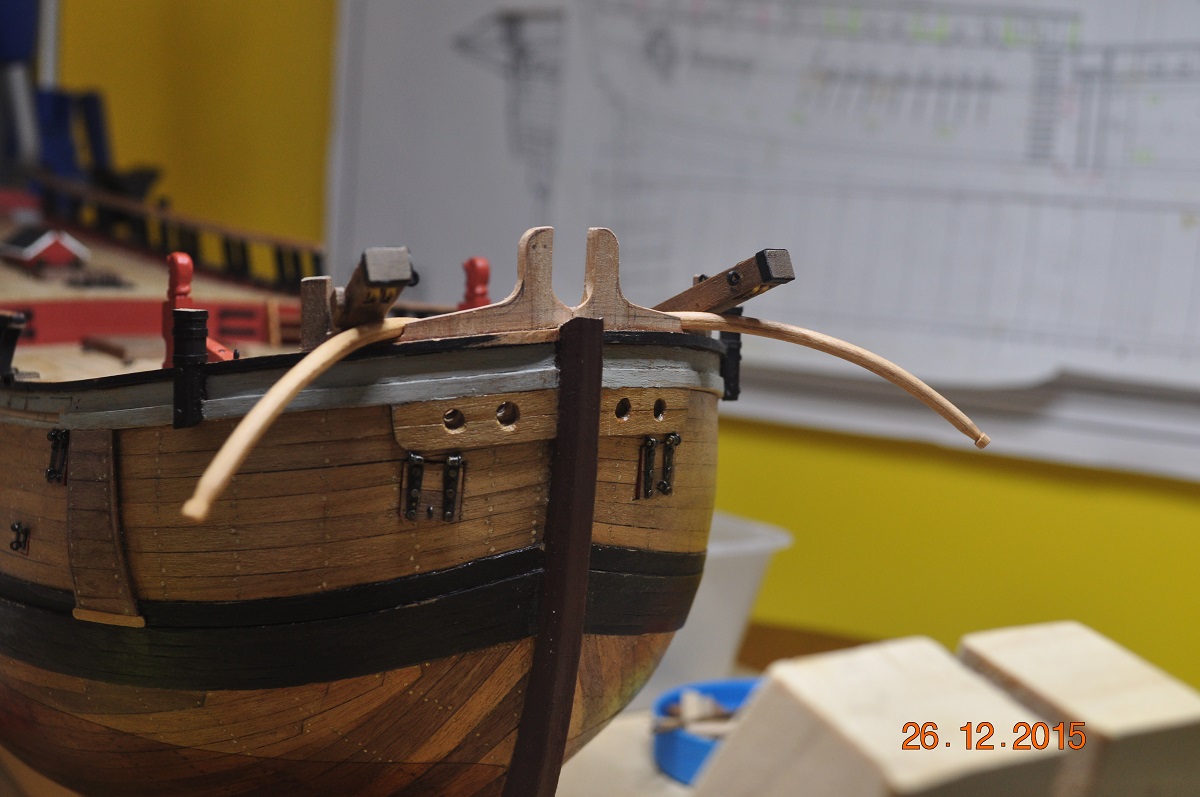
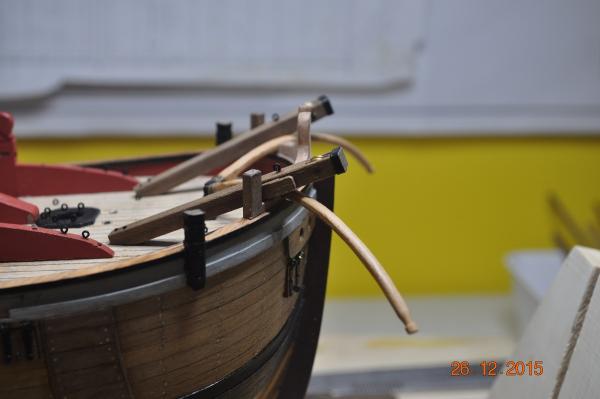
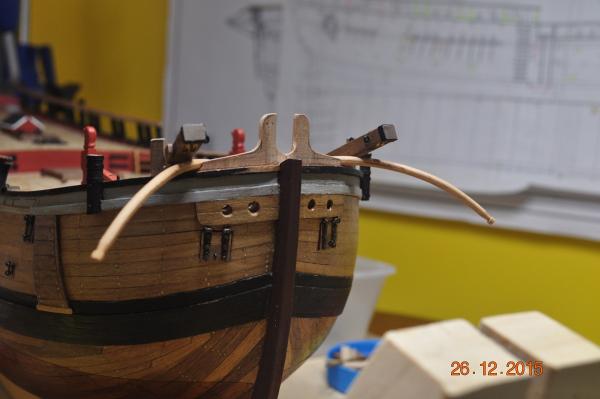
Hi Greg, The bowsprit just clears over the bracket. I curved the end(today) so it clears. I should of had the bracket a little further forward. Where the bumpkins are, they stay, already grooved the vertical timber. I laid them in like on the AOTS deck layout. But I see your point, the anchor ropes may foul them.? Dave R
-
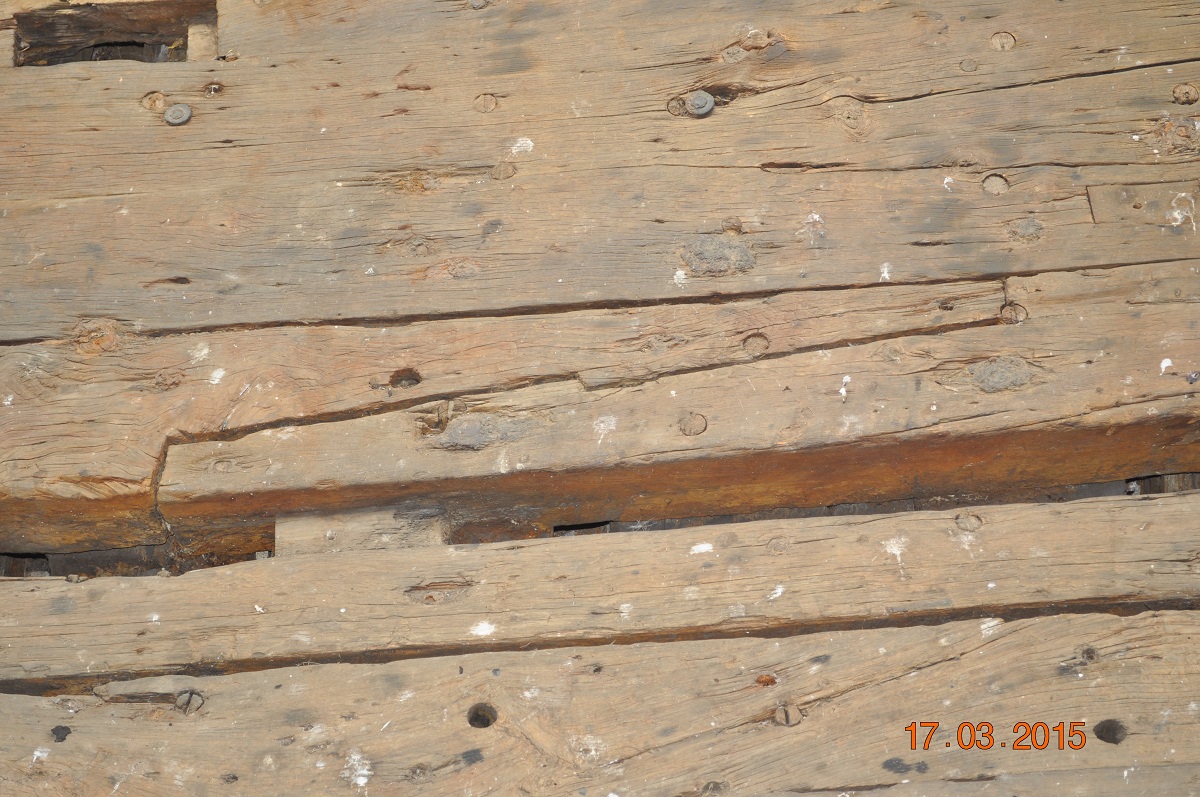
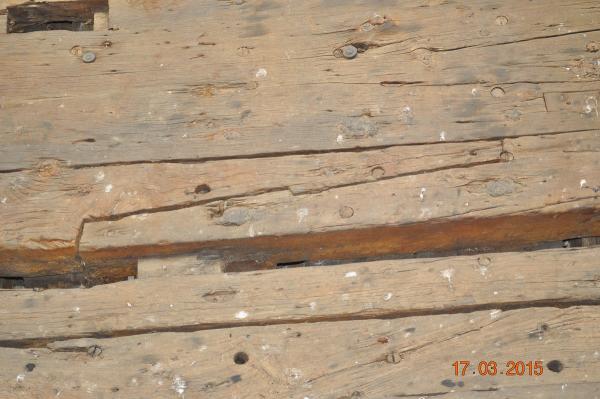
Hello ca.shipwright, Look at my post #90 it shows a number of them on the deck. The AOTS has them indicated on one of the deck plans in the book. Also I visited the Edwin Fox in Picton(NZ) March 2015, and saw original internal hull planking had the same scarf design. I nearly fell over backwards when I saw it. I had a mate of mine with me, he is a boat builder and he says he knew of this type of joint, he had never had to make one in his carrier. Dave R
-
I try to tinker every day or 2 to keep her moving along. All the best for 2016 Dave R
-
Hi Pat, Congratulations on the step to retire. A well earned cold one Not an easy decision these days to retire. May your shipyard, shipbuilding provide much enjoyment. Push the Endeavour along and get her finished, she looks great. Dave R
- 517 replies
-
- 3
-

-
- Endeavour
- Artesania Latina
- (and 1 more)
-
Nice detail mate. Nothing better to do over the Xmas break eh! . Dave R
-
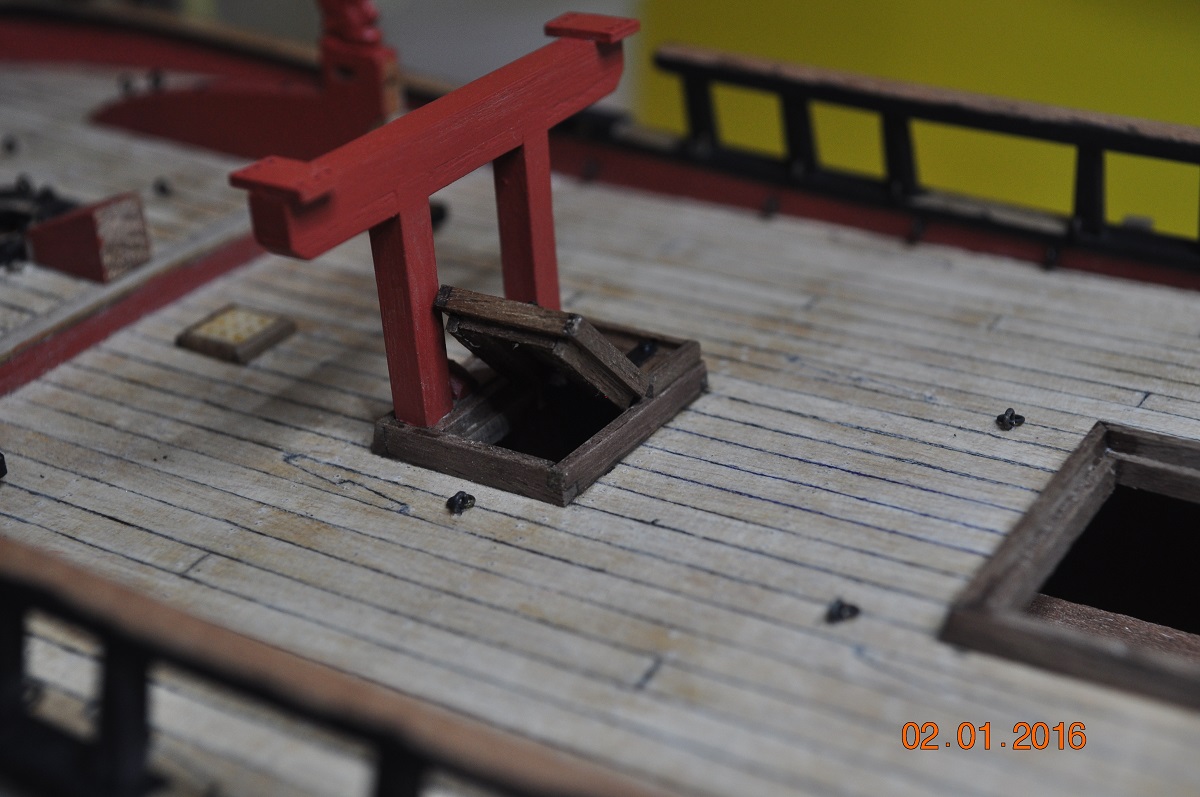
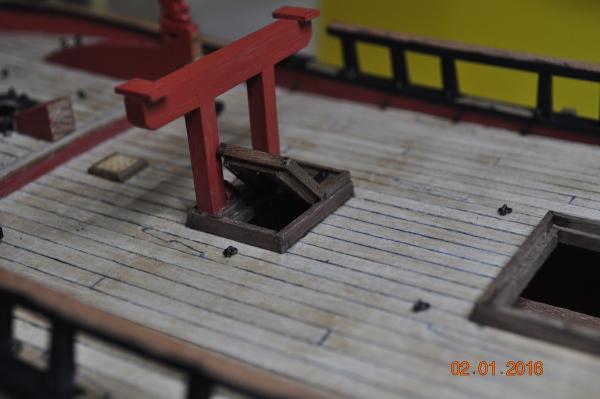
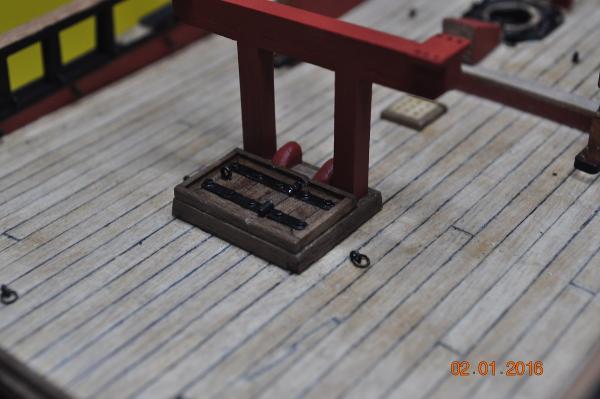
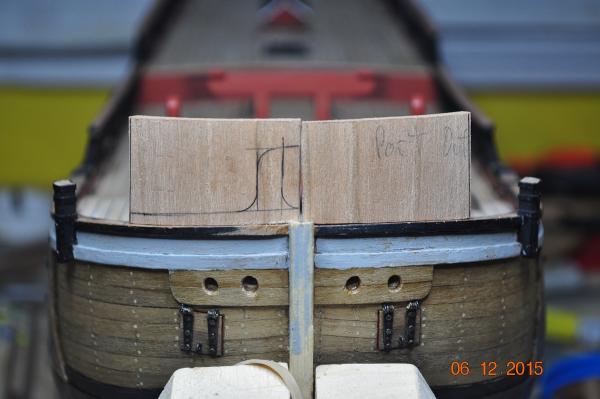
Latest shipyard update: Decided the mid hatch would be a simple hinged flat one over the opening. I added a combining about the outer edges, give it some functionality, maybe it did have an outer edge so things did not roll off. One of the larger section raised for the crew to slip under decks. Dave R
-
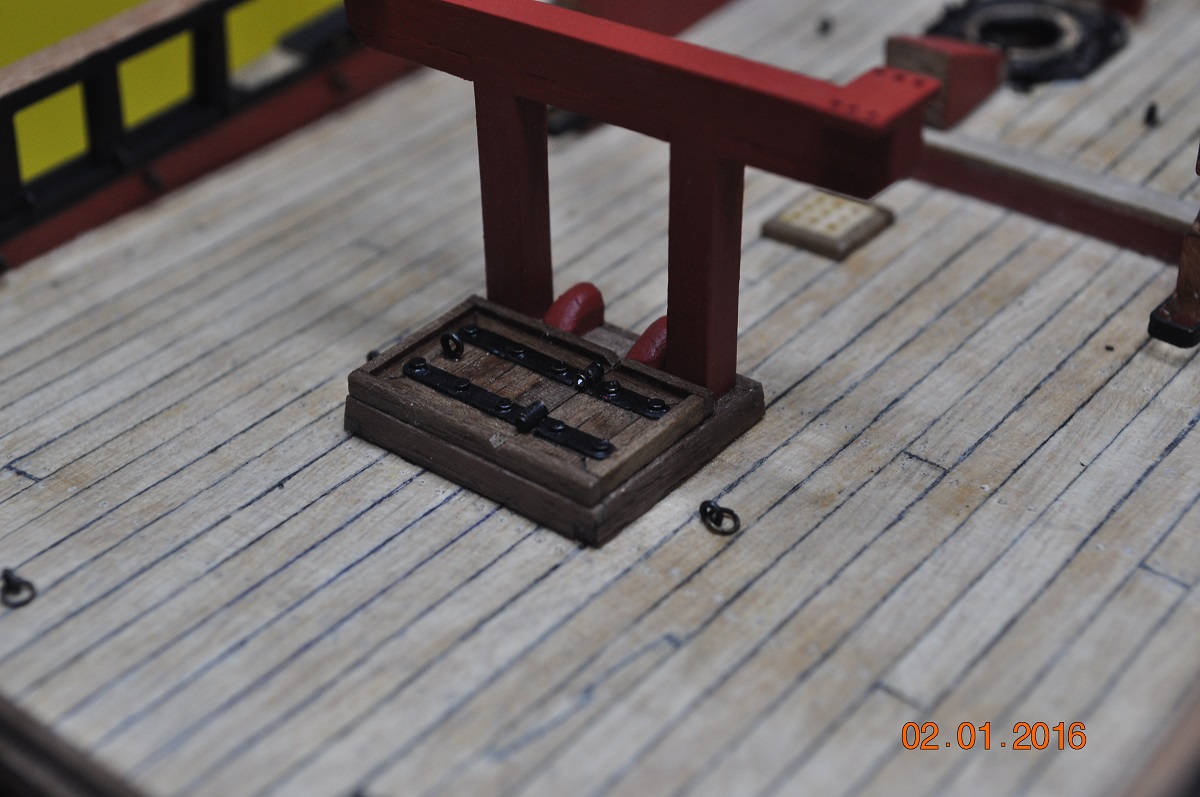
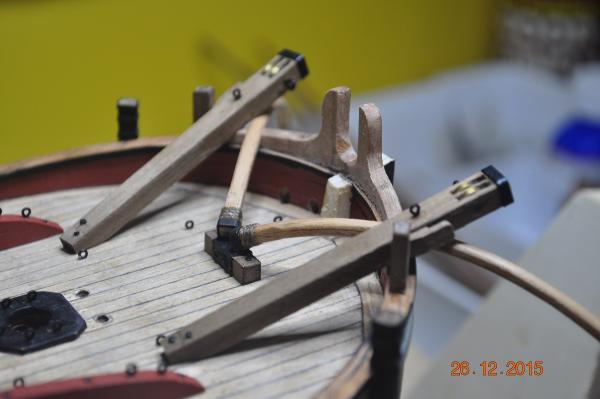
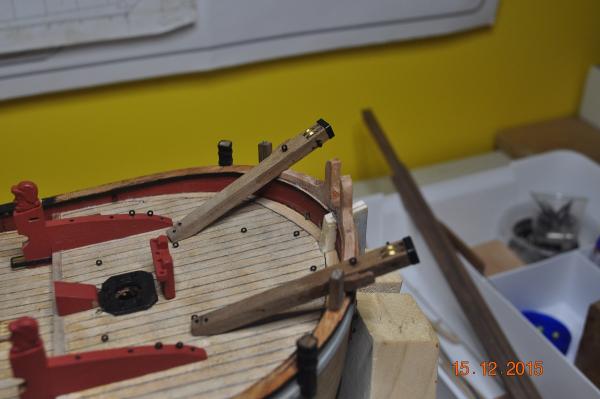
Shipyard Update. The 2 bumpkins made and in place. I laminated 2 pieces of flat timbers then rounded each for final shape. The end housing on the deck is from: - timber base - cardboard inverted "U" over and - brass boxes(for the ends to fit into) I wound some rope around the end to stop the bumpkin sliding back. Hope I got it all right. May have the deck block a bit too far back though - fouls the/a straight bowsprit ? If I curve/bend the bowsprit will just clear over it. Dave R
-
Hi Steve, I have no doubt there was an "arch" on the end of the tiller, as the draughts indicate. I had a look at several other builds, most vary to some extent. Some appear that the rope would fowl the vent. I agree the tiller/blocks like the AOTS would not work. A quandary. Dave R
-
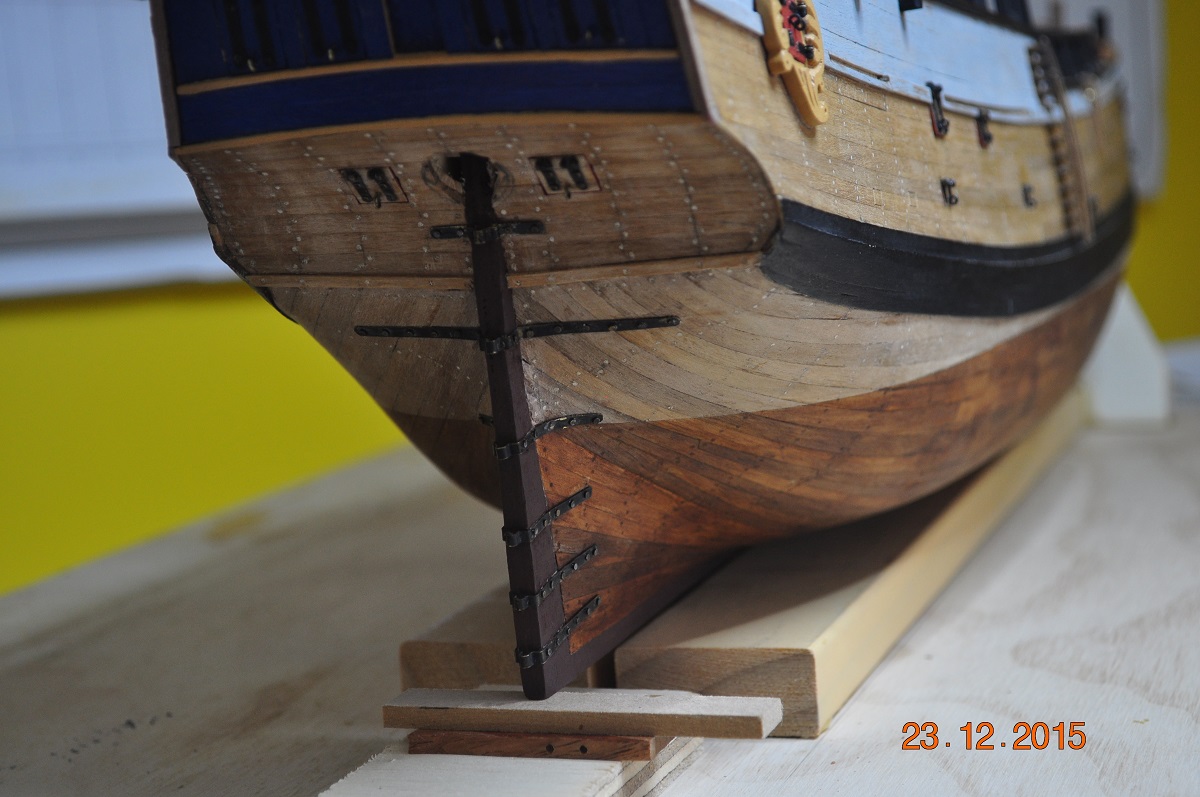
Merry Xmas all, To mark the occasion I commissioned the shipyard to stain the hull bottom, below the waterline. The effect to show the hull in contact with the the water in a brown-ish color. Dave R

-
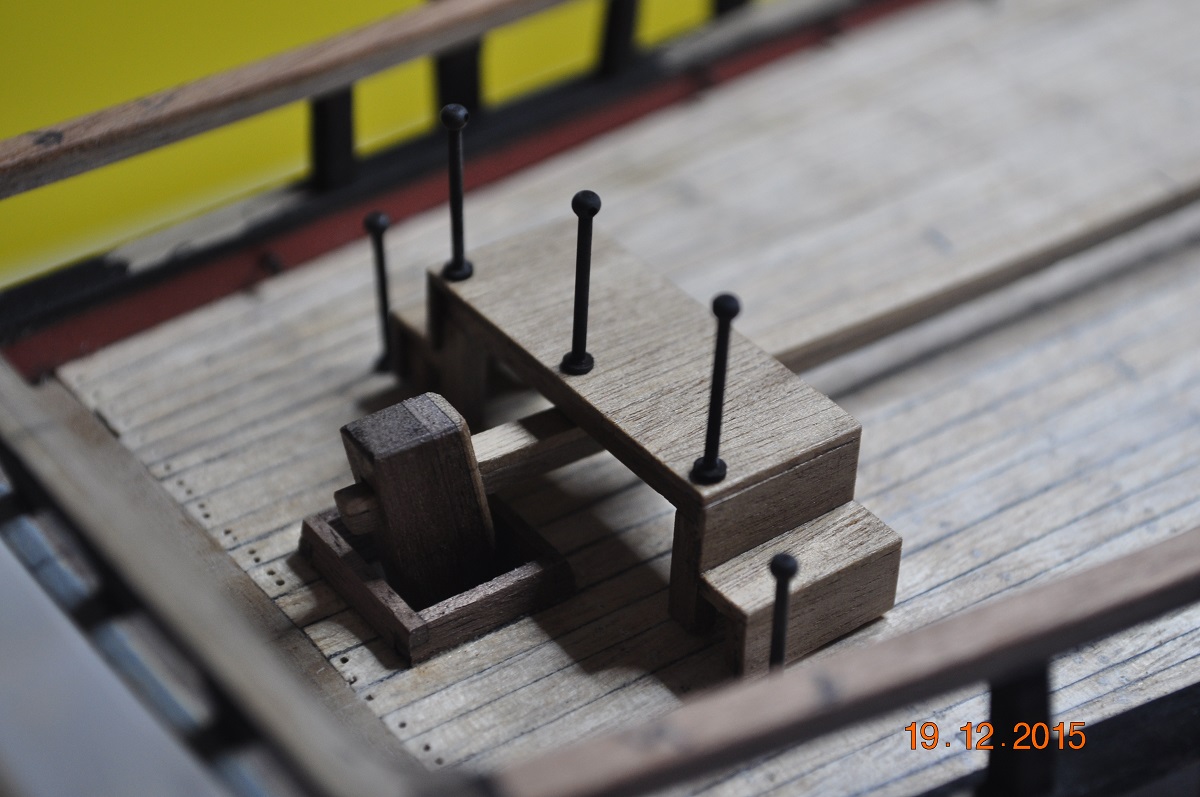
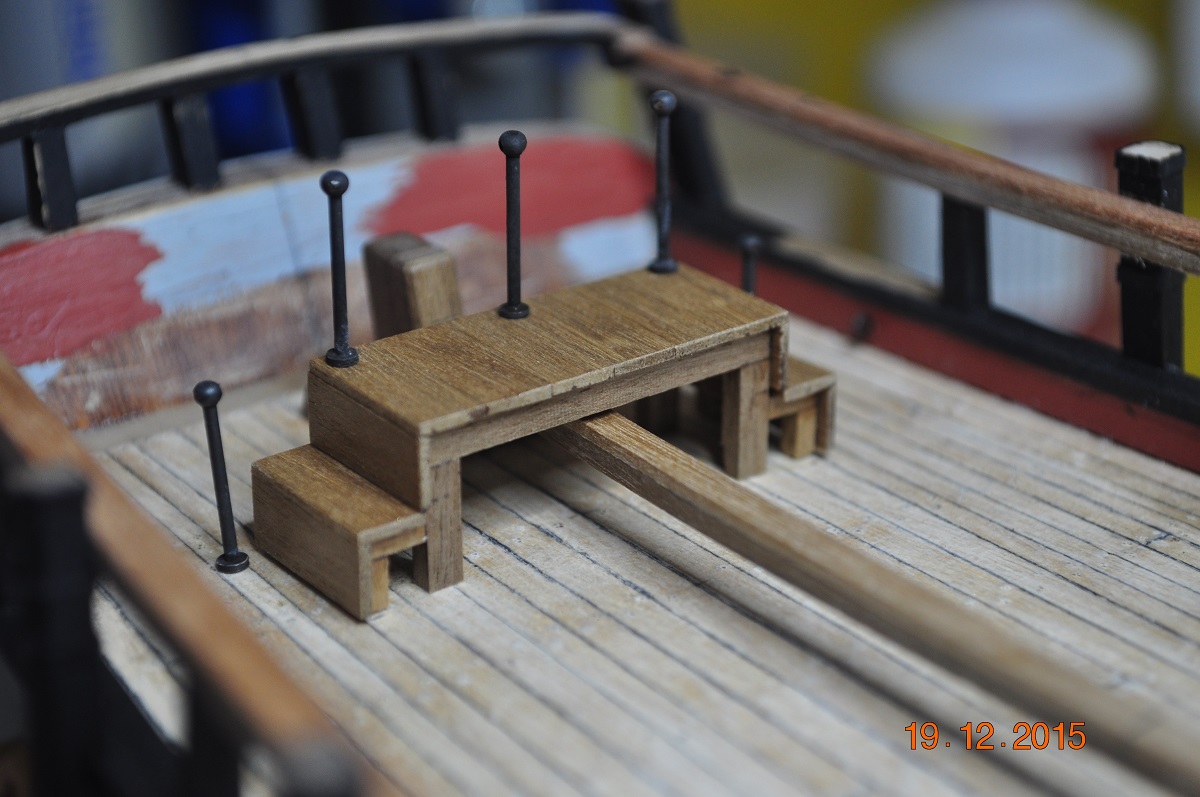
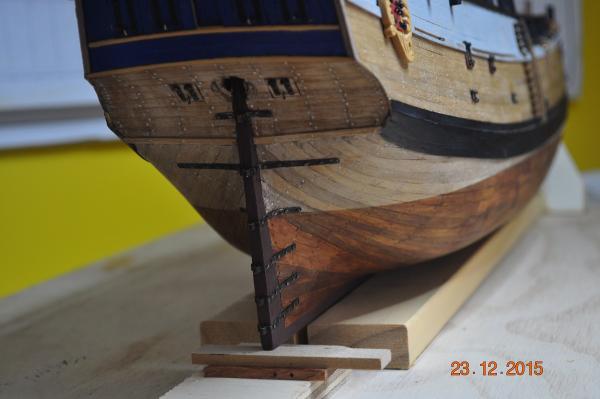
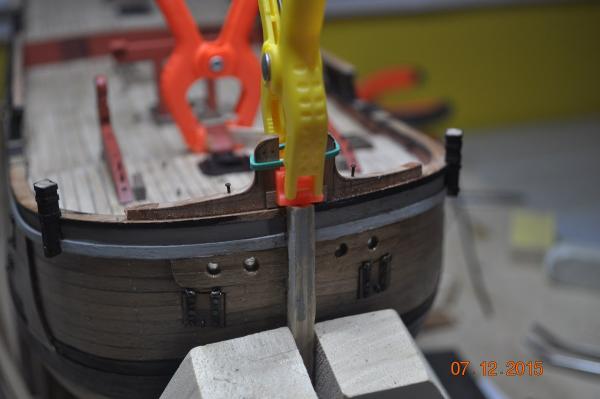
Out of the Shipyard talk. I got sidetracked and went down to the stern to make: 1. platform over the rudder tiller. 2. the rudder tiller. The Platform did not take too long to make, but I did want it to clear the tiller - just. I blackened 5 brass stanchions which will all be glued in place, rope strung when all the deck "goodies" are done and a massive "fitting day". The Rudder Tiller took longer to make/fit, well to mortise into the rudder. I reckon it took a good 2.5hrs to widdle, drill, shave, my way through to get a firm fit, and doesn't move when fully in. And by some luck sweeps up/tapered just like in AOTS. Very happy with the out come. I am really struggling with the practicality of the "arch" on the end of the tiller. We can see that the "arch" was probably added to extend the tiller over the fireplace flue. For extra leverage ? or maybe to exclude access to the flue when hot ? However, by attaching the tiller ropes to the "arch" end, I can see the ropes fowling the flue when the tiller is hard over either way. The ropes would need to be high enough to clear over the flue, and kept taught enough. I am temped to not add the "arch" and have a double purchase at the end of the tiller. Ray Parkins book, it is not consistently shown. What to do ?? So by my reckoning, I am am on target to have all the deck finished by the 2 year anniversary of the build - that being 28 April 2016. Dave R

-
OMG so so cool Alexandru. I'd go blind working all that detail in. Dave R
-
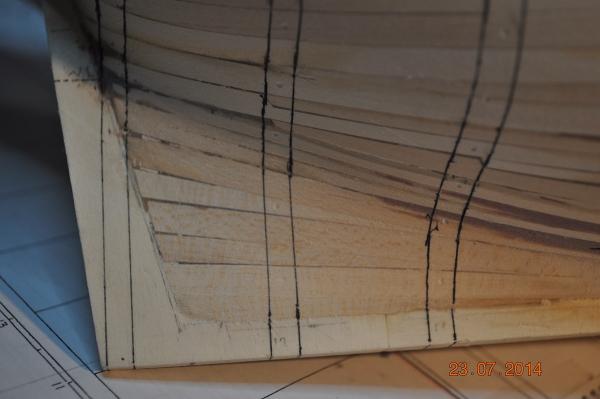
Hi Chris, I believe you're on the right track. My first planking layer, I dropped planks as in the picture below. I had never planked a model when I did my first layer, so as you have, tried it out for practice for the 2nd layer. Some of the 1st layer I just tapered, but it did provide what I was in for with the 2nd layer. So the second layer I ended up with dropped and steelers, as the shape chnages to the stern. I rebated the planks into the keel, so it(keel) remained at 5mm - I think it is. Keep the good work up Chris, coming along nice. Dave R
-
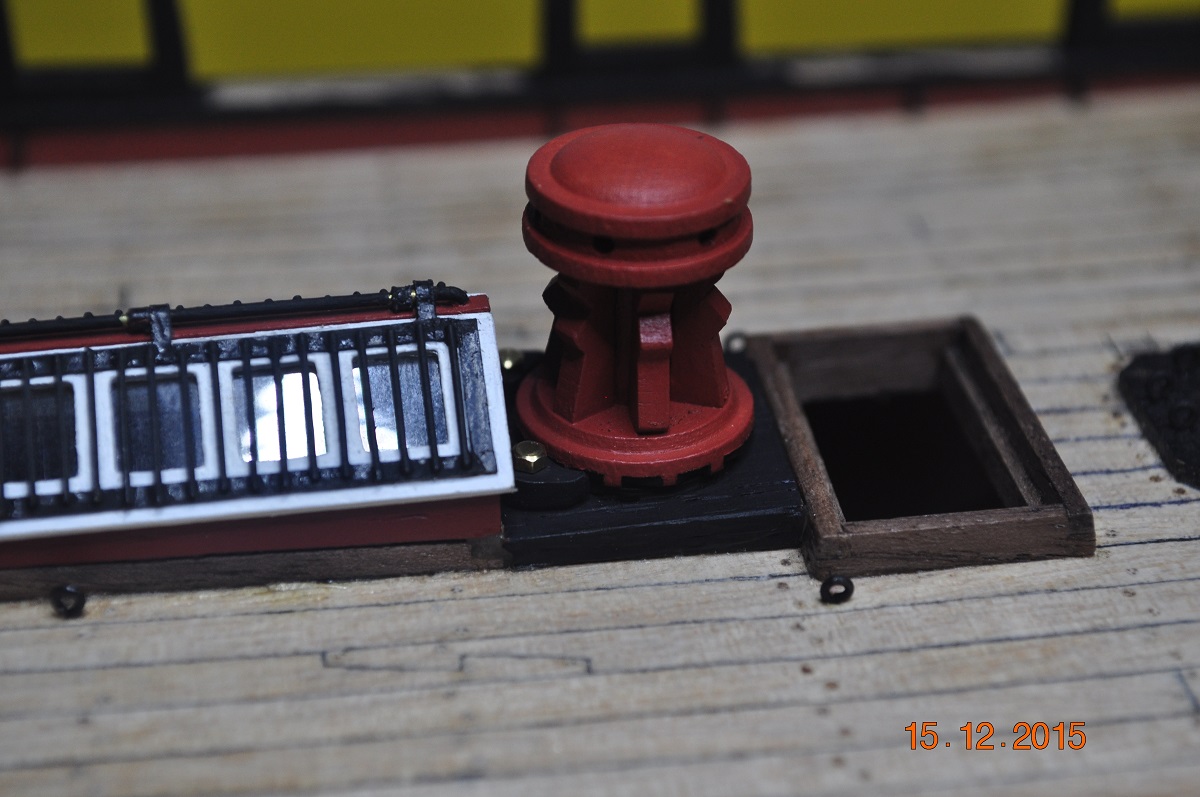
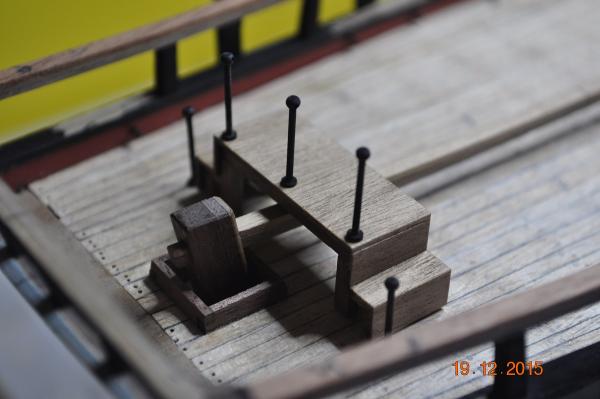
In the Shipyard, Couple of small things out of the way. The 2 x Cats Head cut in place over the knight head. The Capstan: I raised the black base up a little so the cap will be above the hatch(next build item) to the right. At the bottom of the capstan I notched in rebates for 2 flippers to lock the rotation. Dave R

-
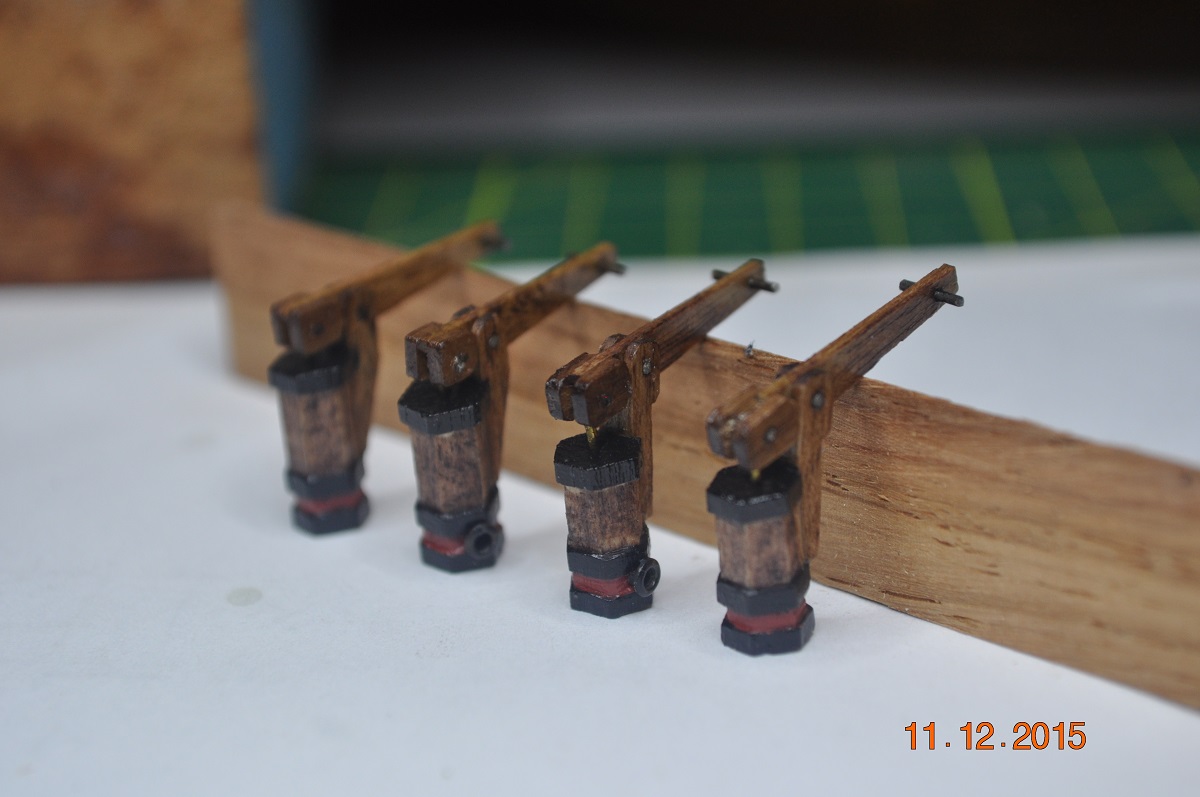
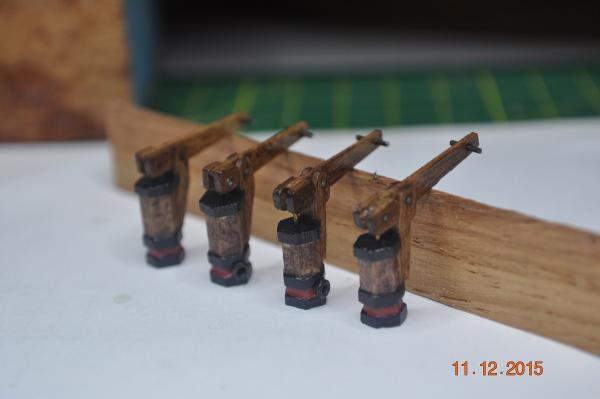
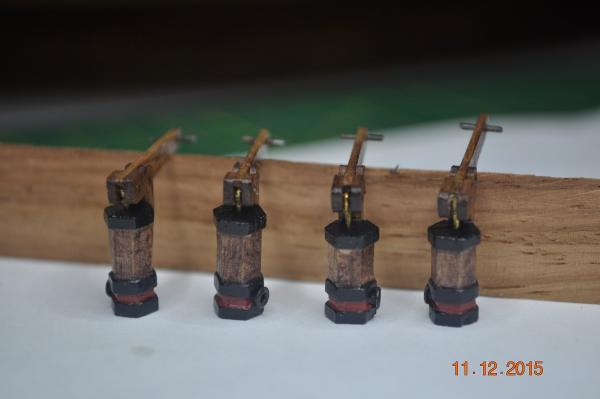
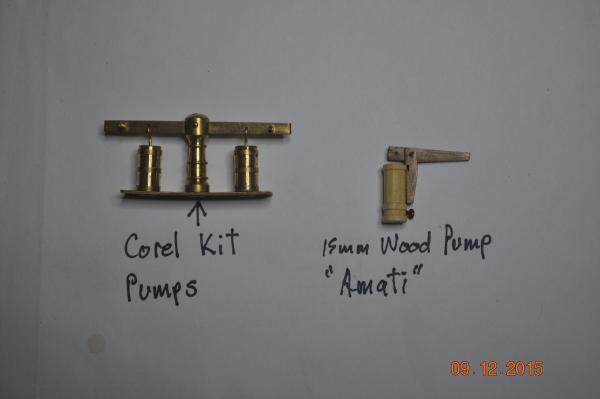
Shipyard Update, 4 pumps constructed, bashed from "Amati 15mm wood pump". I really wanted them to look as though made of timber, metal bands. Left: The Corel Kit supplied a brass twin pump piece. What can I say, typical of many items supplied in the kit, not appropriate. Right: The Amati kit pump was not up to scratch, so bashed it into something like >>> I made two(2) types of pumps. 2 more were added whilst in the Deptford Yard ? - 1 type has the taller barrel with strut over the cap(2 original "Pembrook" pumps) - 1 type with a shorter barrel and strut 180 deg. facing away(added at refit, Deptford yard) I replaced the top flange with a cap(a small hole in the middle for pump shaft). I shaved the barrel and 3 black rings into hex(6 sides) so they look like that in the AOTS. Also added bar at the end of the handles. Some timber stain and a clear coat of lacquer to seal them up. Each one even works up and down. A lot time, but I think worth it. Just got to get them in the right place on the deck. I saw in another Endeavour log, that the Dave R
-
Thanks Guys, I like seeing at what you guys do on your builds, gives me inspiration. Dave R
-
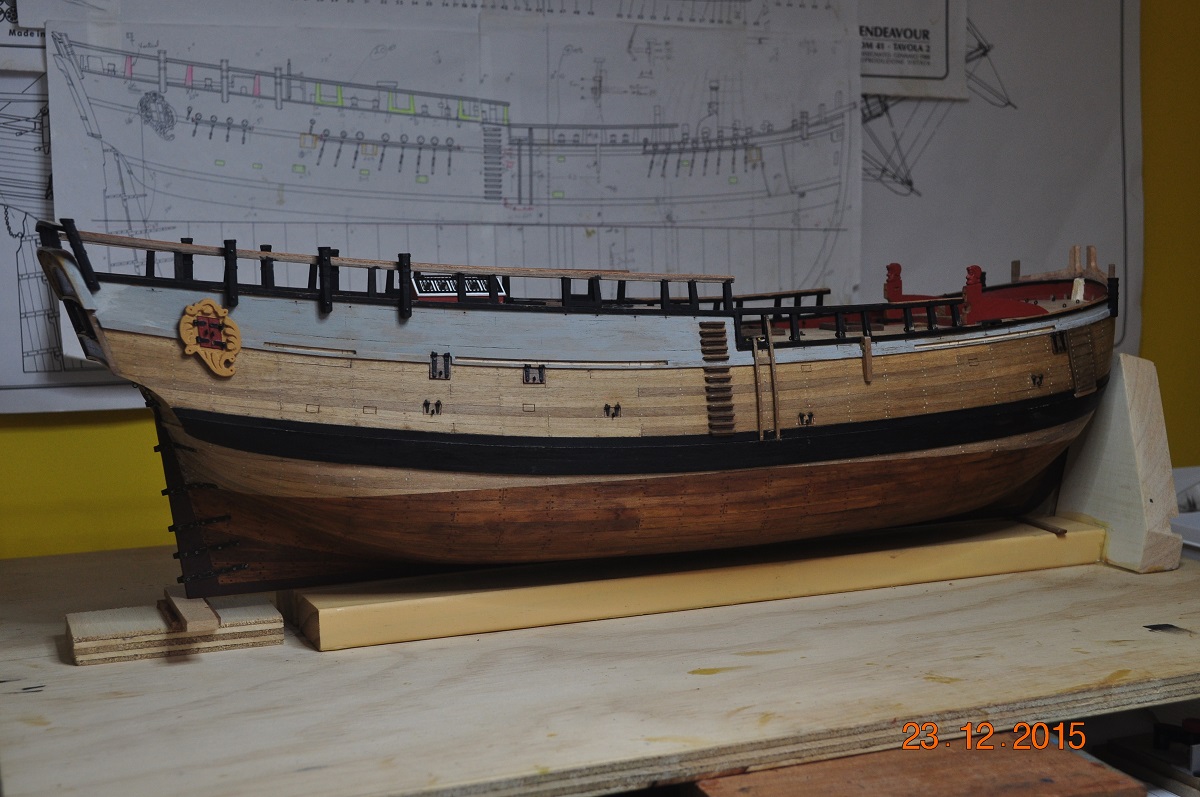
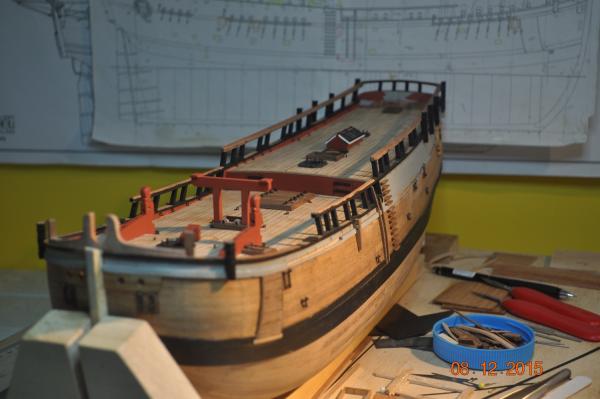
General progress view/update. It has been 20 months since the keel was laid. I have not kept a detail log of the build hours, however I reckon 850hrs would be a fair figure to put on the build so far. Quiet a few other items I have made not "glued" on the deck yet. - Windlass/Belfry - Sheet Bits(4) - Spar Gallows(2) - Capstan - Steering Wheel - cannons(6) part built I've taken Greg L's advice and slowly progressing along the deck, making all the items. One big "fixing" session at the completion. That will be a milestone - hoping that will be before April 2016, mark 2 years since I stared. Dave R
-
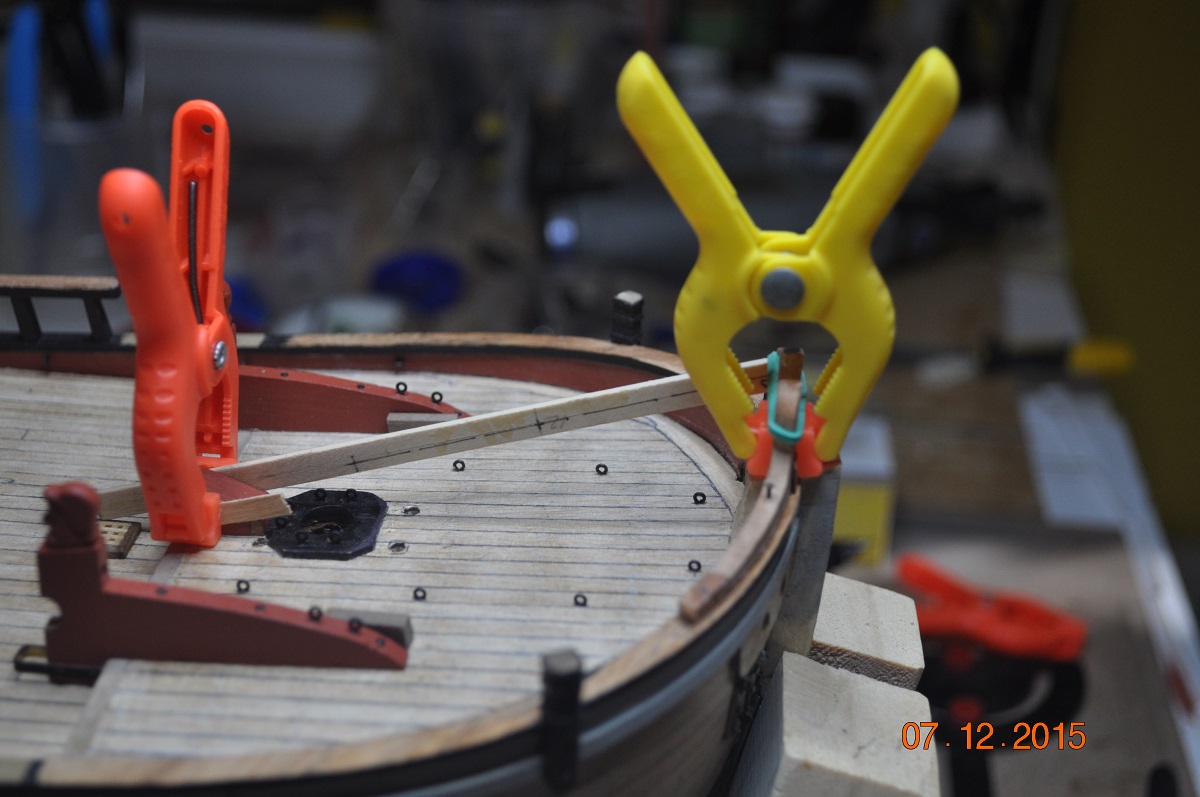
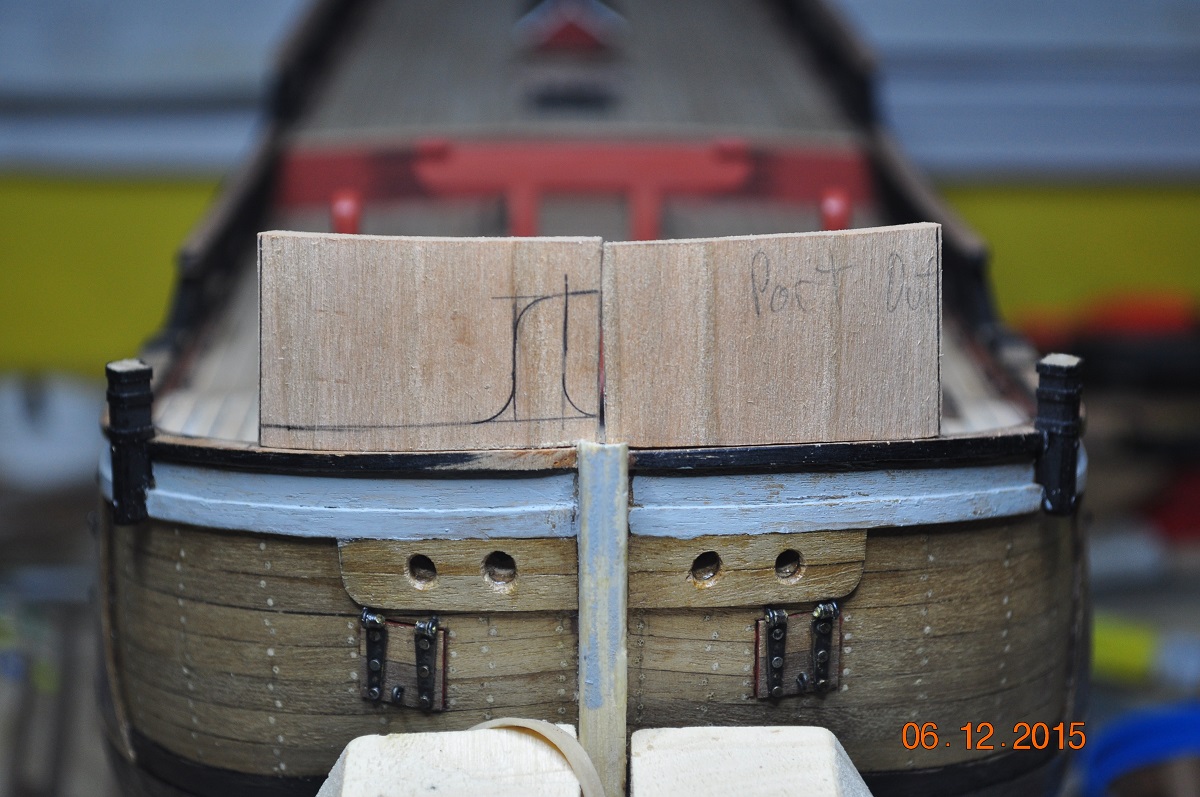
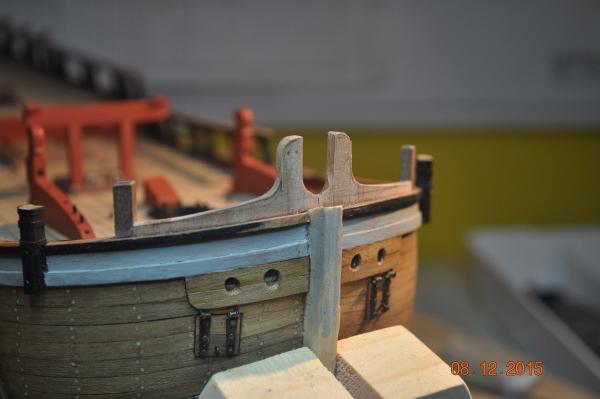
Shipyard Update, So been a bit slow of late. Battled our way to make the Knighthead(the wooden thing over the bow) and Timberhaed ends. These items seem to provide multiple functions to house the Bowsprit, locate the Cat-heads and Bumpkins. I purposely have left excess material in the trough(for the bowsprit) and either side to trim later on. Interesting making and adding these items now, when I'll make the Bowsprit later(work out the rake w.r.t the Knighthead) Marking out the shape. I used pear wood. Waiting for the glue to dry. I drilled a couple of holes for pins in each side to hold the shape. Glued in place, roughed in. Nearly finished the 2 Cat-heads. Dave R


-
Steve, The running rigging comes up really nice with the blacken rope(thinned enamel). Great work. I'll be aiming to go for the longer bowsprit and higher mizzen on my Endeavour - when I get to them. Dave R
-
Great craftsmanship Alexandru. Dave R
-
Hi Michael, Great progress on the hull. The Corel Kit(plans) sure do take liberties. I've changed my Endeavour a lot along the way > more to Marquardt's AOTS. Keep the shipyard going. Dave R
-
Hi Greg/s Paul. I installed Google Chrome and the picture option "add the image" works fine where the cursor is. What have I been missing. Thanks guys. Dave R
-
Hi Chris, Don't rush it that's all say, My second planking layer, on average took 1 plank per day(part time). By the time you sort out the length(placement of the ends to match a pattern), cut to rough length, taper if needed, bevel edges, work out how to hold for gluing, Actually do the final gluing, clean-up etc. all takes time. Have fun. Dave R
-
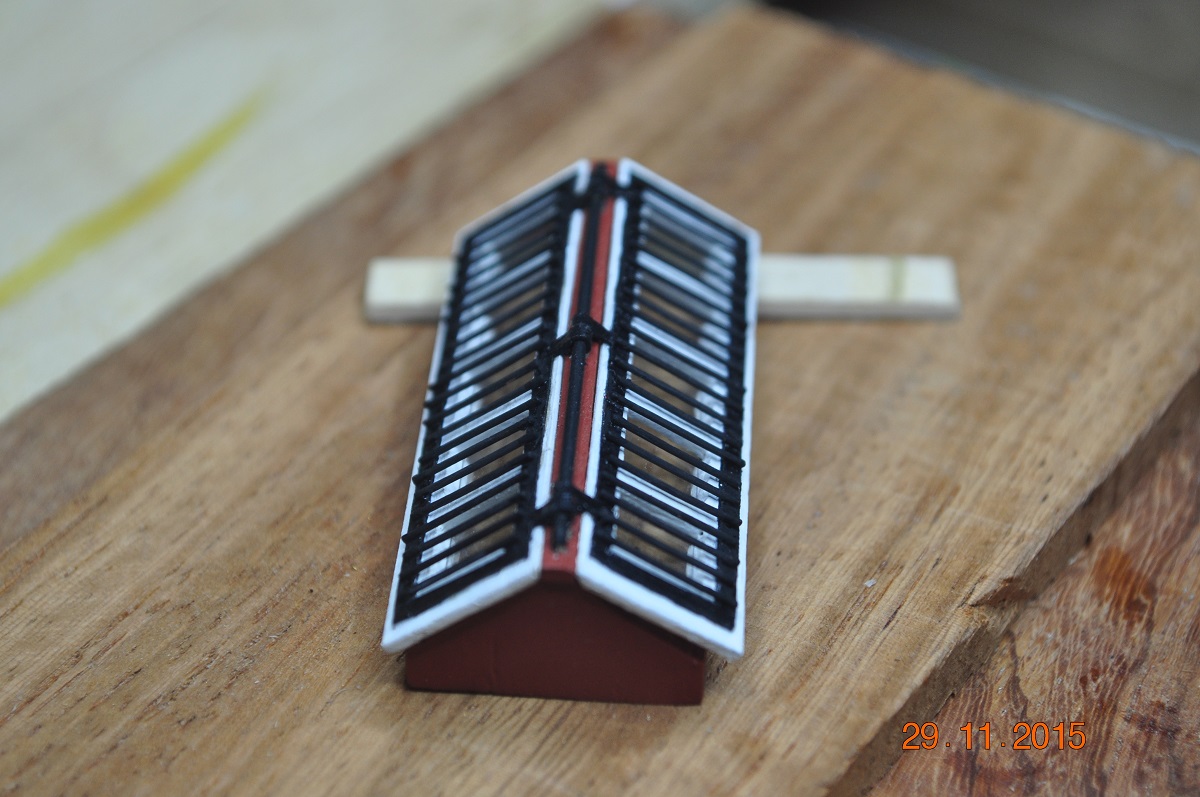
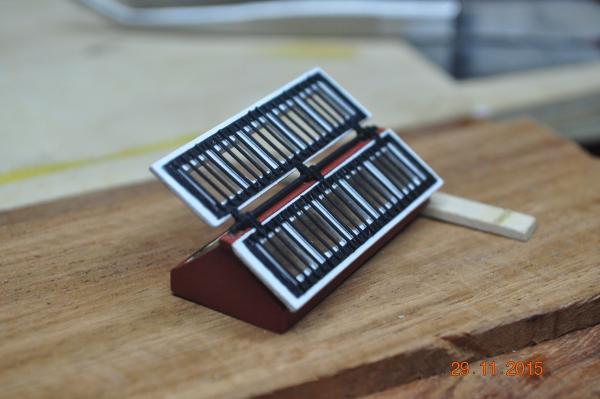
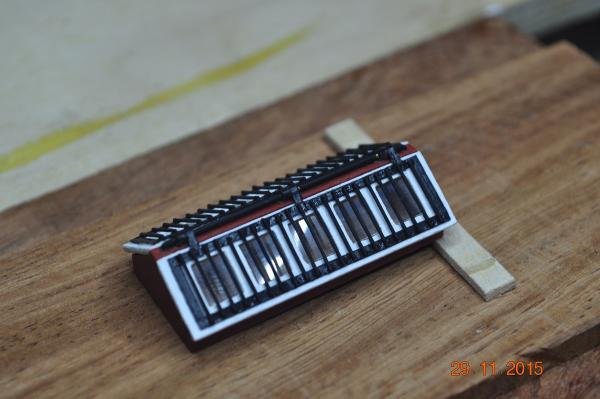
From the Shipyard. Hope Dave's happy with this one - Deck Skylight. Bit more paint touch up if I can get into the tight places. White lids to reflect the light into the hull. The bars over the top were a killer. Used black card for the metal frame and hinges. Hopefully it assimilates in with the other deck features. Dave R

-
Hi Paul, I set up a new post, followed the instructions. When I select the "add the image" it does not post a txt ref into the message. May be something to do that I am using Windows 8 IE ? Dave R